Loading ...
Loading ...
Loading ...
6 English
Installation Instructions
We recommend that a qualied technician install the range hood. It is the
installer’s responsibility to ensure the range hood complies with the instal-
lation clearances speciations for the product.
• It is recommended that the vent system be installed before the hood is
installed.
• Before making cutouts, make sure there is proper clearance within the
ceiling or wall for the exhaust vent.
• Conrm that all installations parts have been removed from the
shipping carton.
WARNING
To reduce the risk of re, electric shock, or injury to persons, observe the
following.
• Shut off power to the circuit you will be attaching the hood to at the
circuit breaker panel or fuse box.
• Determine which venting method to use: roof, wall, or nonvented.
• Select a at surface for assembling the range hood.
Place a covering over that surface.
• Always have 2 or more persons lift or move the range hood.
Mounting the duct cover bracket
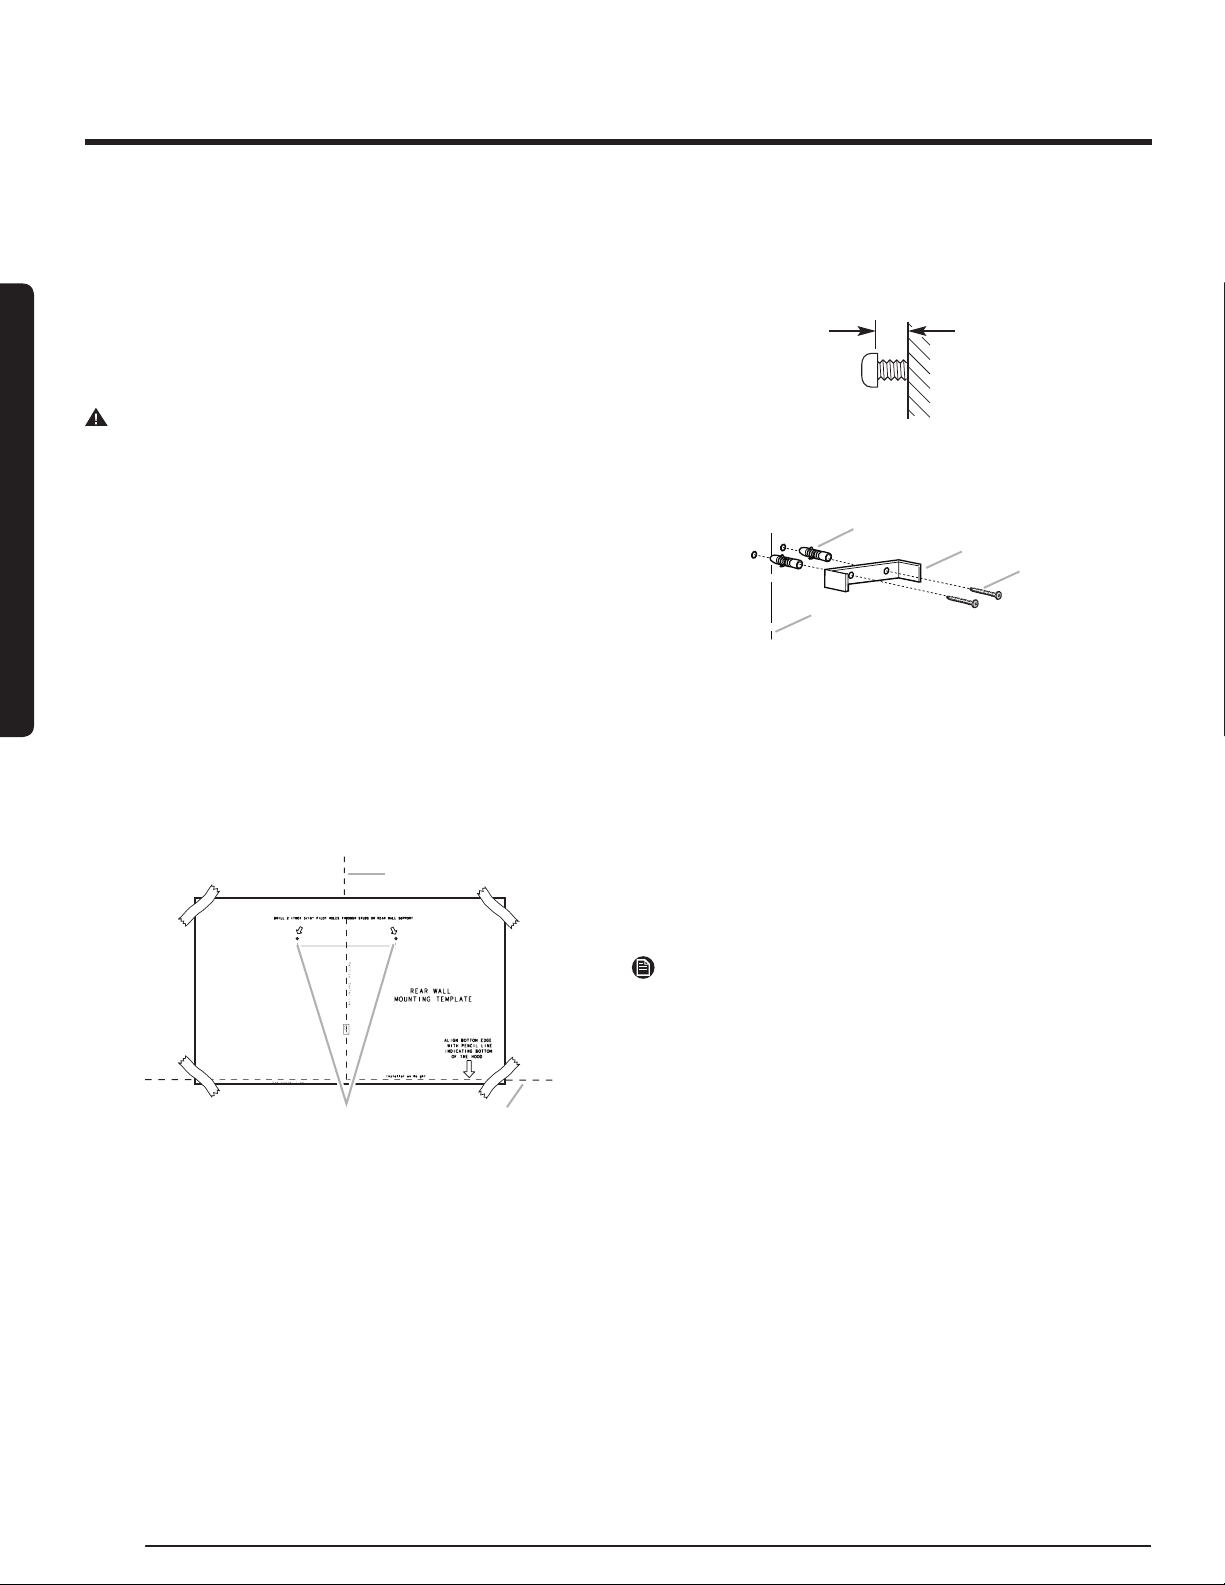
1. Determine and mark the centerline on the wall where the canopy
hood will be installed. Shut off power at the circuit breaker panel or
fuse box.
2. Select a mounting height of no less than 24” (61 cm) above an electric
cooking surface or 27” (68.6 cm cm) above a gas cooking surface.
3. Tape the template in place, aligning the template center line and
bottom with the hood center line and hood bottom line marked on
the wall.
A
B
C
A. Centerline
B. Fastener locations
C. Mounting height reference (hood bottom line)
4. Mark the centers of the fastener locations on the wall by pushing a
pencil point through the template.
IMPORTANT: All screws must be installed into the wood studs or
framing. If there is no wood to screw into, additional wall framing
supports may be required.
5. Remove the template.
6. Drill
3
⁄16″ (4.8 mm) pilot holes at all locations where screws are going
to be installed into wood.
7. Install the 2 - 5 x 45 mm mounting screws. Leave a
1
⁄4″ (6.4 mm) gap
between the wall and the back of the screw head to slide the range
hood into place.
1
⁄4″ (6.4 mm)
8. Attach the vent cover bracket to the wall ush to the ceiling using 2 -
5 x 45mm screws.
A
B
C
D
A. 8 x 40 mm anchors
B. Centerline on wall
C.Vent cover support bracket
D. 5 x 45 mm screws
Complete preparation
1. Determine and make all necessary cuts in the wall for the vent system.
Install the vent system before installing the hood. See “Venting
Requirements” section.
2. Determine the required height for the home power supply cable and
drill a 1¼” (3.2 cm) hole at this location.
3. Run the home power supply cable according to the National Electrical
Code or CSA Standards and local codes and ordinances. There must
be enough ½” conduit and wires from the fused disconnect (or circuit
breaker) box to make the connection in the hood’s electrical terminal
box.
NOTE
Do not turn on power until the installation is complete.
4. Use caulk to seal all openings
Installation
Installation
Loading ...
Loading ...
Loading ...