Loading ...
Loading ...
Loading ...
STEP 1
PREPARATION
Locate the items in the installation package:
• Screws
• Junction box cover
• Drain hose and clamp
• Mounting brackets
• Trim pieces (on some models)
• Drain hose hanger
• Owner’s Manual
• Product samples and/or coupons
Dishwasher Installation
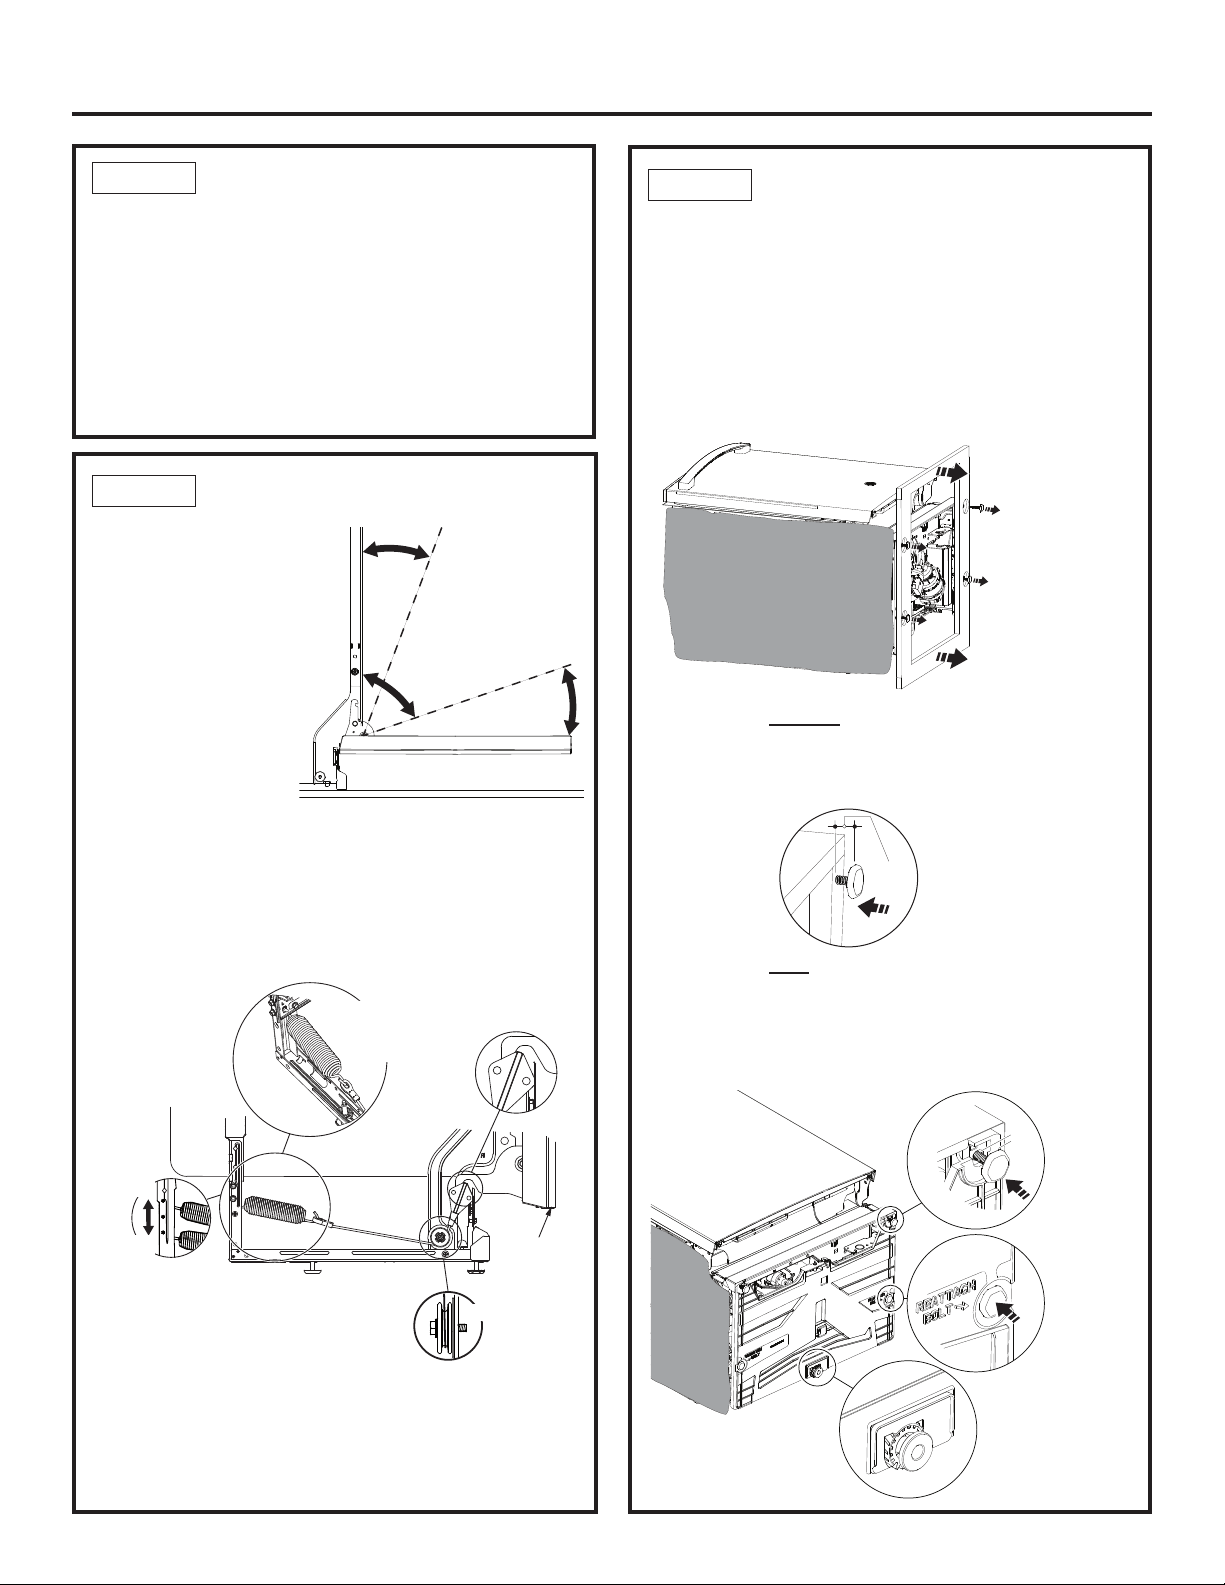
CHECK DOOR BALANCE
NOTE: If installing a
Custom Door Panel
(available on some
models), please
follow the instructions
found in the Custom
Door Panel kit
WD35X20417.
• With dishwasher
on the wood base,
check the door
balance by opening
and closing the door.
• Door is properly balanced if, when opened, it self
closes within 20° from vertical, stays in position from
20° to 70° and falls fully open beyond 70°.
• If necessary increase or decrease tension as shown.
Some models will have 2 springs on one side and
1 spring on the other side. Latch door and adjust
springs to correct balance.
Tip: Make sure door opens and closes smoothly.
Check door opening and closing. If door does not open
easily or falls too quickly, check spring cable routing.
The cable is held in place by “shoulders” on the pulley.
Check to be sure cable has not slipped over the pulley
shoulders and is routed as shown.
6
Figure G
Door
closes
within
20°
Door stays in
position from
20° to 70°
Door falls fully
open beyond 70°
Side View
Figure G
Figure H
Side View
Custom
door
panel
Spring
hooked
to hole
inside rail
NOTE: The number of
springs, on each side,
will vary by model.
Front View
Make sure pully
cables are within
pulley shoulders
Increase
Tension
Decrease
Tension
STEP 2
STEP 3
REMOVE WOOD BASE,
INSTALL LEVELING LEGS
IMPORTANT – Do not kick off wood base!
Damage will occur.
• Move the dishwasher close to the installation location
and lay it on its back. NOTE: Do not place the
dishwasher on its side.
• Remove the 4 leveling legs on the underside of the
wood base with a 15/16” socket wrench.
• Discard base.
• On models without the center bottom adjustable
leveling system:
Screw leveling legs back into the dishwasher frame,
approximately 1/2” from frame as shown.
• On models with the center bottom adjustable
leveling system:
Screw front leveling legs back into dishwasher frame
approximately 1/2”.
Screw rear leveling legs completely in until fully seated.
Approx
1/2"
Replace all 4 legs
to about 1/2” from
the frame
Remove all four
leveling legs and
the wood base
Appearance will vary
Replace 2
front legs
to about
1/2” from
the frame
Replace
2 back
legs and
screw in
completely
Leveling System
To be adjusted
later in Step 14.
1/2”
Loading ...
Loading ...
Loading ...