Loading ...
Loading ...
Loading ...
Dishwasher Installation
14
DISHWASHER WET TEST
• Turn on power supply or plug power cord into outlet,
if equipped.
• Select a cycle to run and push the Start pad.
• Ensure the door is latched. Dishwasher should start.
• Check to be sure that water enters the dishwasher.
If water does not enter the dishwasher, check to be
sure that water and power are turned on.
• Check for leaks under the dishwasher. If a leak
is found, turn off power at the breaker, and then
tighten water connections. Restore power after leak
is corrected.
NOTE: A small amount of water may splash out of
the fill funnel, on the right side of the tub, during the
first use after installation. Splash-out is most likely to
occur if there is air in the water supply line from new
construction or if the valve has been closed for an
extended time.
• Check for leaks around the door. A leak around
the door could be caused by door rubbing or
hitting against adjacent cabinets. Reposition the
dishwasher if necessary. See Step 13.
• Press and hold the Start pad for 3 seconds to
cancel the cycle. The unit will begin to drain. Check
drain lines. If leaks are found, turn off power at the
breaker and correct plumbing as necessary. Restore
power after corrections are made. See Steps 7, 8, 9,
10 and 17.
• Open dishwasher door and make sure all of the
water has drained. If not, check that disposer plug
has been removed and/or air gap is not plugged.
Also check drain hose to be sure it is not kinked
underneath or behind dishwasher. See Step 17.
• Press Start pad once again and run dishwasher
through another cycle. Check for leaks and correct if
required.
• Repeat these steps as necessary.
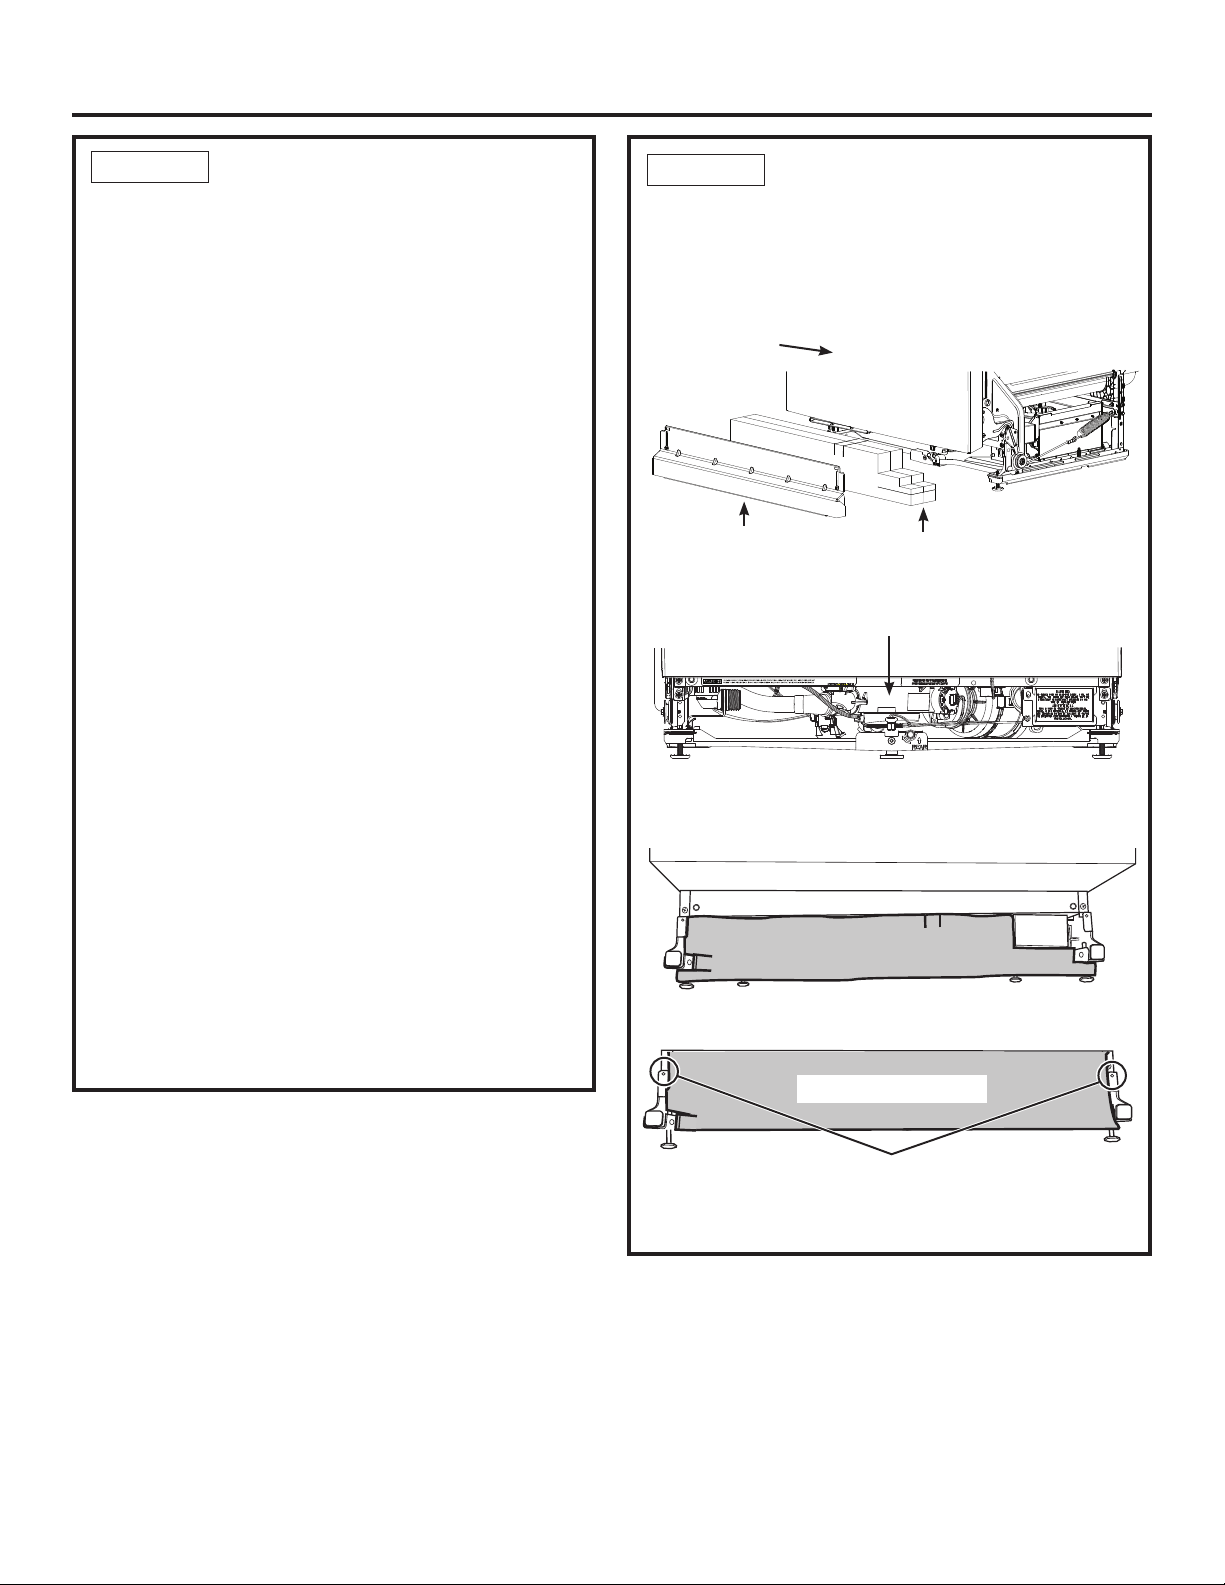
STEP 20
POSITION SOUND
INSULATION PIECE
(on some models)
• Locate the sound insulation package inside the
dishwasher.
• Stand the parts upright as shown.
• Locate the control box.
• Push insulation block portion under the dishwasher
until it is beneath the control box.
• Push the panel portion up to the front of the block.
• Tuck the sides of the front panel behind the toekick
attachment screw holes.
Control Box
Figure AH
STEP 21
Push the sides of the insulation behind the toekick
attachment screw holes
(on some models)
Toekick
Insulation Block
(On some models.)
Dishwasher
Door
B
Loading ...
Loading ...
Loading ...