Loading ...
Loading ...
Loading ...
Installation
English20
Installation
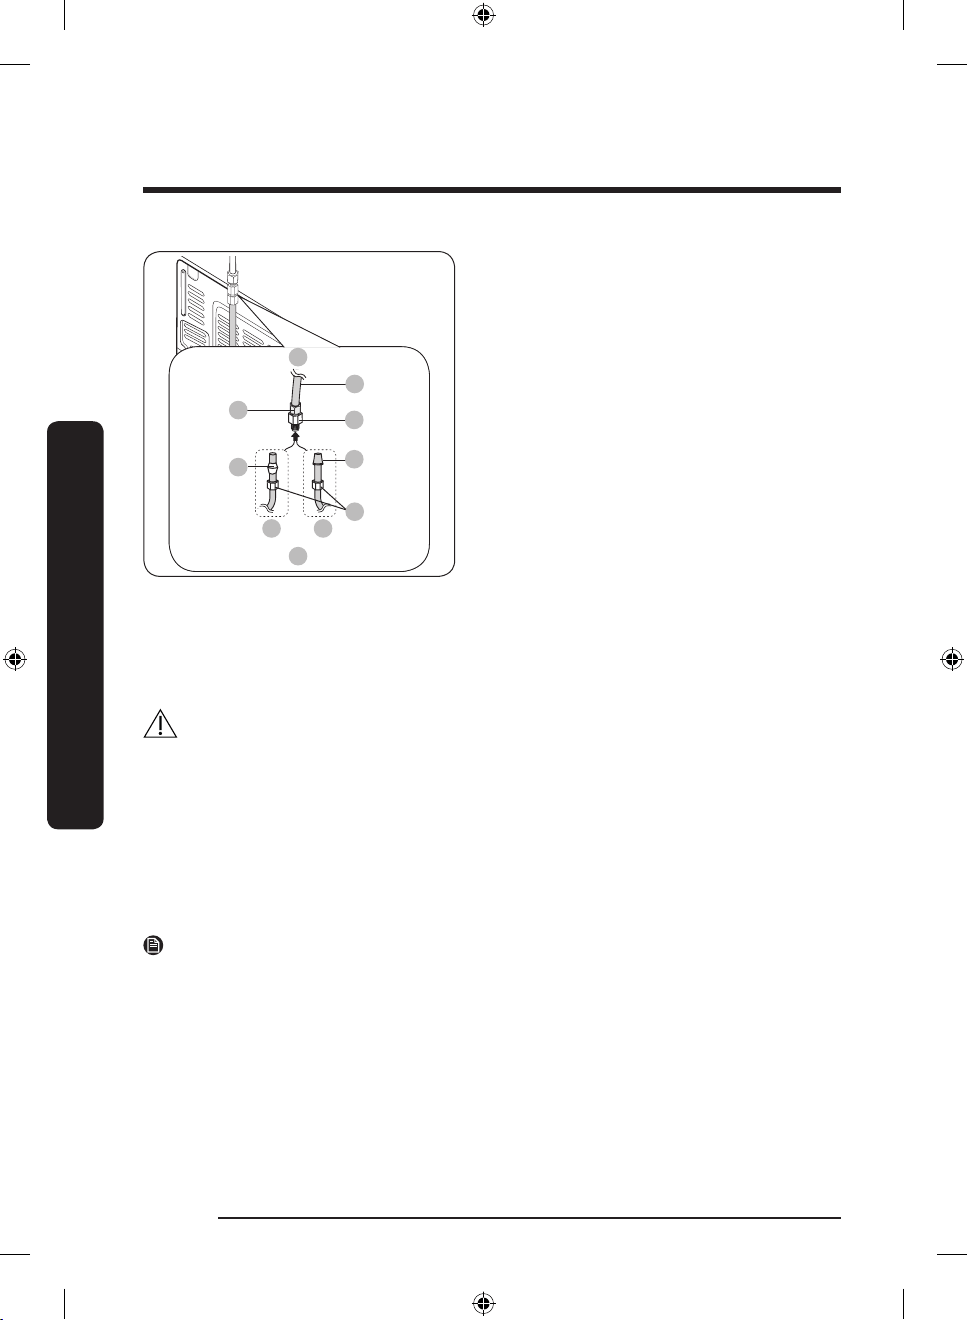
A
01
02
03 08
04
05
06
07
B
A. Refrigerator
B. Household water supply line
01 Compression nut (
1
/4”) (Not supplied)
02 Ferrule (Not supplied)
03 Copper tubing (Not supplied)
04 Plastic tubing (Assembled)
05 Compression tting (Not supplied)
06 Molded end (Bulb)
07 Compression nut (B) (
1
/4”) (Not
supplied)
08 Plastic tubing (A) (Not supplied)
1. Connect the household water line to the assembled compression tting.
- If you are using copper tubing, slip the compression nut (B) (not supplied) and ferrule
(not supplied) on the copper tubing (not supplied) as shown.
- If you are using plastic tubing (A), insert the molded end (Bulb) of the plastic tubing
(A) into the compression tting.
CAUTION
If you use plastic tubing, (A) do not use it without the molded end (Bulb).
2. Tighten the compression nut (B) onto the compression tting. Do not over-tighten the
compression nut (B).
3. Turn the water on and check for any leakage. If you nd water drops or leakage in
the connection areas, turn off the main water supply. Check the connections and, if
necessary, tighten.
4. After you turn on the refrigerator, let the ice maker makes ice for 1 to 2 days. Over that
period of time, throw out the rst 1 or 2 buckets of ice the ice maker makes to ensure
all impurities have been removed from the water line.
NOTE
• If you have to repair or disassemble the water line, cut off
1
/4“ of the plastic tubing to
make sure you get a snug, leak-free connection.
• Leaving the water line disconnected may cause the water valve to produce a buzzing
sound over time.
• If water is not supplied to the refrigerator, make sure to turn the ice maker off.
Untitled-2 20 2017-01-20 11:27:39
Loading ...
Loading ...
Loading ...