Loading ...
Loading ...
Loading ...
English
12
www.ninjakitchen.com
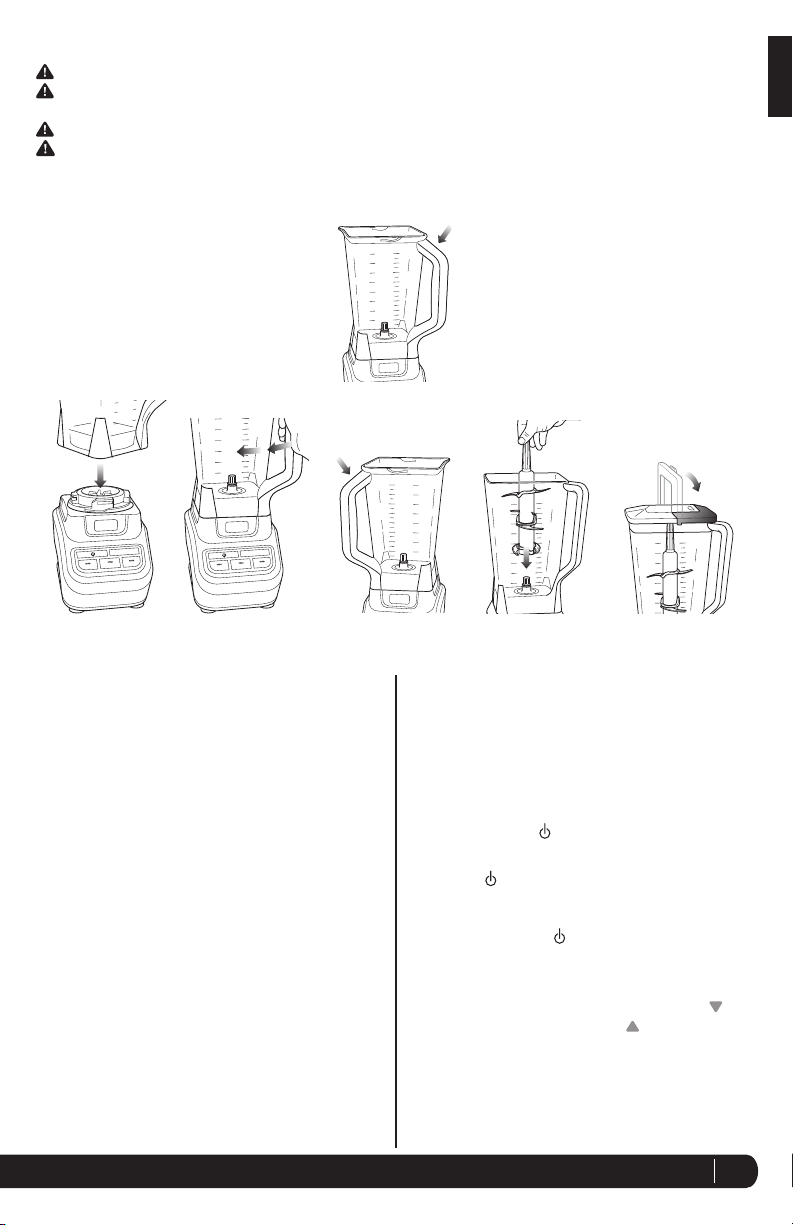
Assembly and Use of the Pitcher
1 Review warning and caution statements above before
proceeding to number 2.
2 Place the motor base on a clean, dry, level surface such
as a counter or table top.
3 Align and lower the Pitcher onto the motor base.
(Fig. 1)
4 Rotate the pitcher clockwise until it locks in place. You
will hear a click when the lock is engaged. (Fig. 2)
5 The pitcher can be placed on the motor base two ways;
the handle can be on the front right corner or the front
left corner. (Fig. 3a, Fig. 3b)
6 Holding the Stacked Blade Assembly by the top of the
shaft, place it onto the drive gear inside the pitcher.
Ensure that the Stacked Blade Assembly is seated
properly and is standing upright. (Fig. 4)
NOTE: The Stacked Blade Assembly will fit loosely on
the drive gear.
7 Add the ingredients to the pitcher, making sure that
they do not exceed the highest measured marking line
on the side of the pitcher.
Fig. 2
MEDIUM
LOW
HIGH
PULSE
Fig. 3a
MEDIUM
LOW
HIGH
PULSES
MEDIUM
LOW
HIGH
PULSES
Fig. 3b
MEDIUM
LOW
HIGH
PULSES
MEDIUM
LOW
HIGH
PULSES
WARNING: Handle the Stacked Blade Assembly with care, as the blades are sharp.
WARNING: Remove utensils prior to processing. Failure to remove may cause the pitcher to be damaged or
to shatter, which may cause personal injury.
WARNING: Never leave the appliance unattended while in use.
CAUTION: Do not blend hot liquids, doing so may cause excessive pressure buildup, resulting in risk of the
user being burned.
IMPORTANT: Make sure that the motor base is plugged in for use.
NOTE: If you need to add additional ingredients while
the appliance is processing, open the pour spout cap
and pour the ingredients in through the opening.
NOTE: When blending any kind of liquids, such as
mixtures of any drinks or smoothies, do not exceed the
“Max liquid” mark (64 ounces) on the pitcher.
8 Plug the power cord into the electrical outlet and press
the power button ( ).
IMPORTANT: As a safety feature, the power
button ( ) will flash and the motor will not work
if the pitcher and lid are not installed correctly.
When the pitcher and lid are installed properly,
the power button ( ) will be solid, indicating that
the blender is ready for use.
9 Holding the lid by the handle in the upright position,
place it on top of the pitcher aligning the arrow ( )
located on the lid with the arrow ( ) located on the
pitcher’s handle. (Fig. 5) Press the handle down until
you hear a click.
Fig. 1
MEDIUM
LOW
HIGH
PULSE
Fig. 4
Fig. 5
ASSEMBLY
OR
Loading ...
Loading ...
Loading ...