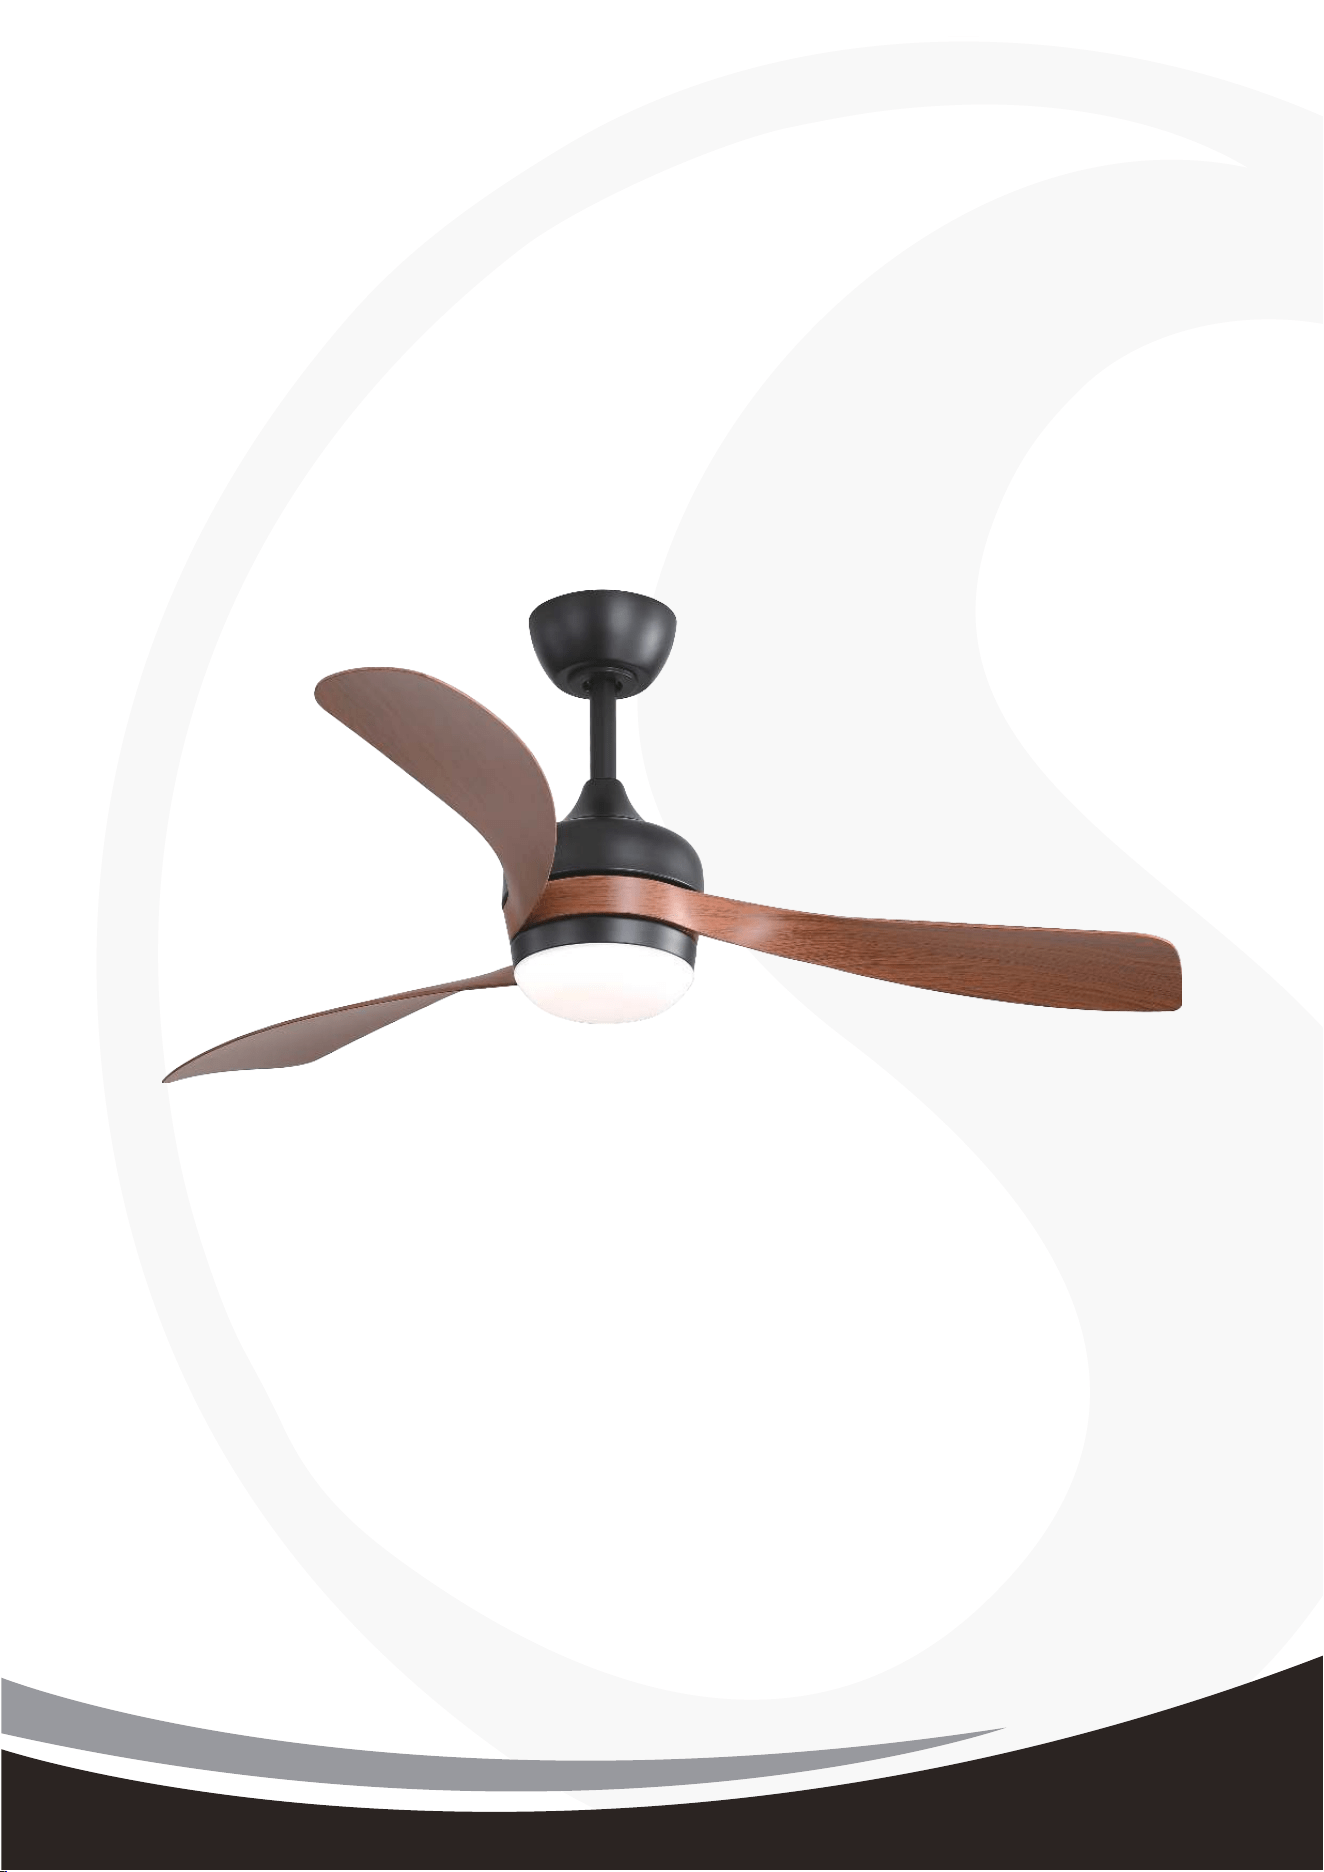
KBS-52K103
KBS-52K103
H
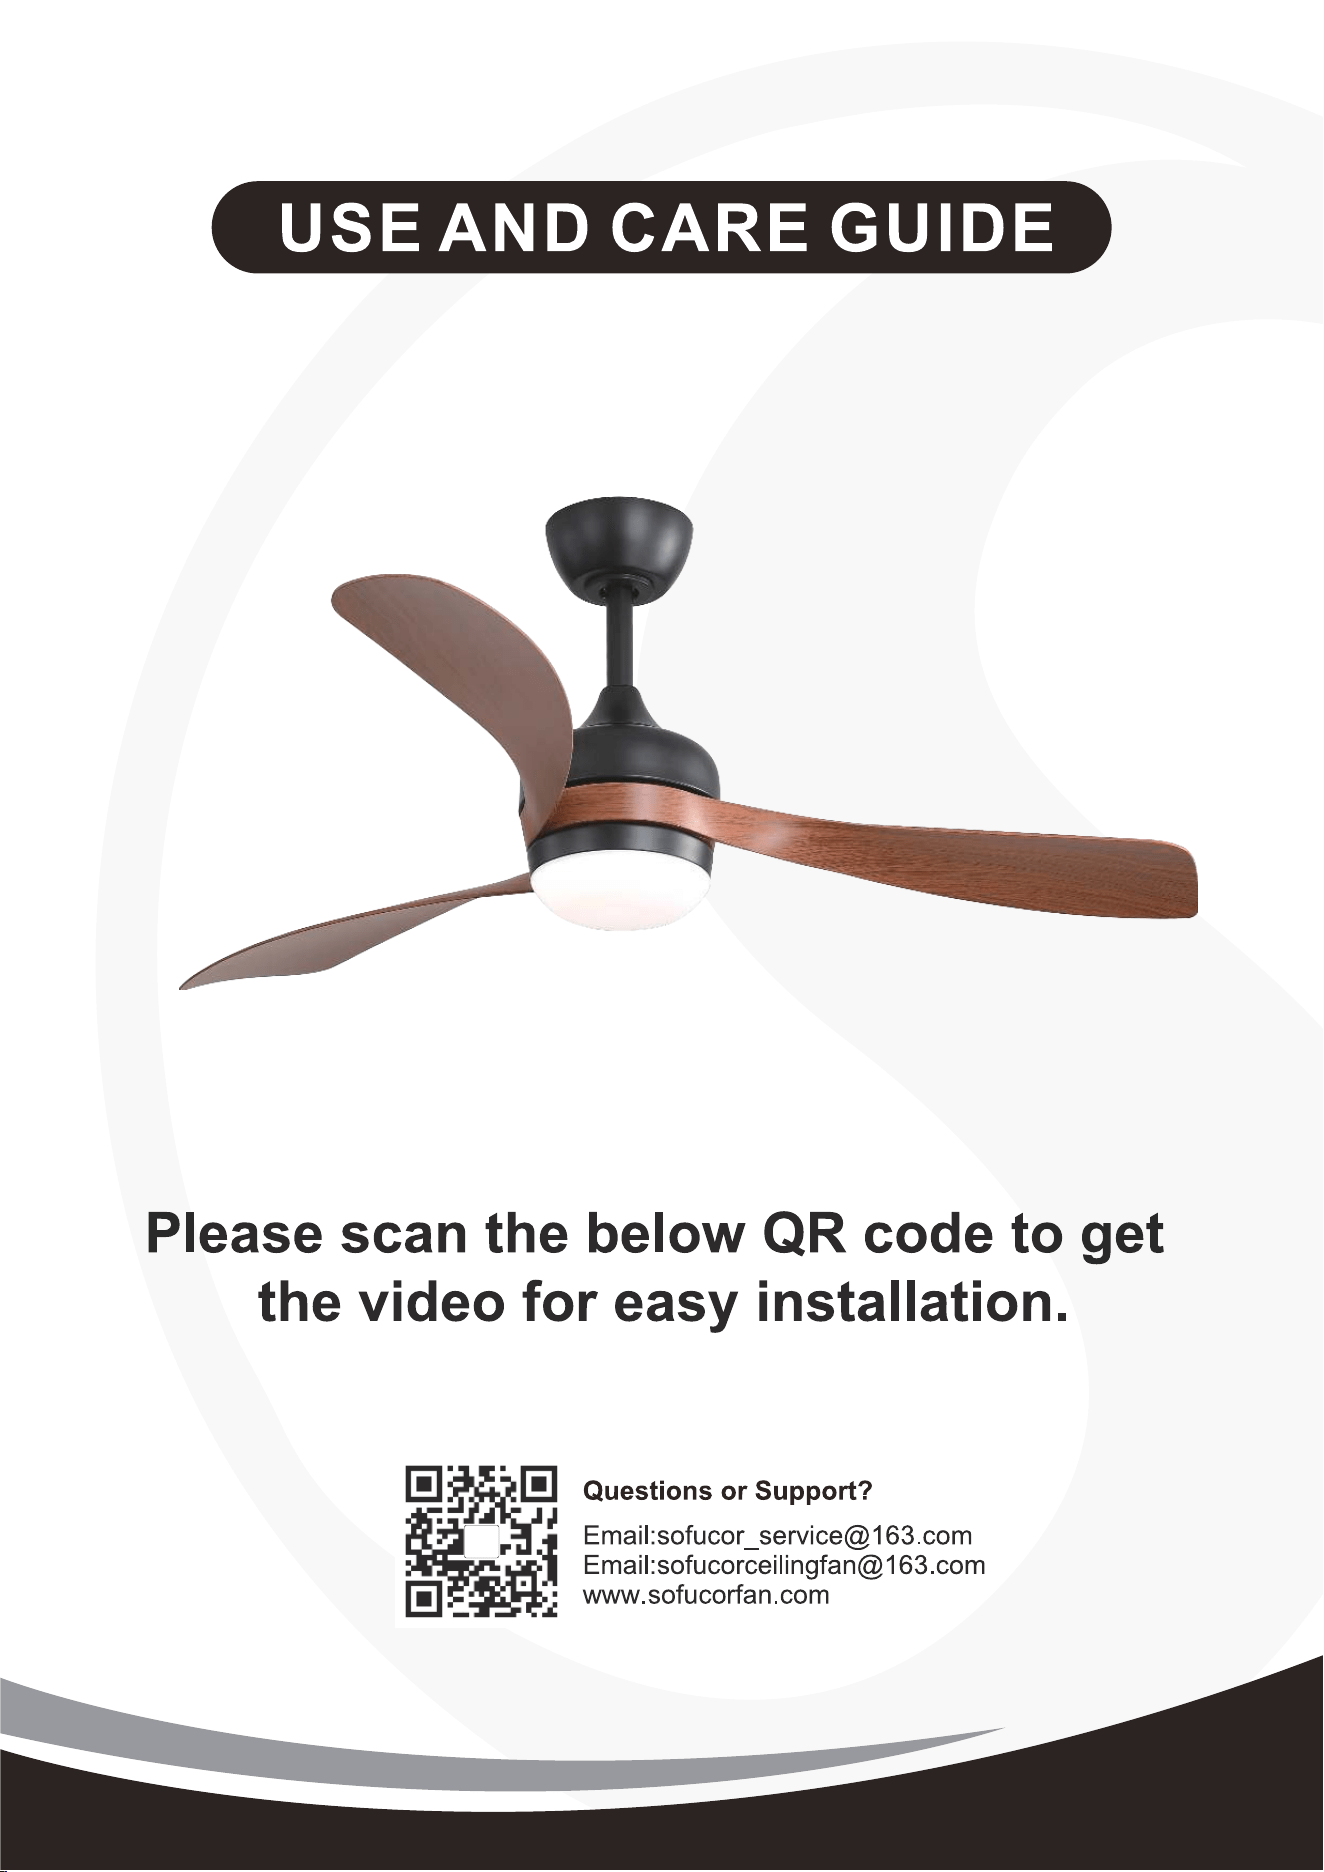
Installation
Video
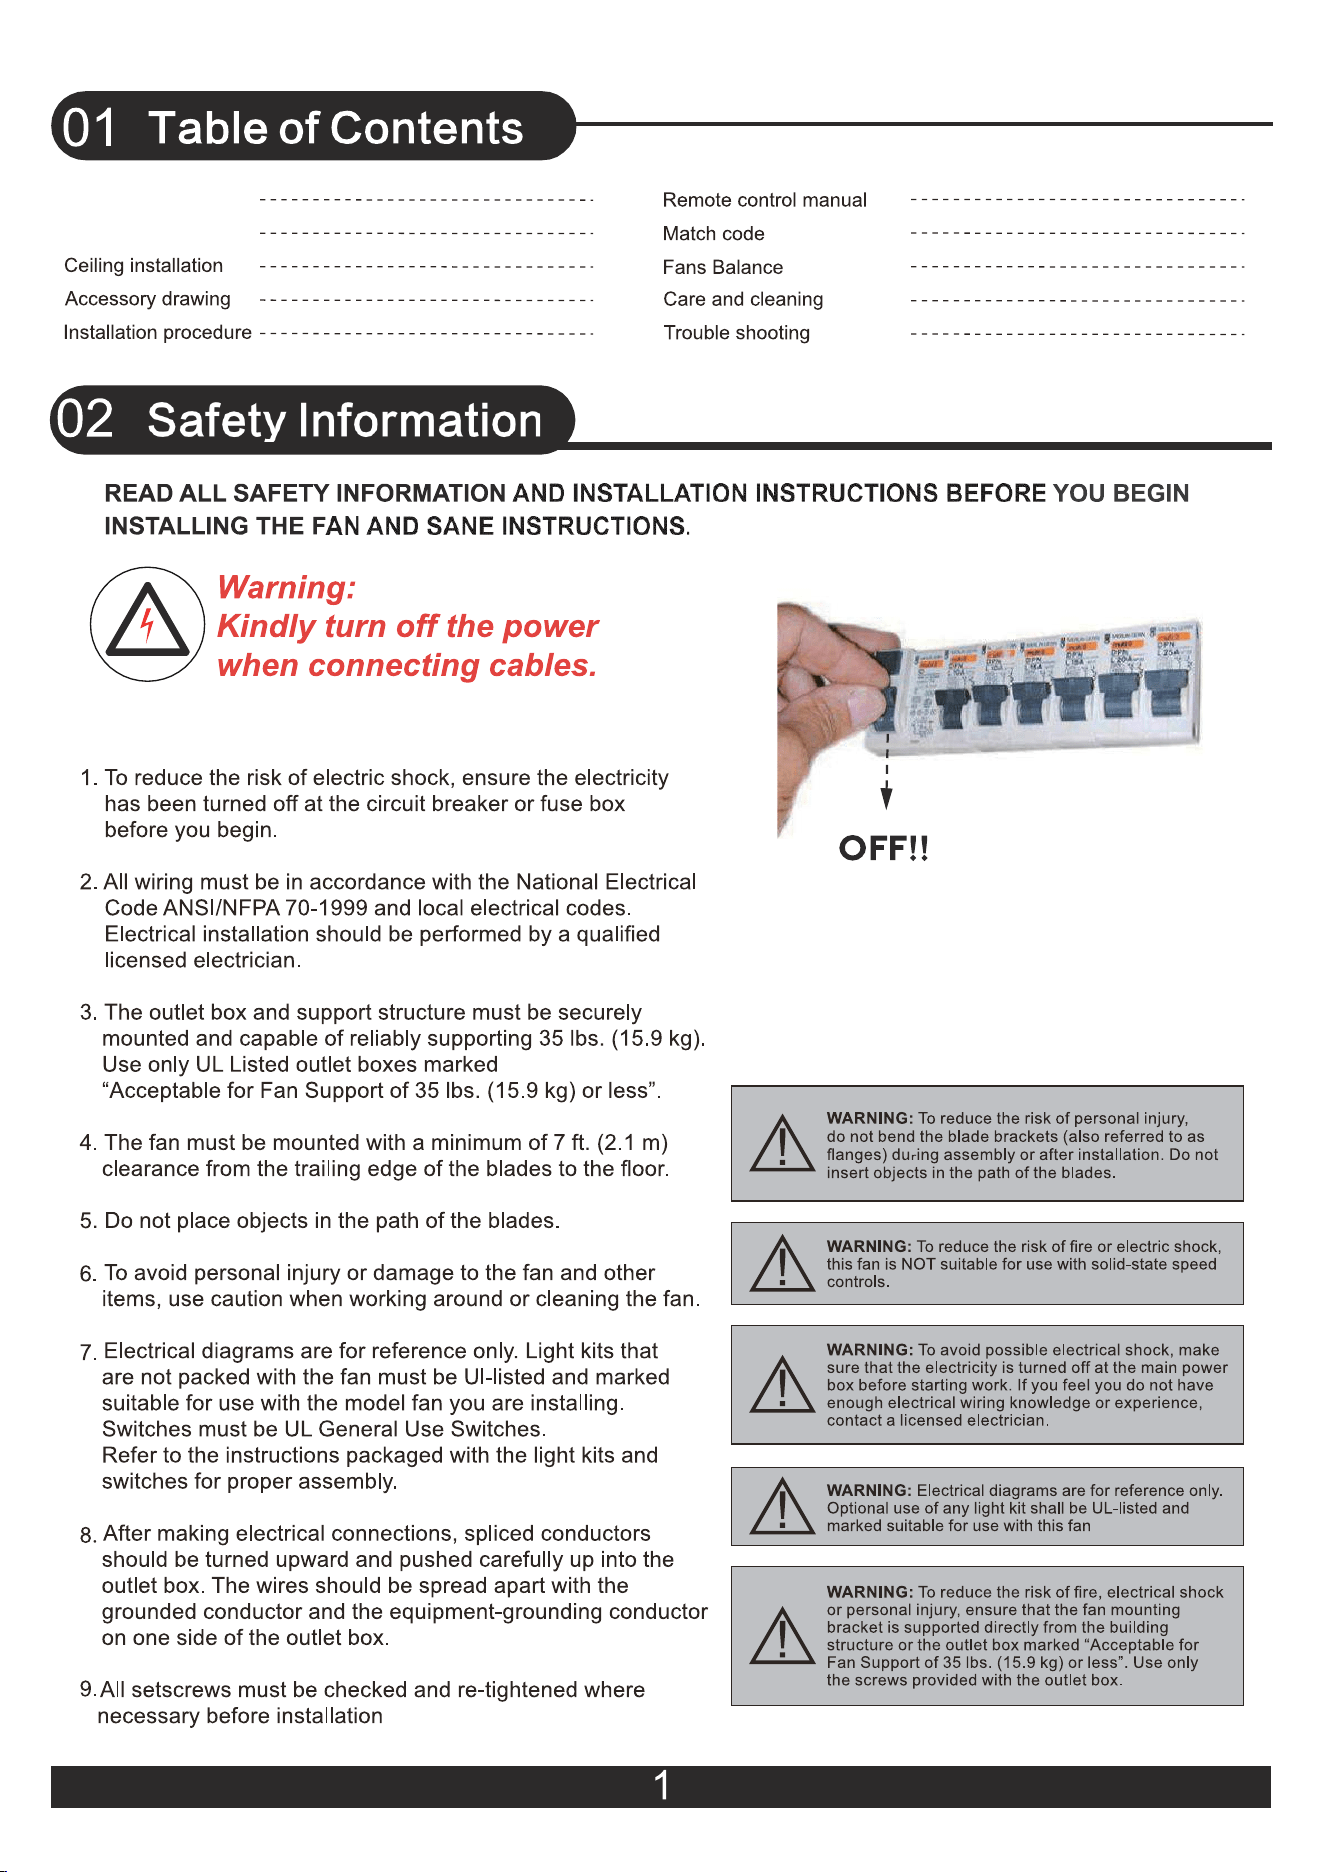
Safety Information 02
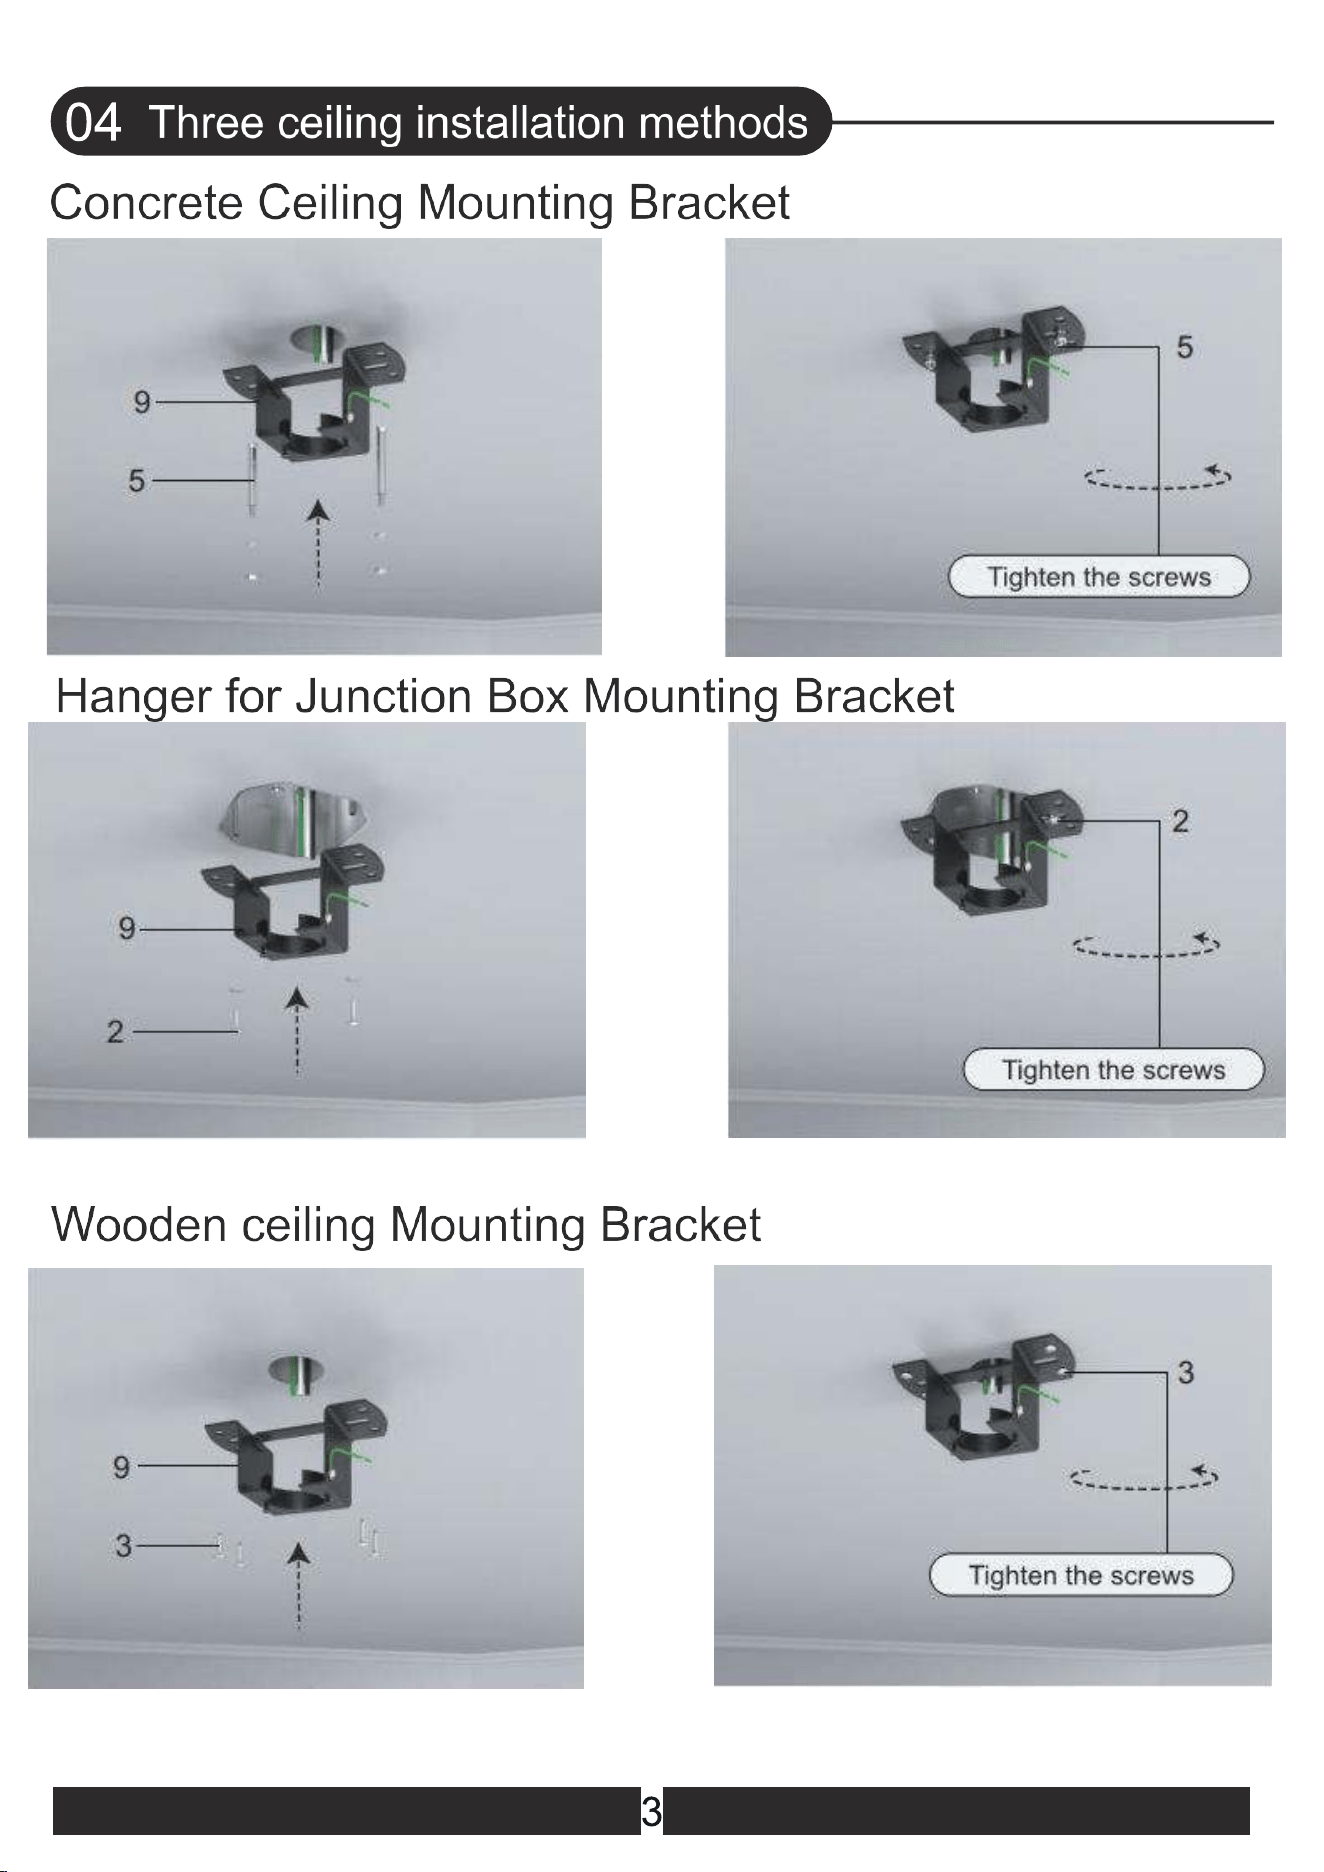
04
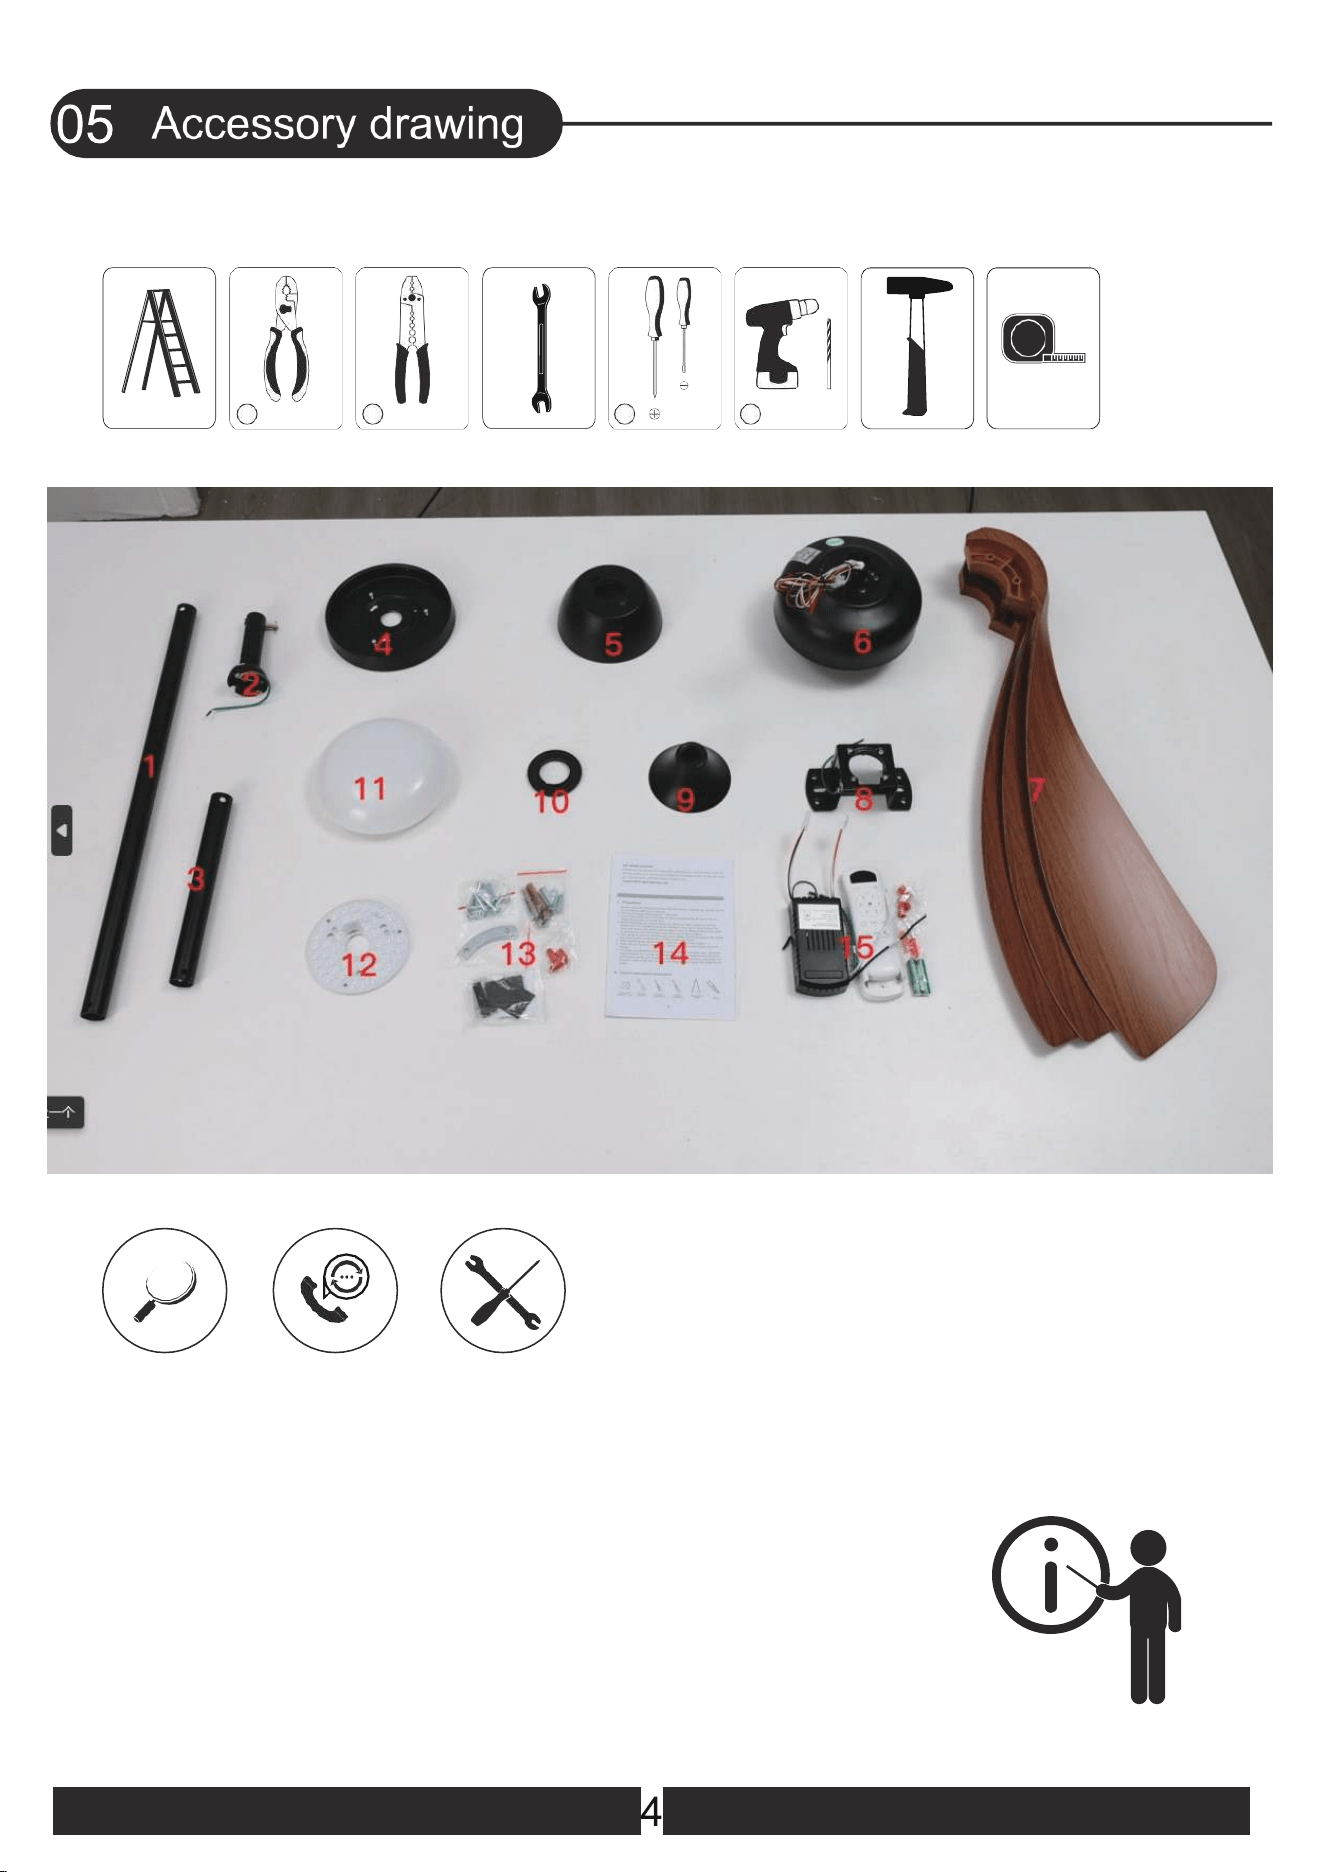
05
06
Warranty 03
07
09
10
11
08

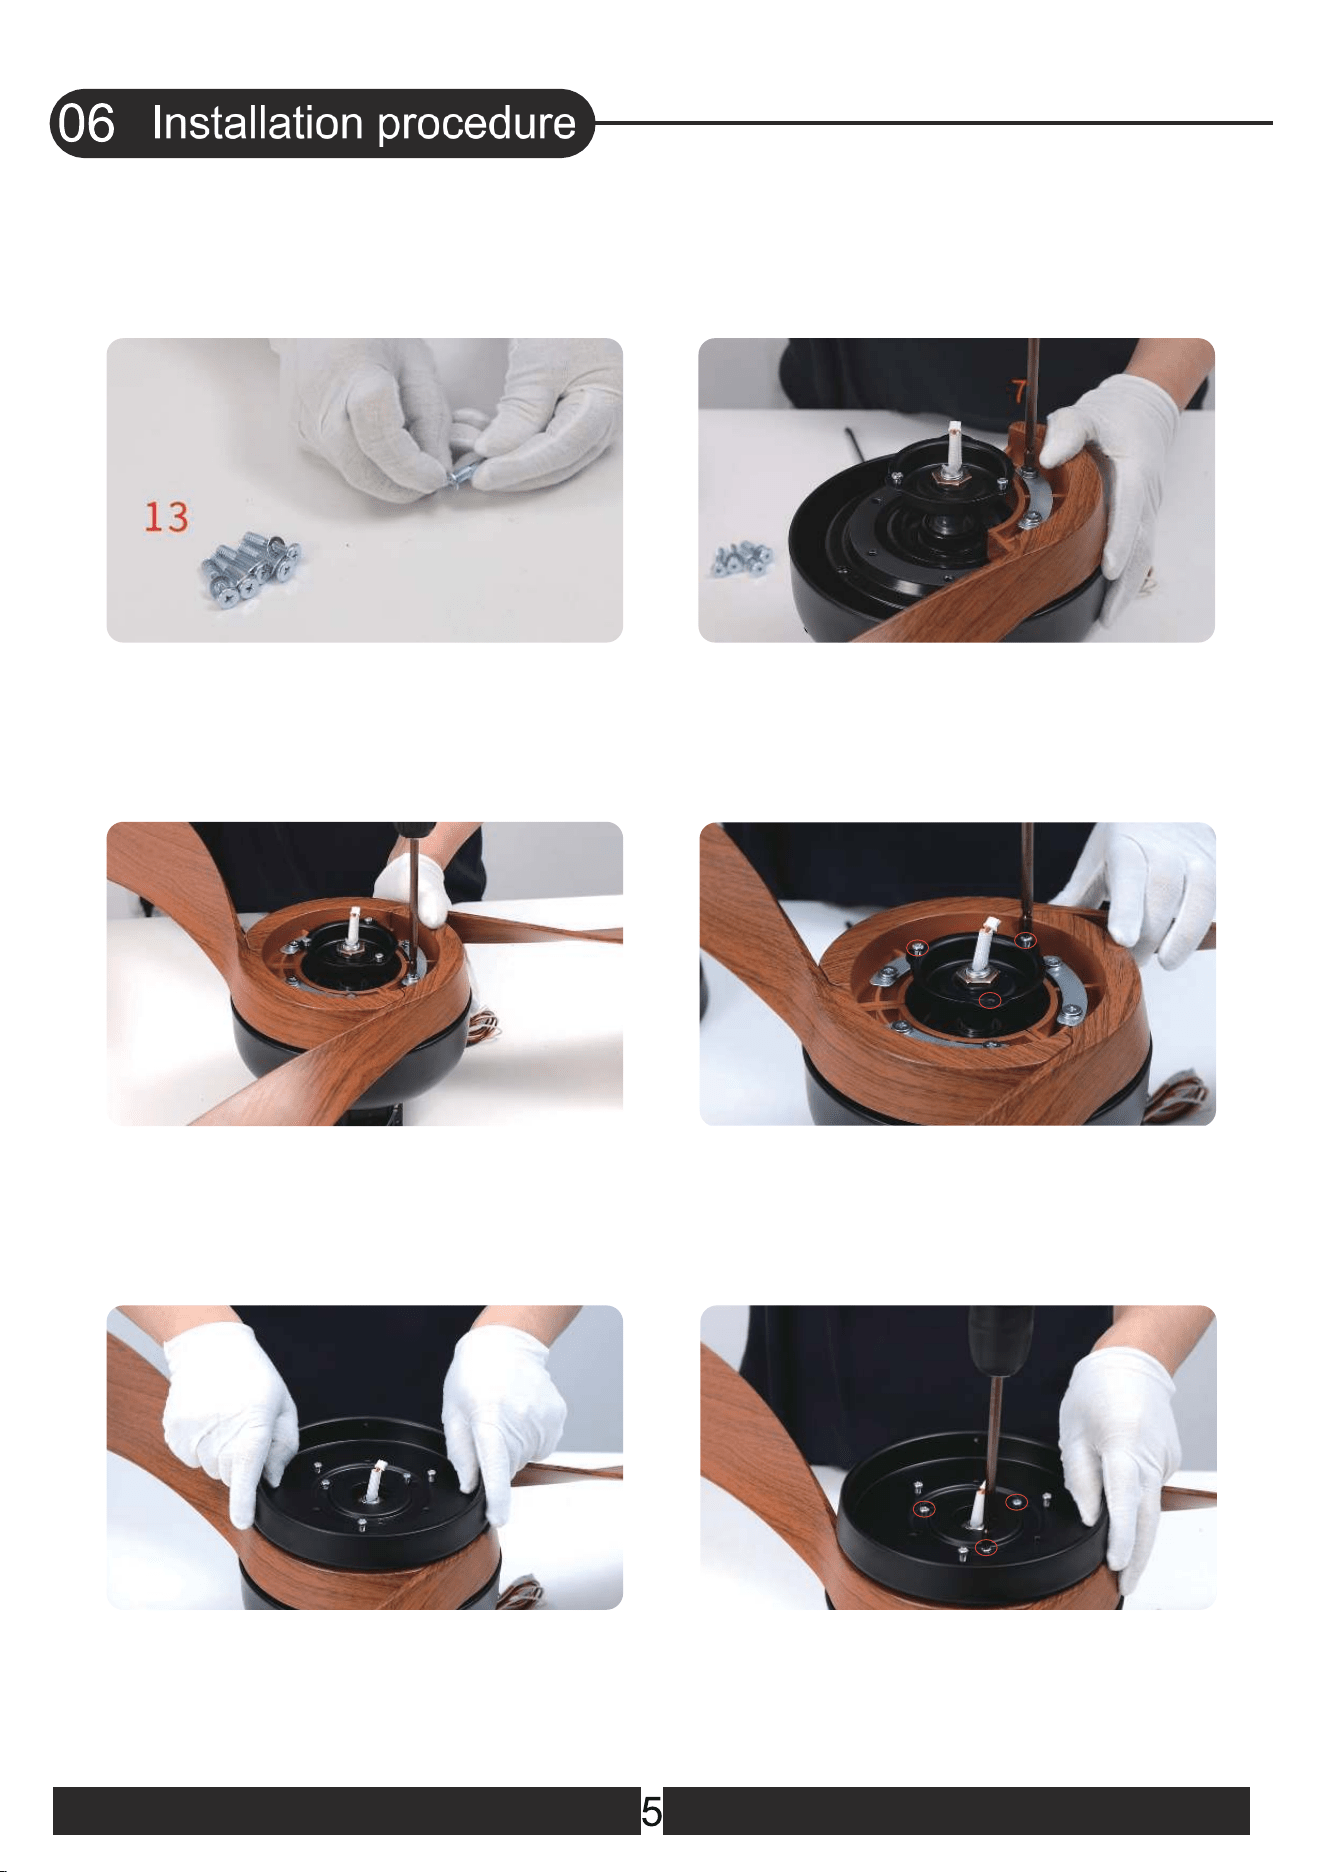
3. Repeat install the remaining blades,
and tighten all the blade screws
1. Fit the gasket over the screw
2. Place the blade gasket onto the blade,
align it with the screw hole, and tighten
the screw
4. Loosen and remove the 3 silver screws
pre-locked on the motor
(Do not remove them all)
5. Put on the lamp panel and feed the
wire plugs through the center hole
6. Tighten the 3 silver lamp panel screws
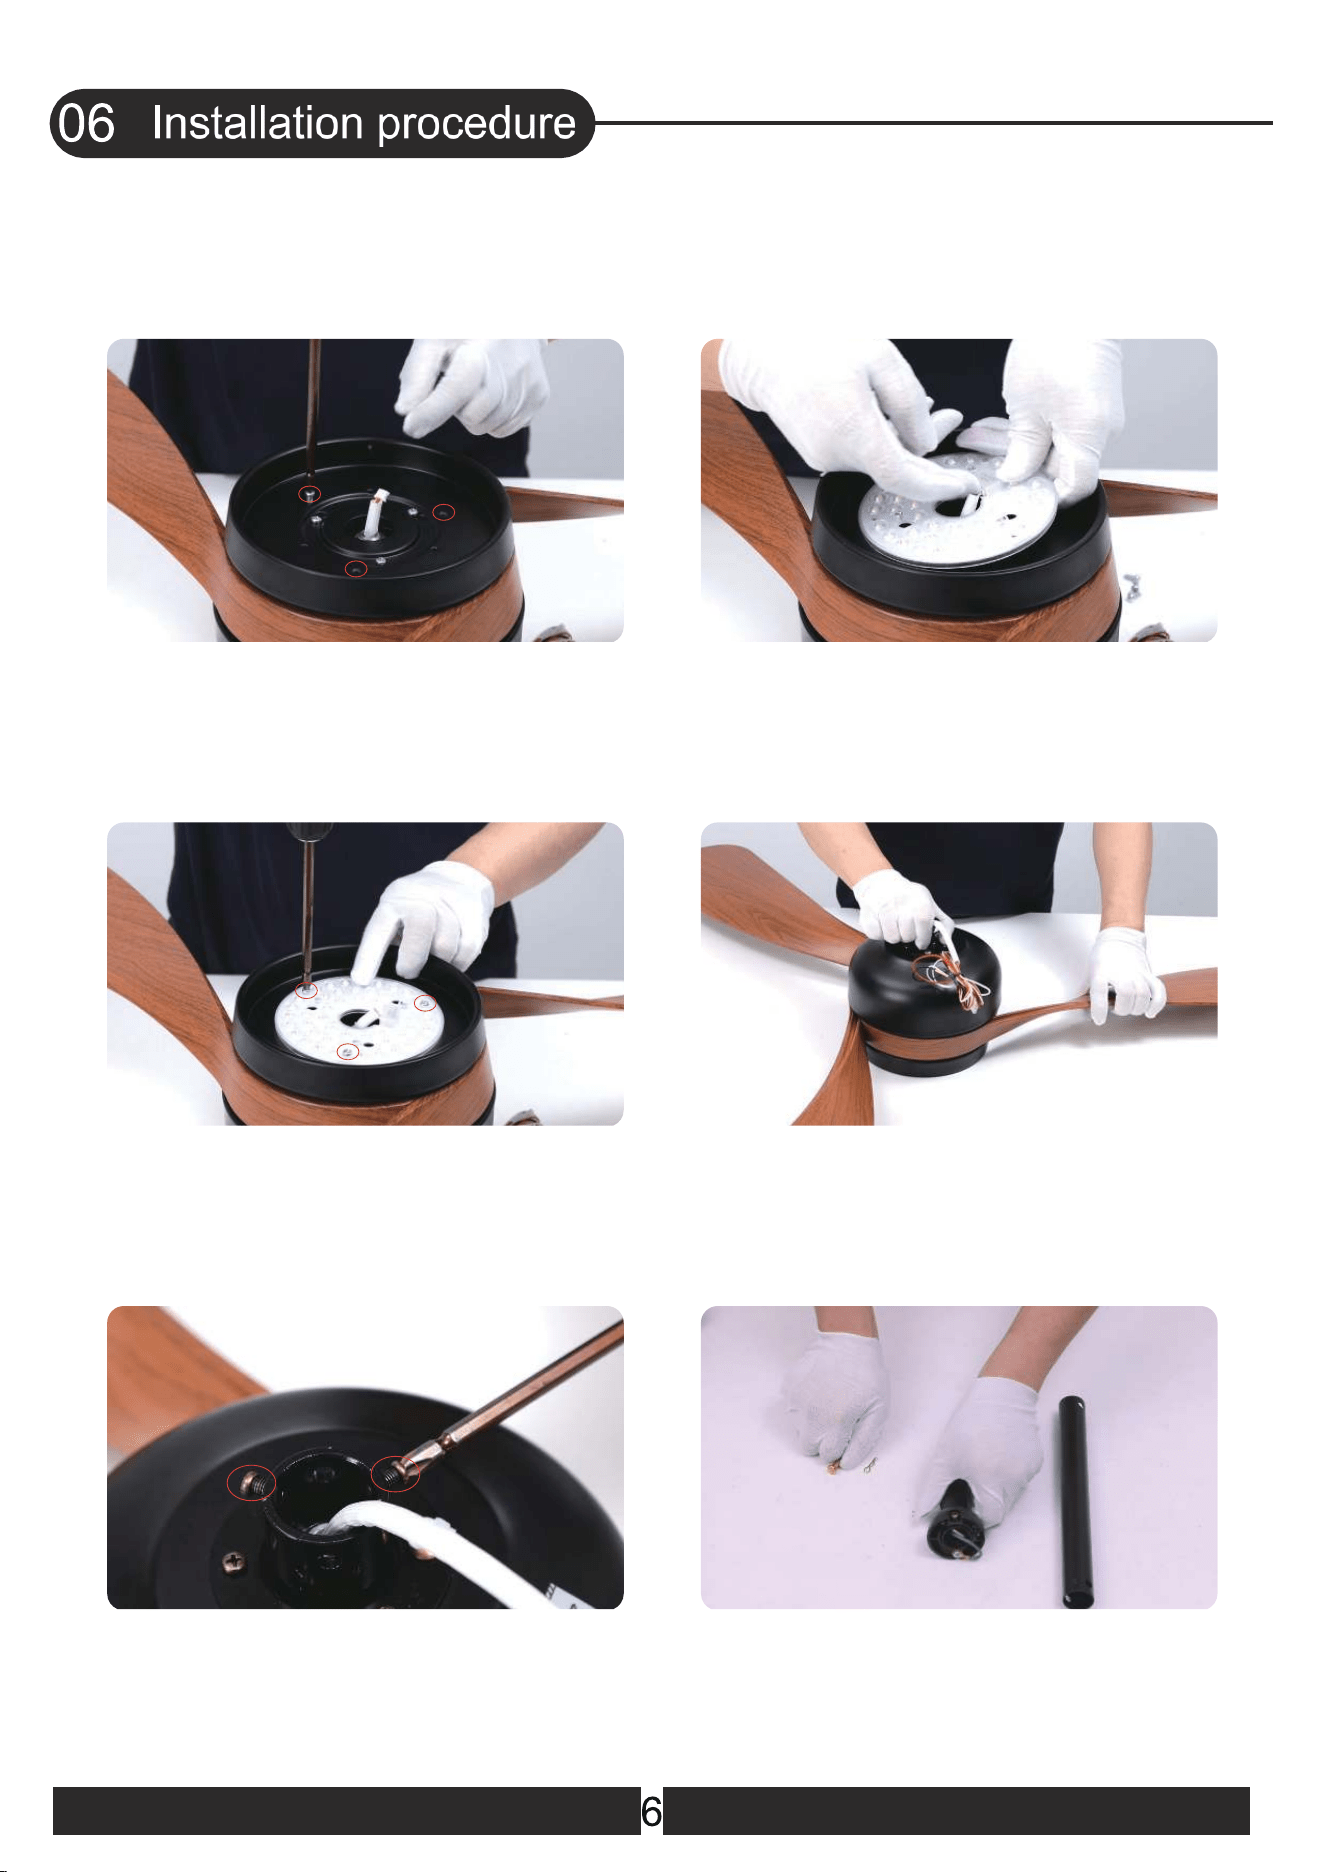
7. Loosen and remove the 3 brass light
kit screws pre-locked on the lamp panel
(They will be needed later)
8. Connect the light source with the
wires from the motor
9. Align the screw holes and tighten the 3
brass light kit screws
11. Remove the 2 screws from the top of
the fan motor
12. Remove the lock pin and the bolt
of the base of the downrod
10. Turn the fan over
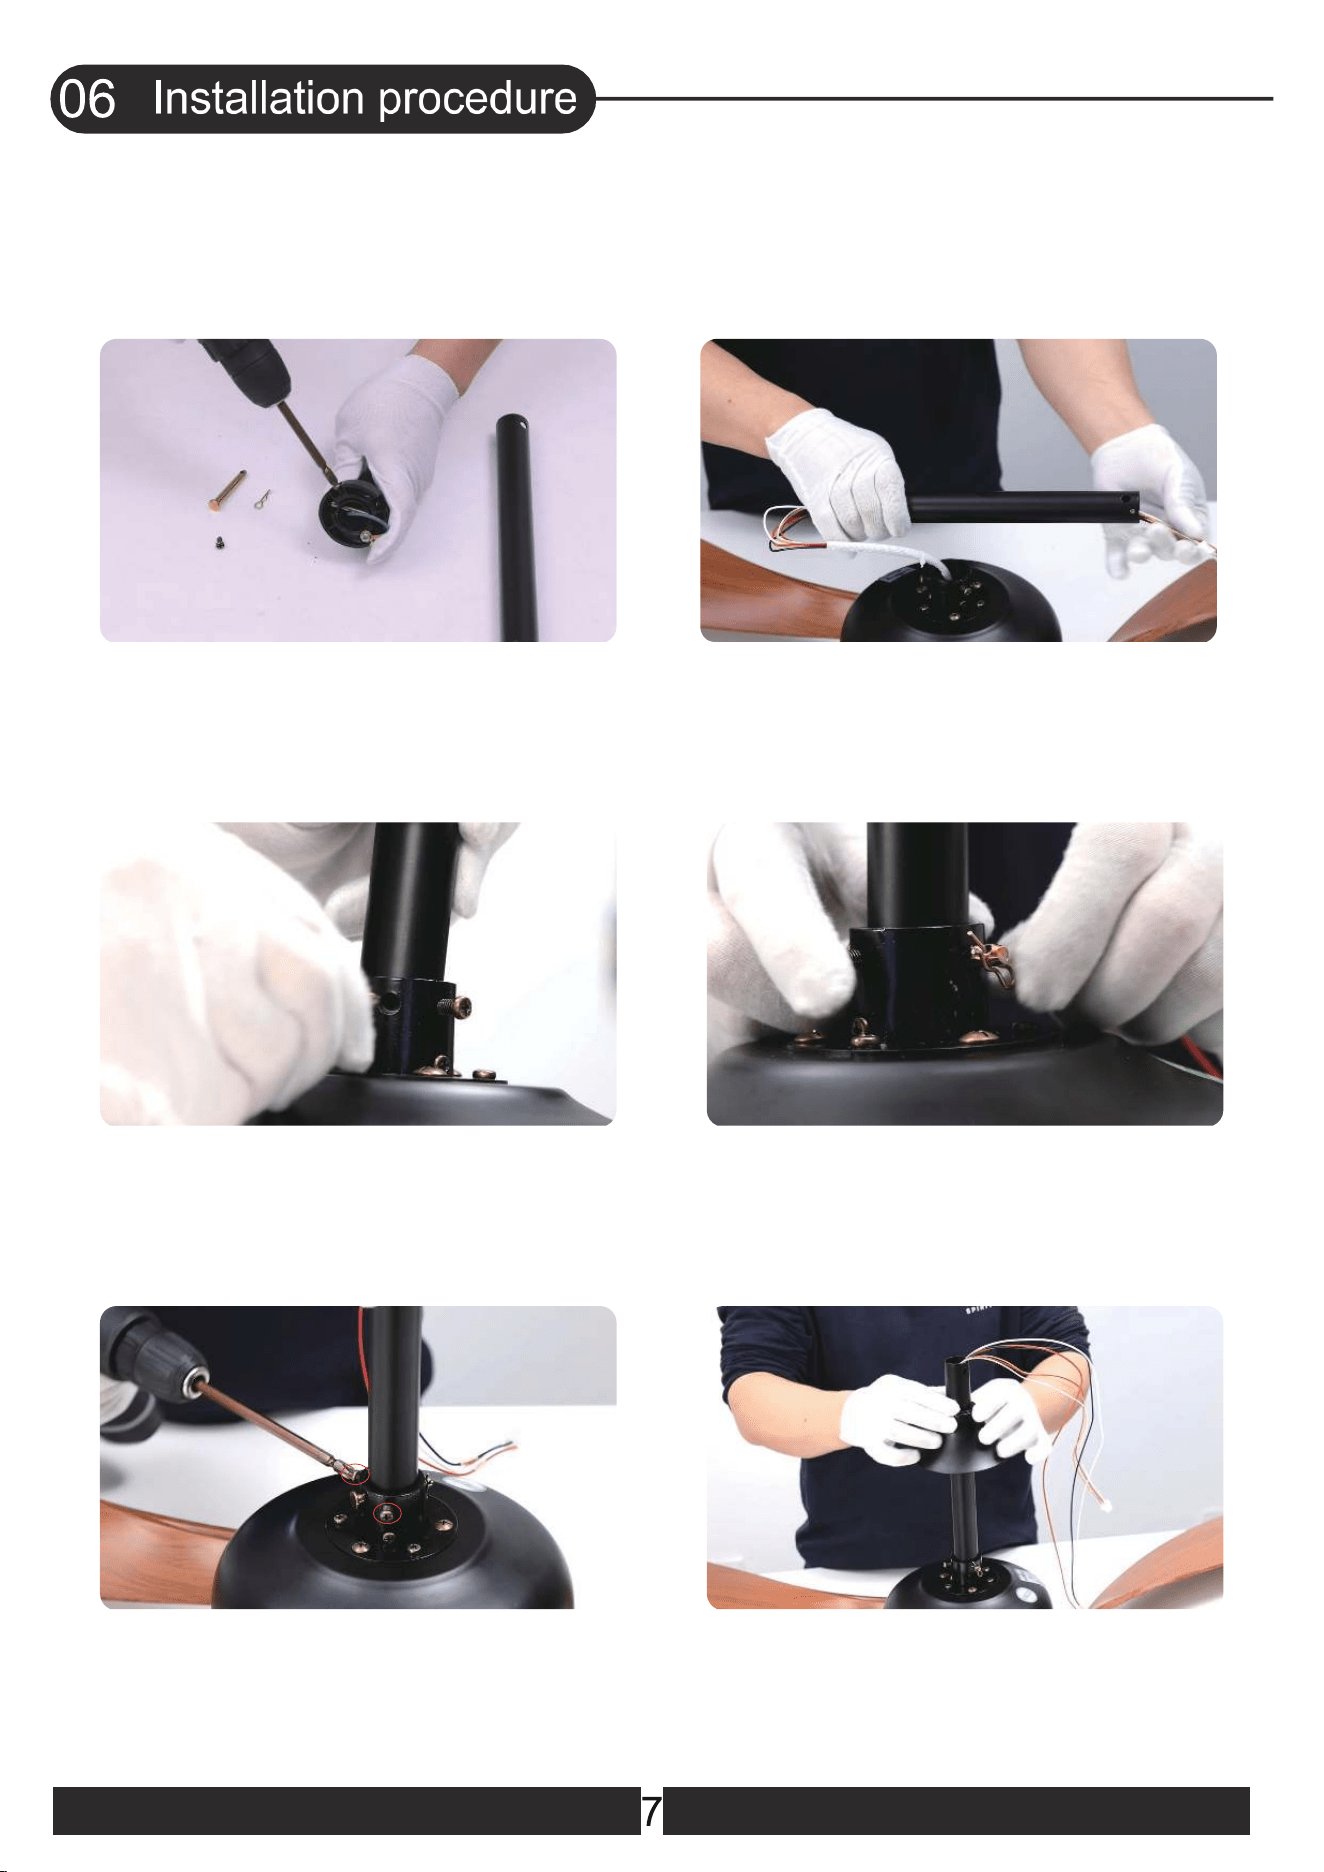
14. Select one downrod and pass all
motor wires/light cables through it
13. Remove 2 screws on the hanger ball
15. Insert the bolt
17. Tighten the 2 screws to prevent fan
shaking during operation
18. Put the decorative cover through the
downrod
16. Fix the bolt with the lock pin
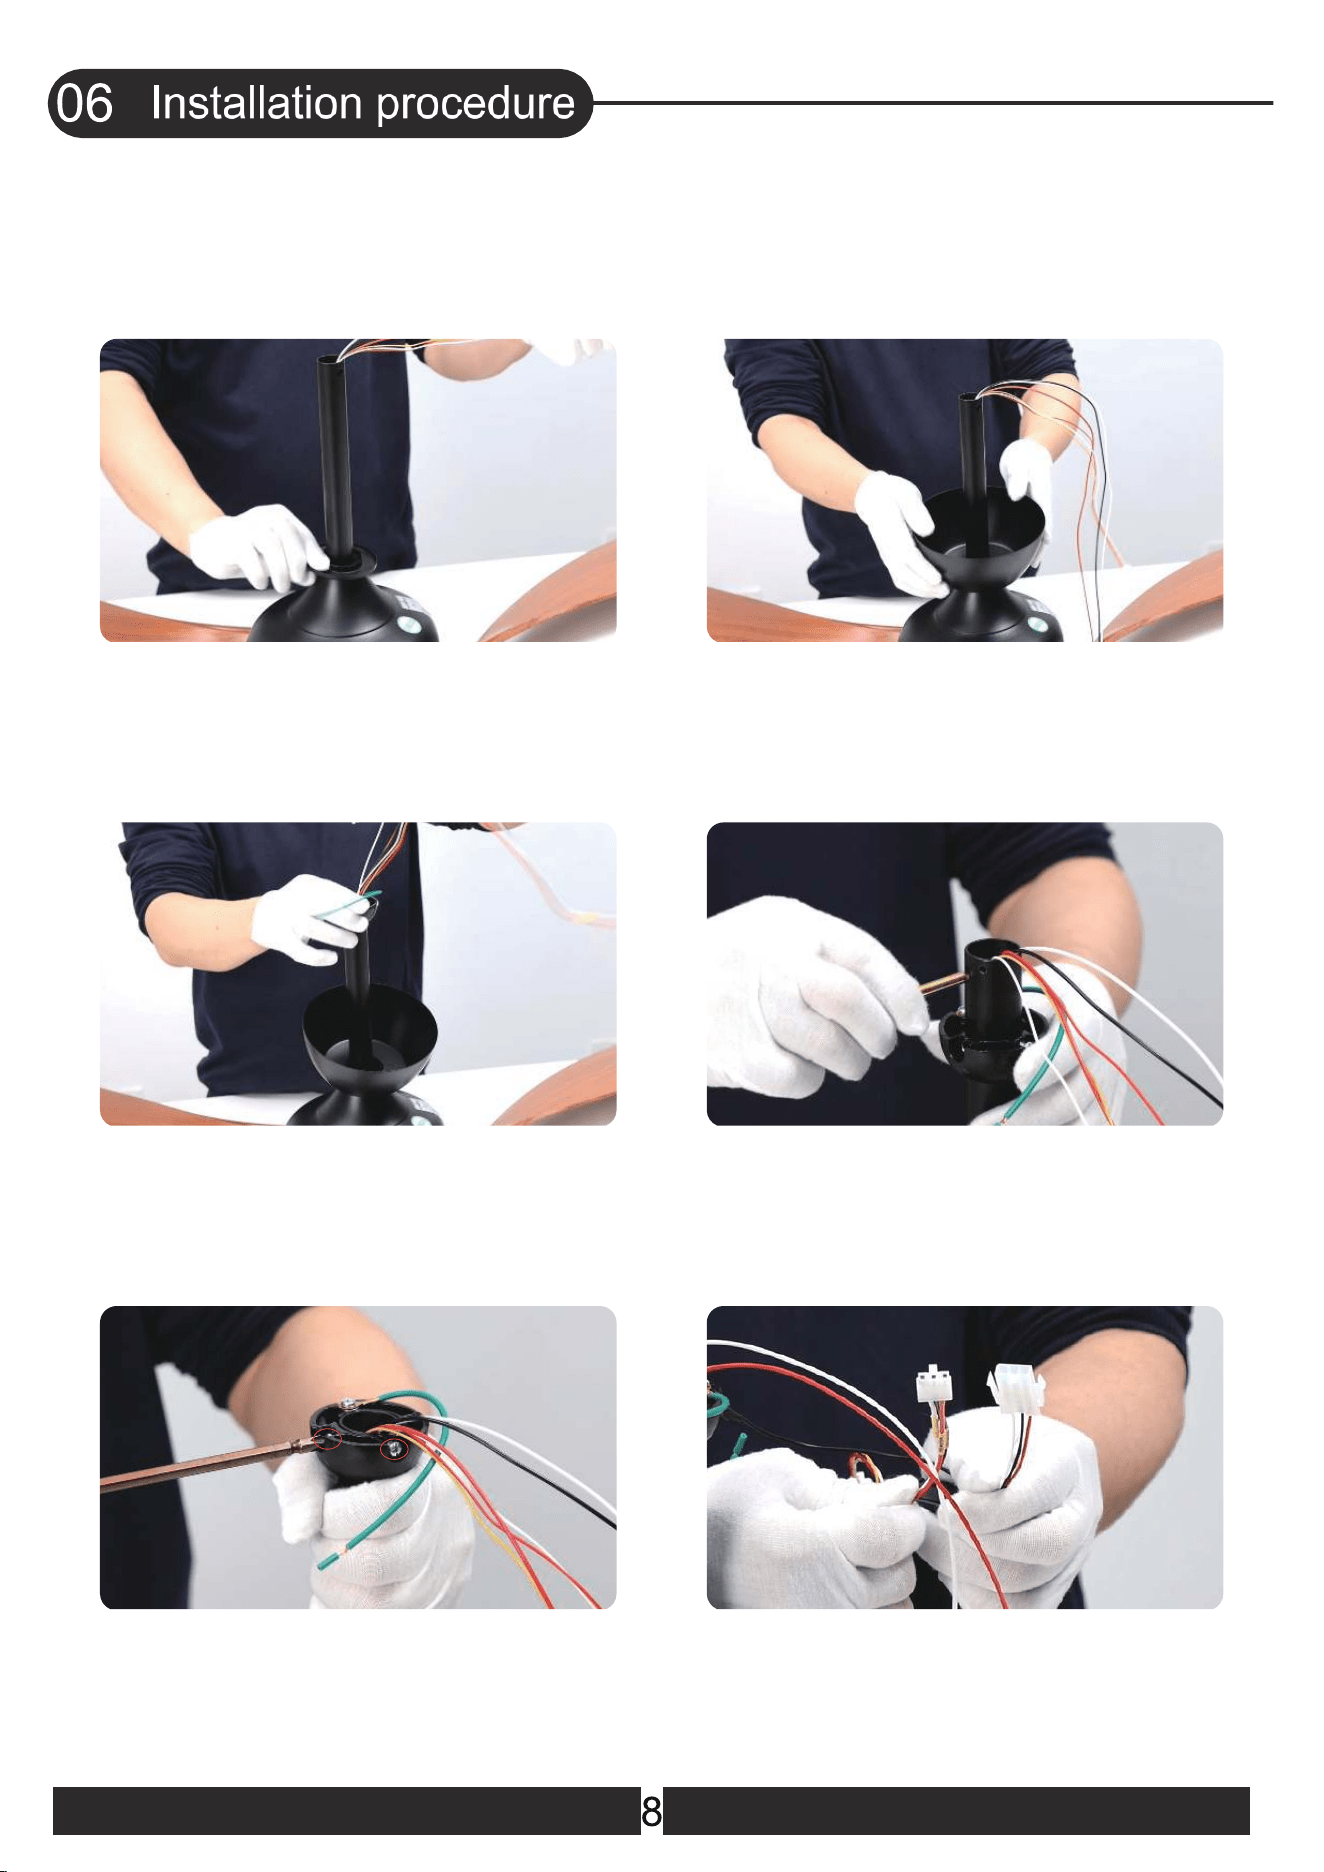
19. Put the canopy cover through the
downrod
20. Put the canopy through the downrod
21. Put the hanger ball through the
downrod
23. Align the screw hole and tighten
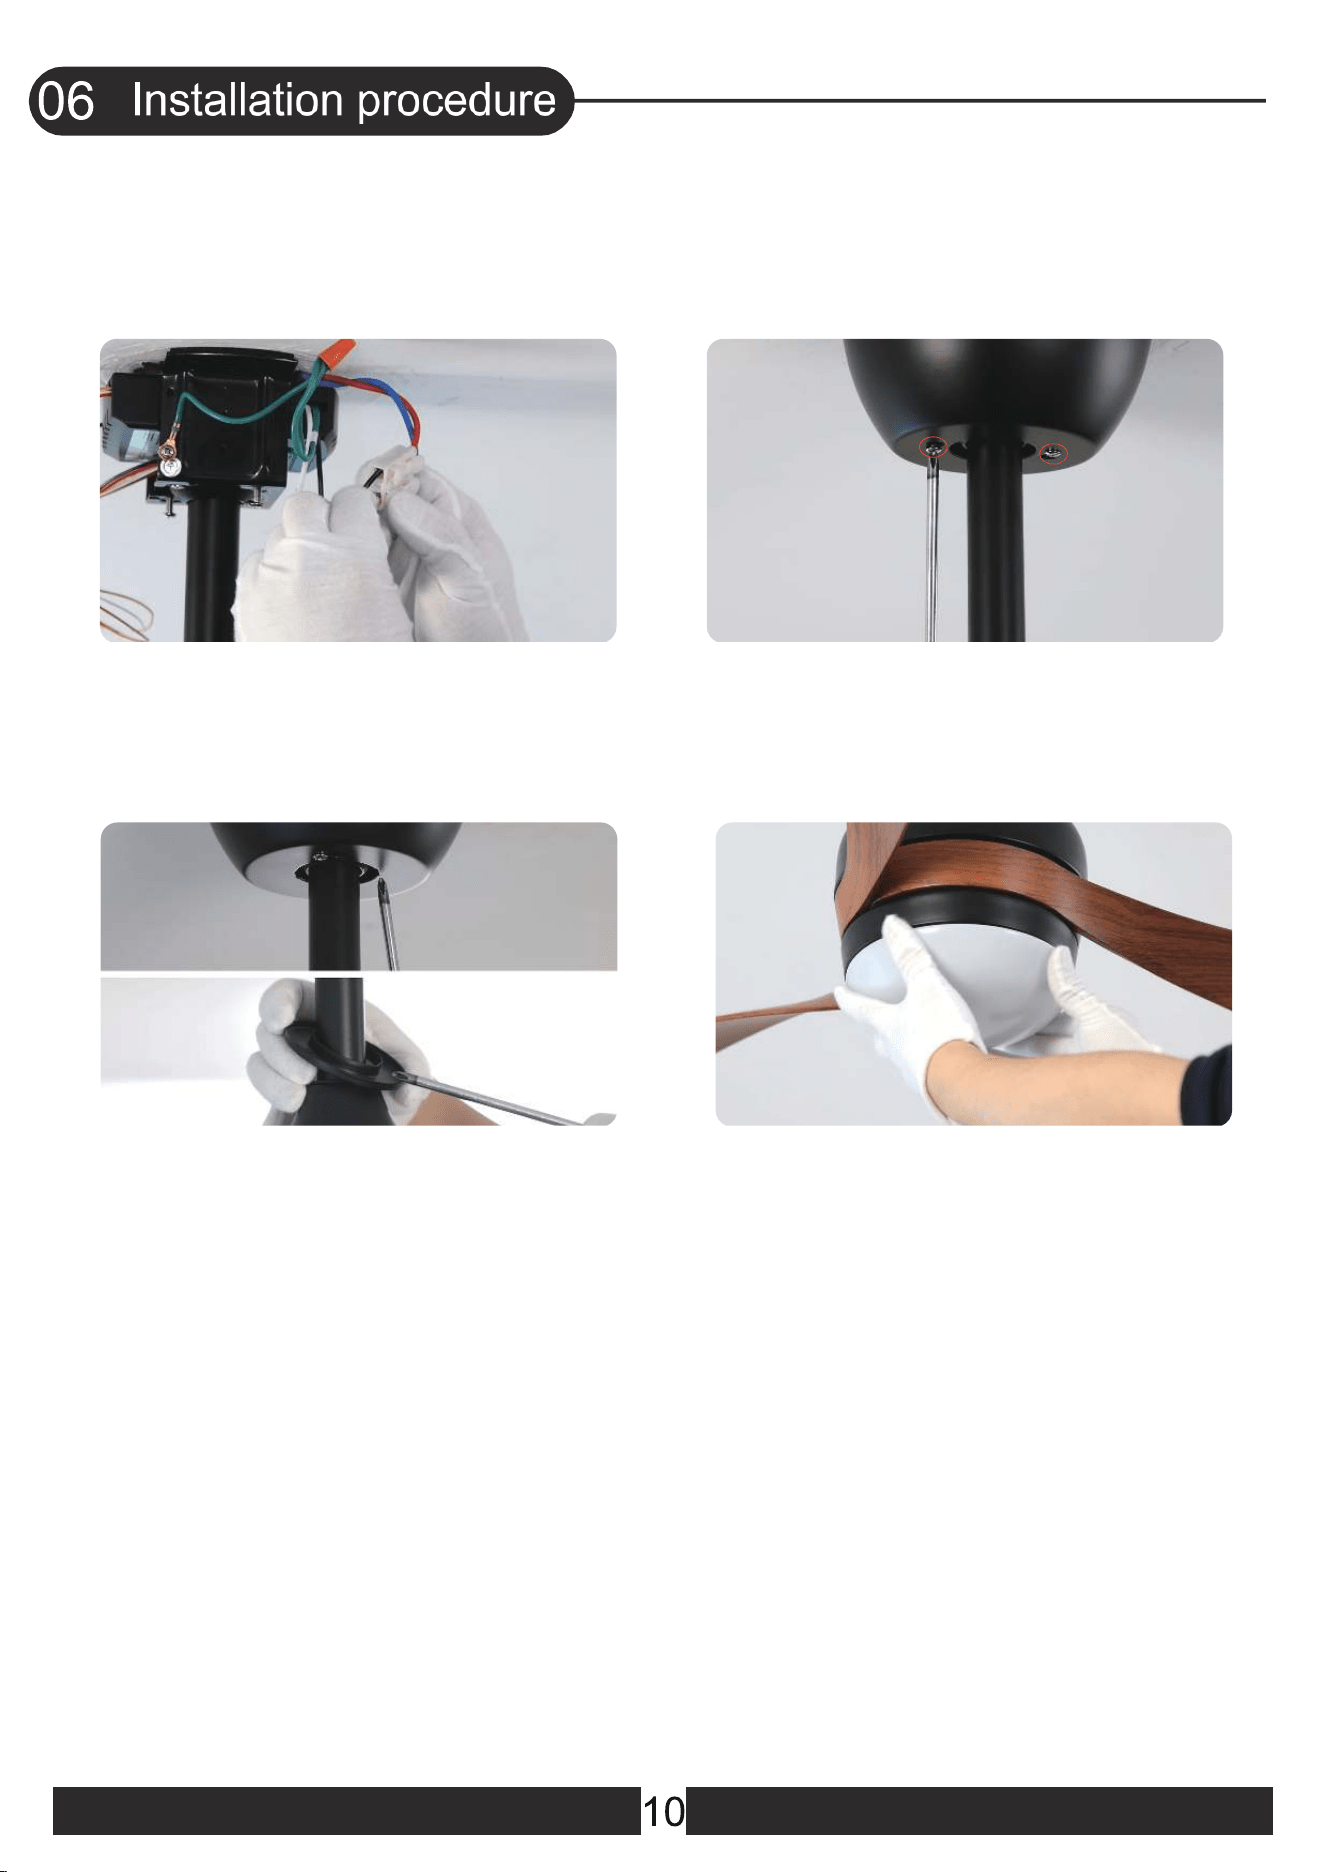
the screw
24. Connect the wire from the ceiling fan
to the receiver(Red,White and Black wires)
22. Insert the bolt.
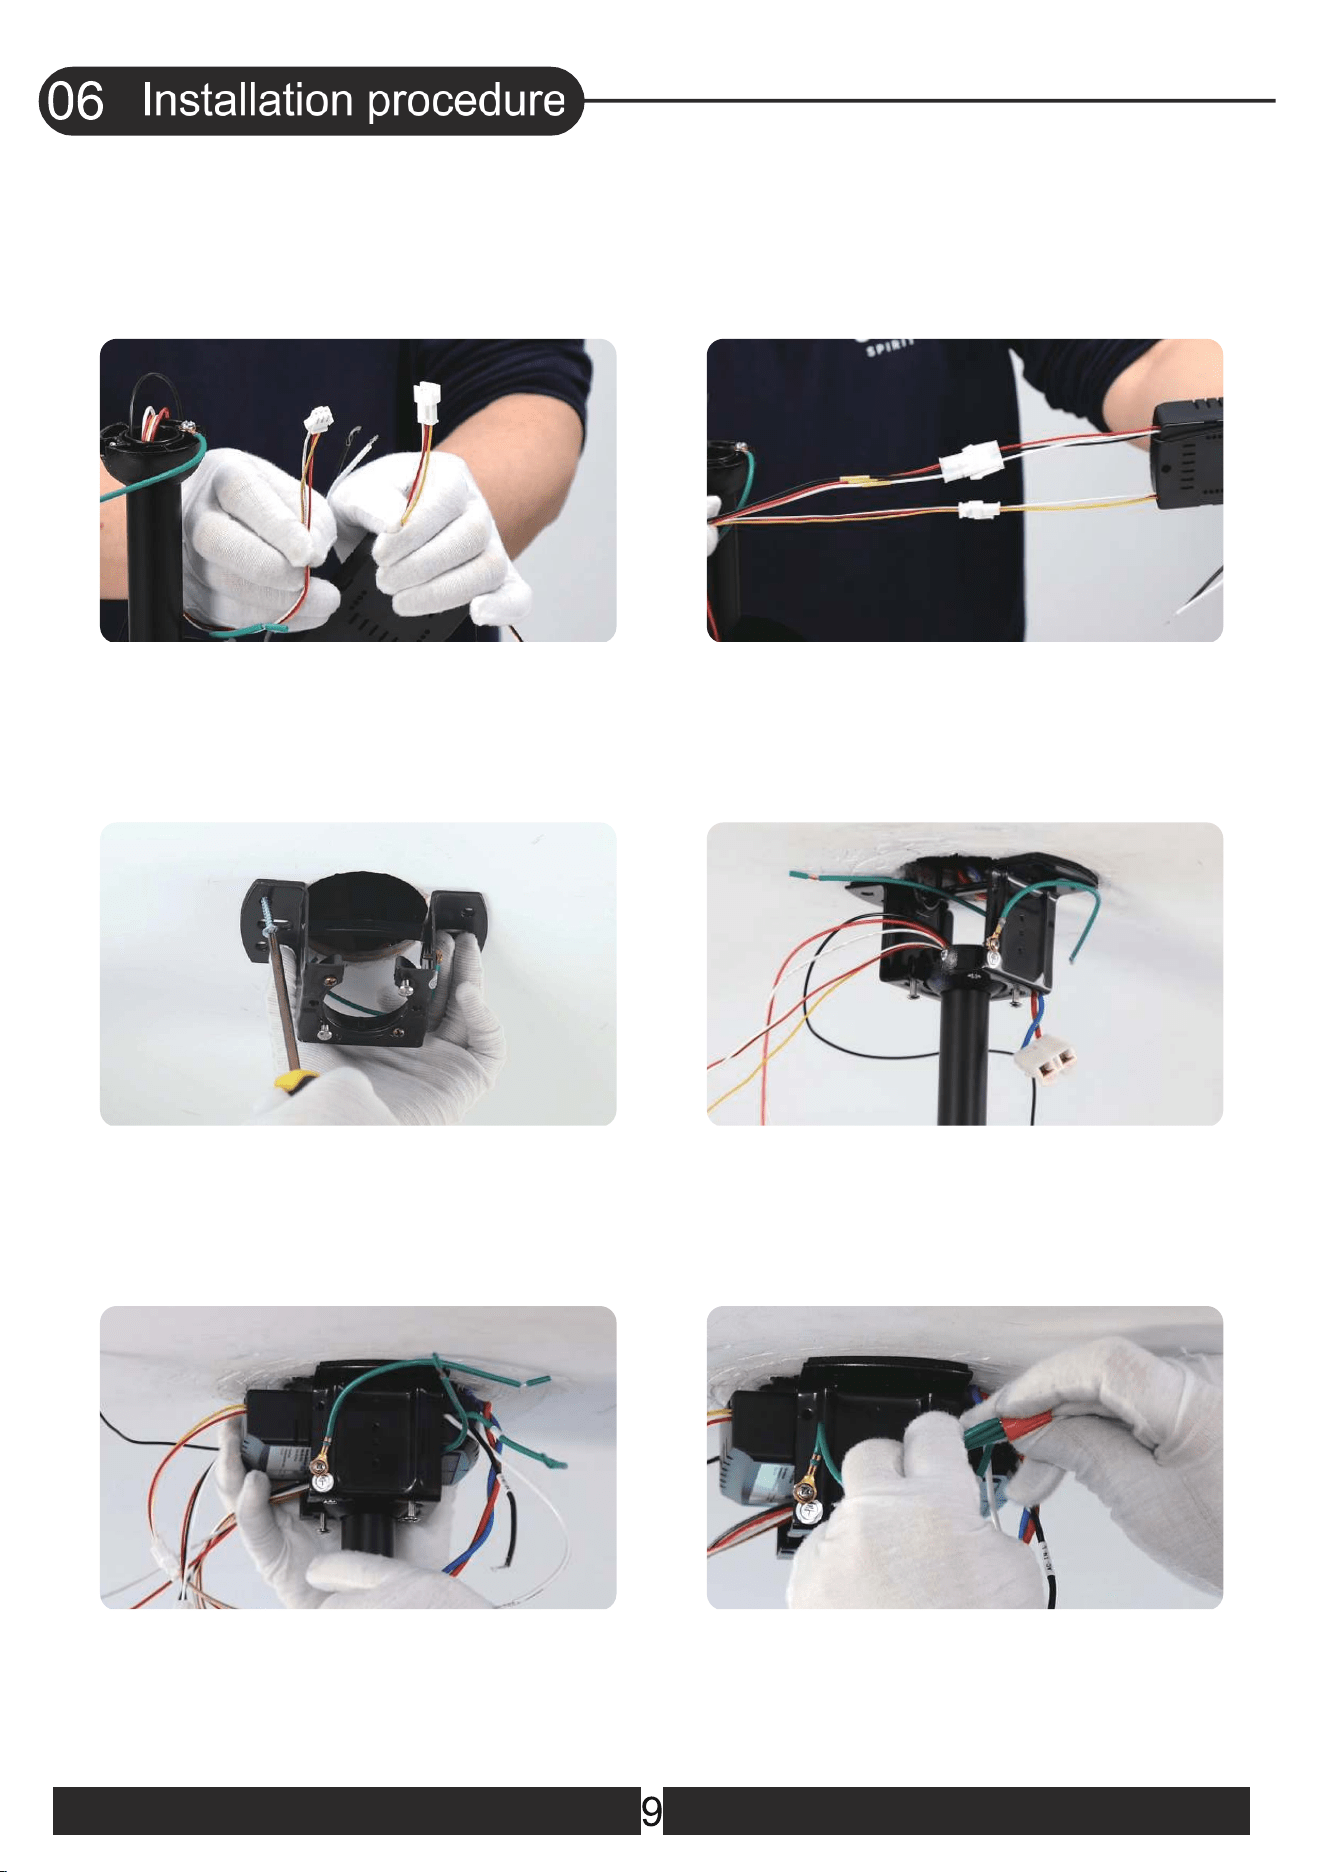
25. Connect the wire from the ceiling
fan to the receiver
(Red,Yellow and White wires)
26. All wires are connected
27. Install the ceiling bracket with four
self tapping screws
30. Use wire connecting nuts to connect the
three ground wires(Green)coming from the
downrod, receiver and hanging bracket
28. Place the downrod ball into the slot in
the ceiling bracket. If the slot doesn't
align properly then rotate the ball
29. Put the receiver into the mounting
bracket
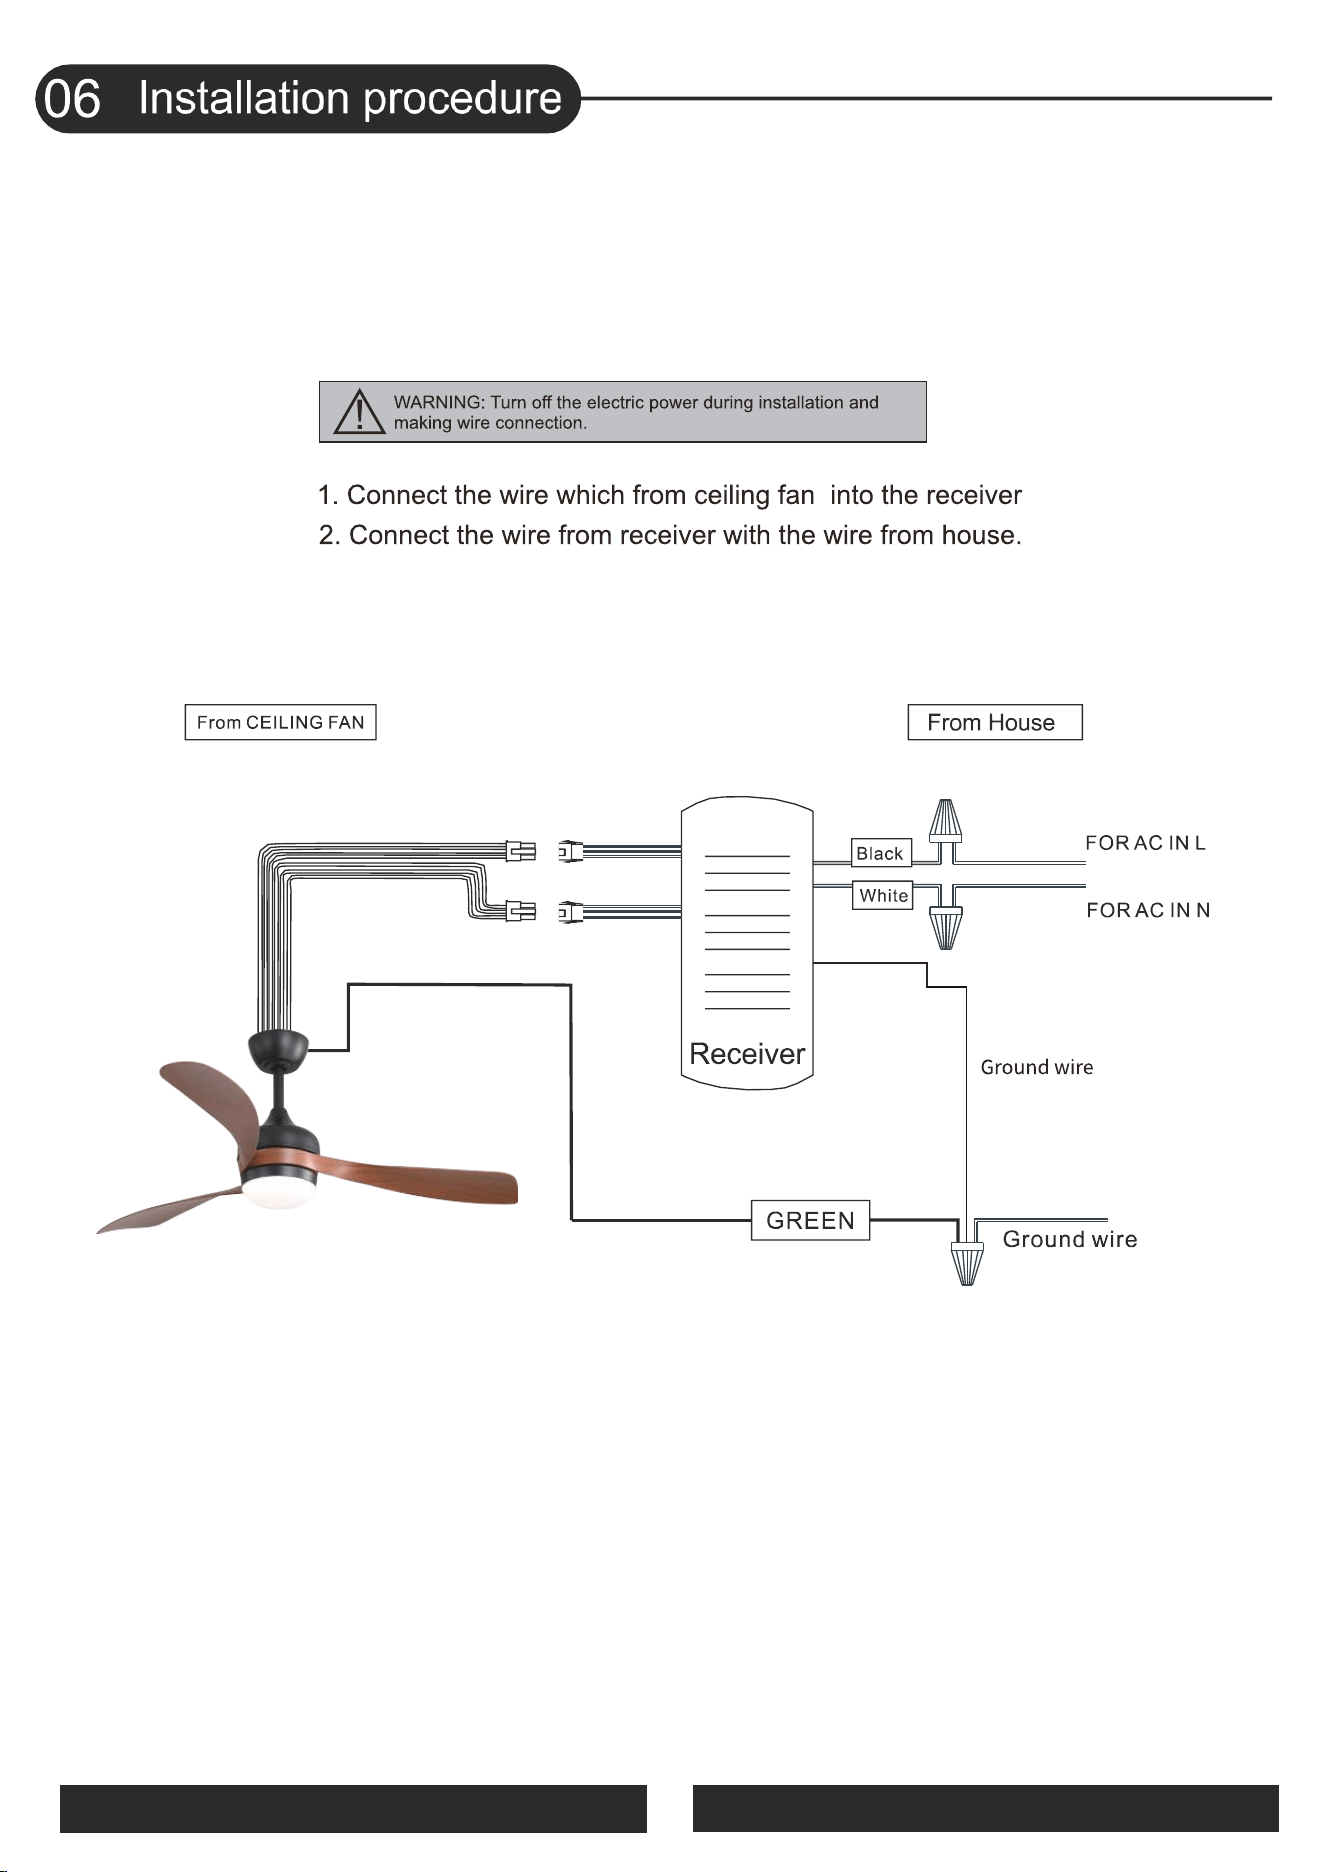
31. Connect the fan live wire (black) to your
house live wire; Connect the fan neutral
wire (white) to your house neutral wire
32. Lift the cannopy into place so that the
screw holes are aligned. Wrap keyhole slots
around the screws, twist clockwise and
tighten 2 screws
33. Lift the canopy cover to the canopy,
then turn and tighten
34. Install the lampshade and rotate it
to lock
11
12
When the reversible button is pressed, the fan slowly slows
down to a stop and then begins to reverse.
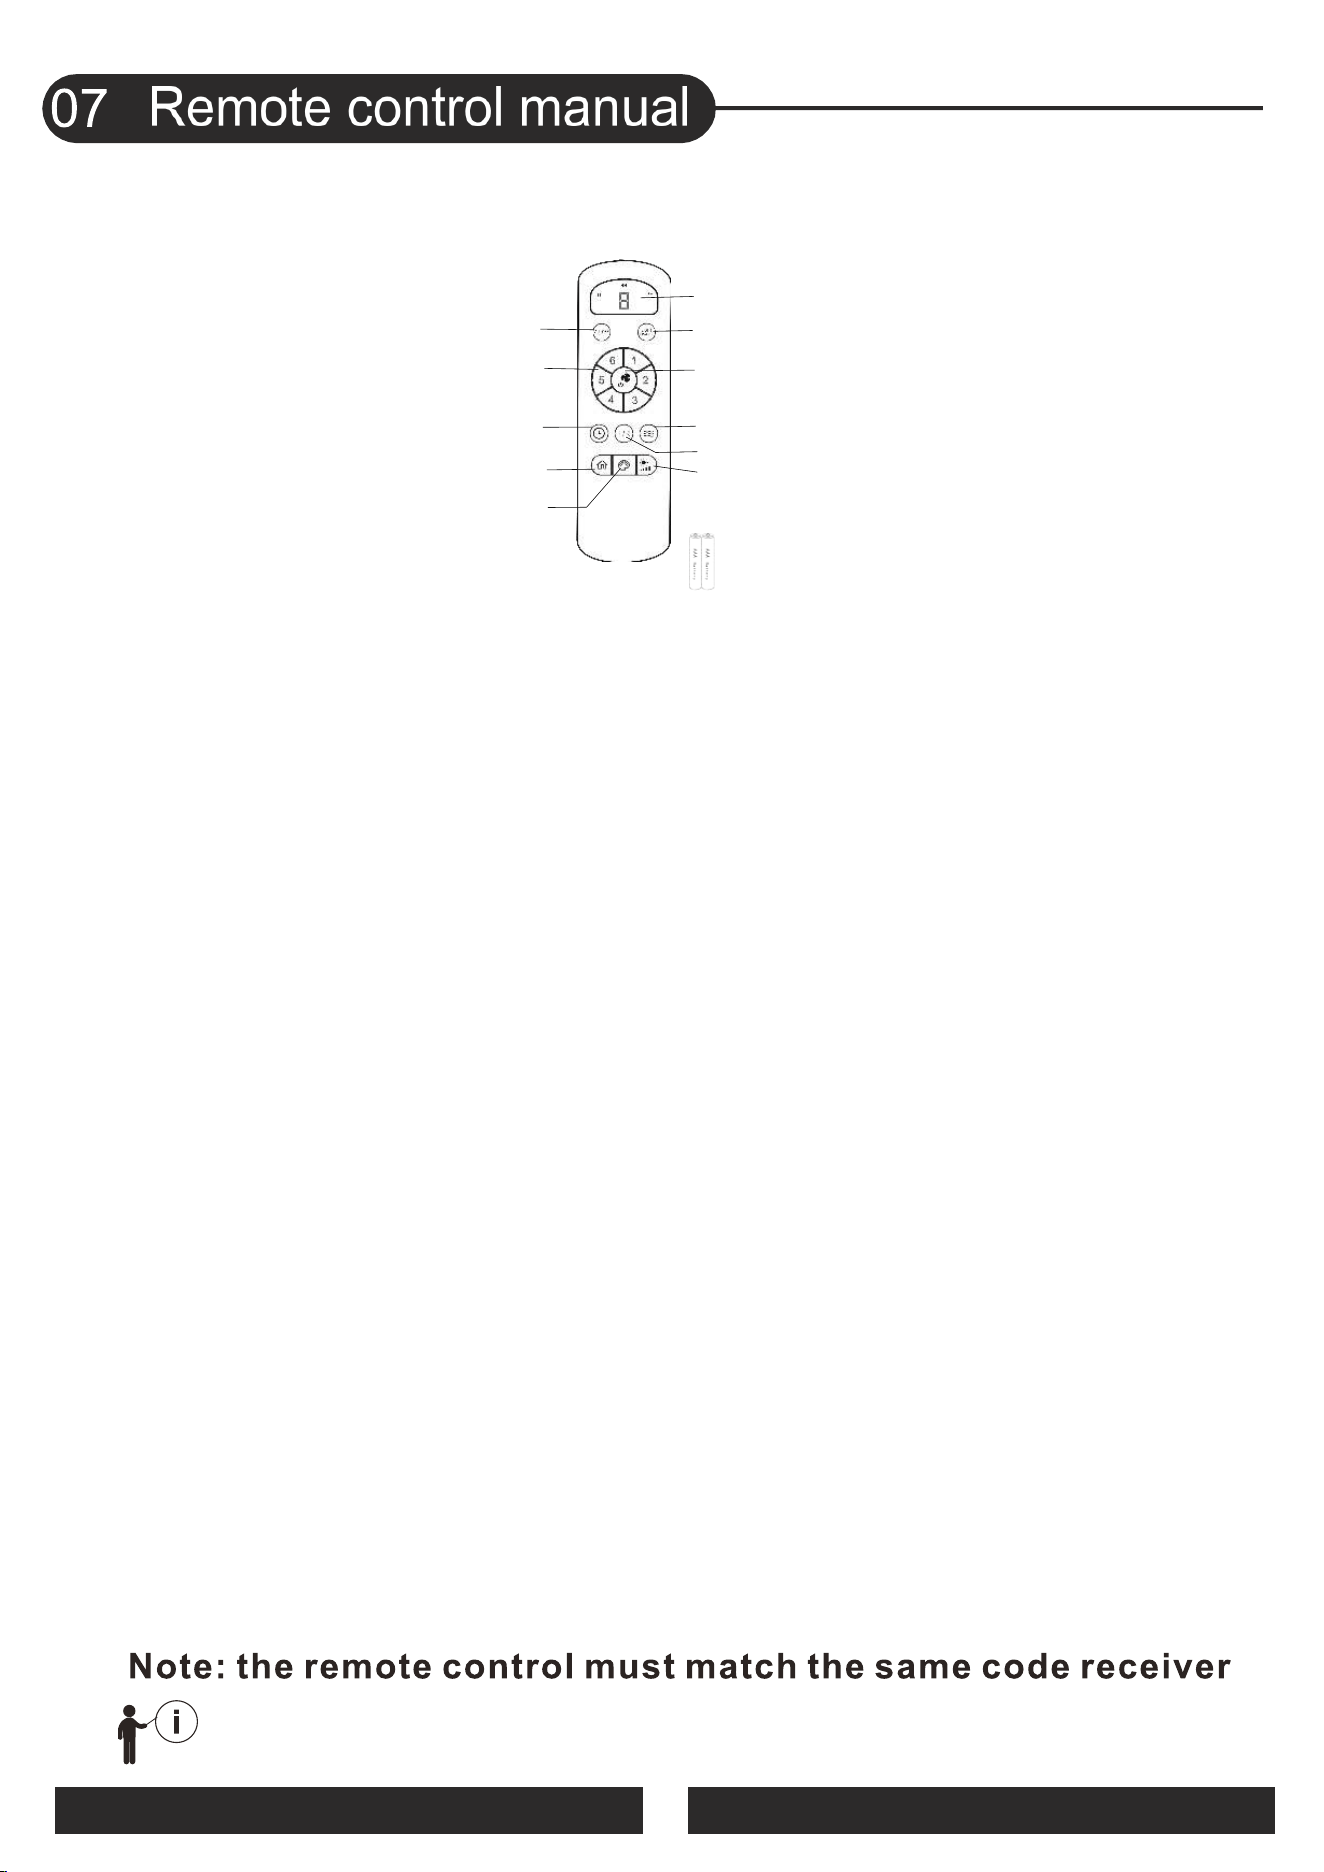
USER MANUAL FOR REMOTE CONTROL TRANSMITTER
(1) Turn OFF the Fan and Light
Trun OFF the Fan and Light together.
(2) Fan speed
Press the key 1-6 to start the fan.
(3) Timing control of the Fan and Light
- Press the key to set up the timer at 1hour ,4 hours or 8 hours to set up fan and
lamp timer. At the end of the timing, the fan and lamp will be automatically turned off.
- When the timing function is in effect, you can operate all the functions of the ceiling fan,
and then press any timing button to recalculate the timing time.
- Timer setting cancellation : When timing function is working, press key(1) to cancel the
timing function.
(4) Anti-theft mode
Press the key to turn on or turn off Anit-theft mode:
Every three hours, the light will automatically turn on and go out after 30 minutes. Press the
key again to cancel.
(5) Color temperature Switch of the light
Press the key to change LED light color : white-yellow-warm (circulate).
(6) Light dimming
When the light is on, press and hold the key, the light gradually brightened - gradually
dimmed(circulate).
(7) Direction of the fan
Press the key to change direction of the fan.
(8) Natural wind
Press the key, the fan speed automatic change between 1 to 6 speed.
(9) Fan OFF / Remote control pairing
- Turn OFF the fan.
- Remote control pairing : when AC power on, press and hold the key for 3-5 seconds,
then inish the remote control pairing.
Notice:
The remote controller only needs to be paired once. After the paired product, the controller
will have memory. The products have been paired before leaving the factory. When the
remote control is damaged or lost, it is necessary to implement remote control pairing
before using a new remote control.
(10) Turn ON/OFF the Light
(11) Fan speed and Timing time indicator
The indicator light will light up when press any key of the remote control
(12) AAA battery * 2
- Please install 2 pieces of AAA batteries before use.
- Please remove the battery when it is not used for a long time.
(1) Turn OFF the Fan and Light
(2) Fan speed
(5) Color temperature switch of
(3) Timing control of the Fan & Light
(12) AAA battery *2
(4) Anti-theft mode
(11) Fan speed / Timing time indicator
(9) Fan OFF /
Remote control pairing
(8) Natural wind
(10) Turn ON/OFF the light
(7) Direction of the fan
(6) Light dimming
the light
8
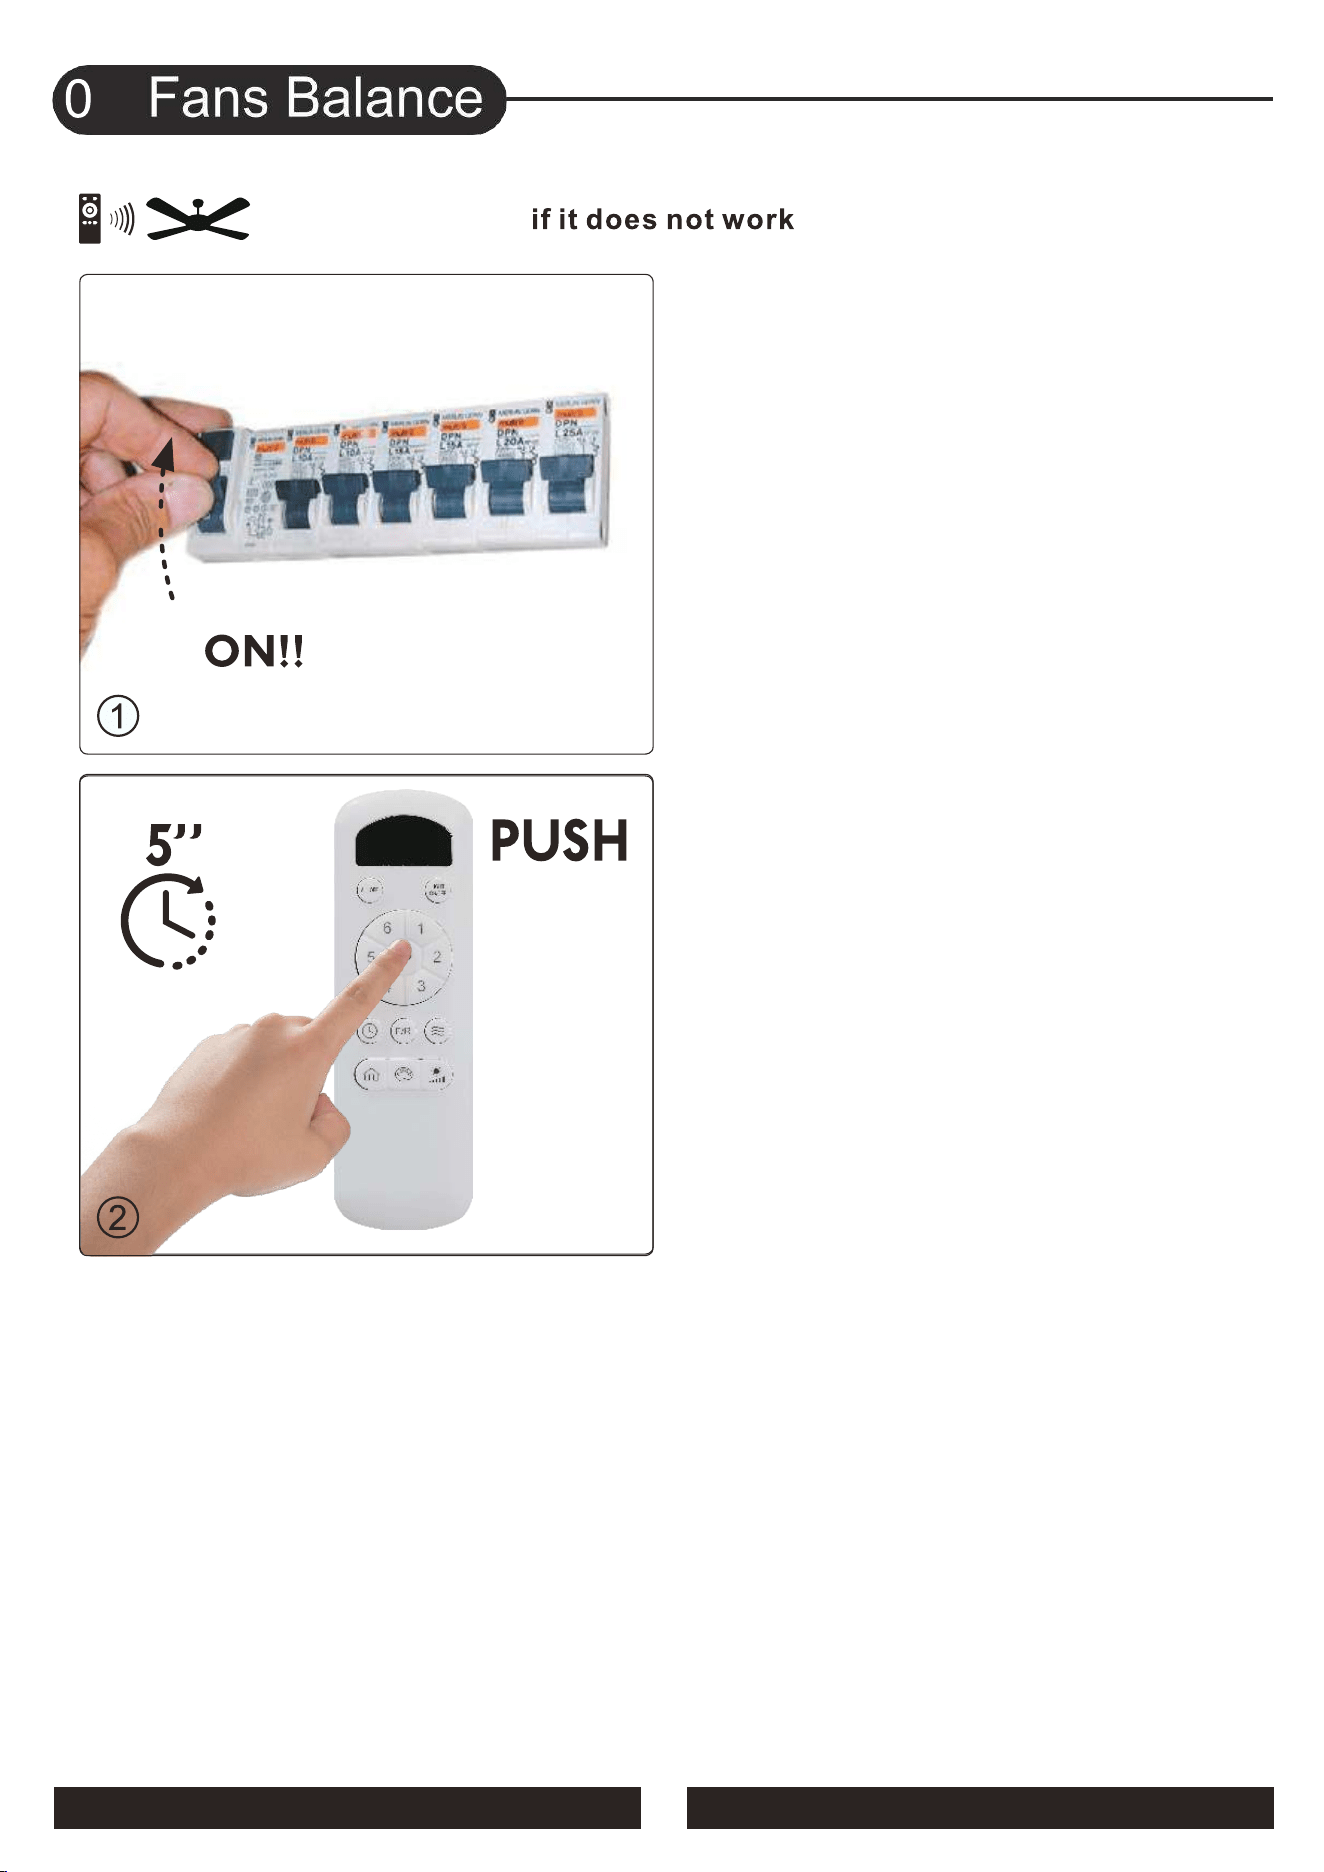
2.Pressing and holding this key
for 5 seconds.
1.Turn on the main switch.
13
09
14
15
KBS-52K103
H
Installation
Video