Air conditioner
User manual
AR50F**C1***
• Thank you for purchasing this Samsung air conditioner.
• Before operating this unit, please read this manual carefully and retain it for future reference.
2
English
Contents
Safety Information 4
Safety Information 4
At a Glance 15
Indoor Unit Overview 15
Display 16
Remote Control Overview 17
Charging the remote control • Installing the remote control holder 18
Remote Control Operation 19
Initial Settings 19
Selecting an operation mode • To set the temperature 20
To adjust the fan speed • To adjust the airflow direction 21
Smart Features 22
Power Smart Features 22
AI Auto mode 22
AI Energy mode 23
Cool mode 24
Dry mode • Fan mode 25
Heat mode • Automatic defrost 26
Variety Smart Features 27
MAX function 27
Eco function 28
Quiet function 29
Beep function 30
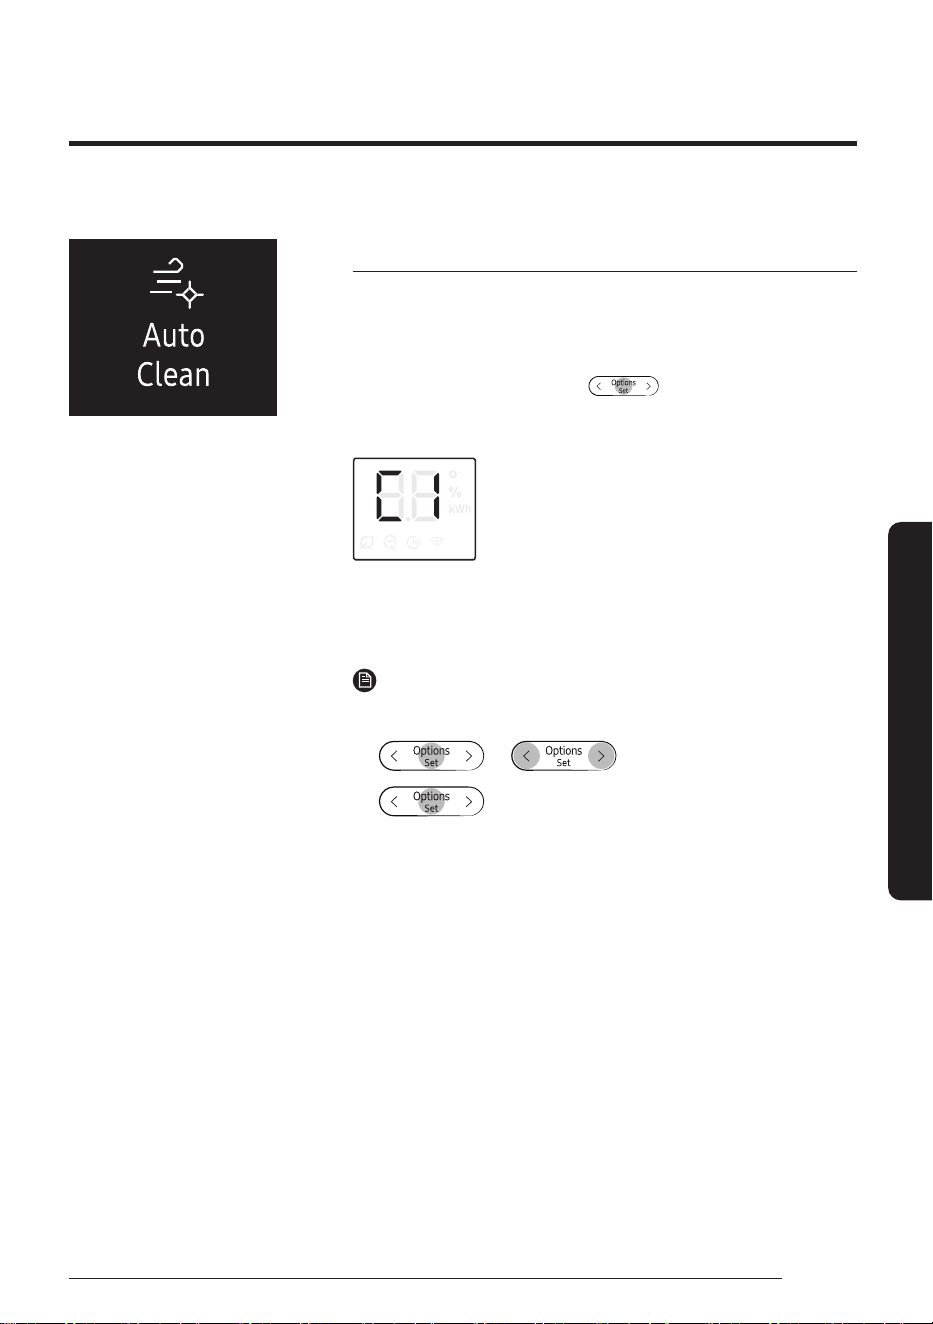
Auto Clean function 31
Display lighting function • Wi-Fi function (SmartThings app) 33
Time scheduling 34
Timed on/ Timed off function 34
Good Sleep function 36
3
English
Cleaning and Maintenance 37
Schedule 37
Cleaning 38
Appendix 40
Troubleshooting 40
Information about Refrigerant 42
SmartThings app 43
Reference 45
Correct Disposal of This Product
(Waste Electrical & Electronic Equipment)
(Applicable in countries with separate collection systems)
This marking on the product, accessories or literature indicates that the product and its electronic
accessories (e.g. charger, headset, USB cable) should not be disposed of with other household waste
at the end of their working life. To prevent possible harm to the environment or human health from
uncontrolled waste disposal, please separate these items from other types of waste and recycle
them responsibly to promote the sustainable reuse of material resources.
Household users should contact either the retailer where they purchased this product, or their local
government office, for details of where and how they can take these items for environmentally safe
recycling.
Business users should contact their supplier and check the terms and conditions of the purchase
contract. This product and its electronic accessories should not be mixed with other commercial
wastes for disposal.
Correct disposal of batteries in this product
This marking on the battery, manual or packaging indicates that the batteries in this product should
not be disposed of with other household waste at the end of their working life. Where marked, the
chemical symbols Hg, Cd or Pb indicate that the battery contains mercury, cadmium or lead above
the reference levels in EC Directive 2006/66.
For information on Samsung’s environmental commitments and product regulatory obligations, e.g. REACH,
visit our sustainability page available via www.samsung.com
4
English
Safety Information
WARNING: Read This Manual
Read and follow all safety information and instructions before
installation, use, or maintenance of this appliance. Incorrect
installation, use, or maintenance of this appliance can result in death,
serious injury, or property damage. Keep these instructions with this
appliance. This manual is subject to change. For the latest version, visit
www.samsung.com.
Because the instructions in this manual cover various models, the
characteristics of your air conditioner may differ slightly from those
described. If you have any questions, please contact your service
provider or visit www.samsung.com.
Notices and notes
To make you aware of safety messages and highlighted information,
we use the following notices and notes throughout this manual:
WARNING
Hazards or unsafe practices that may result in severe personal injury
or death.
CAUTION
Hazards or unsafe practices that may result in minor personal injury or
property damage.
IMPORTANT
Information of special interest
NOTE
Supplementary information that may be useful
Safety Information
Safety Information
5
English
Safety Information
Symbol Meaning
WARNING: Low burning velocity material
(This appliance is filled with R-32.)
The user and installer guides should be read
carefully.
The user and installer guides should be read
carefully.
The service guide should be read carefully.
FOR GENERAL
This appliance is not intended for use by persons (including
children) with reduced physical, sensory or mental capabilities,
or lack of experience and knowledge, unless they have been
given supervision or instruction concerning use of the appliance
by a person responsible for their safety. Children should be
supervised to ensure that they do not play with the appliance.
For use in Europe : This appliance can be used by children aged
from 8 years and above and persons with reduced physical,
sensory or mental capabilities or lack of experience and
knowledge if they have been given supervision or instruction
concerning use of the appliance in a safe way and understand
the hazards involved. Children shall not play with the appliance.
Cleaning and user maintenance shall not be made by children
without supervision.
Safety Information
6
English
Safety Information
IMPORTANT
To perform its antimicrobial function this product has been
treated with the biocide substance Silver zinc zeolite.
FOR INSTALLATION
WARNING
Use a power cord with this product's power specifications or
higher and use the power cord for this appliance only. In addition,
do not use an extension cord.
• Extending the power cord may result in electric shock or fire.
• Do not use an electric transformer. This may result in electric
shock or fire.
• If the voltage/frequency/rated current condition is different, it
may cause fire.
The installation of this appliance must be performed by a
qualified technician or service company. Do not attempt to
install the air conditioner yourself.
• Failing to do so may result in electric shock, fire, explosion,
problems with the product, or injury and may also void warranty
on the installed product.
Install an Isolation Switch next to the Air Conditioner (but not on
the panels of the Air Conditioner) and circuit breaker dedicated
to the air conditioner.
• Failing to do so may result in electric shock or fire.
Fix the outdoor unit firmly so that the electric part of the outdoor
unit is not exposed.
• Failing to do so may result in electric shock, fire, explosion, or
problems with the product.
7
English
Safety Information
Do not install this appliance near a heater, or flammable material.
Do not install this appliance in a humid, oily or dusty location, in
a location exposed to direct sunlight and water (or rain). Do not
install this appliance in a location where gas may leak.
• This may result in electric shock or fire.
Never install the outdoor unit in a location such as on a high
external wall where it could fall.
• If the outdoor unit falls, it may result in injury, death or property
damage.
This appliance must be properly grounded. Do not ground the
appliance to a gas pipe, plastic, water pipe, or telephone line.
• Failing to do so may result in electric shock, fire, and explosion.
• Make sure to use a socket-outlet with ground.
The product shall be stored in a room with no ignition sources
(e.g. open flames, gas appliance, electric heater, etc.).
• Note that the refrigerant has no odour.
CAUTION
Please cover the air conditioner with PE BAG after installation,
and remove it when you start to run air conditioner.
Install your appliance on a level and hard floor that can support
its weight.
• Failing to do so may result in abnormal vibrations, noise, or
problems with the product.
Install the drain hose properly so that water drains correctly.
• Failing to do so may result in water overflowing and property
damage. Avoid adding drain to waste pipes as odours may arise
in the future.

Safety Information
8
English
Safety Information
When installing the outdoor unit, make sure to connect the drain
hose so that draining is performed correctly.
• The water generated during heating by the outdoor unit may
overflow and result in property damage.
In particular, in winter, if a block of ice falls, it may result in
injury, death or property damage.
Do not install the product in a place where thermo-hygrostat is
needed (such as server room, machinery room, computer room,
etc.)
• Those places do not provide guaranteed operation condition of
the product therefore performance can be poor in these places.
FOR POWER SUPPLY
WARNING
When the circuit breaker is damaged, contact your nearest
service centre.
Do not pull or excessively bend the power line. Do not twist or tie
the power line. Do not hook the power line over a metal object,
place a heavy object on the power line, insert the power line
between objects, or push the power line into the space behind
the appliance.
• This may result in electric shock or fire.
If the supply cord is damaged, it must be replaced by the
manufacturer, its service agent or similarly qualified persons in
order to avoid a hazard.
9
English
Safety Information
CAUTION
When not using the air conditioner for a long period of time or
during a thunder/lightning storm, cut the power at the circuit
breaker.
• Failing to do so may result in electric shock or fire.
FOR USING
WARNING
If the appliance is flooded, please contact your nearest service
centre.
• Failing to do so may result in electric shock or fire.
If the appliance generates a strange noise, a burning smell or
smoke, cut off the power supply immediately and contact the
nearest service centre.
• Failing to do so may result in electric shock or fire.
If the air conditioner malfunctions or requires repair,
immediately stop its operation and disconnect the entire power
system. Then consult the authorized service personnel.
In the event of a gas leak (such as propane gas, LP gas, etc.),
ventilate immediately without touching the power line. Do not
touch the appliance or power line.
• Do not use a ventilating fan.
• A spark may result in an explosion or fire.

Safety Information
10
English
Safety Information
To reinstall the air conditioner, please contact your nearest
service centre.
• Failing to do so may result in problems with the product, water
leakage, electric shock, or fire.
• Delivery service for the product is not provided. If you reinstall
the product in another location, additional construction
expenses and an installation fee will be charged.
• Especially, when you wish to install the product in an unusual
location such as in an industrial area or near the seaside where
it is exposed to salt in the air, please contact your nearest
service centre.
Do not touch the circuit breaker with wet hands.
• This may result in electric shock.
Do not turn the air conditioner off with the circuit breaker while
it is operating.
• Turning the air conditioner off and then on again with the
circuit breaker may cause a spark and result in electric shock or
fire.
After unpacking the air conditioner, keep all packaging materials
well out of the reach of children, as packaging materials can be
dangerous to children.
• If a child places a bag over its head, it may result in suffocation.
Do not touch the airflow blade with your hands or fingers during
heating.
• This may result in electric shock or burns.
Do not insert your fingers or foreign substances into the air inlet/
outlet of the air conditioner.
• Take special care that children do not injure themselves by
inserting their fingers into the product.

11
English
Safety Information
Do not strike or pull the air conditioner with excessive force.
• This may result in fire, injury, or problems with the product.
Do not place an object near the outdoor unit that allows children
to climb onto the machine.
• This may result in children seriously injuring themselves.
Do not use this air conditioner for long periods of time in badly
ventilated locations or near infirm people.
• Since this may be dangerous due to a lack of oxygen, open a
window at least once an hour.
Do not use means to accelerate the defrost operation or to clean,
other than those recommended by Samsung.
Do not pierce or burn.
Be aware that refrigerants may not contain an odour.
If any foreign substance such as water has entered the appliance,
cut off the power supply and contact the nearest service centre.
• Failing to do so may result in electric shock or fire.
Do not attempt to repair, disassemble, or modify the appliance
yourself.
• Do not use any fuse (such as copper, steel wire, etc.) other than
the standard fuse.
• Failing to do so may result in electric shock, fire, problems with
the product, or injury.
CAUTION
Do not place objects or devices under the indoor unit.
• Water dripping from the indoor unit may result in fire or
property damage.

Safety Information
12
English
Safety Information
Check that the installation frame of the outdoor unit is not
broken at least once a year.
• Failing to do so may result in injury, death or property damage.
To prevent personal injury, make sure that you change the
directions of the horizontal airflow blades after stopping the
movements of the vertical airflow blade. (In case of adjusting the
horizontal airflow manually)
When the air conditioner does not operate properly for cooling
or heating, there is a possibility of refrigerant leakage. If any
leakage, stop operation, ventilate the room, and consult your
dealer immediately for recharging refrigerant.
The refrigerant is not harmful. However, if it comes in contact
with fire, it may generate harmful gases and there is risk of fire.
During transportation of the indoor unit, the pipe lines shall be
covered with brackets for protection. Do not move the product
with holding the pipe lines.
• It may cause gas leakage.
Do not install the product in a ship or a vehicle (such as a
campervan).
• Salt, vibration or other environmental factor may cause the
product malfunction, electric shock or fire.
Do not stand on top of the appliance or place objects (such as
laundry, lighted candles, lighted cigarettes, dishes, chemicals,
metal objects, etc.) on the appliance.
• This may result in electric shock, fire, problems with the
product, or injury.
Do not operate the appliance with wet hands.
• This may result in electric shock.

13
English
Safety Information
Do not spray volatile material such as insecticide onto the
surface of the appliance.
• As well as being harmful to humans, it may also result in
electric shock, fire or problems with the product.
Do not drink the water from the air conditioner.
• The water may be harmful to humans.
Do not hit, shake, drop, or attempt to disassemble the remote
control.
When replacing the remote control batteries, keep them out of
the reach of infants.
• If an infant eats batteries, contact a doctor immediately.
When replacing the remote control batteries, be careful not to
get the battery fluid on your skin.
• Battery fluid is harmful to humans.
Do not touch the pipes connected with the product.
• This may result in burns or injury.
Do not cut or burn the refrigerant container or pipings.
Do not point the air direction to the fireplace or heater.
Do not use this air conditioner to preserve precision equipment,
food, animals, plants or cosmetics, or for any other unusual
purposes.
• This may result in property damage.
Avoid directly exposing humans, animals or plants to the airflow
from the air conditioner for long periods of time.
• This may result in harm to humans, animals or plants.

Safety Information
14
English
Safety Information
FOR CLEANING
WARNING
Do not clean the appliance by spraying water directly onto it. Do
not use benzene, thinner or alcohol to clean the appliance.
• This may result in discolouration, deformation, damage, electric
shock or fire.
Before cleaning, servicing, or performing maintenance, make
sure to disconnect the product from its power source and wait
until the fan stops.
• Failing to do so may result in electric shock or fire.
CAUTION
Take care when cleaning the surface of the heat exchanger of the
outdoor unit since it has sharp edges.
• This should be done by a qualified technician. Please contact
your installer or service centre.
Do not clean the inside of the air conditioner by yourself.
• For cleaning inside the appliance, contact your nearest service
centre.
• When cleaning the filter, refer to the descriptions in the
'Cleaning' section.
• Failing to do so may result in damage, electric shock or fire.
• Make sure to prevent any injury from sharp edges of the
surface when handling the heat exchanger.

15
English
At a Glance
The appearance of the actual product may differ slightly from the image below.
06
08
07
01
02
03
04
05
Indoor Unit Overview
At a Glance
01 Air intake
02 Air filter
03 Front panel
04 Airflow blade (up and down)
05 Airflow blade (left and right)
06 Power button/Remote control receiver
07 Room temperature sensor
08 Display
Indoor Unit Overview
16
English
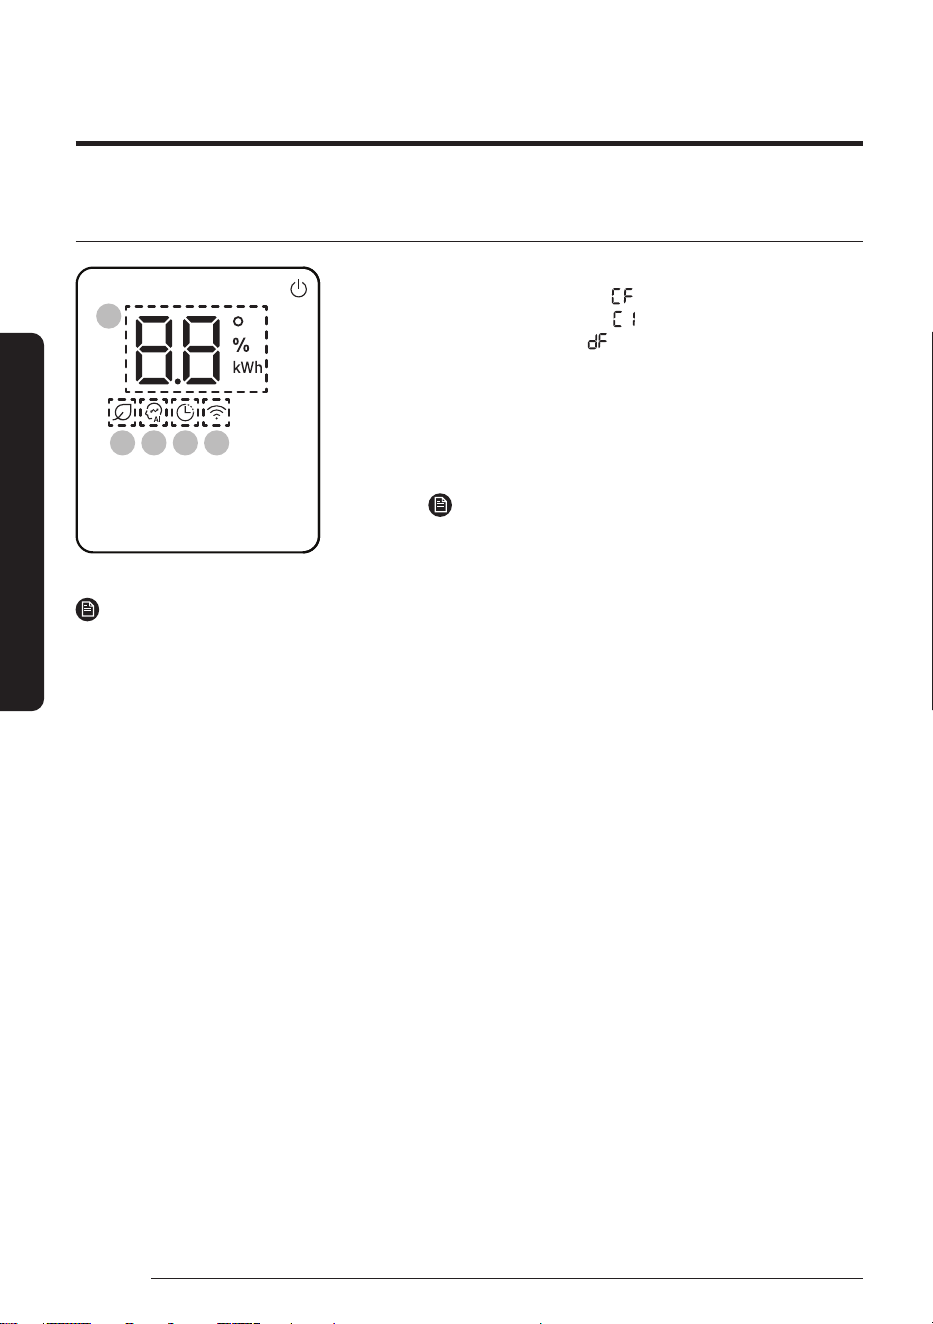
At a Glance
Display
01
02 03 04 05
01 Temperature indicator (numeric) /
Filter reset indicator ( ) /
Auto Clean indicator ( ) /
Defrost indicator ( )
02 AI Energy indicator
03 AI Auto indicator
04 Timer indicator /
Good Sleep indicator
05
Wi-Fi indicator
NOTE
• When the Wi-Fi is turned on, the indicator blinks three
times and then turns on.
NOTE
• If the Wi-Fi indicator blinks for 10 seconds when operation starts, it means that the air conditioner is not
connected to Wi-Fi. See "SmartThings app" on page 43 and connect the air conditioner to Wi-Fi.
• When connected to Wi-Fi, the air conditioner can gather and learn your user patterns so that it can run in
AI Auto mode.
17
English
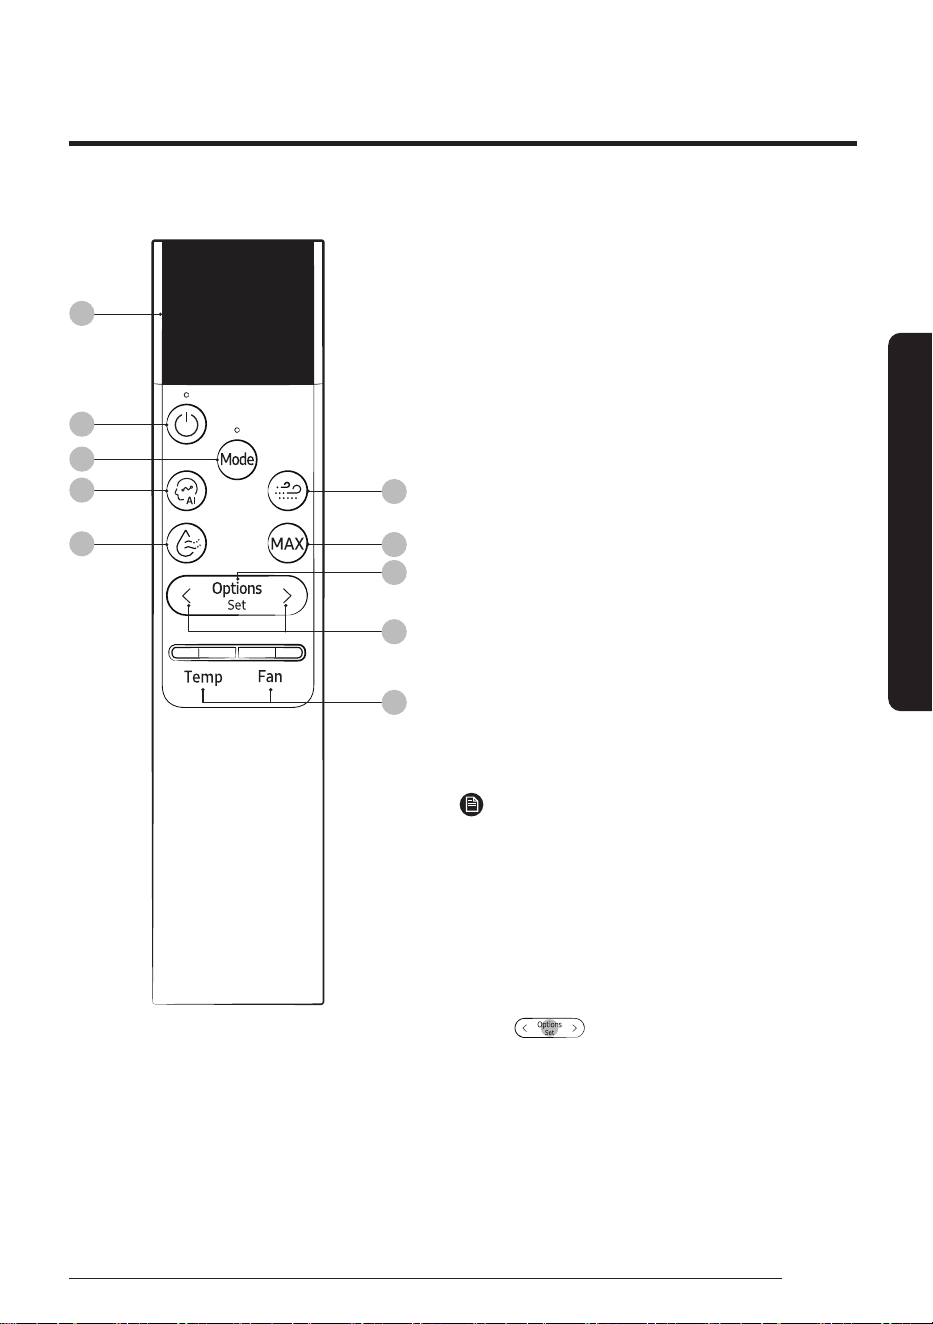
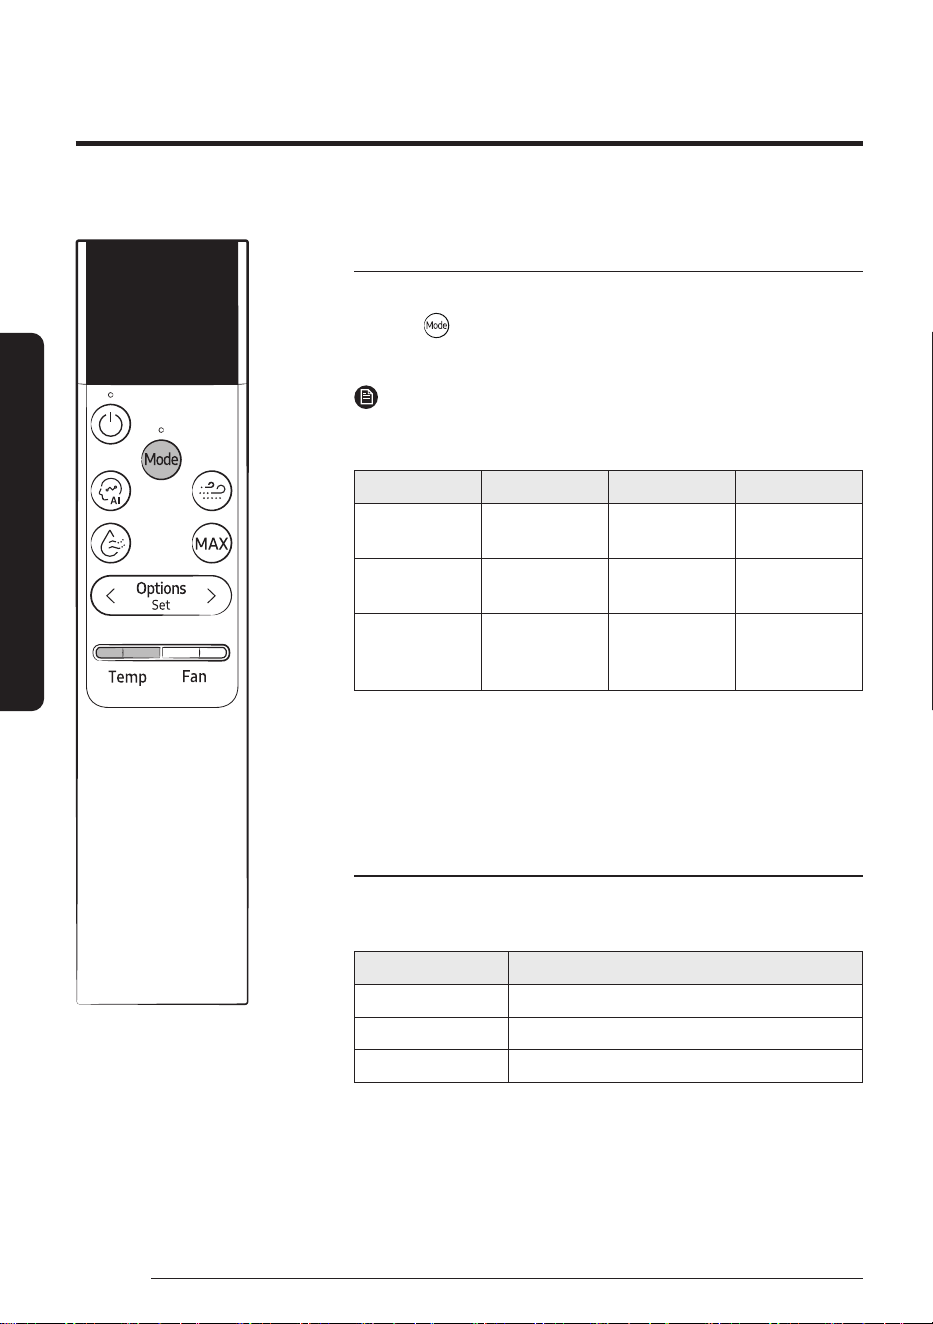
At a Glance
23
5
Cool
01
02
04
05
03
06
07
08
09
10
01 Display
02 Power button
03 Mode button
04 AI Auto button
05 Dry Comfort button
• The Dry Comfort function is not available for this model.
But, if you press this button, the device operates in Dry
mode.
06 WindFree button
• The WindFree function is not available for this model.
07 MAX button
08 Options/Set/Auto Clean button
• Press and hold the button for 3 seconds to turn on
or off the Auto Clean function.
09 Direction button
10 Temperature/Fan speed button
• Push the button up or down to adjust the
temperature or fan speed.
• To set the airflow direction to Horizontal All or
Horizontal Fix, press the [Temp] button.
• To set the airflow direction to Vertical All or Vertical
Fix, press the [Fan] button.
NOTE
• Press any button to wake up the display.
• The display switches off if no remote control button
is pressed for 5 seconds.
• Low Ambient mode does not work on air conditioners,
even if it is enabled under the Heating Range.
• The grey circles on the remote control buttons
shown in the user manual indicate the regions that
should be pressed for the buttons to work.
E.g.
• Although Dry Comfort, WindFree, Motion detection
and Freeze Wash appear on the remote control
display, they are not available on this model.
Most operating instructions in this manual require using the remote control.
Remote Control Overview
Remote Control Overview
18
English
At a Glance
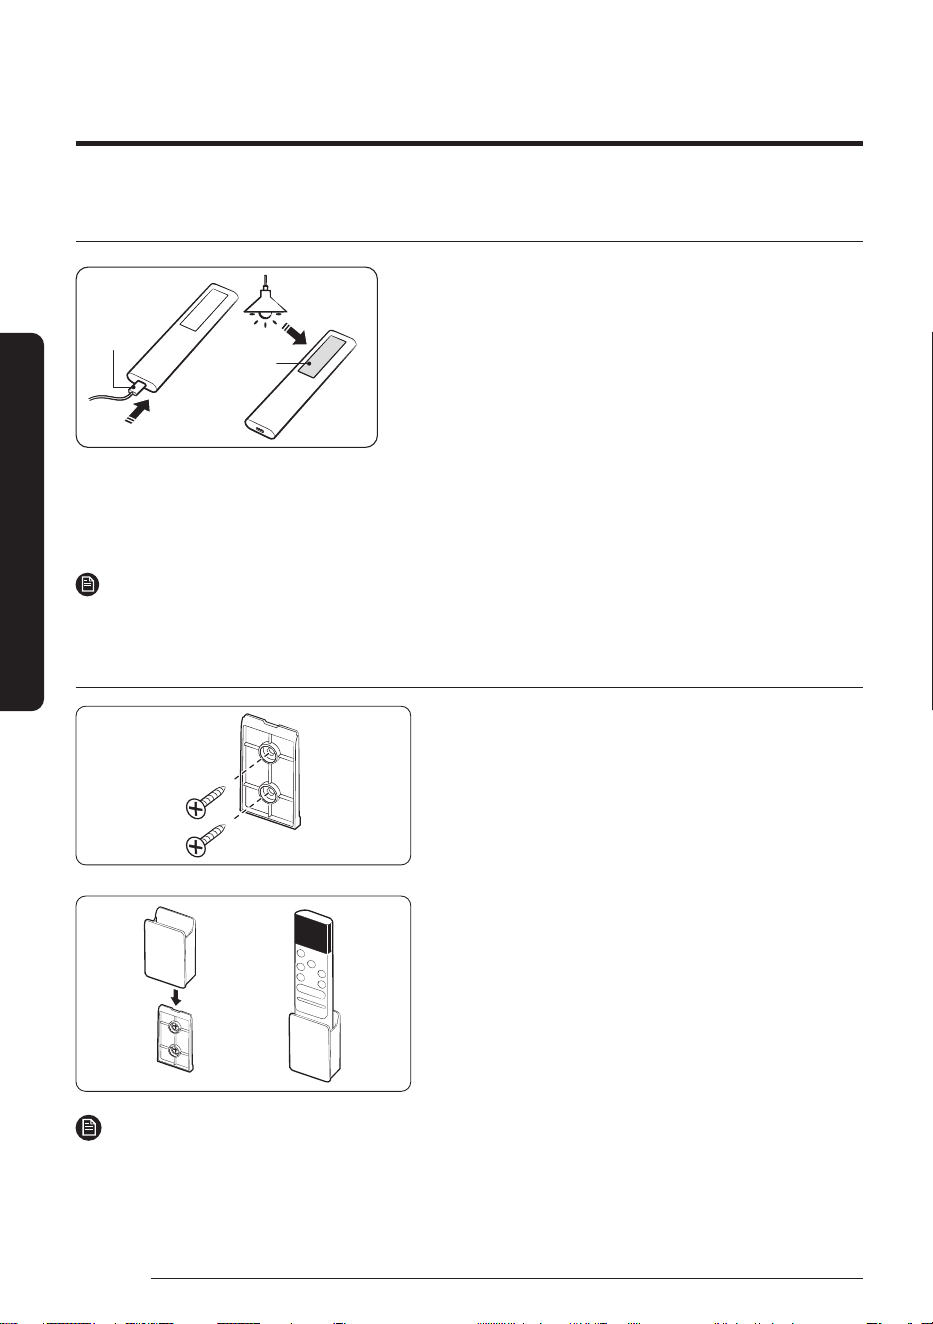
Charging the remote control
Charging
port
Solar cell
• Fully charge the remote control before use.
• If "Low Battery" appears on the remote control display,
charge the remote control by using the USB port
(C-Type) at the bottom of the remote control.
If you keep the remote control facing down, it is charged
via the solar
cell, allowing the battery to last longer.
• While the remote control is being charged, 'Charging'
is displayed on the display. After charging is complete,
'Complete' appears and then the display turns off. Then,
remove the charging cable.
• If the remote control will not be used for an extended
period of time, make sure to charge the remote control
by using the USB port before storage.
NOTE
• The product does not come with a remote control charging cable or charger.
Installing the remote control holder
1 Choose a location on the wall where to install the
remote control holder.
2 Mark the two spots for fastening the two M4 x 16 mm
screws. Then drill the two holes.
3 Attach the remote control holder to the wall-mount
pad by sliding it down from the top of the pad until a
‘click’ sounds.
NOTE
• Installation location requirements:
– Avoid locations exposed to direct sunlight.
– Avoid locations where the holder is covered by objects such as curtains.
– Choose a location that is at least 1 m away from a TV or stereo system.
19
English
At a Glance
Initial Settings
Before using the remote control for the first time, you should set the
temperature unit to Celsius or Fahrenheit.
▶ Initial Settings ▶ Press any key ▶ Temp. Unit
▶ Press any key ▶
▶
Select
℃/℉.
▶
NOTE
• After the temperature unit is set, the remote control turns off.
Press the button to turn it on.
• The temperature indications on the indoor unit are not switched.
• To change the temperature unit, change the setting as follows:
In
operation
▶
▶ ▶
Select
Settings.
▶
▶ ▶
Select
Temp. Unit.
▶
▶ ▶ Select ℃/℉.
▶
You can use the air conditioner easily by selecting a mode and then by controlling the temperature, fan speed,
and air direction.
Remote Control Operation
Remote Control Operation
20
English
At a Glance
Selecting an operation mode
To change the current mode between AI Auto, Cool, Dry, Fan, and Heat,
press the (Mode) button.
You can use AI Auto mode after Wi-Fi is connected.
NOTE
• You can use the Cool, Dry, and Heat modes in the following
operation range.
Mode Cool Dry Heat
Indoor
temperature
16°C to 32°C 18°C to 32°C 27°C or less
Outdoor
temperature
-10°C to 46°C -10°C to 46°C −15℃ to 24℃
1)
Indoor humidity
Relative
humidity of
80% or less
2)
- -
1)
If the outdoor temperature drops to −15℃, the heating capacity may
decrease by as much as 60-70 %.
2)
If the air conditioner operates in Cool mode in a high-humidity
environment for an extended period of time, condensation may occur.
To set the temperature
To control the temperature in each mode, Push the [Temp] button up
or down:
Mode Temperature control
AI Auto/Cool/Heat Adjust by 1℃ from 16℃ to 30℃.
Dry Adjust by 1℃ from 18℃ to 30℃.
Fan No temperature control.
23
Cool
°
21
English
At a Glance
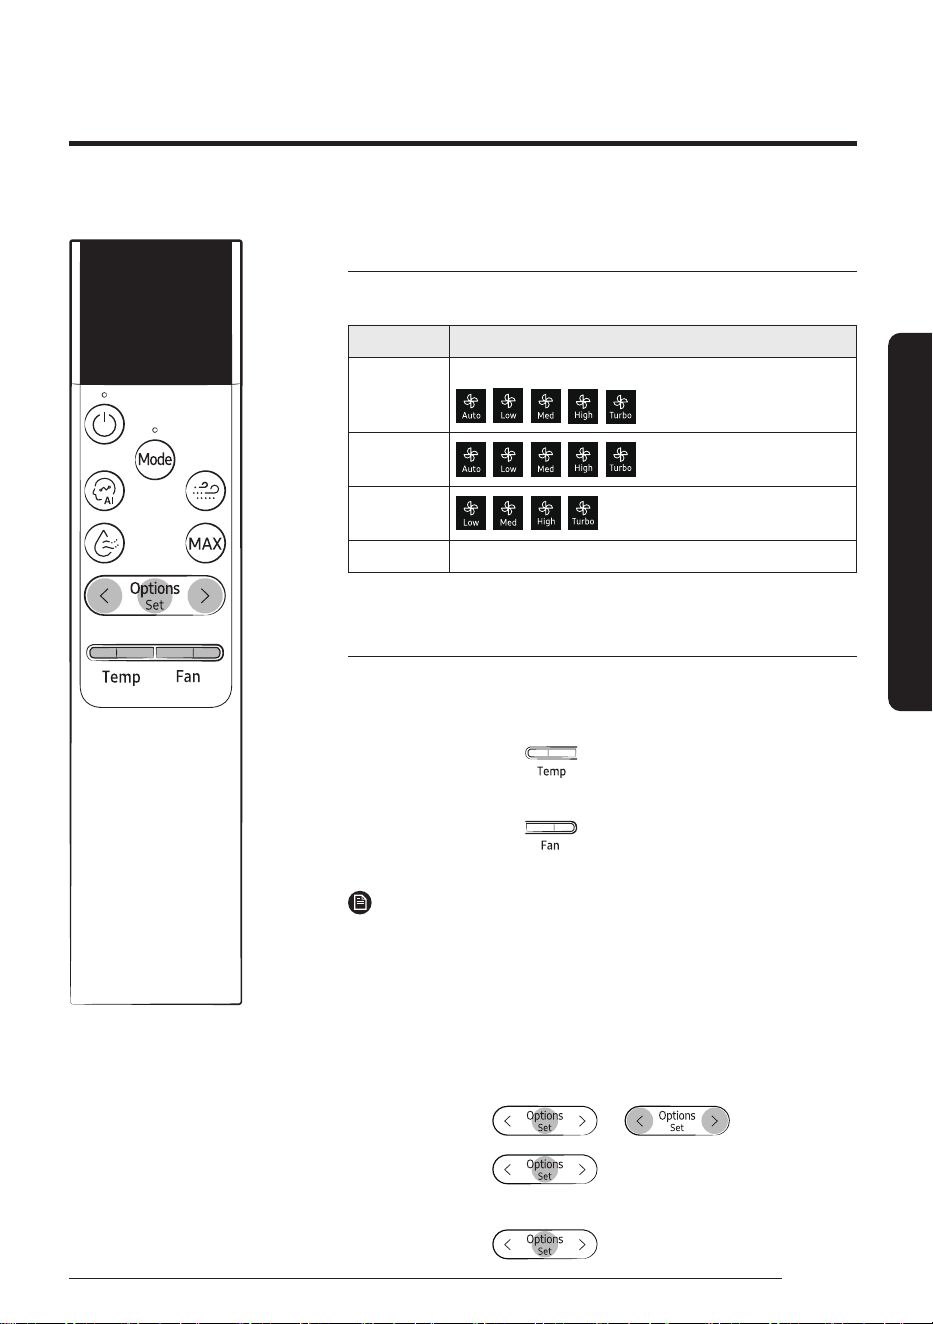
To adjust the fan speed
Select from the following fan speeds in each mode:
Mode Available fan speeds
AI Auto
No fan speed control. (Auto fan, default controller setting)
(Manual fan)
Cool/Heat
Fan
Dry No fan speed control.
To adjust the airflow direction
Keep the airflow in a constant direction by stopping the movements of
the vertical and horizontal airflow blades.
In operation ▶
Press
button
▶
Select Horizontal All or
Horizontal Fix.
or
In operation ▶
Press
button
▶
Select Vertical All or
Vertical Fix.
NOTE
• If you adjust the vertical airflow blade manually, it may not close
completely when you turn off the air conditioner.
• Always use the remote control to adjust the airflow blades. Do not
move the blades by hand. They may not operate normally.
• You cannot control the vertical airflow direction in Cool mode when
the Good Sleep function is on.
• You can also select the airflow direction from the Options menu:
In operation ▶
▶ ▶
Select
Direction.
▶
Select
Vertical.
▶
▶ Select Vertical All or Vertical Fix.
or
Select
Horizontal.
▶
▶
Select Horizontal All or Horizontal Fix.
23
Cool
°
22
English
Smart Features
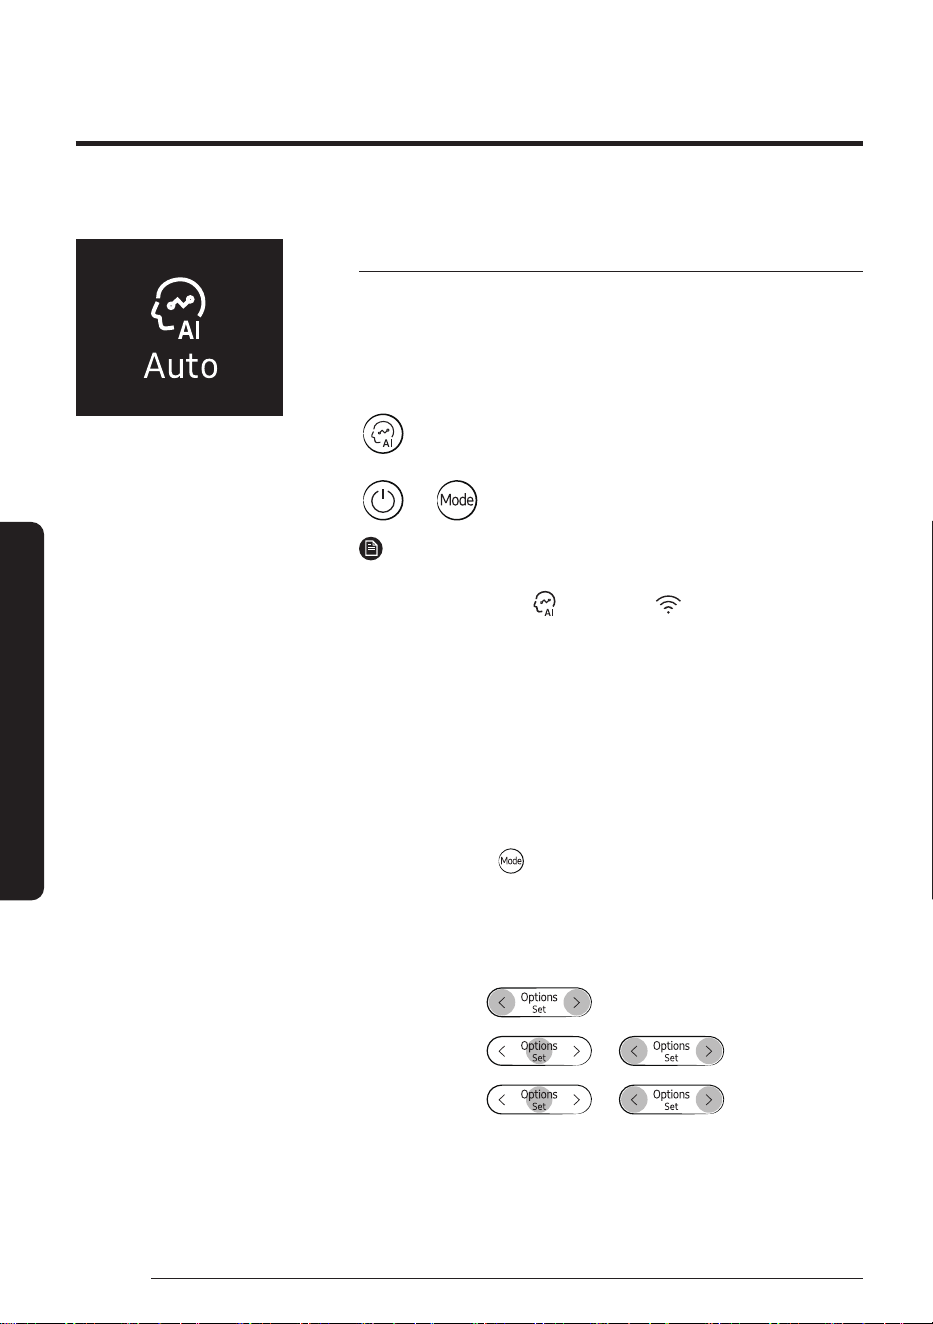
AI Auto mode
Use AI Auto mode to automatically operate any of Cool, Dry, Heat
modes depending on the learned user patterns gathered from an
external server via Wi-Fi module. The favourite temperature and
operation mode are also set based on the current temperatures
(indoor/outdoor) and the gathered user patterns.
or
▶ ▶ Select Auto.
NOTE
• You can use this mode after Wi-Fi is connected.
• In AI Auto mode, the
(AI Auto) and (Wi-Fi) indicators
appears on the display of the indoor unit.
• If the gathered user patterns are not sufficient, the set
temperature is set based on the user's activity time and indoor/
outdoor temperatures.
• The set temperature is controlled within the range of 22℃ to
28℃ (Cool) / 20℃ to 28℃ (Heat) in AI Auto mode. You can also
change it manually.
• An automatically changed set temperature is shown on the indoor
unit display, which switches to the current temperature after 4 to
5 seconds.
• When you press
(Mode) in AI Auto mode, the mode is cancelled.
• If you change the set temperature in AI Auto mode, the air
conditioner operates with the changed set temperature.
• Adjust the fan speed or fix it at your desired speed. It can be done
as follows:
In AI Auto
mode
▶
▶
Select
Settings.
▶
▶ ▶
Select
Auto mode.
▶
▶ ▶
Select Auto fan/
Manual fan.
• If you select Auto Fan, the fan speed is automatically adjusted.
• If you select Manual Fan, you can choose a fan speed from Auto,
Low, Med, High, and Turbo.
Power Smart Features
Smart Features
23
English
Smart Features
If not connected to Wi-Fi
• The air conditioner automatically switches to Cool, Dry, or Heat
mode, depending on the temperature and humidity of the room.
Optimum mode, appropriate for the current air quality of the room,
operates automatically to quickly provide pleasant air.
• Fan speed is automatically adjusted, depending on the
temperature and humidity of the room.
AI Energy mode
• Use AI Energy mode to save electricity consumed by the operating
air conditioner. This mode can be turned on or off from the
SmartThings app only.
• The amount of saved electricity is calculated while in AI Auto mode
only.
• AI Energy indicator (
) lights up on the display of the indoor unit.
• The amount of saved electricity is calculated from the moment
when the air conditioner is turned on.
• The amount of saved electricity will vary, depending on the
ambient environment (e.g., indoor/outdoor temperature and
humidity), set temperature, and operation mode.
• Note that the amount of saved electricity also may differ even
under the same operating environment conditions, depending on
how it was measured.
• To have powerful cooling or heating, turn off AI Energy mode in the
SmartThings app.

Power Smart Features
24
English
Smart Features
Cool mode
Use Cool mode to stay cool in hot weather.
▶ ▶ Select Cool.
NOTE
• After selecting Cool mode, select the desired function,
temperature, and fan speed.
– To cool more quickly, select a lower temperature and a faster
fan speed.
– To save energy, select a higher temperature and a slower fan
speed.
– As the room temperature nears the set temperature, the
compressor motor will slow down to save energy.
°
25
English
Smart Features
Dry mode
Use Dry mode in rainy or humid weather.
▶ ▶ Select Dry.
NOTE
• The proper set temperature range for dehumidifying operation is
24 to 26℃. If you feel that the current humidity seems high, use a
lower set temperature.
• You cannot use Dry mode for heating. Dry mode is designed to
produce a cooling side-effect.
• If the device is operating and you press the
button, the device
switches to Dry mode.
Fan mode
Use Fan mode to run the air conditioner like a floor fan, providing a
breeze without heating or cooling.
▶ ▶ Select Fan.
NOTE
• If the air conditioner will not be used for an extended period
of time, run it in Fan mode for 3 to 4 hours to dry the internal
components.
• The outdoor unit does not operate in Fan mode. This is normal and
not a fault with the air conditioner.
°

Power Smart Features
26
English
Smart Features
Heat mode
Use Heat mode to stay warm.
▶ ▶ Select Heat.
NOTE
• While the air conditioner warms up, the fan may not operate for
about 3 to 5 minutes at the beginning to prevent cold draft.
• If the air conditioner heats insufficiently, use an additional heating
appliance in combination with the air conditioner.
Automatic defrost
When the outdoor temperature is low and the humidity is high, frost
may develop on the outdoor heat exchanger, which may decrease
heating efficiency. When these conditions are met while Heat mode is
on, the air conditioner runs the Defrost function for 5 to 12 minutes to
remove frost from the outdoor heat exchanger.
NOTE
• When the Defrost function is on, the (Defrost) indicator
appears on the indoor unit display, steam is produced on the
outdoor unit, the airflow blades do not move.
• You cannot select other functions with the remote control until the
Defrost function is finished.
°
27
English
Smart Features
Variety Smart Features
MAX function
Use the MAX function to quickly cool or heat your room. This function
is the most powerful cooling and heating function provided by the air
conditioner. You can select this function in Cool or Heat mode.
In Cool or Heat mode ▶
NOTE
• You can change the airflow direction, but you cannot change the
set temperature and the fan speed.
• When you select the MAX function in Heat mode, you may not be
able to increase the fan speed for 3 to 5 minutes while the unit
heats up.
• Selecting the MAX function cancels the Eco, Good Sleep, and Quiet
functions.
Variety Smart Features
28
English
Smart Features
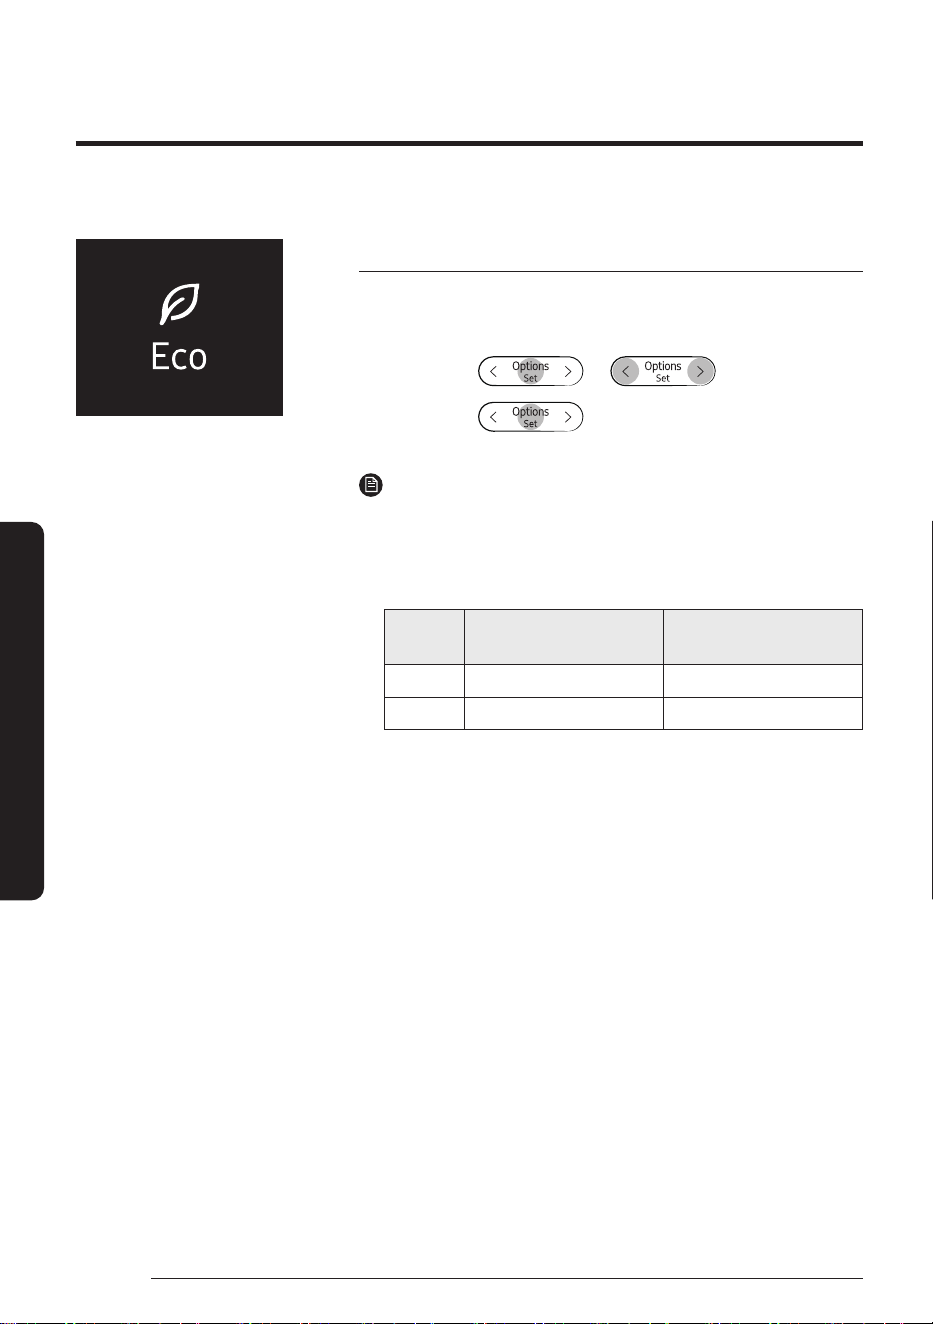
Eco function
Use the Eco function to reduce electricity consumption while staying
cool or warm. You can select this function in Cool or Heat mode.
In Cool or
Heat mode
▶
▶ ▶
Select Eco. ▶
NOTE
• When the Eco function starts, the vertical air swing begins.
• You can change the set temperature, airflow direction, and fan
speed.
• The allowed set temperatures while the Eco function is on are:
Mode
Minumum set
temperature
Maximum set
temperature
Cool 24 ℃ 30 ℃
Heat 16 ℃ 30 ℃
• If you change the set temperature to be outside the allowed range
for the current mode, the set temperature is automatically reset to
be within the range.
• When you turn off the Eco function, the air swing continues. Use
the airflow direction adjustment function to turn it off.
• Selecting the Eco function cancels the Good Sleep, MAX, and Quiet
functions.
29
English
Smart Features
Quiet function
Use the Quiet function to reduce the unit’s operating noise. You can
select this function in Cool or Heat mode.
In Cool or
Heat mode
▶
▶ ▶
Select Quiet. ▶
NOTE
• You can change the set temperature and the airflow direction, but
you cannot change the fan speed.
• Selecting the Quiet function cancels the Eco, Good Sleep, and MAX
functions.
Variety Smart Features
30
English
Smart Features
Beep function
Use the Beep function to turn on or off the beep that sounds when you
press a button on the remote control.
In operation ▶
▶ ▶
Select Settings. ▶
▶ ▶
Select Beep. ▶
31
English
Smart Features
Auto Clean function
Use the Auto Clean function if the indoor unit produces odors.
Activating Auto Clean
To activate Auto Clean, press the (Options) button for at
least 3seconds.
The indoor unit display shows:
If the air conditioner is off, Auto Clean starts immediately. If the air
conditioner is running, Auto Clean starts as soon as the air conditioner
turns off.
NOTE
• You can also activate Auto Clean from the Options menu:
▶ ▶ Select Auto Clean. ▶
• Once Auto Clean is selected, it is always activated whenever the air
conditioner turns off.
• Auto Clean runs for 10 to up to 30 minutes depending on internal
dry conditions. The indoor unit display shows the cleaning progress
from 1% to 99%.
• If you start another function while Auto Clean is progressing, Auto
Clean pauses and will resume when the other function stops.
• When Auto Clean completes, the air conditioner turns off.
• Auto Clean does run after Timed off and Good Sleep function
operation, but Auto Clean does not run after Heat or Fan mode.
Variety Smart Features
32
English
Smart Features
Canceling Auto Clean
To cancel Auto Clean while it is running, follow the procedure below:
▶ Press and hold for 3 or more seconds.
or
▶ ▶ Select Auto Clean. ▶
NOTE
• Canceling Auto Clean does not deactivate it.
Deactivating Auto Clean
To deactivate Auto Clean, follow the procedure below while the air
conditioner is in operation:
▶ Press and hold for 3 or more seconds.
or
▶ ▶ Select Auto Clean. ▶
33
English
Smart Features
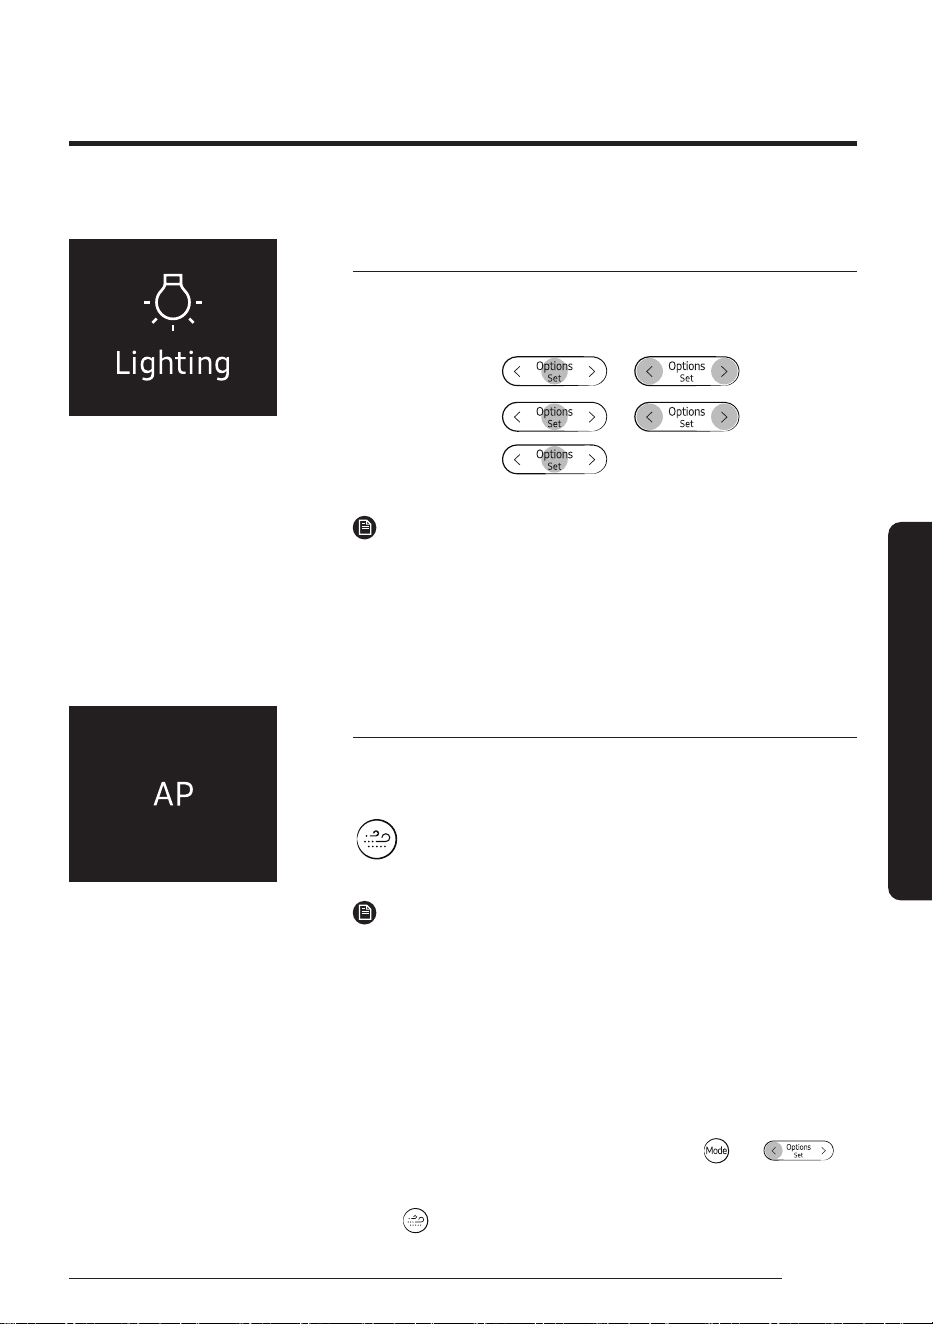
Display lighting function
Use the Display lighting function to turn on or off the lighting of the
indoor unit display.
In operation ▶
▶ ▶
Select Settings. ▶
▶ ▶
Select Lighting. ▶
NOTE
• If you change the current mode or function when the Display
lighting function is on, the display lighting turns on for 5 seconds
and then turns off again.
• To turn off the Display lighting function, run the method above
again or turn the product off and on.
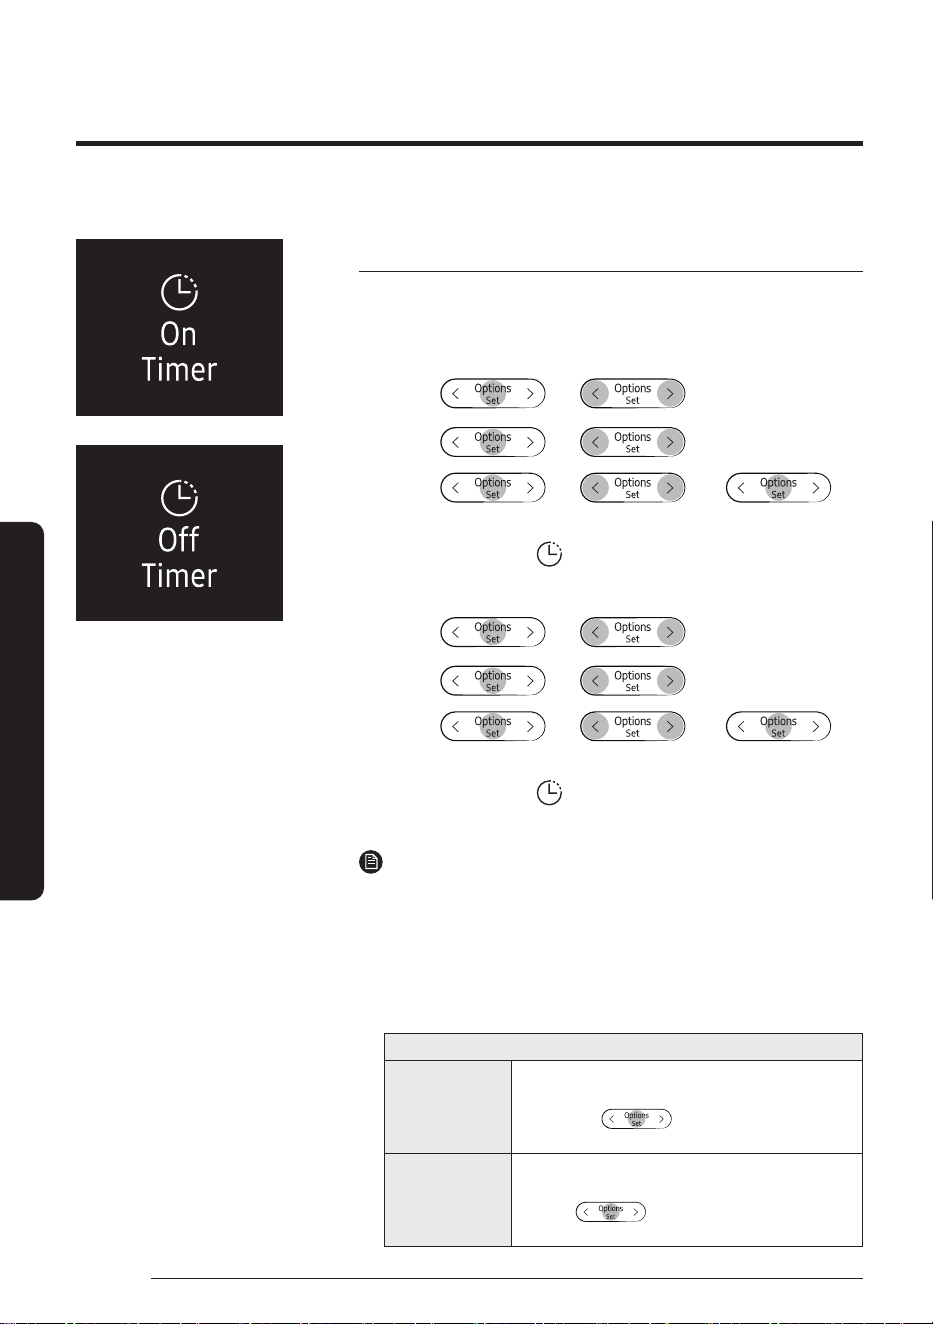
Wi-Fi function (SmartThings app)
Turn on the Wi-Fi function to pair your smartphone with the air
conditioner.
▶ Press and hold for 5 or more seconds.
NOTE
• When you turn on the Wi-Fi function, your smartphone pairs with
the air conditioner, AP appears on the remote control display for a
few seconds.
• Once your smartphone is connected with the air conditioner, you
can control it via the wireless Internet using the SmartThings app
installed on your smartphone.
• For more information about how to prepare your smartphone
for connection and how to control the air conditioner using the
SmartThings app, see "SmartThings app" on page 43.
• To turn on or off the Wi-Fi, press and hold the
and
buttons for 5 seconds.
– In order to launch the SmartThings app, press and hold the
button for 5 seconds, which enables to connect the air
conditioner.
34
English
Smart Features
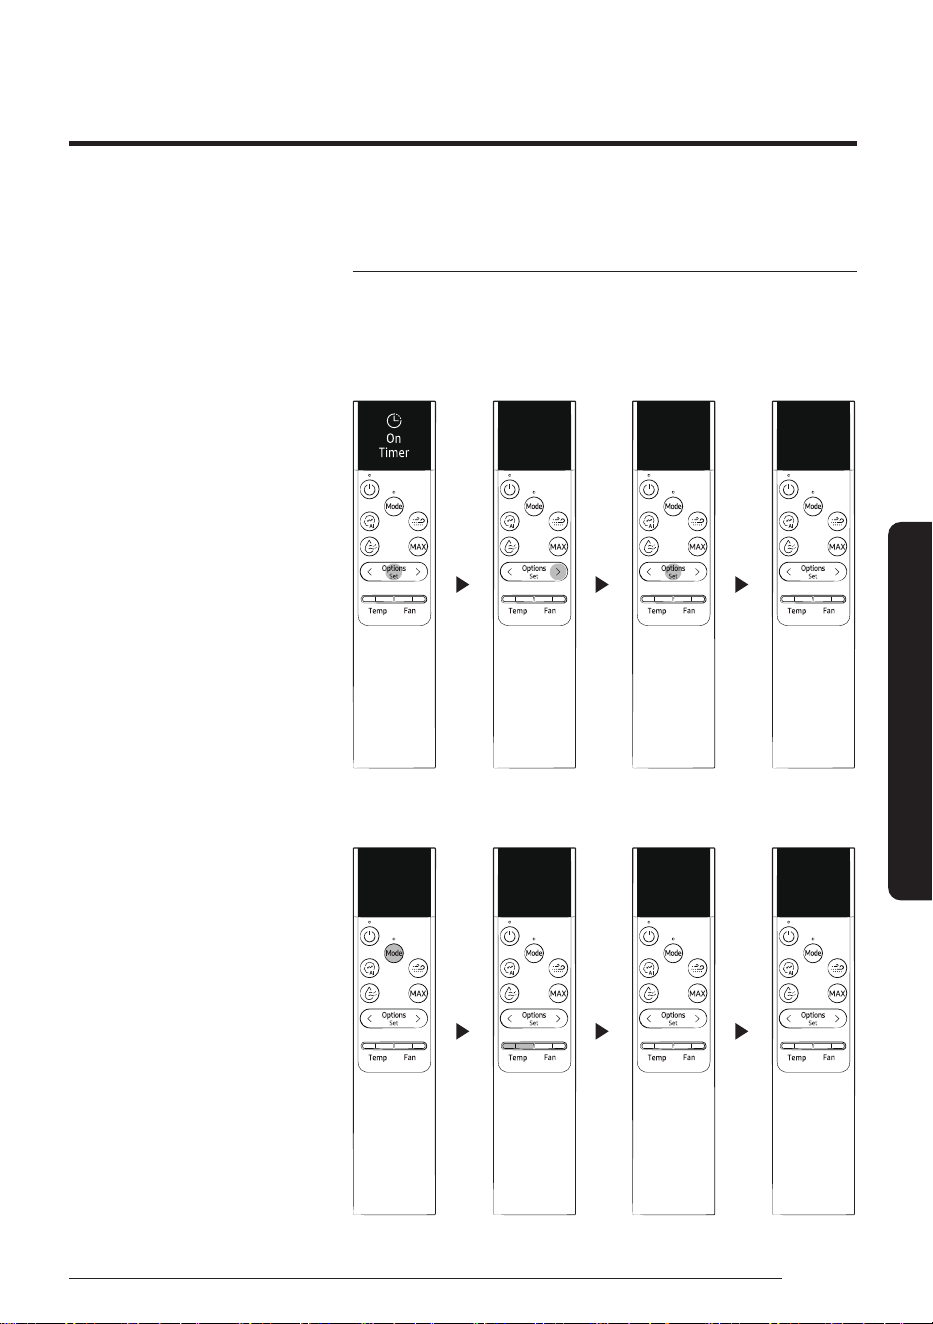
Timed on/ Timed off function
Use the Timed on/off function to turn the air conditioner on or off after
a duration. Scheduling durations before the air conditioner turns on or
off helps use the air conditioner economically.
Turning
on
▶ ▶
Select Good
Sleep/Timer.
▶
▶ ▶
Select On Timer
or Off Timer.
▶
▶ ▶ ▶
(Set the duration.)
Confirm that
on the indoor unit
display is turned on.
Turning
off
▶ ▶
Select Good
Sleep/Timer.
▶
▶ ▶
Select On Timer
or Off Timer.
▶
▶ ▶ ▶
(Set the duration.)
Confirm that
on the indoor unit
display is turned off.
NOTE
• To cancel the Timed on/off function, set the duration to 00 m.
• If the remote control is off and you select Timer/Good Sleep,
[On Timer] appears on the remote control display. If the remote control is on
and y
ou select Timer/Good Sleep, [Off Timer] appears.
• You can set the duration to from 30 minutes to 24 hours.
• You cannot set the same duration for both Timed on and Timed off functions.
Combining Timed on and Timed off
When the air
conditioner
is off
Example: Timed on 3 hours, Timed off 5 hours
The air conditioner turns on 3 hours after the last time
you press the button to start the Timed on/
off function, remains on for 2 hours, then turns off again.
When the air
conditioner
is on
Example: Timed on 3 hours, Timed off 1 hour
The air conditioner turns off 1 hour after the last time you
press the button to start the Timed on/off
function, remains off for 2 hours, then turns on again.
Time scheduling
35
English
Smart Features
Timed on/ Timed off function
If you set the Timed on function, you can change the mode or
temperature while the remote control is off.
Basic selection
23
Cool
30
m
1
hr
00
m
01:00
Turn On
in
Additional selection
01:00
Turn On
in
Dry
18
°
Time scheduling
36
English
Smart Features
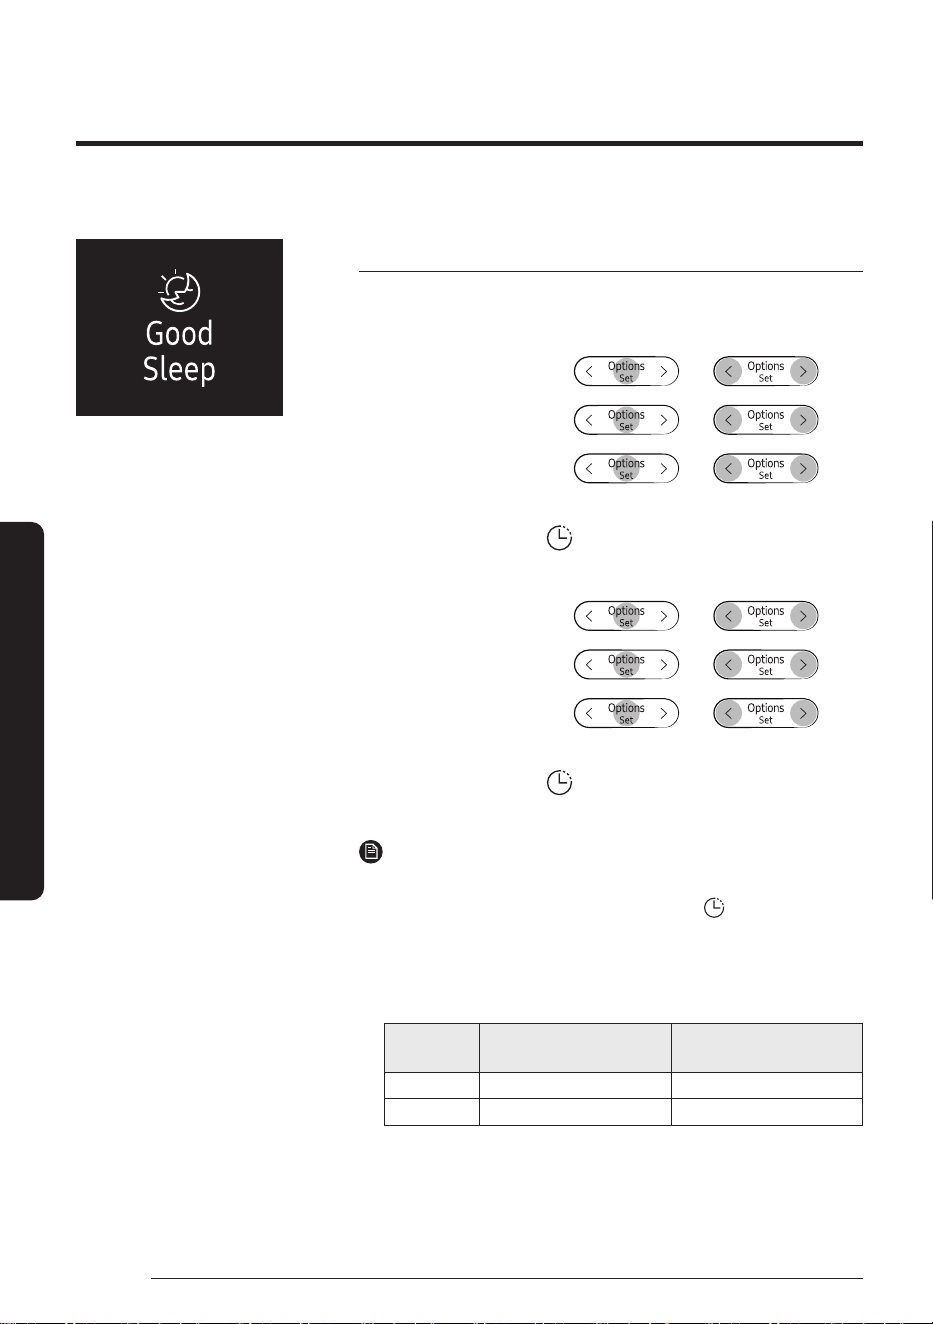
Good Sleep function
Use the Good Sleep function to save energy while you are sleeping.
You can select this function in Cool or Heat mode.
Turning
on
In Cool or
Heat mode
▶
▶ ▶
Select Good
Sleep/Timer.
▶
▶ ▶
Select
Good Sleep.
▶
▶ ▶
(Set the duration.)
Confirm that on the indoor
unit display is turned on.
Turning
off
In Cool or
Heat mode
▶
▶ ▶
Select Good
Sleep/Timer.
▶
▶ ▶
Select
Good Sleep.
▶
▶ ▶
(Set the duration.)
Confirm that on the indoor
unit display is turned off.
NOTE
• To cancel the Good Sleep function, set the duration to 00 m.
• When you start the Good Sleep function, the
(Timer) indicator
appears on the indoor unit display.
• You can set the duration to from 30 minutes to 12 hours.
• The recommended set temperatures while the Good Sleep
function is on are:
Mode
Recommended set
temperature
Optimal set
temperature
Cool 25 ℃ to 27 ℃ 26 ℃
Heat 21 ℃ to 23 ℃ 22 ℃
• Selecting the Good Sleep function cancels Eco, MAX, and Quiet
functions.
37
English
Cleaning and Maintenance
Task How often By whom Instruction
Run the Auto Clean
function.
As needed Owner
"Auto Clean function" on
page 31.
Clean the filter. Once every two weeks Owner
"Cleaning the filter" on
page 39.
Clean the exterior of the
indoor unit.
As needed Owner
"Cleaning the outside of
the indoor unit" on page
38.
Clean the exterior of the
outdoor unit.
At least once a year Owner
"Cleaning the heat
exchanger on the outdoor
unit" on page 38.
Charge the remote control As needed Owner
"Charging the remote
control" on page 18.
Apply corrosion inhibitor
on outdoor unit. (Only if
installed near salt water
such as an ocean)
At least once a year Qualified technician
Contact your service
provider.
Clean inside the indoor or
outdoor unit.
Once a year Qualified technician
Contact your service
provider.
Inspect the units,
electrical connections,
refrigerant pipes, and
protections.
Once a year Qualified technician
Contact your service
provider.
Schedule
Cleaning and Maintenance
38
English
Cleaning and Maintenance
Cleaning the outside of the indoor unit
1 Turn off the air conditioner and wait until the fan
stops.
2 Disconnect the power supply.
3 Use a soft brush or lukewarm damp cloth to clean the
exterior.
WARNING
• Do not clean the appliance by spraying water directly
onto it. Water entering the unit may result in electric
shock or fire that could cause death, serious injury, or
property damage:
CAUTION
• Do not use an alkaline detergent to clean the indoor
unit display.
• Do not use sulphuric acid, hydrochloric acid, or
organic solvents such as paint thinner, kerosene,
acetone, benzene, or alcohol to clean the unit
surfaces.
Cleaning the heat exchanger on the outdoor unit
1 Turn off the air conditioner and wait until the fan
stops.
2 Disconnect the power supply.
3 Spray water on the heat exchanger to remove dust
and other debris.
CAUTION
• Do not use sulphuric acid, hydrochloric acid, or
organic solvents such as paint thinner, kerosene,
acetone, benzene, or alcohol to clean the unit
surfaces.
• If you need to inspect or clean the inside of the heat
exchanger on the outdoor unit, contact a local service
centre for help.
Soft brush
Lukewarm damp cloth
Cleaning
39
English
Cleaning and Maintenance
Cleaning the filter
Clean the air filter every two weeks or when the (filter-cleaning reminder) appears on the indoor unit
display. The time between cleanings may vary, depending on the usage and environmental conditions.
Vacuum cleaner
Soft brush
30 minutes
Mild detergent
1 Slide the filter off of the unit.
2 Use a soft brush or vacuum cleaner to remove any dust or debris on the filter.
3 Soak the filter in a solution of water and mild detergent for 30 minutes.
4 Rinse the filter and let it air dry in a well-ventilated area that is out of direct sunlight.
5 Reinstall the filter.
6 Reset the filter-cleaning reminder:
In operation ▶
▶ ▶ Select Settings.
▶
▶ ▶
Select
Filter reset.
▶
CAUTION
• Take care not to damage the filter during cleaning.
• Do not scrub the air filter with a hard-bristle brush or another cleaning utensil.
• Do not expose the air filter to direct sunlight when drying it.
40
English
Appendix
Problem Solution
The air conditioner stops
working.
• Make sure the unit is receiving power.
• Check the circuit breaker. If it is flipped off, flip it on again and restart
the unit. If the problem persists, contact your service provider.
• The Timed off function may have turned off the unit. Turn on the unit
again.
Cannot change the
temperature.
• Check if the unit is in Fan or MAX mode. If so, you cannot change the set
temperature; the unit automatically controls the set temperature.
Improper airflow
temperature.
• Check the set temperature. In Cool mode, cooling occurs only when the
set temperature is lower than the current temperature. In Heat mode,
heating occurs only when the set temperature is higher than the current
temperature.
• Use the [Temp] button on the remote control to change the set
temperature.
• Check if the air filter is blocked with dirt or debris. If the air filter is
blocked, the cooling and heating performance may decrease. Clean the
air filter regularly (page 39).
• Check if the outdoor unit is covered or is installed near obstacles.
Remove the coverings and obstacles.
• Check if the Defrost function is on (page 26). During defrost, the fan
stops and warm air does not come out.
• Check if doors or windows are open. This may cause poor circulation or
performance. Close all doors and windows.
• Check if the pipe length between the units exceeds the maximum pipe
length (see “Typical installation” in the Installation manual). If so, the
cooling and heating performance may decrease.
Cannot change the airflow
direction.
• Check if the Good Sleep function is on in Cool mode. If so, you cannot
control the airflow direction.
Cannot change the fan speed.
• Check if the unit is in AI Auto, Dry, or MAX mode or the Good Sleep
function is on in Cool mode. In these conditions, you cannot control the
fan speed; the unit automatically controls the fan speed.
The remote control does not
work.
• Charge the remote control, using the USB port (type C) on the bottom of
the remote control.
• Make sure the remote control can send an unobstructed signal to the
unit.
• Keep bright lights away from the unit. Light from fluorescent bulbs or
neon signs may interrupt the signal from the remote control.
The Timed on/off function
does not work.
• Make sure to press the
button on the remote control when
setting the timer.
If the air conditioner is not operating normally, refer to the troubleshooting guide below.
Troubleshooting
Appendix
41
English
Appendix
Problem Solution
The indicator on the
indoor unit display blinks
continuously.
• Press the
(Power) button to turn off the unit, or disconnect the
power plug.
• If the indicator light on the indoor unit display continues blinking,
contact your service provider.
Odors are coming from the
unit during regular operation.
• If the unit is operating in a smoky area, ventilate the room or operate the
unit in Fan mode for 3 to 4 hours. There are no components in the unit
that produce a strong odor.
• Check if the drain pipes are clean. Clean them regularly.
The indoor unit display shows
an error message.
• If the indoor unit indicator blinks, write down the error code. Contact
your service provider and provide them with the error code.
The unit is generating noise.
• It is normal for the unit to generate some noise while operating.
If the pipe length between the units is less than 3 m and no coil was
used (se
e “Typical installation” in the Installation manual), additional
noise may be transmitted from the outdoor unit to the indoor unit via
the piping.
Smoke is coming from the
outdoor unit.
• In winter, most likely this is steam coming from the outdoor heat
exchanger while the Defrost function is on.
Water drips from the pipe
connections on the outdoor
unit.
• Condensation may develop when the ambient temperature or humidity
changes significantly. This is normal.
Condensation forms on the
surface of the indoor unit.
• If the humidity is higher in the room in Cool mode, or the difference
between the desired temperature and indoor temperature is great,
condensation may form on the surface of the indoor unit.
42
English
Appendix
CAUTION
• If the system contains 5 tCO₂e or more of fluorinated greenhouse gases, it must be checked for leakage
at least once every 12 months, according to regulation No. 517/2014. This activity must be covered by
qualified personnel only. In the case of the situation above, the installer (or authorized person with
responsibility for final check) must provide a maintenance book, with all the information recorded,
according to REGULATION (EU) No. 517/2014 OF THE EUROPEAN PARLIAMENT AND OF THE COUNCIL of 16
April 2014 on fluorinated greenhouse gases.
Refrigerant type GWP value
R-32 675
• GWP: Global Warming Potential
• Calculating tCO₂e: kg x GWP/1000
Important information: regulation regarding the refrigerant used.
This product contains fluorinated greenhouse gases. Do not vent gases into the atmosphere.
Information about Refrigerant

43
English
Appendix
Step 1. Checking the requirements
for connection
Before connecting your smartphone with the
air conditioner, make sure that the following
requirements are met:
• Wi-Fi access point: 2.4 GHz Wi-Fi access point only
• The air conditioner and your smartphone must be
within the coverage of the same Wi-Fi access point
and connected to it. After the connection, you can
control the air conditioner from any place via various
wireless networks such as Wi-Fi, 3G, LTE and 5G.
• The supporting software version of the SmartThings
app is subject to change according to the OS
supporting policy the manufacturer provides.
In addition, as for the SmartThings app or the
function
s that the app supports, the new application
update policy on the existing OS version can be
suspended due to usability or security reasons.
• The SmartThings app is subject to change without
notice to improve usability or performance. As the
mobile phone OS version is updated every year, the
SmartThings is also updated continually according
to the latest OS.
• If you have enquiries regarding the items mentioned
above, please contact us on st.service@samsung.
com.
Step 2. Connecting your
smartphone to the Wi-Fi network
1 Turn on the Wi-Fi access point.
2 Tap Settings → Wi-Fi on your smartphone.
3 Tap the Wi-Fi switch to activate it, and then select
the 2.4 GHz Wi-Fi access point to connect to.
4 If needed, enter the password for the access
point.
5 Tap Advanced.
6 Tap the Switch to mobile data switch to
deactivate it.
Step3. Installing the SmartThings
app
If the SmartThings app is not installed on your
smartphone, follow the procedure below. If installed,
skip to "Step 4. Configuring the SmartThings app" on
page 43.
1 Launch Play Store or App Store.
2 Tap the search field, and then search for
"SmartThings".
3 Tap INSTALL for the found SmartThings app item.
4 Select Agree.
Step 4. Configuring the
SmartThings app
After the SmartThings app is installed, follow the
procedure below to configure it. If already configured,
skip to "Step 5. Connecting your smartphone to the
air conditioner" on page 44.
1 Launch the SmartThings app.
2 When you see pop-up windows asking for
location, Wi-Fi, Bluetooth permissions, tap Start.
3 Tap Sign In.
4 Sign in to your Samsung account.
• If you have no Samsung account, create your
Samsung account.
5 Consent to TERMS AND CONDITIONS.
6 When you see a pop-up window asking for access
permission to location information, tap ALLOW.
Use the SmartThings app on your smartphone to control the air conditioner via the wireless Internet.
To remotely control the air conditioner, you need to connect your smartphone to the air conditioner. If already
connected, skip to "Step 6. Controlling the air conditioner with your smartphone" on page 44.
SmartThings app
SmartThings app
44
English
Appendix
Step 5. Connecting your
smartphone to the air conditioner
1 Plug in the power cord of the air conditioner, and
then turn on the power.
2 Launch the SmartThings app.
3 Tap Add device on the home screen of the
SmartThings app.
4 Tap Samsung Air conditioner > Room air
conditioner.
5 Press the
button on the remote control for at
least 4 seconds.
To notify that registration of the selected air
conditioner to your Samsung account is in progress,
the AP appears on the remote control display. When
the connection is finished, the AP disappears. A new
device card for the selected air conditioner is added
to the home screen of the SmartThings app.
Step 6. Controlling the air
conditioner with your smartphone
1 Launch the SmartThings app.
2 On the home screen of the SmartThings app,
tap the device card for the air conditioner,
which was added when you proceeded with
"Step 5. Connecting your smartphone to the air
conditioner" on page 44.
WARNING
• RF exposure warning statement – for keeping
20cm distance when installing this module.
• Warning that this module should not be installed
and operating simultaneously with other radio
without additional evaluation or FCC filing.
• Your device uses non-harmonised frequency
and is intended for use in all European countries.
The WLAN can be operated in the EU without
restriction indoors, but cannot be operated
outdoors in France.
Specifications
Wi-Fi
Frequency Range Transmitter Power (Max)
2412 - 2472 MHz 20 dBm
Open Source Announcement
The software included in this product contains open
source software. You may obtain the complete
corresponding source code for a period of three years
after the last shipment of this product by contacting
our support team via http://opensource.samsung.com
(Please use the “Inquiry” menu.)
It is also possible to obtain the complete corresponding
source code in a physical medium such as a CD-ROM; a
minimal charge will be required.
The following URL http://opensource.samsung.com/
opensource/SMART_AT_051/seq/0 leads to the open
source license information as related to this product. This
offer is valid to anyone in receipt of this information.
Security updates information
Security updates are provided to strengthen the
security of your device and protect your personal
information. For more information on security
updates, visit https://security.samsungda.com.
* The website supports only some languages.

45
English
Appendix
English
Hereby, Samsung declares that this radio equipment is in compliance with Directive 2014/53/
EU and with the relevant statutory requirements in the UK. The full text of the EU declaration
of conformity and the UK declaration of conformity is available at the following internet
address: http://www.samsung.com, go to Support > Search Product Support and enter the
model name.
Czech
Společnost Samsung tímto prohlašuje, že toto radiové zařízení splňuje požadavky směrnice
2014/53/EU a příslušné požadavky právních norem platných ve Spojeném království. Úplné
znění EU Prohlášení o shodě a UK Prohlášení o shodě je k dispozici na následující internetové
adrese: http://www.samsung.com, kde klepněte na odkaz Podpora a do pole Hledat Podporu
zadejte název modelu.
Danish
Samsung erklærer hermed, at dette radioudstyr er i overensstemmelse med direktiv
2014/53/EU og med relevante lovmæssige krav i Storbritannien. Hele teksten i EU-
overensstemmelseserklæringen og UK-overensstemmelseserklæringen findes på denne
webadresse: http://www.samsung.com. Gå til support > Søg efter produktsupport, og angiv
modelnavnet.
German
"Samsung erklärt hiermit, dass diese Funkanlage mit der Richtlinie 2014/53/EU und den
entsprechenden gesetzlichen Anforderungen im Vereinigten Königreich übereinstimmt. Der
gesamte Text der EU-Konformitätserklärung und der Konformitätserklärung für das Vereinigte
Königreich ist unter der folgenden Internetadresse verfügbar: http://www.samsung.com zu finden.
Gehen Sie zu Support > Produktsupport durchsuchen und geben Sie den Modellnamen ein."
Estonian
Samsung kinnitab käesolevaga, et antud raadioseade vastab direktiivile 2014/53/EL ja
asjakohastele seadusjärgsetele nõuetele Suurbritannias. EL-i vastavusdeklaratsiooni ja
Suurbritannia vastavusdeklaratsiooni terviktekst on saadaval internetis järgmisel aadressil:
http://www.samsung.com, avage menüü Tugi > Otsi toote tuge ja sisestage seejärel mudeli
nimi.
Spanish
Por la presente, Samsung declara que este equipo radioeléctrico cumple con la Directiva
2014/53/UE y con los requisitos legales relevantes en el Reino Unido. El texto completo
de la declaración de conformidad con la UE y de la declaración de conformidad con Reino
Unido está disponible en la siguiente dirección de Internet: http://www.samsung.com, vaya a
soporte > Búsqueda de soporte de productos e introduzca el nombre del modelo.
Greek
Συνεπώς, η Samsung δηλώνει ότι αυτός ο ραδιοεξοπλισμός συμμορφώνεται με την Οδηγία
2014/53/ΕΕ και με τις σχετικές νόμιμες απαιτήσεις του Ηνωμένου Βασιλείου. Το πλήρες κείμενο
της δήλωσης συμμόρφωσης με την ευρωπαϊκή οδηγία και της δήλωσης συμμόρφωσης με τη
βρετανική νομοθεσία είναι διαθέσιμο στη διεύθυνση: http://www.samsung.com. Επιλέξτε
Υποστήριξη > Αναζήτηση υποστήριξης προϊόντος και εισαγάγετε το όνομα μοντέλου.
Reference
Reference
46
English
Appendix
French
Par la présente, Samsung déclare que cet équipement radio est conforme à la directive
2014/53/UE et aux exigences réglementaires applicables au Royaume-Uni. Le texte intégral
de la déclaration de conformité de l'UE et de la déclaration de conformité du Royaume-Uni
est disponible à l'adresse Internet suivante: http://www.samsung.com, rendez-vous sur la
page d'assistance > Rechercher dans l'Assistance et saisissez un nom de modèle.
Italian
Con la presente, Samsung dichiara che questa apparecchiatura radio è conforme alla
Direttiva 2014/53/UE e ai relativi requisiti di legge nel Regno Unito. Il testo integrale della
dichiarazione di conformità EU e del Regno Unito è disponibile al seguente indirizzo:
http://www.samsung.com, selezionare supporto> Cerca Supporto Prodotto e inserire il nome
del modell
o.
Latvian
Ar šo uzņēmums Samsung paziņo, ka šī radioiekārta atbilst Direktīvai 2014/53/ES un
attiecīgajām likumiskajām prasībām Apvienotajā Karalistē. Pilns ES atbilstības deklarācijas
teksts un Apvienotās Karalistes atbilstības deklarācijas teksts ir pieejams šajā interneta
adresē: http://www.samsung.com, atverot Atbalsts > Meklēt produkta atbalstu un ievadot
modeļa nosaukumu.
Lithuanian
Šiuo dokumentu „Samsung“ patvirtina, kad radijo įranga atitinka 2014/53/ES direktyvos
reikalavimus ir JK susijusius įstatyminius reikalavimus. Visą ES atitikties deklaracijos ir JK atitikties
deklaracijos tekstą rasite apsilankę internetinėje svetainėje adresu: http://www.samsung.com,
eikite į skirtuką Palaikymas > Ieškoti gaminio palaikymo ir įveskite modelio numerį.
Dutch
Samsung verklaart hierbij dat deze radioapparatuur voldoet aan Richtlijn 2014/53/
EU en aan de relevante statutaire vereisten in het VK. De volledige tekst van de EU-
Conformiteitsverklaring en de conformiteitsverklaring van het VK vindt u op deze website:
http://www.samsung.com, ga naar Ondersteuning > Productondersteuning zoeken en voer de
modelnaam in.
Hungarian
A Samsung ezennel kijelenti, hogy ez a rádióberendezés megfelel a 2014/53/EU irányelvnek
és az Egyesült Királyságban a vonatkozó jogszabályi követelményeknek. Az EU megfelelőségi
nyilatkozat és az Egyesült Királyság megfelelőségi nyilatkozat teljes szövege a következő
internet cím alatt található: http://www.samsung.com honlapon olvasható, lépjen a Támogatás >
Terméktámogatás keresése menüpontra, és adja meg a modell nevét.
Polish
Niniejszym firma Samsung deklaruje, że ten sprzęt radiowy jest zgodny z wymogami dyrektywy
2014/53/UE oraz odnośnych ustaw obowiązujących w Wielkiej Brytanii. Pełny tekst deklaracji
zgodności z przepisami europejskimi i brytyjskimi jest dostępny na stronie internetowej:
http://www.samsung.com w menu Wsparcie > Szukaj, gdzie należy podać nazwę modelu.
Por
tuguese
A Samsung declara, pelo presente, que este equipamento de rádio está em conformidade
com a Diretiva 2014/53/UE e com os requisitos legais relevantes no Reino Unido. O texto
integral da declaração de conformidade europeia e da declaração de conformidade do Reino
Unido está disponível no seguinte endereço da Internet: http://www.samsung.com, vá a
Suporte > Pesquisar Suporte do produto e insira o nome do modelo.
47
English
Appendix
Slovenian
Družba Samsung izjavlja, da je ta radijska oprema v skladu z Direktivo 2014/53/EU in
ustreznimi zakonskimi zahtevami v Združenem kraljestvu. Celotno besedilo izjave ES o
skladnosti in izjave Združenega kraljestva o skladnosti je na voljo na spodnjem internetnem
naslovu: http://www.samsung.com. Pojdite na podporo > Iskanje podpore za izdelek, nato
vnesite ime izdelka.
Slovak
Spoločnosť Samsung týmto vyhlasuje, že toto zariadenie rádiového typu je v súlade so smernicou
2014/53/EÚ a náležitými zákonnými požiadavkami v Spojenom kráľovstve. Celé znenie Vyhlásenia o
zhode v EÚ a Vyhlásenia o zhode v Spojenom kráľovstve je k dispozícii na nasledujúcej internetovej
adrese: http://www.samsung.com, prejdite na položky Podpora > Vyhľadávanie podpory produktov a
zadajte názov modelu.
Finnish
Samsung vakuuttaa, että tämä radiolaite on direktiivin 2014/53/EU ja Yhdistyneen kuningaskunnan
oleellisten lakisääteisten vaatimusten mukainen. EU-vaatimustenmukaisuusvakuutuksen ja
Yhdistyneen kuningaskunnan vaatimustenmukaisuusvakuutuksen koko teksti on saatavilla
seuraavassa Internet-osoitteessa: http://www.samsung.com. Valitse Tuki > Etsi tuotetukea ja kirjoita
mallinimi.
Swedish
Härmed deklarerar Samsung att denna radioutrustning uppfyller direktivet 2014/53/
EU och de relevanta lagstadgade kraven i Storbritannien. Den fullständiga texten i EU-
deklarationen om överensstämmelse och Storbritanniens deklaration om överensstämmelse
finns tillgänglig på följande internetadress: http://www.samsung.com. Gå till stöd > Sök
produktsupport och ange modellnamnet.
Bulgarian
С настоящото Samsung декларира, че това радиооборудване е в съответствие с
Директива 2014/53/ЕС и със съответните законови изисквания в Обединеното кралство.
Пълният текст на ЕС Декларацията за съответствие и Декларацията за съответствие
за Обединеното кралство е наличен на следния интернет адрес: http://www.samsung.com,
отидете на отидете на поддръжка > Търсене на поддръжка за продукт и въведете името
на модела.
Romanian
Prin prezenta, Samsung declară faptul că acest echipament radio respectă Directiva 2014/53/UE
și toate cerințele legale relevante din Regatul Unit. Textul complet al declarației de conformitate
UE și al declarației de conformitate din Regatul Unit este disponibil la următoarea adresă de
internet: http://www.samsung.com, accesați asistența > Căutați asistența produsului și introduceți
numele modelului.
Norwegian
Samsung erklærer herved at dette radioutstyret er i samsvar med direktiv 2014/53/EU
og med de relevante lovpålagte kravene i Storbritannia. Den fullstendige teksten til EU-
samsvarserklæringen og den britiske samsvarserklæringen er tilgjengelig på følgende
nettadresse: http://www.samsung.com. Gå til Support > Søk gjennom produktsupport og angi
modellnavn.
Turkish
Samsung, bu radyo ekipmanının 2014/53/AB Direktifi ve Birleşik Krallık'taki ilgili yasal
gerekliliklere uygun olduğunu beyan eder. AB uygunluk beyanının ve Birleşik Krallık uygunluk
beyanının tam metni aşağıdaki internet adresinde mevcuttur: http://www.samsung.com
adresinde bulabilirsiniz. Destek > Ürün Desteği Ara'ya gidin ve model adını girin.
Reference
48
English
Appendix
Russian
Настоящим компания Samsung заявляет, что данное радиооборудование соответствует
Директиве 2014/53/ЕС и соответствующим требованиям законодательства Великобритании.
Полный текст декларации о соответствии ЕС и декларации о соответствии Великобритании
доступен по следующему веб-адресу: http://www.samsung.com, пройдите в раздел Поддержка
> Поиск продукта и введите имя модели.
Ukrainian
Цим компанія Samsung заявляє, що це радіообладнання відповідає вимогам Директиви
2014/53/ЄС і відповідним законодавчим нормам Великобританії. Повний текст
декларації про відповідність нормам країн ЄС і Великобританії доступний за такою
адресою в інтернеті: http://www.samsung.com; перейдіть до розділу підтримки, потім —
до поля пошуку підтримки для певного виробу та введіть назву моделі.
Serbian
Kompanija Samsung ovim izjavljuje da je ova radio oprema u skladu sa direktivom 2014/53/
EU i sa odgovarajućim zakonskim zahtevima u UK. Kompletan sadržaj deklaracija o
usaglašenosti za EU i UK dostupan je na sledećoj internet adresi: http://www.samsung.com,
idite na Podrška > Pretraga podrške za proizvode i unesite naziv modela.
Croatian
Ovime Samsung izjavljuje da je ova radijska oprema usklađena s Direktivom 2014/53/
EU i relevantnim uvjetima propisanim zakonom u Ujedinjenoj Kraljevini. Potpuni tekst EU
deklaracije o sukladnosti te UK deklaracije o sukladnosti dostupan je na sljedećoj internetskoj
adresi: http://www.samsung.com, ako odaberete Podrška > Traži podršku za proizvod i
unesete naziv modela
49
English
Memo
Appendix

COUNTRY CALL OR VISIT US ONLINE AT
UK 0333 000 0333 www.samsung.com/uk/support
IRELAND (EIRE) 0818 717100 www.samsung.com/ie/support
GERMANY 06196 77 555 77 www.samsung.com/de/support
FRANCE 01 48 63 00 00 www.samsung.com/fr/support
SPAIN 91 175 00 15 www.samsung.com/es/support
PORTUGAL
210 608 098
Chamada para a rede fixa nacional
Dias úteis das 9h às 20h
www.s
amsung.com/pt/support
LUXEMBURG 261 03 710 www.samsung.com/be_fr/support
NETHERLANDS 088 90 90 100 www.samsung.com/nl/support
BELGIUM 02-201-24-18
www.samsung.com/be/support (Dutch)
www.samsung.com/be_fr/support (French)
NORW
AY 21629099 www.samsung.com/no/support
DENMARK 707 019 70 www.samsung.com/dk/support
FINLAND 030-6227 515 www.samsung.com/fi/support
SWEDEN 0771-400 300 www.samsung.com/se/support
AUSTRIA 0800 72 67 864 (0800-SAMSUNG) www.samsung.com/at/support
SWITZERLAND 0800 726 786
www.samsung.com/ch/support (German)
www.samsung.com/ch_fr/support (French)
HUNGARY 0680S
AMSUNG (0680-726-7864) www.samsung.com/hu/support
CZECH 800 - SAMSUNG (800-726786) www.samsung.com/cz/support
SLOVAKIA 0800 - SAMSUNG (0800-726 786) www.samsung.com/sk/support
CROATIA 072 726 786 www.samsung.com/hr/support
BOSNIA 055 233 999 www.samsung.com/ba/support
North Macedonia 023 207 777 www.samsung.com/mk/support
MONTENEGRO 020 405 888 www.samsung.com/support
SLOVENIA 080 697 267 (brezplačna številka) www.samsung.com/si/support
SERBIA 011 321 6899 www.samsung.com/rs/support
KOSOVO 038 40 30 90 www.samsung.com/support
ALBANIA 045 620 202 www.samsung.com/al/support
BULGARIA
0800 111 31 - Безплатен за всички оператори
*3000 - Цена на един градски разговор или според
тарифата на мобилният оператор
09
:00 до 18:00 - Понеделник до Петък
www.s
amsung.com/bg/support
ROMANIA
0800872678 - Apel gratuit
*8000 - Apel tarifat în reţea
Program Call Center
Luni - Vineri: 9 AM - 6 PM
www.s
amsung.com/ro/support
ITALIA 800-SAMSUNG (800.7267864) www.samsung.com/it/support
CYPRUS 8009 4000 only from landline, toll free
www.samsung.com/gr/support
GREECE
80111-SAMSUNG (80111 726 7864) only from land line
(+30) 210 6897691 from mobile and land line
POLAND
801-172
-678*
* (opłata według taryfy operatora)
http:/
/www.samsung.com/pl/support/
LITHUANIA 8-800-77777 www.samsung.com/lt/support
LATVIA 8000-7267 www.samsung.com/lv/support
ESTONIA 800-7267 www.samsung.com/ee/support
UKRAINE 0-800-502-000 www.samsung.com/ua/support
MOLDOVA +373-22-667-400 www.samsung.com/ua/support/moldova
QUESTIONS OR COMMENTS?