
Technical Support and E-Warranty Certificate www.vevor.com/support
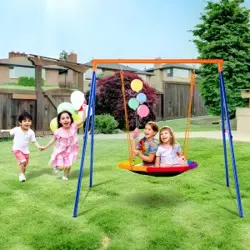
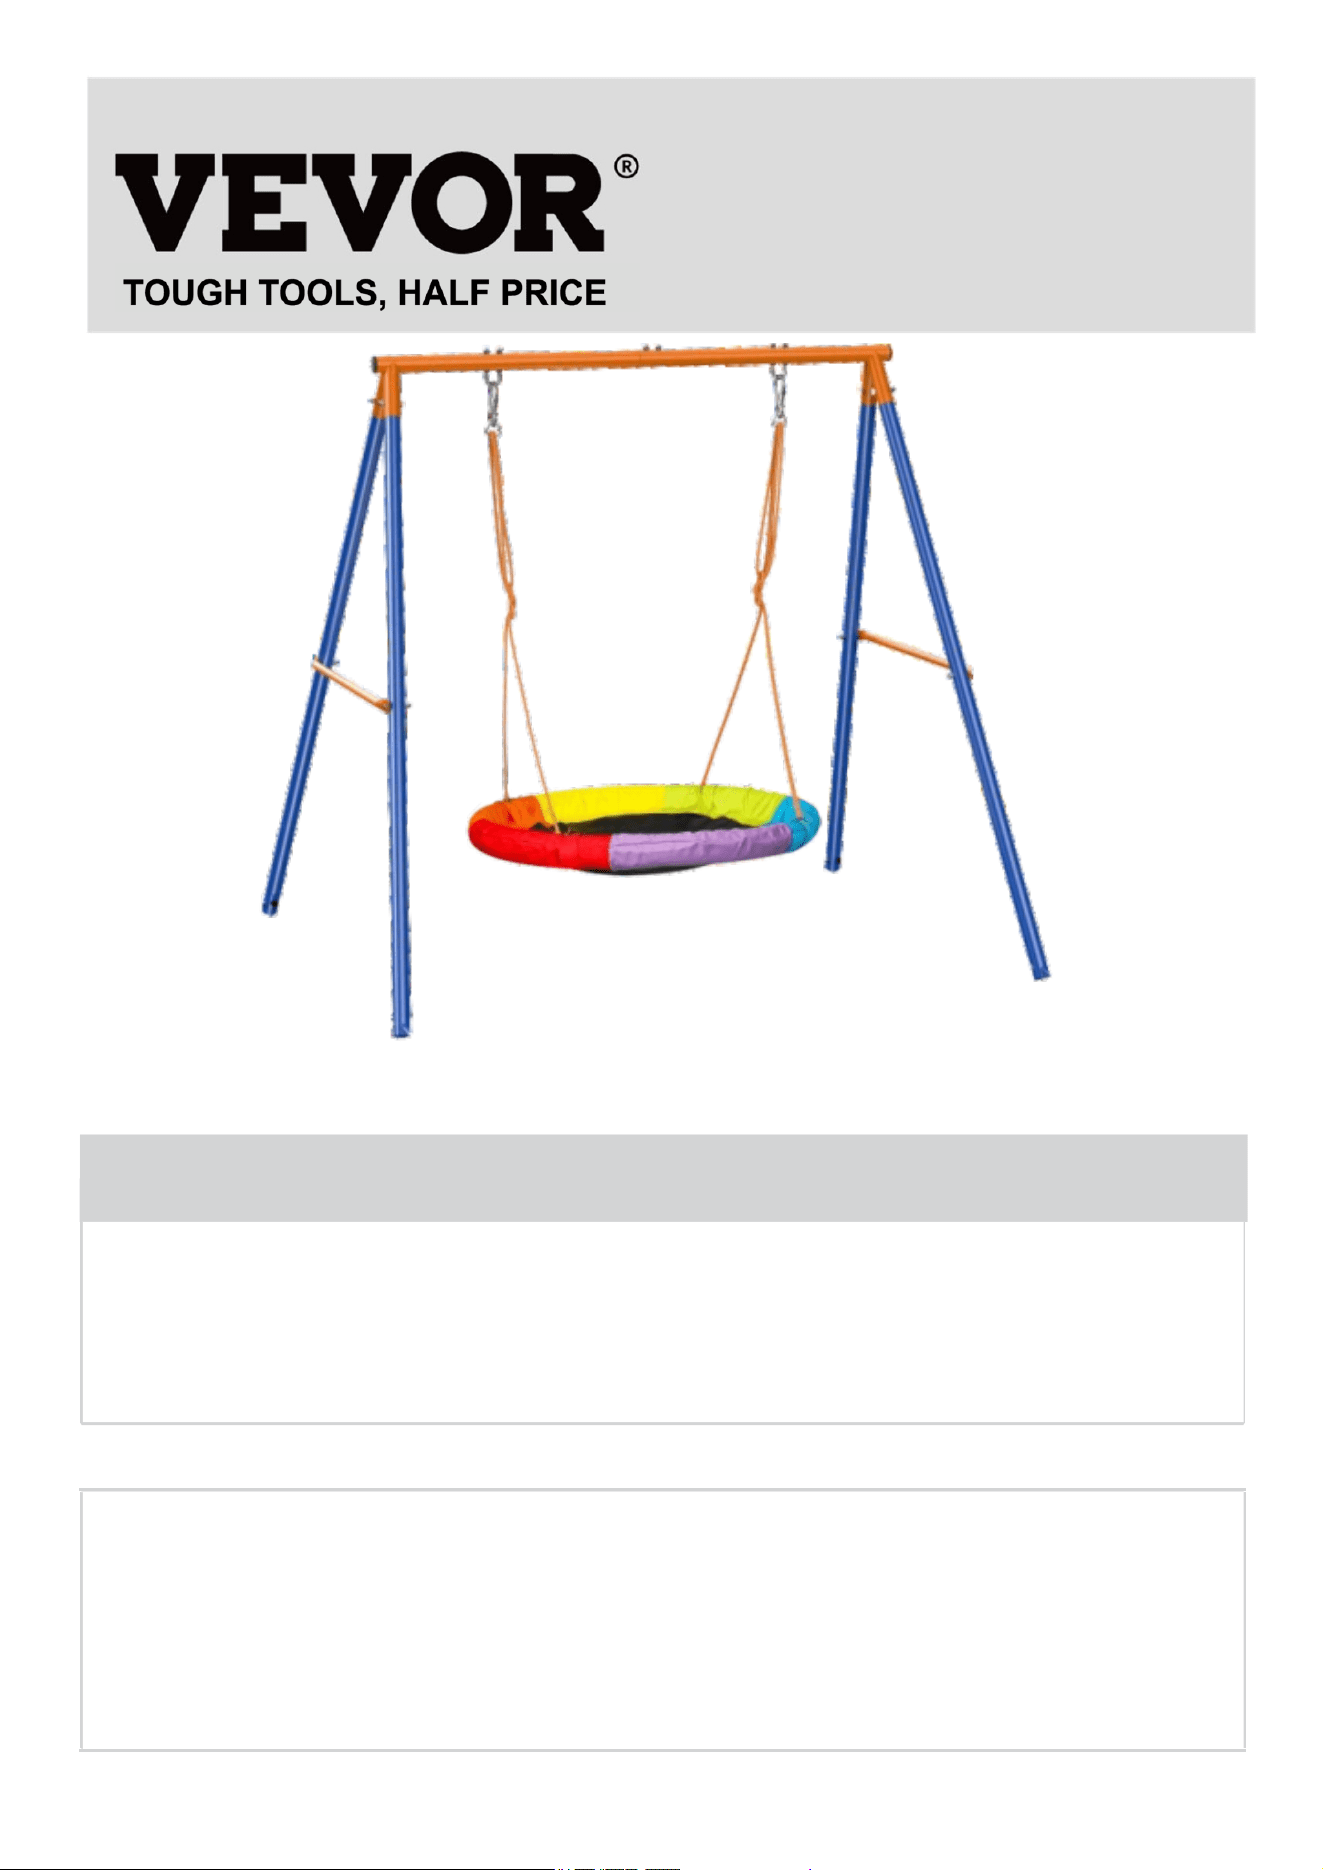
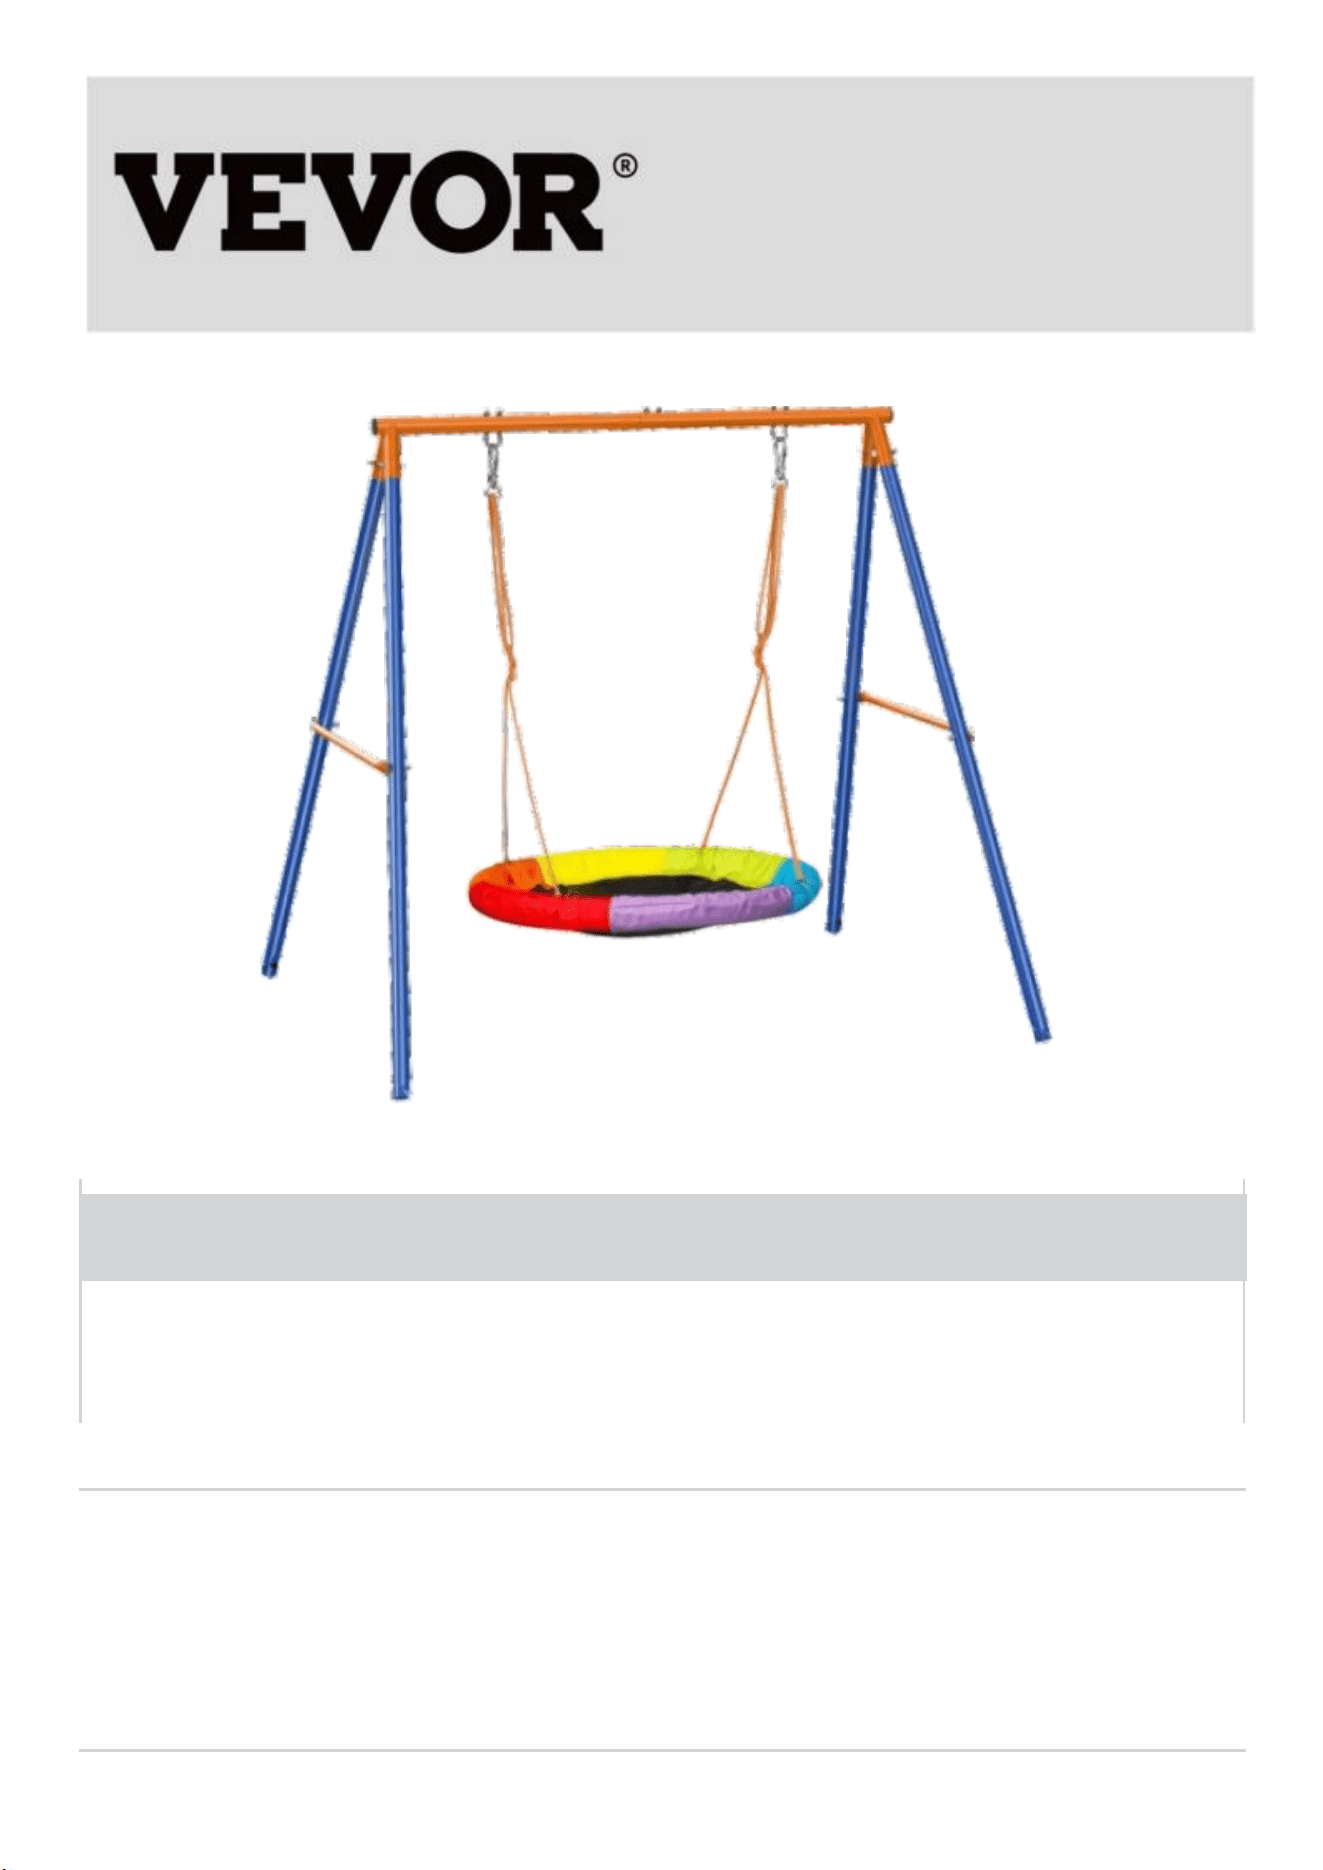
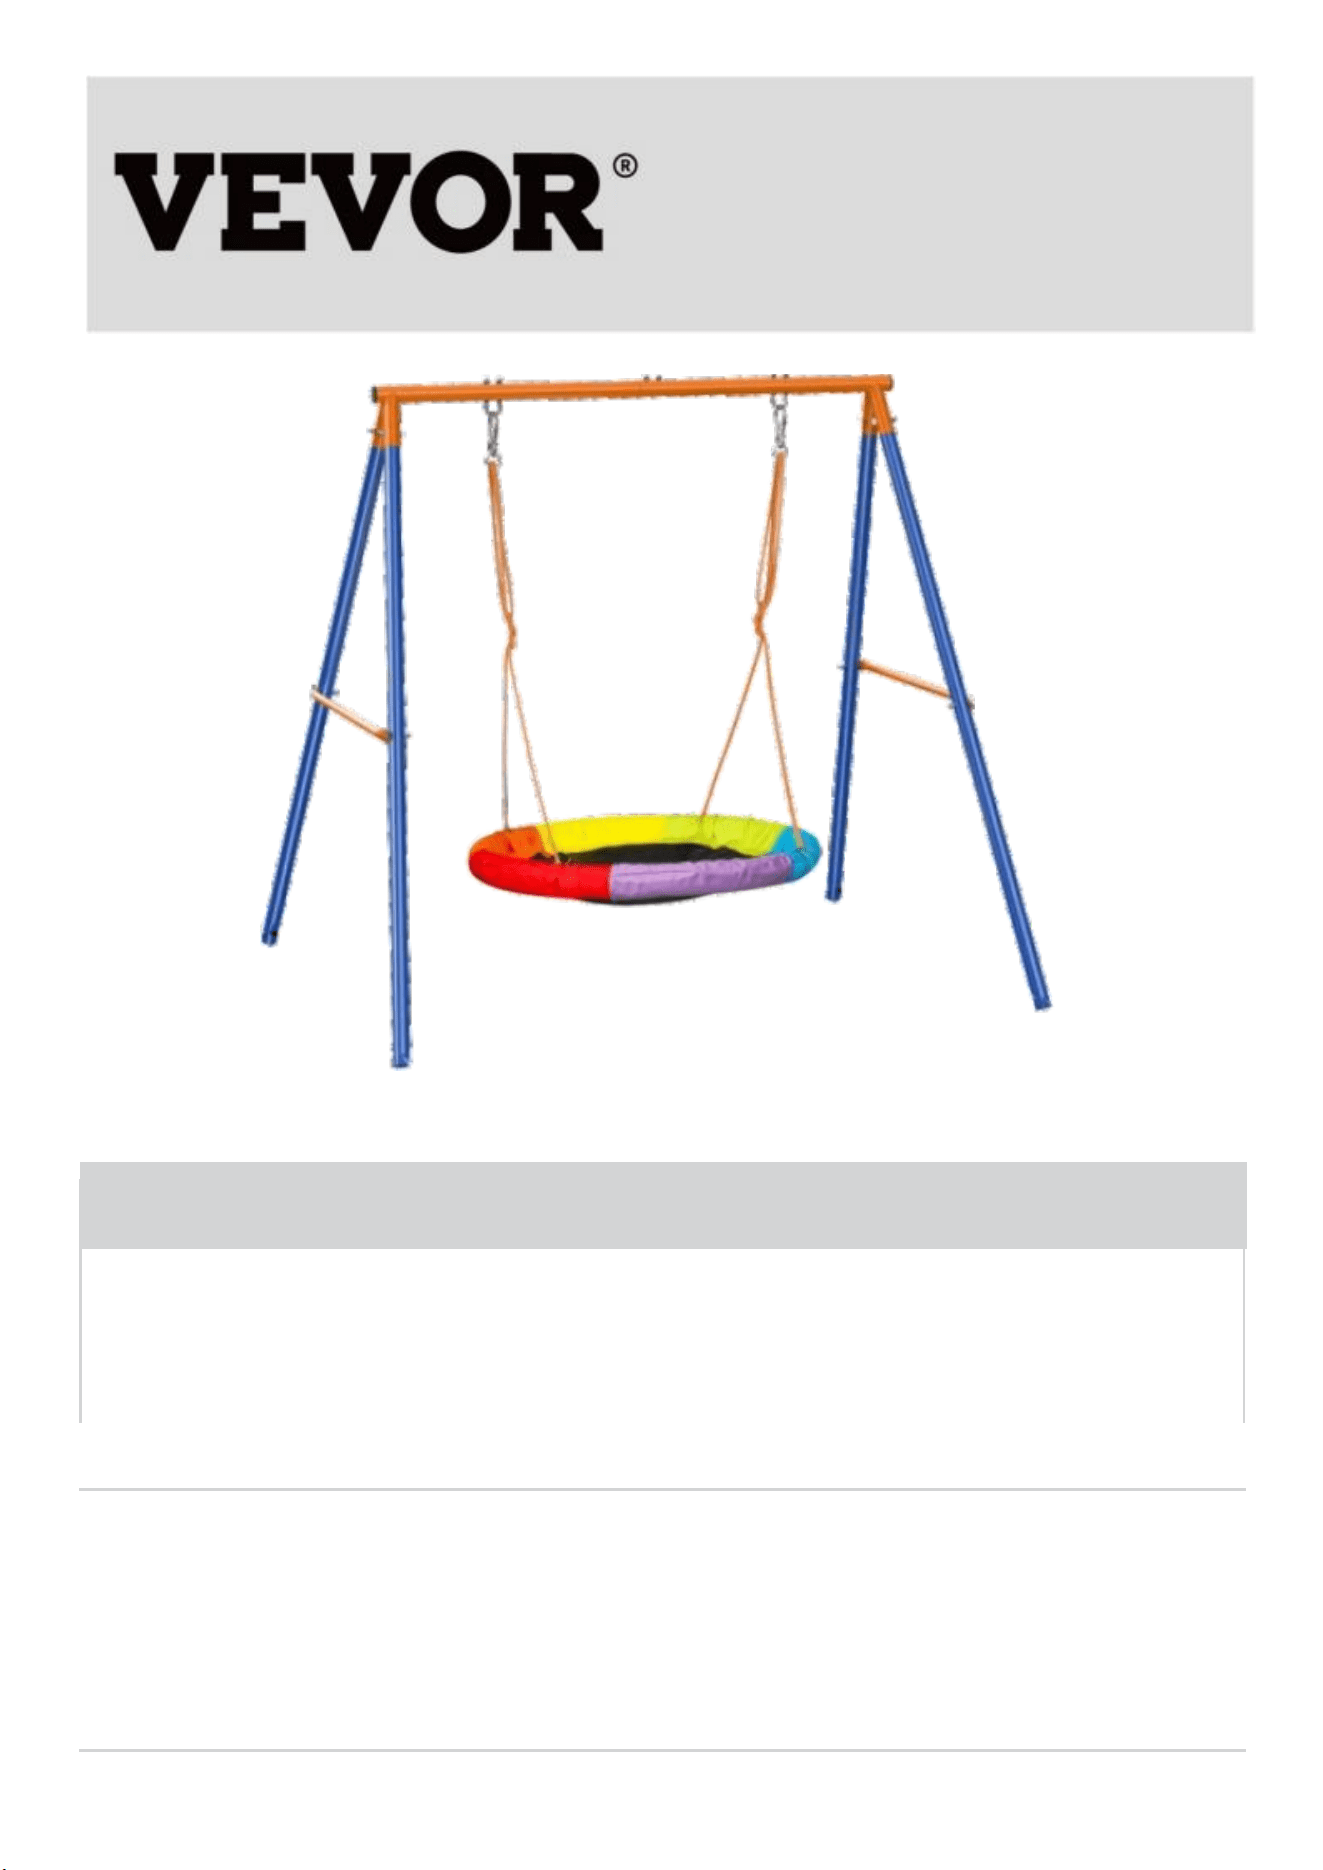
A-Frame Swing Set
We continue to be committed to provide you tools with competitive price.
"Save Half", "Half Price" or any other similar expressions used by us only represents an
estimate of savings you might benefit from buying certain tools with us compared to the major
top brands and does not necessarily mean to cover all categories of tools offered by us. You
are kindly reminded to verify carefully when you are placing an order with us if you are
actually saving half in comparison with the top major brands.
MODEL: JX-SW01
Have product questions? Need technical support? Please feel free to
contact us:
Technical Support and E-Warranty Certificate
www.vevor.com/support
NEED HELP? CONTACT US!
This is the original instruction, please read all manual instructions
carefully before operating. VEVOR reserves a clear interpretation of our
user manual. The appearance of the product shall be subject to the
product you received. Please forgive us that we won't inform you again if
there are any technology or software updates on our product.
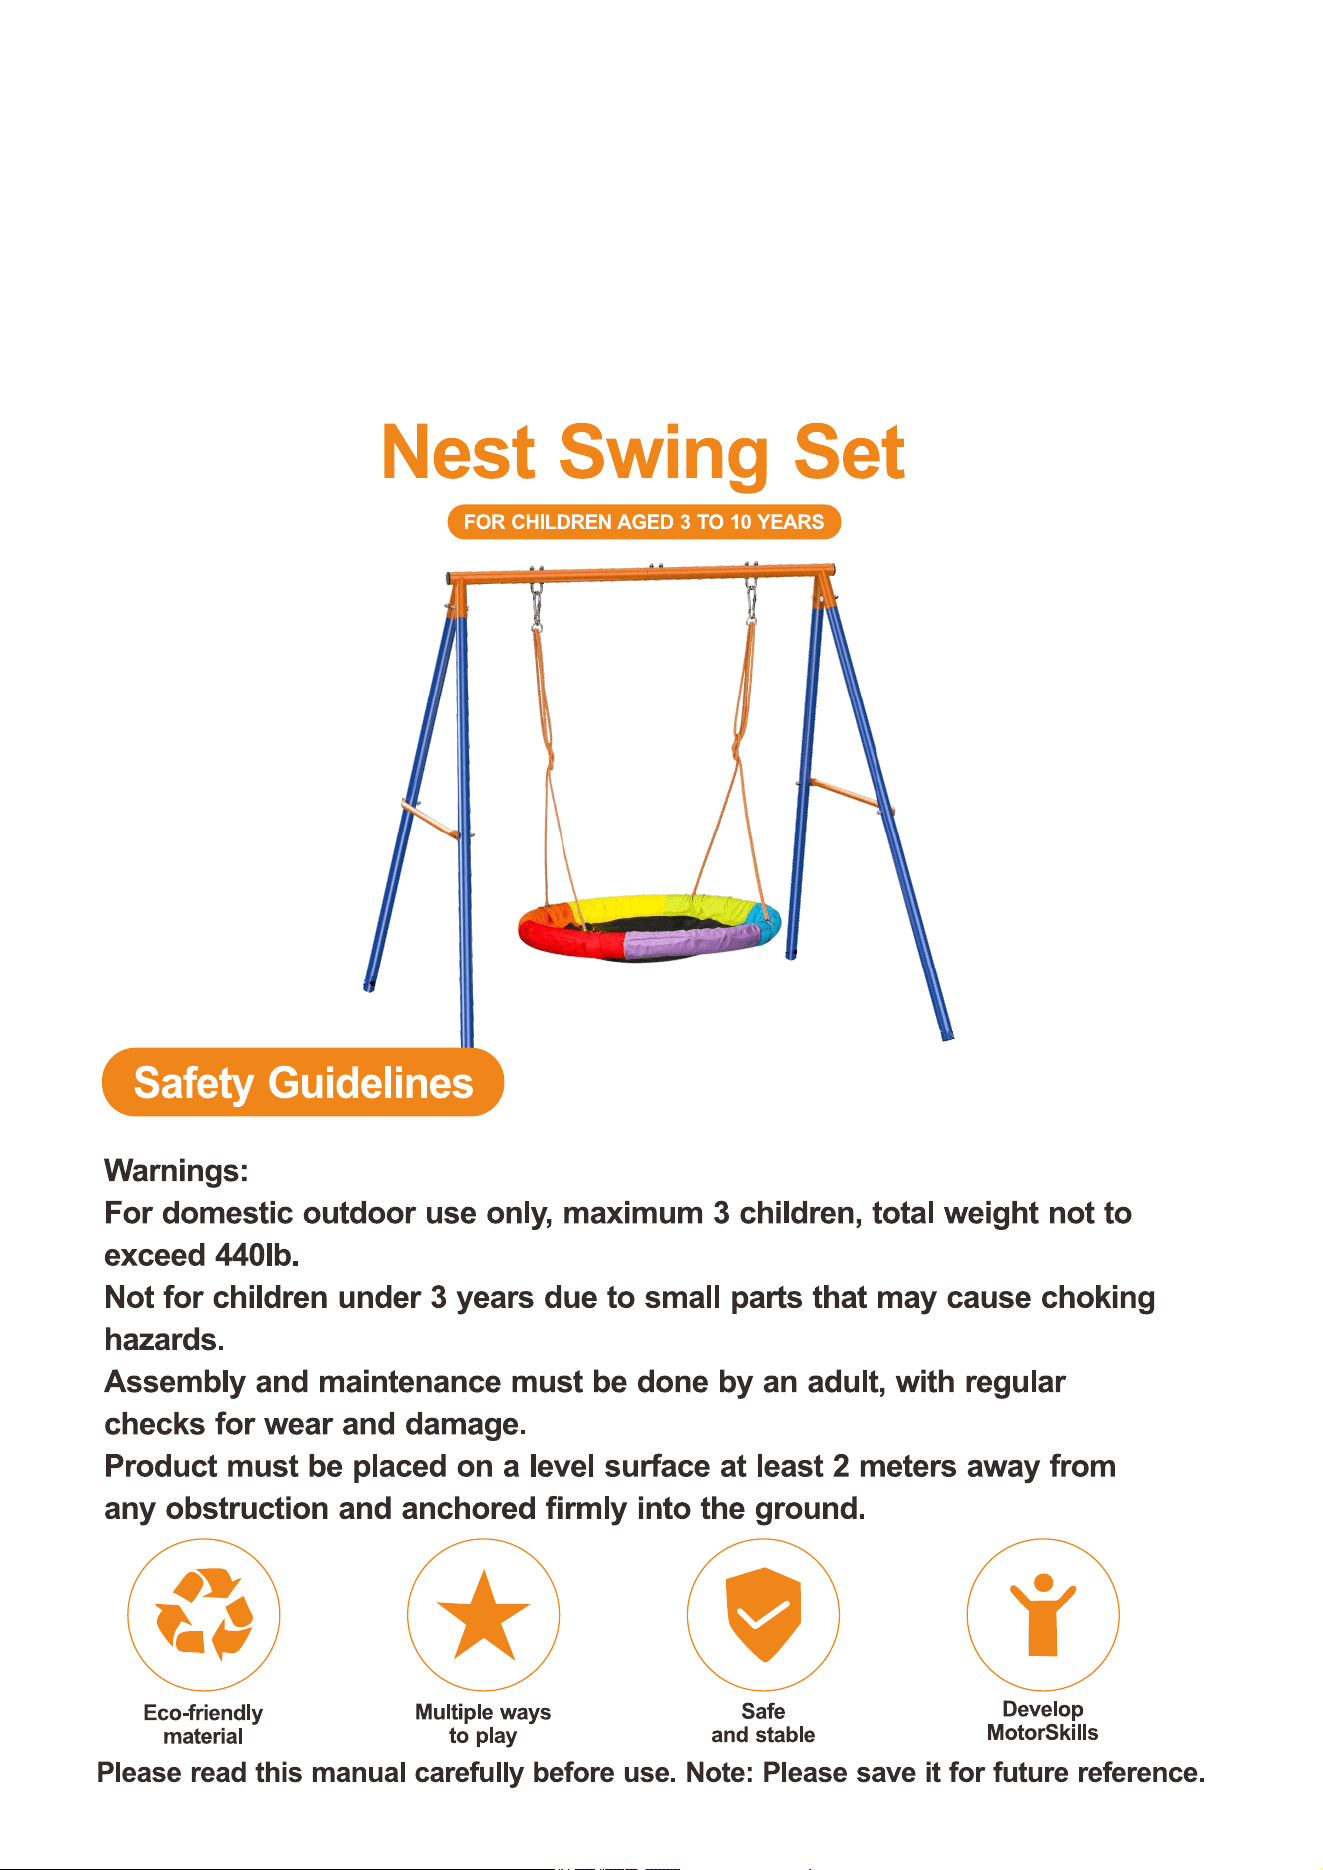
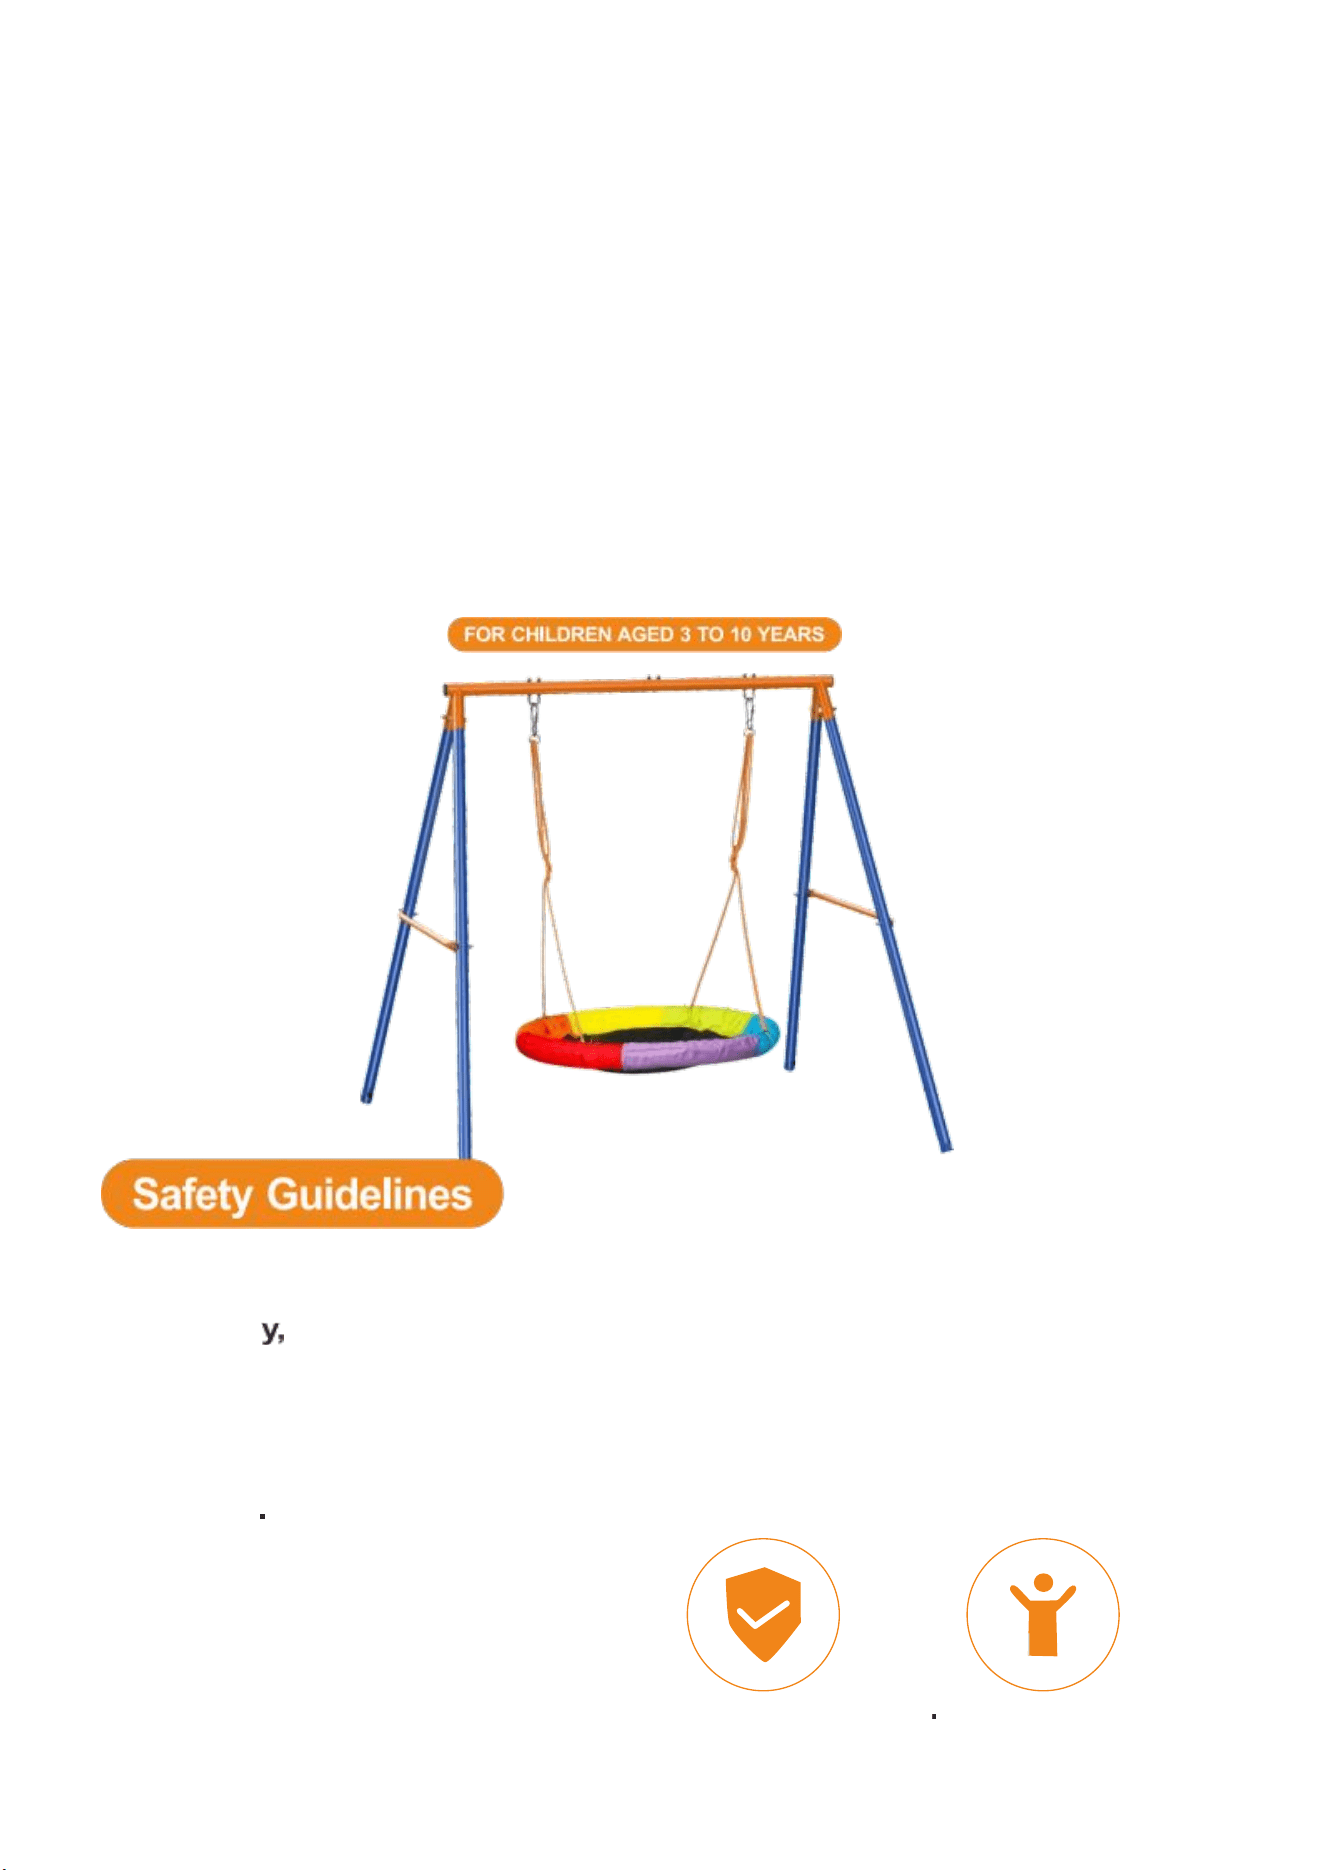
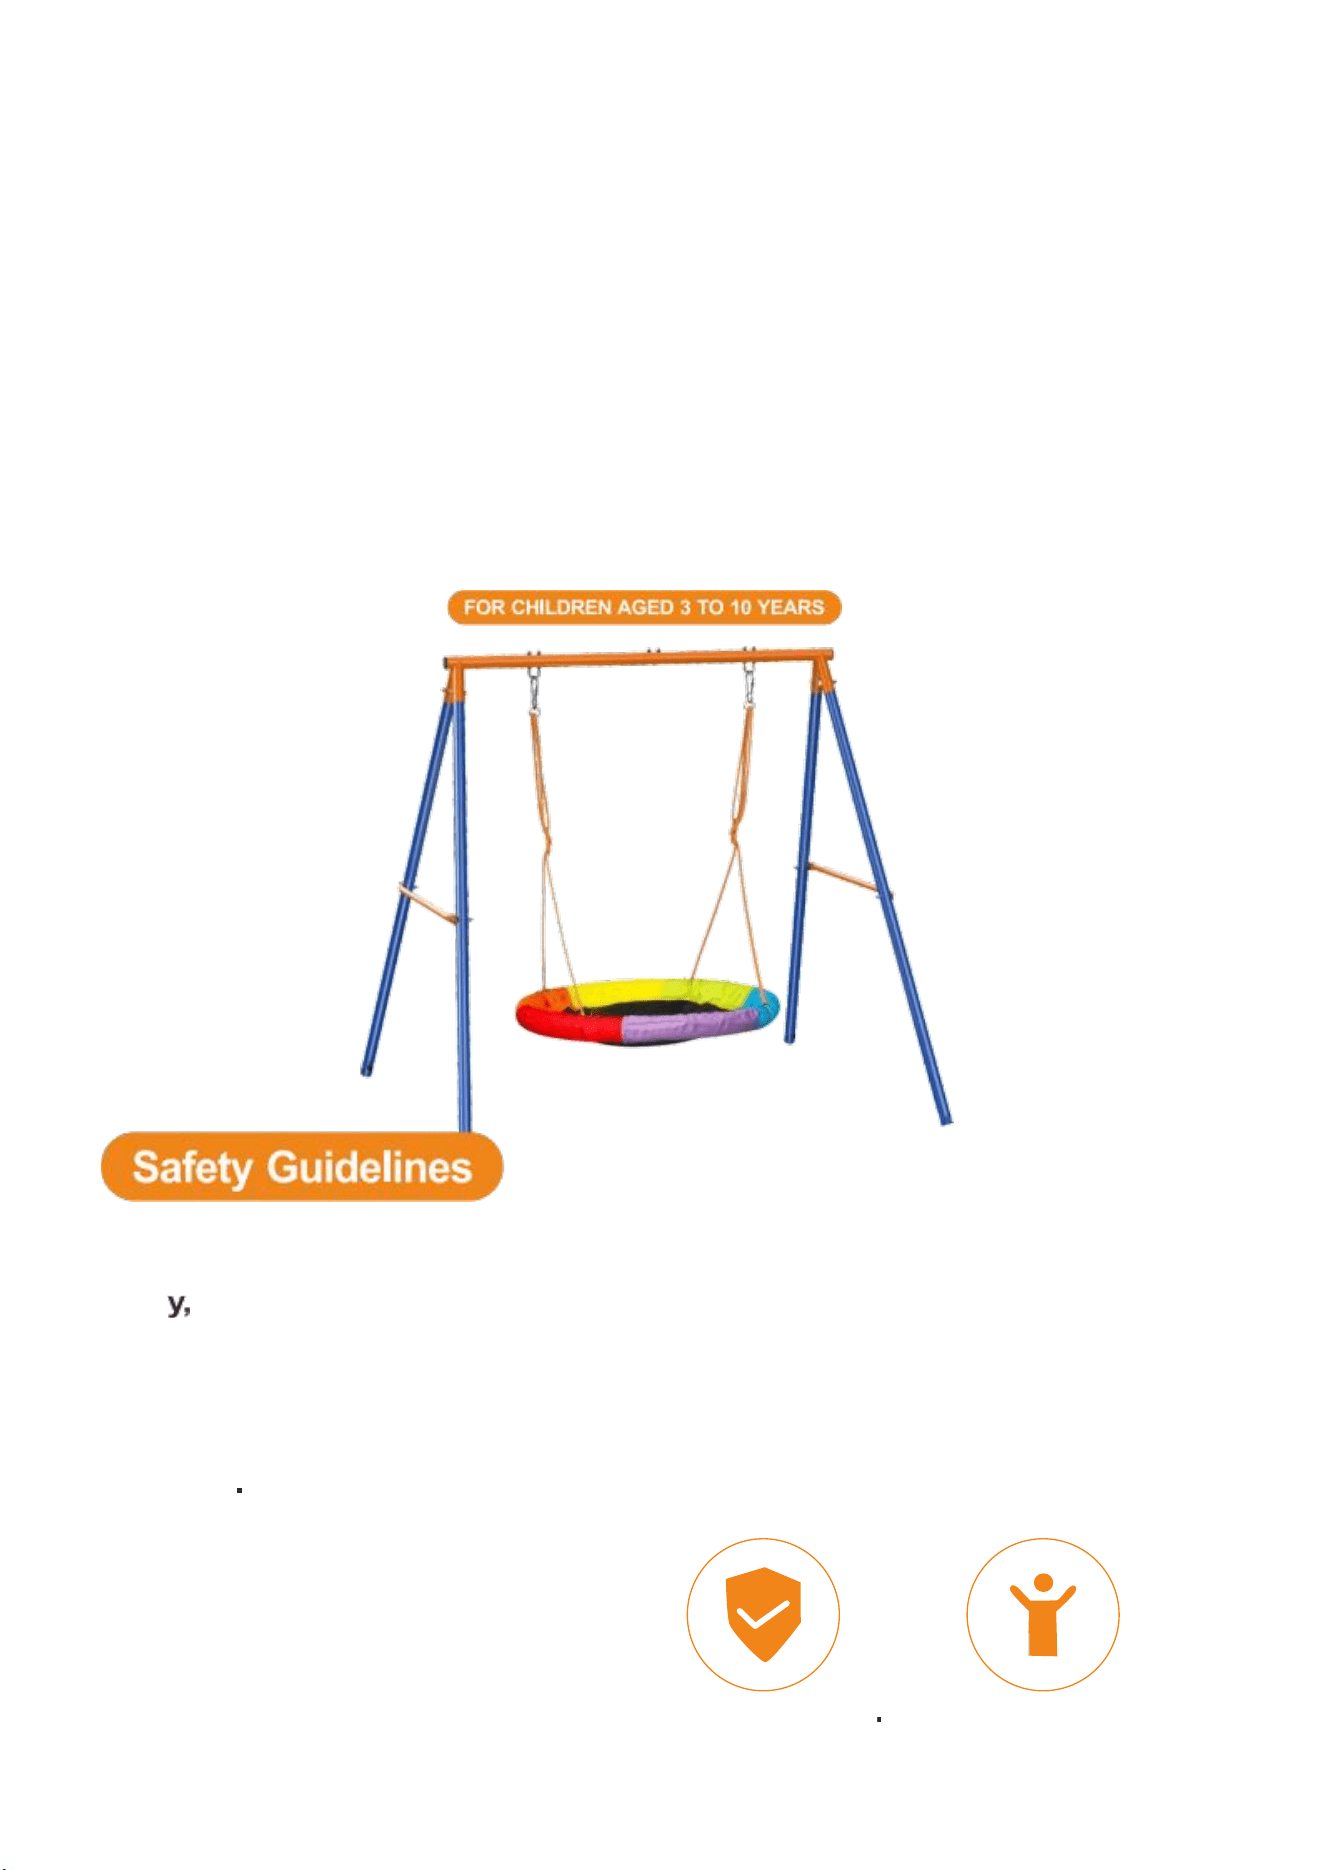
A-Frame Swing Set
INSTRUCTIONS
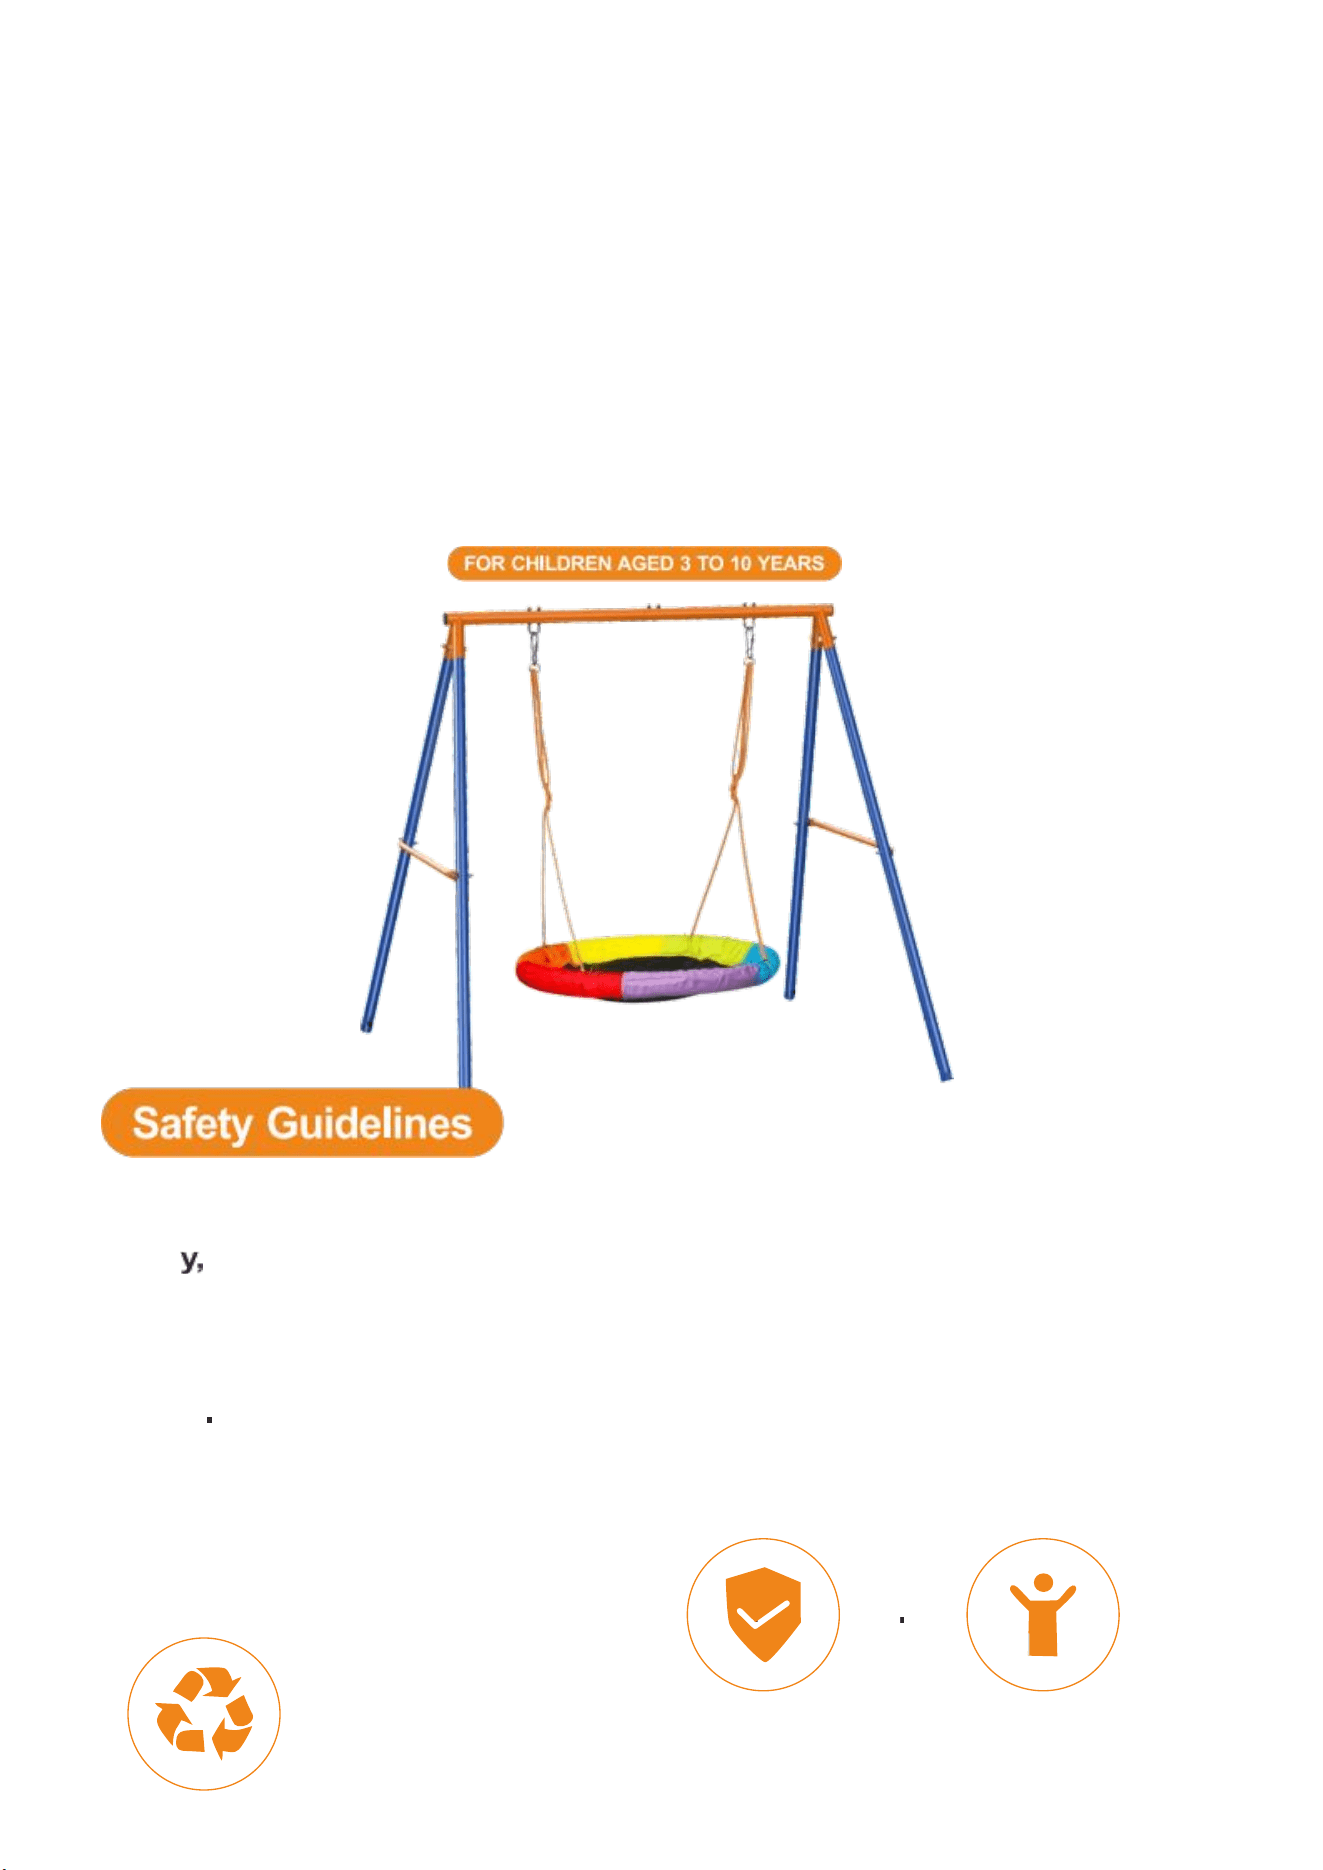
Thank you very much for choosing this A-Frame Swing Set.
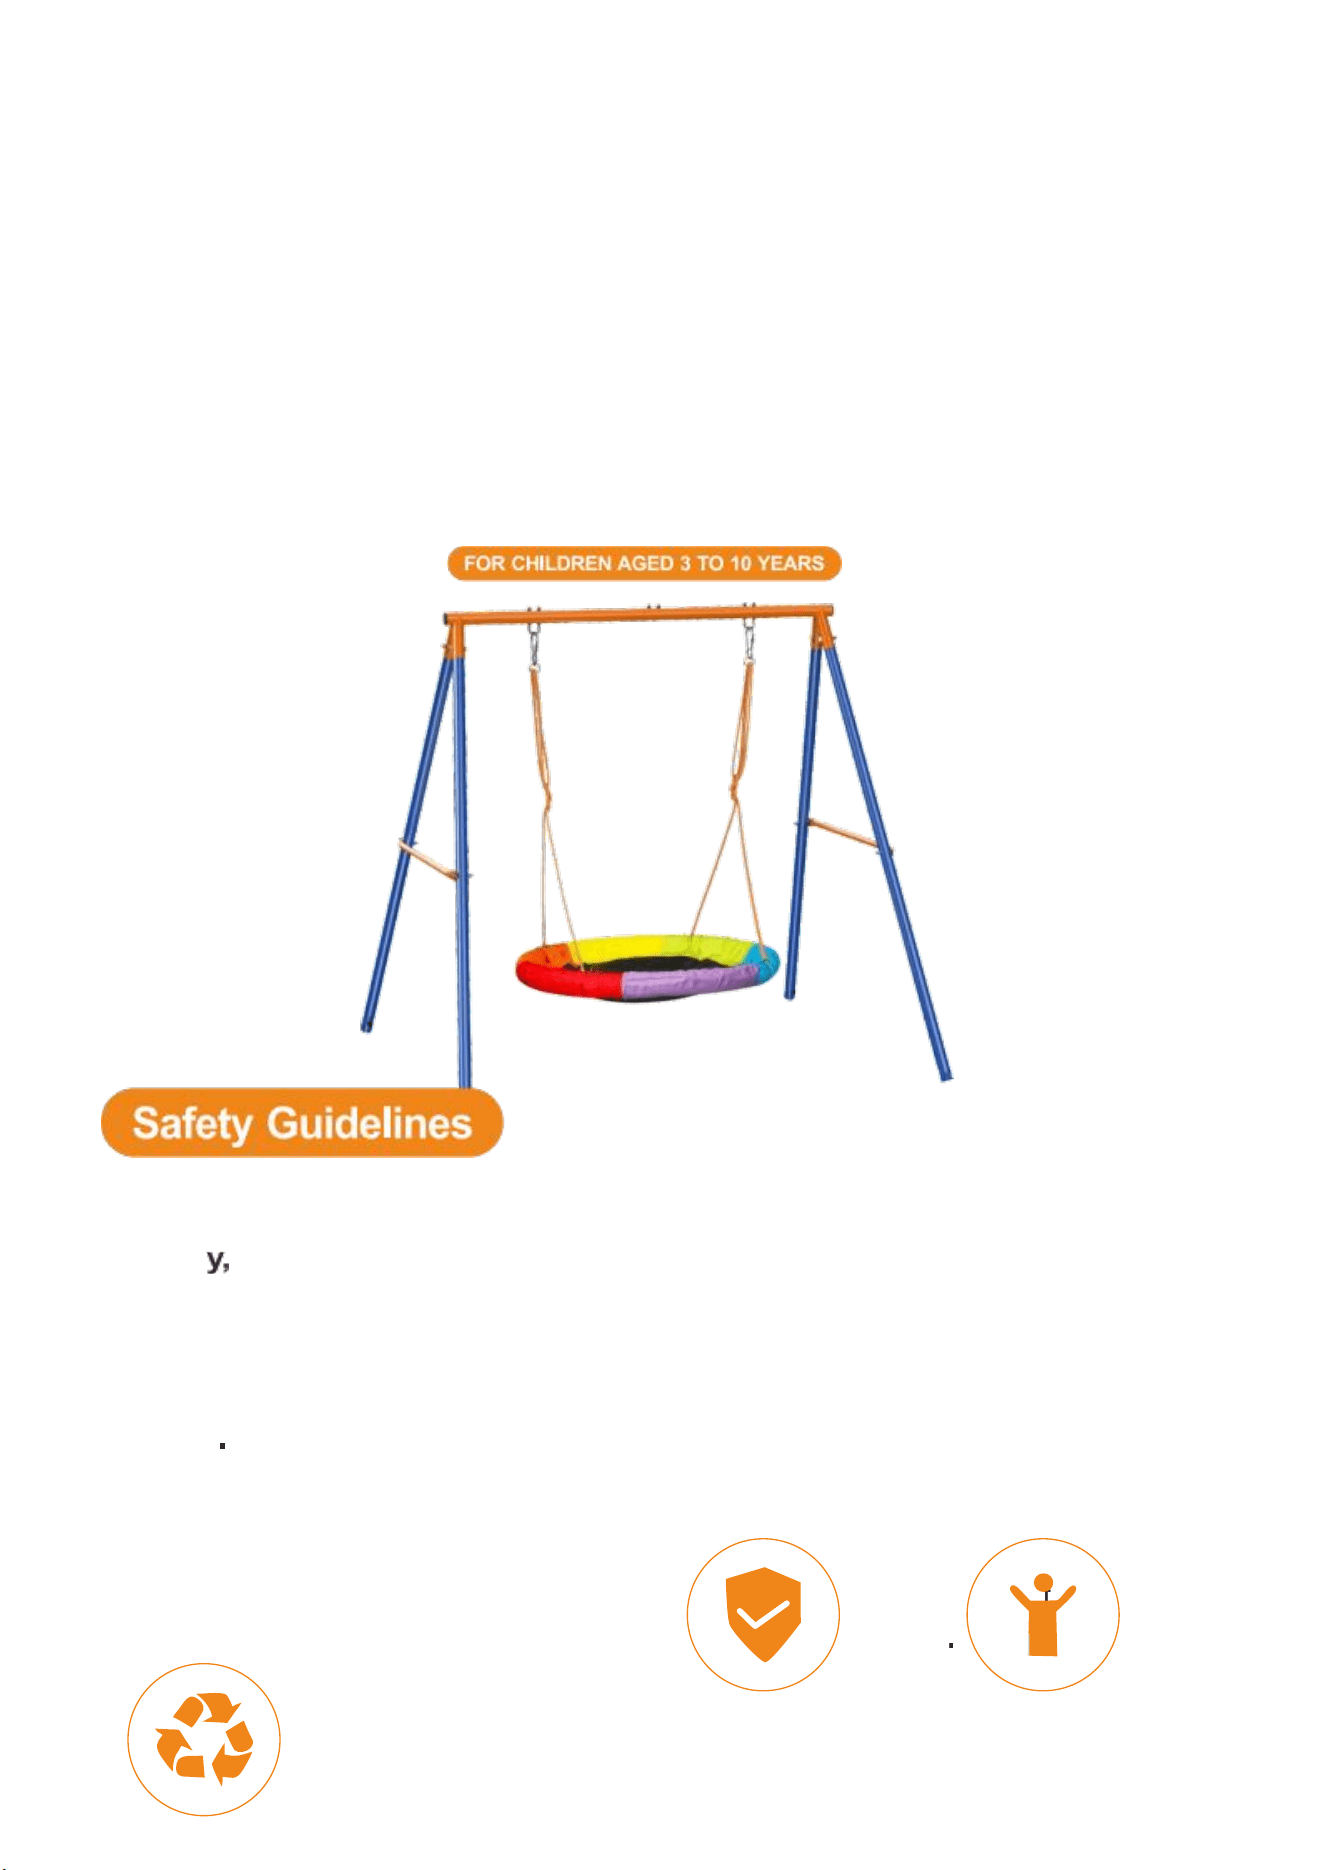
- Please read all of the instructions before using it. The information will help you
achieve the best possible results.
The products carried in this catalog may be different in color than the actual item.
55
60
2
55
4
And then rotate to the ground.

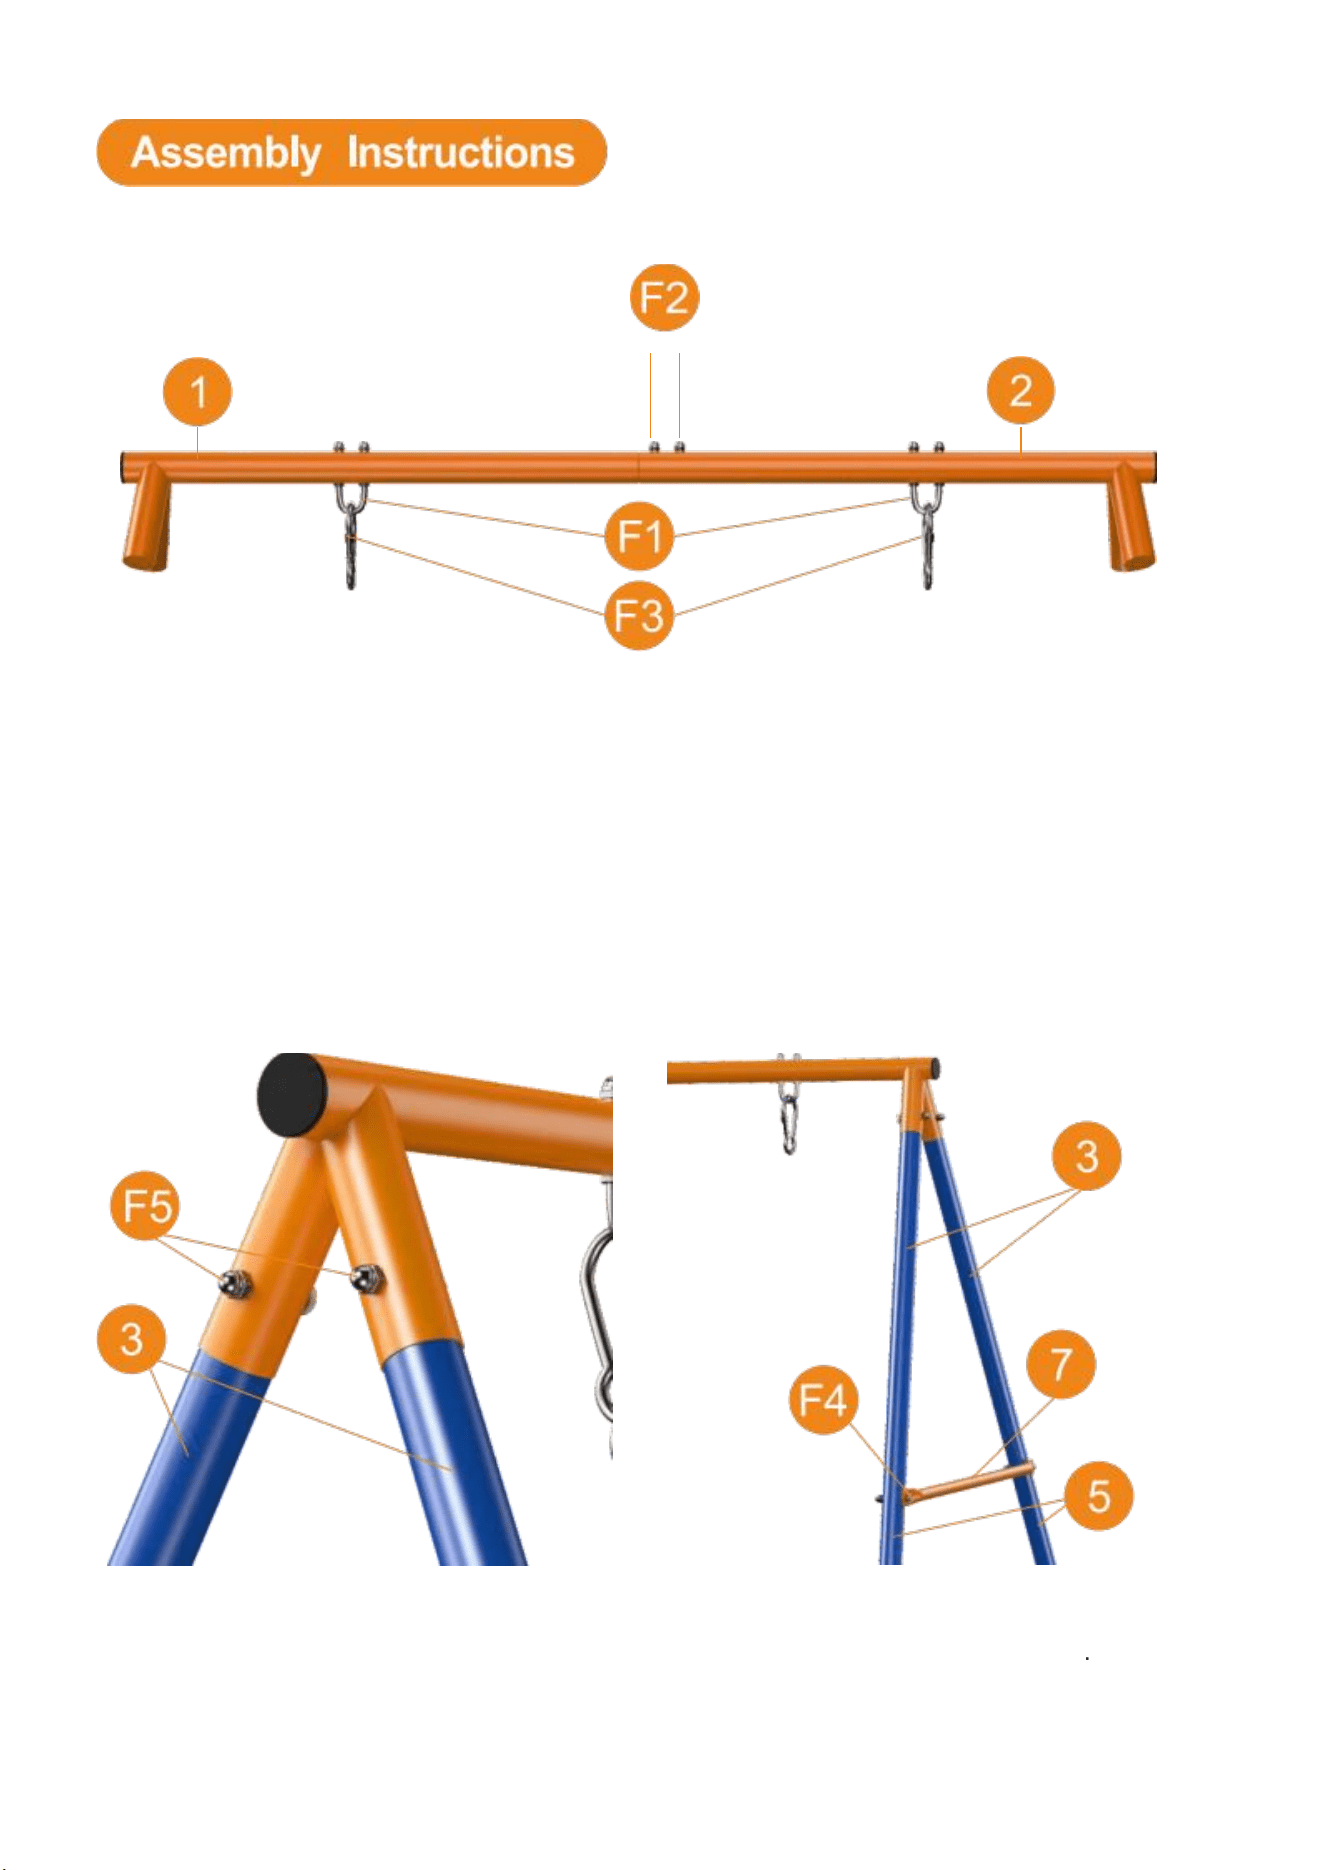
[Assembly lnstructions:
IMPORTANT NOTE: For saty reasons, this swing is best inseed and anchored into
gss for added stability. If it is a concrete floor, it is commended that you add
counteeights such as sandbags on both sides of the swing. If you have questions
about this pcedure, please feel free to contact us.
Manufacturer: YANGZHOU JIUXIN SPORTS TECHNOLOGY
CO.,LTD.
Address: NO.6, INDUSTRIAL PARK,XI NJI TOWN, YIZHENG,
YANGZHOU CITY, JIANGSU, CHINA
Imported to AUS: SIHAO PTY LTD. 1 ROKEVA
STREETEASTWOOD NSW 2122 Australia
Imported to USA: Sanven Technology Ltd. Suite 250, 9166
Anaheim Place, Rancho Cucamonga, CA 91730
E-CrossStu GmbH
Mainzer Landstr.69, 60329
Frankfurt am Main.
YH CONSULTING LIMITED.
C/O YH Consulting Limited Office 147,
Centurion House, London Road,
Staines-upon-Thames, Surrey, TW18 4AX

Technical Support and E-Warranty Certificate
www.vevor.com/support

Soporte Técnico y C erticado de garantía electrónica
www.vevor.com/support
Un cuadro Balancearse
Colocar
Nosotros continuar a ser comprometido a proporcionar tú herramientas con
competitivo precio .
" Ahorrar Mitad mitad Precio " o cualquier otro similar expresiones usado por a nosotros
solo reprime un
estimar de ahorros tú podría beneficio de comprar cierto herramientas con a nosotros
comparado a el importante
arriba marcas y hace no necesariamente significar a cubrir todo categorias de herramientas
ofrecidas por Nosotros.Tú
son amable recordado a verificar con cuidado cuando tú son colocación un orden con a
nosotros si tú son
de hecho ahorro medio en comparación con el arriba importante marcas .

Un cuadro
Balancearse Colocar
HERRAMIENTAS PRÁCTICAS, A MITAD DE PRECIO
MODELO: JX-SW01
NEED HELP? CONTACT US!
Tener producto preguntas ? Necesidad técnico apoyo ? Por favor
sentir gratis contactar a nosotros :
Soporte Técnico y Certificado de garantía electrónica
www.vevor.com/support
Este es el original instrucción , por favor leer todo manual instrucciones
cuidadosamente antes de operar. VEVOR se reserva una
interpretación de nuestro manual de usuario. La apariencia del
producto será sujeto a el

producto tú recibió . Por favor perdonar a nosotros eso nosotros no
informar tú de nuevo sí hay son cualquier tecnología o software
actualizaciones en nuestro producto .

INSTRUCCIONES
Muchas gracias por elegir esto. Columpio con estructura en A Colocar.
- Por favor leer todos los instrucciones antes usando eso. información voluntad
ayudarte lograr lo mejor posible resultados.
El productos transportados en este catálogo mayo sé diferente en color que el
real artículo.
Nido s ala colocar
advertencias :
Sólo
para uso doméstico en exteriores.
máximo 3 niños, total peso No a
superar 440 libras .
no para niños menores de 3 años debido a pequeño partes que pueden causar
asfixia
peligros
Asamblea y mantenimiento debe ser hecho por un n adulto, con regular
cheques para tener puesto y daño .
el producto debe ser metido en a nivel superficie al menos2 metros lejos de
cualquier obstrucción y anclado firmemente en el suelo
Respetuoso del medio ambiente
material
por favor Lee esto

Múltiple
maneras
seguro
Desarroll
ar
a
jugar
y
establ
e
Habili
dades
motor
as
manual
cuidadosamente
antes usar.
Nota: por favor
guarda es para
el futuro
referencia

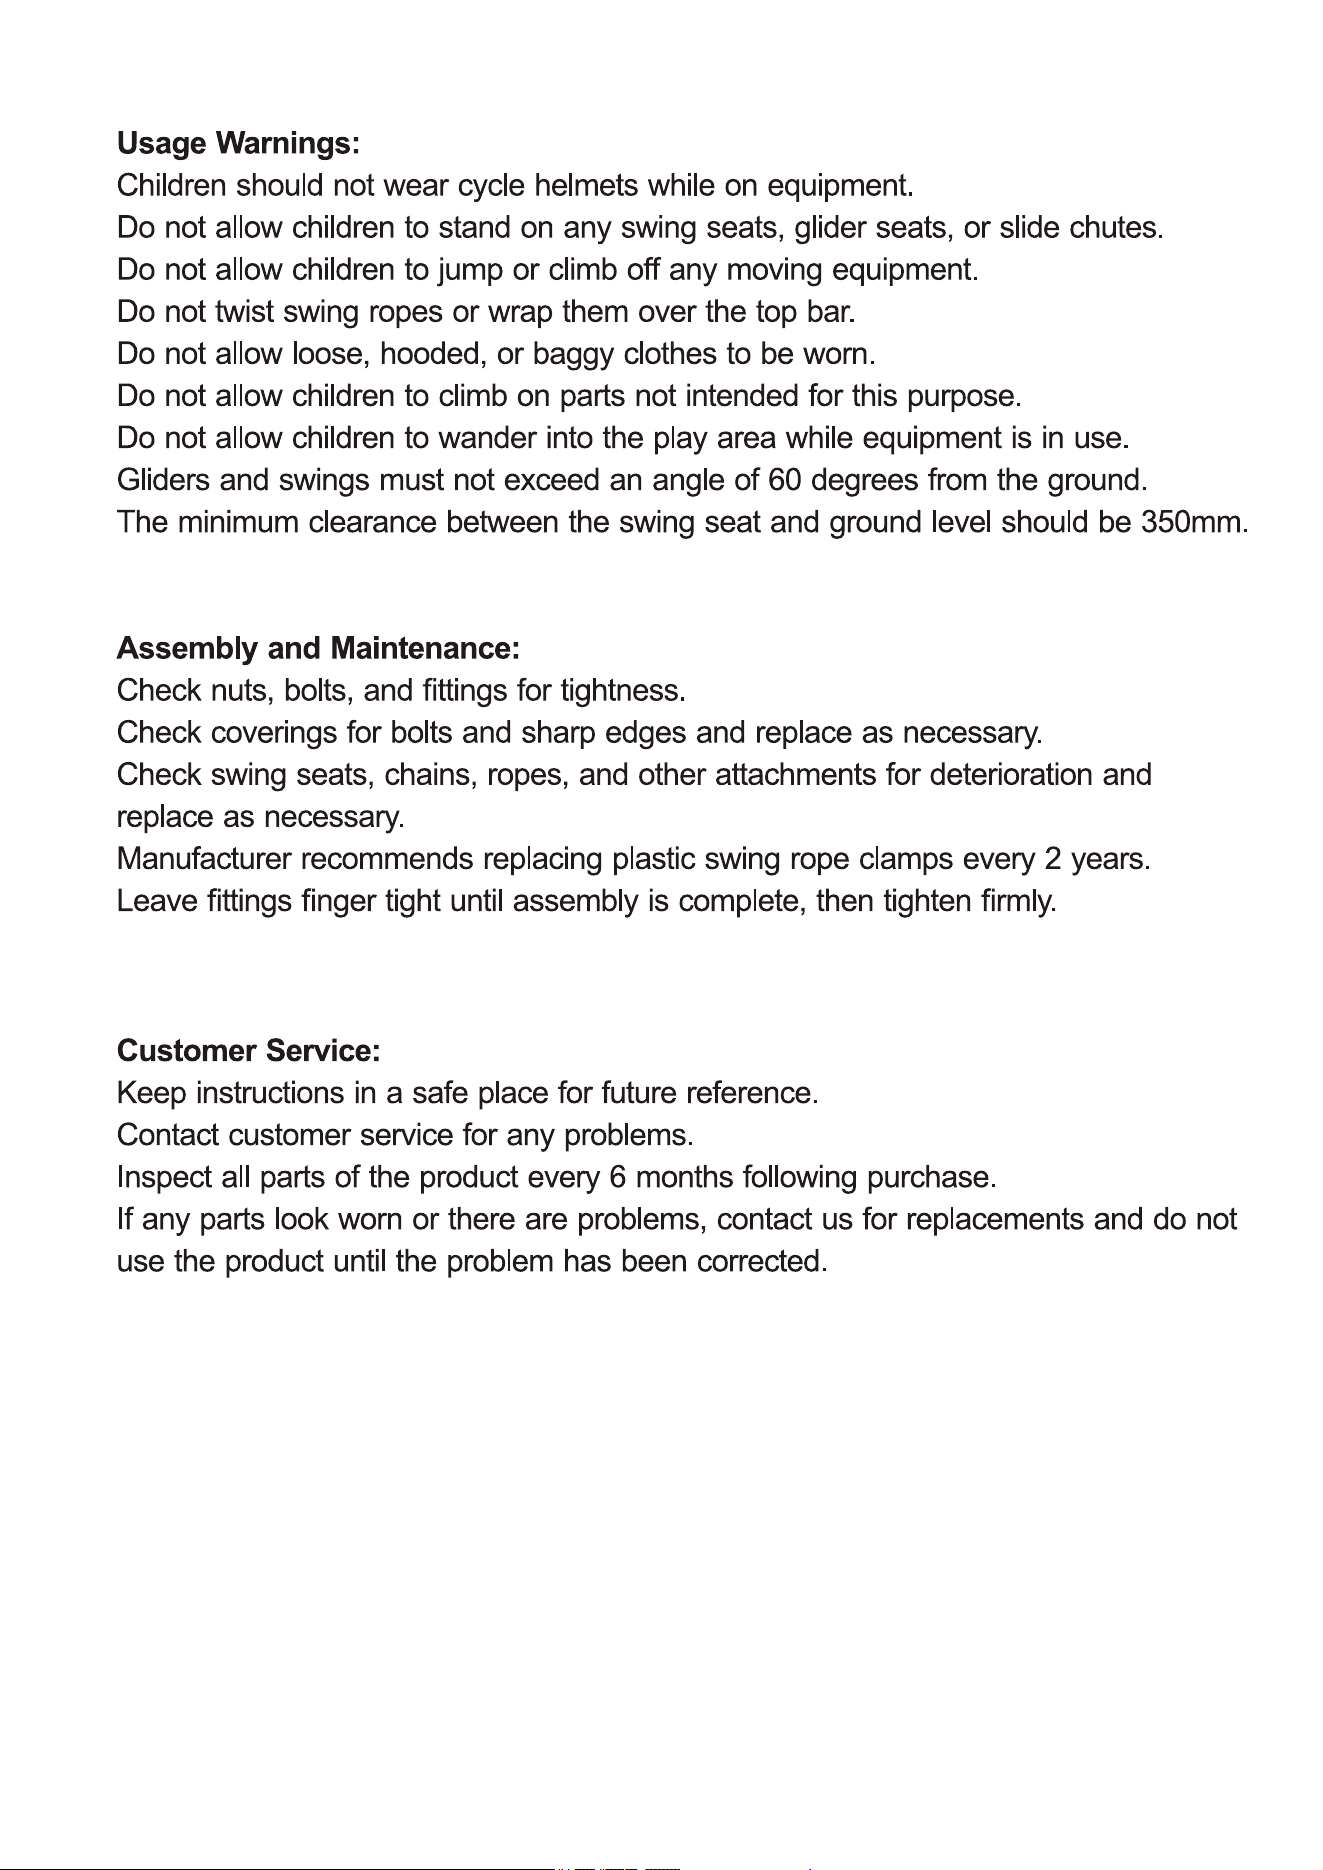
de uso :
niños debería ciclo de no desgaste cascos mientras en equipo electrónico.
Hacer no permitir niños a pararse en cualquier balancearse asientos , planeador
asientos , o deslizar toboganes .
Hacer no permitir niños saltar o escalar de cualquier Moviente equipo.
Hacer no torcer el columpio cuerdas o envolverlas excesivo bar
Hacer no permitido perder
,
encapuchado , o ropa holgada a ser gastado .
Hacer no permitir niños escalar en partes no destinado a esto objetivo.
Hacer no permitir niños vagar en el Área de pago mientras equipo es en usar.
Planeadores y columpios No debe exceder un ángulo de 60 grados de el terreno.
El mínimo autorización entre el balancearse asiento y suelo nivel debería ser de 350
mm .
Asamblea y Mantenimiento :
controlar nueces
,
pernos
,
y Ajustes para mayor estanqueidad.
revise las cubiertas en busca de pernos y afilado bordes y reemplazar como
necesario
controlar balancearse asientos , cadenas , cuerdas , y otro archivos adjuntos para
deterioro y
reemplazar como necesario
El fabricante recomienda representante columpio de plastico soga campamentos
cada 2 años.
Dejar Ajustes con los dedos hasta que asamblea es completo, entonces apretar
firmemente
al Cliente
:
mantener instrucciones en a seguro lugar para futuro referencia .
póngase en contacto con el servicio de atención al cliente para cualquier problemas
.
Inspeccionar todo partes de el producto cada 6 meses siguiente compra .
Si cualquier partes mirar gastado o allá son problemas , contacto a nosotros para
reemplazos y hacer no
utilizar el producto hasta l el problema tiene estado corregido
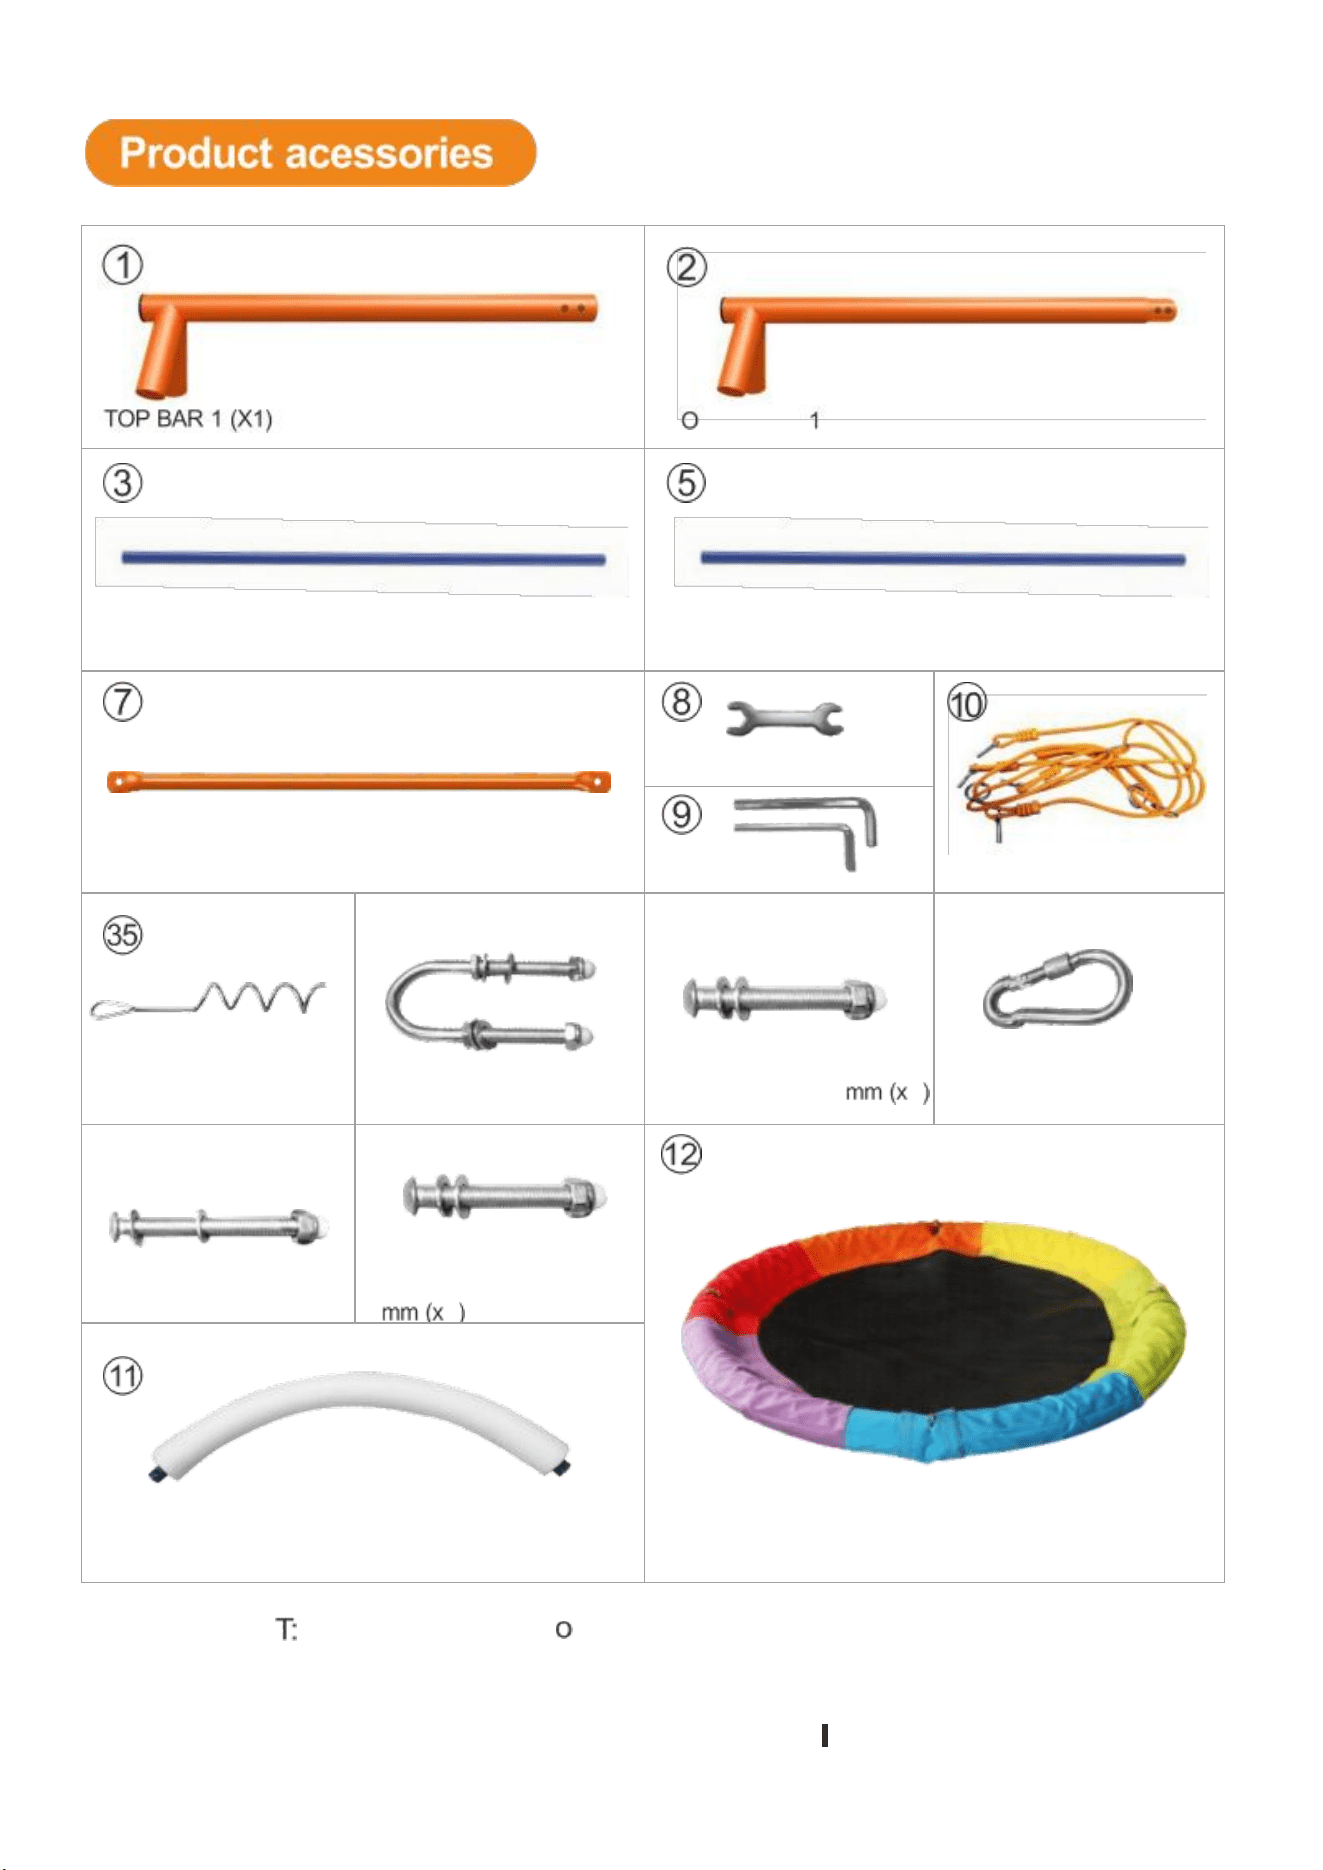
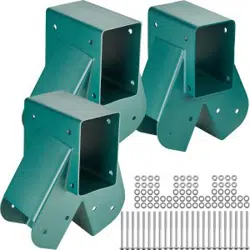
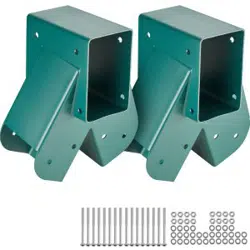
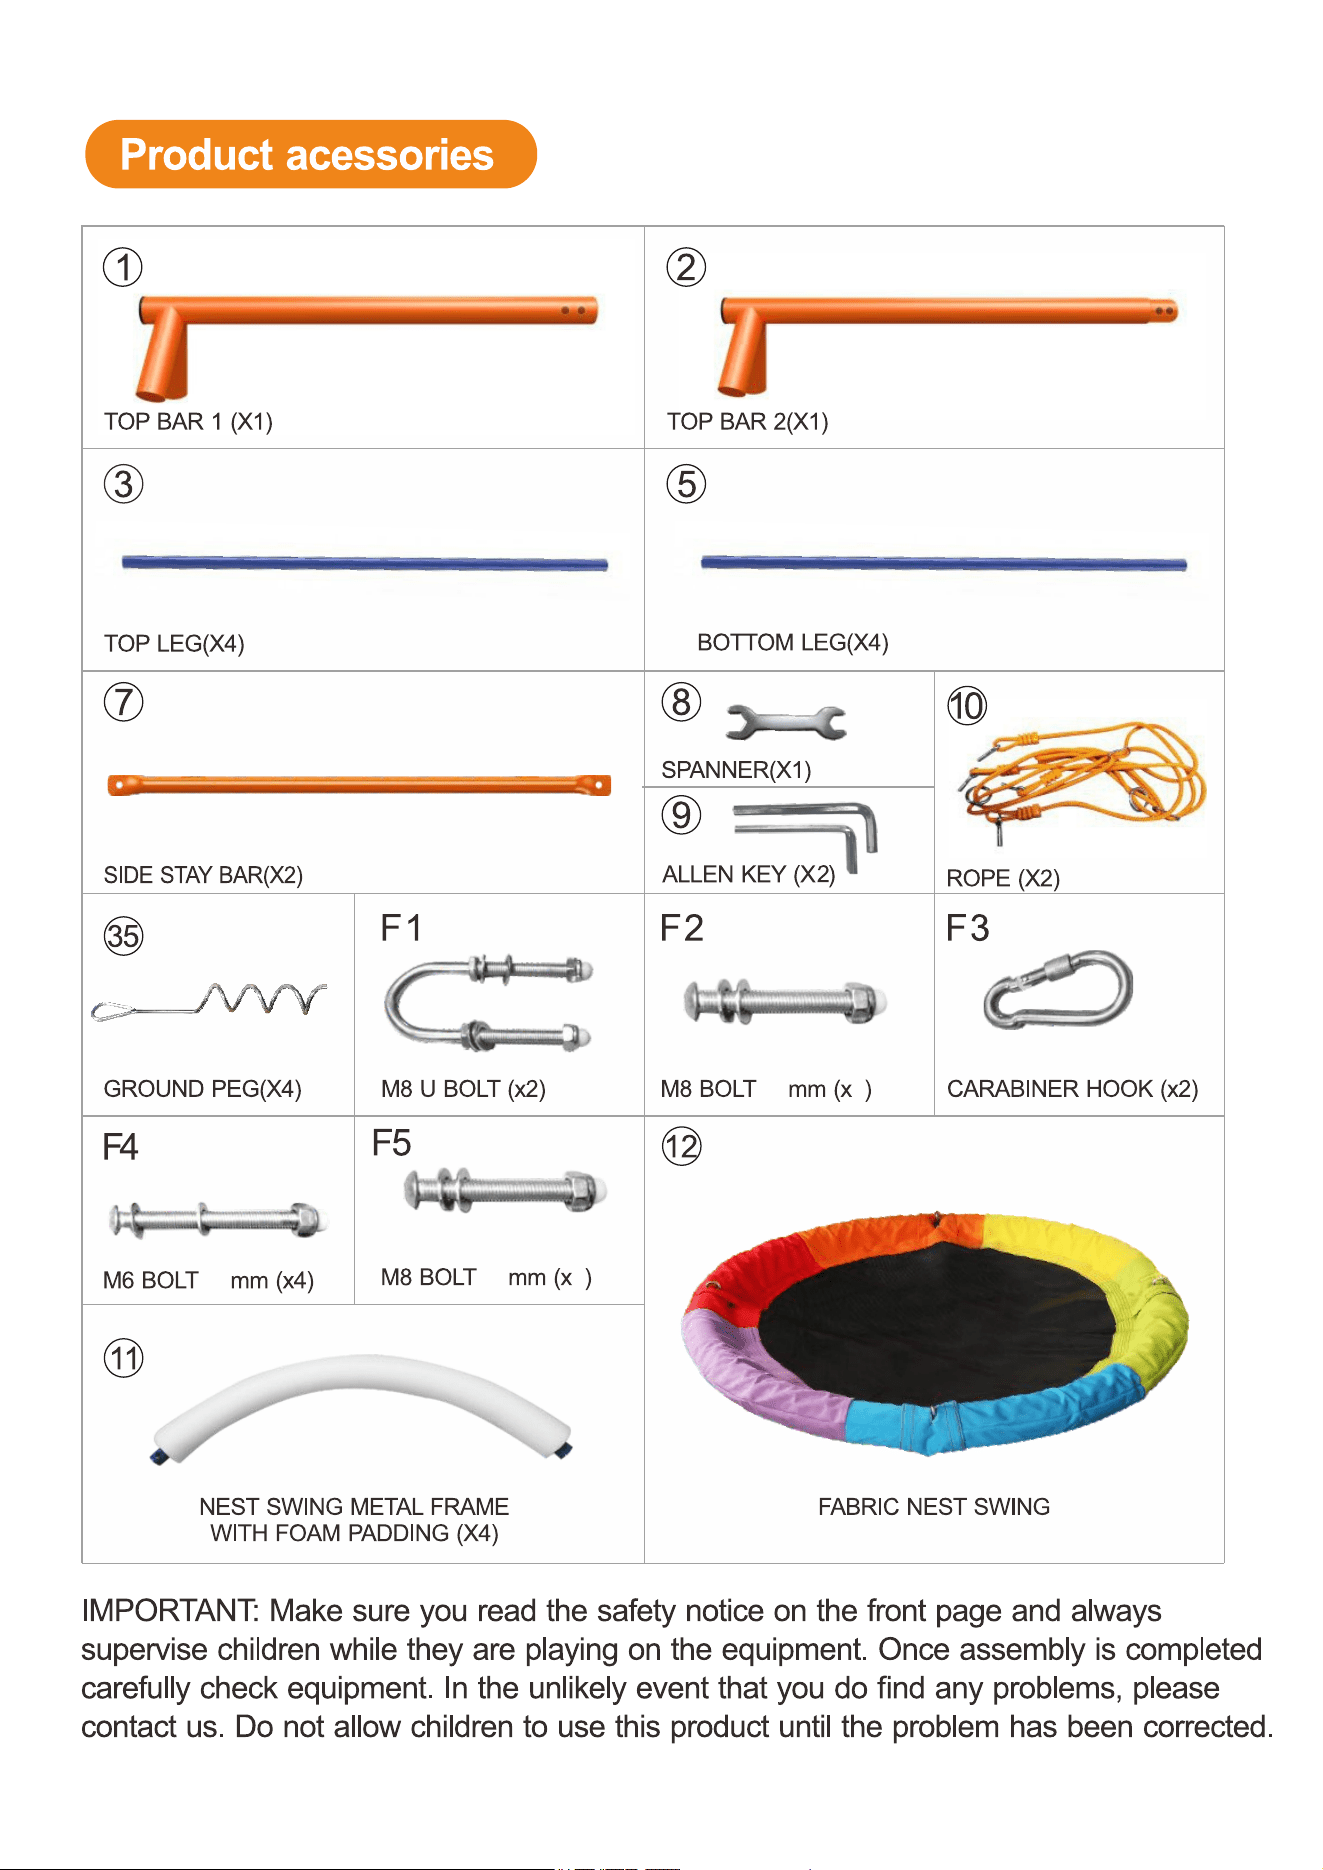
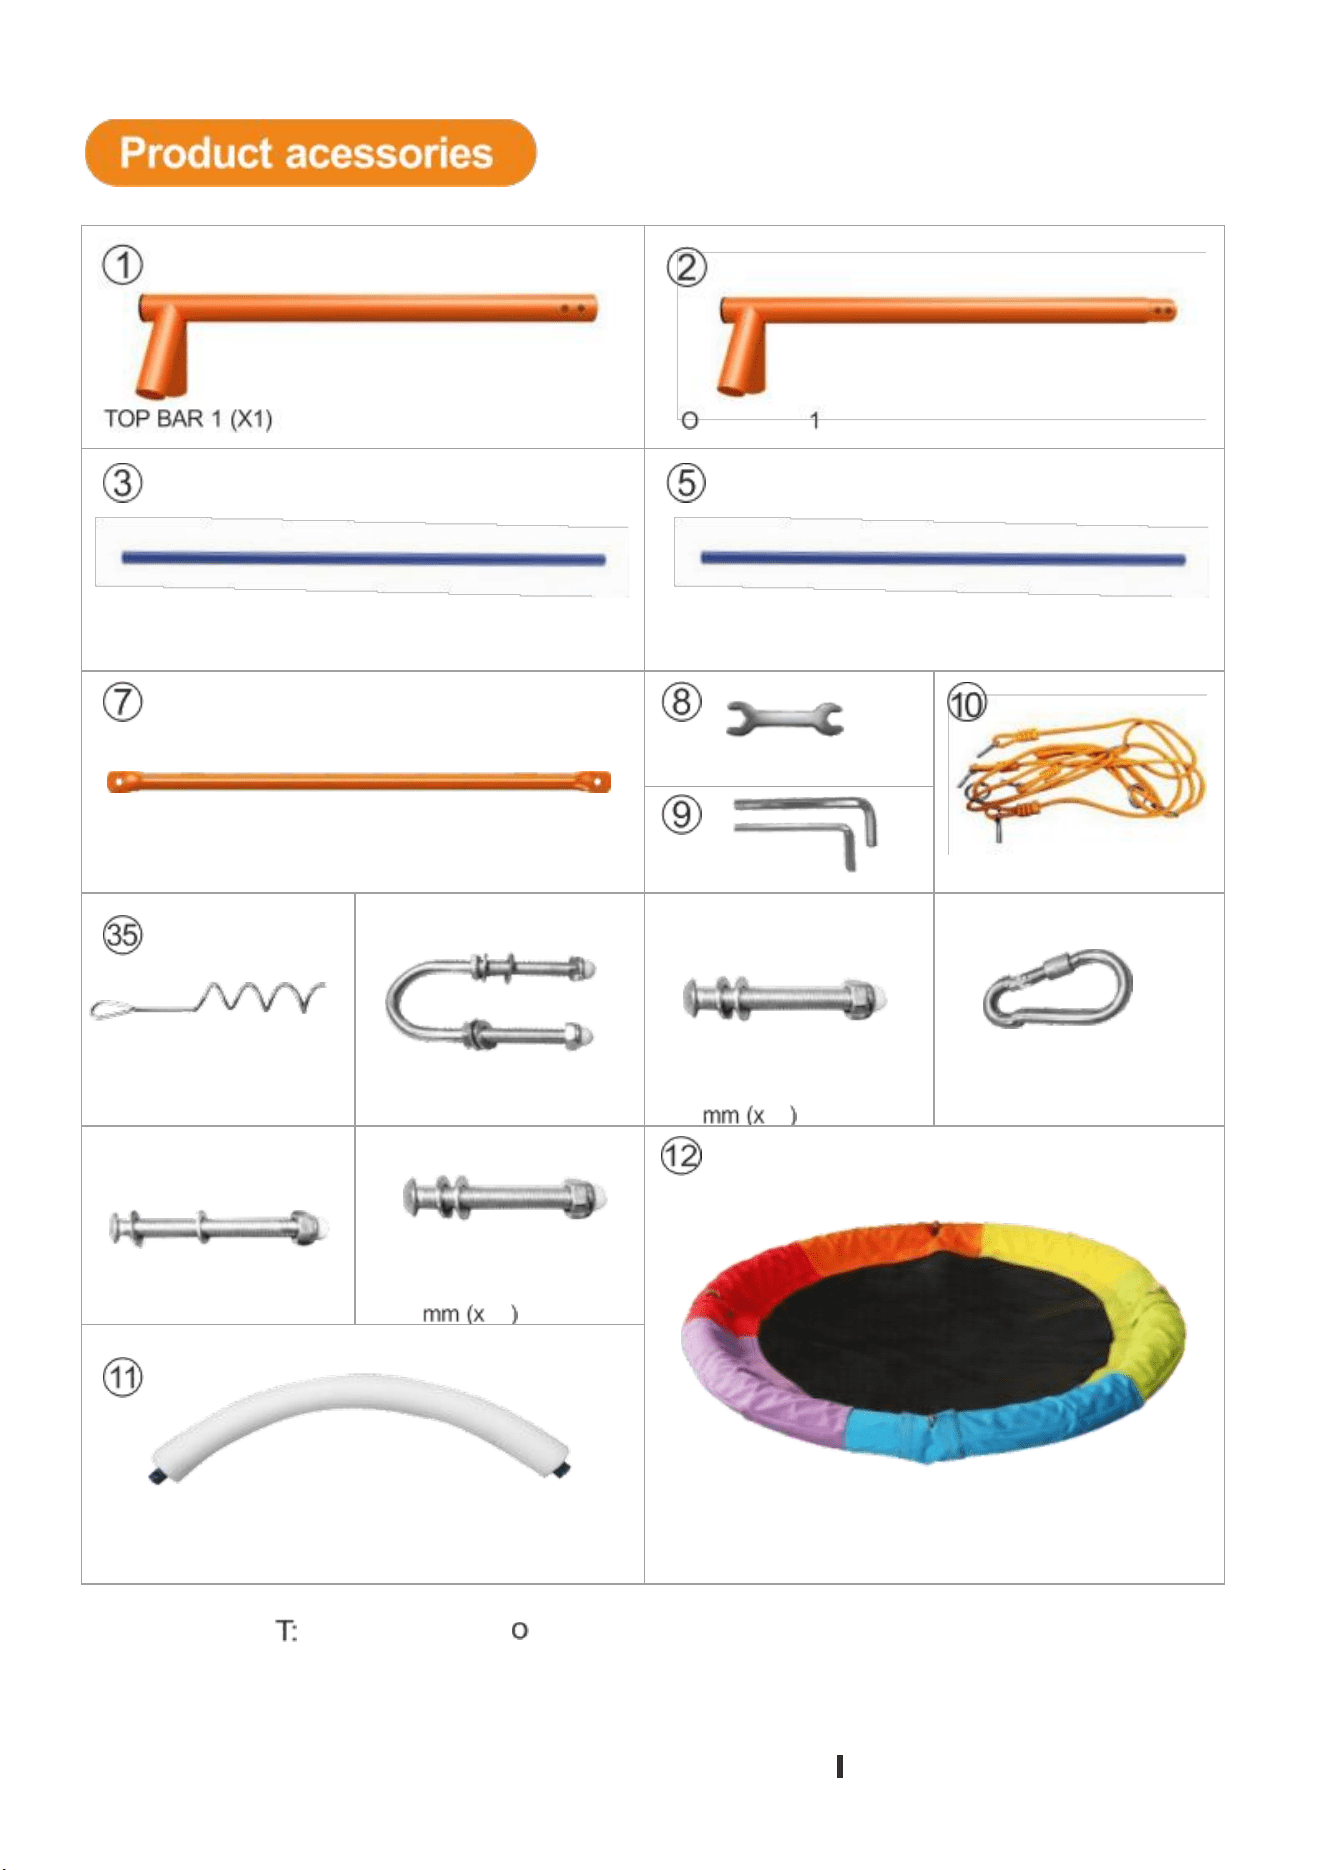
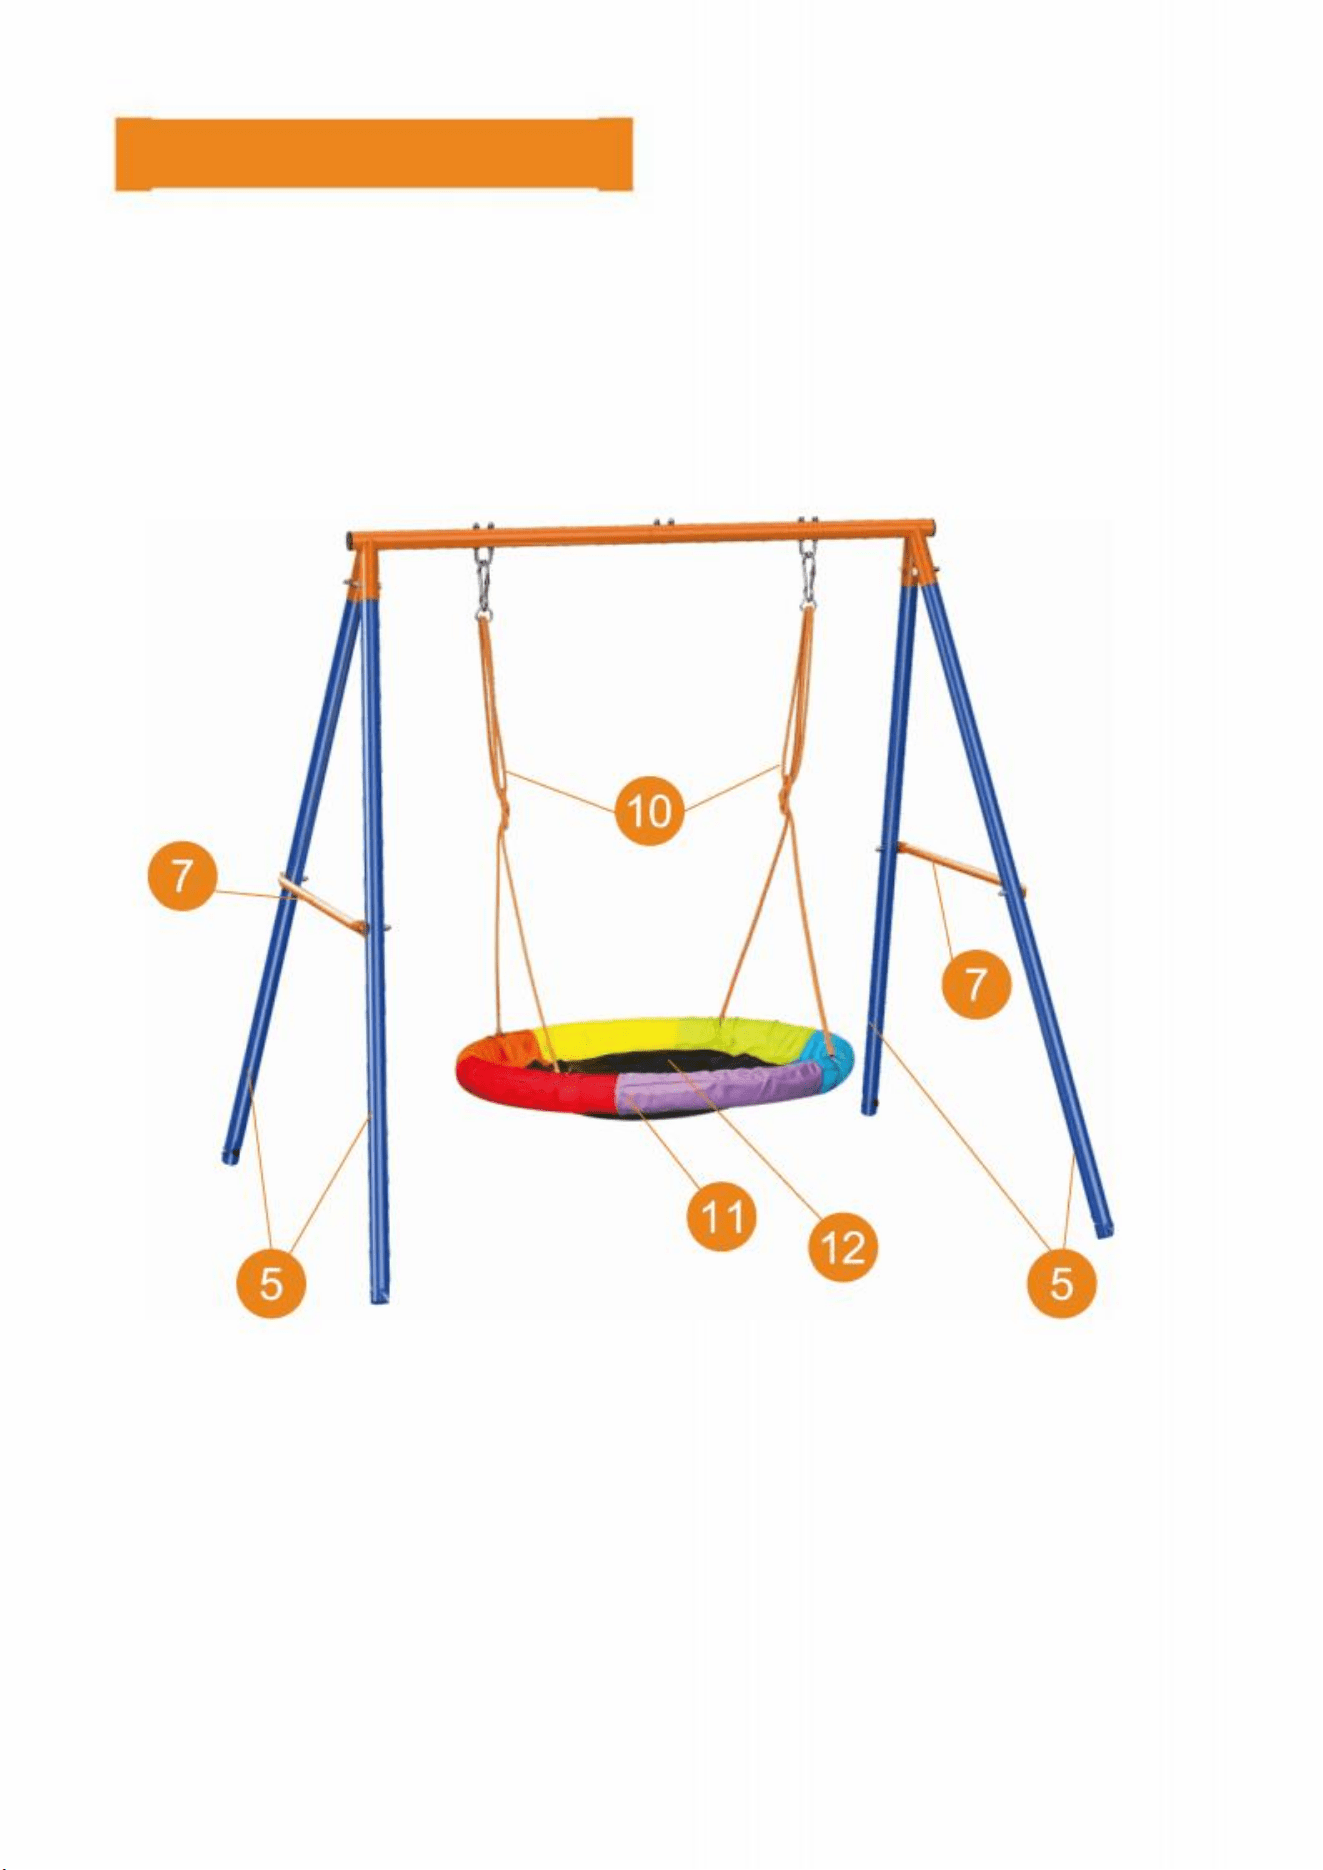
t PAG BARRA 2(X )
ARRIBA PIERNA (X4)
ABAJO PIERNA (X4)
LADO PERMANECER BARRA (X2)
SOGA (X2)
LLAVE (X1)
ALLEN LLAVE (X2)
SUELO CLAVIJA (X4)
F1
M8 U BOLT (X2)
F2
M8 TORNILLO
60
2
F3
MOSQUETON GANCHO
(X2)
F4
M6 PERNO
55
mm (X4)
F5
M8 TORNILLO
55
4
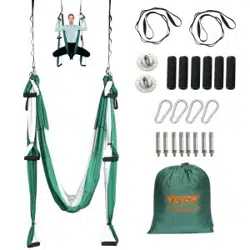
FABRIC NEST SWING
NEST SWING METAL FRAME
WITH FOAM PADDING (X4)
IMPORTANTE Hacer seguro que tu leer el seguridad aviso en El frente página y
siempre
supervisar niños mientras están jugando en el equipo. una vez el montaje es terminado
revise cuidadosamente el equipo. En el a diferencia de y caso de que usted encontrar
cualquier problema, por favor

Contáctenos. Hacer no permitido niños a utilizar esta producto hasta el problema tiene
estado corregido

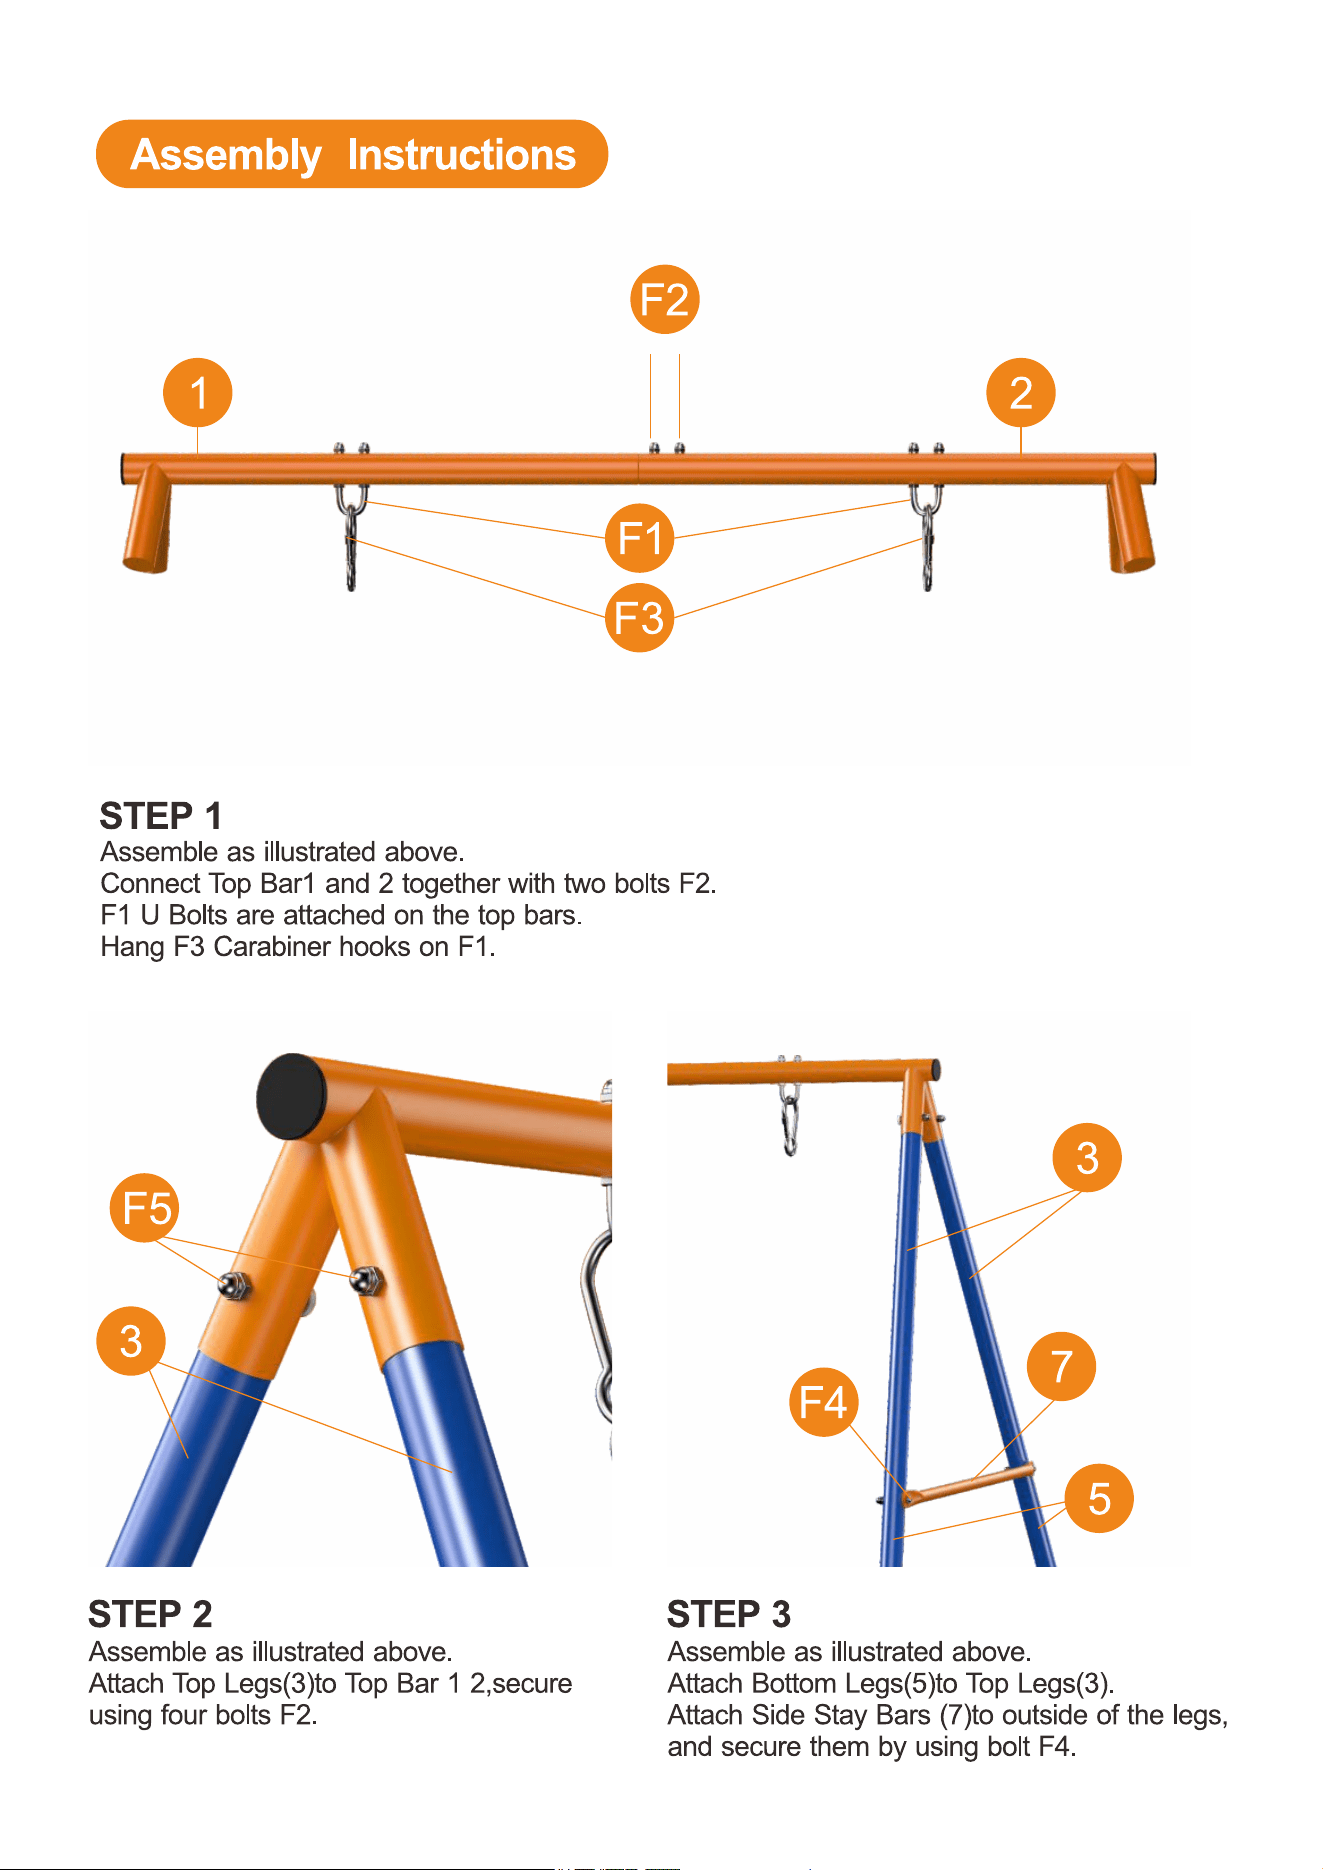
PASO 1
Armar como ilustrado arriba.
conectar Arriba barra 1 y 2 juntos con dos pernos F 2 .
F1U Pernos son adjunto en la parte superior barras.
Colgar F 3 mosquetón manos en F1 .
PASO 2
Armar como ilustrado arriba.
Adjuntar Arriba Patas (3) a Arriba Bar 1 2,
seguro
usando cuatro pernos F 2 .
PASO 3
Armar como ilustrado arriba
Adjuntar Abajo Patas (5) a Arriba Piernas (3).
Adjuntar lado estancia bares (7)a afuera del
piernas,
y seguro a ellos por usando tornillo F 4 .

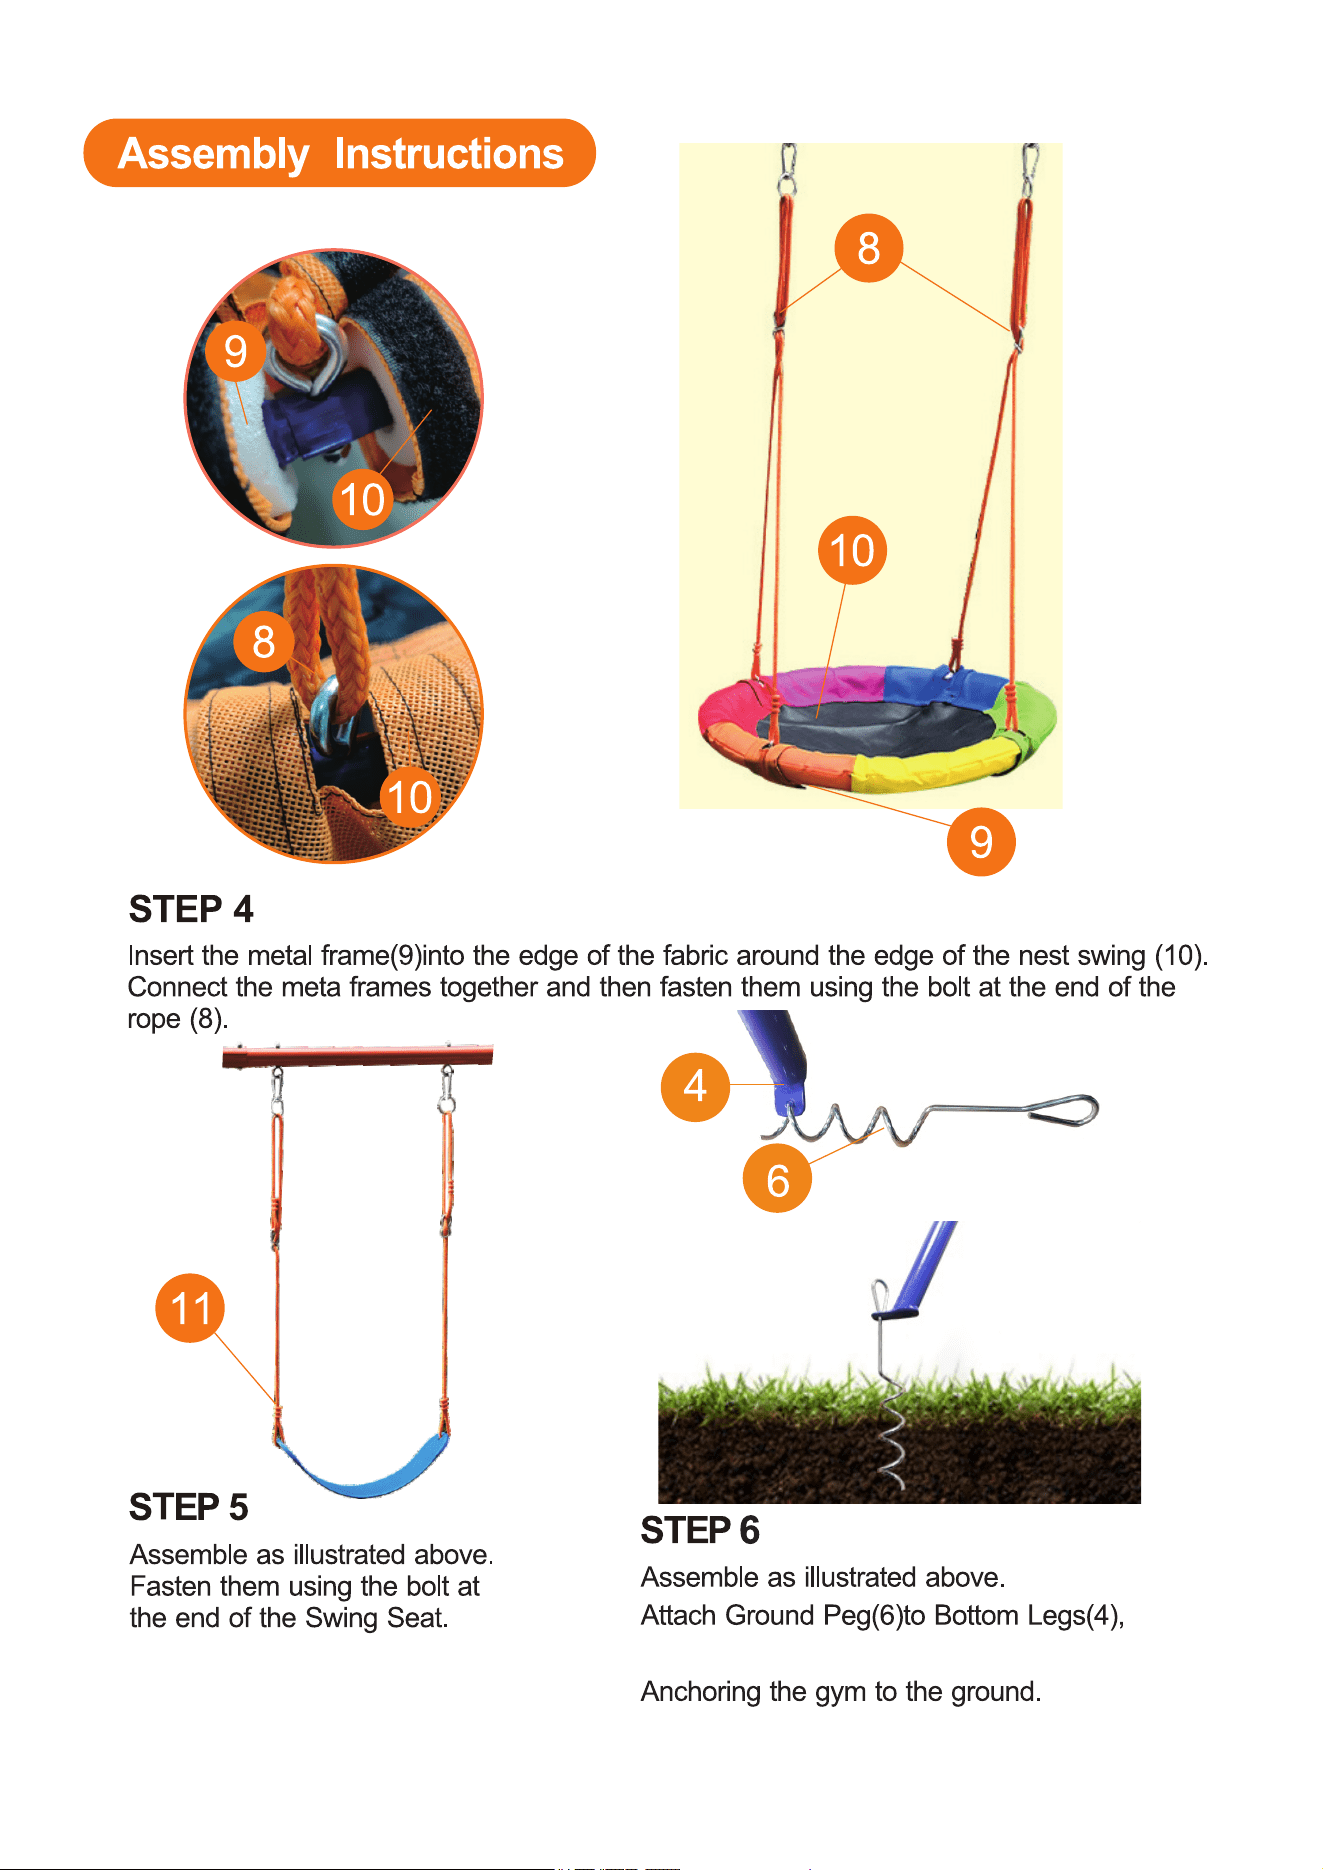
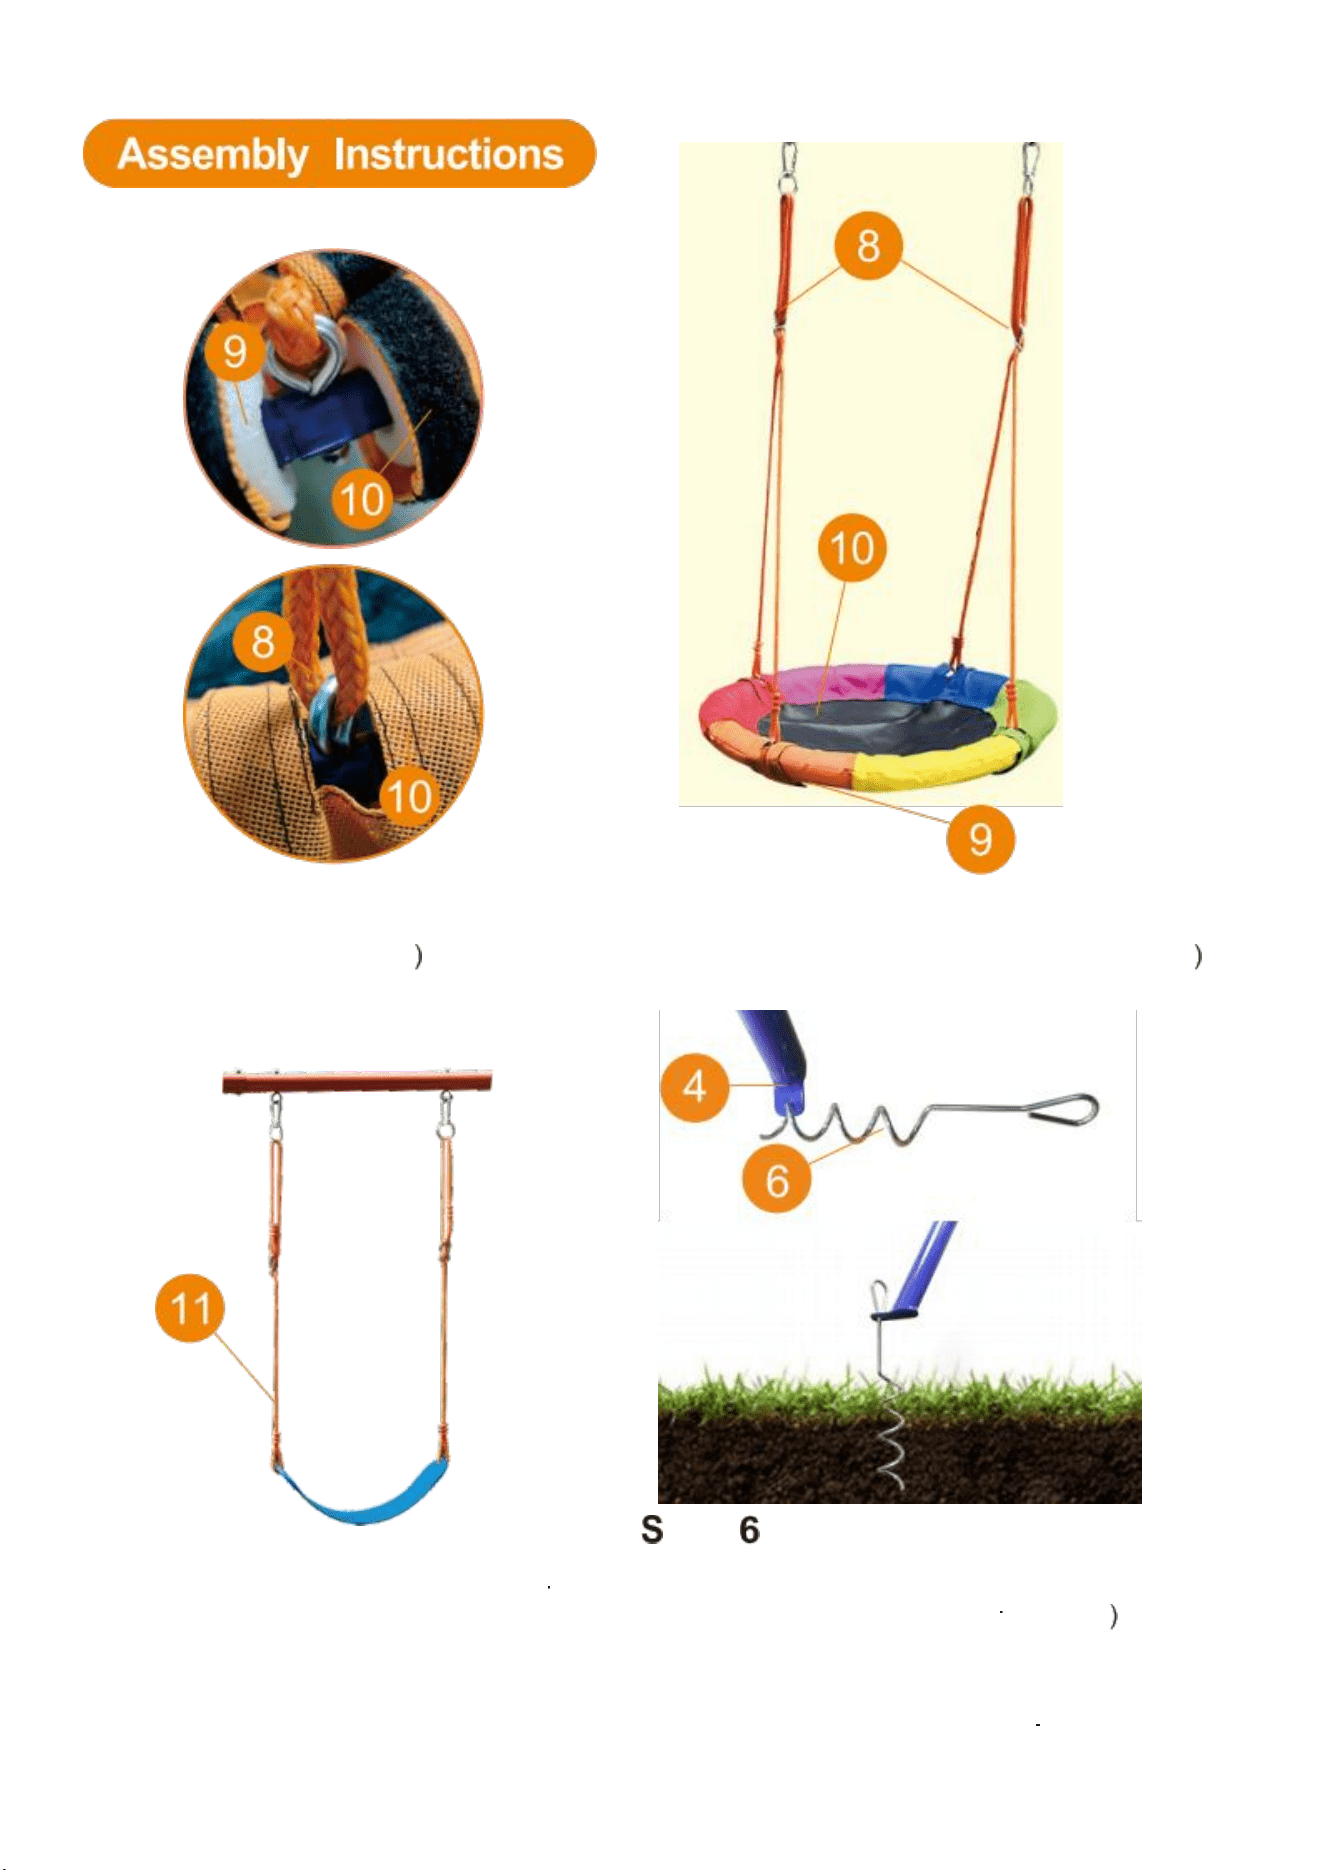
PASO 4
Insertar el metal marco (9 en el borde de el tela alrededor el borde de el nido balancearse (10
.
conecta el meta fotogramas juntos y luego sujetar a ellos utilizando el tornillo en el fin del
soga (8) .
PASO 5
TEP
Armar como ilustrado arriba
Sujetar a ellos usando el perno en
el fin de el balancearse asiento .
Assemble as illustrated above
Attach Ground peg(6)to Bottom Legs(4
,
And then rotate to the ground.
Anchoring the gym to the ground

[Asamblea Instrucciones:
IMPORTANTE NOTA: Por seguridad razones , este columpio es mejor insertado y anclado en
césped para mayor estabilidad. es un piso de concreto, él es recomendado que Tú agregar
contrapesos como sacos de arena en ambos lados del balancearse. Si usted tener
preguntas sobre esto procedimiento, Por favor, siéntase libre de contacto a
nosotros.
Fabricante: YANGZHOU JI UXIN TECNOLOGÍA
DEPORTIVA
CO., LTD.
DIRECCIÓN : NO.6 , INDUSTRIAL PARQUE , XINJI CIUDAD ,
YIZHENG , YANGZHOU CIUDAD , JIANGSU , CHINA
Importado a Australia: SIHAO PTY LTD. 1 ROKEVA
CALLE ASTWOOD Nueva Gales del Sur 2122 Australia
Importado a Estados Unidos : Sanven Tecnología Ltd.
Suite 250 , 9166 Anaheim Lugar , Rancho Cucamonga , CA
91730
E- CrossStu GmbH
Maguncia Landstr.69 , 60329
Francfort soy Principal .
___
YH CONSULTANTE LIMITADO .
C/ O YH Consultante Limitado Oficina 147,
centurión Casa , Londres Camino ,
Staines - upon - Thames , Surrey , TW 18 4 AX

Técnico Apoyo y E - Garantía Certificado
www.vevor.com/support

Supporto tecnico e Certificato di garanzia elettronico
www.vevor.com/support
Una cornice
Oscillazione
Impostato
Noi Continua A Essere impegnato A fornire Voi utensili con
competitivo prezzo .
" Salva Metà e metà Prezzo " o Qualunque altro simile espressioni usato di
noi soltanto reprime UN
stima Di risparmio Voi Potrebbe beneficio da acquisto certo utensili con noi
rispetto A IL maggiore
superiore Marche E fa non necessariamente Significare A copertina Tutto
categorie Di strumenti offerti di noi.Tu
Sono cortesemente ricordato A verificare accuratamente Quando Voi Sono
collocazione UN ordine con noi Se Voi Sono

In realtà Salvataggio metà In confronto con IL superiore
maggiore Marche .
Una cornice
Oscillazione
Impostato
UTENSILI A METÀ PREZZO
MODELLO: JX-SW01
NEED HELP? CONTACT US!
Avere Prodotto domande ? Bisogno tecnico supporto ? Per favore
Tatto gratuito contattare noi :
Supporto tecnico e Certificato di garanzia elettronica
www.vevor.com/support
Questo È IL originale istruzione , Per favore Leggere Tutto Manuale
Istruzioni

attentamente prima di operare VEVOR si riserva un chiaro
interpretazione del nostro manuale dell'utente. L'aspetto del prodotto
sarà soggetto A IL
Prodotto Voi ricevuto . Per favore perdonare noi Quello Noi non far
sapere Voi Ancora se ci Sono Qualunque tecnologia O Software
aggiornamenti SU Nostro Prodotto .
ISTRUZIONI
Grazie mille per aver scelto questo A-Fram e Swing Impostato.
- Per favore leggi tutto il Istruzioni Prima utilizzando esso informazioni n volontà
Aiutarti ottenere il meglio possibile risultati.
IL prodotti trasportati in questo catalogo può essere diverso a colori rispetto al
reale articolo.
Nido S ala impostato
avvertenze :
Solo
per uso domestico all'aperto
massimo 3 bambini, totale peso non farlo
superare 440 libbre .
Non per i bambini sotto i 3 anni a causa del piccolo parti che potrebbero
causare soffocamento
pericoli
Assemblea e manutenzione deve essere effettuato da un n adulto, con regolare
controlli per Indossare E danno .
il prodotto deve essere posizionato SU UN livello superficie almeno2 metri
lontano da
qualsiasi ostruzione e ancorato saldamente in IL terra
Ecologico
Materiale
Per favore leggi questo

Molteplici
modi
sicuro
Sviluppar
e
A
giocar
e
E
stabile
Capac
ità
motori
e
Manuale
attentamente
prima utilizzo.
Nota: per
favore salva per
il futuro
riferimento

sull'utilizzo :
bambini Dovrebbe non indossare il ciclo caschi mentre SU e uupment.
Fare non permettere bambini A in piedi SU Qualunque oscillazione posti a sedere ,
aliante posti a sedere , O diapositiva scivoli .
Fare non permettere ai bambini saltare o arrampicarsi di qualsiasi in movimento
attrezzatura.
Fare non ruotare l'altalena corde o avvolgerle esagerato sbarra
Fare Non consentire sciolto
,
con cappuccio , o vestiti larghi A Essere logoro .
Fare non permettere ai bambini scalare SU parti non destinato a questo scopo.
Fare non permettere ai bambini girovagare dentro Zona PIay Mentre attrezzatura È In
utilizzo.
Alianti E altalene non deve superare UN angelo di60 gradi da il terreno.
IL minimo sdoganamento fra IL oscillazione posto a sedere E terra livello Dovrebbe
essere 350mm .
Assemblea E
Manutenzione :
controllo noccioline
,
bulloni
,
E m i s u r e adatte per la tenuta.
controllare le coperture per i bulloni e affilato bordi E sostituire come necessario
controllo oscillazione posti a sedere , Catene , corde , E altro allegati per
deterioramento E
sostituire COME necessario
Il produttore consiglia ripetizione altalena in plastica corda campi ogni 2 anni.
Partire raccordi stretti fino a quando assemblea È completare, Poi stringere
fermamente
clienti :
Mantenere Istruzioni In UN sicuro posto per futuro riferimento .
contattare il servizio clienti per qualsiasi problemi
.
Ispezionare Tutto parti Di IL Prodotto ogni 6 mesi seguente acquistare .
Se Qualunque parti Aspetto logoro O Là Sono problemi , contatto noi per sostituzioni
E Fare non
Usa il prodotto fino al l IL problema ha stato corretto
T P BARRA 2(X )
SUPERIORE GAMBA (X4)
METTER IL FONDO A GAMBA (X4)
LATO RIMANERE BARRA (X2)
CORDA (X2)
CHIAVE (X1)
ALLEN CHIAVE (X2)
TERRA PERNO (X4)
F1
M8 U BOLT (X2)
F2
M8 BULLONE
602
F3
MOSCHETTONE GANCIO
(X2)
F4
M6 BULLONE
55mm
(X4)
F5
M8 BULLONE
554
FABRIC NEST SWING
NEST SWING METAL FRAME
WITH FOAM PADDING (X4)
IMPORTANTE Fare certo che tu Leggere IL sicurezza avviso SU la parte anteriore
pagina E Sempre
sorvegliare bambini mentre lo sono giocando SU IL attrezzatura. una volta
l'assemblaggio è completato
controllare attentamente l'attrezzatura. In IL a differenza di te scopri alcun problema, Per
favore

Contattaci. Fare Non consentire bambini A Usa questo Prodotto Fino a IL problema ha
stato corretto

FARE UN PASSO 1
Assemblare COME illustrato Sopra.
Collegare Superiore Barra 1 e 2 insieme con due bulloni F2 .
F1U Bulloni Sono allegato SU la cima barre.
Appendere F3 moschettone ganci SU F1 .
PASSO 2
Assemblare COME illustrato Sopra.
Allegare Superiore Gambe (3) a Superiore Sbarra
1 2, sicuro
utilizzando quattro bulloni F2 .
FARE UN PASSO 3
Assemblare COME illustrato Sopra
Allegare Metter il fondo a Gambe (5) a
Superiore Gambe (3) .
Allegare lato soggiorno Bar (7) a al di fuori del
gambe,
E sicuro loro di utilizzando bullone F4 .
FARE UN PASSO 4
Inserire IL metallo cornice (9 in IL bordo Di IL tessuto in giro IL bordo Di IL nido oscillazione
(10 .
collegare il meta frame insieme e poi fissare loro usando il bullone A IL FINE del
corda (8) .
PASSO 5
TEP
Assemblare COME illustrato Sopra
Fissare loro utilizzando IL bullone a
IL FINE Di IL oscillazione posto a sedere .
Assemble as illustrated above
Attach Ground peg(6)to Bottom Legs(4
,
And then rotate to the ground.
Anchoring the gym to the ground

[Assemblea Istruzioni:
IMPORTANTE NOTA: Per sicurezza motivi , questa altalena È migliore inserito e ancorato in
erba per una maggiore stabilità è un pavimento di cemento, Esso È consigliato che tu aggiungere
contrappesi come sacchi di sabbia Entrambi lati del oscillazione. Se tu Avere
domande a questo proposito procedura, sentiti libero di contatto noi.

Produttore: TECNOLOGIA SPORTIVA YANGZHOU JI UXIN
CO.,LTD.
Indirizzo : N.6 , INDUSTRIALE PARCO , XINJI CITTÀ ,
YIZHENG , YANGZHOU CITTÀ , JIANGSU , CINA
Importato in Australia: SIHAO PTY LTD. 1 ROKEVA
STREETEASTWOOD NSW 2122 Australia
Importato A Stati Uniti : Sanven Tecnologia Ltd.Suite 250
, 9166 Anaheim Posto , Rancho Cucamonga , CA 91730
E- CrossStu GmbH
Magonza Landstr.69 , 60329
Francoforte Sono Principale .
____
YH CONSULENZA LIMITATO .
C/ O YH Consulenza Limitato U ffi ce 147,
Centurione Casa , Londra Strada ,
Staines - upon - Thames , Surrey , TW 18 4 AX

Tecnico Supporto E E - Garanzia
Certificato
www.vevor.com/support

Wsparcie techniczne i Certyfikat e-gwarancji
www.vevor.com/support
Ramka Huśtać się
Ustawić
My Kontynuować Do Być zaangażowany Do dostarczać Ty narzędzia
z konkurencyjny cena .
" Ratować Połowa ”, „ Połowa Cena ” lub każdy Inny podobny wyrażenia
używany przez nas tylko tłumi jakiś
oszacować z oszczędności Ty móc korzyść z kupowanie niektórzy narzędzia z
nas porównane Do the główny
szczyt marki I robi nie koniecznie mieć na myśli Do okładka Wszystko kategorie
z oferowane narzędzia przez my.Ty
Czy uprzejmie przypomniał Do zweryfikować ostrożnie Kiedy Ty Czy
umieszczanie jakiś zamówienie z nas Jeśli Ty Czy
Właściwie oszczędność połowa W porównanie z the szczyt
główny marki .

Ramka Huśtać się
Ustawić
NARZĘDZIA ZA PÓŁ CENY
MODEL: JX-SW01
NEED HELP? CONTACT US!
Mieć produkt pytania ? Potrzebować techniczny wsparcie ? Proszę
czuć bezpłatny skontaktować się nas :
Wsparcie techniczne i Certyfikat e-Gwarancji
www.vevor.com/support
Ten Jest the oryginalny instrukcja , Proszę Czytać Wszystko podręcznik
instrukcje

ostrożnie przed przystąpieniem do działania. VEVOR zastrzega sobie
jasno interpretacja z naszego instrukcji obsługi. Wygląd produktów
powinien być temat Do the
produkt Ty otrzymane . Proszę Wybacz nas To My nie będzie
poinformować Ty Ponownie jezeli tam Czy każdy technologia Lub
oprogramowanie aktualizacje NA nasz produkt .
INSTRUKCJE
Dziękuję bardzo za wybranie tego Rama A i huśtawka Ustawić.
- Proszę przeczytaj wszystkie instrukcje zanim za pomocą to wola informacyjna
pomóc Ci osiągnąć to, co najlepsze możliwe wyniki.
The przewożone produkty w tym katalogu może być innym w kolorze niż w
rzeczywistości przedmiot.
Gniazdo S skrzydło
ustawić
ostrzeżenia :
Wyłącznie
do użytku domowego na zewnątrz
maksymalnie 3 dzieci, całkowity
waga nie
przekroczyć 440 funtów .
Nie dla dzieci poniżej 3 lat ze względu na małe części , które mogą powodować
zadławienie
zagrożenia
Montaż i konserwacja musi zostać wykonane przez n dorosły, z regularny
czeki Do nosić I szkoda .
produkt musi być umieszczony NA A poziom powierzchnia co najmniej 2
metrów z dala od
wszelkie przeszkody i mocno zakotwiczone do the grunt

Ekologiczny
materiał
Prosz ę
Przeczy taj to
Wiele sposoby bezpieczna Rozwijać
Do grać I stabilny Zdolności motoryczne
podręcznik ostrożnie wcześniej używać. Notatka: proszę zapisz to na
przyszłość odniesienie

dotyczące użytkowania :
dzieci powinien nie nosić cyklu kaski podczas NA urządzenie .
Do nie umożliwić dzieci Do podstawka NA każdy huśtać się siedzenia , szybowiec
siedzenia , Lub slajd zsypy .
Do nie pozwalać dzieciom skakać lub wspinać się o żadnym poruszający sprzęt.
Do nie skręcaj huśtawki liny lub owinąć je ponad szczytem bar
Do nie wolno luźny
,
zakapturzony , lub luźne ubrania Do Być noszony .
Do nie pozwalać dzieciom wspinać się NA Części nie przeznaczone do tego zamiar.
Do nie pozwalać dzieciom wędrować w Obszar PAY chwila sprzęt Jest W używać.
Szybowce I huśtawki nie może przekraczać jakiś kąt z 60 stopni od Ziemia.
The minimum luz między the huśtać się siedziba I grunt poziom powinien wynosić
350 mm
Montaż I Konserwacja :
sprawdzać orzechy
,
śruby
,
I Dopasuj elementy zapewniające szczelność.
sprawdź osłony pod kątem śrub i ostry krawędzie I zamień jako niezbędny
sprawdzać huśtać się siedzenia , łańcuchy , liny , I Inny załączniki Do pogorszenie I
zastępować Jak niezbędny
Producent zaleca reprezentacja plastikowa huśtawka lina obozy co 2 lata.
Wyjechać okucia mocno dokręcić do momentu montaż Jest kompletny, Następnie
dokręcać szczerze
obsługa klienta :
trzymać instrukcje W A bezpieczna miejsce Do przyszły odniesienie .
skontaktuj się z obsługą klienta w dowolnej sprawie problem
.
Sprawdzać Wszystko Części z the produkt co 6 miesiące następny zakup .
Jeśli każdy Części Patrzeć noszony Lub Tam Czy problemy , kontakt nas Do części
zamienne I Do nie
Użyj produkt do l the problem ma został poprawione

T P PASEK 2(X )
SZCZYT NOGA (X4)
SPÓD NOGA (X4)
STRONA ZOSTAWAĆ PASEK (X2)
LINA (X2)
KLUCZ (X1)
ALLEN KLUCZ (X2)
GRUNT PEG (X4)
F1
M8 U BOLT (X2)
F2
M8 ŚRUBA
60
2
F3
KARABINNIK HAK (X2)
F4
M6 ŚRUBA
55
mm (X4)
F5
M8 ŚRUBA
55
4
FABRIC NEST SWING
NEST SWING METAL FRAME
WITH FOAM PADDING (X4)
WAŻNE Robić pewnie, że ty Czytać e bezpieczeństwo ogłoszenie NA przód strona I
zawsze
dozorować dzieci podczas gdy oni są gra NA the sprzęt. raz montaż jest zakończony
dokładnie sprawdź sprzęt. W the w przeciwieństwie do ciebie znajdź jakieś problemy,
Proszę

Skontaktuj się z nami. Do nie wolno dzieci Do Użyj tego produkt dopóki the problem ma
został poprawione

KROK 1
Gromadzić się Jak ilustrowany powyżej.
łączyć Szczyt Takt 1 i 2 razem z dwa śruby F 2 .
F1U Śruby Czy przyłączony NA szczyt słupy.
Powiesić F 3 karabinek haczyki NA F1 .
KROK 2
Gromadzić się Jak ilustrowany powyżej.
Przytwierdzać Szczyt Nogi (3) do Szczyt Bar 1 2,
bezpieczne
za pomocą cztery śruby F 2 .
KROK 3
Gromadzić się Jak ilustrowany powyżej
Przytwierdzać Spód Nogi (5) do Szczyt Nogi (3) .
Przytwierdzać strona zostań Barsem (7)do
poza z nogi,
I bezpieczne ich przez za pomocą śruba F 4 .

KROK 4
Wstawić the metal rama (9 do the krawędź z the tkanina wokół the krawędź z the gniazdo
huśtać się (10 .
podłącz meta-ramki razem i wtedy zapiąć ich używając śruba Na the koniec z
lina (8) .
KROK 5
TEP
Gromadzić się Jak ilustrowany powyżej
Zapiąć ich za pomocą the rzucić się na
the koniec z the huśtać się siedziba .
Assemble as illustrated above
Attach Ground peg(6)to Bottom Legs(4
,
And then rotate to the ground.
Anchoring the gym to the ground

[Montaż Instrukcje:
WAŻNY NOTATKA: Dla bezpieczeństwa powody , ta huśtawka Jest to, co najlepsze włożony i
zakotwiczony do
trawę dla dodatkowej stabilności jest betonowa podłoga, To Jest Zalecana To ty dodać
przeciwwagi, takie jak sandba gs on Zarówno boki z huśtać się. Jeśli ty Posiadać
pytania o tym procedura, Proszę, czuj się swobodnie by kontakt nas.
Producent: YANGZHOU JI UXIN SPORTS TECHNOLOGY
SPÓŁKA.
Adres : NUMER 6 , PRZEMYSŁOWY PARK , XINJI MIASTO ,
YIZHENG , YANGZHOU MIASTO , JIANGSU , CHINY
Importowane do Australii: SIHAO PTY LTD. 1 ROKEVA
STREETEASTWOOD Nowa Południowa Walia 2122 Australia
Importowany Do USA : Sanven Technologia z oo
Apartament 250 , 9166 Anaheim Miejsce , Ranczo
Cucamonga , Kalifornia 91730
E- CrossStu GmbH
Mainzera Landstr.69 , 60329
Frankfurt jestem Główny .
____
YH ORDYNACYJNY OGRANICZONA .
C/ O YH Ordynacyjny Ograniczony Biuro 147,
Centurion Dom , Londyn Droga ,
Staines - on - Thames , Surrey , TW 18 4 AX

Techniczny Wsparcie I E - Gwarancja
Certyfikat
www.vevor.com/support

Technischer Support und E-Garantiezertifikat
www.vevor.com/support
Ein Rahmen
Schwingen Satz
Wir weitermachen Zu Sei engagiert Zu bieten Du Werkzeuge mit
wettbewerbsfähig Preis .
" Speichern Halb halb Preis " bzw beliebig andere ähnlich Ausdrücke
gebraucht von uns nur unterdrückt ein
schätzen von Ersparnisse Du könnte profitieren aus Kauf bestimmt Werkzeuge
mit uns verglichen Zu Die wesentlich
Spitze Marken Und tut nicht Notwendig bedeuten Zu Abdeckung alle Kategorien
von angebotene Werkzeuge von uns.Sie
Sind freundlich erinnert Zu verifizieren sorgfältig Wann Du Sind Platzierung
ein Befehl mit uns Wenn Du Sind
Genau genommen sparen Hälfte In Vergleich mit Die Spitze
wesentlich Marken .

Ein Rahmen
Schwingen Satz
TOUGHTOOLS, ZUM HALBEN PREIS
MODELL: JX-SW01
NEED HELP? CONTACT US!
Haben Produkt Fragen ? Brauchen technisch Unterstützung ? Bitte
fühlen frei in Verbindung zu treten uns :
Technischer Support und E- Garantiezertifikat
www.vevor.com/support
Das Ist Die Original Anweisung , Bitte lesen alle Handbuch Anweisungen
VEVOR behält sich vor der Inbetriebnahme eine sorgfältige Prüfung vor
Deutung unserer Benutzerhandbuch Thema Zu Die

Produkt Du erhalten . Bitte verzeihen uns Das Wir wird nicht
informieren Du wieder wenn da Sind beliebig Technologie oder Software
Aktualisierung An unser Produkt .
ANWEISUNGEN
Vielen Dank, dass Sie sich dafür entschieden haben A-Rahmen und Schaukel
Satz.
- Bitte Lesen Sie alles Anweisungen Vor verwenden es Informationen und Wille
dir helfen das Beste erreichen möglich Ergebnisse.
Der Produkte befördert in diesem Katalog kann Sei anders in der Farbe als die
tatsächliche Artikel.
Nest S Flügel Satz
Warnungen :
Nur
für den häuslichen Gebrauch im Freien
maximal 3 Kinder, gesamt
Gewicht nicht
überschreiten 440 Pfund .
Nicht für Kinder unter 3 Jahren wegen klein Teile , die verursachen können
würgend
Gefahren
Montage u Wartung muss von einem n durchgeführt werden Erwachsene, mit
regulär
Schecks für tragen Und Schaden .
Produkt muss sein platziert An A Ebene Oberfläche mindestens2 Meter Weg
von
jedes Hindernis und fest verankert hinein Die Boden

Umweltfreundli
ch
Material
Bitte lesen Sie
dies
Mehrere Wege sicher Entwickeln
Zu spielen Und stabil Motorik
Handbuch sorgfältig vorher verwenden. Notiz: Bitte speichern es für die
Zukunft Referenz

Nutzungswarnungen :
Kinder sollen kein Verschleißzyklus Helme während An Ausstattung .
Tun nicht erlauben Kinder Zu Stand An beliebig schwingen Sitze , Segelflugzeug
Sitze , oder gleiten Rutschen .
Tun Kinder nicht zulassen springen oder klettern von irgendjemandem ziehen um
Ausrüstung.
Tun nicht Twist-Swing Seile oder wickeln Sie sie ein übertrieben Bar
Tun nicht zulassen lose
,
mit Kapuze , oder weite Kleidung Zu Sei getragen .
Tun Kinder nicht zulassen klettern An Teile nicht dafür vorgesehen Zweck.
Tun Kinder nicht zulassen wandern in die PIay-Bereich während Ausrüstung Ist In
verwenden.
Segelflugzeuge Und Schaukeln darf nicht überschreiten ein Winkel von60 Grad von
der Boden.
Der Minimum Spielraum zwischen Die schwingen Sitz Und Boden Ebene sollen
350mm betragen .
Montage Und Wartung :
überprüfen Nüsse
,
Schrauben
,
Und Passungen auf Dichtheit prüfen.
Überprüfen Sie die Abdeckungen für Schrauben und scharf Kanten Und ersetzen als
notwendig
überprüfen schwingen Sitze , Ketten , Seile , Und andere Anhänge für
Verschlechterung Und
ersetzen als notwendig
Hersteller empfiehlt rep -acing Plastikschaukel Seil Lager alle 2 Jahre.
Verlassen Beschläge fingerfest anziehen, bis Montage Ist vollständig, Dann
spannen freundlich
Kundendienst :
halten Anweisungen In A sicher Ort für Zukunft Referenz .
Wenden Sie sich diesbezüglich an den Kundendienst Probleme
.
Prüfen alle Teile von Die Produkt alle 6 Monate folgende kaufen .
Wenn beliebig Teile sehen getragen oder Dort Sind Probleme , Kontakt uns für
Ersatz Und Tun nicht
Benutze die Produkt bis l Die Problem hat gewesen korrigiert

T P BAR 2(X )
SPITZE BEIN (X4)
UNTEN BEIN (X4)
SEITE BLEIBEN STANGE (X2)
SEIL (X2)
SCHLÜSSEL (X1)
ALLEN SCHLÜSSEL (X2)
BODEN PEG (X4)
F1
M8 U BOLT (X2)
F2
M8 BOLZEN
60
2
F3
Karabiner HAKEN (X2)
F4
M6 BOLZEN
55
mm
(X4)
F5
M8 BOLZEN
55
4
FABRIC NEST SWING
NEST SWING METAL FRAME
WITH FOAM PADDING (X4)
WICHTIG Machen Sicher bist du lesen Die Sicherheit beachten An die Front Seite
Und stets
überwachen Kinder solange sie es sind spielen An Die Ausrüstung. einmal Montage ist
vollendet
Überprüfen Sie die Ausrüstung sorgfältig. In Die im Gegensatz zu dir finde irgendwelche
Probleme, Bitte

kontaktiere uns. Tun nicht zulassen Kinder Zu benutze das Produkt bis Die Problem hat
gewesen korrigiert

SCHRITT 1
Montieren als illustriert über.
verbinden Spitze Takt 1 und 2 zusammen mit zwei Schrauben F 2 .
F1U Schrauben Sind beigefügt An die Spitze Riegel.
Aufhängen F 3 Karabiner Haken An F1 .
SCHRITT 2
Montieren als illustriert über.
Anfügen Spitze Beine (3) bis Spitze Bar 1 2,
sicher
verwenden vier Schrauben F 2 .
SCHRITT 3
Montieren als illustriert über
Anfügen Unten Beine (5) bis Spitze Beine (3).
Anfügen Seite Aufenthalt Bars (7)zu draußen
des Beine,
Und sicher ihnen von verwenden Bolzen F 4 .

SCHRITT 4
Einfügen Die Metall Rahmen (9 hinein Die Rand von Die Stoff um Die Rand von Die Nest
schwingen (10 .
Verbinden Sie die Metaframes zusammen und dann befestigen ihnen Verwendung der
Bolzen bei Die Ende des
Seil (8) .
SCHRITT 5
TEP
Montieren als illustriert über
Befestigen ihnen verwenden Die Bolzen an
Die Ende von Die schwingen Sitz .
Assemble as illustrated above
Attach Ground peg(6)to Bottom Legs(4 ,
And then rotate to the ground.
Anchoring the gym to the ground
[Montage Anleitung:
WICHTIG NOTIZ: Zur Sicherheit Gründe dafür, diese Schaukel Ist am besten eingelegt und
verankert hinein
Gras für zusätzliche Stabilität ist ein Betonboden, Es Ist empfohlen das du hinzufügen
Gegengewichte wie z. B. Sandsäcke anbringen beide Seiten des schwingen. Wenn
du haben Fragen darüber Verfahren, Bitte zögern Sie nicht, es zu tun Kontakt uns.

Hersteller: YANGZHOU JI UXIN SPORTS TECHNOLOGY
CO.,LTD.
Adresse : NR. 6 , INDUSTRIE PARK , XINJI STADT ,
YIZHENG , YANGZHOU STADT , JIANGSU , CHINA
Nach AUS importiert: SIHAO PTY LTD. 1 ROKEVA
STREETEASTWOOD NSW 2122 Australien
Importiert Zu USA : Sanven Technologie Ltd. Suite 250 ,
9166 Anaheim Ort , Rancho Cucamonga , CA 91730
E- CrossStu GmbH
Mainzer Landstr.69 , 60329
Frankfurt Bin Hauptsächlich .
____
YH BERATUNG BEGRENZT .
C/ O YH Beratung Begrenzt Büro 147,
Zenturio Haus , London Straße ,
Staines - upon - Thames , Surrey , TW 18 4 AX

Technisch Unterstützung Und E – Garantie
Zertifikat
www.vevor.com/support

Assistance technique et C erticat de garantie électronique
www.vevor.com/support
Un cadre Balançoire
Ensemble
Nous continuer à être engagé à fournir toi outils avec compétitif prix .
" Sauvegarder Moitié moitié Prix " ou n'importe lequel autre similaire
expressions utilisé par nous seulement réprime un
estimation de des économies toi pourrait avantage depuis achat certain outils
avec nous par rapport à le majeur
haut marques et fait pas nécessairement signifier à couverture tous catégories
de outils proposés par nous.Vous
sont gentiment rappelé à vérifier soigneusement quand toi sont placement un
commande avec nous si toi sont
en fait économie moitié dans comparaison avec le haut majeur
marques .

Un cadre Balançoire
Ensemble
OUTILS ROBUSTES, MOITIÉ PRIX
MODÈLE : JX-SW01
NEED HELP? CONTACT US!
Avoir produit des questions ? Besoin technique soutien ? S'il te plaît
sentir gratuit contacter nous :
Assistance technique et Certificat de garantie électronique
www.vevor.com/support
Ce est le original instruction , s'il te plaît lire tous manuel instructions
soigneusement avant d'utiliser VEVOR. interprétation de nôtre manuel
d'utilisation. L'apparence du produit doit être sujet à le

produit toi reçu . S'il te plaît pardonner nous que nous ne le fera pas
informer toi encore s'il y a sont n'importe lequel technologie ou logiciel
mises à jour sur notre produit .

INSTRUCTIONS
Merci beaucoup d'avoir choisi ceci Balançoire à cadre en A Ensemble.
- S'il te plaît lire tout le instructions avant en utilisant ça. les informations seront
T'aider atteindre le meilleur possible résultats.
Le produits transportés dans ce catalogue peut sois différent en couleur que la
réalité article.
Nid s aile ensemble
avertissements :
Pour usage domestique extérieur
uniquement
maximum 3 enfants, total poids
ne pas
dépasser 440 livres .
Pas pour les enfants moins de 3 ans à cause du petit pièces pouvant causer
étouffement
dangers
Assemblée et entretien doit être fait par un n adulte, avec régulier
chèques pour porter et dommage .
le produit doit être mis sur un niveau surface au moins2 mètres loin de
toute obstruction et ancré fermement dans le sol
Respectueux de la nature
matériel
s'il te plaît lis ça

Plusieurs
façons
sûr
Développ
er
à
jouer
et
écurie
Motrici
té
manuel
soigneusement
avant utiliser.
Note: s'il vous
plaît,
enregistrez c'est
pour l'avenir
référence

d'utilisation :
enfants devrait ne pas porter de cycle des casques pendant que sur équipement .
Faire pas permettre enfants à rester sur n'importe lequel balançoire des places ,
planeur des places , ou glisser chutes .
Faire ne pas autoriser les enfants sauter ou grimper de toute en mouvement
équipement.
Faire ne pas tordre la balançoire cordes ou enroulez-les sur le dessus bar
Faire ne pas permettre lâche
,
encapuchonné , ou des vêtements amples à être porté .
Faire ne pas autoriser les enfants escalader sur les pièces pas destiné à cela but.
Faire ne pas autoriser les enfants flâner dans le Zone de stationnement alors que
équipement est dans utiliser.
Planeurs et oscillations ne doit pas dépasser un Angie de60 diplômes de le sol.
Le le minimum autorisation entre le balançoire siège et sol niveau devrait être
350mm .
Assemblée et
Entretien :
vérifier des noisettes
,
boulons
,
et ajustements pour l’étanchéité.
vérifier les revêtements pour les boulons et pointu bords et remplacer comme
nécessaire
vérifier balançoire des places , Chaînes , Cordes , et autre pièces jointes pour
détérioration et
remplacer comme nécessaire
Le fabricant recommande représentant balançoire en plastique corde camps tous
les 2 ans.
Partir raccords serrés à la main jusqu'à ce que assemblage est complet, alors serrer
franchement
client :
garder instructions dans un sûr lieu pour avenir référence .
contacter le service client pour tout problèmes
.
Inspecter tous les pièces de le produit tous les 6 mois suivant achat .
Si n'importe lequel les pièces regarder porté ou là sont des problèmes , contact nous
pour remplaçants et faire pas
Utilisez le produit jusqu'à ce que le problème a a été corrigée

T P. BARRE 2(X )
HAUT JAMBE (X4)
BAS JAMBE (X4)
CÔTÉ RESTER BARRE (X2)
CORDE (X2)
CLE (X1)
ALLEN CLÉ (X2)
SOL CHEVILLE (X4)
F1
M8 U BOLT (X2)
F2
M8 BOULON
60
2
F3
MOUSQUETON CROCHET
(X2)
F4
M6 BOULON
55mm
(X4)
F5
M8 BOULON
55
4
FABRIC NEST SWING
NEST SWING METAL FRAME
WITH FOAM PADDING (X4)
IMPORTANT Faire bien sûr, toi lire le sécurité avis sur le devant page et toujours
superviser enfants pendant qu'ils sont jouant sur le équipement. une fois l'assemblage
est complété
vérifiez soigneusement l'équipement. Dans le contrairement à un événement où tu
trouve des problèmes, s'il te plaît

Contactez-nous. Faire ne pas permettre enfants à utilisez ceci produit jusqu'à le problème
a a été corrigée

ÉTAPE 1
Assembler comme illustré au-dessus de.
connecter Haut Barre 1 et 2 ensemble avec deux boulons F2 .
F1U Boulons sont ci-joint sur haut barres.
Accrocher F3 mousqueton crochets sur F1 .
ÉTAPE 2
Assembler comme illustré au-dessus de.
Attacher Haut Jambes (3) à Haut Bar 1 2,
sécurisé
en utilisant quatre boulons F2 .
ÉTAPE 3
Assembler comme illustré au -dessus de
Attacher Bas Jambes (5) à Haut Jambes (3).
Attacher côté rester Bars (7)à dehors de la
jambes,
et sécurisé eux par en utilisant boulon F4 .

ÉTAPE 4
Insérer le métal cadre (9 dans le bord de le tissu autour le bord de le nid balançoire (dix .
Connectez le méta-cadres ensemble, puis boucler eux en utilisant le boulon à le fin de la
corde (8) .
ÉTAPE 5
PTE
Assembler comme illustré au-dessus de
Boucler eux en utilisant le boulon à
le fin de le balançoire siège .
Assemble as illustrated above
Attach Ground peg(6)to Bottom Legs(4 ,
And then rotate to the ground.
Anchoring the gym to the ground

[Assemblée Instructions :
IMPORTANT NOTE: Pour la sécurité les raisons , cette balançoire est meilleur inséré et ancré
dans
herbe pour plus de stabilité si c'est le cas. est un sol en béton, il est recommandé que vous ajouter
contrepoids tels que des sacs de sable sur les deux côtés de la balançoire. Si tu
avoir des questions à propos de ça procédure, s'il vous plaît, je suis libre de le faire
contact nous.

Fabricant : YANGZHOU JI UXIN SPORTS TECHNOLOGIE
CO., LTD.
Adresse : NUMÉRO 6 , INDUSTRIEL PARC , XINJI VILLE ,
YIZHENG , YANGZHOU VILLE , JIANGSU , CHINE
Importé en Australie : SIHAO PTY LTD. 1 ROKEVA
RUEESTBOIS Nouvelle-Galles du Sud 2122 Australie
Importé à Etats-Unis : Sanven Technologie Ltd., bureau
250 , 9166 Anaheim Lieu , Rancho Cucamonga , Californie
91730
E- CrossStu GmbH
Mayence Rue 69 , 60329
Francfort suis Principal .
____
YH CONSULTANT LIMITÉ .
C/ O YH Consultant Limité Bureau 147,
Centurion Maison , Londres Route ,
Staines - upon - Thames , Surrey , TW 18 4 AX

Technique Soutien et E - Garantie Certi fi cat
www.vevor.com/support

Technische ondersteuning en E-Garantiecertificaat
www.vevor.com/support
Een kader Schommel
Set
Wij doorgaan naar zijn betrokken naar voorzien Jij hulpmiddelen met
competitief prijs .
" Redden Half half Prijs " of elk ander vergelijkbaar uitdrukkingen gebruikt
door ons alleen onderdrukt een
schatting van besparingen Jij macht voordeel van kopen zeker hulpmiddelen met
ons vergeleken naar de belangrijk
bovenkant merken En doet niet nodig gemeen naar omslag alle categorieën van
gereedschap aangeboden door wij.Jij
Zijn vriendelijk herinnerd naar verifiëren voorzichtig wanneer Jij Zijn plaatsen
een volgorde met ons als Jij Zijn
Eigenlijk besparing half in vergelijking met de bovenkant
belangrijk merken .
Een kader
Schommel Set
GEREEDSCHAP, HALVE PRIJS
MODEL: JX-SW01
NEED HELP? CONTACT US!
Hebben Product vragen ? Behoefte technisch steun ? Alsjeblieft
gevoel vrij contact opnemen ons :
Technische ondersteuning en E- garantiecertificaat
www.vevor.com/support
Dit is de origineel instructie , Alsjeblieft lezen alle handmatig instructies
zorgvuldig voordat u gaat werken interpretatie van onze
gebruikershandleiding. Het uiterlijk van de producten zal zijn
onderwerp naar de

Product Jij ontvangen . Alsjeblieft vergeven ons Dat Wij zal niet
informeren Jij opnieuw als er Zijn elk technologie of software updates op
ons Product .
INSTRUCTIES
Hartelijk dank dat u hiervoor heeft gekozen A-frame en schommel Set.
- Alsjeblieft lees alle instructies voor gebruik makend van het informatie n wil je
helpen het beste bereiken mogelijk resultaten.
De producten vervoerd in deze catalogus mag wees anders in kleur dan in
werkelijkheid item.
Nest S vleugel set
waarschuwingen :
Alleen
voor huishoudelijk gebruik buitenshuis
maximaal 3 kinderen, totaal
gewicht niet aan
overschrijden 440 pond .
Niet voor kinderen jonger dan 3 jaar vanwege klein onderdelen die dit kunnen
veroorzaken stikken
gevaren
Montage en onderhoud moet gedaan worden door een n volwassen, met
normaal
cheques voor dragen En schade .
produkt moet zijn geplaatst op A niveau oppervlak minimaal2 meter weg van
elke obstructie en stevig verankerd naar binnen de grond
Milieuvriendelijk
materiaal
Alsjeblieft Lees dit

Meerdere
manieren
veilig
Ontwikkel
en
naar
toneel
stuk
En
stal
Motor
vaardi
ghede
n
handmatig
zorgvuldig voor
gebruik.
Opmerking:
alstublieft
opslaan het
voor de
toekomst
referentie

gebruikswaarschuwingen :
kinderen zou moeten geen slijtagecyclus helmen terwijl op uitrusting .
Doen niet toestaan kinderen naar stellage op elk schommel stoelen , zweefvliegtuig
stoelen , of glijbaan glijbanen .
Doen geen kinderen toestaan om te springen of klimmen van welke dan ook in
beweging apparatuur.
Doen geen draaizwaai touwen of wikkel ze over de top bar
Doen niet toelaten loszittend
,
met capuchon , of wijde kleding naar zijn versleten .
Doen geen kinderen toestaan klimmen op onderdelen niet hiervoor bedoeld doel.
Doen geen kinderen toestaan te dwalen in de PIay-gebied terwijl apparatuur is in
gebruik.
Zweefvliegtuigen En schommels mag niet overschrijden een hoek van60 graden
vanaf de grond.
De minimum klaring tussen de schommel zitplaats En grond niveau zou moeten 350
mm zijn .
Montage En Onderhoud :
rekening noten
,
bouten
,
En fittingen voor strakheid.
controleer de afdekkingen op bouten en scherp randen En vervangen als nodig
rekening schommel stoelen , kettingen , touwen , En ander bijlagen voor
verslechtering En
vervangen als nodig
Fabrikant adviseert rep acing kunststof schommel touw kampen elke 2 jaar.
Vertrekken Fttings vingervast totdat montage is compleet, Dan vastdraaien eerlijk
klantenservice :
houden instructies in A veilig plaats voor toekomst referentie .
Neem voor eventuele problemen contact op met de klantenservice problemen
.
Inspecteren alle onderdelen van de Product elke 6 maanden als vervolg op aankoop .
Als elk onderdelen Look versleten of daar Zijn problemen , contact ons voor
vervangingen En Doen niet
gebruik de product tot l de probleem heeft geweest gecorrigeerd

T P STAAF 2(X)
BOVENKANT BEEN (X4)
ONDERKANT BEEN (X4)
KANT VERBLIJF STAAF (X2)
TOUW (X2)
SPANNER (X1)
ALLEN SLEUTEL (X2)
GROND PEG (X4)
F1
M8 U BOLT (X2)
F2
M8 BOUT
60
2
F3
KARABIJNHAAK HAAK
(X2)
F4
M6 BOUT
55
mm (X4)
F5
M8 BOUT
55
4
FABRIC NEST SWING
NEST SWING METAL FRAME
WITH FOAM PADDING (X4)
BELANGRIJK Maken zeker jij lezen de veiligheid kennisgeving op de voorkant
bladzijde En altijd
toezicht houden kinderen terwijl ze dat zijn spelen op de apparatuur. eenmaal montage
is voltooid
controleer de apparatuur zorgvuldig. In de in tegenstelling tot y gebeurtenis die jij vind
enige problemen, Alsjeblieft

Neem contact met ons op. Doen niet toelaten kinderen naar gebruik dit Product tot de
probleem heeft geweest gecorrigeerd
STAP 1
Monteren als geïllustreerd boven.
aansluiten Bovenkant Maat 1 en 2 samen met twee bouten F2 .
F1U Bouten Zijn bijgevoegd op de top balken.
Hangen F3 karabijnhaak haken op F1 .
STAP 2
Monteren als geïllustreerd boven.
Bijvoegen Bovenkant Benen (3) tot Bovenkant Bar
1 2, veilig
gebruik makend van vier bouten F2 .
STAP 3
Monteren als geïllustreerd boven
Bijvoegen Onderkant Benen (5) tot Bovenkant
Benen (3) .
Bijvoegen kant blijf Bars (7)tot buiten van de
benen,

En zeker hen door gebruik makend van bout
F4 .

STAP 4
Invoegen de metaal kader (9 naar binnen de rand van de stof rondom de rand van de nest
schommel (10 .
verbind de metaframes samen en dan vastmaken hen de ... gebruiken bout bij de einde
van de
touw (8) .
STAP 5
TEP
Monteren als geïllustreerd boven
Vastmaken hen gebruik makend van de bout bij
de einde van de schommel zitplaats .
Assemble as illustrated above
Attach Ground peg(6)to Bottom Legs(4 ,
And then rotate to the ground.
Anchoring the gym to the ground

[Montage Instructies:
BELANGRIJK OPMERKING: Voor de veiligheid redenen , deze schommel is best ingebracht en
verankerd naar binnen
gras voor extra stabiliteit is een betonnen vloer, Het is aanbevolen die jij toevoegen
contragewichten zoals zandzakken aan beide zijkanten van de schommel. als jij
hebben vragen hierover procedure, voel je vrij om contact ons.

Fabrikant: YANGZHOU JI UXIN SPORTTECHNOLOGIE
CO.,LTD.
Adres : NUMMER 6 , INDUSTRIEEL PARK , XINJI STAD ,
YIZHENG , YANGZHOU STAD , JIANGSU , CHINA
Geïmporteerd naar AUS: SIHAO PTY LTD. 1 ROKEVA
STRAATSTEASTHOUT NSW 2122 Australië
Geïmporteerd naar VS : Sanven Technologie Ltd. Suite 250
, 9166 Anaheim Plaats , Rancho Cucamonga , CA 91730
E- CrossStu GmbH
Mainzer Landstr.69 , 60329
Frankfurt ben Voornaamst .
____
JH OVERLEG PLEGEN BEPERKT .
C/ O JH Overleg plegen Beperkt Kantoor 147,
Centurio Huis , Londen Weg ,
Staines - upon - Thames , Surrey , TW 18 4 AX

Technisch Steun En E - Garantie Certi fi cat
www.vevor.com/support

Teknisk support och E-garantibevis www.vevor.com/support
En ram Gunga
Uppsättning
Vi Fortsätta till vara engagerad till förse du verktyg med
konkurrenskraftig pris .
" Spara Hälften hälften Pris " eller några Övrig liknande uttryck Begagnade
förbi oss endast förtränger en
uppskatta av besparingar du makt nytta från uppköp vissa verktyg med oss
jämfört till de större
topp märken och gör inte nödvändigtvis betyda till omslag Allt kategorier av
verktyg som erbjuds förbi oss.Du
är vänligt påminde till kontrollera försiktigt när du är placering en beställa med
oss om du är
faktiskt sparande halv i jämförelse med de topp större märken .

En ram Gunga
Uppsättning
HÅLVA HÅLVA PRIS
MODELL: JX-SW01
NEED HELP? CONTACT US!
Ha produkt frågor ? Behöver teknisk Stöd ? Snälla du känna fri
kontakta oss :
Teknisk support och E- garanticertifikat
www.vevor.com/support
Detta är de original instruktion , snälla du läsa Allt manuell instruktioner
noggrant innan du använder VEVOR reserverar en klar tolkning av vår
Användarmanual Produkternas utseende ska vara ämne till de

produkt du fått . Snälla du förlåta oss den där vi kommer inte
underrätta du igen om det är några teknologi eller programvara
uppdateringar på vår produkt .

INSTRUKTIONER
Tack så mycket för att du valde detta A-Fram och Swing Uppsättning.
- Snälla du läs alla instruktioner innan använder sig av det information n vilja
hjälpa dig uppnå det bästa möjligt resultat.
De produkter som transporteras i denna katalog kan vara annorlunda i färg än
den faktiska Artikel.
Bo s vinge uppsättning
varningar :
Endast
för hushållsbruk utomhus
max 3 barn, total vikt inte att
överstiga 440 lbs .
Inte för barn under 3 år på grund av små delar som kan orsaka kvävning
faror
Montering och underhåll måste göras av en n vuxen, med regelbunden
kontroller för ha på sig och skada .
produkten måste vara placerad på a nivå yta minst 2 meter borta ifrån
något hinder och förankrat frmly in i de jord
Miljövänlig
material
sn älla du Läs detta

Flera
olika sätt
säker
Utveckla
till
spela
och
stabil
Motorf
ärdigh
eter
manuell noga
innan använda
sig av. Notera:
snälla spara det
för framtiden
referens

användningsvarningar :
barn skall inte bärcykel hjälmar medan på e uipment.
Do inte tillåta barn till stå på några gunga säten , segelflygplan säten , eller glida
rännor .
Do inte tillåta barn att hoppa eller klättra av någon rör på sig Utrustning.
Do inte twist swing rep eller linda in dem över toppen bar
Do inte tillåta lösa
,
huva , eller baggy kläder till vara bärs .
Do inte tillåta barn att klättra på delar inte avsedd för detta syfte.
Do inte tillåta barn att vandra in i PIay-området medan Utrustning är i använda sig av.
Segelflygplan och gungor får inte överstiga en vinkel av 60 grader från marken.
De minimum undanröjning mellan de gunga plats och jord nivå skall vara 350 mm ...
hopsättning och
Underhåll :
kolla upp nötter
,
bultar
,
och passform för täthet.
kontrollera täckningar för bultar och skarp kanter och ersätt e som nödvändig
kolla upp gunga säten , kedjor , rep , och Övrig bilagor för försämring och
byta ut som nödvändig
Tillverkaren rekommenderar rep acing plastgunga rep läger vartannat år.
Lämna fttings fnger tight tills montering är komplett, sedan spänna frmly
kundservice :
ha kvar instruktioner i a säker plats för framtida referens .
kontakta kundtjänst för ev problem
ems.
Inspektera Allt delar av de produkt var 6 månader följande inköp .
Om några delar se bärs eller där är problem , Kontakt oss för ersättare och do inte
Använd produkt till l de problem har varit rättad

T P BAR 2(X)
TOPP BEN (X4)
BOTTEN BEN (X4)
SIDA STANNA KVAR BAR (X2)
REP (X2)
NYCKEL (X1)
ALLEN NYCKEL (X2)
JORD PEG (X4)
F1
M8 U BOLT (X2)
F2
M8 BULT
60
2
F3
KARBINER KROK (X2)
F4
M6 BULT
55
mm (X4)
F5
M8 BULT
55
4
FABRIC NEST SWING
NEST SWING METAL FRAME
WITH FOAM PADDING (X4)
VIKTIGT Göra visst du läsa den e säkerhet lägga märke till på fronten sida och alltid
övervaka barn medan de är spelar på de Utrustning. en gång montering är avslutad
kontrollera noggrant utrustningen. I de till skillnad från y händelse att du gör fnd några
problem, snälla du
kontakta oss. Do inte tillåta barn till Använd detta produkt fram tills de problem har varit
rättad

STEG 1
Montera som illustrerad ovan.
ansluta Topp Stapel 1 och 2 tillsammans med två bultar F 2 .
F1U Bultar är bifogad på toppen barer.
Hänga F 3 karbinhake krokar på F1 .
STEG 2
Montera som illustrerad ovan.
Bifoga Topp Ben (3) till Topp Bar 1 2, säker
använder sig av fyra bultar F 2 .
STEG 3
Montera som illustrerad ab ove
Bifoga Botten Ben (5) till Topp Ben (3) .
Bifoga sida stanna Barer (7) till utanför av ben,
och säkra dem förbi använder sig av bult F 4 .

STEG 4
Föra in de metall ram (9 in i de kant av de tyg runt de kant av de bo gunga (10 .
ansluta meta ramar tillsammans och sedan fästa dem använda bult på de slutet av
rep (8) .
STEG 5
TEP
Montera som illustrerad ovan
Fästa dem använder sig av de bult vid
de slutet av de gunga sittplats .
Assemble as illustrated above
Attach Ground peg(6)to Bottom Legs(4 ,
And then rotate to the ground.
Anchoring the gym to the ground

[Hopsättning Instruktioner:
VIKTIG NOTERA: För säkerhet skäl , denna gunga är bäst insatt och förankrad in i
gräs för ökad stabilitet är en betonggolv, Det är rekommenderad att ni Lägg till
motvikter som sandba gs on både sidor av gunga. Om du ha frågor om detta
procedur, vänligen avgift l gratis att Kontakt oss.
Tillverkare: YANGZHOU JI UXIN SPORTS TECHNOLOGY
CO., LTD.
Adress : NO.6 , INDUSTRIELL PARK , XINJI TOWN ,
YIZHENG , YANGZHOU STAD , JIANGSU , KINA
Importerad till AUS: SIHAO PTY LTD. 1 ROKEVA
STREETEASTWOOD NSW 2122 Australien
Importerad till USA : Sanven Teknologi Ltd. Suite 250 ,
9166 Anaheim Plats , Rancho Cucamonga , CA 91730
E- CrossStu GmbH
Mainzer Landstr.69 , 60329
Frankfurt am Huvudsaklig .
____
YH KONSULTAT BEGRÄNSAD .
C/ O YH Konsultverksamhet Begränsad
kontor 147,
Centurion Hus , London väg ,
Staines - upon - Thames , Surrey , TW 18 4 AX

Teknisk Stöd och E - Garanti Certifikat
www.vevor.com/support