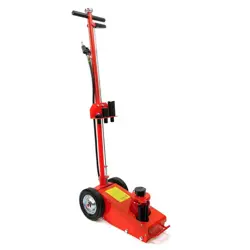
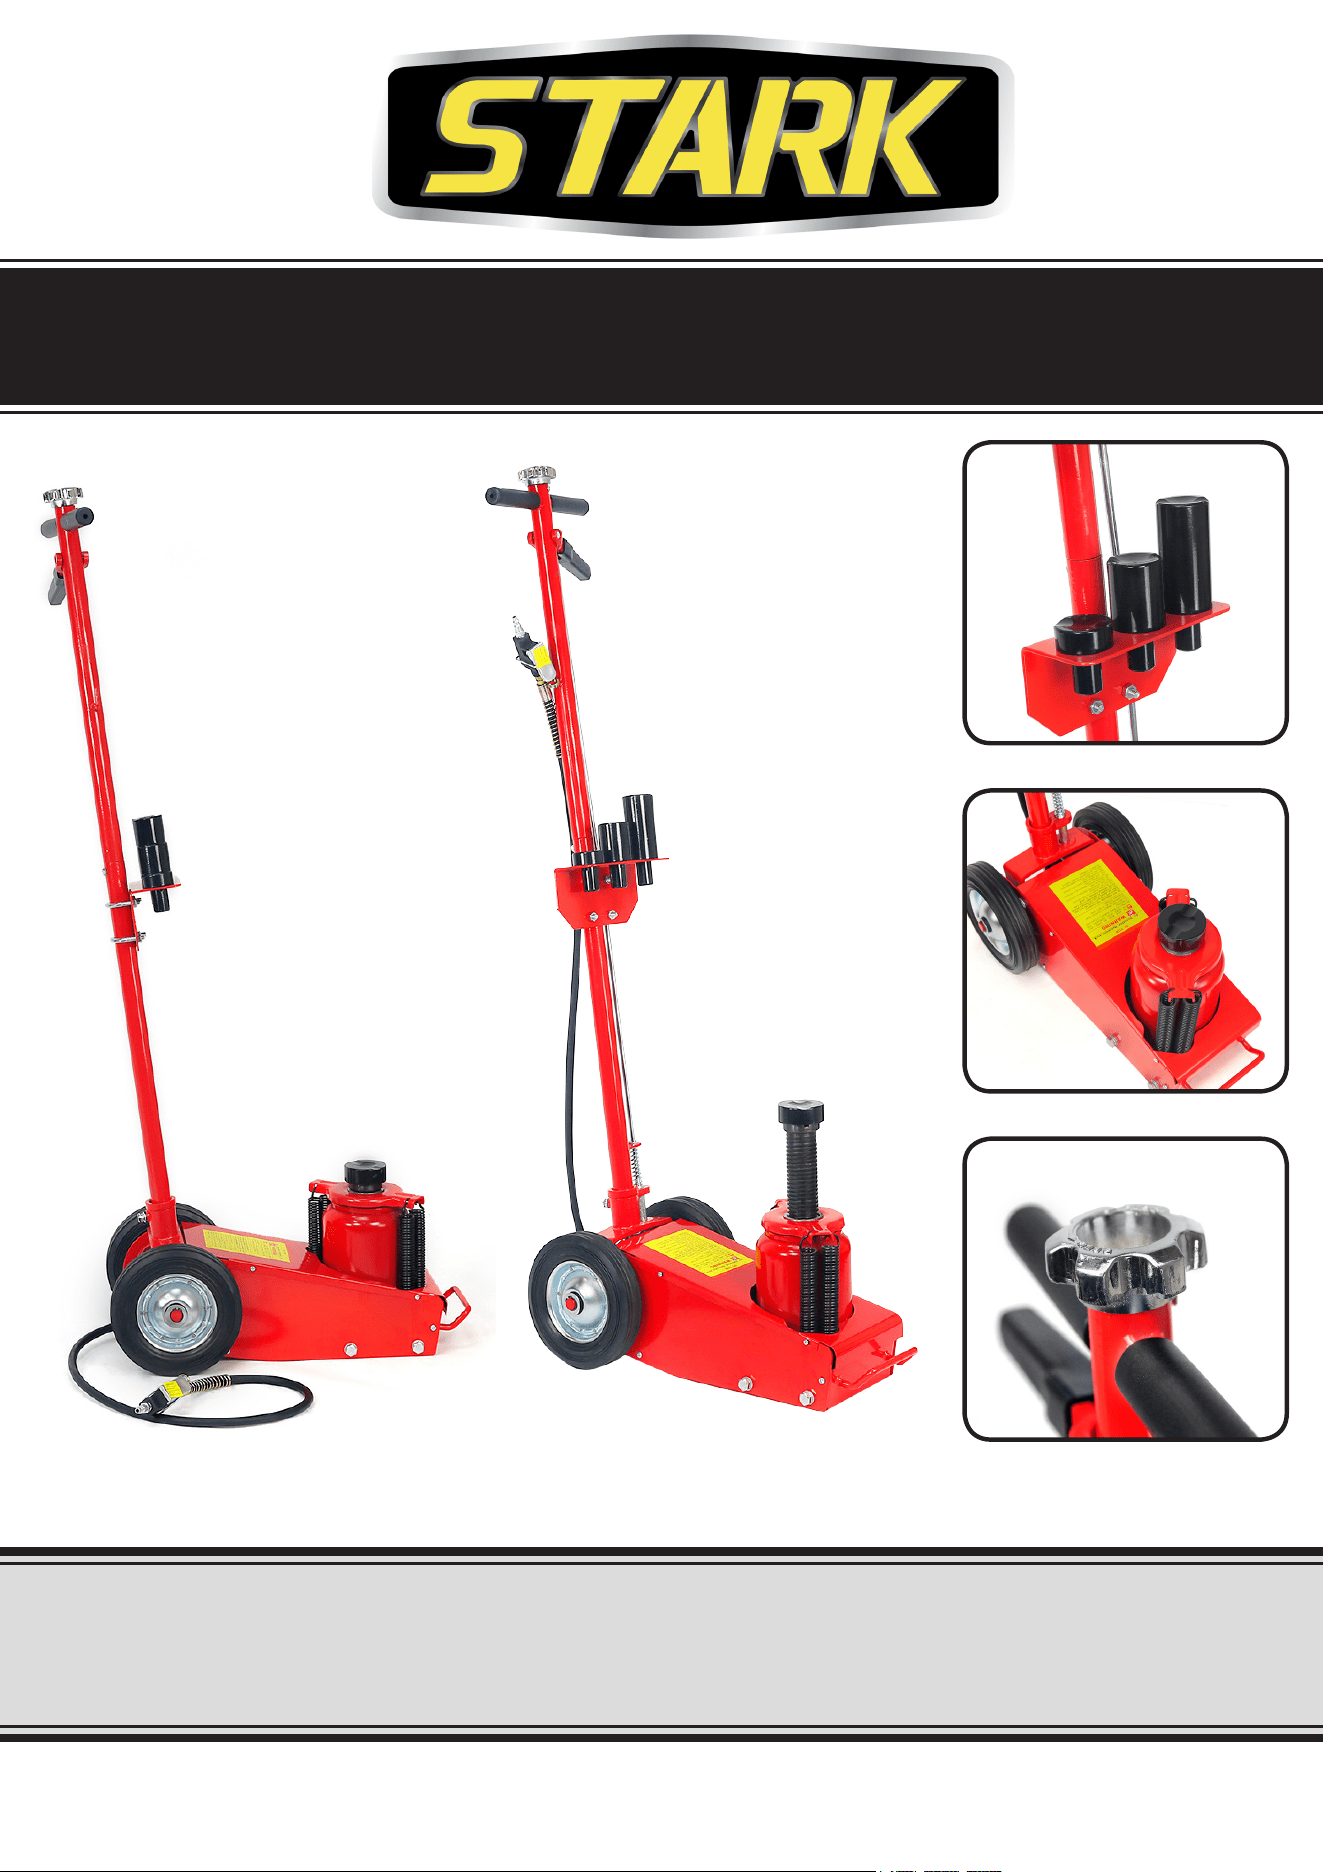
35 TON FLOOR AIR / HYDRAULIC JACK
SAVE THIS MANUAL: KEEP THIS MANUAL FOR SAFETY WARNINGS, PRECAUTIONS, ASSEMBLY,
OPERATING, INSPECTION, MAINTENANCE AND CLEANING PROCEDURES. WRITE THE
PRODUCT’S SERIAL NUMBER ON THE BACK OF THE MANUAL NEAR THE ASSEMBLY DIAGRAM
(OR MONTH AND YEAR OF PURCHASE IF PRODUCT HAS NO NUMBER).
OWNER’S MANUAL AND SAFETY INSTRUCTIONS
ITEM: 55062
FOR QUESTIONS PLEASE CALL OUR CUSTOMER SUPPORT: (909) 628 4900 MON-FRI 9AM TO 3PM PST

1
IMPORTANT SAFETY INFORMATION
GENERAL SAFETY WARNINGS
Read all safety warnings and instructions. Failure to follow the warnings and instructions may
result in electric shock, re and/or serious injury. Save all warnings and instructions for future
reference.
SAFETY
The warnings, precautions, and instructions discussed in this instruction manual cannot cover all possible
conditions and situations that may occur. It must be understood by the operator that common sense and
caution are factors which cannot be built into this product, but must be supplied by the operator. Read
carefully and understand all ASSEMBLY AND OPERATION INSTRUCTIONS before operating. Failure
to follow the safety rules and other basic safety precautions may result in serious personal injury.
Stay alert, watch what you are doing, and use common sense when operating the tool. DO NOT use the
tool while you are tired or under the inuence of drugs, alcohol, or medication.
Dress properly. DO NOT wear loose clothing, dangling objects, or jewellery. Keep your hair, clothing
and gloves away from moving parts. Loose clothes, jewellery, or long hair can be caught in moving parts.
Wear the proper personal protective equipment when necessary. Use ANSI Z87.1 compliant safety
goggles (not safety glasses) with side shields, or when needed, a face shield.
DO NOT overreach. Keep proper footing and balance at all times.
Read and understand all instructions. Failure to follow all instructions may result in serious injury or
property damage.
DO NOT allow persons to operate or assemble the product until they have read this manual and have
developed a thorough understanding of how it works.
Store idle equiptment. When not in use, tools must be stored in a dry location to inhibit rust. ALWAYS lock
up tools and keep out of the reach of children.
Inspect the work area before each use. Keep work area clean, dry, free of clutter, and well-lit. Cluttered,
wet, or dark work areas can result in injury. Using the product in conned work areas may put you
dangerously close to cutting tools and rotating parts.
Keep children and bystanders away from the work area while operating the tool. DO NOT allow
children to handle the product.
Remove keys and adjusting wrenches. Check that the keys and adjusting wrenches are removed from
the tool or machine before starting work.
Check for damaged parts before each use. Carefully check that the product will operate properly and
perform its intended function. Replace damaged or worn parts immediately. Never operate the product
with a damaged part.
Use the right tool for the job. DO NOT attempt to force a small tool to do the work of a larger tool. DO
NOT modify this tool or use the tool for a purpose it was not intended.
DO NOT operate the tool if under the inuence of drugs or alcohol. read the warning labels to determine
if your judgement. If there is any doubt, DO NOT operate the tool.

2
IMPORTANT SAFETY INFORMATION
SAVE THESE WARNINGS
Maintain tools with care. Keep tools sharp and clean for better performance. Follow instructions for
lubricating and changing accessories. The handles must be kept clean, dry and free of oil and grease.
When servicing, use only identical replacement parts. Use of any other parts will void the warranty.
The utes on these tools are sharp and can cut you. Handle with care.
DO NOT use any high speed means, such as a lathe or drill press, to cut threads with these Taps and Dies.
High speed use may overheat the tool , causing loss of heat-treatment and premature failure. Use of high
speed means will void the warranty.
Taps and dies are heat treated and not designed to be sharpened. After considerable use, corrosion, or
high speed use these tools may lose their cutting edge. They will be less effective and may break.
DO NOT overload this equipment. Know the weight of the item being lifted.
Use the Jack for lifting only. Immediately after lifting, Support the load with appropriate supporting equipment.
Place the jack correctly. Only use this tool on a surface that is stable, level, clean and dry and capable of
sustaining the load.
Stabilize the load. Ensure that the load remains stable at all times. DO NOT move the load while it is on
the jack.
When lifting a vehicle, apply the emergency break and block all the wheels.
Stabilize the load. Ensure that the load remains stable at all times. DO NOT move the load while it is on
the jack.
Observe work area conditions. DO NOT use machines or power tools in damp or wet locations.
DO NOT force the tool. It will do the job better and safer at the rate for which it was intended. DO NOT use
innapropriate attachments in an attempt to exceed the tools capacity.
SPECIFICATIONS
3
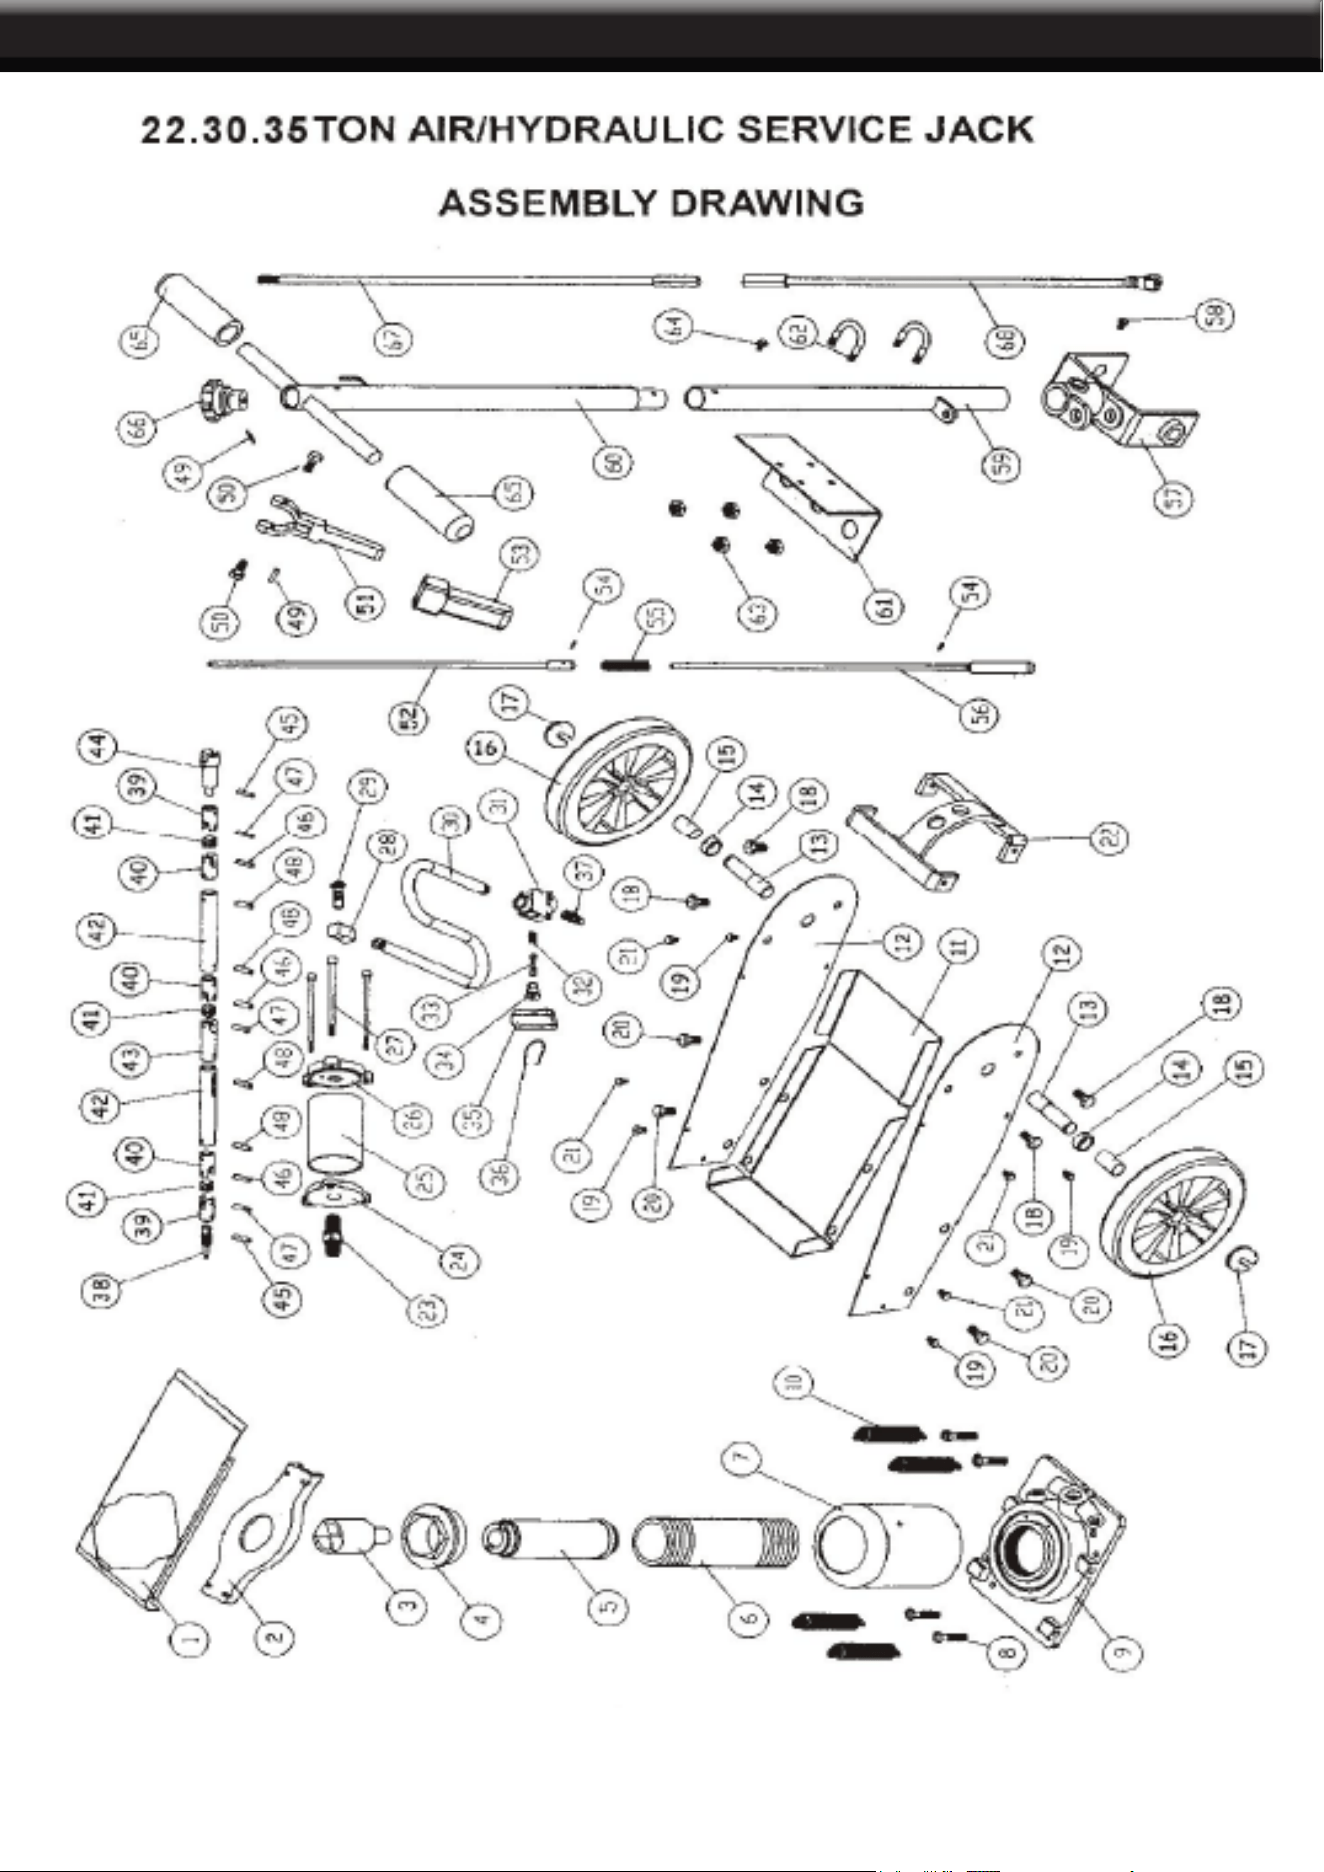
PARTS DIAGRAM
4
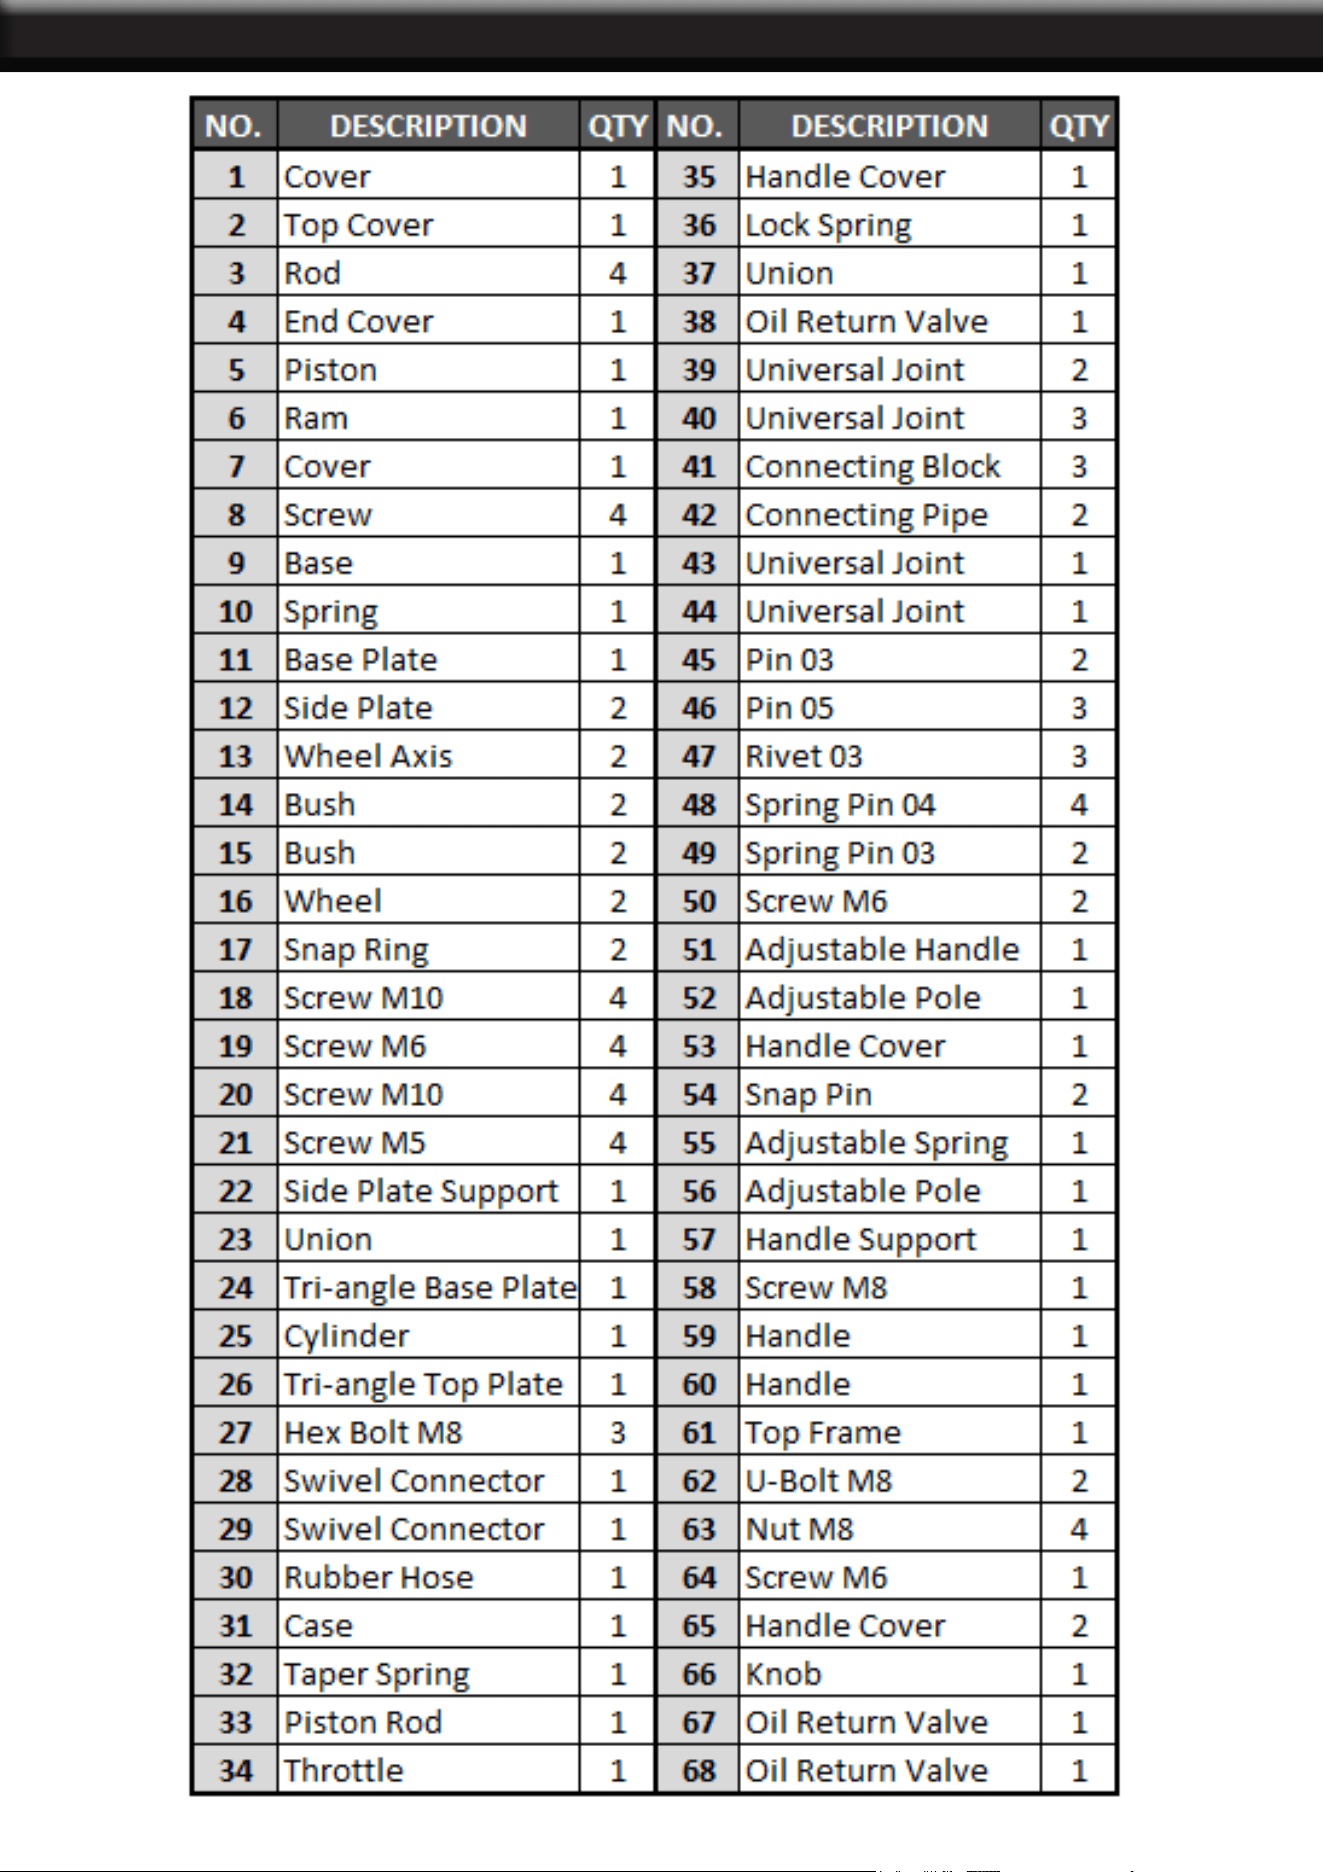
PARTS LIST
PARTS DIAGRAM
5

6
OPERATION and MAINTENANCE
LIFTING:
1. Assemble the handle, according to the assembly drawing.
2. Turn the handwheel clockwise until snug.
3. Adjust the handle angle degree as needed to place the jack into position under the load.
6. Press the lever to the ON position and lock using the lock lever. This provides a continous air supply to the
air motor.
LOWERING:
1. Release the lock level to stop air ow to the air motor.
2. Remove the air supply hose from the air inlet tting.
IMPORTANT: Use only good hydraulic jack oil. Avoid mixing different types of uid and NEVER use brake
uid, turbine oil, transmission uid, motor oil or glycerin. Improper uid can cause premature failure of the
jack and the potential for sudden and immediate loss of the load.
MAINTENANCE
4. Adjust the extension screw as needed.
5. Connect the air supply hose lock tting into the air inter tting. The lever should be OFF, not in the locked
postion.
7. Raise the jack by altenately lifting and lowering the handle assembly.
CAUTION: Avoid rapid descent of the load. Turn the release valve off slowly.
3. Lower the extension screw as needed by turning clockwise.
4. Remove the jack.
GENERAL CARE:
1. Periodically lubricate the joints and extension screw with light oil as needed.
2. Clean the outside of the jack with a clean, dry cloth.
3. If the jack is exposed to moisture, wipe with a dry cloth and lubricate as noted above.
4. Store jack with the extension screw and ram fully collapsed.
PURGING AIR FROM THE HYDRAULIC SYSTEM:
1. Turn the handwheel 1-1/2 turns counterclockwise.
2. Remove the oil lter plug on the side of the jack reservoir by gently pulling.
Air bubbles can become trapped inside the hydraulic system, therby reducing the efciency of the jack. Purge
the aor from the system if the lift efciency drops.
3. Connect the air supply hose lock tting into the air inlet ttong. Open the air valve and work for a moment
to purge air from the hydraulic system.
4. Turn the handwheel clockwise until snug.
5. Top off jack reservoir as described below, then replace the lter plug.
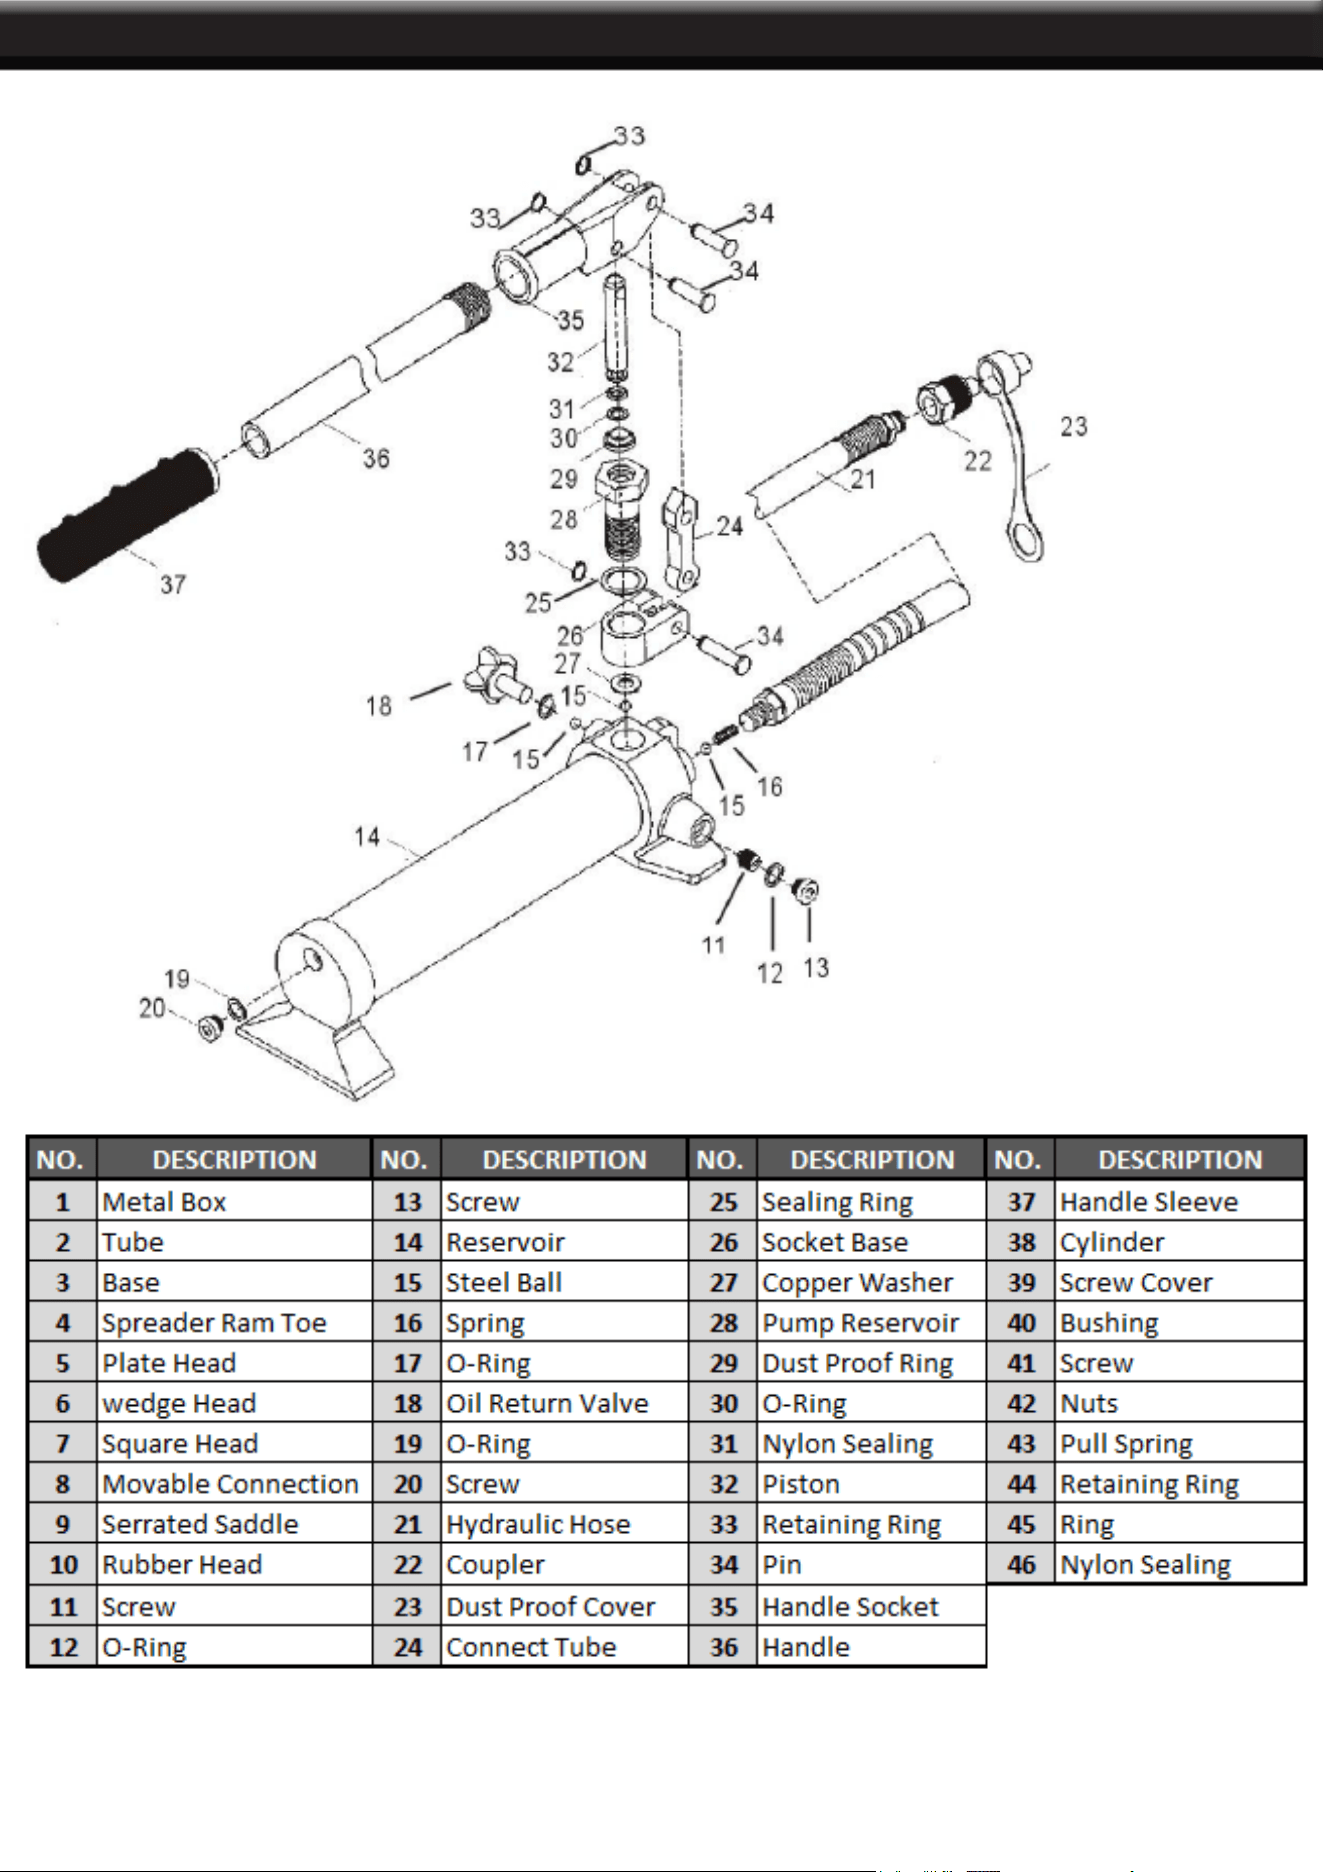
PARTS DIAGRAM
7
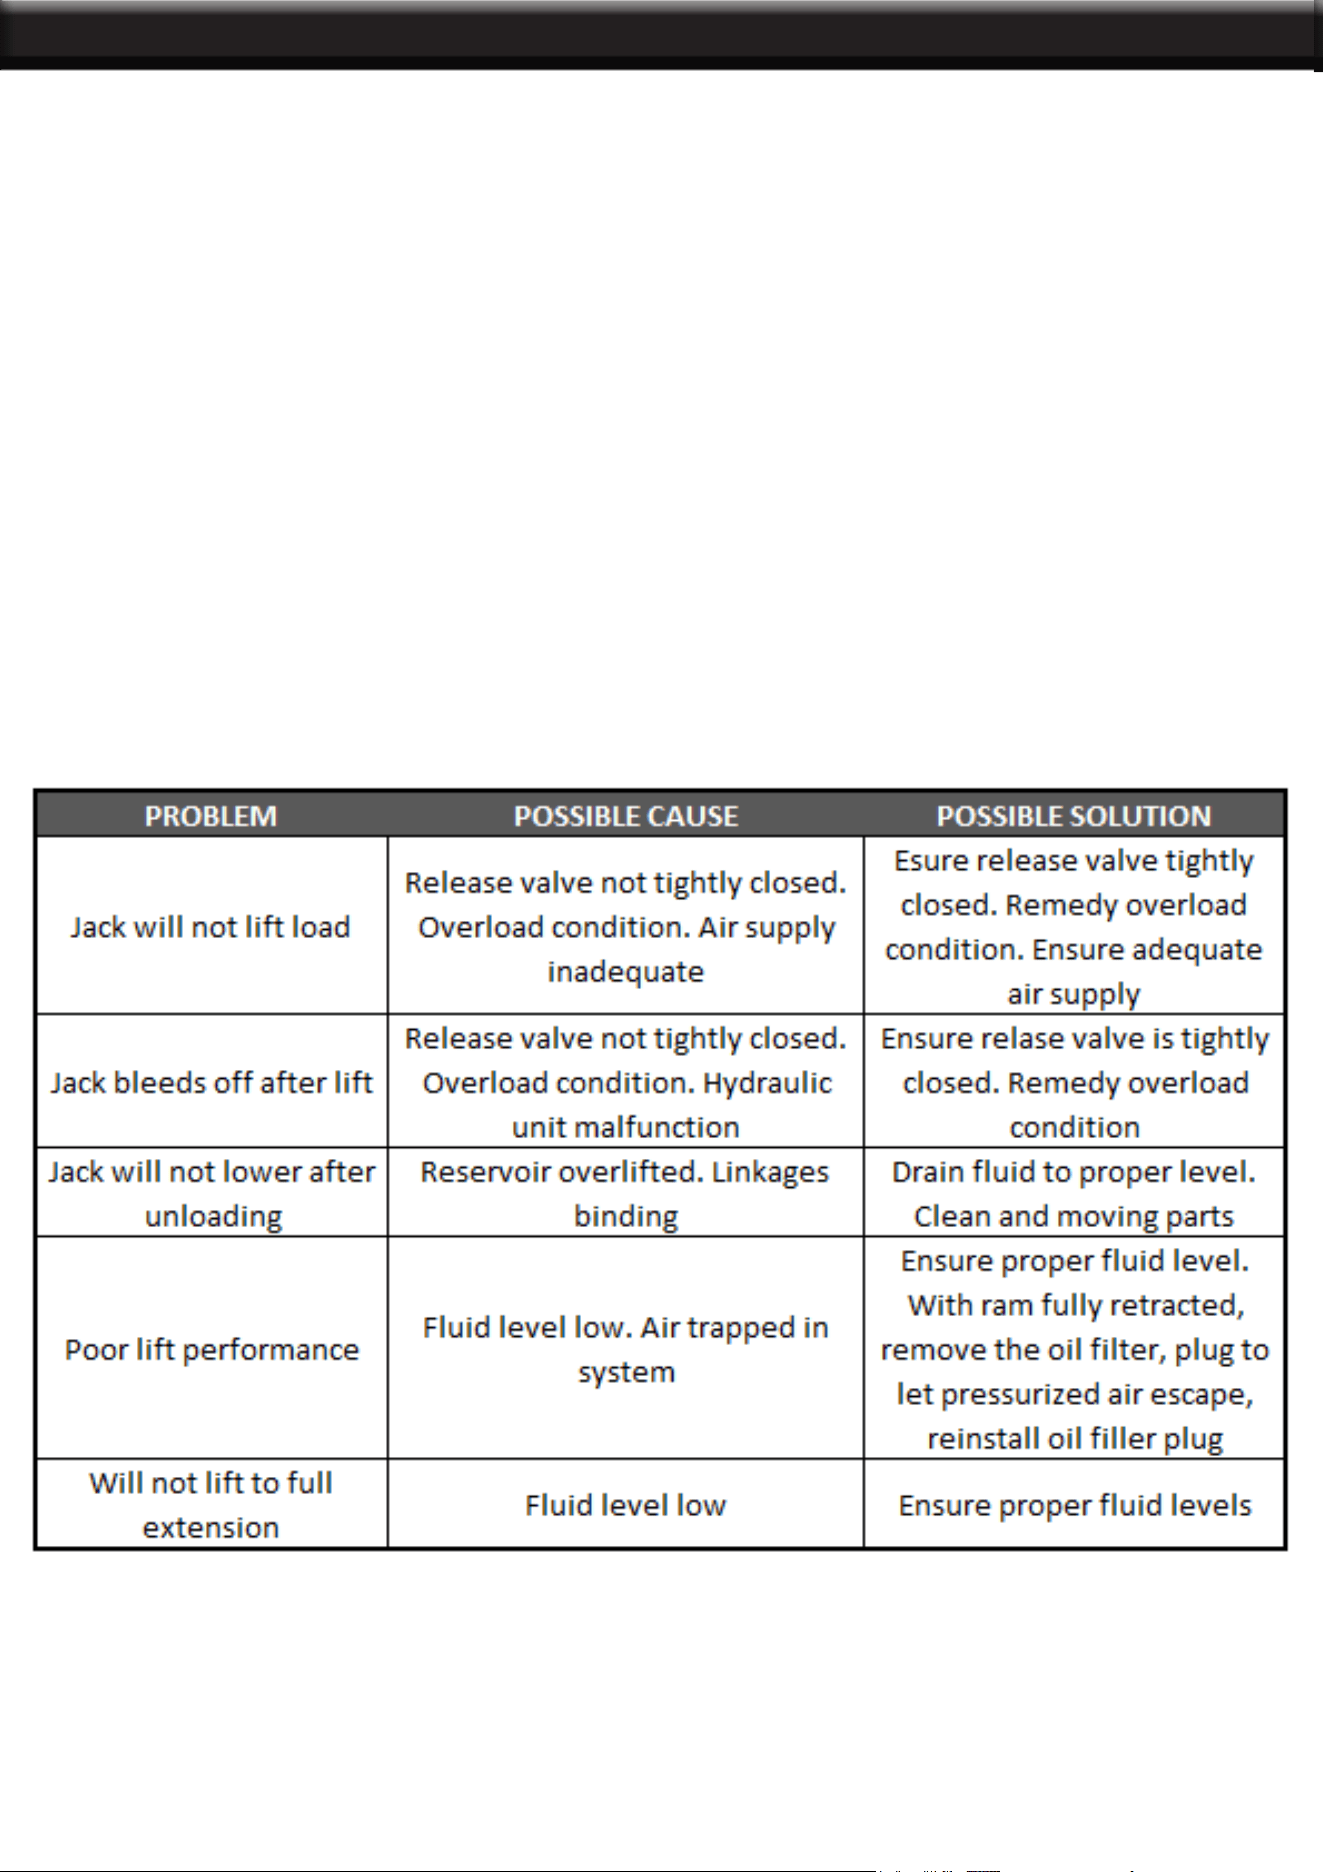
MAINTENANCE / TROUBLESHOOTING
OF NOTE
PRODUCT MADE IN CHINA
Oil Replacement:
1. Place the jack in an upright postion.
2. Completely lower the ram.
3. Remove the lter plug.
6. Top off with more hydraulic oil.
4. Fill with high quality hydraulic jack oil to the lower rim of the ll hole.
5. Purge air from the hydraulic system as previously described.
7. Replace the lter plug.
8
Record Product’s Serial Number Here:
Note: If product has no serial number, record month and year of purchase instead.
Note: Some parts are listed and shown for illustration purposes only and are not available
individually as replacement parts.
THE MANUFACTURER AND/OR DISTRIBUTOR HAS PROVIDED THE PARTS LIST AND ASSEMBLY
DIAGRAM IN THIS MANUAL AS A REFERENCE TOOL ONLY. NEITHER THE MANUFACTURER OR
DISTRIBUTOR MAKES ANY REPRESENTATION OR WARRANTY OF ANY KIND TO THE BUYER THAT
HE OR SHE IS QUALIFIED TO MAKE ANY REPAIRS TO THE PRODUCT, OR THAT HE OR SHE IS
QUALIFIED TO REPLACE ANY PARTS OF THE PRODUCT. IN FACT, THE MANUFACTURER AND/OR
DISTRIBUTOR EXPRESSLY STATES THAT ALL REPAIRS AND PARTS REPLACEMENTS SHOULD BE
UNDERTAKEN BY CERTIFIED AND LICENSED TECHNICIANS, AND NOT BY THE BUYER. THE BUYER
ASSUMES ALL RISK AND LIABILITY ARISING OUT OF HIS OR HER REPAIRS TO THE ORIGINAL
PRODUCT OR REPLACEMENT PARTS THERETO, OR ARISING OUT OF HIS OR HER INSTALLATION
OF REPLACEMENT PARTS THERETO.
PLEASE READ THE FOLLOWING CAREFULLY
DISCLAIMER
PRODUCT MADE IN CHINA