-06- -07- -08- -09-
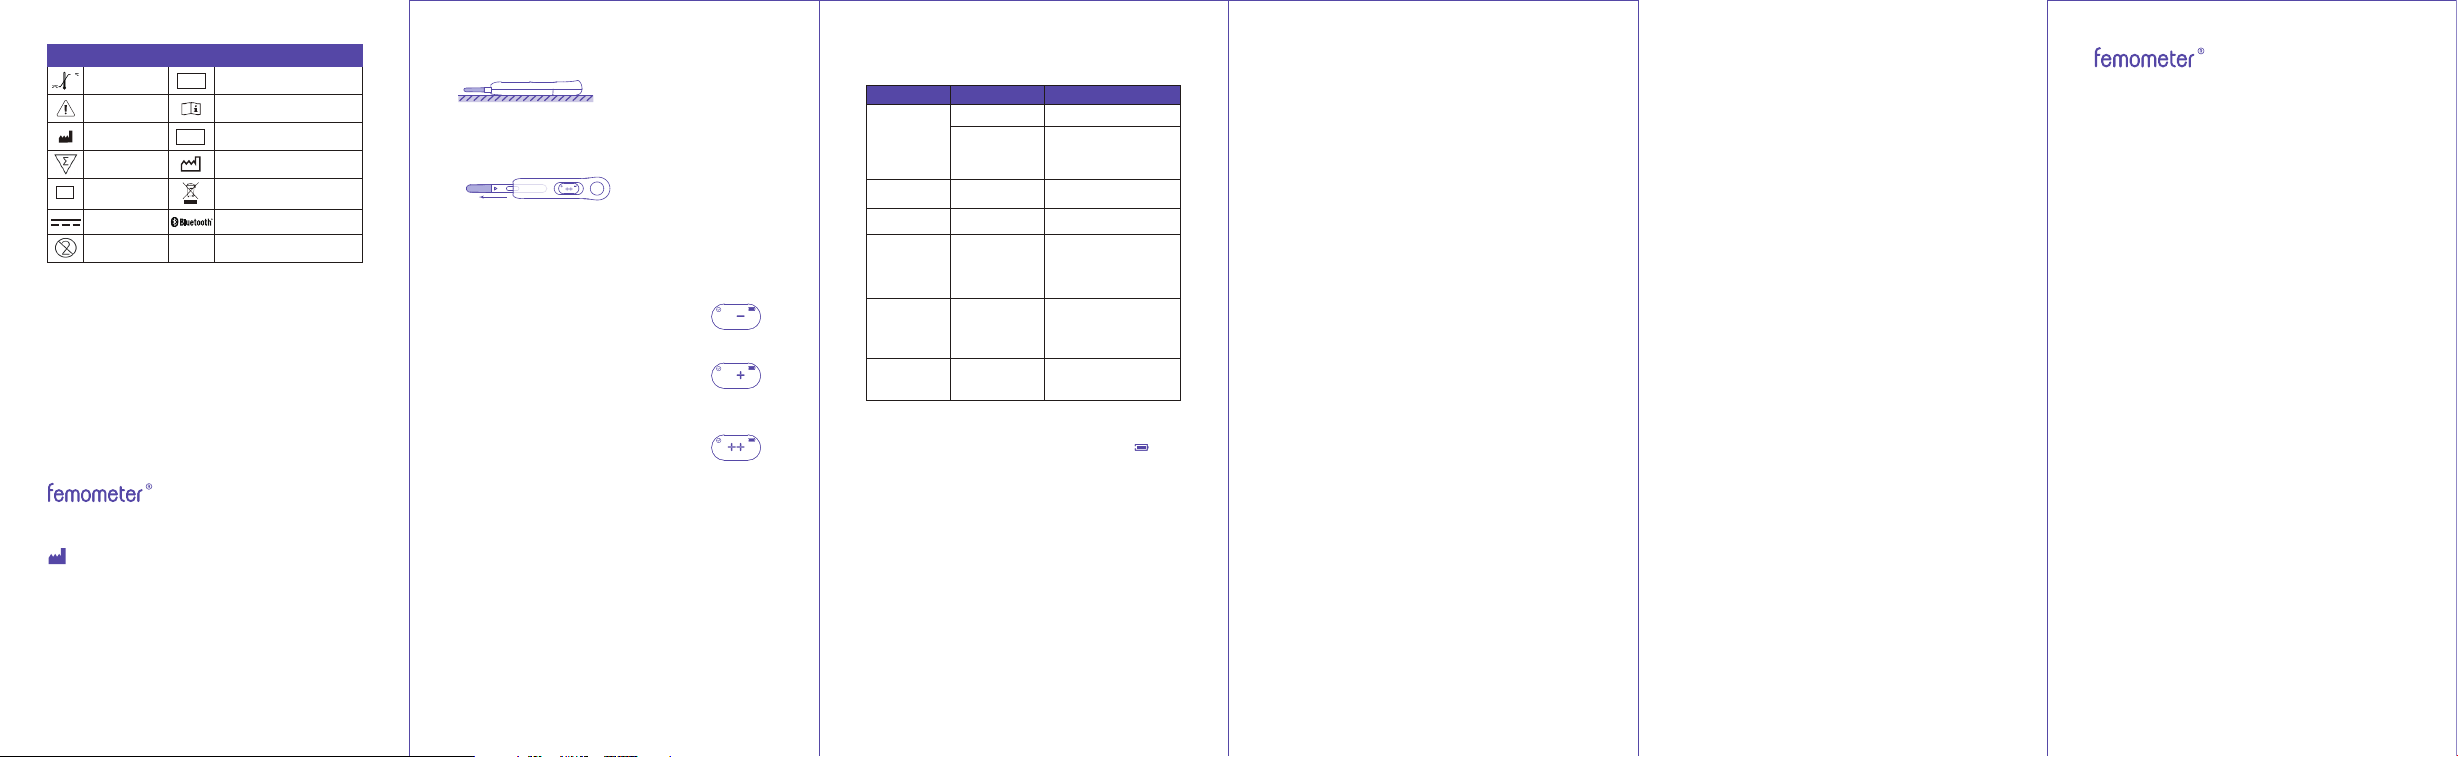
SN
LOT
IVD
Courant Direct
For in vitro diagnostic
use only
Consult instructions
for use
Lot number
Date of Manufacture
Connect to bluetooth devices
Store between
2°C-30°C
Caution
Manufacturer
Tests per kit
Serial number
Do not reuse
Waste electrical materials
should be sent to a dedicated
collection point for recycling.
Table of Symbol
9. Test result
* The measurement result will be displayed for 10 minutes. If the
screen goes out after some time, pulling out the test stick, it will
show again for 5 minutes.
Indicates a LOW result with a low probability of
conception. Please test again after 24 hours.
To ensure the accuracy of the tests, please
test every day.
Indicates HIGH result, when the test detects the
rise of LH, "+" will be displayed, which indicates
a high probability of conception. Please test
every 4-6 hours afterwards. Have intercourse
today to increase your chance to pregnant.
Indicated a PEAK result which means an LH
surge is detected. And you have the highest
probability of conception. Please keep testing
every 4-6 hours until it shows "+" or "-", which
indicates that you have ovulated. Have
intercourse within 24 hours to maximize your
chance to pregnant.
10. Product specifications
Product name: Fertility Tracking Kit
Product model: FM-IVY-103
Dimension of meter: 120*28.5*19mm
Weight of meter: 30g
Operation condition Temperature: 20°C~30°C(68°F~86°F), RH: ≤85%,
Pressure: 86~106kpa
Storage condition Temperature: -25°C~55°C(-13°F~131°F), RH: ≤95%,
Pressure: 86-106kpa
Service life of meter: 3 years
Battery: CR2032 battery (replaceable battery)
Test sticks: Contains 20 Fertility Tests
Storage condition of test stick Temperature: 2°C~30°C(36°F~86°F)
Accuracy: 99%
11. Error and troubleshooting
When a fault occurs during the test process, the instrument will
beep for 10 seconds and display the error code on the screen. The
4. Please treat the used test stick according to the Medical
Waste Management Regulations to avoid biological hazards.
5. Please use the meter in strict accordance with the
instructions provided by Femometer, otherwise, the protection
provided by the meter will be damaged.
14. Q&A
1. Q: Why is my Ivy not connecting to the app via Bluetooth?
A: Make sure your phone's Bluetooth is turned on. If Ivy still does
not connect, restart your smartphone and Ivy.
2. Q: How do I restart my Ivy?
A: Pull out the test stick, wait 10 seconds for the automatic
shutdown, and reinsert a test stick to restart.
3. Q: How long should I continue testing?
A: Test until an LH surge has been detected. If your bleed begins
before you see a surge, test again during the next cycle, but
start on an earlier cycle day. If you do not see a HIGH result after
testing for 3 cycles, consult your doctor.
4. Q: Do alcohol or common medications affect the test?
A: No, but consult your doctor regarding whether LH testing is
useful for you if you are taking medications that affect
hormones or for fertility reasons.
5. Q: Once I see a PEAK result, when is the best time to have
intercourse?
A: Ovulation is likely to occur within 24-48 hours. This is your
most fertile time, so we advise having intercourse within 24
hours.
6. Q: Will the amount of liquid I drink affect the result?
A: We suggest that you limit your fluid intake for about two
hours before you collect your sample. Drinking a large amount
before testing will dilute the hormone in your urine.
7. Q: Can I determine the result from the lines on the test stick?
A: No, the results can only be read on the meter's screen or in
the Femometer app.
8. Q: Can I buy more test sticks used with the meter?
A: Yes, the meter can be re-used with supplement test stick for
FM-IVY-103 only. Do not put any other test stick or stick into the
meter.
15. Disclaimer
This manual is written in accordance with available information
and contents are subject to change without notice. Lollipop
Technology (Hangzhou) Co., Ltd. has made the best effort to
guarantee the manual’s accuracy and reliability. However, the
company does not assume liability for loss or damage caused
by omissions, inaccuracies or typographical errors in this
manual.
If there are discrepancies in this manual due to software
upgrades, instructions and functions dictated by the software.
16. Warranty page
Product model: Remark:
Purchase data: Point of sales:
Note
• 1-year warranty (from date of purchase) is included under
dproper usage.
• Warranty doesn’t cover parts other than the meter itself.
• Under these circumstances, repair will be charged.
Warranty expired.
Warranty card not shown to the seller.
Vague information on the warranty card.
The warranty does not cover
• Product surface damage
• Battery
• Damages caused by improper using habit
• Improper inspection and maintenance
• Other irresistible reasons
Warning:
This device complies with Part 15 of the FCC Rules. Operation is
subject to the following two conditions: (1) this device may not
cause harmful interference, and (2) this device must accept
any interference received, including interference that may
cause undesired operation.
Changes or modifications not expressly approved by the party
responsible for compliance could void the user's authority to
operate the equipment.
NOTE: This equipment has been tested and found to comply
with the limits for a Class B digital device, pursuant to Part 15 of
the FCC Rules. These limits are designed to provide reasonable
protection against harmful interference in a residential
installation. This equipment generates, uses and can radiate
radio frequency energy and, if not installed and used in
accordance with the instructions, may cause harmful
interference to radio communications. However. there is no
guarantee that interference will not occur in a particular
installation.
If this equipment does cause harmful interference to radio or
television reception which can be determined by turning the
equipment off and on, the user is encouraged to try to correct
the interference by one or more of the following measures:
--Reorient or relocate the receiving antenna.
-- Increase the separation between the equipment and
receiver
--Connect the equipment into an outlet on a circuit different
from that to which the receiver is connected.
--Consult the dealer or an experienced radio/TV technician for
help
NOTE: This device and its antenna(s) must not be co-located or
operation in conjunction with any other antenna or transmitter.
The device has been evaluated to meet general RF exposure
requirement. The device can be used in portable exposure
condition without restriction.
12. Maintenance
Replace the battery
When the meter starts to blink the low battery signal " ",
Replace a new battery for the meter.
Maintenance
1. Please keep the meter clean.
2. The internal hardware and software of the Digital Fertility
Meter can only be repaired, replaced or upgraded by
manufacturer. Please contact customer services for support.
Maintenance Method and Plan
The meter does not require special maintenance or cleaning.
External cleaning and maintenance method: A cloth
dampened with 70% alcohol can be used to wipe the outside of
the meter. Do not use strong bleach (≥0.5% bleach solution),
because oxidizing substances and solvents may damage the
meter's parts and touch screen. Take care to avoid getting
liquids, dirt, blood or buffer into the meter through the slot or
data port.
Caution
Before cleaning, please make sure the meter is turned off and
the battery has been taken out.
13. Precautions for meter use
1. Do not place the meter in a position that is difficult to operate.
2. In addition to the test stick provided by the manufacturer, do
Made in China
Hangzhou Laihe Biotech Co., Ltd.
Room 401-406, F1-3, Building 1, No.425 Miaohouwang Road,
Xixing Street, Binjiang District, Hangzhou, 310051 Zhejiang P.R.
China
Distributor: Lollipop Technology (Hangzhou) Co., Ltd.
1901 Dongguan Building, No.618 Jiangnan Avenue, Binjiang
District, 310000, Hangzhou, Zhejiang, China
Customer service:[email protected]
Trouble Reason
Solution
The screen
becomes
unclear or
doesn't show
anything
An error occurs
and the machine
shuts down
automatically
Replace a new test Stick
and take test again.
Test according to the
user manual strictly
Before adding sample:
Reinsert the stick and
take a test again
After adding sample:
Replace a new test Stick
and take test again
Inaccurate
results
Error code: E0
Error code: E1
Error code: E2
Error code: E3
Low battery Replace battery
Replace batteryLow battery
Test fail
Add sample time
out (more than 10
minutes without
complete add
sample)
Incorrect
test procedure
Pull out test stick
during test
Take out the test stick,
wait 10 seconds after the
meter is off, then reinsert
the test. Sample addition
should be completed
within 10 minutes
Reinsert the test stick
within 10 seconds;
otherwise, the test will fail
Start the IVY meter
Take out a test stick from the foil wrapper, insert the test into
the meter.
Pair IVY 103
For the newly downloaded App, tap the scan icon on the
Prime promotion page and scan the QR code to pair.
If you already have the App installed and are using it, tap the
Bluetooth icon on the home page, select IVY 103 to pair.
Take test
1. Collect your urine sample usingthe clean dry cup included in
the package.
① First morning urine is not recommended, but any other time
of day is suitable. For best results, try to collect urine at
approximately the same time each day.
② Only fill sample cup to the line. Don’t drink too much liquid
before testing.
2. Allow the test stick to equilibrate to room temperature
(20°C~30°C or 68°C~86°F).
3. Take out the test stick from the foil wrapper, remove the test
stick cap, and insert it into the meter. The screen will display the
last test result for 5 seconds, then the icon “ ” blinks prompt to
add sample. (Please make sure that the test stick is inserted all
the way to the bottom)
4. Dip the sampling tip of the test stick into the urine and hold
the meter until you hear three "beeps" (usually takes 15-20
seconds to complete), a progress bar will appear at the
bottom of the screen. Then pull out the meter and put the test
stick cap back on.
①Please finish adding samples within 10
minutes, otherwise the test will fail.
②Do not let the urine pass over the plastic
part of the test stick.
③Do not pull out the test stick while
adding samples.
File version: A1.1
Effective Date:2023-10
5. Place the meter on a flat surface. Wait for about 5-10 minutes
till you hear ten beeps which indicate that the test is completed.
The test result will be displayed on the screen.
①do not pull out the test stick while testing.
②If the Femometer App is connected, the test results will also
be uploaded to the App for historical records.
6. Remove and discard the test stick after the test is complete.
not put any other items into the meter.
3. If the test sample is potentially infectious, please use
protective gloves or other protective measures to avoid skin
contact with the test stick and sample.
meanings of the error code are shown in the following table.
If the methods do not solve the problem, please contact
customer services ([email protected]) for help.
Symbol “-”
Symbol “+”
Symbol “++”

-01- -02- -03- -04- -05-
4. Product structure
Test Meter
Screen
Test Stick
Thank you for purchasing!
For the safe use of the product, please read this User Manual
first, and keep it properly after reading so that you may access
and consult it at any time.
1. Intended use
Fertility Tracking Kit is composed of the Meter and Test stick. It is
intended to be used for the semi-quantitative detection of
luteinizing hormone (LH) in human urine, as an aid in predicting
the time of ovulation, and peak fertility.
2. Summary
Ovulation is the release of an egg from the ovary. The egg then
passes into the fallopian tube where it is ready to be fertilized.
In order for pregnancy to occur, the egg must be fertilized by
sperm within 24 hours after its release. Immediately prior to
ovulation, the body produces a large amount of luteinizing
hormone (LH) which triggers the release of a ripened egg from
the ovary. This “LH surge” usually takes place in the middle of
the menstrual cycle.
Fertility Tracking Kit is a complete system to help predict the
time of ovulation, and peak fertility. It is during this fertile time
that pregnancy is most likely to occur.
The product detects the LH surge in urine, signaling that
ovulation is likely to occur in the next 24-36 hours. The test
utilizes a combination of antibodies including a monoclonal LH
antibody to selectively detect elevated levels of LH.
Important: The LH surge and ovulation may not occur in all
cycles.
Reagents
The test contains anti-LH particles and anti-LH antibodies
coated on the membrane.
3. Test principle
Fertility Tracking Kit is a lateral flow sandwich immunoassay
employing monoclonal antibodies that are specifically
directed against the coating and labeling antibody. During the
test procedures, the user collects a sample in a clean, dry
container and dips the sample pad into the collected sample
until the screen prompts sample adding is complete (which
usually takes 15-20 seconds). After the urine specimen is
applied to the stick, the substance to be tested in the sample
will react with the monoclonal antibody conjugate of the
substance to be tested obtained by mouse immunization.
Conjugated complexes migrate along the membrane to the
test and control regions. The digital component integrated with
the chromatographic strip displays the results of the
immunochemical reaction on the screen of the equipment.
After the equipment self-calibration procedure is completed,
the screen displays the progress bar to indicate that the test is
working. After the result is displayed on the screen, the test is
completed. The test progress usually takes 5-10 minutes.
5. List of accessories
1 digital meter, 20 fertility tests, 1 urine cup, 1 CR2032 battery, 1
user manual, 1 quick guide.
Please confirm what’s in the package you have purchased. In
case anything is missing, please contact us via support@fem-
ometer.com
6. Dos and Don’ts
1. For Self-testing. Do not use it after the expiration date.
2. Do not eat, drink or smoke in the area where the samples or
products are handled.
3. Do not use a test if the pouch is damaged.
4. Handle all samples as if they contain infectious agents.
Observe established precautions against microbiological
hazards throughout the procedure and follow the standard
procedures for the proper disposal of samples.
5. Humidity and temperature can adversely affect results.
6. Keep out of the reach of children.
7. The test stick in the bag should be used immediately after
unpacking to avoid failure caused by dampness.
8. Stop drinking water 2 hours before collecting the urine
sample to prevent it from being diluted.
9. There is a desiccant in the aluminum foil bag. Do not eat it.
10. The urine cup can be reused.
11. Test sticks are disposable and cannot be reused.
12. The used test should be discarded according to local
regulations.
13. This product is for in vitro diagnostic use only.
14. This product is an auxiliary diagnostic device only. It cannot
determine the actual amount of hormone in a urine sample.
The test results cannot serve as a basis for diagnosis.
15. Used test stick、meter and the battery disposal must comply
with the regulations of the national government and
environmental protection agencies.
16. When there are stains, it is recommended to wipe with
alcohol cotton or damp cloth.
17. Do not attempt to disassemble or repair the meter. Doing so
may result in inaccurate readings.
18. Please check the delivery information of products, including
unpacking, completeness and any damages during transport,
and contact customer services ([email protected]) if
there are any damages.
Warning
Any measurement done by this product is for personal
reference only. It is very dangerous for a patient to conduct
self-diagnosis and self-treatment based on measurements
only. Please be sure to follow your doctor’s instructions.
7. When to start testing
First, determine the subject’s menstrual cycle length. The
menstrual cycle length is the number of days from the first day
of the subject’s period (menstrual bleeding) to the last day
before the next period starts.
Next, determine the days to count ahead after the period to
start testing. Find the subject’s menstrual cycle length on the
first row of the chart below, and read the corresponding days
to count ahead in the second row. This is the number of days
after the period to begin testing.
Days to Count Ahead
Finally, determine the day to start
testing. Starting from and
including the first day of the last
period, count ahead the number
of days indicated in the previous
step. This is the day on which
testing should begin.
Note: If uncertain about the length
of the subject’s menstrual cycle,
use the shortest menstrual cycle
length (21 days) when reading the
chart.
21 or less
22
23
24
25
26
27
28
29
30
31
32
33
34
35
36
37
38
39
40 or more
5
5
6
7
8
9
10
11
12
13
14
15
16
17
18
19
20
21
22
23
Cycle
length
Testing
day
8. How to use
Install the CR2032 battery inside
the package.
Scan QR code with a phone
camera to download the App.
①The Digital Fertility Tracking kit
can work without App. In order to
take historical records, it is
recommended to use it with the
Femometer App.
②To avoid wasting the test stick,
it’s better to pair the App when
you are trying to take a test.
③Please place the meter as close
as possible to your phone. If the
first pairing fails, please try it
again. If the pairing still fails,
please contact customer services
([email protected]) for
help.
*Steady on indicates that the Femometer App is connected,
blinking or off indicates that the App is not connected
3
4
5
6
7
1
2
1.FM-IVY 103 meter 2.Screen 3.Test insert position
4.Battery cover 5.Test stick cap 6.Test stick
7.Sampling tip8.Test complete 9. In testing 10.Test results
11.Bluetooth connection status 12.Battery status 13.Error code
14. Progress bar in test 15.Prompt to add sample
*
8
15
9 10
14
11
12
13
*
Start the IVY meter
Take out a test stick from the foil wrapper, insert the test into
the meter.
Pair IVY 103
For the newly downloaded App, tap the scan icon on the
Prime promotion page and scan the QR code to pair.
If you already have the App installed and are using it, tap the
Bluetooth icon on the home page, select IVY 103 to pair.
Take test
1. Collect your urine sample usingthe clean dry cup included in
the package.
① First morning urine is not recommended, but any other time
of day is suitable. For best results, try to collect urine at
approximately the same time each day.
② Only fill sample cup to the line. Don’t drink too much liquid
before testing.
2. Allow the test stick to equilibrate to room temperature
(20°C~30°C or 68°C~86°F).
3. Take out the test stick from the foil wrapper, remove the test
stick cap, and insert it into the meter. The screen will display the
last test result for 5 seconds, then the icon “ ” blinks prompt to
add sample. (Please make sure that the test stick is inserted all
the way to the bottom)
4. Dip the sampling tip of the test stick into the urine and hold
the meter until you hear three "beeps" (usually takes 15-20
seconds to complete), a progress bar will appear at the
bottom of the screen. Then pull out the meter and put the test
stick cap back on.
①Please finish adding samples within 10
minutes, otherwise the test will fail.
②Do not let the urine pass over the plastic
part of the test stick.
③Do not pull out the test stick while
adding samples.
90°
5. Place the meter on a flat surface. Wait for about 5-10 minutes
till you hear ten beeps which indicate that the test is completed.
The test result will be displayed on the screen.
①do not pull out the test stick while testing.
②If the Femometer App is connected, the test results will also
be uploaded to the App for historical records.
6. Remove and discard the test stick after the test is complete.

成品尺寸:120*65mm
纸张材质:70克双胶纸,风琴折