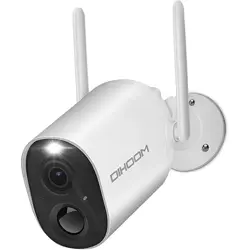
Indoor Wireless Battery Wi-Fi Camera
Y660
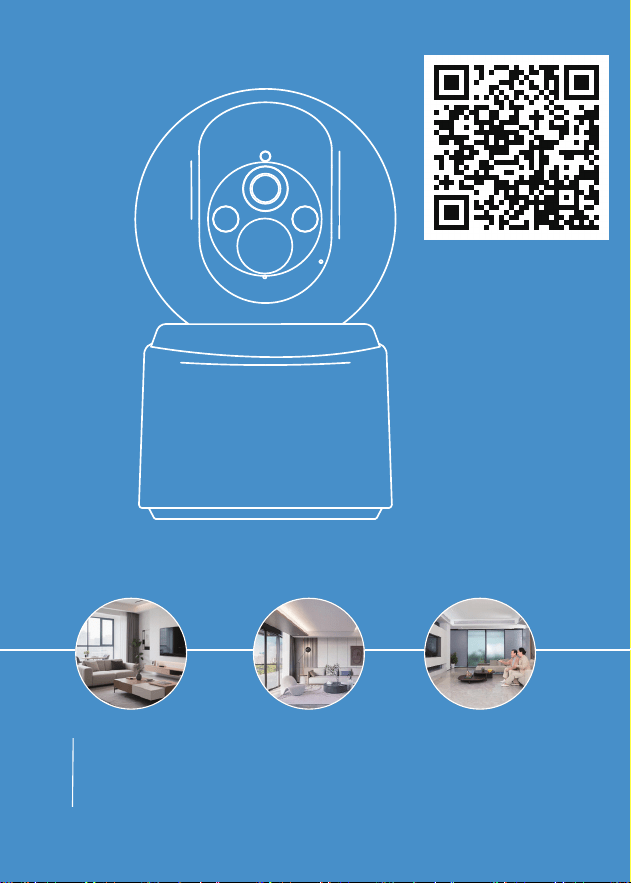
Detailed Electronic Manual

Table of Contents
Statement ····························································01
Technical Support ·················································01
FCC Statement ·····················································02
Product Details ·····················································03
Installing the “DIHOOM” App ··································05
Adding the Camera················································07
-01-
1. Thank you for purchasing this product. We are committed to providing our
customers with a reliable security solution and protecting their property at all
times.
2. This is the quick setup guide that just helps you get familiar with this
product faster. For more information about the product, please refer to the
complete user manual.
3. Although we try our best to make the manual complete and accurate,
there might still be some discrepancies due to timely updating of products.The
detailed information is according to the final products.
If you need help, please contact ser[email protected] before returning your
product.
Statement
Technical Support

This equipment has been tested and found to comply with the limits for a
Class B digital device,pursuant to part 15 of the FCC rules.These limits are
designed to provide reasonable protection against harmful interference in a
residential installation.
This equipment generates,uses and can radiate radio frequency energy and,if
not installed and used in accordance with the instructions, may cause harmful
interference to radio communications. equipment does cause harmful
interference to radio or television reception, which can be determined by
turning the equipment off and on, the user is encouraged to try to correct the
interference by one or more of the following measures:
Reorient or relocate the receiving antenna.
Increase the separation between the equipment and receiver.
Connect the equipment into an outlet on a circuit different from that to
which the receiver is connected.
Consult the dealer or an experienced radio/TV technician for help.
Responsible for compliance could void the user's authority to operate this
equipment.(Example-use only shielded interface cables when connecting to
computer or peripheral devices).Any Changes or modifications not expressly
approved by the party responsible for compliance could void the user's
authority to operate the equipment.
This equipment complies with Part 15 of the FCC Rules.
Operation is subject to the following two conditions: This device may not
cause harmful interference.
This device must accept any interference received,including interference that
may cause undesired operation.
FCC Radiation Exposure Statement:
The equipment complies with FCC Radiation exposure limits set forth for
uncontrolled environment. This equipment should be installed and operated
with minimum distance 20cm between the radiator and your body.
FCC Statement
FCC ID: 2A762-Y660
-02-
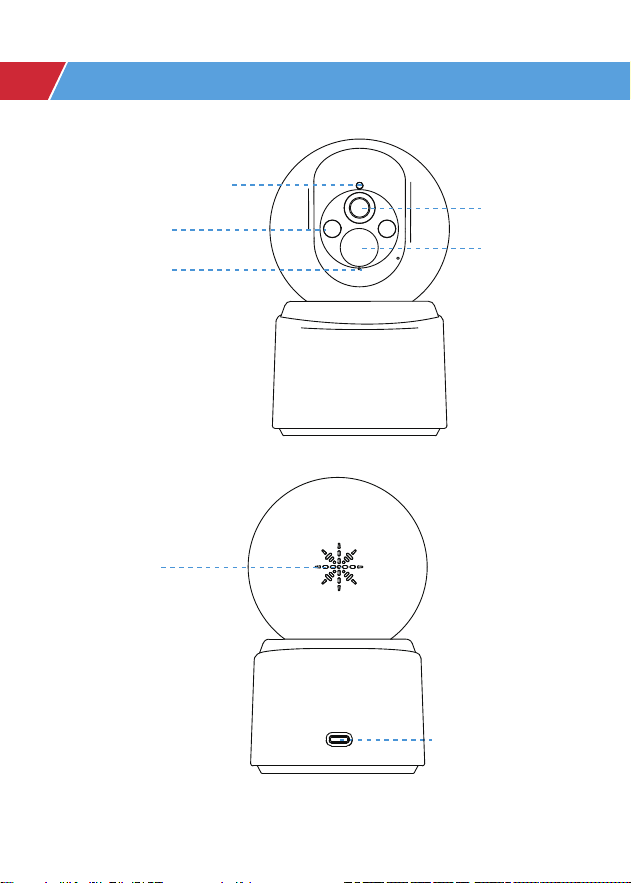
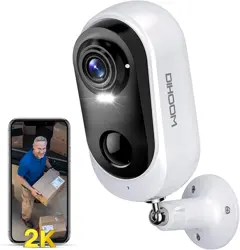
Photosensitive hole
White light/
Infrared light
PIR
Lens
Network
indicator light
TYPE-C
charging port
Speaker
-03-
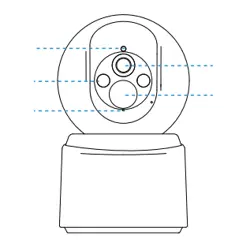
Product details
Product details
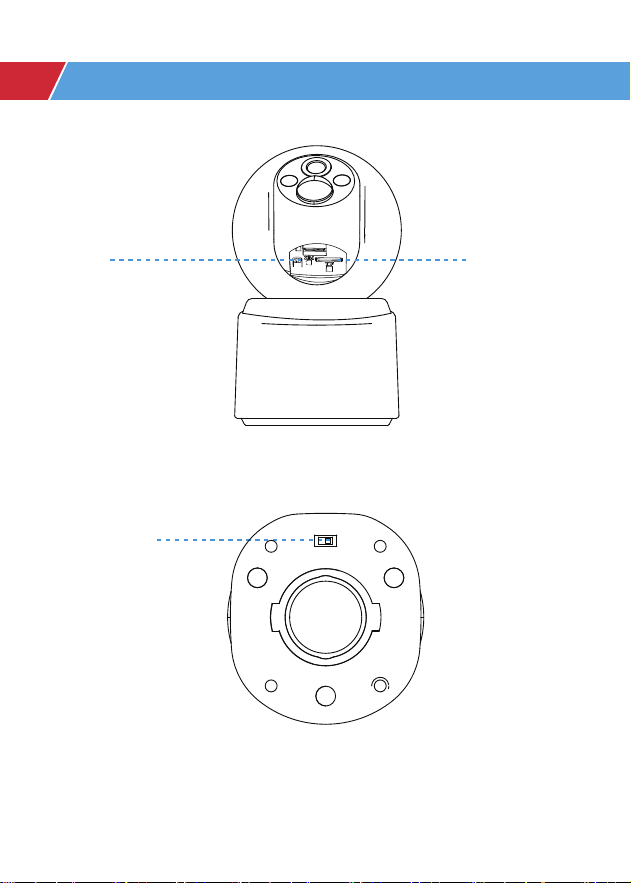
On/Off Key
Reset
TF card slot
-04-

Note : If using an SD card, please insert a Micro SD card (2-128GB) before
starting the product. If the Micro SD card is inserted after powering on,
detection may fail and the product will need to be powered on again.
If the "DIHOOM" app does not work, you can download the universal version
app "Eseecloud".
After turning on the switch, wait for 6-8
seconds to start pairing the network
Installing the ”DIHOOM“ app
No. Camera Buttons
Power button
Press this button for five seconds to reset
and restart the camera.
Reset button
While waiting for a Wi-Fi connection,
start adding devices
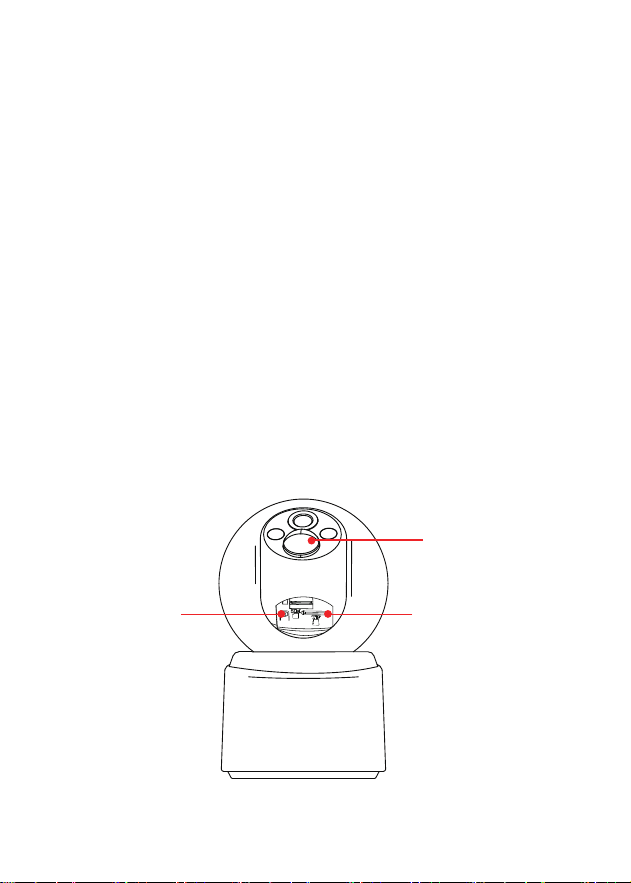
Slowly flashing red
Wi-Fi connected Camera is working
normally.
Continuous blue
Connect to Wi-Fi
Fast flashing red
1
2
Function
No. LED Status
1
2
3
Function
How to get to the connection
1. Connection
Allow ”DIHOOM“ to access mobile data and WLAN, so you can add devices.
Allow ”DIHOOM“ to receive notifications, to receive alert notifications when
motion is detected.
(The following QR codes are common to both IOS and Android)
IOS & Android
-05-
① After turning on the bottom switch, wait for about 5-8 seconds, you will
hear the prompt tone "Please Configure Network" and the camera network
indicator will flash red.
② Press and hold the "Reset" button at the bottom of the lens for about 5
seconds and then release it. When you hear the prompt tone "Please
Configure Network", you can connect and pair normally.
3. Turn on and Restart the camera
2. Register account
1. Click "Register"
2. Follow the steps to complete your account registration
3. Login
Advice
① Make sure you use the correct email address.
② Select the correct region.
③ When registering for a new account, please select the region where you
are actually located.(Cross-region data sharing between your ”DIHOOM“
account is not supported.)
Reset key SD Card
PIR
-06-
Adding the Camera
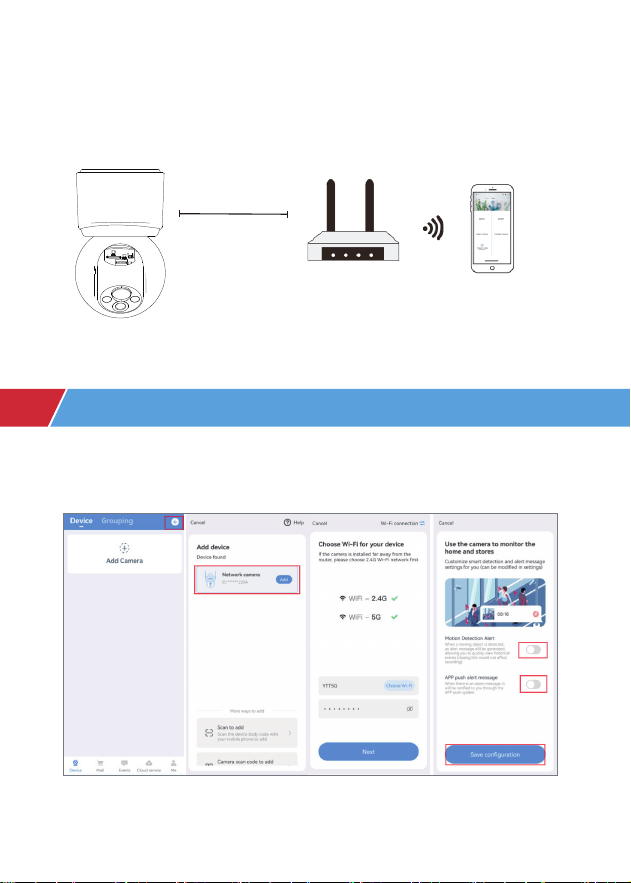
4. Connect to Wi-Fi (Support Both 2.4GHz and 5GHz Wi-Fi)
Place the camera and smartphone 1 to 3 feet (30 to 100 cm) away from the
router to ensure a strong Wi-Fi signal.
Smartphone
30cm~100cm
Home router
Method 1: Bluetooth connection
Please turn Bluetooth and Wi-Fi all the way on when you start using it
-07-
1. APP main interface
2. Device
3. Click “+”or “Add camera”in the upper right corner
4. “Network camera”will pop up automatically at the top(wait 30 seconds)
5. Click “Network camera” to connect.
Note:
1. If the connection is unsuccessful, press the RESET button to reset the Y660
camera and then try to reconnect via Bluetooth.
2. When you successfully add a device, turn on the Smart Detection Alarm,
which is turned off by default and needs to be turned on by yourself.
Method 2 : QR code connection
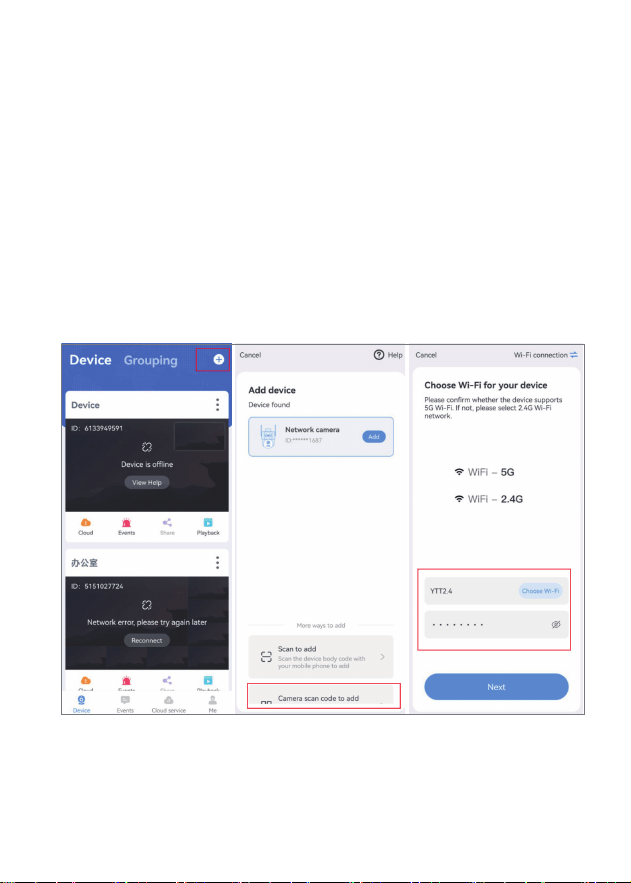
Tap “+” to Add Device Tap “Camera scan code to add” Input Wi-Fi Password
-08-
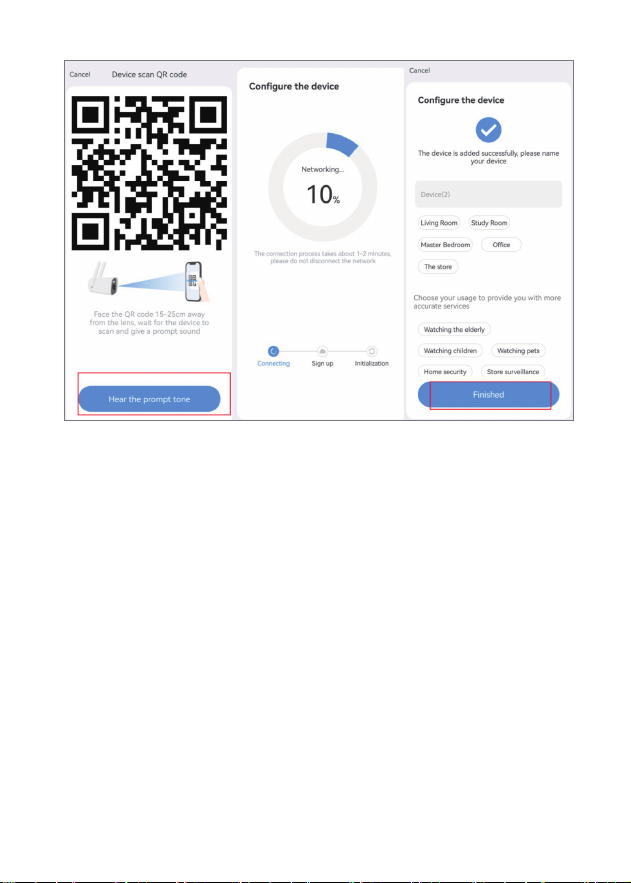
Scan QR Code Wait for Connection Device Added
Step 1:
Open the ”DIHOOM“ APP and tap the “+” sign in the upper right corner to
enter the Add Device page.
Step 2:
Make sure you follow the correct steps to turn on the camera (make sure
the unit is connected to the power supply, then press the button, the unit
will turn on automatically, the head will rotate automatically and the LEDs
will turn on).
Step 3:
Select 2.4GHz or 5GHz Wi-Fi and enter the password, click "Next".
-09-

Step 4:
Click "Next" and the camera will start connecting to Wi-Fi. Once the
connection is complete, a "connection successful" notification page will
appear. Then click "Next" to switch to the "Devices" screen and the Wi-Fi
connection will be made.
Precaution
We have a variety of connection methods, if the code scanning method fails
to connect, we can consider using Bluetooth link, for details, you can go to
our detailed manual, the QR code of the detailed manual is on the upper
right corner of the home page, thank you for your support.
-10-