
EN
ELECTRIC SONIC TOOTHBRUSH
Translation of the original manual
SOC 3200SL / SOC 3210SL
SOC 3311BK / SOC 3312WH
SOC 3313PW
SOC 3200SL / SOC 3210SL
SOC 3311BK / SOC 3312WH
SOC 3313PW
A
45°
Clean
White
Polish
Massage
Sensitive
1
2
8
5
11
6
7
3
4
9
10
B
1
2
4
5
3
C
6
5
1
2
4
7
3
D
E
45°
F
Clean
White
Polish
Massage
Sensitive

- 1 -
Revision 05/2022
Copyright © 2022, Fast ČR, a.s.
EN Electric Sonic Toothbrush
Important safety instructions
READ CAREFULLY AND STORE FOR FUTURE USE.
• Toothbrushes may be used by children and persons with
reduced physical or mental capabilities or with alack of
experience and knowledge, if they are supervised or have
been instructed to use the appliance in asafe manner and
understand the potential dangers.
• Children must not play with the appliance. Cleaning
and maintenance performed by the user must not be
performed by unsupervised children.
• In the event that the power cord is damaged, have it
repaired at aprofessional service centre to prevent causing
adangerous situation. It is forbidden to use the appliance if
it has adamaged power cord.
• The parts of the appliance that need to be mounted or
stood upright, must be mounted or stood upright in such
away that they cannot fall into water.
• The appliance must only be powered using asmall safe
voltage corresponding to the markings on the appliance.
• To charge the toothbrush, only use the original charging
stand or the travel charger case set with USB cable
supplied with it. Never use non-original accessories.
Before connecting the charging stand to apower
socket, make sure the voltage stated on its rating label

- 2 -
Revision 05/2022
Copyright © 2022, Fast ČR, a.s.
corresponds to the voltage in your power socket. The
charging case is to be charged using an external 5 V
USB interface.
• This toothbrush serves to clean teeth and gums. Do not use it for purposes other than those for which it was designed.
• Do not expose the toothbrush or its accessories to the effects of the outdoor environment, extreme temperatures, direct sunlight or locate it in the
vicinity of an open flame, heating elements and other equipment or appliances that could be potential sources of heat.
• Always locate the charging stand on an even and stable surface.
• In the event that the charging stand is submerged in water, first disconnect it from the power socket and only then take it out of the water and dry it
out thoroughly.
• Protect the travel charger case against the entry of water. Do not place it in the vicinity of vessels filled with water, e.g. sinks, baths, etc., do not
spray it with water, submerge it in water or wash it under running water.
• Keep the power cord plug of the charging stand and the USB cable dry.
• Charge, use and keep the toothbrush at room temperature. Do not submerge it in hot water.
• The travel case, which is fitted with asterilisation chamber, has aUV lamp that heats up during the sterilisation process. As aresult of residual
heat, the UV lamp remains hot for acertain time after the sterilisation process has finished. Do not touch the hot surface. Ensure that the ventilation
opening of the sterilisation chamber is not blocked during the sterilisation process.
• Allow the UV lamp to cool down for at least 10 minutes between individual sterilisation cycles.
• Do not use the travel case with the sterilisation chamber when the UV lamp remains lit even after the lid is opened, when the UV lamp is damaged
or when smoke is coming out of the lamp or when there is aburning smell. UV radiation is damaging to human eye sight and skin. Keep the
sterilisation case with sterilisation chamber out of children’sreach.
• For hygiene reasons, atoothbrush head should be used by only asingle user. Regularly replace the toothbrush head every 3 months or sooner if it
shows signs of wear. Use only original replacement toothbrush heads.
• When the toothbrush is used by children, supervise them while they are brushing their teeth until they acquire the proper tooth brushing technique.
• In the event that dental work or oral surgery was performed in the past two months, consult the use of asonic toothbrush with your dentist.
• In the event that gum bleeding occurs when the toothbrush is used and if bleeding does not stop even after aweek of its use, contact your dentist.
• In the event that using the toothbrush causes unpleasant or painful feelings, stop using the toothbrush and consult this situation with your dentist.
• In the event that you have apacemaker or another implanted device, consult the use of the toothbrush with your doctor or manufacturer of the
implant.
• Perform cleaning and maintenance according to the instructions in chapter Cleaning and maintenance. Do not wash the toothbrush or its
accessories in adishwasher.
• Disconnect the charging stand from the power socket by gently pulling the plug of the power cord, and not the power cord itself. Otherwise, this
could damage the power cord or the socket.
• Do not make any modifications to the toothbrush or its accessories.
• In the event that the toothbrush, charging stand, charging stand power cord, travel charger case, UV lamp or the USB cable are damaged in
any way, do not use it. Adamaged travel charger case or USB cable must always be replaced with an original type. The power cord on the
charging stand cannot be replaced. In the event that it is damaged, the charging stand must be disposed of and replaced with an original type.
For replacement of damaged accessories and for all repairs of the toothbrush, contact an authorised service centre. Do not repair the toothbrush
yourself. By tampering with the product you risk voiding your legal rights arising from unsatisfactory performance or quality warranty.

- 3 -
Revision 05/2022
Copyright © 2022, Fast ČR, a.s.
• Prior to using this appliance, please read the user'smanual
thoroughly, even in cases, when one has already familiarised
themselves with previous use of similar types of appliances. Only use
the appliance in the manner described in this user’smanual. Keep this
user'smanual in asafe place where it can be easily retrieved for future
use. In the event that you hand this appliance over to somebody else,
make sure to also include this user'smanual.
• Carefully unpack the appliance and take care not to throw away any
part of the packaging before you find all its parts. We recommend
saving the original cardboard box, packaging material, purchase
receipt and responsibility statement of the vendor or warranty card for
at least the duration of the legal liability for unsatisfactory performance
or quality. In the event of transportation, we recommend that you pack
the appliance in the original box from the manufacturer.
. . . . . . . . . . . . . . . . . . . . . . . . . . . . . . . . . . . . . . . . . . . . . . . . . . . . . . . . . . . . . . . . . . . .
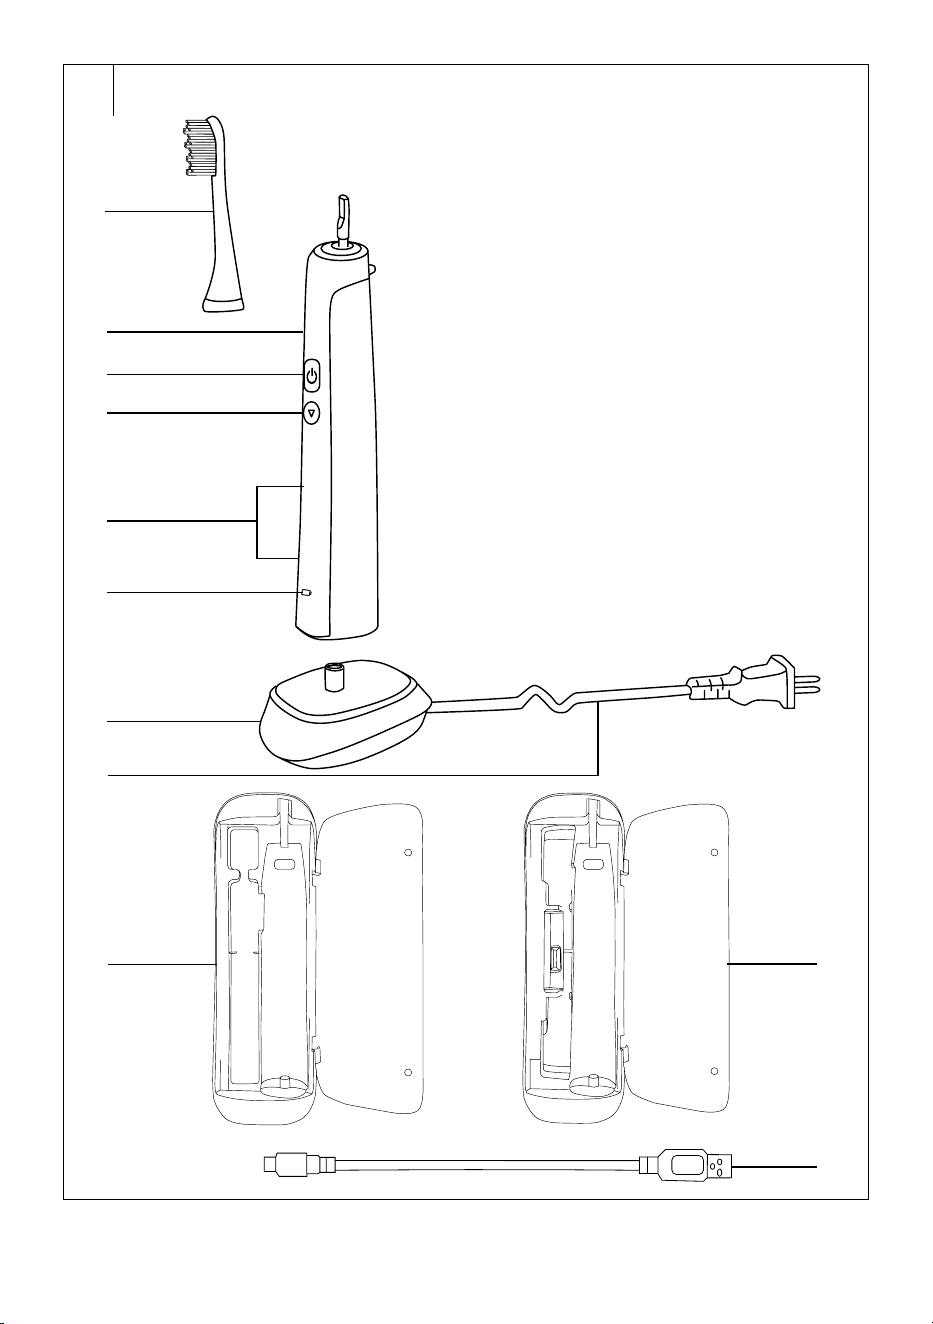
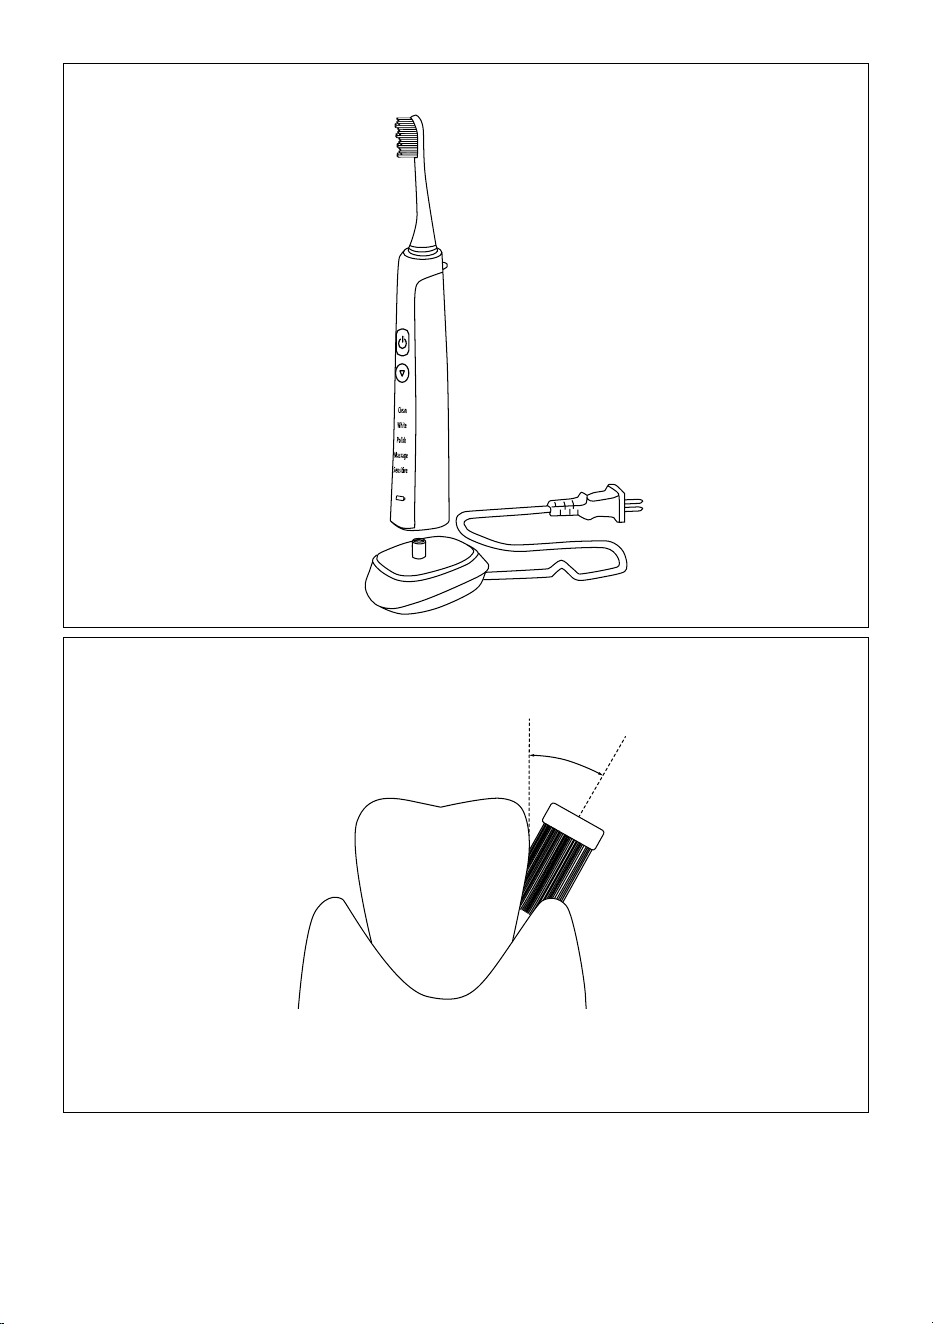
DESCRIPTION OF THE TOOTHBRUSH AND ITS ACCESSORIES
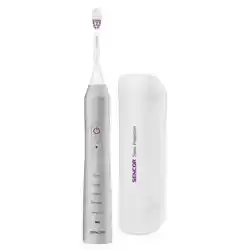
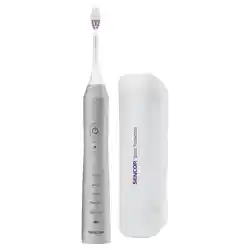
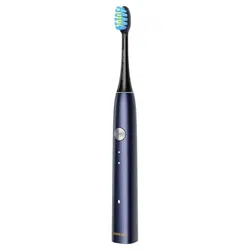
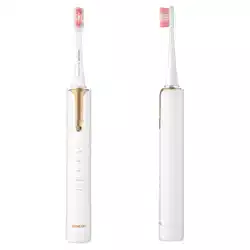
A1 Toothbrush head*
A2 Ergonomically-shaped handle
A3 On/Off button of the
toothbrush
A4 Button for setting the brushing
mode
Depending on the selected
mode, the speed is set to
31000, 41000 or 48 000
vibrations per second.
A5 Brushing mode setting
LEDindicators
A6 Operation or charging of the
toothbrush LED indicator
A7 Charging stand
A8 Power cord
A9 Travel charger case without
sterilisation chamber
Supplied with model
SOC 3200SL.
A10 Travel charger case with
sterilisation chamber
Supplied with model
SOC3210SL, SOC 3311BK
andSOC 3312WH.
A11 USB cable
*
Note:
2 toothbrush heads are included.
. . . . . . . . . . . . . . . . . . . . . . . . . . . . . . . . . . . . . . . . . . . . . . . . . . . . . . . . . . . . . . . . . . . .
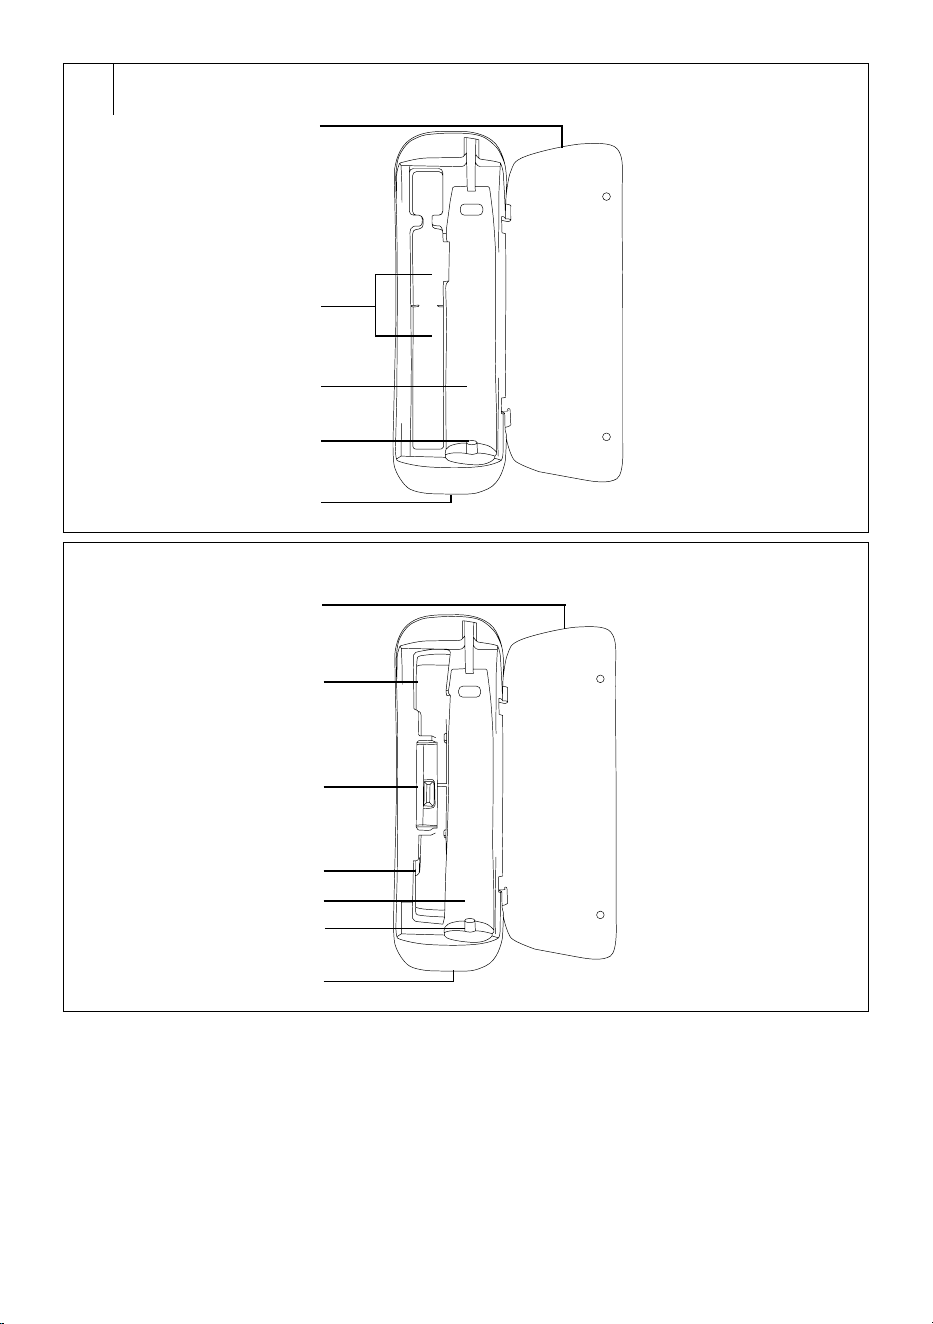
DESCRIPTION OF THE TRAVEL CASE WITHOUT STERILISATION
CHAMBER
B1 Lid
B2 Toothbrush head storage
space
One or two toothbrush heads
can be stored in this space.
B3 Toothbrush handle storage
space
B4 Charging unit
B5 USB micro port
. . . . . . . . . . . . . . . . . . . . . . . . . . . . . . . . . . . . . . . . . . . . . . . . . . . . . . . . . . . . . . . . . . . .
DESCRIPTION OF THE TRAVEL CASE WITH STERILISATION
CHAMBER
C1 Lid
C2 Toothbrush head storage
space
C3 Sterilisation chamber
C4 Toothbrush head storage
space
C5 Toothbrush handle storage
space
C6 Charging unit
C7 USB micro port
. . . . . . . . . . . . . . . . . . . . . . . . . . . . . . . . . . . . . . . . . . . . . . . . . . . . . . . . . . . . . . . . . . . .
ATTACHING AND REMOVING THE TOOTHBRUSH HEAD
• Make sure that the toothbrush is turned off before attaching or
removing atoothbrush head A1.
• Attach the toothbrush head A1 by sliding it on to the handle A2 from
above.
• Take off the toothbrush head A1 by pulling it away from the handle A2.
. . . . . . . . . . . . . . . . . . . . . . . . . . . . . . . . . . . . . . . . . . . . . . . . . . . . . . . . . . . . . . . . . . . .
CHARGING THE TOOTHBRUSH
• This toothbrush has abuilt-in Li-Ion battery that enables cordless
operation.
• Make sure that the toothbrush is turned off before charging it.
1. IN THE CHARGING STAND
• Locate the charging stand A7 on an even and stable surface and plug
the power cord A8 into apower socket (100–240 V).
• Put the toothbrush on to the stand A7 from above, see figure D. When
charging, LED indicator A6 is lit red and LED indicators A5 gradually
light up and turn off. When the battery is fully charged, the LED
indicator A6 will be lit blue and LED indicators A5 will turn off. After
charging, disconnect the charging stand A7 from the power socket.
Note:
Allow the toothbrush to charge for at least 15hours before
first use and after not using it for along time.
If you are charging the toothbrush for the first time or if
you have not used it for along time, it may take up to
10minutes before the LED indicator A6 lights up.
• Afully charged toothbrush will provide approximately 180hours
of operation. If you brush your teeth twice aday for 2minutes, the
toothbrush will last for 45days without needing to be recharged.
2. IN THE TRAVEL CHARGER CASE
• Place the travel case A9 or A10 on adry even surface. Open the lid B1
or C1 and insert the toothbrush handle A2 into space B3 or C5 so that
the end of the charging unit B4 or C6 slides into the toothbrush handle
A2. The lid B1 or C1 may be left open or it may be closed.
• To supply power to the charger case A9 or A10 from an external USB
interface, e.g. your computer, powerbank, etc., connect the USB micro
port B5 or C7 to an external USB interface using USB cable A11.
• When the travel case A9 or A10 is connected to acharging power
source, the charging process will start. With travel case A10, which is
fitted with asterilisation chamber C3, you may sterilise the toothbrush
head A1 during the charging process. Sterilisation may only be
performed with the lid C1 closed. More detailed information about
using the sterilisation chamber C3 is provided in chapter Toothbrush
head sterilisation.
• After finishing charging, disconnect the travel case A9 or A10 from the
external USB interface.
. . . . . . . . . . . . . . . . . . . . . . . . . . . . . . . . . . . . . . . . . . . . . . . . . . . . . . . . . . . . . . . . . . . .
HOW TO ACHIEVE THE LONGEST POSSIBLE BATTERY LIFETIME
• To ensure the longest possible lifetime of the battery, we recommend:
– store, use and charge the battery at room temperature.
Excessively high temperatures may negatively affect its lifetime.
– do not unnecessarily leave the battery fully charged or completely
flat for too long.
– do not keep the battery permanently fully charged.
– do not fully discharge the battery.
. . . . . . . . . . . . . . . . . . . . . . . . . . . . . . . . . . . . . . . . . . . . . . . . . . . . . . . . . . . . . . . . . . . .
USING THE TOOTHBRUSH
• Make sure that the toothbrush is properly assembled before using it.
Wet the toothbrush bristles with water and apply the toothpaste. Turn
on the toothbrush by pressing button A3.
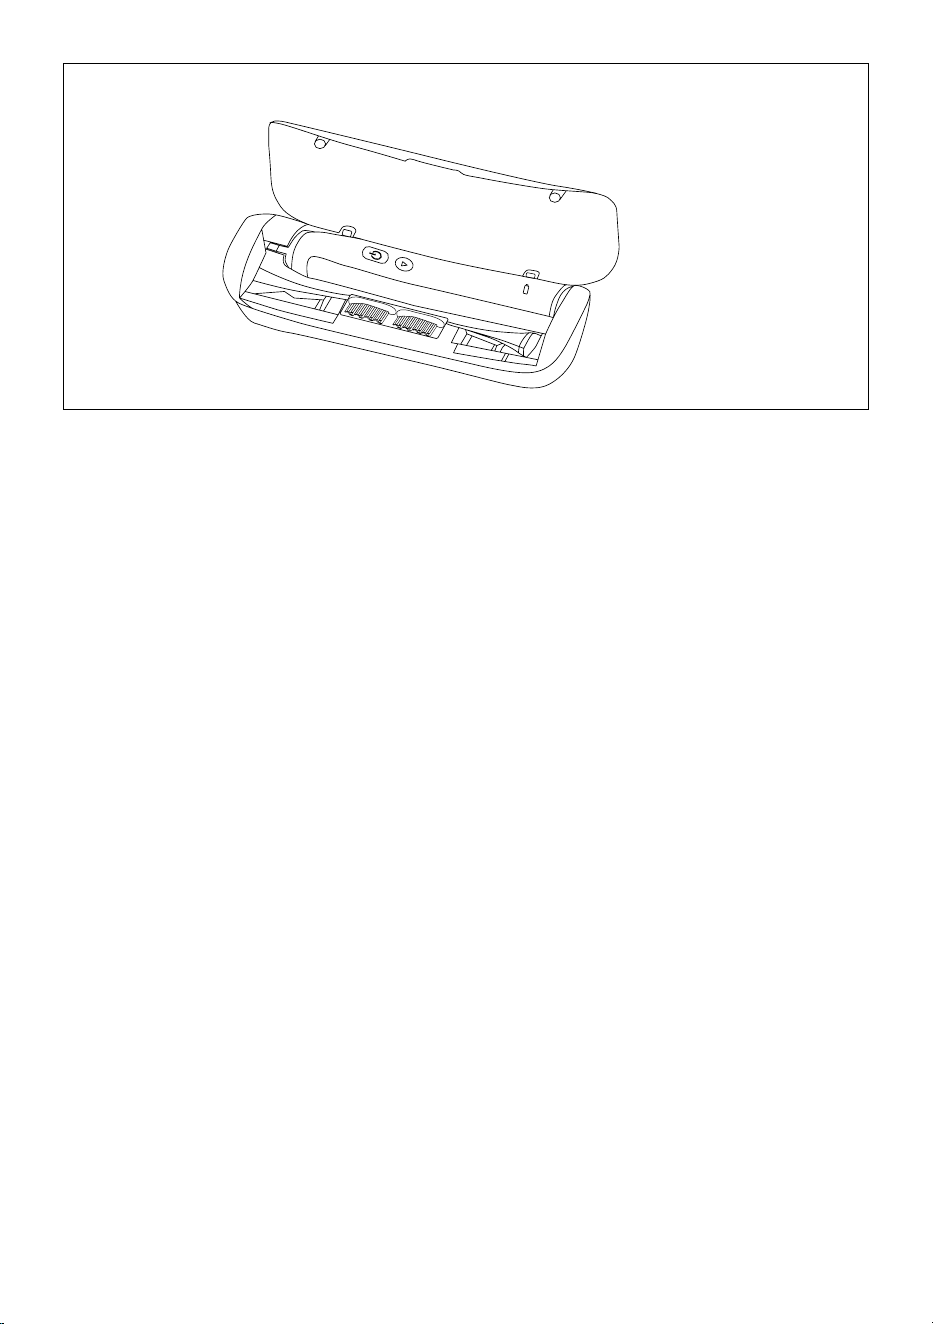
1. CORRECT BRUSHING TECHNIQUE
• We recommend to start by brushing the right half of the upper dental
arch from the outer side. When brushing, proceed from back to front.
Place the toothbrush bristles on to the teeth at an angle of 45° in
line with the gum, see figure E. Using short slow motions, move the
toothbrush to the other teeth. Once the outer side of the upper right
EN
Electric Sonic Toothbrush
User'smanual

- 4 -
Revision 05/2022
Copyright © 2022, Fast ČR, a.s.
dental arch is brushed, move the toothbrush to the inner side of the
dental arch. Again, proceed from back to front. Adjust the toothbrush
angle to the tooth arrangement. When brushing the inner side of the
front teeth, hold the toothbrush handle A2 vertical so that the tip of
the toothbrush head A1 points upwards. Finally, brush the upper tooth
surfaces.
• In the same way, brush the right half of the lower dental arch, the left
half of the lower dental arch and finally also the left half of the upper
dental arch. When brushing the inner side of the front teeth of the
lower dental arch, hold the toothbrush handle A2 vertical so that the
tip of the toothbrush head A1 points downwards.
2. SETTING UP THE BRUSHING MODE
• Repeatedly press button A4 to switch between the modes: CLEAN
(standard brushing), WHITE (whitening), POLISH (polishing),
MASSAGE (massaging) and SENSITIVE (gentle brushing). LED
indicator A6 is lit during operation. The mode setting is indicated by
the respective LED indicator A5. The last setting is saved to memory.
This means that the next time the toothbrush is started, it will run in
the mode that was set previously.
• CLEAN mode is intended for standard tooth brushing. WHITE mode is
intended for more intensive tooth brushing (whitening). POLISH mode
is intended for tooth polishing. MASSAGE mode is acombination of
tooth brushing and gum massaging. SENSITIVE mode is intended for
brushing sensitive teeth.
3. 4PACER FUNCTION
• The toothbrush has atimer function that momentarily pauses the
toothbrush every 30 seconds until it turns off automatically, thereby
informing the user that it is time to start brushing the next part of your
teeth. This will ensure that all the dental quadrants are brushed for the
same amount of time.
4. AUTOMATIC SHUT-OFF TIMER
• The automatic shut-off timer automatically turns the toothbrush
off after 2minutes of operation. This is the tooth brushing time
recommended by dentists for the sonic toothbrush.
• When the toothbrush is turned off, the LED indicators A5 and A6 will
flash afew times and then turn off.
• When you have finished using it, make sure that the toothbrush
is turned off and clean it according to the instructions contained
in chapter Cleaning and maintenance. Then put it back on to the
charging stand A7 or into the case A9 or A10. Before putting it into
the case, it is necessary to remove the head A1 from the toothbrush
handle A2.
. . . . . . . . . . . . . . . . . . . . . . . . . . . . . . . . . . . . . . . . . . . . . . . . . . . . . . . . . . . . . . . . . . . .
CLEANING AND MAINTENANCE
• For hygiene reasons, regularly clean the toothbrush after every use.
• Make sure that the toothbrush is turned off before cleaning it.
• Thoroughly rinse the toothbrush head A1 under lukewarm running
water to remove any toothpaste or other remains. If whitening pastes
are used when brushing teeth, it is recommended to apply adrop of
soap on to the toothbrush head A1 and then thoroughly wash it under
running lukewarm water. Remove the toothbrush head A1 from the
handle A2 at least once per week and clean it under running water in
the location where it is attached to the handle A2.
• Rinse the toothbrush handle A2 under running lukewarm water and
then dry it.
• In the event that the charging stand A7 is soiled, wipe it with aclean
dampened cloth and then wipe dry. Ensure that the power plug
contacts do not come into contact with water or moisture.
• You may wipe the travel case A9 or A10 using adry or alightly
dampened cloth and then dry it carefully. Do not spray the travel case
A9 or A10 with water, do not rinse it under running water or submerge
it in water.
• For cleaning, do not use abrasive cleaning products, thinners, etc.
Otherwise the surface of the appliance may be damaged.
. . . . . . . . . . . . . . . . . . . . . . . . . . . . . . . . . . . . . . . . . . . . . . . . . . . . . . . . . . . . . . . . . . . .
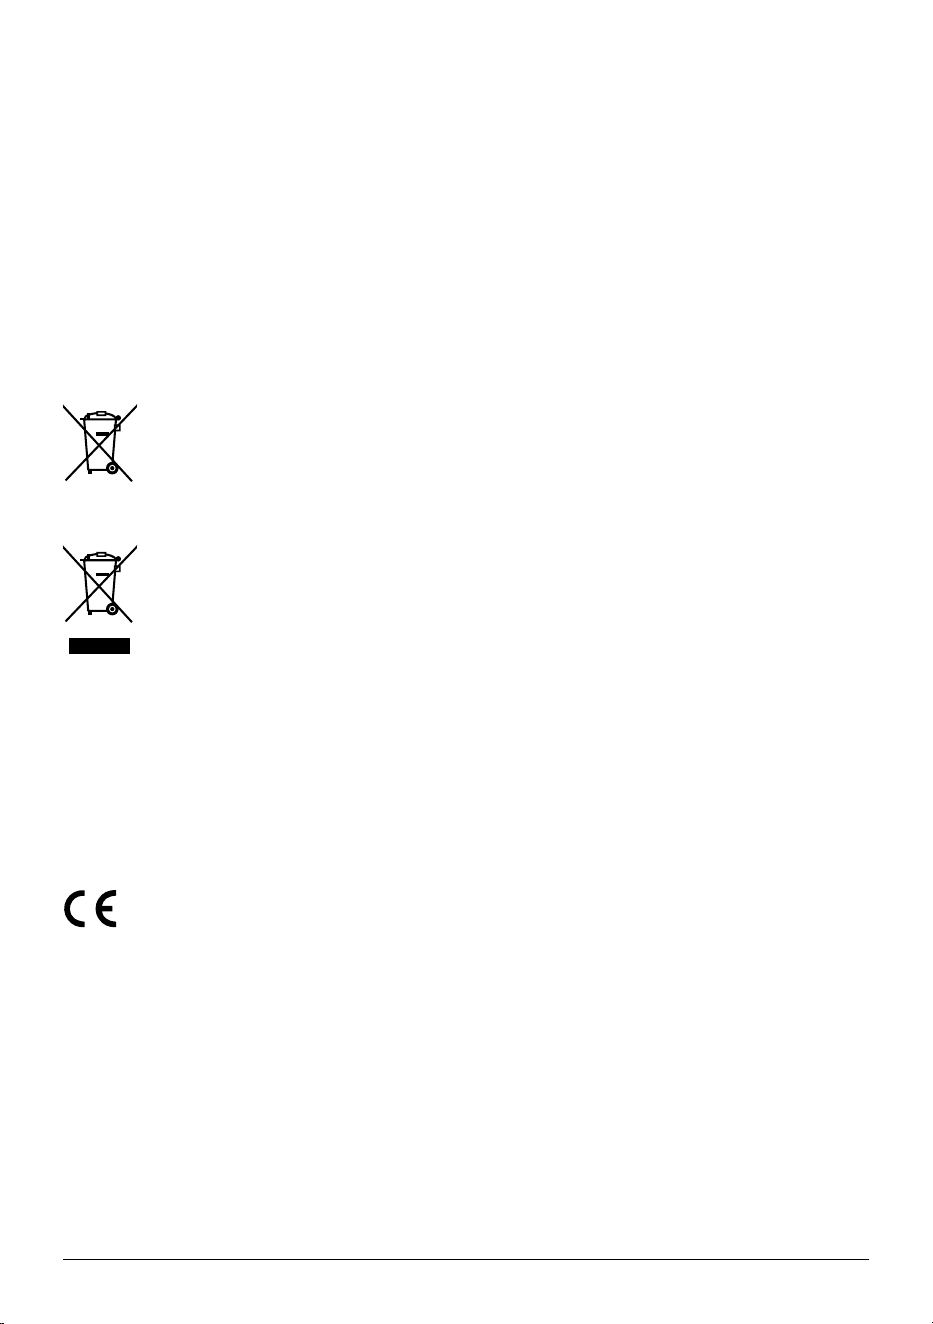
STERILISING THE TOOTHBRUSH HEAD
• You may sterilise the toothbrush head A1 in the sterilisation chamber
C3 after every use. Put the toothbrush head into the space C2 or C4
so that the toothbrush bristles point towards the UV lamp, see figure
F. Before sterilisation, it is necessary to thoroughly wash and dry the
toothbrush head A1.
• Connect the travel case A10 to apower source according to the
instructions contained in the chapter Charging the toothbrush in the
travel case and close the lid C1. When the lid C1 is closed, the UV lamp
will turn on and the sterilisation process will start. The sterilisation
process will automatically stop after 8minutes and the UV lamp will
turn off. In the event that the lid C1 is opened during the sterilisation
process, the UV lamp will automatically turn off. When it is necessary
to sterilise another toothbrush head A1, wait 10minutes until the
UV lamp cools down. To start another sterilisation process, again
connect the USB cable A10 to apower source and close the lid C1.
• Sterilisation may be performed at the same time as charging the
toothbrush handle A2.
• UV radiation is damaging to human eye sight and skin. Do not use the
travel case A10 with the sterilisation chamber C3 when the UVlamp
remains lit even after the lid C1 is opened, when the UVlamp is
damaged or when smoke is coming out of the lamp or when there
is aburning smell. Have the damaged UVlamp replaced at an
authorised service centre.
. . . . . . . . . . . . . . . . . . . . . . . . . . . . . . . . . . . . . . . . . . . . . . . . . . . . . . . . . . . . . . . . . . . .
REPLACING THE TOOTHBRUSH HEAD
• Regularly replace the toothbrush head A1 every 3months or sooner
if it shows signs of wear. Use only original replacement toothbrush
heads.
• Replacement toothbrush heads are available from you vendor both in
online and brick&mortar stores.
. . . . . . . . . . . . . . . . . . . . . . . . . . . . . . . . . . . . . . . . . . . . . . . . . . . . . . . . . . . . . . . . . . . .
STORAGE
• When not using the toothbrush for an extended period of time,
disconnect the charging stand A7 from the power socket and put the
toothbrush into the case A9 or A10 in adry, clean place.
• Store the case A9 or A10 with the toothbrush, the charging stand
A7and the USB cable A11 in adry, clean place.
. . . . . . . . . . . . . . . . . . . . . . . . . . . . . . . . . . . . . . . . . . . . . . . . . . . . . . . . . . . . . . . . . . . .
TECHNICAL SPECIFICATIONS
Toothbrush
Battery ................................................................................ Li-Ion / 3.7 V/ 800 mAh
Operating time when fully charged .........................................up to 180 minutes
Noise level ........................................................................................................ 65 dB(A)
Protection class level against damaging entry of water ............................. IPX7
Charging stand
Input ........................................................................100−240 V~, 50–60 Hz, 1.4 W
Electrical shock protection class ............................................................................... II
Protection class level against damaging entry of water ............................. IPX7
Travel charger case
Input ..................................................................................................5 V , 500−1 000 mA
The declared noise emission level is 65dB(A), which represents alevel Aof
sound power with respect to areference sound power of 1 pW.
Explanation of technical terminology
Safety class for electrical shock protection:
Class II – Electrical shock protection is provided by double or heavy-duty
insulation.
Protection class level against damaging entry of water:
IPX7 – The appliance is protected against damaging entry of water when
submerged at adepth of 1metre for 30minutes.
Changes to text and technical parameters are reserved.
. . . . . . . . . . . . . . . . . . . . . . . . . . . . . . . . . . . . . . . . . . . . . . . . . . . . . . . . . . . . . . . . . . . .
- 5 -
Revision 05/2022
Copyright © 2022, Fast ČR, a.s.
INSTRUCTIONS AND INFORMATION REGARDING THE DISPOSAL OF
USED PACKAGING MATERIALS
Dispose of used packaging material at asite designated for waste in your
municipality.
REMOVING THE BATTERY AT THE END OF THE
PRODUCT’SLIFETIME
Prior to disposing of the product or handing it over at aspecialised
collection facility, it is necessary to ensure that the built-in battery is
removed. Allow the battery to discharge before removing it. To remove
the battery, proceed as follows. Wrap the toothbrush handle A2 into an
unneeded piece of cloth and place it on an even, stable surface. Using
asmall hammer, hit the handle A2 from the side afew times in the vicinity
of the LED indicator A6. Rotate the handle A2 and repeat this procedure
until the bottom cover is released from the handle A2. After releasing the
cover, remove it and take out the built-in battery. Battery removal may
also be performed at an authorised service centre. In the event that the
product has been disassembled for the purpose of ecological disposal
then it must not be reassembled.
BATTERY DISPOSAL
The battery contains environmentally damaging
substances and therefore does not belong in standard
household waste. Hand it over for proper disposal at
respective collection locations.
. . . . . . . . . . . . . . . . . . . . . . . . . . . . . . . . . . . . . . . . . . . . . . . . . . . . . . . . . . . . . . . . . . . .
DISPOSAL OF USED ELECTRICAL AND ELECTRONIC EQUIPMENT
This symbol on products or original documents means that
used electric or electronic products must not be added to
ordinary municipal waste. For proper disposal, renewal and
recycling, hand over these appliances to determined
collection points. Alternatively, in some European Union
states or other European countries you may return your
appliances to the local retailer when buying an equivalent
new appliance. Correct disposal of this product helps save
valuable natural resources and prevents potential negative effects on the
environment and human health, which could result from improper waste
disposal. Ask your local authorities or collection facility for more details. In
accordance with national regulations penalties may be imposed for the
incorrect disposal of this type of waste.
For business entities in European Union states
If you want to dispose of electric or electronic equipment, ask your retailer
or supplier for the necessary information.
Disposal in other countries outside the European Union.
This symbol is valid in the European Union. If you wish to dispose of this
product, request the necessary information about the correct disposal
method from the local council or from your retailer.
This product meets all the basic requirements of EU
directives related to it.

FAST ČR, a.s.
U Sanitasu 1621
CZ-251 01 Říčany
www.sencor.eu