RJ14-DB-SERIES
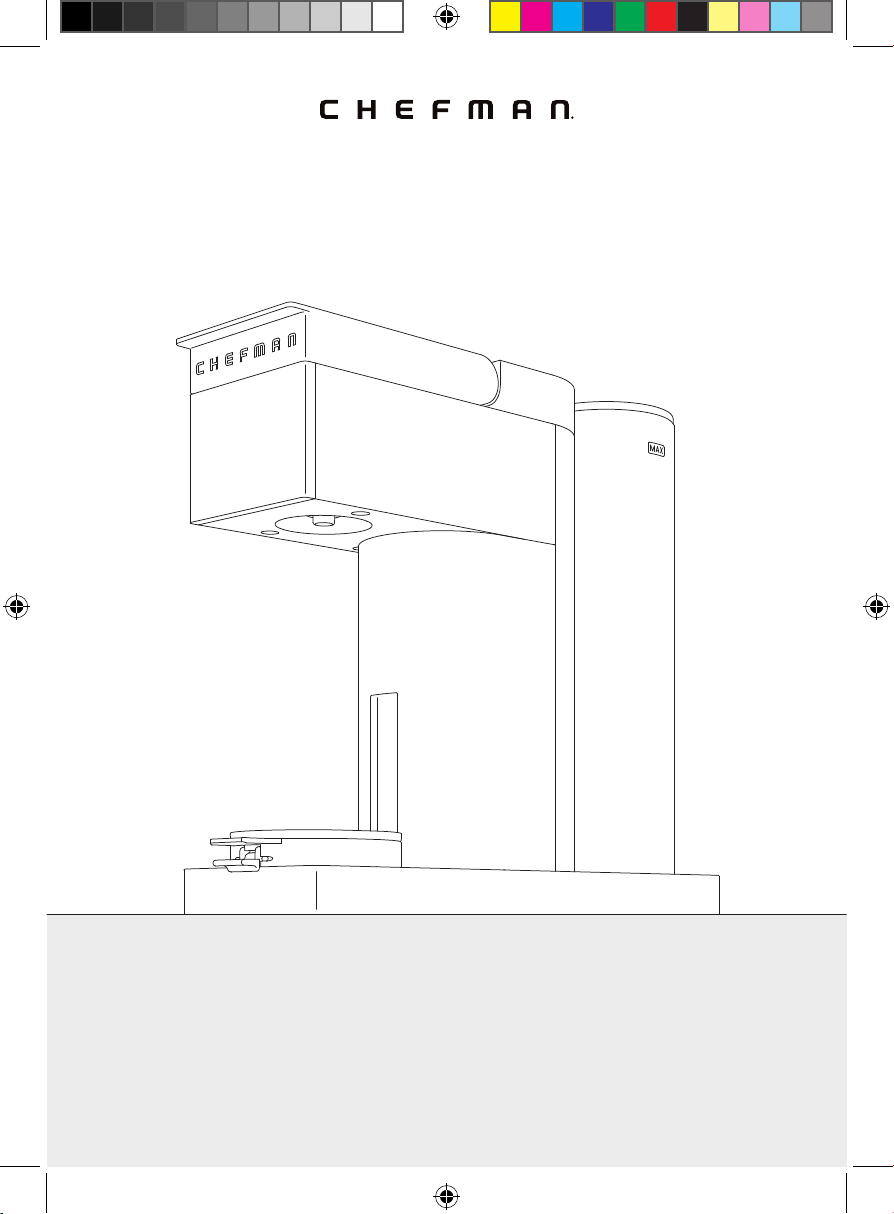
COVER DRAWING
Caffeinator™

Table of Contents
4 Get to Know Your Coffee Maker
6 Control Panel
7 Safety Instructions & Important Safeguards
10 Before First Use
11 Quick Start: How to Make Coffee
16 Special Features
17 Having Trouble?
18 Coffee Creations
20 Keep It Clean
22 Terms & Conditions
25 Warranty Registration
4
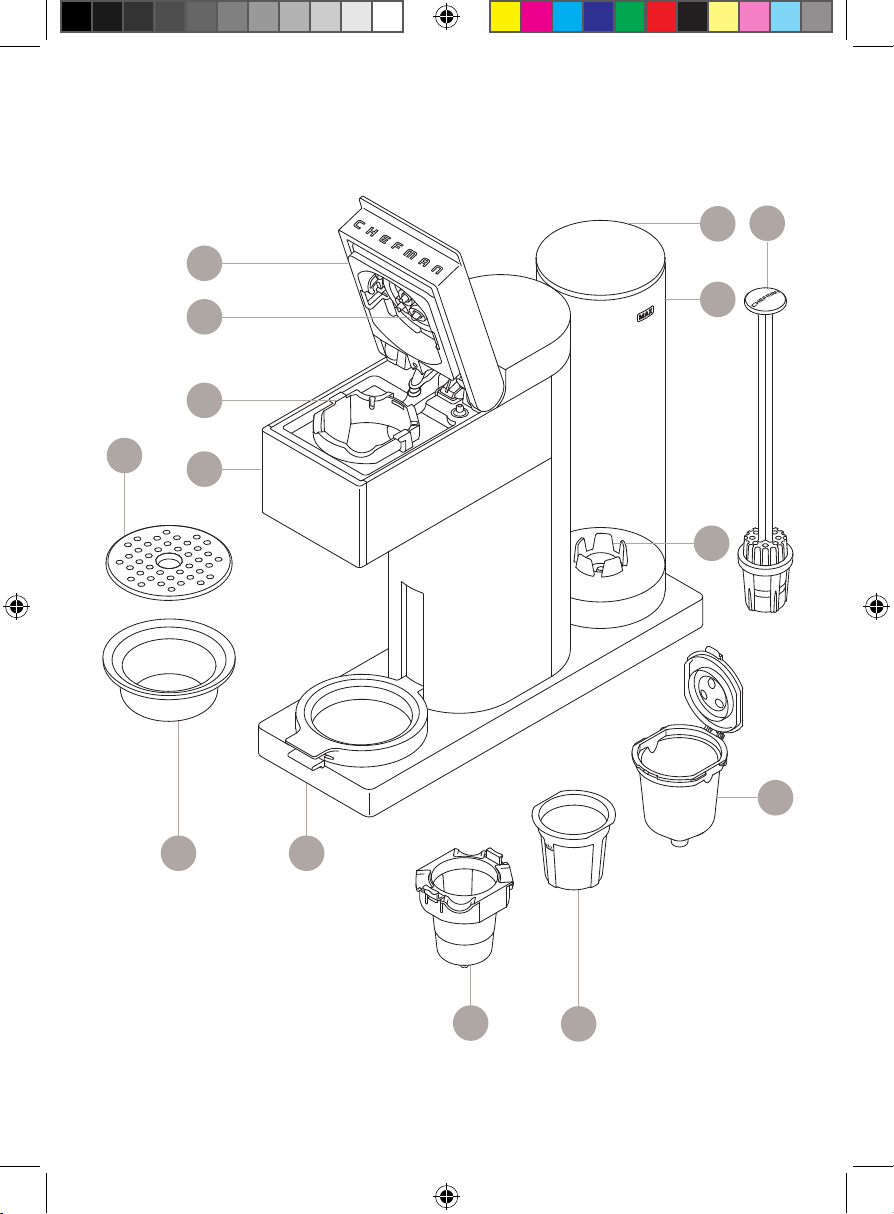
Get to Know Your Coffee Maker
1. Water reservoir lid
2. Water reservoir
3. Water filter assembly
4. Water filter port
5. Coffee filter holder
6. Reusable coffee filter (for loose grounds)
7. Capsule receptacle (for K-cups)
8. Adjustable mug lift platform
9. Removable drip cup
10. Removable trivet
11. Control panel
12. Brew chamber
13. Puncturing needles
14. Brew chamber lid
READ ALL INSTRUCTIONS BEFORE USE
For your safety and continued enjoyment of this product,
always read the instruction manual before using.
5
Get to Know Your Coffee Maker
6
7
89
10
3
FEATURES DRAWING
4
11
12
13
14
5
2
1
6
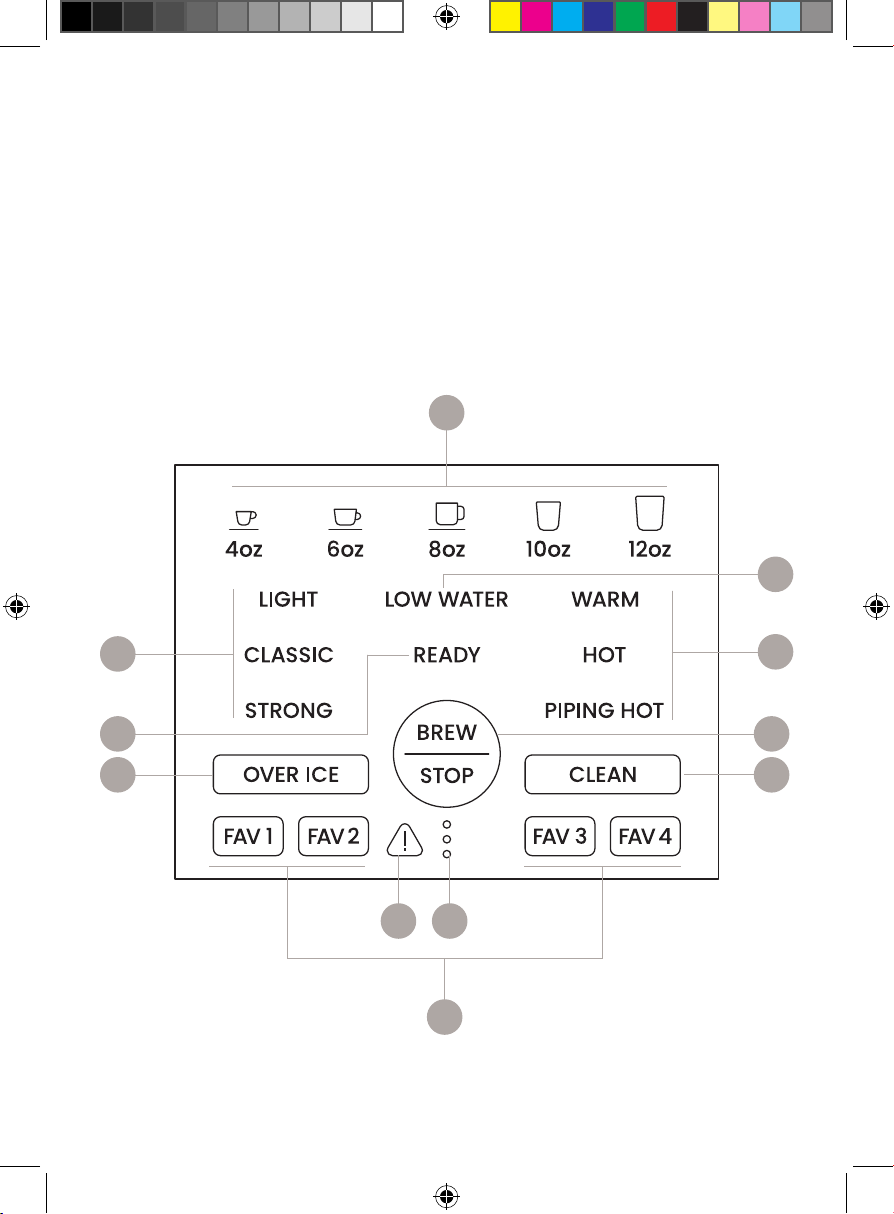
Control Panel
1. Serving size buttons
2. LOW WATER warning light
3. Temperature buttons
4. BREW/STOP button
5. CLEAN button
6. Error light
7. Progress lights
8. Favorites buttons (see p. 16)
9. OVER ICE button
10. READY light
11. Brew strength buttons
CONTROL PANEL
6
8
1
11
9
4
10
2
3
5
7

7
SAFETY INSTRUCTIONS &
IMPORTANT SAFEGUARDS
WARNING: When using electrical appliances, basic safety precautions should
always be followed, including:
1. Read all instructions.
2. Do not touch hot surfaces. Use caution when handling coffee and other
hot liquids.
3. To protect against electric shock, and injury to persons, do not immerse
cord or plug in water or other liquid.
4. Close supervision is necessary when any appliance is used by or
near children.
5. Unplug from outlet when not in use and before cleaning. Allow to cool
before putting on or taking off parts, and before cleaning the appliance.
6. Do not operate any appliance with a damaged cord or plug, or after the
appliance malfunctions, or has been damaged in any manner. Contact
Chefman® Customer Support for examination, repair, or adjustment.
7. The use of accessory attachments not recommended by Chefman® may
result in fire, electric shock, or injury to persons.
8. Do not use outdoors.
9. Do not let cord hang over edge of table or counter, or touch hot surfaces.
10. Do not place on or near a hot gas or electric burner, or in a heated oven.
11. To disconnect, remove plug from wall outlet.
12. Do not use appliance for other than intended use.
13. Scalding may occur if the lid is opened during the heating cycle.
14. Do not use single-serve coffee capsules other than those intended for
this appliance. If the capsule does not fit, do not force the capsule into
the appliance.
SAVE THESE INSTRUCTIONS
FOR HOUSEHOLD USE ONLY

8
SAFETY INSTRUCTIONS &
IMPORTANT SAFEGUARDS
WARNING: Improper use of the grounding plug can result in electric shock.
This appliance must be grounded. In the event of an electrical short circuit,
grounding reduces the risk of electric shock by providing an escape wire for the
electric current. To protect against electrical shock, this appliance is equipped
with a cord having a 3-prong grounding-type plug for insertion into a proper
grounding-type electrical outlet.
Do NOT alter the plug for use in a 2-prong outlet. If the plug will not fit into an
outlet, have a proper outlet installed by a qualified electrician.
Short Cord Instructions
A short power-supply cord is provided to reduce the hazards of entanglement
or tripping over a longer cord. Longer detachable power-supply cords or
extension cords are available and may be used if care is exercised in their use.
If a longer detachable power-supply extension cord is used:
1. The marked electrical rating of the extension cord should be at least as
great as the electrical rating of the appliance;
2. If the appliance is of the grounding type, the extension cord should be a
grounding-type 3-wire cord; and
3. The longer cord should be arranged so that it will not drape over
the countertop or tabletop where it can be pulled on by children or
tripped over.

9
California Proposition 65:
(Applicable for California Residents only)
WARNING: Cancer and Reproductive Harm
www.P65Warnings.ca.gov
Do not place the appliance on a
stovetop or any other heatable surface,
even if stovetop is not on.
Doing so is a fire hazard.
SAFETY INSTRUCTIONS &
IMPORTANT SAFEGUARDS
Power Cord Safety Tips
1. Never pull or yank on cord or the appliance.
2. To insert plug, grasp it firmly and guide it into outlet.
3. To disconnect appliance, grasp plug and remove it from outlet.
4. Never use the product if the power cord shows signs of excessive wear.
Contact Chefman® Customer Support for additional guidance
and support.
5. Never wrap the cord tightly around the appliance, as this could place
undue stress on the cord where it enters the appliance and cause it to fray
and break.
DO NOT OPERATE APPLIANCE IF THE POWER CORD SHOWS ANY DAMAGE
OR IF APPLIANCE WORKS INTERMITTENTLY OR STOPS WORKING ENTIRELY

10
Before First Use
1. Remove all packing materials and stickers from the inside and outside
of the unit. Be sure that all parts are included before throwing out
packaging.
2. Gently wipe down the exterior with a damp cloth or paper towel. Never
immerse the coffee maker, its base, cord, or plug in water or any other
liquid. The electrical connections and the brew buttons must never come
into contact with water or any other liquid.
3. Remove and hand wash the water reservoir, water fi lter assembly, and lid
with warm, soapy water. Rinse and dry well before returning them to the
unit.
4. Install the water fi lter: Pull the water fi lter stalk/cap off the basket and
place one of the charcoal fi lters in the basket. Snap the cap back into
place. Lower the fi lter assembly, basket-side down, into the water reservoir
and insert into the port at the bottom of the reservoir. When water is
added, the fi lter will bubble until it is fully saturated.
5. Rinse the coffee fi lter with water. Wash the capsule receptacle with a
sponge and warm, soapy water. Dry completely.
6. To rinse the brewer’s internal parts of any manufacturing residue, we
recommend “brewing” a plain, 12-oz cup of hot water with NO coffee.
Follow the instructions starting on p. 11, but insert the empty capsule
receptacle and select the 12 oz brew button.
11
Quick Start: How to Make Coffee
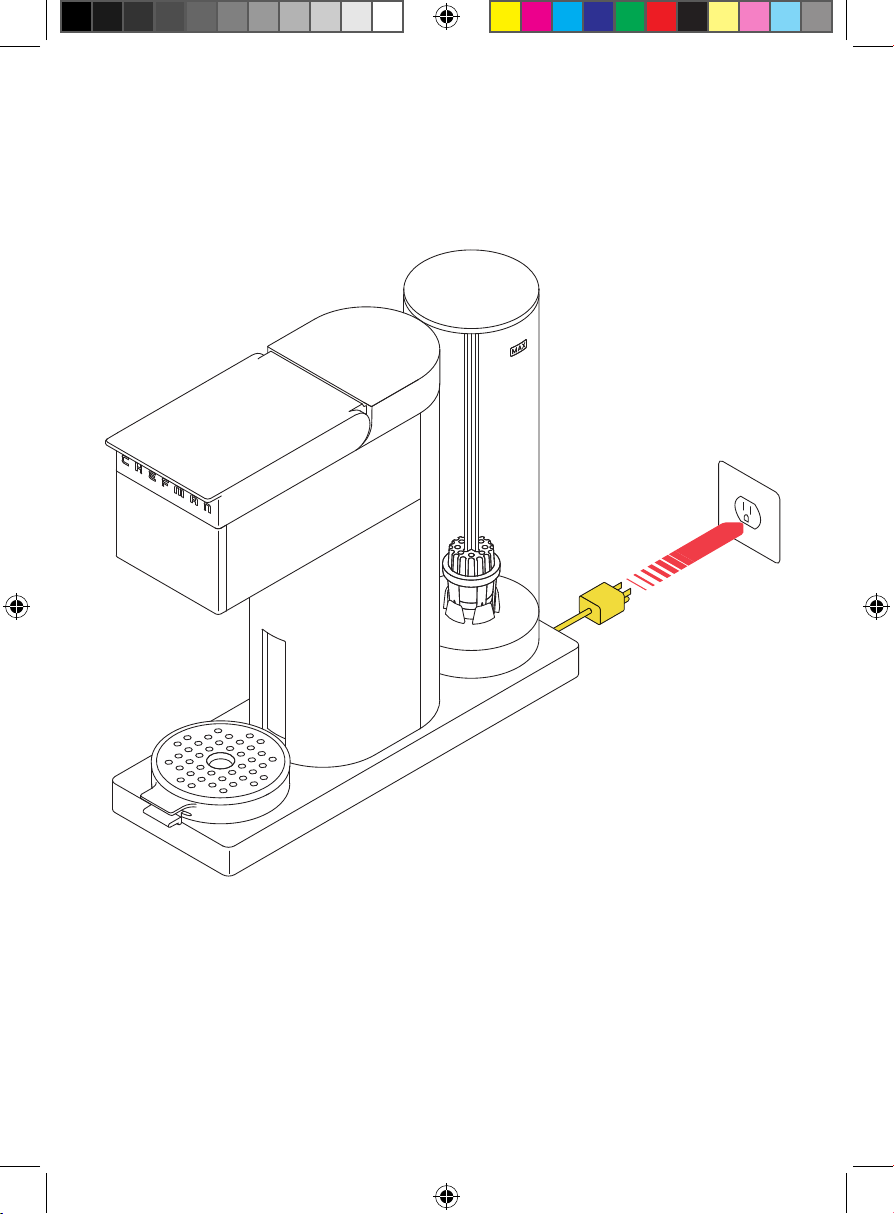
1. If not already plugged in, plug in the unit. Ensure the trivet is in place over
the drip tray.
STEP 3
12
Quick Start: How to Make Coffee
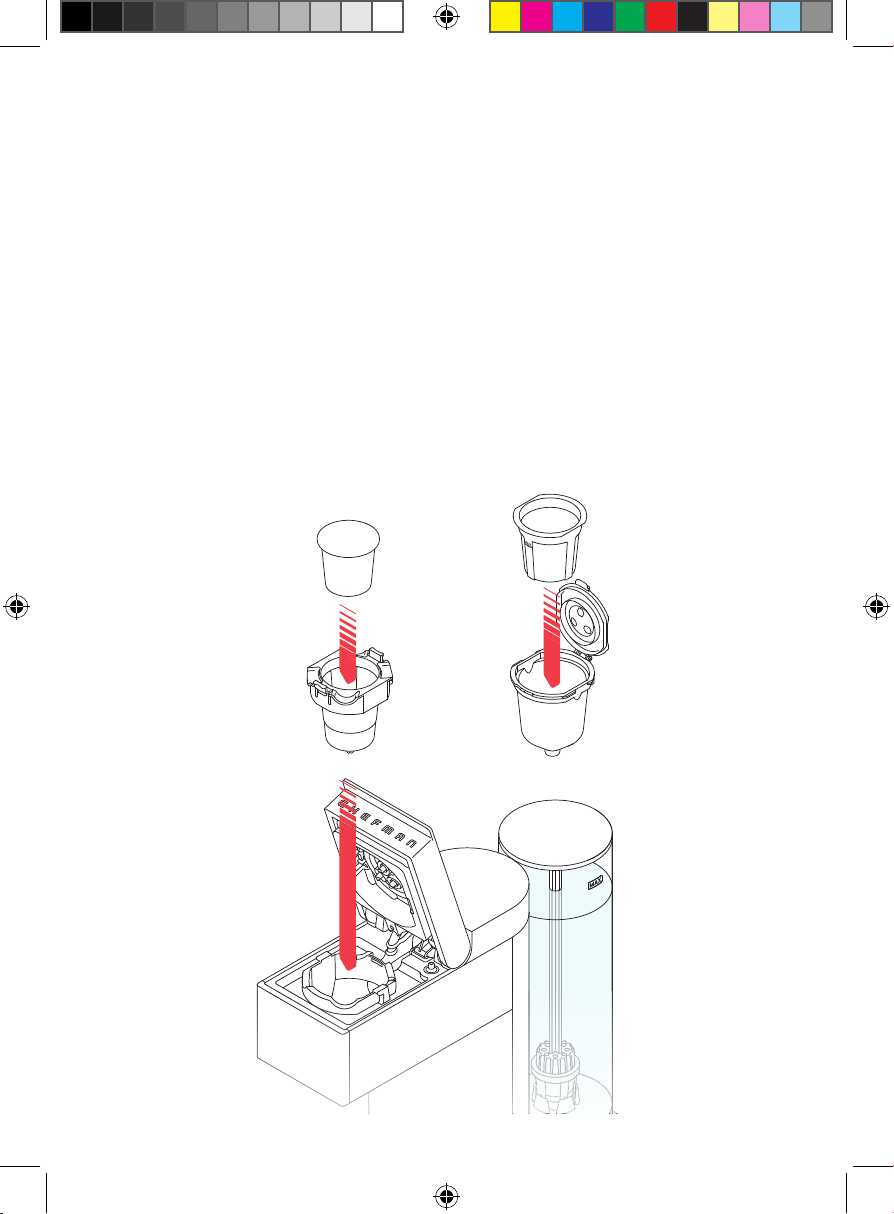
3. Pull up the lid to open the brew chamber. CAUTION: When opening the lid
and handling the capsule receptacle, be mindful of three small, sharp
puncturing needles located above and inside the capsule receptacle that
puncture the K-Cup®.
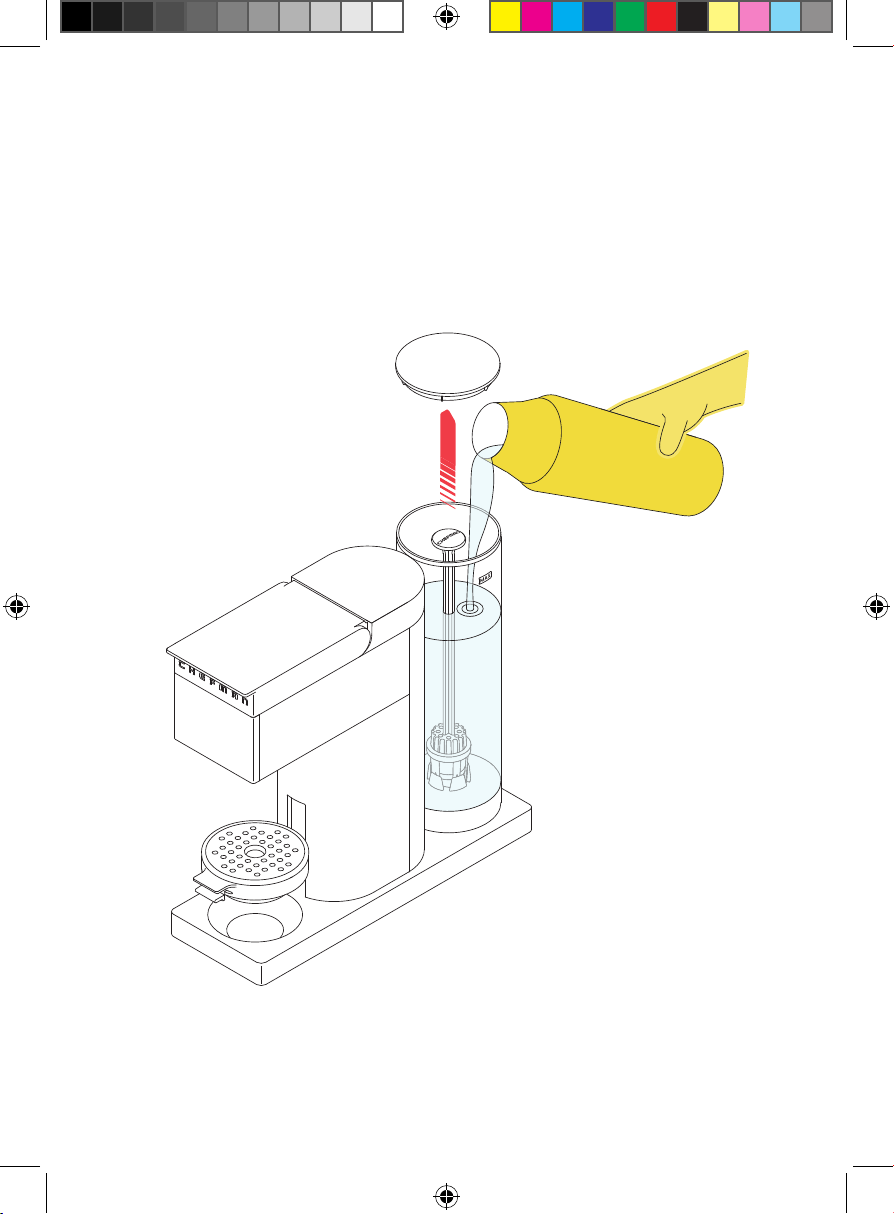
2. You can either fi ll the water reservoir with a pitcher while the reservoir is on
the unit, or remove it and fi ll at the sink. To remove it, pull it up and away
from the unit. Remove the reservoir lid and fi ll with cold water up to but not
exceeding the MAX line. Replace the reservoir lid. If it was removed, set it
down on the base. A ring of LEDs around the base of the unit will light up
when the water reservoir is properly seated.
13
Quick Start: How to Make Coffee
STEP 2
4. If using a K-Cup® you must also
use the capsule receptacle.
Place the receptacle into the
brew chamber. The arrows
labeled FRONT should be
pointing towards the front of the
unit. Press until the receptacle
clicks into place. Insert the
K-Cup® into the capsule
receptacle. Press on the K-Cup®
fi rmly until you hear it being
punctured. IMPORTANT: Always
use the capsule receptacle when
brewing with K-Cup® pods.
OR
If using ground coffee, you must
use the reusable coffee fi lter and
fi lter holder. Spoon the desired
amount of coffee into the fi lter
up to but not exceeding the MAX
line on the fi lter. (The fi lter can
hold up to 17 grams of ground
coffee.) Put the fi lter in the fi lter
holder, then snap the lid shut.
Drop the fi lter holder into the
brew chamber, with the word
FRONT on the fi lter holder toward
the front of the chamber.
14
Quick Start: How to Make Coffee
5. Push the brew chamber lid down until it clicks into place.
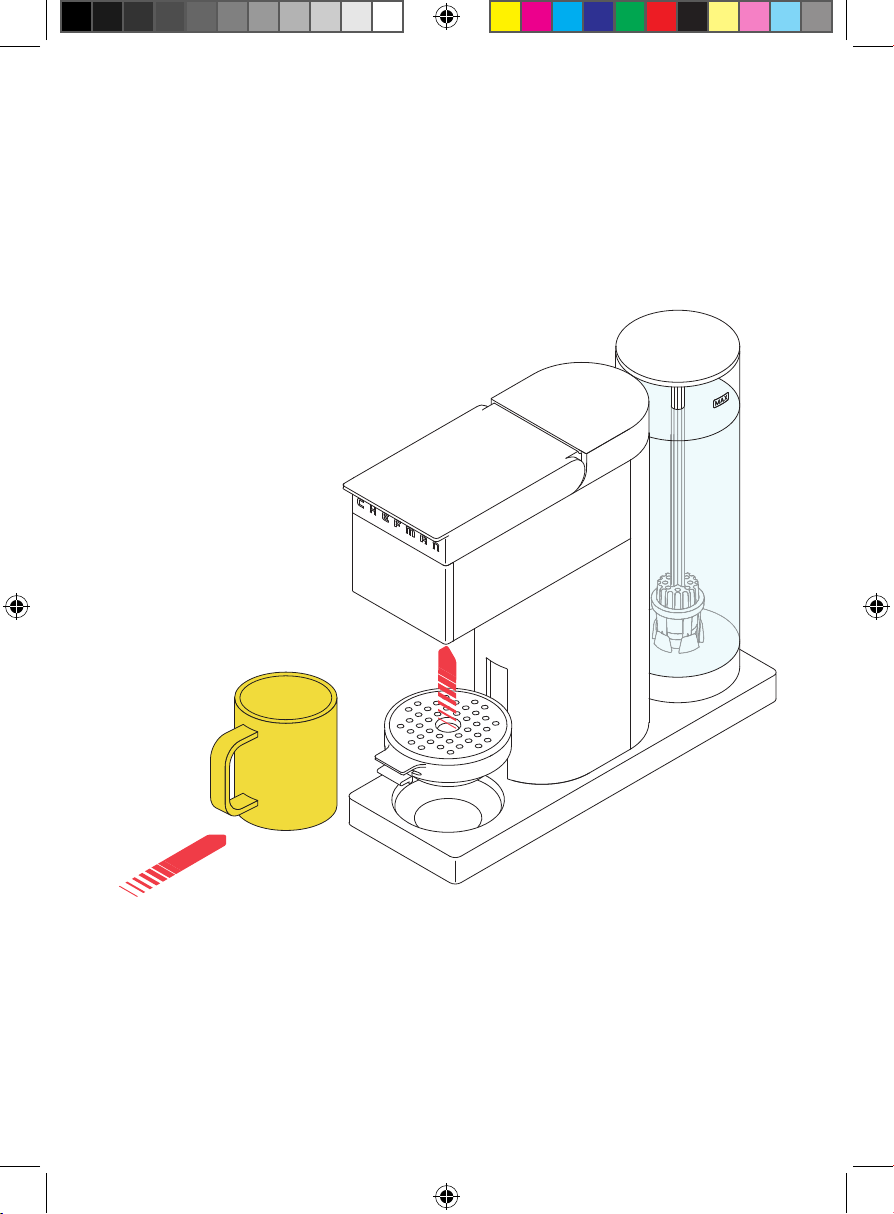
6. If using a tall cup or travel mug, place it securely on the base with the
movable lift in its lowest position. If using a shorter mug, you can bring it
closer to the drip spout by squeezing the tabs at the front of the lift and
raising it into a higher position. Place the mug securely on the raised lift.
CAUTION: Never adjust the lift with a cup already on it.
STEP 4
15
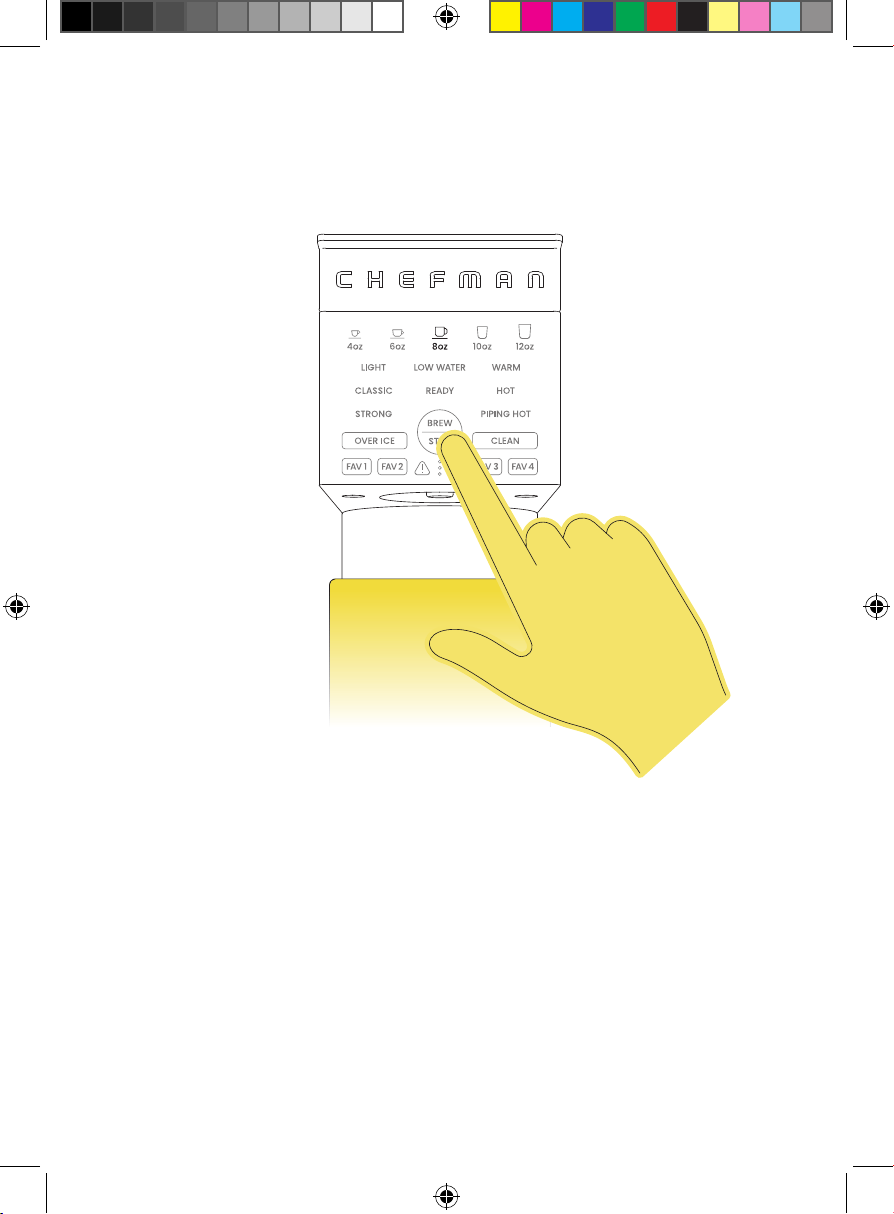
Quick Start: How to Make Coffee
STEP 5
7. On the control panel, select your preferred coffee strength, water
temperature, and serving size. Alternatively, choose a saved Favorite or
the Over Ice function (see p. 16 for more information on these settings).
Press the BREW | STOP button, and brewing will begin. NOTE: To cancel
brewing, press the BREW | STOP button again.
8. When brewing is fi nished, the READY light will blink on the control panel.
Remove your coffee and enjoy! If you’d like to immediately brew another
coffee, press the BREW | STOP button to return to the home screen.
Otherwise, the unit will go into sleep mode after 10 minutes. Press
BREW | STOP to wake it up.

1616
Special Features
Over Ice
Perfect for making your favorite iced coffee drinks, the Over Ice function starts
out hot to extract full flavor, then reduces the temperature to minimize ice melt.
To use, simply press the OVER ICE button, select your brew size (4 oz or 6 oz),
then press BREW | STOP.
Favorites
The coffee maker can store up to four favorite brewing profiles, so that every
family member can auto-brew their coffee just the way they like it. To program
a favorite, select your preferred strength, temperature, and serving size, then
press and hold one of the four FAV buttons for 3 seconds. To use a saved favorite,
simply press that button and then press BREW | STOP. Favorites will be saved
when the unit is unplugged. You can overwrite an existing favorite simply by
programming a new one.
Low Water
When the water level in the reservoir drops below 12 fl oz, the LOW WATER warning
light will illuminate. Should this occur, simply add more water to the reservoir. The
unit will not allow you to start brewing until water has been added.

17
Having Trouble?
After brewing several coffees back-to-back, the unit may temporarily overheat
and the Error light will illuminate. If this happens, unplug the coffee maker
and let it cool down for a few minutes. When plugged back in, it should resume
normal function.
If the Error light is still lit after several minutes of cooling, it could mean there
is a malfunction. Contact Chefman® Customer Support for assistance.
1818
Coffee Creations
The Caffeinator
TM
makes your daily coffee ritual ultra-simple, but it’s also
fantastic for whipping up barista-inspired concoctions. Here are a few ideas, or
experiment with your own inventions.
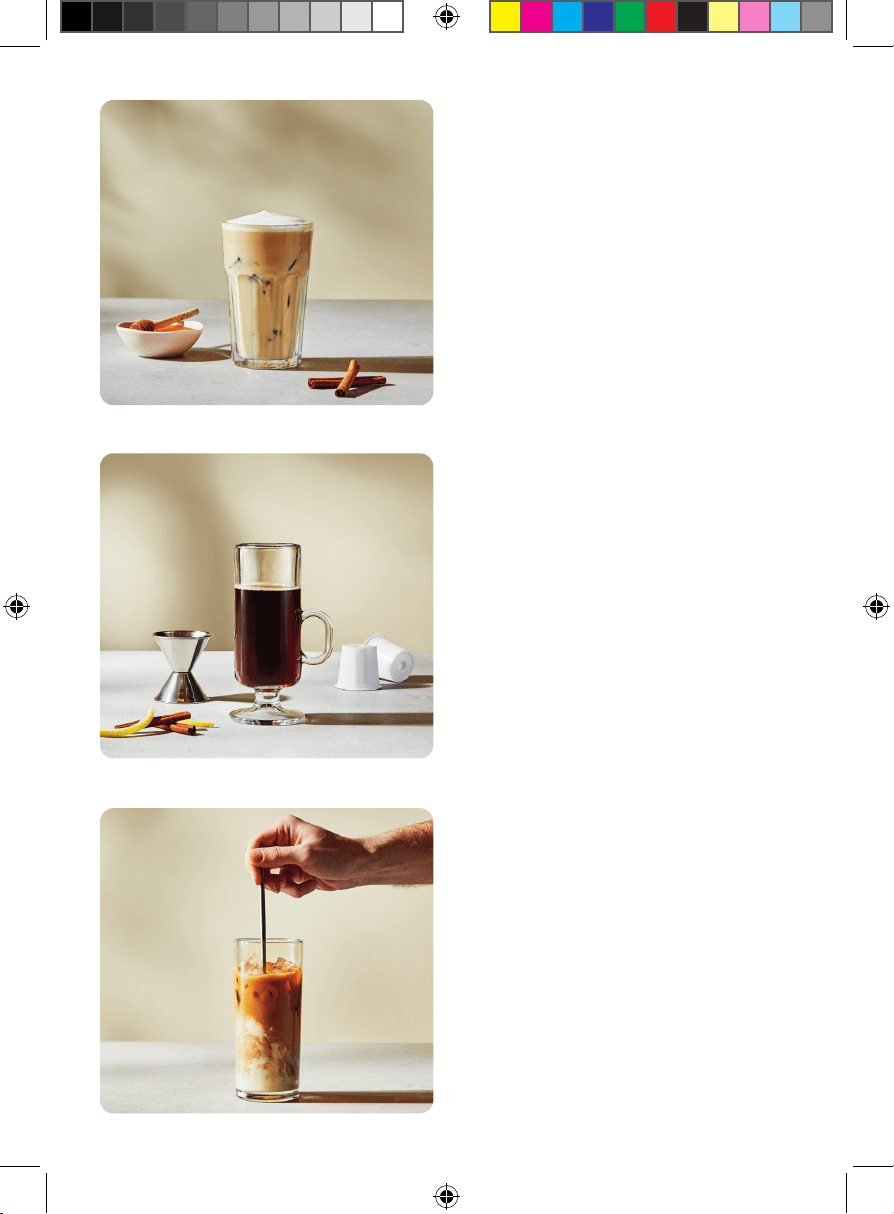
London Fog Latte
Earl Grey’s iconic bergamot flavor
meets a subtle hint of lavender in this
cozy warm drink with the appearance
of a rainy London day. Fill the grounds
basket with loose-leaf Earl Grey tea
and a pinch of dried lavender with
the WARM | 10 oz | CLASSIC settings.
(If the unit is usually used for coffee,
we recommend brewing a large cup
of water first.) Sweeten to taste with
sugar or honey, plus a touch of vanilla
extract if desired. Top with steamed
milk and garnish with additional
dried lavender.
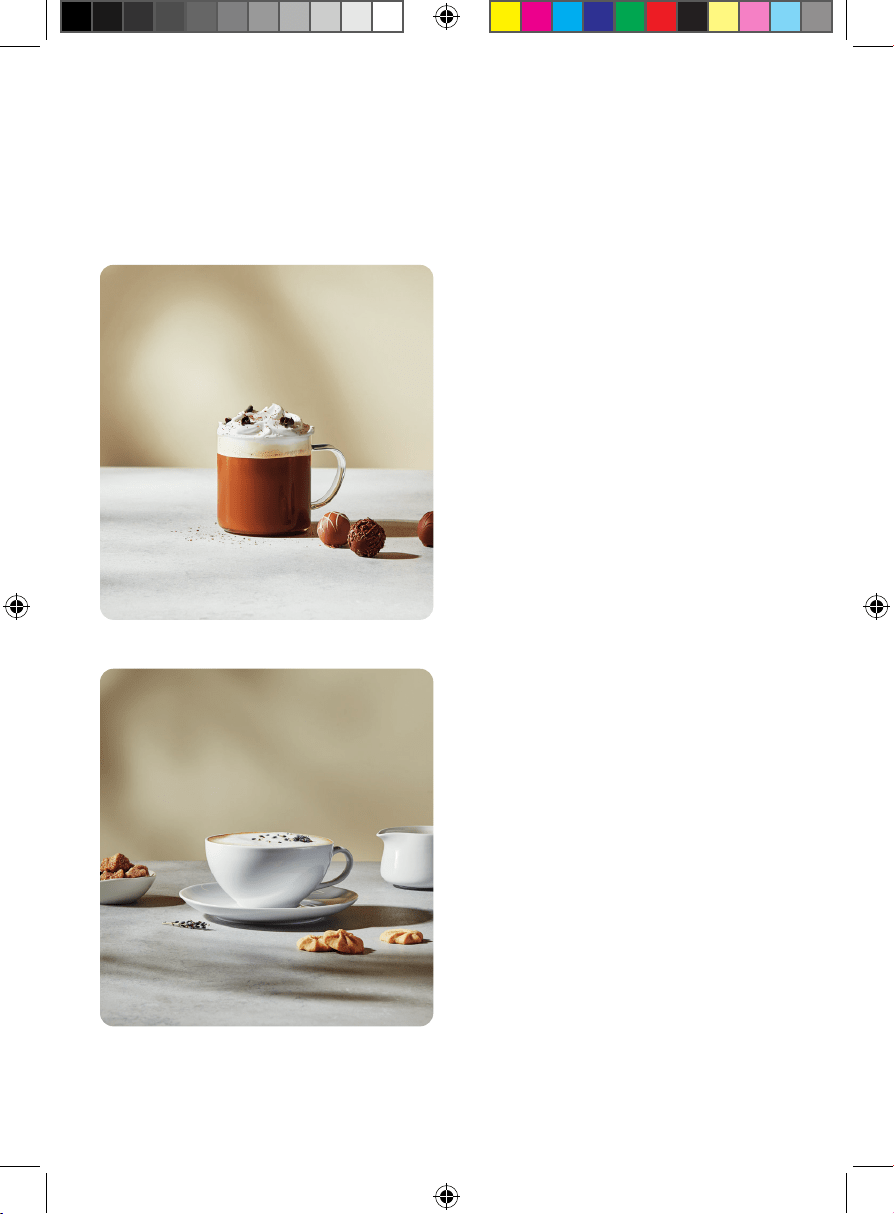
Caffe Mocha
Replicate the indulgent flavors of
this café classic at home without the
fuss of making espresso. Place 1 or 2
chocolate truffles in a mug (for a fun
twist, use flavored truffles, such as
hazelnut or caramel). Brew a K-Cup®
or ground coffee over the chocolate,
using the PIPING HOT | 8 oz | CLASSIC
settings. Let the coffee sit for a minute
to melt the chocolate, then stir to
combine. Add steamed/frothed milk
and top with whipped cream and
chocolate shavings, if desired.
19
Coffee Creations
Salted Honey Iced Coffee
This underrated flavor combo is
reminiscent of cereal milk, candied
nuts, and granola bars. Fill a tall glass
with ice. Brew a K-Cup® or ground
coffee into the glass using the
OVER ICE | 6 oz settings. In a jar,
vigorously shake cold milk with
honey and a generous pinch of sea
salt until foamy. Pour over the coffee
and sprinkle with a little cinnamon,
if desired.
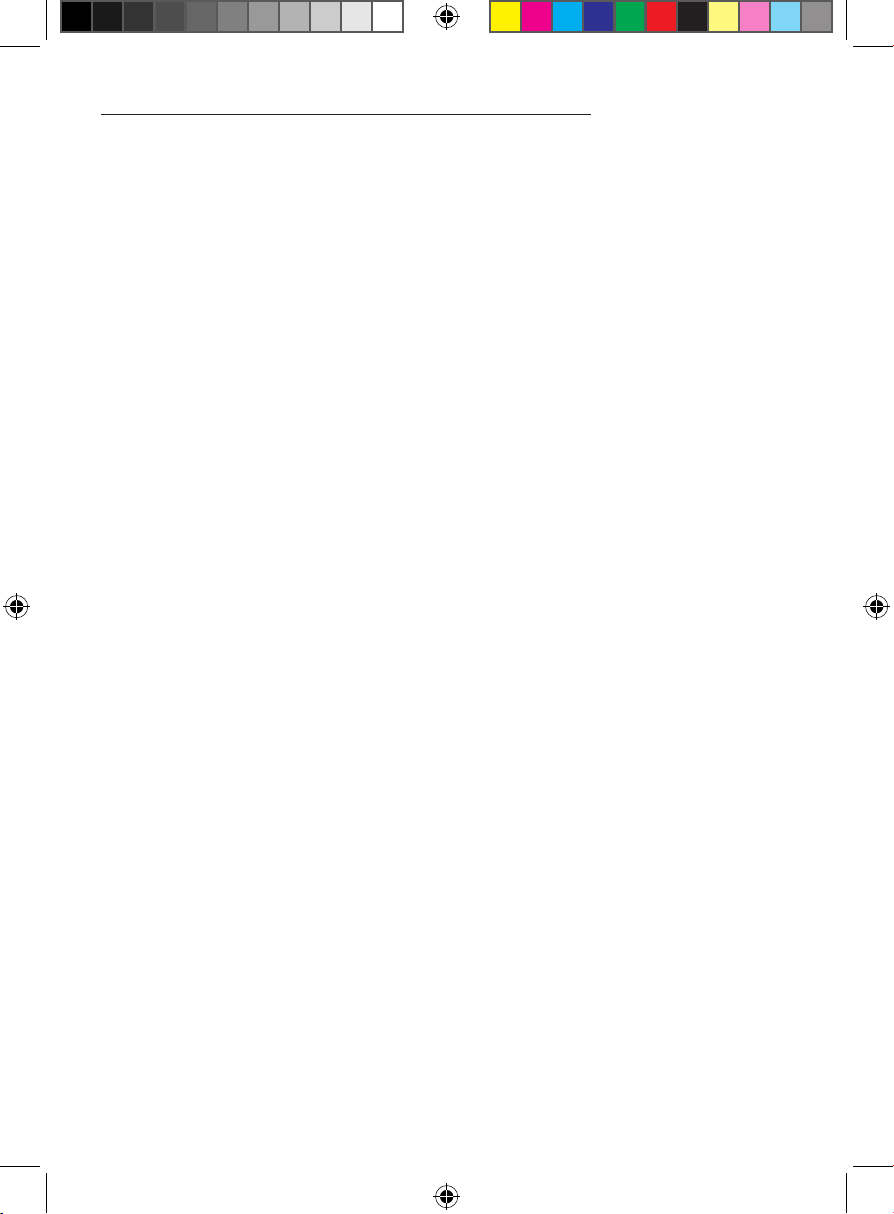
Carajillo
A courage-inducing cocktail of
coffee and liquor common in the
Spanish-speaking world. Gently heat
brandy or rum with a twist of lemon
peel, and a cinnamon stick. Brew a
K-Cup® or ground coffee with the
HOT | 8 oz | STRONG settings. Add
the liquor to the coffee, sweeten to
taste with sugar, and garnish with
the lemon peel and cinnamon stick.
Vietnamese Iced Coffee
Strong dark-roast coffee cut with
creamy sweetness makes the perfect
afternoon pick-me-up. To a tall glass,
add 1 to 3 Tbsp sweetened condensed
milk, depending how sweet you like
your coffee. Fill with ice, then brew
a K-Cup® or ground coffee into
the glass using the OVER ICE | 4 oz
settings (chicory coffee is especially
well-suited for this style). Stir gently
to combine, and serve.

20
Keep It Clean
Regular cleaning after each use is minimal and will keep your coffee maker in
top shape. Additionally, your coffee maker has a self-cleaning program that
makes descaling the unit a breeze.
For Daily Cleaning
1. Make sure the unit is unplugged and cooled.
2. If a K-Cup® was used, remove the capsule receptacle with the K-Cup®.
Discard the K-Cup®.
3. If coffee grounds were used, remove the reusable coffee filter.
Discard the grounds, then rinse the filter with water, and dry completely.
NOTE: Be sure to discard brewed coffee grounds promptly. If they sit in the
brew chamber or coffee filter for an extended period of time, they may
begin to mold.
4. For fresh-tasting coffee, empty the water reservoir between uses. Wash
the reservoir as needed with warm, soapy water. Rinse and dry well.
5. If necessary, rinse or wash the trivet and drip tray with a sponge and
warm, soapy water.
6. Wipe down the base of the unit with a damp cloth or sponge, if needed.
Dry completely. Never immerse the coffee maker or its plug in water.
NOTE: The coffee maker and its accessories are NOT dishwasher safe.

21
Keep It Clean
To Descale the Caffeinator
TM
Calcium buildup (or “scale”), caused over time by minerals commonly found
in water, can adversely affect brewing. After 100 brewing cycles, the CLEAN
button will blink three times when the unit is powered on. You can continue to
use the unit, but the CLEAN indicator will continue to alert you each time it is
powered on until it is cleaned. To run the cleaning cycle:
1. Empty the water reservoir completely and return it to the base. Ensure
there is no K-Cup® (nor any coffee grounds) in the brew chamber.
2. Use a commercial descaler, prepared according to the package
directions. Fill the water reservoir completely with the mixture.
3. Plug in the coffee maker and place a large mug or cup (at least 12 oz)
under the brew head.
4. Press the CLEAN button, then the BREW | STOP button. The unit will cycle
the cleaning solution through its internal parts and dispense into the cup.
5. When the cycle has finished, one of the three small progress lights at the
bottom of the control panel will light up. Discard the liquid in the cup and
return the cup to the the trivet.
6. Press the BREW | STOP button to run the cleaning cycle three more times,
discarding the liquid each time, until the water reservoir is nearly empty.
Each time you complete a cleaning cycle, another progress light will
illuminate, marking your progress. After the fourth cycle, the unit will return
to Ready mode.
7. Discard any remaining liquid in the water reservoir and rinse it thoroughly.
Return it to the base, fill it with fresh water and run the cleaning cycle
twice more to flush the system with fresh water.
Replacing the Filter
If the optional water filter is used, we recommend changing it approximately
every 60 brew cycles. Replacement filters are included with your coffee maker,
but if you need to purchase new ones, they are widely available online—look
for 1.1-in. x 1.06-in. (33 mm x 34.4 mm) dome-shaped filters. To replace:
1. Remove the filter from the water reservoir.
2. Pull off the cap (attached to the stalk) and discard the old filter.
3. Place a new filter in the basket and replace the cap.
4. Re-install the water filter in the reservoir (see p. 10, step 4).

22
Terms & Conditions
Limited Lifetime Warranty
Congratulations on your purchase of this Chefman product! We stand behind
the quality and durability of our products with a limited lifetime warranty
(the “Warranty”). If any component fails due to a manufacturing defect and
workmanship, we will repair or replace the appliance at no additional cost.
If your product does not work as it should, please contact Customer Support at
support@chefman.com so that we may assist you. We may ask you to please
submit, via email, photos and/or video of the issue you are experiencing. This is
to help us better assess the matter and possibly offer a quick fix. Photos and/or
video may also be required to determine Warranty eligibility.
We encourage you to register your product. Registering can make the Warranty
process easier and can keep you informed of any updates or recalls on
your product. To register, follow the directions on the Chefman® Warranty
Registration page in the Chefman® User Guide. Please retain your proof of
purchase even after registering, as this Warranty may be declared void without
proof of purchase within the contiguous United States and Canada.

23
Terms & Conditions
This Warranty Does Not Cover
• Misuse
Damage that occurs from neglectful or improper use of products, including,
but not limited to, damage that occurs as a result of usage with incompatible
voltage, regardless of whether the product was used with a converter or
adapter. See Safety Instructions in the Chefman® User Guide for information
on proper use of product;
• Poor Maintenance
General lack of proper care. We encourage you to take care of your
Chefman® products so that you may continue to enjoy them. Please see
Keep It Clean directions in this Chefman® User Guide for information on
proper maintenance;
• Commercial Use
Damage that occurs from commercial use;
• Normal Wear and Tear
Damage or degradation expected to occur due to normal use over time;
• Altered Products
Damage that occurs from alterations or modifications by any entity other
than Chefman® such as the removal of the rating label affixed to the
product;
• Catastrophic Events
Damage that occurs from fire, floods, or natural disasters; or
• Loss of Interest
Claims of loss of interest or enjoyment.
24
Terms & Conditions
For product information, please visit us at Chefman.com.
EXCEPT WHERE SUCH LIABILITY IS REQUIRED BY LAW, THIS WARRANTY DOES NOT
COVER, AND CHEFMAN® SHALL NOT BE LIABLE FOR, INCIDENTAL, INDIRECT, SPECIAL,
OR CONSEQUENTIAL DAMAGES, INCLUDING WITHOUT LIMITATION, DAMAGE TO, OR
LOSS OF USE OF THE PRODUCT, OR LOST SALES OR PROFITS OR DELAY OR FAILURE
TO PERFORM THIS WARRANTY OBLIGATION. THE REMEDIES PROVIDED HEREIN ARE
THE EXCLUSIVE REMEDIES UNDER THIS WARRANTY, WHETHER BASED ON CONTRACT,
TORT OR OTHERWISE.
25
How do I register my product?
All you need to do is fill out a simple Chefman® registration form.
You can easily access the form in one of the two ways listed below:
• Visit Chefman.com/register.
• Scan the QR code to the right to access site.
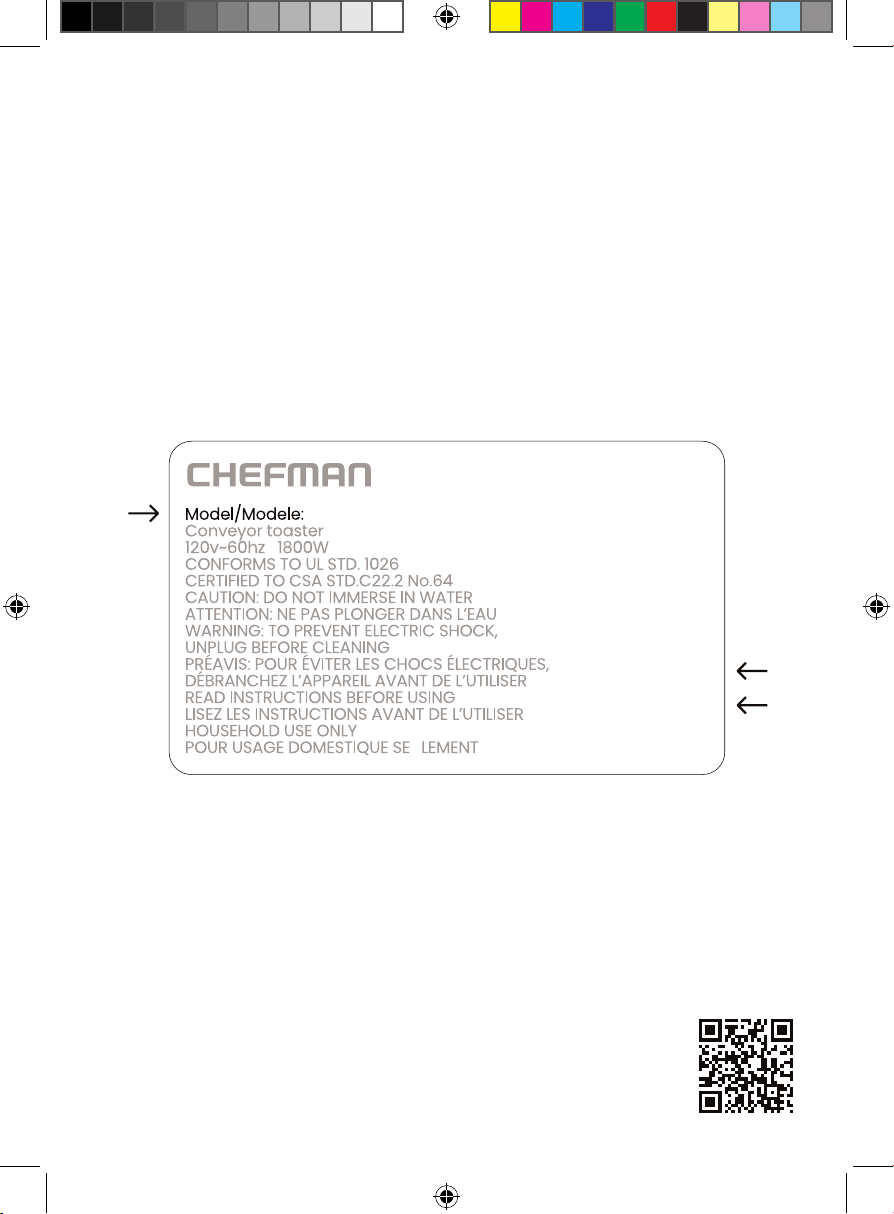
Warranty Registration
What do I need to register my product?
• Contact Information
• Model Number (see example below)
• Proof of Purchase (online confirmation, receipt, gift receipt)
• Date Code (see example below)
• Access Code (see example below)
NOTE: Label depicted here is an example.
Please see label on your product for actual model/date code/access code.
Date Code:
0000
Access Code:
Xxxxxxxx
Made in China/Fabrique en Chine
AC Only/ AC Seulement
XXXXX
RJ14DBSERIESUG032224
Chefman® is a registered trademark of RJ Brands, LLC.
Caffeinator
TM
is a trademark of RJ Brands, LLC.
Caffeinator™