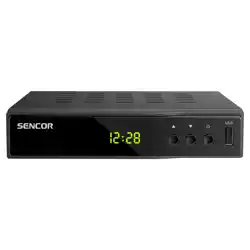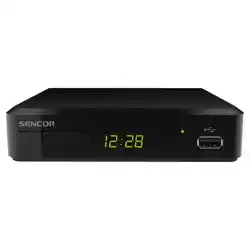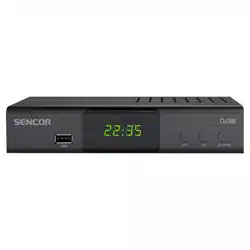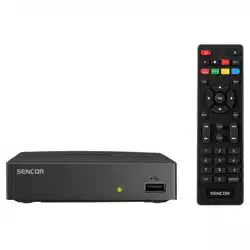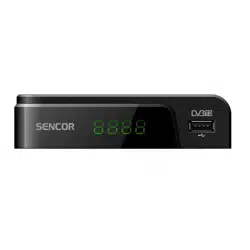

SDB 524T
EN User Manual
CZ Uživatelská příručka
SK Používateľská príručka
HU Felhasználói kézikönyv
PL Podręcznik użytkownika
DVB-T2 SET-TOP BOX

2 EN
EN
Copyright © 2024, Fast ČR, a. s. Revision 11/2024
EN .............................................................................................................................................................. 3
CZ ............................................................................................................................................................ 28
SK ............................................................................................................................................................53
HU ............................................................................................................................................................ 78
PL ...........................................................................................................................................................107
EN 3
EN
Copyright © 2024, Fast ČR, a. s. Revision 11/2024
Safety Information
TO MINIMIZE THE RISK OF FIRE AND ELECTRIC SHOCK, DO NOT EXPOSE THIS UNIT
TO RAIN OR MOISTURE.
NOTICE
ELECTRIC SHOCK HAZARD – DO NOT OPEN
CAUTION
To minimize fire hazard or electric shock, do not remove the cover (or the rear
panel) of the device. Leave all repairs to qualified service technicians.
The lightning bolt symbol, located in an equilateral triangle, alerts the user to the
existence of uninsulated "dangerous voltages" inside the device that may be of
such intensity as to constitute arisk of electric shock.
The exclamation point symbol within the equilateral triangle alerts the user
to the existence of important operating and maintenance instructions in the
instrument'saccompanying documentation.
WARNING
TO MINIMIZE FIRE HAZARD OR ELECTRIC SHOCK, DO NOT EXPOSE THIS
DEVICE TO RAIN OR HUMIDITY.
CAUTION
TO PREVENT FIRE HAZARD OR ELECTRIC SHOCK, ALIGN THE PLUG WIDE
BLADE WITH THE SOCKET WIDE SLOT AND PUSH THE PLUG AS FAR AS IT
GOES.
This symbol indicates that the appliance has double insulation between the
dangerous mains voltage and the parts accessible to the user. In case of service,
use only identical spare parts.
Do not expose the unit to dripping or splashing water or place objects filled with liquid,
such as vases, on the unit.
4 EN
EN
Copyright © 2024, Fast ČR, a. s. Revision 11/2024
Safety Information
During the manufacture of this set-top-box, great attention has been paid not only to meeting quality
requirements, but also to providing safety which is a key factor in designing all of our products.
But you must also do your part to ensure safety. Please read this document carefully before installing
and using this set-top box.
This document is just an abridged version. The full version of this manual can be found at
www.sencor.com. This document contains important information that will help you learn how to
correctly use this set-top box and its accessories to your satisfaction.
CAUTION
To minimize fire hazard or electric shock, do not remove the cover (or the rear panel) of the
device. Leave all repairs to qualified service technicians.
Technical Data
TUNER AND CHANNEL • RF INPUT CONNECTOR × 1 (IEC TYPE, IEC169-2, SOCKET TYPE)
• FREQUENCY BAND: 174MHz ~ 230MHz (VHF)
470MHz ~ 862MHz (UHF)
• SIGNAL LEVEL: -15 ~ -70 dBm
DECODER
• Video decoder
• Audio decoder
• VIDEO FORMATS
• VIDEO EXIT
• MODULATION
• MPEG-2 MP@HL, AVC/H.264 HP @L4.1
MPEG-4 ASP, HEVC/H.265 HP @L4.1 SUPPORT
• MPEG-1 Layer 1,2/PCM/HE-AAC V1.0
ICE958 SPDIF/Dolby D+ and Dolby D
• 4:3/16:9 SWITCHABLE
• HDMI, SCART
• 16QAM, 64QAM, 256QAM
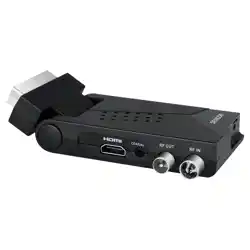
CONNECT
• TUNER
• HDMI
• DATA PORT
• SCART
• ANTENNA INPUT × 1
• HDMI OUTPUT × 1
• USB 2.0 x 1
• FOR TV x 1
ENERGY SOURCE
• INPUT VOLTAGE • DC IN, 5V/2A
Note:
Design and specifications are subject to change without notice.

EN 5
EN
Copyright © 2024, Fast ČR, a. s. Revision 11/2024
Important Safety Measures
In the production of this set-top box, great attention was paid not only to meeting quality
standards, but also to ensuring safety, which is adecisive factor in the design of each of our
devices. But you must also do your part to ensure safety. This document contains important
information that will teach you how to use this set-top box and its accessories properly so
that you are satisfied. Please read them carefully before installing and using this set-top
box.
Installation
1. Read and observe the instructions – Please read all safety and operating instructions
before using this set-top-box. Follow all operating instructions.
2. Keep the instructions – Keep the safety instructions and operating instructions for future
reference.
3. Heed the warnings – Observe all warnings on the set-top-box and in the operating
instructions.
4. Power – This set-top box is powered from the mains or from the power plug of
aDC adapter. To avoid the risk of electric shock, make sure that the power socket is
connected correctly.
5. Power Sources – Only power sources that meet the ratings listed on the label on the
rear panel of the set-top box may be used to power this set-top box. If you are not sure
what type of power source is available at your home or office, contact your set-top
box dealer or electrician. For set-top boxes designed to run on batteries or other power
sources, please read the operating instructions.
6. Overloading – Do not overload the power outlets and extension cords to avoid risk
of fire or electric shock. Overloaded power outlets and extension cords, frayed power
cords, damaged or cracked conductor insulations and damaged plugs are dangerous
and may lead to electric shock or fire. Inspect the cord on regular basis and if it appears
that insulation damage or property deterioration may have occurred, ask aqualified
service technician for areplacement.
7. Power cord protection – Route power cords so that they cannot be stepped on or
damaged by placing objects on or against them, paying particular attention to where
they exit the set-top box.
8. Ventilation – Cutouts and openings in the cabinet of the unit are used for ventilation
to ensure reliable operation of the set-top box and to protect it from overheating. It is
forbidden to block or cover these openings. These openings must never be blocked
by placing the set-top box on abed, sofa, mat or air heating device. Do not place this
set-top-box in an enclosed space such as afridge or aself unless proper ventilation is
provided or it this is inconsistent with the set-to-box manufacturer requirements.
9. Accessories – To avoid any danger, do not use accessories other than those
recommended by the manufacturer of this set-top box.
10. Do not expose the unit to dripping or splashing water or place objects filled with liquid,
such as vases, on the unit.
Warning: Be safe when using electricity. The equipment or accessories supplied from
the power line and connected to this device must be marked with the certification mark

6 EN
EN
Copyright © 2024, Fast ČR, a. s. Revision 11/2024
on the accessory itself and must not be modified so as to block the safety functions.
This minimises the potential risk of electric shock or fire. In case of any doubt, contact
aqualified service technician.
11. Accessories – Do not place this set-top box on an unstable cart, stand, tripod,
bracket or table. The set-top box could fall to the ground and cause serious injury
to children or adults, or seriously damage itself. Use this set-top box only with the
cart, stand, bracket or table recommended by the manufacturer or sold with the
set-top box. Any installation of the device must be carried out in accordance with
the manufacturer'sinstructions and the mounting accessories recommended by the
manufacturer must be used.
11a. Be careful when moving the set-top box trolley. Quick stops, excessive force and
uneven surfaces can cause damage to the set-top box.
12. Outdoor aerial grounding – If an outdoor aerial or cable system is connected to this
set-top-box, it’snecessary that this aerial or cable system should be earthed to provide
acertain protection against voltage surges and static charge formation. Section 810 of
the National Electrical Code, ANSI/NFPA No. 70-1984 (Section No. 54 of the Canadian
Electrical Code, Part 1) provides instructions on proper grounding of the pole and the
supporting framework, grounding the connecting lead to the aerial’sdischarge unit,
connecting to the grounding electrodes and grounding electrode requirements.
13. Power Lines – The outdoor antenna system shall not be located near overhead power
lines, other electric light or power circuits, or where it could fall on such power lines or
circuits. When installing an outdoor antenna system, you must be extremely careful
not to touch or approach such electrical lines or circuits, as this could be fatal. Installing
an outdoor antenna can be dangerous, so leave it to the professionals who install
antennas.
Usage
14. Cleaning – Unplug this set-top box from the power outlet before cleaning. Do not use
liquid or spray cleaners. Use adamp cloth for cleaning.
15. Objects that can touch dangerous voltage points or "short out" parts can cause fire or
electric shock. Avoid spilling any liquid on the set-top box.
16. Lightning thunderstorms – For increased protection of this set-top-box during
alightning thunderstorm or for longer periods when the device will not be used,
disconnect the power cord from the power socket and disconnect the antenna or cable
system. This will protect the set-top box from damage caused by lightning and power
surges in the power grid.
Repairs
17. Repairs – Do not attempt to repair this set-top box yourself, as opening the cabinet or
removing the covers could expose you to dangerous voltage or other hazards. Entrust
all repairs to qualified service technicians.
18. Damage requiring repair – In the following situations, unplug the set-top box from the
power outlet and have it repaired by qualified service technicians:

EN 7
EN
Copyright © 2024, Fast ČR, a. s. Revision 11/2024
A. If the power adapter or the connecting power cable is damaged.
B. If liquid or foreign objects get into the set-top box.
C. If the set-top box has been exposed to rain or water.
D. If the image is not displayed correctly even though you follow the operating
instructions.Only adjust the controls that are described in this manual. Improper
adjustment of other controls can result in damage, and restoring the set-top box to
normal operation often requires asignificant amount of work by aqualified service
technician.
E. If the set-top box has fallen to the ground or its cabinet has been damaged.
F. If the set-top box shows an obvious change in behaviour – this clearly indicates the
need for repair.
19. Replacement parts – If replacement parts are required, ask the service technician
to verify that the replacement parts used have the same safety characteristics as
the original replacement parts. Using replacement parts specified by the set-top box
manufacturer protects you from the risk of fire, electric shock or other hazards.
20. Safety Check – After completing any service or repair on this set-top box, ask your
service technician to perform the manufacturer'srecommended safety checks to verify
safe operation of the set-top box.
21. Wall or Ceiling Mounting – This unit can only be wall or ceiling mounted in the manner
recommended by the manufacturer.
22. Heat – This appliance must be located away from any heat sources such as radiators,
air handlers, stoves or similar devices (including amplifiers) that produce heat.
Remote Control and Batteries
Do not expose the remote control or the batteries to direct sunlight or sources of heat, such
as heaters, heat exchangers, stoves or other appliances (including amplifiers) producing
heat. Do not use or leave the device in the vicinity of an open fire.
Ensure that the sensor is not exposed to astrong light source (e.g. sunlight) or light from
fluorescent light tubes, which could reduce the effectiveness and reliability of the remote
control.
Neither the remote control nor the batteries may be exposed to dripping or running water
and objects filled with water must not be placed on them, e.g. vases. Protect from getting
wet, splashing or spilling any liquid. Do not use outdoors. Failure to follow these instructions
may result in damage to the remote control or batteries.
Do not use this device near water.
It is necessary pay attention to the environmental impact aspects of battery disposal.
The incorrect use of batteries may cause the leakage of the electrolyte and corrosion. Follow
the instructions below to ensure that the remote control works properly:
• Do not insert the batteries in the wrong direction.
• Do not recharge, heat, open or short circuit the batteries.
• Do not throw the batteries into afire.
• Do not leave discharged batteries in the remote control.
• Do not combine various types of batteries or new and old batteries.

8 EN
EN
Copyright © 2024, Fast ČR, a. s. Revision 11/2024
• If you will not be using the remote control for along period of time, remove the
batteries to prevent potential damage caused by asubsequent battery leakage.
• If the remote control is not working correctly or its operational range is reduced, change
all batteries for new ones.
• If electrolyte leaks out from the batteries, have the remote control cleaned at an
authorised service centre.
Control in Normal Operation
Shortcut options from the remote control:
GREEN button – cyclic switching of resolution 576i, 576p, 720p, 1080i, 1080p.
YELLOW Button – cyclic switching of aspect ratio Auto, 16:9 Wide Screen, 16:9 Pillar Box,
16:9 Pan Scan, 4:3 Letter Box, 4:3 Pan Scan, 4:3 Full
BLUE button – enter timer overview

EN 9
EN
Copyright © 2024, Fast ČR, a. s. Revision 11/2024
Remote Control
1. STANDBY (Standby mode)
(Turning the TV on or switching to
standby)
2. PLAY (Playback)
3. PAUSE (Pause / Activate time shift
function)
4. TV/RADIO (TV/radio)
(Switching between TV and radio
modes)
5. MEDIA (Media)
(Open the Record menu)
6. RED/GREEN/YELLOW/Blue button
(For interactive functions / Nested
menu function buttons)
7. EPG (Electronic Programme Guide)
(Open the Electronic Programme Guide
menu)
8. OK button
(Confirm amenu selection)
9. Cursor / CH+,- (Previous/Next Channel)
/ VOL+,- (Volume Up/Down)
(Cursor: Navigation buttons to browse
menu items)
(CH+/-: Previous/Next channel)
(VOL+/-: Volume up/down)
10. Menu (Menu)
(Open and close the menu screen)
11. Search backward /forward
(Search backwards/forwards)
12. MUTE (Turning the sound off/on)
13. Numeric buttons
(To enter numeric values and select
achannel by direct number entering)
14. TTX (Teletext – opening interactive
services)
15. STANDBY (Stand-by mode)
(Turning the STB on or switching to
standby)
16. RECORD (Recording)
(TV programme recording)
17. STOP (Stop)
(Stop playback or programme
recording)
18. FAV (Favourites)
(Open favourites list)
19. AUDIO (Audio)
(Select the sound mode and track)
20. BACK (Back)
(Switch to previous channel)
21. EXIT (Exit menu)
22. INFO (Information)
(Press to view information about the
current channel)
23. Previous/Next (Previous/Next)
24. SUBTITLE (Turn subtitles on/off)

10 EN
EN
Copyright © 2024, Fast ČR, a. s. Revision 11/2024
Programmable Button Learning Mode
1. To enter the learning mode, press the “SET” button in the TV CONTROL area for 3
seconds (until the LED lights up intensely).
2. Press the blue “POWER” button of the learning remote control (the LED will flash
slowly).
3. Point the TV remote control directly at the learning remote control from adistance of
3–5 cm.
4. Press and hold down the “POWER” button on the TV remote control for approximately
3 seconds (the LED will flash rapidly) until the LED stops flashing (learning has been
successful).
5. Repeat steps 2–4 to learn the other remote control commands (INPUT, VOL-, VOL+).
6. To exit the learning mode and save the learned codes, briefly press the “SET” button
(LED will go off).
Get Started
The first time you use this STB, the "Installation Guide" menu
will appear. Press the cursor buttons to set Language, Country.
Next, select Antenna Power (Antenna Power 5V), FTA (only non-paid stations). Press the
"OK" button to save and start the channel search. Wait for full completion and saving to
memory. Duplicate identical channels can be stored only once, depending on the specific
parameters of the broadcaster.
Practical notes:
When you receive atuned channel, you can check its reception quality by pressing the
INFO button two times. Technical information about the multiplex being received, which
carries multiple TV channels (5–15), is displayed. 3 indicators will also be displayed:
Strength should be 60–100%, the other two parameters (BER and Quality) should be as
full as possible, all the way to the right. Lower, and especially unstable, values can mean
occasional or permanent reception failures, poor picture quality, etc. In this case, upgrade
your antenna.
EN 11
EN
Copyright © 2024, Fast ČR, a. s. Revision 11/2024
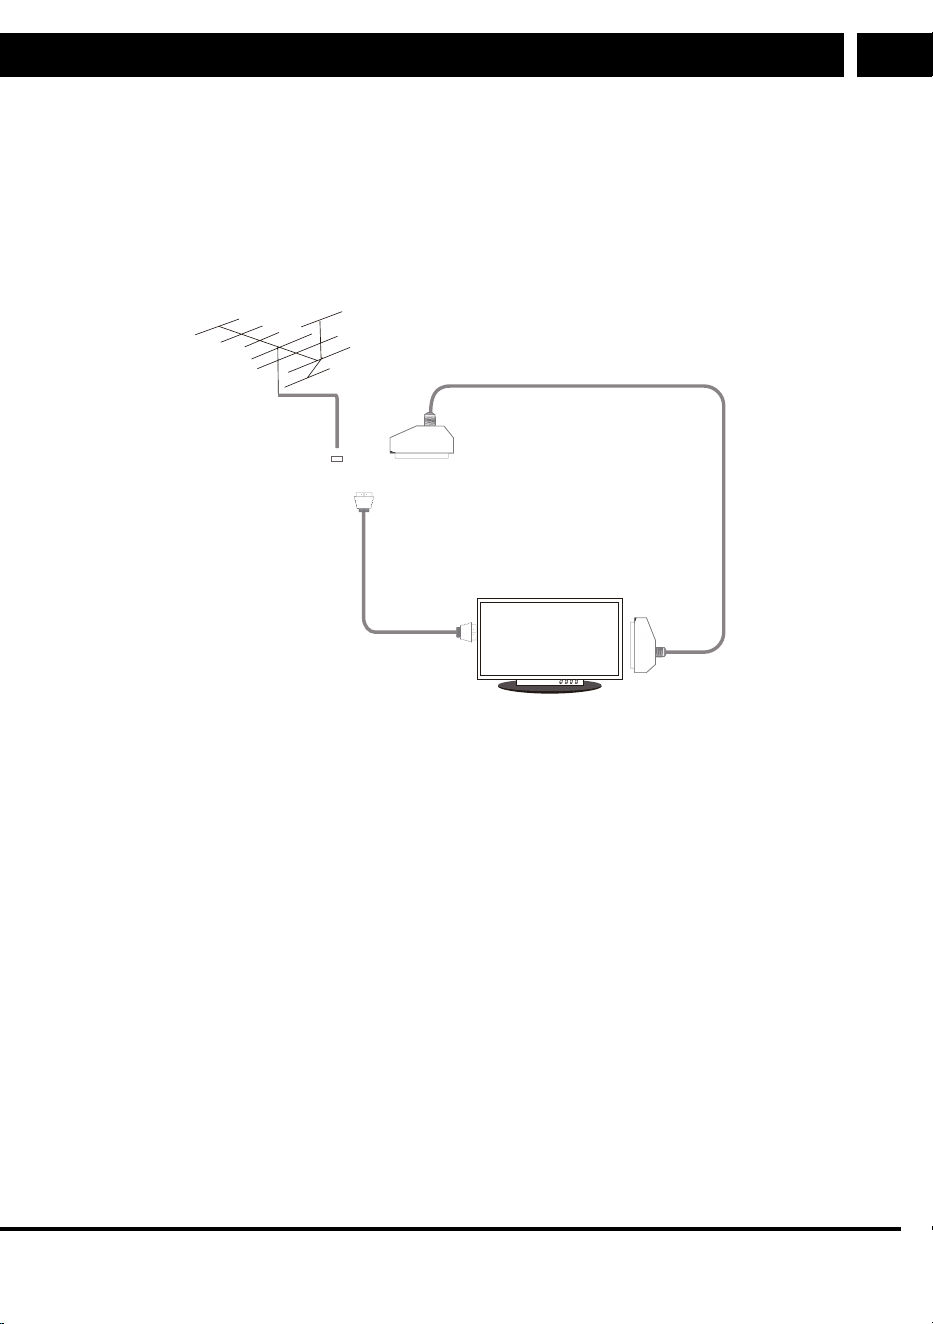
System Connection
General Information
There are many different types of TVs and other devices that can be connected to this STB.
This guide lists the most common ways to connect your devices.
Connecting a TV
Antenna
Scart cable
Television
HDMI cable
RF cable
Note: Please connect the HDMI cable to the receiver ONLY when turned off (red Standby
indicator lights)
Controls
Switching Channels
There are three ways to select achannel – by scrolling through the channel list, selecting by
number and selecting from the on-screen channel list.
1. Scroll through the channel list:
To move through the channel list, press the up or down arrow button on the remote
control.
2. Selection by number:
Enter the channel number directly by pressing the numeric buttons and press the "OK"
button to select the desired channel.
3. Select from the list of channels on the screen:
You can also select the desired channel number by using the UP/DOWN arrow keys
and confirming "OK" directly from the channel list on the screen. This list is displayed
by pressing the "OK" button and, if necessary, the LEFT and RIGHT arrows to select
agroup of favourite channels. For more detailed information, see the "Channel
Manager" section of this guide.

12 EN
EN
Copyright © 2024, Fast ČR, a. s. Revision 11/2024
Electronic Programme Guide (EPG)
1.
Press the “EPG” button to open the EPG
(Electronic Programme Guide) menu.
2. Press the cursor buttons to toggle
between the channel list, the selected
channel'sevent schedule.
3. Press the “LEFT/RIGHT” button to
switch between channel and programme
windows.
4. Only in the channel window: Press OK
to view information about the current
programme.
5. Only in the programme window: Press the “RED” button to set the event timer to
Record PVR or Reminder PLAY.
6. Press the “GREEN” and “YELLOW” buttons to switch between days.
7. Only in the programme window: Press “OK” to display selected event information.
8. Press the “EXIT” button to return to the previous menu.
Arrows – move between the programmes and shows.
Press the "BLUE" button to switch to Booking Management where you can manage
previously created events or add new ones.

EN 13
EN
Copyright © 2024, Fast ČR, a. s. Revision 11/2024
Main Menu
The main menu is used to set reception parameters, set advanced functions and manage
channels. Press the MENU button to enter the menu. Use the LEFT and RIGHT keys to
navigate through its categories, press OK to enter acategory. Within acategory, use the UP
and DOWN keys to move between items.If the item has values to set marked with arrows
before and after the current value, to toggle these values use the LEFT and RIGHT arrows
on the remote control. Press OK to enter some items with multiple values (e.g. resolution,
list of countries) or submenus.
Main Menu
Press the EXIT (or MENU) button to exit the current setting level and move to ahigher level.
If any settings need to be saved separately when leaving (e.g. setting atimer), the device
prompts you to confirm. Confirm this save by pressing OK or cancel it by selecting Cancel.
Note on terminology:
“Programme” is asingle, coherent part of abroadcast defined by its beginning, duration and
end. In technical terminology it is called an “Event”.
“Channel” is acontinuous series of programmes of aparticular broadcaster, for TV it is
called aTV Channel, for radio it is called aRadio Channel.
“RF channel” is atransmission characterised by astandardised number or carrier frequency
in MHz (e.g. RF Channel 40 or 626 MHz) that contains multiple digital channels.

14 EN
EN
Copyright © 2024, Fast ČR, a. s. Revision 11/2024
Channel Settings
Editing Channels
This option allows you to manage channel lists. In the submenu, select amode using the
number buttons 1–5, and its marking will light up in blue. Pressing the number button again
will exit the mode and the blue mode marking will turn grey again. Use the UP/DOWN
buttons to navigate the list. Press OK to select achannel to edit according to the selected
mode. Inside the mode you can select all channels by pressing the RED button. For
example, you can use this even if you want to unmark all previously marked channels in
bulk, in which case you press the RED button twice. You can make edits in multiple modes,
such as deleting and skipping. When you have made all the adjustments, press EXIT to
confirm and save your changes. If you don't save the changes, they will be lost.Press the
GREEN button to rename the channel.
List of Editing Modes:
1. Del (Delete) – after switching on the mode, select the channel to delete with the OK
button, across symbol will appear next to it. You can mark multiple channels.
2. Move – after switching on the mode, select the channel to move with the OK button,
asymbol will appear next to it. If you want to move multiple channels at once, mark them
with the GREEN button. Then use the UP/DOWN arrow keys to move them to anew
position in the list and press OK again to place them under the selected position.
3. Skip – after switching on the mode, select the channel to skip with the OK button,
asymbol will appear next to it. This channel will not be visible in the normal list, but will not
be deleted. You can later cancel the skip again. The channel number series in the current
list will not be broken, the numbering will be shifted.
4. Lock – after switching on the mode and entering your password, select the channel to
lock with the OK button, alock symbol will appear next to it. The channel marked in this
way will be protected by your password in normal mode, you will need to enter it to watch
it.

EN 15
EN
Copyright © 2024, Fast ČR, a. s. Revision 11/2024
5. Fav (Favourites) – after switching on the mode, select the channel to be added to one (or
more) favourites list by pressing OK. When pressed, alist of favourite channel groups will
appear (e.g. Movies, News, Sports, etc.). You can also indicate your inclusion in more than
one group. When you exit the EXIT group list, aheart symbol will appear next to it.
Note: in normal operation, you can navigate between channel groups using the LEFT/
RIGHT arrow keys. Appropriate compilation of favourite groups can greatly simplify the
use of the receiver when receiving many channels, extensive lists.
EPG Programme Guide
The option has the same function as the EPG button on the remote control, described
above.
Sort Channels
Extensive channel lists can be forced to sort by some property: LCN, Frequency, Service ID,
Service Name. It always depends on the information obtained from the digital broadcast.
LCN
Logical channel numbering is asystem of fixed channel number assignment according to
the operator'schoice. It is mainly used in cable television. In terrestrial broadcasting only in
some states. If the option is enabled and there is no information in the broadcast, channels
800 and above are numbered.
Channel Updates
Enable or disable channel updates based on broadcast information. Such updates are
performed by the operator, only occasionally.
Volume Adjustment
You can set either Bulk Adjustment (common volume for all channels, recommended) or
Adjust by Channel (only if there are significant volume differences between channels).

16 EN
EN
Copyright © 2024, Fast ČR, a. s. Revision 11/2024
Picture Setting
Aspect ratio
Set to Auto if you have awidescreen TV and it receives all commands from the HDMI
interface. If not, set asuitable 16:9 image processing method
Resolution
Set the correct resolution according to your TV'scharacteristics. Proceed from lower values
to the highest possible. Then confirm the new choice, otherwise the resolution will be
reverted. This prevents image loss by overly high resolution.
TV Format
Choose between NTSC and PAL according to the system in your area.
TV Scart
Select acolour system (for SCART output only), CVBS is more compatible, RGB is more
accurate but more demanding.
Panel Settings
Use the menu to adjust the panel brightness, channel number or time display, and time
display during Standby.

EN 17
EN
Copyright © 2024, Fast ČR, a. s. Revision 11/2024
Search
Search Mode
Choose between terrestrial DVB-T2 and cable DVB-C.
All or Free – FTA only
Select, if you want to tune all channels or only free, non-paid (FTA).
Automatic Search
Before starting, you will be asked to clear all previously tuned channels and automatically
retune the entire band according to the parameters specified above.
Manual Search
DVB-C: to manually find aspecific channel, search for its parameters according to your
operator'sdata. Enter the Frequency, Symbol Rate and QAM Modulation, if applicable.
Specify whether to search for other associated operator channels on this frequency
according to the NIT table. Then press Start.
For DVB-C there is also an option to search alarger range of frequencies by selecting
Search All.
DVB-T2: according to the information about terrestrial channels in your area, set the best
radio channel number, its frequency and bandwidth will be assigned automatically according
to the standard. Then press Start.
Country
Select the correct country where you are receiving in order to choose the correct frequency
plan and other parameters.
Antenna Power Supply: 5V
If you have an active antenna equipped with an amplifier with a5 volt power supply over
the antenna cable, turn this option to ON. Otherwise, leave it on OFF.

18 EN
EN
Copyright © 2024, Fast ČR, a. s. Revision 11/2024
Setting the Clock
Region and Time
Select the method of entering the time, either Manual, where you also select Region and
Time Zone. Or select DVB, where the exact time will be loaded automatically from the
broadcast (recommended). The automatic time depends on the accuracy of the broadcast
and its operators. With DVB time, the current time cannot be entered manually.Summer
time: Choose according to your current circumstances. Some operators also supply the
correct information to the broadcast.
Sleep
Select after how many hours the receiver should be switched off when the user is idle.
Alternatively, you can disable this function completely by selecting OFF.
Timer Setting
Press the GREEN button to set atimer to switch to aspecific channel at aspecific time by
selecting Play. Or you can select PVR to record aspecific channel for aset period of time.
Once you have set valid values, press the EXIT button and confirm the saving of the set
values by selecting OK. You can remove the set timers one by one with the RED button or
edit them with the YELLOW button. To clear all timers, press the BLUE button.
The total number of timers is 8.

EN 19
EN
Copyright © 2024, Fast ČR, a. s. Revision 11/2024
Automatic On and Off
You can leave full manual control by selecting Disabled or enable afunction by entering
aspecific time. The function depends on the correct entry of the time and, if necessary,
updating the time from the broadcast.
Options
OSD Language
Select the receiver menu language from the available languages.
EPG Language
We recommend leaving it on All, where the language definition is loaded from the
broadcast. If it does not give good results, select the language manually, from those
available.
Subtitle Language
Set to aspecific language to search for amatch with the broadcast subtitles – depends on
the specific broadcast. Or suppress the subtitle display by selecting OFF.
Teletext Language
Leave it to Auto to search for amatch with the broadcast teletext – depends on the specific
broadcast. If it does not give good results, select the language manually, from those
available.
The First Language of Sound
Amatch is searched for with the broadcast language, if found, the audio is selected when
watching that channel.
The Second Language of Sound
If no match with the first sound is found in the broadcast, the second sound is searched for.
Digital Audio
The digital audio output is output in linear PCM format (most compatible) or original from
the broadcast (Bypass) or according to the broadcast information (Auto).

20 EN
EN
Copyright © 2024, Fast ČR, a. s. Revision 11/2024
Sound Memorisation
Saves the soundtrack determination. It depends on the broadcast and identification of the
soundtrack.
Audio Description
If an audio description (usually marked AD for aparticular programme) is broadcast, it can
be switched on by selecting ON. The ratio of the original sound to the audio description (AD
Volume Offset) can then be adjusted.
Turn Off after Recording
Select ON if you do not want to leave the receiver on after recording is complete.
HDMI CEC
HDMI CEC is asystem of mutual control of different devices connected by HDMI cable. If
you have another device equipped with HDMI CEC, test which functions will work together
(on, off, volume, channel selection, etc.) with the remote control from the other device.
Faultless cooperation between different devices is not guaranteed.
System
Parental Control
Enter the original password “000000” and set the age 4–18 to be searched for programmes
during the broadcast. If ahigher age is broadcast, the receiver will prevent reception of that
programme until the password is entered.
Lock Settings
You can set Menu Lock, Channel Lock or change the factory password “000000” to
acustom password. If you forget your own password, you can use the super password
“876543” to set anew password
Factory Settings
If you need to clear all your settings and reset the receiver to factory settings, use this
option. You will need to enter apassword to do this.

EN 21
EN
Copyright © 2024, Fast ČR, a. s. Revision 11/2024
System Information
Displays information about the receiver'shardware and software.
Software Upgrade
If you receive an approved software upgrade from the manufacturer, you can install it using
this option. Select the type and location according to the instructions issued for this update
and start the installation by selecting Start. DO NOT SWITCH OFF THE DEVICE! Ensure
uninterrupted power during the upgrade. After the upgrade, you will need to reinstall the
device.
Starting Mode
Select the status after the device is connected to power, e.g. after apower failure between
On, Standby or Last status.
USB
Connecting aMass Storage Device to the USB port will enable the Time Shift/Record
feature for abroadcast program.
Note: For recording or the time-shift feature, use aUSB 2.0 disc. For the time-shift and
recording feature, please use aUSB disc with ahigher capacity (> 2 GB). To power the
HDD, please use aseparate power supply. The disk must be fast enough without failures,
the required speed is determined by the transmission speed of the specific channel. If the
speed is insufficient, the recording will be disturbed or unusable. Flash memories are less
suitable than HDDs due to limited long-term reliability.
Multimedia
This option opens the playback option if you connect acompatible USB stick with your files.
Next, select simple view FILE, VIDEO, MUSIC or IMAGE. You can then view the specified
file type by opening the USB drive (C:). The playback is then controlled using the remote
control keys: OK, PLAY, PAUSE, STOP.

22 EN
EN
Copyright © 2024, Fast ČR, a. s. Revision 11/2024
PVR Records
If you have already recorded broadcasts to your USB drive, this option will display alist
of them. Press OK to start playback of the selected recording. You can delete aparticular
recording with the RED button, or you can delete all with the BLUE button.
Note: The record list can be accessed in normal operation by pressing the MEDIA button.
PVR Settings
Time Shift:
Select On to enable time shift when watching aprogramme, after pressing the PAUSE
button. If time shift is not enabled, pressing PAUSE will only pause the picture.
Length of Recording:
Set apreset recording duration after pressing the REC button, e.g. 2 hours.
PVR Transcription:
Turn on or off time-shift overwriting when there is insufficient space in the USB memory.
Storage Info:
Displays the total and free space in the USB memory. If there are multiple partitions on the
disk, you can use the GREEN button to specify which one will be used for PVR. You can
format the partition with the RED button.

EN 23
EN
Copyright © 2024, Fast ČR, a. s. Revision 11/2024
ATTENTION! Formatting irreversibly deletes all the contents of the disk!
Time Shift / Recording
Time Shift
The Time Shift function can be activated in broadcast monitoring mode by pressing the
“PAUSE” button if this function is enabled in the MENU/USB/PVR settings. When the
function is started, an information window is briefly displayed.
During the time shift, you can control the watching with the PLAY (starts playback where
you paused it) and PAUSE (pauses playback – the broadcast is still recording in the
background) buttons. Press the FORWARD/BACKWARD buttons to fast-forward through the
current recording. Or you can search for aspecific location on the timeline by pressing INFO
“i”. Use the LEFT/RIGHT arrow keys to scroll on the timeline and press OK to start the
found location.
To stop the Time Shift function, press the “STOP” button and confirm the end with OK.
Record
Instant recording during normal viewing of the broadcast by pressing the “RECORD” button.
The preset recording length is determined by the setting in the PVR menu. To end the
recording, press STOP and confirm with OK.
You can set the general timer recording in MENU/Time/Timer settings. In the timer settings,
select PVR. Set the necessary values, press the EXIT button and confirm the saving of the
set values by selecting OK. You can remove the set timers one by one with the RED button
or edit them with the YELLOW button. To clear all timers, press the BLUE button.
Recording by EPG is the easiest timer to enter, as the receiver fills in the necessary data
according to the information from the digital programme information stream displayed
by the EPG system. With the EPG displayed, search for the desired channel in the left
window and for the desired programme in the right window. Press the RED Reservation
button, check the details you entered and press EXIT. Confirm the saving of these values by
pressing OK. Ared circle will appear next to the selected programme.
Note: If you did not select PVR when you entered the mode, but only Play, agreen circle
will appear next to the programme.

24 EN
EN
Copyright © 2024, Fast ČR, a. s. Revision 11/2024
Multimedia Player
Multimedia Player Main Menu
Make sure that external data storage device is connected to the USB port.
1. Press the "MENU" button to open the main menu.
2. Press the “LEFT” or “RIGHT” button to highlight USB and press OK to select
"”Multimedia”.
3. Press the “UP” or “DOWN” button to select simple view Files, Video, Music or Images.
You can then display the specified type by pressing OK and opening the USB drive
(C:). The playback is then controlled using the remote control keys: OK, PLAY, PAUSE,
STOP.
4. Press the “EXIT” or “MENU” button to exit.
Media Playback
This feature allows you to play media files from adevice connected to the USB port.
During playback, press OK to display the information and control window. It contains basic
information about the file being played and amenu of controls (scroll, pause, settings,
information) depending on the type of file being played.
Press “DOWN” to move to the available functions when the window is displayed, and then
press “LEFT” and "”RIGHT” to switch between functions.
Files:
This option displays all files on the disk. After pressing OK, the media files will be played,
while the others will display an error message. You can play files similar to the other
options VIDEO, MUSIC, PICTURES, only they are visible all at once.
This option combines photo viewing with background music. Start music from the MP3
music folder first, then start viewing JPG photos from the pictures folder on the same drive.
Music playback continues until you exit the selected USB drive (C:) or stop it.
Video:
Useful features include Settings (the gear
symbol) which will offer to skip to aspecific
playback time, select asoundtrack from
those available, set arepeat or switch the
aspect ratio of the display if available. You
can also view information about the file.

EN 25
EN
Copyright © 2024, Fast ČR, a. s. Revision 11/2024
Note: When you stop playing afile, e.g. amovie, and restart it, the player will offer you
the option to resume where you left off. You can confirm this by pressing OK or cancel
and play from the beginning.
Audio:
Useful features include Settings (the gear
symbol), which will offer to set the repetition
and the way text is displayed and coded
if available. You can also view information
about the file.
Note: Music playback continues until you exit the selected USB drive (C:) or stop it. You
can continue to select other music on the disc with background music, which will start
when you press OK on the music file.
Picture:
Useful features include Settings (the gear
symbol), which offers to set the repetition
and duration of asingle image display. You
can also view information about the file.
26 EN
EN
Copyright © 2024, Fast ČR, a. s. Revision 11/2024
INSTRUCTIONS AND INFORMATION ON DISPOSAL OF USED PACKAGING MATERIAL
Dispose of used packaging material in the designated waste disposal area determined by
the municipality.
DISPOSING OF USED ELECTRICAL AND ELECTRONIC EQUIPMENT
This symbol on products or original documents means that used electric or
electronic products must not be added to ordinary municipal waste. For proper
disposal and recycling of these products, deliver them to designated collection
points. Alternatively, in some European Union states or other European countries
the products can be returned to the local retailer when buying an equivalent
new product. By properly disposing of this product, you help preserve valuable
natural resources and contribute to preventing potential negative impacts on
the environment and human health resulting from improper waste disposal.
For further details, contact your local authorities or the nearest collection point.
Fines may be imposed for improper disposal of this type of waste in accordance
with national regulations.
For Business Entities in European Union States
If you want to dispose of electric or electronic devices, ask your retailer or supplier
for the necessary information.
Disposal in Other Countries Outside the European Union
This symbol is valid in the European Union. If you wish to dispose of this product,
request the necessary information about the correct disposal method from the
local council or from your retailer.
FAST ČR, a.s. hereby declares that the radio device type SDB 524T conforms to
the 2014/53/EU directive.
For full version of the EU declaration of conformity, please refer to
www.sencor.com website
The text, design and technical specifications may be changed without prior notice and we
reserve the right to make these changes.

EN 27
EN
Copyright © 2024, Fast ČR, a. s. Revision 11/2024
EN
Warranty conditions
Warranty card is not apart of the device packaging.
This product is warranted for the period of 24 months from the date of purchase to the end-user. Warranty
is limited to the following conditions. Warranty is referred only to the customer goods using for common
domestic use. The claim for service can be applied either at dealer’sshop where the product was bought, or
at below mentioned authorized service shops. The end-user is obligated to set up aclaim immediately when
the defects appeared but only till the end of warranty period. The end user is obligated to cooperate to certify
the claiming defects. Only completed and clean (according to hygienic standards) product will be accepted.
In case of eligible warranty claim the warranty period will be prolonged by the period from the date of claim
application till the date of taking over the product by end-user, or the date the end-user is obligated to take it
over. To obtain the service under this warranty, end-user is obligated to certify his claim with duly completed
following documents: receipt, certificate of warranty, certificate of installation.
This warranty is void especially if apply as follows:
Defects which were put on sale.
Wear-out or damage caused by common use.
The product was damaged by unprofessional or wrong installation, used in contrary to the applicable
instruction manual, used in contrary to legal enactment and common process of use or used for another
purpose which has been designed for.
The product was damaged by uncared-for or insufficient maintenance.
The product was damaged by dirt, accident of force majeure (natural disaster, fire, and flood).
Defects on functionality caused by low duality of signal, electromagnetic field interference etc.
The product was mechanically damaged (e.g. broken button, fall).
Damage caused by use of unsuitable media, fillings, expendable supplies (batteries) or by unsuitable
working conditions (e.g. high temperatures, high humidity, quakes).
Repair, modification or other failure action to the product by unauthorized person.
End-user did not prove enough his right to claim (time and place of purchase).
Data on presented documents differs from data on products.
Cases when the claiming product cannot be indentified according to the presented documents (e.g. the
serial number or the warranty seal has been damaged).
Manufacturer:
FAST ČR, a.s., U Sanitasu 1621, Říčany 251 01, Czech Republic
Visit www.sencor.com for detailed information about authorized service centers.
The original version of the instructions is in the Czech language, other language versions are made by the
appropriate translation.

FAST ČR, a.s., USanitasu 1621, Říčany CZ-251 01