
USER MANUAL
Hardwired Gateway
Model NO. HWG040WLBRF
Welcome to the RAINPOINT family! Please read the manual before use
to learn about the features and functions.

Contents
1. Box Contents
2. Introduction
2.1 Product Oveiew
2.2 Button and Light Introduction
2.3 Specication
3. Connection and Installation
3.1 Download app
3.2 Sma WiFi Connection
3.3 AP Connection
3.4 Ethernet Connection
3.5 app Oveiew
4. Troubleshooting
5. Precautions
6. Warranty Policy
7. FCC Statement
8. Customer Suppo
01
02
02
02
03
04
04
06
11
14
17
21
22
22
23
24
EN

-01-
1. Box Contents
HWG040WLBRF Hardwired Gateway
USB Cable
Warranty Card
User Manual
1.
2.
3.
4.
4
3
2
1
EN
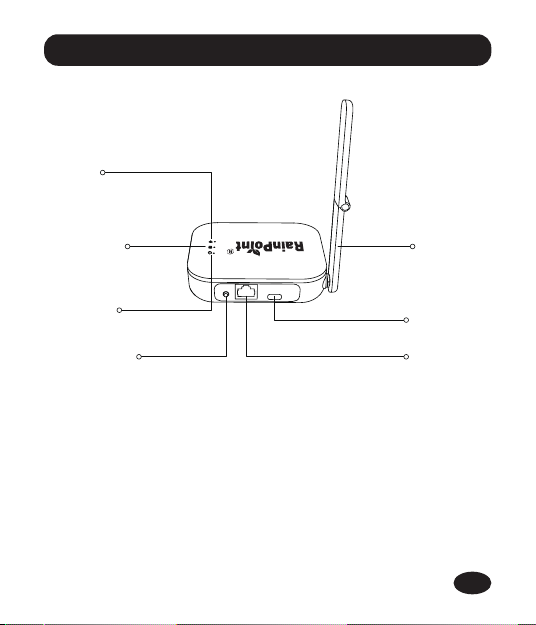
2.1 Product Oveiew
2.2 Button and Light Introduction
WiFi
Connecting
Indicator
Ethernet
Indicator
Power
Indicator
Operation
Button
Ethernet
Po
Charging
Po
Folding
Antenna
-02-
Operation Button
Press and hold the operation button for about 5 seconds to activate WiFi
connection mode.
2. Introduction
EN

Indicator Meaning Table
2.3 Specication
Range Between Hardwired Gateway and Router:
492ft in the open area without inteerence
Temperature Operating Range: 3℃-40℃ (37.4°F-104°F)
WiFi Frequency Band: 2.4GHz Only
Input: DC 5V 1A
For Indoor Use Only
Powered onPower Indicator Turn Solid Green
WiFi Connection ModeConnecting Indicator Blink Quickly
AP Connection ModeConnecting Indicator Blink Slowly
Connected with WiFi
Successfully
Connecting Indicator Turn Solid
Green
-03-
EN
3. Connection and Installation
a.
3.1 Download app
3.1.1 Download
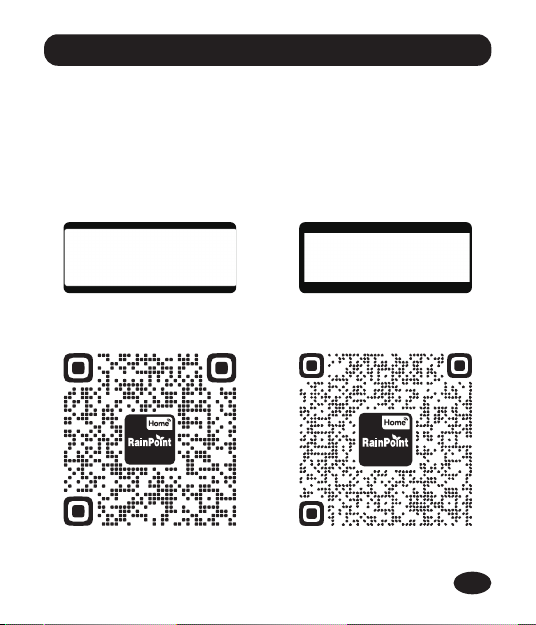
Search and download RainPoint Home app on App Store
or Google Play:
OR scan the QR code below to download the app
Android
iOS
-04-
EN
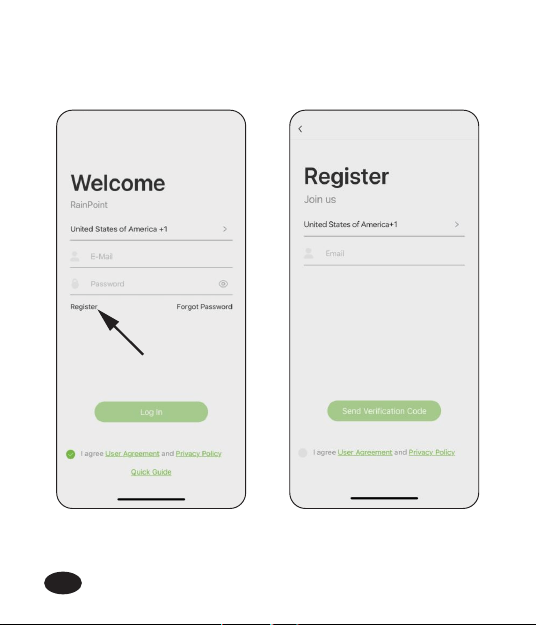
Create an account and log in:
Follow in-app instructions to sign up for your account or log in
with your existing account and sta adding device.
b.
-05-
EN

3.2 Sma WiFi Connection
3.2.1 Before Connection
To assure your Gateway connect to Wi-Fi, it will need to meet the
following requirements:
Please make sure your mobile device is connecting with 2.4GHz
Wi-Fi before using RainPoint Home app. The Gateway has to keep
staying under 2.4GHz Wi-Fi to work normally.
iOS Requirements: Mobile device with iOS 11.0 (or higher) with
cellular or Wi-Fi seice.
Android Requirements: Mobile device with Android OS 6.0 (or
higher) with cellular or Wi-Fi seice.
Please do not use public Wi-Fi networks.
The Gateway and your mobile device are better to be within 10 ft
(3m) during pairing.
If you need to change the working Wi-Fi network, press and hold
the operation button on the hub to reset your hub and reconnect.
-06-
EN
-07-
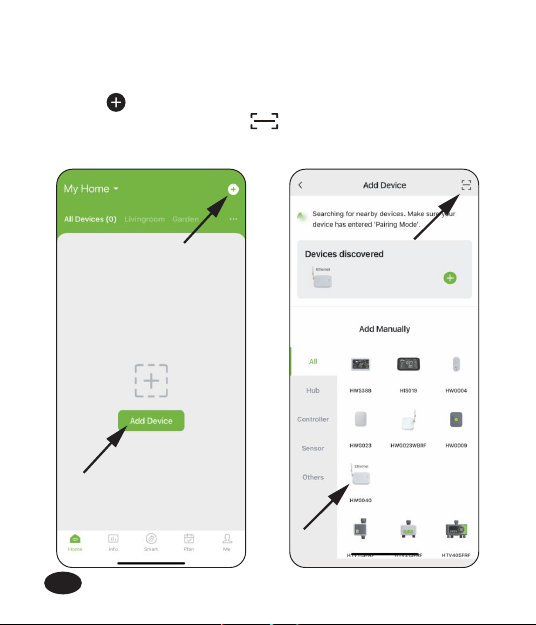
3.2.2 WiFi Connection
Tap or "Add Device" on the Home page, and select
HWG040WLBRF. Or press scan QR code and move onto
next step.
a.
Plug in the Gateway near the router and follow the steps below to connect:
EN
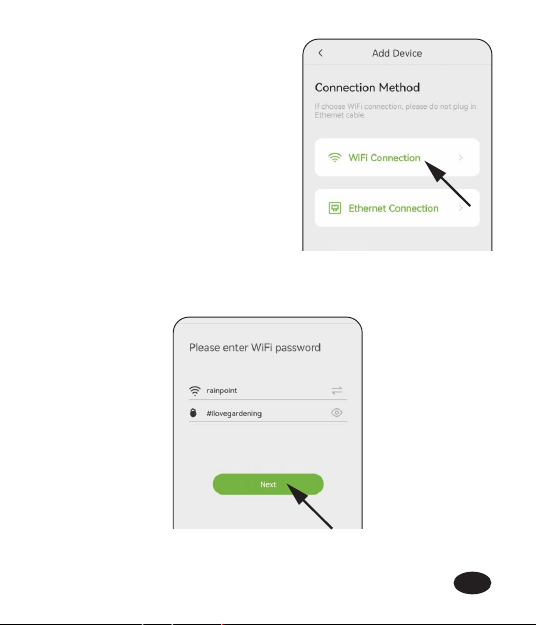
Tap Wi-Fi Connection.b.
Log into Wi-Fi and tap Next.c.
-08-
EN

Plug in the gateway near the router and follow in-app instructions
to complete the connection.
d.
The indicator will ash green
rapidly when in WiFi connection
mode and turn solid green
when connected successfully.
Press and hold the button for
about 5 seconds to activate
WiFi connection mode.
-09-
EN
Congratulations!
Now the gateway has been successfully connected with WiFi
network and added on your app. You can add up to 39 devices
controlled by this gateway by click " + Add Device" icon.
e.
Tips: If failed to connect through the sma WiFi connection mode,
please t AP connection mode or contact the customer suppo team.
Email: suppo@rainpointonline.com
-10-
EN
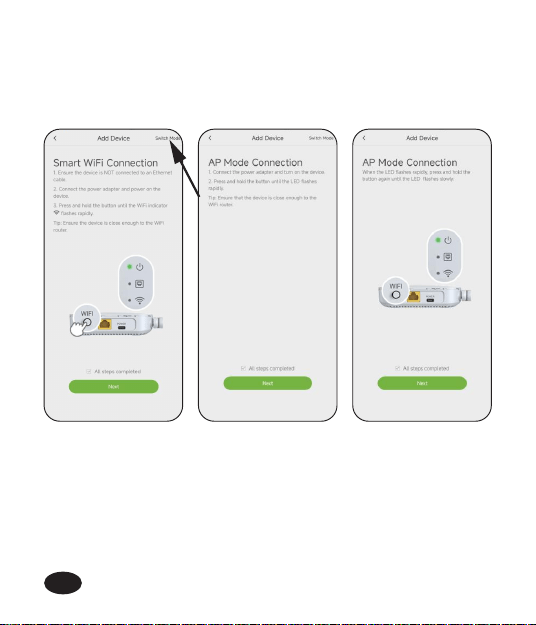
3.3 AP Connection
You can access to AP Connection Mode by click "Switch Mode" on Sma
WiFi Connection page and follow in-app instructions.
-11-
EN
-12-
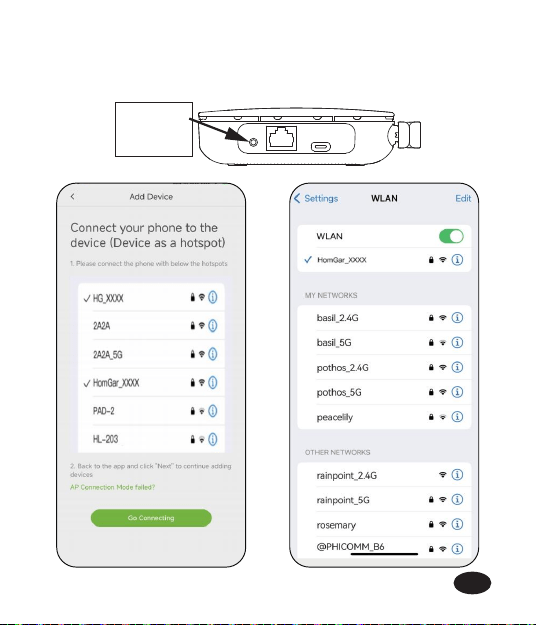
When WiFi connecting indicator ashes slowly, tick the checkbox on
the app, click "Next", then follow the wizard and click "Go Connecting"
to connect your phone to the hotspot ( HomGar_xxxx or HG_xxxx).
ash
slowly
EN
Note: If the mobile device pops up that there is no signal and needs to
switch WiFi, please do not switch. Please keep the selected hotspot
(HomGar_xxxx or HG_xxxx) to connect.
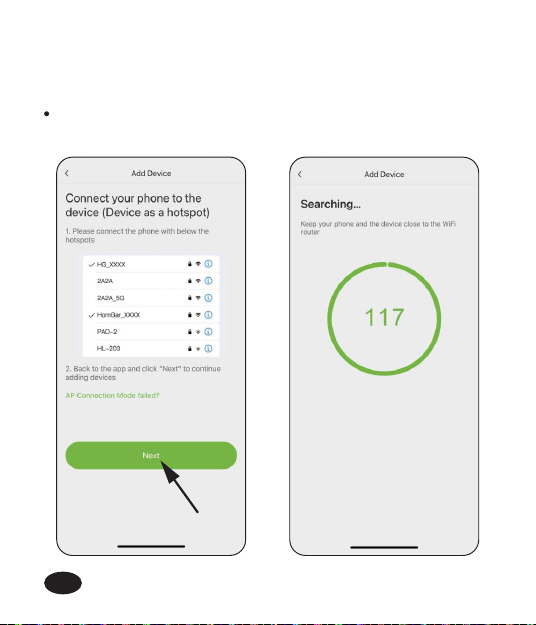
Back to the app and click "Next" to continue adding devices
automatically.
-13-
EN
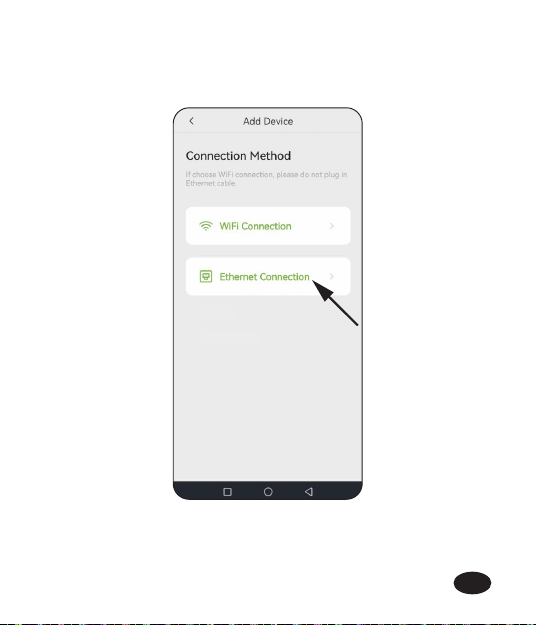
3.4 Ethernet Connection
Click "Ethernet Connection" on Connection Method page .a.
-14-
EN
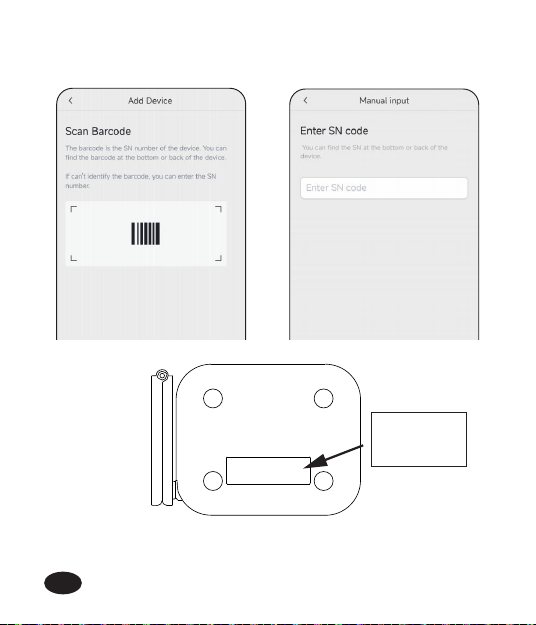
Scan barcode at the bottom of the hub or enter the SN number,
and then tap "Next" .
b.
SN CODE
Scan
barcode
-15-
EN
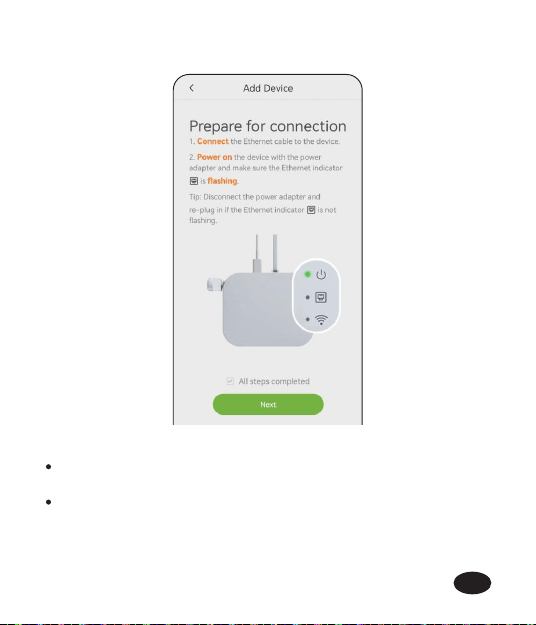
Follow in-app instructions to complete the connection. c.
Please plug the Ethernet cable into the "LAN" pos or "WAN/LAN"
pos in Optical Terminal. Do not plug it into single po labeled "WAN".
If Ethernet Indicator does not ash, please disconnect and
reconnect the power connector. If there is no response after
reconnecting several times, please contact us and we will provide
you with a solution.
Note:
-16-
EN

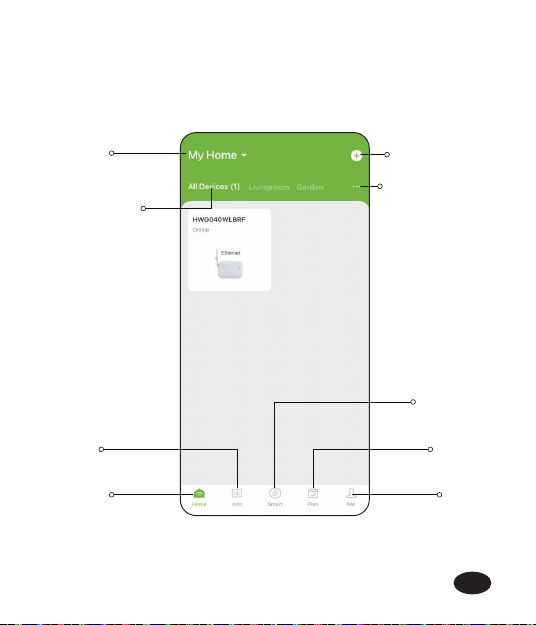
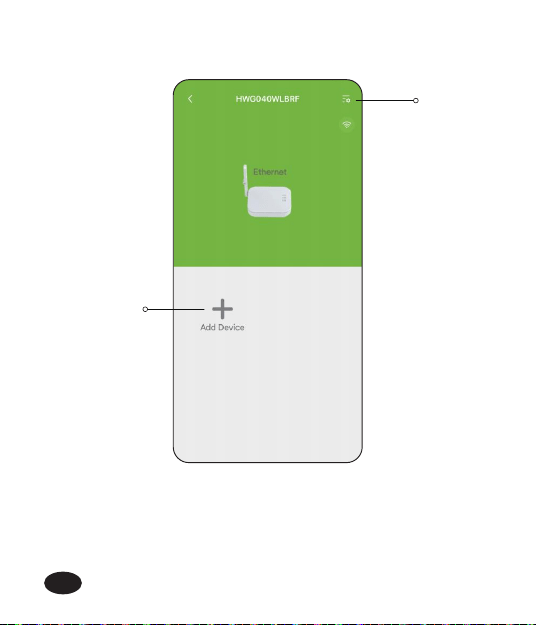
3.5 App Oveiew
3.5.1 App Home page
Home Management: Set home name, location and other
information to manage your home environment monitoring system
more intelligent and accurate.
All Devices: All added devices will be displayed here.
Room Management: Related devices list of each room will be
displayed here.
Add Devices: To add devices under your monitor and management.
Home: The app home page.
Plan Page: List all of your irrigation plans that set on water
timers/pumps. You can manually turn on or o the plan by the
button on the right. There is also a manual Rain Delay button in
each plan. It is available to check and edit the plans on the specic
device plan page.
Info: Check weather information and list of optional devices.
Me and Basic Settings: Manage your account, home, basic settings,
and other options. You can also nd unit format and notication
button in these settings.
Sma: You can dene various scenarios to manage the devices as
per your desire.
-17-
EN
-18-
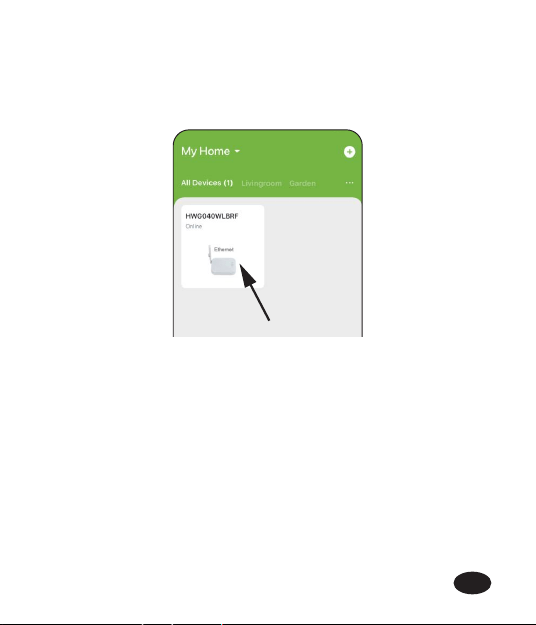
Notes: After the gateway and devices are connected, the list of the
devices will be displayed on both app’s home page and the gateway’s
device page. You can click the device icons in the "All Devices" list to
enter the device page, or nd them on gateway’s device page.
Home
Management
Home
All Devices
Info
Folding
Antenna
Plan
Me
Add Decives
Room System
Management
EN
-19-
3.5.2 Device Page
Device
Setting
Add device
controlled
by the hub
EN
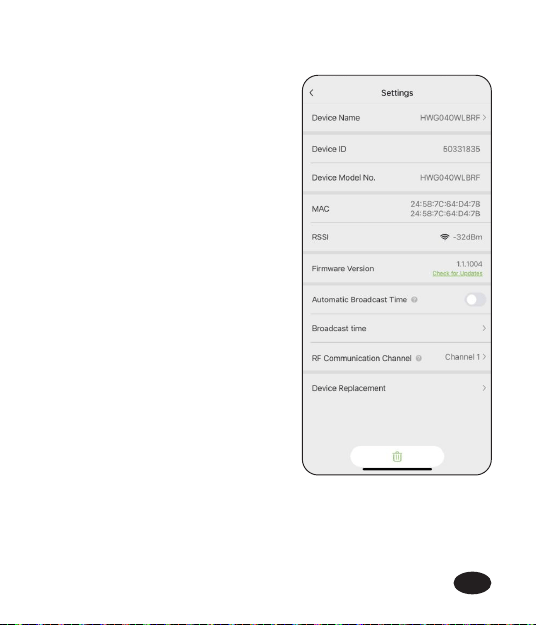
3.5.3 Device Settings
On device settings page, you can
nd basic information of the device
and some default settings.
Tips: Timing setting ONLY works for precision clock product to calibrate
time.
-20-
EN
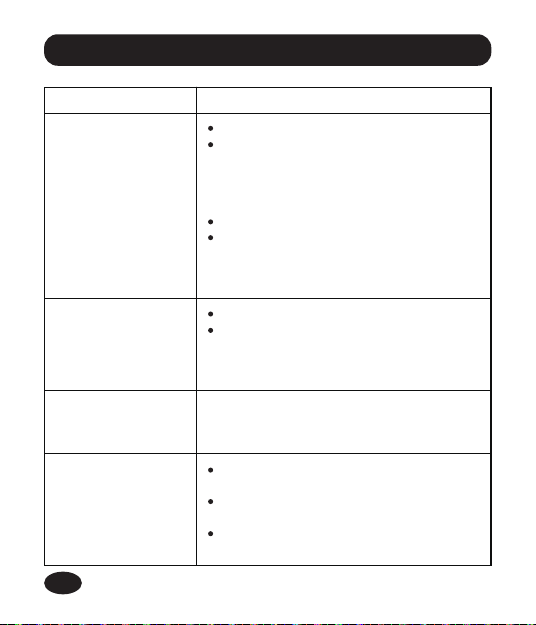
WiFi gateway gets
disconnected or
oine.
Problems
Solution
Please check if the router works normally.
If there is a power shut down and then
recover, and the router is back to work
again, please reconnect the WiFi gateway
following the connection pa of this
manual.
Please check if the WiFi signal is unstable.
If the distance between the gateway and
the router is too far, please move the
gateway closer to make the connection
more stable.
Devices get
disconnected.
Please check the stability of Wi-Fi signal.
If there are any strong signal sources in
between gateway and devices, please
move the devices to another place to
avoid inteerence.
Please disconnect and reconnect the
power connector.
Make sure you have the Ethernet cable
plugged fully into the Ethernet Po.
If connecting directly to a modem, please
check if the modem's LAN po is enabled
The operationbutton
on the WiFi gateway
doesn’t work.
Please contact our customer seice for
more suppo and suggestions.
Ethernet indicator
does not ash.
4. Troubleshooting
-21-
EN

5. Precautions
6. Warranty Policy
Please make sure to use 2.4GHz band WiFi to connect to this product.
Do not block the vent, inse ngers, or any objects, as this may
cause equipment failure or other conditions.
Do not use the product near gas, heaters, microwave ovens, and
other positions that may cause inteerence.
RainPoint provides a 1-year limited warranty on this product against
manufacturing defects in materials and workmanship. You can get an
extra two years of extended warranty by registering your product on our
website www.rainpointonline.com
-22-
EN

7. FCC Statement (2AWDBHWG040)
This device complies with Pa 15 of the FCC Rules. Operation is subject
to the following two conditions:
1. This device may not cause harmful inteerence.
2. This device must accept any inteerence received, including
inteerence that may cause undesired operation.
FCC Warning: Any changes or modications not expressly approved by
the pay responsible for compliance could void the user’s authority to
operate this equipment.
Note: This equipment has been tested and found to comply with the limits
for a Class B digital device, pursuant to Pa 15 of the FCC Rules. These
limits are designed to provide reasonable protection against harmful
inteerence in a residential installation. This equipment generates, uses,
and can radiate radio frequency energy, if not installed and used in
accordance with the instructions, may cause harmful inteerence to
radio communications. However, there is no guarantee that inteerence
will not occur in a paicular installation. If this equipment does cause
harmful inteerence to radio or television reception, which can be
determined by turning the equipment o and on, the user is encouraged
to t to correct the inteerence by one of the following measures:
Reorient or relocate the receiving antenna.
Increase the separation between the equipment and the receiver.
Connect the equipment into an outlet on a circuit dierent from
that to which the receiver is connected.
Consult the dealer or an experienced radio/TV technician for help.
Note: The manufacturer is not responsible for any radio or TV inteerence
caused by unauthorized modications to this equipment. Such
modications could void the user’s authority to operate the equipment.
-23-
EN
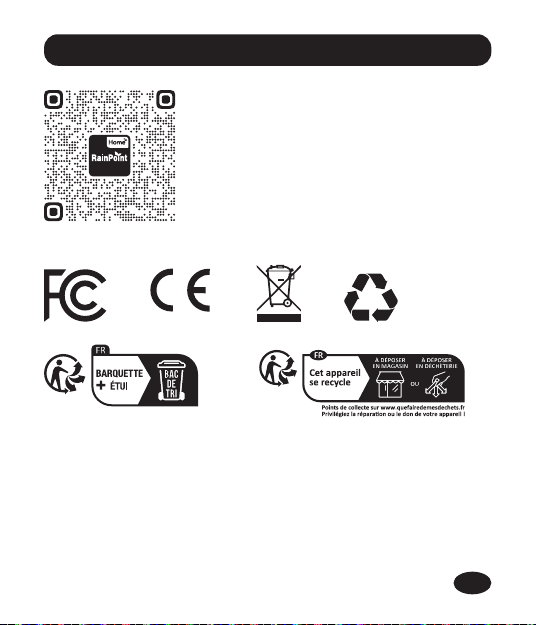
8.Customer Suppo
Please subscribe to our channel:
Rainpoint on YouTube for tutorial videos.
Or scan the QR code to visit RainPoint channel
on YouTube.
-24-
Made in China
EN
Need Help ?
or Email:
suppo@rainpointonline.com
Scan the QR code for more help.
V1