DEHUMIDIFIER

After receiving the product, please place the machine
in normal position and standing still for 6-8 hours to
allow the refrigerant to return to normal and improve
the lifespan of compressor.
Before use, please take out the water tank, peel off
the sticker on the float and check that the float turns
normally.
Emergency Handle Method:
When the machine operates abnormally, please quickly turn
off the power and unplug the power from the main socket.
Contact the seller and do not try to fix and open the machine.

Please keep this manual properly for future
reference. You can also scan the QR code to
visit our official website for multi-language
manuals. For any usage issues, please feel
free to contact us at suppor[email protected].

Warm tips
To quickly jump to a specific chapter page,
click on the relevant text on the contents page.
You can also use the thumbnail or document
outline in the top left corner to quickly find a
specific page.

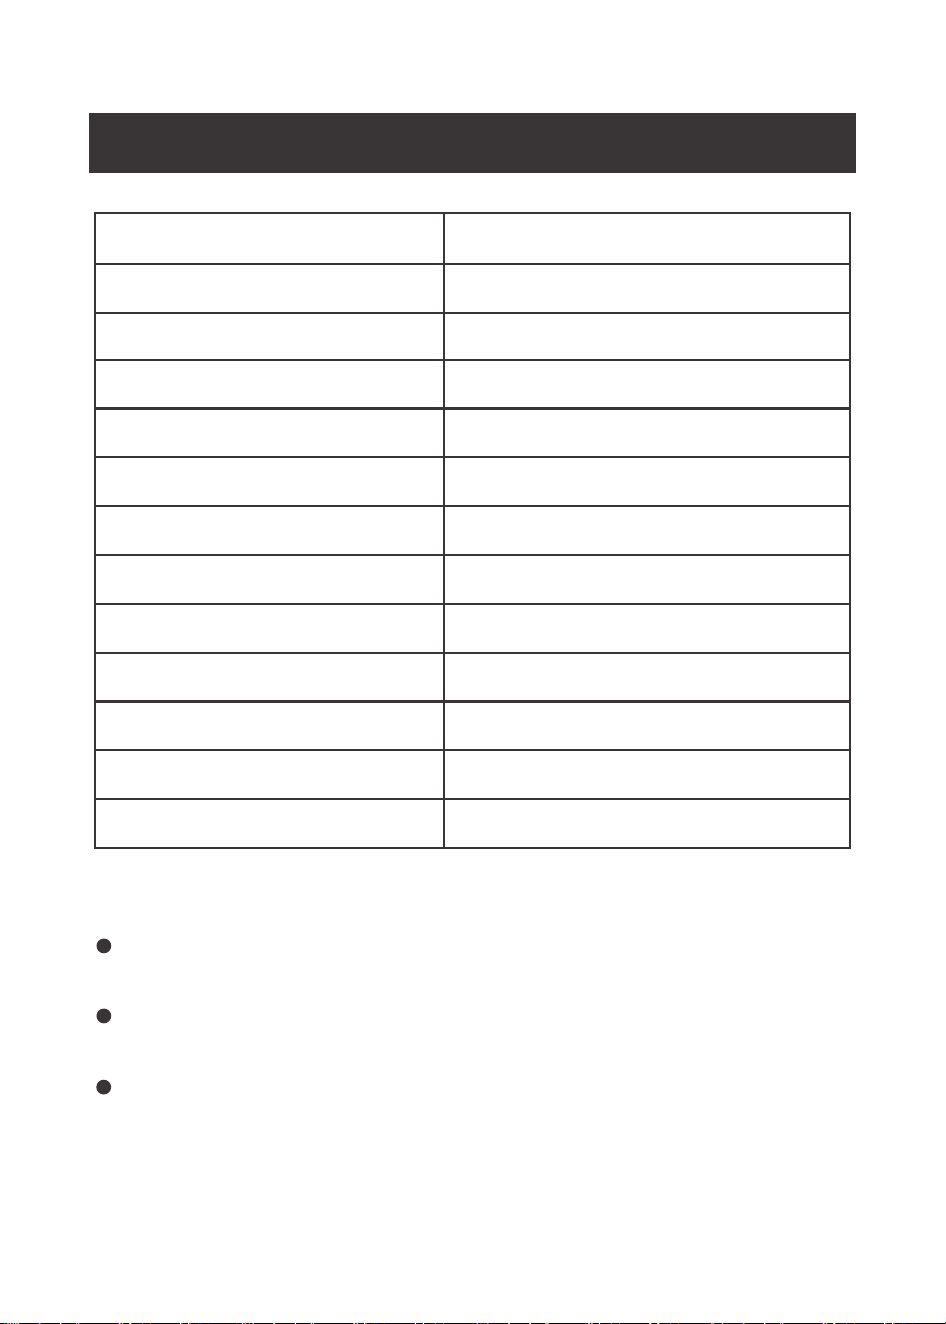
01/ TECHNICAL SPECIFICATIONS
Model No
Item No
Dehumidify Capacity
Rated Voltage
Rated Frequency
Rated Input Power
Max Input Power
Rated Input Current
Max.Input Current
Airflow Volume
Refrigerant Charge
Suction Side Pressure
Discharge Side Pressure
STS12-1027
INK-DH01
12L/day (30°C 80%)
220-240 V~
50-60Hz
195W (27°C 60%)
260W (35°C 80%)
0.85A (27°C 60%)
1.13A (35°C 80%)
150m³/h
R290/50g
0.6MPa
1.6MPa
Above parameters may have +5% accuracy error compared to
test lab environment and setup.
If the parameters are changed, please refer to the product
rating label.
Clean the inside of the water tank with an anti-bacterial cleaner
every few weeks to prevent the build up of bacteria.The tank has
a float water level for the FULL TANK indicator and must be
placed in the correct position.
NOTES:
01
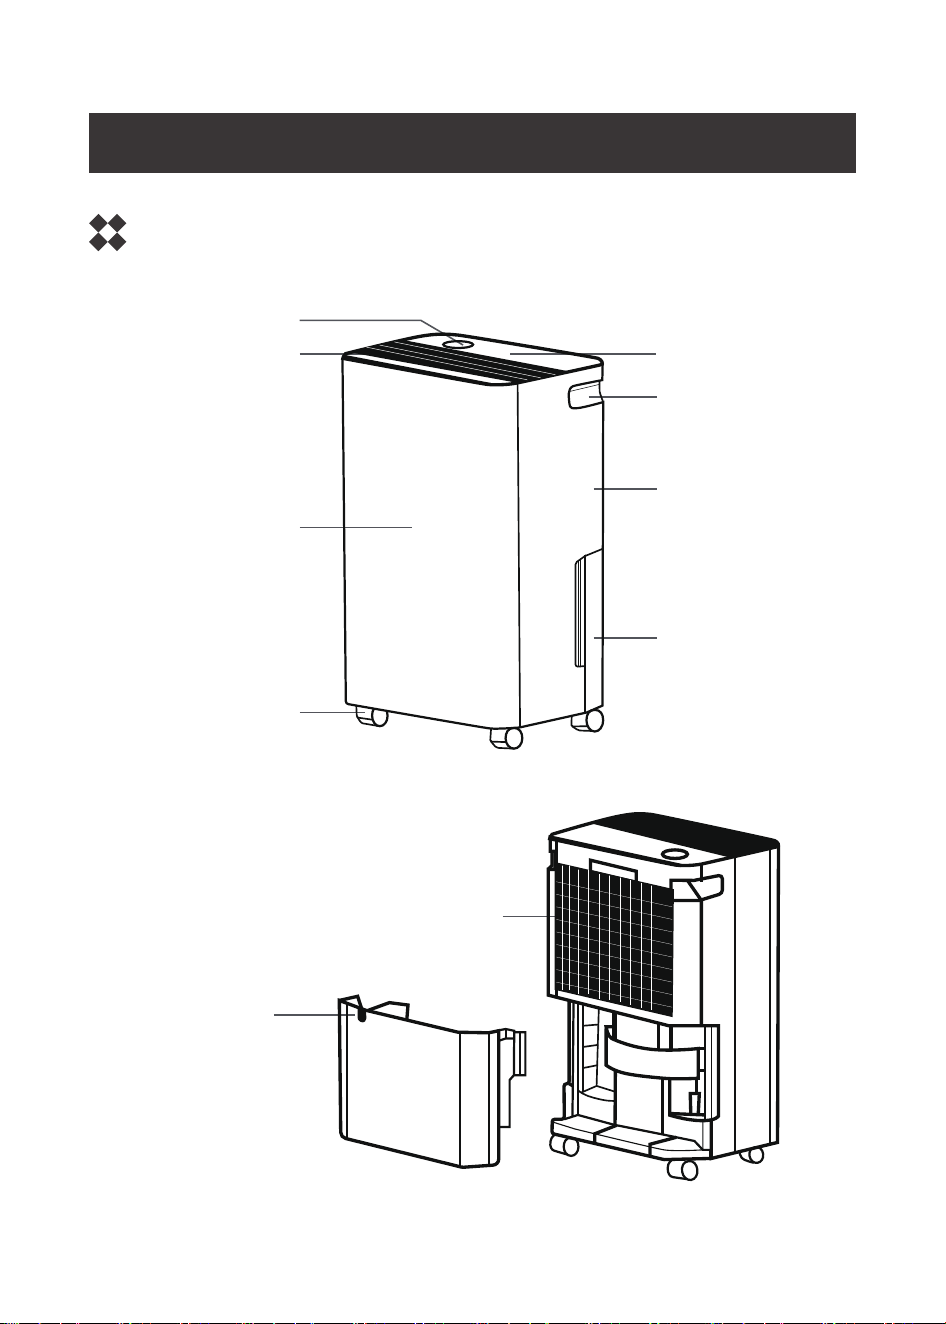
Product Appearance
02/ PRODUCT INTRODUCTION
Display screen
Control panel
Handle
Rear pane
Water tank
Air outlet
Front panel
wheel
02
Drainpipe
Connection
Filter

Operating Buttons:
POWER button: Press to switch the dehumidifier on, and
the dehumidifier will run the AUTO mode by default. Press
again to switch off.
TIMER button: Press to enter the timer setting
MODE button: Press to select a working mode from Hum
Set, Dry Clothes, Automatic
DOWN button: Short press to select the parameter you
wish to adjust. Long press to enter child lock mode
UP button: Short press to select the parameter you wish
to adjust.
Screen Display:
a. When the machine is switched on, it displays the humidity level.
b. When setting the humidity level, it shows the value of the target
humidity level.
c. When doing ON/OFF timer setting, it shows the timer setting.
Control Panel
03/ OPERATION INSTRUCTIONS
03
POWER
TIMER
MODE
RH%Hr
CHILD LOCK
RH%Hr

3.1 OPERATING MODES:
Fan Speed in
Automatic Mode
When the ambient humidity is > 70%, the machine
switches the fan to high speed.
When the ambient humidity is 55%-70%, the machine
switches the fan to low speed.
When the ambient humidity is < 55%, the compressor
stops working.
Fan Speed in
HUM SET Mode
If the target humidity is >10% higher than the room
humidity level, the fan speed will switch to high.
If the humidity level is <10% lower than the room
humidity level, fan speed will switch to low.
The compressor stops working when the target
humidity level is reached.
① AUTOMATIC Mode
Press the MODE button once to enter automatic mode. In automatic
mode, the target humidity level is 55% and cannot be adjusted. The
dehumidifier will automatically adjust the fan speed according to
the humidity level.
② HUM SET Mode
Step1: Press the MODE button twice to enter HUM SET mode.
Step2: Press + or - to set the target humidity according to your
needs, the default setting is 55%.
Step3: Wait for 5 seconds, the screen will flash and return to
normal display.
04

③ DRY CLOTH Mode
Press the MODE button a third time to enter DRY CLOTH mode. In
DRY CLOTH mode, the target humidity level is 55% and cannot be
adjusted, and the fan runs at high speed. The compressor will stop
if the humidity level is <55% or the temperature protection is
triggered.
① Countdown Timer OFF:
Step 1: With the dehumidifier running, press the TIMER button to
enter the timer setting.
Step 2: Press + or - to set the time to switch off, ranging from 1 to
24 hours.
Step 3: Wait for 5 seconds, the screen will flash and return to
display the humidity, which means the setting is complete.
② Countdown Timer ON:
Step 1: With the dehumidifier in standby mode, press the TIMER
button to enter the timer setting.
Step 2: Press + or - to set the time to switch on, from 1 to 24
hours.
Step 3: Wait for 5 seconds, the screen will flash and return to
display the humidity, which means the setting is complete.
TIP: Once the TIMER has been set, press the TIMER button to
check the remaining time of the timer.
3.2 Timer Mode:
3.3 Child Lock:
05

Press and hold the - button for 5 seconds to enable the child lock,
and the CHILD LOCK indicator will light up. Press and hold the
button for 5 seconds to disable the child lock.
When the FULL TANK indicator comes on, remove the tank and
dispose of the water in the tank.
When the machine is switched on and the FULL TANK indicator
is on, the machine will not operate and will beep for 20 seconds.
The FULL TANK indicator goes out when the machine detects
that the water tank is not full.
If the room temperature is >20°C, the machine continues to run
and the defrost function is deactivated.
If the room temperature is between 12°C and 20°C, the
machine's compressor runs for 35 minutes, stops for 8 minutes
to defrost and then starts again to continue the cycle.
If the room temperature is between 5°C and 12°C, the
machine's compressor runs for 25 minutes, stops for 12 minutes
to defrost and then starts again to continue the cycle.
When the machine enters the defrost mode, E4 is displayed on
the screen.
3.4 FULL TANK Indicator
3.5 Defrost Function
04/ PRECAUTIONS FOR USE
06
The operating temperature of the machine is 5°C-35°C.
While the machine is running, the compressor will generate heat,
it may cause the room temperature to rise, this is normal.
Please do not put any part or object into the water tank.
When the operating mode is changed, the compressor will enter
the safety mode for 3 minutes.
This machine must be placed on a flat, solid surface that can
support the weight of the machine when full of water.
When using the dehumidifier, all doors and windows should be
closed as the humidity outside will increase the workload of the
machine.
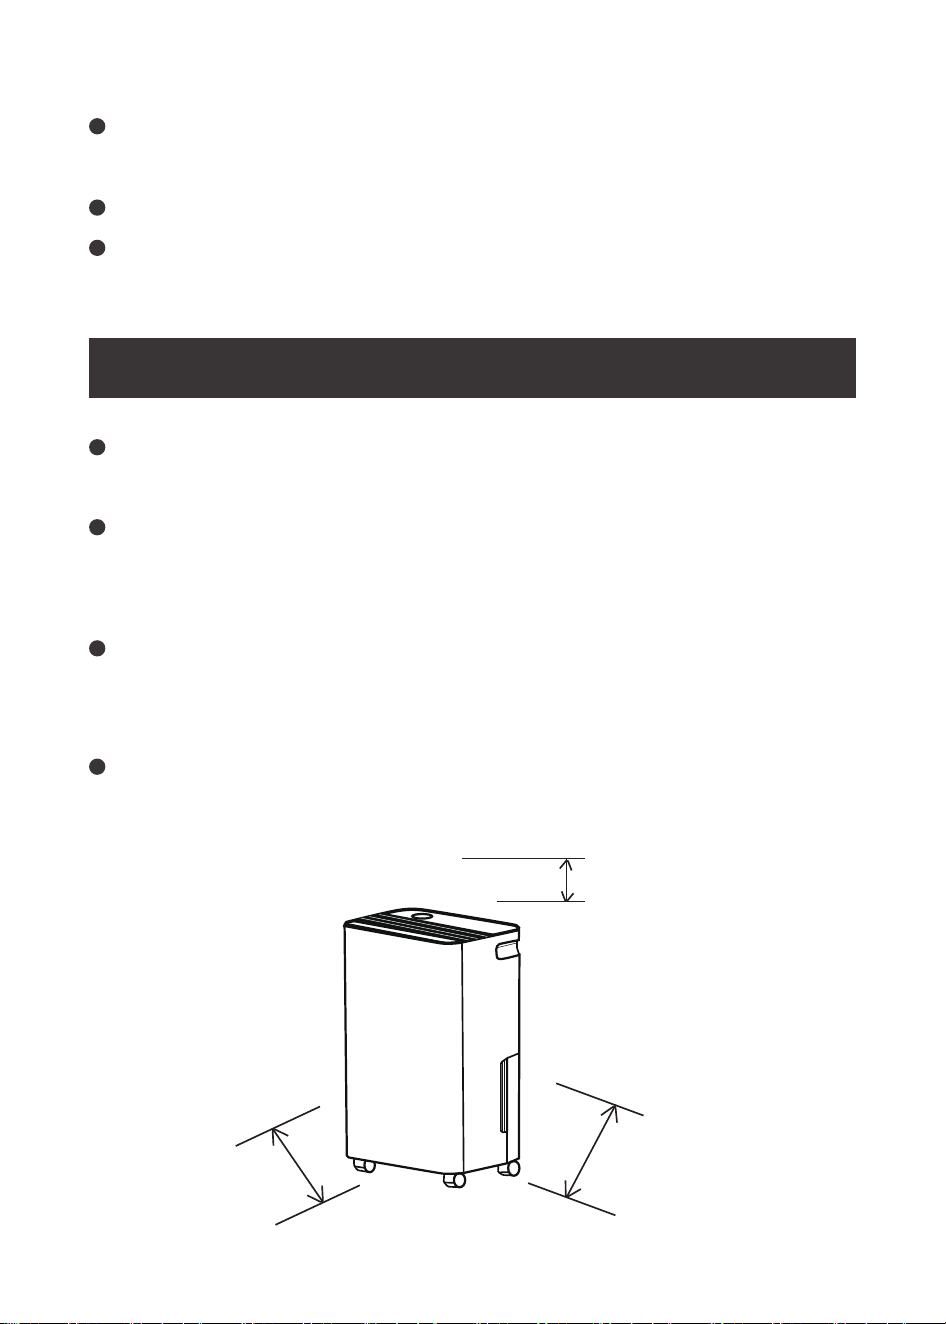
Ensure that there is at least 45 cm clearance from the rear and
side intake vents and space above for the top air outlet of the
machine.
Do not place the dehumidifier in a room with a temperature
lower than 5℃ and not higher than 35℃. Otherwise the appliance
will not work.
05/ MACHINE PLACEMENT REQUIREMENTS
07
45cm
45cm
45cm

PLEASE READ THESE INSTRUCTIONS CAREFULLY. USE THE
PRODUCT CORRECTLY AND WITH CARE FOR THE PURPOSE FOR
WHICH IT IS INTENDED. FAILURE TO DO SO MAY CAUSE DAMAGE
AND/OR PERSONAL INJURY AND WILL INVALIDATE THE
WARRANTY. KEEP THIS MANUAL SAFE FOR FUTURE REFERENCE.
Please ensure that the power supply is 220V/50Hz and that it is
earthed.
To avoid overheating, do not place other objects on top of the
machine.
Do not place the machine near an electrical outlet.
Do not place the machine in a bathroom, laundry room or other
wet areas.
Please do not spill water, liquid, insecticide or flammable liquids
on the machine.
Please switch off and unplug the machine before servicing.
When moving the machine, switch off and unplug the machine.
Do not drink the water stored in the water tank.
This machine can only be used indoors. When using the machine,
do not place it near a fire.
If there is any damage to the plug or cord, please contact your
dealer or retailer.
Do not allow children to use, ride or play on this machine.
Do not place heavy objects on top of the machine.
Use this product under the supervision of an adult. Avoid using
06/ IMPORTANT NOTES / WARNINGS
08
this product unattended in the presence of children, animals or of
children, animals or persons with reduced mobility and must be
supervised.
Ensure that the insulation on all cables and on the unit is safe
before connecting it to the power supply.
Regularly inspect power supply cables and plugs for wear or
damage and check all connections to ensure they are secure.
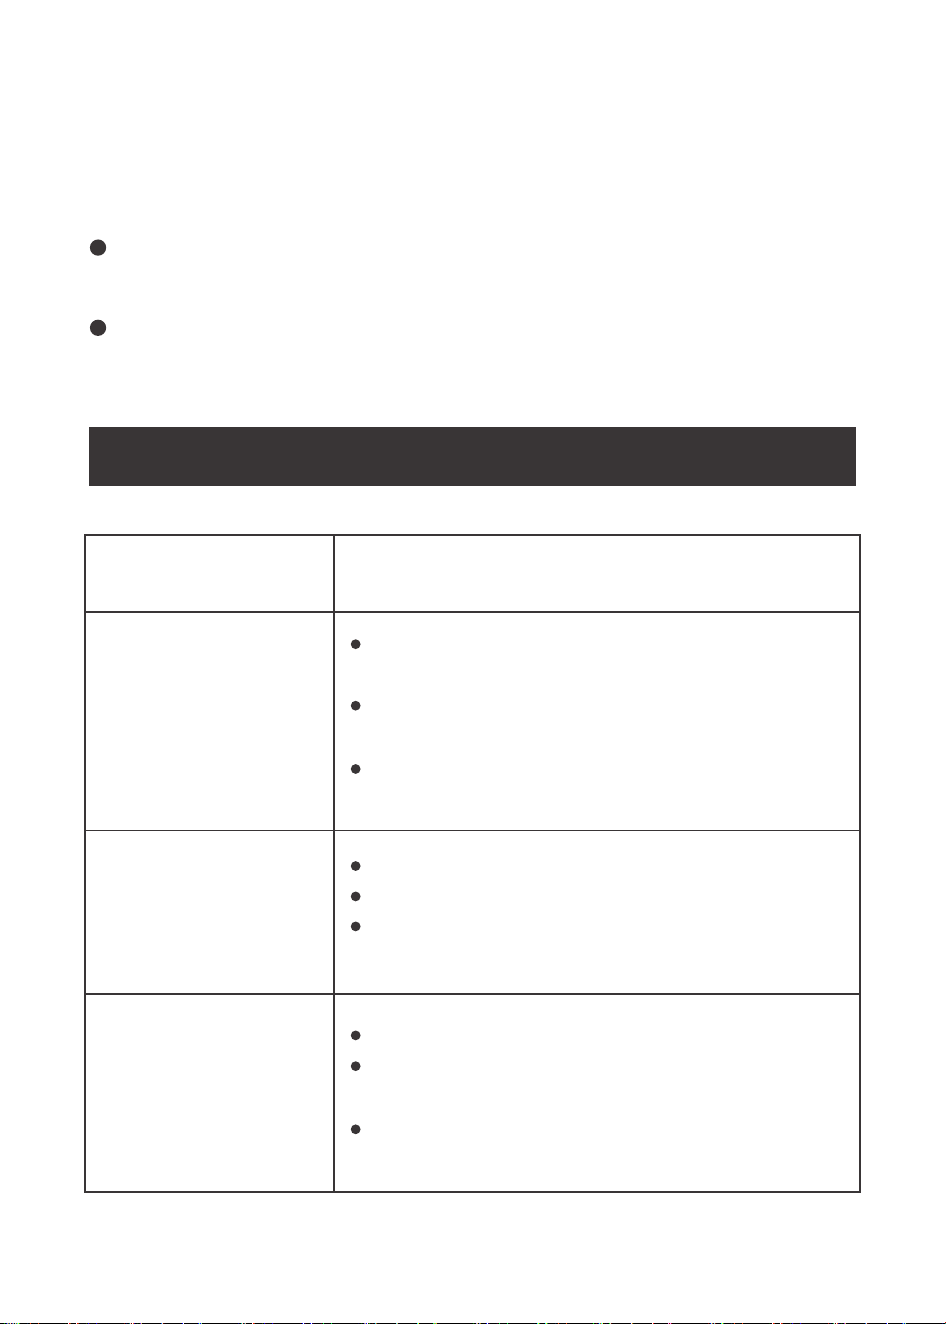
07/ TROUBLESHOOTING GUIDE
09
Ensure that the power plug of the dehumidifier
is correctly inserted into the socket.
Ensure that the water tank is correctly inserted
into the appliance and in the correct position.
Ensure that the water tank is not full (empty)
and that the float is in the correct position.
Power On and
dehumidifier does
not work/function
Check if the filter is dirty or clogged.
Check that the temperature and humidity are low.
Check that the air inlet behind the machine is
not blocked.
Dehumidification
capacity is weak
Check that doors and windows are open.
Check if anything is producing vapors that
increase humidity.
Check if the area/volume of the room is too large
to affect the operation effect.
Expected humidity
takes long time to
be reached
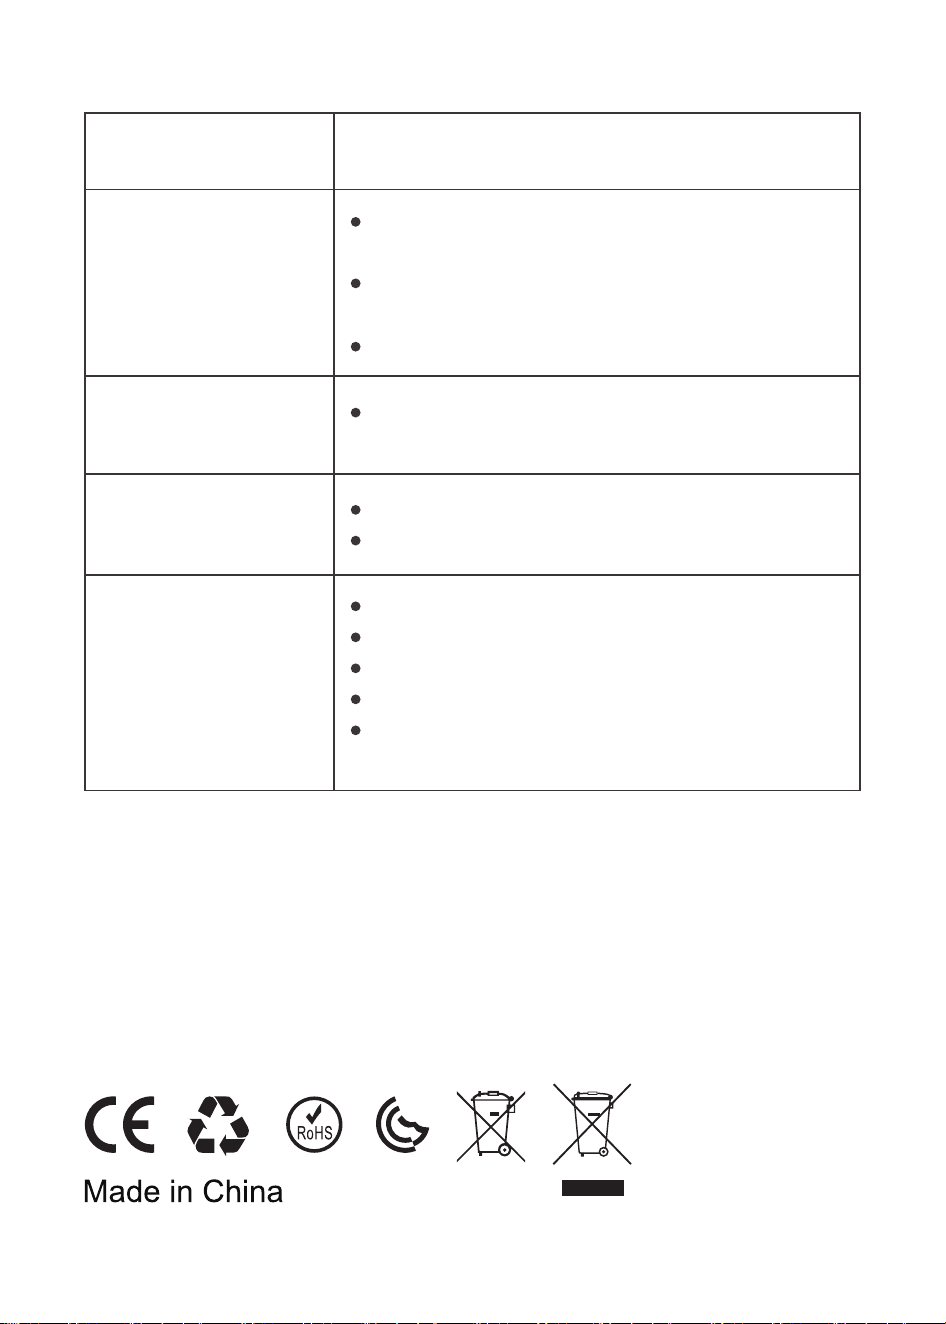
FAULT CONDITION
CHECK LIST
10
Check that the room humidity level is lower than
the default target level of 55% or the target level.
Check if the target humidity is too close to the
room humidity.
Check if the filter is dirty or clogged.
E1: Humidity control issue
E2: Temperature control issue
E3: Temperature <5°C or >40°C
E4: DEFROST mode
E5: Machine running for more than 8 hours
stops for 10 minutes
Dehumidifier is
running but not
collecting water
Error Code appears
It is normal for warm air to be blown out of the
air outlet when the dehumidifier is running.
When machine
is running, the air
outlet is warm/hot
Make sure the surface is flat and solid.
Make sure the dehumidifier is placed properly.
Dehumidifier is
noisy and has
abnormal sound
FAULT CONDITION
CHECK LIST
Manufacturer: Ningbo Cetus Electric Appliance Co.,Ltd.Xianhu
Factory Address: Industry Development Zone,Fuhai,Cixi,Ningbo, Zhejiang,
China.
Distributor: DongGuan YingMeng Technology Co., Ltd.
Address: No.118 Fengping Road, Fenggang Town, Room 101, Building 2,
Dongguan,Guangdong,China.

