Visit Our Website
SCAN ME
serenelifehome.com
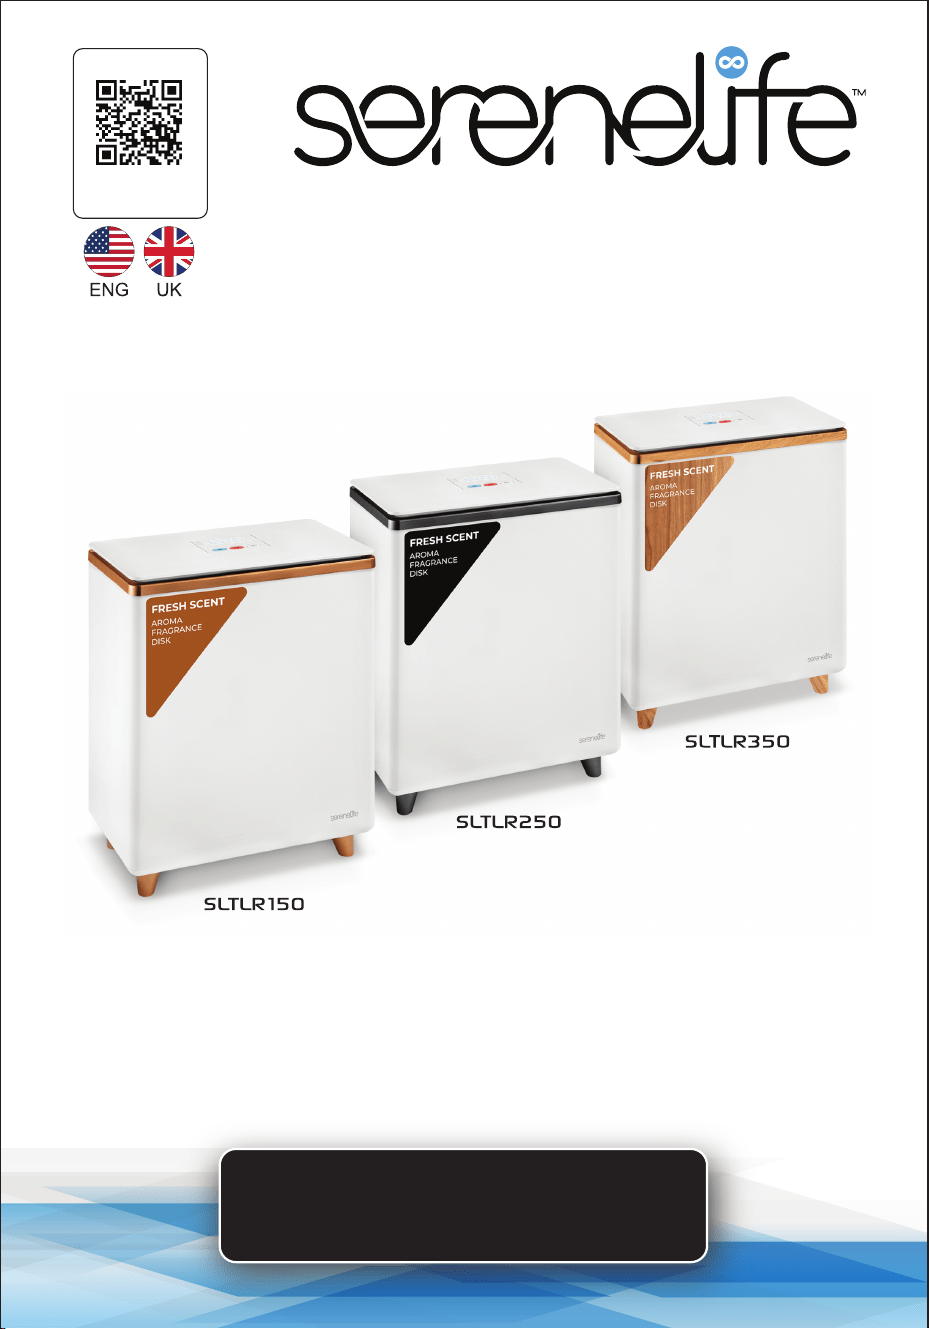
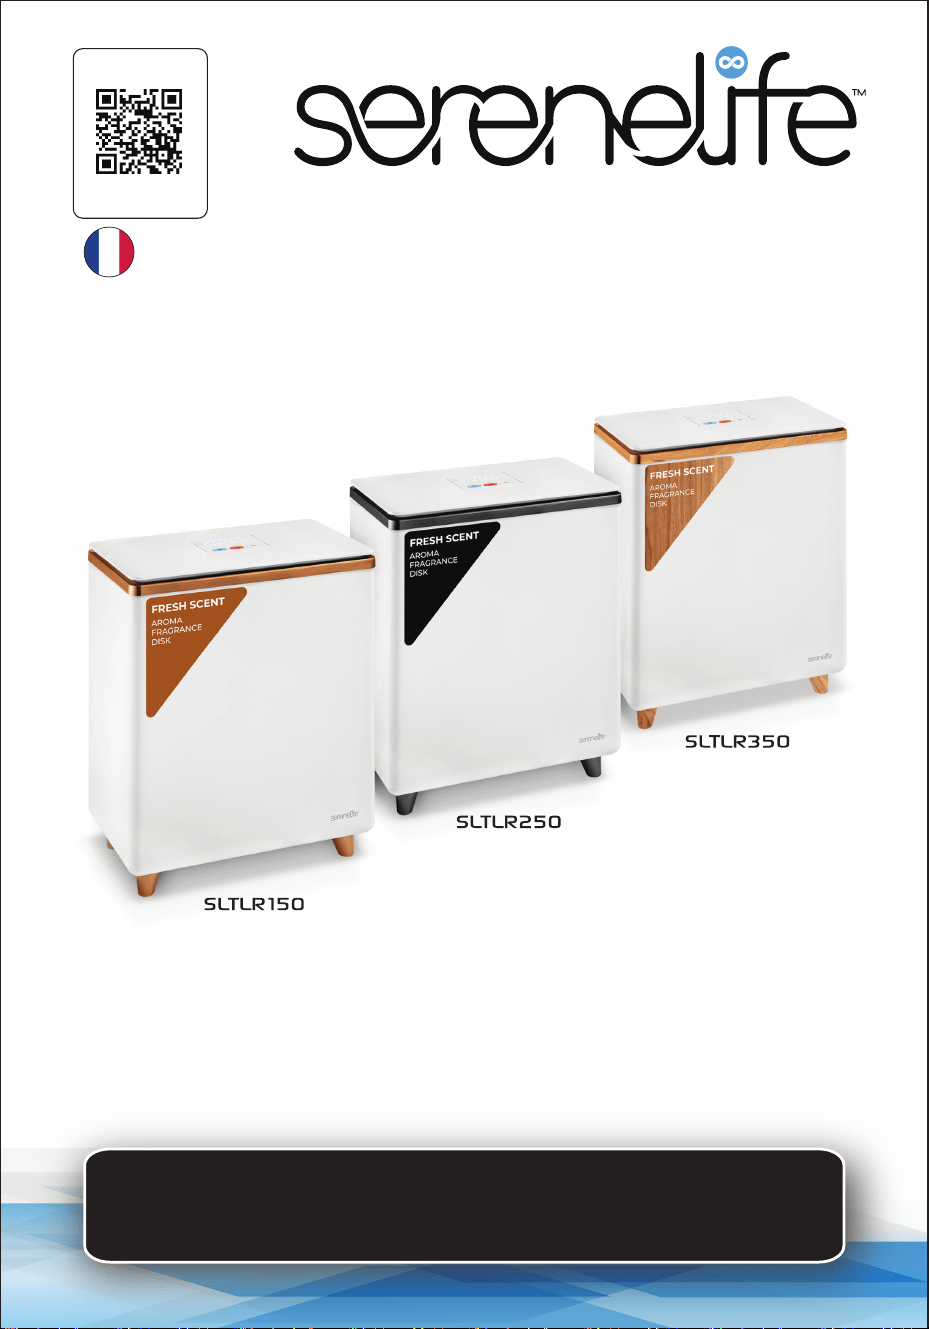
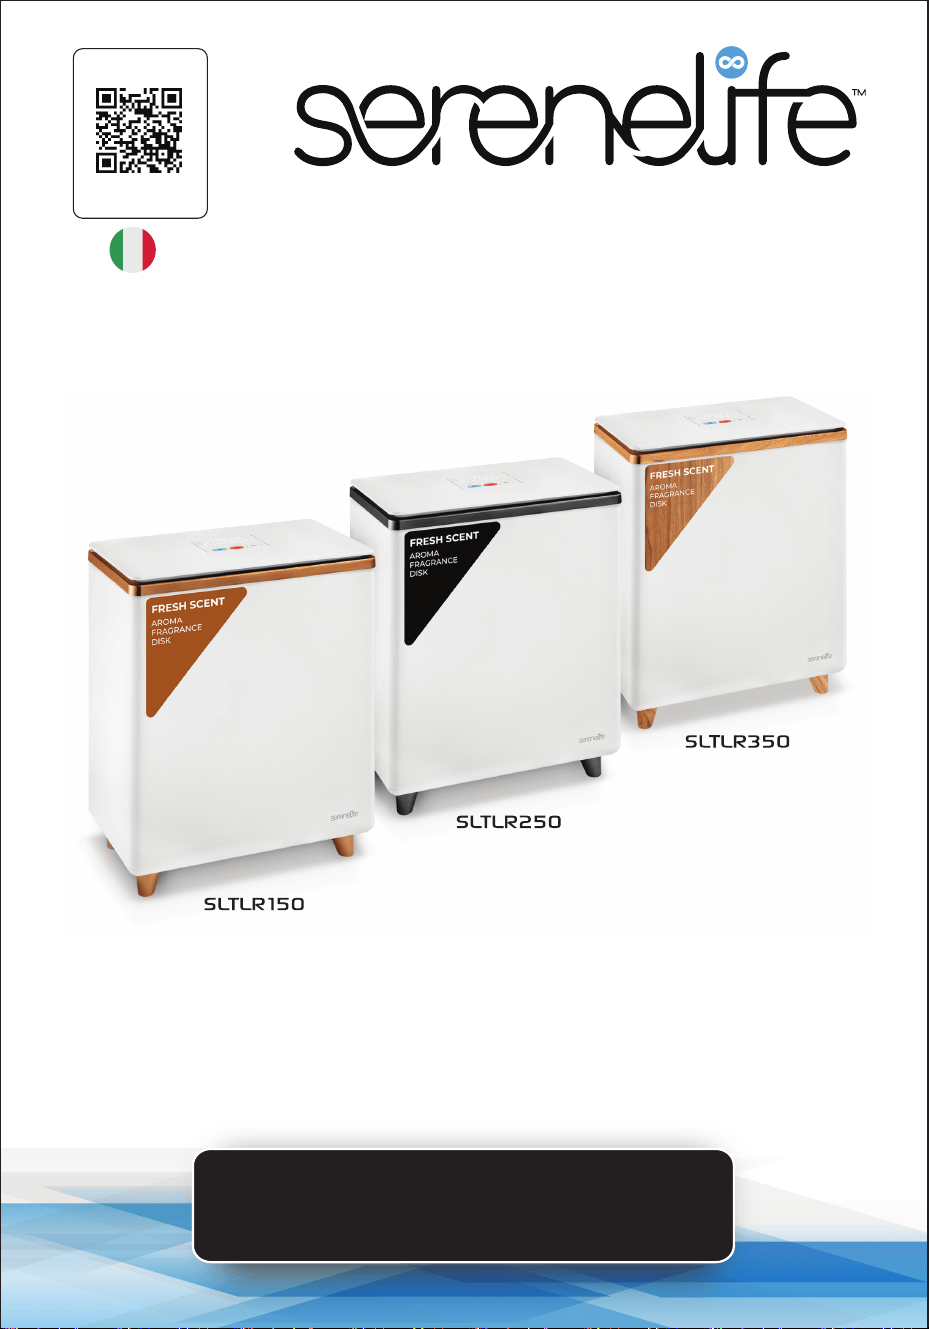
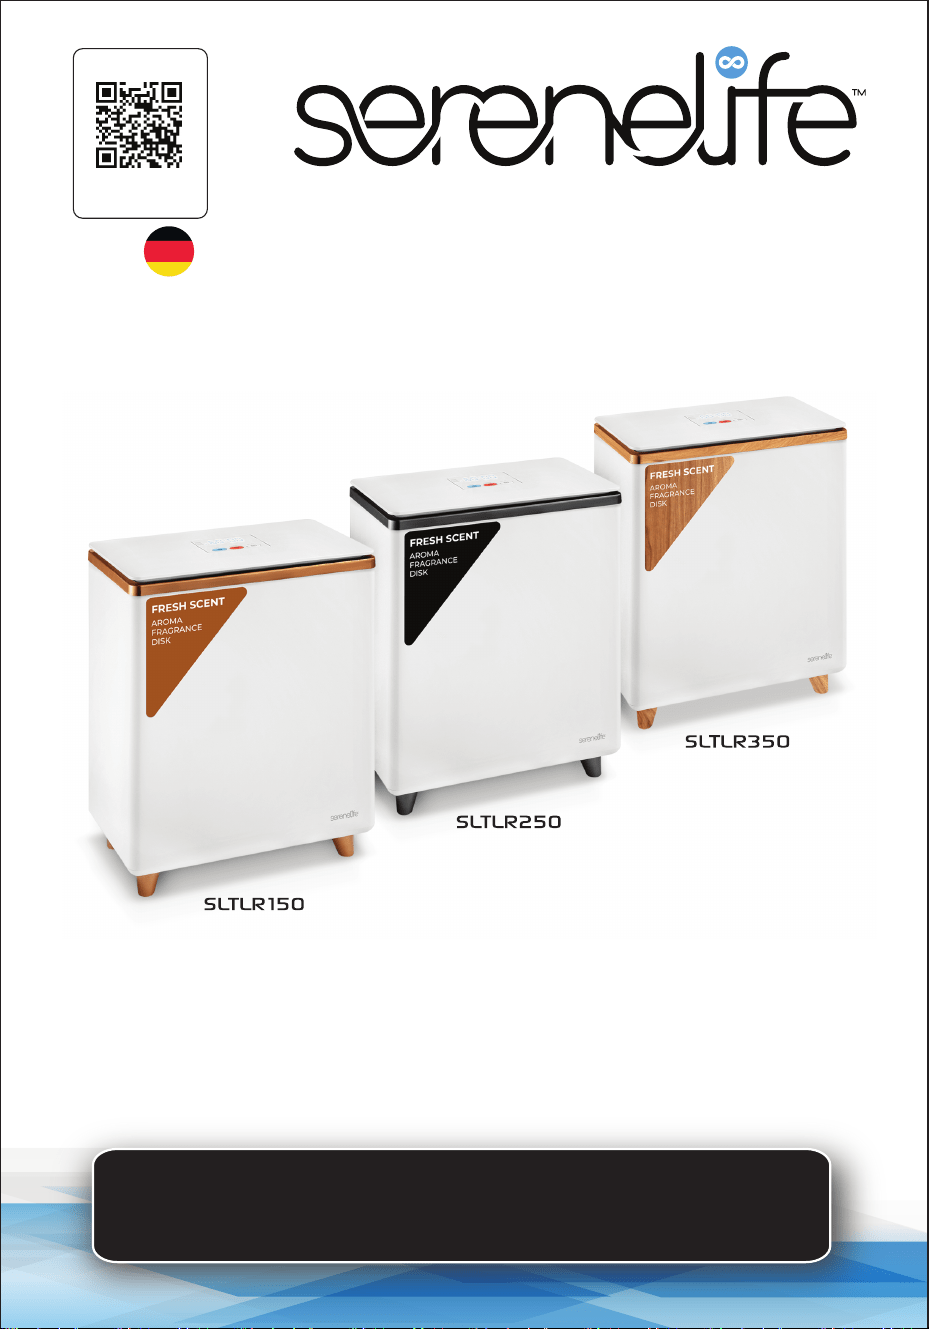
SLTLR150 - SLTLR250 - SLTLR350
USER GUIDE
Rectangular Towel Warmer Bucket

www.SereneLifeHome.com
2
CONTENTS
FEATURES & TECHNICAL SPECS
CAUTION
IMPORTANT SAFETY INSTRUCTIONS
FCC INFORMATION
LOCATION OF PARTS AND CONTROLS
LED SCREEN
DISPLAY INSTRUCTIONS
FRAGRANCE DISC INSTRUCTIONS
SET UP
USING THE TOWEL & BLANKET WARMER
TIPS FOR BEST RESULTS
CARE AND MAINTENANCE
REGISTER PRODUCT
3
4
5
6
7
8
9
9
9
10
11
11
11
WARNING:
BE SURE TO READ ALL INSTRUCTIONS, WARNINGS AND
PRECAUTIONS CAREFULLY BEFORE USING THIS PRODUCT.
FAILURE TO DO SO COULD RESULT IN INJURY TO YOU
OR DAMAGE TO THE UNIT.

www.SereneLifeHome.com
3
Features:
•
Perfectly Size for Two Large Bath Towels
• Holds 2 Large Bath Towels or a Personal Throw Blanket
• Simple Single-Touch Control
• On/O Button
• Automatically Turns O After Time Duration
• Lid Keeps Hands Free when Filling and Emptying the Towel and Blanket Warmer
• Double-walled Insulated Lid Keeps Heat in While Staying Cool to the Touch
• Overheat Protection and Water-Resistant Design
• Built-in Indicator Light
• Convenient for Transporting Towel Warmer Bucket
• Designed to conserve Power and Energy Consumption
• Can Warm Towels, Robes, Blankets, or Other Fabric Items
What's in the Box:
•
Towel Warmer
• Aromatherapy Tablet
• Desiccant
Technical Specs:
•
Construction Material: Stainless Sheet
• Power Supply: 450W
• Power Output: 120V AC
• Frequency Response: 60Hz
• Volume: 20L
• Time Duration: 20, 40, 60 minutes
• Power Cord Length: 5.91 ft.
• Weight Capacity: 110.2 Lbs.
• Item Weight: 8.1 Lbs.
• Temperature Range: Adjustable from 90°F to 140°F (32°C to 135°C)
• Product Dimensions (L x W x H):
15.35” x 8.86” x 18.31” -inches / 39 x 22.51 x 46.51 -centimeter

www.SereneLifeHome.com
4
CAUTION
To reduce the risk of serious injury, please note that this is not a toy.
Do not allow children to operate or play near the towel & blanket warmer.
TO REDUCE THE RISK OF FIRE OR ELECTRIC SHOCK, DO NOT EXPOSE THIS
UNIT TO RAIN OR MOISTURE.
IMPORTANT SAFETY INSTRUCTIONS
ALL OF THE SAFETY AND OPERATING INSTRUCTIONS SHOULD BE READ,
ADHERED TO AND FOLLOWED BEFORE THE UNIT IS OPERATED.
• FOR HOUSEHOLD USE ONLY
• FOR ADULT USE ONLY
• FOR DRY FABRIC ITEMS ONLY
SAVE THESE INSTRUCTIONS
The lightning ash with arrow-head symbol within an equilateral
triangle is intended to alert the user to the presence of uninsulated
“dangerous voltage” within the unit’s enclosure that may be of
sucient magnitude to constitute a risk of electric shock.
The exclamation point within an equilateral triangle is intended to
alert the user to the presence of important operating and maintenance
(servicing) instructions in the literature accompanying the unit.

www.SereneLifeHome.com
5
Important Safety Instructions
WARNING:
TO REDUCE RISK OF FIRE, ELECTRIC SHOCK, OR SERIOUS INJURY TO
PERSONS WHEN USING THE APPLIANCE, FOLLOW BASIC PRECAUTIONS
INCLUDING THE FOLLOWING:
• Read all instructions before using the appliance.
• Always unplug the unit from the electrical outlet immediately after using.
• Do not use appliance for anything other than its intended use.
• Do not place or store the unit where it can fall or be pulled into a tub or sink.
• Do not place in or drop into water or other liquid.
• Do not reach for a unit that has fallen into water. Unplug it immediately.
• Care should be taken so that objects do not fall into and/or liquids are not
spilled onto the unit.
• This unit should never be left unattended when plugged in.
• Close supervision is necessary when this unit is used near children or disabled
persons.
• Use this unit for its intended use as described in this manual.
• Never operate this unit if it has a damaged cord or plug, if it is not working
properly, or if it has been dropped, damaged, or dropped in water.
• Keep cords away from heated surfaces. Do not wrap the cord around the
exterior of the appliance or let the cord hang over a table or counter edge.
• Do not use outdoors.
• Do not alter the safety plug or use an extension cord with this device.
• Do not operate with a voltage converter.
• Do not touch hot surfaces.
• Do not use accessory attachments not recommended by the manufacturer as
this may case injuries.
SAVE THESE INSTRUCTIONS

www.SereneLifeHome.com
6
FCC INFORMATION
CAUTION: Changes or modications not expressly approved by the party
responsible for compliance could void the user’s authority to operate the
equipment.
This device complies with Part 15 of the FCC Rules.
Operation is subject to the following two conditions:
1. This device may not cause harmful interference.
2. This device must accept any interference received including interference that
may cause undesired operation.
WARNING:
Changes or modications to this unit not expressly approved by the party
responsible for compliance could void the user’s authority to operate the
equipment.
Note:
This equipment has been tested and found to comply with the limits for a Class B
digital device, pursuant to Part 15 of the FCC Rules. These limits are designed to
provide reasonable protection against harmful interference in a residential
installation. This unit generates, uses and can radiate radio frequency energy
and if not installed and used in accordance with the instructions, may cause
harmful interference to radio communications. However, there is no guarantee
that interference will not occur in a particular installation. If this equipment does
cause harmful interference to radio or television reception, which can be
determined by turning the equipment o and on, the user is encouraged to try
and correct the interference by one or more of the following measures:
• Reorient or relocate the receiving antenna.
• Increase the separation between the equipment and receiver.
• Connect the equipment to an outlet on a circuit dierent from that to which
the receiver is connected.
• Consult the dealer or an experienced radio/TV technician for help.
www.SereneLifeHome.com
7
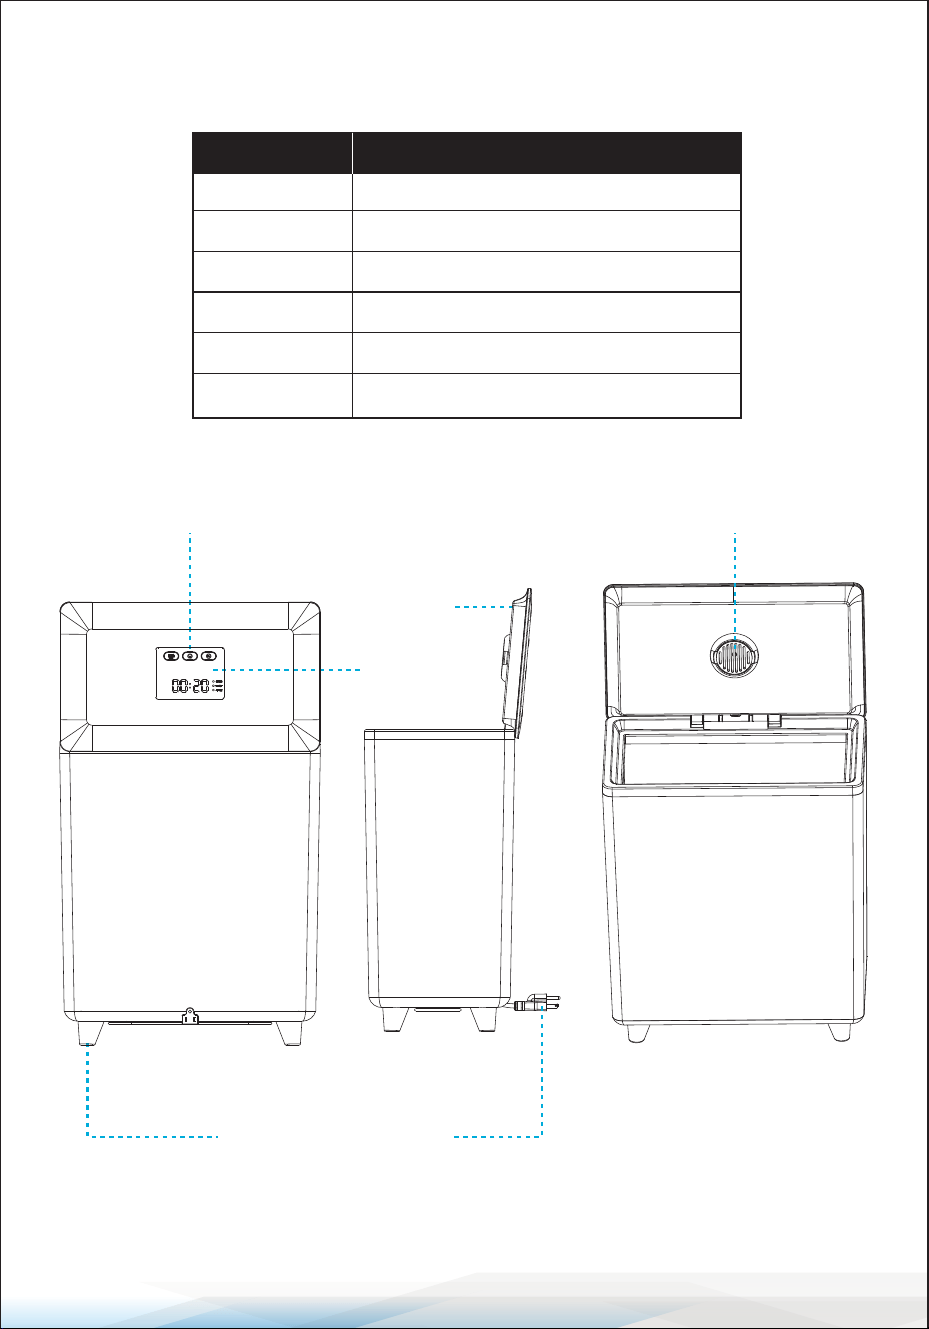
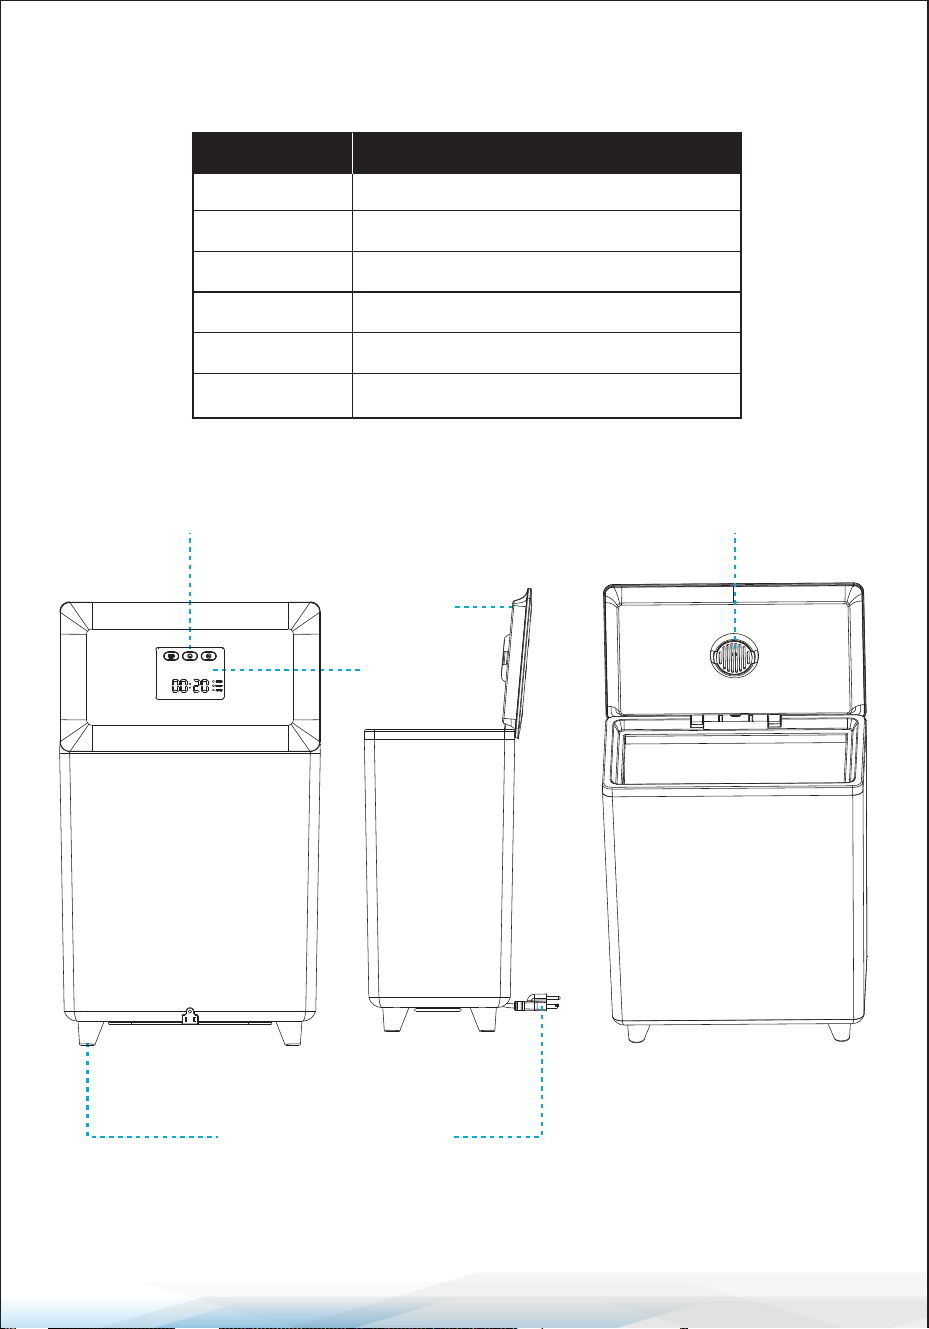
LOCATION OF PARTS AND CONTROLS
2
1
5
3
No.
1
2
3
4
5
6
PART NAME
On/O Button
LED Light
Feet
Fragrance disc
Lid
Power cord
4
6

www.SereneLifeHome.com
8
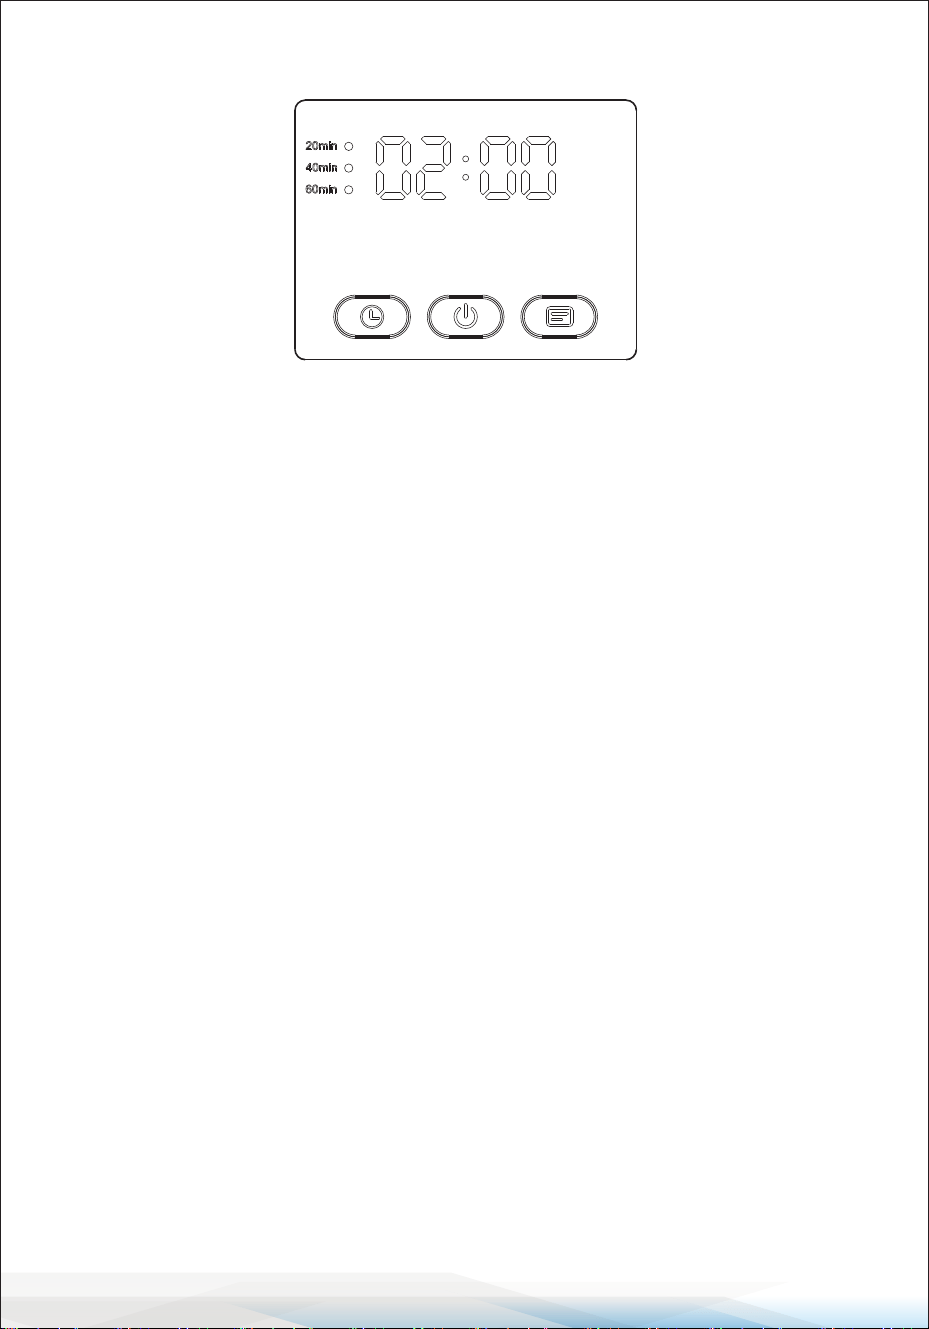
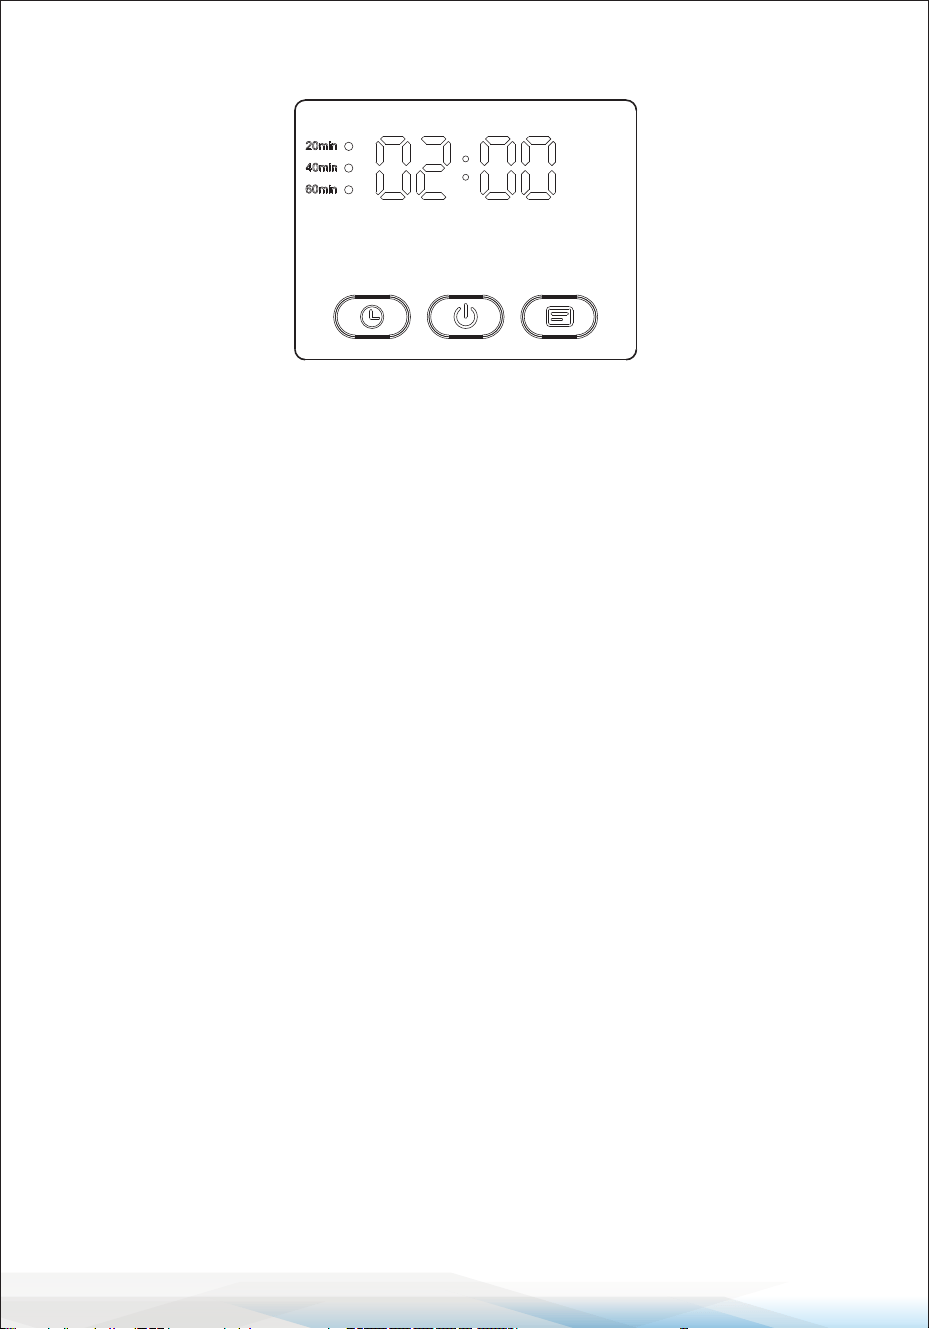
LED SCREEN
1. Symbol 00:00 ashes for 1 minute to dim into standby mode.
2. Press the 'On' key. 00:00 slowly ashes 5 times. When there's no operation,
the machine starts to work. The working time options are 20 minutes,
40 minutes, and 60 minutes, cycling through in that order.
Press the 'Time' key to add 20 minutes each time.
The corresponding time next to the dot will ash 5 times.
If there's no further action, the towel warmer will start automatically, and the
small circle indicator will remain lit. The display shows the countdown time.
The background light of the time button is illuminated.
3. Press the 'Switch' key. 00:00 slowly ashes, indicating appointment time.
Press the right 'DELAY' key once to delay for 30 minutes; the 'DELAY' key
background ashes. Press twice to delay for 60 minutes. The display will show
the appointment time ashing. The 00:00 symbol will continue to slowly ash,
allowing you to set the working time after the start.
The machine defaults to 20 minutes. Press the second time for 40 minutes and
the third time for 60 minutes. Each press increases by 20 minutes (same as in
step 2). When the set time is over, the display shows the countdown of the
working appointment, and the appointment light stays on.
4. The 'Switch' symbol light is red, indicating a high internal temperature during
operation. This serves as a reminder not to touch the internal metal parts due
to the risk of burns.

www.SereneLifeHome.com
9
DISPLAY INSTRUCTIONS
1. Appointment light: It ashes when the appointment is being selected,
remains continuously lit during the appointment, and turns o at the end of
the appointment time.
2. Time light: It ashes when selecting the time, stays on while in operation, and
turns o at the end of the working period.
3. Screen display instructions: Press the time button to cycle between 20, 40,
and 60, with the corresponding small round light ashing. The small round light
remains on during operation and turns o when the work is complete. When not
selecting an appointment, choose TIME. The screen will display the time and
ash when not in operation. During normal work, it stays ON continuously
while counting down. To make an appointment, rst select the appointment
and then choose the time. Click on the appointment, and the screen will display
the appointment time, blinking at rst. After conrmation, the light remains on,
counting down the appointment time. Once the appointment time ends, the
appointment light turns o, the time light stays on, and the screen displays
the countdown to the selected heating time.
FRAGRANCE DISC INSTRUCTIONS
This fragrance disc additionally design is for some users who like to use
aromatherapy tablets or essential oils when warming towels.
1. Remove the Fragrance Disc from its sealed plastic bag.
2. Slide it into the Fragrance Disc Holder located on the underside of the lid.
SET UP
1. Open the Lid and remove any packaging contents.
2. Place the Towel Warmer on a dry, level, hard surface.
3. Insert Plug into a standard 120V outlet.
NOTE: This Towel & Blanket Warmer has a 3-prong grounding plug.
To reduce the risk of electric shock, plug the power cord into a groundedv (earthed)
electrical outlet that is easily accessible.

www.SereneLifeHome.com
10
USING THE TOWEL & BLANKET WARMER
The Towel & Blanket Warmer can comfortably warm up two large cotton
bath towels or a personal throw blanket.
1. Insert the power cord into an electrical outlet.
2. Open the LID and place ONLY DRY towel(s) or a blanket inside.
NOTE: Placing damp or wet towels inside the towel warmer can damage the
unit and pose serious safety risks.
3. Close the LID.
4. Press the ON/OFF BUTTON.
5. Please do not touch the inner wall of the product; otherwise, there is a risk of
scalding. The temperature of the barrel can reach 130+/- 8°C/46.4°F in about 5
minutes, and it can maintain this temperature for about 15 minutes.
At this point, the temperature of the towel can reach more than 50°C/122°F,
which is a relatively warm and comfortable temperature for human contact.
The towel bucket is indirectly heated to keep the towel temperature around
55°C/131°F. The work indicator light goes out 80 minutes after starting the
machine, indicating that the product has completed a work cycle.
6. With 30 seconds of fast heating, 15 minutes is typically sucient for heating
two bath towels.
7. Open the LID to remove the towel(s) or blanket. Press down on the handle of
the lid and then pull up to open the lid of the product.
Note: To avoid damaging the unit, gently raise the lid when removing items.
8. Press the ON/OFF BUTTON at any time to stop or start the heating cycle.

www.SereneLifeHome.com
11
Register Product
Thank you for choosing SereneLife. By registering your
product, you ensure that you receive the full benets of our
exclusive warranty and personalized customer support.
Complete the form to access expert support and to keep
your SereneLife purchase in perfect condition.
Serenelifehome.com/
register
TIPS FOR BEST RESULTS
1. Use cotton or cotton blend towels or fabrics.
2. For fast and even heating, loosely pile 1 towel into the Towel & Blanket Warmer.
Tightly rolled or folded towels will take longer to heat thoroughly.
Two towels will take longer to heat than one.
3. Use only with DRY fabrics.
Note: DO NOT use with damp or wet particles.
4. Avoid using delicate fabrics that cannot withstand high heat.
Any fabric indicating that a cool iron must be used may not be able to
withstand the heat of the towel warmer, resulting in damage to the fabric
and the Towel & Blanket Warmer.
5. Once the heating cycle has begun, keep the lid closed.
This will prevent heat from escaping. Opening the lid mid-cycle may result in
slower heating times.
Note: Condensation on the lid and Interior of the unit Is normal.
CARE AND MAINTENANCE
REMOVE THE POWER CORD FROM THE ELECTRICAL OUTLET BEFORE CLEANING.
WIPE WITH A DRY CLOTH ONLY WHEN UNIT IS COOL TO THE TOUCH.
Questions or Comments?
We are here to help!
Phone: 1.718.535.1800
Serenelifehome.com/ContactUs
Italian German Polish Turkish Dutch
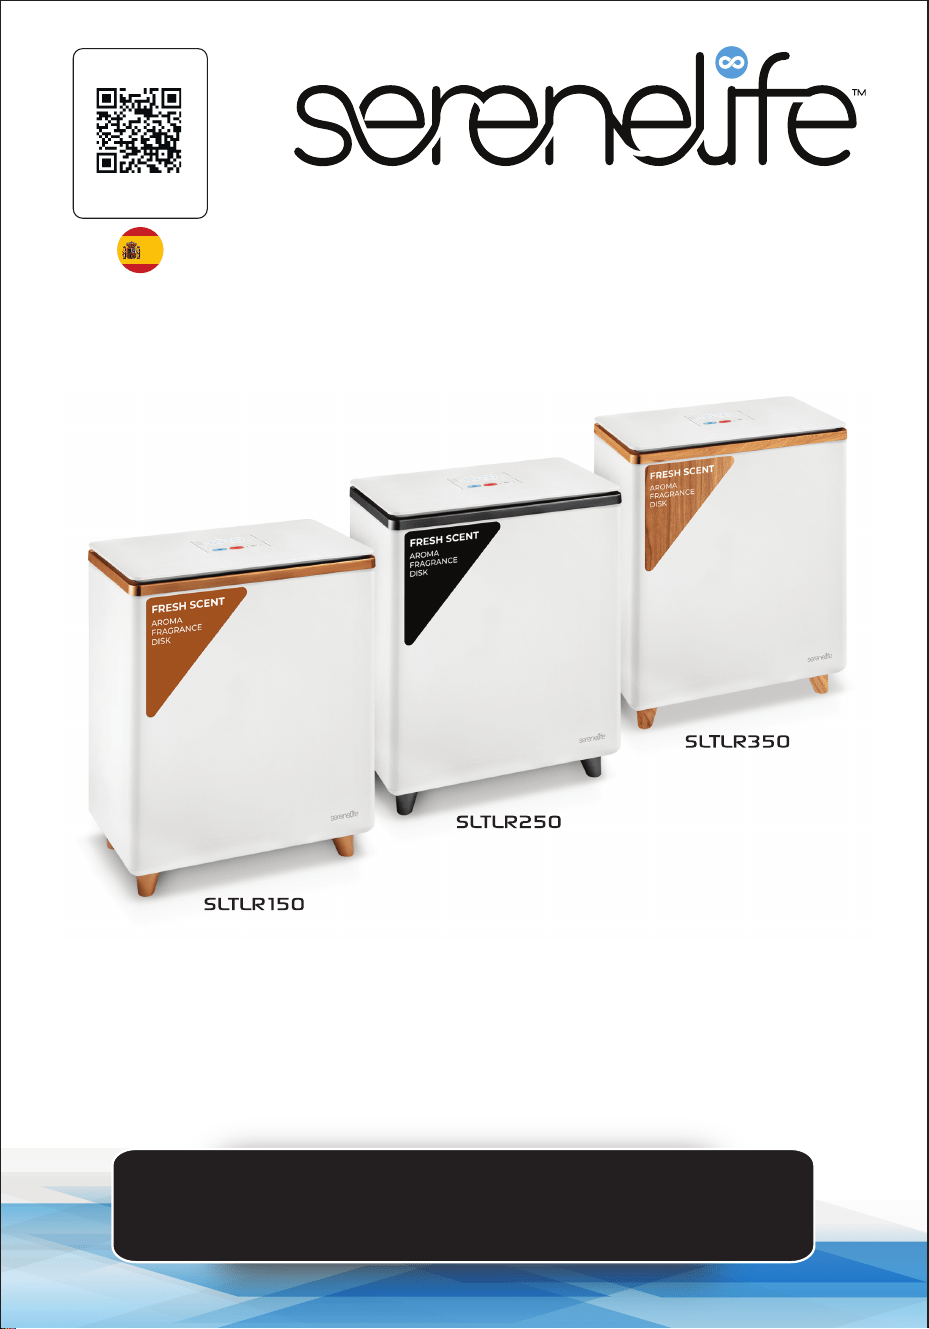
SLTLR150 - SLTLR250 - SLTLR350
GUÍA DEL USUARIO
Cubo rectangular para calentar toallas
Visite nuestro
sitio web
ESCANÉAME
serenelifehome.com
SPA
www.SereneLifeHome.com
2
CONTENIDO
CARACTERÍSTICAS Y ESPECIFICACIONES TÉCNICAS
PRECAUCIONES
INSTRUCCIONES IMPORTANTES DE SEGURIDAD
INFORMACIÓN DE LA FCC
UBICACIÓN DE PIEZAS Y CONTROLES
PANTALLA LED
INSTRUCCIONES DE VISUALIZACIÓN
INSTRUCCIONES PARA EL DISCO PERFUMADO
INSTALACIÓN
USO DE CALENTADORES DE TOALLAS Y MANTAS
CONSEJOS PARA RESULTADOS ÓPTIMOS
CUIDADO Y MANTENIMIENTO
REGISTRO DE PRODUCTOS
3
4
5
6
7
8
9
9
9
10
11
11
11
ADVERTENCIA:
ASEGÚRESE DE LEER ATENTAMENTE TODAS LAS INSTRUCCIONES,
ADVERTENCIAS Y PRECAUCIONES ANTES DE UTILIZAR ESTE
PRODUCTO.
EL INCUMPLIMIENTO DE ESTAS INSTRUCCIONES PUEDE PROVOCAR
LESIONES PERSONALES O DAÑOS AL PRODUCTO.

www.SereneLifeHome.com
3
Características:
• Tamaño perfecto para dos toallas grandes.
• Tiene capacidad para 2 toallas grandes o una manta personal ligera.
• Control sencillo con una sola pulsación.
• Botón Encendido/Apagado
• Desconexión automática tras un tiempo preestablecido.
• La tapa permanece en posición abierta, para facilitar el llenado y la
extracción de toallas y mantas.
• La tapa aislante de doble pared retiene el calor al tiempo que se man
tiene fría al tacto.
• Protección contra el sobrecalentamiento y diseño resistente al agua.
• Indicador luminoso incorporado.
• Práctica asa para transportar el cubo calentador de toallas.
• Diseñado para ahorrar energía y reducir el consumo.
• Capaz de calentar toallas, albornoces, mantas u otros artículos de tela.
Contenido del paquete:
• Calentador de toallas
• Pastilla de aromaterapia
• Desecador
Especificaciones técnicas:
• Material de construcción: chapa de acero inoxidable.
• Fuente de alimentación: 450W
• Potencia de salida: 120V CA
• Respuesta en frecuencia:50 Hz.
• Volumen: 20 L.
• Tiempo de funcionamiento: 20, 40, 60 minutos.
• Longitud del cable de alimentación: 1,8 m.
• Capacidad máxima: 50 kg.
• Peso por unidad: 3,7 kg.
• Rango de temperatura: Ajustable de 90°F a 140°F (32°C a 60°C)
• Dimensiones del producto (largo x ancho x alto): 39 cm x 22,5 cm x 46,5 cm.
Advertencia de la Proposición 65 de California
Advertencia:
Este producto contiene Cadmio, el cual es conocido en el
Estado de California por causar cáncer, defectos de
nacimiento y otros daños de reproducción. No ingerir.
Para más información ir a: www.P65warning.ca.gov

www.SereneLifeHome.com
4
PRECAUCIONES
Para reducir el riesgo de lesiones graves, tenga en cuenta que este aparato
no es un juguete. No permita que los niños manipulen o jueguen cerca del
calentador de toallas y de las mantas.
PARA REDUCIR EL RIESGO DE INCENDIO O DESCARGA ELÉCTRICA, NO
EXPONGA ESTE APARATO A LA LLUVIA NI A LA HUMEDAD.
INSTRUCCIONES IMPORTANTES DE SEGURIDAD
TODAS LAS INSTRUCCIONES DE SEGURIDAD Y FUNCIONAMIENTO DEBEN
LEERSE, OBSERVARSE Y SEGUIRSE ANTES DE UTILIZAR EL APARATO.
• SÓLO PARA USO DOMÉSTICO.
• PARA USO EXCLUSIVO DE ADULTOS.
• EXCLUSIVAMENTE PARA PRENDAS DE TEJIDO SECO.
CONSERVE ESTAS INSTRUCCIONES
El símbolo del rayo con punta de echa, dentro de un triángulo
equilátero, pretende alertar al usuario de la presencia de "tensión
peligrosa" no aislada, dentro de la caja del producto, que puede
ser de magnitud suciente para constituir un riesgo de descarga
El signo de exclamación, dentro de un triángulo equilátero,
pretende alertar al usuario de la presencia de instrucciones impor-
tantes de funcionamiento y mantenimiento (reparación) en la
documentación que acompaña al aparato.

www.SereneLifeHome.com
5
Instrucciones de seguridad importantes
ADVERTENCIA:
PARA REDUCIR EL RIESGO DE INCENDIO, DESCARGA ELÉCTRICA O
LESIONES GRAVES, AL UTILIZAR ESTE APARATO, SIGA ESTAS PRE-
CAUCIONES BÁSICAS:
• Lea todas las instrucciones antes de utilizar el aparato.
• Desenchufe siempre el aparato de la red eléctrica inmediatamente después de
utilizarlo.
• No utilice el aparato para nes distintos de los previstos.
• No coloque ni guarde el aparato donde pueda caerse o ser arrastrado hacia
una bañera o lavabo.
• No sumerja el aparato en agua ni en ningún otro líquido.
• No intente recuperar un aparato que haya caído al agua. Desenchúfelo inmed
iatamente.
• Asegúrese de que no caigan objetos dentro del aparato y de que no se derra
men líquidos sobre él.
• Este aparato no debe dejarse nunca sin vigilancia cuando esté enchufado.
• Se requiere una estricta supervisión cuando este aparato se utilice cerca de
niños o personas discapacitadas.
• Utilice este aparato, únicamente, para los nes previstos, tal y como se describe
en este manual.
• Nunca utilice este aparato si su cable o enchufe están dañados, si no funciona
correctamente o si se ha caído, dañado o sumergido en agua.
• Mantenga los cables alejados de supercies calientes. No los enrolle alrededor
del exterior del aparato ni los deje colgando sobre una mesa o al borde del
mostrador.
• No utilice este aparato al aire libre.
• No modique el enchufe de seguridad ni utilice un alargador con este aparato.
• No utilice el aparato con un convertidor de tensión.
• No toque las supercies calientes.
• No utilice accesorios no recomendados por el fabricante, ya que podría sufrir
lesiones.
CONSERVE ESTAS INSTRUCCIONES

www.SereneLifeHome.com
6
INFORMACIÓN DE LA FCC
PRECAUCIÓN: Los cambios o modicaciones, no aprobados expresamente
por la parte responsable del cumplimiento, podrían anular la autoridad del
usuario para utilizar este equipo.
Este equipo cumple la Parte 15 de las normas FCC.
Su funcionamiento está sujeto a las siguientes dos condiciones:
1. Este equipo no debe causar interferencias perjudiciales.
2. Este aparato debe aceptar cualquier interferencia recibida, incluidas las que
puedan causar un funcionamiento no deseado.
ADVERTENCIA:
Los cambios o modicaciones, no aprobados por la parte responsable del
cumplimiento, podrían anular la autoridad del usuario para utilizar este
equipo.
Nota:
Este equipo ha sido probado y cumple los límites establecidos, para los disposi-
tivos digitales de Clase B, de conformidad con la Parte 15 de las normas de la
FCC. Estos límites están diseñados para proporcionar una protección razonable
contra interferencias perjudiciales en una instalación residencial.
Este equipo genera, utiliza y puede irradiar energía de radiofrecuencia. Si este
equipo no se instala y utiliza de acuerdo con las instrucciones, puede causar
interferencias perjudiciales para las comunicaciones por radio. No obstante, no
se garantiza que no se produzcan interferencias en una instalación concreta. Si
este equipo causa interferencias perjudiciales en la recepción de radio o
televisión, lo que puede determinarse apagando y encendiendo el equipo, se
recomienda al usuario que intente corregir la interferencia mediante una de las
siguientes medidas:
• Reorientar o reubicar la antena receptora.
• Aumente la distancia entre el equipo y el receptor.
• Conecte el equipo a un toma corriente de un circuito distinto al que está
conectado el receptor.
• Consulte a su distribuidor o a un técnico cualicado de radio/TV para obten
er ayuda.

www.SereneLifeHome.com
7
UBICACIÓN DE PIEZAS Y CONTROLES
2
1
5
3
No.
1
2
3
4
5
6
NOMBRE DE LA PIEZA
Botón Encendido/Apagado
Indicador LED
Pies
Disco perfumado
Tapa
Cable de alimentación
4
6

www.SereneLifeHome.com
8
PANTALLA LED
1. El símbolo 00:00 parpadea durante un minuto antes de pasar al modo de
espera.
2. Pulse el botón de encendido. El símbolo 00:00 parpadeará lentamente 5 veces.
Si no se realiza ninguna acción, el aparato comenzará a funcionar. Las opciones
de tiempo de funcionamiento son 20 minutos, 40 minutos y 60 minutos, que se
desplazan en ese orden. Pulse el botón Tiempo para añadir 20 minutos con
cada pulsación. La hora correspondiente, indicada por un punto, parpadea
cinco veces. Si no se realiza ninguna otra acción, el calentador de toallas se
pondrá en marcha automáticamente. El indicador circular permanecerá encen
dido y la pantalla mostrará el tiempo restante. Se activa la retroiluminación del
botón Hora.
3. Pulse el botón “Cambiar”. El símbolo 00:00 parpadea lentamente, indicando
que se está programando una cita. Pulse el botón “RETRASO” una vez para
añadir un retraso de 30 minutos; la retroiluminación del botón “RETRASO”
parpadeará. Pulse dos veces para añadir un retraso de 60 minutos. La pantalla
mostrará la hora programada parpadeando. El símbolo 00:00 sigue parpadean
do lentamente, lo que le permite ajustar el tiempo de funcionamiento después
de la puesta en marcha. Por defecto, la máquina arranca a los 20 minutos. Pulse
una segunda vez para seleccionar 40 minutos y una tercera vez para 60 minu
tos. Cada pulsación aumenta el tiempo en 20 minutos (como se muestra en el
paso 2). Una vez transcurrido el tiempo, la pantalla mostrará la cuenta atrás del
tiempo de la cita y el indicador de cita permanecerá encendido.
4. La luz del símbolo de “cambiar” es roja, lo que indica una temperatura interna
elevada durante el funcionamiento. Esto sirve como recordatorio para no tocar
las piezas metálicas internas debido al riesgo de quemaduras.

www.SereneLifeHome.com
9
INSTRUCCIONES DE VISUALIZACIÓN
1. Luz de cita: Parpadea cuando se selecciona una cita, permanece encendida de
forma continua durante el tiempo programado y se apaga cuando naliza la cita.
2. Indicador de tiempo: parpadea durante la selección del tiempo, permanece encendi
do durante el funcionamiento y se apaga al nal del periodo de calentamiento.
3. Instrucciones de visualización: Pulse el botón tiempo para alternar entre 20, 40 y 60
minutos. El pequeño LED redondo correspondiente parpadea durante la selección.
Durante el funcionamiento, la pequeña luz permanece encendida y se apaga al
nalizar el trabajo. Si no está seleccionando una cita, seleccione TIEMPO. La pantalla
mostrará la hora y parpadeará cuando no esté en uso. Durante el funcionamiento
normal, la pantalla permanece ENCENDIDA de forma continua mientras se ejecuta la
cuenta regresiva. Para programar una cita, primero seleccione la cita y, a continuación,
elija la hora. Pulse en cita y la pantalla mostrará la hora programada parpadeando al
inicio. Tras la conrmación, la luz permanecerá encendida, indicando la cuenta
regresiva de la cita. Una vez nalizada la cita, la luz de cita se apagará, la luz de la hora
permanecerá encendida y la pantalla mostrará la cuenta atrás hasta la hora de calefac
ción seleccionada.
INSTRUCCIONES PARA EL DISCO PERFUMADO
Este disco perfumado está diseñado para los usuarios que desean utilizar pastillas de
aromaterapia o aceites esenciales al calentar las toallas.
1. Saque el disco perfumado de su envase hermético.
2. Deslícelo en el soporte situado en la parte inferior de la cubierta.
INSTALACIÓN
1. Abra la tapa y retire todo el embalaje.
2. Coloque el calentador de toallas sobre una supercie seca, plana y dura.
3. Conecte el enchufe a una toma corriente estándar de 220 V.
NOTA: Este calentador de toallas está equipado con un enchufe de tres clavijas con toma
de tierra.
Para reducir el riesgo de descarga eléctrica, enchufe el cable de alimentación a un toma
corriente con toma de tierra de fácil acceso.

www.SereneLifeHome.com
10
USANDO EL CALENTADOR DE TOALLAS Y MAN-
TASt
El calentador de toallas puede calentar, cómodamente, dos toallas grandes
de algodón o una manta personal ligera.t
1. Enchufe el cable de alimentación a un toma corriente.t
2. Abra la TAPA y coloque SÓLO toallas o mantas SECAS en el interior.
NOTAt: Colocar toallas húmedas o mojadas, dentro del calentador de toallas,
puede dañar el aparato y presentar un grave peligro para la seguridad.
3. Cierre la TAPA.
4. Pulse el BOTÓN ENCENDIDO/APAGADO.
5. Por favor no toque el interior del aparato, ya que podría sufrir quemaduras. La
temperatura del compartimento puede alcanzar 130+/- 8°C/46.4°F en unos 5
minutos y permanecer a esta temperatura durante unos 15 minutos. En este
punto, la temperatura de las toallas puede superar los 50°C/122°F, proporcion
ando un calor agradable al tacto. El compartimento se calienta indirectamente
para mantener la temperatura de las toallas a unos 55°C/131°F. El piloto de
funcionamiento se apaga 80 minutos después de poner en marcha el aparato,
indicando que el ciclo ha nalizado.
6. Con un calentamiento rápido en 30 segundos, 15 minutos suelen bastar para
calentar dos toallas grandes.t
7. Abra la TAPA para retirar las toallas o la manta. Presione el asa de la tapa y
levántela, suavemente, para abrir el aparato.
Nota: Para evitar dañar el aparato, levante la tapa con cuidado al retirar
objetos.
8. Pulse el BOTÓN ENCENDIDO/APAGADO en cualquier momento para detener o
iniciar el ciclo de calentamiento.

www.SereneLifeHome.com
11
REGISTRO DEL PRODUCTO
Gracias por elegir SereneLife. Al registrar su producto, podrá
beneciarse de nuestra garantía exclusiva y de un servicio
de atención al cliente personalizado.
Complete el formulario para acceder a la asistencia de
expertos y mantener su compra SereneLife en perfectas
Serenelifehome.com/
register
CONSEJOS PARA OBTENER MEJORES RESULTADOS
1. Utilice toallas o tejidos de algodón o mezcla de algodón.
2. Para un calentamiento rápido y uniforme, coloque una sola toalla sin apretar
en el calentador de toallas. Las toallas enrolladas o muy dobladas tardarán más
en calentarse completamente. Dos toallas tardarán más en calentarse que una.
3. Utilice únicamente tejidos SECOS.
Nota: NO UTILICE TEJIDOS HÚMEDOS O MOJADOS.
4. Evite utilizar tejidos delicados que no puedan soportar altas temperaturas.
Cualquier tejido que indique que debe plancharse a baja temperatura puede
resultar dañado por el calor del calentador de toallas, lo que también podría
dañar el aparato.
5. Una vez iniciado el ciclo de calentamiento, mantenga la tapa cerrada.
Esto evitará que se escape el calor. Abrir la tapa durante el ciclo podría prolon
gar el tiempo de calentamiento.
Nota: La condensación en la tapa y en el interior del aparato es normal.
CUIDADO Y MANTENIMIENTO
DESENCHUFE EL CABLE DE ALIMENTACIÓN ANTES DE LIMPIAR EL APARATO.
LIMPIE CON UN PAÑO SECO SÓLO CUANDO EL APARATO ESTÉ FRÍO AL TACTO.
Preguntas o comentarios?
¡Estamos aquí para ayudar!
Phone: 1.718.535.1800
Serenelifehome.com/ContactUs
Italian German Polish Turkish Dutch
Visitez notre site
Internet
SCANNE MOI
serenelifehome.com
SLTLR150 - SLTLR250 - SLTLR350
GUIDE D’UTILISATION
Seau Chauffe-Serviettes Rectangulaire
FRE

www.SereneLifeHome.com
2
SOMMAIRE
CARACTÉRISTIQUES ET SPÉCIFICATIONS TECHNIQUES
PRÉCAUTIONS
INSTRUCTIONS DE SÉCURITÉ IMPORTANTES
INFORMATIONS FCC
EMPLACEMENT DES PIÈCES ET COMMANDES
ÉCRAN LED
INSTRUCTIONS D'AFFICHAGE
INSTRUCTIONS POUR LE DISQUE PARFUMÉ
INSTALLATION
UTILISATION DU CHAUFFE-SERVIETTES ET COUVERTURES
CONSEILS POUR DES RÉSULTATS OPTIMAUX
ENTRETIEN ET MAINTENANCE
ENREGISTREMENT DU PRODUIT
3
4
5
6
7
8
9
9
9
10
11
11
11
AVERTISSEMENT:
LISEZ ATTENTIVEMENT TOUTES LES INSTRUCTIONS,
AVERTISSEMENTS ET PRÉCAUTIONS AVANT D’UTILISER
CE PRODUIT. LE NON-RESPECT DE CES CONSIGNES PEUT
ENTRAÎNER DES BLESSURES OU DES DOMMAGES À L’APPAREIL.

www.SereneLifeHome.com
3
Caractéristiques:
•
Parfaitement dimensionné pour accueillir deux grandes serviettes de bain.
• Peut contenir 2 grandes serviettes de bain ou une couverture légère personnelle.
• Commande simple à une touche.
• Bouton Marche/Arrêt.
• Arrêt automatique après une durée prédénie.
• Le couvercle reste en position ouverte pour faciliter le remplissage et
le retrait des serviettes et couvertures.
• Couvercle isolé à double paroi, retenant la chaleur tout en restant frais au toucher.
• Protection contre la surchaue et conception résistante à l’eau.
• Indicateur lumineux intégré.
• Poignée pratique pour transporter le seau chaue-serviettes.
• Conçu pour économiser l’énergie et réduire la consommation électrique.
• Capable de chauer des serviettes, peignoirs, couvertures ou autres articles en tissu.
Contenu de l’emballage:
•
Chaue-serviettes
• Tablette d’aromathérapie
• Dessiccateur
Spécifications techniques:
•
Matériau de construction : Feuille d'acier inoxydable.
• Puissance : 450 W.
• Alimentation : 220 V AC.
• Fréquence : 50 Hz.
• Volume : 20 L.
• Durée de fonctionnement : 20, 40, 60 minutes.
• Longueur du cordon d’alimentation : 1,8 m.
• Capacité maximale : 50 kg.
• Poids de l’appareil : 3,7 kg.
• Plage de température : Réglable de 32°C à 60°C.
• Dimensions du produit (L x l x H) :
15.35” x 8.86” x 18.31” -pouces / 39 x 22.51 x 46.51 -centimètres
Avertissement Californie Prop 65
AVERTISSEMENT:
Ce produit peut vous exposer à des produits chimiques qui,
selon l'État de Californie, provoquent des cancers, des
anomalies congénitales et d'autres troubles de la
reproduction. Ne pas ingérer.
Pour plus d'informations, voir : www.P65warnings.ca.gov

www.SereneLifeHome.com
4
PRÉCAUTIONS
Pour réduire le risque de blessures graves, veuillez noter que cet appareil
n’est pas un jouet. Ne laissez pas les enfants manipuler ou jouer à proxim-
ité du chaue-serviettes et couvertures.
POUR RÉDUIRE LE RISQUE D’INCENDIE OU DE CHOC ÉLECTRIQUE, NE PAS
EXPOSER CET APPAREIL À LA PLUIE OU À L’HUMIDITÉ.
INSTRUCTIONS DE SÉCURITÉ IMPORTANTES
TOUTES LES INSTRUCTIONS DE SÉCURITÉ ET DE FONCTIONNEMENT
DOIVENT ÊTRE LUES, RESPECTÉES ET SUIVIES AVANT D’UTILISER L’APPAREIL.
• UNIQUEMENT POUR UNE UTILISATION DOMESTIQUE.
• RÉSERVÉ À UNE UTILISATION PAR DES ADULTES.
• CONÇU UNIQUEMENT POUR DES ARTICLES EN TISSU SEC.
CONSERVEZ CES INSTRUCTIONS.
Le symbole d’un éclair avec une èche dans un triangle équilatéral
est destiné à avertir l’utilisateur de la présence de “tensions
dangereuses” non isolées à l’intérieur de l’appareil, qui pourraient
être susamment élevées pour présenter un risque de choc électrique.
Le point d’exclamation dans un triangle équilatéral signale à
l’utilisateur la présence d’instructions importantes concernant le
fonctionnement et l’entretien (réparation) dans la documentation
accompagnant l’appareil.

www.SereneLifeHome.com
5
Instructions de Sécurité Importantes
AVERTISSEMENT:
POUR RÉDUIRE LES RISQUES D’INCENDIE, DE CHOC ÉLECTRIQUE OU DE
BLESSURES GRAVES LORS DE L’UTILISATION DE L’APPAREIL, SUIVEZ LES
PRÉCAUTIONS DE BASE SUIVANTES:
• Lisez toutes les instructions avant d’utiliser l’appareil.
• Débranchez toujours l’appareil de la prise électrique immédiatement après utilisation.
• N’utilisez pas l’appareil à d’autres ns que celles prévues.
• Ne placez pas et ne stockez pas l’appareil dans un endroit où il pourrait tomber
ou être tiré dans une baignoire ou un évier.
• Ne plongez pas l’appareil dans l’eau ou tout autre liquide.
• Ne tentez pas de récupérer un appareil tombé dans l’eau.
Débranchez-le immédiatement.
• Veillez à ce que des objets ne tombent pas dans l’appareil et qu’aucun
liquide ne soit renversé dessus.
• Cet appareil ne doit jamais être laissé sans surveillance lorsqu’il est branché.
• Une surveillance étroite est nécessaire lorsque cet appareil est utilisé à
proximité d’enfants ou de personnes handicapées.
• Utilisez cet appareil uniquement pour son usage prévu, tel que décrit dans ce manuel.
• N’utilisez jamais cet appareil si son cordon ou sa prise est endommagé, s’il ne
fonctionne pas correctement, ou s’il est tombé, endommagé ou plongé dans l’eau.
• Gardez les cordons éloignés des surfaces chaudes. Ne les enroulez pas autour
de l’extérieur de l’appareil et ne laissez pas les cordons pendre sur le bord
d’une table ou d’un comptoir.
• N’utilisez pas cet appareil à l’extérieur.
• Ne modiez pas la prise de sécurité et n’utilisez pas de rallonge avec cet appareil.
• N’utilisez pas l’appareil avec un convertisseur de tension.
Ne touchez pas les surfaces chaudes.
• N’utilisez pas d’accessoires non recommandés par le fabricant,
car cela pourrait entraîner des blessures.
CONSERVEZ CES INSTRUCTIONS

www.SereneLifeHome.com
6
INFORMATIONS FCC
ATTENTION: Les modications ou changements non expressément approu-
vés par la partie responsable de la conformité peuvent annuler l’autorisation
d’utiliser cet équipement.
Cet appareil est conforme à la partie 15 des règlements de la FCC.
Son fonctionnement est soumis aux deux conditions suivantes:
1. Cet appareil ne doit pas provoquer d’interférences nuisibles.
2. Cet appareil doit accepter toute interférence reçue, y compris celles pouvant
entraîner un fonctionnement indésirable.
AVERTISSEMENT:
Les modications ou changements non approuvés par la partie responsable
de la conformité pourraient annuler l’autorisation d’utiliser cet équipement.
Remarque:
Cet équipement a été testé et déclaré conforme aux limites pour un appareil
numérique de classe B, conformément à la partie 15 des règlements de la FCC.
Ces limites visent à orir une protection raisonnable contre les interférences
nuisibles dans une installation résidentielle.
Cet appareil génère, utilise et peut émettre de l’énergie radiofréquence. S’il n’est
pas installé et utilisé conformément aux instructions, il peut provoquer des
interférences nuisibles aux communications radio. Cependant, il n’y a aucune
garantie que des interférences ne se produiront pas dans une installation partic-
ulière. Si cet équipement provoque des interférences nuisibles à la réception
radio ou télévisée, ce qui peut être conrmé en allumant et éteignant l’appareil,
l’utilisateur est encouragé à essayer de corriger ces interférences en appliquant
l’une des mesures suivantes :
• Réorienter ou déplacer l’antenne de réception.
• Augmenter la distance entre l’équipement et le récepteur.
• Brancher l’appareil sur une prise appartenant à un circuit diérent de celui
auquel le récepteur est connecté.
• Consulter le revendeur ou un technicien radio/télévision qualié
pour obtenir de l’aide

www.SereneLifeHome.com
7
EMPLACEMENT DES PIÈCES ET COMMANDES
2
1
5
3
No.
1
2
3
4
5
6
Nom de la pièce
Bouton Marche/Arrêt
Voyant LED
Pieds
Disque parfumé
Couvercle
Cordon d’alimentation
4
6
www.SereneLifeHome.com
8
ÉCRAN LED
1. Le symbole 00:00 clignote pendant une minute avant de passer en mode veille.
2. Appuyez sur le bouton Marche. Le symbole 00:00 clignote lentement cinq fois.
Si aucune action n’est eectuée, l’appareil commence à fonctionner. Les options
de durée de fonctionnement sont 20 minutes, 40 minutes et 60 minutes, qui
délent dans cet ordre. Appuyez sur le bouton Temps pour ajouter 20 minutes à
chaque pression. Le temps correspondant, indiqué par un point lumineux,
clignote cinq fois. Si aucune autre action n’est eectuée, le chaue-serviettes
démarre automatiquement. L’indicateur circulaire reste allumé, et l’écran ache le
compte à rebours du temps restant. Le rétroéclairage du bouton Temps est activé.
3. Appuyez sur le bouton Délai. Le symbole 00:00 clignote lentement, indiquant
que la programmation d’un rendez-vous est en cours. Appuyez une fois sur le
bouton Délai pour ajouter un retard de 30 minutes ; le rétroéclairage du bouton
Délai clignote. Appuyez deux fois pour ajouter un retard de 60 minutes. L’écran
achera le temps programmé qui clignote. Le symbole 00:00 continue de
clignoter lentement, vous permettant de régler la durée de fonctionnement
après le démarrage. Par défaut, la machine démarre à 20 minutes. Appuyez une
deuxième fois pour sélectionner 40 minutes et une troisième fois pour 60
minutes. Chaque pression augmente de 20 minutes (comme indiqué à l’étape 2).
Une fois le temps écoulé, l’écran ache le compte à rebours du temps de
rendez-vous, et l’indicateur de rendez-vous reste allumé.
4. Le voyant du bouton Marche/Arrêt s’allume en rouge, signalant une température
interne élevée pendant le fonctionnement. Cela sert de rappel pour éviter de
toucher les parties métalliques internes an d’éviter tout risque de brûlure.

www.SereneLifeHome.com
9
INSTRUCTIONS D'AFFICHAGE
1. Voyant de rendez-vous: Il clignote lors de la sélection d’un rendez-vous,
reste allumé en continu pendant la durée programmée, puis s’éteint à la n
du rendez-vous.
2. Voyant de temps: Il clignote pendant la sélection du temps, reste allumé
pendant le fonctionnement, puis s’éteint à la n de la période de chaue.
3. Instructions d’achage: Appuyez sur le bouton Temps pour alterner entre
20, 40 et 60 minutes. Le petit voyant rond correspondant clignote pendant la
sélection. Pendant le fonctionnement, le petit voyant reste allumé et s’éteint
une fois le travail terminé. Lorsque vous ne sélectionnez pas un rendez-vous,
choisissez Temps. L’écran achera le temps et clignotera lorsqu’il n’est pas en
fonctionnement. Pendant un fonctionnement normal, l’écran reste allumé en
continu tout en eectuant le compte à rebours. Pour programmer un
rendez-vous, sélectionnez d’abord le rendez-vous, puis choisissez le temps.
Cliquez sur Rendez-vous, et l’écran achera le temps programmé en clignotant
au départ. Après conrmation, la lumière reste allumée, indiquant le compte à
rebours du rendez-vous. Une fois le rendez-vous terminé, le voyant de
rendez-vous s’éteint, le voyant de temps reste allumé, et l’écran ache le
compte à rebours de la durée de chaue sélectionnée.
INSTRUCTIONS POUR LE DISQUE PARFUMÉ
Ce disque parfumé est conçu pour les utilisateurs souhaitant utiliser des tablettes
d’aromathérapie ou des huiles essentielles lors du chauage des serviettes.
1. Retirez le disque parfumé de son emballage hermétique.
2. Glissez-le dans le support prévu, situé sous le couvercle.
INSTALLATION
1. Ouvrez le couvercle et retirez tous les éléments d’emballage.
2. Placez le chaue-serviettes sur une surface sèche, plane et dure.
3. Branchez la prise dans une prise électrique standard de 220 V.
REMARQUE: Ce chaue-serviettes est équipé d’une prise de terre à trois broches.
Pour réduire le risque de choc électrique, branchez le cordon d’alimentation dans
une prise électrique mise à la terre et facilement accessible.

www.SereneLifeHome.com
10
UTILISATION DU CHAUFFE-SERVIETTES ET COUVERTURES
Le chaue-serviettes peut réchauer confortablement deux grandes
serviettes de bain en coton ou une couverture légère personnelle.
1. Branchez le cordon d’alimentation dans une prise électrique.
2. Ouvrez le COUVERCLE et placez uniquement des serviettes ou une
couverture SÈCHE à l’intérieur.
REMARQUE: Placer des serviettes humides ou mouillées à l’intérieur du
chaue-serviettes peut endommager l’appareil et présenter de graves
risques pour la sécurité.
3. Fermez le COUVERCLE.
4. Appuyez sur le BOUTON MARCHE/ARRÊT.
5. Attention: Ne touchez pas les parois internes de l’appareil, car cela pourrait
provoquer des brûlures. La température du compartiment peut atteindre
130 ± 8°C en environ 5 minutes et maintenir cette température pendant
environ 15 minutes. À ce moment-là, la température des serviettes peut
dépasser 50°C, orant une chaleur confortable au toucher. Le compartiment
est chaué indirectement pour maintenir la température des serviettes
autour de 55°C. Le voyant de fonctionnement s’éteint 80 minutes après le
démarrage de l’appareil, indiquant que le cycle est terminé.
6. Avec un chauage rapide en 30 secondes, 15 minutes susent généralement
pour chauer deux grandes serviettes de bain.
7. Ouvrez le COUVERCLE pour retirer les serviettes ou la couverture. Appuyez
sur la poignée du couvercle, puis soulevez doucement pour ouvrir l’appareil.
REMARQUE: Pour éviter d’endommager l’appareil, soulevez le couvercle avec
précaution lors du retrait des articles.
8. Appuyez sur le BOUTON MARCHE/ARRÊT à tout moment pour arrêter
ou démarrer le cycle de chauage.

www.SereneLifeHome.com
11
ENREGISTREMENT DU PRODUIT
Merci d’avoir choisi SereneLife. Enregistrer votre produit
vous permet de bénécier pleinement de notre garantie
exclusive et d’un service client personnalisé.
Remplissez le formulaire pour accéder à un support expert
et préserver votre achat SereneLife en parfait état.
Serenelifehome.com/
register
CONSEILS POUR OBTENIR LES MEILLEURS RÉSULTATS
1. Utilisez des serviettes ou des tissus en coton ou en mélange de coton.
2. Pour un chauage rapide et uniforme, déposez une seule serviette de manière
lâche dans le chaue-serviettes. Les serviettes roulées ou pliées de manière
serrée prendront plus de temps à chauer complètement. Deux serviettes
mettront plus de temps à chauer qu’une seule.
3. Utilisez uniquement des tissus SECS.
Remarque: N’UTILISEZ PAS DE TISSUS HUMIDES OU MOUILLÉS.
4. Évitez d’utiliser des tissus délicats qui ne supportent pas les températures élevées.
Tout tissu indiquant qu’il nécessite un repassage à basse température peut
être endommagé par la chaleur du chaue-serviettes, ce qui pourrait
également abîmer l’appareil.
5. Une fois que le cycle de chauage a commencé, gardez le couvercle fermé.
Cela empêchera la chaleur de s’échapper. Ouvrir le couvercle en cours de cycle
pourrait prolonger les temps de chauage.
Remarque: La condensation sur le couvercle et à l’intérieur de l’appareil est normale.
ENTRETIEN ET MAINTENANCE
DÉBRANCHEZ LE CORDON D’ALIMENTATION AVANT DE NETTOYER L’APPAREIL.
ESSUYEZ AVEC UN CHIFFON SEC UNIQUEMENT LORSQUE L’APPAREIL EST FROID
AU TOUCHER.

Questions? Commentaires?
Nous sommes là pour vous aider!
Téléphone: 1.718.535.1800
Serenelifehome.com/ContactUs
Italian German Polish Turkish Dutch
SLTLR150 - SLTLR250 - SLTLR350
Guida utente
Secchio scaldasalviette rettangolare
ITA
Visita il nostro
sito web
SCANSIONAMI
serenelifehome.com
www.SereneLifeHome.com
2
CONTENUTO
CARATTERISTICHE E SPECIFICHE TECNICHE
PRECAUZIONI
IMPORTANTI ISTRUZIONI DI SICUREZZA
INFORMAZIONI FCC
UBICAZIONE DELLE PARTI E DEI COMANDI
DISPLAY A LED
ISTRUZIONI PER IL DISPLAY
ISTRUZIONI PER IL DISCO DI FRAGRANZA
INSTALLAZIONE
UTILIZZO DELLO SCALDASALVIETTE E DELLE COPERTE
CONSIGLI PER OTTENERE I MIGLIORI RISULTATI
CURA E MANUTENZIONE
REGISTRAZIONE DEL PRODOTTO
3
4
5
6
7
8
9
9
9
10
11
11
11
AVVERTENZA :
LEGGERE ATTENTAMENTE TUTTE LE ISTRUZIONI, LE
AVVERTENZE E LE PRECAUZIONI PRIMA DI UTILIZZARE
QUESTO PRODOTTO.
OSSERVANZA DI QUESTE ISTRUZIONI PUÒ
CAUSARE LESIONI PERSONALI O DANNI AL PRODOTTO.

www.SereneLifeHome.com
3
Caratteristiche:
• Dimensioni perfette per contenere due grandi asciugamani da bagno.
• Può contenere 2 grandi asciugamani da bagno o una coperta leggera person
ale.
• Semplice controllo one-touch.
• Pulsante di accensione/spegnimento.
• Spegnimento automatico dopo un tempo prestabilito.
• Il coperchio rimane aperto per facilitare il riempimento e la rimozione di
asciugamani e coperte.
• Il coperchio isolato a doppia parete trattiene il calore rimanendo fresco al tatto.
• Protezione contro il surriscaldamento e design resistente all'acqua.
• Spia luminosa integrata.
• Pratica maniglia per il trasporto del secchio scaldasalviette.
• Progettato per risparmiare energia e ridurre il consumo energetico.
• In grado di riscaldare asciugamani, accappatoi, coperte o altri articoli in tessu
to.
Contenuto della confezione:
• Scaldasalviette.
• Compressa di aromaterapia.
• Essiccante.
Specifiche tecniche:
• Materiale di costruzione: lamiera d'acciaio inossidabile.
• Potenza: 450 W.
• Alimentazione: 220 V CA.
• Frequenza: 50 Hz.
• Volume: 20 L.
• Tempo di funzionamento: 20, 40, 60 minuti.
• Lunghezza del cavo di alimentazione: 1,8 m.
• Capacità massima: 50 kg.
• Peso dell'apparecchio: 3,7 kg.
• Intervallo di temperatura: regolabile da 32°C a 60°C.
• Dimensioni del prodotto (L x P x A):
Dimensioni del prodotto (L x P x A): 39 cm x 22,5 cm x 46,5 cm.
Avvertenza California Prop 65
ATTENZIONE:
Questo prodotto può esporre a sostanze chimiche che,
secondo lo stato della California, possono causare cancro,
difetti di nascita e altri danni riproduttivi. Non ingerire.
Per maggiori informazioni: www.P65warnings.ca.gov
Lorem ipsum dolor sit amet, consectetuer adipiscing elit, sed diam nonummy nibh
www.SereneLifeHome.com
4
PRECAUZIONI
PER RIDURRE IL RISCHIO DI INCENDIO O DI SCOSSE ELETTRICHE, NON
ESPORRE QUESTO APPARECCHIO ALLA PIOGGIA O ALL'UMIDITÀ.
IMPORTANTI ISTRUZIONI DI SICUREZZA
TUTTE LE ISTRUZIONI DI SICUREZZA E DI FUNZIONAMENTO DEVONO
ESSERE LETTE, OSSERVATE E SEGUITE PRIMA DI UTILIZZARE L'APPAREC-
CHIO.
• SOLO PER USO DOMESTICO.
• SOLO PER ADULTI.
• PROGETTATO SOLO PER TESSUTI ASCIUTTI.
CONSERVARE QUESTE ISTRUZIONI.
Il simbolo del lampo con la punta a freccia, all'interno di un triango-
lo equilatero, avverte l'utente della presenza di “tensione pericolo-
sa” non isolata all'interno dell'involucro del prodotto, che può
essere di entità suciente a costituire un rischio di scossa elettrica.
Il punto esclamativo all'interno di un triangolo equilatero avverte
l'utente della presenza di importanti istruzioni per il funzionamento
e la manutenzione (assistenza) nella documentazione che accom-
pagna l'apparecchio.
Per ridurre il rischio di lesioni gravi, si ricorda che questo apparecchio non è un
giocattolo. Non permettere ai bambini di maneggiare o giocare vicino allo
scaldasalviette e alle coperte.

www.SereneLifeHome.com
5
Istruzioni importanti per la sicurezza
AVVERTENZA :
PER RIDURRE IL RISCHIO DI INCENDI, SCOSSE ELETTRICHE O LESIONI
GRAVI DURANTE L'USO DI QUESTO APPARECCHIO, SEGUIRE QUESTE
PRECAUZIONI DI BASE:
• Leggere tutte le istruzioni prima di utilizzare l'apparecchio.
• Scollegare sempre l'apparecchio dalla rete elettrica subito dopo l'uso.
• Non utilizzare l'apparecchio per scopi diversi da quelli per cui è stato concepito.
• Non collocare o riporre l'apparecchio in un luogo in cui possa cadere o essere
trascinato in una vasca da bagno o in un lavandino.
• Non immergere l'apparecchio in acqua o in altri liquidi.
• Non tentare di recuperare un apparecchio caduto in acqua. Staccare immediata
mente la spina.
• Assicurarsi che nessun oggetto cada nell'apparecchio e che non vi siano versati
liquidi.
• Questo apparecchio non deve mai essere lasciato incustodito quando è collegato
alla rete elettrica.
• È necessaria una stretta sorveglianza quando l'apparecchio viene utilizzato in
prossimità di bambini o persone disabili.
• Utilizzare l'apparecchio solo per lo scopo previsto, come descritto nel presente
manuale.
• Non utilizzare mai questo apparecchio se il cavo o la spina sono danneggiati, se
non funziona correttamente o se è caduto, è stato danneggiato o è stato immerso
in acqua.
• Tenere i cavi lontani da superci calde. Non avvolgerli intorno all'esterno dell'ap
parecchio e non lasciarli pendere dal bordo di un tavolo o di un bancone.
• Non utilizzare l'apparecchio all'aperto.
• Non modicare la spina di sicurezza o utilizzare una prolunga con questo apparec
chio.
• Non utilizzare l'apparecchio con un convertitore di tensione.
• Non toccare le superci calde.
• Non utilizzare accessori non raccomandati dal produttore per non incorrere in
lesioni.
CONSERVARE QUESTE ISTRUZIONI

www.SereneLifeHome.com
6
INFORMAZIONI FCC
ATTENZIONE : Cambiamenti o modiche non espressamente approvati dalla
parte responsabile della conformità possono invalidare l'autorizzazione
dell'utente all'uso di questa apparecchiatura.
Questo dispositivo è conforme alla Parte 15 delle norme FCC.
Il funzionamento è soggetto alle due condizioni seguenti:
1. Il dispositivo non deve causare interferenze dannose.
2. Il dispositivo deve accettare qualsiasi interferenza ricevuta, comprese quelle
che possono causare un funzionamento indesiderato.
AVVERTENZA :
Cambiamenti o modiche non approvati dalla parte responsabile della
conformità possono invalidare l'autorizzazione dell'utente a utilizzare
questa apparecchiatura.
Nota :
Questa apparecchiatura è stata testata ed è risultata conforme ai limiti previsti
per i dispositivi digitali di Classe B, ai sensi della Parte 15 delle norme FCC. Questi
limiti sono concepiti per fornire una protezione ragionevole contro le interferen-
ze dannose in un'installazione residenziale.
Questa apparecchiatura genera, utilizza e può irradiare energia a radiofrequenza.
Se non viene installata e utilizzata secondo le istruzioni, questa apparecchiatura
può causare interferenze dannose alle comunicazioni radio. Tuttavia, non è
possibile garantire che non si verichino interferenze in una particolare instal-
lazione.
Se questa apparecchiatura causa interferenze dannose alla ricezione radiotelevi-
siva, che possono essere determinate spegnendo e riaccendendo l'apparecchia-
tura, l'utente è invitato a cercare di correggere l'interferenza adottando una o più
delle seguenti misure:
• Riorientare o riposizionare l'antenna ricevente.
• Aumentare la distanza tra l'apparecchiatura e il ricevitore.
• Collegare l'apparecchiatura a una presa di corrente su un circuito diverso da
quello a cui è collegato il ricevitore.
• Consultare il rivenditore o un tecnico radiotelevisivo esperto.

www.SereneLifeHome.com
7
UBICAZIONE DELLE PARTI E DEI COMANDI
2
1
5
3
No.
1
2
3
4
5
6
Nome
Bottone On/O
Luce LED
Piedi
Disco di fragranza
Coperchio
Cavo di alimentazione
4
6
www.SereneLifeHome.com
8
Schermo LED
1. Il simbolo 00:00 lampeggia per un minuto prima di passare alla modalità standby.
2. Premere il pulsante di accensione. Il simbolo 00:00 lampeggia lentamente per cinque
volte. Se non si interviene, l'apparecchio entra in funzione.
Le opzioni di tempo di funzionamento sono 20 minuti, 40 minuti e 60 minuti, che
scorrono in quest'ordine.
Premendo il pulsante Ora si aggiungono 20 minuti ad ogni pressione.
L'ora corrispondente, indicata da un punto illuminato, lampeggia cinque volte.
Se non si compiono altre azioni, lo scaldasalviette si avvia automaticamente. L'indica
tore circolare rimane acceso e il display visualizza il tempo rimanente.
La retroilluminazione del pulsante Ora è attivata.
3. Premere il pulsante Ritardo. Il simbolo 00:00 lampeggia lentamente, indicando che è
in corso la programmazione di un appuntamento.
Premere una volta il tasto Delay per aggiungere un ritardo di 30 minuti; la retroillumi
nazione del tasto Delay lampeggia.
Premere due volte per aggiungere un ritardo di 60 minuti. Il display visualizza l'ora
impostata che lampeggia.
Il simbolo 00:00 continua a lampeggiare lentamente, consentendo di impostare il
tempo di funzionamento della macchina dopo l'avvio.
Per impostazione predenita, la macchina si avvia a 20 minuti. Premere una seconda
volta per selezionare 40 minuti e una terza volta per 60 minuti. Ogni pressione
aumenta il tempo di 20 minuti (come mostrato al punto 2). Una volta trascorso il
tempo, il display visualizza il conto alla rovescia dell'ora dell'appuntamento e l'indica
tore dell'appuntamento rimane acceso.
4. Il LED sul pulsante di accensione/spegnimento si illumina di rosso, indicando una
temperatura interna elevata durante il funzionamento. Ciò serve a ricordare di non
toccare le parti metalliche interne per evitare il rischio di ustioni.

www.SereneLifeHome.com
9
ISTRUZIONI PER LA VISUALIZZAZIONE
1. Spia dell'appuntamento : Lampeggia quando si seleziona un appuntamento,
rimane accesa ininterrottamente per il tempo programmato e si spegne al termine
dell'appuntamento.
2. Spia dell'ora: lampeggia quando si seleziona l'ora, rimane accesa durante il
funzionamento e si spegne al termine del periodo di riscaldamento.
3. Istruzioni per il display :
Premere il pulsante Ora per passare da 20, 40 e 60 minuti. La piccola luce rotonda
corrispondente lampeggia durante la selezione.
Durante il funzionamento, la piccola luce rimane accesa e si spegne quando il
lavoro è terminato.
Se non si sta selezionando un appuntamento, selezionare Ora. Lo schermo
visualizza l'ora e lampeggia quando non è in uso.
Durante il normale funzionamento, lo schermo rimane acceso ininterrottamente
durante il conto alla rovescia.
Per programmare un appuntamento, selezionare prima l'appuntamento e poi
l'ora. Cliccando su Appuntamento, lo schermo visualizzerà l'ora programmata
lampeggiando all'inizio. Dopo la conferma, la luce rimane accesa per indicare il
conto alla rovescia dell'appuntamento. Una volta terminato l'appuntamento, la
spia dell'appuntamento si spegne, la spia dell'ora rimane accesa e lo schermo
visualizza il conto alla rovescia no all'ora di riscaldamento selezionata.
ISTRUZIONI PER IL DISCO PROFUMATO
Questo disco profumato è stato progettato per gli utenti che desiderano utilizza-
re compresse per aromaterapia o oli essenziali per riscaldare gli asciugamani.
1. Estrarre il disco profumato dalla confezione ermetica.
2. Inserirlo nel supporto sotto il coperchio.
INSTALLAZIONE
1. Aprire il coperchio e rimuovere l'imballaggio.
2. Posizionare lo scaldasalviette su una supercie asciutta, piana e dura.
3. Inserire la spina in una presa elettrica standard da 220 V.
NOTA: Questo scaldasalviette è dotato di una spina a tre poli con messa a terra.
Per ridurre il rischio di scosse elettriche, collegare il cavo di alimentazione a una
presa elettrica con messa a terra facilmente accessibile.

www.SereneLifeHome.com
10
UTILIZZO DELLO SCALDASALVIETTE E DELLE COPERTE
Lo scaldasalviette può riscaldare comodamente due grandi asciugamani da
bagno in cotone o una leggera coperta personale.
1. Collegare il cavo di alimentazione a una presa di corrente.
2. Aprire il coperchio e collocare all'interno solo asciugamani o coperte asciutti.
NOTA: L'inserimento di asciugamani umidi o bagnati all'interno dello scaldasalvi
ette può danneggiare l'apparecchio e costituire un grave rischio per la sicurezza.
3. Chiudere il coperchio.
4. Premere il pulsante ON/OFF.
5. Attenzione: non toccare l'interno dell'apparecchio per non incorrere in ustioni. La
temperatura dello scomparto può raggiungere 130 ± 8°C in circa 5 minuti e
rimanere a questa temperatura per circa 15 minuti.
A questo punto, la temperatura degli asciugamani può superare i 50°C, orendo
un calore confortevole al tatto.
Il vano viene riscaldato indirettamente per mantenere la temperatura degli
asciugamani a circa 55°C.
La spia di funzionamento si spegne 80 minuti dopo l'avvio dell'apparecchio,
indicando che il ciclo è completo.
6. Con un riscaldamento rapido in 30 secondi, 15 minuti sono di solito sucienti per
riscaldare due grandi asciugamani da bagno.
7. Aprire il coperchio per rimuovere gli asciugamani o la coperta. Premere la man
iglia sul coperchio e sollevare delicatamente per aprire l'apparecchio.
Nota: per evitare di danneggiare l'apparecchio, sollevare con cautela il
coperchio quando si rimuovono gli oggetti.
8. Premere il pulsante ON/OFF in qualsiasi momento per arrestare o avviare il ciclo di
riscaldamento.

www.SereneLifeHome.com
11
REGISTRAZIONE DEL PRODOTTO
Grazie per aver scelto SereneLife. La registrazione del prodotto
vi consente di usufruire di una garanzia esclusiva e di un
servizio clienti personalizzato.
Compilate il modulo per accedere all'assistenza di esperti e
mantenere il vostro acquisto SereneLife in perfette condizioni.
Serenelifehome.com/
register
CONSIGLI PER OTTENERE I MIGLIORI RISULTATI
1. Utilizzare asciugamani o tessuti di cotone o misto cotone.
2. Per un riscaldamento rapido e uniforme, posizionare un singolo asciugamano in
modo lasco nello scaldasalviette.
Gli asciugamani arrotolati o ben piegati impiegheranno più tempo per riscaldarsi
completamente.
Due asciugamani impiegheranno più tempo a riscaldarsi di uno.
3. Utilizzare solo tessuti asciutti.
Nota: NON UTILIZZARE TESSUTI UMIDI O BAGNATI.
4. Evitare di utilizzare tessuti delicati che non possono resistere alle alte tempera
ture.
I tessuti che richiedono di essere stirati a bassa temperatura possono essere
danneggiati dal calore dello scaldasalviette, con il rischio di danneggiare anche
l'apparecchio.
5. Una volta avviato il ciclo di riscaldamento, tenere il coperchio chiuso.
In questo modo si evita la fuoriuscita del calore. L'apertura del coperchio durante
il ciclo potrebbe prolungare i tempi di riscaldamento.
Nota: la formazione di condensa sul coperchio e all'interno dell'apparecchio è
normale.
CURA E MANUTENZIONE
SCOLLEGARE IL CAVO DI ALIMENTAZIONE PRIMA DI PULIRE L'APPARECCHIO.
PULIRE CON UN PANNO ASCIUTTO SOLO QUANDO L'APPARECCHIO È FREDDO AL TATTO.

Italian German Polish Turkish Dutch
Domande o Commenti?
Siamo qui per aiutarti!
Phone: 1.718.535.1800
Serenelifehome.com/ContactUs
Besuchen Sie
unsere Webseite
SCANNEN
SIE MICH
serenelifehome.com
SLTLR150 - SLTLR250 - SLTLR350
BENUTZERHANDBUCH
Rechteckiger Handtuchwärmer-Eimer
GER
www.SereneLifeHome.com
2
INHALT
MERKMALE & TECHNISCHE SPEZIFIKATIONEN
VORSICHTSMASSNAHMEN
WICHTIGE SICHERHEITSHINWEISE
FCC-INFORMATIONEN
POSITION DER TEILE UND STEUERUNG
LED-BILDSCHIRM
ANZEIGEANLEITUNG
DUFTSCHEIBEN-ANLEITUNG
INSTALLATION
VERWENDUNG DES HANDTUCH-UND DECKENWÄRMERS
TIPPS FÜR BESTE ERGEBNISSE
PFLEGE UND WARTUNG
PRODUKTREGISTRIERUNG
3
4
5
6
7
8
9
9
9
10
11
11
11
WARNUNG:
LESEN SIE ALLE ANWEISUNGEN, WARNHINWEISE UND
VORSICHTSMASSNAHMEN SORGFÄLTIG DURCH,
BEVOR SIE DIESES PRODUKT VERWENDEN.
DIE NICHTBEACHTUNG KANN ZU VERLETZUNGEN
ODER SCHÄDEN AM GERÄT FÜHREN.

www.SereneLifeHome.com
3
Merkmale:
•
Perfekte Größe für zwei große Badetücher
• Fasst zwei große Badetücher oder eine persönliche Kuscheldecke
• Einfache Ein-Tasten-Bedienung
• Ein-/Aus-Taste
• Schaltet sich nach Ablauf der eingestellten Zeit automatisch ab
• Deckel bleibt freihändig oen, erleichtert das Befüllen und Entleeren
• Doppelwandig isolierter Deckel speichert die Wärme, bleibt aber kühl bei Berührung
• Überhitzungsschutz und wasserfestes Design
• Eingebaute Kontrollleuchte
• Praktischer Transportgri für einfaches Tragen
• Energiesparendes Design zur Reduzierung des Stromverbrauchs
• Erwärmt Handtücher, Bademäntel, Decken oder andere Stoartikel
Lieferumfang:
•
Handtuchwärmer
• Aromatherapie-Tablette
• Trockenmittel
Technische Spezifikationen:
•
Material: Edelstahlblech
• Stromversorgung: 450 W
• Spannung: 120 V AC
• Frequenz: 60 Hz
• Fassungsvermögen: 20 L
• Timer-Einstellungen: 20, 40, 60 Minuten
• Netzkabellänge: 1,8 m (5,91 ft)
• Maximale Belastung: 50 kg (110,2 lbs)
• Produktgewicht: 3,67 kg (8,1 lbs)
• Temperaturbereich: Einstellbar von 32°C bis 135°C (90°F bis 140°F)
• Produktmaße (L x B x H):
15.35” x 8.86” x 18.31” -Zoll / 39 x 22.51 x 46.51 -Zentimeter
Kalifornische Prop 65 Warnung
WARNUNG:
Dieses Produkt kann Sie Chemikalien aussetzen, die im
US-Staat Kalifornien als Verursacher von Krebs, Geburtsschäden
und anderen Fortpflanzungsschäden bekannt sind.
Nicht verschlucken.
Für weitere Informationen besuchen Sie: www.P65warnings.ca.gov

www.SereneLifeHome.com
4
VORSICHT
Um das Risiko schwerer Verletzungen zu verringern, beachten Sie bitte,
dass dies kein Spielzeug ist. Lassen Sie keine Kinder das Gerät bedienen
oder in der Nähe des Handtuch- & Deckenwärmers spielen.
ZUR VERRINGERUNG DES RISIKOS VON BRAND ODER STROMSCHLÄGEN
darf dieses Gerät nicht Regen oder Feuchtigkeit ausgesetzt werden.
WICHTIGE SICHERHEITSHINWEISE
Alle Sicherheits- und Betriebsanweisungen müssen gelesen, beachtet und
befolgt werden, bevor das Gerät in Betrieb genommen wird.
• NUR FÜR DEN HAUSHALTSGEBRAUCH
• NUR FÜR ERWACHSENE GEEIGNET
• NUR FÜR TROCKENE STOFFARTIKEL VERWENDEN
BEWAHREN SIE DIESE ANLEITUNG AUF
Das Blitzsymbol mit Pfeilspitze innerhalb eines gleichseitigen
Dreiecks soll den Benutzer auf das Vorhandensein nicht isolierter
“gefährlicher Spannungen“ innerhalb des Gehäuses hinweisen, die
stark genug sein können, um einen Stromschlag zu verursachen.
Das Ausrufezeichen innerhalb eines gleichseitigen Dreiecks weist
darauf hin, dass in der mitgelieferten Dokumentation wichtige
Betriebs- und Wartungshinweise enthalten sind.

www.SereneLifeHome.com
5
Wichtige Sicherheitsanweisungen
WARNUNG:
TO REDUCE RISK OF FIRE, ELECTRIC SHOCK, OR SERIOUS INJURY TO
PERSONS WHEN USING THE APPLIANCE, FOLLOW BASIC PRECAUTIONS
INCLUDING THE FOLLOWING:
• Lesen Sie alle Anweisungen sorgfältig durch, bevor Sie das Gerät benutzen.
• Ziehen Sie den Stecker nach der Benutzung sofort aus der Steckdose.
• Verwenden Sie das Gerät nur für den vorgesehenen Zweck.
• Stellen oder lagern Sie das Gerät nicht an Orten, an denen es in eine Bade
wanne oder ein Waschbecken fallen oder hineingezogen werden kann.
• Tauchen Sie das Gerät nicht in Wasser oder andere Flüssigkeiten und lassen
Sie es nicht hineinfallen.
• Greifen Sie niemals nach einem Gerät, das ins Wasser gefallen ist.
Ziehen Sie stattdessen sofort den Stecker.
• Achten Sie darauf, dass keine Gegenstände in das Gerät fallen oder
Flüssigkeiten darauf verschüttet werden.
• Lassen Sie das Gerät niemals unbeaufsichtigt, wenn es eingesteckt ist.
• Kinder oder Personen mit Einschränkungen sollten das Gerät nur unter
Aufsicht benutzen.
• Verwenden Sie das Gerät ausschließlich gemäß den Anweisungen in dieser Anleitung.
• Betreiben Sie das Gerät nicht, wenn das Netzkabel oder der Stecker beschädigt ist,
es nicht ordnungsgemäß funktioniert oder es heruntergefallen oder beschädigt wurde.
• Halten Sie das Netzkabel von heißen Oberächen fern. Wickeln Sie es nicht um
das Gerät und lassen Sie es nicht über eine Tisch- oder Thekenkante hängen.
• Verwenden Sie das Gerät nicht im Freien.
• Verändern Sie den Sicherheitsstecker nicht und verwenden Sie keine Verlängerungskabel.
• Verwenden Sie das Gerät nicht mit einem Spannungswandler.
• Berühren Sie keine heißen Oberächen.
• Verwenden Sie keine Zubehörteile, die nicht vom Hersteller empfohlen
wurden, da dies zu Verletzungen führen kann.
BEWAHREN SIE DIESE ANWEISUNGEN AUF

www.SereneLifeHome.com
6
FCC-Informationen
WARNUNG: Änderungen oder Modikationen, die nicht ausdrücklich von der
für die Einhaltung der Vorschriften verantwortlichen Partei genehmigt
wurden, können das Recht des Benutzers, das Gerät zu betreiben, aufheben.
Dieses Gerät entspricht Teil 15 der FCC-Vorschriften.
Der Betrieb unterliegt den folgenden zwei Bedingungen:
1. Dieses Gerät darf keine schädlichen Störungen verursachen.
2. Dieses Gerät muss alle empfangenen Störungen akzeptieren, einschließlich
solcher, die den Betrieb unerwünscht beeinussen könnten.
WARNUNG:
Änderungen oder Modikationen an diesem Gerät, die nicht ausdrücklich von
der für die Einhaltung der Vorschriften verantwortlichen Partei genehmigt
wurden, können das Recht des Benutzers, das Gerät zu betreiben, aufheben.
Hinweis:
Dieses Gerät wurde getestet und entspricht den Grenzwerten für ein digitales
Gerät der Klasse B gemäß Teil 15 der FCC-Vorschriften. Diese Grenzwerte wurden
entwickelt, um einen angemessenen Schutz vor schädlichen Störungen in einer
Wohninstallation zu bieten. Dieses Gerät erzeugt, nutzt und kann Funkfrequen-
zenergie abstrahlen und könnte, wenn es nicht gemäß den Anweisungen
installiert und verwendet wird, schädliche Störungen in der Funkkommunikation
verursachen. Es gibt jedoch keine Garantie dafür, dass in einer bestimmten
Installation keine Störungen auftreten. Wenn dieses Gerät schädliche Störungen
bei Radio- oder Fernsehempfang verursacht, die durch Aus- und Einschalten des
Geräts ermittelt werden können, wird der Benutzer ermutigt, die Störung durch
eine oder mehrere der folgenden Maßnahmen zu beheben:
• Ändern oder verlegen Sie die Empfangsantenne.
• Erhöhen Sie den Abstand zwischen dem Gerät und dem Empfänger.
• Schließen Sie das Gerät an eine Steckdose an, die sich auf einem anderen
Stromkreis bendet als der, an dem der Empfänger angeschlossen ist.
• Wenden Sie sich an den Händler oder einen erfahrenen Radio-/TV-Techniker.
www.SereneLifeHome.com
7
LOCATION OF PARTS AND CONTROLS
2
1
5
3
No.
1
2
3
4
5
6
TEILNAME
Ein-/Aus-Schalter
LED-Licht
Grundlage
Duftscheibe
Deckel
Netzkabel
4
6

www.SereneLifeHome.com
8
LED-BILDSCHIRM
1. Symbol 00:00 ashes for 1 minute to dim into standby mode.
2. Das Symbol 00:00 blinkt für 1 Minute und wechselt in den Standby-Modus.
Drücken Sie die „Ein“-Taste. 00:00 blinkt langsam 5 Mal. Wenn keine Operation
erfolgt, beginnt das Gerät zu arbeiten. Die Arbeitszeit-Optionen sind 20
Minuten, 40 Minuten und 60 Minuten, die in dieser Reihenfolge durchlaufen
werden. Drücken Sie die „Zeit“-Taste, um jeweils 20 Minuten hinzuzufügen.
Die entsprechende Zeit neben dem Punkt blinkt 5 Mal. Wenn keine weitere
Aktion erfolgt, startet der Handtuchtrockner automatisch, und die kleine
Kreisanzeige bleibt eingeschaltet. Das Display zeigt die verbleibende Zeit an.
Das Hintergrundlicht der Zeit-Taste leuchtet.
3. Drücken Sie die „Schalter“-Taste. 00:00 blinkt langsam, was die eingestellte
Zeit für die Terminplanung anzeigt. Drücken Sie einmal die rechte
„DELAY“-Taste, um 30 Minuten zu verzögern; der Hintergrund der
„DELAY“-Taste blinkt. Drücken Sie zweimal, um um 60 Minuten zu verzögern.
Das Display zeigt die Terminkorrekturzeit an, während das 00:00-Symbol
weiterhin langsam blinkt und Ihnen erlaubt, die Arbeitszeit nach Beginn
festzulegen. Die Maschine ist standardmäßig auf 20 Minuten eingestellt.
Drücken Sie ein zweites Mal für 40 Minuten und ein drittes Mal für 60 Minuten.
Jede Drückung erhöht die Zeit um 20 Minuten (wie in Schritt 2). Wenn die
eingestellte Zeit abgelaufen ist, zeigt das Display den Countdown für die
Arbeitszeit an, und die Terminlichter bleiben eingeschaltet.
4. Das Licht des „Schalter“-Symbols ist rot, was auf eine hohe Innentemperatur
während des Betriebs hinweist. Dies dient als Erinnerung, dass die internen
Metallteile aufgrund der Verbrennungsgefahr nicht berührt werden sollten.

www.SereneLifeHome.com
9
ANZEIGE-ANWEISUNGEN
1. Terminanzeige: Sie blinkt, wenn der Termin ausgewählt wird, bleibt während des
Termins kontinuierlich eingeschaltet und schaltet sich am Ende der Terminzeit aus.
2. Zeitanzeige: Sie blinkt, wenn die Zeit ausgewählt wird, bleibt während des
Betriebs eingeschaltet und schaltet sich am Ende des Arbeitszeitraums aus.
3. Bildschirm-Anzeigebeschreibungen: Drücken Sie die Zeit-Taste, um zwischen
20, 40 und 60 Minuten zu wechseln, wobei das entsprechende kleine Rundlicht
blinkt. Das kleine Rundlicht bleibt während des Betriebs an und schaltet sich
aus, wenn die Arbeit abgeschlossen ist. Wenn kein Termin ausgewählt wird,
wählen Sie ZEIT. Der Bildschirm zeigt die Zeit an und blinkt, wenn der Betrieb
nicht läuft. Während des normalen Betriebs bleibt der Bildschirm kontinuierlich
eingeschaltet und zählt die verbleibende Zeit herunter. Um einen Termin zu
vereinbaren, wählen Sie zuerst den Termin aus und dann die Zeit. Klicken Sie
auf den Termin, und der Bildschirm zeigt die Zeit des Termins an, die zunächst
blinkt. Nach der Bestätigung bleibt das Licht eingeschaltet und zählt die
verbleibende Terminzeit herunter. Sobald die Terminzeit abgelaufen ist,
schaltet sich die Terminanzeige aus, die Zeitanzeige bleibt eingeschaltet,
und der Bildschirm zeigt den Countdown zur gewählten Heizzeit an.
ANWEISUNGEN FÜR DEN DUFTTELLER
Dieser Duftteller ist für Benutzer gedacht, die Aromatherapie-Tabletten oder
ätherische Öle beim Erwärmen von Handtüchern verwenden möchten.
1. Entfernen Sie den Duftteller aus der versiegelten Plastiktüte.
2. Schieben Sie ihn in den Duftteller-Halter, der sich an der Unterseite des Deckels bendet.
EINRICHTUNG
1. Önen Sie den Deckel und entfernen Sie alle Verpackungsinhalte.
2. Stellen Sie den Handtuchwärmer auf eine trockene, ebenen, feste Oberäche.
3. Stecken Sie den Stecker in eine Standard-120V-Steckdose.
HINWEIS: Dieser Handtuch- und Deckenwärmer hat einen 3-poligen
Erdungsstecker. Um das Risiko eines elektrischen Schlags zu verringern, stecken
Sie das Netzkabel in eine geerdete Steckdose, die leicht zugänglich ist.

www.SereneLifeHome.com
10
VERWENDUNG DES HANDTUCH- UND DECKENWARMERS
Der Handtuch- und Deckenwärmer kann bequem zwei große
Baumwoll-Badetücher oder eine persönliche Wurfdecke erwärmen.
1. Stecken Sie das Netzkabel in eine Steckdose.
2. Önen Sie den DECKEL und legen Sie NUR TROCKENE Handtücher oder
eine Decke hinein.
HINWEIS: Das Einlegen von feuchten oder nassen Handtüchern in den
Handtuchwärmer kann das Gerät beschädigen und ernsthafte
Sicherheitsrisiken darstellen.
3. Schließen Sie den DECKEL.
4. Drücken Sie die EIN/AUS-TASTE.
5. Bitte berühren Sie nicht die innere Wand des Produkts, da dies zu Verbrennungen
führen kann. Die Temperatur des Behälters kann in etwa 5 Minuten 130±8°C /
46,4°F erreichen und diese Temperatur etwa 15 Minuten lang halten. Zu diesem
Zeitpunkt kann die Temperatur des Handtuchs mehr als 50°C / 122°F erreichen,
was eine relativ warme und angenehme Temperatur für den menschlichen Kontakt ist.
Der Handtuchbehälter wird indirekt beheizt, um die Handtuchtemperatur bei
etwa 55°C / 131°F zu halten. Das Betriebsanzeigelicht erlischt 80 Minuten nach
dem Start des Geräts und zeigt an, dass der Arbeitszyklus abgeschlossen ist.
6. Mit 30 Sekunden Schnellheizung sind 15 Minuten in der Regel ausreichend,
um zwei Badetücher zu erwärmen.
7. Önen Sie den DECKEL, um das Handtuch oder die Decke zu entfernen.
Drücken Sie auf den Gri des Deckels und ziehen Sie dann nach oben,
um den Deckel des Produkts zu önen.
Hinweis: Um Schäden am Gerät zu vermeiden, heben Sie den Deckel vorsichtig
an, wenn Sie die Gegenstände herausnehmen.
8. Drücken Sie jederzeit die EIN/AUS-TASTE, um den Heizzyklus zu stoppen
oder zu starten.

www.SereneLifeHome.com
11
Produkt registrieren
Vielen Dank, dass Sie sich für SereneLife entschieden haben.
Indem Sie Ihr Produkt registrieren, stellen Sie sicher, dass Sie
alle Vorteile unserer exklusiven Garantie und unseres
persönlichen Kundensupports erhalten. Füllen Sie das
Formular aus, um fachkundige Unterstützung zu erhalten
und Ihren SereneLife-Kauf in perfektem Zustand zu halten.
Serenelifehome.com/
register
TIPPS FÜR BESTE ERGEBNISSE
1. Verwenden Sie Handtücher oder Stoe aus Baumwolle oder Baumwollmischungen.
2. Für schnelles und gleichmäßiges Erhitzen legen Sie 1 Handtuch locker in den
Handtuch- und Deckenwärmer. Fest gerollte oder gefaltete Handtücher benötigen
länger, um vollständig zu erwärmen. Zwei Handtücher benötigen länger als eines.
3. Verwenden Sie nur TROCKENE Stoe.
Hinweis: VERWENDEN SIE KEINE FEUCHTEN ODER NASSEN HANDTÜCHER.
4. Vermeiden Sie die Verwendung von empndlichen Stoen, die keine
hohen Temperaturen vertragen. Stoe, bei denen angegeben ist, dass sie
mit einem kühlen Bügeleisen gebügelt werden müssen, könnten der Hitze des
Handtuchwärmers nicht standhalten, was zu Schäden am Sto und am
Handtuchwärmer führen kann.
5. Sobald der Heizzyklus begonnen hat, halten Sie den Deckel geschlossen.
Dadurch wird verhindert, dass Wärme entweicht. Das Önen des Deckels
während des Zyklus kann zu längeren Heizzeiten führen.
Hinweis: Kondensation auf dem Deckel und im Inneren des Geräts ist normal.
PFLEGE UND WARTUNG
ZIEHEN SIE DAS NETZKABEL AUS DER STECKDOSE, BEVOR SIE DAS GERÄT
REINIGEN. WISCHEN SIE MIT EINEM TROCKENEN TUCH AB, WENN DAS GERÄT
ABGEKÜHLT IST.

Fragen oder Kommentare?
Wir sind für Sie da!
Telefon: 1.718.535.1800
Serenelifehome.com/ContactUs
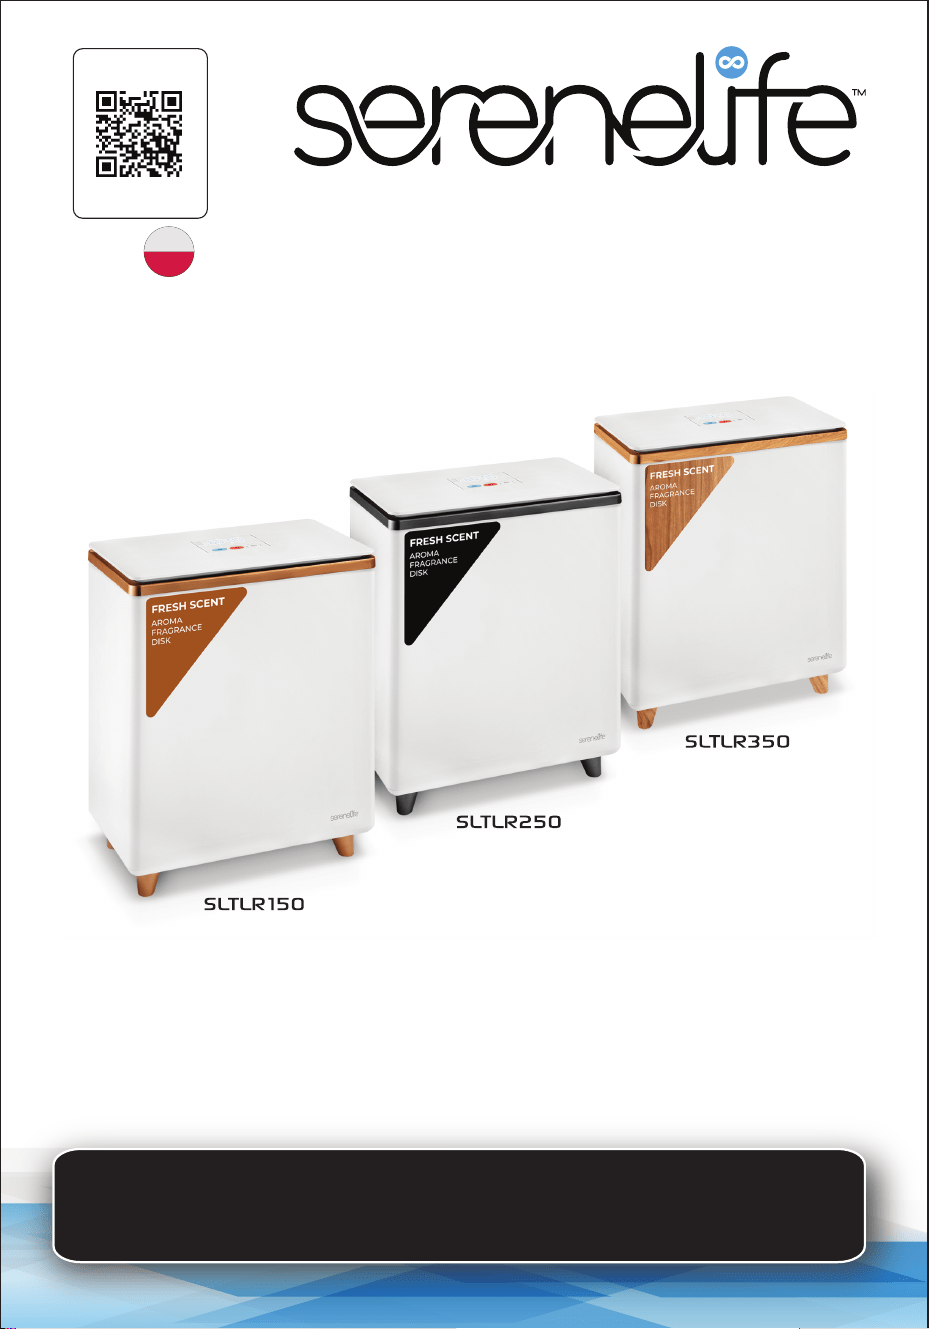
Odwiedź Naszą
Stronę
ZESKANUJ MNIE
serenelifehome.com
SLTLR150 - SLTLR250 - SLTLR350
PORADNIK UŻYTKOWNIKA
Prostokątny podgrzewacz do ręczników
POL
www.SereneLifeHome.com
2
SPIS TREŚCI
CECHY I SPECYFIKACJE TECHNICZNE
ŚRODKI OSTROŻNOŚCI
WAŻNE INSTRUKCJE BEZPIECZEŃSTWA
INFORMACJE FCC
LOKALIZACJA CZĘŚCI I ELEMENTÓW STERUJĄCYCH
WYŚWIETLACZ LED
INSTRUKCJE DOTYCZĄCE WYŚWIETLACZA
INSTRUKCJE DOTYCZĄCE PŁYTY ZAPACHOWEJ
INSTALACJA
KORZYSTANIE Z PODGRZEWACZA DO RĘCZNIKÓW I KOCÓW
WSKAZÓWKI DLA UZYSKANIA NAJLEPSZYCH REZULTATÓW
PIELĘGNACJA I KONSERWACJA
REJESTRACJA PRODUKTU
3
4
5
6
7
8
9
9
9
10
11
11
11
OSTRZEŻENIE:
PRZECZYTAJ UWAŻNIE WSZYSTKIE INSTRUKCJE,
OSTRZEŻENIA I ŚRODKI OSTROŻNOŚCI PRZED UŻYCIEM
TEGO PRODUKTU. NIEZASTOSOWANIE SIĘ DO TEGO
ZALECENIA MOŻE SPOWODOWAĆ OBRAŻENIA
CIAŁA LUB USZKODZENIE PRODUKTU.

www.SereneLifeHome.com
3
Cechy:
•
Idealny rozmiar do przechowywania dwóch dużych ręczników kąpielowych.
• Mieści 2 duże ręczniki kąpielowe lub lekki koc.
• Proste sterowanie jednym dotknięciem.
• Przycisk włączania/wyłączania.
• Automatyczne wyłączanie po ustawionym czasie.
• Pokrywa pozostaje otwarta, co ułatwia napełnianie i wyjmowanie ręczników i koców.
• Izolowana pokrywa o podwójnych ściankach zatrzymuje ciepło,
pozostając chłodną w dotyku.
• Zabezpieczenie przed przegrzaniem i wodoodporna konstrukcja.
• Wbudowany wskaźnik świetlny.
• Poręczny uchwyt do przenoszenia pojemnika na ręczniki.
• Zaprojektowany z myślą o oszczędzaniu energii i zmniejszeniu zużycia prądu.
• Możliwość podgrzewania ręczników, szlafroków, koców i innych tkanin.
Zawartość opakowania:
•
Podgrzewacz do ręczników.
• Tabletka do aromaterapii.
• Środek osuszający.
Dane techniczne:
•
Materiał konstrukcyjny: Blacha ze stali nierdzewnej.
• Moc: 450 W.
• Zasilanie: 220 V AC.
• Częstotliwość: 50 Hz.
• Pojemność: 20 L.
• Czas pracy: 20, 40, 60 minut.
• Długość przewodu zasilającego: 5.91 ft. / 1,8 m.
• Maksymalna pojemność: 110.2 Lbs. / 50 kg.
• Waga urządzenia: 8.1 Lbs. / 3,7 kg
• Zakres temperatur: regulowany od 90°F to 140°F (32°C to 135°C)
• Wymiary produktu (dł. x szer. x wys.):
15.35” x 8.86” x 18.31” -cali / 39 x 22.51 x 46.51 -centymetr
Ostrzeżenie California Prop 65
OSTRZEŻENIE:
Ten produkt może narazić użytkownika na kontakt z
substancjami chemicznymi, o których wiadomo, że
Stanu Kalifornia, że powodują raka, wady wrodzone i inne
szkodliwe działanie na rozrodczość. Nie połykaj.
Więcej informacji: www.P65warnings.ca.gov

www.SereneLifeHome.com
4
ŚRODKI OSTROŻNOŚCI
Aby zmniejszyć ryzyko poważnych obrażeń, pamiętaj, że to urządzenie nie
jest zabawką. Nie pozwalaj dzieciom dotykać ani bawić się w pobliżu
podgrzewacza do ręczników i koców.
ABY ZMNIEJSZYĆ RYZYKO POŻARU LUB PORAŻENIA PRĄDEM, NIE WYST-
AWIAJ URZĄDZENIA NA DZIAŁANIE DESZCZU LUB WILGOCI.
WAŻNE INSTRUKCJE BEZPIECZEŃSTWA
PRZED ROZPOCZĘCIEM UŻYTKOWANIA URZĄDZENIA NALEŻY ZAPOZNAĆ
SIĘ ZE WSZYSTKIMI INSTRUKCJAMI DOTYCZĄCYMI BEZPIECZEŃSTWA I
OBSŁUGI ORAZ PRZESTRZEGAĆ ICH.
• WYŁĄCZNIE DO UŻYTKU DOMOWEGO.
• TYLKO DLA DOROSŁYCH.
• PRZEZNACZONE WYŁĄCZNIE DO PRANIA SUCHYCH TKANIN.
ZACHOWAJ NINIEJSZĄ INSTRUKCJĘ.
Symbol błyskawicy ze strzałką w trójkącie równobocznym ma na
celu ostrzeżenie użytkownika o obecności nieizolowanego „niebez-
piecznego napięcia” w obudowie produktu, które może być
wystarczająco duże, aby stanowić ryzyko porażenia prądem.
Wykrzyknik w trójkącie równobocznym ma na celu zwrócenie
uwagi użytkownika na obecność ważnych instrukcji obsługi i
konserwacji (serwisowania) w literaturze dołączonej do urządzenia.

www.SereneLifeHome.com
5
Ważne instrukcje bezpieczeństwa
OSTRZEŻENIE:
ABY ZMNIEJSZYĆ RYZYKO POŻARU, PORAŻENIA PRĄDEM ELEKTRYCZNYM
LUB POWAŻNYCH OBRAŻEŃ PODCZAS KORZYSTANIA Z TEGO URZĄDZENIA,
PRZESTRZEGAJ PONIŻSZYCH PODSTAWOWYCH ŚRODKÓW OSTROŻNOŚCI:
• Przeczytaj wszystkie instrukcje przed użyciem urządzenia.
• Zawsze odłączaj urządzenie od zasilania natychmiast po jego użyciu.
• Nie używaj urządzenia do celów innych niż jego przeznaczenie.
• Nie umieszczaj urządzenia w miejscu, w którym mogłoby spaść lub zostać
wciągnięte do wanny lub zlewu.
• Nie zanurzaj urządzenia w wodzie ani żadnym innym płynie.
• Nie próbuj odzyskać urządzenia, które wpadło do wody. Natychmiast odłącz
urządzenie od zasilania.
• Upewnij się, że do urządzenia nie wpadły żadne przedmioty i nie rozlały się
na nie żadne płyny.
• Nigdy nie pozostawiaj urządzenia podłączonego do zasilania bez nadzoru.
• Jeśli urządzenie jest używane w pobliżu dzieci lub osób niepełnosprawnych,
konieczny jest ścisły nadzór.
• Używaj urządzenia wyłącznie zgodnie z jego przeznaczeniem opisanym
w niniejszej instrukcji.
• Nigdy nie używaj tego urządzenia, jeśli jego przewód lub wtyczka są
uszkodzone, jeśli nie działa ono prawidłowo lub jeśli zostało upuszczone,
uszkodzone lub zanurzone w wodzie.
• Trzymaj przewody z dala od rozgrzanych powierzchni. Nie owijaj przewodów
wokół urządzenia ani nie pozwalaj im zwisać z krawędzi stołu lub blatu.
• Nie używaj urządzenia na zewnątrz.
• Nie modykuj wtyczki zabezpieczającej ani nie używaj przedłużacza z
tym urządzeniem.
• Nie używaj urządzenia z konwerterem napięcia.
• Nie dotykaj gorących powierzchni.
• Nie używaj akcesoriów niezalecanych przez producenta, ponieważ może to
spowodować obrażenia.
ZACHOWAJ TE INSTRUKCJE

www.SereneLifeHome.com
6
Informacje FCC
PRZESTROGA: Zmiany lub modykacje, które nie zostały wyraźnie zatwi-
erdzone przez stronę odpowiedzialną za zgodność, mogą unieważnić prawo
użytkownika do korzystania z urządzenia.
To urządzenie jest zgodne z częścią 15 przepisów FCC.
Jego działanie podlega następującym dwóm warunkom:
1. Urządzenie nie może powodować szkodliwych zakłóceń.
2. To urządzenie musi akceptować wszelkie odbierane zakłócenia,
w tym zakłócenia, które mogą powodować niepożądane działanie.
OSTRZEŻENIE:
Zmiany lub modykacje niezatwierdzone przez stronę odpowiedzialną za
zgodność mogą unieważnić prawo użytkownika do korzystania z tego
urządzenia.
Uwaga:
To urządzenie zostało przetestowane i uznane za zgodne z ograniczeniami dla
urządzeń cyfrowych klasy B, zgodnie z częścią 15 przepisów FCC. Ograniczenia te
mają na celu zapewnienie rozsądnej ochrony przed szkodliwymi zakłóceniami w
instalacjach domowych. To urządzenie generuje, wykorzystuje i może emitować
energię o częstotliwości radiowej. Jeśli urządzenie nie jest zainstalowane i
używane zgodnie z instrukcjami, może powodować szkodliwe zakłócenia w
komunikacji radiowej. Nie ma jednak gwarancji, że zakłócenia nie wystąpią w
konkretnej instalacji. Jeśli to urządzenie powoduje szkodliwe zakłócenia w
odbiorze radiowym lub telewizyjnym, co można stwierdzić poprzez wyłączenie i
włączenie urządzenia, zachęca się użytkownika do podjęcia próby usunięcia
zakłóceń za pomocą jednego lub kilku z poniższych środków:
• Zmień kierunek lub położenie anteny odbiorczej.
• Zwiększ odległość między urządzeniem a odbiornikiem.
• Podłączenie urządzenia do gniazdka w innym obwodzie niż ten, do którego
podłączony jest odbiornik.
• Skonsultuj się ze sprzedawcą lub doświadczonym technikiem
radiowo-telewizyjnym w celu uzyskania pomocy.

www.SereneLifeHome.com
7
LOKALIZACJA CZĘŚCI I ELEMENTÓW STERUJĄCYCH
2
1
5
3
No.
1
2
3
4
5
6
Nazwa części
Przycisk Start/Stop
Indykator LED
Nóżki
Perfumowany krążek
Pokrywa
Przewód zasilający
4
6

www.SereneLifeHome.com
8
EKRAN LED
1. Symbol 00: 00 będzie migać przez minutę przed przejściem do trybu gotowości.
2. Naciśnij przycisk ‘ON’. Symbol 00: 00 mignie powoli pięć razy. Jeśli nie zostaną
podjęte żadne działania, urządzenie rozpocznie pracę. Dostępne opcje czasu
pracy to 20 minut, 40 minut i 60 minut, przewijane w tej kolejności. Naciśnij
przycisk Time (Czas ), aby dodać 20 minut za każdym naciśnięciem.
Odpowiedni czas jest wyświetlany obok kontrolki, która miga pięć razy.
Jeśli nie wykonasz żadnych innych czynności, podgrzewacz ręczników uruchomi
się automatycznie. Okrągły wskaźnik pozostanie zapalony, a na wyświetlaczu
pojawi się pozostały czas. Podświetlenie przycisku czasu zaświeci się.
3. Naciśnij przycisk ‘Switch”. Symbol 00: 00 miga powoli, wskazując, że
zaprogramowano opóźnienie.Naciśnij przycisk ‘delay’ jeden raz, aby ustawić
30-minutowe opóźnienie; podświetlenie przycisku ‘delay’ zacznie migać. Naciśnij
dwukrotnie, aby ustawić 60-minutowe opóźnienie. Na wyświetlaczu zacznie migać
zaprogramowany czas. Symbol 00:00 będzie nadal powoli migać, umożliwiając
ustawienie czasu działania po uruchomieniu. Ustawienie domyślne to 20 minut.
Naciśnij drugi raz, aby wybrać 40 minut, a trzeci raz, aby wybrać 60 minut. Każde
naciśnięcie dodaje 20 minut (jak powyżej). Po upływie czasu na wyświetlaczu
pojawi się odliczanie czasu pracy, a wskaźnik spotkania pozostanie zapalony.
4. Dioda LED na przycisku ON świeci się na czerwono, wskazując wysoką
temperaturę wewnętrzną podczas pracy. Służy to jako przypomnienie, aby
unikać dotykania wewnętrznych części metalowych ze względu na ryzyko
poparzenia.

www.SereneLifeHome.com
9
INSTRUKCJE WYŚWIETLANIA
1. Wskaźnik spotkania: Miga po wybraniu terminu, świeci światłem ciągłym
przez zaprogramowany czas, a następnie gaśnie po zakończeniu terminu.
2. Wskaźnik czasu: Miga po wybraniu czasu, pozostaje włączony podczas pracy,
a następnie gaśnie po zakończeniu czasu pracy.
3. Instrukcje dotyczące wyświetlacza: Naciśnij przycisk Czas, aby przełączać
między 20, 40 i 60 minutami. Podczas wyboru miga odpowiednia mała okrągła
kontrolka. Podczas pracy mała kontrolka pozostaje włączona i gaśnie po zakończeniu
zadania. Jeśli nie wybierasz terminu, wybierz opcję Czas. Wyświetlacz pokaże godzinę i
będzie migać, gdy urządzenie nie będzie działać. Podczas normalnej pracy ekran
będzie świecił światłem ciągłym podczas odliczania. Aby zaprogramować spotkanie,
najpierw wybierz spotkanie, a następnie wybierz godzinę. Kliknij spotkanie, a na
ekranie pojawi się zaprogramowany czas migający na początku. Po potwierdzeniu,
kontrolka pozostanie włączona, odliczając czas do zaprogramowanej godziny. Po
zakończeniu spotkania wskaźnik spotkania zgaśnie, wskaźnik czasu pozostanie
włączony, a na ekranie zostanie wyświetlone odliczanie do wybranego czasu ogrzewania.
INSTRUKCJE DOTYCZĄCE TARCZY
ZAPACHOWEJ
Ten krążek zapachowy jest przeznaczony dla użytkowników, którzy chcą używać
tabletek do aromaterapii lub olejków eterycznych podczas podgrzewania ręczników.
1. Wyjmij krążek zapachowy z hermetycznego opakowania.
2. Wsuń go do uchwytu pod pokrywą.
INSTALACJA
1. Otwórz pokrywę i usuń całe opakowanie.
Umieść podgrzewacz do ręczników na suchej, płaskiej i stabilnej powierzchni.
Podłącz gniazdo do standardowego gniazdka elektrycznego 220 V.
UWAGA: Ten podgrzewacz ręczników i koców jest wyposażony w trójbolcową
wtyczkę z uziemieniem.
Aby zmniejszyć ryzyko porażenia prądem, podłącz przewód zasilający do łatwo
dostępnego uziemionego gniazdka elektrycznego.

www.SereneLifeHome.com
10
KORZYSTANIE Z PODGRZEWACZA DO
RĘCZNIKÓW I KOCÓW
Podgrzewacz do ręczników może wygodnie ogrzać dwa duże bawełniane
ręczniki lub lekki koc.
1. Podłącz przewód zasilający do gniazdka elektrycznego.
2. Otwórz pokrywę i umieść w niej wyłącznie SUCHE ręczniki lub koce.
UWAGA: Wkładanie wilgotnych lub mokrych ręczników może uszkodzić
urządzenie i stanowić poważne zagrożenie dla bezpieczeństwa.
3. Zamknij pokrywę.
4. Naciśnij przycisk włączania/wyłączania.
5. Przestroga: Nie dotykaj wnętrza produktu, ponieważ może to spowodować
oparzenia. Temperatura w komorze może osiągnąć 130 ± 8°C w ciągu około 5
minut i utrzymywać się na tym poziomie przez około 15 minut.
Na tym etapie temperatura ręczników może przekraczać 50°C, zapewniając
komfortowe ciepło w kontakcie z ludźmi. Komora jest ogrzewana pośrednio,
aby utrzymać temperaturę ręczników na poziomie około 55°C. Kontrolka pracy
gaśnie po 80 minutach, wskazując, że cykl pracy został zakończony.
6. Dzięki szybkiemu nagrzewaniu w ciągu 30 sekund, 15 minut zwykle wystarcza
na ogrzanie dwóch ręczników.
7. Otwórz pokrywę, aby wyjąć ręczniki lub koc. Naciśnij uchwyt na pokrywie i
delikatnie podnieś, aby otworzyć produkt.
UWAGA: TAby uniknąć uszkodzenia urządzenia, ostrożnie podnoś pokrywę
podczas wyjmowania przedmiotów.
8. Naciśnij przycisk ON/OFF w dowolnym momencie, aby zatrzymać lub
rozpocząć cykl ogrzewania.

www.SereneLifeHome.com
11
Zarejestruj swój produkt
Dziękujemy za wybranie SereneLife. Rejestrując swój
produkt, zapewniasz sobie wszystkie korzyści płynące z
naszej ekskluzywnej ekskluzywnej gwarancji i
spersonalizowanej obsługi klienta.
Wypełnij formularz, aby uzyskać dostęp do pomocy ekspertów i
utrzymać swój zakup SereneLife w idealnym stanie.
Serenelifehome.com/
register
WSKAZÓWKI DLA UZYSKANIA NAJLEPSZYCH REZULTATÓW
1. Używaj ręczników lub tkanin bawełnianych lub z mieszanki bawełny.
2. Aby zapewnić szybkie i równomierne nagrzewanie, umieść pojedynczy ręcznik
luźno w podgrzewaczu. Zwinięte lub ciasno złożone ręczniki będą nagrzewać
się dłużej. Dwa ręczniki nagrzewają się dłużej niż jeden.
3. Używaj wyłącznie SUCHYCH tkanin.
Uwaga: NIE UŻYWAJ WILGOTNYCH LUB MOKRYCH TKANIN.
4. Unikaj używania delikatnych tkanin, które nie wytrzymują wysokich temperatur.
Każda tkanina wymagająca prasowania w niskiej temperaturze może zostać
uszkodzona przez ciepło podgrzewacza do ręczników, co może również
spowodować uszkodzenie urządzenia.
5. Po rozpoczęciu cyklu podgrzewania trzymaj pokrywę zamkniętą.
Zapobiegnie to ucieczce ciepła. Otwarcie pokrywy podczas cyklu może
wydłużyć czas nagrzewania.
Uwaga: Kondensacja na pokrywie i wewnątrz urządzenia jest zjawiskiem
normalnym.
PIELĘGNACJA I KONSERWACJA
PRZED PRZYSTĄPIENIEM DO CZYSZCZENIA URZĄDZENIA ODŁĄCZ PRZEWÓD
ZASILAJĄCY. PRZETRZYJ SUCHĄ SZMATKĄ TYLKO WTEDY, GDY URZĄDZENIE
JEST CHŁODNE W DOTYKU.

Masz pytania lub uwagi?
Jesteśmy tutaj, aby Ci pomóc!
Phone: 1.718.535.1800
Serenelifehome.com/ContactUs
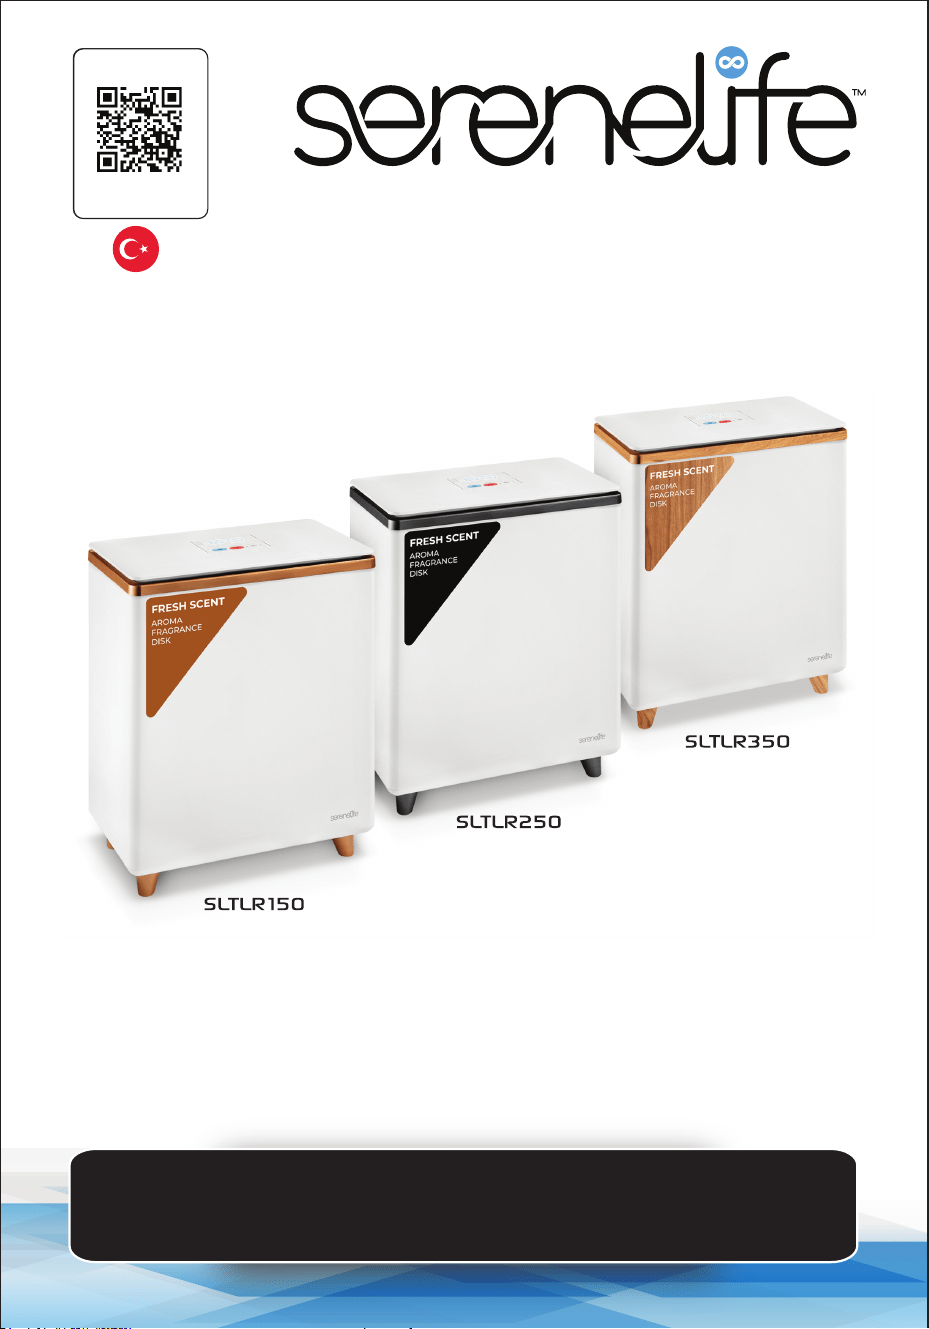
Visit Our Website
SCAN ME
serenelifehome.com
SLTLR150 - SLTLR250 - SLTLR350
KULLANICI KILAVUZU
Dikdörtgen Havlu Isıtıcı Kova
Web Sitemizi
Ziyaret Edin
BENİ TARA
serenelifehome.com
TUR
www.SereneLifeHome.com
2
İÇİNDEKİLER
ÖZELLİKLER & TEKNİK ÖZELLİKLER
DİKKAT
ÖNEMLİ GÜVENLİK TALİMATLARI
FCC BİLGİLERİ
PARÇALARIN VE KONTROLLERIN YERI
LED EKRAN
EKRAN TALIMATLARI
KOKU DISKI TALIMATLARI
KURULUM
HAVLU VE BATTANİYE ISITICISINI KULLANMA
EN İYİ SONUÇLAR İÇİN İPUÇLARI
BAKIM VE ONARIM
ÜRÜN KAYDI
3
4
5
6
7
8
9
9
9
10
11
11
11
UYARI:
BU ÜRÜNÜ KULLANMADAN ÖNCE TÜM TALİMATLARI,
UYARILARI VE ÖNLEMLERİ DİKKATLE OKUDUĞUNUZDAN
EMİN OLUN.
BUNUN YAPILMAMASI YARALANMANIZA VEYA ÜNİTENİN
HASAR GÖRMESİNE NEDEN OLABİLİR.

www.SereneLifeHome.com
3
Özellikler:
• İki Büyük Banyo Havlusu İçin Mükemmel Boyut
• 2 Büyük Banyo Havlusu veya Kişisel Battaniye Alabilir
• Tek Dokunuşla Basit Kontrol
• Açma/Kapama Düğmesi
• Süre Sonunda Otomatik Olarak Kapanır
• Kapak, Havlu ve Battaniye Isıtıcıyı Doldururken ve Boşaltırken Elleri Serbest Bırakır
• Çift Duvarlı Yalıtımlı Kapak Dokunulduğunda Serin Kalırken Isıyı İçeride Tutar
• Aşırı Isınma Koruması ve Suya Dayanıklı Tasarım
• Dahili Gösterge Işığı
• Havlu Isıtıcı Kovasını Taşımak İçin Uygun
• Güç ve Enerji Tüketimini korumak için tasarlanmıştır
• Havluları, Bornozları, Battaniyeleri veya Diğer Kumaş Eşyaları Isıtabilir
Kutu İçinde Ne Var?
• Havlu Isıtıcı
• Aromaterapi Tableti
• Kurutucu
Teknik Özellikler:
• İnşaat Malzemesi: Paslanmaz Sac
• Güç Kaynağı: 450W
• Güç Çıkışı: 120V AC
• Frekans Tepkisi: 60Hz
• Hacim: 20L
• Süre: 20, 40, 60 dakika
• Güç Kablosu Uzunluğu: 5,91 ft.
• Ağırlık Kapasitesi: 110,2 Lbs.
• Ürün Ağırlığı: 8,1 Lbs.
• Sıcaklık Aralığı: 90°F ila 140°F (32°C ila 135°C) arasında ayarlanabilir
• Ürün Boyutları (U x G x Y): 15,35“ x 8,86” x 18,31” –inç
/ 39 x 22.51 x 46.51 -cm
Kaliforniya Prop 65 Uyarısı
DİKKAT:
Bu ürün, Kaliforniya Eyaleti tarafından kansere, doğum
kusurlarına ve diğer üreme zararlarına neden olduğu bilinen
kurşun ve kadmiyum içerir. Yutmayın.
Daha fazla bilgi için bkz: www.P65warnings.ca.gov

www.SereneLifeHome.com
4
DİKKAT
Ciddi yaralanma riskini azaltmak için lütfen bunun bir oyuncak olmadığını
unutmayın. Çocukların havlu ve battaniye ısıtıcısını çalıştırmasına veya
yakınında oynamasına izin vermeyin.
YANGIN VEYA ELEKTRİK ÇARPMASI RİSKİNİ AZALTMAK İÇİN BU ÜNİTEYİ
YAĞMUR VEYA NEME MARUZ BIRAKMAYIN.
ÖNEMLİ GÜVENLİK TALİMATLARI
ÜNİTE ÇALIŞTIRILMADAN ÖNCE TÜM GÜVENLİK VE KULLANIM TALİMAT-
LARI OKUNMALI, BUNLARA UYULMALI VE TAKİP EDİLMELİDİR.
• SADECE EV KULLANIMI IÇIN
• SADECE YETIŞKINLERIN KULLANIMI IÇIN
• SADECE KURU KUMAŞLI ÜRÜNLER IÇIN
BU TALIMATLARI KAYDEDIN
Eşkenar üçgen içinde ok başlı şimşek sembolü, kullanıcıyı ünitenin
muhafazası içinde elektrik çarpması riski oluşturabilecek
büyüklükte yalıtılmamış “tehlikeli voltaj” bulunduğu konusunda
uyarmak için tasarlanmıştır.
Eşkenar üçgen içindeki ünlem işareti, üniteyle birlikte verilen
literatürde önemli çalıştırma ve bakım (servis) talimatlarının bulun-
duğu konusunda kullanıcıyı uyarmak içindir.

www.SereneLifeHome.com
5
Önemli Güvenlik Talimatları
UYARI:
CİHAZI KULLANIRKEN YANGIN, ELEKTRİK ÇARPMASI VEYA KİŞİLERİN
CİDDİ ŞEKİLDE YARALANMASI RİSKİNİ AZALTMAK İÇİN AŞAĞIDAKİLER
DAHİL TEMEL ÖNLEMLERİ ALIN:
• Cihazı kullanmadan önce tüm talimatları okuyun.
• Cihazı kullandıktan hemen sonra daima şini prizden çekin.
• Cihazı kullanım amacı dışında kullanmayın.
• Cihazı küvete veya lavaboya düşebileceği veya çekilebileceği bir yere koymayın
veya saklamayın.
• Su veya diğer sıvıların içine koymayın veya düşürmeyin.
• Suya düşmüş bir üniteye uzanmayın. Derhal şini çekin.
• Nesnelerin ünitenin içine düşmemesi ve/veya sıvıların dökülmemesi için
dikkatli olunmalıdır.
• Bu ünite şe takılıyken asla gözetimsiz bırakılmamalıdır.
• Bu ünite çocukların veya engelli kişilerin yakınında kullanıldığında yakın
gözetim gereklidir.
• Bu üniteyi bu kılavuzda açıklanan kullanım amacı doğrultusunda kullanın.
• Hasarlı bir kablosu veya şi varsa, düzgün çalışmıyorsa veya düşürülmüşse,
hasar görmüşse veya suya düşmüşse bu üniteyi asla çalıştırmayın.
• Kabloları ısıtılmış yüzeylerden uzak tutun. Kabloyu cihazın dış çevresine
sarmayın veya kablonun bir masa veya tezgah kenarından sarkmasına izin
vermeyin.
• Açık havada kullanmayın.
• Güvenlik şini değiştirmeyin veya bu cihazla uzatma kablosu kullanmayın.
• Voltaj dönüştürücü ile çalıştırmayın.
• Sıcak yüzeylere dokunmayın.
• Yaralanmalara neden olabileceğinden, üretici tarafından önerilmeyen aksesuar
eklerini kullanmayın.
BU TALIMATLARI KAYDEDIN

www.SereneLifeHome.com
6
FCC BİLGİLERİ
DİKKAT: Uyumluluktan sorumlu tarafça açıkça onaylanmayan değişiklikler
veya modikasyonlar kullanıcının ekipmanı çalıştırma yetkisini geçersiz
kılabilir.
Bu cihaz FCC Kuralları Bölüm 15 ile uyumludur.
Çalıştırma aşağıdaki iki koşula tabidir:
1. Bu cihaz zararlı parazitlere neden olmamalıdır.
2. Bu cihaz, istenmeyen çalışmaya neden olabilecek parazitler de dahil olmak
üzere alınan her türlü paraziti kabul etmelidir.
UYARI:
Bu ünitede uyumluluktan sorumlu tarafça açıkça onaylanmayan değişik-
likler veya modikasyonlar kullanıcının ekipmanı çalıştırma yetkisini
geçersiz kılabilir.
Not:
Bu ekipman test edilmiş ve FCC Kuralları Bölüm 15 uyarınca B Sınıfı dijital cihaz
sınırlarına uygun olduğu tespit edilmiştir. Bu sınırlar, bir konut kurulumunda
zararlı parazitlere karşı makul koruma sağlamak üzere tasarlanmıştır. Bu ünite
radyo frekansı enerjisi üretir, kullanır ve yayabilir ve talimatlara uygun olarak
kurulmaz ve kullanılmazsa, radyo iletişiminde zararlı parazite neden olabilir.
Ancak, belirli bir kurulumda parazit oluşmayacağının garantisi yoktur. Bu ekip-
man radyo veya televizyon yayınlarında zararlı parazitlere neden oluyorsa (bu
durum ekipmanın açılıp kapatılmasıyla belirlenebilir), kullanıcının aşağıdaki
önlemlerden birini veya birkaçını alarak paraziti gidermeye çalışması önerilir:
• Alıcı antenin yönünü veya yerini değiştirin.
• Ekipman ve alıcı arasındaki mesafeyi artırın.
• Ekipmanı, alıcının bağlı olduğu devreden farklı bir devre üzerindeki prize
bağlayın.
• Yardım için satıcıya veya deneyimli bir radyo/TV teknisyenine danışın.

www.SereneLifeHome.com
7
PARÇALARIN VE KONTROLLERIN YERI
2
1
5
3
No.
1
2
3
4
5
6
PARÇA ADI
Açma/Kapama Düğmesi
LED Işık
Ayaklar
Koku diski
Kapak
Güç kablosu
4
6
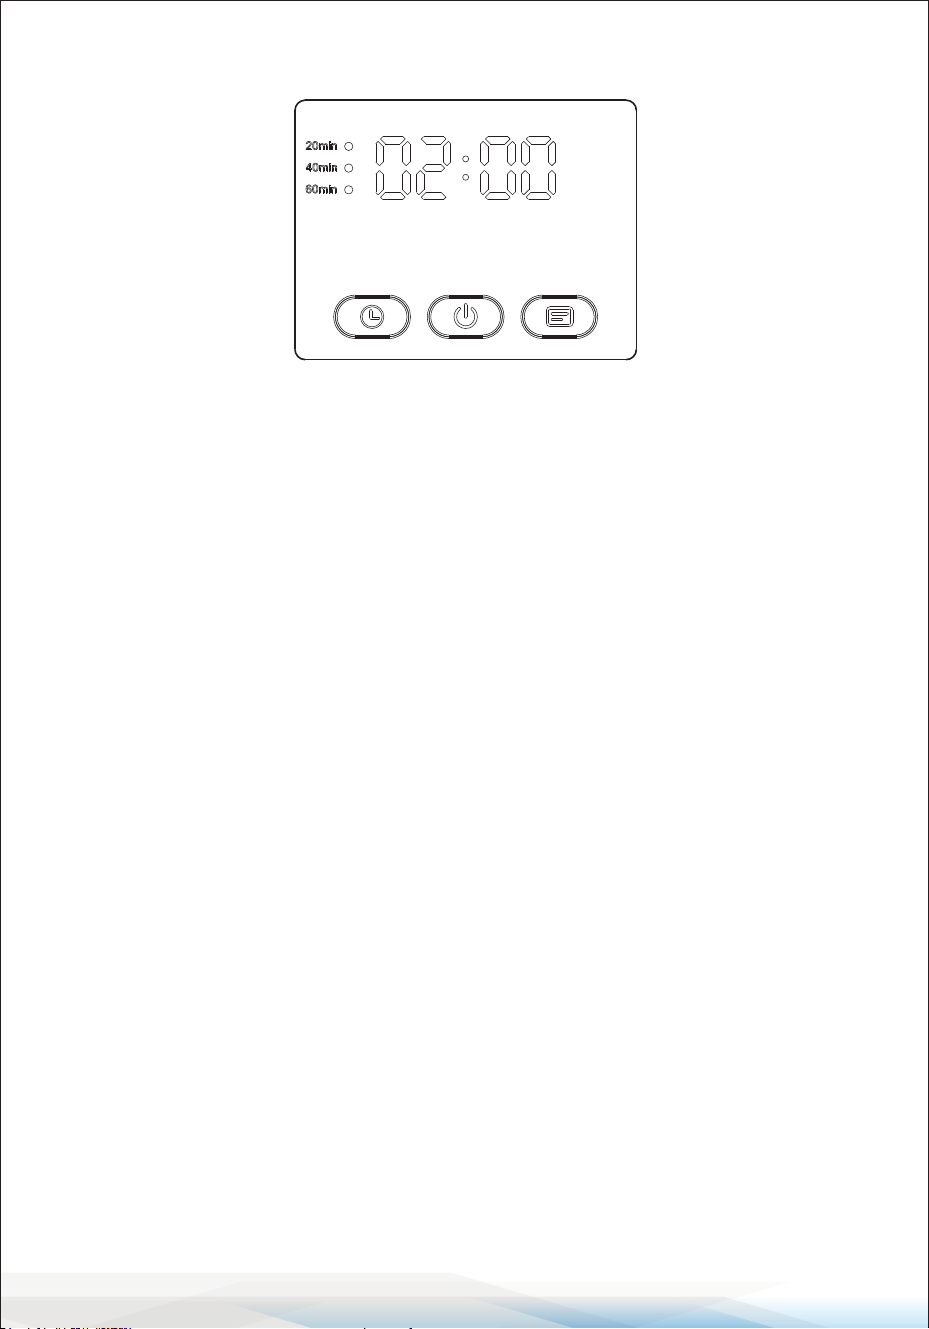
www.SereneLifeHome.com
8
LED EKRAN
1. Bekleme moduna geçmek için 00:00 sembolü 1 dakika boyunca yanıp söner.
2. 'Açık' tuşuna basın. 00:00 yavaşça 5 kez yanıp söner. Herhangi bir işlem
olmadığında, makine çalışmaya başlar. Çalışma süresi seçenekleri 20 dakika,
40 dakika ve 60 dakikadır ve bu sırayla ilerler. Her seferinde 20 dakika eklemek
için 'Zaman' tuşuna basın. Noktanın yanındaki ilgili süre 5 kez yanıp sönecek
tir. Başka bir işlem yapılmazsa, havlu ısıtıcı otomatik olarak başlayacak ve
küçük daire göstergesi yanık kalacaktır. Ekranda geri sayım süresi gösterilir.
Zaman düğmesinin arka plan ışığı yanar.
3. 'Anahtar' tuşuna basın. 00:00 yavaşça yanıp sönerek randevu saatini gösterir.
Sağdaki 'GECİKTİRME/DELAY' tuşuna 30 dakika geciktirmek için bir kez basın;
'GECİKTİRME/ DELAY' ' tuşunun arka planı yanıp söner. İki kez basarak 60
dakika erteleyin. Ekranda randevu saati yanıp sönerek gösterilecektir. 00:00
sembolü yavaşça yanıp sönmeye devam edecek ve başlangıçtan sonra
çalışma süresini ayarlamanıza izin verecektir. Makine varsayılan olarak 20
dakikadır. İkinci kez 40 dakika için ve üçüncü kez 60 dakika için basın. Her
basışta 20 dakika artar (adım 2'deki ile aynı). Ayarlanan süre sona erdiğinde,
ekranda çalışma randevusunun geri sayımı gösterilir ve randevu ışığı yanık
kalır.
4. 'Anahtar/Switch' sembol ışığı kırmızıdır ve çalışma sırasında yüksek bir iç
sıcaklık olduğunu gösterir. Bu, yanma riski nedeniyle dahili metal parçalara
dokunulmaması gerektiğini hatırlatır.

www.SereneLifeHome.com
9
EKRAN TALIMATLARI
1. Randevu ışığı: Randevu seçildiğinde yanıp söner, randevu sırasında sürekli
yanık kalır ve randevu süresinin sonunda söner.
2. Zaman ışığı: Zaman seçilirken yanıp söner, çalışma sırasında yanık kalır ve
çalışma süresinin sonunda söner.
3. Ekran görüntüleme talimatları: İlgili küçük yuvarlak ışık yanıp sönerken 20,
40 ve 60 arasında geçiş yapmak için zaman düğmesine basın. Küçük yuvarlak
ışık çalışma sırasında yanık kalır ve iş tamamlandığında söner. Bir randevu
seçmediğinizde, ZAMAN öğesini seçin. Ekran saati gösterecek ve çalışmadığı
zaman yanıp sönecektir. Normal çalışma sırasında, geri sayarken sürekli AÇIK
kalır. Bir randevu oluşturmak için önce randevuyu seçin ve ardından saati
seçin. Randevu üzerine tıkladığınızda, ekran randevu saatini ilk başta yanıp
sönerek gösterecektir. Onaydan sonra ışık açık kalır ve randevu saatini geri
sayar. Randevu süresi sona erdiğinde, randevu ışığı söner, zaman ışığı yanık
kalır ve ekranda seçilen ısıtma zamanına geri sayım görüntülenir.
KOKU DISKI TALIMATLARI
Bu koku diski ayrıca havluları ısıtırken aromaterapi tabletleri veya uçucu
yağlar kullanmak isteyen bazı kullanıcılar için tasarlanmıştır.
1. Koku Diskini kapalı plastik poşetinden çıkarın.
2. Kapağın alt tarafında bulunan Koku Diski Tutucusunun içine kaydırın.
KURULUM
1. Kapağı açın ve ambalaj içeriğini çıkarın.
2. Havlu Isıtıcıyı kuru, düz ve sert bir yüzeye yerleştirin.
3. Fişi standart bir 120V prize takın.
NOT: Bu Havlu ve Battaniye Isıtıcı 3 uçlu topraklama şine sahiptir. Elektrik
çarpması riskini azaltmak için, güç kablosunu kolayca erişilebilen topraklı bir
elektrik prizine takın.

www.SereneLifeHome.com
10
HAVLU VE BATTANİYE ISITICISINI KULLANMA
Havlu ve Battaniye Isıtıcı, iki büyük pamuklu banyo havlusunu veya kişisel
bir battaniyeyi rahatça ısıtabilir.
1. Güç kablosunu bir elektrik prizine takın.
2. Kapağı açın ve içine SADECE KURU havlu(lar) veya battaniye yerleştirin.
NOT: Havlu ısıtıcısının içine nemli veya ıslak havluların yerleştirilmesi üniteye
zarar verebilir ve ciddi güvenlik riskleri oluşturabilir.
3. Kapağı kapatın.
4. AÇMA/KAPAMA DÜĞMESİNE basın.
5. Lütfen ürünün iç duvarına dokunmayın; aksi takdirde haşlanma riski vardır.
Varilin sıcaklığı yaklaşık 5 dakika içinde 130+/- 8°C/46,4°F'ye ulaşabilir ve bu
sıcaklığı yaklaşık 15 dakika boyunca koruyabilir. Bu noktada, havlunun sıcak
lığı 50°C/122°F'nin üzerine çıkabilir, bu da insan teması için nispeten sıcak ve
rahat bir sıcaklıktır. Havlu kovası, havlu sıcaklığını 55°C/131°F civarında tutmak
için dolaylı olarak ısıtılır. Çalışma gösterge ışığı, makine çalıştırıldıktan 80
dakika sonra sönerek ürünün bir çalışma döngüsünü tamamladığını gösterir.
6. 30 saniyelik hızlı ısıtma ile iki banyo havlusunu ısıtmak için genellikle 15 dakika
yeterlidir.
7. Havlu(lar)ı veya battaniyeyi çıkarmak için KAPAĞI açın. Ürünün kapağını açmak
için kapağın tutma
Not: Üniteye zarar vermekten kaçınmak için, öğeleri çıkarırken kapağı
yavaşça kaldırın.
8. Isıtma döngüsünü durdurmak veya başlatmak için istediğiniz zaman
AÇMA/KAPAMA DÜĞMESİNE basın.

www.SereneLifeHome.com
11
Kayıt Olun
Ürün SereneLife'ı seçtiğiniz için teşekkür ederiz. Ürününüzü
kaydettirerek, özel garantimizin ve kişiselleştirilmiş müşteri
desteğimizin tüm avantajlarından yararlanmanızı sağlarsınız.
Uzman desteğine erişmek ve SereneLife satın alma işleminizi
mükemmel durumda tutmak için formu doldurun.
Serenelifehome.com/
register
EN İYİ SONUÇLAR İÇİN İPUÇLARI
1. Pamuk veya pamuk karışımı havlu veya kumaşlar kullanın.
2. Hızlı ve eşit ısıtma için 1 havluyu Havlu & Battaniye Isıtıcıya gevşek bir şekilde
yerleştirin. Sıkıca sarılmış veya katlanmış havluların iyice ısınması daha uzun
sürecektir. İki havlunun ısınması bir havlunun ısınmasından daha uzun sürecek-
tir.
3. Sadece KURU kumaşlarla kullanın.
Not: NEMLI VEYA ISLAK PARÇACIKLARLA KULLANMAYIN
4. Yüksek ısıya dayanamayan hassas kumaşları kullanmaktan kaçının.
Soğuk ütü kullanılması gerektiğini belirten herhangi bir kumaş, havlu ısıtıcının
ısısına dayanamayabilir, bu da kumaşa ve Havlu & Battaniye Isıtıcıya zarar
verebilir.r.
5. Isıtma döngüsü başladıktan sonra kapağı kapalı tutun.
Bu, ısının kaçmasını önleyecektir. Döngünün ortasında kapağın açılması daha
yavaş ısıtma sürelerine neden olabilir.
Not: Kapakta ve ünitenin iç kısmında yoğuşma olması normaldir.
BAKIM VE ONARIM
TEMİZLEMEDEN ÖNCE GÜÇ KABLOSUNU ELEKTRİK PRİZİNDEN ÇIKARIN. KURU BİR
BEZLE SADECE ÜNİTE DOKUNULABİLECEK KADAR SOĞUK OLDUĞUNDA SİLİN.
Italian German Polish Turkish Dutch
Sorulariniz veya yorumlariniz var mi?
Yardim etmek için buradayiz!
Phone: 1.718.535.1800
Serenelifehome.com/ContactUs
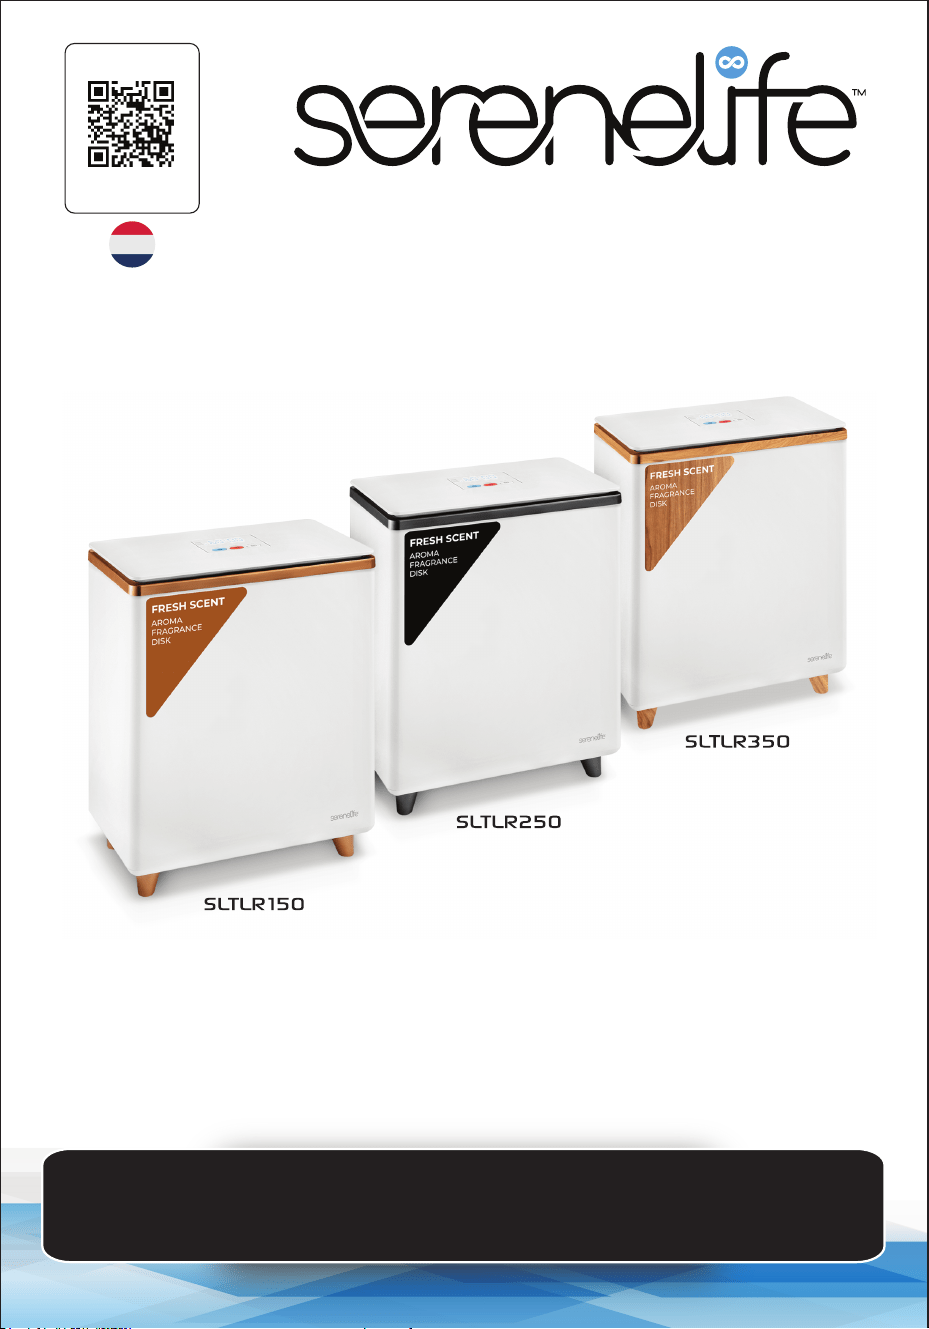
SLTLR150 - SLTLR250 - SLTLR350
GEBRUIKERSHANDLEIDING
Rechthoekige Handdoekverwarmer Emmer
DUT
Bezoek onze
website
SCAN MIJ
serenelifehome.com
www.SereneLifeHome.com
2
INHOUDSOPGAVE
KENMERKEN & TECHNISCHE SPECIFICATIES
VOORZICHTIGHEID
BELANGRIJKE VEILIGHEIDSINSTRUCTIES
FCC-INFORMATIE
LOCATIE VAN ONDERDELEN EN BEDIENINGEN
LED-SCHERM
WEERGAVE-INSTRUCTIES
GEBRUIKSAANWIJZING GEURDISK
INSTALLATIE
HET GEBRUIK VAN DE HANDDOEK- & DEKENVERWARMER
TIPS VOOR HET BESTE RESULTAAT
ONDERHOUD EN VERZORGING
PRODUCTREGISTRATIE
3
4
5
6
7
8
9
9
9
10
11
11
11
WAARSCHUWING:
LEES ALLE INSTRUCTIES, WAARSCHUWINGEN EN
VOORZORGSMAATREGELEN ZORGVULDIG DOOR
VOORDAT JE DIT PRODUCT GEBRUIKT.
HET NIET VOLGEN VAN DEZE INSTRUCTIES KAN LEIDEN TOT
LETSEL OF SCHADE AAN HET APPARAAT.

www.SereneLifeHome.com
3
Kenmerken:
•
Perfect formaat voor twee grote badhanddoeken
• Geschikt voor 2 grote badhanddoeken of een persoonlijke plaid
• Eenvoudige bediening met één druk op de knop
• Aan/uit-knop
• Schakelt automatisch uit na ingestelde tijdsduur
• Deksel houdt handen vrij bij het vullen en legen van de handdoek- en deken-
verwarmer
• Dubbelwandig geïsoleerd deksel houdt warmte vast terwijl het koel blijft
aanvoelen
• Oververhittingsbeveiliging en waterbestendig ontwerp
• Ingebouwd indicatielampje
• Handig te vervoeren handdoekverwarmer-emmer
• Ontworpen om stroom- en energieverbruik te besparen
• Kan handdoeken, badjassen, dekens of andere stoen items verwarmen
Wat zit er in de doos:
•
Handdoekverwarmer
• Aromatherapie-tablet
• Vochtabsorberend middel
Technische specificaties:
•
Constructiemateriaal: Roestvrij staal
• Vermogen: 450W
• Stroomvoorziening: 120V AC
• Frequentierespons: 60Hz
• Inhoud: 20L
• Timerinstellingen: 20, 40, 60 minuten
• Lengte stroomkabel: 1,8 meter
• Gewichtscapaciteit: 110,2 lbs.
• Gewicht apparaat: 3,7 kg
• Temperatuurbereik: Instelbaar van 32°C tot 57°C
• Afmetingen (L x B x H):
39 cm x 22,5 cm x 46,5 cm
California Proposition 65 Waarschuwing
WAARSCHUWING:
Dit product bevat Cadmium, een stof die volgens de staat
Californië kanker, geboorteafwijkingen of andere schade aan
de voortplanting kan veroorzaken. Niet inslikken.
Voor meer informatie: www.P65warnings.ca.gov

www.SereneLifeHome.com
4
LET OP
Om het risico op ernstig letsel te verminderen, houd er rekening mee dat
dit geen speelgoed is.
Laat kinderen niet met of in de buurt van de handdoek- en dekenverwarm-
er spelen.
OM HET RISICO OP BRAND OF ELEKTRISCHE SCHOKKEN TE VERKLEINEN,
STEL DIT APPARAAT NIET BLOOT AAN REGEN OF VOCHT.
BELANGRIJKE VEILIGHEIDSINSTRUCTIES
ALLE VEILIGHEIDS- EN BEDIENINGSINSTRUCTIES MOETEN WORDEN
GELEZEN, OPGEVOLGD EN GEHANDHAAFD VOORDAT HET APPARAAT
WORDT GEBRUIKT.
• ALLEEN VOOR HUISHOUDELIJK GEBRUIK
• ALLEEN VOOR VOLWASSENEN
• ALLEEN VOOR DROGE STOFFEN
BEWAAR DEZE INSTRUCTIES
Het bliksemsymbool met een pijl in een driehoek waarschuwt voor
de aanwezigheid van on geïsoleerde “gevaarlijke spanning” in de
behuizing van het apparaat die voldoende kan zijn om een
elektrische schok te veroorzaken.
Het uitroepteken in een driehoek waarschuwt voor de aanwezig-
heid van belangrijke bedienings- en onderhoudsinstructies in de
documentatie die bij het apparaat hoort.

www.SereneLifeHome.com
5
Belangrijke veiligheidsinstructies
WAARSCHUWING:
OM HET RISICO OP BRAND, ELEKTRISCHE SCHOKKEN OF ERNSTIG LETSEL
TE VERKLEINEN, VOLG DEZE BASISVOORZORGSMAATREGELEN BIJ HET
GEBRUIK VAN DIT APPARAAT:
• Lees alle instructies zorgvuldig door voordat je het apparaat gebruikt.
• Haal de stekker van het apparaat na gebruik altijd uit het stopcontact.
• Gebruik het apparaat alleen waarvoor het bedoeld is.
• Plaats of bewaar het apparaat niet op een plek waar het in een bad of goot-
steen kan vallen of erin kan worden getrokken.
• Plaats het apparaat niet in water of andere vloeistoen en dompel het niet
onder.
• Raak het apparaat niet aan als het in water is gevallen. Haal onmiddellijk de
stekker uit het stopcontact.
• Zorg ervoor dat er geen voorwerpen in het apparaat vallen en dat er geen
vloeistoen op het apparaat worden gemorst.
• Laat het apparaat nooit onbeheerd achter terwijl het is ingeschakeld.
• Houd toezicht bij gebruik in de buurt van kinderen of personen met een
beperking.
• Gebruik het apparaat alleen zoals beschreven in deze handleiding.
• Gebruik het apparaat niet als het snoer of de stekker beschadigd is, als het niet
goed werkt of als het is gevallen, beschadigd of in water is ondergedompeld.
• Houd snoeren uit de buurt van hete oppervlakken. Wikkel het snoer niet rond
het apparaat en laat het niet over een tafel- of aanrechtblad hangen.
• Gebruik het apparaat niet buitenshuis.
• Verwijder de veiligheidsplug niet en gebruik geen verlengsnoer met dit appa
raat.
• Gebruik het apparaat niet met een spanningsomvormer.
• Raak geen hete oppervlakken aan.
• Gebruik geen accessoires die niet door de fabrikant worden aanbevolen,
omdat dit letsel kan veroorzaken.
BEWAAR DEZE INSTRUCTIES

www.SereneLifeHome.com
6
FCC-INFORMATIE
LET OP: Wijzigingen of aanpassingen die niet uitdrukkelijk zijn goedgekeurd
door de verantwoordelijke partij voor naleving kunnen de bevoegdheid van
de gebruiker om het apparaat te gebruiken ongeldig maken.
Dit apparaat voldoet aan deel 15 van de FCC-regels.
Het gebruik is onderworpen aan de volgende twee voorwaarden:
1. Dit apparaat mag geen schadelijke interferentie veroorzaken.
2. Dit apparaat moet ontvangen interferentie accepteren, inclusief interferentie
die ongewenste werking kan veroorzaken. .
WAARSCHUWING:
Wijzigingen of aanpassingen aan dit apparaat die niet uitdrukkelijk zijn
goedgekeurd door de verantwoordelijke partij voor naleving kunnen de
bevoegdheid van de gebruiker om het apparaat te gebruiken ongeldig
maken.
Opmerking:
Dit apparaat is getest en voldoet aan de limieten voor een Class B digitaal
apparaat, conform deel 15 van de FCC-regels. Deze limieten zijn ontworpen om
redelijke bescherming te bieden tegen schadelijke interferentie in een woonom-
geving. Dit apparaat genereert, gebruikt en kan radiofrequentie-energie
uitstralen en kan, indien niet geïnstalleerd en gebruikt volgens de instructies,
schadelijke interferentie veroorzaken met radiocommunicatie. Er is echter geen
garantie dat interferentie in een specieke installatie niet zal optreden. Als dit
apparaat schadelijke interferentie veroorzaakt bij radio- of televisieontvangst,
wat kan worden vastgesteld door het apparaat uit en weer aan te zetten, wordt
de gebruiker aangemoedigd de interferentie te corrigeren door een of meer van
de volgende maatregelen:
• De ontvangstantenne opnieuw oriënteren of verplaatsen.
• De afstand tussen het apparaat en de ontvanger vergroten.
• Het apparaat aansluiten op een stopcontact op een ander circuit dan
waarop de ontvanger is aangesloten.
• De dealer of een ervaren radio-/tv-technicus raadplegen voor hulp.

www.SereneLifeHome.com
7
LOCATIE VAN ONDERDELEN EN BEDIENINGEN
2
1
5
3
Nr.
1
2
3
4
5
6
ONDERDEELNAAM
Aan/uit-knop
LED-lampje
Voetjes
Geurschijf
Deksel
Stroomkabel
4
6

www.SereneLifeHome.com
8
LED-SCHERM
1. Het symbool 00:00 knippert gedurende 1 minuut om naar de stand-bymodus te
dimmen.
2. Druk op de 'Aan'-knop. 00:00 knippert langzaam 5 keer. Als er geen bediening
plaatsvindt, begint het apparaat met werken.
De beschikbare werktijden zijn 20 minuten, 40 minuten en 60 minuten, die in deze
volgorde worden doorlopen.
Druk op de 'Tijd'-knop om telkens 20 minuten toe te voegen.
De bijbehorende tijd naast de stip knippert 5 keer.
Als er geen verdere actie wordt ondernomen, start de handdoekverwarmer automa
tisch en blijft de kleine cirkelindicator branden.
Het display toont de aooptijd en de achtergrondverlichting van de tijdknop wordt
verlicht.
3. Druk op de 'Schakel'-knop. 00:00 knippert langzaam, wat de afspraakinstelling
aangeeft.
Druk één keer op de rechter 'VERTRAGING'-knop om een vertraging van 30 minuten
in te stellen; de achtergrond van de 'VERTRAGING'-knop knippert.
Druk tweemaal om een vertraging van 60 minuten in te stellen. Het scherm toont de
afspraakinstelling met een knipperend symbool.
Het 00:00-symbool blijft langzaam knipperen, zodat je de werktijd na de start kunt
instellen.
De standaard instelling is 20 minuten. Druk een tweede keer voor 40 minuten en een
derde keer voor 60 minuten. Elke keer wordt met 20 minuten verhoogd (zoals in stap
2).
Wanneer de ingestelde tijd voorbij is, toont het scherm de afteltijd van de actieve
werking en blijft de afspraakinstelling-indicator aan.
4. Het 'Schakel'-symbool licht rood op, wat aangeeft dat het apparaat intern een hoge
temperatuur bereikt.
Dit dient als een herinnering om de interne metalen onderdelen niet aan te raken om
brandwonden te voorkomen.

www.SereneLifeHome.com
9
WEERGAVE-INSTRUCTIES
1. Afspraakindicator: Knippert wanneer een afspraak wordt geselecteerd, blijft
continu branden tijdens de afspraak en schakelt uit na aoop van de afspraak.
2. Tijdindicator: Knippert bij het selecteren van de tijd, blijft aan tijdens de
werking en schakelt uit na aoop van de werkperiode.
3. Schermweergave-instructies: Druk op de Tijd-knop om te schakelen tussen
20, 40 en 60 minuten, waarbij het bijbehorende kleine ronde licht knippert.
Het kleine ronde licht blijft branden tijdens het gebruik en schakelt uit wan
neer het werk is voltooid.
Als er geen afspraak wordt geselecteerd, kies dan TIJD. Het scherm toont de
ingestelde tijd en knippert wanneer niet in gebruik. Tijdens normaal gebruik
blijft het AAN terwijl het aftelt.
Om een afspraak in te stellen, selecteer eerst de afspraak en kies vervolgens
de tijd.
Klik op de afspraak, het scherm knippert eerst, en na bevestiging blijft het licht
continu aan en telt het af.
Zodra de afspraak eindigt, schakelt de afspraakindicator uit, blijft de tijdindica
tor aan, en toont het scherm de resterende verwarmtijd.
INSTRUCTIES VOOR DE GEURDISK
Deze geurdisks zijn ontworpen voor gebruikers die graag aromatherapie-tab-
letten of essentiële oliën gebruiken bij het verwarmen van handdoeken.
1. Verwijder de geurdiskschijf uit de verzegelde plastic verpakking.
2. Schuif deze in de geurdiskschijfhouder aan de onderkant van het deksel.
INSTALLATIE
1. Open het deksel en verwijder alle verpakkingsmaterialen.
2. Plaats de handdoekverwarmer op een droog, vlak en hard oppervlak.
3. Steek de stekker in een standaard 120V-stopcontact.
Opmerking: Deze handdoek- en dekenverwarmer heeft een 3-pins geaarde
stekker. Om het risico op elektrische schokken te verkleinen, sluit je het netsnoer
aan op een geaard stopcontact dat gemakkelijk toegankelijk is.

www.SereneLifeHome.com
10
GEBRUIK VAN DE HANDDOEK- & DEKENVERWARMER
De handdoek- & dekenverwarmer kan comfortabel twee grote katoenen
badhanddoeken of een persoonlijke eece deken verwarmen.
1. Steek het netsnoer in een stopcontact.
2. Open het deksel en plaats ALLEEN DROGE handdoeken of een deken in de
verwarmer.
LET OP: Het plaatsen van vochtige of natte handdoeken in de handdoekverwarm
er kan schade aan het apparaat veroorzaken en ernstige veiligheidsrisi
co’s opleveren.
3. Sluit het deksel.
4. Druk op de AAN/UIT-KNOP.
5. Raak de binnenwand van het product niet aan om brandwonden te voorkomen.
De temperatuur van de binnenkant van de emmer kan 130°C ± 8°C (46,4°F)
bereiken in ongeveer 5 minuten en deze temperatuur ongeveer 15 minuten
behouden.
Op dit punt kan de temperatuur van de handdoek meer dan 50°C (122°F) bereik
en, wat een relatief warme en comfortabele temperatuur is voor huidcontact.
De emmer wordt indirect verwarmd om de handdoektemperatuur rond 55°C
(131°F) te houden.
De indicatielamp gaat uit 80 minuten na het starten van het apparaat, wat
aangeeft dat een volledige verwarmingscyclus is voltooid.
6. Met een opwarmtijd van 30 seconden is 15 minuten doorgaans voldoende om
twee grote handdoeken te verwarmen.
7. Open het deksel om de handdoek(en) of deken te verwijderen.
Druk omlaag op de handgreep en trek vervolgens omhoog om het deksel te
openen.
LET OP: Til het deksel voorzichtig op bij het verwijderen van items om schade aan
het apparaat te voorkomen.
8. Druk op de AAN/UIT-KNOP om het verwarmingsproces op elk gewenst moment
te stoppen of opnieuw te starten.

www.SereneLifeHome.com
11
Product registreren
Bedankt voor je keuze voor SereneLife. Door je product te
registreren, zorg je ervoor dat je volledig proteert van de
exclusieve garantie en gepersonaliseerde klantenservice.
Voltooi de registratie om toegang te krijgen tot klantenon-
dersteuning en je SereneLife-product in perfecte staat te
houden.
Serenelifehome.com/
register
TIPS VOOR HET BESTE RESULTAAT
1. Gebruik katoenen of katoenen badhanddoeken of stoen.
2. Voor snelle en gelijkmatige verwarming, plaats één handdoek losjes in de hand
doek- & dekenverwarmer.
Strak opgerolde of gevouwen handdoeken zullen langer nodig hebben om
volledig te verwarmen.
Twee handdoeken zullen langer nodig hebben om op te warmen dan één.
3. Gebruik alleen DROGE stoen.
Let op: GEBRUIK GEEN VOCHTIGE OF NATTE STOFFEN OF DEELTJES.
4. Vermijd het gebruik van delicate stoen die niet bestand zijn tegen hoge
temperaturen.
Stoen waarbij een koude strijkstand vereist is, kunnen mogelijk de warmte van
de handdoekverwarmer niet verdragen, wat schade aan de stof en het apparaat
kan veroorzaken.
5. Zodra de verwarmingscyclus is begonnen, houd het deksel gesloten.
Dit voorkomt warmteverlies.
Het openen van het deksel halverwege de cyclus kan de verwarmingstijd vertra
gen.
Let op: Condensatie op het deksel en de binnenkant van het apparaat is
normaal.
ONDERHOUD EN REINIGING
HAAL DE STEKKER UIT HET STOPCONTACT VOORDAT JE HET APPARAAT SCHOON-
MAAKT.
MAAK HET APPARAAT ALLEEN SCHOON MET EEN DROGE DOEK WANNEER HET AFGE-
KOELD IS.
Italian German Polish Turkish Dutch
Vragen of opmerkingen?
We staan voor je klaar!
Telefoon: 1.718.535.1800
Serenelifehome.com/ContactUs

