
OWNER’S
MANUAL
;
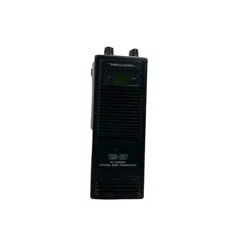
TRC-207
40-Channel
Citizens
Band
Walkie-Talkie
Please
read
before
using
this
equipment
Wb
207
40
CHANNEL
CITIZENS
BAND
TRANSCEIVER
Cat.
Ke
21-1645
REALISTIC.

FEATURES
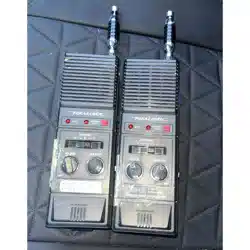
Your
Realistic
TRC-207
40-Channel
Citizens
Band
Walkie-Talkie
is
a
porta-
ble,
easy-to-use,
two-way
radio
that
you
can
carry
almost
anywhere.
It
is
skillful-
ly
constructed
to
give
you
reliable
com-
munication
for
many
different
applica-
tions.
The
TRC-207
is
ideal
for
around
the
house,
in
your
car
or
boat,
on
hunting
and
camping
trips,
or
at
your
business
for
security
patrols
or
warehouse
communications.
Automatic
Modulation
Limiter—
prevents
over-modulation
to
ensure
a
clear
sound.
Automatic
Noise
Limiter—reduces
noise
caused
by
nearby
electrical
equip-
ment
such
as
motors
or
automotive
ig-
nition
systems.
Transmit
Power
Selection—lets
you
adjust
the
output
power
to
save
battery
power
during
short-range
transmissions.
Power-Saver
Display—saves
battery
power
by
dimming
the
display
after
showing
the
selected
channel.
BATT
(Battery
Low)
Indicator—lights
to
show
you
when
it
is
time
to
replace
or
recharge
the
batteries.
FCC
License
Not
Required
in
the
USA—so
you
can
operate
your
walkie-
talkie
in
the
USA
without
an
FCC
license.
Note:
You
are
required
to
know
Part
95
of
FCC
Rules.
This
information
applies
to
the
operation
of
a
Class
D
citizen’s
band
radio.
A
copy
of
Part
95
is
en-
closed
with
your
walkie-talkie.
For
your
permanent
records,
we
urge
you
to
record
the
serial
number
of
your
walkie-talkie
in
the
space
provided
be-
low.
The
serial
number
is
printed
on
the
back
panel
of
the
walkie-talkie.
Serial
Number
©
1989
Tandy
Corporation.
All
Rights
Reserved.
Realistic
and
Radio
Shack
are
registered
trademarks
of
Tandy
Corporation.
NO

CONTROL
LOCATIONS
TX
POWER
HIGH/LOW
Switch
Antenna
Connector
eer
—f2
=
OFF/VOLUME
Control
Te:
©
:
re
SQUELCH
Control
CHANNEL
DOWN/UP
Buttons
BATT
(Battery
low)
Indicator
TX
(Transmit)
Indicator
eee
ase
e'
EB
coe
es
BH
ee ee
eee
se
:
Channel
Display
peice.
Speaker
il
eee
PUSH
TO
TALK
Button
|
CHARGER
Jack
Vib
=
207
40
CHANNEL
CITIZENS
BAND
TRANSCEIVER
6
|
POWER
Jack
oS
“eh
ANT
(Antenna)
Jack
MICROPHONE
Battery
Compartment
Antenna
Hand
Strap

PREPARATION
FOR
USE
POWER
SOURCES
You
can
power
your
walkie-talkie
from
any
of
the
following
three
sources:
e
Internal
batteries
e
Your
vehicle’s
battery
using
the
sup-
plied
12-volt
DC
power
cord
e
A
standard
AC
outlet
(using
an
op-
tional
12-volt
DC
power
supply)
installing/Replacing
Batteries
Your
walkie-talkie
uses
eight
AA
batter-
ies
and
the
two
supplied
dummy
batter-
ies,
or
ten
nickel-cadmium
batteries.
For
the
longest
operation
and
best
perfor-
mance,
we
recommend
alkaline
batter-
ies
(Radio
Shack
Cat.
No.
23-552)
or
rechargeable
nickel-cadmium
batteries
(Cat.
No.
23-125).
If
the
BATT
(battery
low)
indicator
lights,
replace
or
recharge
your
walkie-talkie’s
batteries.
1.
Remove
the
battery
compartment
cover
by
sliding
it
in
the
direction
of
the
arrow.
Battery
Compartment
Cover
2.
Remove
and
dispose
of
any
old
non-rechar
geable
batteries
if
neces-
sary.
Then,
install
either
eight
fresh
non-rechargeable
batteries
and
the
two
supplied
dummy
batteries
or
ten
nickel-cadmium
batteries.
Cautions:
e
Be
sure
to
install
the
batteries
accord-
ing
to
the
polarity
symbols
(+
and—)
marked
on
the
batteries
installation
label.
Improper
installation
(incorrect
polarity)
might
damage
the
walkie-
talkie.
7
e
Always
replace
all
the
batteries.
Never
mix
new
and
old
batteries
in
the
walkie-talkie.
e
Never
mix
rechargeable
and
non-
rechargeable
batteries.
3.
Replace
the
battery
compartment
cover.
Battery
Compartment

a
Charging
Nickel-Cadmium
Batteries
Your
walkie-talkie’s
CHARGER
jack
is
designed
for
use
with
Radio
Shack’s
walkie-talkie
nickel-cadmium
battery
charger
(Cat.
No.
21-516).
Cautions:
e
Use
only
Radio
Shack’s
battery
charg-
er
(Cat.
No.
21-516)
with
the
walkie-
talkie’s
CHARGER
jack.
Using
a
different
charger
to
charge
the
nickel-
cadmium
batteries
might
damage
your
walkie-talkie.
e
Do
not
connect
the
battery
charger
to
the
walkie-talkie’s
POWER
jack.
Do-
ing
so
might
damage
the
charger.
—
eDo
not
connect
anything
to
the
CHARGER
jack
when
you
have
in-
stalled
non-rechargeable
batteries.
Doing
so
might
damage
your
walkie-talkie.
New
nickel-cadmium
batteries
come
ful-
ly
discharged.
To
charge
nickel-
cadmium
batteries,
turn
off
the
walkie-
talkie’s
power
and
connect
the
charger
to
the
CHARGER
jack.
It
takes
16
to
18
hours
to
charge
fully
discharged
batter-
ies.
You
cannot
operate
the
walkie-talkie
while
you
charge
batteries.
Warning:
Never
try
to
recharge
non-
rechargeable
batteries.
They
become
very
hot
and
might
explode.
Charging
Hint:
Nickel-cadmium
batteries
last
longer
.
and
deliver
more
power
if
you
occasion-
ally
let
them
discharge
completely.
To
do
so,
simply
use
the
walkie-talkie
until
the
BATT
indicator
lights.
Then,
fully
recharge
the
batteries.
If
you
do
not
let
nickel-cadmium
batteries
discharge,
they
lose
the
ability
to
use
their
full
pow-
er
capacity.
Using
AC
Power
You
can
power
the
walkie-talkie
from
AC
power
using
an
optional
12-volt
pow-
er
supply
(Cat.
No.
22-120).
Caution:
Using
a
different
power
sup-
ply
might
damage
your
transceiver
or
the
power
supply.
1.
Make
a
power
cable,
using
a
3.5
mm
power
connector
plug
(available
at
your
local
Radio
Shack
store).
Be
sure
to
wire
the
plug
with
the
tip
positive.
2.
Connect
the
leads
from
the
plug
to
the
+
and
—
terminals
on
the
power
supply.
3.
Turn
on
the
power
supply
and
use
a
voltmeter
to
be
sure
that
you
have
correctly
wired
the
plug.
Then,
turn
off
the
power
supply.
4.
Insert
the
plug
into
the
walkie-talkie’s
POWER
jack.
Caution:
Do
not
connect
this
power
supply
to
the
CHARGER
jack.
Doing
so
might
damage
the
walkie-talkie.
5.
Turn
on
the
power
supply.
6.
When
you
finish
using
AC
power,
turn
off
the
power
supply.
Then,
dis-
connect
the
power
supply’s
plug
from
the
POWER
jack.

Using
Your
Vehicle’s
Battery
You
can
power
your
walkie-talkie
from
your
vehicle’s
cigarette
lighter
socket,
provided
your
vehicle
has
a
12-volt,
negative-ground
electrical
system.
Use
the
supplied
12-volt
DC
power
cord.
Caution:
Using
a
different
power
cord
might
damage
your
walkie-talkie
or
the
power
cord.
1.
Insert
the
cord’s
barrel
plug
into
the
walkie-talkie’s
POWER
jack.
Caution:
Do
not
insert
the
plug
into
the
CHARGER
jack.
Doing
so
might
damage
the
walkie-talkie.
2.
Plug
the
other
end
of
the
cord
into
your
vehicle’s
cigarette
lighter
socket.
Note:
If
the
walkie-talkie
does
not
oper-
ate
properly
when
you
use
the
lighter
cord,
unplug
the
cord
from
the
lighter
socket
and
clean
the
socket
to
remove
ashes
and
other
debris.
If
your
walkie-
talkie
still
does
not
work,
check
the
fuse
in
the
power
cord
and
replace
it
if
necessary.
6
3.
When
you
finish
using
the
power
cord,
disconnect
it
from
the
cigarette
lighter
socket.
Then,
disconnect
the
cord
from your
walkie-talkie.
CONNECTING
AN
ANTENNA
Your
walkie-talkie
includes
an
efficient
rubber
antenna
that
is
ideal
for
most
ap-
plications.
Simply
screw
the
antenna
into
the
walkie-talkie’s
antenna
socket.
For
mobile
or
base-station
applications,
you
might
want
to
connect
a
more
effi-
cient
external
mobile
or
outdoor
base
antenna
to
your
walkie-talkie’s
ANTEN-
NA
jack.
This
connection
requires
a
coaxial
plug
adapter.
Your
local
Radio
Shack
store
sells
the
proper
adapter
and
a
variety
of
external
antennas
for
your
walkie-talkie.
Warning:
When
installing
or
remov-
ing
base
station
CB
antennas,
use
ex-
treme
caution.
If
the
antenna
starts
to
fall,
let
it
go!
It
might
contact
over-
head
power
lines.
If
the
antenna
is
touching
a
power
line,
contact
with
the
antenna,
mast,
cable,
or
guy
wires
can
cause
electrocution
and
death!
Call
the
power
company
to
re-
move
the
antenna.
Do
not
attempt
to
remove
it
yourself.
Caution:
Never
try
to
transmit
without
an
antenna.
You
might
damage
the
walkie-talkie.

OPERATION
Follow
these
steps
to
operate
your
walkie-talkie.
1.
Turn
the
SQUELCH
control
fully
counterclockwise.
Then,
turn
on
the
power
by
rotating
the
OFF/VOLUME
control
clockwise.
The
current
chan-
nel
appears
on
the
display
and
you
can
hear
static.
2.
Use
the
CHANNEL
[UP]/[DOWN]
buttons
to
select
the
desired
channel.
Note:
If
you
press
CHANNEL
[UP]
from
Channel
40,
the
channel
selector
“loops’”’
to
Channel
1.
If
you
press
CHANNEL
[DOWN]
from
Channel
1,
the
channel
selector
loops
to
Channel
40.
.
Set
the
TX
PWR
switch
to
HIGH
or
|
LOW.
For
transmitting
to
a
nearby
walkie-talkie,
set
the
switch
to
LOW.
This
conserves
battery
power
by
transmitting
at
a
low
power
level.
If
|
the
other
walkie-talkie
is
farther
away,
or
if
the
person
using
it
hears
exces-
sive
noise,
set
the
switch
to
HIGH.
.
TO
transmit
a
message,
press
and
hold
down
[PUSH
TO
TALK].
The
red
TX
indicator
lights.
Then,
hold
the
|
walkie-talkie’s
microphone
about
3
|
inches
from
your
mouth
and
speak
slowly
and
clearly
in
a
normal
tone
of
voice.
|
.
Toreceive
a
message,
release
[PUSH
TO
TALK].
HIGH
iii
LOW
<i
Yee

.
Adjust
the
VOLUME
control
for
a
|
comfortable
listening
level.
SQUEL(
Pt
e@
i)
@
MIN
oe)
HIGH
LOW
SQUELCH
.
Adjust
the
SQUELCH
control
to
cut
out
the
background
noise
between
transmissions.
To
do
so,
turn
the
SQUELCH
control
clockwise
until
the
static
stops.
The
display
quickly
fades.
See
‘‘Power-Saver
Display.”’
Note:
Do
not
turn
the
SQUELCH
con-
trol
too
far
clockwise
because
you
might
not
be
able
to
hear
weak
signals.
Power-Saver
Display
If
you
keep
the
SQUELCH
control
at
the
recommended
position
or
farther
clock-
wise,
each
time
you
turn
on
the
walkie-
talkie
or
change
channels,
the
display
briefly
shows
the
channel
and
fades.
This
is
caused
by
a
special
power-saver
Circuit.
You
can_.periodically
check
the
current
channel
by
pressing
[PUSH
TO
TALK].
The
display
remains
lighted
as
long
as
you
hold
down
this
button.
Operational
Hints
The
transmission
and
reception
range
of
your
walkie-talkie
depends
on
several
conditions—the
terrain,
battery
condi-
tion,
and
type
and
position
of
the
anten-
na,
for
example.
Buildings
absorb
signals,
and
if
the
buildings
contain
metal,
they
might
completely
block
signals.
Trees
and
heavy
cloud
forma-
tions
have
a
similar
effect,
though
not
as
severe.
However,
large
bodies
of
water
sometimes
increase
range
con-
siderably.
To
ensure
maximum
transmission
and
reception
range,
always
use
fresh
or
ful-
ly
charged
batteries.
When
the
range
decreases
significant-
ly,
replace
or
re-charge
the
batteries.
(See
“‘Installing/Replacing
Batteries”
and
‘‘Charging
Nickel-Cadmium
Batteries.’’)

CITIZENS
BAND
FREQUENCY
CHART
FREQUENCY
(MHz)
CHANNEL
OONOnOAWN
—
Caution:
Do
not
make
any
internal
ad-
justments
to
the
walkie-talkie.
Internal
adjustments
can
be
made
only
by
(or
under
the
direct
supervision
of)
a
person
holding
an
FCC
general
class
radio
tel-
CHANNEL
|
FREQUENCY
(MHz)
ephone
operator’s
license.
Internal
ad-
justments
and/or
modifications
can
lead
to
illegal
operations
as
defined
by
FCC
Rules,
Part
95.
Such
illegal
operation
can
lead
to
very
serious
consequences.

CARE
AND
MAINTENANCE
Your
TRC-207
Walkie-Talkie
is
an
ex-
ample
of
superior
design
and
craftsman-
ship.
The
following
suggestions
will
help
you
care
for
your
walkie-talkie
so
that
you
can
enjoy
it
for
years.
Keep
the
walkie-talkie
dry.
If
it
does
get
wet,
wipe
it
dry
immediately.
Liquids
can
contain
minerals
that
can
corrode
the
electronic
circuits.
oT
—-
U
Use
and
store
the
walkie-talkie
only
in
normal
temperature
environments.
Temperature
extremes
can
shorten
the
life
of
electronic
devices
and
distort
or
melt
plastic
parts.
Handle
the
walkie-talkie
gently
and
care-
fully.
Dropping
it
can
damage
its
circuit
boards
and
can
cause
the
walkie-talkie
to
work
improperly.
10
Keep
the
walkie-talkie
away
from
dust
and
dirt,
which
can
cause
premature
wear
of
parts.
Occasionally
wipe
the
walkie-talkie
with
a
damp
cloth
to
keep
it
looking
new.
Do
not
use
harsh
chemi-
cals
cleaning
solvents,
or
strong
deter-
gents
to
clean
the
walkie-talkie.
Use
only
fresh
batteries
of
the
recom-
mended
size
and
type.
Always
remove
old
or
weak
batteries.
They
can
leak
chemicals
that
destory
electronic
circuits.
Modifying
or
tampering
with
the
walkie-
talkie’s
internal
components
can
cause
a
malfunction
and
invalidate
the
walkie-
talkie’s
warranty.
If
your
walkie-talkie
is
not
operating
as
it
should,
take
it
to
your
local
Radio
Shack
store.
Our
personnel
can
assist
you
and
arrange
for
service,
if
needed.

SPECIFICATIONS
Receiver
PPCIONICY
GOVElAQC
1.05
ce
<-ccics--gcene-sg
Merce
ccavsdesrcoscuayesencs
26.965
to
27.
405
MHz
eo
AT
lp
VS
oy
eagle
ene,
.
Aare
ners
0.5uV
for
10
dB
(S+N)/N
PACMAG
HANNE!
FROJOCUON.
«
...125-01
0c
Meese
onececeynssaratminansunetthyenedenstonepnyesvarses
60
dB
SE
FAM
Pe
EPS
08
65
ae
oe
gicsn
sree
bho
cM
vo-
em
dieanee
sha
ueseoebamegieat
Adjustable
from
1yV
aM
8546
as
Sacks
sc.
css
sc
he
Senet
Shs
AMOMD
+o
eManen
ceva
dadestec
pein
400
mW
(10%
THD)
PPMRIIOLI
UNA
Goce.
jst
ccbesssccceaucs+
ose
eoqhtMitees+cecnetolaaer
gees
sdetacnawecuth
55
mA
to
550
mA
Transmitter
PE
AUIOTICVCOVEIAGO
«1...
sn
sacacencoc
svete
---ctbuedotaredonraoeanvee
26.965
to
27.405
MHz
PPV
RUC
erie
=.
9552
n
oes
cn
duende
ce dh
ewes
Fer
cdemes
>
ccdedesoteartt
5W
(at
HIGH)
2.5W
(at
LOW)
EU
eae
ec
ce
na
Spnea
cnt
antec
SeMeMnasecstsecegensoaa
4W
(at
HIGH),
1W
(at
LOW)
Se
AITISSION
.
foon
Js
feosntscates
».P.ceMinre--+.nasveaen
solves
aveeea
ser:
ainere
60
dB
or
better
MII
OTENIOCUIATION,
sods.
-2-
2-08.
conten
cgtttssne-ceccancane-cubenasdarenuyeedscoasedeccrenrocsnssseene
A3
PIUGNIGY
SPOICL
ANCE
fo.
0.
-
oeslas
onc
as-csszsegees
sssavensrecmbescoamagarcraquttersesncenlgsGetcoe
0.002%
PUOMTMARIMPCGANCE
....2
22.6.
-05.-4..ccgeccctaese+++sydoaunessorscadaateuereravesnaagecdsetonees
50
ohms
Pere
AUT
Es
vase
ccc
es
ccdiee
os
«+s
cc
Go
Meme
+
«+s
aeagardees
Wa
odieteccumeea
600mA
to
1600
mA
SOO,
gle
saa
eR
ee
2,
ei:
ore
7114"
X
23/4"’
x
13/4’’(HWD)
OOS
A?
pig
elias
oie
een
ane
os
PMR
erence
Mee
mas
err
Oho
oc¥
14.10zs
(400g)
11

RADIO
SHACK
LIMITED
WARRANTY
This
product
is
warranted
against
defects
for
90
days
from
date
of
purchase
from
Radio
Shack
company-owned
stores
and
authorized
Radio
Shack
franchisees
and
dealers.
Within
this
period,
we
will
repair
it
without
charge
for
parts
and
labor.
Simply
bring
your
Radio
Shack
sales
slip
as
proof
of
purchase
date
to
any
Radio
Shack
store.
Warranty
does
not
cover
transportation
costs.
Nor
does
it
cover
a
product
subjected
to
misuse
or
accidental
damage.
EXCEPT
AS
PROVIDED
HEREIN,
RADIO
SHACK
MAKES
NO
WARRANTIES,
EXPRESS
OR
IMPLIED,
INCLUDING
WARRANTIES
OF
MERCHANTABILITY
AND
FITNESS
FOR
A
PARTICULAR
PURPOSE.
Some
states
do
not
permit
limitation
or
exclusion
of
implied
warranties;
therefore,
the
aforesaid
limitation(s)
or
exclusion(s)
may
not
apply
to
the
purchaser.
This
warranty
gives
you
specific
legal
rights
and
you
may
also
have
other
rights
which
vary
from
state
to
state.
We
Service
What
We
Sell
RADIO
SHACK
A
Division
of
Tandy
Corporation
Fort
Worth,
Texas
76102
Printed
in
Thailand
7AO
936385
A