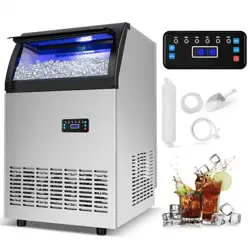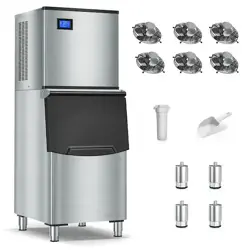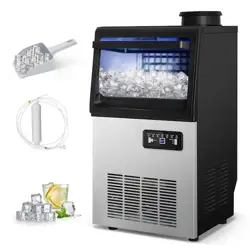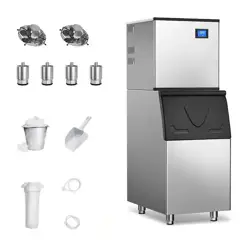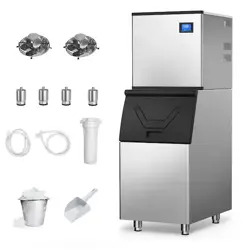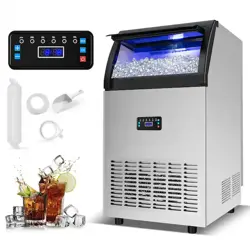
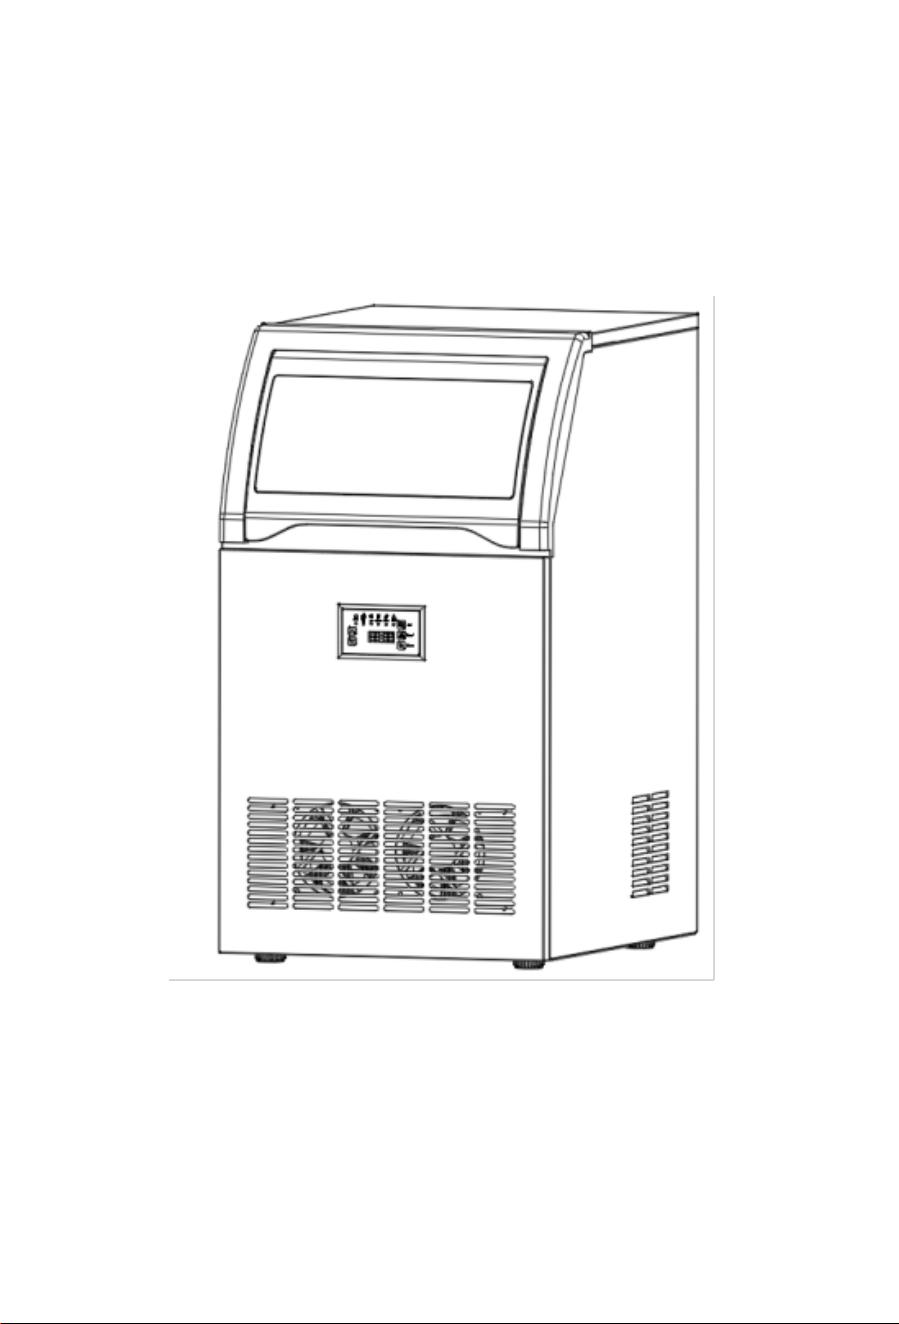
Commercial Spray Ice Machine
Operation Manual
For your safety and proper use of this product, please read the manual
carefully before use.Keep this manual for future reference.The actual
product shall prevail over the packaging contents.
Support Email: support@tittla.com
Support Phone: +1(510)228-4672

Contents
Important Safety Instructions ..................................................1
Installation and Connection .................................................... 2
1) Unpacking .................................................................... 2
2) Machine Placement ......................................................5
3) Water Line Connection .................................................6
Machine Drainage .................................................................. 7
1) Electrical Connection ................................................... 7
Operation Instructions ............................................................ 8
1) Control Panel Overview ............................................... 8
2) Brief Description of Machine Functions ........................8
3) Key Functions: ............................................................. 9
Cleaning and Maintenance ...................................................10
1) Cleaning Internal and External Components ..............10
2) Long-Term Storage .................................................... 11
Circuit Diagram .....................................................................11
Troubleshooting ....................................................................12
1) No Ice Production .......................................................12
2) Low Ice Production .....................................................13
3) Error Codes ................................................................13

1
Important Safety Instructions
● When using electrical appliances, basic safety precautions must be
followed to reduce the risk of fire, electric shock, or injury. Read the
entire manual before operating the appliance.
● The machine must be installed correctly according to the installation
procedures before use.
● Do not place the power cord under carpets or near heat sources.Avoid
placing the cord in high-traffic areas or submerging it in water.
Extension cords are not recommended due to overheating or fire
hazards.
● If the power cord is damaged, it must be replaced by a qualified
professional from the manufacturer or an authorized service center.
● Unplug the machine when not in use.
● Before cleaning or servicing, unplug the machine or disconnect the
power supply. Note: Repairs should only be performed by qualified
professionals.
● Never pull the plug by the cord; always grip the plug firmly and pull
straight out.
● Do not store explosive materials, such as flammable sprays, in the
appliance. This appliance is intended for household and similar use,
including:
- Kitchen areas in shops, offices, or other workplaces.
- Farms, hotels, motels, and residential environments.
- Bed-and-breakfasts.
- Catering and similar non-retail applications.
● Warning: Do not use the ice machine outdoors or expose it to
rain.Place the machine indoors in a well-ventilated area, away from
direct sunlight. Ensure sufficient clearance around the machine for
proper heat dissipation. Refer to the "Installation Instructions" in the
manual for specific requirements.
● Avoid tilting or tipping the machine, as this may cause abnormal noise,
irregular ice size, or water leakage.

2
● If the machine is moved indoors from a cold environment in
winter,allow it to warm up before operation.
● Only use the appliance with the recommended accessories
specified by the manufacturer.
● Warning: The machine must be grounded and connected to a 110V
~/60Hz power supply.
● Connect only to a potable water source that meets local drinking
water standards.
● Do not use mechanical devices or other methods to accelerate
defrosting. Do not damage the refrigeration circuit.
● The refrigeration system contains high-pressure refrigerant. Do not
tamper with the system. Installation and servicing must be
performed by the manufacturer or qualified personnel. Dispose of the
machine through designated recycling channels.
● The ice machine contains flammable insulation materials. Keep
away from fire sources. Repairs must be performed by the
manufacturer or qualified personnel. Dispose of the machine
through designated recycling channels.
Installation and Connection
Note: Installation must be performed by qualified
personnel according to the manual.
1) Unpacking
Warning: Do not allow children or individuals with limited cognitive
abilities to play with foam or other packaging materials, as they may pose
a hazard.
Note: Remove all packaging materials before use to ensure proper
operation.
a) Remove packaging and inspect the machine for damage.
b) Open the accessory bag and verify all components are included:
3
Helpful Tips:
1.Check whether all below accessories are there.
2.Install the machine according to the manual.
3.Allow the machine to stand for 24 hours after delivery before use.
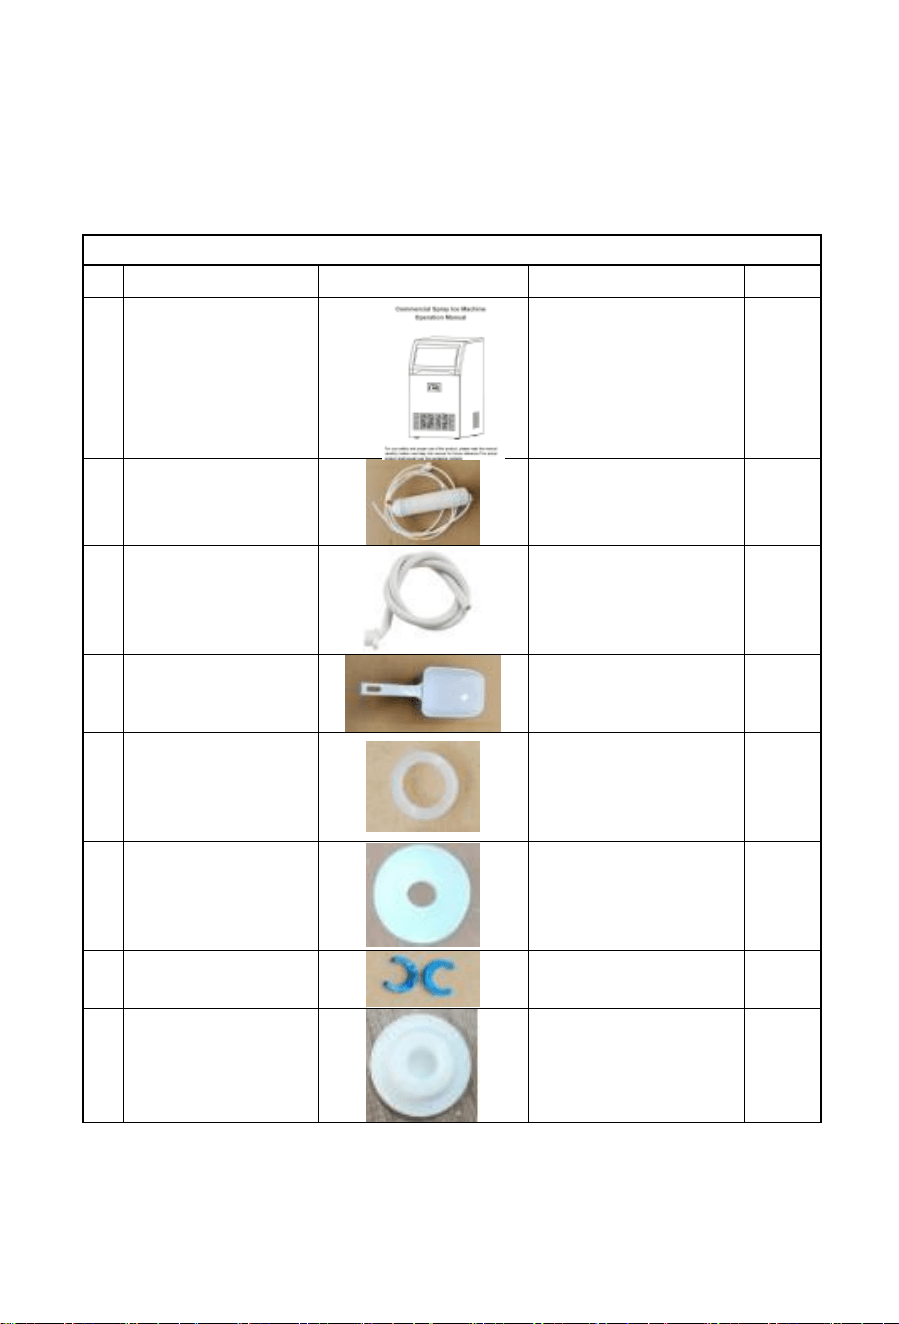
Accessories list
NO
Description Picture
Usage QTY
1
Manual
Operation manual
1PC
2
Filter
Filter water
1PC
3
Drainage pipe
It needs to be
connected to floor
drain before starting
the machine.
1PC
4
Ice spoon
Take ice cubes
1PC
5
Seal ring
Insert one piece into
the connector of the
filter; the other
piece is a spare.
2PCS
6
Seal ring
Insert one piece into
the connector of the
filter; the other
piece is a spare.
2PCS
7
Spare blue clip
Spare blue clip if
needed.
4PCS
8
Spare plug
Spare plug which
plug the
tank if needed.
1PC
4
Installation steps for the main components of the sink
parts
installation
Explain in detail
step by step
Matters needing
attention
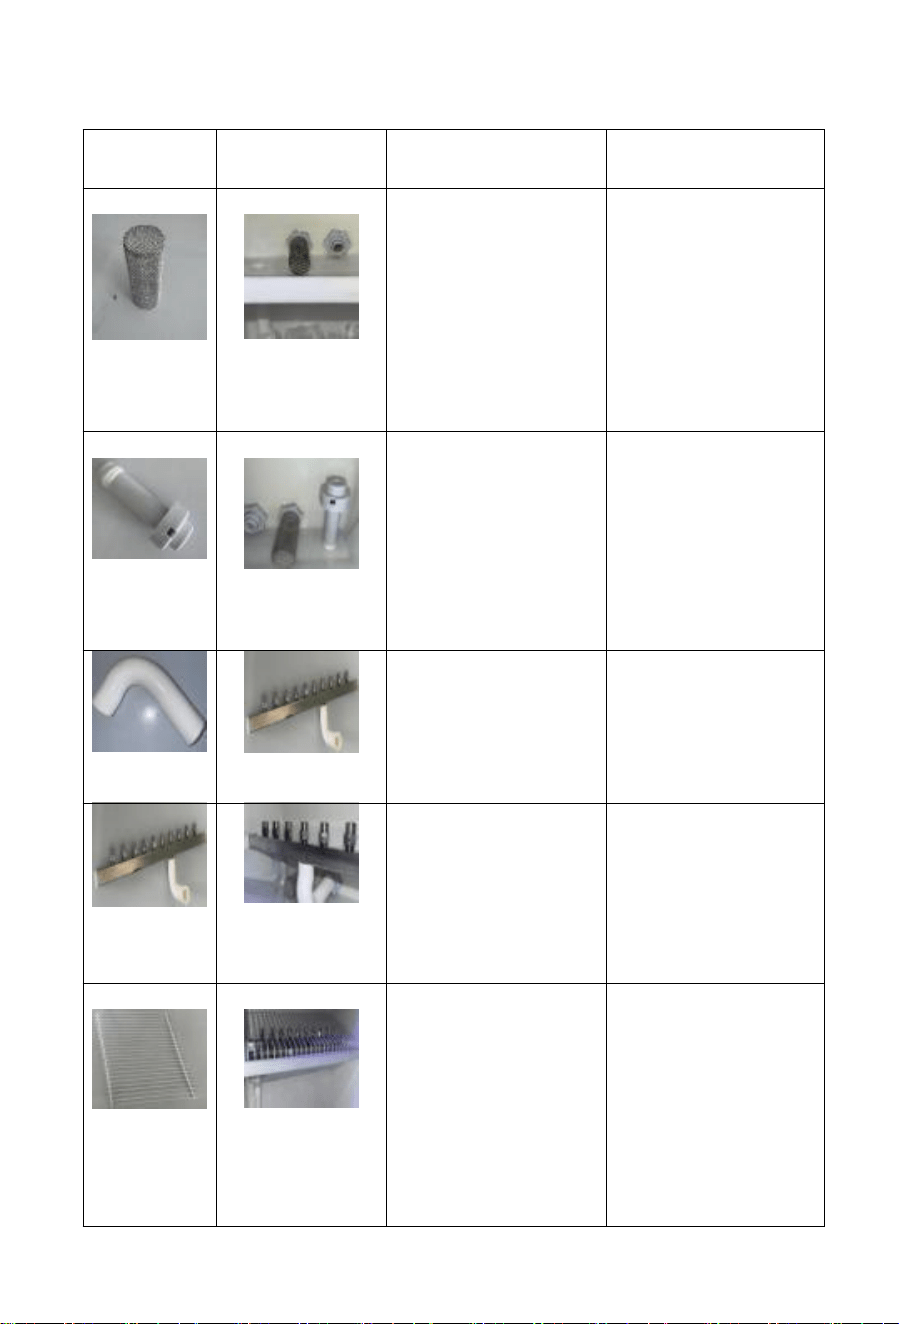
sieve
Install the filter
screen
1.Align the filter
screen with the
screw hole of the slot
at the bottom of the
sink.
2. Note: Ensure that
the edge of the filter
screen is seamless
to prevent the
leakage of impurities.
It is recommended to
install the parts in the
sequence shown in
the table to avoid
later components
blocking earlier
installations.
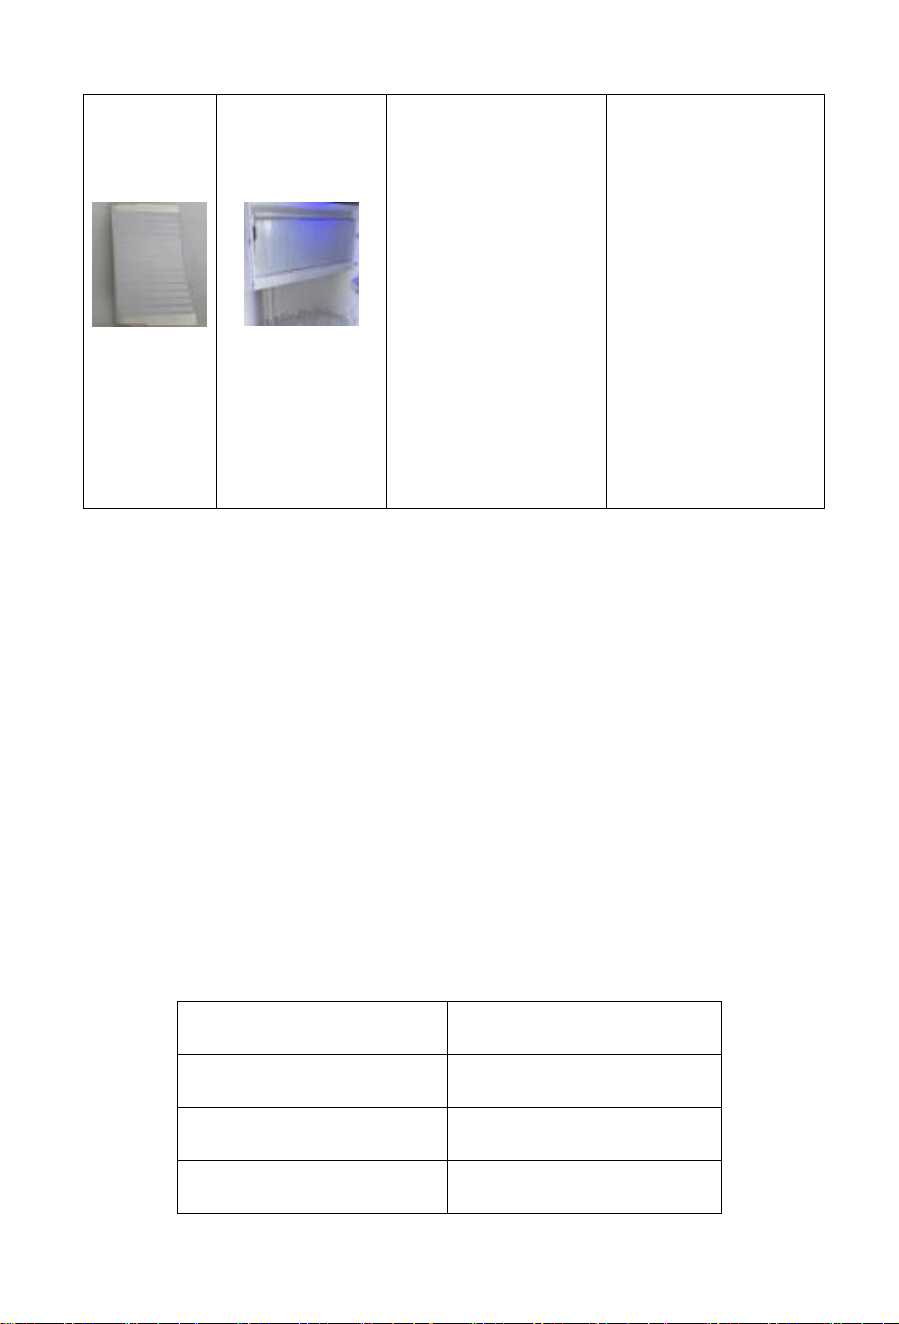
overflow
pipe
Install the
overflow pipe
Align the overflow
pipe interface with
the overflow outlet of
the water tank, insert
it and rotate it to fix.
Sealing property:
The parts involved
in the connection of
water pipes (Such as
the inlet pipe and
overflow pipe) need
to be inspected
repeatedly to prevent
leakage.
inlet pipe
Install the water
inlet pipe
1. Install the water
inlet pipe below the
spray square pipe to
complete the
component
installation
Cleaning and
maintenance:
Regularly clean the
filter screen and
spray holes. Prevent
clogging by scale.
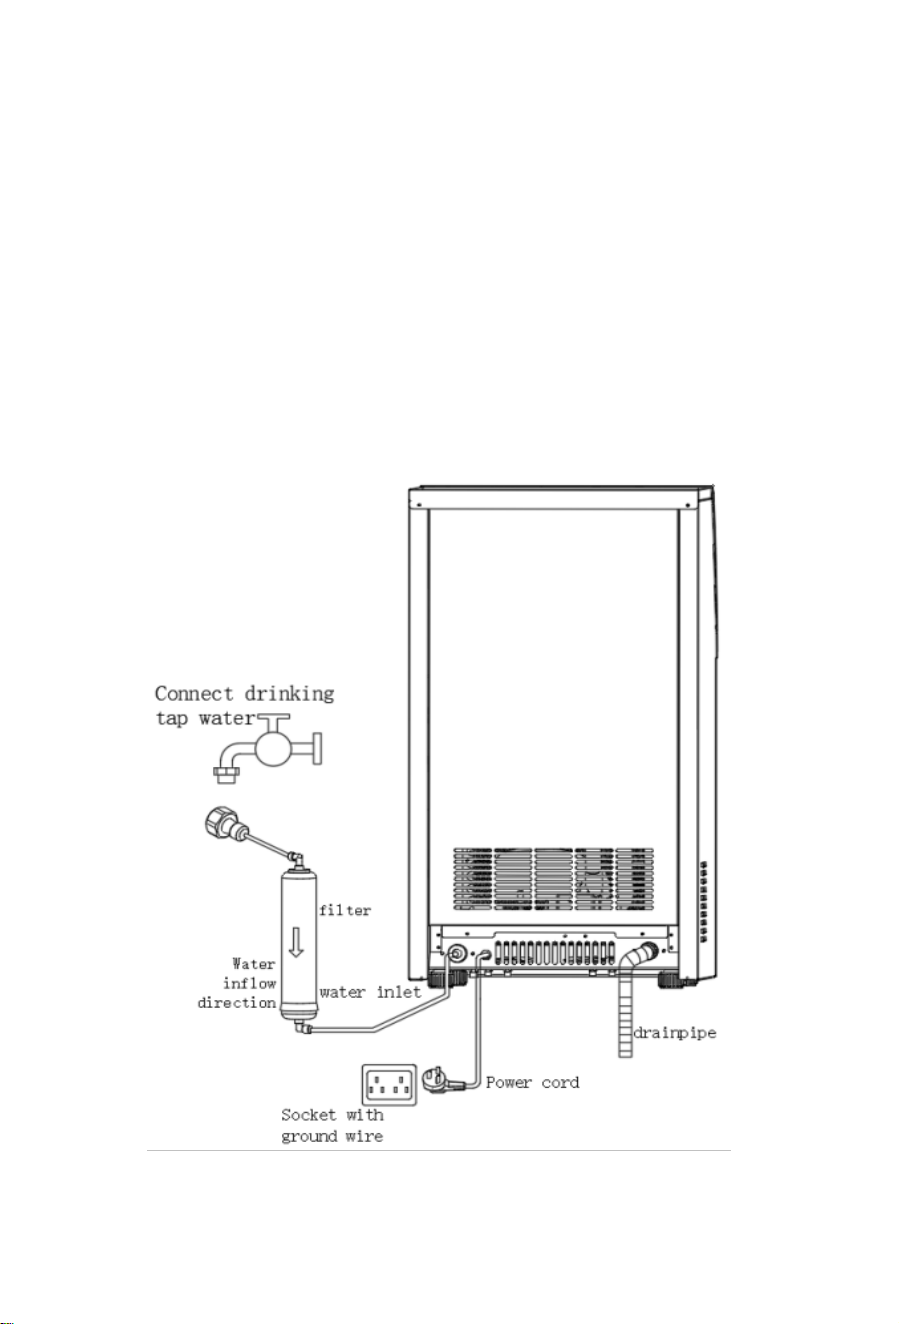
Spray
square tube
assembly
Install the spray
square
tube assembly
1.Tighten the water
inlet pipe to the
water inlet of the sink
2. The other end is
connected to an
external water
source pipeline
Leakage: Retighten
the interface or wrap
sealing tape
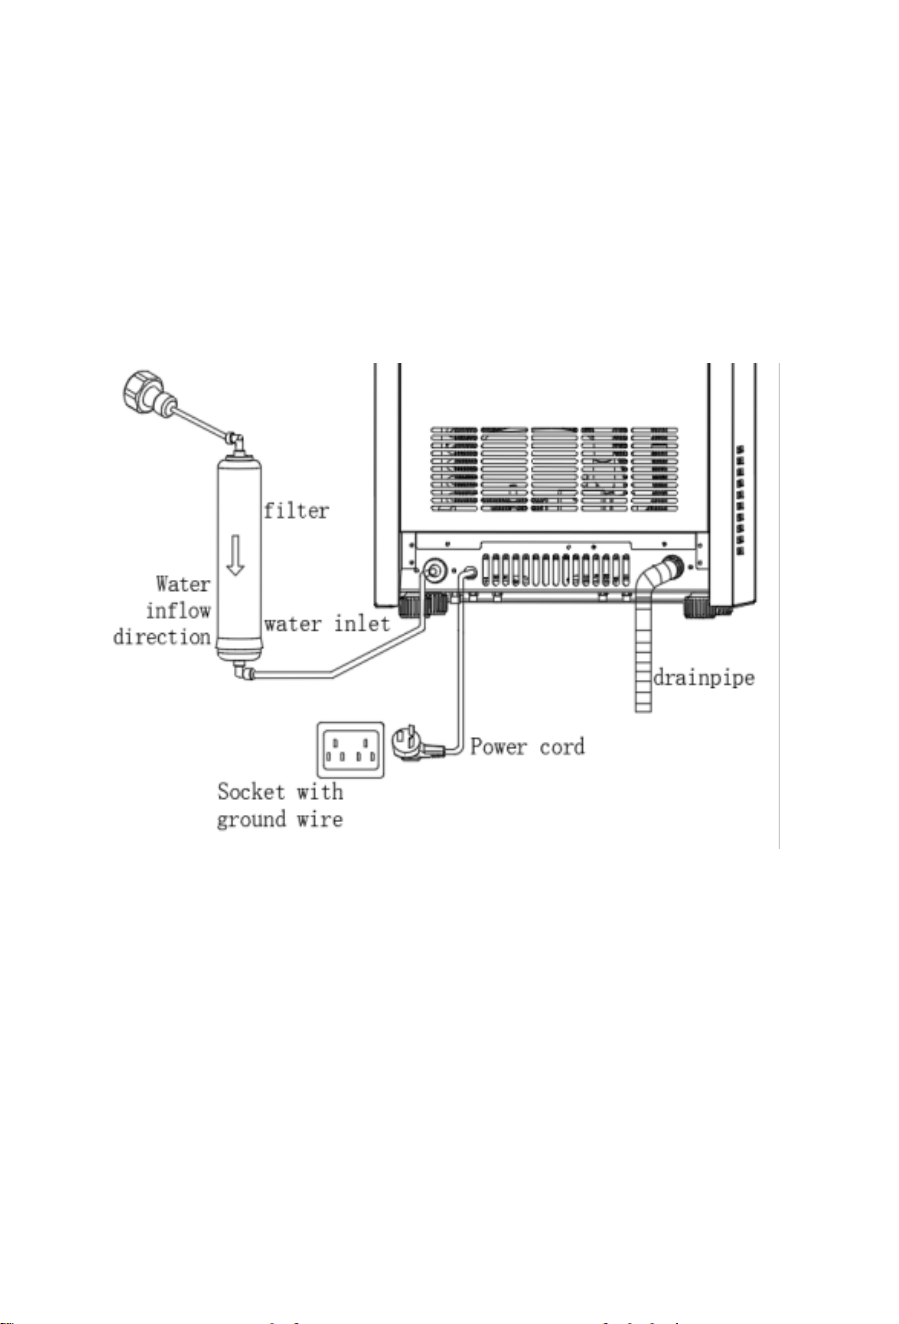
grid
structure
Install grid
structure
1.Place the grid
structure flat inside
the water tank and
align it with the two
side slots.
2. Press down or
slide until it is fully
inserted, making
sure there is no
shaking.
Uneven spraying:
Check whether the
spray square tubes
are level.
Clear the clogged
holes.
5
Water
curtain
Install Water
curtain
Align the hook or
slide groove at the
top of the water
curtain with the hook
at the edge of the
water tank Carry out
installation.
2. Adjust the flatness
of the curtain fabric
to ensure there are
no wrinkles or tilts
Test: After spraying
water, observe
whether the water
curtain effectively
blocks splashing
water.
The water-blocking
curtain falls off:
Confirm whether the
hook is installed
properly.
Reinforce when
necessary.
2) Machine Placement
Before installation, use a level to ensure the machine is placed
horizontally. Visually check that the top of the machine is level.
a) Place the machine in a clean, well-ventilated indoor area. Avoid outdoor
placement, direct sunlight, or rain exposure.
b) Keep the machine away from heat sources.
c) Ambient temperature should be between 10°C (50°F) and 38°C ( 100.4°
F). Ensure adequate clearance around the machine for optimal ice
production and heat dissipation.
d) Place the machine on a stable, level surface. Adjust the leveling during
installation.
e) Do not place any objects on top of the ice machine.
f) Maintain sufficient clearance on all sides for proper airflow and
maintenance access.
Location
Clearance
Sides
50cm ( 19.69 in)
Rear
50cm ( 19.69 in)
Front
50cm ( 19.69 in)
6
3) Water Line Connection
Warning: Connect only to a potable water source that meets local drinking
water standards.
● If using tap water, install a filter to improve water quality. Do not
connect directly to unfiltered tap water. The manufacturer is not
responsible for malfunctions caused by water quality issues.
● Water pressure should be between 0.1–0.4 MPa( 14.5-58.02 Psi). If
pressure exceeds 0.4 MPa(58.02 Psi), install a pressure-reducing
valve.
● The drain hose relies on gravity flow. Ensure the drain hose has
sufficient elevation or drop.
Water Line Connection Diagram
7
Machine Drainage
Warning: Ice in the machine will melt. Always connect the drain hose to a
floor drain or sewer line before use. The manufacturer is not responsible
for water damage caused by improper drainage.
Note: Connect one end of the drain hose to the machine's drain outlet and
the other end to a waste container or sewer line. Ensure the drain outlet is
lower than the machine's drain port.
1) Electrical Connection
Warning: The machine must be connected to a grounded power outlet.
a) Ensure a 110V~/60Hz power supply with proper grounding is available.
b) The fuse in the electrical box must be rated above 10A. Replacement
must be performed by a qualified professional.
c) If the power cord or plug needs replacement, contact an authorized
service technician.
d) Voltage fluctuations must not exceed ±10% of the rated voltage.
Otherwise, install a voltage stabilizer.
8
e) The internal blue light cannot be replaced by the user. Contact a
professional for replacement.
Warnings:
This ice machine is for producing and storing ice. To ensure hygiene:
a) Wash hands before handling ice. Use the provided plastic ice scoop.
b) Do not store any items other than ice in the storage bin.
c) Clean the storage bin before first use. Keep the scoop clean by
washing it with a mild detergent. Close the door after use to prevent
dust from entering. General electrical safety precautions:
a) High humidity increases the risk of short circuits or electric shock. If in
doubt, disconnect the power supply.
b) Do not unplug the machine by pulling the cord.
c) Do not allow children or elderly individuals to operate the machine
unsupervised.
Operation Instructions
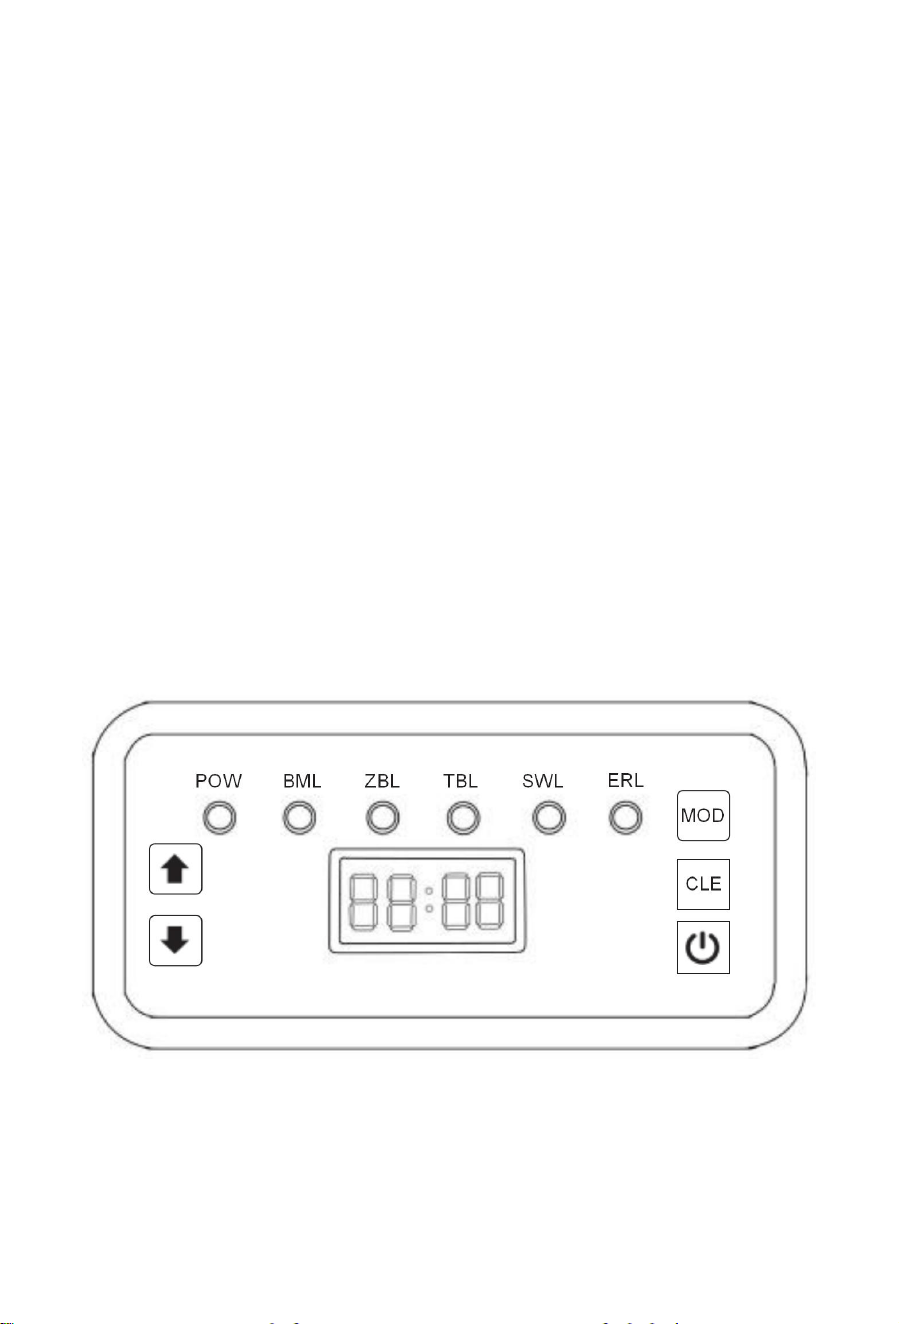
1)Control Panel Overview
Control Panel
2) Brief description of machine functions:
1.Before plugging the new machine into the power plug, connect the water
circuit of the machine properly and turn on the faucet.

9
2.Plug the machine into the power plug and it will automatically replenish
water. The display shows “00” during water replenishment. Once
replenishment is complete, the display changes to “--”. The standby light
comes on, indicating that the machine has entered the standby state. At
the same time, both water replenishment and water shortage disappear.
At this point, you can start making ice.
3) Key Functions:
Power Key:
1.Press to turn off when the machine is on.
2.Press to turn on when the machine is off.
3.In settings mode, press to exit and save parameters.
4.Press to exit temperature display mode.
5.In ice thickness adjustment mode, press to exit and save settings.
6.Press to enter scheduled operation mode.
Settings Key:
1.Press and hold for 10 seconds in standby mode to enter settings.
2.In settings mode, press to toggle parameters.
3.Press briefly to display evaporator temperature.
4.Press briefly in standby mode to enter cleaning(Automatic cleaning
time is 40-60 minutes.)
5.Press and hold for 3 seconds to display the last ice-making cycle time.
Mode Key:
1.Press to exit temperature display mode.
2.Press to exit ice thickness adjustment mode .
3.Press to start ice production in delay mode.
4.Press to enter de-icing mode during ice production .
5.In de-icing mode, press to enter "ice full" status if the bin is full;
otherwise, resume ice production .

10
+ Keys:
1.Press to adjust ice thickness during ice production.
2.Press in standby mode to enter scheduled operation setup.
3.Press to increase time during scheduled operation setup.
4.Press to increase parameters in settings or ice thickness adjustment
mode.
- Key:
1.Press to decrease parameters in settings or ice thickness adjustment
mode.
2 . Press to toggle the blue light in non-settings mode.
Note: If the machine enters "water shortage protection" mode, refill the
water tank to restart automatically. For other faults, wait 45 minutes
before pressing the power button or reconnecting the power supply to
restart.
Cleaning and Maintenance
1) Cleaning Internal and External Components
Note:
1.Unplug the machine before cleaning or maintenance.
2.Have the condenser inspected and cleaned by a service technician at
least once a year for optimal performance.
3.Do not use alcohol or harsh chemicals, as they may damage plastic
components.
a) Exterior
Wipe the exterior with a soft, damp cloth weekly. Use a neutral
detergent for stubborn stains.
b) Ice Scoop (Weekly)
Soak the scoop in a neutral detergent solution for 3 minutes, then rinse
and air-dry.
Note: Drying with a cloth may cause recontamination of the scoop.
c) Storage Bin (Weekly)
Open the door and remove all ice.
11
Clean the interior with neutral detergent, rinse, and dry with a clean
cloth.
d) Water Pump (Weekly)
Unplug the machine, remove the pump from the tank, and clean the
inlet with a small brush. Reinstall afterward.
2) Long-Term Storage
a) Unplug the machine.
b) Close the water valve and disconnect the inlet hose.
c) Remove all ice and drain water from the storage bin and tank.
d) Clean and dry the interior surfaces.
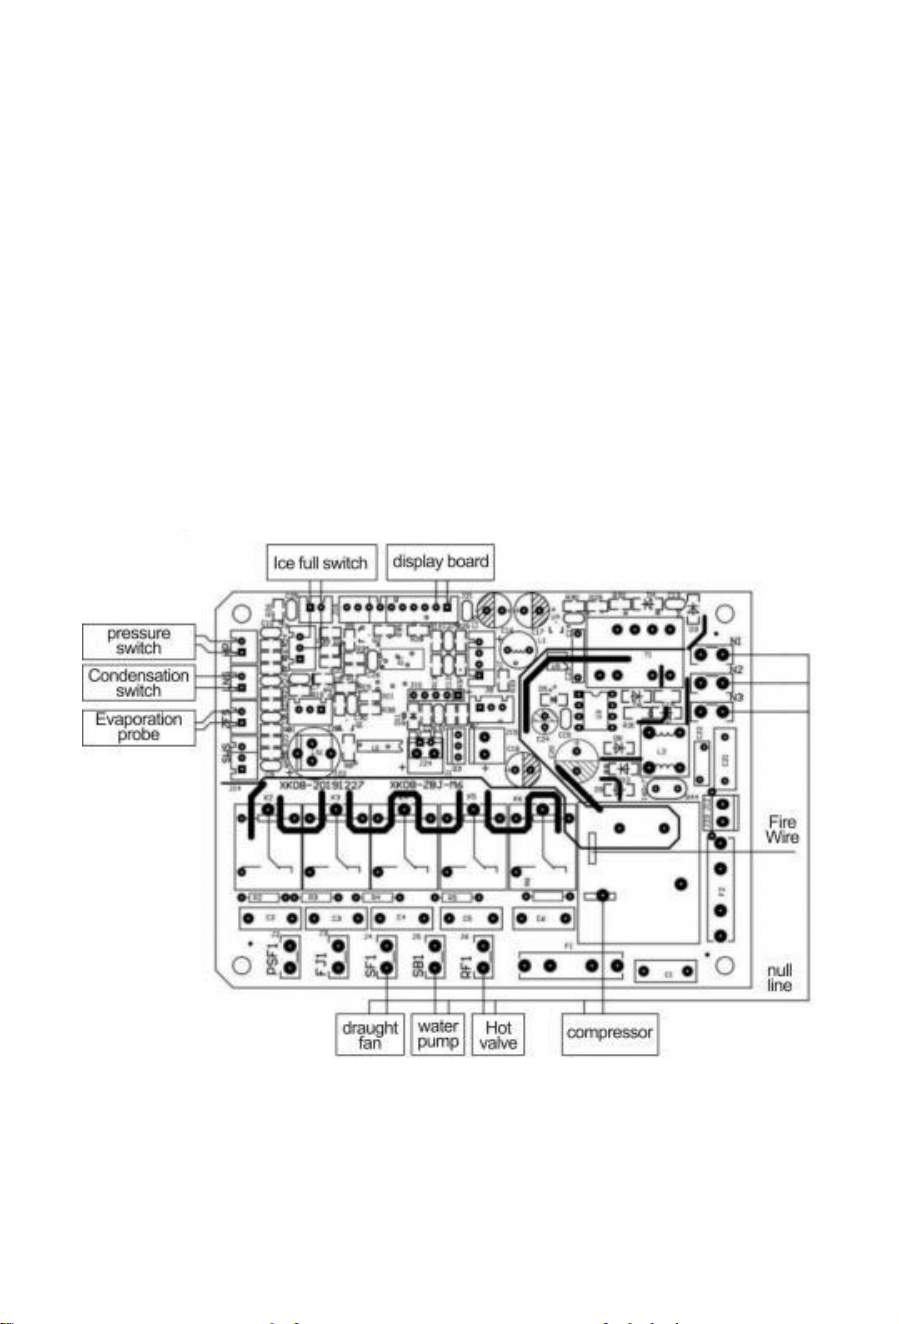
Circuit Diagram
12
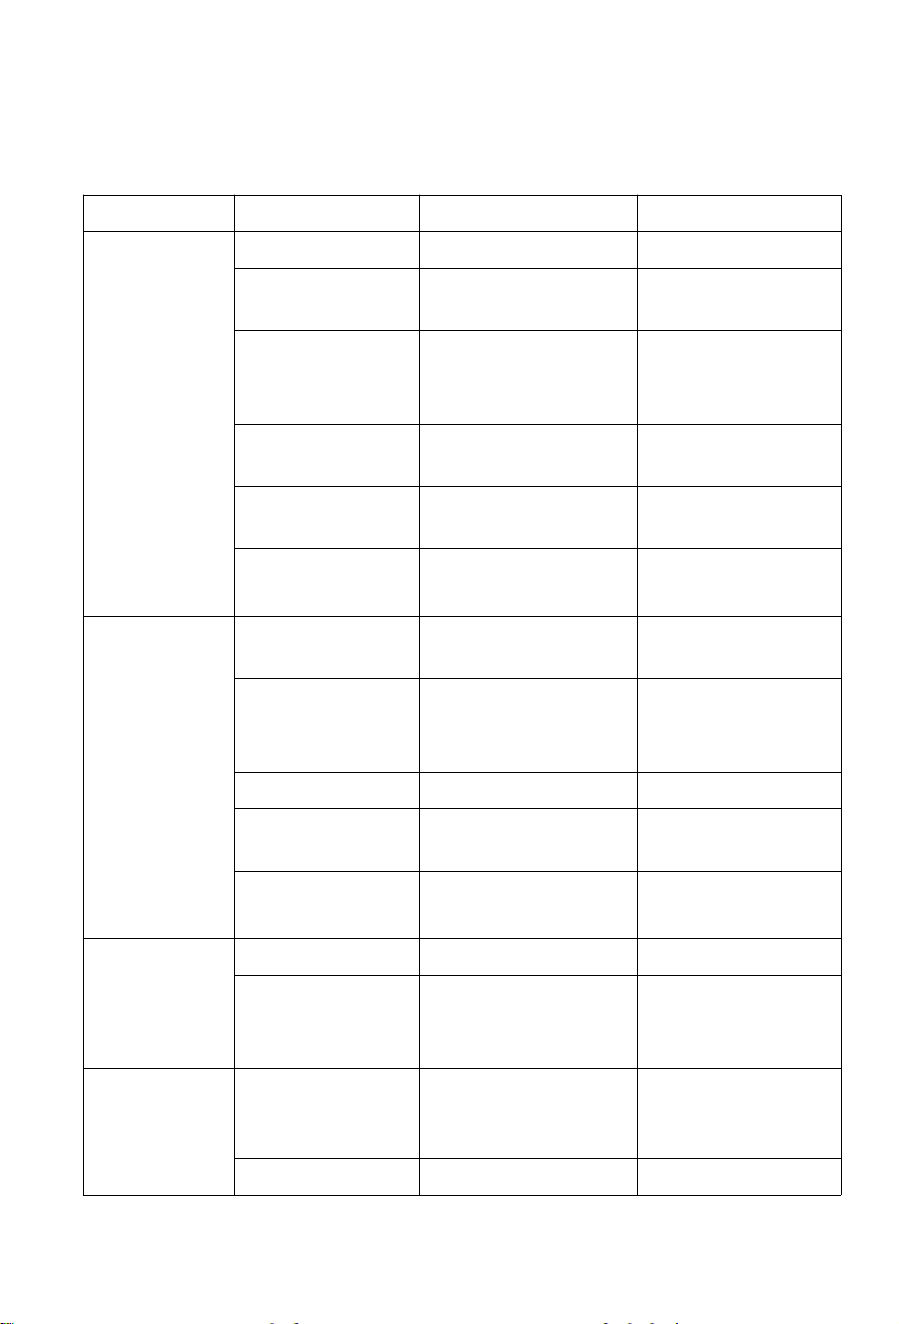
Troubleshooting
1) No Ice Production
Symptom
Check
Possible Cause
Solution
Machine
does not start
Power cord
Not plugged in
Plug in
Control board
fuse
Blown or damaged
Replace
Storage bin
Ice bin full or ice
blocking
evaporator
Remove ice
Power supply
No power or low
voltage
Contact utility
provider
Water valve
No water or low
pressure
Increase water
pressure
Inlet valve
Clogged filter or
faulty valve
Clean filter or
replace valve
Compressor
fails
Power supply
Low voltage
Contact utility
provider
Air intake
Blocked
Clear obstruction
(min. 15 cm
clearance)
Condenser
Dirty
Clean condenser
Refrigeration
system
Leak
Contact service
technician
Compressor
Loose or
disconnected wires
Contact service
technician
No water in
tank
Float switch
Stuck or faulty
Adjust or replace
Water line
Clogged or no
water supply
Check line or
contact water
provider
Water
leakage
Inlet connection
Loose or
improperly installed
Tighten or reinstall
Inlet/drain hose
Cracked
Replace
13
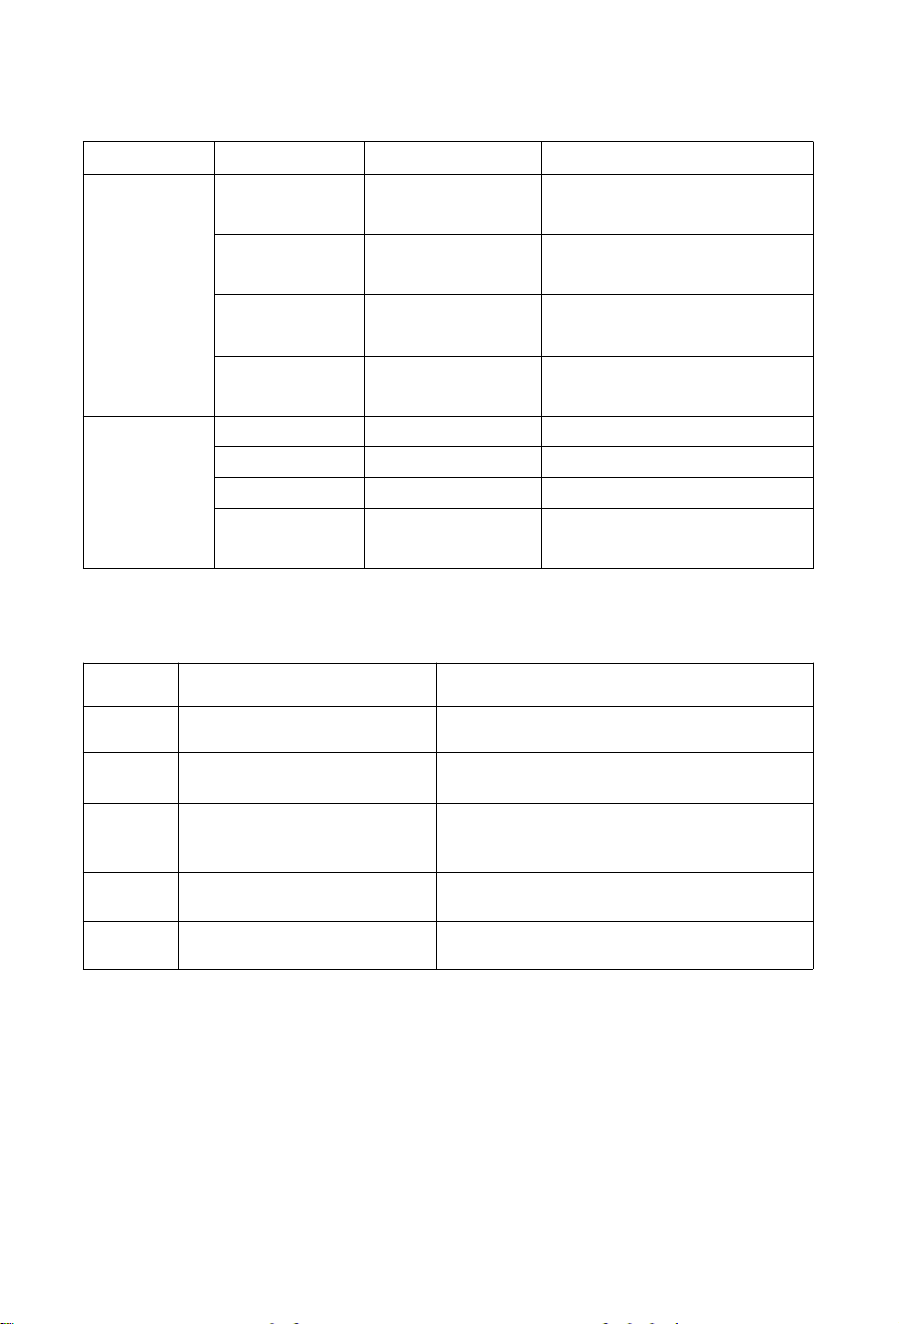
2) Low Ice Production
Symptom
Check
Possible Cause
Solution
Slow ice
production
Water
pressure
Low pressure
Increase pressure
Water
temperature
Too high
Lower temperature
Ambient
temperature
Too high or low
Relocate machine
Refrigerant
Leak
Contact service technician
Thin/
insufficient
ice
Condenser
Dirty
Clean condenser
Filter
Clogged
Clean or replace
Water pump
Faulty
Replace pump
Air intake
Blocked
Clear obstruction
(min. 15 cm clearance)
3) Error Codes
Code
Description
Solution
FULL
Ice bin full
Remove ice or check bin sensor
E-02
Ice production timeout
Check fan, refrigerant, or compressor
E-03
De-icing timeout
Check water supply and ambient
temperature (10–38 °C/50- 100.4 °F)
E-04
High-temperature fault
Check ambient temperature and fan
E-05
Water shortage
Check water supply

If you have any questions, please contact us:
Support Email: support@tittla.com
Support Phone: +1(510)228-4672