
SPL2 AND SPL3 BRACKET MOUNT
INSTALLATION GUIDE
INSTRUCTIONS
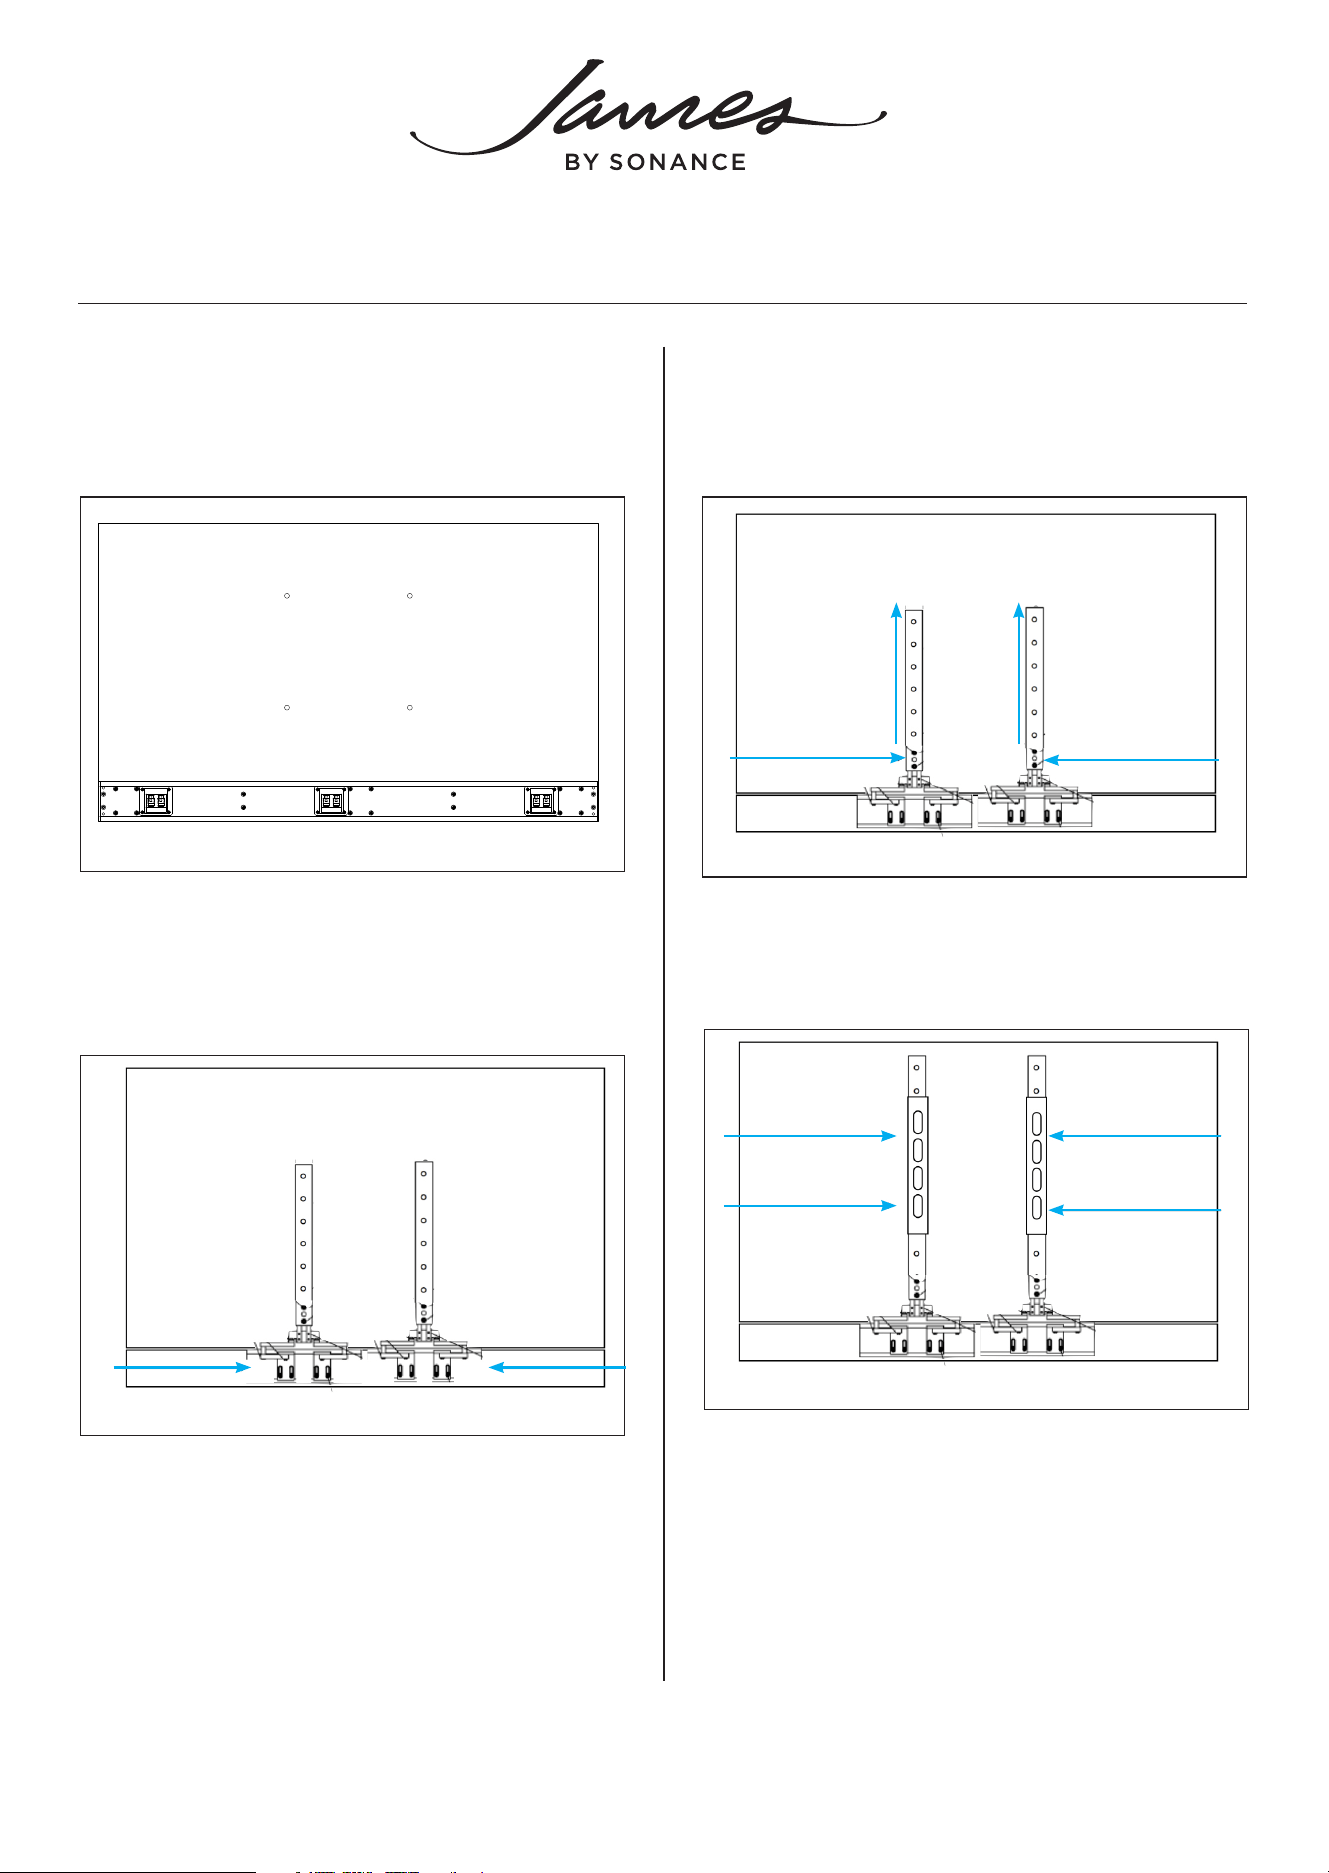
1. Carefully place the TV and James SPL Soundbar
face down on a soft surface with the soundbar
positioned flush with the bottom of the TV.
2. Attach bracket mount to the soundbar without
tightening the provided pinch tabs. Adjust the
bracket arms to ensure clearance of speaker
terminals.
Figure 1: Lay TV and Soudbar flat on a Soft Surface
3. Loosen 10-32 Hex flathead screws on the VESA
bracket and extend to match the TV’s VESA hole
pattern.
Figure 2: Attach Bracket Mount
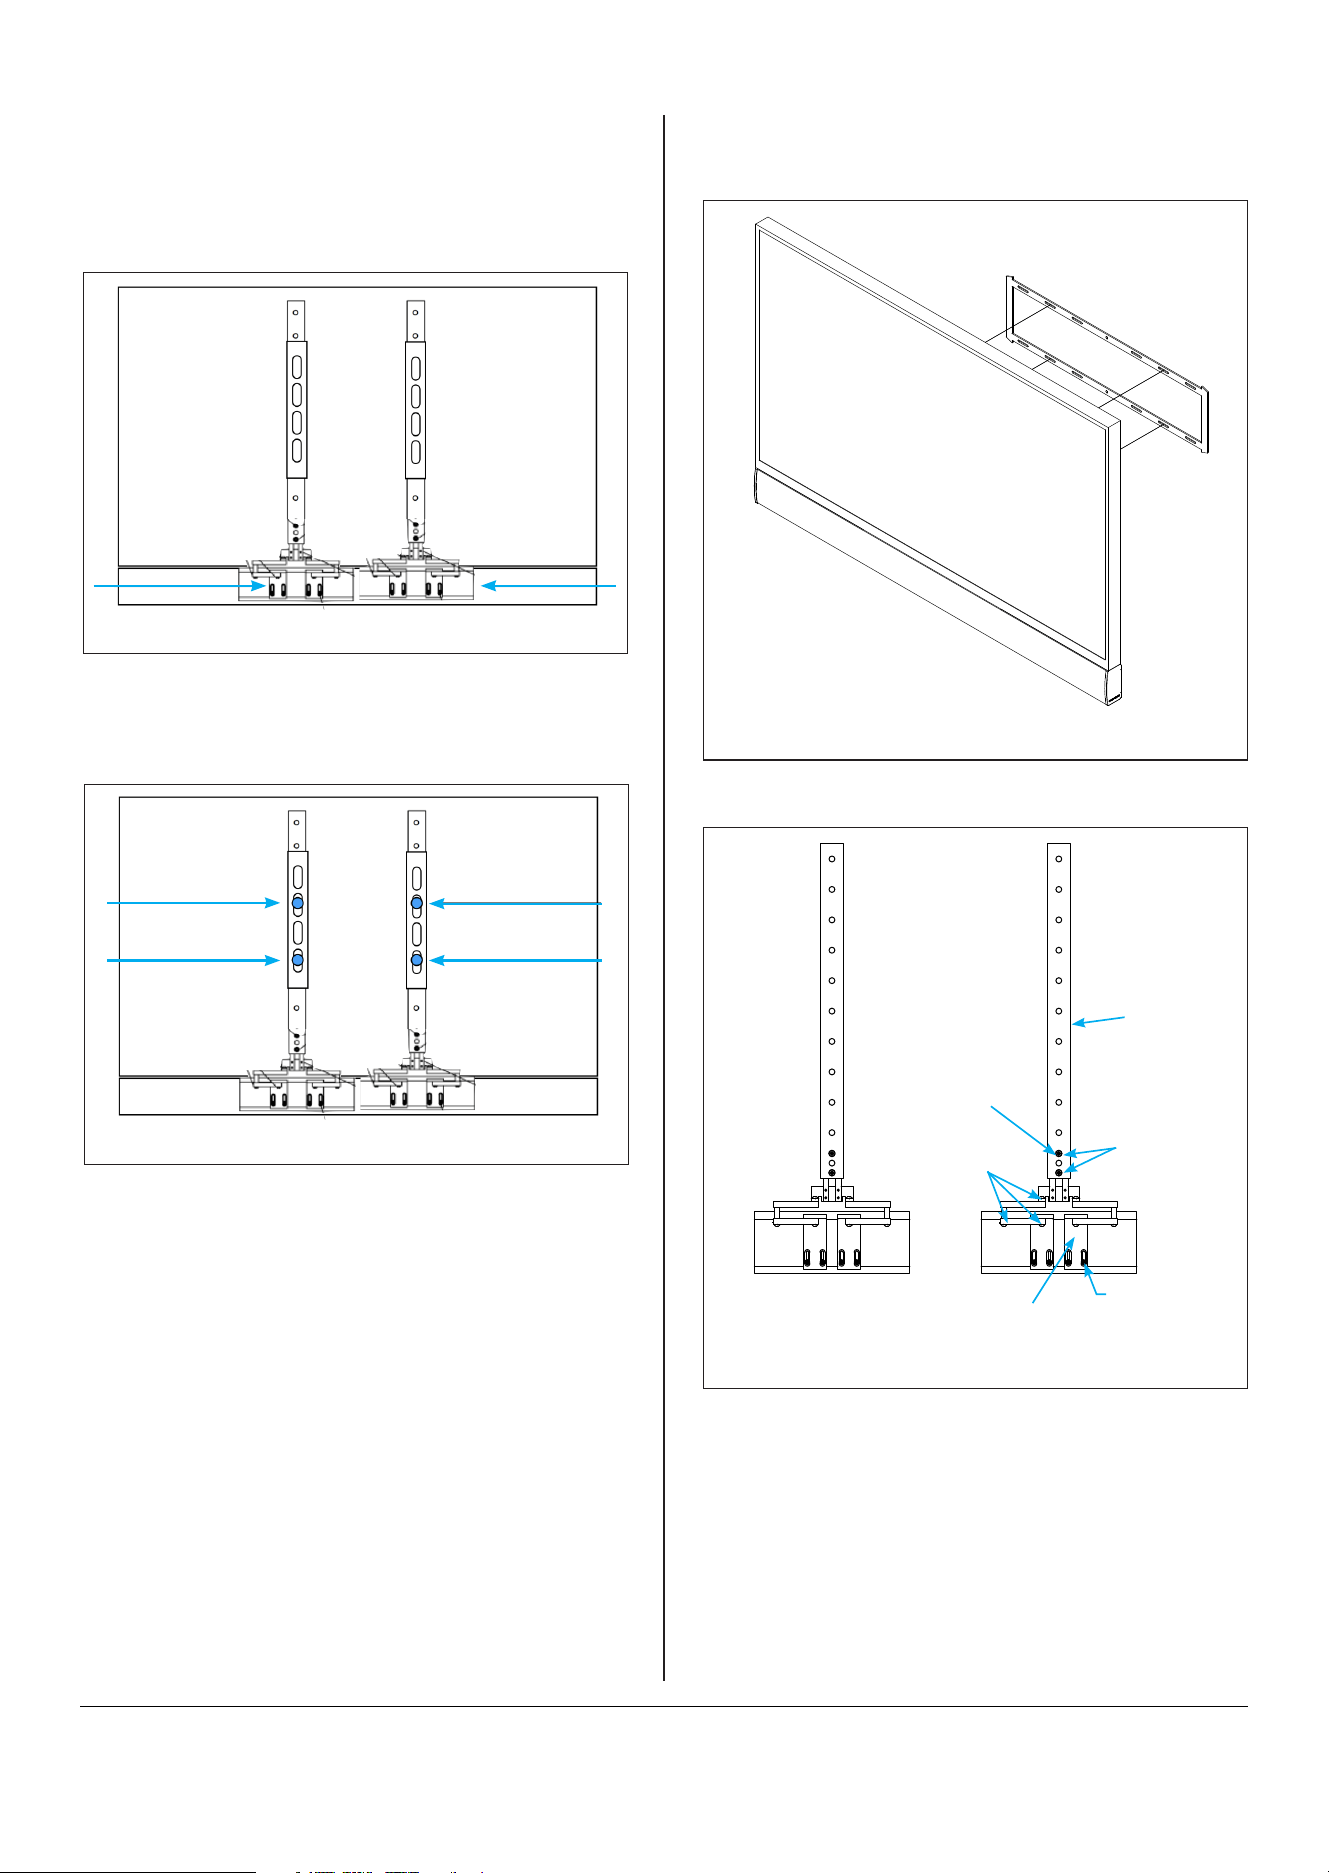
4. Install TV wall mount on top of the VESA bracket
using metric screws. (Use provided spacers if
necessary).
Figure 3: Loosen Screws
Figure 4: Install Mount on Bracket
©2024 James by Sonance. All rights reserved. James by Sonance is a registered trademark of Dana Innovations. Due to continuous product improvement, all features and
specifications are subject to change without notice. For the latest Sonance product specification information visit our website: www.sonance.com
James by Sonance • 2185 Park Place • Minden, NV 89423 USA • 775.461.7500 12.13.2024
7. Hang the TV and soundbar on the wall.
Figure 7: Hang TV
Figure 8: SPL3 (0.000-1.479” TV Depth)
Pinch Tab
Screws
Loosen to
raise and lower
bracket
Tighten to lock
bracket arms
Uses 1/8”
hex key
Vesa Bracket
Soundbar
Bracket Mount
6. Tighten 10-32 Hex flathead screws on the VESA
bracket to lock the bracket into position.
Figure 6: Tighten Screws and Lock into Position
5. Tighten the bracket arm screws and the provided
pinch tab screws. Loosen pinch tab screws. Slide
pinch tab down into soundbar channel. Tighten
pinch tabs, then tighten the bracket arm screws.
Figure 5: Tighten Bracket Screws
