
STAINLESS STEEL PANEL MOUNTING INSERT ADJUSTMENT GUIDE
This guide provides a clear, non-invasive solution to resolve alignment issues during the
mounting of the stud into the panel insert, in cases where there is a slight misalignment with the
stainless-steel panel. This approach avoids the need to replace the panel or enlarge the existing
hole.
Stainless Steel Panel Kits Possibly Affected:
Model Code
Factory Code
SP36FDX/24
901642
SP36BMX
901609
SP30BMX
901605
SP30CX
901637
SP24CX
901646
SP18CX
901636
SP18WXV
901644
SP24WXV
901645
Tools Needed:
• Standard screwdriver or Allen key (depending on insert/stud type).
• Mounting studs (supplied with the handle kit).
Step-by-Step Instructions:
1. Locate the Panel Insert
Identify the insert on the stainless-steel panel where the mounting stud is intended to be
threaded.
2. Loosen the Insert Slightly
Using your screwdriver or Allen key, gently loosen the insert just enough to allow some
movement.
���
Do not remove the insert completely.
3. Thread the Mounting Stud
Carefully begin threading the mounting stud into the loosened insert.
You’ll notice that the insert will self-align with the stud as you tighten.
EN
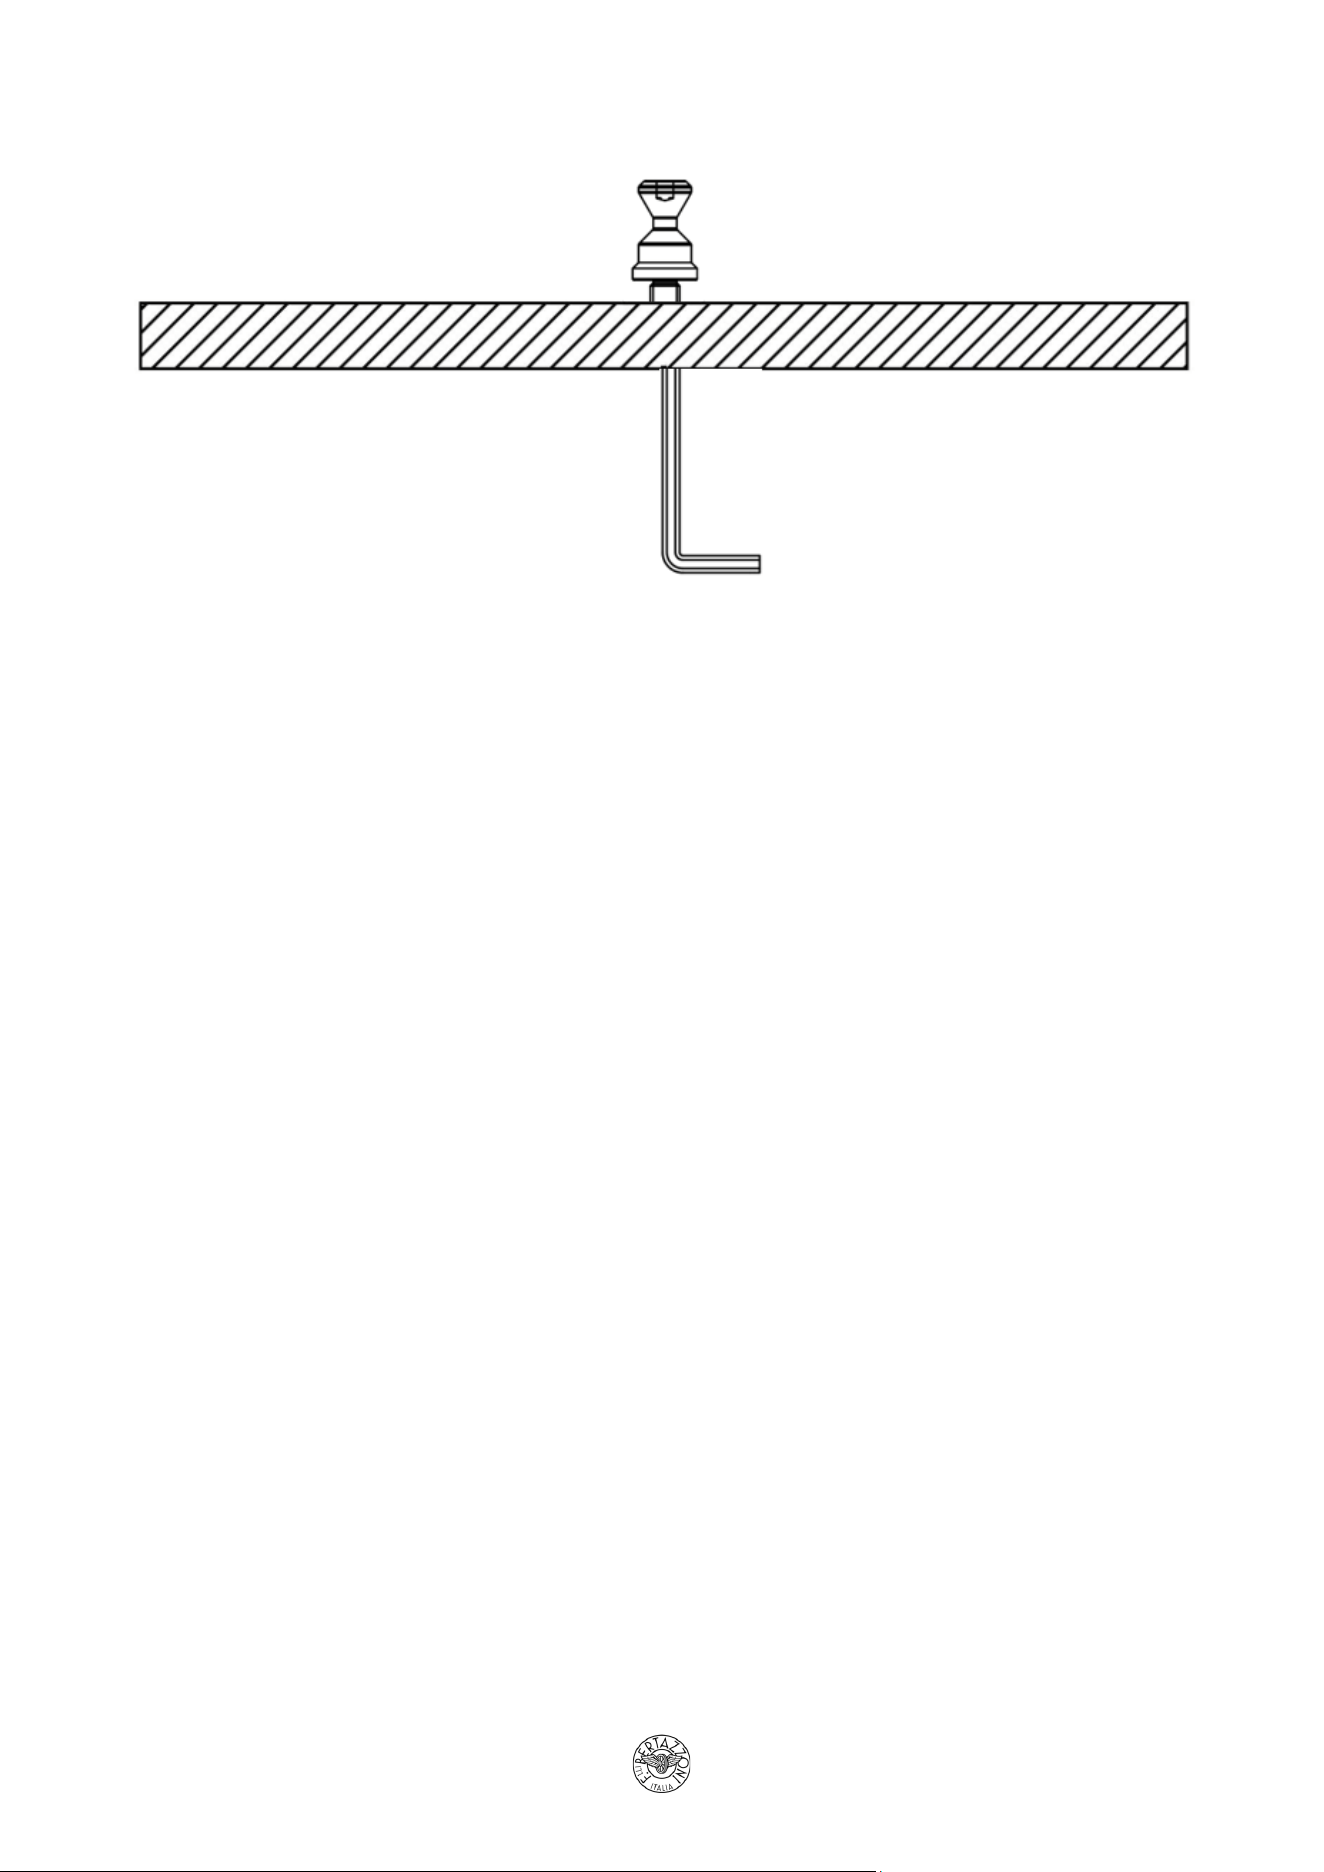
4. Secure the Insert and Stud Together
Once the stud is fully threaded, tighten the insert and the stud simultaneously.
This ensures proper alignment and a secure fit.
5. Final Check
Confirm that the stud is firmly in place and the insert is flush with the panel surface.
Notes:
• This method avoids the need to enlarge the hole or replace the panel.
• The self-alignment feature of the insert ensures a precise fit once tightened.
EN
