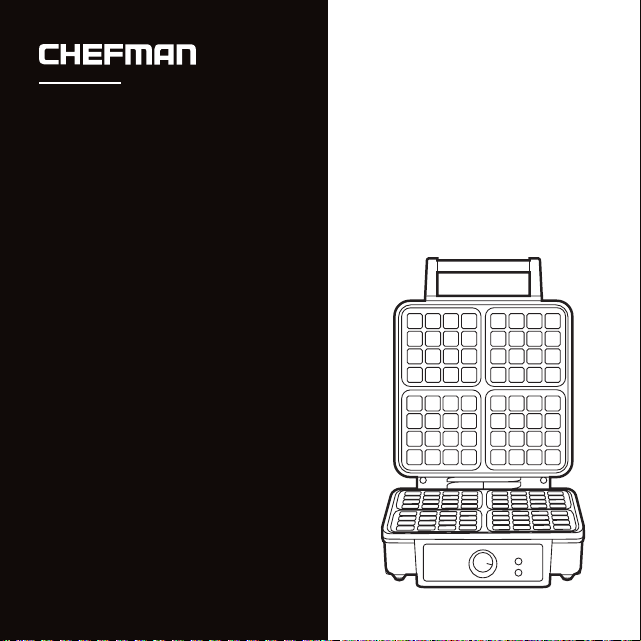
®
4-SLICE BELGIAN
WAFFLE
MAKER
USER GUIDE
RJ04-4P-V2
• Safety Instructions
• Features
• Operating Instructions
• Cleaning and Maintenance
• Recipes
• Terms and Conditions
• Warranty

READ ALL INSTRUCTIONS BEFORE USE
For your safety and continued enjoyment of this product, always
read the instruction manual before using.
COOKING FORWARD
Welcome!
Whether this is your first Chefman
®
appliance purchase or you’re
already part of our family, we’re happy to be cooking with you!
With your new 4-slice Belgian Waffle Maker, you can make light and
crisp waffles for the entire family in no time. Thanks to its nonstick
cooking plates, cleanup is a breeze, and because the Waffle Maker
can be stored vertically, it’s easy to store.
We know you’re excited to get cooking, but please take a few
minutes to read our directions, safety instructions, and warranty
information.
For more information on this product and our other high-quality
appliances, please visit us at Chefman.com.
From our kitchen to yours,
The Chefman
®
Team

1 Safety Instructions
5 Features
6 Operating Instructions
9 Cleaning and Maintenance
11 Recipes
13 Terms and Conditions
15 Warranty
CONTENTS

1
WARNING: When using electrical appliances especially when children are
present, basic safety precautions should always be followed to reduce the risk
of fire, electric shock, and/or injury to persons, including the following:
1. Read all Instructions.
2. Do not touch hot surfaces. Use handles or knobs.
3. To protect against electric shock do not immerse cord, plugs, or unit
enclosure in water or other liquid.
4. Close supervision is necessary when any appliance is used by or near
children.
5. Unplug from outlet when not in use and before cleaning. Allow to cool
before putting on or taking off parts, and before cleaning the appliance.
6. Do not operate any appliance with a damaged cord or plug or after the
appliance malfunctions, or has been damaged in any manner. Return
appliance to the nearest Chefman service facility for examination, repair
or adjustment.
7. The use of accessory attachments not recommended by Chefman may
cause injuries.
8. Do not use outdoors.
9. Do not let cord hang over edge of table or counter or touch hot surfaces.
SAFETY INSTRUCTIONS
IMPORTANT SAFEGUARDS

2
10. Do not place on or near a hot gas or electric burner, or in a heated oven.
11. Extreme caution must be used when moving an appliance containing hot
oil or other hot liquids.
12. To disconnect, turn any control to "off," then remove plug from wall outlet.
13. Do not use appliance for other than intended use.
14. Use on a heat-resistant, flat level surface only.
15. When using this appliance, provide adequate ventilation above and on all
sides for air circulation. Do not allow this appliance to touch curtains, wall
coverings, clothing, dish towels or other flammable materials during use.
16. CAUTION: This appliance generates heat during use. Proper precautions
must be taken to prevent the risk of burns, fire or other damage to persons
or property.
SAVE THESE INSTRUCTIONS.
SAFETY INSTRUCTIONS
IMPORTANT SAFEGUARDS
3
WARNING: This appliance has a polarized plug (one blade is wider than the
other). This plug is intended to fit into a polarized outlet only one way. If the plug
does not fit fully into the outlet, reverse the plug. If it still does not fit, contact
a qualified electrician. Do not attempt to modify the plug in any way or force it
into the outlet. This could result in injury or electric shock.
SHORT CORD INSTRUCTIONS
A short power supply cord is provided to reduce the hazards of entanglement or
tripping over a longer cord. Longer detachable power-supply cords or extension
cords are available and may be used if care is exercised in their use. If a longer
detachable power-supply extension cord is used:
1. The marked electrical rating of the extension cord should be at least as
great as the electrical rating of the appliance.
2. The cord should be arranged so that it will not drape over the countertop
or tabletop where it can be pulled on by children or tripped over
unintentionally.
SAFETY INSTRUCTIONS
IMPORTANT SAFEGUARDS
Do not place the appliance
on a stovetop or any other
hot surface.

4
POWER CORD SAFETY TIPS
1. Never pull or yank on cord or the appliance.
2. To insert plug, grasp it firmly and guide it into outlet.
3. To disconnect appliance, grasp plug and remove it from outlet.
4. Before each use, inspect the power cord for cuts and/or abrasion marks.
If any are found, this indicates that the appliance should be serviced, and
the power cord replaced. Please contact Chefman Customer Support for
assistance.
5. Never wrap the cord tightly around the appliance, as this could place undue
stress on the cord where it enters the appliance and cause it to fray and
break.
DO NOT OPERATE APPLIANCE IF THE POWER CORD SHOWS ANY DAMAGE
OR IF APPLIANCE WORKS INTERMITTENTLY OR STOPS WORKING ENTIRELY.
IMPORTANT: During the first few minutes of initial use, you may notice smoke
and/ or a slight odor. This is normal and should quickly disappear. It will not recur
after appliance has been used a few more times.
This appliance is not intended for use by persons (including children) with
reduced physical, sensory or mental capabilities, or lack of experience and
knowledge, unless they have been given supervision or instruction concerning
use of the appliance by a person responsible for their safety.
SAFETY INSTRUCTIONS
IMPORTANT SAFEGUARDS
5
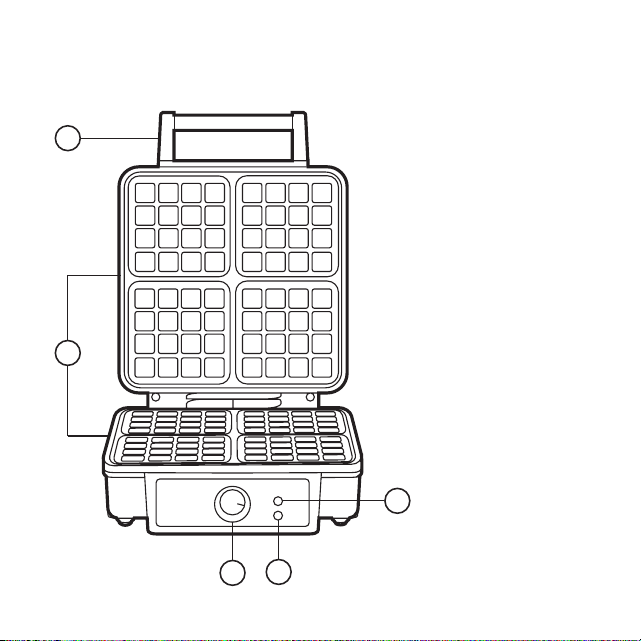
FEATURES
1. Cool-Touch Handle
2. Nonstick Cooking Plates
3. Sleek Stainless-Steel
Finish (not shown)
4. Adjustable Browning
Control Knob
5. Power Light
6. Ready Light
4
1
6
5
2

6
BEFORE FIRST USE
1. Remove all packaging materials. Read and discard any stickers.
2. If necessary, wipe nonstick cooking plates with a damp cloth to
remove any packing dust.
3. For best results, pour a teaspoon of vegetable oil on to the nonstick
plates. Spread over with a paper towel and wipe off any excess oil.
HOW TO USE THE WAFFLE MAKER
1. Prepare waffle batter.
2. Close the waffle maker and plug it into the wall outlet; a red power
light will turn on.
3. Set the browning control knob according to your preference for
lighter or darker waffles.
4. Wait for the green indicator light to come on. This shows that the waffle
maker has reached its optimum cooking temperature and is ready to
cook with. (The waffle maker usually takes 3-5 minutes to heat.)
5. When green light comes on, open waffle maker and pour batter onto
bottom plate starting in the center of the grid; use just enough batter
to just cover the peak areas of the grids. If batter is very thick, use a
heatproof spatula to spread the batter into the corners of the grid.
OPERATING INSTRUCTIONS

7
NOTE: The amount of batter you use will vary depending on recipe
and thickness.
6. Cook waffles until green ready indicator light comes back on. Open
waffle maker to check for doneness; if you would like waffle to be
darker, shut waffle maker and cook longer.
NOTE: Do not open waffle maker during the first minute of
cooking as uncooked waffles will split. If top of waffle maker resists
when attempting to lift, allow waffle to cook longer in 30-second
increments.
7. Remove waffles from waffle maker using non-metallic utensils.
8. Waffles are best cooked to order, but they can be kept warm in a
200°F oven. To retain crispness, transfer them directly to oven rack or
place on a rack on a baking sheet.
9. If making more than one batch of waffles, close waffle maker and wait
for green ready indicator light to come back on before adding more
batter.
10. When baking is complete, turn the browning control knob to zero and
unplug the power cord from wall outlet. Leave waffle maker open to
cool. Do not clean until unit has cooled completely.
OPERATING INSTRUCTIONS

8
WAFFLE BAKING TIPS
• When preparing waffle batter, do not over mix or waffles will be
tough. Stir batter only until large lumps of dry ingredients disappear.
• Never use nonstick spray on cooking plates. Nonstick spray will cause
build-up over time, which may cause sticking. If desired, brush plates
with a small amount of cooking oil instead, such as canola, vegetable
or grapeseed.
• To reheat already cooled waffles, return them to the hot waffle maker.
Place waffles on plate so grooves match up; close lid and heat for 1 to
2 minutes, checking often to prevent burning.
• Baked waffles freeze well. To freeze, cool completely on wire rack,
then store airtight in the freezer. Do not defrost; reheat frozen waffles
in a toaster or toaster oven until hot and crisp.
• Experiment beyond waffles: Try “waffling” other kinds of foods,
including quesadillas, grilled cheese, tater tots, and even apple pie.
OPERATING INSTRUCTIONS

9
Here are a few easy steps to keep your waffle maker looking and working
like new:
1. Always unplug the waffle maker and allow it to cool before cleaning.
2. Brush away any loose crumbs from the grooves of cooking plates.
Wipe clean with a paper towel or a damp cloth, absorbing any oil or
butter that might be down in the grooves. Do not use any abrasive
materials, including scouring pads or steel wool, as this will damage
the nonstick coating.
3. Wipe the outside of the waffle maker with a damp cloth only. Do not
clean the outside with any abrasive scouring pad or steel wool, as
this will damage the finish. A little metal polish suitable for stainless
steel may be used occasionally on the top housing. Do not immerse in
water or any other liquid. Do not place in the dishwasher.
4. Should any batter become baked onto the grids, pour a little cooking
oil onto the hardened batter. Let it sit for 5 minutes to soften batter,
then wipe off with a paper towel or soft cloth.
5. Do not use metal utensils to remove your waffles; they can damage
the non-stick surface.
CLEANING AND MAINTENANCE

10
STORAGE
• Always unplug the appliance and let cool completely before storing.
• Always make sure the appliance is cool, clean, and dry before storing.
• To minimize storage space in your kitchen, the appliance can be
stored vertically.
CLEANING AND MAINTENANCE

11
RECIPES
CLASSIC WAFFLES
Makes about 5½ cups batter
1. In large bowl, whisk flour, cornstarch, baking
powder and salt; set aside.
2. With an electric mixer, beat egg whites until
soft peaks form. Add sugar; continue beating
just until stiff peaks form; set aside.
3. Whisk together egg yolks, milk, and vanilla.
4. Using a rubber spatula, stir milk mixture into
flour mixture, blending just until dry ingredients
are moistened. (There should still be small lumps;
do not overmix.) Stir in melted butter. Fold in
beaten egg whites until just combined.
5. Set Browning Control to “desired doneness.”
6. When waffle maker is ready, pour just enough
batter onto bottom plate to cover high points
of grids.
7. Cook until green ready indicator lights up or to
desired doneness.
• 1½ cups all-purpose
flour
• ½ cup cornstarch
• 1 Tbsp baking powder
• 1 tsp salt
• 3 large eggs,
separated
• 2 Tbsp granulated
sugar
• 1¾ cups milk
• ½ tsp pure vanilla
extract
• 8 Tbsp (½ cup)
unsalted butter,
melted
INGREDIENTS
Variation: Toasted Pecan & Cranberry Waffles
Before adding batter, sprinkle chopped pecans onto bottom cooking plate.
Pour batter over pecans, then sprinkle dried cranberries over batter. Close
waffle maker and bake as directed

12
RECIPES
CLASSIC BUTTERMILK WAFFLES
Makes about 5½ cups batter
1. In large bowl, whisk flour, cornstarch, baking
powder, baking soda, and salt.
2. With an electric mixer, beat egg whites until
soft peaks form. Add sugar; continue beating
just until stiff peaks form. Set aside.
3. Whisk together egg yolks, buttermilk and
vanilla.
4. Using a rubber spatula, stir buttermilk mixture
into flour mixture, blending just until dry
ingredients are moistened. (There should still
be small lumps; do not overmix.) Stir in melted
butter. Fold in beaten egg whites until just
combined.
5. Set Browning Control to desired doneness.
6. When waffle maker is ready, pour just enough
batter onto bottom plate to cover high points
of grids.
7. Cook until green ready indicator lights up or to
desired doneness.
• 1½ cups all-purpose
flour
• ½ cup cornstarch
• 1 Tbsp baking
powder
• 1 tsp baking soda
• 1 tsp salt
• 3 large eggs,
separated
• 2 Tbsp sugar
• 1¾ buttermilk
• ½ tsp pure vanilla
extract
• 8 Tbsp (½ cup)
unsalted butter,
melted
INGREDIENTS

13
Our products are backed by a limited 1-year warranty. To register, follow
the instructions on the Chefman
®
Warranty Registration page in this User
Guide.
We offer a limited 1-year warranty from the date of purchase. This warranty
is void without proof of purchase within the USA, Canada, or Mexico.
Service centers and retail stores do not have the right to alter or change
the Terms & Conditions of this warranty.
WHAT THE WARRANTY COVERS
• Manufacturer Defects
Chefman
®
products are warranted against defects in material and
workmanship for a period of 1 year from the date of purchase, when used
in accordance with the Chefman
®
User Guide.
• Qualified Replacements
If your product does not work as it should, we will send you a new one.
If the product is no longer available, we will replace it with one that is
comparable.
TERMS AND CONDITIONS
Limited Warranty

14
THIS WARRANTY DOES NOT COVER
• Misuse - Damage that occurs from neglectful or improper use of
products. See Safety Instructions for information on proper use.
• Poor Maintenance - General lack of proper care. See Cleaning and
Maintenance Instructions for information on proper maintenance.
• Commercial Use - Damage that occurs from commercial use.
• Altered Products - Damage that occurs from alterations or modifications
by any entity other than Chefman
®
; removal of rating label.
• Catastrophic Events - Damage that occurs from fire, floods, or natural
disasters.
• Loss of Interest - Claims of loss of interest or enjoyment.
TERMS AND CONDITIONS
Limited Warranty
15
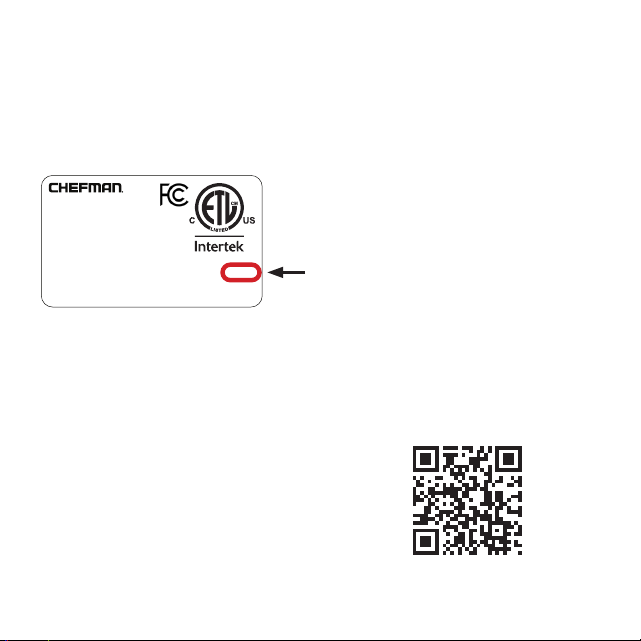
Register your product to add an additional 3 months to your warranty.
What do I Need to Register my Product?
•Contact Information
•Model Number
•Proof of Purchase
(online confirmation, receipt, gift receipt)
•Date code
How Do I Register my Product?
We offer 2 convenient ways to access the Chefman
®
registration form:
1. Visit chefman.com/register.
2. Scan the QR code below to access site:
CHEFMAN
®
WARRANTY REGISTRATION
NOTE: Label depicted here is an exmaple.
MADE IN CHINA/FABRIQUE EN CHINE
AC ONLY/ AC SEULEMENT
DATE CODE:
ACCESS CODE:
Model/Modele: RJ25-C
Conveyor toaer
120v~60hz 1800W
CONFORMS TO UL STD. 1026
CERTIFIED TO CSA STD.C22.2 No.64
CAUTION: DO NOT IMMERSE IN WATER
ATTENTION: NE PAS PLONGER DANS L’EAU
WARNING: TO PREVENT ELECTRIC SHOCK,
UNPLUG BEFORE CLEANING
PRÉAVIS: POUR ÉVITER LES CHOCS ÉLECTRIQUES,
DÉBRANCHEZ L’APPAREIL AVANT DE L’UTILISER
READ INSTRUCTIONS BEFORE USING
LISEZ LES INSTRUCTIONS AVANT DE L’UTILISER
HOUSEHOLD USE ONLY
POUR USAGE DOMESTIQUE SEULEMENT
0000000
0000
XXXXXXXX

16
Need more information?
Please visit us at Chefman.com.
OTHER LIMITATIONS: ALL WARRANTIES OF ANY KIND WHATSOEVER, EXPRESS, IMPLIED AND
STATUTORY, ARE HEREBY DISCLAIMED. ALL IMPLIED WARRANTIES OF MERCHANTABILITY AND
FITNESS FOR A PARTICULAR PURPOSE ARE HEREBY DISCLAIMED, PROVIDED THAT IF ANY IMPLIED
WARRANTIES OF ANY KIND IS REQUIRED BY ANY JURISDICTION, INCLUDING MERCHANTABILITY
AND FITNESS FOR A PARTICULAR PURPOSE, THE DURATION OF SUCH IMPOSED IMPLIED
WARRANTY IS LIMITED TO ONE (1) YEAR. THIS WARRANTY DOES NOT COVER, AND CHEFMAN
®
SHALL NOT BE LIABLE, FOR INCIDENTAL, INDIRECT, SPECIAL OR CONSEQUENTIAL DAMAGES,
INCLUDING WITHOUT LIMITATION, DAMAGE TO, OR LOSS OF USE OF THE PRODUCT, OR LOST SALES
OR PROFITS OR DELAY OR FAILURE TO PREFORM THIS WARRANTY OBLIGATION. THE REMEDIES
PROVIDED HEREIN ARE THE EXCLUSIVE REMEDIES UNDER THIS WARRANTY, WHETHER BASED ON
CONTRACT, TORT OR OTHERWISE.
This Warranty gives you specific legal rights, and you may also have other rights that vary from state
to state or Province to Province. Some states or Provinces do not allow the exclusions or limitations set
forth in this Warranty, so the above limitations or exclusions may not apply to you depending on the
jurisdiction of purchase.
Chefman
®
is a registered trademark of RJ BRANDS, LLC.
CHEFMAN
®
WARRANTY REGISTRATION

17
®
CHEFMAN.COM | @MYCHEFMAN
©CHEFMAN 2020