Free Standing Cooker / User Manual
EN
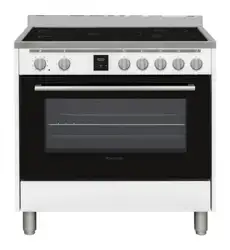
AFI902B
AFI902X
EN - 2
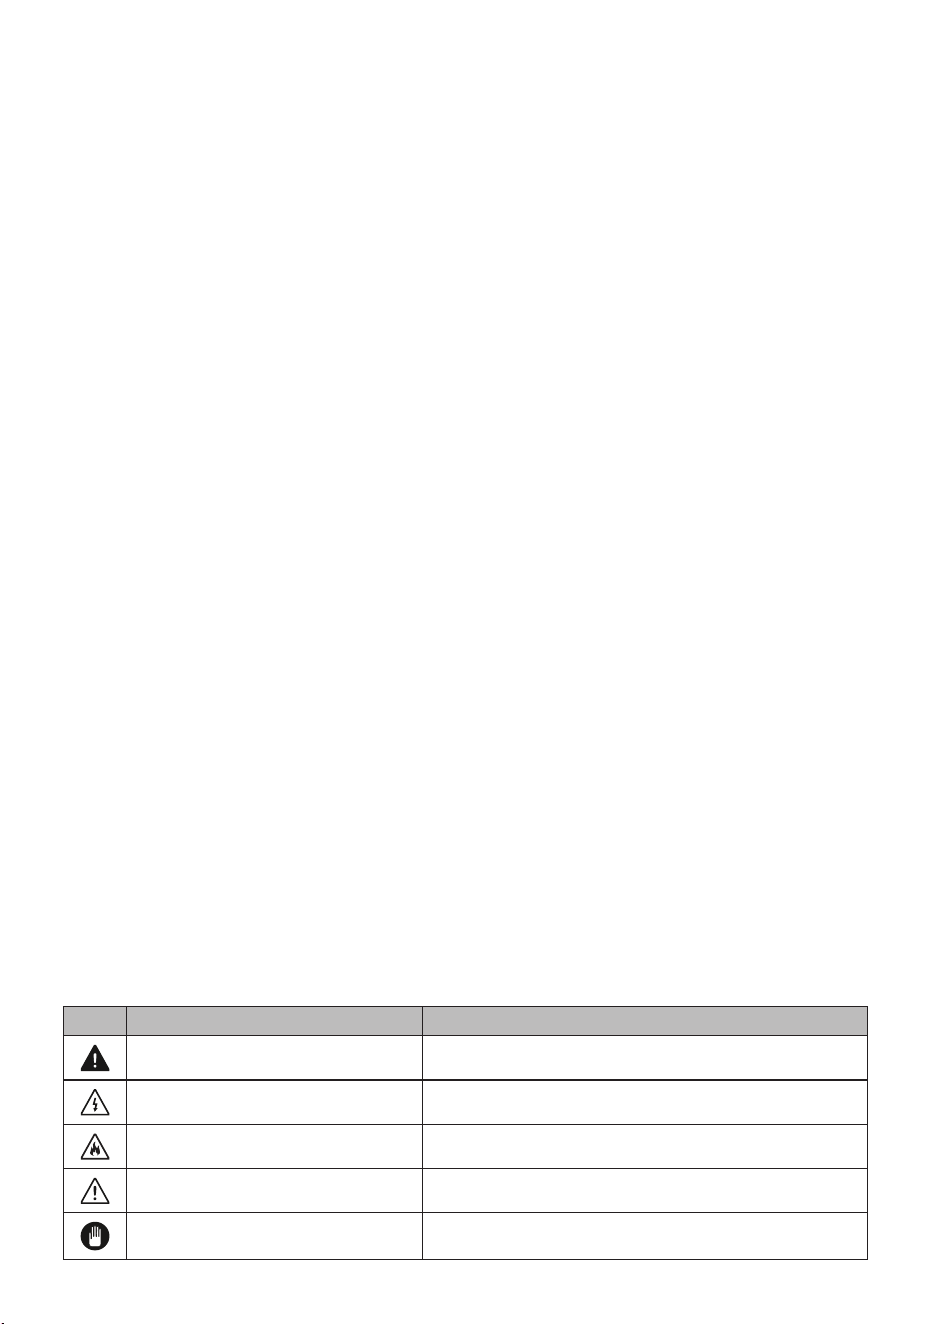
Icon Type Meaning
WARNING Serious injury or death risk
RISK OF ELECTRIC SHOCK Dangerous voltage risk
FIRE Warning; Risk of re / ammable materials
CAUTION Injury or property damage risk
IMPORTANT / NOTE Operating the system correctly
Thank you for choosing this product.
This User Manual contains important safety information and instructions on the operation
and maintenance of your appliance.
Please take the time to read this User Manual before using your appliance and keep this
book for future reference.

CONTENTS
1.SAFETY INSTRUCTIONS ................................................................................................. 4
1.1 General Safety Warnings ............................................................................................... 4
1.2 Installation Warnings ...................................................................................................... 7
1.3 During Use...................................................................................................................... 8
1.4 During Cleaning and Maintenance ................................................................................. 9
2.INSTALLATION AND PREPARATION FOR USE ............................................................ 10
2.1 Instructions for the Installer .......................................................................................... 10
2.2 Electrical Connection and Safety...................................................................................11
2.3 Safety Chain ................................................................................................................. 12
2.4 Adjusting the feet .......................................................................................................... 12
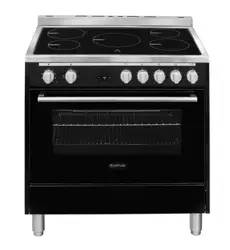
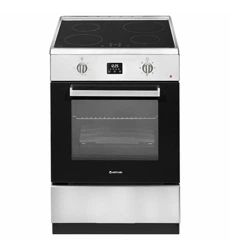
3.PRODUCT FEATURES ................................................................................................... 13
4.USE OF PRODUCT ........................................................................................................ 14
4.1 Hob controls ................................................................................................................. 14
4.2 Oven Controls............................................................................................................... 16
4.3 Cooking Table ............................................................................................................... 18
5.CLEANING AND MAINTENANCE................................................................................... 21
5.1 Cleaning ....................................................................................................................... 21
6.TROUBLESHOOTING&TRANSPORT ............................................................................ 24
6.1 Troubleshooting ............................................................................................................ 24
6.2 Transport ...................................................................................................................... 25
EN - 4
1. SAFETY INSTRUCTIONS
• Carefully read all instructions before using your
appliance and keep them in a convenient place for
reference when necessary.
• This manual has been prepared for more than one
model therefore your appliance may not have some
of the features described within. For this reason, it
is important to pay particular attention to any figures
whilst reading the operating manual.
1.1 General Safety WarninGS
• This appliance can be used by children aged from
8 years and above and by persons with reduced
physical, sensory or mental capabilities or lack
of experience and knowledge if they have been
given supervision or instruction concerning use of
the appliance in a safe way and understand the
hazards involved. Children should not play with the
appliance. Cleaning and user maintenance should
not be made by children without supervision.
WARNING: The appliance and its accessible parts
become hot during use. Care should be taken to avoid
touching heating elements. Keep children less than 8
years of age away unless they are continually
supervised.
WARNING: Unattended cooking on a hob with
fat or oil can be dangerous and may result in fire.
NEVER try to extinguish such a fire with water, but
switch off the appliance and cover the flame with a lid
or a fire blanket.
CAUTION: The cooking process has to be
supervised. A short term cooking process has to be
supervised continuously
EN - 5
WARNING: Danger of fire: Do not store items
on the cooking surfaces.
WARNING: If the surface is cracked, switch off
the appliance to avoid the possibility of electric shock.
• For induction hobs, metallic objects such as knives,
forks, spoons and lids should not be placed on the
hob surface because they can get hot.
• For induction hobs, after use switch off the hob
element using the control knob. Do not rely on the
pan detector.
• For models which incorporate a hob lid, clean any
spillages off the lid before use and allow the cooker
to cool before closing the lid.
• Do not operate the appliance with an external timer
or separate remote-control system.
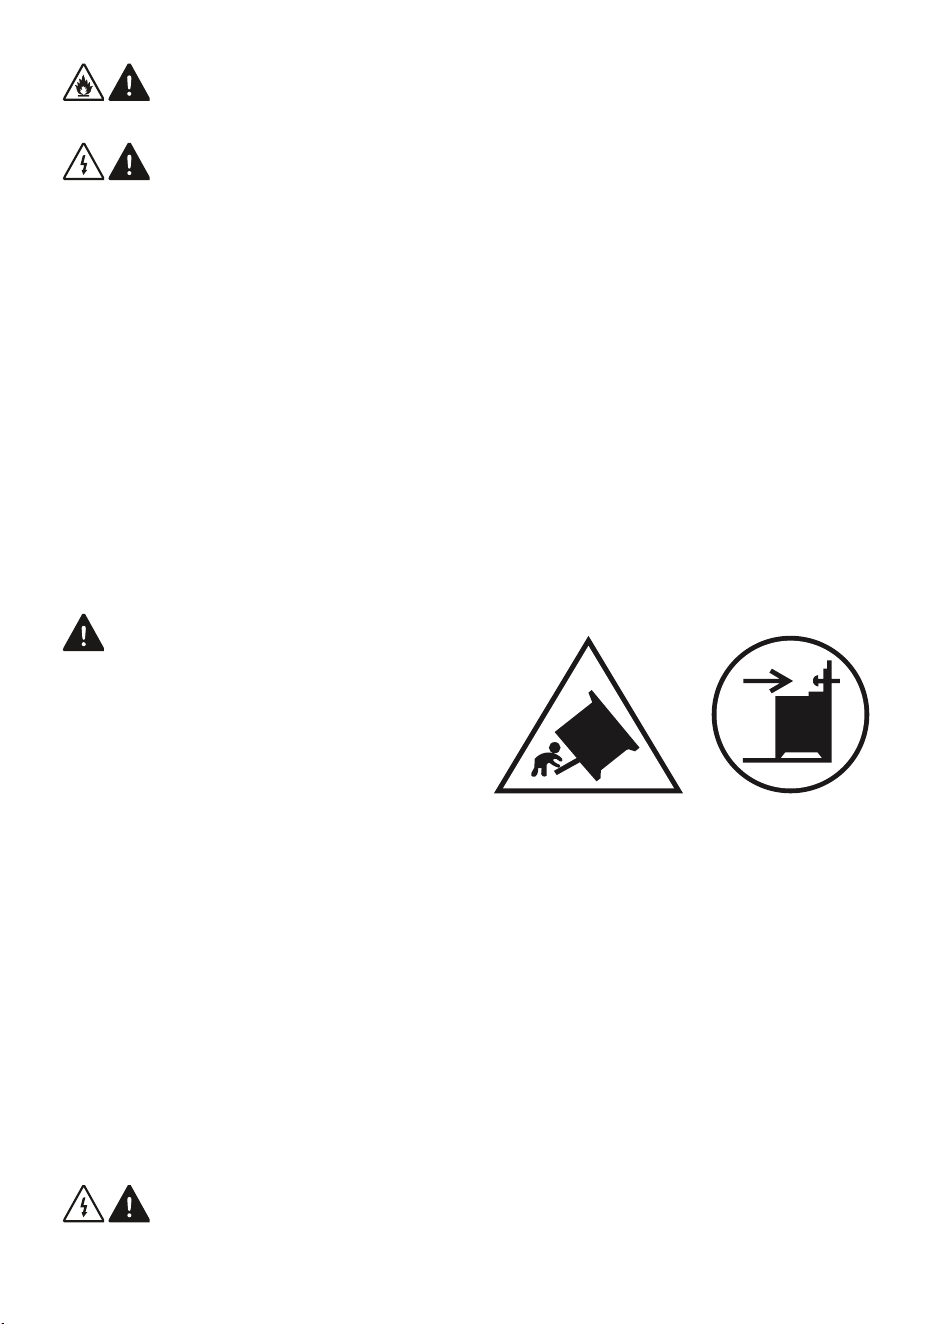
WARNING: To prevent
the appliance tipping, the
stabilising brackets must be
installed. (For detailed
information refer to the anti-
tilting kit set guide.)
• During use the appliance will get hot. Care should
be taken to avoid touching heating elements inside
the oven.
• Handles may become hot after a short period during
use.
• Do not use harsh abrasive cleaners or scourers to
clean oven surfaces. They can scratch the surfaces
which may result in shattering of the door glass or
damage to surfaces.
• Do not use steam cleaners to clean the appliance.
WARNING: To avoid the possibility of electric
shock, make sure that the appliance is switched off

EN - 6
before replacing the lamp.
CAUTION: Accessible parts may be hot when
cooking or grilling. Keep young children away from the
appliance when it is in use.
• Your appliance is produced in accordance with all
applicable local and international standards and
regulations.
• Maintenance and repair work should only be carried
out by authorised service technicians. Installation
and repair work that is carried out by unauthorised
technicians may be dangerous. Do not alter or
modify the specifications of the appliance in any
way. Inappropriate hob guards can cause accidents.
• Before connecting your appliance, make sure
that the local distribution conditions (nature of the
gas and gas pressure or electricity voltage and
frequency) and the specifications of the appliance
are compatible. The specifications for this appliance
are stated on the label.
CAUTION: This appliance is designed only for
cooking food and is intended for indoor domestic
household use only. It should not be used for any
other purpose or in any other application, such as for
non-domestic use, in a commercial environment or for
heating a room.
• Do not use the oven door handles to lift or move the
appliance.
• All possible measures have been taken to ensure
your safety. Since the glass may break, care should
be taken when cleaning. Avoid hitting or knocking
the glass with accessories.
• Make sure that the supply cord is not trapped or
damaged during installation. If the supply cord is
damaged, it must be replaced by the manufacturer,

EN - 7
its service agent or similarly qualified persons in
order to prevent a danger.
• Do not let children climb on the oven door or sit on it
while it is open.
• Please keep children and animals away from this
appliance.
• When the induction hob is in use, keep the objects
that are sensitive to magnetic fields (such as credit
cards, bank cards, watches, and similar items) away
from the hob. It is strongly suggested that anyone
with a pacemaker should consult their cardiologist
before using the induction hob.
1.2 inStallation WarninGS
• Do not operate the appliance before it is fully
installed.
• The appliance must be installed by an authorised
technician. The manufacturer is not responsible
for any damage that might be caused by incorrect
placement and installation by unauthorised people.
• When the appliance is unpacked, make sure that
it is has not been damaged during transportation.
In the case of a defect do not use the appliance
and contact a qualified service agent immediately.
The materials used for packaging (nylon, staplers,
styrofoam, etc) may be harmful to children and they
should be collected and removed immediately.
• Protect your appliance from the atmosphere. Do
not expose it to sun, rain, snow, dust or excessive
humidity.
• Materials around the appliance (i.e. cabinets) must
be able to withstand a minimum temperature of
100°C.
• The appliance must not be installed behind a

EN - 8
decorative door, in order to avoid overheating.
1.3 DurinG uSe
• When you first use your oven you may notice a
slight smell. This is perfectly normal and is caused
by the insulation materials on the heater elements.
We suggest that, before using your oven for the first
time, you leave it empty and operate it at maximum
temperature for 45 minutes. Make sure that the
environment in which the product is installed is well
ventilated.
• Take care when opening the oven door during or
after cooking. The hot steam from the oven may
cause burns.
• Do not put flammable or combustible materials in or
near the appliance when it is operating.
• Always use oven gloves to remove and replace food
in the oven.
• Under no circumstances should the oven be lined
with aluminium foil as overheating may occur.
• Do not place dishes or baking trays directly onto the
base of the oven whilst cooking. The base becomes
very hot and damage may be caused to the product.
Do not leave the cooker unattended when
cooking with solid or liquid oils. They may catch fire
under extreme heating conditions. Never pour water
on to flames that are caused by oil, instead switch the
cooker off and cover the pan with its lid or a fire
blanket.
• Always position pans over the centre of the cooking
zone, and turn the handles to a safe position so they
cannot be knocked.
• If the product will not be used for a long period of
time, turn the main control switch off. Turn the gas

EN - 9
valve off when gas appliances are not in use.
• Make sure the appliance control knobs are always in
the “0” (stop) position when it is not used.
• The trays incline when pulled out. Take care not to
spill or drop hot food while removing them from the
oven.
• Do not place anything on the oven door when it is
open. This could disrupt the balance of the oven or
damage the door.
• Do not place heavy or flammable items (e.g. nylon,
plastic bags, paper, cloth, etc.) into the drawer. This
includes cookware with plastic accessories (e.g.
handles).
CAUTION: The inside surface of the storage
compartment may get hot when the appliance is in
use. Avoid touching the inside surface.
• Do not hang towels, dishcloths or clothes from the
appliance or its handles.
1.4 DurinG CleaninG anD MaintenanCe
• Make sure that your appliance is turned off at
the mains before carrying out any cleaning or
maintenance operations.
• Do not remove the control knobs to clean the control
panel.
• To maintain the efficiency and safety of your
appliance, we recommend you always use original
spare parts and to call our authorised service agents
when needed.
EN - 10
2. INSTALLATION AND
PREPARATION FOR USE
WARNING : This appliance must be
installed by an authorised service
person or qualified technician,
according to the instructions in this guide
and in compliance with the current local
regulations.
• Incorrect installation may cause harm
and damage, for which the manufacturer
accepts no responsibility and the
warranty will not be valid.
• Prior to installation, ensure that the local
distribution conditions (electricity voltage
and frequency and/or nature of the gas
and gas pressure) and the adjustments
of the appliance are compatible. The
adjustment conditions for this appliance
are stated on the label.
• The laws, ordinances, directives and
standards in force in the country of use
are to be followed (safety regulations,
proper recycling in accordance with the
regulations, etc.).
• If the product contains removable shelf
guides (wire racks) and the user manual
includes recipes like yoghurt, the wire
racks shall be removed and the oven
operated in the defined cooking mode.
Removal of the Wire Shelf information
is included in the CLEANING AND
MAINTENANCE section.
2.1 inStruCtionS for the inStaller
General instructions
• After removing the packaging material
from the appliance and its accessories,
ensure that the appliance is not
damaged. If you suspect any damage,
do not use it and contact an authorised
service person or qualified technician
immediately.
• Make sure that there are no flammable
or combustible materials in the close
vicinity, such as curtains, oil, cloth etc.
which may catch fire.
• The worktop and furniture surrounding
the appliance must be made of
materials resistant to temperatures
above 100°C.
• The appliance should not be installed
directly above a dishwasher, fridge,
freezer, washing machine or clothes
dryer.
• The appliance can be placed close to
other furniture on condition that, in the
area where the appliance is set up, the
furniture’s height does not exceed the
height of the cooktop.
Installation of the Cooker
• If the kitchen furniture is higher than the
cooktop, the kitchen furniture must be
at least 10 cm away from the sides of
appliance for air circulation.
• If a cooker hood or cupboard is to be
installed above the appliance, the safety
distance between cooktop and any
cupboard/cooker hood should be as
shown below.
A (mm) Cupboard 420
B (mm) Cooker Hood 650/700
C (mm) Product Width
D (mm) 50
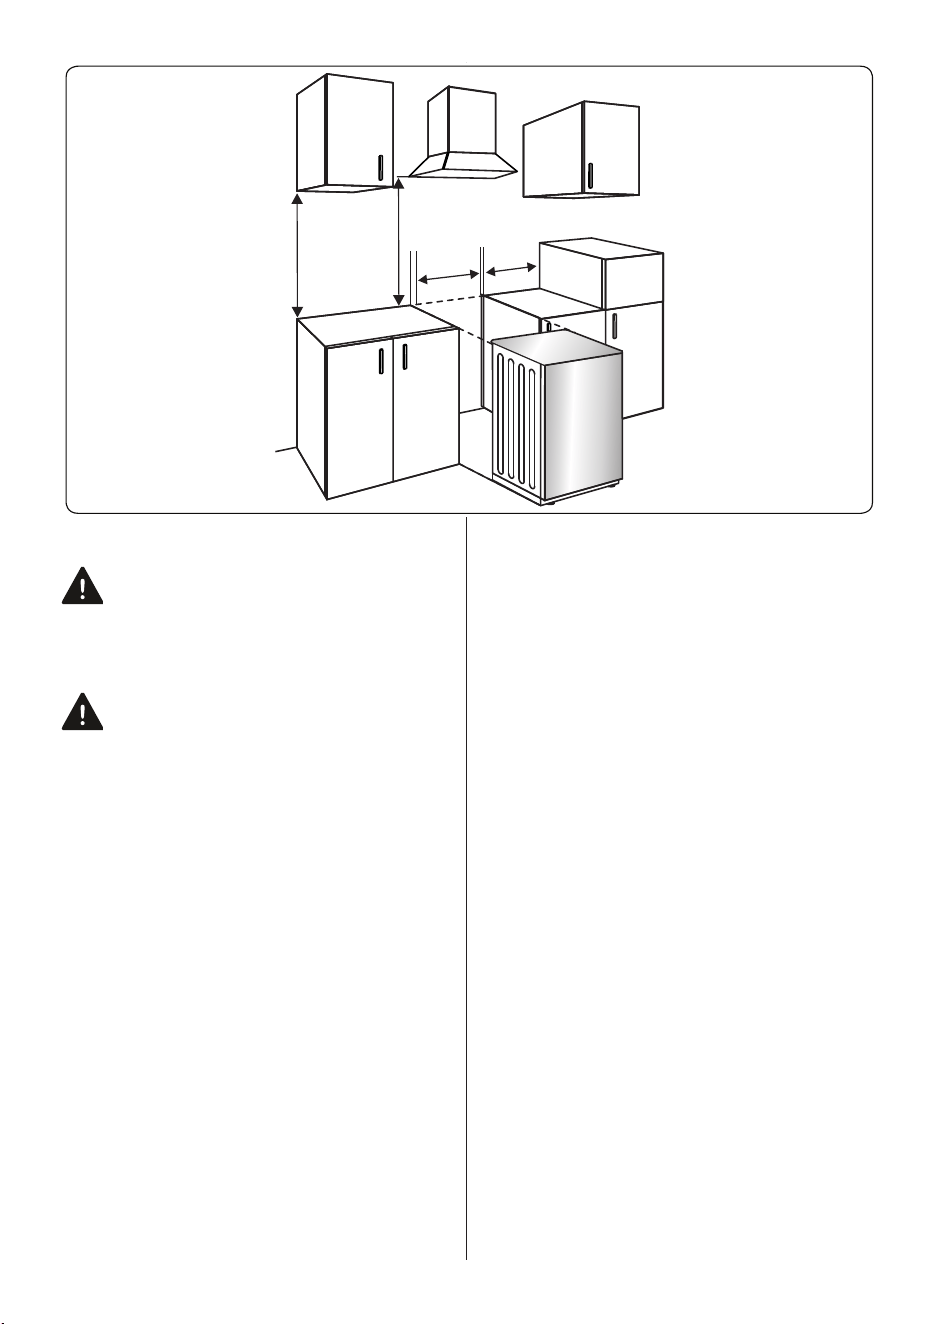
EN - 11
A
B
C
D
2.2 eleCtriCal ConneCtion anD Safety
WARNING: The electrical connection
of this appliance should be carried out
by an authorised service person or
qualified electrician, according to the
instructions in this guide and in compliance
with the current local regulations.
WARNING: THE APPLIANCE MUST
BE EARTHED.
• Before connecting the appliance to the
power supply, the voltage rating of the
appliance (stamped on the appliance
identification plate) must be checked for
correspondence to the available mains
supply voltage, and the mains electric
wiring should be capable of handling the
appliance’s power rating (also indicated
on the identification plate).
• During installation, please ensure
that isolated cables are used. An
incorrect connection could damage
your appliance. If the mains cable is
damaged and needs to be replaced
this should be done by a qualified
personnel.
• Do not use adaptors, multiple sockets
and/or extension leads.
• The supply cord should be kept away
from hot parts of the appliance and must
not be bent or compressed. Otherwise
the cord may be damaged, causing a
short circuit.
• If the appliance is not connected
to the mains with a plug, a all-pole
disconnector (with at least 3 mm contact
spacing) must be used in order to meet
the safety regulations.
• The appliance is designed for a power
supply of 220-240 V~.380-415 3N~
If your supply is different, contact
the authorized service personnel or
qualified electrician.
• The power cable (H05VV-F) must be
long enough to be connected to the
appliance.
• The fused switch must be easily
accessible once the appliance has been
installed.
• Ensure all connections are adequately
tightened.
• Fix the supply cable in the cable clamp
and then close the cover.
• The terminal box connection is placed
on the terminal box.
EN - 12
4
4
N
N PE
PE
L2
L3
L1
L
5 5
3
3
2
2
1
1
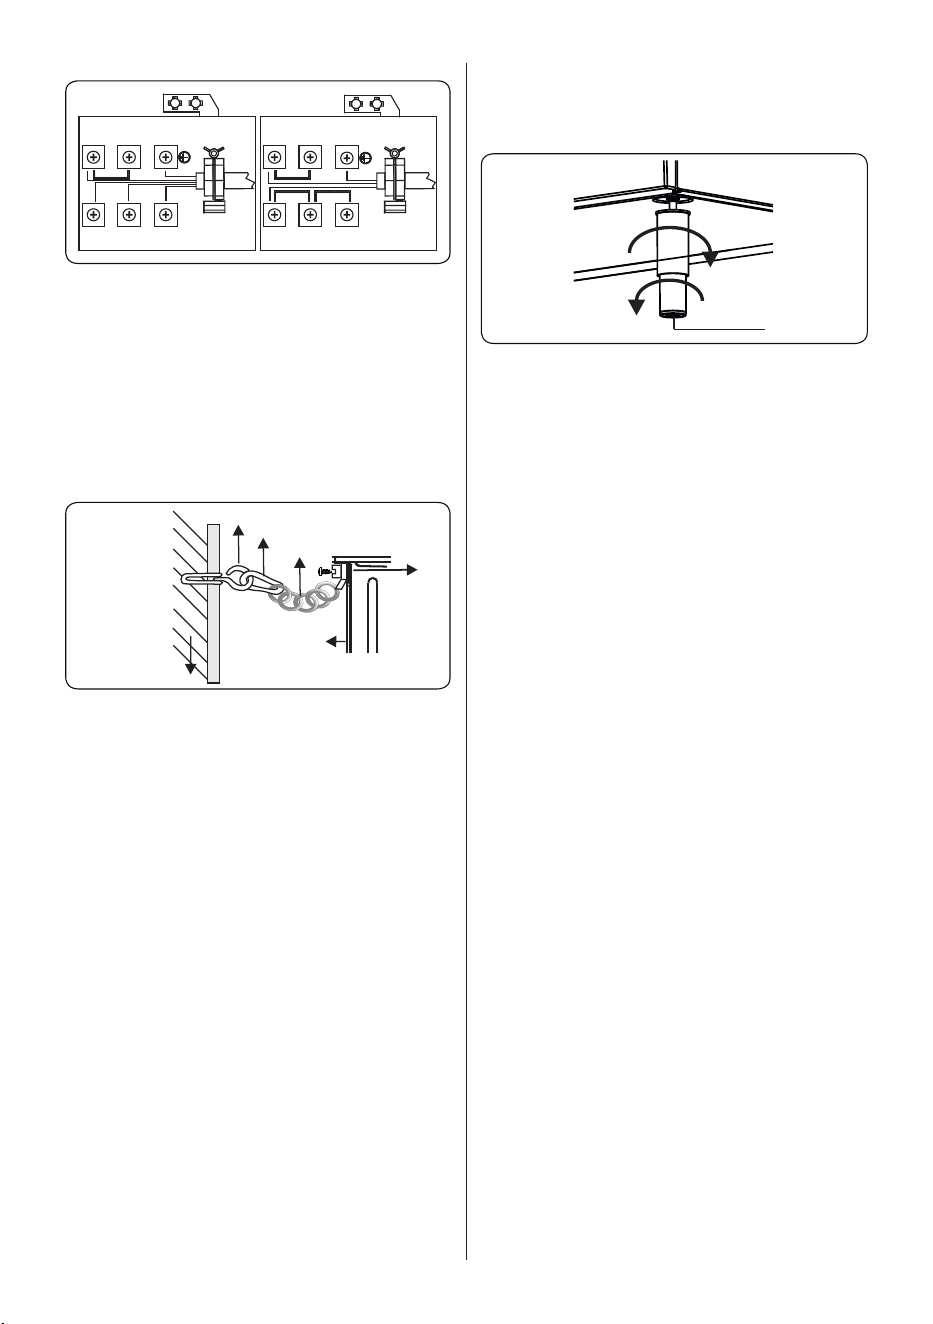
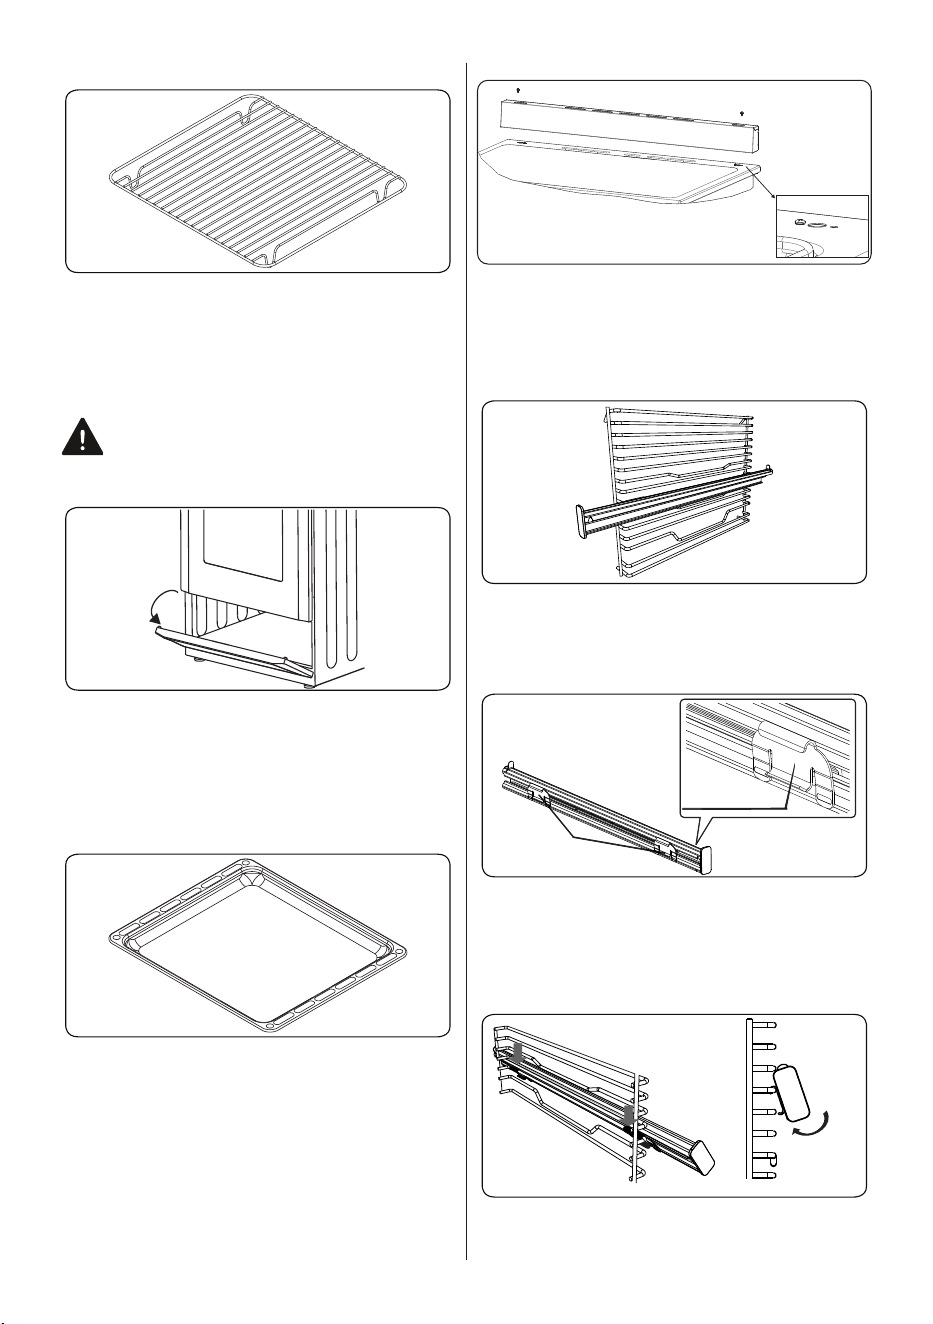
2.3 Safety Chain
The appliance can be prevented from falling
over by securing the supplied safety chain
to the rear of the cooker.
Use a wall plug to fasten the hook (1) to the
kitchen wall and connect the safety chain
(3) to the hook with the help of the locking
mechanism.
1
2
3
4
5
6
1- Hook
2- Locking mechanism
3- Safety chain (mounted to appliance)
4- Tightly fix chain to cooker rear
5- Rear of cooker
6- Kitchen wall
The safety chain should be as short as
practically possible to avoid the cooker
tilting forward.
2.4 aDjuStinG the feet
The appliance is supplied with 4 adjustable
feet. Attach the feet to the bottom panel
support by rotating clockwise as shown in
the figure.
For safe operation, it is important that your
appliance is correctly balanced. Make sure
the appliance is level prior to cooking. To
increase the height of the appliance, turn
the inner part of the feet anti-clockwise. To
decrease the height of the appliance, turn
the inner part of the feet clockwise.
It is possible to raise the height of the
appliance up to 50 mm by adjusting the
feet. The appliance is heavy and we
recommend that a minimum of 2 people lift
it. Never drag the appliance.
Inner part
EN - 13
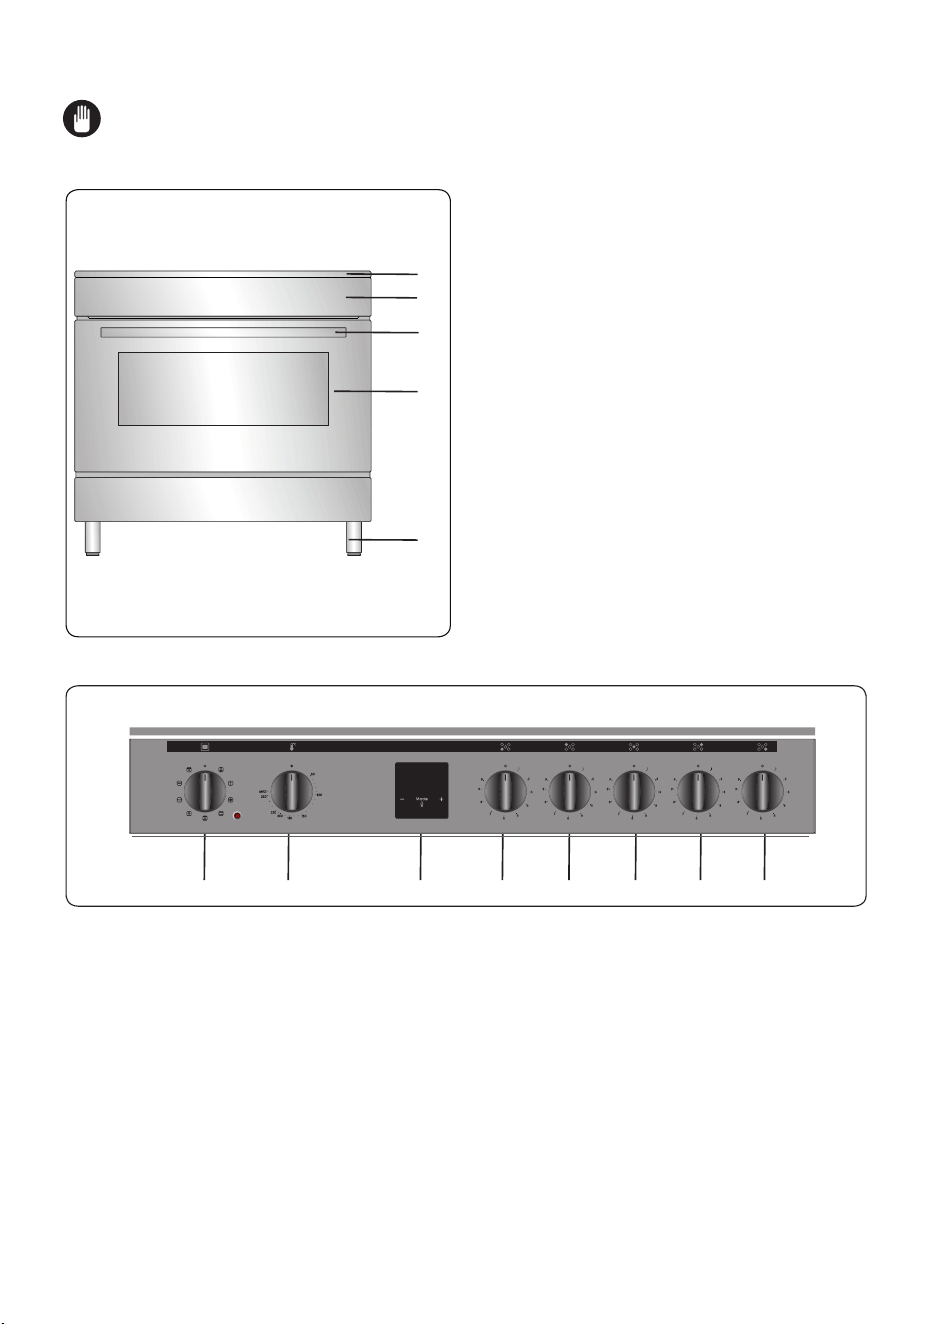
3. PRODUCT FEATURES
Important: Specifications for the product vary and the appearance of your appliance
may differ from that shown in the figures below.
List of Components
1
2
3
4
5
1. Cooktop
2. Control Panel
3. Oven Door Handle
4. Oven Door
5. Adjustable Feet
Control Panel
6. Timer
7. Oven Control Knob
8. Thermostat Control Knob
9. Hob Control Knob
7
8
6
10
10
10
10
10
EN - 14
4. USE OF PRODUCT
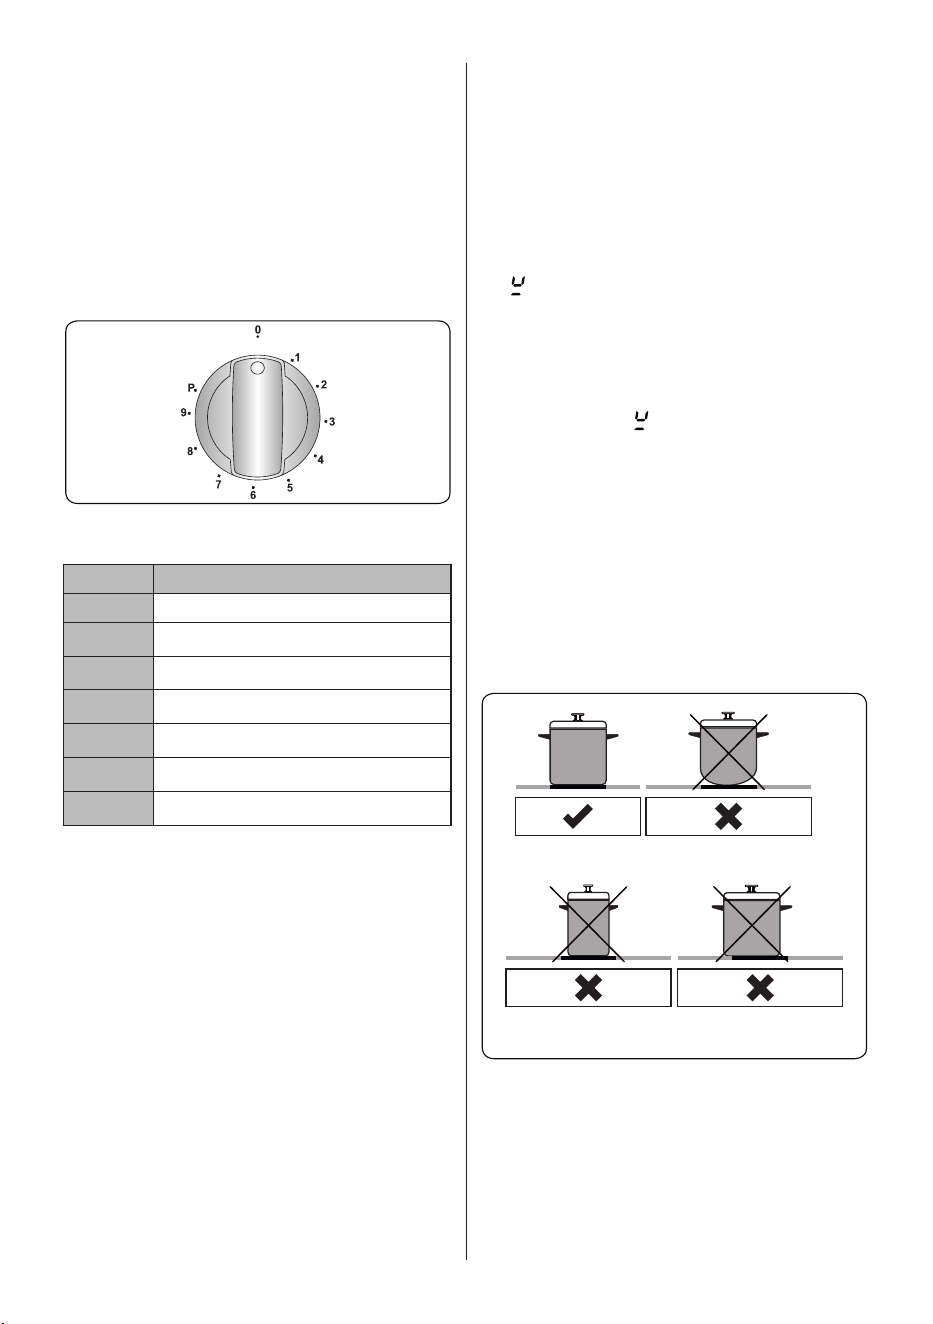
4.1 hob ControlS
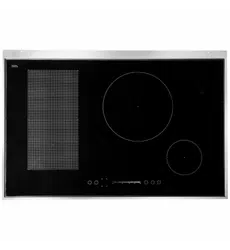
Induction Zone
The induction zone is controlled by a knob
with 9 positions.
The induction zone is operated by turning
the control knob to the required setting.
Near each control knob is a symbol which
indicates the zone that is controlled by the
knob.
The information given in the following table
is for guidance only.
Settings Use for
0 Element off
1-3 Delicate warming
4-5 Gentle simmering, slow warming
6-7 Reheating and rapid simmering
8 Boiling, saute and searing
9 Maximum heat
P Boost function
Cookware
• Use thick, flat, smooth bottomed
good quality cookware made of steel,
enamelled steel, cast iron or stainless
steel. The quality and composition of the
cookware has a direct effect on cooking
performance.
• Do not use concave or convex bottomed
cookware. Cookware made from
aluminium and stainless steel with non-
ferromagnetic bottom, glass, copper,
brass, ceramic, porcelain are unsuitable
for induction heating.
• To check if the cookware is suitable
for induction cooking you can hold a
magnet to the base of the cookware.
If the magnet sticks, the cookware is
generally suitable or you can put little
water in the cookware on a cooking
zone set at maximum level. The water
must heating at a few seconds.
• When using certain pans, you may hear
various noises coming from them, this is
due to the design of the pans and does
not affect the performance or safety of
the hob.
• To achieve the best cooking
performance, the pan should be placed
in the center of the cooking zone.
• symbol flashes when the power level
is selected in cooking zone display if
unsuitable pan or no pan is placed on
the cooking zone. The cooking zone will
switch off automaticaly after 2 minutes.
• If a suitable pan is placed on the
cooking zone symbol will disappear
and cooking continues at the selected
power level.
• To obtain best energy transferring the
diameter of the cookware base should
match that of the cooking zone.
• The minimum cookware diameter
should be D120 mm for 160 mm
cooking zones, D140 mm for 210 mm
cooking zones and D160 mm for 290
mm cooking zones.
Circular Saucepan
Base
Small Saucepan
Diameter
Saucepan base that
has not settled
The appliance is operated by pressing
knobs and the functions are confirmed by
displays and audible sounds.
EN - 15
Touch Control Unit
2
3
4
5
1
1- Decrease timer
2- Timer display
3- Timer zone indicator
4- Timer selection
5- Increase timer
Use the induction cooking zones with
suitable cookware.
After mains voltage is applied, the hob
is in the stand-by mode and is ready for
operation.
The hob is controlled by the use of knobs
for setting the cooking level and touch
sensors for setting the timer. Each button
pressed is followed by a buzzer sound.
Switching the Cooking Zones On
Use the corresponding knob to set the
cooking level from 0 to 9. The element is
now ready to use. For fast boil times, keep
the knob at the “P” position for 2 seconds to
activate the Boost function and then adjust
to the desired level.
Switching the Cooking Zones Off
Adjust the knob to“0”.
If the cooking zone is hot, “H” will be
displayed instead of “0”.
Residual Heat Indicator
The residual heat indicator indicates that
the glass ceramic area has a temperature
that is dangerous to touch.
After switching off the cooking zone, the
respective display will show “H” until the
corresponding cooking zone temperature is
at a safe level.
Safety Switch-Off Function
A cooking zone will automatically switch off
if the heat setting has not been modified
for a specified duration of time. A change
in the heat setting of the cooking zone will
reset the time duration to the initial value.
This initial value depends on the selected
temperature level, as shown below.
Heat setting Safety switch off after
1-2 6 Hours
3-4 5 Hours
5 4 Hours
6-9 1.5 Hours
Timer Function
Cooking Zone Timer (1 - 99 min.)
When the hob is switched on, an
independent timer can be programmed for
each cooking zone.
Select a cooking zone, then select the
temperature setting and, finally, activate the
timer setting button , the timer can be
programmed to switch off a cooking zone.
Four LEDs are arranged around the timer
that indicate which cooking zone the timer
has been set for.
10 seconds after the last operation, the
timer display will change to the timer that
will run out next (in cases where a timer is
set for more than one cooking zone).
When the timer has run down, a signal will
sound, the timer display will show ´00` and
the assigned cooking zone timer LED will
blink. The programmed cooking zone will
switch off and “H” will be displayed if the
cooking zone is hot.
The sound signal and the blinking of the
timer LED will stop automatically after 2
minutes and/or by pressing any button.
Buzzer
While the hob is in operation, the following
activities will be signalled by the buzzer.
• Normal button activation will be
accompanied with a short sound signal.
• Continuous button operation over a
longer period of time (10 seconds)
will be accompanied with a longer,
intermittent sound signal.
Boost Function
To use this function, select a cooking zone
and set the desired cooking level, then
press the “P” (Boost) button.
The Boost function can only be activated
if it is applicable with the cooking zone
selected. If the Boost Function is active, a
“P” is shown on the corresponding display.
Activating the booster can exceed the
EN - 16
maximum power, in which case the
integrated power management will be
activated.
The necessary power reduction is shown
by the corresponding cooking zone display
blinking. Blinking will be active for 3
seconds to allow for further adaptations of
the settings before power reduction.
Error Codes
If there is an error, an error code will be shown on the
heater displays.
E0
Ampere limit feature must be selected at the
moment the product is energized. Otherwise
E0 error is seen. At the same time, this
feature should be selected on the display
and mainboard. If there is an error in the
software of any card, the product will show
an error. The customer cannot interfere
in this error. Authorized service should be
called.
E1
Cooling Fan is disabled. Call an authorised
service agent.
E2
This error is seen when the heater gets too
hot. In case of this error, the heater must be
cooled. It should be operated after cooling,
again.
E3
Supply voltage is other than the rated values.
Switch the hob off by pressing ,wait until
“H” disappears for all zones, switch the hob
on by pressing and continue to use. If
the same error is displayed again, call an
authorised service agent.
E4
Supply frequency is different from the rated
values. Switch the hob off by pressing
, wait until “H” disappears from all
zones, switch the hob on by pressing
and continue to use. If the same error is
displayed again, switch the plug for the
appliance off and on. Switch the hob on by
pressing and continue to use. If the same
error is displayed again, call an authorised
service agent.
E5
Internal temperature of the hob is too high,
switch the hob off by pressing and let the
heaters cool down.
E6
Communication error between the touch
control and heater. Call an authorised service
agent.
E7
Coil temperature sensor is disabled. Call an
authorized service agent.
E8
Cooler temperature sensor is disabled. Call
an authorized service agent.
EA
Large Coil Saturation Error. Switch the hob
off by pressing on/off button, switch the hob
on by pressing on/off button and continue to
use. If the same error is displayed again, call
an authorised service agent.
EC
Supply Voltage Error.Switch the hob off by
pressing on/off button, switch the hob on by
pressing on/off button and continue to use.
If the same error is displayed again, call an
authorised service agent.
C1-C8
Microprocessor alert. After this warning,
cut off energy from the product and then
re-energize the product. If the same error is
displayed again, call an authorised service
agent.
4.2 oven ControlS
Oven function control knob
Turn the knob to the corresponding symbol
of the desired cooking function. For the
details of different functions see ´Oven
Functions`.
Oven thermostat knob
After selecting a cooking function, turn
this knob to set the desired temperature.
The oven thermostat light will illuminate
whenever the thermostat is in operation
to heat up the oven or maintain the
temperature.
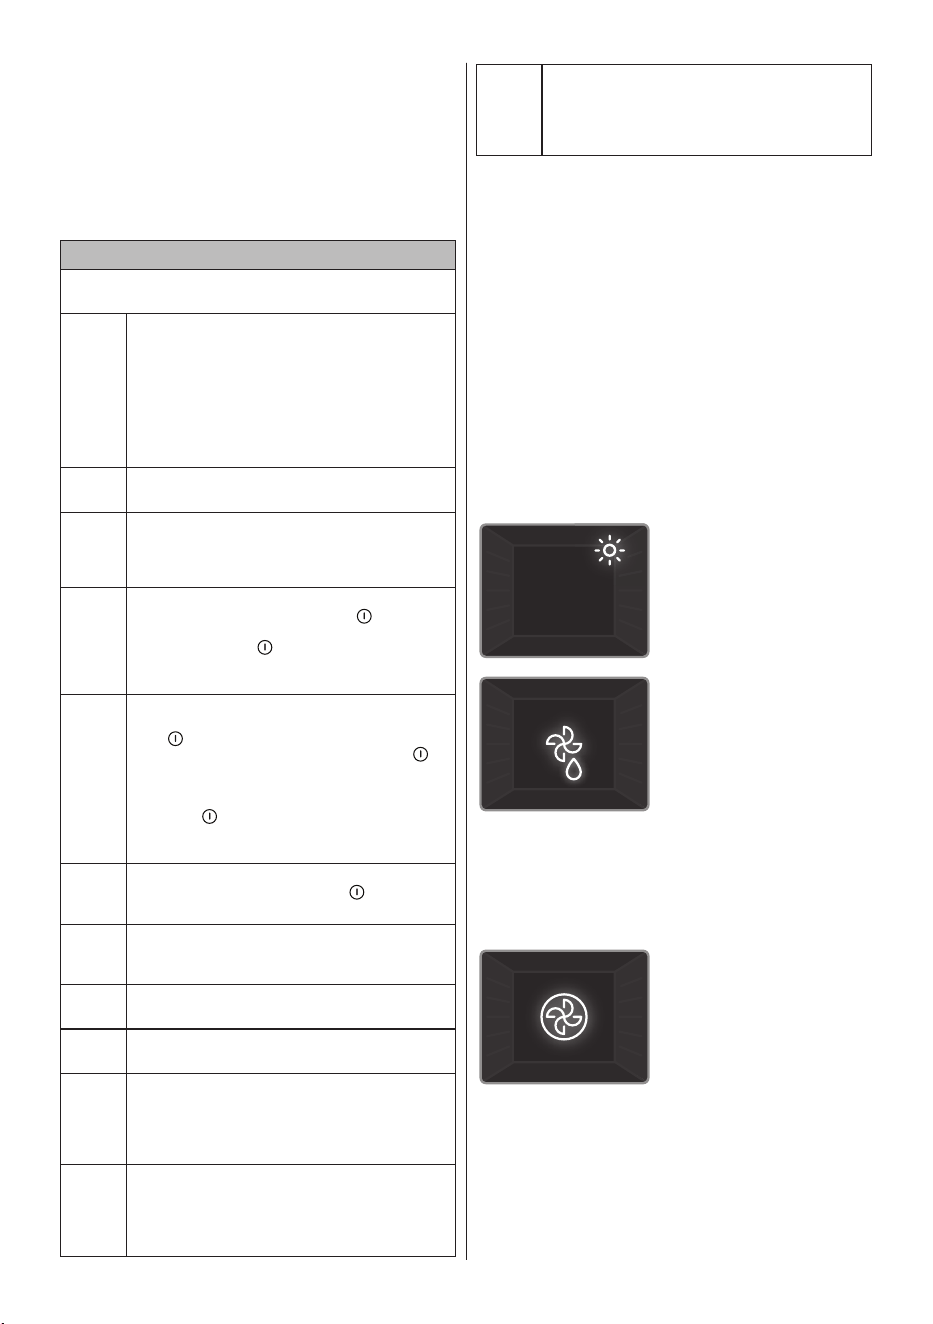
Oven Functions
* The functions of your oven may be
different due to the model of your product.
Oven Lamp: Only the
oven light will switch
on. It will remain on for
the duration of the
cooking function.
Defrost Function: The
oven’s warning lights
will switch on and the
fan will start to operate.
To use the defrost
function, place your
frozen food in the oven
on a shelf in the third slot from the bottom.
It is recommended that you place an oven
tray under the defrosting food to catch the
water accumulated due to melting ice. This
function will not cook or bake your food, it
will only help to defrost it.
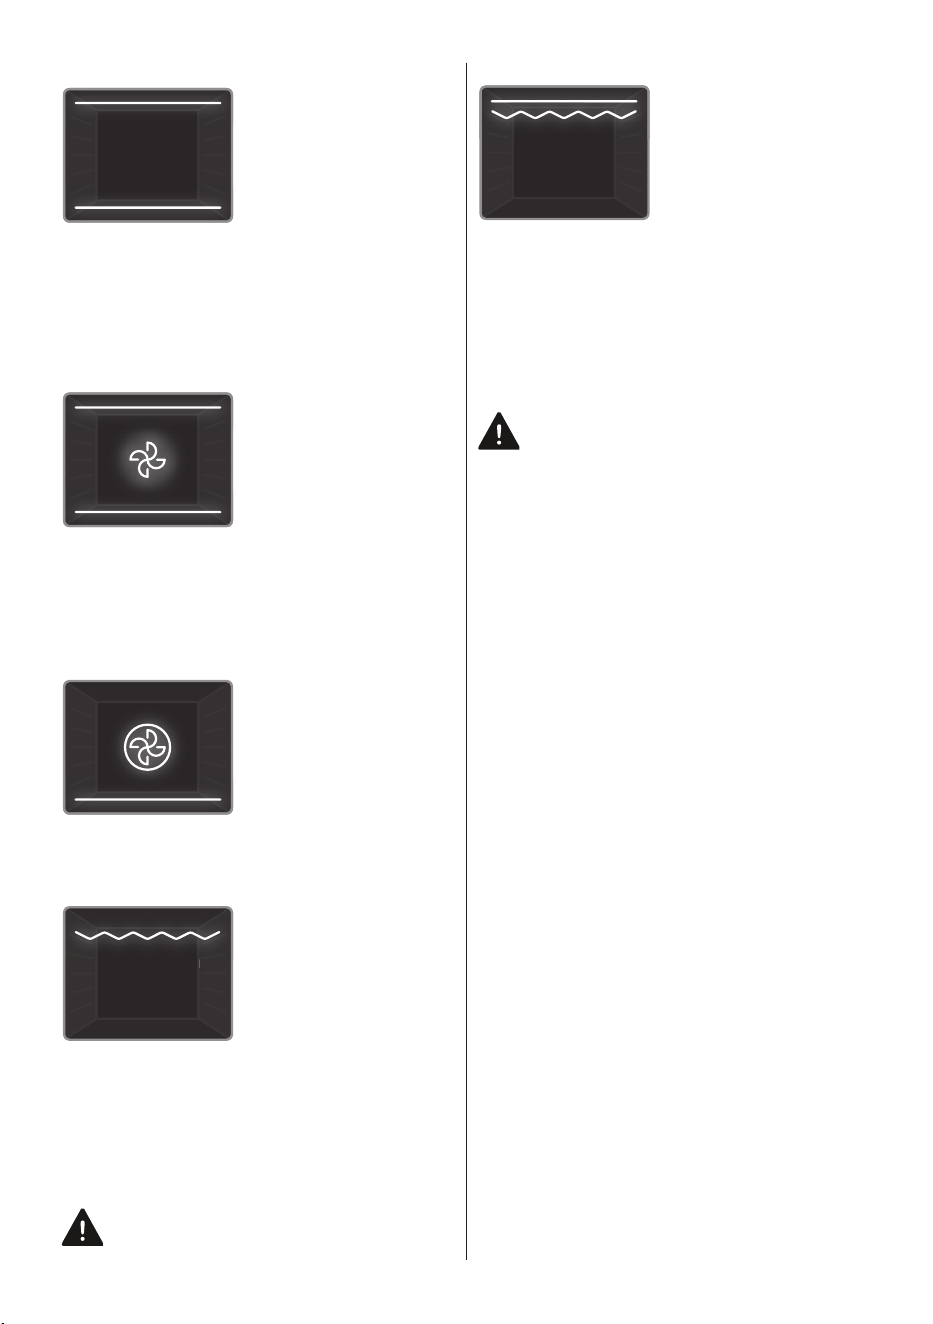
Turbo Function: The
oven’s thermostat and
warning lights will
switch on, and the ring
heating element and
fan will start operating.
The turbo function
evenly disperses the heat in the oven so all
food on all racks will cook evenly. It is
recommended that you preheat the oven for
about 10 minutes.
EN - 17
Static Cooking
Function: The oven’s
thermostat and
warning lights will
switch on, and the
lower and upper
heating elements will
start operating. The
static cooking function emits heat, ensuring
even cooking of food. This is ideal for
making pastries, cakes, baked pasta,
lasagne and pizza. Preheating the oven for
10 minutes is recommended and it is best
to use only one shelf at a time in this
function.
Fan Function: The
oven’s thermostat and
warning lights will
switch on, and the
upper and lower
heating elements and
fan will start operating.
This function is good for baking pastry.
Cooking is carried out by the lower and
upper heating elements within the oven and
by the fan, which provides air circulation,
giving a slightly grilled effect to the food. It
is recommended that you preheat the oven
for about 10 minutes.
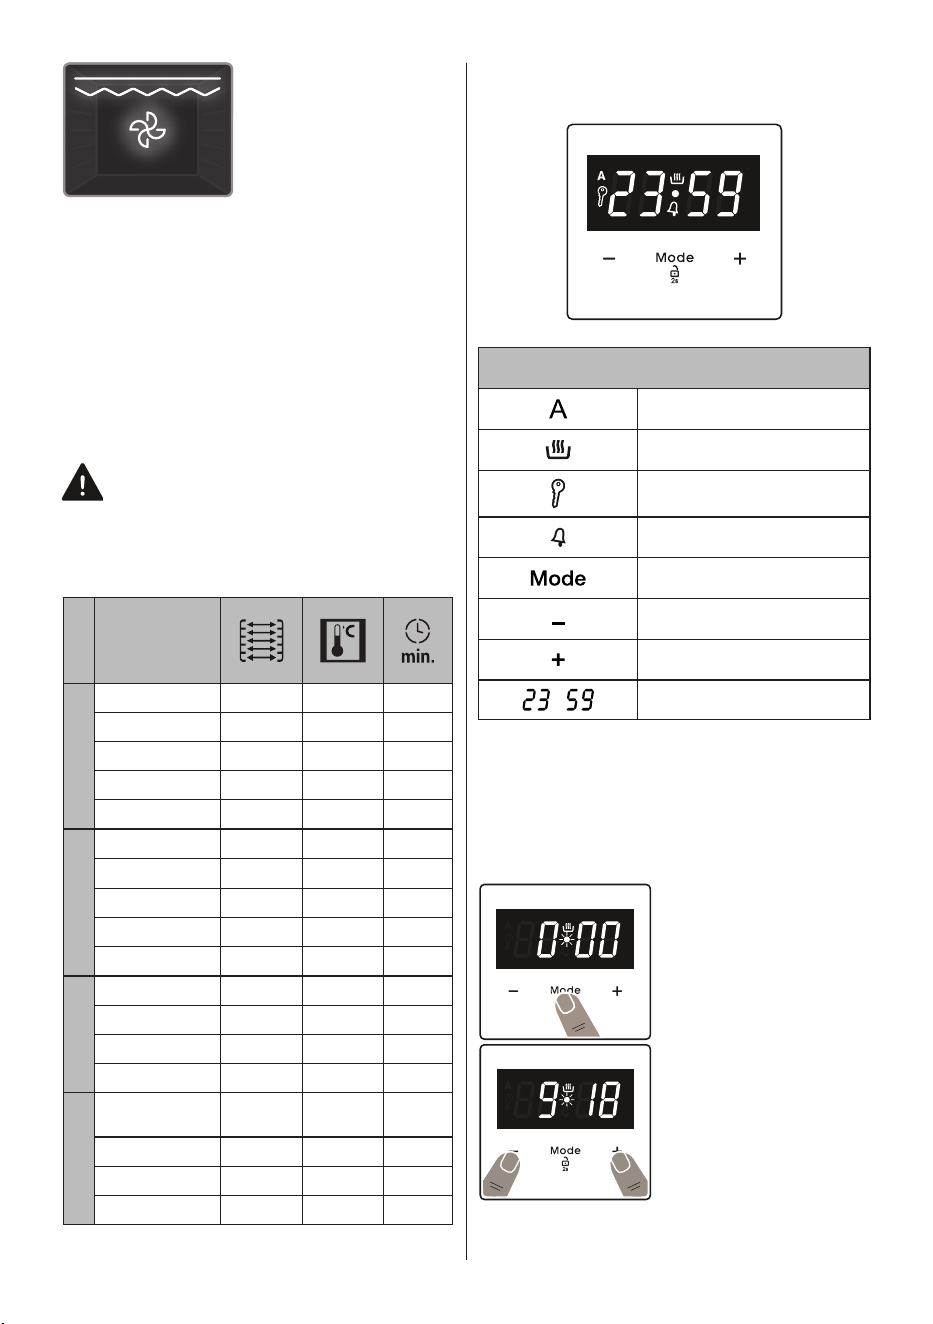
Pizza Function: The
oven’s thermostat and
warning lights will
switch on, and the ring,
lower heating elements
and fan will start
operating. This function
is ideal for baking food, such as pizza,
evenly in a short time. While the fan evenly
disperses the heat of the oven, the lower
heating element ensures baking of the food.
Grilling Function: The
oven’s thermostat and
warning lights will
switch on, and the grill
heating element will
start operating. This
function is used for
grilling and toasting foods on the upper
shelves of the oven. Lightly brush the wire
grid with oil to stop food sticking and place
food in the centre of the grid. Always place
a tray beneath the food to catch any drips
of oil or fat. It is recommended that you
preheat the oven for about 10 minutes.
Warning: When grilling, the oven door
must be closed and the oven
temperature should be adjusted to 190°C.
Faster Grilling
Function: The oven’s
thermostat and
warning lights will
switch on, and the grill
and upper heating
elements will start
operating. This function is used for faster
grilling and for grilling food with a larger
surface area, such as meat. Use the upper
shelves of the oven. Lightly brush the wire
grid with oil to stop food sticking and place
food in the centre of the grid. Always place
a tray beneath the food to catch any drips
of oil or fat. It is recommended that you
preheat the oven for about 10 minutes.
Warning: When grilling, the oven door
must be closed and the oven
temperature should be adjusted to 190°C.
EN - 18
Double Grill and Fan
Function: The oven’s
thermostat and
warning lights will
switch on, and the grill,
upper heating
elements and fan will
start operating. This function is used for
faster grilling of thicker food and for grilling
of food with a larger surface area. Both the
upper heating elements and grill will be
energised along with the fan to ensure even
cooking. Use the upper shelves of the oven.
Lightly brush the wire grid with oil to stop
food sticking and place food in the centre of
the grid. Always place a tray beneath the
food to catch any drips of oil or fat. It is
recommended that you preheat the oven for
about 10 minutes.
Warning: When grilling, the oven door
must be closed and the oven
temperature should be adjusted to
190°C.
4.3 CookinG table
Function
Dishes
Static
Puff Pastry 1 - 2 170-190 35-45
Cake 1 - 2 170-190 30-40
Cookie 1 - 2 170-190 30-40
Stew 2 175-200 40-50
Chicken 1 - 2 200 45-60
Fan
Puff Pastry 1 - 2 170-190 25-35
Cake 1 - 2 - 3 150-170 25-35
Cookie 1 - 2 - 3 150-170 25-35
Stew 2 175-200 40-50
Chicken 1 - 2 200 45-60
Turbo
Puff Pastry 1 - 2 - 3 170-190 35-45
Cake 1 - 2 - 3 150-170 30-40
Cookie 1 - 2 - 3 150-170 25-35
Stew 2 175-200 40-50
Grilling
Grilled
meatballs
4 200 10-15
Chicken * 190 50-60
Chop 3 - 4 200 15-25
Beefsteak 4 200 15-25
*If available cook with roast chicken skewer.
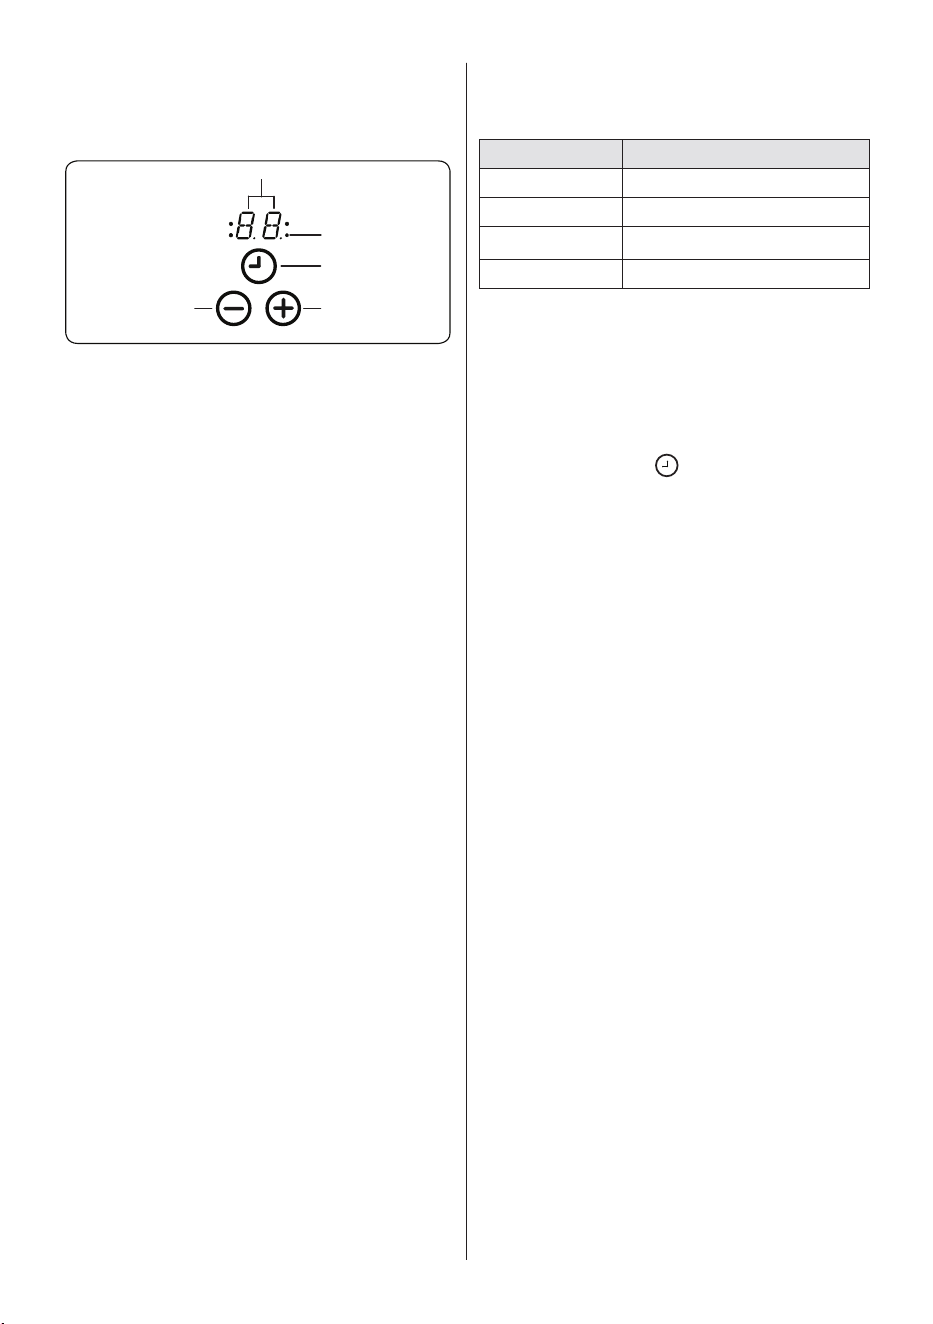
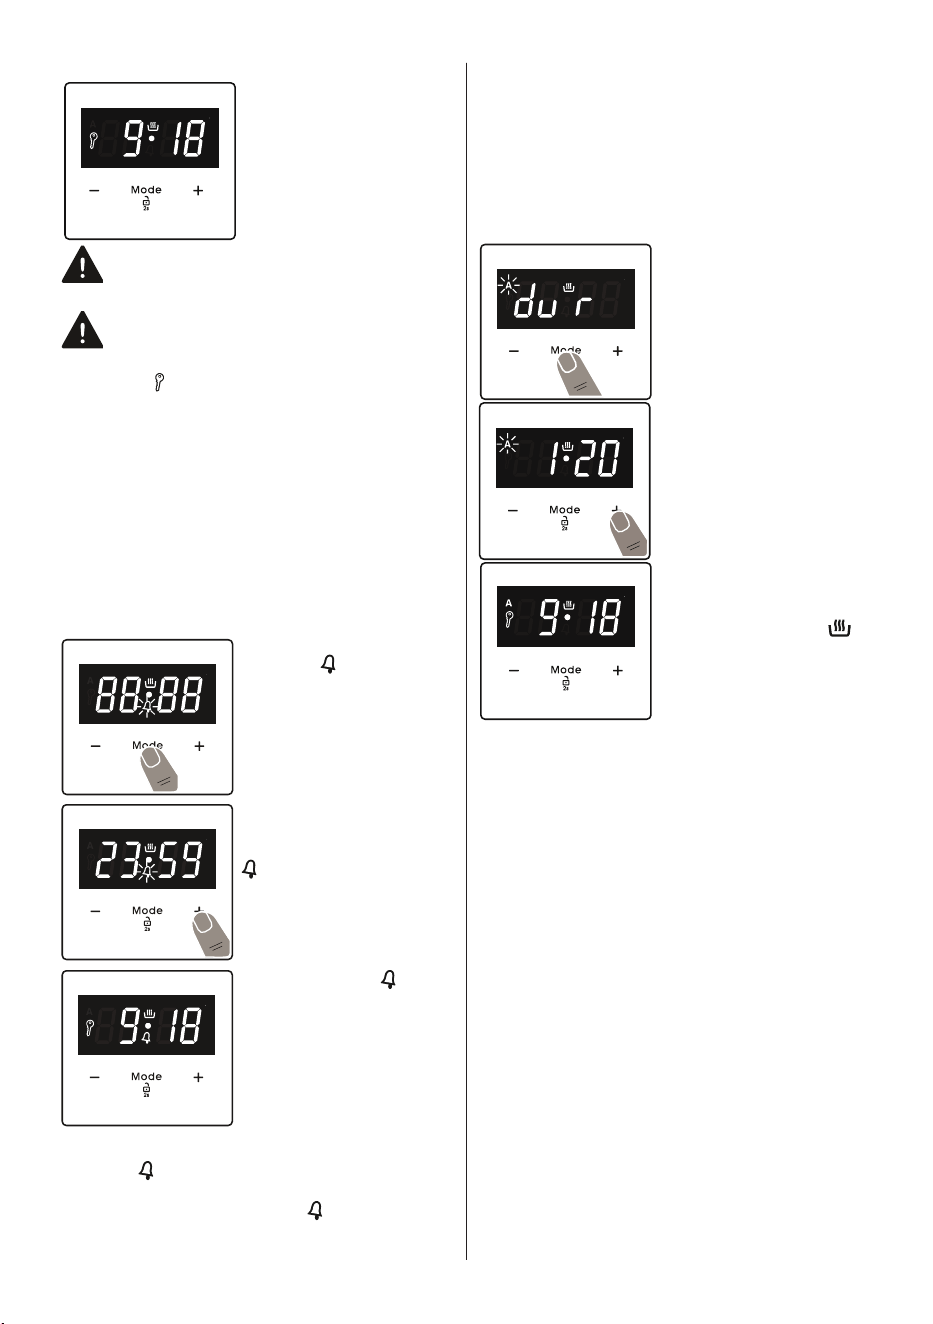
Use of the Digital Touch Timer
Function Description
Auto cooking
Manual cooking
Key Lock
Minute minder
Mode function
Decrease timer
Increase timer
Timer display
Time adjustment
The time must be set before you start using
the oven. Following the power connection,
the symbol “A” and “00:00” or “12:00” will
flash on the display.
1. Press the “MODE”
for 2 sec to deactive
keylock and the dot
in the middle of the
screen will start to
flash.
2. Adjust the time while
the dot is flashing
using the “+” and “-”
keys.
EN - 19
3. After a few
seconds, the dot will
stop flashing and will
remain illuminated.
After time adjustment, both control
knobs must be in the off position for
the product to reach standby mode.
Key Lock
The key lock automatically activates
after the timer has not been used for 5
seconds. “ ” symbol will appear and remain
illuminated. To unlock the timer buttons,
press and hold the “MODE” button for 2
seconds. The desired operation can then be
carried out.
Audible warning time adjustment
The audible warning time can be set to any
time between “00:00” and “23:59” hours.
The audible warning time is for warning
purposes only. The oven will not
be activated with this function.
1. Press “MODE”. The
symbol “ ” will begin to
flash and “000” will be
displayed.
2. Select the desired
time period using the
“+” and “-” keys while “
” is flashing.
3. The symbol “ ” will
remain illuminated, the
time will be saved and
the warning will be set.
When the timer reaches
zero, an audible warning will sound and the
symbol “ ” will flash on the display. Press
any key to stop the audible warning. Press
“MODE” for 2 seconds the “ ” symbol will
disappear and the clock will be displayed.
Semi-automatic time adjustment
(cooking period)
This function helps you to cook for a fixed
period of time. A time range between 0 and
10 hours can be set. Prepare the food for
cooking and put it in the oven.
1. Select the desired cooking function and
the temperature using the control knobs.
2. Press “MODE” until
you see “dur” symbol
on the display screen.
The symbol “A” will
flash.
3. Select the desired
cooking time period
using the “+” and “-”
keys.
4. The current time will
reappear on the
screen, and the
symbols “A”, and “ ”
will remain illuminated.
When the timer reaches zero, the oven
will switch off and an audible warning will
sound. The symbols “A” will flash. Turn both
control knobs to the “0” position and press
any key on the timer to stop the warning
sound. Press “MODE” for 2 seconds the
“A” symbol will disappear and the timer will
switch back to manual function.
Sound Adjustment
Press and hold the “-” sensor button until
you hear an audible 'beep' sound. After
this, each time the “-” button is pressed,
a different “beep” tone will sound. There
are four different types of signal sounds. If
“off” is selected, all sounds will be turned
off except alarm and error sounds press
any buttons. After a short time the selected
beep will be recorded.Accessories
The Wire Grid for Deep Trays
Make sure the wire grid is correctly placed
within a deep tray. It is recommended
to use this accessory for grilling steaks,
meatballs and similar food.
EN - 20
The Flap Drawer
Your appliance includes a drawer for storing
accessories such as trays, shelves, grids,
or small pots and pans.
WARNING: The inner surface of the
drawer may become hot during use.
Do not store any food, plastic or
flammable materials in the drawer.
The Shallow Tray
The shallow tray is best used for baking
pastries.
Put the tray into any rack and push it to the
end to make sure it is correctly placed.
The Splashback
The splashback is attached to the cooktop
with two screws.
The Wire Rack with Easyfix Half
Telescopic Rail
The half telescopic rail extends half-way
out, to allow easy access to your food.
Telescopic rails
Clean the accessories thoroughly with
warm water, detergent and a soft clean
cloth on first use.
Fastening tab
Fastener
• On each telescopic rail there are
fasteners that allow you to remove them
for cleaning and repositioning.
• Remove the side runner. See section
“Removal of the wire shelf”.
• Hang the telescopic rail top fasteners
on the side rack level reference wire
EN - 21
and simultaneously press the bottom
fasteners until you clearly hear the
fasteners clip into the side rack level
fixing wire.
• In order to remove, hold the front
surface of the rail and repeat the
previous instructions in reverse.
The Wire Grid
The wire grid is best used for grilling or for
processing food in oven-friendly containers.
WARNING
Place the grid to any corresponding
rack in the oven cavity correctly and push it
to the end.
5. CLEANING AND
MAINTENANCE
5.1 CleaninG
WARNING: Switch off the appliance
and allow it to cool before cleaning is
to be carried out.
General Instructions
• Check whether the cleaning materials
are appropriate and recommended by
the manufacturer before use on your
appliance.
• Use cream cleaners or liquid cleaners
which do not contain particles. Do not
use caustic (corrosive) creams, abrasive
cleaning powders, rough wire wool or
hard tools as they may damage the
cooker surfaces.
Do not use cleaners that contain
particles, as they may scratch the
glass, enamelled and/or painted parts
of your appliance.
• Should any liquids overflow, clean them
immediately to avoid parts becoming
damaged.
Do not use steam cleaners for
cleaning any part of the appliance.
Cleaning the Inside of the Oven
• The inside of enamelled ovens are best
cleaned while the oven is warm.
• Wipe the oven with a soft cloth soaked
in soapy water after each use. Then,
wipe the oven over again with a wet
cloth and dry it.
• You may need to use a liquid cleaning
material occasionally to completely
clean the oven.
Cleaning the Ceramic Glass
Ceramic glass can hold heavy utensils but
may be broken if it is hit with a sharp object.
WARNING : Ceramic Cooktops - if the
surface is cracked, to avoid the
possibility of an electric shock, switch
off the appliance and call for service.
• Use a cream or liquid cleaner to clean
the vitroceramic glass. Then, rinse and
dry the glass thoroughly with a dry cloth.
Do not use cleaning materials meant
for steel as they may damage the
glass.
• If substances with a low melting point
are used in the cookware’s base or
coatings, they can damage the glass-
ceramic cooktop.If plastic, tin foil, sugar
or sugary foods have fallen on the hot
glass-ceramic cooktop, please scrape
it off the hot surface as quickly and as
safely as possible. If these substances
melt, they can damage the glass-
EN - 22
ceramic cooktop. When you cook very
sugary items like jam, apply a layer of a
suitable protective agent beforehand if it
is possible.
• Dust on the surface must be cleaned
with a wet cloth.
• Any changes in colour to the ceramic
glass will not affect the structure or
durability of the ceramic and is not due
to a change in the material.
Colour changes to the ceramic glass may
be for a number of reasons:
1. Spilt food has not been cleaned off the
surface.
2. Using incorrect dishes on the hob will
erode the surface.
3. Using the wrong cleaning materials.
Cleaning the Glass Parts
• Clean the glass parts of your appliance
on a regular basis.
• Use a glass cleaner to clean the inside
and outside of the glass parts. Then,
rinse and dry them thoroughly with a dry
cloth.
Cleaning the Enamelled Parts
• Clean the enamelled parts of your
appliance on a regular basis.
• Wipe the enamelled parts with a soft
cloth soaked in soapy water. Then,
wipe them over again with a wet cloth
and dry them.
Do not clean the enamelled parts while
they are still hot from cooking.
Do not leave vinegar, coffee, milk, salt,
water, lemon or tomato juice on the
enamel for a long time.
Cleaning the Stainless Steel Parts (if
available)
• Clean the stainless steel parts of your
appliance on a regular basis.
• Wipe the stainless steel parts with a soft
cloth soaked in only water. Then, dry
them thoroughly with a dry cloth.
Do not clean the stainless steel parts
while they are still hot from cooking.
Do not leave vinegar, coffee, milk, salt,
water, lemon or tomato juice on the
stainless steel for a long time.
Cleaning Painted Surfaces (if available)
• Spots of tomato, tomato paste, ketchup,
lemon, oil derivatives, milk, sugary
foods, sugary drinks and coffee should
be cleaned with a cloth dipped in warm
water immediately. If these stains are
not cleaned and allowed to dry on the
surfaces they are on, they should NOT
be rubbed with hard objects (pointed
objects, steel and plastic scouring wires,
surface-damaging dish sponge) or
cleaning agents containing high levels
of alcohol, stain removers, degreasers,
surface abrasive chemicals. Otherwise,
corrosion may occur on the powder
painted surfaces, and stains may occur.
The manufacturer will not be held
responsible for any damage caused
by the use of inappropriate cleaning
products or methods.
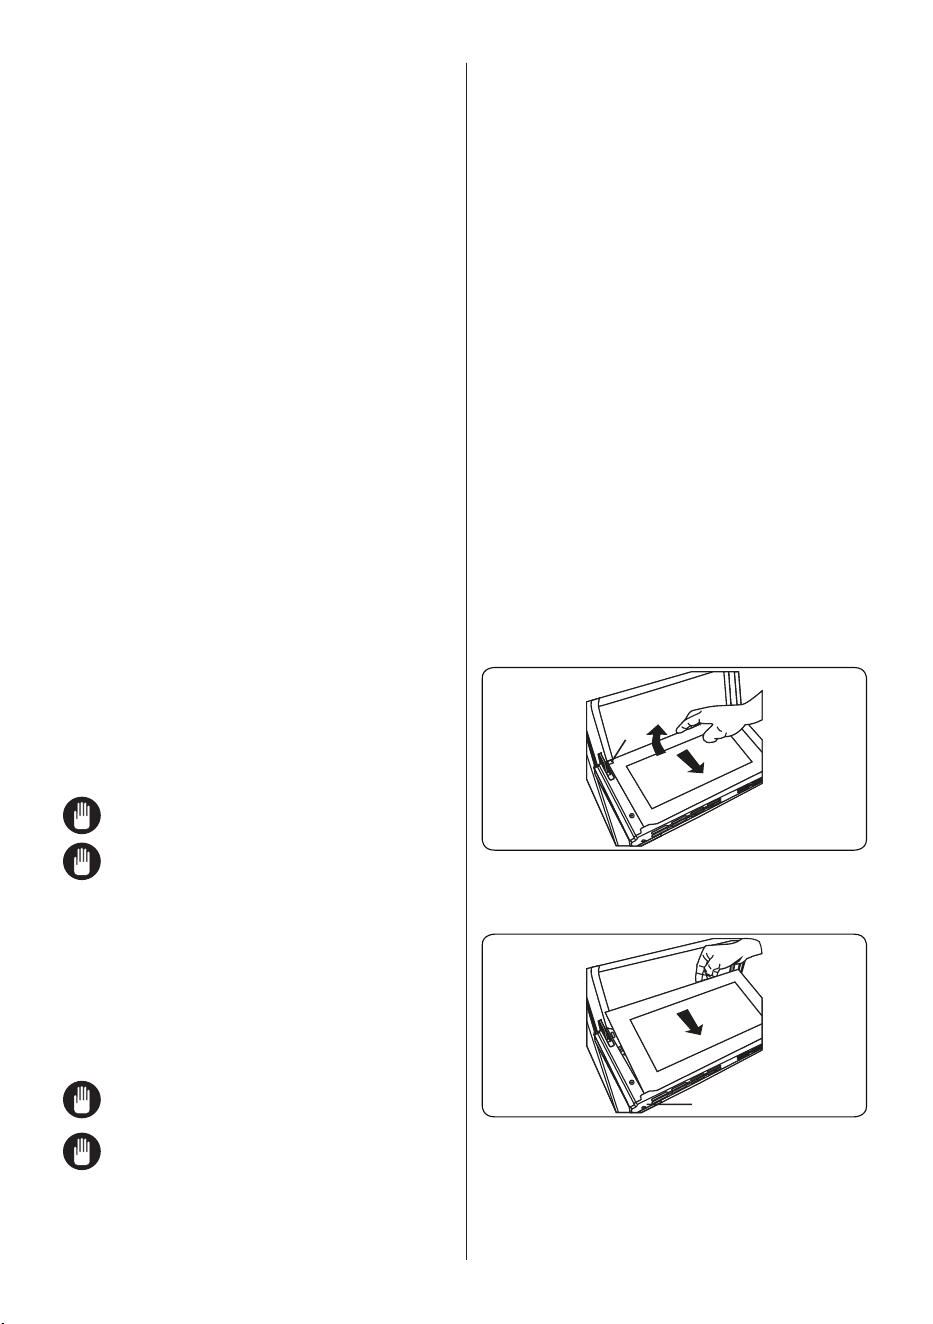
Removal of the Inner Glass
You must remove the oven door glass
before cleaning, as shown below.
1. Push the glass in the direction of B and
release from the location bracket (x). Pull
the glass out in the direction of A.
x
A
B
To replace the inner glass:
2. Push the glass towards and under the
location bracket (y), in the direction of B.
y
B
3. Place the glass under the location
bracket (x) in the direction of C.
EN - 23
x
C
If the oven door is a triple glass oven
door, the third glass layer can be
removed the same way as the second
glass layer.
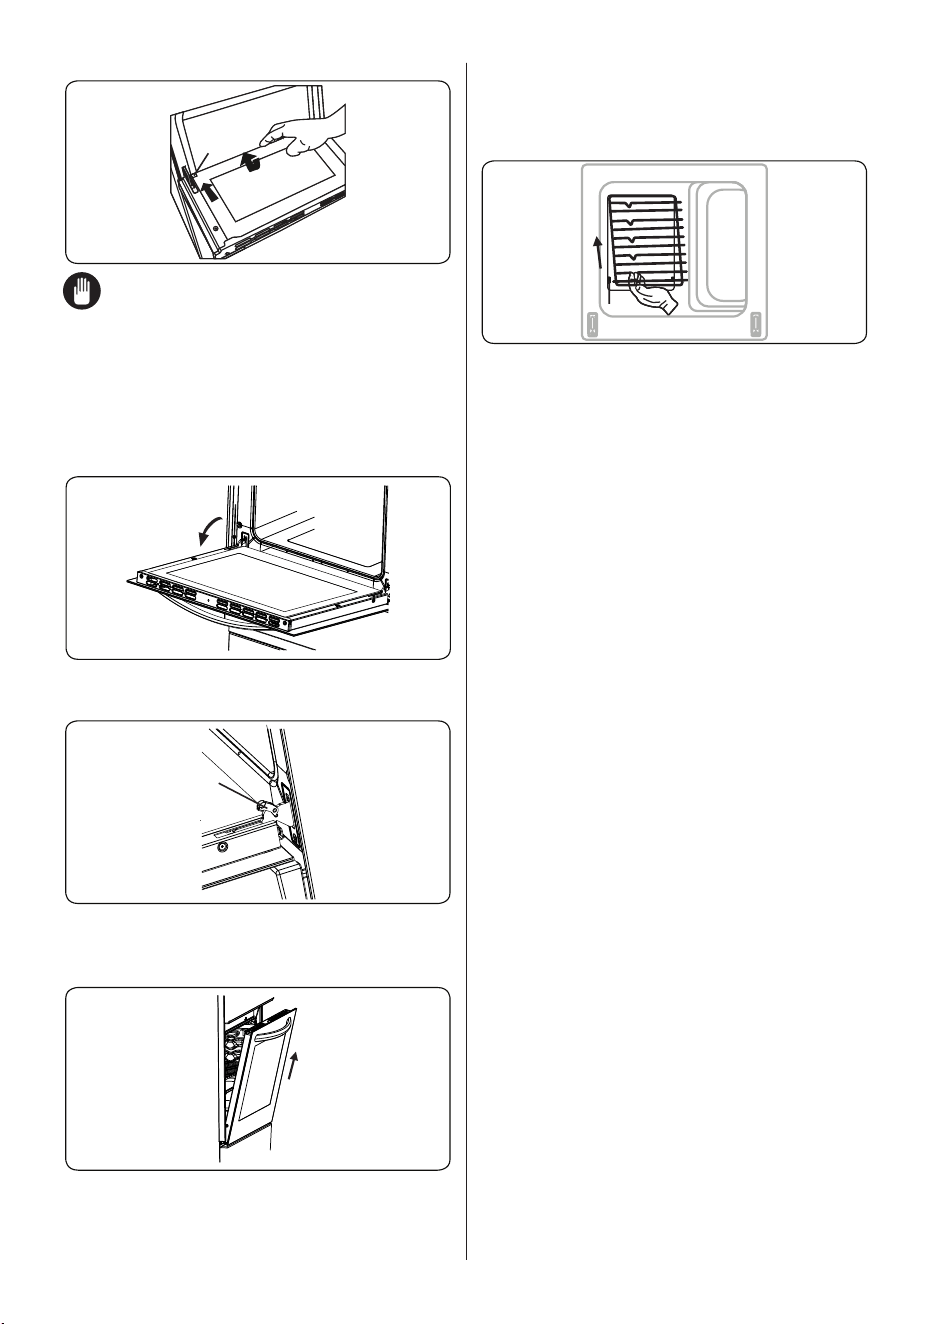
Removal of the Oven Door
Before cleaning the oven door glass, you
must remove the oven door, as shown
below.
1. Open the oven door.
2. Open the locking catch (a) (with the aid
of a screwdriver) up to the end position.
a
3. Close the door until it almost reaches the
fully closed position and remove the door
by pulling it towards you.
Removal of the Wire Shelf
To remove the wire rack, pull the wire rack
as shown in the figure. After releasing it
from the clips (a), lift it up.
a
EN - 24
6. TROUBLESHOOTING&TRANSPORT
6.1 troubleShootinG
If you still have a problem with your appliance after checking these basic troubleshooting
steps, please contact an authorised service person or qualified technician.
Problem Possible Cause Solution
Hob control card’s display is blacked
out. The hob or cooking zones
cannot be switched on.
There is no power supply.
Check the household fuse for the
appliance.
Check whether there is a power
cut by trying other electronic
appliances.
The hob switches off while it is in
use and an 'F' flashes on each
display.
The controls are damp or an object
is resting on them.
Dry the controls or remove the
object.
The hob switches off while it is use.
One of the cooking zones has been
on for too long.
You can use the cooking zone again
by switching it back on.
The hob controls are not working
and the child lock LED is on.
Child lock is active. Switch off the child lock.
The saucepans make noise during
cooking or your hob makes a
clicking sound during cooking.
This is normal with induction hob
cookware. This is caused by the
transfer of energy from the hob to
the cookware.
This operation is normal. There is
no risk, neither to your hob nor to
your cookware.
The 'U' symbol lights up in the
display of one of the cooking zones.
There is no pan on the cooking
zone, or the pan is unsuitable.
Use a suitable pan.
Power level 9 or 'P' is automatically
reduced. If you select power level 'P'
or 9 on two cooking zones which are
on the same side at the same time.
Maximum power level for the two
zones is reached
Operating both zones at power level
'P' or 9 would exceed the permitted
maximum power level for the two
zones.
Oven does not switch on. Power is switched off.
Check whether there is power
supplied. Also check that other
kitchen appliances are working.
No heat or oven does not warm up.
Oven temperature control is
incorrectly set.
Oven door has been left open.
Check the oven temperature control
knob is set correctly.
Cooking is uneven within the oven.
Oven shelves are incorrectly
positioned.
Check that the recommended
temperatures and shelf positions
are being used.
Do not frequently open the door
unless you are cooking things that
need to be turned. If you open the
door often, the interior temperature
will be lower and this may affect the
results of your cooking.
Oven light (if available) does not
operate.
Lamp has failed.
Electrical supply is disconnected or
switched off.
Replace lamp according to the
instructions.
Make sure the electrical supply
is switched on at the wall socket
outlet.
The timer buttons cannot be
pressed properly.
There is foreign matter caught
between the timer buttons.
Touch model: there is moisture on
the control panel.
The key lock function is set.
Remove the foreign matter and try
again.
Remove the moisture and try again.
Check whether the key lock function
is set.
The oven fan (if available) is noisy. Oven shelves are vibrating.
Check that the oven is level.
Check that the shelves and any
bake ware are not vibrating or in
contact with the oven back panel.

EN - 25
6.2 tranSport
If you need to transport the product, use the original product packaging and carry it using
its original case. Follow the transport signs on the packaging. Tape all independent parts to
the product to prevent damaging the product during transport.
If you do not have the original packaging, prepare a carriage box so that the appliance,
especially the external surfaces of the product, is protected against external threats.

22
Warranty Card
Worldwide Appliances Pty Limited
A.B.N. 45868077422
Distributed by Eurolinx pty Ltd
Oce:
48-50 Moore Street, Leichhar
dt N.S.W 2040
Post:
Locked Bag 3000, Annandale, N.S.W 2038
P: 1300 694 583
W
ARRANTY REGISTRATION
Your ongoing satisfaction with your artusi
product is important to us. We ask that you
complete the enclosed Warranty Registration
Card and return it to us so that we have a record
of the artusi product purchased by you.
PRIVACY
Worldwide Appliances respects your
privacy and is committed to handling your
personal information in accordance with the
National Privacy Principles and the Privacy
Act 1988 (Cth). A copy of the Worldwide
Appliances Privacy Policy is available at
www.artusi.com.au. Worldwide Appliances will
not disclose any personal information set out
in the Warranty Registration Card (“Personal
Information”) without your consent unless
required by:
1. law;
2. any Worldwide Appliances related company;
3. any service provider which provide services
to artusi or assist artusi in pr
oviding services
(including repair and warranty services) to
customers. Our purpose in collecting the
Personal Information is
to keep a record of the artusi product purchased
by you, in order to provide a better warranty
service to you in the unlikely event that there is
a problem with your artusi product. Worldwide
Appliances may contact you at any one or more
of the address, email address or telephone
numbers set out in the Warranty Registration
Card. Please contact artusi on 1300 694
583 should you not wish to be contacted by
Worldwide Appliances.
WARRANTY
1. W
arranty
Worldwide Appliances warrants that each artusi
product will remain, for a period of either 12
months or 24 months of warranty. All Warranties
are valid from the original date of purchase, And
warranty claims must be accompanied by the
proof of purchase.
24 months warranty products:
All Built-in Appliances – Limited to Ovens,
Gas, Induction and Electric Cooktops, and All
Rangehoods. Freestanding Cookers - Gas and
Electric Models (900mm Width).
artusi.com.au
Dishwashers - Freestanding, Fully Integrated,
Semi Integrated and built-in. All Wine coolers. All
Dryers. Freestanding Cookers - Gas and Electric
Models in 50cm, 54cm and 60cm Widths
Portable Appliances* – Benchtop Models and
Portable Gas Models
2. What is not Cover
ed by the Warranty.
The Warranty does not apply if an artusi product
is defective by a factor other than a defect arising
in the manufacture of the artusi product, including
but not limited to:
(a) damage through misuse (including failure
to maintain, service or use with pr
oper care),
neglect, accident or ordinary wear and tear
(including deterioration of parts and accessories
and glass breakage);
(b) use for purpose for which the artusi product
was not sold or designed;
(c) use or installation which is not in accordance
with any specied instructions for use or
installation;
(d) use or operation after a defect has occurred or
been discover
ed;
(e) damage thr
ough fr
eight, transportation or
handling in transit (other than when W
orldwide
Appliances is responsible);
(f) damage thr
ough exposur
e to chemicals, dusts,
r
esidues, excessive voltage, heat, atmospheric
conditions or other forces or environmental
factors outside the control or Worldwide
Appliances;
(g) repair, modication or tampering by the
pur
chaser or any person other than Worldwide
Appliances, an employee of Worldwide
Appliances or an authorised artusi service
contractor*;
(h) use of parts, components or accessories
which have not been supplied or specically
appr
oved by artusi.
(i) damage to surface coatings caused by cleaning
or maintenance using pr
oducts not recommended
in the artusi product handbook provided to the
purchaser upon purchase of the artusi product;
(j) damage to the base of an electric oven due to
items having been placed on the base of the oven
cavity or covering the base, such as aluminium
foil (this impedes the transfer of heat fr
om the
element to the oven cavity and can result in
irreparable damage); or
(k) damages, dents or other cosmetic
imperfections not aecting the performance of the
artusi in r
espect of an artusi product purchased
as a “factory second” or from display
The Warranty does not extend to light globes
used in artusi products.
3. Domestic Use
Each artusi product is made for domestic use.
This Warranty may not extend to artusi products
used for commercial purposes.
Continued over...
23
Warranty Card
Worldwide Appliances Pty Limited
A.B.N. 45868077422
Distributed by Eurolinx pty Ltd
Oce:
48-50 Moore Street, Leichhardt N.S.W 2040
Post:
Locked Bag 3000, Annandale, N.S.W 2038
P: 1300 694 583
WARRANTY REGISTRATION
Your ongoing satisfaction with your artusi
product is important to us. We ask that you
complete the enclosed Warranty Registration
Card and return it to us so that we have a record
of the artusi product purchased by you.
PRIVACY
Worldwide Appliances respects your
privacy and is committed to handling your
personal information in accordance with the
National Privacy Principles and the Privacy
Act 1988 (Cth). A copy of the Worldwide
Appliances Privacy Policy is available at
www.artusi.com.au. Worldwide Appliances will
not disclose any personal information set out
in the Warranty Registration Card (“Personal
Information”) without your consent unless
required by:
1. law;
2. any Worldwide Appliances related company;
3. any service provider which provide services
to artusi or assist artusi in providing services
(including repair and warranty services) to
customers. Our purpose in collecting the
Personal Information is
to keep a record of the artusi product purchased
by you, in order to provide a better warranty
service to you in the unlikely event that there is
a problem with your artusi product. Worldwide
Appliances may contact you at any one or more
of the address, email address or telephone
numbers set out in the Warranty Registration
Card. Please contact artusi on 1300 694
583 should you not wish to be contacted by
Worldwide Appliances.
WARRANTY
1. Warranty
Worldwide Appliances warrants that each artusi
product will remain, for a period of either 12
months or 24 months of warranty. All Warranties
are valid from the original date of purchase, And
warranty claims must be accompanied by the
proof of purchase.
24 months warranty products:
All Built-in Appliances – Limited to Ovens,
Gas, Induction and Electric Cooktops, and All
Rangehoods. Freestanding Cookers - Gas and
Electric Models (900mm Width).
artusi.com.au
Dishwashers - Freestanding, Fully Integrated,
Semi Integrated and built-in. All Wine coolers. All
Dryers. Freestanding Cookers - Gas and Electric
Models in 50cm, 54cm and 60cm Widths
Portable Appliances* – Benchtop Models and
Portable Gas Models
2. What is not Covered by the Warranty.
The Warranty does not apply if an artusi product
is defective by a factor other than a defect arising
in the manufacture of the artusi product, including
but not limited to:
(a) damage through misuse (including failure
to maintain, service or use with proper care),
neglect, accident or ordinary wear and tear
(including deterioration of parts and accessories
and glass breakage);
(b) use for purpose for which the artusi product
was not sold or designed;
(c) use or installation which is not in accordance
with any specied instructions for use or
installation;
(d) use or operation after a defect has occurred or
been discovered;
(e) damage through freight, transportation or
handling in transit (other than when Worldwide
Appliances is responsible);
(f) damage through exposure to chemicals, dusts,
residues, excessive voltage, heat, atmospheric
conditions or other forces or environmental
factors outside the control or Worldwide
Appliances;
(g) repair, modication or tampering by the
purchaser or any person other than Worldwide
Appliances, an employee of Worldwide
Appliances or an authorised artusi service
contractor*;
(h) use of parts, components or accessories
which have not been supplied or specically
approved by artusi.
(i) damage to surface coatings caused by cleaning
or maintenance using products not recommended
in the artusi product handbook provided to the
purchaser upon purchase of the artusi product;
(j) damage to the base of an electric oven due to
items having been placed on the base of the oven
cavity or covering the base, such as aluminium
foil (this impedes the transfer of heat from the
element to the oven cavity and can result in
irreparable damage); or
(k) damages, dents or other cosmetic
imperfections not aecting the performance of the
artusi in respect of an artusi product purchased
as a “factory second” or from display
The Warranty does not extend to light globes
used in artusi products.
3. Domestic Use
Each artusi product is made for domestic use.
This Warranty may not extend to artusi products
used for commercial purposes.
Continued over...
4. Time for Claim under the Warranty
You must make any claim under this Warranty
within twenty eight (28) days after the occurrence
of an event which gives rise to a claim pursuant
to the Warranty, by booking a service call on the
telephone number below.
5. Proof of Purchase
Customers must retain proof of purchase in order
to be eligible to make a warranty claim in respect
of an artusi product.
6. Claiming under the Warranty
Customers will bear the cost of claiming under
this Warranty unless Worldwide Appliances
determines the expenses are reasonable, in which
case the customer must claim those expenses
by providing written evidence of each expense
to Worldwide Appliances at the address on the
Warranty Registration Card.
7. Statutory Rights
H;OLZL[LYTZHUKJVUKP[PVUZKVUV[HɈLJ[`V\Y
statutory rights.
(b) The limitations on the Warranty set out in this
document do not exclude or limit the application
of the consumer guarantees set out in the Act or
any other equivalent or corresponding legislation
in the relevant jurisdiction where to do so would:
(i) contravene the law of the relevant jurisdiction;
or
(ii) cause any part of the Warranty to be void.
(c) Worldwide Appliances excludes indirect or
consequential loss of any kind (including, without
limitation, loss of use of the artusi product) and
(other than expressly provided for in these terms
and conditions) subject to all terms,
conditions and warranties implied by custom, the
general law, the Act or other statute.
(d) The liability of Worldwide Appliances to you
for a breach of any express or non-excludable
implied term, condition or warranty is limited at
the option of Worldwide Appliances to:
(i) replacing or repairing the defective part of the
artusi product;
(ii) paying the cost of replacing or repairing the
defective part of the artusi product;
(iii) replacing the artusi product; or
(iv) paying the cost of replacing the artusi
product.
(e) Our goods come with guarantees that cannot
be excluded under the Australian Consumer
Law. You are entitled to a replacement or refund
for a major failure and for compensation for any
other reasonably foreseeable loss or damage.
You are also entitled to have the goods repaired
or replaced if the goods fail to be of acceptable
quality and the failure does not amount to a
major failure.
8. Defects
Any part of an artusi product deemed to be
defective and replaced by Worldwide Appliances
is the property of Worldwide Appliances.
Worldwide Appliances reserves the right to
inspect and test artusi products in order to
determine the extent of any defect and the
validity of a claim under the Warranty.
All warranty service calls must be booked via
the customer care department. The team can
ILJVU[HJ[LKVUVW[PVUVY
customercare@eurolinx.com.au
Warranty Card continued
artusi.com.au
2
Please complete and send to ARTUSI at: REPLY PAID 83617
LEICHHARDT NSW 2040
Last Name: First Name:
Address:
State: Postcode: Email:
Home Phone: Mobile:
Purchase Date: / /
(Please attach proof of purchase to validate warranty)
MODEL NUMBER
SERIAL NUMBER
(if you cannot locate the serial number please call ARTUSI on 1300 856 411)
1
2
3
4
WARRANTY REGISTRATION CARD
01052016
01082016
Warranty Card tear off

52202020