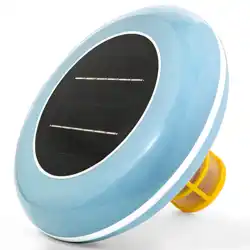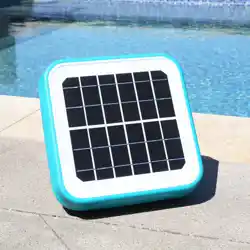
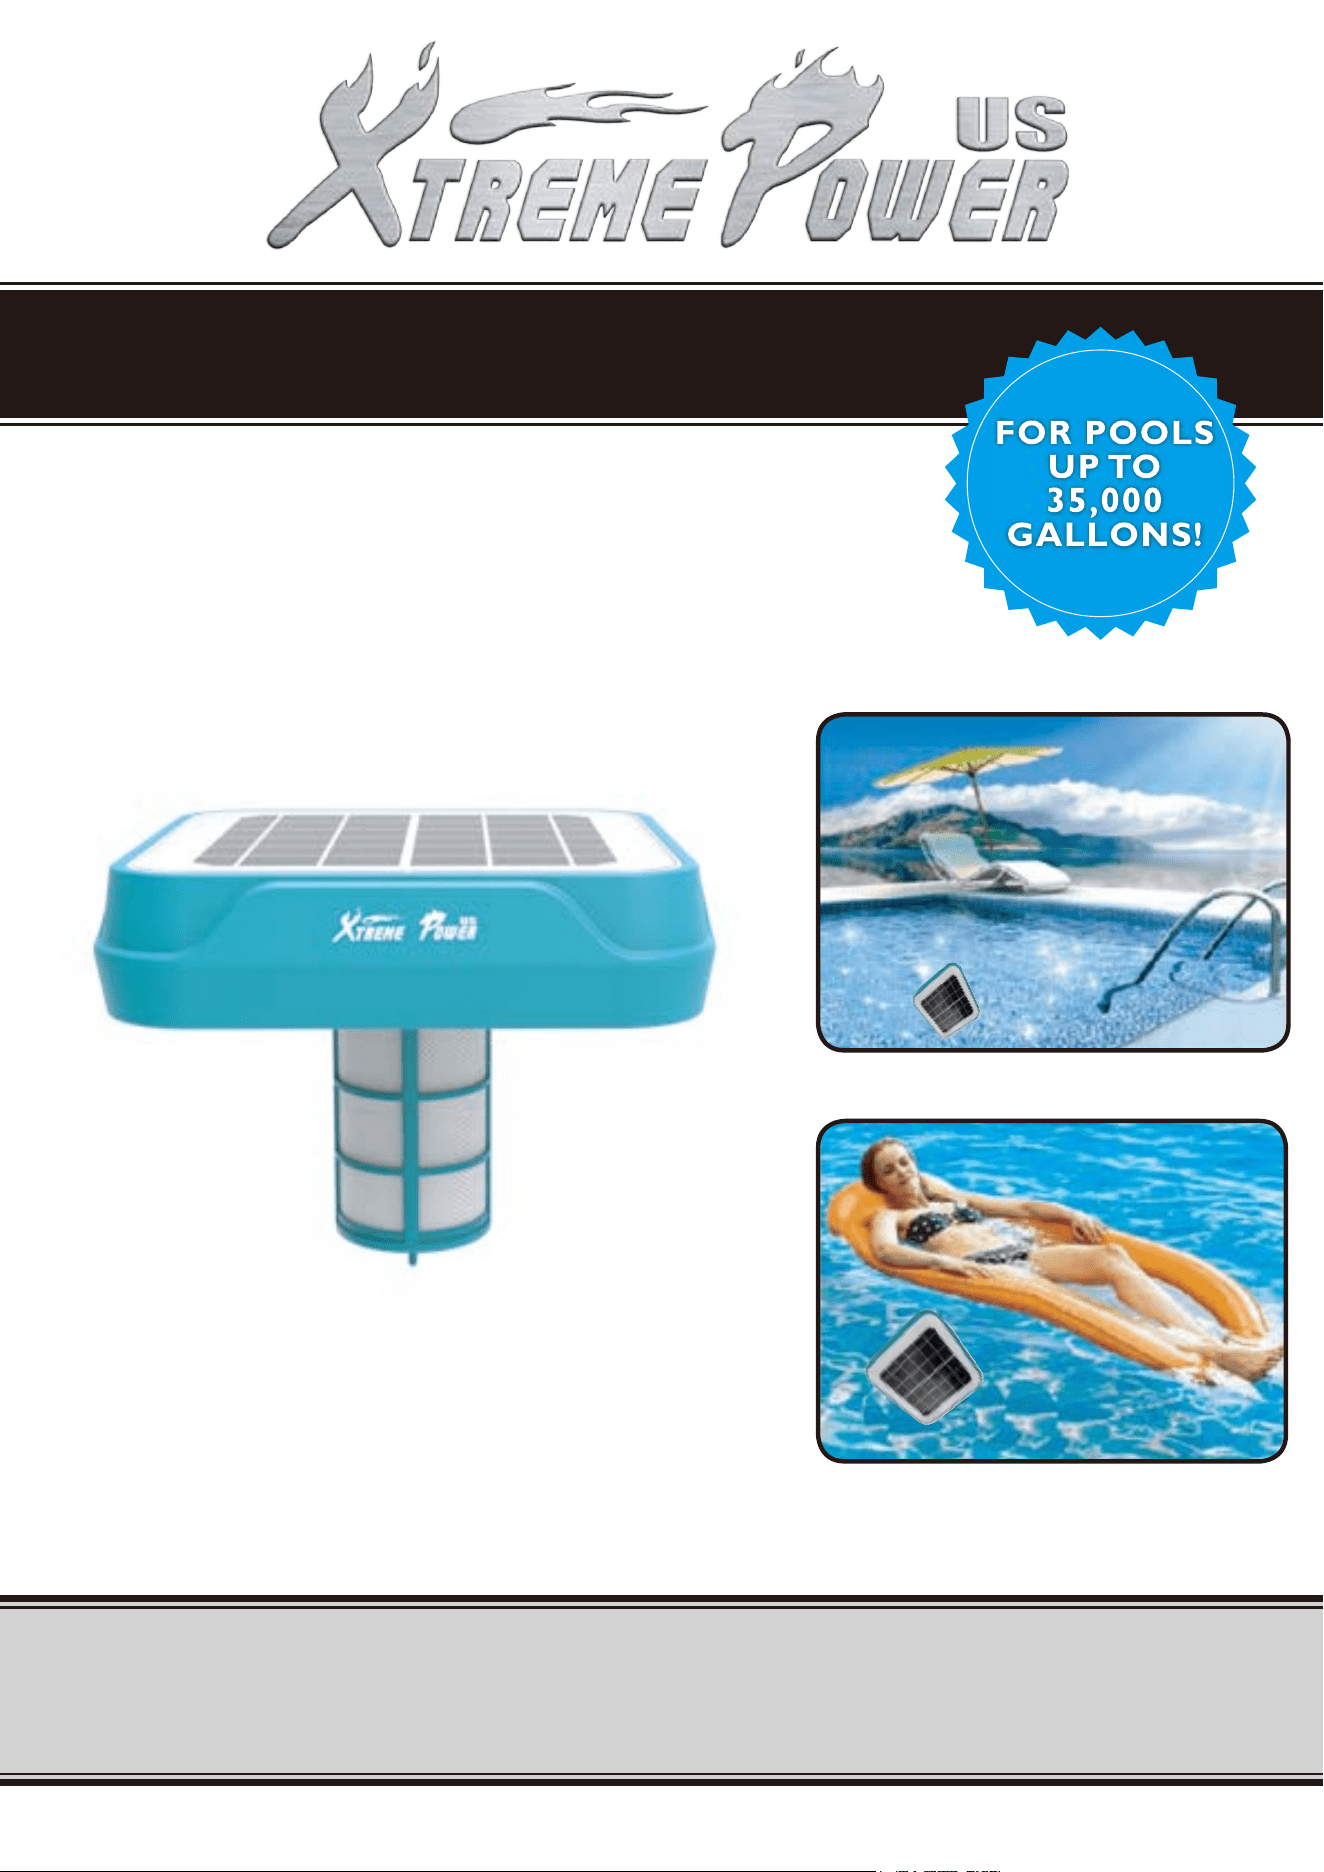
SOLAR POOL IONIZER
SAVE THIS MANUAL: KEEP THIS MANUAL FOR SAFETY WARNINGS, PRECAUTIONS, ASSEMBLY,
OPERATING, INSPECTION, MAINTENANCE AND CLEANING PROCEDURES. WRITE THE PRODUCT’S
SERIAL NUMBER ON THE BACK OF THE MANUAL NEAR THE ASSEMBLY DIAGRAM (OR MONTH
AND YEAR OF PURCHASE IF PRODUCT HAS NO NUMBER).
OWNER’S MANUAL AND SAFETY INSTRUCTIONS
ITEM:
FOR QUESTIONS PLEASE CALL OUR CUSTOMER SUPPORT: (909) 628 0880 MON-FRI 9AM TO 3PM PST
90134
What is the Solar Ionizer?
in containers made of copper and silver allows water to maintain its freshness, clarity and avoids
the growth of algae and bacteria. However, if you incorporate pieces of copper and silver in your
our water ionizer, a small charge of electricity supplied by the control panel, energizes the electrodes
1
INFORMATION
How does the Solar Ionizer work?
At the instant the atoms of the electrodes of copper/silver or silver/copper/zinc of our equipment
forms. The experiments of the University of Arizona have demonstrated that the mineral ions,
algae and bacteria. Once that these minerals are dissolved in the water, they remain for extended
intense heat. Contrarily, the chlorine is a very light element that tends to evaporate easily, especially
in warm climates.
Is the mineral incorporated in the water of the Ionizer safe?
because they are non-toxic.
Our Solar Pool Ionizer is designed to last as long as your swimming pool. The control panel is not
it is not necessary, nor advisable because it would be needlessly wearing down the electrodes.
solar ionizer in the pool is perfectly safe.
2
INFORMATION
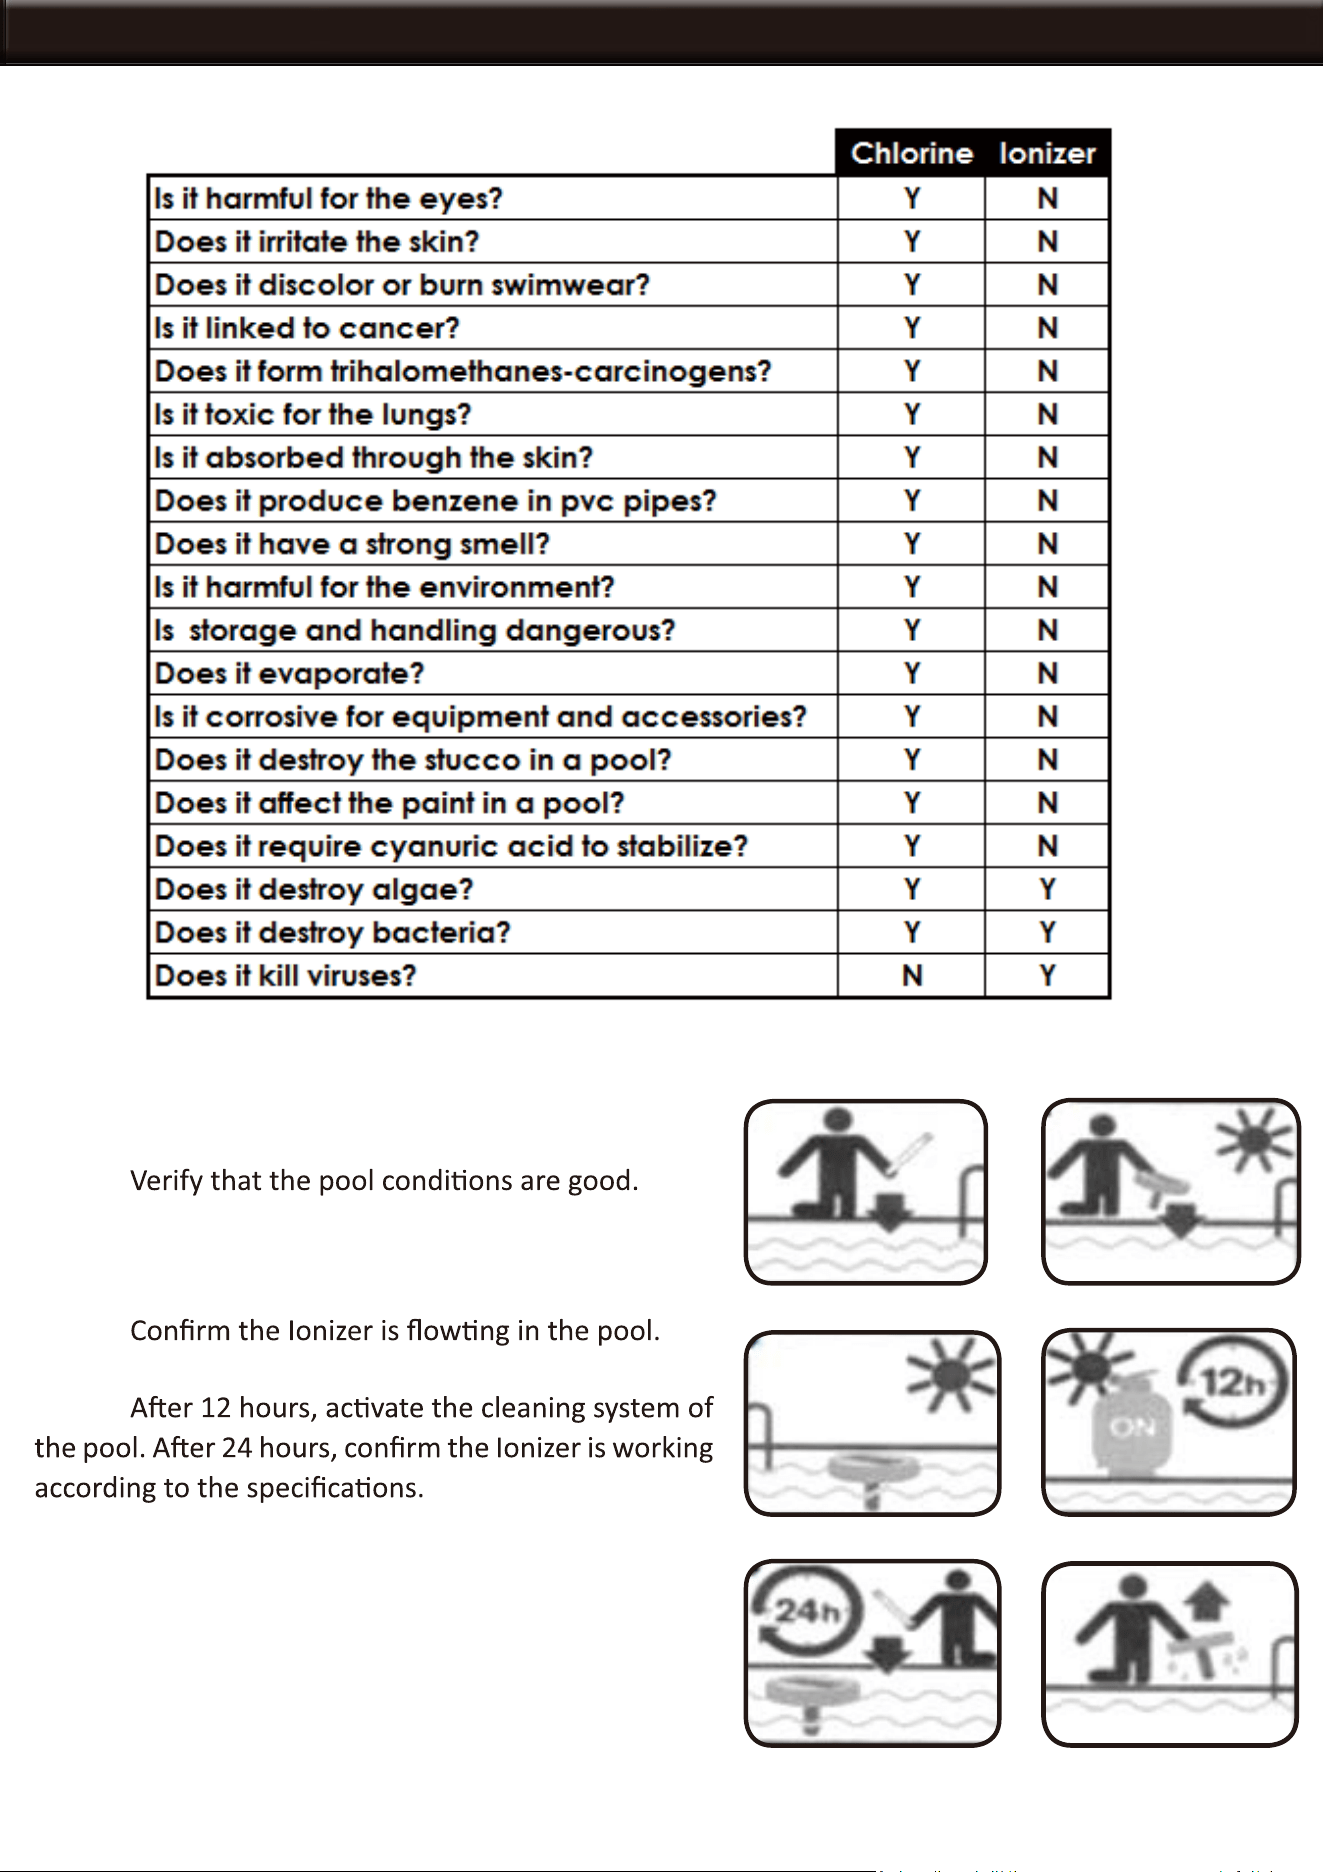
Advantage of the Solar Ionizers versus chlorine:
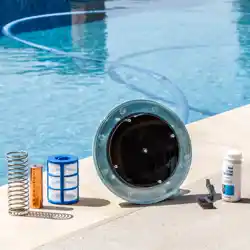
Using the Solar Ionizer:
Step 1.
Step 2. Introduce the solar pool ionizer into the pool.
Step 3.
Step 4.
Step 5. Remove every 15 days and do a cleaning of the
electrode with the brush included. Check the copper
level weekly, if in of excess 0.9 ppm, take it out of the
pool, or the water will turn cloudy and green. And put
it back to the pool when less than 0.4 ppm.
3
THE MANUFACTURER AND/OR DISTRIBUTOR HAS PROVIDED THE PARTS LIST AND ASSEMBLY
DIAGRAM IN THIS MANUAL AS A REFERENCE TOOL ONLY. NEITHER THE MANUFACTURER OR
DISTRIBUTOR MAKES ANY REPRESENTATION OR WARRANTY OF ANY KIND TO THE BUYER THAT
HE OR SHE IS QUALIFIED TO MAKE ANY REPAIRS TO THE PRODUCT, OR THAT HE OR SHE IS
QUALIFIED TO REPLACE ANY PARTS OF THE PRODUCT. IN FACT, THE MANUFACTURER AND/OR
DISTRIBUTOR EXPRESSLY STATES THAT ALL REPAIRS AND PARTS REPLACEMENTS SHOULD BE
UNDERTAKEN BY CERTIFIED AND LICENSED TECHNICIANS, AND NOT BY THE BUYER. THE BUYER
ASSUMES ALL RISK AND LIABILITY ARISING OUT OF HIS OR HER REPAIRS TO THE ORIGINAL
PRODUCT OR REPLACEMENT PARTS THERETO, OR ARISING OUT OF HIS OR HER INSTALLATION
OF REPLACEMENT PARTS THERETO.
Record Product’s Serial Number Here:
Note: If product has no serial number, record month and year of purchase instead.
Note: Some parts are listed and shown for illustration purposes only and are not available individually
as replacement parts.
PLEASE READ THE FOLLOWING CAREFULLY
DISCLAIMER
PRODUCT MADE IN CHINA