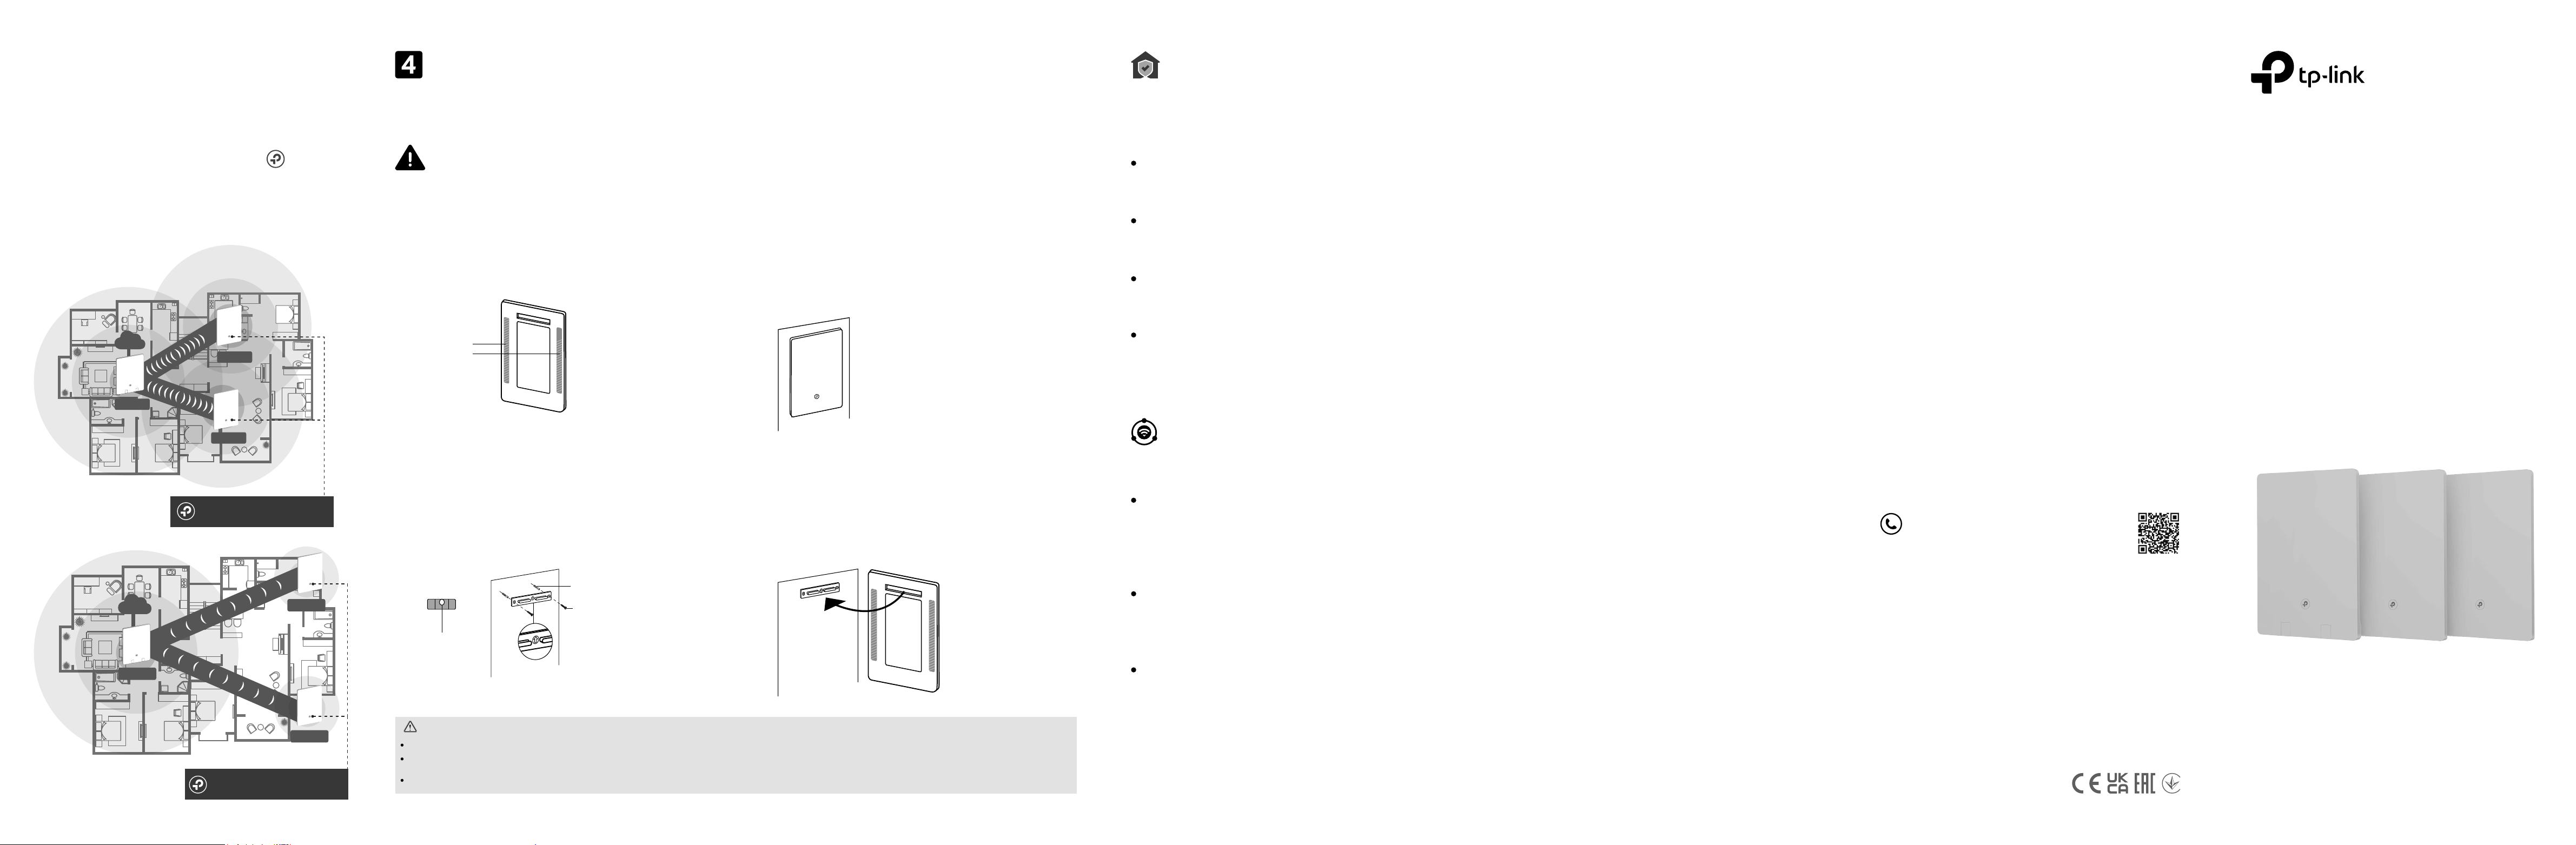
You can experience strong, stable, and seamless wireless
connections throughout your home with EasyMesh.
EasyMesh-Compatible
Flexible Scalability
Flexibly scale your home networking with dierent
vendors, dierent topologies, dierent Protocols, and
dierent product categories.
One-Click Settings
Press the WPS button on the router and the extender
within 2 minutes of each other, then the EasyMesh
network will set up.
Seamless Roaming
Connects mobile devices to your routers or extenders
that provide the best coverage. Devices compatible
with EasyMesh also share a single Wi-Fi name so you
stay connected in every room.
For more information, visit
https://www.tp-link.com/easymesh/
*Connection failures may be due to rmware conicts of dierent vendors. A
better network connection can be established between all APs from TP-Link.
Q1. What should I do if I can’t access the
router’s web management page?
•
Reboot your router and try again.
•
If the computer is set to a static IP, change its
settings to obtain an IP address automatically.
•
Verify that http://tplinkwifi.net is correctly
entered in the web browser. Alternatively, enter
http://192.168.0.1 or http://192.168.1.1 in the
web browser.
•
Use another web browser and try again.
•
Disable and enable the network adapter in use.
Q2. What should I do if I can’t access the
internet?
•
Power off your modem for about 5 minutes,
then power it on and check the internet. If your
modem has more than one Ethernet port,
keep the other ports unconnected.
•
Check if the internet is working normally by
connecting a computer directly to the modem
via an Ethernet cable. If it is not, contact your
internet service provider.
•
L
og in to
the router’s web management page
and go to the Network Map page to check
whether the internet IP address is valid. If it’s
valid, go to Advanced > Network > Internet,
click Advanced Settings, select Use the
Following DNS Addresses, set the primary DNS
to 8.8.8.8, and set the secondary DNS to 8.8.4.4.
If it is invalid, check the hardware connection or
contact your internet service provider.
•
For cable modem users, log in to the router’s
web management page and go to Advanced >
Network > Internet > MAC Clone. Select
Clone Current Device MAC and click SAVE.
Then reboot both the modem and the router.
Q3. What should I do if I forget my wireless
password?
• If you have not changed the default wireless
password, it can be found on the label at the
bottom of the router.
Need Help?
TP-Link hereby declares that the device is in compliance with the essential
requirements and other relevant provisions of directives 2014/53/EU, 2009/125/EC,
2011 /65/EU and (EU) 2015/863.
The original EU Declaration of Conformity may be found at
https://www.tp-link.com/en/support/ce
TP-Link hereby declares that the device is in compliance with the essential
requirements and other relevant provisions of the Radio Equipment Regulations
2017.
The original UK Declaration of Conformity may be found at
https://www.tp-link.com/support/ukca
• Keep the device away from water, re, humidity or hot environments.
• Do not attempt to disassemble, repair, or modify the device. If you need service,
please contact us.
• Do not use the device where wireless devices are not allowed.
• Do not use damaged charger or USB cable to charge the device.
• Do not use any other chargers than those recommended.
• Adapter shall be installed near the equipment and shall be easily accessible.
Please read and follow the above safety information when operating the device. We
cannot guarantee that no accidents or damage will occur due to improper use of the
device. Please use this product with care and operate at your own risk.
For technical support, replacement services,
user manuals and other information, please visit
https://www.tp-link.com/support, or simply scan
the QR code.
TP-Link HomeShield premium security services keep your
home network safe with cutting-edge features. Download
the Tether app to enjoy.
For more details, visit https://www.tp-link.com/homeshield/.
Mount on the Wall
The back area of your router/extender is used for heat dissipation. It works best when your router/extender
is mounted on a wall.
Caution, Hot Surface
The device should be used within a temperature range of 0°C-40°C.
When the router/extender is working, the temperature on its backside is high. Do not touch the router/extender with bare hands and do not stick or directly mount the router/extender to
wallpaper, paper, wood, glass, non-heat-resistant paint, foam board, flammable and explosive materials, etc. to avoid burns, discoloration, breakage, or other accidental injury.
It is recommended to mount the router/extender to flat and smooth painted walls, tile walls, and other objects. Do not stick it on metal surfaces to avoid shielding the wireless signal.
Method ONE: Via 3M adhesives*
1. Tear off the protective paper from the 3M
adhesives on the back of the router/extender.
3M adhesives
*Extra 3M adhesives are
provided for future use.
The 2.3mm 3M
adhesives are used for
E5 extenders only.
Method TWO: Via mounting bracket
1. Mount the bracket on the wall in the correct
direction with the two provided screws.
Tip: You can use the
included level to help
install the bracket
horizontally.
The air bubble in
the level should
be centered.
Anchor
Screw
UP
UP
2. Adhere the router/extender vertically to a flat
surface that is out of children’s reach.
Caution: Double-sided tape may
damage the wall or leave adhesive
residue on the wall when removed.
Note: This equipment shall be installed at a height of
less than 2 meters.
2. Attach the router/extender on the bracket as
shown below.
UP
DO NOT mount the extender until it is connected and relocated to a suitable location.
AX3000 Wi-Fi 6 Air Mesh Router 3-Pack
Quick Installation Guide
©2024 TP-Link 7106510877 REV1.1.0
• Connect a computer directly to the router using
an Ethernet cable. Log in to the router’s web
management page at http://tplinkwi.net, and go
to the Wireless page to retrieve or reset your
wireless password
.
Q4. What should I do if I forget the web
management page password of my router?
• If you are using a TP-Link ID to log in, click Forgot
password on the login page and then follow the
instructions to reset it.
• Alternatively, press and hold the Reset button at
the bottom for about 6 seconds until the LED
blinks. Then visit http://tplinkwifi.net to create a
new login password.
Note: You will need to set up your network again
after resetting the router.
Q5. What should I do if the router/extender does
not turn on when connected to a power
source?
• Make sure the power source can supply power
normally.
• Make sure you are using the included power
adapter.
TP-Link HomeShield
Network Protection
Detects cyber threats to keep your privacy and
connected devices well protected.
Parental Controls
Manage online time and block inappropriate content to
maintain healthy online habits.
Quality of Service (QoS)
Prioritize your bandwidth needs for a better networking
experience.
Comprehensive Reports
Gain full statistics and insight to help you understand your
home network better.
Step 2: Relocate the Extender
1. Relocate the other two extenders (E5). Avoid
too much distance and too many obstacles
between the router (R5) and extenders (E5).
2. Wait for about 2 minutes until the LED
turns solid blue. If it doesn't, relocate the
extenders closer to the router to achieve
better signal quality.
Internet
R5
E5
E5
Solid Blue: Suitable location
Signal Strength: Strong
Internet
R5
E5
E5
Solid Red: Too far from router
Signal Strength: Weak
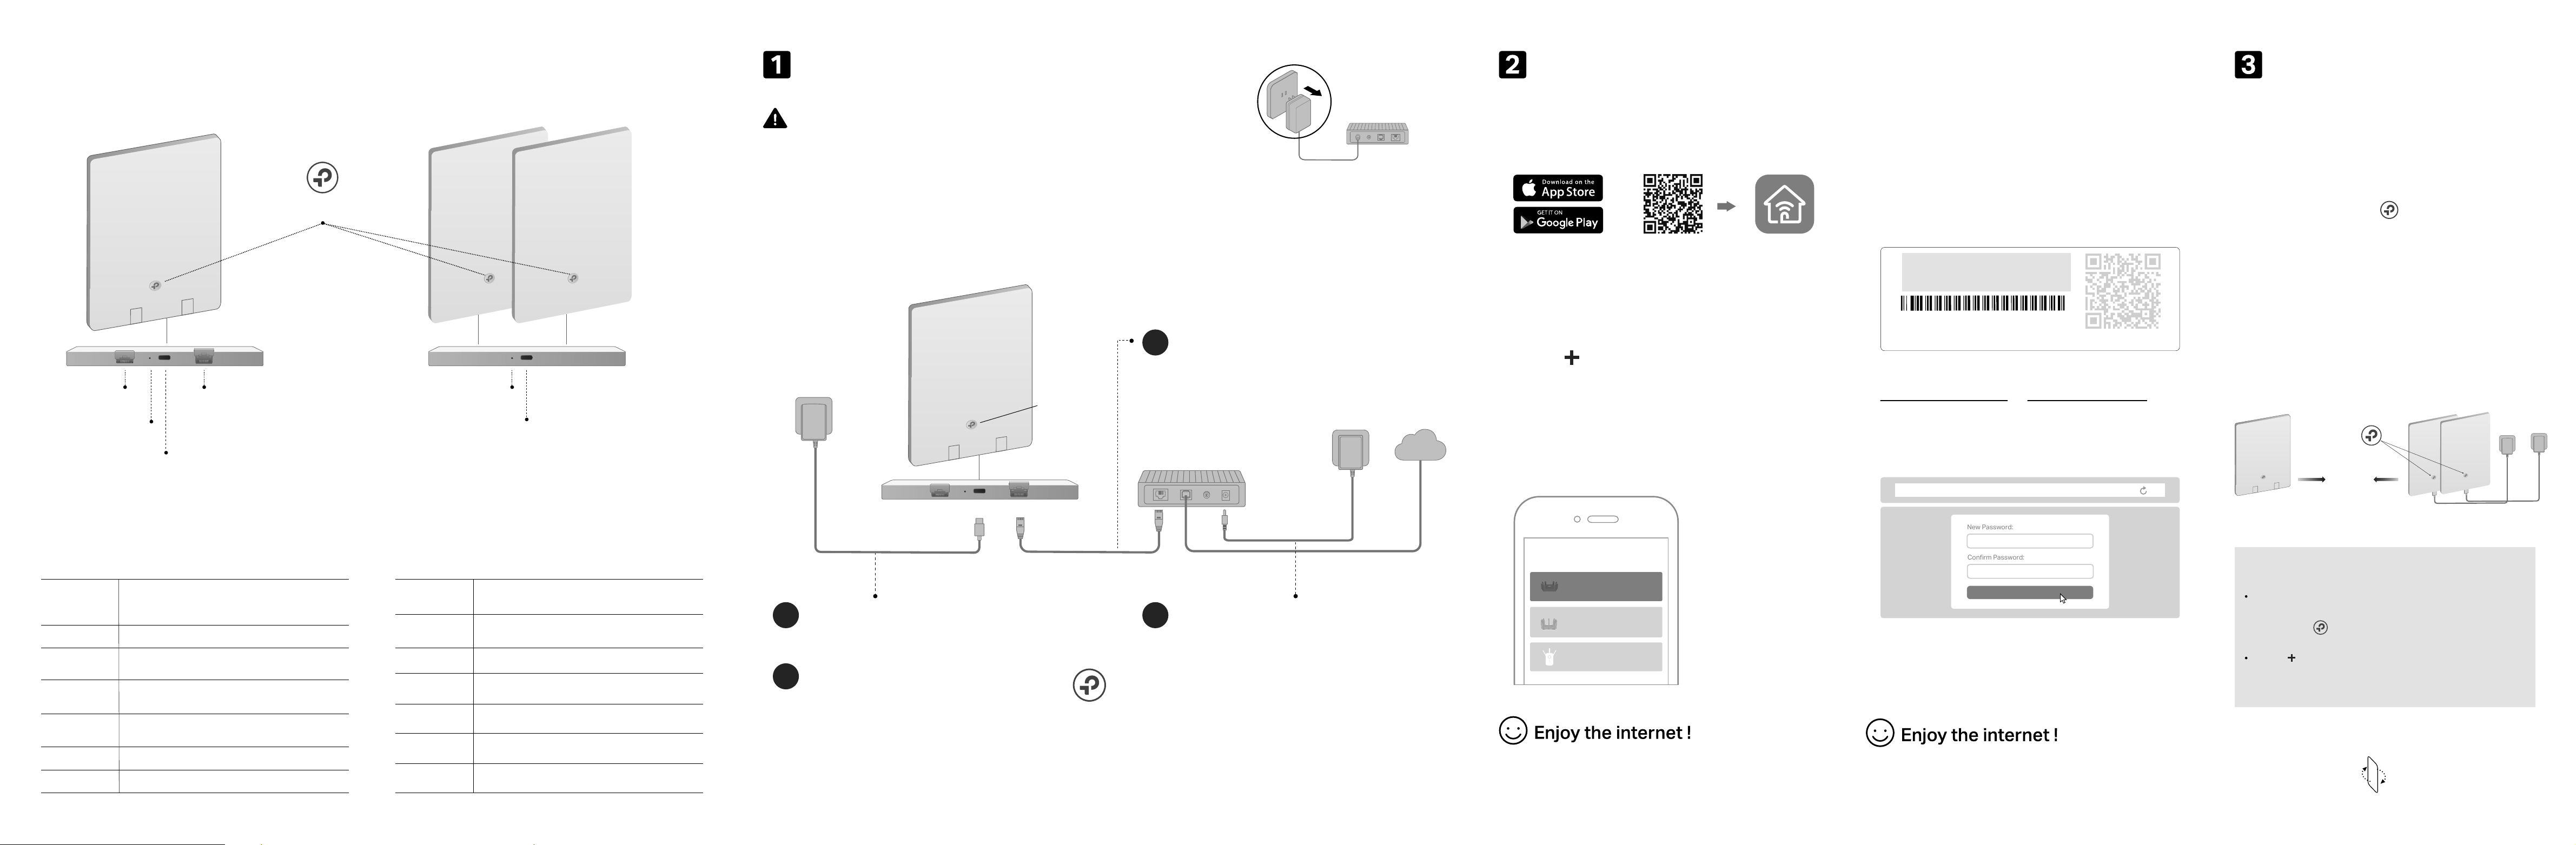
Choose Your Device Type
Gaming Router
Range Extender
Wireless Router
Power on the modem and wait about
2 minutes for it to restart.
2
Connect the router to a power source via
the provided power adapter.
3
On (red or blue)
Verify the LED is solid red or blue
before moving on.
4
Connect the powered-off modem to
the router’s WAN port with an Ethernet
cable.
Internet
1
LAN WAN
LED
If your internet comes from an Ethernet outlet instead of a DSL / Cable / Satellite modem, connect
the router’s WAN port to it, then follow steps 3 and 4 to complete the hardware connection.
Modem
Unplug the power
*Images may dier from the actual products.
Connect the Router (R5)
Unplug the power to turn o your modem, if any, and remove the
backup battery if it has one.
1. Connect your device to the router wirelessly
or with an Ethernet cable.
3. Follow the step-by-step instructions to set up
the internet connection and register for the
TP-Link Cloud service.
New Password:
Let’s Get Started
Conrm Password:
http://tplinkwi.net
Method TWO: Via a Web Browser
2. Launch a web browser and enter
http://tplinkwifi.net or http://192.168.0.1 in
the address bar. Create a password to log in.
Note: If the login window does not appear, please refer to
Q1 of Need Help? in this guide.
The default wireless network names (SSIDs) and
password are printed on the label at the back of the
router.
JOIN PRESET WI-FI
Wireless Password/PIN:XXXXXXXX
SSID:TP-Link_XXXX
SSID:TP-Link_XXXX_5G
QR
Code
Scan for Tether Tether
or
To enjoy a more complete service from TP-Link, bind your
TP-Link ID to the router.
Set Up the Network
Method ONE: Via the TP-Link Tether App
1. Download the Tether app.
2. Open the Tether app and log in with your
TP-Link ID.
3. Tap the button in the Tether app and select
Wireless Router > Standard Routers. Follow
the steps to complete setup and connect to
the internet.
Note: If you don’t have an account, create one first.
Note: Due to Tether app updates, your actual user
interface and pathway may differ from those depicted
here.
Press the WPS button on the router (R5). Within 2
minutes, press the WPS button on the extender (E5).
Wait until the LED turns solid blue, which indicates
that the WPS connection is successful.
Tap the button in the Tether app and select Range
Extender. Follow the steps to connect the extender to
the network.
If the extender fails to join the network, try the following:
Router (R5)
Next to
Solid Blue
Extenders (E5)
Connect the Extender (E5)
Power on the remaining two E5 extenders at
the same time next to your router. The
extenders will automatically connect to the
network. Wait until the LED turns solid
blue and stays on for more than 30s, which
indicates that they are connected
successfully.
Step 1: Power on the Extender
Note: Make sure your router (R5) is in Wireless Router
mode. When the router is in AP mode, the extenders
cannot join the network automatically through
EasyMesh. You need to set up the network manually via
WPS or switch it to Wireless Router mode before
continuing.
To continue, flip the page over.
Pulsing Red
Blinking Red
The router is not powered or not powered by
a standard power source.
LED Explanation (R5)
The system is starting up or the router is
being upgraded. Do not disconnect or power
o your router.
The router is working normally.
WPS connection is being established. Do not
disconnect or power o your router.
WAN port is connected but there is no internet
connection.
WAN port is not connected.
WPS connection failed.
Blinking Blue
Pulsing Blue
Solid Red
O
Solid Blue
LED Explanation (E5)
The system is starting up or rmware upgrade
is in progress.
Solid Red
Pulsing Red
Blinking Red
Blinking Blue
Pulsing Blue
O
Solid Blue
The extender is connected to the router’s
wireless network and is in a suitable location.
WPS connection is in progress.
The extender is not powered or not
powered by a standard power source.
The extender is connected with a weak
signal. Try relocating it closer to your router.
The extender is not connected to the router’s
wireless network.
WPS connection failed. The extender will
return to its unconnected status in one minute.
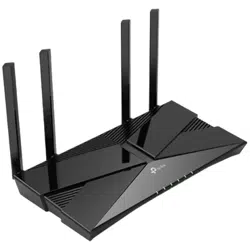
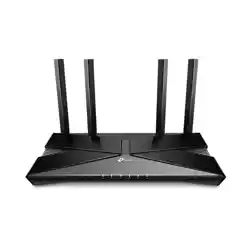
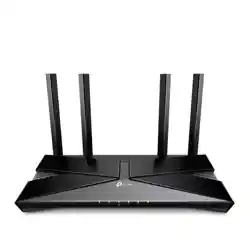
Appearance
Router (R5)
LAN Port WAN Port
Power Port
Reset Button
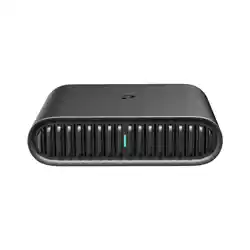
Extenders (E5)
Reset Button
Power Port
WPS Button