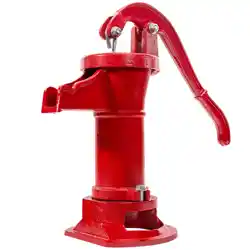
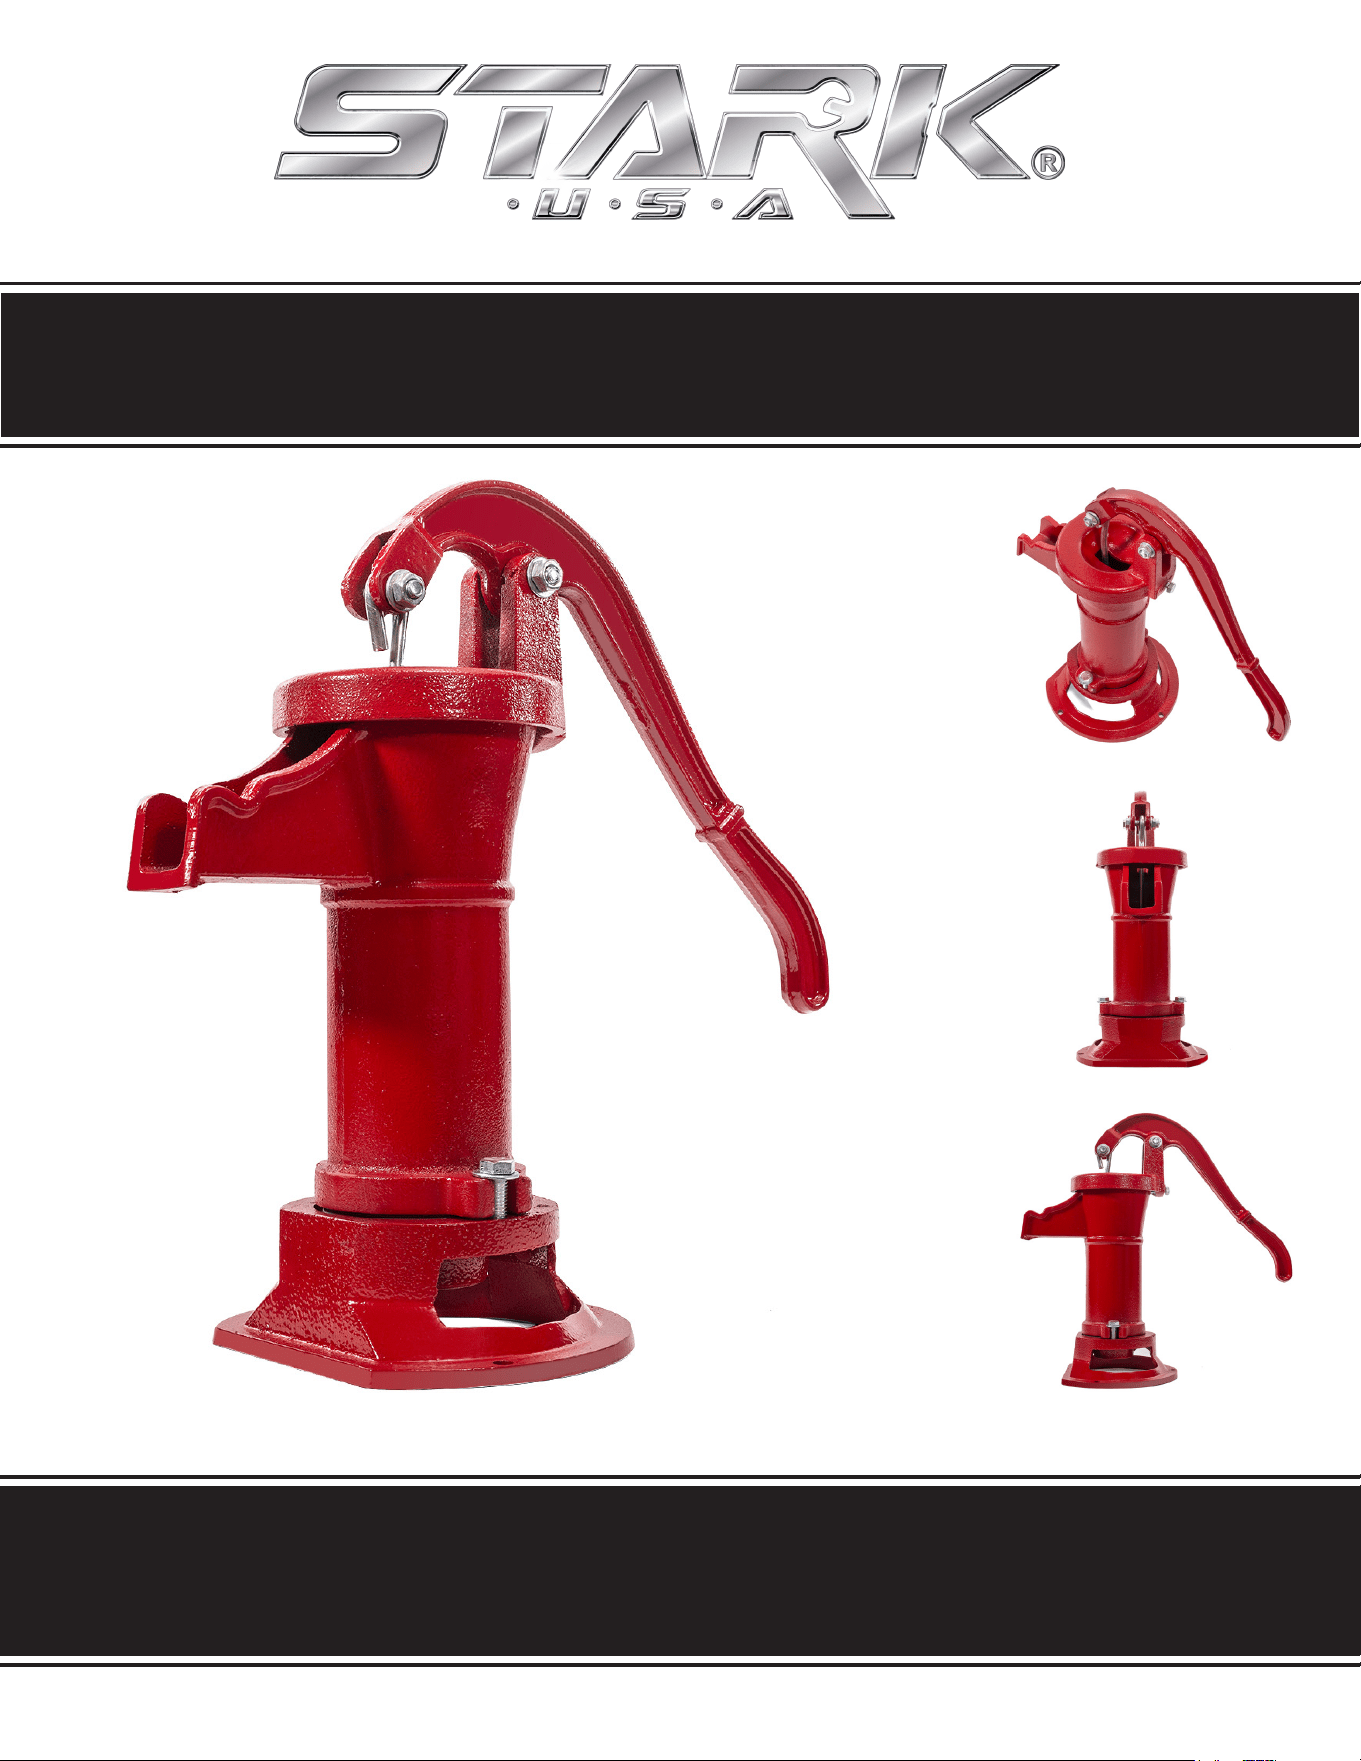
OWNER’S MANUAL AND SAFETY INSTRUCTIONS
PITCHER HAND PUMP
ITEM # 71004
SAVE THIS MANUAL. KEEP THIS MANUAL FOR SAFETY WARNINGS, PRECAUTIONS, ASSEMBLY,
OPERATION, INSPECTION, MAINTENANCE AND CLEANING PROCEDURES. WRITE THE PRODUCT’S
SERIAL NUMBER ON THE BACK OF THE MANUAL, OR THE MONTH AND YEAR OF PURCHASE IF
PRODUCT HAS NO SERIAL NUMBER
FOR QUESTIONS, PLEASE CALL CUSTOMER SERVICE: 909.628.4900

SAFETY WARNINGS
Read all safety warnings and instructions. Failure to follow the warnings and
instructions may result in injury and/or property damage. Save all warnings and
instructions for future reference.
The warning and safety instructions in this manual are not meant to cover all possible conditions and
situations that may occur. Common sense, caution and care must be exercised when operating or
cleaning tools and equipment. Always contact your dealer, distributor, service agent or manufacturer
about problems or conditions you do not understand before operating the product.
Keep the work area clean and well lit. A cluttered work area may cause accidents. Never allow children to
use this product. When operating this product, keep children and animals at a safe distance from the work
area.
When not in use, store product in a secure, dry and safe place. The storage area should be out of the reach
of children. Maintain this product with care.
WARNING: This product contains or, when used, produces a chemical known to the State of California to
cause cancer and birth defects or other reproductive harm. (California Health & SAFETY CODE § 25249.5,
ET SEQ.)
Use for pumping water only.
SAVE THESE WARNINGS.
Do not modify the pump.
1
Do not allow pump to freeze.
Periodically inspect pump for wear or damaged parts. Discontinue use if worn or damaged.
Wear safety glasses at all times when working with the Pitcher Pump
Do not modify the machine.
Use for pumping water only.
Do not modify the machine.
SAFETY WARNINGS PARTS INFORMATION
SAVE THESE WARNINGS.
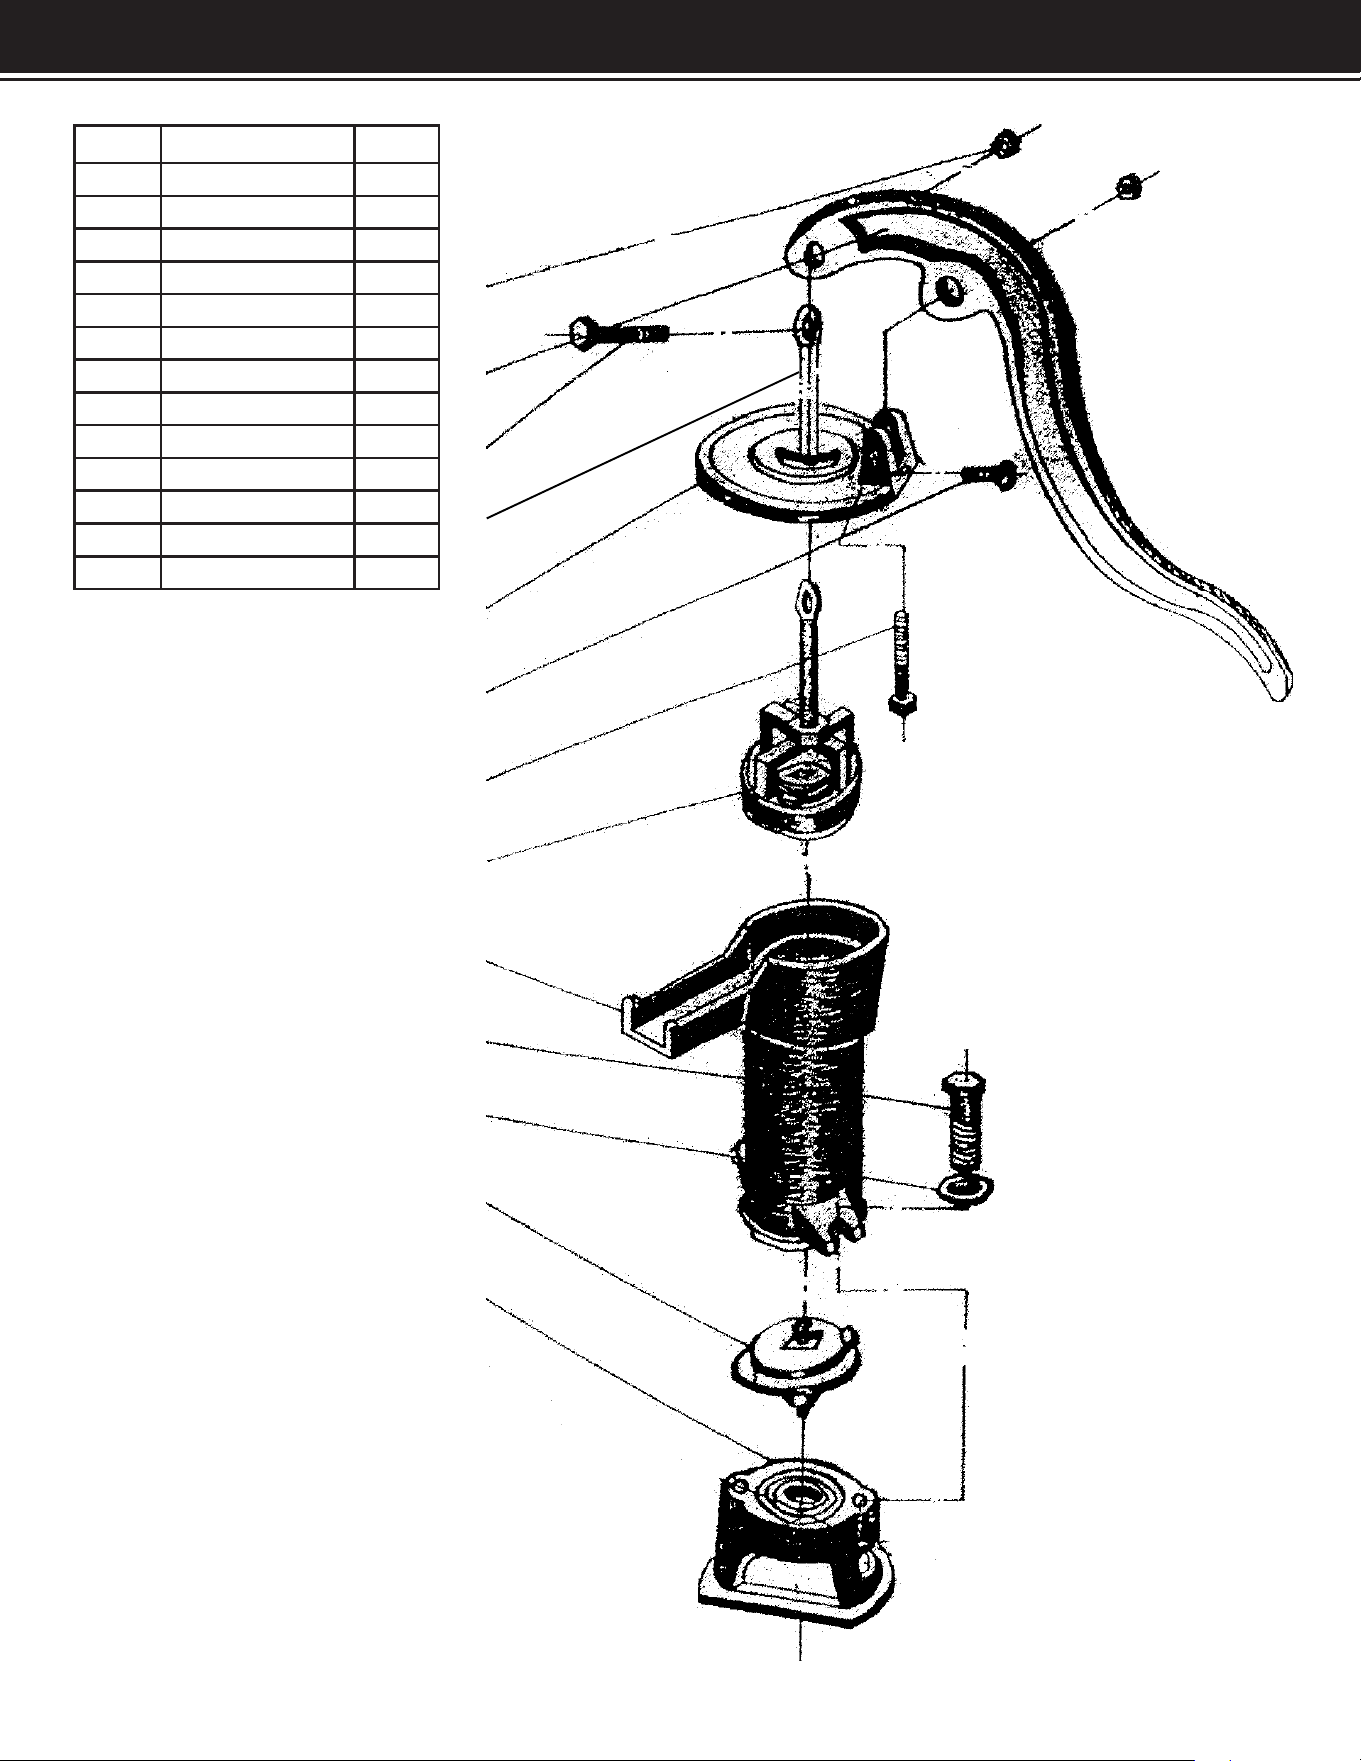
21
1
2
3
5
6
7
8
9
10
11
12
13
Part Description Qty
1 Nut M8 2
2 Handle 1
3 Bolt M8 x 30 1
4
Galvanized rod 1
5 Cover 1
6 Bolt M8 x 20 1
7 Bolt M8 x 40 1
8 Piston Assembly 1
9 Cylinder 1
10 Bolt M10 x 40 2
11 Washer M10 2
12 Valve Assembly 1
13 Base
1
4

3
1. Place the base (13) on a smooth, at surface.
OPERATION
2. Set the 2. Valve Assembly (12) in the circle groove of the Base (13). It will only t with the metal plate up.
3. Put the Cylinder (9) on the Valve Assembly (12). Line up the Cylinder (9) so that the bolt holders on each side
of sit over the two drilled openings on the Base (13). The spout on the Cylinder (9) should rest over the at side
of the Base (13).
4. Slip a Bolt (10) and a Washer (11) into the bolt holder on the Cylinder (9). Hand tighten. Repeat the procedure
on the other side. Then, wrench tighten both bolts (10).
5. Set the Piston Assembly (8) with the screw eyelet up, down into the Cylinder (9).
6. Put the Cover (5) onto the Cylinder (9) so the screw eyelet on the Piston Assembly (8) ts through the
opening in the center of the cover (5). The large bolt hole on the Cover (5) should sit opposite the spout on the
Cylinder (9) with a crescent wrench, tighten the large bolt (6) on the cover (5) oppostite the spout.
7. Attach the 7. Handle (2) to the Piston Assembly (8) using a Bolt (3) and Nut (1). Make sure the hole on the
Handle (2) that attaches to the Cover (5) rests between the bolt housing on the Cover (5). If necessary, rotate
the screw eyelet on the Piston Assembly (8) to nd the best t. Tighten the Nut (1). Next, run the Bolt (7) through
the bolt housing on the Cover (5) and the Handle (2) and tighten the Nut (1).
8. Attach 1-1/4” NPT threaded water source pipe onto the threaded inlet on the bottom of the pump.
9. Secure the pump by screwing the base into a stable surface.
7. This pump needs to be primed before every use. Keep a pitcher (not included) of water near the pump for
this purpose. Pump the handle up and down while pouring about a quart of water into the top of the pump to
prime it and start the water ow.
NOTE: DO NOT STOP PUMPING THE HANDLE UNTIL FINISHED. Stopping, even momentarily, will cause
the pump to lose its prime and no longer work until primed again.
2. Do not pump drinking water from this pump.
4
ASSEMBLY / OPERATION
ASSEMBLY
ASSEMBLY / OPERATION
DISCLAIMER
4
PLEASE READ THE FOLLOWING CAREFULLY
THE MANUFACTURER AND/OR DISTRIBUTOR HAS PROVIDED THE PARTS LIST AND ASSEMBLY
DIAGRAM IN THIS MANUAL AS A REFERENCE TOOL ONLY. NEITHER THE MANUFACTURER OR
DISTRIBUTOR MAKES ANY REPRESENTATION OR WARRANTY OF ANY KIND TO THE BUYER THAT HE
OR SHE IS QUALIFIED TO MAKE ANY REPAIRS TO THE PRODUCT, OR THAT HE OR SHE IS QUALIFIED
TO REPLACE ANY PARTS OF THE PRODUCT. IN FACT, THE MANUFACTURER AND/OR DISTRIBUTOR
EXPRESSLY STATES THAT ALL REPAIRS AND PARTS REPLACEMENTS SHOULD BE UNDERTAKEN
BY CERTIFIED AND LICENSED TECHNICIANS, AND NOT BY THE BUYER. THE BUYER ASSUMES
ALL RISK AND LIABILITY ARISING OUT OF HIS OR HER REPAIRS TO THE ORIGINAL PRODUCT OR
REPLACEMENT PARTS THERETO, OR ARISING OUT OF HIS OR HER INSTALLATION OF REPLACEMENT
PARTS THERETO.
Record Product’s Serial Number Here:
Note: If product has no serial number, record month and year of purchase instead.
Note: Some parts are listed and shown for illustration purposes only and are not available
individually as replacement parts.
MADE IN CHINA
