
2
Dash Cam i07
User Manual
V02

IC warning:
This device contains licence-exempt transmitter(s)/receiver(s)/ that comply with Innovation
Science and Economic Development Canada's licence-exempt RSS(s). Operation is subject to
the following two conditions:
1. this device may not cause interference and
2. this device must accept any interference, including interference that may cause undesired
operation of the device.
Radiation Exposure: This equipment complies with Canada radiation exposure limits set forth
for an uncontrolled environment; To maintain compliance with IC's RF Exposure guidelines,
This equipment should be. installed and operated with minimum distance of 20cm the radiator
your body. This device and its antenna(s) must not be co-located or operation in conjunction
with any other antenna or transmitter.
Déclaration de l'ISED Canada :
Cet appareil contient des tasmittre (s) / récepteur (s) sans licence / conformes à l'innovationRSS
exemptes de licence de Sciences et Développement économique Canada. L'opération est
sous réserve des deux conditions suivantes :

1. cet appareil ne peut pas causer d'interférences et
2. cet dispositif doit accepter toute interférence, y compris peut provoquer le fonctionnement
indésirable de l'appareil.
Exposition aux rayonnements : Cet équipement est conforme aux radiations du Canada
limites d'exposition pour un environnement incontrôlé noncé d'exposition RF Pour maintenir
le respect des guides d'exposition RF d'IC, cquipment doit être.installé et actionné avec
une distance minimale de 20cm le radiateur de votre corps. Cet appareil et ses antennes
ne doivent pas être co-localisé ou en opération en conjonction avec toute autre antenne ou
émetteur.

02
INTRODUCTION
PRE-CAUTIONS
APPEARANCE
ABOUT THE MICRO SD CARD
INSTALLATION
HOME SCREEN
POWER ON/OFF
MENU SETTINGS
04
04
06
07
08
13
14
16

03
PLAY ON CAMERA
PLAY ON APP
PLAY ON PC
TROUBLE SHOOTINGS
ONE YEAR LIMITED WARRANTY
PRODUCT SPECIFICATIONS
30
32
38
39
42
43

04
INTRODUCTION
PRE-CAUTIONS
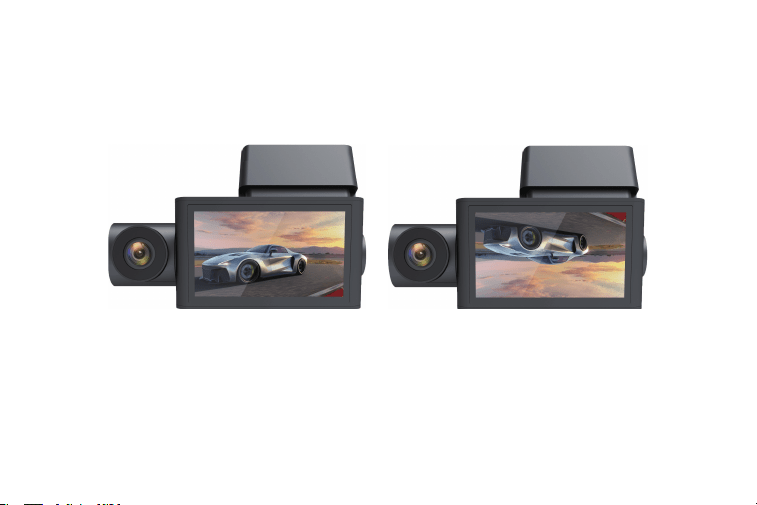
Thank you for purchasing WOLFBOX i07 Dash Cam. This product is a triple channel dash cam
which offers 150° front camera, 160° inside camera and 155° rear camera, it can simultaneously
monitor the front, rear, and interior of your vehicle while providing audio at 2.5K + 1080P +
1080P, protecting you from potential accidents and liability issues. When the rear camera is not
inserted, the cam will turn to front and inside dual recording mode automatically. It provides
top 4K 2160P resolution front camera and a 1080P inside camera. The rear cam is easily 360°
adjustable with 20ft extension cable, and it works well for cars, SUVs, jeeps, and truck.
In addition to triple-camera recording and ultra-high definition, i07 dash cam also has other
smart features to provide customers with elegant and convenient services. It has built-in GPS,
built-in WIFI, free APP, split-screen display, rear flip(180°) & rear mirror, DST switch, built-
in G-Sensor, emergency recording, audio recording, loop recording, parking monitoring,
Screensaver mode, and is very easy to use.
If you have any questions, or want accessories, please CONTACT US (service @wolfbox.com),
we will solve it for you.

05
Please check the functionality of dash cam with its all accessories before installation. If you
want to find a professional for installation, please check the function first, so as to prevent
the inconvenience and installation cost loss caused by the machine problem after the
installation.
Please use original accessories provided in the package, just in case of compatible issues
after using others', especially use 2 or 3 in 1 cigar socket will lead to 100% insufficient current
supply.
If you use micro SD card capacity > 32GB, Please change micro SD card [Class10 (10MB/
sec) required) format to FAT 32 on PC(a 32GB card is included in the package).
Please format micro SD card termly in case of locked videos occupied much capacity, release
them necessarily.
Please confirm whether your cigar power port is ACC. (if the cigarette lighter is still charged
after the car is turned off, please use the hardwire kit or unplug the car charger after the car
is turned off, otherwise it may exhaust your car's power supply.) (Note: This happens in some
Ford/Audi cars, and electric cars).
The rear camera in the package is for installation on the rear windshield in the car.
If you have any questions or need accessories, please CONTACT US.
06
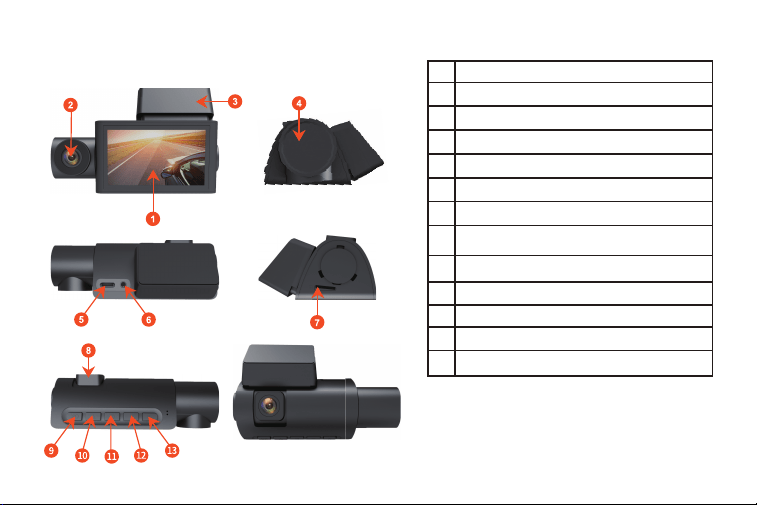
APPEARANCE
IPS Screen
In-Car camera
GPS built-in bracket
Rotate to adjust the In-Car camera image
Type-C Power port
Rear Camera input terminal(AV-IN)
TF Card slot
Front Camera(Can rotate to adjust
front camera image)
M button
UP button
Power button
Down button
OK button
NOTE: When inserting the rear camera
cable, please insert it firmly to ensure
that the circuit is unobstructed, so that
the rear camera can detect.
1
2
3
4
5
6
7
8
9
10
11
12
13

07
About the Micro SD Card
When using a new MicroSD card, be sure to format it on the dash cam.
Do not remove or insert a Micro SD card while the power is on.
Use a Micro SD card with Class 10 or higher (32GB-512GB). 32GB card is included in
package.
For stable use,it is recommended to format the micro SD card regularly. Recommend: Once
a month.
Please press the “M" button once to enter the menu settings, then press the UP/DOWN
button to scroll until you see "Storage" setting, press the “OK" button to enter it. Then press
"OK" button again to confirm to format the SD card.
This product will check the Micro SD card at startup and will announce if it is not inserted or
damaged,that can prevent missed shots.
08
NOTE
:
When you use the dash cam for the first time, the dash cam comes with factory default settings
and you do not need to set it manually.
Format SD before use! Please refer to page 7 for SD card settings
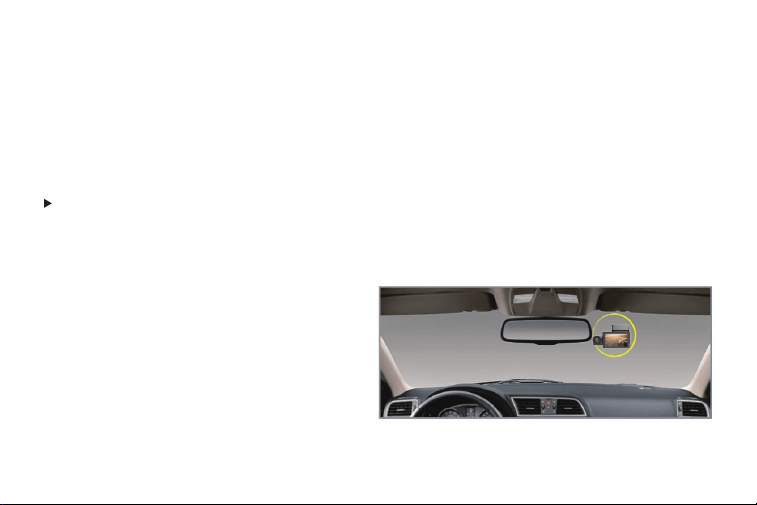
How to install the main body
1. Installation Position-Please find the most
suitable place to record the picture you
want(such as the back seat) with the In-Car
camera. Note: Front-Cam and In-Car Cam can
be rotated to adjust the angle of the picture.
Installation

09
2. Make sure to clean your windshield from the dust
particles and attack attach the electrostatic sticker to the
windshield.
3. Peel off the 3M tape attached to the GPS built-in
bracket and attach it on the electrostatic sticker on the
windshield.
About electrostatic Sticker
Since the adhesive strength is strong on both sides and it is difficult to peel off once it is
pasted, it will be troublesome if the pasting position is incorrect. Therefore, we design
the electrostatic sticker to attached to the windshield first,then stick the bracket with 3M
Adhesive on the electrostatic sticker. You can easily readjust location by sticking the 3M
Adhesive on electrostatic sticker and peel it off.
To strengthen the fixing force,do not attach the unit and leave it for 24 hours or more.

10
4. Use the power cord to connect the type-c Port of the product
to car's cigarette lighter socket.
Re-sticking may weaken the adhesive strength of the tape and cause it to fall off. If you need
more accessories, please CONTACT US.
CAUTION
:
Connect the cigar plug cord connector in the correct orientation. Connecting in the wrong
direction may cause malfunction or damage. If you cannot connect successfully, check the
connection part carefully before connecting.
Only use WOLFBOX's Car Charger, otherwise the camera may frequently reboot or flicker
LCD due to insufficient power.

11
In the package is the in-car rear camera which is mounted on the car rear windshield.
1. Fix camera with 3M adhesive
Find a best location, tear off the 3M adhesive on the rear
camera, fix the rear camera on car rear windshield.(The rear
camera can be rotated 360°.For easier installation, please
find the correct position first, and then adjust the rear camera
angle before fixing it.)
How to install the rear camera
2. Connect the rear cameras power cable to the connection cord.After installing your rear
camera's connection cable, connect the power cable to rear camera's connection cord.

12
3. Route your rear camera's power cable to the front of the car.
If you'd like, use a trim removal tool to pop out the headlining
panel directly above your windshield. Then, run your cable
through the exposed chamber.
4. Power on the dash cam with box included car charger,don't
charge it with your own chargers.
NOTE
:
Make sure to remove the Plastic Lens Screen Protector from the lens before recording
videos, otherwise your videos will look blurry and blocked.
If you find that the rear image is reversed or mirrored after installing the rear camera, there is
no need to re-install it, please find "Rear Mirror" and "Rear Flip(180°)" in the menu to adjust
the image correctly.
13
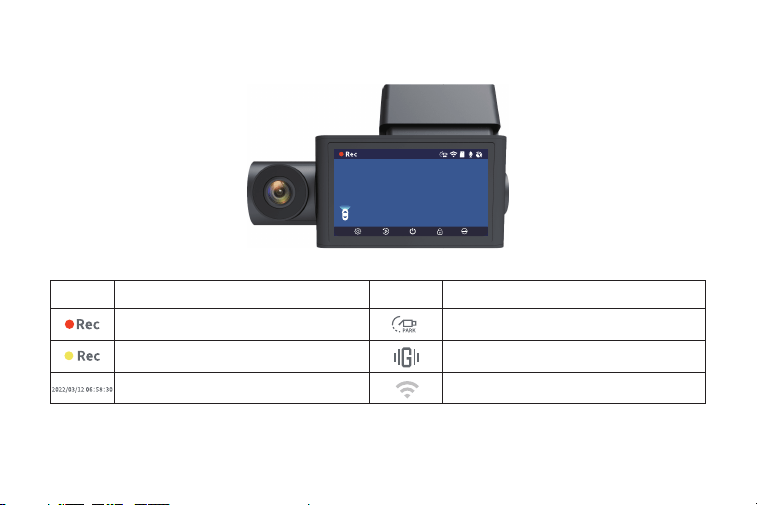
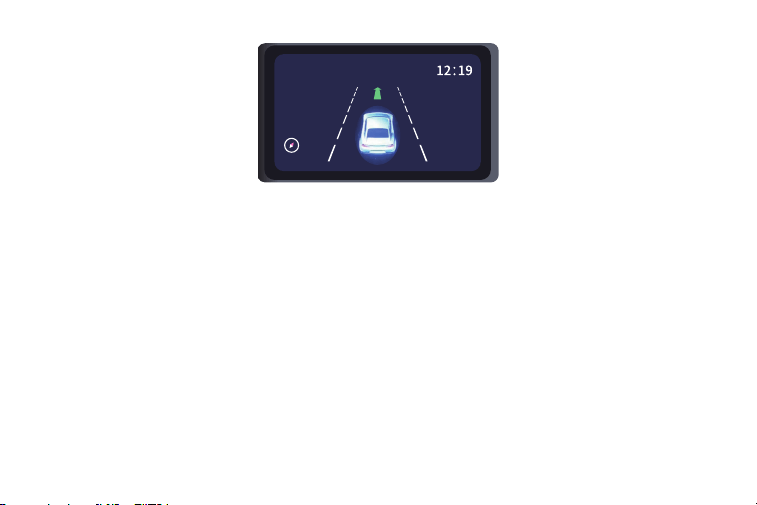
HOME SCREEN
2022/03/12 06:58:30
ICONS ICONS
WHAT DOES IT MEAN? WHAT DOES IT MEAN?
Indicates that dash
cam is in recording
Time Lapse Mode is on
Indicates that the current
recording video is locked
Parking Monitor Mode is on
Date and Time WIFI is on but not be connected
14
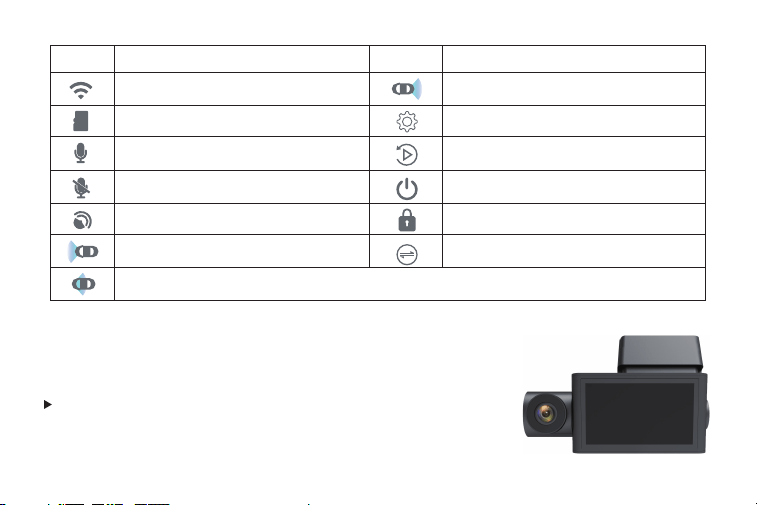
ICONSICONS
WHAT DOES IT MEAN? WHAT DOES IT MEAN?
WIFI is on and be connected
SoundRecord is Closed
Indicates that showing the rear camera
image currently
Press “Power” button to turn screen off
TF Card is inserted
Received GPS signal
Press “M” button to enter Menu Setting
Press “Down” button to lock the current
recording video
SoundRecord is Opened
Indicates that showing the front camera
image currently
Indicates that showing the in-car
camera image currently
Press “UP” button to enter Playback
Mode
Press “OK” button to switch screen
Power ON/OFF
<Power ON>
If you turn on the engine (ACC on) while the cigar power
adapter is connected,the power will be turned on automatically
and the opening screen will be displayed.

15
Press and hold the power button to turn off the power during startup,and then briefly press
the power button again to turn on the power of the unit and display the opening screen.
When the engine is turned off the power is automatically turned off.
If you press and hold the power button while the power is on, the power of this unit will be
turned off.
Please confirm whether your cigar power port is ACC. (if the cigarette lighter is still charged
after the car is turned off, please use the hardwire kit or unplug the car charger after the
car is turned off, otherwise it may exhaust your car's power supply. ) (Note: This happens in
some Ford/Audi cars, and electric cars).
Micro SD card check function
This product will check the Micro SD card at startup and will announce if it is not inserted or
damaged, that can prevent missed shots.
<Power off>
NOTE
:
16
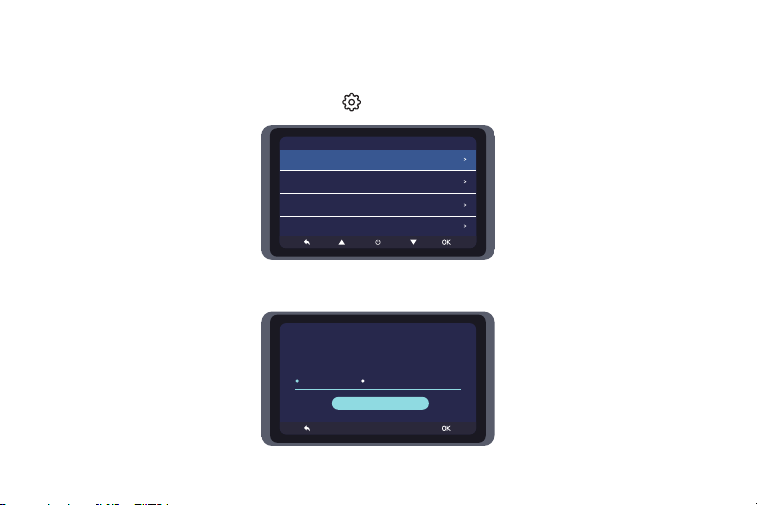
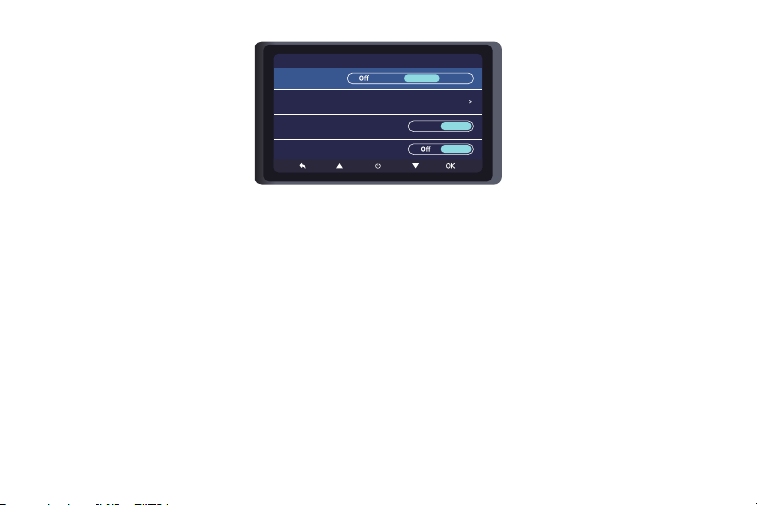
Menu Settings
After powering ON the camera, press the button to enter the setup process.
Storage
Setting
Storage
Language
Data/Time
WIFI
01/05
GMT+08:00
Remaining Space
240MB
Video 29.27GB Other Capacity 29.53GB
Format SD Card
17
Language
Choose the language you want.
The dash cam has the built-in GPS function, it will automatically update the time according to
your location and time, so you do not need to manually change the time.
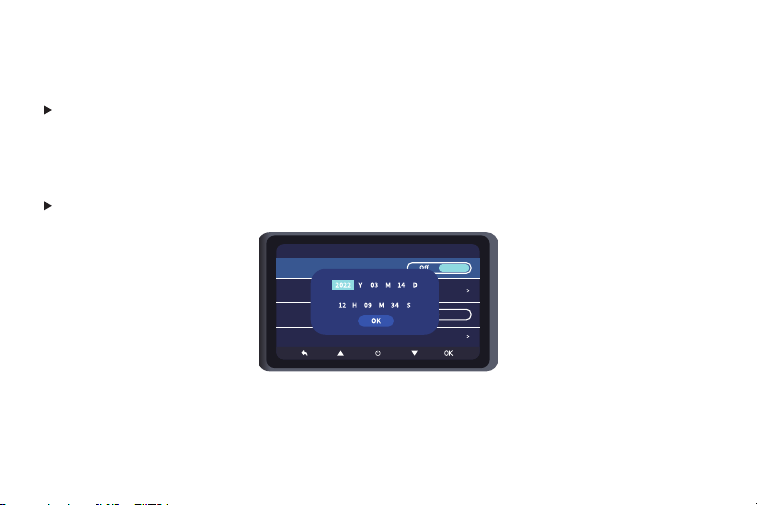
Date/Time
Date/Time
Automatically update the time by GPS
SetDate and Time
24-Hour
Time zone
01/02
GMT+08:00
On
On
The setting displays the video's occupied space and remaining space.Press “OK” button to
format SD Card.
18
But you can adjust the daylight saving time by changing the DST Setting(On/Off). Please
CONTACT US if you need help.
If you want to set the time you want, please turn “Automatically update the time by GPS” off.
Please set [Time zone] before setting Date and time.
Automatically update the time by GPS
Turn the setting on, means that the time will be adjusted according to your location and the
time zone detected by GPS. You can also change the time zone by setting "Time zone", but
you cannot adjust the time.
Set Date and Time
Date/Time
Automatically update the time by GPS
SetDate and Time
24-Hour
Time zone
01/02
GMT+08:00
On
On
19
24-Hour
Turn on or off the "24-Hour" setting according to your usage habits
Time zone
If you need a special time zone or need any help, please CONTACT US.
DST
Turn on or off the setting to adjust the daylight saving time.
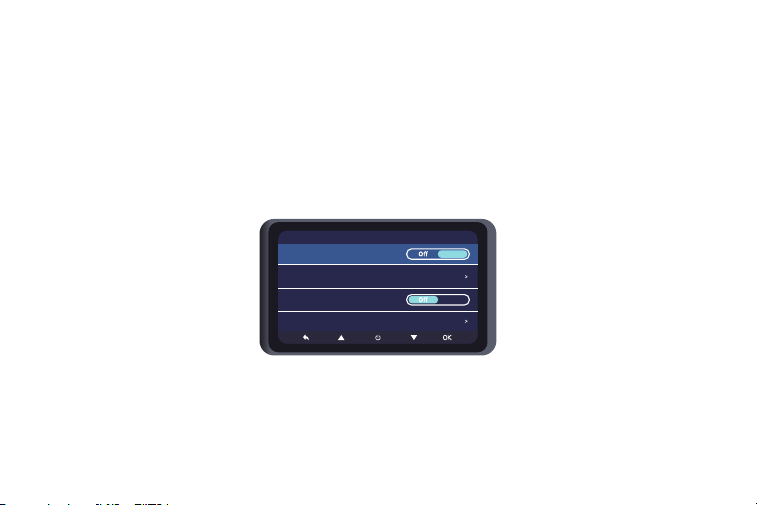
WIFI
For specific functions, please refer to "About WIFI and APP".
Setting
Resolution
Loop Recording
SoundRecord
Exposure
02/05
Close
Open
5Minutes3Minutes1Minutes
2160P1440P1080P

20
Resolution
There are 4 resolutions:
* Front: 1080P + Inside: 1080P + Rear:1080P
* Front: 2.5K + Inside: 1080P + Rear:1080P
* Front: 2.5K + Inside: 1080P
* Front: 4K + Inside: 1080P
NOTE
:
When the rear camera is inserted, that is, 3 channel recording, the highest resolution of the
front camera is 2.5K . If switch to 4K, it will prompt "3 channel dash cam does not support
this setting".
Q: Why is every video recording so short?
Loop Recording : 1 Minute/3 Minutes/5 Minutes

21
A: We set the recording interval of each video to 1min/3min/5min.This is for the convenience
of finding the locked video later.The main function of the recorder is to record, especially
to record emergency video. If each video is too long and the G-Sensor triggers emergency
recording when a collision occurs, the video will be locked and cannot be covered by the loop
recording, and customers will be difficult to find the video in the subsequent search. You need
slide the longer progress bar to find this locked video.And the capacity of the Micro SD card
is limited, if the locked video is too long, the normal video capacity that can be stored will
decrease.
In order to be able to record more comprehensive evidence, we recommend that you turn on
this switch.
Adjusting the exposure for the front camera.
Sound Record
:
Close/Open
Exposure
22
Setting
Frequency
G-Sensor
Parking Monitoring
Display Mode
03/05
60Hz50Hz
Medium HighLow
Frequency: 50Hz / 60Hz for choosing
G-Sensor: Off/Low/Medium/High
NOTE
:
If the local AC power is 220V-240V, it is recommended to modify the frequency to 50Hz. If the
local AC power is 110V, it is recommended to modify the frequency to 60Hz.
After turning on the G-Sensor, the dash cam will lock the video when it detects bumps while
driving.
Recommended to adjust to medium/low
23
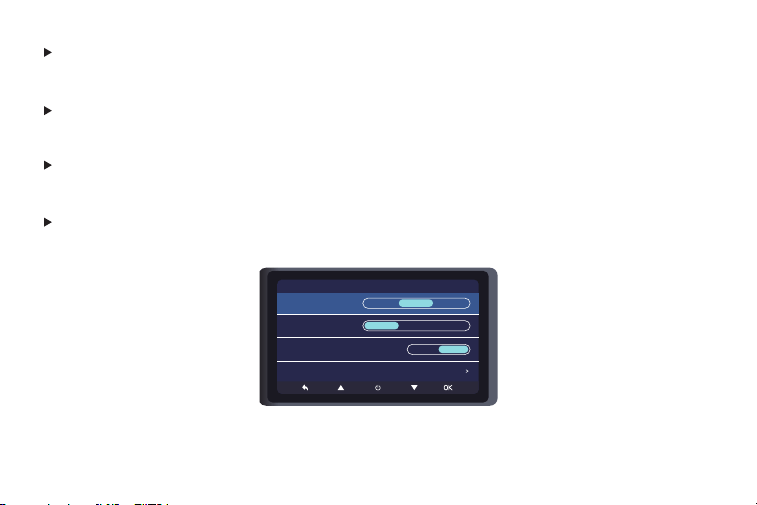
Parking Monitoring
(
Available after installing the hardwire kit
)
Parking Monitoring
Parking Mode
Monitoring Sensitivity
Time Lapse
Time-Lapse Recording Time
On
There are two parking Monitoring mode.
Mode 1: Collision boot recording
There are two ways to open this mode.
(
note
:
Do not turn on “Time Lapse”.
)
Way-1: Turn on “Parking Mode” and set “G-Sensor” among Low, Medium or High.
Way-2: Turn on “Parking Mode” and set the “Monitoring Sensitivity” among Low, Medium or
High. After the car engine is off, the camera will turn off automatically, and prompt "Enter parking
monitoring mode!" on the screen. The camera will turn on and start recording automatically
when there’s collision or vibration detected and the video file will be locked.

24
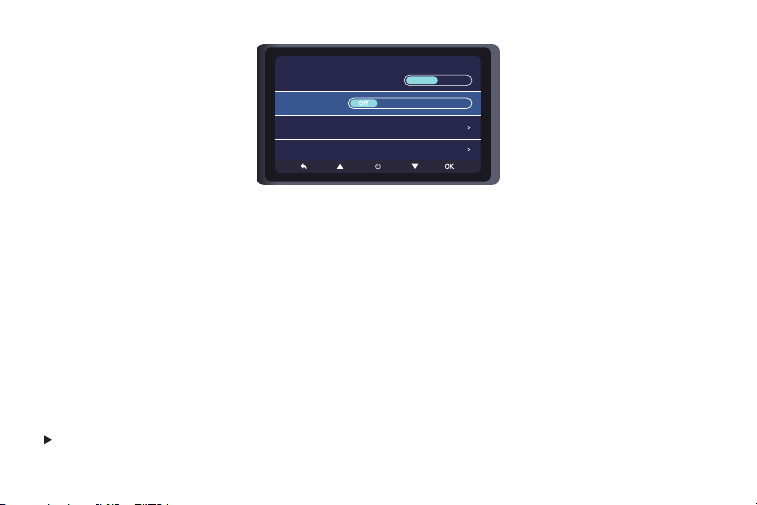
Mode 2: Time lapse recording
Turn on “Time Lapse”, set 0.5Sec/1Sec/5Sec and set Time-Lapse Recording
Time(12H/24H/72H).
After the car engine is off, the camera will turn off automatically, and prompt "Enter time lapse
mode!" on the screen. If you turn the G-Sensor among Low, Medium and High, the parking
video will be locked when there’s collision or vibration detected.
Driving Mode/Always on/Auto LCD Off
NOTE:
Display Mode
Collision-boot-recording won't work when Time Lapse is turned on.
If you need this function,please connect the hardwire kit.
Only work after the dash cam is powered off.
Recommended to adjust to medium/low.
25
Always on: When choose this setting, i07’s screen will always be on.
Auto LCD Off: When choose this setting, i07 will black out after 30s.
Q: Why does my machine shut down automatically?
A: It may be that “Auto LCD Off” is turned on. Please check carefully. If you do not want to use
this function, please turn it off manually.
Rec
0km/h
SE
Rec
0km/h
2022-03-16 Wed
SE
26
Set the volume of i07 dash cam.
To track the Location, Speed, GPS state, Signal Strength, please check it in this setting.
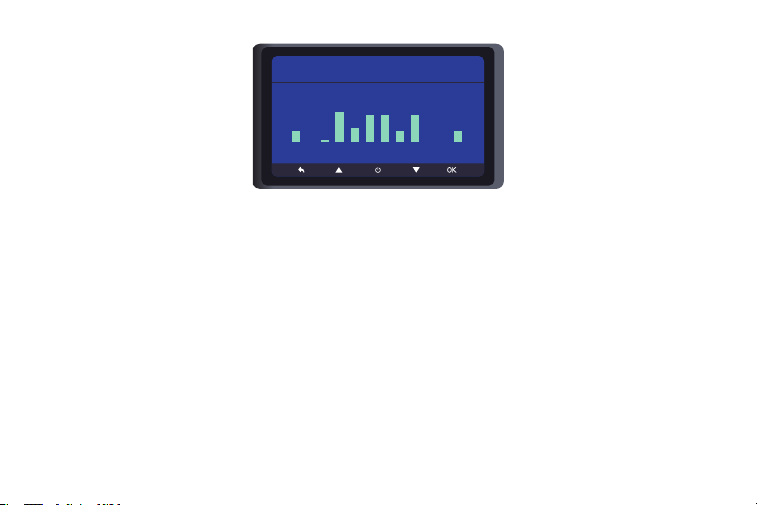
Volume
GPS Information
Setting
Volume
GPSInformation
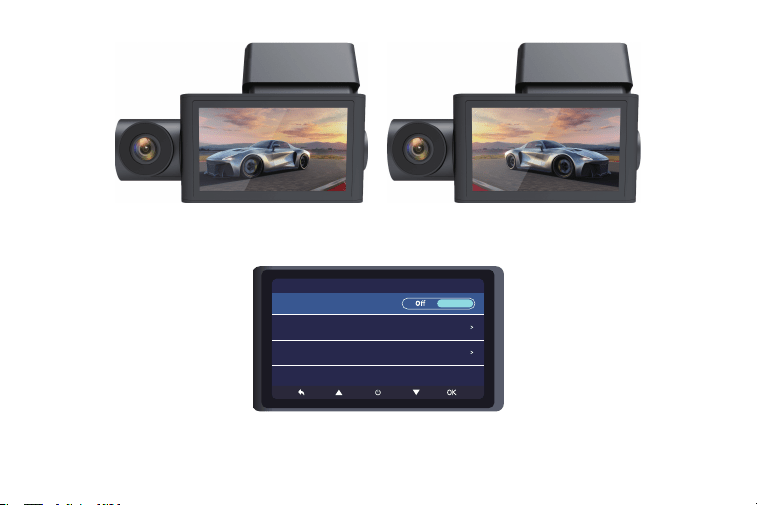
Speed Unit
Rear Mirror
04/05
km/h
mph
On
HighMediumLow
27
Speed GPS StateLongitude and Latitude
30.2803W/119.977E 00km/h/0.00 Positioned
16 00 00 48 21 45 43 17 43 00 00 17
14 93 03 17 08 19 01 30 21 07 08 30
km/h and mph, select the speed unit you want.
If you find that the rear camera screen is reversed from left to right after installing the rear
camera, please turn on/off “Rear Mirror” to adjust the view.
Speed Unit
Rear Mirror
28
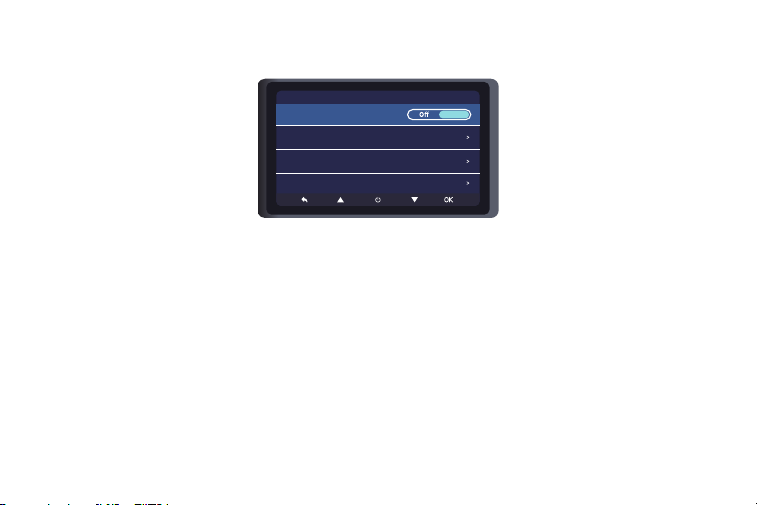
Mirror Image
Setting
Rear Flip(180ã)
Reset
About
05/06
On
29
If you find that the rear camera image is upside down after installing the rear camera, please
turn on/off “Rear Flip(180°)” to adjust the view.
This option is used to restore the factory settings
.
Rear Flip(180°)
Reset
Rear Image
30
Include Product Model and System Version.
Please continue to pay attention to the latest version.
Latest version will be posted to: https://wolfbox.com/firmware/
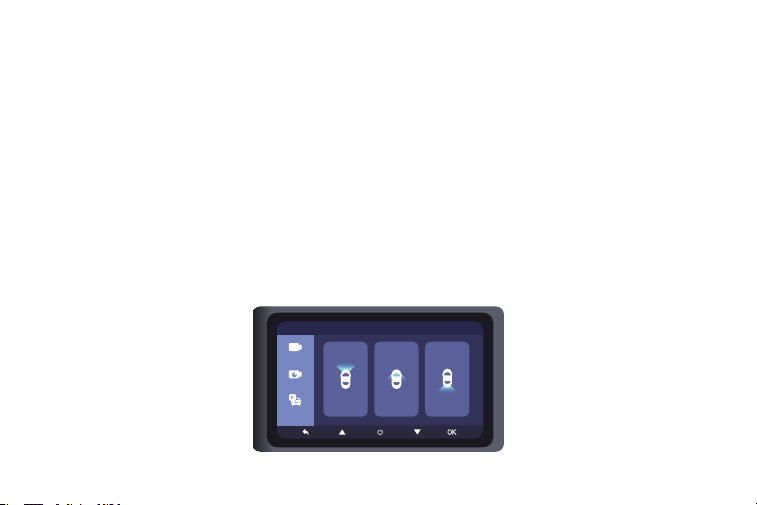
Press the UP button to enter the playback interface.
There are three folders: Normal Video Folder, Locked Video Folder and Parking Video Folder.
And there are three video lists in each folder: Front Video List, In-Car Video List and Rear Video
List.
About
Play on Camera
Playback List
Front In-carR ear
Normal Video
Folder
Locked Video
Folder
Parking Video
Folder
31
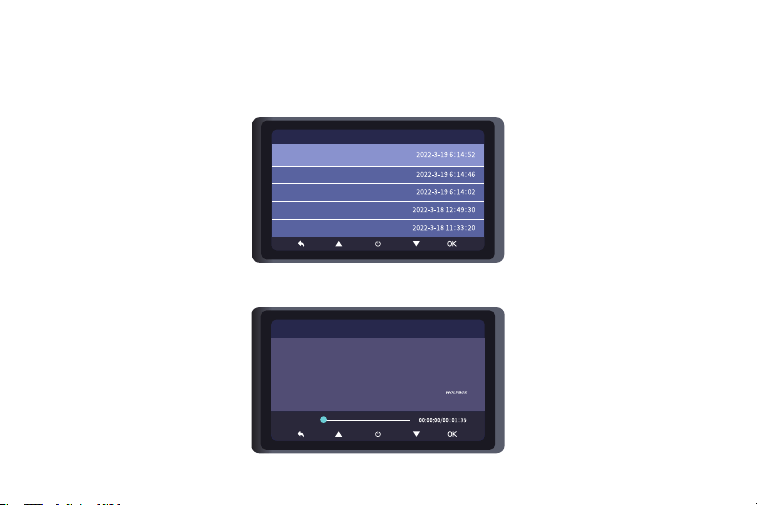
After entering the video list, you can see the following video list.
Front video name ends with F, in-car video name ends with I, rear video name ends with R.
You can scroll up or down to select a video to play, also you can delete a video.
Press the power button to lock/unlock the video.
Playback List
20220319081451-000137F.MP4
20220319081406-000134F.MP4
20220319081323-000132F.MP4
20220319084632-000130F.MP4
20220318113320-000128F.MP4
01/090
20220319081451-000137F.MP4
2022/03/21 12:34:31
30km/h N:45.213730 E:110.426598

32
NOTE:
Play on APP(About WIFI and APP)
If the video recorded by time-lapse mode is locked, it is still stored in the parking video folder,
but it is locked.
The WIFI feature has been designed so you can pair your dash camera wirelessly with your
smartphone and access your recording instantly from the dash cam. Here you can view,
download and share your videos easily with your friends and family. The app “Wolfbox” is a free
app that allows you to operate this WLAN built-in drive recorder from your smartphone.
1. Download the “Wolfbox” app
Please go to the following address to download the “Wolfbox” app:
https://wolfbox.com/app/
Or you can use your smart phone to scan the QR code to go to the
download page.
How to connect WIFI
33
2. WIFI Function on
Turn on the WIFI setting. The WIFI name and WIFI password will appear on the screen.
3. Connect WIFI
Now simply join the i07 WIFI by going into your iPhone or Android phone’s Settings > WiFi >
i07 WiFi. Then enter the default password:12345678 to join the network.
4. Open the “Wolfbox” app
Once your camera is connected to i07 WiFi successfully and when you open the “Wolfbox”
app, the camera will sync automatically. You should see the live video feed from the camera on
the “Wolfbox” app. Then keep exploring the app from here on.
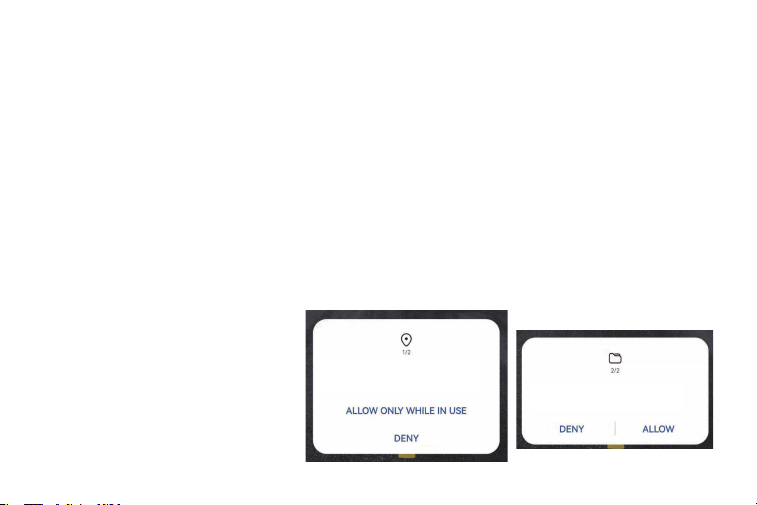
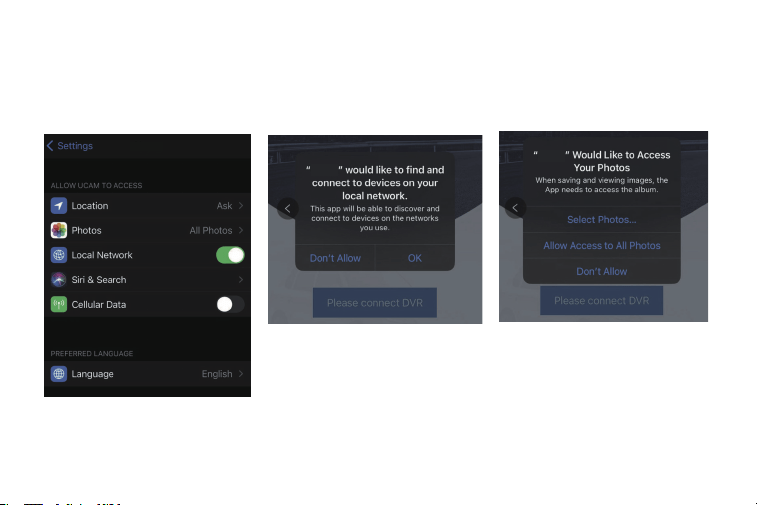
Please choose to allow when these
prompts appear.
For Android Phone
Allow Wolfbox to access this
device’s location?
Allow Wolfbox to access photos
and media on your device?
34
If you get this pop up for your iPhone while using WiFi feature, make sure to tap on "ALLOW"
or "OK"
For iPhone
Wolfbox
Wolfbox
Wolfbox

35
NOTE:
Recording Interface
Once you connect to i07 WiFi, it will say "No Internet". Which is fine. As long as you keep the
WIFI connection,you can still use the APP normally.
When connected to WIFI,the dash cam can only operate by phone.
Please CONTACT US if you need any help.
Mirror the image
Display the video screen in full screen
Stop recording
Capture video screen
Enter video list
Enter Camera Settings

36
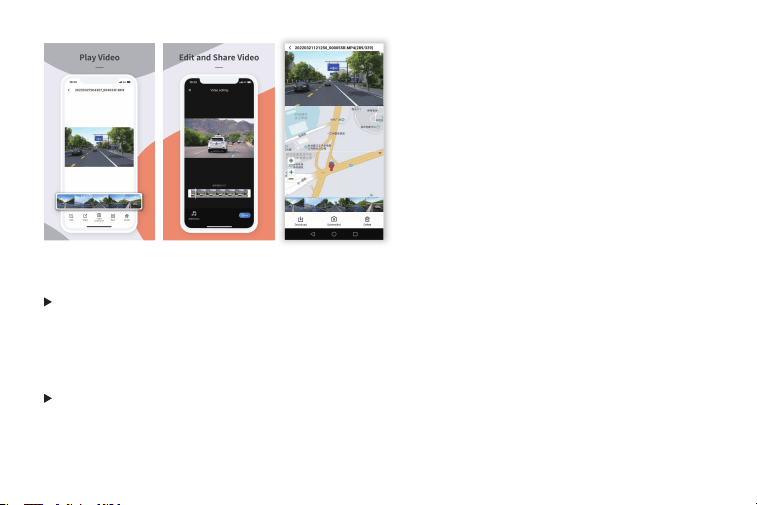
Check/Play data with APP
You can check and play the video by pressing “ ” on the recording
screen to enter the data file list.
On the data file screen, you can select a file to play/download/screenshot/delete.
After download, you can share it to social media, such as facebook, wechat, line, etc.
You can select a local album, play the downloaded data, and view it in conjunction with Google
Maps.(Internet connection environment is required)
37
FAQ about WIFI&App
What is the WiFi range?
The WiFi signal range is about 10ft when there are no obstructions in the middle. Please
NOTE that just like your home WiFi network,you can't have WiFi signal outside your
home,the same way, WiFi range is 10FT from this small device.
Can I change the password?
Yes. You can set the WIFI password in the app. And if you need to modify the WIFI password,
please restart the dash cam and forget the original network with your mobile phone after the
modification is completed.
38
Can I change the password?
Yes. You can set the WIFI password in the app. And if you need to modify the WIFI password,
please restart the dash cam and forget the original network with your mobile phone after the
modification is completed.
Why can't I use the APP normally when all the steps are correct?
Because there are too many mobile phones and software version numbers, our APP is
currently not compatible with all mobile phones.
If you are unable to use the APP, please CONTACT US. We will include your mobile phone
model and software version.We need your help to improve our APP, thank you very much for
your support and understanding.
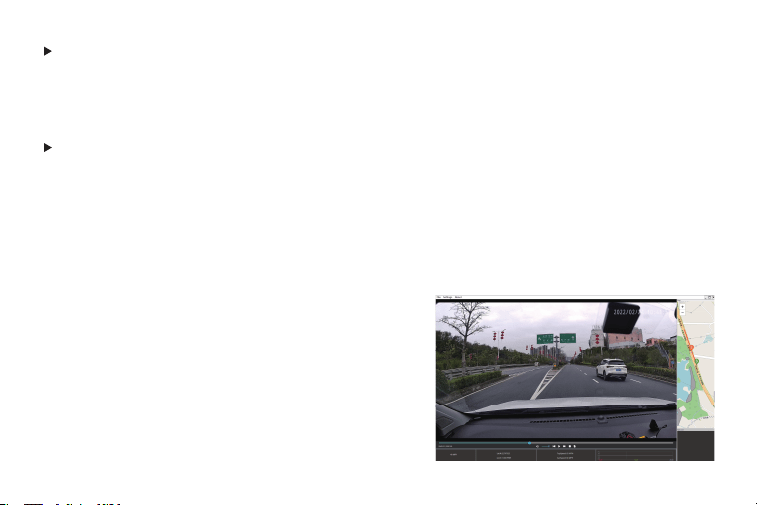
Play on PC
If you need to track GPS information, please download
the dedicated player, the download link as follows:
Wolfbox Player: https://wolfbox.com/gps-player/
Use this player to track the speed and location
information.

39
NOTE:
Why doesn't the rear camera image appear?
Why can't my dash cam be turned on?/Why does my dash cam automatically turn on and off
after using it for a period of time?
If you encounter problems during use,please CONTACT US.
Trouble Shootings
Please feel free to contact our customer support at [email protected] . Most emails are
typically replied with 10 hours and all questions are answered within 24 Hours.
The rear camera AV-IN port needs to be inserted tightly to be detected. Be sure to check.
Please confirm whether you're using the original accessories first. If not, please use the original
accessory and check the problem. If yes, it may caused by the accessories,you can check as
below:

40
1. Unplug the TF card&Rear view camera&GPS bracket, use the car charger to supply power,
please check if i07 dash cam can work normally.
2. If yes,it may be the problem of car charger cable,you can tell us your address to get one new
car charger.
If not, please connect the other accessories one by one and check if the cam can work
normally. If there is a problem after connected to a certain accessory, please tel us, that might
be the problem.
Please format the TF card first. If still doesn’t work, you can replace the TF card. Or CONTACT
US directly, we will help you solve it.
If the car is large, such as trucks, RVs, etc, the cable of the rear camera will be a little short.
We have 33ft and 50ft extension cable to solve this problem, if you want, please CONTACT US.
Won’t loop recording?/Loop recording doesn’t work?/Stop recording after recording a video.
The cord is too short for my car.

41
Please confirm whether your cigar power port is ACC. (if the cigarette lighter is still charged
after the car is turned off, please use the hardwire kit or unplug the car charger after the car
is turned off, otherwise it may exhaust your car's power supply. ) (Note: This happens in some
Ford/Audi cars, and electric cars).
Please change your G-Sensor setting to lower. This setting depends on how much vibration
you car/truck is creating based on suspensions and road condition.
It may be difficult to receive GPS signals in tunnels or in valleys of buildings, and also difficult to
receive GPS signals immediately after starting this unit. Please check again after a while.
Please CONTACT US if you still have problems.
It is normal for your camera to run slightly hot.
Why is my car battery drained while using the car charger?
Camera Locks many videos automatically?
GPS signal can not be received?
Camera gets hot?

42
NOTE:
The operation video of i07 dash cam will be posted on www.wolfbox.com/faq
ONE YEAR LIMITED WARRANTY
We are committed to giving customers the best product experience and after-sale service.
We would like to provide One full year of limited warranty for your product from the date of
purchase to be free from defects in materials and craftsmanship.
Please CONTACT US with your online order, and we will provide free replacement and lifetime
technical support.

43
Product Specifications
Model
Display
TF Card
Working voltage
Aperture
Frame rate
TF Card
Features
Warranty period 1 Year
IP67
-20℃ ~ 70℃
built-in GPS, builit-in WIFI, free APP,
split-screen display, rear flip(180°)
& rear mirror, DST switch, built-in
G-Sensor, emergency recording, audio
recording, loop recording, parking
monitoring, Screensaver mode
Format
Battery
Recording method
Video:MP4 Image:JPG
Super capacitor
i07
3 inches IPS
512GB Max, Class 10 Above
DC 5V
3 channel mode:
* Front: 1080P + Inside:
1080P + Rear:1080P
* Front: 2.5K + Inside:
1080P + Rear:1080P
2 channel mode(front+inside):
* Front: 1080P + Inside: 1080P
* Front: 2.5K + Inside: 1080P
* Front: 4K + Inside: 1080P
Waterproof level
(Rear Cam)
Operating
temperature
Front Camera F1.55; In-Car Camera
F1.8;Rear Camera F2.0
Front Camera 30fps; In-Car Camera
30fps;Rear Camera 25fps
Class 10 or above,
max support 512GB
Normal recording/
Emergency recording
Resolution
Check us out here!
We have professional customer service!
E-mail: [email protected]
Phone: +1 888 296 8399