USER GUIDE
Start Here
Serenelifehome.com/register
SLSUPB11 - SLSUPB12
Inflatable Stand-Up Paddle-Board

www.SereneLifeHome.com
2
California Prop 65 Warning
WARNING:
This product may expose you to chemicals, which is known to
the state of California to cause cancer, birth defects and other
reproductive harm. Do not ingest.
For more info go to: www.P65warnings.ca.gov
Important Warnings
• This board does NOT provide protection against drowning.
• Only use within recommended pressure levels.
• Designed for swimmers only—not a lifesaving device.
• Always supervise children in the water.
Prohibited Uses:
• Do not use in white water.
• Do not use in breaking waves.
• Do not use in oshore currents.
• Do not use in strong oshore winds.
• Not for children under 14 years old.
Usage Guidelines:
• Read instructions before use.
• Fully inate all air chambers before use.
• One adult per board only.
• Safe distance from shore: Maximum 150 meters (492 ft).
WARNING & SAFETY REMINDERS
Before Use:
• Inspect your board and gear before heading into the water.
• Avoid paddling alone—use the buddy system.
• Carry a communication device while on the water.
• Check weather conditions and tides before riding.
• Avoid paddling when winds are blowing away from shore.
While On the Water:
• Be aware of tides and currents to estimate your travel time.
• Wear a wetsuit or dry suit when needed.
• Always wear a life jacket or otation device.
• Take a rst aid course and carry rst aid equipment.
DO NOT:
• Use the board if you cannot swim.
• Go on the water if under the inuence of alcohol or drugs.

www.SereneLifeHome.com
3
Features:
• Stand-Up Paddleboard (SUP)
• Single-Person Inatable Platform
• Water-ready with Everything Needed to Paddle
• Stable Design for Children, Teens, and Adults
• Marine-Grade, Waterproof, Corrosion-Resistant Build
• Lightweight, Portable, and Convenient
• Hassle-Free Setup for Quick Water Fun
• Smooth Surface with Hi-tech Heat Welded Seam
• Easy to Inate and Deate
• Non-Slip EVA Deck Pad for Extra Grip
• Wide and Stable Shape for Better Balance
• Quick Fin Installation and Removal
• Ideal for Beginner to Intermediate Paddlers
• Suitable for Use in Lakes, Rivers, or Oceans
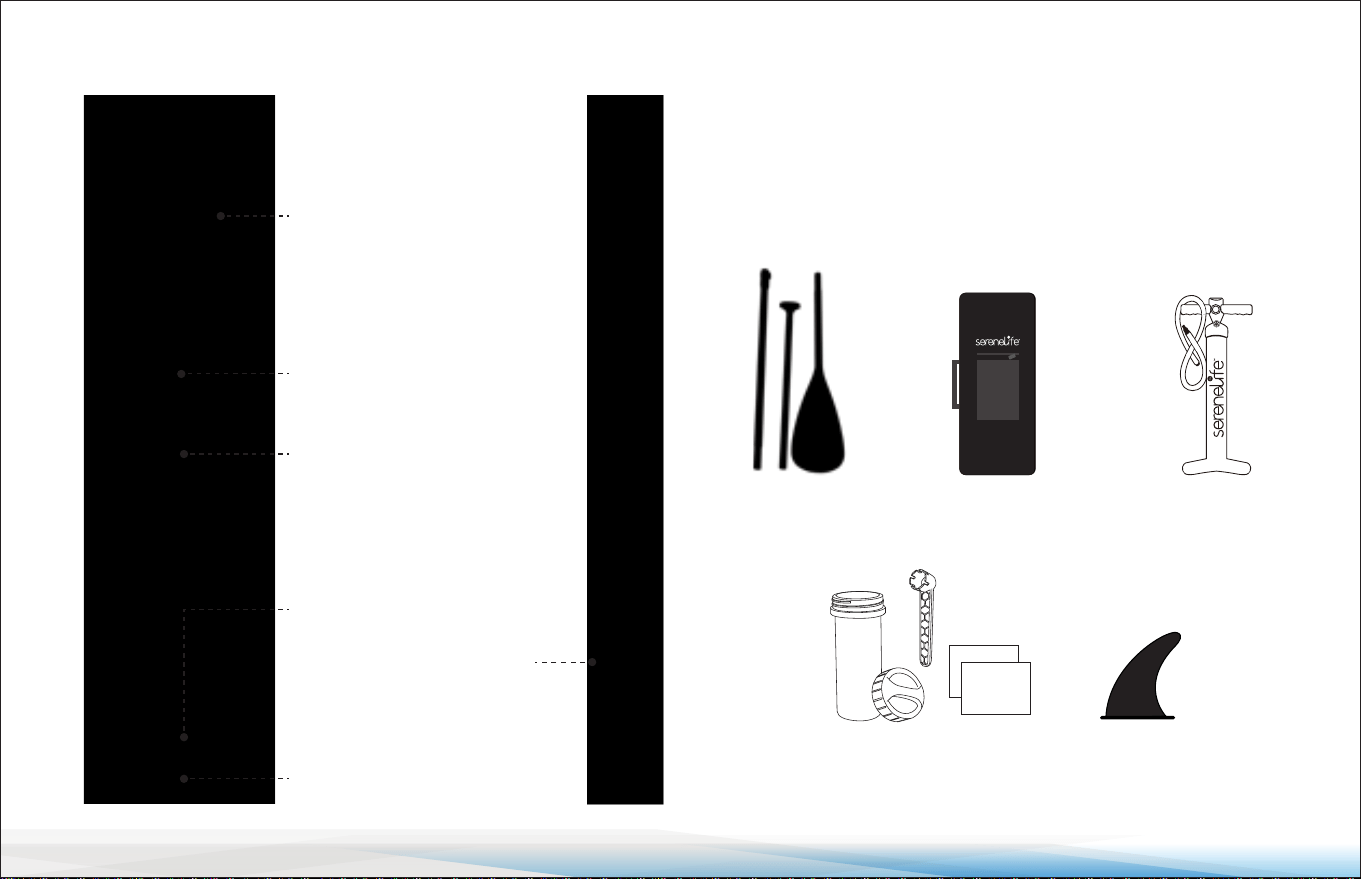
What's in the Box:
• SUP Paddle-Board
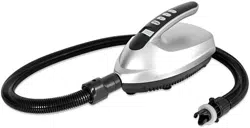
• Double-Action Hand Pump
• (3) Shaft Aluminum Paddle
• (1) Leash
• (2) Small Fixed Fins
• (1) Big Removable Fin
• Repair Kit
• Backpack
Technical Specications:
• Construction Materials: Single-Layer Drop-Stitch +
Single-Layer Side
• Recommended Age: 10+
• Air Pressure Ination: 13 PSI (0.89 Bar)
• Max. Weight Capacity: 275 lbs.
• Item Weight: 16.08 lbs.
• Product Dimensions (L x W x H): 10’ x 32'' x 6'' -in. (Inated)
INTRODUCTION
THIS INSTRUCTION BOOKLET CONTAINS IMPORTANT
SAFETY INFORMATION. PLEASE READ AND KEEP FOR
FUTURE REFERENCE.
Inatable stand-up paddle boards (ISUPs) are ideal for
camping, boating, and those with limited storage or transport
space. Made with high-quality materials and Drop-Stitch
construction, they oer excellent stiness, stability, and
rigidity. This manual provides instructions for safe and proper
use of the ISUP, including details on supplied equipment and
operation guidelines. Users should read it carefully before
use. To ensure safety, always adjust speed and direction
according to sea conditions, and wear a suitable buoyancy
aid. In some countries, wearing a certied life jacket is
legally required.
www.SereneLifeHome.com
4
ISUP Structure Terminology
D-Ring
EVA Foot Pad:
Provides excellent grip
and comfort
Heavy-Duty Carry Handle
High-Pressure Recessed Valve:
Allows for quick and easy
ination/deation
Tri-Fin Set:
Includes one center n
and two smaller side ns
Important Information
• Read the product instructions thoroughly before use.
Store the manual for future reference.
• Inspect the product carefully after opening the package.
If you discover any damage, contact the after-sales
department immediately.
Paddle Backpack Hand Pump
pvc
D-Ring: Stainless steel ring for
attaching a safety leash (optional)
Repair Kit Fins
www.SereneLifeHome.com
5
SET-UP PREPARATION
1. Unfold the Board
• Choose a smooth, clean surface to unfold the board.
• Roll out the board until it lays at with the top side facing up.
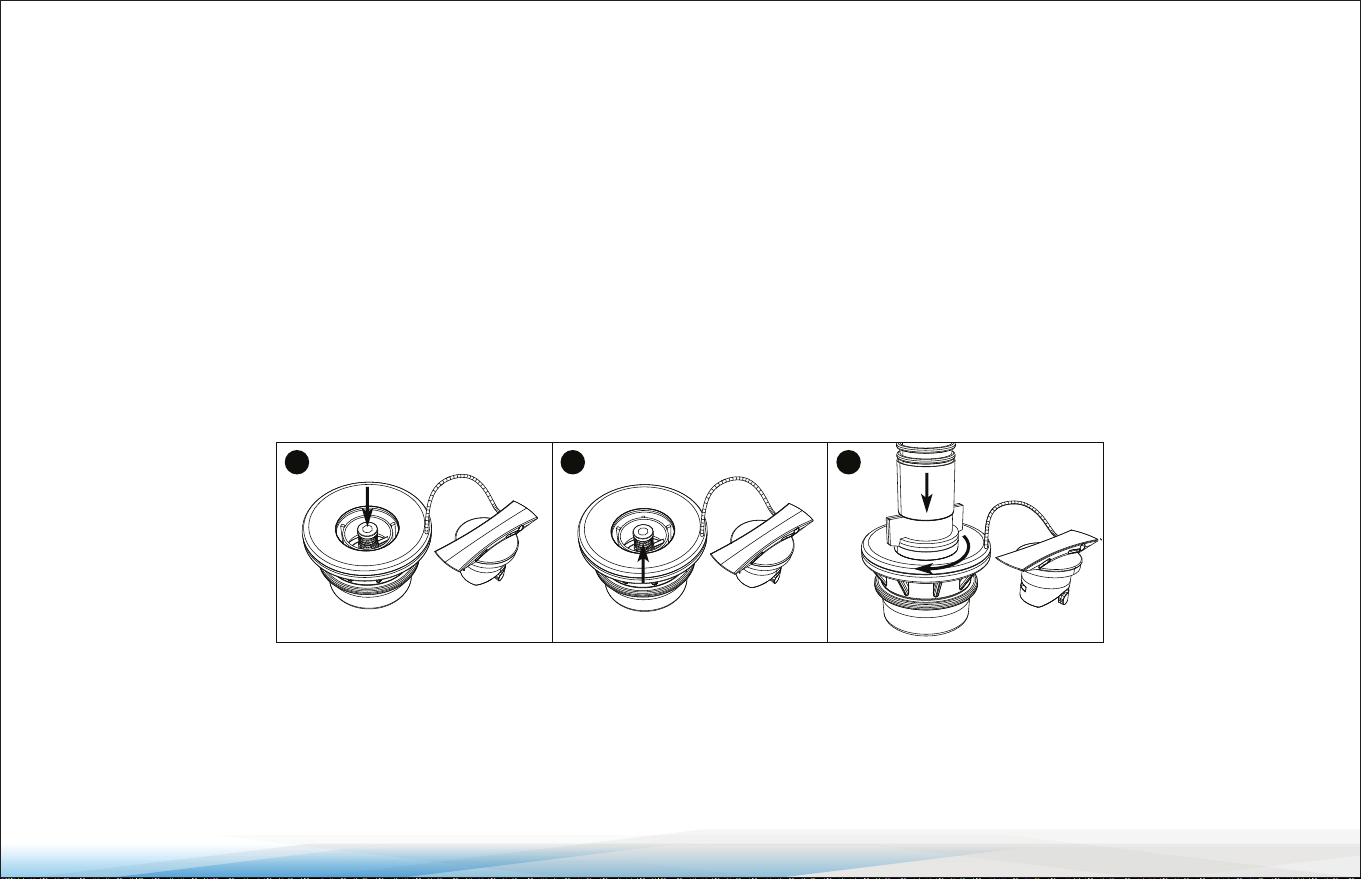
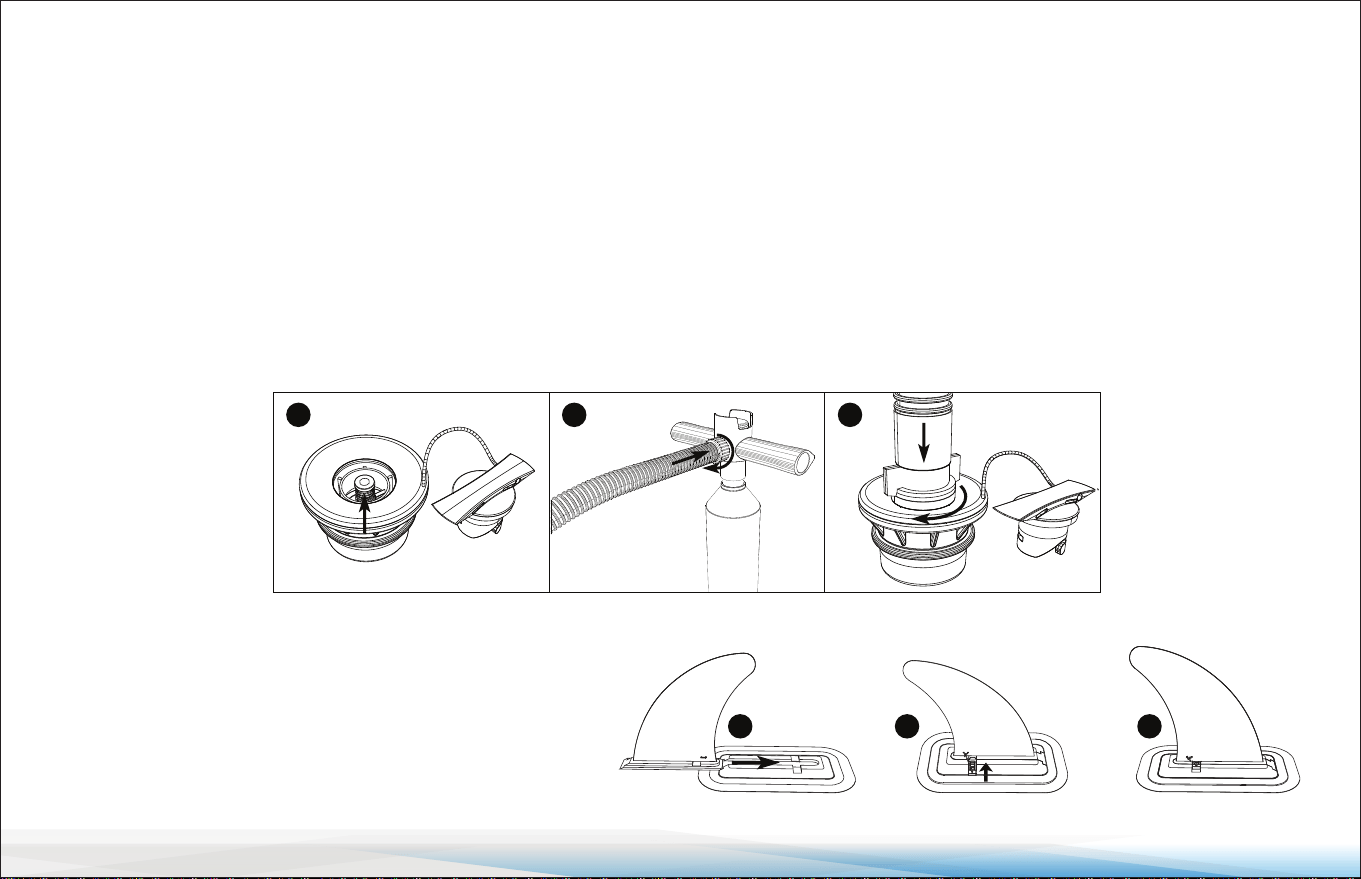
2. Valve Operation
Follow the steps below for proper valve operation and correct ination/deation procedures:
• The ination valve is located near the nose of the board.
• For ination: Ensure the center valve pin is in the “UP” position. If the pin is in the “DOWN” position, press it once to return
it to the “UP” position.
• For deation: Press the valve pin to the “DOWN” position. You do not need to twist it.
Important:
• Avoid sand or debris around the valve during deation, as small particles may become airborne when air pressure is released.
• Always lock the valve cover over the valve stem during use to prevent accidental air release or entry of debris into the air
chambers.
1 2 3
www.SereneLifeHome.com
6
3. Board Ination Steps
a. Unscrew the valve cap and press down the valve pin to open the valve. Let air naturally ow into the board to save time.
Once some air has entered, press the valve pin again to return it to the “UP” position.
b. Ensure the pump hose is connected to the “INFLATE” outlet.
c. Connect the pump nozzle to the valve receptacle using a half-twist motion (clockwise).
d. Pump air into the board by sliding the pump piston up and down. Inate until the required pressure is reached:
• Minimum pressure: 8 psi
• Recommended operating pressure: 15 psi
e. After ination, tighten the valve cap securely. Only the valve cap ensures nal airtightness.
4. Fin Installation
• The two side ns are pre-attached to the board.
• After ination, slide the middle n into its base
and secure it by inserting the xed pin.
4 5 6
7 8 9
www.SereneLifeHome.com
7
3. Board Ination Steps
a. Unscrew the valve cap and press down the valve pin to open the valve. Let air naturally ow into the board to save time.
Once some air has entered, press the valve pin again to return it to the “UP” position.
b. Ensure the pump hose is connected to the “INFLATE” outlet.
c. Connect the pump nozzle to the valve receptacle using a half-twist motion (clockwise).
d. Pump air into the board by sliding the pump piston up and down. Inate until the required pressure is reached:
• Minimum pressure: 8 psi
• Recommended operating pressure: 15 psi
e. After ination, tighten the valve cap securely. Only the valve cap ensures nal airtightness.
4. Fin Installation
• The two side ns are pre-attached to the board.
• After ination, slide the middle n into its base
and secure it by inserting the xed pin.
5. Ination Tips and Precautions
• Do not use an air compressor. Over-ination caused by an air compressor can damage the board and is not covered
under warranty.
• A slight pressure loss over 2–3 days is normal due to temperature changes. If needed, add air with the pump.
• Before long paddling trips, inate the board for 24 hours beforehand to ensure it is airtight.
If you notice consistent air loss, refer to the “Board Repair” section for leak detection instructions.
• Maximum pressure: Do not exceed 15 psi. Proper pressure is achieved when the board feels rm under hand pressure.
• Avoid pumping the board to high pressure and leaving it in direct sunlight for extended periods.
In hot environments, slightly deate the board, as heat will increase internal pressure.
• In colder water conditions, you may notice a slight pressure drop. Carry a pump with you to add air if necessary.
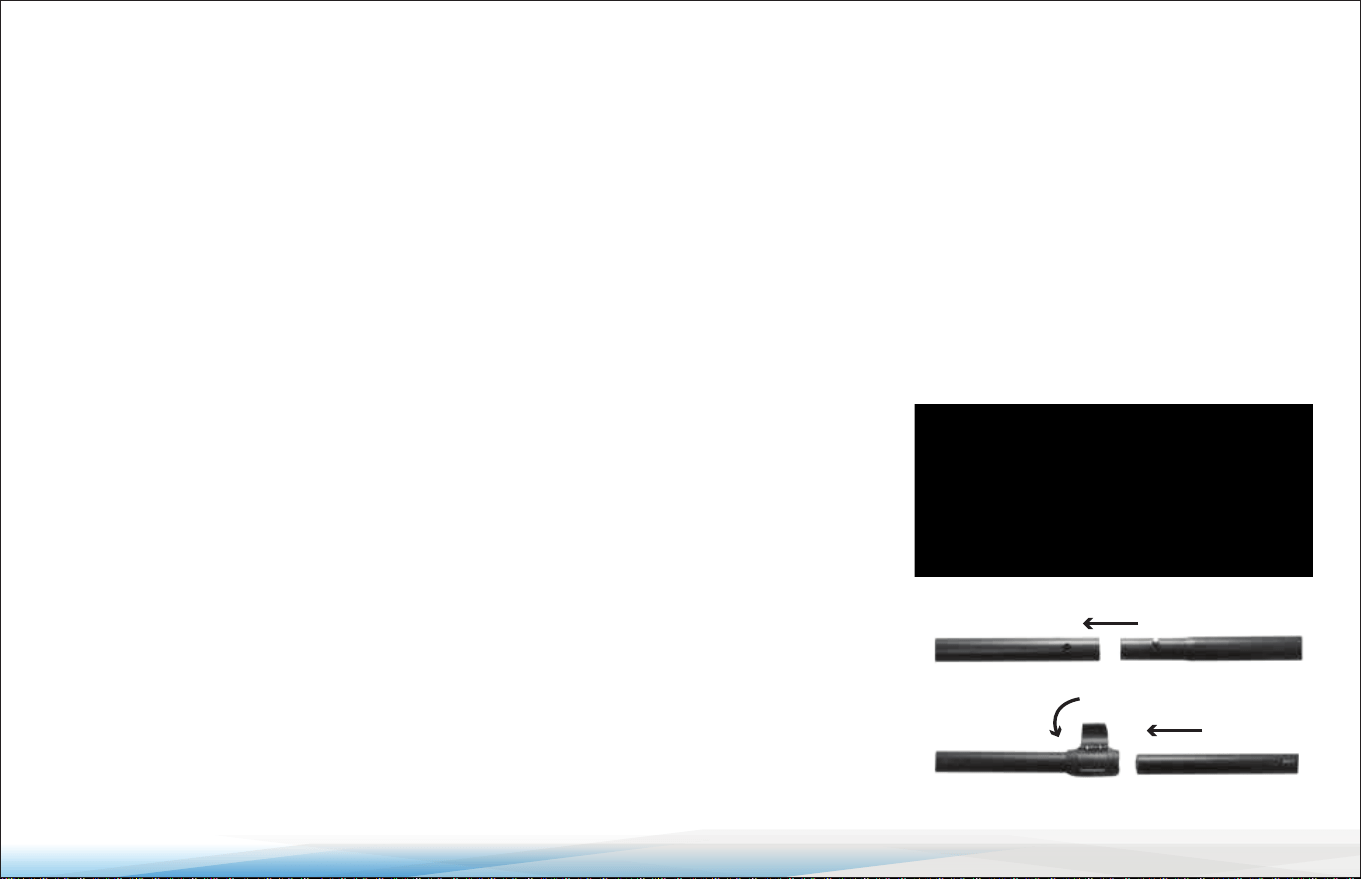
ALU Telescopic Kayak Paddle
Your paddle comes in three pieces. Follow these steps to assemble and adjust it:
1. Press and hold the button while sliding the paddle pieces together until they
click into place.
2. Adjust the top section of the paddle to nd the ideal height:
• Start with the paddle approximately 6 inches taller than your height.
• Adjust the top section up or down until the paddle length feels comfortable.
• A longer paddle is better for smooth, easy paddling, while a shorter paddle is
ideal for performance or competition.
Note: If the adjustable section feels loose after assembly, tighten the screw
with a screwdriver to ensure a secure t.

www.SereneLifeHome.com
8
• Adjustable Length: 63" – 83" (160 – 210 cm)
• Lightweight & Floating: 2.1 lbs (960 g)
• Shaft Material: Alloy 6005-T6, with 1.14" (29 mm) and 1.06" (27 mm) diameter sections
• Compact Design: Disassembles into three 31" (79 cm) sections for easy storage and transport
LEAK DETECTION AND REPAIR
Air Leak Detection
If the board is losing air pressure (not due to temperature changes), check for leaks, starting with the valves. While a leaking
valve is rare, if you nd one, tighten it using the included wrench.
To locate a leak:
1. Mix soap and water in a spray bottle.
2. Spray the solution around the valve.
3. If you see bubbles forming, check the valve seating and base, ensuring the valve insert is tightly screwed.
4. If the issue persists, contact customer support.
If the valves are secure but the board is still losing air, there may be a small puncture. These can be repaired easily:
• Spray soap and water around the board until you see bubbles. Mark the leak location.
• If no bubbles appear, inate the board to maximum pressure and listen carefully.
• Once you narrow down the leak, use the spray bottle again to conrm the exact spot.

www.SereneLifeHome.com
9
Start Here
Serenelifehome.com/pages/register
Register Product
Thank you for choosing SereneLife.
By registering your product, you ensure that
you receive the full benets of our exclusive
warranty and personalized customer support.
Complete the form to access expert support
and to keep your SereneLife purchase in
perfect condition.
Repair Kit Instructions
For Punctures Smaller Than 1/8"
1. Deate the board and clean/dry the aected area.
2. Apply a small drop of glue over the puncture.
3. Allow it to dry for 12 hours before re-inating.
For Larger Tears/Rips
1. Deate the board completely and lay it at. Allow it to dry.
2. Cut a patch at least 2 inches larger than the tear on all
sides.
3. Clean the repair area with alcohol.
4. Apply three coats of adhesive to both the patch and the
board, waiting 5 minutes between coats.
5. Place the patch carefully over the tear. The adhesive reacts
quickly, so position it accurately.
6. Use a roller to ensure the patch is at and even.
7. Wait 24 hours before re-inating the board.
INSTRUCTIONS FOR CARE AND STORAGE
Follow these guidelines to maintain your board:
Before Storage:
• Rinse the board with fresh water and let it dry completely
to prevent mildew.
• Use only mild soap and water for cleaning—avoid harsh
chemicals.
Storage Options:
• You can store the board inated or deated.
• If deated, store it in the protective bag provided.
• If storing outdoors, keep it o the ground and covered
with a tarp to protect it from sun exposure.
What to Avoid:
• Hanging the board is not recommended.
• Do not store the board in extreme temperatures:
• Above 150°F (66°C)
• Below -10°F (-23°C)
• Do not roll the board too tightly when storing it deated.
Fixing Bent Fins: Place them in boiling water and use a
hairdryer to reshape them.

Questions or Comments
We are here to help!
Phone: 1.718.535.1800
Serenelifehome.com/ContactUs