
USER GUIDE
NZ AU SG UK IE
ASSISTED OPENING ACCESSORY
OPIN1, OPIN1EX1RSB,
OPIN1EX1RSW & OPEX1 models


3
CONTENTS
Safety and warnings 4
Compatible models 5
Using assisted opening accessory 6
Maintenance 7
Troubleshooting 8
Adjust sensitivity 10
Adjust mode 11
Warranty and service 12
Waste Electrical and Electronic Equipment information 13
Registration
To register your product visit our website: fisherpaykel.com/register

4
READ AND SAVE THIS GUIDE
When using your Assisted Opening Accessory, follow basic precautions, including
the following:
General
z
This product is not intended for use by person (including children under the age
of 8) with reduced physical sensory or mental Capabilities, or lack of experience of
knowledge, unless they have been given supervision or instruction concerning use of
the product and the hazards involved by a person responsible for their safety.
z
Young children should be supervised to ensure they do not play with the product.
z
Cleaning and user maintenance shall not be made by children without supervision.
z
Ensure that dimensions or product vs. dimensions in the alcove are clear.
z
Dimensions of space.
z
Dimensions and position of means of supporting and fixing.
z
Minimum distance between appliance and surroundings.
z
Minimum dimensions of ventilation openings and their correct arrangement.
z
Connection of the appliance to the supply mains and interconnection of
separate components.
z
Necessity to provide disconnection from mains with an accessible plug or accessible
switch in the fixed wiring in accordance with local wiring rules.
z
For current details about model and specification availability in your country, go to our
website fisherpaykel.com or contact your local Fisher&Paykel dealer.
z
The product must be installed by a qualified installer, or Fisher&Paykel trained and
supported service technician to avoid faulty electrical connections.
z
All connections for electrical power and grounding must comply with local codes and
ordinances and be made by licensed personnel when required.
z
Check the power supply. Ensure that there is a separate power outlet for the product.
Avoid sharing the power point with other appliances to prevent the appliance from
accidentally switching off.
z
For power requirements, refer to the information on the serial plate. Connect the
product to a supply (220-240 V, 50 Hz) with fitted power cord. We recommend using
an isolating switch that is easily accessible to the user after the product is installed.
z
Follow the national electrical codes and all other local codes and ordinances when
installing this product.
WARNING!
To reduce the risk associated with choking:
DO NOT allow children under 3 years of age to have access to small parts during the
installation of the Assisted Opening Accessory.
The product contains a strong permanent magnet which could cause interference with
cardiac pacemakers, implanted defibrillator’s (ICDs) and other implants. Always maintain
a distance of at least 10cm/4” between the actuator head and cardiac pacemakers,
implanted defibrillator’s (ICDs) and other implant.
SAFETY AND WARNINGS

5
COMPATIBLE MODELS
ASSISTED OPENING
ACCESSORY KIT
COMPATIBLE MODELS
OPEX1
(Contains 868305
Assisted Opening
Accessory - quantity 1)
RS4621F, RS6121F, RS6121S, RS6121V, RS7621F, RS7621S,
DD60STX6I1, RB9064S
OPIN1EX1RSW
(Contains 868305
Assisted Opening
Accessory - quantity 2)
RS6121W, RS7621W
OPIN1EX1RSB
(Contains 868305
Assisted Opening
Accessory - quantity 2)
RS6019B
OPIN1
(Contains 868305
or 864750 Assisted
Opening Accessory -
quantity 1)
RS6019F, RS6019S
6
USING ASSISTED OPENING ACCESSORY
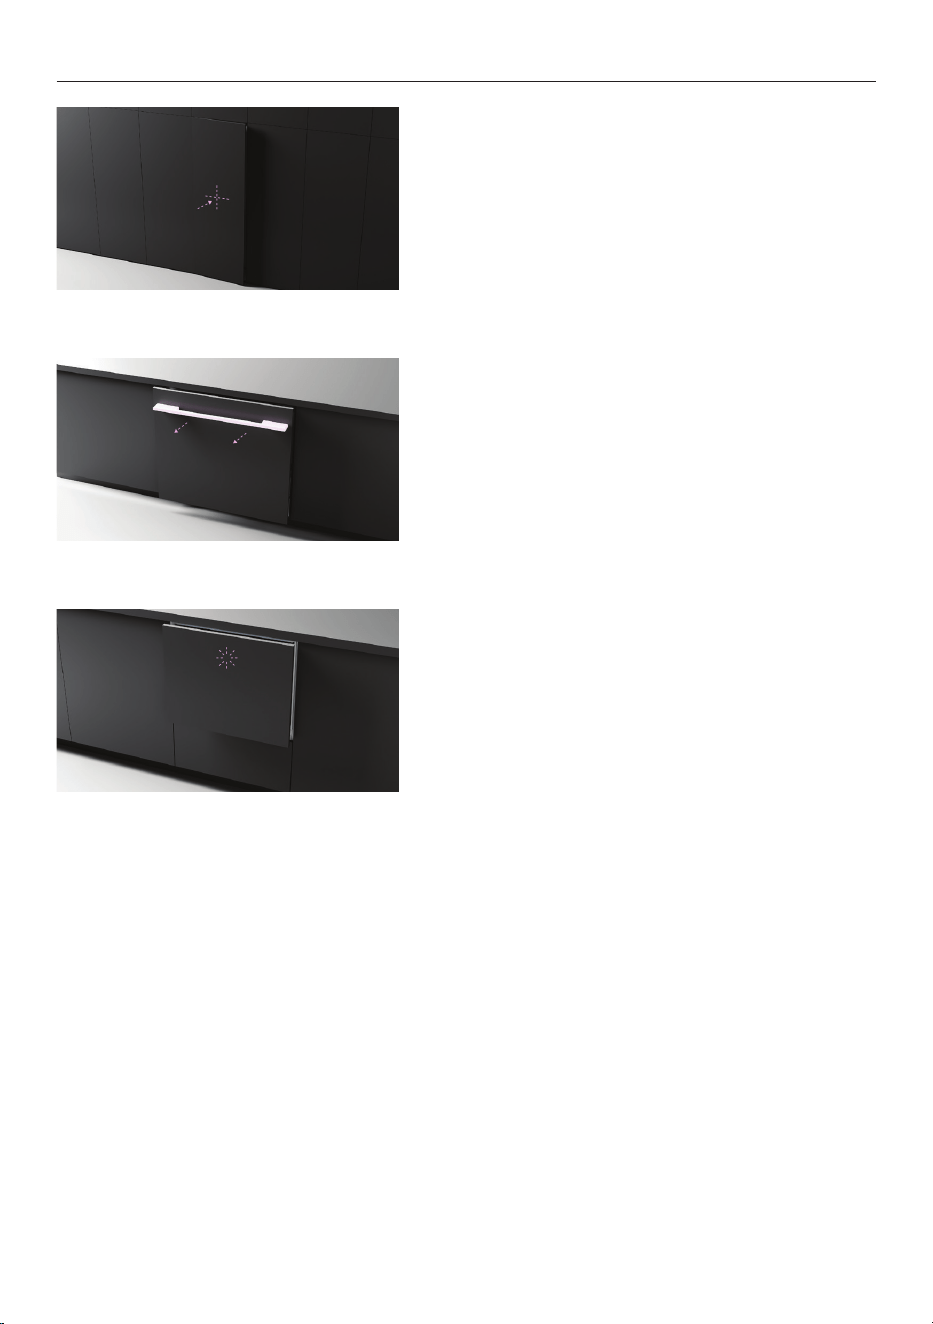
Push door
Push the door to open slightly. The door
will remain ajar for four seconds. If left ajar,
the door will automatically close again after
four seconds.
Pull door to open fully.
Push handle
If handles are fitted, gently push the handle to
open slightly. The door will remain ajar for four
seconds. If left ajar, the door will automatically
close again after four seconds.
Pull door to open fully.
Knock to open (DishDrawer™ only)
For optimal use knock on the door twice to
open drawer slightly. We recommend knocking
in the area shown.
The door will remain ajar for four seconds. If
left ajar, the door will automatically close again
after four seconds.
Pull door to open fully.
7
MAINTENANCE
Lens
Keep lens free of dust.
Gasket
Wash regularly using a damp cloth and
dishwashing liquid.
Striker cover
Keep striker cover free of dust.

8
TROUBLESHOOTING
PROBLEM POSSIBLE CAUSES WHAT TO DO
Door is opening
unexpectedly
Sensitivity may be
too high
These false triggers may be reduced by
lowering the sensitivity setting. Refer to
page 10 for details.
Door opens
slightly,
then closes
immediately
The door opening force
may be too high
Wait 20 seconds and try again. It is normal
for large doors to be hard to open for a
short time after closing due to a vacuum
created in the product.
There may be an
obstruction preventing
the door from opening or
closing correctly
Check for obstructions and remove
if present.
Door gasket may
need cleaned
Wash gasket using a damp cloth and
dishwashing liquid.
Power may need to be reset to your
Assisted Opening Accessory unit.
Door immediately
reopens after
closing
Door movement within
one second after door
has closed.
Ensure the product is secure. If the issue
persists, refer to 'Adjust sensitivity'.
Door is
not opening
Deactivated mode may
be selected.
The mode may be set to Deactivated.
Change this to the desired setting. Refer to
page 11 for details.
Sensitivity may be
too low
Increasing the sensitivity will help detect
soft pushes, refer to 10 for details.
Incorrect use Push door with deliberate force to ensure
the Assisted Opening Accessory does not
register the touch as a false trigger. Refer
to page 6 for details.
There is no door gap The door should not be hard against
cabinetry or movement can't be detected.
Refer to installation guide.
Power may need to be reset to your
Assisted Opening Accessory unit.
Striker plate may
be misaligned
Refer to installation guide for striker
plate location.
Door gap is too large Refer to installation guide for
alignment guidance.

9
TROUBLESHOOTING
PROBLEM POSSIBLE CAUSES WHAT TO DO
Door is
not closing
Mode has been
incorrectly set*
Ensure mode has been correctly set.
Setting the accessory to
DRAWER MODE
may resolve.
Drawer may be catching
on surrounding
cabinetry*
Check product is level and opens and
closes smoothly. Adjust position in cavity
as required.
Drawer may not
be correctly sitting
on runners*
Check product opens and closes
smoothly. Refer to installation guide for
guidance on locking the drawer onto the
runners correctly.
Product may not
be level*
Check product is level and adjust
as required.
Striker plate may be
misaligned or missing**
Refer to the installation guide for guidance
around fitting the striker plate.
Power failure The actuator head
is remaining in the
extended position
Gently push the door/drawer closed, this
will drive the actuator head back in.
*Drawer installs only.
**Applies to all models using Assisted Opening Accessory.
10
ADJUST SENSITIVITY
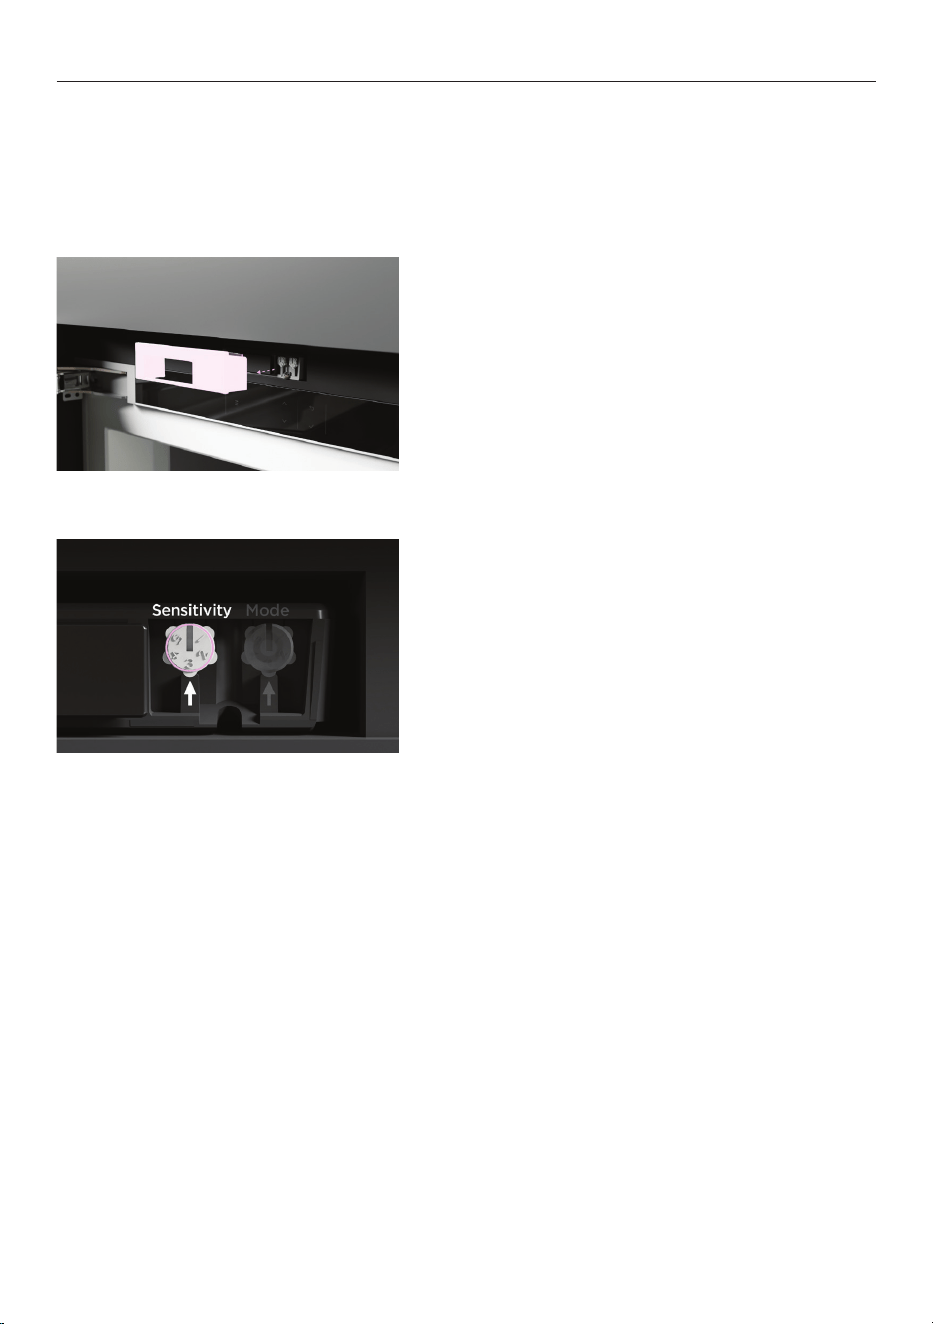
Sensitivity
The
SENSITIVITY dial can be used to adjust the push/pull sensitivity of your Assisted
Opening Accessory. Your accessory is set to 3 by default and should only be adjusted if
required. The sensitivity cannot be adjusted on DishDrawer™ installations.
Adjust sensitivity
Rotate the dial using a flat-bladed screwdriver
until the desired setting is selected.
Setting 1 is the least sensitive and 5 is the
most sensitive.
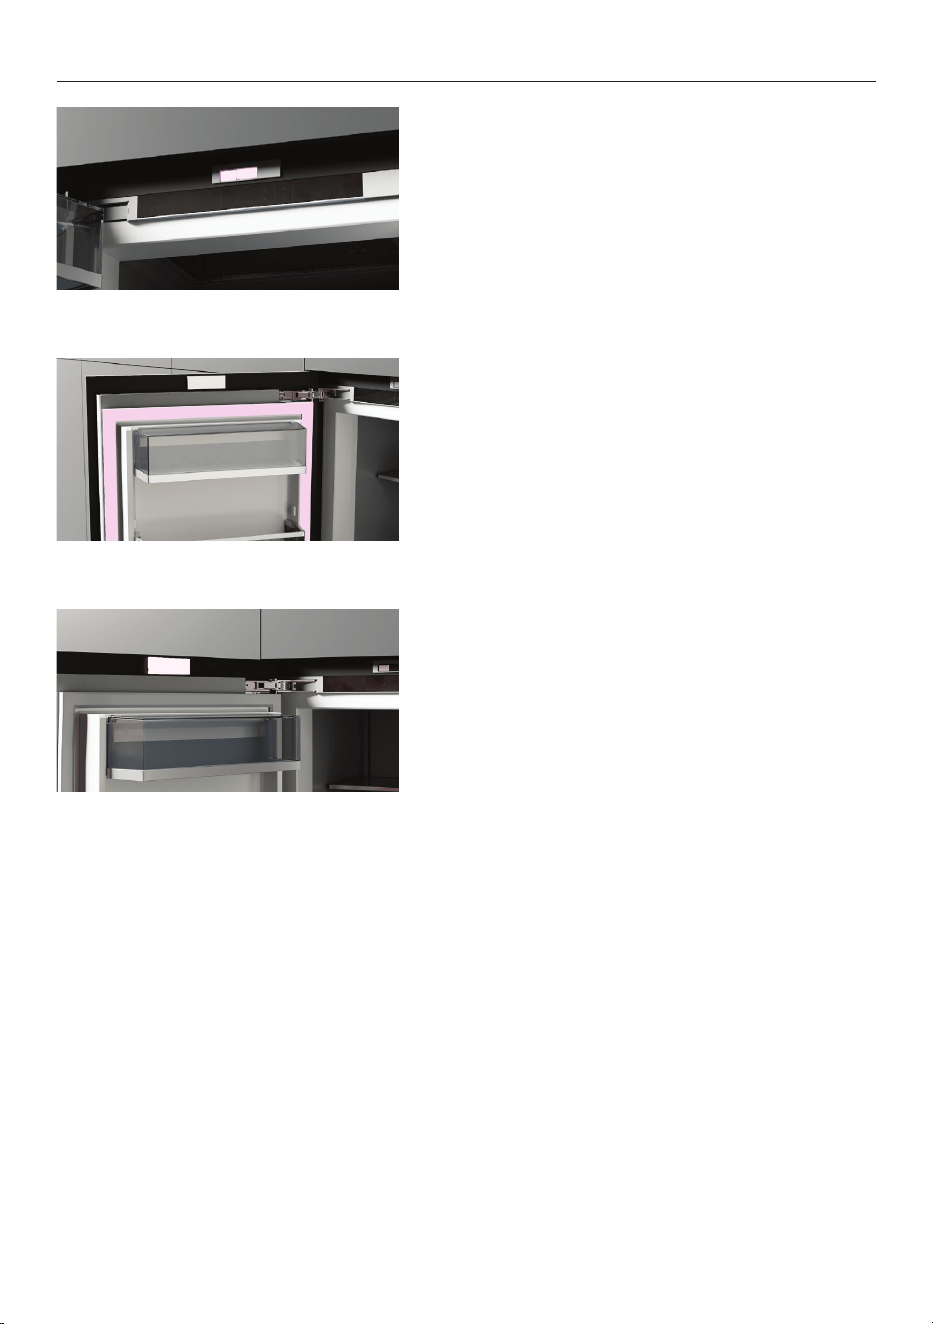
Remove lens cover
Pull lens cover towards you to remove. If
required, a screwdriver may be used to loosen
the cover.
11
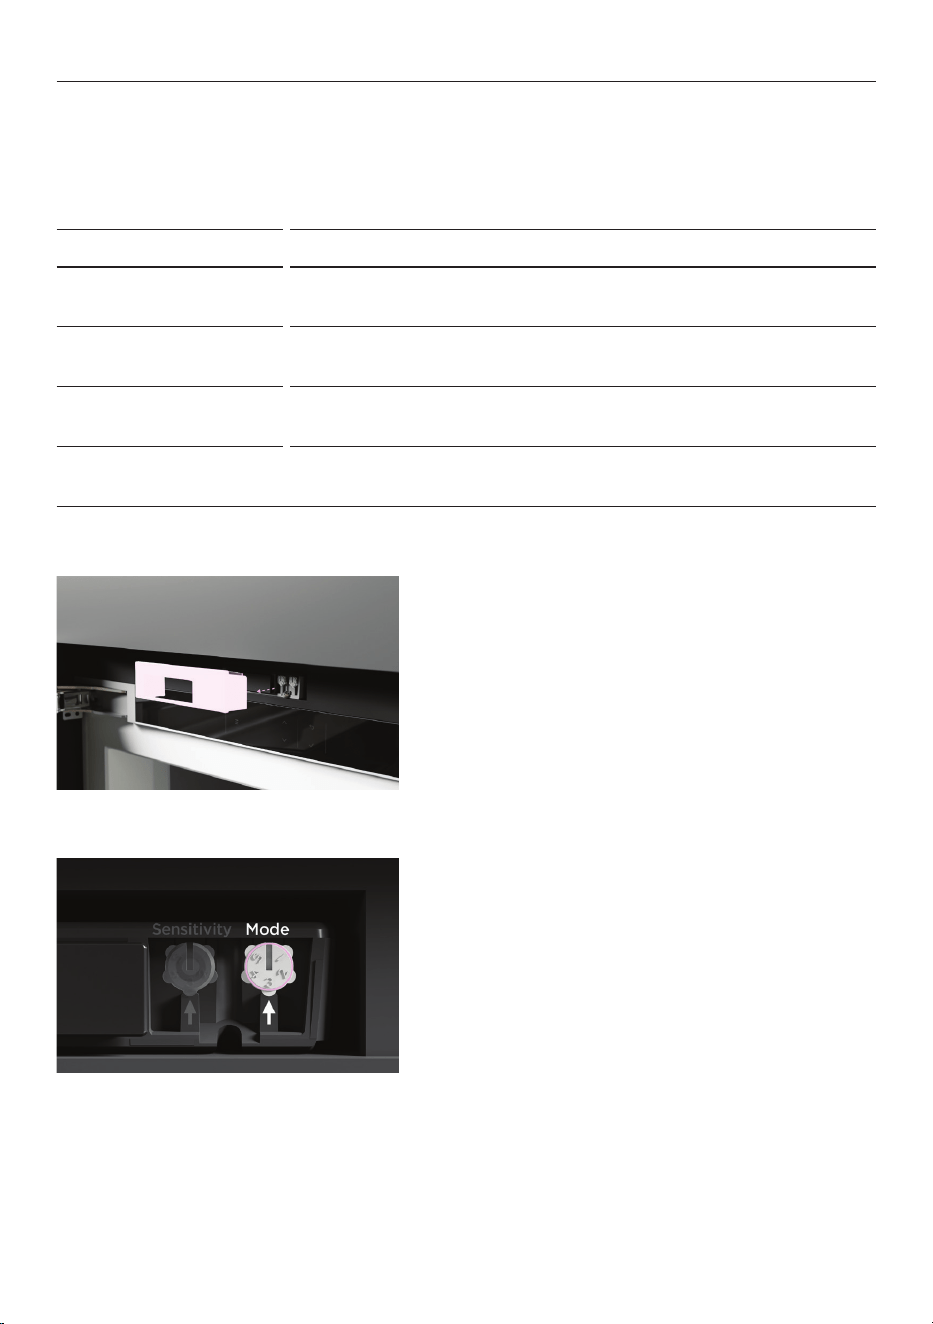
Mode
The
MODE dial can be used to adjust the overall use settings of your Assisted Opening
Accessory. The mode will be automatically set to DRAWER for DishDrawer™ installations and
cannot be adjusted.
MODE DESCRIPTION
1 - DEACTIVATED
Prevents the Assisted Opening Accessory from operating during
installation. Your Accessory will not operate if left in this setting.
2 - SMALL OPENING
Recommended for all hinged door installations. Sets the
opening distance to its minimum.*
3 & 4 - LARGE OPENING
Recommended for all hinged door installations. Sets the
opening distance to its maximum.*
5 - DRAWER
Sets the opening distance to its maximum.* Required for all
drawer installations.
Adjust mode
Rotate the dial using a flat-bladed screwdriver
until the desired setting is selected.
*Opening distance will vary depending on custom panel thickness and the position of the
Assisted Opening Accessory in the cavity.
ADJUST MODE
Remove lens cover
Pull lens cover towards you to remove. If
required, a screwdriver may be use to loosen
the cover.

12
WARRANTY AND SERVICE
To access your Warranty and Service Guide
Scan the QR code with your smartphone to access your warranty and
book a service, or view online at https://www.fisherpaykel.com/nz/
help-and-support/warranty-information
This product has been designed for use in a domestic (residential) environment. This
product is not designed for any commercial use. Any commercial use by the customer will
affect this products Manufacturer’s Warranty.
To access your Warranty and Service Guide
Scan the QR code with your smartphone to access your warranty and
book a service, refer to your separate warranty and service book or
view online at https://www.fisherpaykel.com/au/help-and-support/
warranty-information
NZ
AU
Complete and keep for safe reference:
Model
Serial No.
Purchase Date
Purchaser
Dealer
Suburb
Tow n
Country

13
WASTE ELECTRICAL AND ELECTRONIC EQUIPMENT INFORMATION
This appliance is marked according to the European directive 2012/19/EU and UK The
Waste Electrical and Electronic Equipment Regulations 2013. By ensuring this product
is disposed of correctly, you will help prevent potential negative consequences for the
environment and human health, which could otherwise be caused by inappropriate waste
handling of this product.
The symbol
on the product, or on the documents accompanying the product, indicates
that this appliance may not be treated as household waste. Instead it shall be handed over
to the applicable collection point for the recycling of electrical and electronic equipment.
Disposal must be carried out in accordance with local environmental regulations for waste
disposal. For more detailed information about treatment, recovery and recycling of this
product, please contact your local city office, your household waste dispoal service or the
shop where you purchased the product.

592956B 11.23
FISHERPAYKEL.COM
© Fisher & Paykel Appliances 2023. All rights reserved.
The models shown in this guide may not be available in all markets
and are subject to change at any time.
The product specifications in this guide apply to the specific products and
models described at the date of issue. Under our policy of continuous product
improvement, these specifications may change at any time.
For current details about model and specification availability in your country,
please go to our website or contact your local Fisher&Paykel dealer.