1
©2011 Dorman Products, Inc.
No reproductions in whole or in part without prior written approval.
TECH NOTES: INSTALLATION
Disclaimer:
Even though every attempt is made to ensure this information is complete and accurate, it is impossible to account for all possible circumstances or situations. Please consult with a quali ed auto
technician before attempting to perform any work you are not quali ed to do. Automobiles can be hazardous to work on; be sure to take all necessary safety precautions. Failure to do so may result in
property damage or personal injury. Certain motor vehicle standards and performance requirements may apply to your motor vehicle (such as Federal Motor Vehicle Safety Standards by the National
Highway Tra c Safety Administration). Be sure that your work is performed in accordance with such standards and that you do not disable any motor vehicle safety feature.
741-306
ATTENTION: Refer to the appropriate shop manual for your vehicle to obtain speci c service procedures for this part. If you do not have
a service manual or lack the skill to install this part, it is recommended that you seek the services of a quali ed technician. Pay special
attention to all cautions and warnings included in the shop manual. Read and follow all instructions carefully.
Honda Accord (4 Door) 2003-2007
Proper Alignment of the Window Glass
Prior to installing the window regulator assembly, manually slide the window glass
through its travel in the window glass channels to check for excessive resistance.
Always inspect the visible portion of the window glass channel for damage. If the window
glass run channel is visibly damaged, then replace it. Pay close attention just below the
door skin; this is a common area for the window glass run channel to be pinched. Clean
the window glass channels using a soapy water solution, then apply grease.
To ensure proper installation of the window regulator assembly it is vital to con rm that
the window is properly aligned within the window glass run channels.
STEP 1: After installation of the window
regulator assembly, install the window glass
to the window regulator assembly lift plate.
Do not completely tighten the fasteners at
this time.
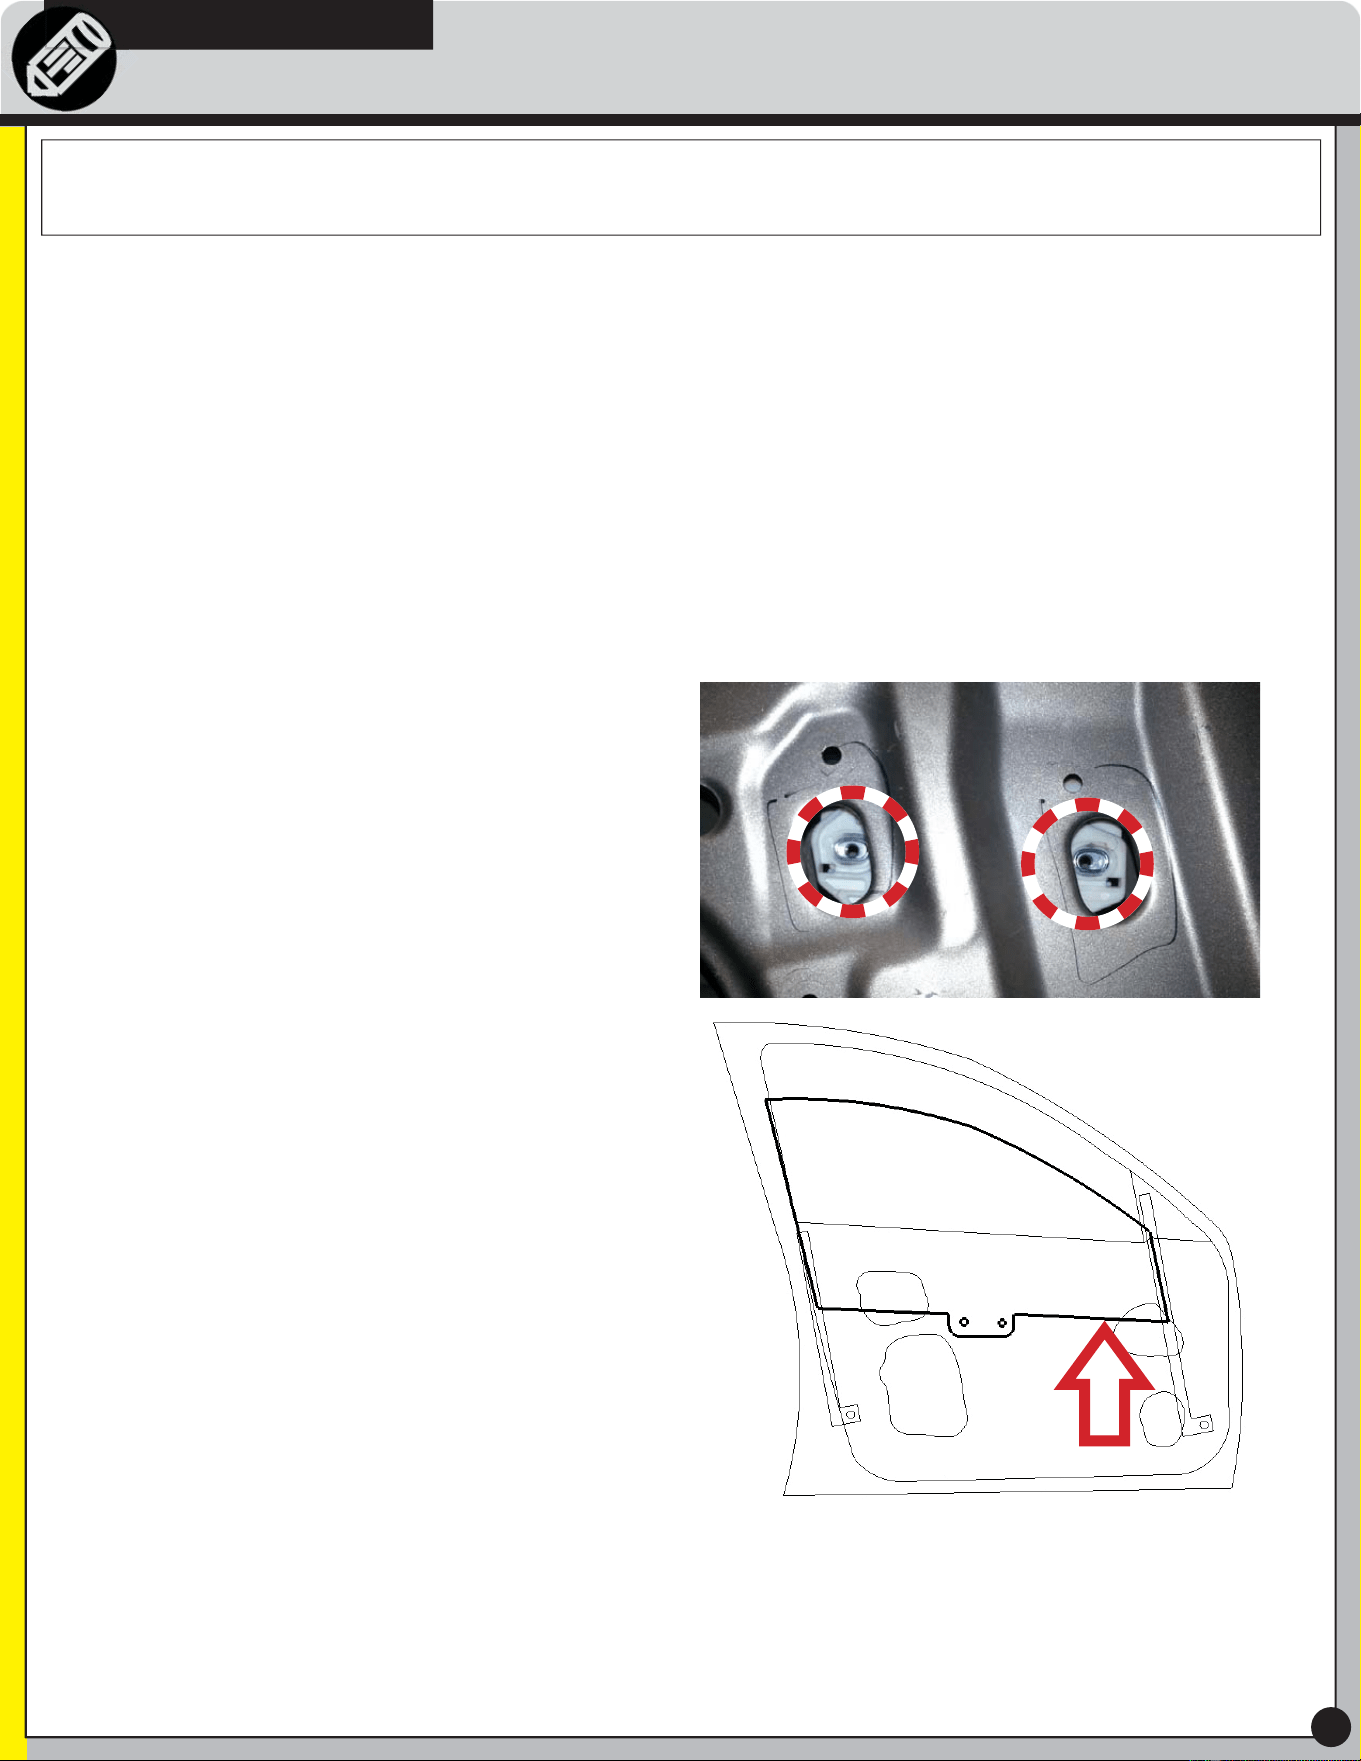
STEP 2: Notice that the mounting points
from the window regulator assembly lift
plate to the window are slots. This is where
alignment can be adjusted for smooth
operation of the window glass within the
window channels.
STEP 3: Press upward slightly on the right
side of the window glass to adjust the
window. This will place the left side of the
window glass ush with the left window
channel.
STEP 4: Completely tighten the fasteners for
attaching the window regulator assembly lift
plate to the window glass at this time.
STEP 5: Temporarily connect power to the
window regulator. Actuate the window
regulator assembly up and down to ensure
smooth operation. If there is any resistance
in the system repeat the steps above.

2
©2011 Dorman Products, Inc.
No reproductions in whole or in part without prior written approval.
TECH NOTES: INSTALLATION
Disclaimer:
Even though every attempt is made to ensure this information is complete and accurate, it is impossible to account for all possible circumstances or situations. Please consult with a quali ed auto
technician before attempting to perform any work you are not quali ed to do. Automobiles can be hazardous to work on; be sure to take all necessary safety precautions. Failure to do so may result in
property damage or personal injury. Certain motor vehicle standards and performance requirements may apply to your motor vehicle (such as Federal Motor Vehicle Safety Standards by the National
Highway Tra c Safety Administration). Be sure that your work is performed in accordance with such standards and that you do not disable any motor vehicle safety feature.
741-306
ATTENTION: Refer to the appropriate shop manual for your vehicle to obtain speci c service procedures for this part. If you do not have
a service manual or lack the skill to install this part, it is recommended that you seek the services of a quali ed technician. Pay special
attention to all cautions and warnings included in the shop manual. Read and follow all instructions carefully.
Be sure to check for gaps and to ensure that the weather-stripping did not fold
underneath the window glass at any point of the window glass run channels.
Failure to properly align the window glass can result in additional resistance on the window
regulator assembly. This can lead to premature failure of the window regulator assembly.
Resetting the Power Window Control Unit
Resetting the power window control unit is required after performing the following
procedures:
• Disconnecting the battery.
• Removing the No.79 (20 A) fuse in the under-hood subfuse box.
• Disconnecting the 18P connector from the power window control unit.
• Removing the window regulator, glass or glass run channel.
• Disconnecting the driver’s door wire harness.
1. Turn the ignition switch o , then back ON (II).
2. Move the driver’s window all the way down by using the driver’s switch; when the
window reaches the bottom, hold the driver’s window switch in the DOWN position
for 2 seconds.
3. Move the driver’s window all the way up without stopping by using the driver’s switch;
when the window reaches the top, hold the driver’s window switch in the UP position
for 2 seconds.
If the window does not work in AUTO, reset the power window control unit according to
the above procedures again.