Panasonic Test and Development Kitchen
Panasonic Consumer Electronics U.K.
A Division of Panasonic U.K. Ltd.
Panasonic UK, A Branch of Panasonic Marketing Europe GmbH,
Maxis 2, Western Road, Bracknell,
Berkshire, RG12 1RT, United Kingdom
Web Site: www.panasonic.co.uk
CUSTOMER CARE CENTRE call: 0344 844 3899
Monday to Friday: 9 am – 8 pm
Saturday: 9 am – 5 pm
Representative in EU :
Panasonic Marketing Europe GmbH
Panasonic Testing Centre
Winsbergring 15, 22525 Hamburg, Germany
Panasonic Taiwan Co., Ltd.
https://www.panasonic.com
© Panasonic Taiwan Co., Ltd. 2021
DZ50E2263
MX0321L30923
Printed in China
XC
OI1_YR250 UK Pagination_16th——audit 20210107.indd 1 2021/4/12 21:00:57
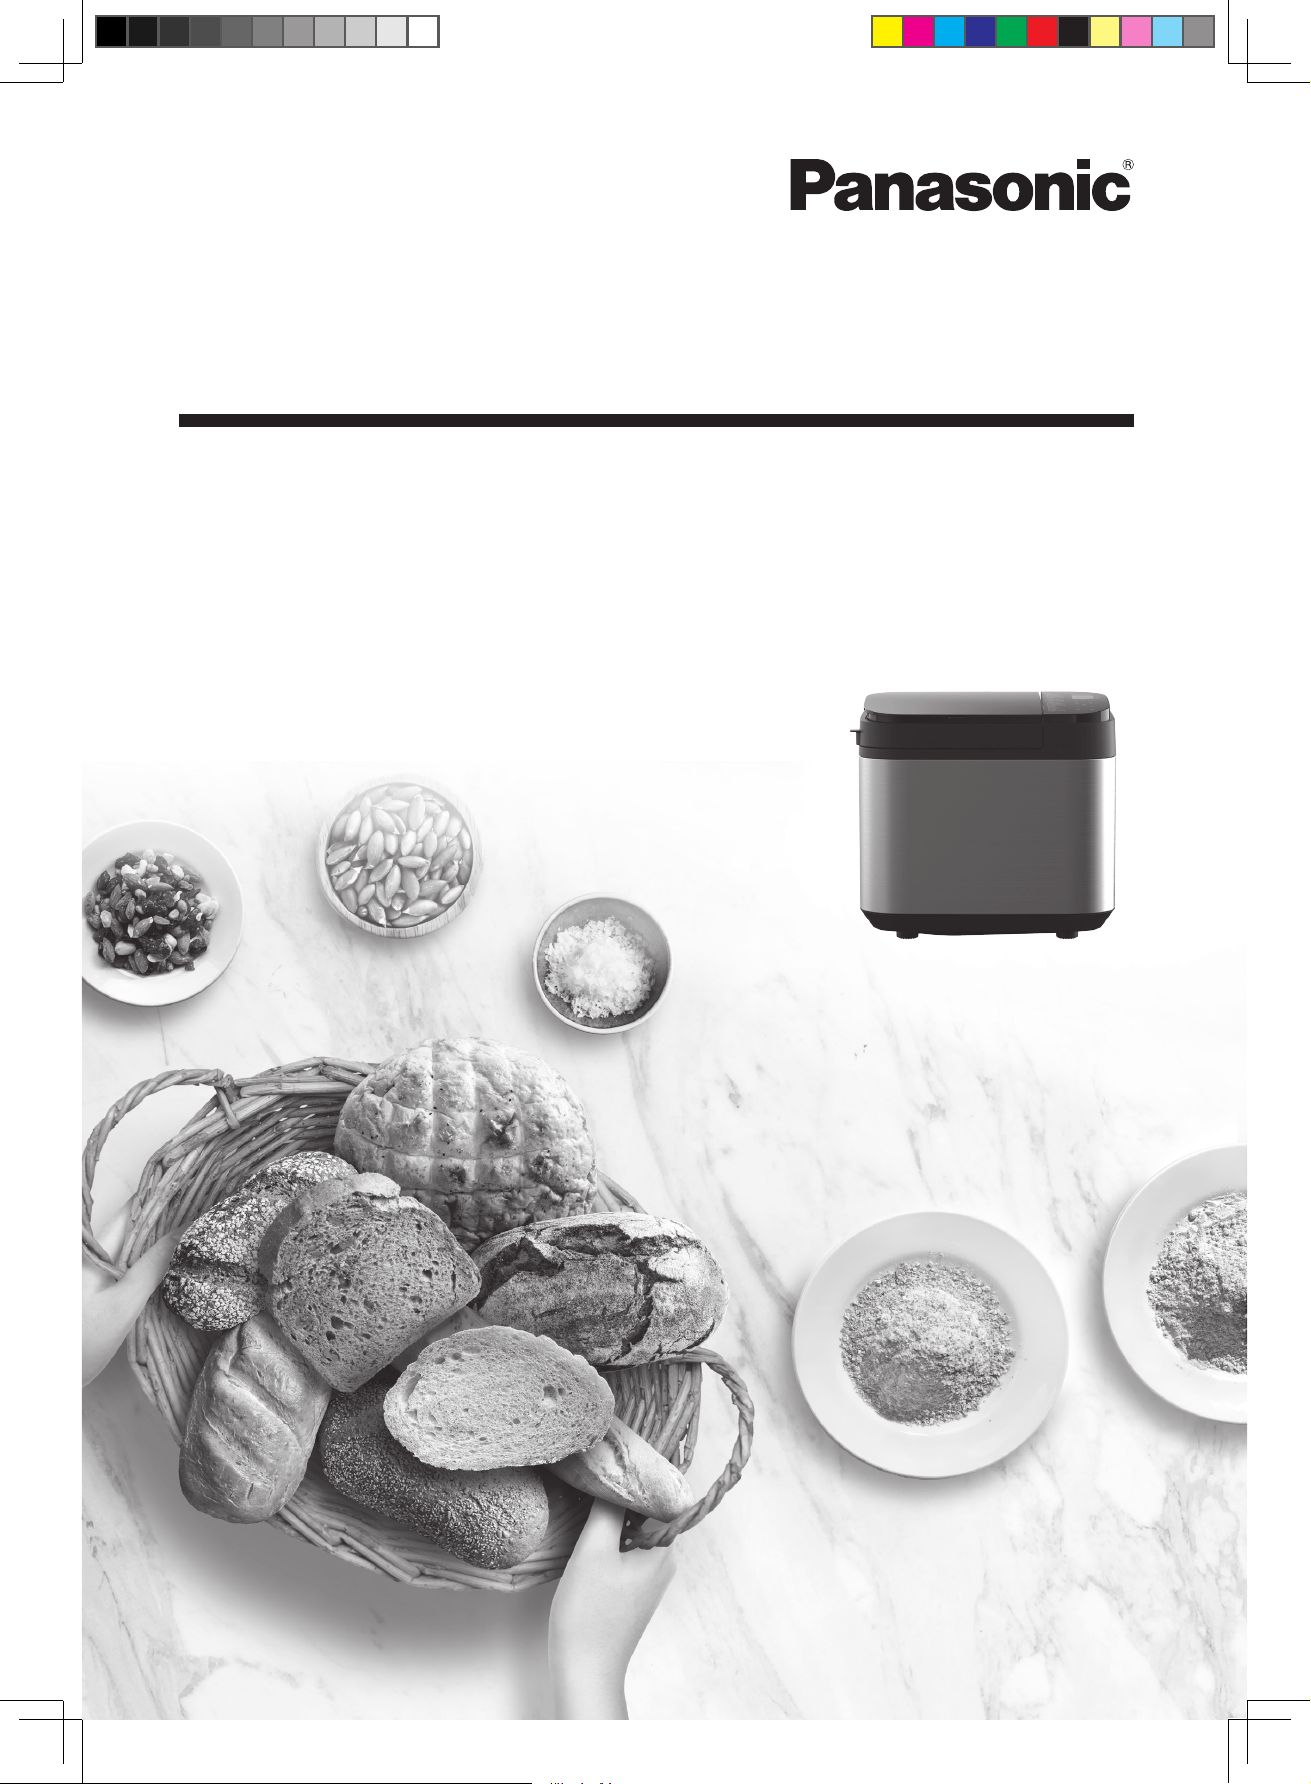
OPERATING INSTRUCTIONS AND RECIPES
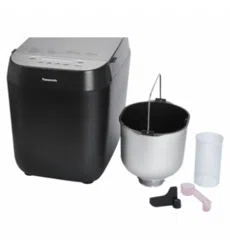
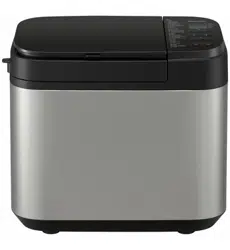
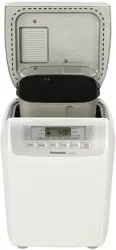
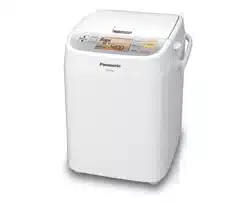
Automatic Bread Maker
(Household Use)
Model No.
SD-YR2550
SD-YR2540
SD-R2530
SD-YR2550
OI1_YR250 UK Pagination_16th——audit 20210107.indd 2 2021/4/12 21:00:58

2
Safety Precaution
s ...........................
3
Important Information
........................
6
Electrical Requirement
......................
6
Parts Names and Instructions
.............
7
Ɣ
Main Unit .................................................... 7
Ɣ
Accessories ................................................. 7
Ɣ
Control Panel and Display ................................ 8
Bread - making Ingredients ...................... 9
Menu Charts and Baking Options ......... 10
Handling Instructions ............................. 12
Ɣ
Before Use ................................................ 12
Ɣ
Preparations .............................................. 12
Ɣ
Baking Bread ............................................. 13
Ɣ
Making Dough ............................................ 13
Ɣ
Additional Ingredients ................................... 14
Ɣ
Bread Mix & Bread Mix Raisin ......................... 14
Ɣ
Baking Brioche ........................................... 15
Ɣ
Sourdough & Sourdough Dough ...................... 15
Ɣ
Gluten Free Information ................................. 16
Thank you for purchasing the Panasonic product.
Ɣ
Please read instructions carefully to use the product correctly and safely.
Ɣ
Before using this product, please give your special attention to Safety Precautions (See P. 3 – 5)
and Important Information (See P. 6) of this instructions.
Ɣ
Please keep instructions for future use.
Ɣ
Panasonic will not accept any liability if the product is subject to improper use, or failure to comply with
these instructions.
Ɣ
Baking Gluten Free Bread ............................ 16
Ɣ
Baking Gluten Free Cake ............................. 17
Ɣ
Making Gluten Free Pizza
/
Gluten Free Pasta
..... 17
Ɣ
Baking Cake ............................................ 18
Ɣ
Bake Only ............................................... 18
Ɣ
Making Jam / Compote ............................... 18
Ɣ
Cake Kneading ......................................... 19
Ɣ
Bread Kneading ........................................ 19
Ɣ
Rise ....................................................... 19
Recipes .................................................. 20
Ɣ
Bread Recipes .......................................... 20
Ɣ
Gluten Free Recipes .................................. 22
Ɣ
Dough Recipes ......................................... 22
Ɣ
Sweet Recipes .......................................... 24
Ɣ
Manual Recipes ........................................ 25
Cleaning & Care .................................... 26
Troubleshooting ................................... 27
Specifications ....................................... 31
Contents
OI1_YR250 UK Pagination_16th——audit 20210107.indd 2 2021/4/12 21:00:58
3
To reduce the risk of personal injury, electric shock or fire, please observe the
following:
n
The following signals indicate the degree of harm and damage when the
appliance is misused.
WARNING :
Indicates potential hazard that could result in serious injury
or death.
CAUTION:
Indicates potential hazard that could result in minor injury or
property damage.
n
The symbols are classified and explained as follows.
This symbol indicates
prohibition.
This symbol indicates requirement
that must be followed.
WARNING
To avoid risk of electric shock, fire due to short circuit, smoke, burn or injury.
l
Do not allow infants and children to play with packaging material.
(It may cause suffocation.)
l
Do not disassemble, repair or modify this appliance.
É
Consult the place of purchase or Panasonic service centre.
l
Do not damage the mains lead or mains plug.
Following actions are strictly prohibited:
Modifying, touching on or placing near heating element or hot surfaces,
bending, twisting, pulling, hanged
/ pulled over sharp edges, putting heavy
objects on top, bundling the mains lead or carrying the appliance by the
mains lead.
l
Do not use the appliance if the mains lead or mains plug is
damaged or the mains plug is loosely connected to the household
mains socket.
É
If the mains lead is damaged, it must be replaced by the
manufacturer, its service centre or similarly qualified person in order
to avoid a hazard.
l
Do not plug or unplug the mains plug with wet hands.
l
Do not immerse the appliance in water, or splash it with water
and
/ or any liquid.
l
Do not touch, block or cover the steam vent during use.
Ɣ
Especially pay attention to children.
Safety Precautions
Please make sure to follow
these instructions.
OI1_YR250 UK Pagination_16th——audit 20210107.indd 3 2021/4/12 21:00:58
4
WARNING
To avoid risk of electric shock, fire due to short circuit, smoke, burn or injury.
l
This appliance can be used by children aged from 8 years and above
and persons with reduced physical, sensory or mental capabilities, or
lack of experience and knowledge if they have been given supervision or
instruction concerning use of the appliance in a safe way and understand
the hazards involved.
Children shall not play with the appliance.
Cleaning and user maintenance shall not be made by children
unless they are older than 8 and supervised.
l
Keep the appliance and its mains lead out of reach of children less
than 8 years.
l
Make sure the voltage indicated on the label of the appliance
corresponds to your local supply.
Also avoid plugging other devices into the same household mains socket
to prevent electrical overheating. However, if you are connecting a
number of mains plugs, make sure the total wattage does not exceed the
rated wattage of the household mains socket.
l
Insert the mains plug firmly.
l
Dust off the mains plug regularly.
É
Unplug the mains plug, and wipe with a dry cloth.
l
Discontinue using the appliance immediately and unplug in the
unlikely event that this appliance stops working properly.
Example for abnormal occurrences or breaking down:
Ɣ
The mains plug and the mains lead become abnormally hot.
Ɣ
The mains lead is damaged or the appliance power fails.
Ɣ
The main body is deformed, has visible damage or is abnormally hot.
Ɣ
There is abnormal turning noise while in use.
Ɣ
There is unpleasant smell.
Ɣ
There is another abnormality or failure.
É
Consult the place of purchase or Panasonic service centre for inspection or repair.
l
Do not use the appliance if the parts of the appliance is deformed or
damaged such as having visible cracks or chips.
É
Consult the place of purchase or Panasonic service centre for inspection or repair.
Safety Precautions
Please make sure to follow
these instructions.
OI1_YR250 UK Pagination_16th——audit 20210107.indd 4 2021/4/12 21:00:58
5
CAUTION
To avoid risk of electric shock, fire, burn, injury or property damage.
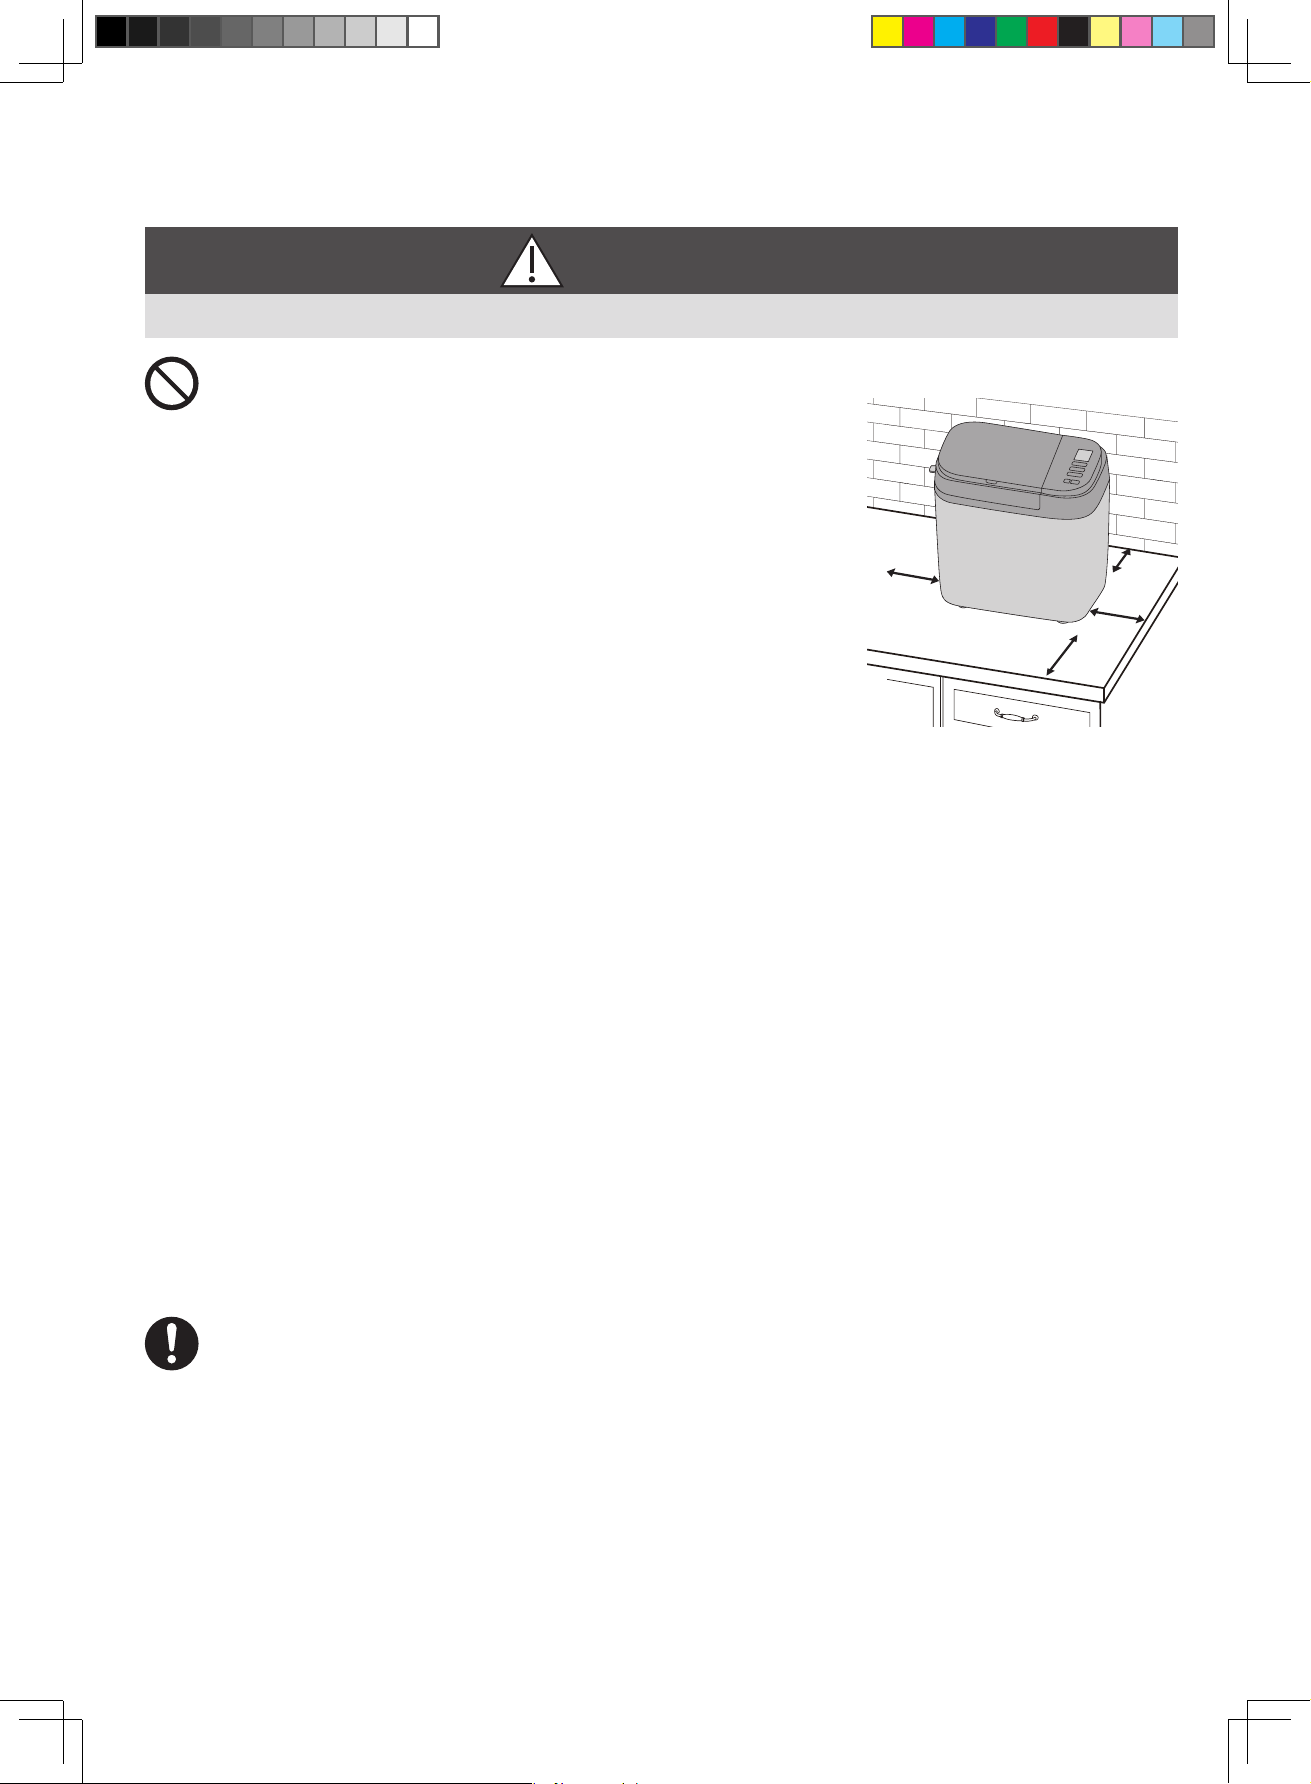
l
Do not use the appliance on following places.
Ɣ
On uneven surfaces, on electrical appliances
such as a refrigerator, on materials such as
tablecloths or on carpets, etc.
Ɣ
Places where it may be splashed with water or
near a heat source.
É
Position the appliance on a firm, dry, clean, flat
heatproof worktop at least 10 cm from edge of
worktop and at least 5 cm from adjacent walls
and other objects.
l
Do not remove the bread pan or unplug the appliance during use.
l
Do not touch hot area such as bread pan, inside of unit, heating
element or inside of the lid while the appliance is in use or
immediately after use.
The accessible surfaces may become hot during use. Be careful with the
residual heat source especially after use.
É
To avoid burn, always use oven gloves to remove the bread pan or the
finished bread. (Do not use wet oven gloves.)
l
Do not use an external timer etc.
Ɣ
This appliance is not intended to be operated by means of an external
timer or separate remote - control system.
l
Do not insert any object in the gaps.
l
Do not exceed the maximum quantities of flour (600 g) and raising
ingredients such as dry yeast (7 g) or baking powder (13 g).
(See P. 31)
l
Unplug the mains plug when the appliance is not in use.
l
Make sure to hold the mains plug when unplugging it.
Never pull on the mains lead.
l
Before handling, moving or cleaning, unplug the appliance and
allow it to cool down.
l
This appliance is intended for household use only.
l
Ensure to clean the appliance especially surfaces in contact with
food after use. (See P. 26)
DN
DN
DN
DN
OI1_YR250 UK Pagination_16th——audit 20210107.indd 5 2021/4/12 21:00:59
6
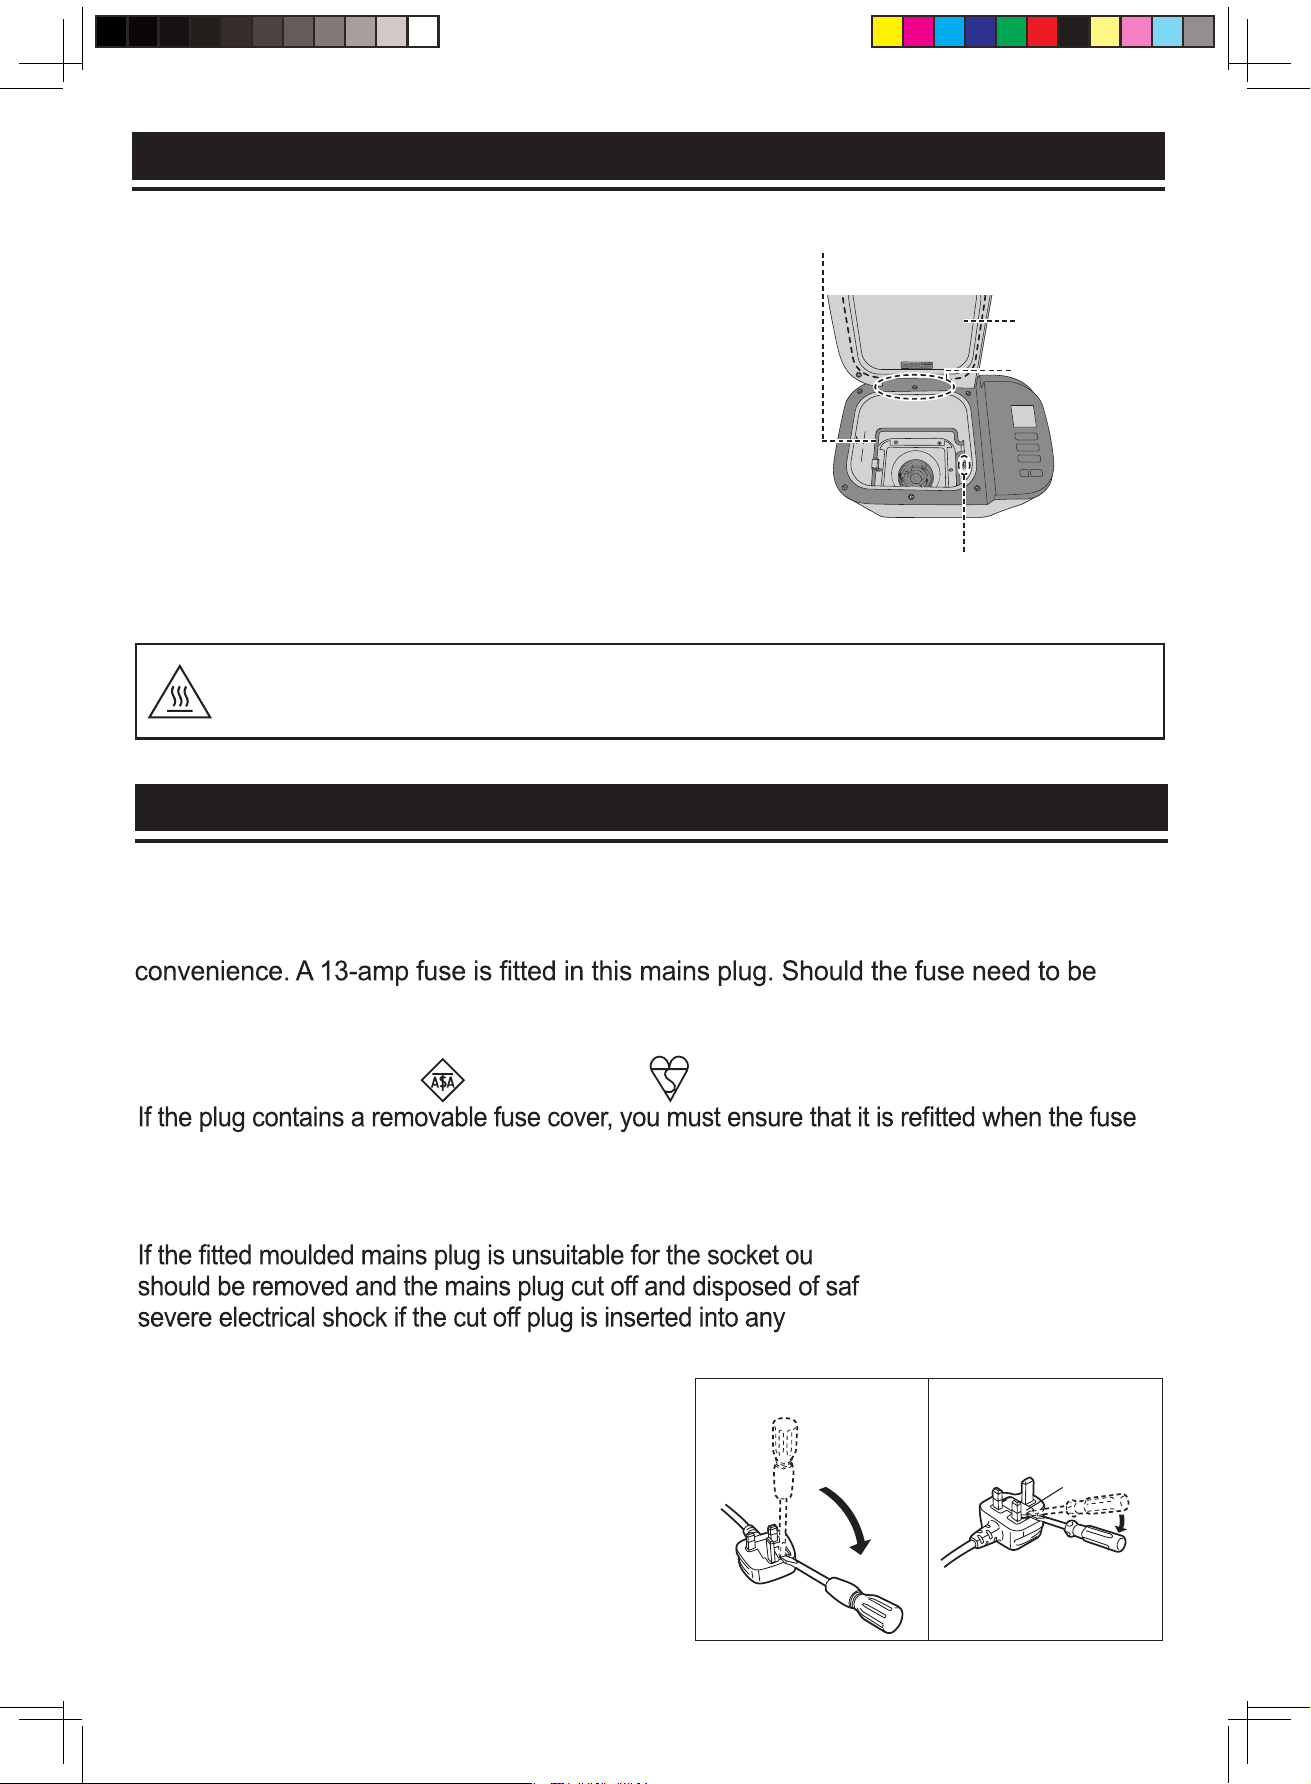
This symbol on the appliance indicates “Hot surface and should
not be touched without caution”.
●
Do not use the appliance outdoors, in rooms of
high humidity, or use excessive force on the parts
as is illustrated on the right to avoid malfunction or
deformation.
●
Do not use a knife or any other sharp tool to remove
residues.
●
Do not drop the appliance to avoid damaging it.
●
Do not store any ingredients or bread in the bread pan.
FOR YOUR SAFETY PLEASE READ THE FOLLOWING TEXT CAREFULLY.
This appliance is supplied with a moulded three pin mains plug for your safety and
replaced please ensure that the replacement fuse has a rating of 13-amp and that it is
approved by ASTA or BSI to BS1362.
Check for the ASTA mark or the BSI mark on the body of the fuse.
is replaced. If you lose the fuse cover, the mains plug must not be used until a replacement
cover is obtained.
A replacement fuse cover can be purchased from your local Panasonic Dealer.
tlet in your home, then the fuse
ely. There is a danger of
13-amp socket.
How to replace the fuse
The location of the fuse differs according to the type
of AC mains plug (figures A and B). Confirm the AC
mains plug fitted and follow the instructions below.
Illustrations may differ from actual AC mains plug.
Open the fuse cover with a screwdriver and replace
the fuse and close or attach the fuse cover.
Figure A Figure B
Fuse cove
r
Important Information
Electrical Requirement
Temperature sensor
Inside of the lid
Heating element
Connected part
OI2_SD-B2510 UK Pagination_20210310.indd 6 2021/4/12 21:04:52
When taking the handle of bread pan, hold the central
part of the handle to avoid shaking or collision.
●
7
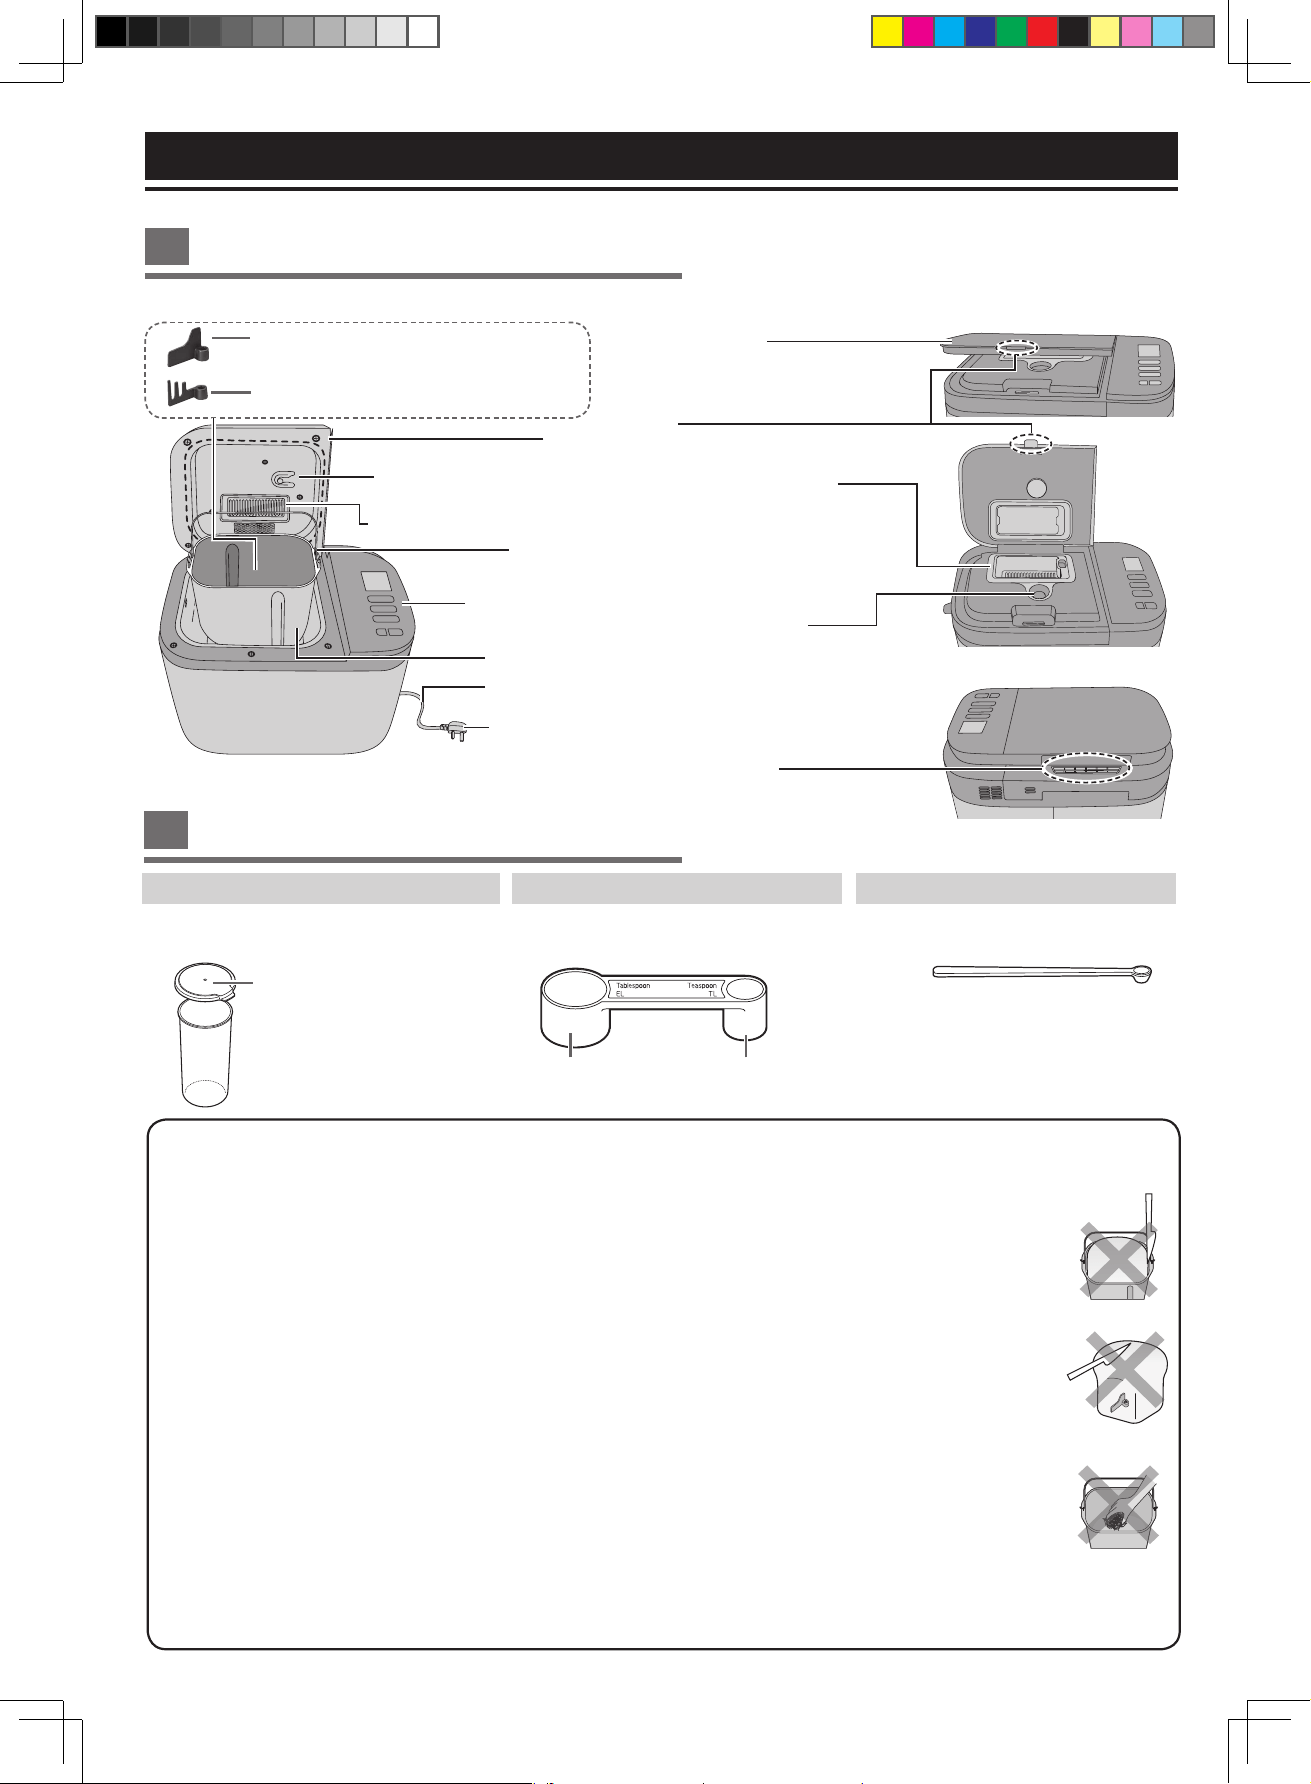
Measuring spoon
To measure out sugar, salt, dry yeast, etc.
Sourdough starter spoon
approx. 0.1 g
(15 mL) (5 mL)
Tablespoon
½ marking
Teaspoon
¼, ½, ¾ markings
Sourdough cup
To measure out liquids or make sourdough starter.
10 mL increments
(max. 550 mL)
Lid
Main Unit
To measure out sourdough starter yeast.
Bread pan and kneading blade are coated with a non-stick finish to avoid stains and to make it easier when removing bread.
n
To avoid damaging it, please follow the instructions below.
Ɣ
Do not use hard utensils such as a knife or a fork when removing the bread from the bread pan.
If the bread cannot be easily removed from the bread pan, leave the bread pan for 5 – 10 minutes to cool,
making sure that it is not left unattended where somebody or something may get burnt. After that, shake
the bread pan several times using oven gloves. (See P. 13)
(Hold the handle down so that it does not get in the way of bread.)
Ɣ
Ensure that the kneading blade is not embedded in the bread loaf before slicing it.
If it is embedded, wait for the loaf to cool and remove it.
(Do not use hard or sharp utensils such as a knife or a fork.)
Be careful not to get burn as the kneading blade may still be hot.
Ɣ
Use the soft sponge when cleaning the bread pan and the kneading blade.
Do not use anything abrasive such as cleansers or scouring pads.
Ɣ
Hard, coarse or large ingredients such as flours with whole or ground grains, sugar, or the addition of
nuts and seeds may damage non-stick finish coating. If using large chunks of ingredient, break or cut
into small pieces. Please follow the information of Additional Ingredients (see P. 14) and the recipe
quantities stated.
Ɣ
Use only supplied kneading blade for this appliance.
The bread pan, kneading blade and bread may be very hot after baking. Always handle with care.
Parts Names and Instructions
Mains lead
Bread pan
Control panel
Lid
Handle
Raisin nut dispenser flap
Kneading blade (rye menu)
(SD-YR2550 / SD-YR2540 only)
Kneading blade
Yeast dispenser
(SD-YR2550 / SD-YR2540 only)
Mains plug *
* The shape of mains plug may be different from illustration.
Raisin nut dispenser
Yeast dispenser
(SD-YR2550 / SD-YR2540 only)
Dry yeast placed in the yeast dispenser
will drop into the bread pan automatically.
Dispenser lid
Press the rib on the side of dispenser
lid and lift up to open it.
The ingredients placed in the raisin
nut dispenser will drop into the bread
pan automatically when the “raisin nut
”
menu is selected.
Steam vent
Ɣ
Illustration of product in this instructions are exemplified by SD-YR2550
Rib
Close the dispenser lid until the rib clicks.
Accessories
OI1_YR250 UK Pagination_16th——audit 20210107.indd 7 2021/4/12 21:01:00
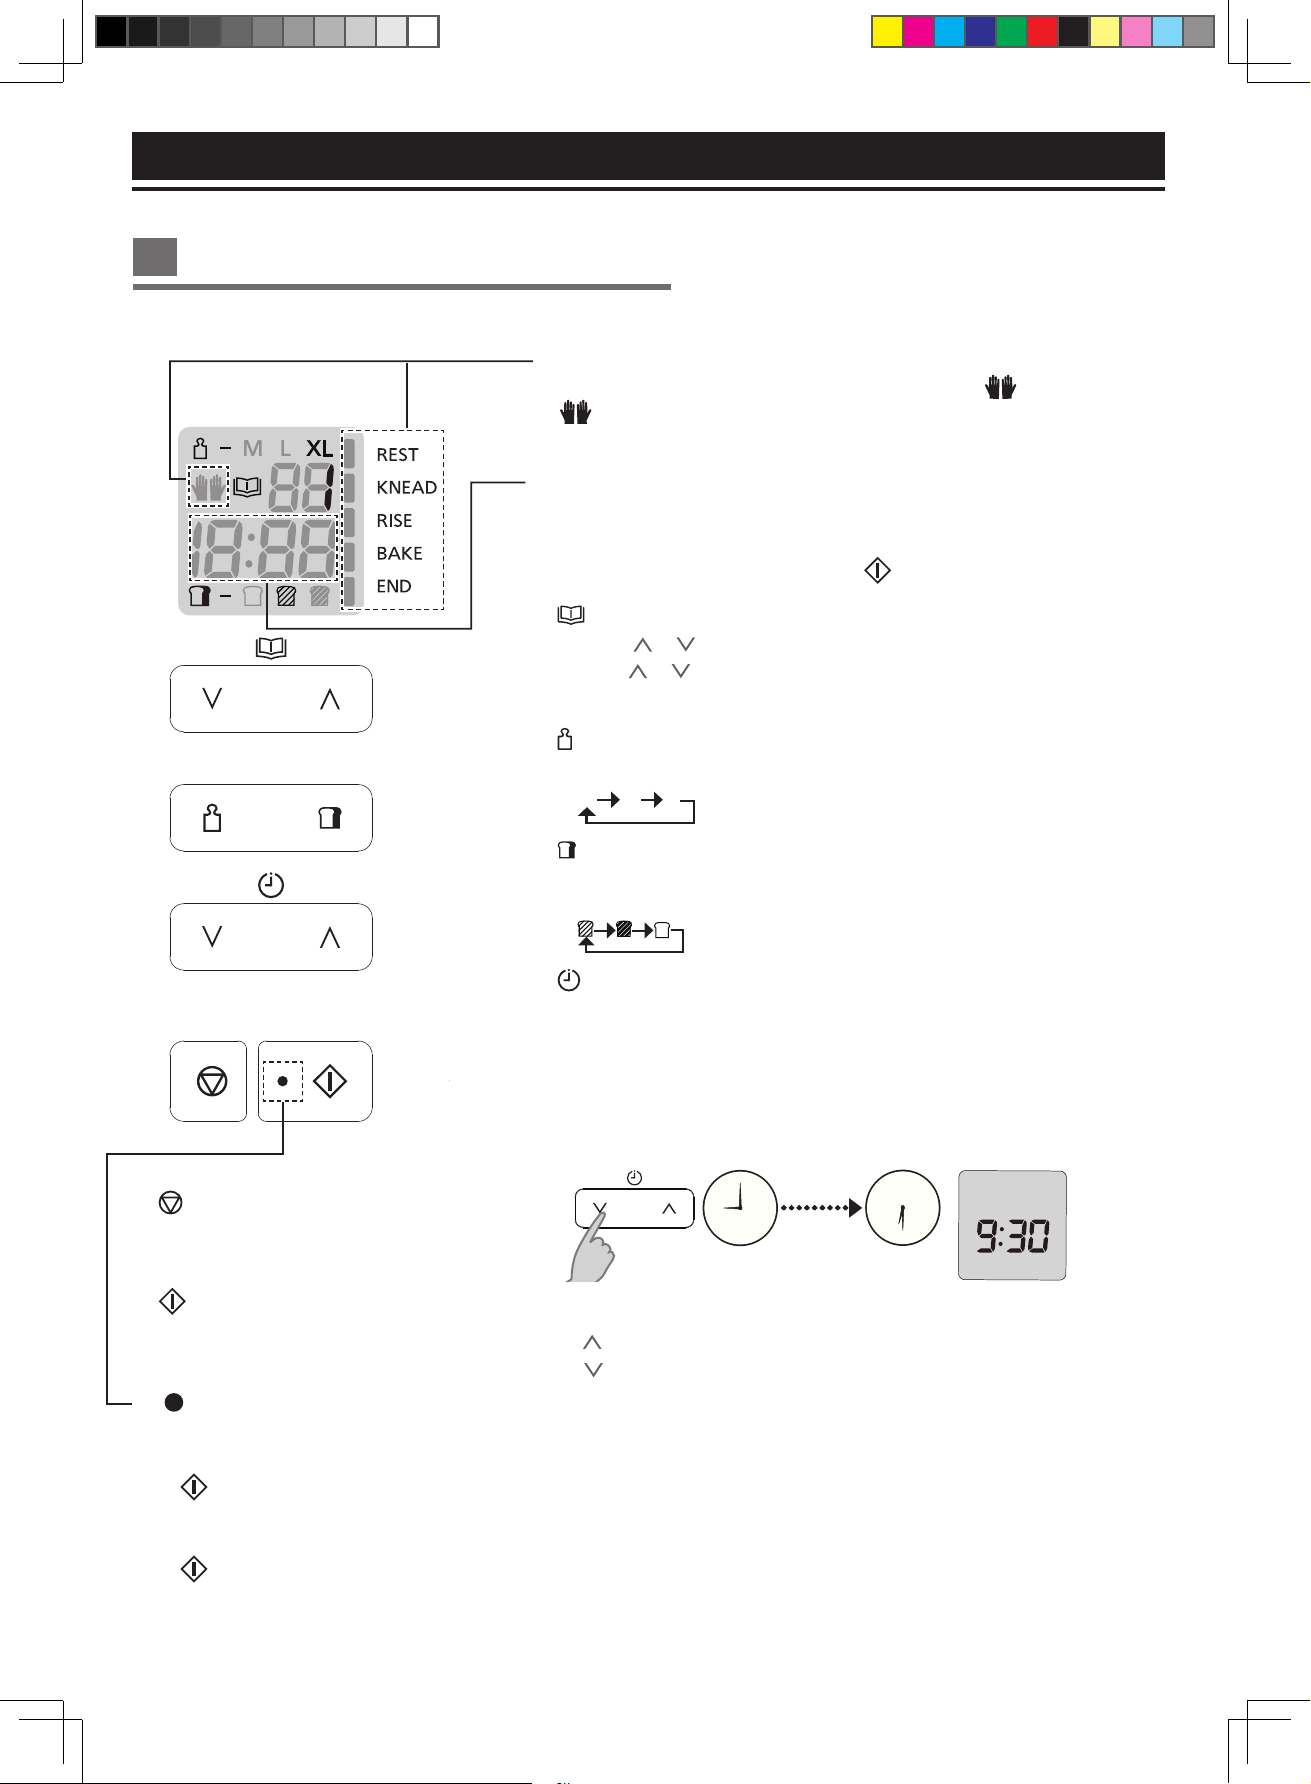
8
n
Operation status
Displayed for the current stage of the program except .
: Provide an indication of doing manual operation.
(See P. 10-11 for available menu.)
n
Status indicator
Ɣ
Flash indicates that the machine is in set
state or manual operation is required.
button can be pressed.
Ɣ
Always light indicates that the machine is
in program execution state.
button cannot be pressed.
It will not turn on even plugged in.
n
Start
Press this button to start the program.
n
Stop
To cancel the setting / stop the program.
(Hold for approximately 1 second.)
n
Timer
Ɣ
Set delay timer (time until bread is ready).
For available menu, it can be set up to 13 hours (except menu sourdough only set
up to 9 hours).
(See P. 10-11)
e.g.: It is 9:00 PM now, and you want the bread to be ready at 6:30 the next
morning.
É
Set the timer to 9:30 (9 hours and 30 minutes from now).
12
9 3
12
9 3
6
6
9 h 30 min
from now
Current time
Ready time
Ɣ
Setting time for Sweet Menus :
“ ” press this button to increase the time.
“ ” press this button to decrease the time.
(To advance more quickly, press this button once then hold it.)
Menu “Cake”
Pressing the button once will advance the additional baking time by 1 minute.
Menu “Bake Only”
Pressing the button once will advance the baking time including additional
baking time by 1 minute.
Menu “Jam” and “Compote”
Pressing the button once will advance the cooking time by 10 minutes but
additional cooking time will be by 1 minute.
Ɣ
Picture shows all words and symbols, but only those relevant will be displayed during operation.
n
Time showing
Ɣ
Time remaining until ready.
Ɣ
Menu required some manual steps, display will show the remaining time
until starting its process after press button.
Control Panel and Display
Parts Names and Instructions
n
Size
Press this button to choose size. (See P. 10-11 for available menu.)
XL
L
M
n
Crust
Press this button to choose crust colour. (See P. 10-11 for available menu.)
Medium Dark Light
n
Menu
Ɣ
Press
or
once to be a setting mode.
Ɣ
Press
or again to
change Menu number.
(To advance more quickly, hold the button.) (See P. 10-11 for menu number.)
OI1_YR250 UK Pagination_16th——audit 20210107.indd 8 2021/4/12 21:01:00

9
It is extremely important to use the correct measure of ingredients for best results.
Liquid ingredients
Use the sourdough cup or measuring spoon provided.
If the recipes indicate a mixture (the liquid plus egg), should be weighted on scales. Using digital scale is recommended.
Dry ingredients
Should be weighed on scales or measured with measuring spoon provided for the small amounts. Using digital scale is
recommended.
Flour
Main ingredient of bread. The protein in flour forms gluten during kneading.
Gluten provides structure and texture and helps the bread to rise.
Use strong flour. Strong flour is milled from the wheat and has a high
content of protein which is necessary for the development of gluten.
Carbon dioxide produced during fermentation is trapped within the elastic
network of gluten, thus making the dough rise.
White flour
Made by grinding wheat kernel, excluding bran and germ. The best kind
of flour for baking bread is a flour marked “for bread baking”.
'RQRWXVHSODLQRUVHOIUDLVLQJIORXUDVDVXEVWLWXWHIRUEUHDGIORXU
Wholemeal flour
Made by grinding entire wheat kernel, including bran and germ.
Makes very health-giving bread. This bread is lower in height and
heavier than bread baked with white flour.
Rye flour
Made by grinding rye kernel. Contains more iron, magnesium and
potassium, which contribute to good health.
Due to the low gluten content, it makes a dense, heavier bread.
Do not use more than stated quantity (could overload motor).
Spelt flour (SD-YR2540 only)
In the wheat family but is a completely different species genetically.
Makes loaves with a flat / slightly sunken crust.
Spelt wholegrain flour bread becomes low height and dense compared
with spelt white flour bread.
When combining white and wholegrain spelt flour, we recommend using
more white to get a better rise.
There is Spelt (Triticum spelta) suitable for baking bread and Einkorm
wheat (Triticum monococcum: also it is called small spelt.) which is
not suitable for baking bread are sold as spelt. Please use spelt on
menu “Spelt
”
.
Dry yeast
Enables the bread to rise.
%HVXUHWRXVHGU\\HDVWWKDWGRHVQRWUHTXLUHSUHIHUPHQWDWLRQ'RQRWXVH
yeast that requires preliminary fermentation. Dry yeast which has “Easy
blend”, “Fast Action” or “Easy Bake” written on the packet is recommended.
When using dry yeast from sachets, seal the sachet again immediately
after use. To store, follow the Manufacturer's instructions and discard after
48 hours of opening. It is recommended on most yeast packets to keep in
a cool dry place.
Dairy products
Add flavour and nutritional value.
If you use milk instead of water, the nutritional value of the bread will be
higher, but do not use in timer setting as it may not keep fresh overnight.
É
Reduce the amount of water proportionally to the amount of milk.
Sugar (granulated sugar, brown sugar, honey, treacle, etc.)
Food for the dry yeast, sweetens and adds flavour to the bread, changes
the colour of the crust.
Use less sugar if using raisins or other fruits, which contain fructose.
Water
Use normal tap water.
When room temperature is low, use tepid water for menu
“Basic Rapid
”
, “Bread Mix
”
, “Bread Mix Raisin
”
, “Whole Wheat
Rapid
”
, “Rye
”
, “Gluten Free Bread
”
or “Gluten Free Pasta
”
.
When room temperature is high, use chilled water for menu
“Rye
”
, “French
”
, “Brioche
”
or “Spelt
”
.
Always measure out liquids using the sourdough cup provided.
Salt
Improves the flavour and strengthens gluten to help the bread rise.
The bread may lose size / flavour if measuring is inaccurate.
Fat
Adds flavour and softness to the bread.
Use butter (unsalted), margarine or oil.
You can make your bread taste better by
adding other ingredients.
■
Eggs
Improve the nutritional value and colouring of the bread. (Water
amount must be reduced proportionally.) Beat eggs when
adding eggs. Do not use the timer for the recipe with egg.
(Eggs go rotten quickly if your room temperature is high.)
■
Bran
Increases the bread’s fibre content.
Use max. 50 H (5 tbsp).
■
Wheat germ
Gives the bread a nuttier flavour.
Use max. 50 H (4 tbsp).
■
Spices, herbs
Enhance the flavour of the bread.
2QO\XVHDVPDOODPRXQWPD[WEVS
If using a bread mix...
■
Bread mixes including dry yeast
➀
Place the mix in the bread pan, then add water.
(Follow instructions on the packet for the quantity of water)
➁
Select menu 5 or 6.
With some mixes, it is not clear how much dry yeast is included,
so some trial and error may be required to obtain optimum results.
■
Bread mix with separate dry yeast sachet
➀
First place the bread mix in the bread pan, then the water. Then
place the measured dry yeast in the yeast dispenser.
(For SD-R2530, place the dry yeast in the bread pan first, then
the bread mix, then the water.)
➁
Set the machine according to the type of flour included in the
mix, and start the baking.
White flour - recommended for menu 5 or 6.
Brown flour - menu 1
Whole wheat - menu 7
Rye flour - menu 12 (SD-YR2550 / SD-YR2540 only)
■
Baking brioche with brioche mix
Select the menu 10 or 2 - “Medium” size - “Light” crust colour.
Tips:
The outcome differs depending on the type of mixed flour.
Bread-making Ingredients
OI1_YR250 UK Pagination_16th——audit 20210107.indd 9 2021/4/12 21:01:00
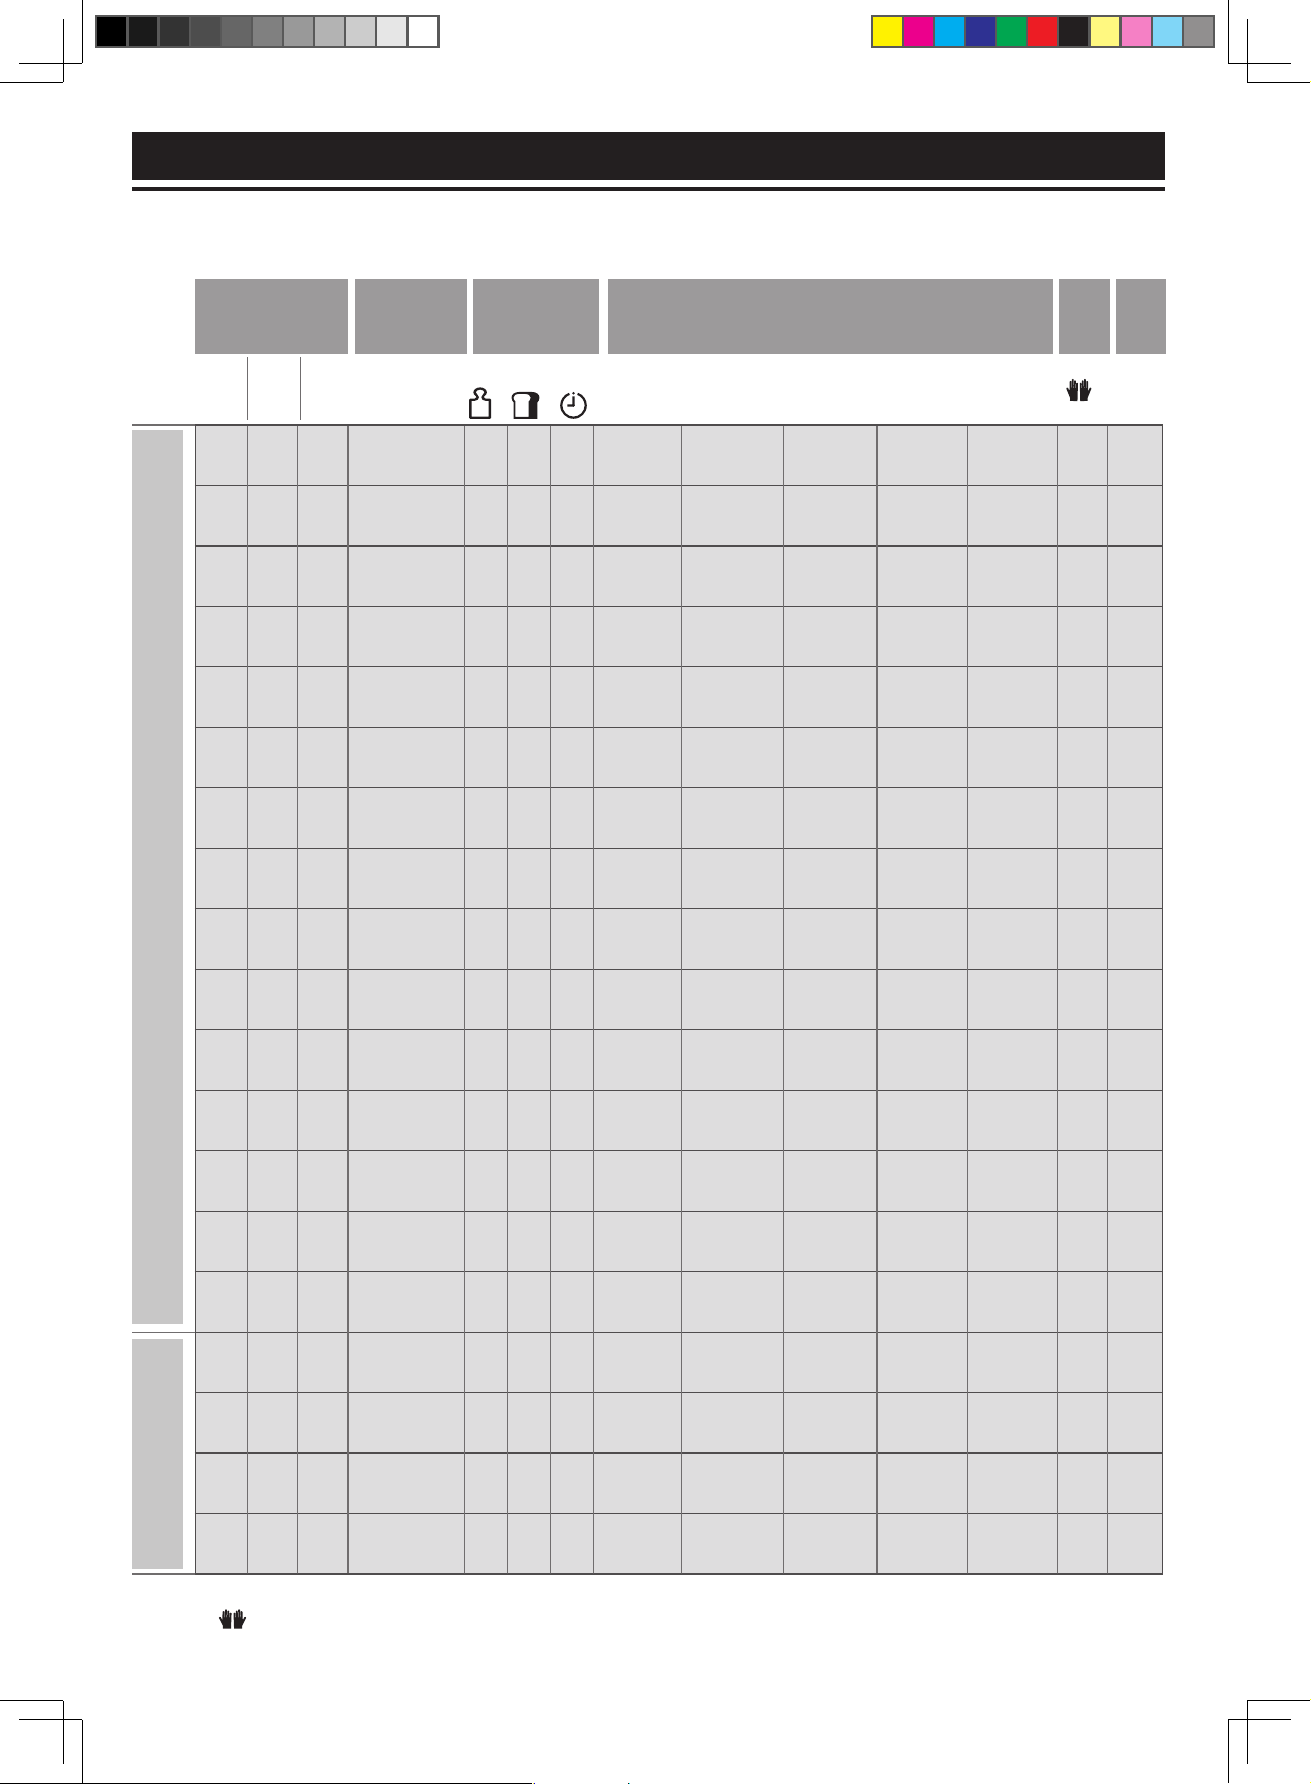
10
Size Crust Timer
n
Function Availability and Time Required
Ɣ
The machine stops or moves during process based on the operating program.
Ɣ
Time required for each process will differ according to room temperature.
Menu Number
Menu Options
SD-
YR2540
SD-
YR2550
SD-
R2530
Total
Remark
Processes
Rest
Knead
Rise Bake
Total
Ɣ
Abbreviations used in this instructions, a full name written as follows: min = minute (s); h = hour (s); approx. = approximately.
Ɣ
Remark ( ) : The menu is available to do manual operation such as adding extra ingredients and scraping the flour from sidewall of bread
pan, when the beep sounds.
Menu Charts and Baking Options
Refer.
Page
Bread
1 1 1
Basic
4 4 4
30 – 60 min 20 – 30 min *4
1 h 50 min –
2 h 20 min
50 – 55 min
4 h –
4 h 5 min
—
P. 12-14
2 2 2
Basic Rapid
4 4
— —
15 – 20 min
approx. 1 h 35 – 40 min
1 h 55 min –
2 h
— P. 12-14
3 3 3
Basic Raisin
4
4
*1
4
30 – 60 min
20 – 30 min *4
1 h 50 min –
2 h 20 min
50 min 4 h — P. 12-14
4 4 4
Basic Stuffed
4 4 4
30 – 60 min
25 – 30 min *4
1 h 45 min –
2 h 10 min
50 – 55 min
4 h –
4 h 5 min
4
P. 12-14
5 5 5
Bread Mix
—
4
— — 30 min *4 1 h 15 min 45 min 2 h 30 min — P. 12-14
6 6 6
Bread Mix
Raisin
—
4
—
— 30 min *4 1 h 15 min 45 min 2 h 30 min — P. 12-14
7 7 7
Whole wheat
4
—
4
1 h–
1 h 40 min
15 – 25 min *4
2 h 10 min –
2 h 50 min
50 min 5 h —
P. 12-14
8 8 8
Whole wheat
Rapid
4
— —
15 – 25 min 15 – 25 min *4
1 h 30 min –
1 h 40 min
45 min 3 h — P. 12-14
9 9 9
Whole wheat
Raisin
4
—
4
1 h –
1 h 40 min
15 – 25 min *4
2 h 10 min –
2 h 50 min
50 min 5 h —
P. 12-14
10 10 10
Brioche
— 4
*1
—
20 min 30 – 60 min *4
1 h 20 min–
1 h 30 min
45 min 3 h 30 min
4
P. 12, 15
11 11 —
French
— —
4
—
40 min –
1 h 20 min *4
3 h 30 min –
4 h 10 min
50 min 5 h 40 min — P. 12-14
— — 11
French
— —
4
5 min – 1 h 35 – 40 min *4
3 h 10 min –
4 h 10 min
50 min 5 h 40 min — P. 12-14
12 12 —
Rye
—
—
4
45 – 60 min
approx.
10 min
1 h 20 min –
1 h 35 min
1 h 3 h 30 min — P. 12-14
13 13 12
Sourdough
— —
4
*3 0 – 55 min 45 – 55 min *5
2 h 25 min –
3 h 10 min
55 min 5 h — P. 15
14 — —
Spelt Bread
4
—
4
30 min –
1 h 15 min
25 – 30 min*4
1 h 50 min –
2 h 45 min
55 min 4 h 30 min —
P. 12-14
Gluten Free
15 14 13
Gluten Free
Bread
—
4
*2 — — 20 – 25 min *7 35 – 40 min 50 – 55 min
1 h 50 min
–
1 h 55 min
4
P. 12, 16
16 15 14
Gluten Free
Cake
— — — — 20 min *6 — 1 h 30 min 1 h 50 min
4
P. 12, 17
17 16 15
Gluten Free
Pizza
— — — — 20 – 25 min *7 5 – 10 min — 30 min
4
P. 12, 17
18 17 16
Gluten Free
Pasta
— — — — 15 min *7 — — 15 min
4
P. 12, 17
OI1_YR250 UK Pagination_16th——audit 20210107.indd 10 2021/4/12 21:01:00
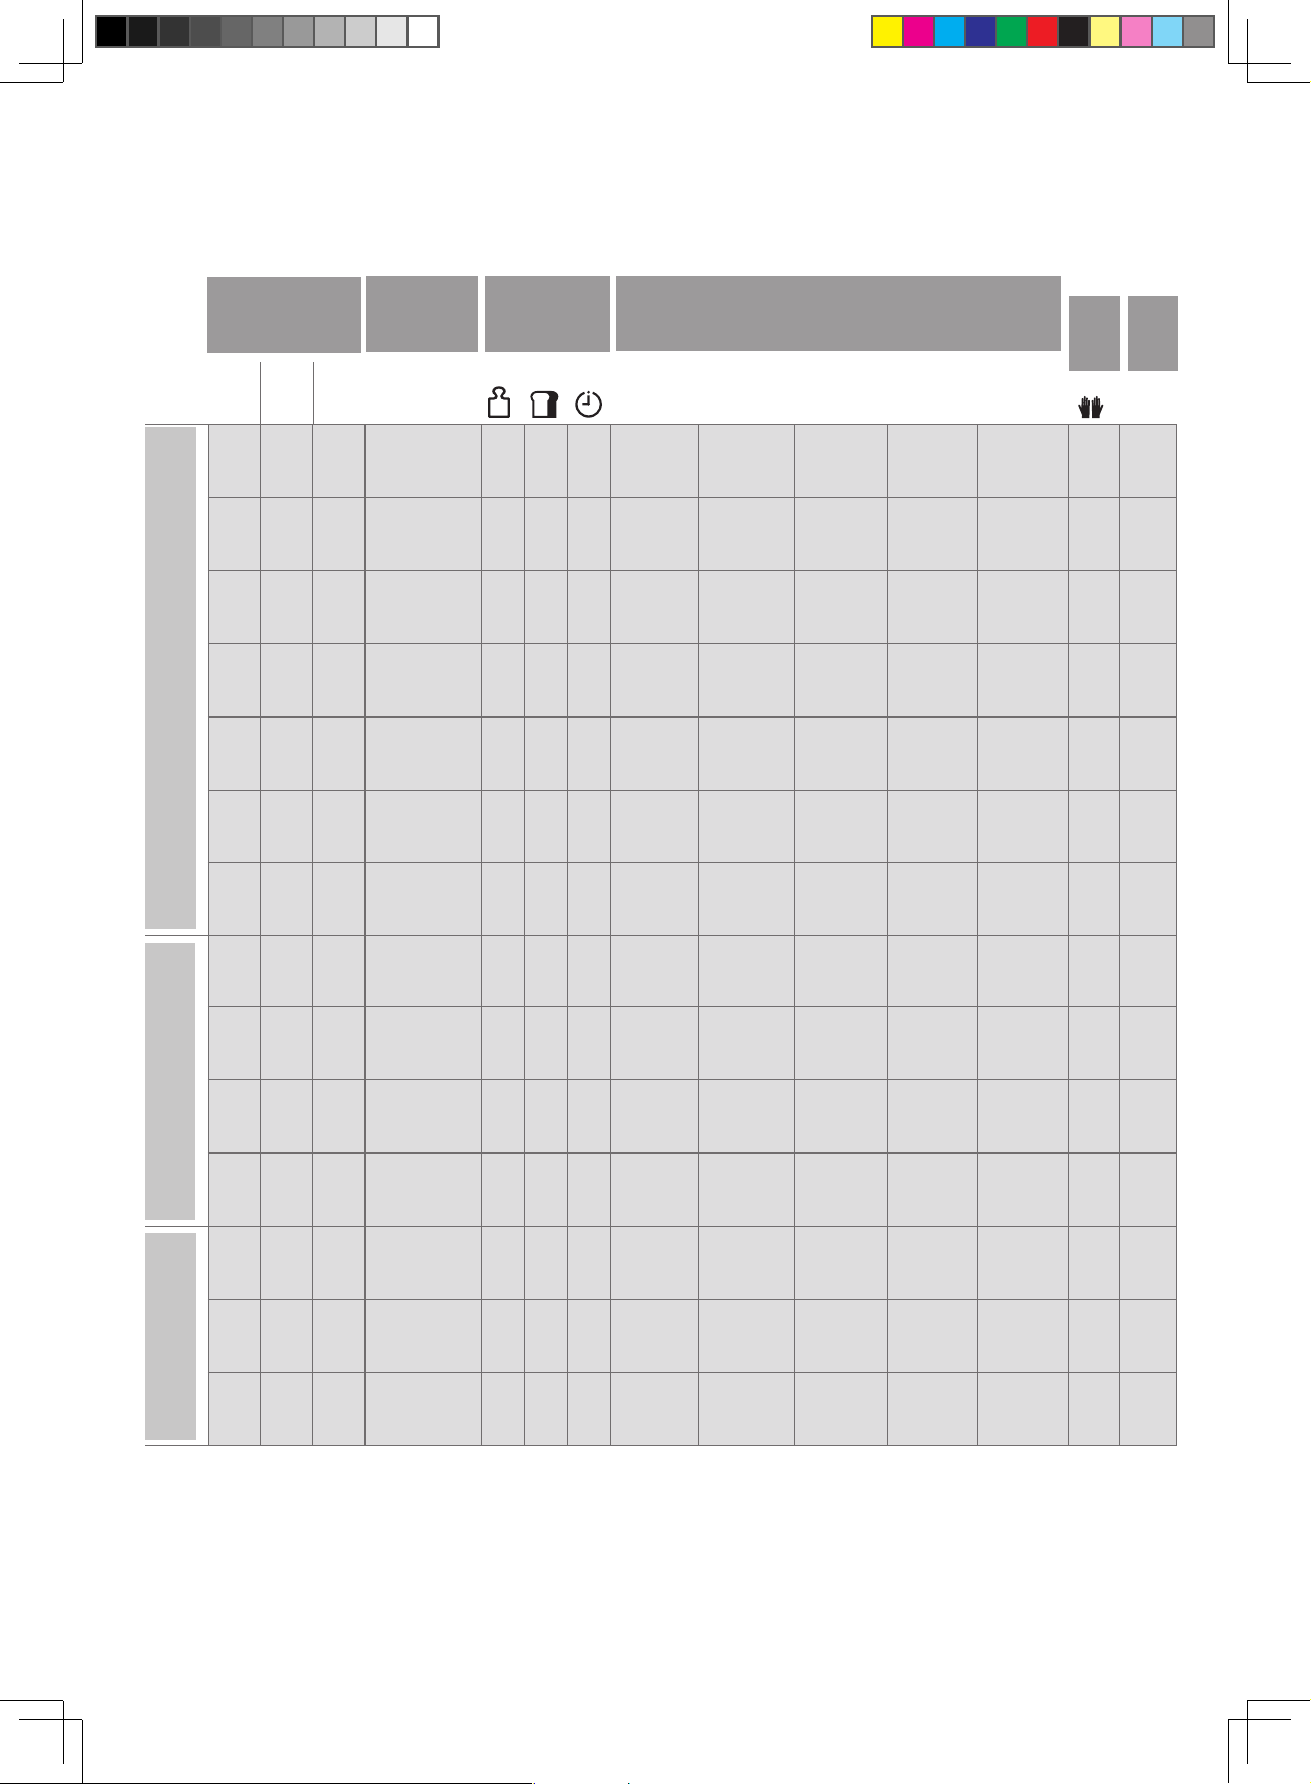
11
Size Crust Timer
n
Function Availability and Time Required
Ɣ
The machine stops or moves during process based on the operating program.
Ɣ
Time required for each process will differ according to room temperature.
Menu Options
Rest
Knead
Rise
Bake
Total
Menu Number
*1 Only “Light” or “Medium” are available.
*2 Only “Medium” or “Dark” are available.
*3 Can be set up to 9 hours.
*4 There is a period of rise during the knead period.
*5 There is a period of rest during the knead period.
*6 There is a period of scraping or molding during the knead period.
*7 There is a period of scrape off the flour.
SD-
YR2540
SD-
YR2550
SD-
R2530
Dough
19 18 17
Basic
— —
—
30 – 50 min 15 – 30 min *4
1 h 10 min –
1 h 30 min
— 2 h 20 min — P. 12, 13
20 19 18
Basic Raisin
— — — 30 – 50 min 15 – 30 min *4
1 h 10 min –
1 h 30 min
— 2 h 20 min — P. 12, 13
21 20 19
Whole wheat
— — —
55 min –
1 h 25 min
15 – 25 min *4
1 h 30 min –
2 h
— 3 h 15 min — P. 12, 13
22 21 20
Whole wheat
Raisin
— —
—
55 min –
1 h 25 min
15 – 25 min *4
1 h 30
min –
2 h
— 3 h 15 min — P. 12, 13
23 22 21
Sourdough
Dough
— — — 0 – 40 min 45 – 55 min *5
1 h 5 min –
1 h 35 min
— 2 h 30 min — P. 15
24 23 22
Sourdough
Starter
— —
—
— — 24 h — 24 h — P. 15
25 24 23
Pizza
— —
4
(Knead)
10 – 18 min
(Rise)
7 – 15 min
(Knead)
approx.
10 min
(Rise)
approx.
10 min
45 min — P. 12-13
Sweet
26 25 24
Cake
— — —
— 20 min *6 — 1 h 35 min 1 h 55 min
4
P. 12, 18
27 26 25
Bake Only
— —
— — — —
30 min–
1 h 30 min
30 min–
1 h 30 min
— P. 18
28 27 26
Jam
— —
— — — — —
1 h 30 min–
2 h 30 min
— P. 18
29 28 27
Compote
— —
— — — — —
1 h –
1 h 40 min
— P. 18
Manual
30 29 28
Cake
Kneading
— —
— —
20 min
(default)
— — 1 – 20 min — P. 19
31 30 29
Bread
Kneading
— —
— —
20 min
(default)
— — 1 – 20 min — P. 19
32 31 30
Rise
— —
— — —
30 min
(default)
— 10 min – 2 h — P. 19
Remark
Processes
Refer.
Page
OI1_YR250 UK Pagination_16th——audit 20210107.indd 11 2021/4/12 21:01:01
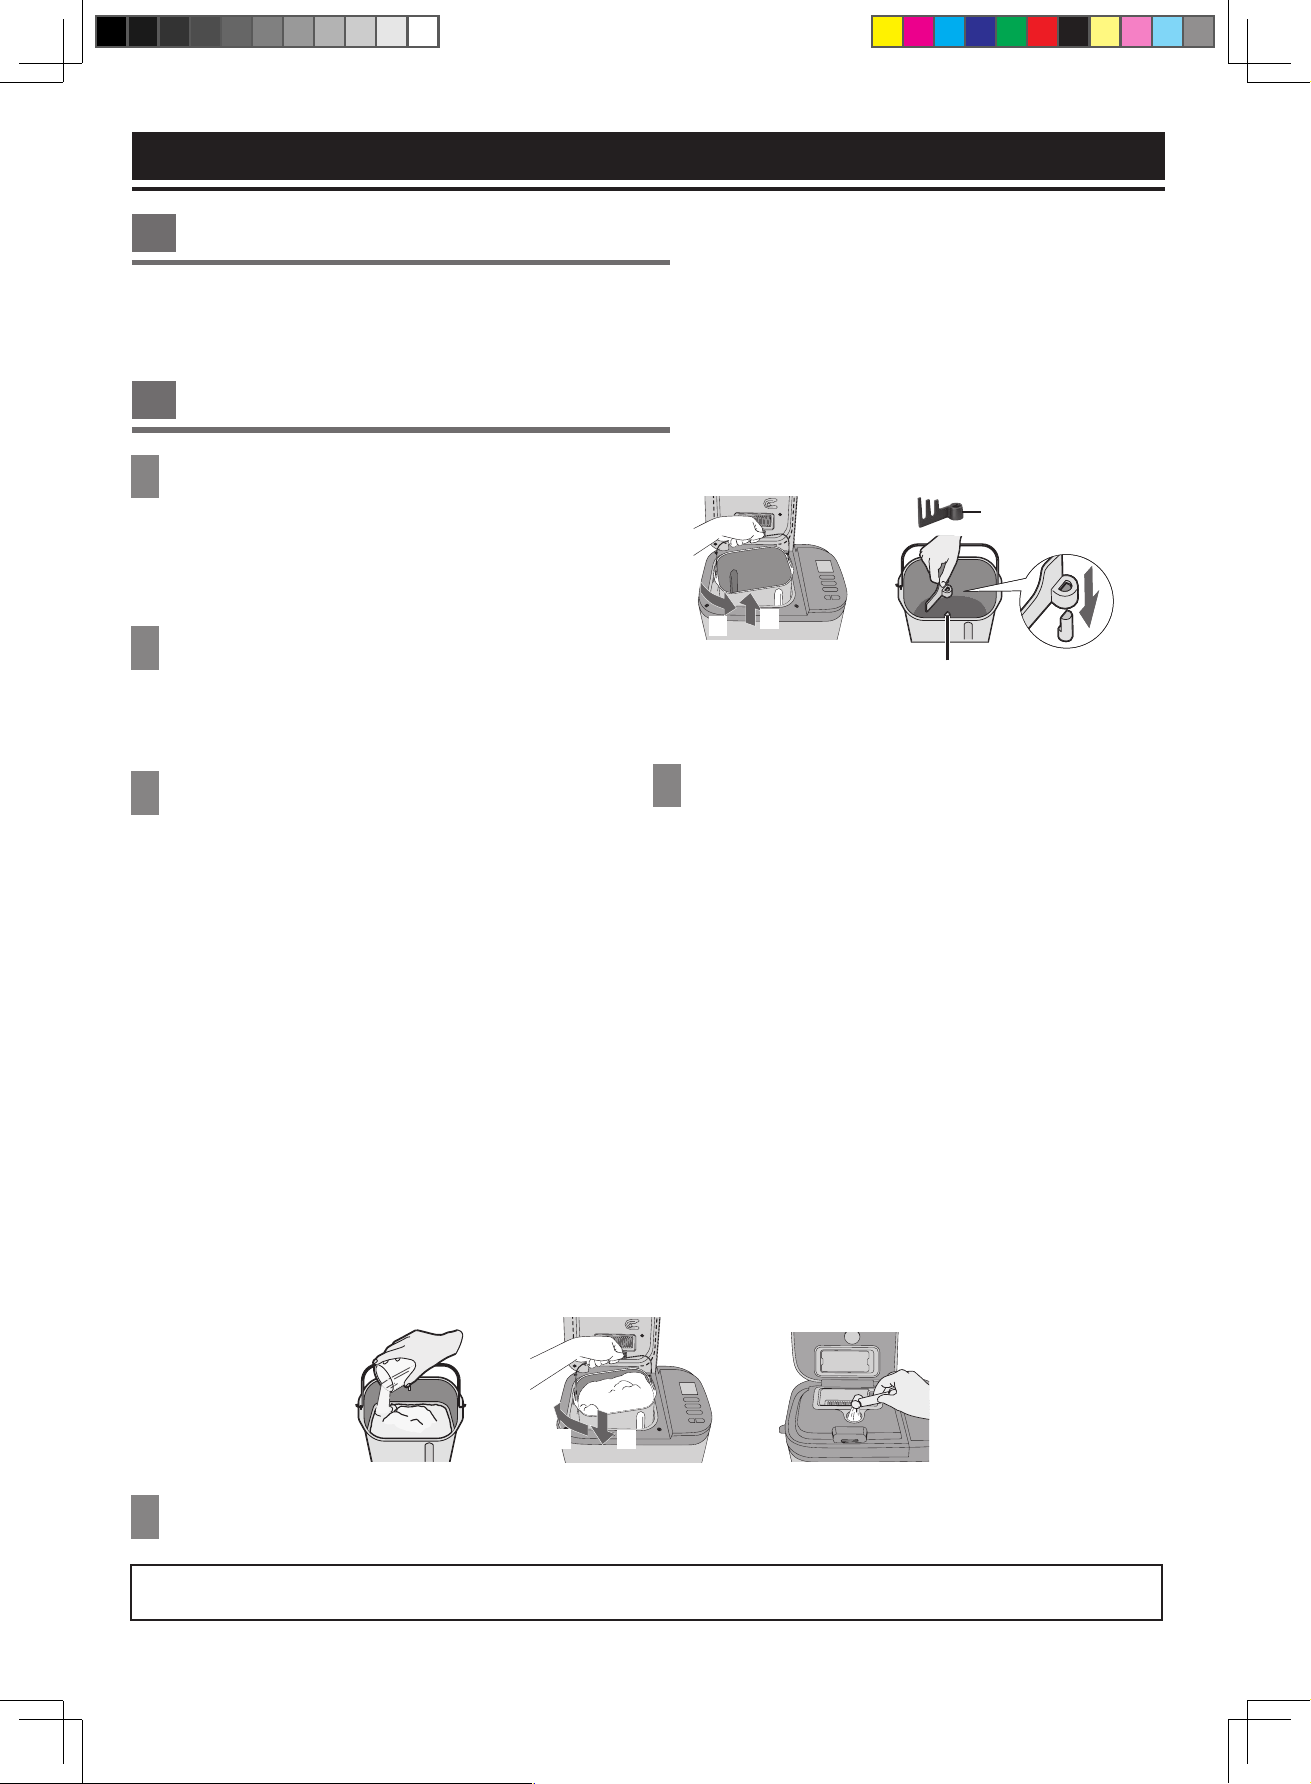
12
For SD-R2530
3
1
Place the measured ingredients into the bread
pan in the order listed in the recipes.
Ɣ
For bread and dough menus, dry yeast should be
placed first.
Place dry yeast away from the kneading blade and
kneading mounting shaft. If some of the dry yeast get into
it, bread may not rise well.
Ύ
Place dry ingredients over the dry yeast.
It must be kept separate from any liquid until mixing
commences.
Ɣ
Pour liquid in the edge of bread pan's sidewall to avoid
splashing. (3)
2
Wipe off any moisture and flour around the bread pan, and
return it into the main unit.(4)
Close the lid.
Ɣ
Add additional ingredients into the raisin nut dispenser
for available menus. (See P. 14)
Ɣ
For optimum results, do not open the lid unless the menu
requires, as it affects bread quality.
1
Open the lid, remove the bread pan (1) and set
the kneading blade into the kneading mounting
shaft. (2)
Ɣ
Check around the shaft and inside the kneading blade and
ensure that they are clean. (See P. 26)
2
Prepare the ingredients with
exact measurement according to the recipe.
For SD-YR2550 / SD-YR2540
3
1
Place the measured ingredients into the
bread pan in the order listed in the recipes.
Ɣ
Pour liquid in the edge of bread pan's sidewall to avoid
splashing. (3)
2
Wipe off any moisture and flour around the bread pan, and
return it into the main unit.(4)
Close the lid.
Ɣ
Place the dry yeast into the yeast dispenser for available
menus. (5)
If the yeast dispenser is wet, absorb wetness with tissue etc.
(Do not rub the yeast dispenser, otherwise the dry yeast
will not drop into the bread pan due to static.)
Ɣ
Add additional ingredients into the raisin nut dispenser
for available menus. (See P. 14)
Ɣ
For optimum results, do not open the lid unless the menu
requires, as it affects bread quality.
4
Plug the machine into 230 - 240 V socket.
Ɣ
For the first time use, remove packing material and clean the machine. (See P. 26)
Ɣ
Clean the machine when you have not used for a long time. (See P. 26)
Before Use
Preparations
Handling Instructions
Make sure to complete the preparation steps before setting menu.
(3)
(5)
(1)
Ύ
Use for rye menu only.
(2)
(4)
Ύ
Kneading mounting shaft
OI1_YR250 UK Pagination_16th——audit 20210107.indd 12 2021/4/12 21:01:01
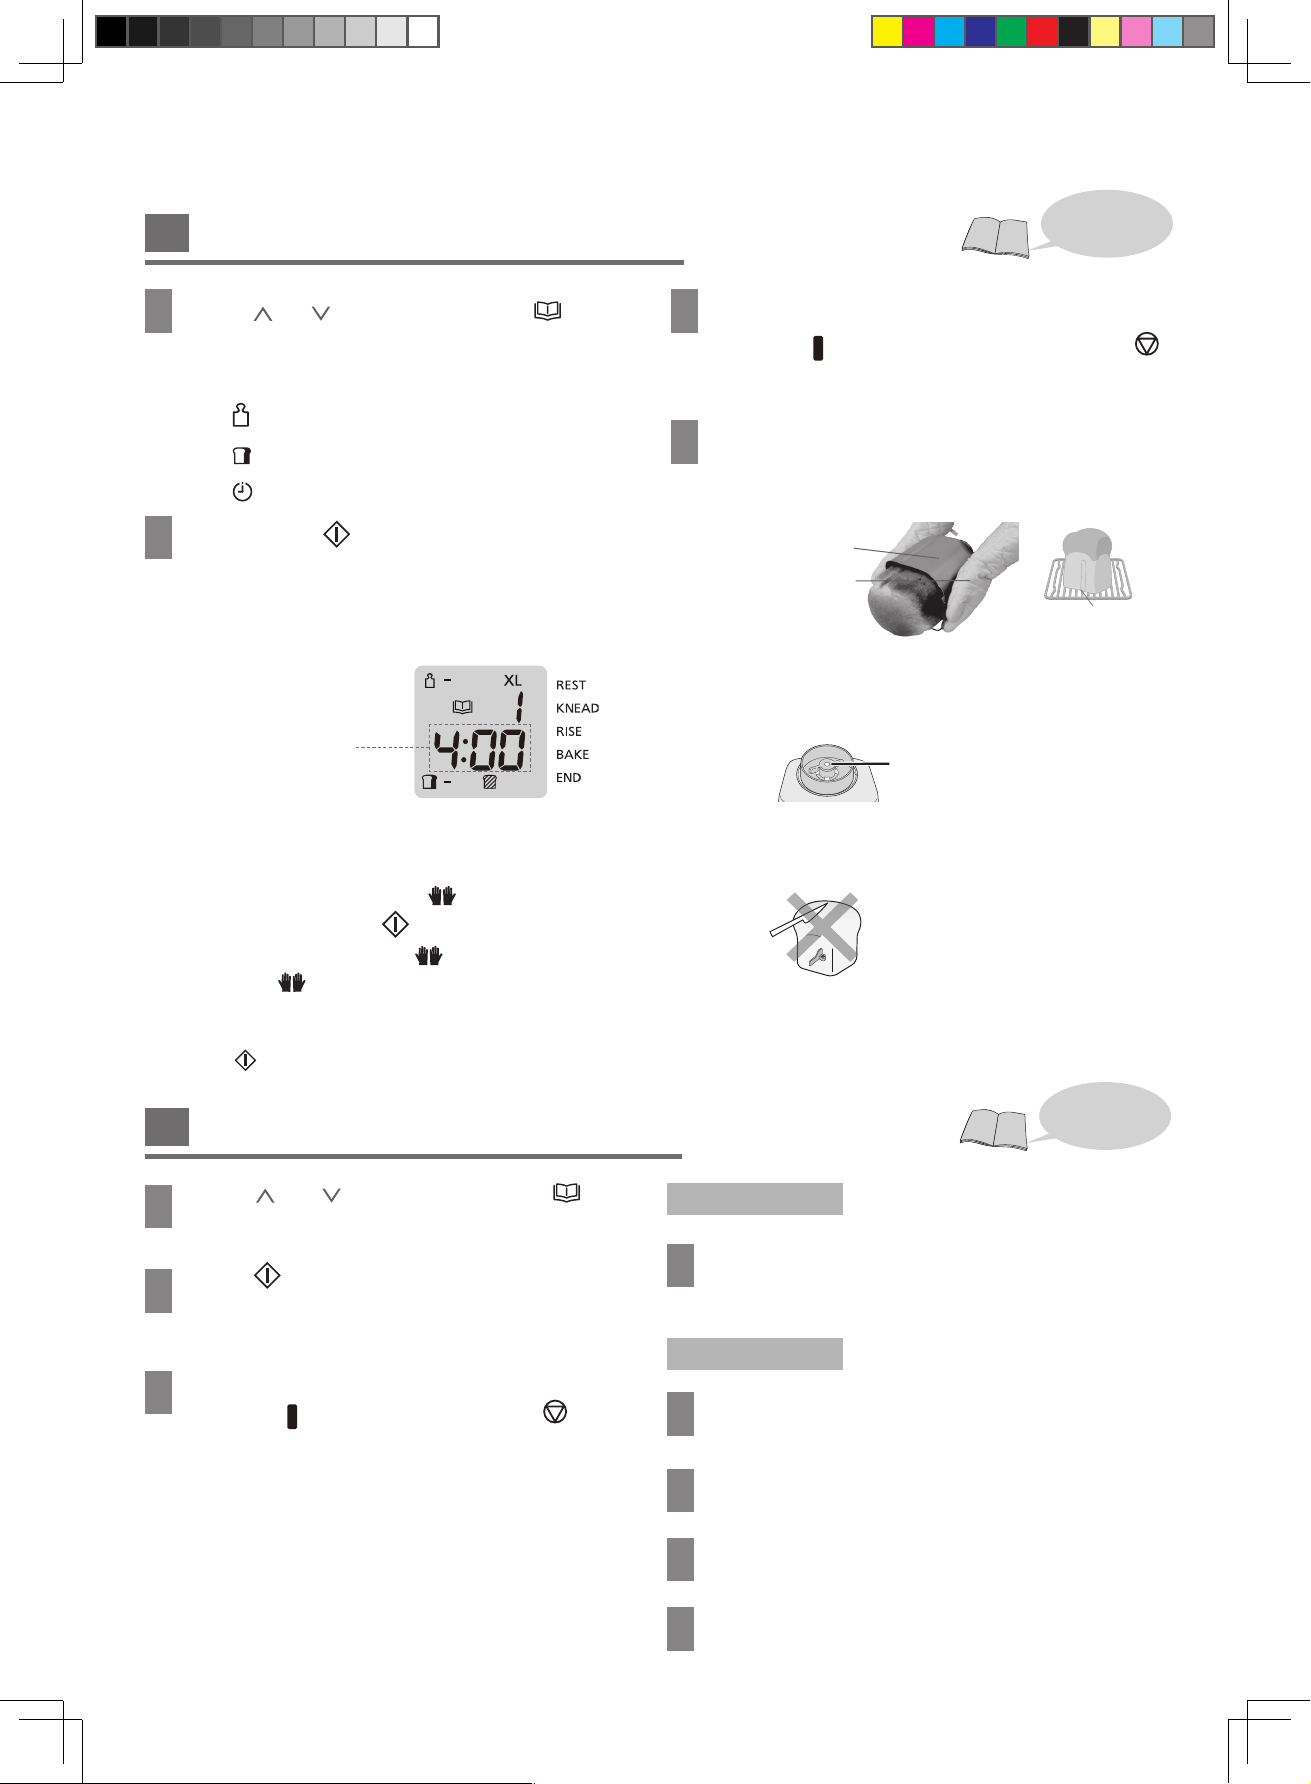
13
5
Press or
button in the
Menu ( ) bar to
select a bread menu.
Ɣ
Choose the options for the selected menu. (See P. 8, 10-11)
Bread Size
Crust colour
Delay timer
6
Press Start ( ) button to start the machine.
(The display shows when menu “1” is selected.)
Ɣ
Display shows the remaining time until the selected
program is complete.
Remaining time
Ɣ
Do manual operation when the beep sounds if you
select the certain menus.
(See P. 10 - 11, menus with
icon. )
After that, then press button again.
*
Complete the works while is flashing on the display.
When
stop flashing, display shows the remaining time.
*
Do not add ingredients after display shows remaining time.
*
Kneading will continue after a certain time without press
button.
7
When bread is ready (machine beeps 8 times and
the cube (
) near END flashes), press Stop ( )
button and unplug.
8
Remove the bread immediately by using dry
oven gloves and place it on a wire rack. (6)
Ɣ
Hold the handle with oven gloves and shake the bread out.
Ɣ
Moving the outside base shaft may damage the bread shape. (7)
Ɣ
Always remove the kneading blade before slicing bread. (8)
(8)
Baking Bread
*
The remaining time is changed depending on the room
temperature.
5
Press or
button in the
Menu ( ) bar to
select a dough menu.
6
Press button to start.
Ɣ
Display shows the remaining time until the program is
complete.
7
When dough is ready (machine beeps 8 times and
the cube (
) near END flashes), press button
and unplug.
Tips:
Timer is not available on doughs menus except Pizza.
Bread Dough
8
Shape the finished dough to your favourite shape
and allow it to rise until double size, then bake in
the oven.
Pizza Dough
8
Divide the dough with scraper and shape them
into balls.
9
Cover them with damp kitchen towel and leave it
for 10 minutes.
10
Shape into a flat round and make holes with a
fork.
11
Spread your favourite sauce and desired topping
then bake it in the oven.
Making Dough
(Bottom of bread pan)
Outside base
shaft of bread pan
(7)
(6)
Bread pan
Oven gloves
Make sure the blade has not
come out with the bread.
Method
Turn to P. 20-21 for
recipes.
Method
Turn to P. 22 - 23 for
recipes.
OI1_YR250 UK Pagination_16th——audit 20210107.indd 13 2021/4/12 21:01:01
14
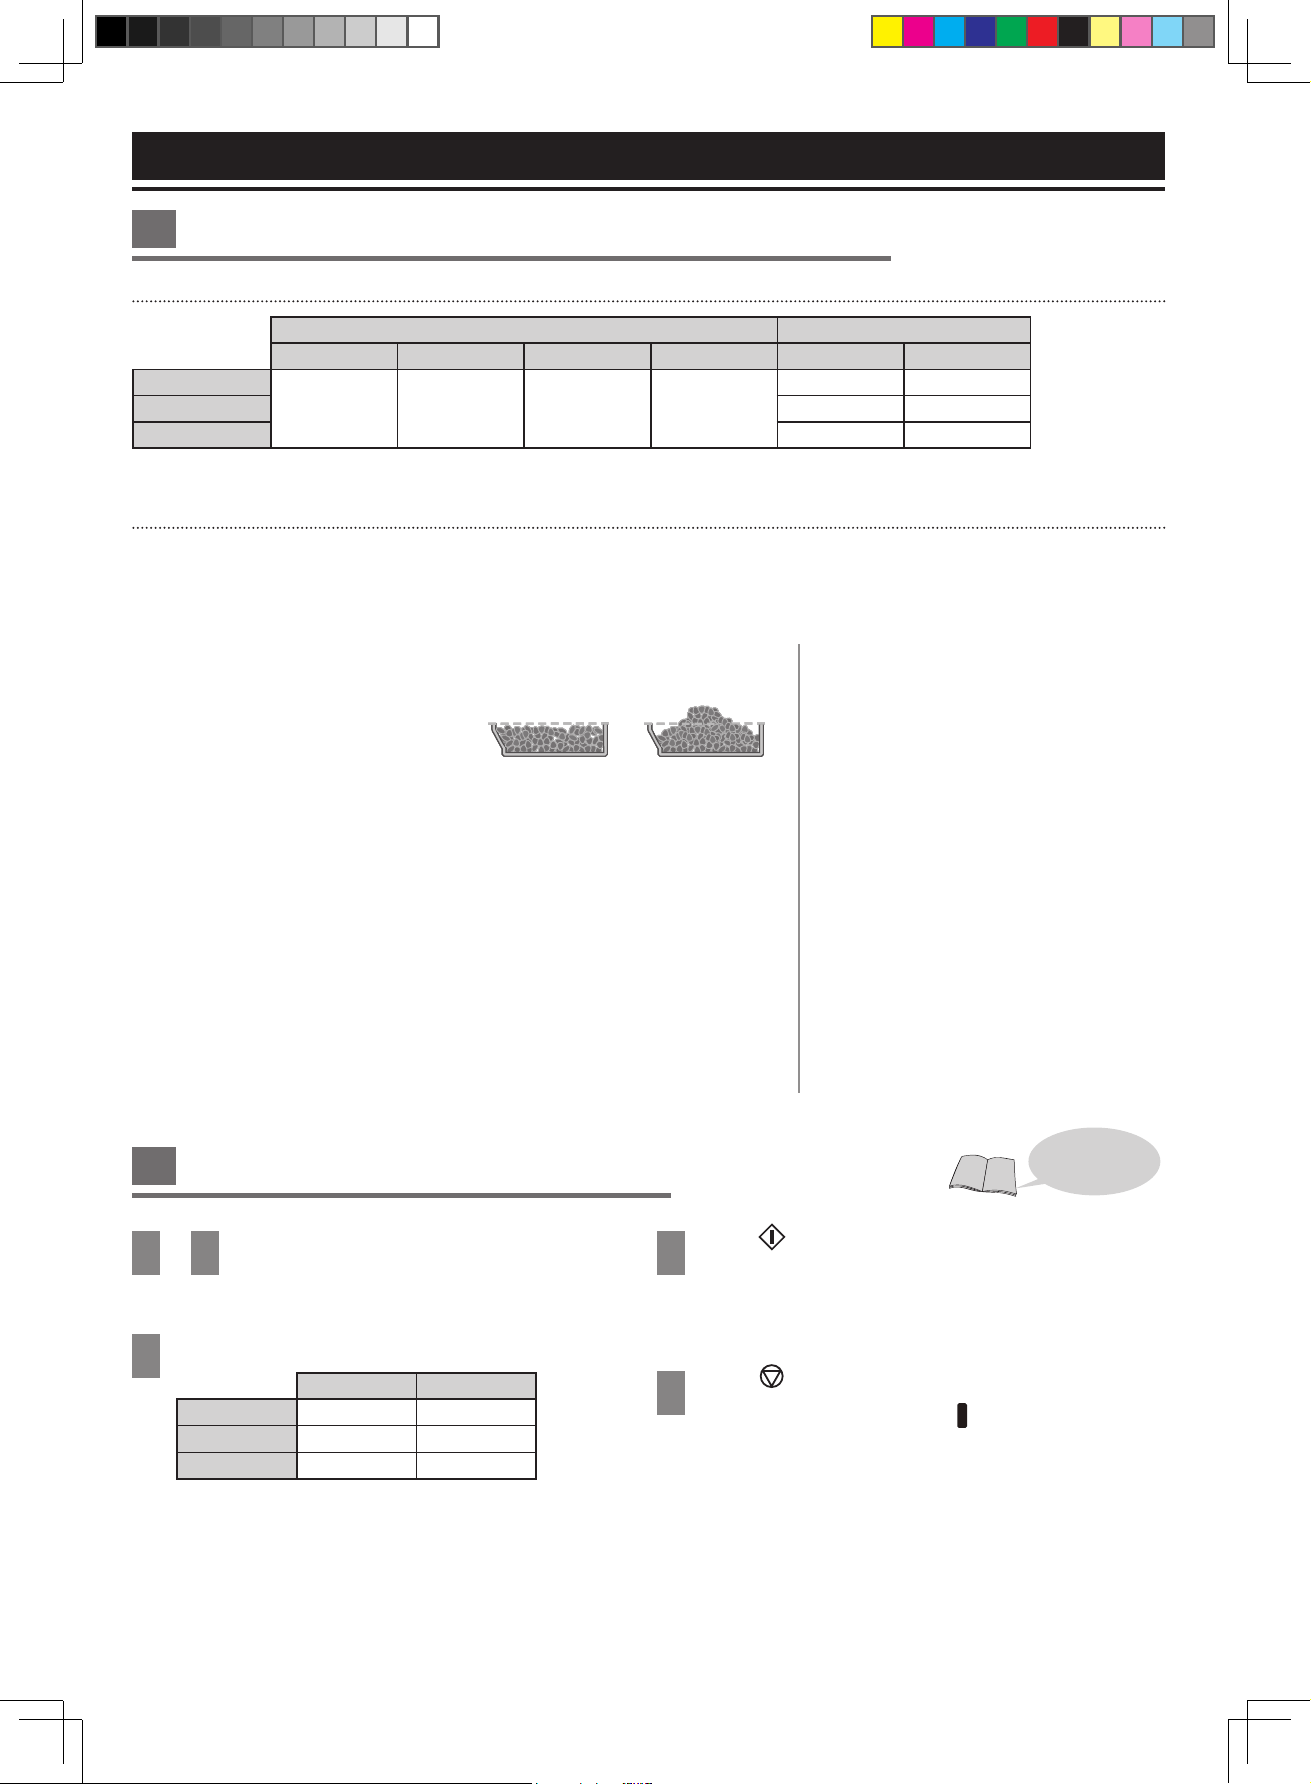
Dry / insoluble ingredients (Using raisin nut dispenser - add automatically)
→Place the extra ingredients in the raisin nut dispenser and set the machine.
→Do not overfill the raisin nut dispenser.
n
Dried fruits
Ɣ
Cut up roughly into approximate 5 mm cubes.
Ɣ
Sugar-coated ingredients may stick to the raisin nut dispenser and not fall into the bread pan.
n
Nuts, seeds
Ɣ
Chop finely.
Ɣ
Nuts impair the effect of gluten, so avoid using too much.
Ɣ
Using large, hard seeds may scratch the coating of the dispenser and bread pan.
n
Herbs
Ɣ
Use up to 1 – 2 tbsp of dried herbs. For fresh herbs, follow the instructions in the recipe.
n
Bacon, salami, olives, dry tomato
Ɣ
Sometimes oily ingredients may stick to the raisin nut dispenser and not fall into the bread pan.
Ɣ
Cut the bacon and the salami into 1 cm cubes.
Ɣ
Cut the olives into quarters.
Moist / viscous / soluble ingredients*
(Adding into the bread pan by hands - cannot be
placed in the raisin nut dispenser)
→ Place these ingredients together with the
others into the bread pan.
n
Fresh fruits, fruits pickled in alcohol,
vegetables
Ɣ
Only use quantities as in the recipe, as the
water content in the ingredients will affect
bread.
n
Cheese, chocolate
Ɣ
Cut the cheese into 1 cm cubes.
Ɣ
Chop chocolate finely.
* These ingredients cannot be placed in the
raisin nut dispenser as they would stick to it and
not fall into the bread pan.
Available Menu
Bread Dough
Basic Raisin %DVLF6WXႇHG Bread Mix Raisin Whole Wheat Raisin Basic Raisin Whole Wheat Raisin
SD-YR2540
Menu 3 Menu 4 Menu 6 Menu 9
Menu 20 Menu 22
SD-YR2550 Menu 19 Menu 21
SD-R2530 Menu 18 Menu 20
To make your flavoured bread, simply place additional ingredients in the raisin nut dispenser or bread pan.
Attention of ingredients
Follow the recipe / menu instructions for the quantities of each ingredients.
Otherwise,
Ɣ
The ingredients may scatter from bread pan to cause unpleasant smells and smoke.
Ɣ
The bread may not rise well.
Correct Incorrect
Additional Ingredients
(Dried fruits, nuts, bacon, cheese etc.)
Handling Instructions
Bread Mix & Bread Mix Raisin
1
—
4
See P. 12 of Preparations
5
Select the menu.
Bread Mix Bread Mix Raisin
SD-YR2540 Menu 5 Menu 6
SD-YR2550 Menu 5 Menu 6
SD-R2530 Menu 5 Menu 6
6
Press button to start.
Ɣ
Display shows the remaining time until the program is
complete.
7
Press button and remove bread when machine
beeps 8 times and the cube (
) near END flashes.
Tips:
The final outcome may differ depending on the actual bread mix
used. (There may be greater variation with wheat free bread
mixes.)
Method
Turn to P. 20 for
recipes.
OI1_YR250 UK Pagination_16th——audit 20210107.indd 14 2021/4/12 21:01:02
15
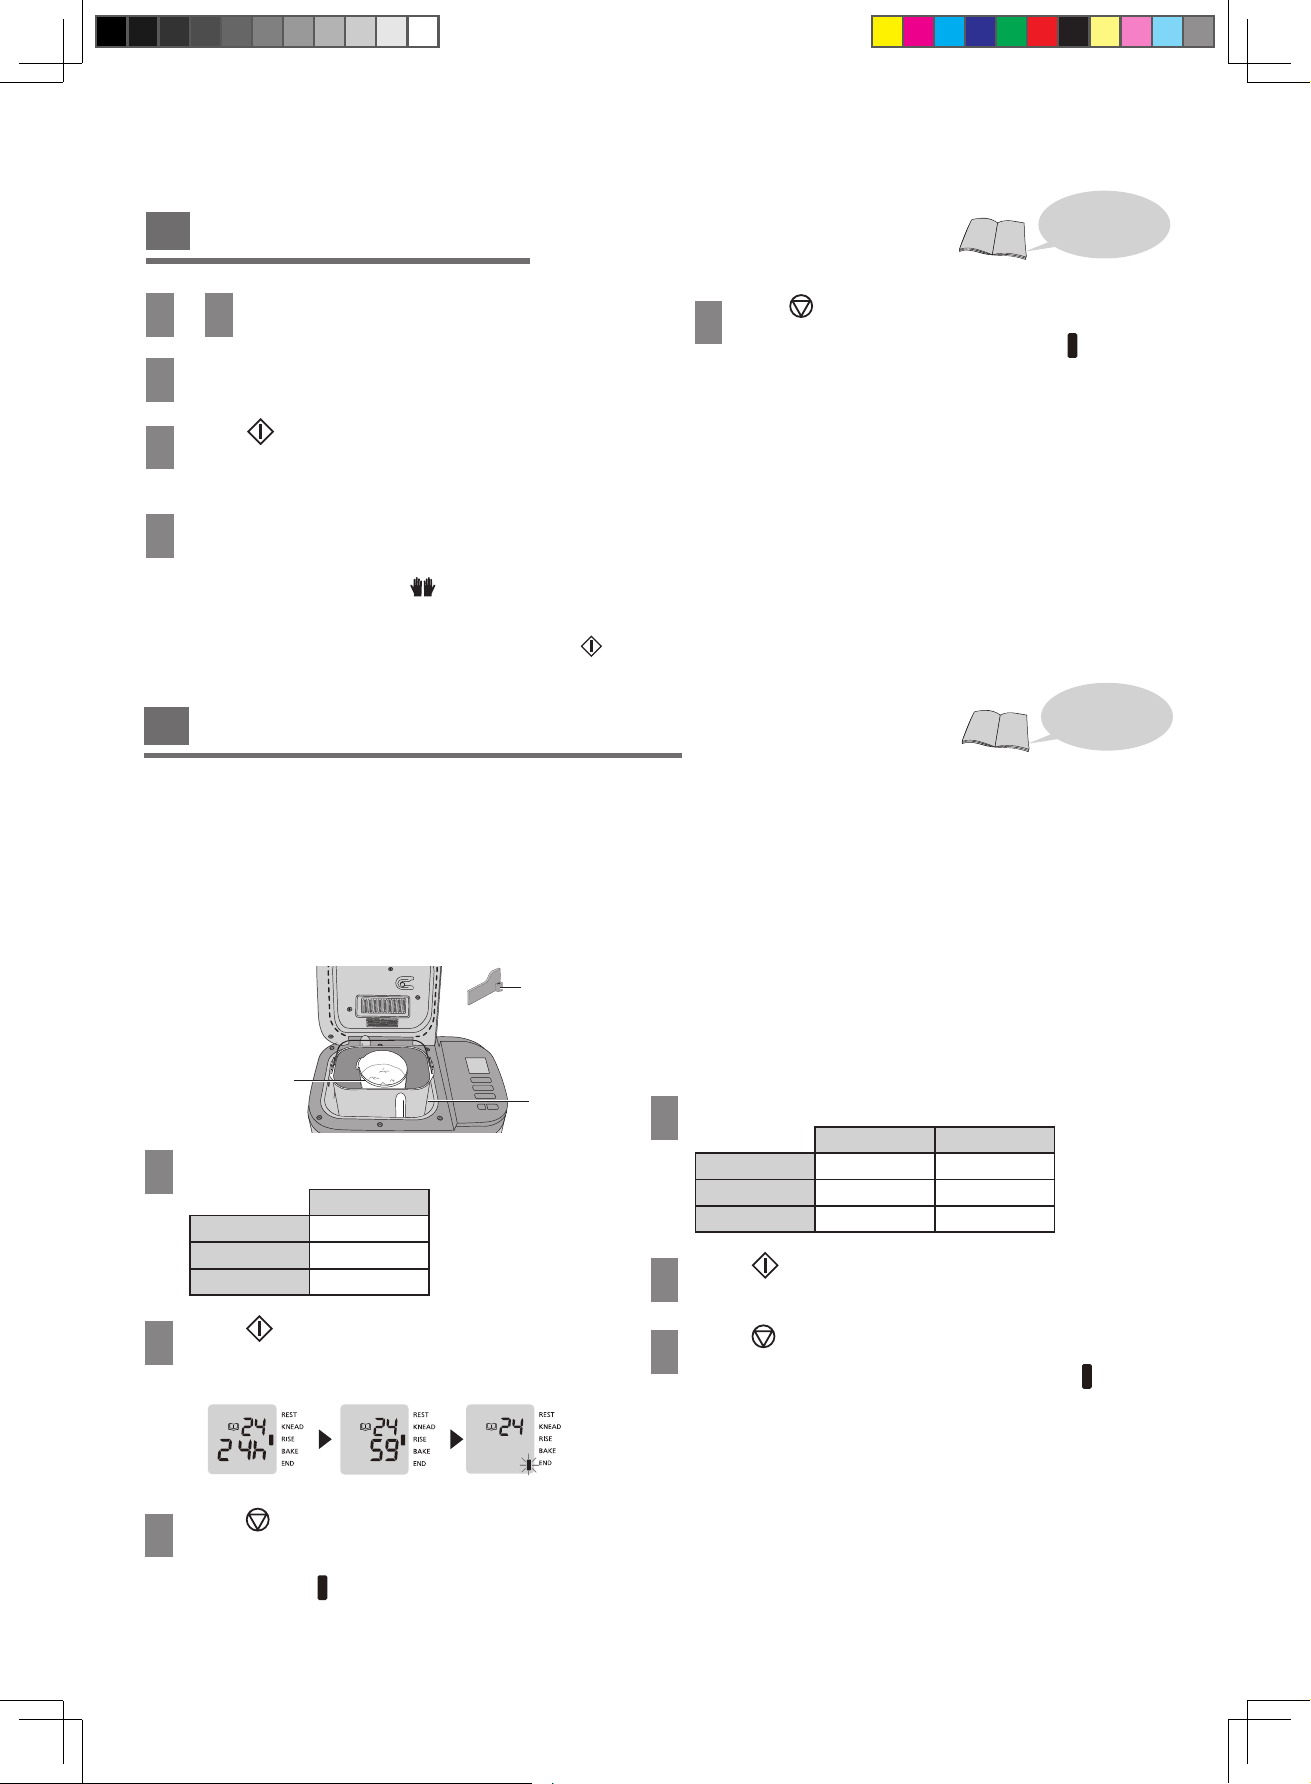
STAGE 1 Making Sourdough Starter
Preparations
➀
Mix all the ingredients well in the sourdough cup.
(Remove the kneading blade)
➁
Put the lid on the sourdough cup.
➂
Place the sourdough cup in the bread pan.
➃
Set the bread pan into the main unit, and plug the machine into
the socket.
1
Select the menu
Sourdough Starter
SD-YR2540 Menu 24
SD-YR2550 Menu 23
SD-R2530 Menu 22
2
Press button to start.
Ɣ
Display shows the remaining time until the program is
complete.
(Take SD-YR2540 display as an example)
3
Press button and remove the sourdough
cup immediately
when machine beeps 8 times
and the cube (
) near END flashes.
Ɣ
When you do not use it immediately, store it in the
refrigerator, but use up within 1 week.
Remove it
Sourdough cup
Bread pan
1
—
4
See P. 12 of Preparations
5
Select menu 10, choose crust colour.
6
Press button to start.
Ɣ
Display shows the remaining time until the beep sounds.
7
After about 55 minutes - 1 hour 5 minutes. Open
the lid when you hear the beep sound. Add the
additional butter while
“ ” is flashing. Close the
lid and restart.
Ɣ
Kneading will continue after 5 minutes without press
button.
Tips:
Ɣ
Timer is not available on this menu.
Ɣ
Do not add butter or extra ingredients after display shows remaining
time.
Ɣ
When adding extra ingredients such as raisins, add them with the
butter in step 7. (Use max. 150 g for ingredients)
To bake brioche in simple way.
Ɣ
Cut butter into 1 - 2 cm cubes and keep them in refrigerator.
Ɣ
Place butter with other ingredients in the beginning and follow step 5.
Ɣ
Skip step 7 process in this way. This Brioche is a little different
from the others.
Baking Brioche
8
Press button and remove bread when
machine beeps 8 times and the cube (
) near
END flashes.
Sourdough & Sourdough Dough
STAGE 2 Baking
/
Making Sourdough
Preparations
➀
Set the kneading blade into the bread pan.
➁
Pour a cup of sourdough starter into the bread pan.
➂
SD-YR2550 / SD-YR2540
1)
Place the ingredients in the bread pan according to the order of recipe.
2) Place the dry yeast in the yeast dispenser.
SD-R2530
1)
Place the ingredients “listed in stage 2” in the bread pan in the
IROORZLQJRUGHUIORXUĺVDOWĺGU\\HDVWNHHSDZD\IURPWKHVDOW
ĺZDWHUNHHSDZD\IURPWKHGU\\HDVWSRXUZDWHUDURXQGIORXU
➃
Set the bread pan into the main unit, and plug the machine into the
socket.
1
Select the menu
Sourdough Bread Sourdough Dough
SD-YR2540 Menu 13 Menu 23
SD-YR2550 Menu 13 Menu 22
SD-R2530 Menu 12 Menu 21
2
Press button to start.
Ɣ
Display shows the remaining time until the program is complete.
3
Press button and remove bread / dough,
when machine beeps 8 times and the cube (
) near
END flashes.
Tips:
Ɣ
Timer is available for baking sourdough bread (up to 9 hours).
Ɣ
Shape the finish dough and allow it to rise until doubled in size,
then bake in the oven.
To make or storage sourdough starter without failure.
Ɣ
Do not select a wrong menu.
Ɣ
Do not take out the sourdough cup until the program is complete.
Ɣ
Do not mix the new sourdough starter with old one.
Ɣ
If the sourdough starter is made well, it smells sour and like alcohol.
Ɣ
When the room temperature is over 30 °C, the sourdough starter
goes bad, and the bread does not turn out well.
(24 hours left) (59 minutes left) (QGFXEHÀDVKHV
Method
Turn to P. 21 for
recipes.
Method
Turn to P. 21, 23 for
recipes.
OI1_YR250 UK Pagination_16th——audit 20210107.indd 15 2021/4/12 21:01:02
16
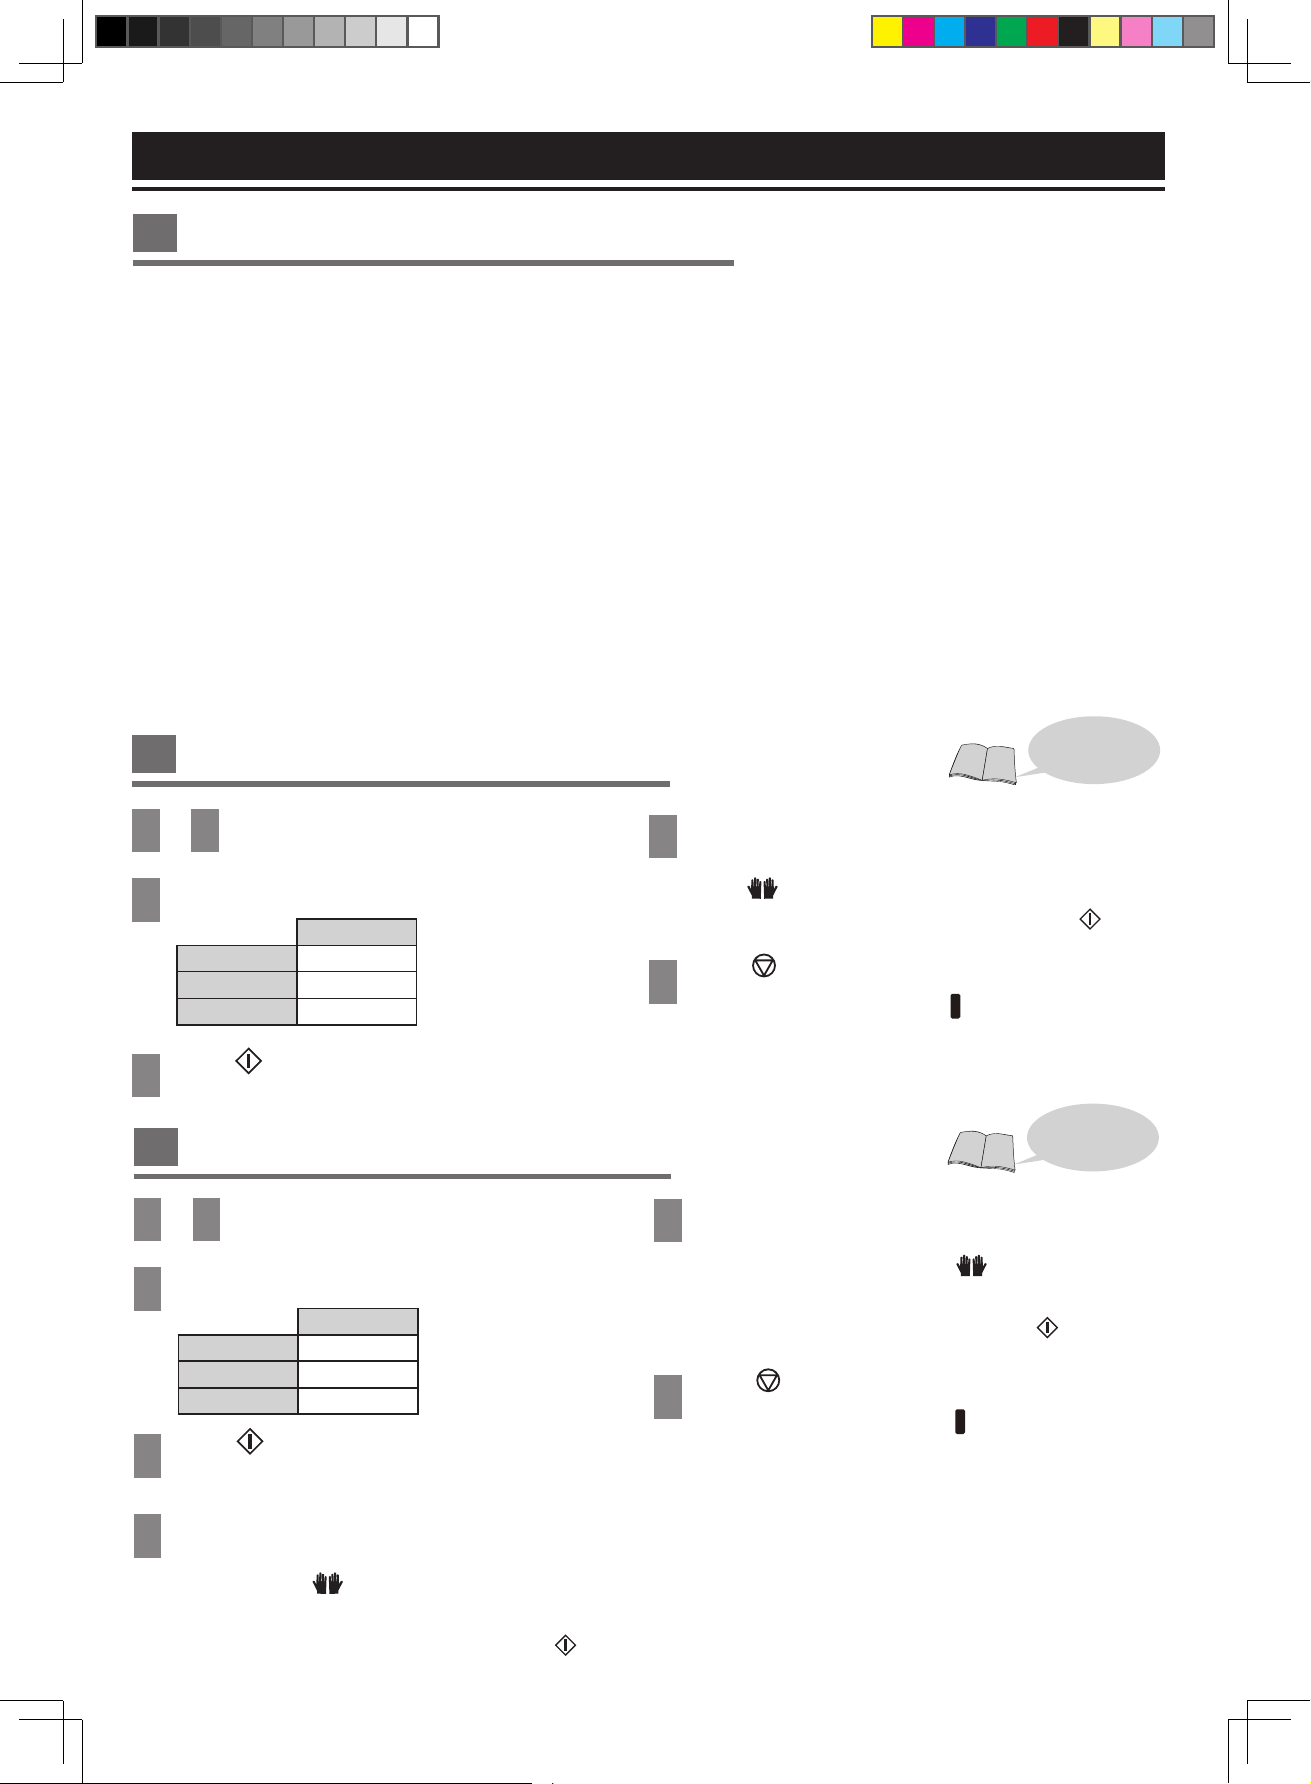
7
After about 6 minutes, open the lid when you hear the
beep sound. Scrape off the flour within 3 minutes
while
is flashing. Close the lid and restart.
Ɣ
Kneading will continue after 3 minutes without press button.
8
Press button and remove bread when machine
beeps 8 times and the cube (
) near End flashes.
Tips:
Use a rubber spatula to avoid damaging the bread pan.
Do not use the metal spatula.
0DNLQJJOXWHQIUHHEUHDGLVYHU\GLႇHUHQWIURPWKHQRUPDOZD\RISURGXFLQJEUHDG
It is very important if you are making gluten free bread for health reasons that you have consulted your doctor and follow the guidelines below.
This program has been developed especially for certain gluten free ingredients, therefore using your own mix may not produce such good results.
Gluten free bread cannot rise as much as a traditional bread. It will be of a denser consistency and lighter colour than normal bread.
When “gluten free” is selected, the details for each recipe must be followed carefully. (Otherwise, the bread may not turn out well.)
7KHUHDUHWZRW\SHVRIJOXWHQIUHHEDNLQJPL[WXUHVPL[WXUHVZLWKORZFRQWHQWRIJOXWHQDQGPL[WXUHVZKLFKGRQRWFRQVLVWRIZKHDWDQGFRQWDLQ
no gluten. If you have to pick one out using this baking program, please consult your doctor beforehand.
7KHEDNLQJUHVXOWVDQGEUHDG¶VDSSHDUDQFHPD\GLႇHUDFFRUGLQJWRWKHW\SHRIPL[2FFDVLRQDOO\DEUHDGPD\KDYHVRPHÀRXUUHPDLQLQJRQWKHVLGH
The wheat free mixes can produce more variable results.
Wait for the bread to cool before slicing it for the better performance.
The bread should be stored in a cool dry place and used within 2 days. If you will not be able to use up all the bread within that time it can be
put into freezer bags, in convenient sized portions, and frozen.
Warning for the users who use this program for health reasons:
When using the gluten free program, make sure to consult your doctor or the Coeliac Association and only use the
ingredients which are suitable for your health conditions.
Panasonic will not be responsible for any consequences resulting from ingredients that have been used without
professional consultation.
,WLVYHU\LPSRUWDQWWRDYRLGFURVVFRQWDPLQDWLRQZLWKÀRXUVWKDWFRQWDLQJOXWHQLIEUHDGLVEHLQJPDGHIRUGLHWDU\UHDVRQV3DUWLFXODUDWWHQWLRQ
must be paid to the cleaning of the bread pan and kneading blade as well as any utensils that are used. You must also ensure that the yeast used
contains no gluten.
Gluten Free Information
Baking Gluten Free Bread
1
—
4
See P. 12 of Preparations
5
Select the menu
Gluten Free Bread
SD-YR2540 Menu 15
SD-YR2550 Menu 14
SD-R2530 Menu 13
6
Press button to start.
Ɣ
Display shows the remaining time until the beep sounds.
1
—
4
See P. 12 of Preparations
5
Select the menu
Gluten Free Cake
SD-YR2540 Menu 16
SD-YR2550 Menu 15
SD-R2530 Menu 14
6
Press button to start.
Ɣ
Display shows the remaining time until the beep sounds.
7
After about 2 minutes, open the lid when you hear
the beep sound. Scrape off the flour within 3
minutes while
is flashing. Close the lid and
restart.
Ɣ
Kneading will continue after 3 minutes without press button.
Baking Gluten Free Cake
8
After about 12 minutes, open the lid when you
hear the beep sound. Scrape off the dough on the
sidewall of bread pan while
is flashing. Close
the lid and restart.
Ɣ
Baking will start after 3 minutes without press button.
9
Press button and remove cake when machine
beeps 8 times and the cube (
) near END flashes.
Tips
Ɣ
Use a rubber spatula to avoid damaging the bread pan. Do not use
metal spatula.
Ɣ
If you shake hard to remove cake from the bread pan, it will lose
shape.
Method
Turn to P. 22 for
recipes.
Method
Turn to P. 22 for
recipes..
Handling Instructions
OI1_YR250 UK Pagination_16th——audit 20210107.indd 16 2021/4/12 21:01:02
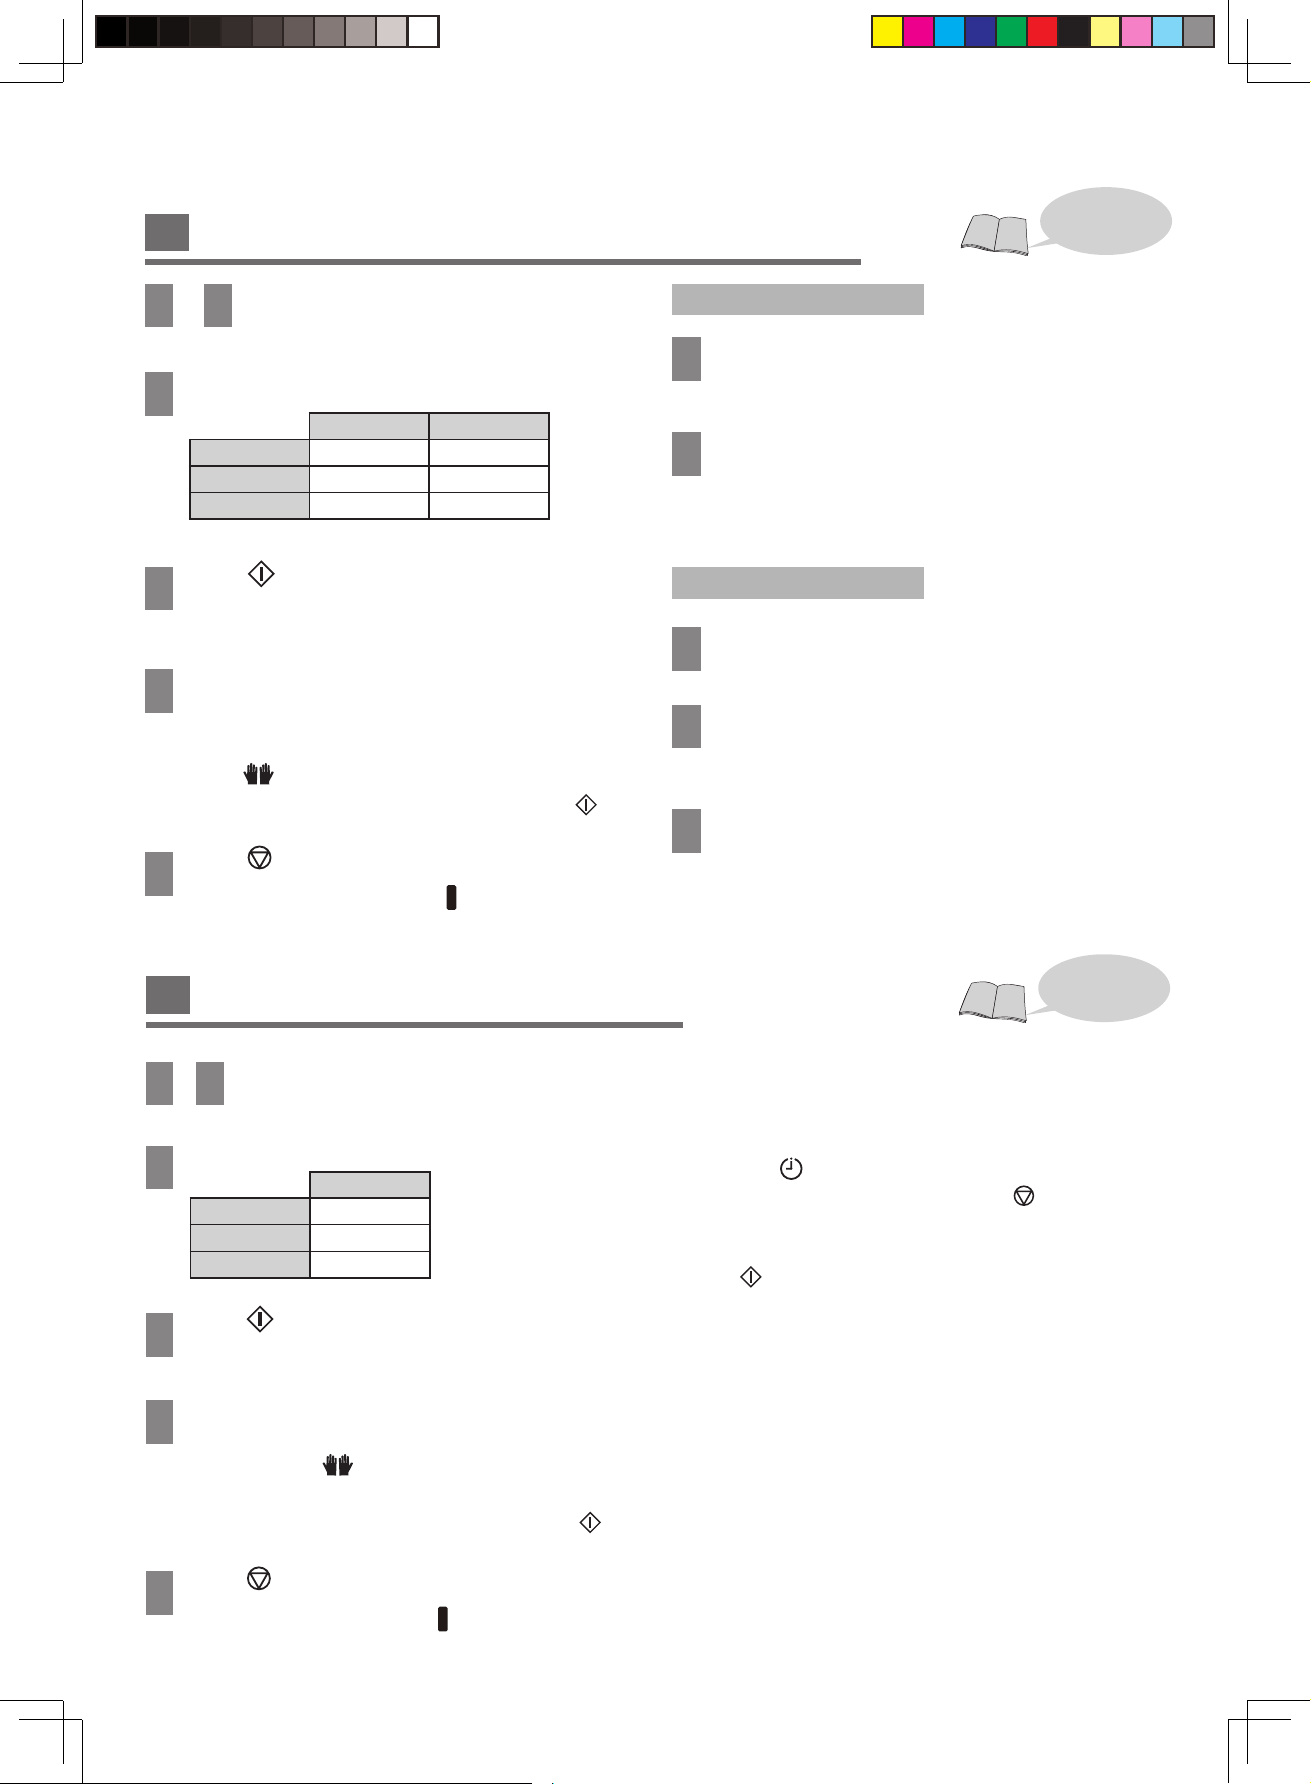
17
1
—
4
See P. 12 of Preparations
5
Select the menu
Gluten Free Pizza Gluten Free Pasta
SD-YR2540 Menu 17 Menu 18
SD-YR2550 Menu 16 Menu 17
SD-R2530 Menu 15 Menu 16
6
Press button to start.
Ɣ
Display shows the remaining time until the beep sounds.
7
After about 5 minutes for gluten free pizza, 2 minutes
for gluten free pasta, open the lid when you hear the
beep sound. Scrape off the flour within 3 minutes
while
is flashing. Close the lid and restart.
Ɣ
Kneading will continue after 3 minutes without press button.
8
Press button and remove dough when machine
beeps 8 times and the cube (
) near END flashes.
Gluten Free Pizza
9
Evenly divide the dough into two parts and press
out the divided dough using a spoon or a spatula
into about 20 cm circles on a greased baking tray.
10
Spread sauce and your favorite topping on the
dough and bake it in the oven.
Gluten Free Pasta
9
Wrap the dough in a cling film and rest for 1 hour
in the refrigerator.
10
Lightly sprinkle with starch or flour from the
recipe on the dough surface, then make it to your
desired shapes.
11
Boil them and enjoy it with your favourite sauce.
Tips:
Use the rubber spatula to avoid damaging the bread pan.
Do not use the metal spatula.
1
-
4
See P. 12 of Preparations
5
Select the menu
Cake
SD-YR2540 Menu 26
SD-YR2550 Menu 25
SD-R2530 Menu 24
6
Press button to start.
Ɣ
Display shows the remaining time until the beep sounds.
7
After about 12 minutes, open the lid when you
hear the beep sound. Scrape off the flour within 5
minutes while
is flashing. Close the lid and
restart.
Ɣ
Kneading will continue after 5 minutes without pressing button.
8
Press button and remove cake
when machine
beeps 8 times and the
cube ( )
near END flashes.
Additional Baking
Ɣ
If baking is not complete, follow the following method. (Additional
baking time can be made up to twice within 20 minutes while the
machine is still hot.
The timer will start again from 1 minute by
pressing the
button as required.)
Select the menu (Skip it if you have not pressed button in step 8)
Ύ
Set the baking time
Ɣ
It can be set to 1 - 20 minutes.
Ώ
Press button to start.
Ɣ
To discontinue baking, hold button.
Tips
Ɣ
Timer is not available on this menu. It only sets the duration of the
baking time.
Ɣ
Use a rubber spatula to avoid damaging the bread pan. Do not use
metal spatula.
Ɣ
If you shake hard to remove cake from the bread pan, it will lose
shape.
Baking Cake
Method
Turn to P. 22 for
recipes.
Method
Turn to P. 24 for
recipes.
Making Gluten Free Pizza / Gluten Free Pasta
OI1_YR250 UK Pagination_16th——audit 20210107.indd 17 2021/4/12 21:01:02
Ɣ
The Gluten Free Pizza dough will be thinner and crispier than
the traditional Pizza dough.
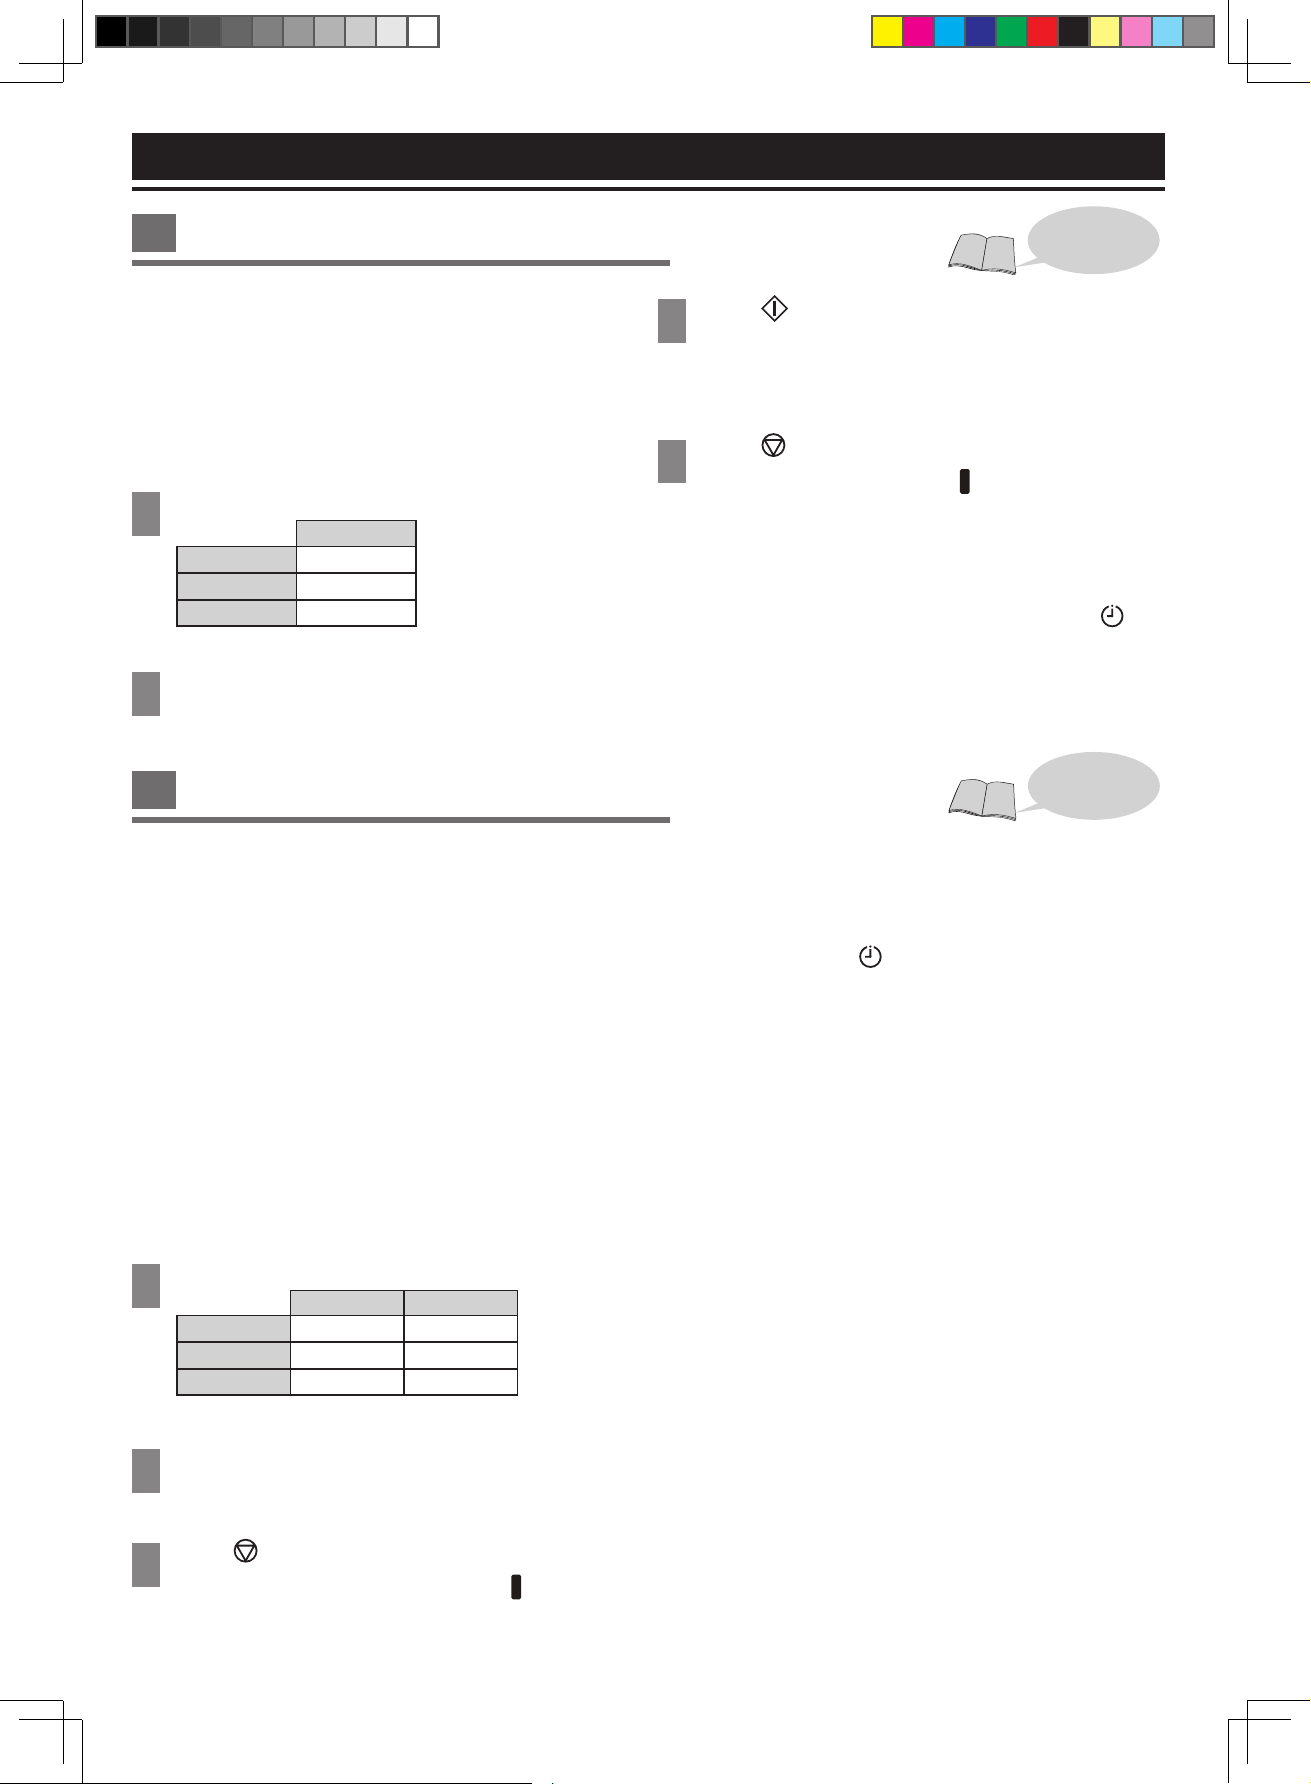
18
Making Jam / Compote
Bake Only
Preparations
➀
Prepare the mixed ingredients in the bowl according to the recipe.
➁
Remove the kneading blade and line the greaseproof paper around
the bread pan, then pour in the mixed ingredients.
➂
Set the bread pan into the main unit, and plug the machine into the
socket.
1
Select the menu
Bake Only
SD-YR2540 Menu 27
SD-YR2550 Menu 26
SD-R2530 Menu 25
2
Set the baking time
3
Press button to start.
Ɣ
Display shows the remaining time until the program is
complete.
4
Press button and remove cake when machine
beeps 8 times and the cube (
) near END flashes.
Additional Baking
Ɣ
If baking is not complete, repeat step 1 – 4. (Additional baking time
can be made up to twice within 50 minutes while the machine is still
hot. The timer will start again from 1 minute by pressing the
button as required.)
Tips:
Timer is not available on this menu. It only sets the duration of
the baking time.
Preparations for Jam-making
➀
Prepare the ingredients according to the recipe.
➁
Put the kneading blade into the bread pan.
➂
Place the ingredients into the pan in following order.
KDOIRIIUXLWVĺKDOIRIVXJDUĺUHPDLQGHURIIUXLWVĺUHPDLQGHURI
sugar.
➃
Set the bread pan into the main unit, and plug the machine into the
socket.
Preparations for Compote-making
➀
Prepare the ingredients according to the recipe. (Remove the
kneading blade.)
➁
Place the ingredients into the bread pan according to the order of
recipes, pour water over ingredients.
➂
Set the bread pan into the main unit, and plug the machine into the
socket.
1
Select the menu
Jam Compote
SD-YR2540
Menu 28 Menu 29
SD-YR2550
Menu 27 Menu 28
SD-R2530
Menu 26 Menu 27
2
Set the cooking time, then start the machine.
3
Press button and remove Jam / Compote when
machine beeps 8 times and the cube (
) near END
flashes.
Additional Cooking
Ɣ
,IWKHFRRNLQJLVQRWFRPSOHWHĺUHSHDWVWHS
(Additional cooking time can be made up to twice within
10 - 40 minutes while the machine is still hot. The timer will start again
from 1 minute by pressing
button as required.)
Tips:
Ɣ
Timer is not available on these menus. It only sets the duration of the
cooking time.
Ɣ
Strictly follow the recipe for the amount of each ingredients. Otherwise, the
jam does not set firm, to be boiled over or scorched as well as the com
pote
.
Tips for
Jam-making
Ɣ
It’s necessary to have an adequate amount of sugar, acid and pectin
WRPDNH¿UPVHWMDP
Ɣ
Fruits with a high level of pectin set easily. Fruits with less pectin do
not set well.
Ɣ
8VHIUHVKO\ULSHQHGIUXLWV2YHURUXQGHUULSHIUXLWVGRQRWVHW¿UPO\
Ɣ
The recipes in this instructions make soft set jams due to using less
sugar.
Ɣ
When cooking time is short, fruit bits can remain partially and the jam
may become watery.
Ɣ
Jam will continue to set as it cools. Be careful not to over cook.
Ɣ
3XWWKH¿QLVKHGMDPLQWRWKHFRQWDLQHUDVVRRQDVSRVVLEOH7DNHFDUH
not to burn when you take out jam.
Ɣ
Jam can be burned if it is left in the bread pan.
Ɣ
Store the jam in a cool, dark place. Due to the lower levels of sugar
the shelf life is not as long as shop bought varieties. Once open,
refrigerate and consume shortly after opening.
Method
Turn to P. 24 for
recipes.
Method
Turn to P. 24 for
recipes.
Handling Instructions
OI1_YR250 UK Pagination_16th——audit 20210107.indd 18 2021/4/12 21:01:03
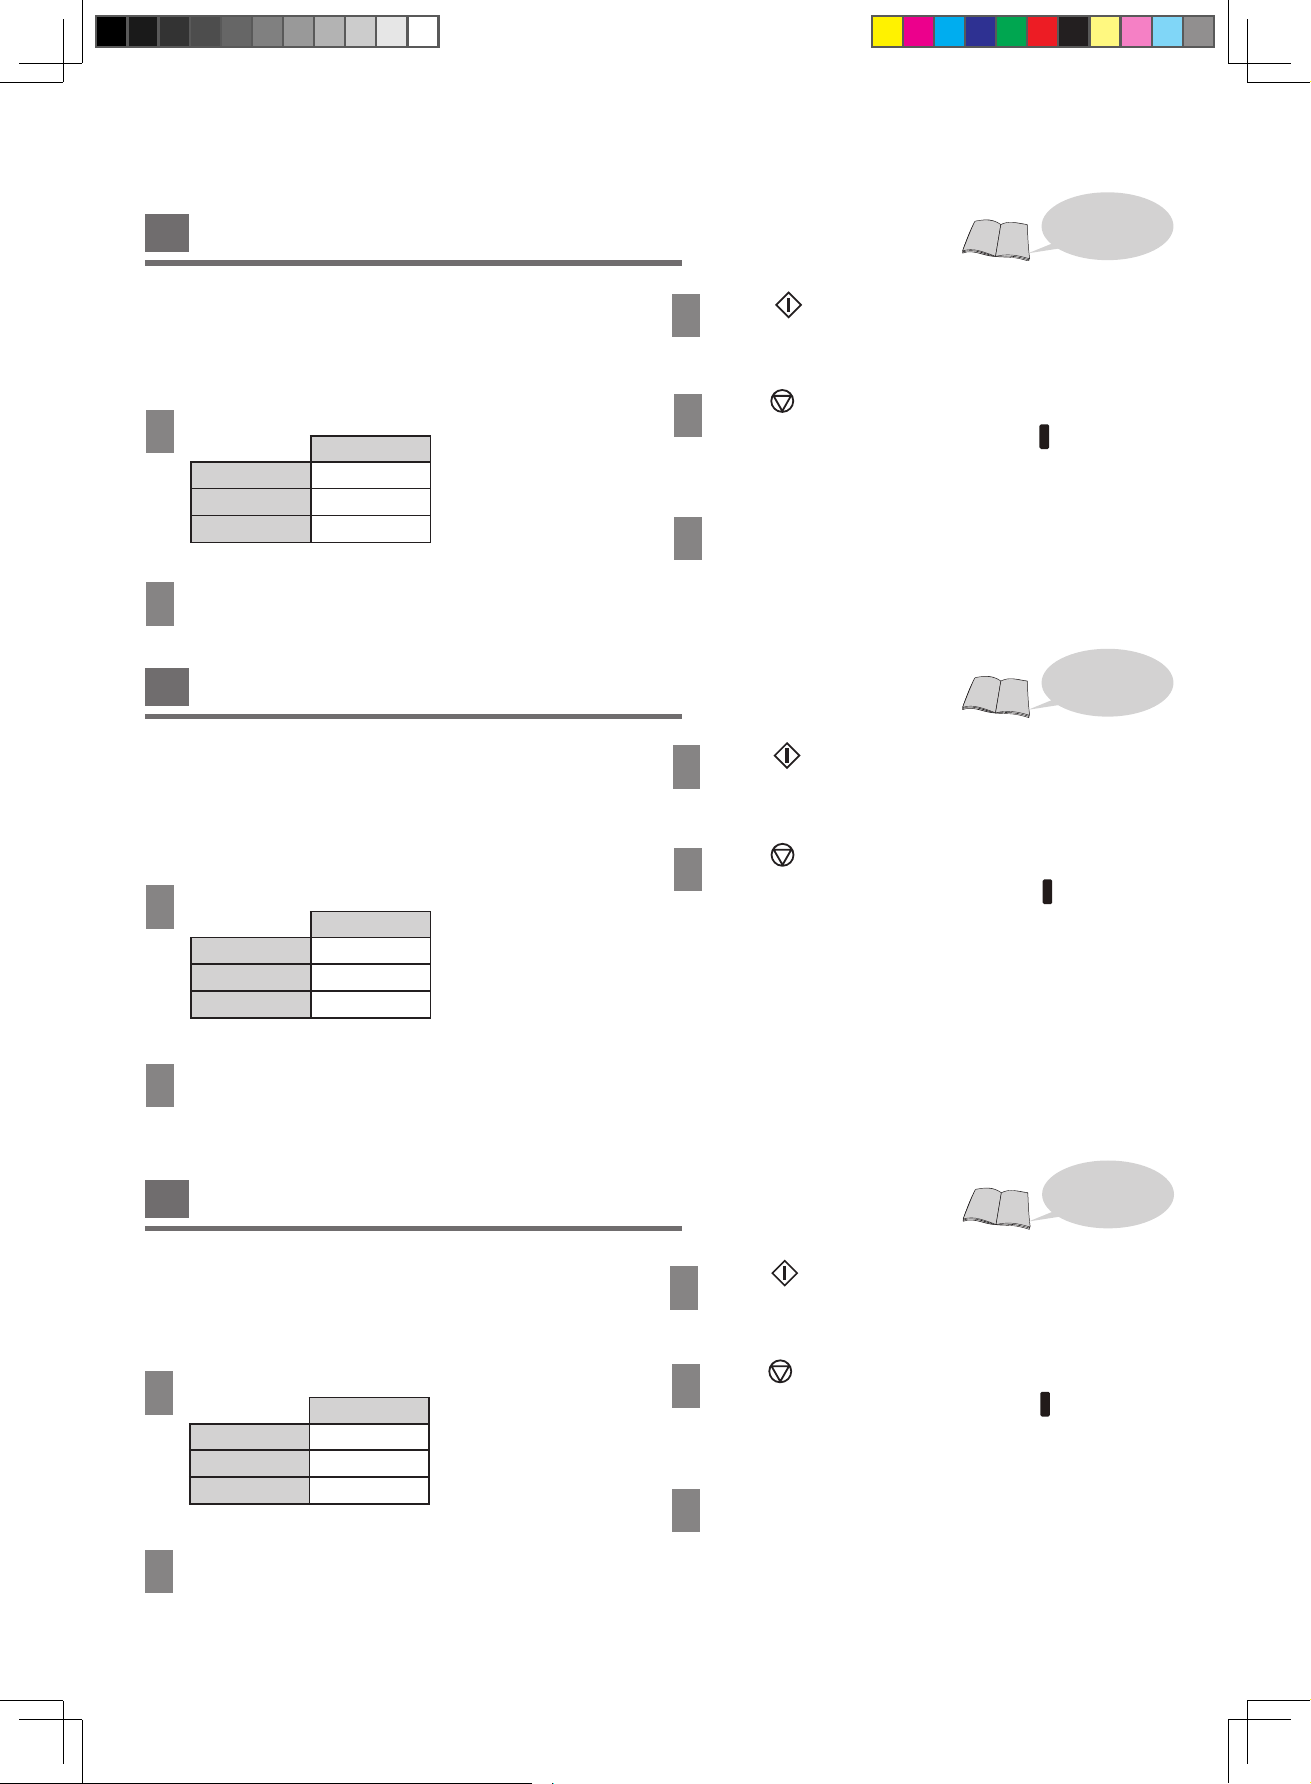
19
Cake Kneading
Bread Kneading
Rise
Preparations
➀
Remove the bread pan and set the kneading blade.
➁
Place the measured ingredients in the bread pan.
➂
Return the bread pan to the main unit. Close the lid and plug in.
1
Select the menu
Cake Kneading
SD-YR2540 Menu 30
SD-YR2550 Menu 29
SD-R2530 Menu 28
2
Set the kneading time (Default: 20 minutes)
3
Press button to start.
Ɣ
Display shows the remaining time until the program is complete.
4
Press button and remove the dough
when
machine beeps 8 times and the cube
( ) n
ear END
flashes.
5
Put it into cake mold, then bake in a preheated oven.
Tips:
Use a rubber spatula to avoid damaging the bread pan. Do not
use metal spatula.
Preparations
➀
Remove the bread pan and set the kneading blade.
➁
Place the measured ingredients in the bread pan.
➂
Return the bread pan to the main unit. Close the lid and plug in.
1
Select the menu
Bread Kneading
SD-YR2540 Menu 31
SD-YR2550 Menu 30
SD-R2530 Menu 29
2
Set the kneading time
Ɣ
Please set the time according to the bread dough which is
used for primary fermentation. Default: 20 minutes
3
Press button to start.
Ɣ
Display shows the remaining time until the beep sounds.
4
Press button and remove the dough
when
machine beeps 8 times and
the cube ( ) near END
flashes.
Tips
Ɣ
Rest for over 20 minutes before the next kneading starts.
Ɣ
For the case of hard dough or much amount of dough, “U50
”
may
appear on the display. Leave a little time to restart the next kneading.
The amount of flour that can be used is up to 400 - 600 g.
Preparations
➀
Remove the kneading blade and place the dough into the bread pan.
➁
Return the bread pan to the main unit. Close the lid and plug in.
1
Select the menu
Rise
SD-YR2540 Menu 32
SD-YR2550 Menu 31
SD-R2530 Menu 30
2
Set the time
Ɣ
Use the primary fermentation of kneaded dough. Set the time
according to the bread dough. Default: 30 minutes
3
Press button to start.
Ɣ
Display shows the remaining time until the program is complete
.
4
Press button and remove the dough
when
machine beeps 8 times and
the cube ( ) near END
flashes.
5
Shape the finished dough and allow it to rise in
the oven, then bake.
Method
Turn to P. 25 for
recipes.
Method
Turn to P. 25 for
recipes.
Method
Turn to P. 25 for
recipes.
OI1_YR250 UK Pagination_16th——audit 20210107.indd 19 2021/4/12 21:01:03
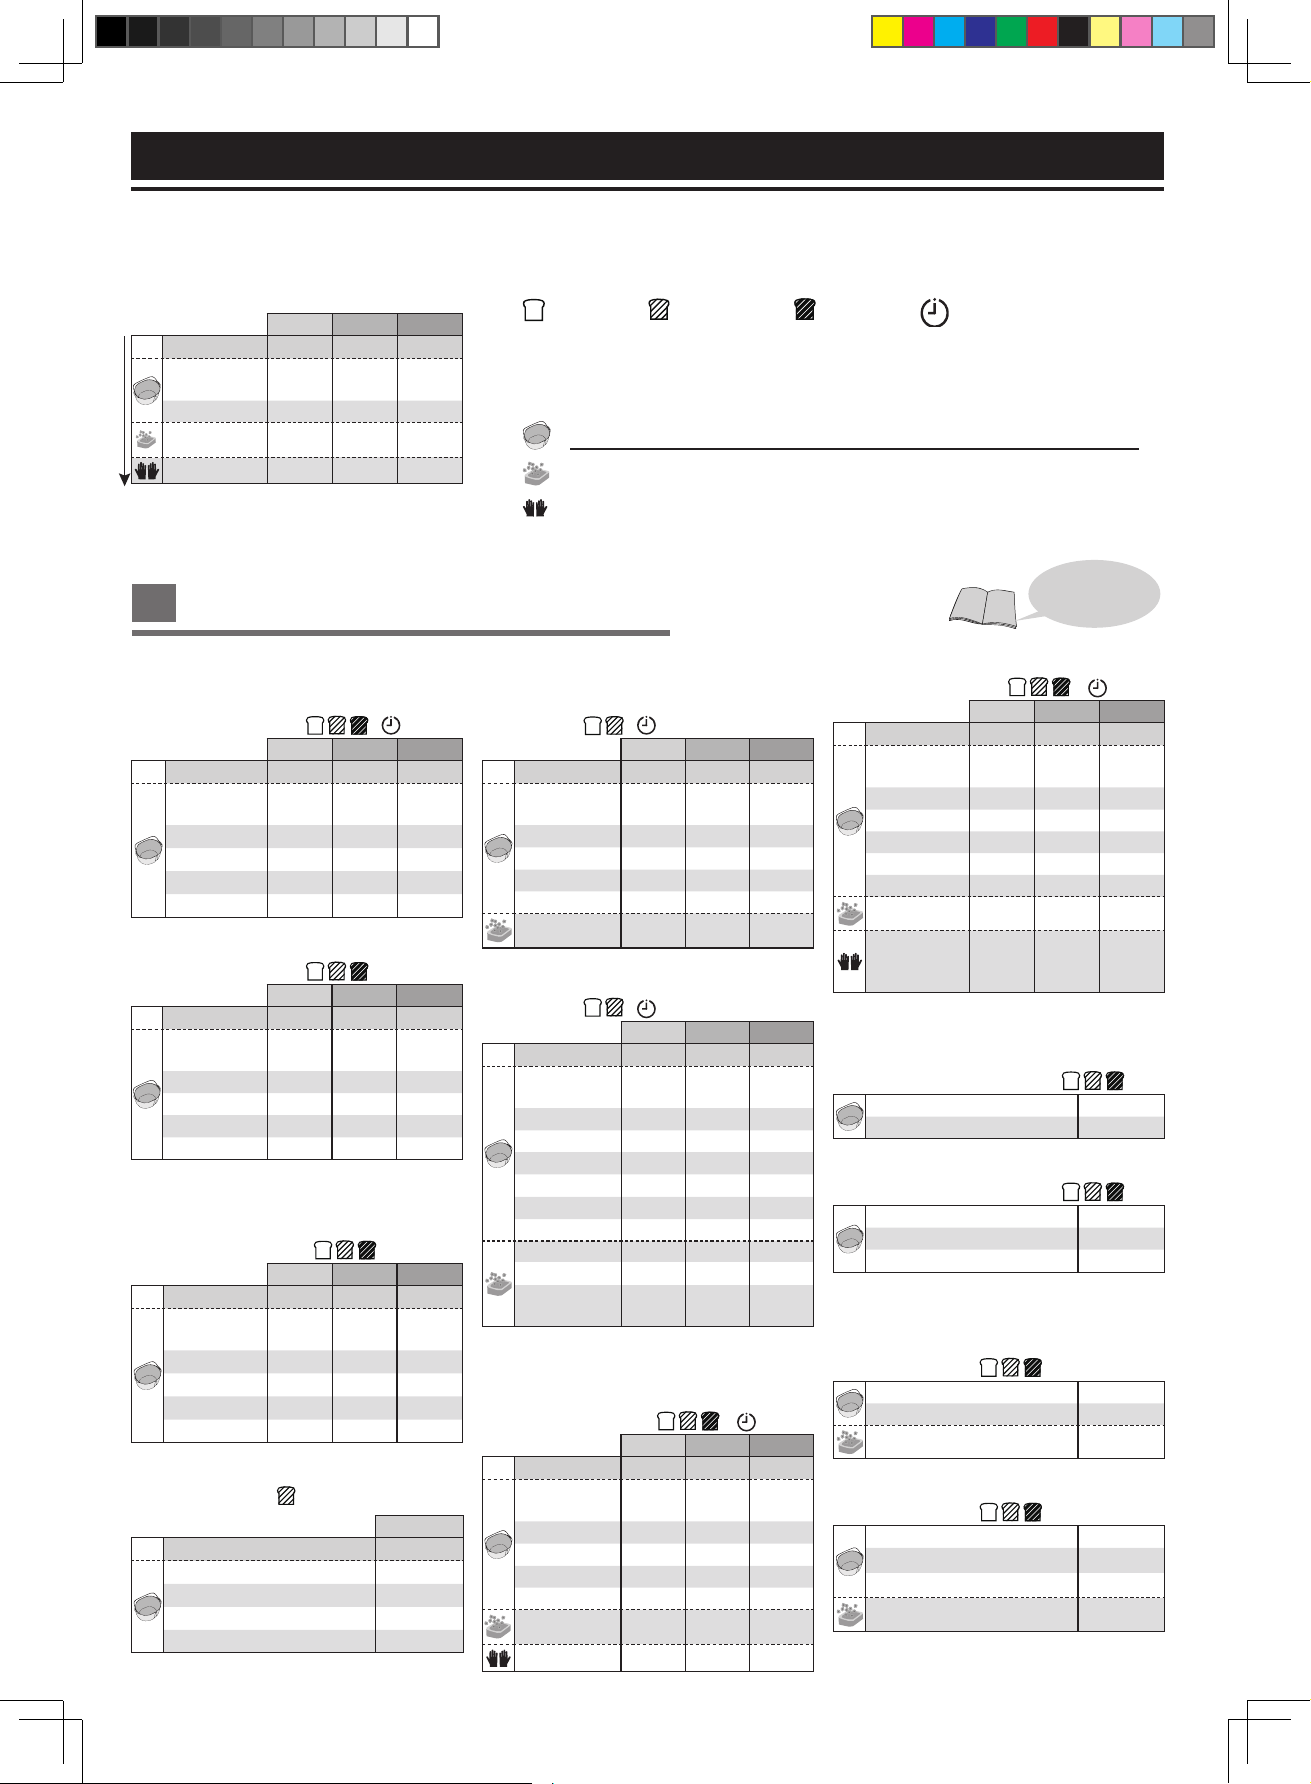
20
Example
Recipe Name
Menu No.+Total process time + Option icon
M L XL
ӹ
Dry yeast 2 tsp 2 tsp 2½ tsp
Strong white
bread flour
400 g 500 g 600 g
Eggs (L), beaten
1 1 2
Sunflower seeds
50 g 65 g 75 g
Cheese
50 g 65 g 75 g
Basic
White Loaf
Menu 1 (4 h – 4 h 5 min)
M L XL
ӹ
Dry yeast 1 tsp 1 tsp 1¼ tsp
Strong white
bread flour
400 g 500 g 600 g
Butter
20 g 30 g 40 g
Sugar 1 tbsp 1½ tbsp 2 tbsp
Salt 1½ tsp 1½ tsp 2 tsp
Water 280 mL 340 mL 400 mL
Milk Loaf
Menu 1 (4 h – 4 h 5 min)
M L XL
ӹ
Dry yeast 1 tsp 1 tsp 1¼ tsp
Strong white
bread flour
400 g 500 g 600 g
Butter
20 g 30g 40 g
Sugar 1 tbsp 1½ tbsp 2 tbsp
Salt 1½ tsp 1½ tsp 2 tsp
Milk 290 mL 360 mL 430 mL
Basic Rapid
Rapid White Loaf
Menu 2 (1 h 55 min – 2 h)
M L XL
ӹ
Dry yeast 2 tsp 2 tsp 2½ tsp
Strong white
bread flour
400 g 500 g 600 g
Butter
20 g 30 g 40 g
Sugar 1 tbsp 1½ tbsp 2 tbsp
Salt 1½ tsp 1½ tsp 2 tsp
Water 280 mL 350 mL 420 mL
Italian
Menu 2 (1 h 55 min)
M
ӹ
Dry yeast 2 tsp
Strong white bread flour
400 g
Olive oil
1½ tbsp
Salt 1½ tsp
Water 260 mL
Basic Raisin
Raisin Loaf
Menu 3 (4 h )
M L XL
ӹ
Dry yeast 1 tsp 1 tsp 1¼ tsp
Strong white
bread flour
400 g 500 g 600 g
Butter
20 g 30 g 40 g
Sugar 1 tbsp 1½ tbsp 2 tbsp
Salt 1½ tsp 1½ tsp 2 tsp
Water 280 mL 340 mL 400 mL
Raisins *1
80 g 100 g 120 g
5 Seeded Bread Loaf
Menu 3 (4 h )
M L XL
ӹ
Dry yeast 1 tsp 1 tsp 1¼ tsp
Strong white
bread flour
400 g 475 g
550 g
Butter
20 g
30 g 40 g
Sugar 1 tbsp 1½ tbsp 2 tbsp
Salt 1 tsp 1½ tsp 2 tsp
Sesame seeds 1 tbsp 1½ tbsp 2 tbsp
Poppy seeds 1 tbsp 1½ tbsp 2 tbsp
Water 280 mL 330 mL 380 mL
Linseeds 1 tbsp 1½ tbsp 2 tbsp
Pumpkin seeds 1 tbsp 1½ tbsp 2 tbsp
Sunflower
seeds
1 tbsp 1½ tbsp 2 tbsp
Basic Stuffed
Bacon and Cheese
Menu 4 (4 h – 4 h 5 min)
M L XL
ӹ
Dry yeast 1 tsp 1 tsp 1¼ tsp
Strong white
bread flour
400 g 500 g 580 g
Butter
20 g 30 g 40 g
Sugar 1 tbsp 1½ tbsp 2 tbsp
Salt 1½ tsp 1½ tsp 2 tsp
Water 280 mL 350 mL 400 mL
Cooked bacon *1
50 g 65 g 75 g
Cheese *1
50 g 65 g 75 g
Sundried Tomato, Olive and Tomato Juice
Menu 4 (4 h – 4 h 5 min)
M L XL
ӹ
Dry yeast 1 tsp 1 tsp 1¼ tsp
Strong white
bread flour
400 g 500 g
580 g
Butter
20 g 30 g 40 g
Sugar 1 tbsp 1½ tbsp 2 tbsp
Salt 1½ tsp 1½ tsp 2 tsp
Water 140 mL 175 mL 200 mL
Tomato juice 140 mL 175 mL 200 mL
Olive
70 g 85 g 100 g
Sundried
tomatoes in oil,
chopped
30 g 40 g 50 g
Bread Mix
Bread Mix
Menu 5 (2 h 30 min - 2 h 35 min)
Bread mix flour *2
500 g
Water *3 300 mL
Vegetable Juice Bread
Menu 5 (2 h 30 min - 2 h 35 min)
Bread mix flour *2
500 g
Water *4 150 mL
Vegetable juice *4 150 mL
Bread Mix Raisin
Bread Mix Raisin
Menu 6 (2 h 30 min)
Bread mix flour *2
500 g
Water *3 300 mL
Raisins *1
100 g
Matcha Sweet Chestnut Loaf
Menu 6 (2 h 30 min)
Bread mix flour *2
500 g
Matcha
10 g
Water *3 300 mL
Sweet chestnut *1
100 g
Recipes
Bread Recipes
The options of each recipe and necessary operation are indicated as the
following icons.
Option icon
Light crust Medium crust Dark crust
Delay timer
Necessary operation icon
ӹ
SD-YR2550 / SD-YR2540:
Place measured dry yeast into yeast dispenser.
SD-R2530:
Place measured dry yeast into bread pan first.
Place measured ingredients into bread pan in the order listed in the recipe.
Add additional ingredients into raisin nut dispenser.
Do manual operation (such as adding extra ingredients, scraping the flour
from sidewall of bread pan) when the beep sounds.
Abbreviation:
tsp = tea spoon; tbsp = table spoon
Egg (L) = Egg in large size; Egg (M) = Egg in medium size.
Method
Turn to P. 12 - 15 for
handling instructions.
OI1_YR250 UK Pagination_16th——audit 20210107.indd 20 2021/4/12 21:01:03
21
Whole Wheat
Wholemeal Loaf 100%
Menu 7 (5 h)
M L XL
ӹ
Dry yeast 1 tsp 1 tsp 1¼ tsp
Strong wholemeal
bread flour
400 g 500 g 600 g
Butter
20 g 30 g 40 g
Sugar 1 tbsp 1½ tbsp 2 tbsp
Salt 1½ tsp 1½ tsp 2 tsp
Water 280 mL 350 mL 420 mL
Oat and Bran Loaf
Menu 7 (5 h)
L
ӹ
Dry yeast 1 tsp
Strong white bread flour
400 g
Bran
50 g
Porridge oats
50 g
Oil
2 tbsp
Sugar 1½ tsp
Salt 1¼ tsp
Water 350 mL
Whole Wheat Rapid
Whole Wheat Rapid
Menu 8 (3 h)
M L XL
ӹ
Dry yeast 1½ tsp 1½ tsp 2 tsp
Strong
wholemeal
bread flour
400 g 500 g 600 g
Butter
20 g 30 g 40 g
Sugar 1 tbsp 1½ tbsp 2 tbsp
Salt 1½ tsp 1½ tsp 2 tsp
Water 280 mL 350 mL 420 mL
Rapid Wholemeal Loaf 50%
Menu 8 (3 h)
M L XL
ӹ
Dry yeast 1½ tsp 1½ tsp 2 tsp
Strong
wholemeal
bread flour
200 g 250 g 300 g
Strong white
bread flour
200 g 250 g 300 g
Butter
20 g 30 g 40 g
Sugar 1 tbsp 1½ tbsp 2 tbsp
Salt 1½ tsp 1½ tsp 2 tsp
Water 300 mL 370 mL 430 mL
Whole Wheat Raisin
Whole Wheat Raisin
Menu 9 (5 h)
M L XL
ӹ
Dry yeast 1 tsp 1 tsp 1¼ tsp
Strong
wholemeal
bread flour
400 g 500 g 600 g
Butter
20 g 30 g 40 g
Sugar 1 tbsp 1½ tbsp 2 tbsp
Salt 1½ tsp 1½ tsp 2 tsp
Water 280 mL 350 mL 420 mL
Raisins *1
80 g 100 g
120 g
Maple and Pecan Nut Loaf
Menu 9 (5 h)
M
ӹ
Dry yeast 1 tsp
Strong wholemeal bread flour
200 g
Strong white bread flour
200 g
Butter
20 g
Maple syrup 3 tbsp
Salt 1 ½ tsp
Water 280 mL
Pecan nuts *1
75 g
Brioche
Basic Brioche
Menu 10 (3 h 30 min)
ӹ
Dry yeast 1¼ tsp
Strong white bread flour
400 g
Butter *5
60 g
Sugar
50 g
Skimmed milk powder 2 tbsp
Salt 1½ tsp
Mixture / beat 2 eggs (M) + 2
egg yolk + water
270 mL
Butter *6
80 g
Panettone
Menu 10 (3 h 30 min)
ӹ
Dry yeast 1½ tsp
Strong white bread flour
400 g
Butter *5
60 g
Sugar
50 g
Salt 1½ tsp
Mixture / beat 2 eggs (M) + 2
egg yolk + water
290 mL
Butter *6
60 g
Candied orange peel *1
50 g
Sultanas *1
50 g
Currants *1
50 g
French
French
Menu 11 (5 h 40 min)
ӹ
Dry yeast
1 tsp
Strong white bread flour
400 g
Salt 1½ tsp
Water 290 mL
Pain de Campagne
Menu 11 (5 h 40 min)
ӹ
Dry yeast
1 tsp
Strong white bread flour
320 g
Strong wholemeal bread flour
80
g
Salt 1½ tsp
Cold water (5 ˫)
300 mL
Rye (SD-YR2540 & SD-YR2550 only)
Rye 100%
Menu 12 (3 h 30 min)
ӹ
Dry yeast 2½ tsp
Rye flour
500 g
Oil 2 tbsp
Sugar 2 tsp
Salt 2 tsp
Water 440 mL
z
Use kneading blade for rye menu.
Rye and White
Menu 12 (3 h 30 min)
ӹ
Dry yeast
2 tsp
Rye flour
250 g
Strong white bread flour
250 g
Oil 2 tbsp
Sugar 2 tsp
Salt 2 tsp
Water 360 mL
z
Use kneading blade for rye menu.
Sourdough
Sourdough
Stage 1: Sourdough Starter: Menu 24
(SD- YR2550: 23; SD-R2530: 22 ) (24 h)
Turn to P. 23 for the recipe.
Stage 2: Menu 13 (SD-R2530: 12) (5 h)
Sourdough starter 1 cup
Strong white bread flour 400 g
Salt 1 tsp
Dry yeast *
¾ tsp
Water
150 mL
*
For SD-YR2550, place dry yeast into the
yeast dispenser
Spelt Bread (SD-YR2540 only)
Spelt White Bread
Menu 14 (4 h 30 min)
M L XL
ӹ
Dry yeast 1 tsp 1¼ tsp 1½ tsp
Spelt white flour
400 g 500 g 600 g
Butter
5 g 10 g 10 g
Sugar 1½ tsp 2 tsp 2 tsp
Salt 1¼ tsp 1½ tsp 1¾ tsp
Water 260 mL 340 mL 400 mL
Lemon and Poppy Seed Spelt
Menu 14 (4 h 30 min)
M L XL
ӹ
Dry yeast 1 tsp 1¼ tsp 1½ tsp
Spelt white flour
400 g 500 g 600 g
Butter
5 g 10 g 10 g
Sugar 1½ tsp 2 tsp 2 tsp
Salt 1¼ tsp 1½ tsp 1¾ tsp
Lemon zest,
grated
1 1 1
Lemon juice 20 mL 20 mL 30 mL
Poppy seeds 2 tbsp 3 tbsp 3 tbsp
Water 250 mL 330 mL 380 mL
*1 Cut into approx. 5 mm cubes.
*2 Bread mix for white loaf only. Follow the
recipes on the package of bread mix.
*3 As shown on packet needs to be added.
*4 Half the specified amount of water for
bread mix.
*5 Cut into 2 - 3 cm cubes and keep in
refrigerator.
*6 Cut into 1 - 2 cm cubes and keep in
refrigerator.
OI1_YR250 UK Pagination_16th——audit 20210107.indd 21 2021/4/12 21:01:04
22
Gluten Free Bread
Ɣ
The outcome differs depending on the
recipes or using type of bread mix.
Ɣ
Follow the recipes on the package of your
gluten free bread mix.
Glutafin Gluten Free Bread Mix
Menu 15 (SD-YR2550: 14; SD-R2530: 13)
(1 h 50 min - 1 h 55 min)
Water 430 mL
Oil 1 tbsp
Gluten free bread mix 500 g
Dry yeast
2 tsp
Gluten and Wheat Free Bread
Menu 15 (SD-YR2550: 14; SD-R2530: 13)
(1 h 50 min - 1 h 55 min)
Milk 310 mL
Eggs (M), beaten 2 (100 g)
Cider vinegar
1 tbsp
Oil
2 tbsp
Honey
60 g
Salt
1¼ tsp
Brown rice flour
150 g
Potato starch
300 g
Xanthan gum
2 tsp
Dry yeast
2½ tsp
Flavoured Gluten Free Loaves
Use one quantity of chosen mix and add the
following ingredients to your bread pan to
produce the loaf of your choice.
Spicy Fruit Loaf
(1 h 50 min)
Mixed fruits
100 g
Cinnamon 2 tsp
Maple & Pecan Loaf
(1 h 55 min)
Maple syrup 2 tbsp
Pecans
50
g
Five Seeds Loaf
(1 h 55 min)
Linseeds 1 tbsp
Sesame seeds 2 tbsp
Pumpkin seeds 1 tbsp
Poppy seeds 1 tbsp
Sunflower seeds 1 tbsp
Sundried Tomato & Parmesan Loaf
(1 h 55 min)
Parmesan cheese grated
50 g
Sundried tomatoes in oil, drained
and chopped
50 g
Gluten Free Cake
Gluten Free Chocolate Cake
Menu 16 (SD-YR2550: 15; SD-R2530: 14)
(1 h 50 min)
Butter *1 150 g
Sugar 150 g
Eggs (L), beaten 3 (180 g)
Dark chocolate, melted 120 g
White rice flour 120 g
Cacao powder 30 g
Baking powder 10 g
Gluten Free Tea Cake
Menu 16 (SD-YR2550: 15; SD-R2530: 14)
(1 h 50 min)
Butter *1 80 g
Sugar 160 g
Eggs (L), beaten 3 (180 g)
White rice flour 160 g
Ground almonds 80 g
Tea leaves, chopped 2 tsp
Baking powder 10 g
Gluten Free Banana Cake
Menu 16 (SD-YR2550: 15; SD-R2530: 14)
(1 h 50 min)
Butter *1 80 g
Sugar 120 g
Eggs (L), beaten 3 (180 g)
White rice flour
160 g
Ground almonds 50 g
Banana *2 80 g
Baking powder 10 g
Gluten Free Pizza
Gluten Free Pizza
Menu 17 (SD-YR2550: 16; SD-R2530: 15)
(30 min)
Water 380 mL
White rice flour
475 g
Vegetable oil 1¾ tbsp
Salt 1 tsp
Dry yeast 1 tsp
Gluten Free Pasta
Gulten Free Pasta
Menu 18 (SD-YR2550: 17; SD-R2530: 16)
(15 min)
Mixture / beat 2 eggs (M) +
water
260 g
White rice flour 220 g
Potato starch 80 g
Corn starch 100 g
Xanthan gum 1½ tbsp
Oil 2 tbsp
Salt 1 tsp
Ɣ
Be sure to whisk eggs and water together
until very smooth.
Ɣ
Place flour, starch and gum into another bowl
and mix well.
Recipes
Gluten Free Recipes
*1: Cut into 1 cm cubes.
*2: Cut into 1 - 2 cm.
Method
Turn to P. 16 -
17 for handling
instructions.
mixed and
sifted
Basic
White Dough
Menu 19 (SD-YR2550: 18; SD-R2530: 17)
(2 h 20 min)
ӹ
Dry yeast
1 tsp
Strong white bread flour 500 g
Butter 30 g
Sugar 1½ tbsp
Salt 1½ tsp
Water 310 mL
Soft Rolls / Baps
Menu 19 (SD-YR2550: 18; SD-R2530: 17)
(2 h 20 min)
ӹ
Dry yeast
1¼ tsp
Strong white bread flour 450 g
Butter 30 g
Sugar 1 tbsp
Salt 1 tsp
Egg(M), beaten
1 (50 g)
Water * 250 mL
*
For a slightly denser roll try 125 mL water and
125 mL milk.
Place the ingredients into the bread pan in
the order listed above.
Select the menu.
Divide dough into 8 – 10 pieces and shape
into baps.
Place on a greased baking tray and allow
WRSURYHDWÛ&XQWLOGRXEOHGLQVL]H
(approx. 20 minutes).
Dust with flour.
%DNHLQDSUHKHDWHGRYHQDWÛ&IRU
minutes or until golden brown.
Dough Recipes
Method
Turn to P. 12 -
15 for handling
instructions.
OI1_YR250 UK Pagination_16th——audit 20210107.indd 22 2021/4/12 21:01:04
23
Basic Raisin
Raisin Dough
Menu 20 (SD-YR2550: 19; SD-R2530: 18)
(2 h 20 min)
ӹ
Dry yeast
1 tsp
Strong white bread flour 500 g
Butter 30 g
Sugar 1½ tbsp
Salt 1½ tsp
Water 310 mL
Raisins *1 100 g
Hot Cross Buns
Menu 20 (SD-YR2550: 19; SD-R2530: 18)
(2 h 20 min)
ӹ
Dry yeast
½ tsp
Strong white bread flour 250 g
Butter 25 g
Sugar 1 tsp
Skimmed milk powder 1 tbsp
Salt ½ tsp
Cinnamon 1 tsp
Mixed spice ½ tsp
Egg (M), beaten 1 (50 g)
Water 100 mL
Mixed dried fruits *1 100 g
Divide mixture into 8 balls. Place on
a lightly greased baking tray and allow to
SURYHDWÛ&XQWLOGRXEOHGLQVL]H
(approx. 20 minutes). Make a paste with
approx. 2 tbsp flour mixed with 2 tbsp
water and pipe a cross over the buns, or
top with thin slices of short crust pastry.
%DNHLQDSUHKHDWHGRYHQDWÛ&IRU
15 – 20 minutes or until golden brown.
While still HOT, brush with a sugar glaze —
40 H sugar in 4 tbsp water, boiled until a
syrup is reached - (approx. 5 minutes).
Whole Wheat
Wholemeal Dough 100%
Menu 21 (SD-YR2550: 20; SD-R2530: 19)
(3 h 15 min)
ӹ
Dry yeast
1½ tsp
Strong wholemeal bread flour 500 g
Butter 30 g
Sugar 1½ tbsp
Salt 2 tsp
Water 340 mL
Wholemeal Dough 70%
Menu 21 (SD-YR2550: 20; SD-R2530: 19)
(3 h 15 min)
ӹ
Dry yeast
1½ tsp
Strong wholemeal bread flour 350 g
Strong white bread flour 150 g
Butter 30 g
Sugar 1½ tbsp
Salt 2 tsp
Water 330 mL
Wholemeal Dough 50%
Menu 21 (SD-YR2550: 20; SD-R2530: 19)
(3 h 15 min)
ӹ
Dry yeast
1½ tsp
Strong wholemeal bread flour 250 g
Strong white bread flour 250 g
Butter 30 g
Sugar 1½ tsp
Salt 2 tsp
Water 320 mL
Whole Wheat Raisin
Wholemeal Raisin Rolls
Menu 22 (SD-YR2550: 21; SD-R2530: 20)
(3 h 15 min)
ӹ
Dry yeast
1½ tsp
Strong wholemeal bread flour 500 g
Butter 30 g
Sugar 1½ tbsp
Salt 2 tsp
Water 340 mL
Raisins *1 100 g
Wholemeal Walnut Rolls 70%
Menu 22 (SD-YR2550: 21; SD-R2530: 20)
(3 h 15 min)
ӹ
Dry yeast
1½ tsp
Strong wholemeal bread flour 350 g
Strong white bread flour 100 g
Medium oatmeal 50 g
Oil 2 tbsp
Maple syrup 2 tbsp
Salt 1½ tsp
Water 320 mL
Walnuts *1 100 g
Divide dough into 12 large rolls or 20 dinner
rolls.
Place on a greased baking trays and
VSULQNOHZLWKIORXU$OORZWRSURYHDWÛ&
until doubled in size (approx. 20 minutes).
%DNHLQDSUHKHDWHGRYHQDWÛ&IRU
12 – 15 minutes or until golden brown.
Sourdough Dough
Sourdough Dough
Stage 1: Sourdough Starter Menu 24
(SD-YR2550: 23; SD-R2530: 22) (24 h)
Turn to P. 15 for handling instructions.
Stage 2: Menu 23
(SD-YR2550: 22; SD-R2530: 21)
(2 h 30 min)
Sourdough starter 1 cup
Strong white bread flour 360 g
Rye flour 40 g
Salt 1 tsp
Dry yeast
*
¾ tsp
Water
150 mL
*
For SD-YR2550, place dry yeast into the
yeast dispenser
Sourdough Starter
Sourdough Starter
Menu 24 (SD-YR2550: 23; SD-R2530: 22) (24 h)
The amount for a sourdough cup
Rye flour 80 g
Salt ½ tsp
Plain yogurt 60 g
Water (20 °C
) 80 mL
Dry yeast * 1 (0.1 g)
* Use the sourdough starter spoon provided.
Pizza
Pizza
Menu 25 (SD-YR2550: 24; SD-R2530: 23)
(45 min)
ӹ
Dry yeast
1 tsp
Strong white bread flour 450 g
Oil
4 tbsp
Salt 2 tsp
Water 240 mL
Doughnut (using failed unfermented bread
dough)
Divide the dough into small pieces that
are 35 H each and shape them into balls.
Cover them with a small towel and place
them still for 10 - 20 minutes.
Roll them into thin round shape and press
the dough with the doughnut mold.
Allow the dough to ferment for 20 - 30
minutes (till it rises to double its original
VL]HDWDWHPSHUDWXUHRIÛ&
Deep-fry them at an oil temperature of
Û&DQGVSULQNOHWKHPZLWKFLQQDPRQ
and refined white sugar.
Focaccia
Menu 25 (SD-YR2550: 24; SD-R2530: 23)
(45 min)
ӹ
Dry yeast
½ tsp
Strong white bread flour
300 g
Olive oil 1 tbsp
Salt 1 tsp
Water 170 mL
Roll and pat the dough into a
30 cm x 25 cm rectangle on a greased
baking tray.
Make indentations over the whole dough
using your fingertips.
Add your favourite toppings such as olives
and tomatoes.
$OORZWRSURYHDWÛ&XQWLOGRXEOHGLQVL]H
(approx. 30 minutes).
Drizzle with olive oil and bake in a preheated
oveQDWÛ&IRU±PLQXWHVRUXQWLO
golden at the edges and cooked well in the
centre.
Ɣ
Serve warm with pasta dishes.
*1 Cut into 5 mm cubes.
OI1_YR250 UK Pagination_16th——audit 20210107.indd 23 2021/4/12 21:01:05
24
Cake
Butter Cake
Menu 26 (SD-YR2550: 25; SD-R2530: 24)
(1 h 55 min)
Butter (cut into 1 cm cubes)
200 g
Sugar
180 g
Milk 2 tbsp
Egg (M), beaten
4 (200 g)
Plain flour
300 g
Baking powder
13 g
Tea Cake
Menu 26 (SD-YR2550: 25; SD-R2530: 24)
(1 h 55 min)
Butter (cut into 1 cm cubes)
200 g
Sugar
180 g
Milk 2 tbsp
Egg (M), beaten
4 (200 g)
Plain flour
300 g
Baking powder
13 g
Earl gray tea (Tea feaf) 1 tbsp
Dried fruit
*
(
cut into 5 mm cubes)
100 g
*
Add it when scraping off the flour in step 7.
Bake Only
Fruit Cake
Menu 27 (SD-YR2550: 26; SD-R2530: 25)
Timer: 1 h 20 min
Butter 150 g
Sugar 130 g
Egg (M), beaten 3 (150 g)
Milk 1 tbsp
Plain flour 250 g
Baking powder 10 g
Mixed dried fruits 70
g
In a large bowl, cream butter and sugar until
light and fluffy. Add eggs, one at a time,
beating well.
Add milk, sifted A and mix dried fruits,
beating well after addition.
Remove the kneading blade and line the
greaseproof paper around the bread pan,
then pour in the mixed ingredients.
Set the bread pan into the main unit, and
plug the machine into the socket.
Select the menu and set the baking time:
1 hour and 20 minutes.
Press button to start.
Press button and remove cake when
machine beeps 8 times and the cube (
)
near END flashes.
Cherry & Marzipan Cake
Menu 27 (SD-YR2550: 26; SD-R2530: 25)
Timer: 1 h
Golden caster sugar
50 g
Butter
175 g
Egg (M), beaten
3 (150 g)
Self raising flour
225 g
Glace cherries, chopped
100 g
Marzipan, grated
75 g
Milk 60 mL
Topping (flaked almonds, roasted)
15 g
In a large bowl, cream butter and sugar until
light and fluffy. Add eggs, one at a time,
beating well.
Add the flour with the cherries and
grated marzipan, mix well with the milk
to a soft consistency.
Remove the kneading blade and line the
greaseproof paper around the bread pan,
then pour in the mixed ingredients.
Set the bread pan into the main unit, and
plug the machine into the socket.
Carefully sprinkle the toasted almonds
on top of the mixture.
Select the menu and enter 1 hour on the
timer.
After baking test with a skewer to see if
the cake is cooked. If the cake does
require extra time, select the menu again
and enter a further 3 – 5 minutes on the
timer. If it is still just slightly sticky, this
will cook through during the stand
period.
Take the bread pan out of the machine
using oven gloves.
Leave to stand for 5 – 10 minutes
before removing from the
bread pan and
allowing to cool.
Jam
Strawberry Jam
Menu 28 (SD-YR2550: 27; SD-R2530: 26)
Timer: 1 h 40 min
Strawberries, finely chopped
600 g
Sugar
400 g
Powdered pectin
*
13 g
Apricot Jam
Menu 28 (SD-YR2550: 27; SD-R2530: 26)
Timer: 1 h 30 min
Apricots, finely chopped
500 g
Sugar
250 g
Powdered pectin *
6 g
*
Sprinkle the pectin on the ingredients in the
bread pan before setting the bread pan into
the main unit.
Compote
Apple Sauce
Menu 29 (SD-YR2550: 28; SD-R2530: 27)
Timer: 1 h 20 min
Bramley apples, peeled, cored
and diced
1000 g
Water 2 tbsp
Ɣ
Stir after cooking is completed.
Peach in Vanilla Syrup
Menu 29 (SD-YR2550: 28; SD-R2530: 27)
Timer: 1 h
Peaches, stone removed and
FXWLQWRǩ
1000 g
Sugar
100 g
Vanilla pod
½
Water 125 mL
Ɣ
When cooking is complete, remove the
peaches with a slotted spoon.
Carefully pour the syrup over the fruit.
Leave to cool.
mixed and
sifted
A
( )
Sweet Recipes
Recipes
mixed and
sifted
A
( )
mixed and
sifted
A
( )
Method
Turn to P. 18 -
19 for handling
instructions.
OI1_YR250 UK Pagination_16th——audit 20210107.indd 24 2021/4/12 21:01:05
25
Manual Recipes
Cake Kneading
Cake Dough
Menu 30 (SD-YR2550: 29; SD-R2530: 28)
Timer: 20 min
Butter (cut into 1 cm cubes)
200 g
Sugar
180 g
Milk 2 tbsp
Egg (M), beaten
4 (200 g)
Plain flour
300 g
Baking powder
13 g
Poppy Seed Gluten Free Cake
Menu 30 (SD-YR2550: 29; SD-R2530: 28)
Timer: 10 min
Vegetable oil
150 g
Egg (M), beaten
3 (150 g)
Milk 110 mL
Sugar
180 g
White rice flour
210 g
Ground almond
75 g
Baking powder
1½ tbsp
Lemon juice
1½ tbsp
Poppy seeds
23 g
Ɣ
Icing as you like. Mix 15 g of lemon juice with 75 g of icing sugar
and sprinkle on the baked gluten-free cake.
Bread Kneading & Rise
Bread Dough
Stage 1 Bread Kneading: Menu 31 (SD-YR2550: 30; SD-R2530: 29)
Stage 2 Rise: Menu 32 (SD-YR2550: 31; SD-R2530: 30)
(Kneading temperature condition : 28
˫
Dry yeast
1½ tsp
Strong white bread flour
500 g
Sugar 1 tbsp
Salt 1½ tsp
Egg (M), beaten
½ (25 g)
Water
320 mL
Butter
15 g
Stage 1
See step 1 - 4 of Bread Kneading. (P. 19 )
(Kneading time setting: 20 minutes)
When kneading is complete, put the butter into the bread pan and
close the lid.
Rest for 5 minutes.
Repeat the step 1 - 4
of Bread Kneading. (P. 19 )
(Kneading time setting: 12 minutes)
Stage 2
Option 1:
6KDSHWKH¿QLVKGRXJKWR\RXUIDYRXULWHVKDSHDQGDOORZLWWRULVHLQWKH
oven.
Option 2:
See step 1 - 5 of Rise. (P. 19)
Rice Flour English Muffin Dough
Stage 1 Bread Kneading: Menu 31 (SD-YR2550: 30; SD-R2530: 29)
Stage 2 Rise: Menu 32 (SD-YR2550: 31; SD-R2530: 30)
(Kneading temperature condition : 28
˫
Ɣ
Making the English Muffin in 9 cm diameter (10 inches).
Divided into 10 pieces)
Dry yeast
1 tsp
Mixture / beat 1 egg + 1 egg
white + warm water
430 g
Butter, melted 60 mL
Cider vinegar 1 tsp
Brown rice flour
300 g
Potato starch
100 g
Skimmed milk powder
*
50 g
Xanthan gum
1 tbsp
Sugar
1 tbsp
Salt
1 tsp
*
The milk powder may be omitted.
Topping
Cornmeal Appropriate amount
Stage 1
See step 1 - 4 of Bread Kneading. (P. 19 )
(Kneading time seting: 5 minutes)
After kneading is complete, open the lid, scrape off the flour.
Rest for 5 minutes.
Repeat the step 1 - 4 of
Bread Kneading. (P. 19 )
(Kneading time seting: 10 minutes)
Stage 2
See step 1 - 5 of Rise. (P. 19)
(Rise time setting: 20 minutes)
Put about 90 H of dough into the mold and sprinkle the cornmeal for
finishing.
Ferment it to 80 % of the size in an oven at 40 °C for about 30
minutes.
Sprinkle cornmeal on its surface and cover the mold.
Bake in an oven at 180 °C for about 15 minutes.
mixed and
sifted
A
( )
Method
Turn to P. 19
for handling
instructions.
OI1_YR250 UK Pagination_16th——audit 20210107.indd 25 2021/4/12 21:01:05
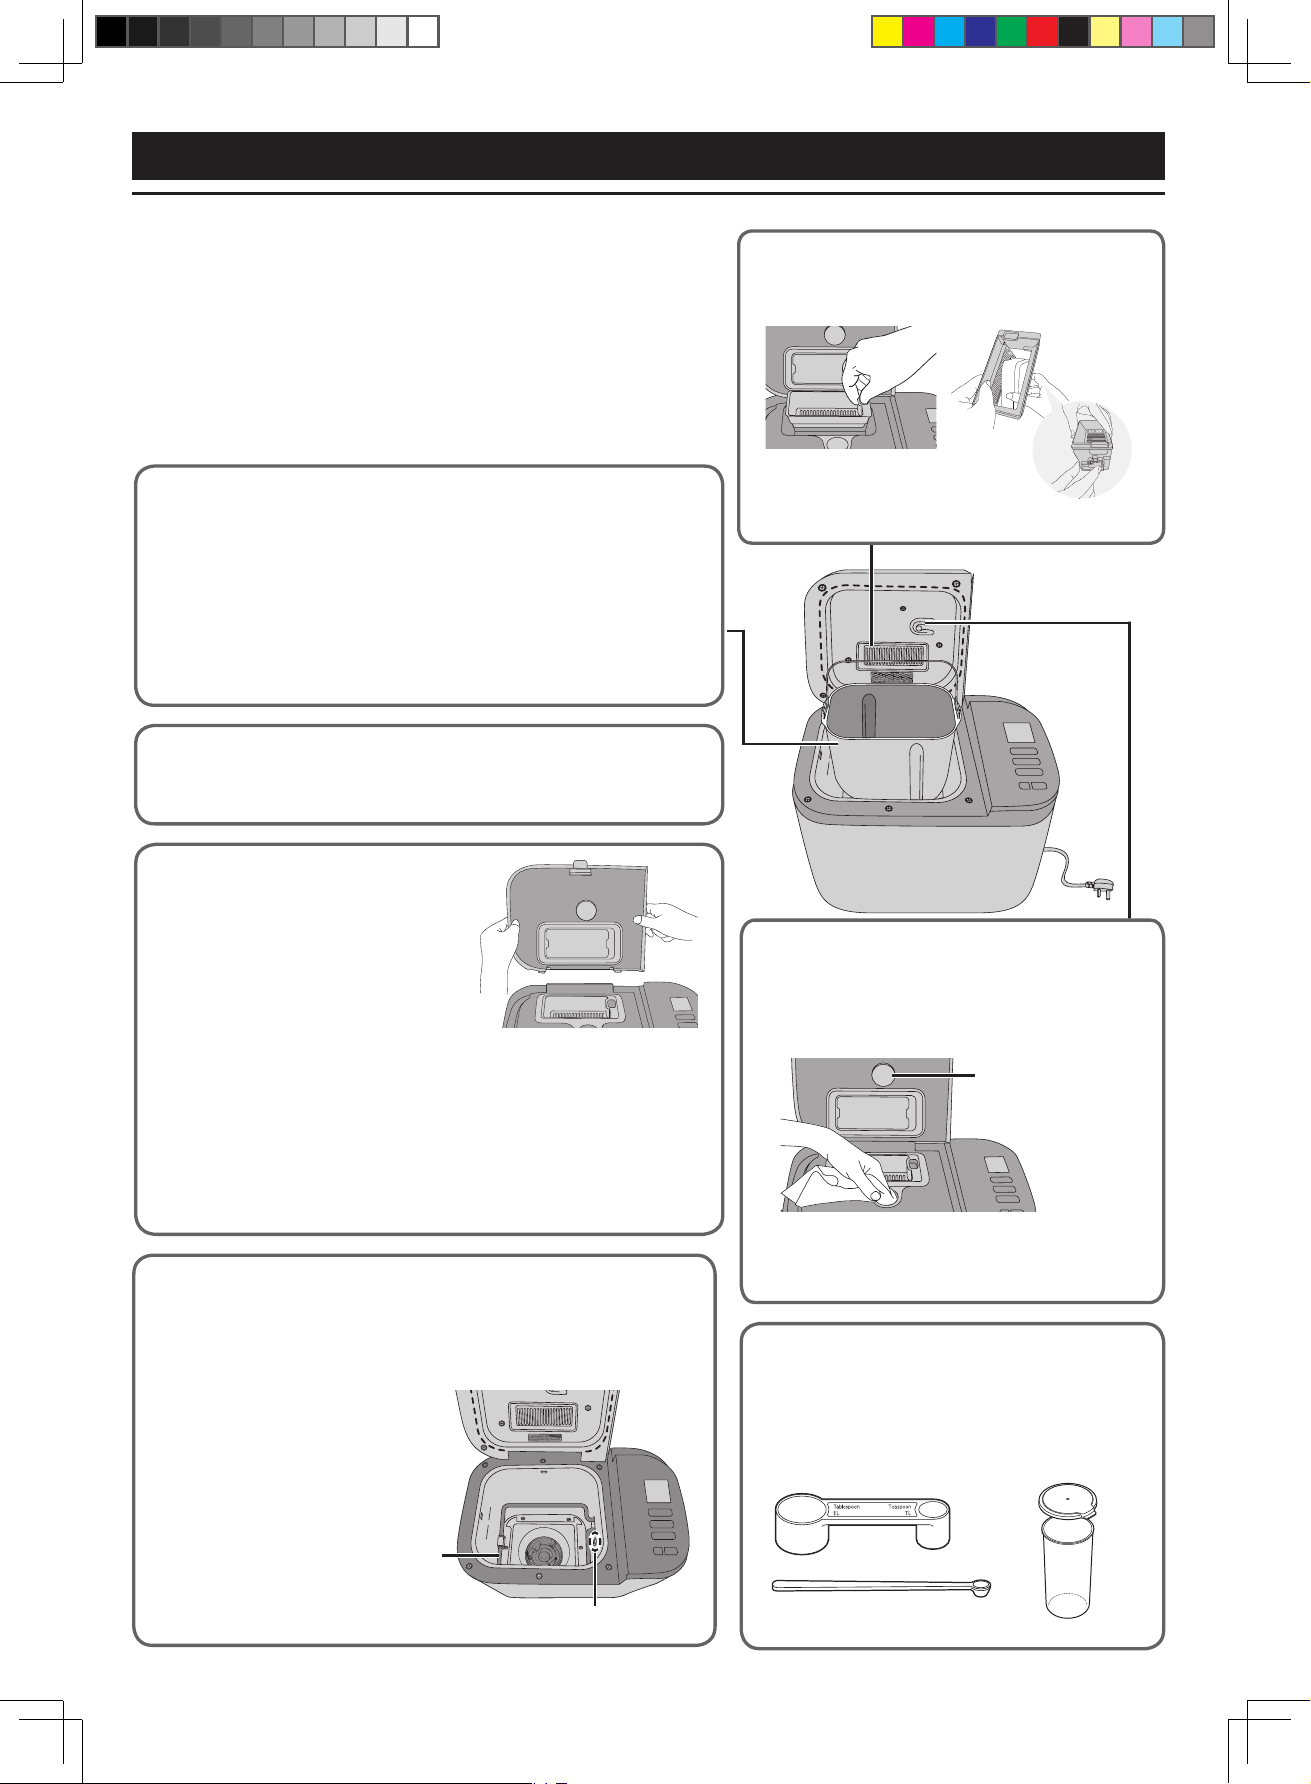
26
假
Dispenser lid
Remove and wash with water.
Dry it completely especially the
yeast dispenser lid.
Ɣ
Raise the dispenser lid to an angle of
approximately 75 degrees.
Align the connections and pull it in an upward direction to remove
or push carefully back at the same angle to attach. Wait until
the machine has cooled down first, because it will be very hot
immediately after use.
Ɣ
Take care not to damage or pull the seal.
(Damage could lead to leakage of steam, condensation or
deformation.)
Before cleaning, unplug the machine and allow it to cool down.
To avoid damaging the machine.
z
Do not use anything abrasive.
(cleansers, scouring pads etc)
z
Do not wash any part of the machine in the dishwasher.
z
Do not use benzine, thinners, alcohol, or bleach.
z
After rinsing the washable parts, wipe with cloth.
Always keep all parts clean and dry.
Raisin nut dispenser
Remove and wash with water.
z
Wash after each use to remove any residue.
Yeast dispenser
(SD-YR2550 / SD-YR2540 only)
Wipe with a damp cloth and dry naturally.
Ɣ
If wipe with a dry cloth, dry yeast will not drop
into the bread pan due to static.
Yeast dispenser lid
(SD-YR2550 / SD-YR2540 only)
Wipe with dry cloth when it is wet.
Bread pan & Kneading blade
Remove any leftover dough. Wash with a soft sponge and dry it
thoroughly.
Ɣ
Do not submerge the bread pan in water.
Ɣ
If difficult to remove the kneading blade, pour warm water into the
bread pan and wait 5–10 minutes. (Do not leave it for too long time.)
Do not put warm water with soap in the bread pan.
Measuring spoon & Sourdough Starter spoon
Wash with water.
Sourdough cup
Wash with warm soapy water and dry well.
Exterior & Steam vent
Ɣ
Wipe with a damp cloth.
Cleaning & Care
Ɣ
Not dishwasher safe
Interior
Remove the food residues.
Use a damp cloth to wipe inside of machine except heating element
and temperature sensor area.
Ɣ
The colour of the interior may
change with use.
Temperature sensor
Heating element
Yeast dispenser lid
OI1_YR250 UK Pagination_16th——audit 20210107.indd 26 2021/4/12 21:01:06
27
Problem Cause and Action
My bread does not rise well.
The top of my bread is
uneven.
[All bread]
z
Your flour gluten quality is poor, or you have not used strong flour. (Gluten quality can vary depending
on temperature, humidity, how the flour is stored, and the season of harvest).
ĺ Try another type, brand or another batch of flour.
z
The dough becomes too firm as you haven’t used enough liquid.
ĺ
Stronger flour with higher protein content absorbs more water than others, try adding an extra 10 - 20 mL.
z
You are not using the right type of dry yeast .
ĺ
Use a dry yeast from a sachet, which has “Easy blend”, “Fast Action” or “Easy Bake” written on it.
This type does not require pre-fermentation.
z
You are not using enough dry yeast, or your dry yeast is old.
ĺ
Use the measuring spoon provided. Check the dry yeast’s expiry date. (Keep dry yeast in refrigerator)
z
The dry yeast has touched liquid before kneading.
ĺ
Check that you have put the ingredients in the correct order according to the instructions. (P. 12)
z
You have used too much salt, or not enough sugar.
ĺ Check the recipe and measure out the correct amounts using the measuring spoon provided.
ĺ Check that salt and sugar are not included in other ingredients.
[Spelt bread]
z
Einkorn wheat was used when baking speciality bread and
/
or a lot of flour other than spelt flour were used.
ĺ The spelt flour should be up to 60% of the entire flour when using more than two kinds of flour
other than spelt. The rye and the rice flour should be up to 40% of the entire flour and buckwheat
flour should be up to 20% of the entire flour.
Can failed dough be used
again?
E.g: The dough hasn’t been
baked…etc.
z
It can be used to make doughnut, pizza and others.
Please confirm at which status baking stopped and resumed the subsequent operations.
When there is still dry yeast in the yeast dispenser (SD-YR2550 / SD-YR2540 only)
ĺRe-start making dough using the “Pizza” dough procedure to make doughnut or pizza (P. 13, 23).
When dry yeast had been mixed with other ingredients.
ĺTake out the dough and make doughnut or pizza (P. 13, 23).
When the bread dough is halfway fermented or baked.
ĺ Take out the dough and start baking for 40 minutes at 170 °C in the oven. While observing the
situation while baking.
My bread has not risen at all.
My bread is pale and sticky.
z
You did not use dry yeast.
ĺ Place the correct amount of dry yeast.
z
You are not using enough dry yeast, or your dry yeast is old.
ĺ
Use the measuring spoon provided. Check the dry yeast’s expiry date. (Keep dry yeast in refrigerator.)
z
There has been a power failure, or the machine has been stopped during bread making.
ĺ You will need to remove the bread from the bread pan and start again with new ingredients.
Dry yeast does not drop into
the bread pan. (SD-YR2550
/ SD-YR2540 only)
z
The timing of yeast dispenser activation is different depending on the menu program and room
temperature.
z
Yeast dispenser is wet, or there may be a static build up.
ĺ Wipe with a damp cloth and dry naturally.
z
Dry yeast is damped.
ĺ Use new dry yeast.
My bread is sticky and slices
unevenly.
z
It was too hot when you sliced it.
ĺ Allow your bread to cool on rack before slicing to release the steam.
My bread has risen too
much.
z
You have used too much dry yeast
/
water.
ĺ
Check the recipe and measure out the correct amount using the measuring spoon (dry yeast) /
sourdough cup (water) provided.
ĺ
Check that excess water amount is not included in other ingredients.
z
You have used too much flour.
ĺ
Carefully weigh the flour using scales.
My bread is full of air holes.
z
You have used too much dry yeast.
ĺ Check the recipe and measure out the correct amount using the measuring spoon provided.
z
You have used too much liquid.
ĺ
Some types of flour absorb more water than others, so try using 10 – 20 mL less water.
Before calling for service, please check through this section.
During or after cooking
Troubleshooting
OI1_YR250 UK Pagination_16th——audit 20210107.indd 27 2021/4/12 21:01:06
28
Problem
Cause and Action
My bread seems to have
collapsed after rising.
z
The quality of your flour isn’t very good.
ĺ Try using a different brand of flour.
z
You have used too much liquid.
ĺ Try using 10 – 20 mL less water.
The crust creases and goes
soft on cooling.
z
The steam remaining in the bread after baking can pass into the crust and soften it slightly.
ĺ To reduce the amount of steam, try using 10 – 20 mL less water.
The sides of my bread have
collapsed and the bottom is
damp.
z
You have left the bread in the bread pan for too long after baking.
ĺ
Remove the bread promptly after baking.
z
There has been a power failure, or the machine has been stopped during bread making.
ĺ
The machine switches off if it is stopped for more than 10 minutes.
How can I keep my crust
crispy?
z
To make your bread more crispy, you could use the “Dark
”
crust colour option, or even bake it in the
oven at 200 °C for an extra 5 – 10 minutes.
There is excess oil on the
bottom of brioche.
The crust is oily.
My bread has big holes.
z
Did you add butter within 5 minutes of the beep?
ĺ
Do not put butter when display show remaining time until ready. (P. 15)
Butter flavour might be weak, but it can bake.
My brioche did not turn out
well when using bread mix.
z
Try following things.
ĺ It might be baked better if dry yeast is decreased a little when using menu 10. (If adding dry yeast
separately).
ĺ
Follow the recipe on the bread mix, but the bread mix should be between 350 – 500 g.
ĺ
Place the ingredients in the order described in the recipe. When adding the extra ingredients, add them
later. (P. 15)
ĺ The completion is different according to recipe on the bread mix.
Why has my bread not
mixed properly?
z
You haven’t put the kneading blade in the bread pan.
ĺ Make sure the kneading blade is in the bread pan before you put in the ingredients.
Extra ingredients are not
mixed properly.
z
Did you add extra ingredients to the raisin nut dispenser before the beep or add it into the bread pan
while “
” is flashing?
ĺ Extra ingredients must be added to the raisin nut dispenser before the beep or put it into the bread
pan during “
” is flashing on the display.
Extra ingredients are not
mixed properly in Brioche.
z
Did you add additional ingredients within 5 minutes of the beep?
ĺ Extra ingredients must be added while “
” is flashing in the display.
z
Some of the bread mix dough is harder to mixed extra ingredients in or to flick out some of them.
ĺ Decrease the extra ingredients into half.
Extra ingredients do not fall
into the bread pan from the
raisin nut dispenser.
z
Is the surface of the extra ingredients higher than the edge of the raisin nut dispenser?
ĺ Put the extra ingredients so that its surface is lower than the edge of the raisin nut dispenser.
(P. 14) The capacity of the raisin nut dispenser is 150 g, however depending on the state and the
type of ingredients, they may overflow.
There is excess flour around
the bottom and sides of my
bread.
z
You have used too much flour, or you are not using enough liquid.
ĺ Check the recipe and measure out the correct amount using scales for the flour or the sourdough
cup provided for liquids.
During or after cooking
Before calling for service, please check through this section.
Troubleshooting
OI1_YR250 UK Pagination_16th——audit 20210107.indd 28 2021/4/12 21:01:06
29
Problem Cause and Action
My bread has not been
baked.
z
The dough menu was selected.
ĺ The dough menu does not include a baking process.
z
There has been a power failure, or the machine has been stopped during bread making.
ĺ You can try baking the dough in your oven if it has risen and proved.
z
There is not enough water and the motor protection device has been activated.
This only happens when the machine is overloaded and excessive force is applied to the motor.
ĺ Visit place of purchase for a service consultation. Next time, check the recipe and measure out the
correct amount using the sourdough cup provided.
z
You have forgotten to attach the kneading blade.
ĺ Make sure you attach the kneading blade first. ( P. 12)
z
The kneading mounting shaft in the bread pan is stiff and does not rotate.
ĺ If the kneading mounting shaft does not rotate when the kneading blade is attached, you will need to
replace the kneading mounting shaft unit. (Consult the place of purchase or a Panasonic service centre.)
The bread does not come
out.
z
If the bread cannot be easily removed from the bread pan, leave the bread pan for 5 – 10 minutes to
cool, making sure that it is not left unattended where somebody or something may get burnt.
After that, shake the bread pan several times using oven gloves.
(Hold the handle down so that it does not get in the way of bread.)
The kneading blade stays in
the bread when I remove it
from the bread pan.
z
The dough is a little stiff.
ĺ Allow the bread to cool completely before removing the kneading blade carefully.
Some types of flour absorb more water than others, so try adding an extra 10 – 20 mL of water next time.
z
Crust has built up underneath the kneading blade.
ĺ Wash the kneading blade and its spindle after each use.
My gluten free pasta did not
turn well.
z
Your dough was too soft.
ĺ Decrease the water volume or increase the amount of xanthan gum.
z
Your dough was too hard.
ĺ Decrease the amount of xanthan gum or increase the water volume.
When cooking jam, it has
scorched or the kneading
blade fixes and it doesn’t
come off.
z
The amount of the fruit is too little, or the amount of sugar is too much.
ĺ Place the bread pan in the sink and half fill the bread pan with warm water. Leave the bread pan
to soak until the cooked on mixture or kneading blade loosens. After scorching is relieved, wash it
with a soft sponge etc.
The jam has boiled over.
z
Too much fruit or sugar has been used.
ĺ Only use the amounts of fruit and sugar specified in the recipes on P. 24.
Jam is too runny and not
firmly set.
z
The fruit was under or over ripe.
z
Sugar was decreased too much.
z
Cooking time was insufficient.
z
Fruit with a low pectin content was used.
ĺ Leave the jam to cool completely. The jam will continue to set as it cools.
ĺ Use the runny jam as a sauce for desserts.
What kinds of sugar can we
use on jam?
z
White caster and granulated can be used.
Do not use brown sugar, diet sugar, and low calorie sugar or artificial sweetener.
Can frozen fruits be used?
z
It can be used for only jam and compote.
During or after cooking
OI1_YR250 UK Pagination_16th——audit 20210107.indd 29 2021/4/12 21:01:06
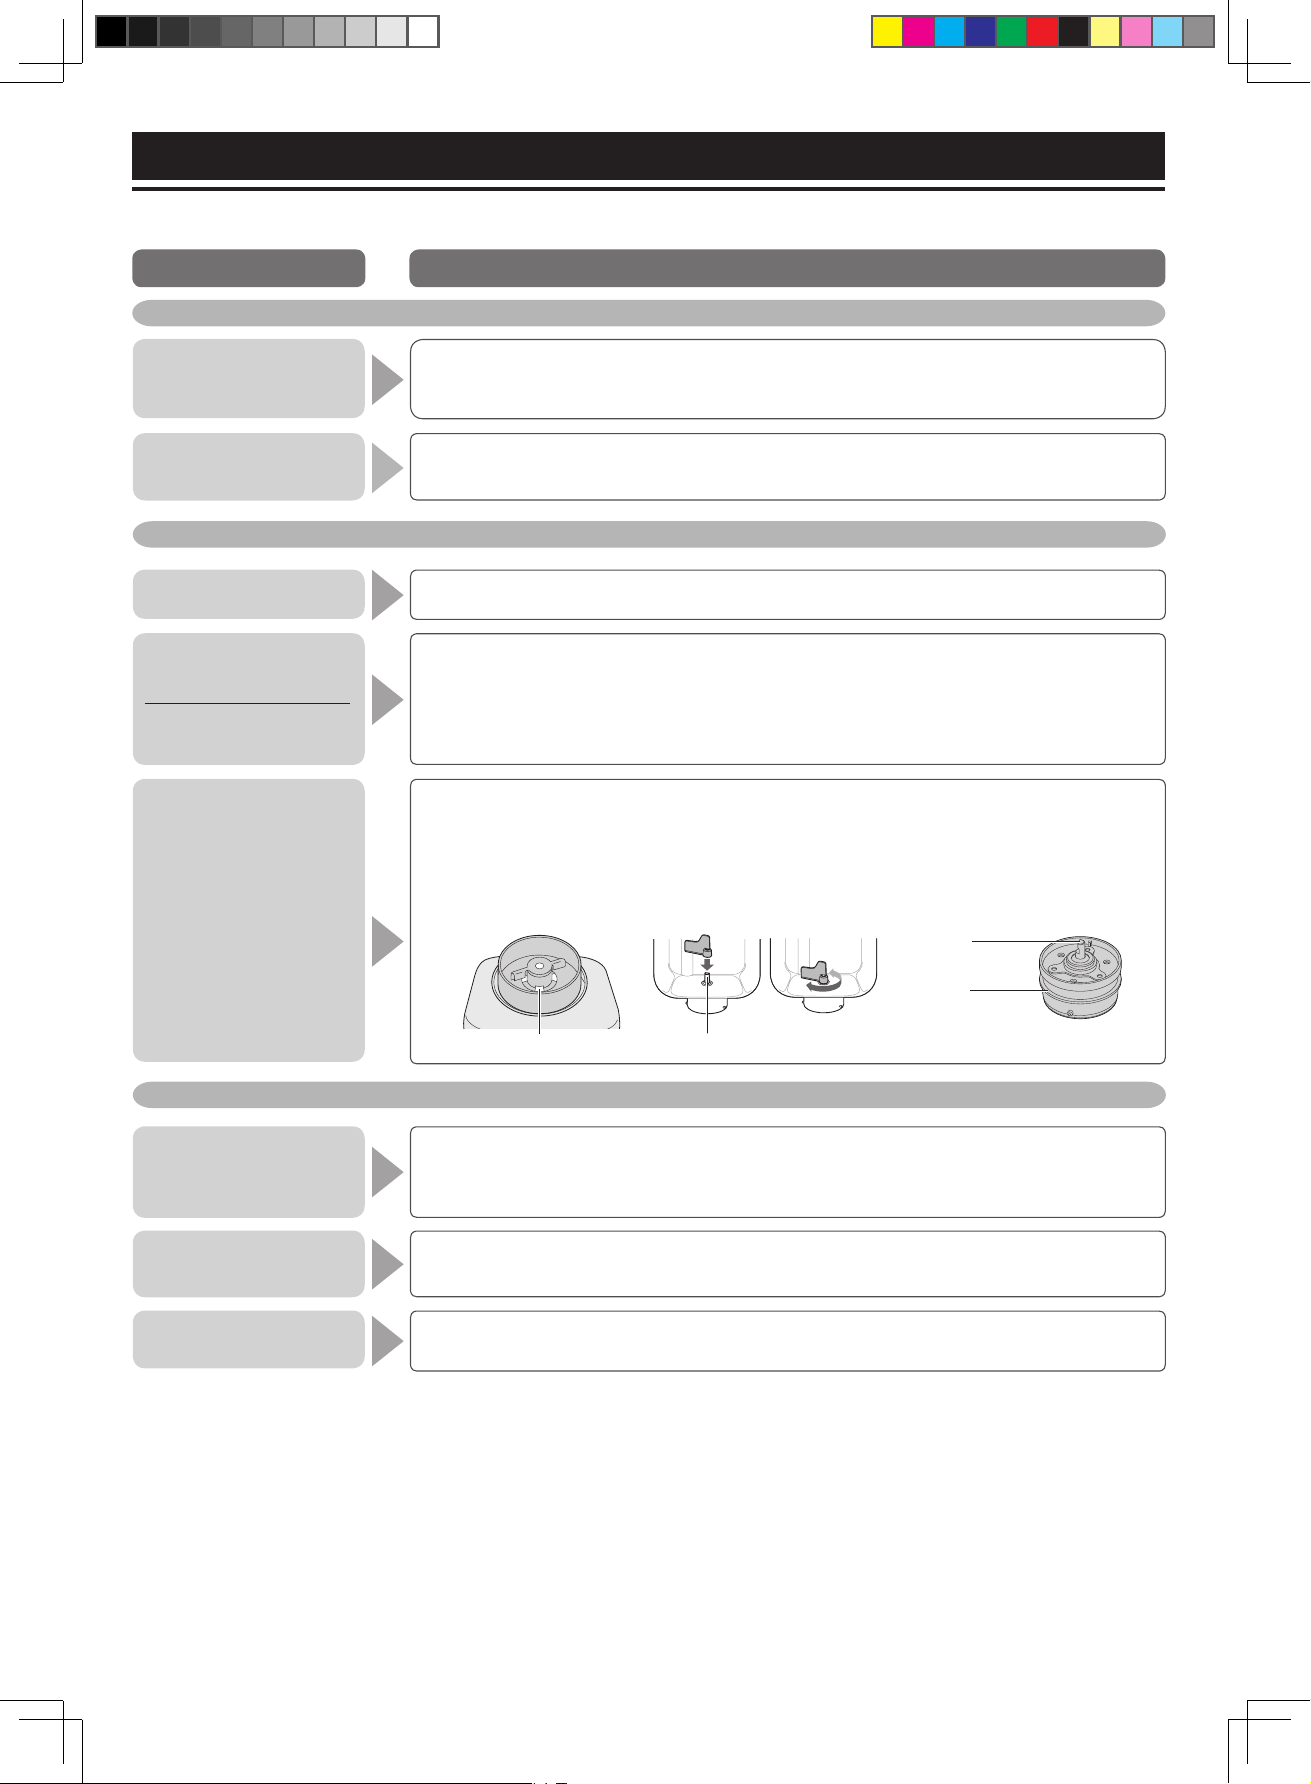
30
Problem Cause and Action
The kneading blade rattles.
z
This is because the kneading blade fits loosely on the kneading mounting shaft. (This is not a fault.)
I can smell burning while the
bread is baking.
Smoke is coming out of the
steam vent.
z
Ingredients may have been spilt on the heating element.
ĺ Sometimes a little flour, raisins or other ingredients may be flicked out of the bread pan during
mixing. Simply wipe the heating element gently after baking once the machine has cooled down.
ĺ Remove the bread pan from the main unit to place ingredients.
Dough leaks out from
bottom of the bread pan.
z
A small amount of dough will escape through the ventilation holes (so that it does not stop the
rotating parts from rotating). This is not a fault, but check occasionally that the kneading mounting
shaft rotate properly.
ĺ
If the kneading mounting shaft does not rotate when the kneading blade is attached, you will need to
replace the kneading mounting shaft unit. (Consult the place of purchase or Panasonic service centre.)
Kneading mounting shaftVentilation holes (4 in total)
(Bottom of bread pan)
Part no. ADA29E226
Kneading
mounting shaft unit
Kneading
mounting shaft
Puzzle
“1” appears on the display
and operation has been
stopped.
z
When the power supply to machine is interrupted for a certain time, the display shows “1” after
recovered. (It is standby mode and machine could not continue the program.)
ĺ Remove the bread, dough or ingredients and start again using new ingredients.
“H01”, “H02” appears on the
display.
z
The display indicates a problem with the machine.
ĺ Consult the place of purchase or a Panasonic service centre.
“U50” appears on the display.
z
The machine is hot (above 40 °C). This may occur with repeated use.
ĺ Allow the machine to cool down to below 40 °C before using it again (U50 will disappear).
Display exception
Troubleshooting
When making jam, can we
use fruits are pickled in
alcohol?
z
Do not use them. The quality is not satisfactory.
The fruit has collapsed when
making compote.
z
The cooking time was too long. The fruit may have been over ripe.
During or after cooking
Before calling for service, please check through this section.
OI1_YR250 UK Pagination_16th——audit 20210107.indd 30 2021/4/12 21:01:07
31
SD-YR2550 SD-YR2540 SD-R2530
Power supply 230 V - 240 V 50 Hz
Power consumption 505 W - 550 W
Capacity
(Strong flour for a loaf) max. 600 g min. 400 g
(Strong flour for a dough) max. 500 g min. 250 g
(Dry yeast) max. 7 g min. 1.4 g
(Baking powder) max. 13 g min. 10 g
Capacity of raisin nut
dispenser
Max. 150 g
dried fruits / nuts
Timer Digital timer (up to 13 hours)
Dimensions
(W × H × D)
Approx. 40.8 × 36.2 × 25.2 cm
Weight
Approx. 7.5 kg Approx. 7.5 kg Approx. 7.0 kg
Accessories 1 sourdough cup, 1 measuring spoon, 1 sourdough starter spoon
Airborne acoustical noise
[dB(A) ref 1 pW]
60.68 60.68 58.68
Specifications
Disposal of Old Equipment
Only for European Union and countries with recycling systems.
This symbol on the products, packaging, and
/ or accompanying documents means that used electrical
and electronic products must not be mixed with general household waste.
For proper treatment, recovery and recycling of old products, please take them to
applicable collection points in accordance with your national legislation.
By disposing of them correctly, you will help to save valuable resources and prevent any
potential negative effects on human health and the environment.
For more information about collection and recycling, please contact your local authority.
Penalties may be applicable for incorrect disposal of this waste, in accordance with
national legislation.
OI1_YR250 UK Pagination_16th——audit 20210107.indd 31 2021/4/12 21:01:07