www.auna-multimedia.com
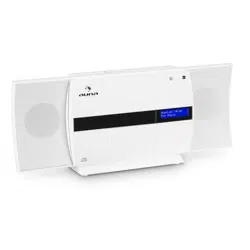
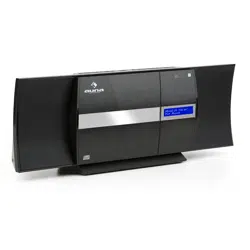
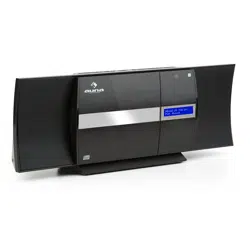
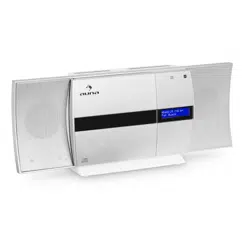
Verticalo SE DAB
Vertikaler Plattenspieler mit DAB+ Radio
Vertical Record Player with DAB+ Radio
Platine vinyle verticale avec radio DAB+
Tocadiscos vertical con radio DAB+
Giradischi verticale con radio DAB+
10034590


3
DE
English 17
Français 29
Español 41
Italiano 53
Sehr geehrter Kunde,
wir gratulieren Ihnen zum Erwerb Ihres Gerätes.
Lesen Sie die folgenden Hinweise sorgfältig durch
und befolgen Sie diese, um möglichen Schäden
vorzubeugen. Für Schäden, die durch Missachtung der
Hinweise und unsachgemäßen Gebrauch entstehen,
übernehmen wir keine Haftung. Scannen Sie den
folgenden QR-Code, um Zugri auf die aktuellste
Bedienungsanleitung und weitere Informationen rund
um das Produkt zu erhalten:
INHALTSVERZEICHNIS
Technische Daten 4
Geräteübersicht 6
Inbetriebnahme und Bedienung 7
Phono-Modus 8
Radio 9
BT-Modus 10
USB-Modus 10
AUX-Eingang 11
Zeit und Datum einstellen 11
Wecker 12
Reinigung und Pege 13
4
DE
TECHNISCHE DATEN
Artikelnummer 10034590
Stromversorgung
230 V ~ 50 Hz
Maximaler Stromverbrauch
12 W
Abspielgeschwindigkeiten
33
1
⁄3, 45, 78 U/min
FM-Radio
87,5 – 108 MHz
DAB+-Radio 174,928 – 239,200 MHz
BT-Frequenz 2400 – 2483,5 MHz
BT-Sendeleistung (max.) 4 dBm
Anschlüsse USB (zur MP3-Wiedergabe);
AUX-Eingang;
Kopfhöreranschluss
KONFORMITÄTSERKLÄRUNG
Hersteller:
Chal-Tec GmbH, Wallstraße 16, 10179 Berlin,
Deutschland.
Importeur für Großbritannien:
Berlin Brands Group UK Limited
PO Box 42
272 Kensington High Street
London, W8 6ND
United Kingdom
Hiermit erklärt Chal-Tec GmbH, dass der
Funkanlagentyp Verticalo SE DAB der Richtlinie
2014/53/EU entspricht. Der vollständige Text der
EU-Konformitätserklärung ist unter der folgenden
Internetadresse verfügbar: use.berlin/10034590

5
DE
SICHERHEITSHINWEISE
• Beachten Sie alle in der Bedienungsanleitung aufgeführten Hinweise.
• Das Gerät darf nicht in der Nähe von Wasser oder in feuchter
Umgebung verwendet werden.
• Achten Sie darauf, dass keine Flüssigkeit über dem Gerät und den
Geräteönungen verschüttet wird.
• Bewegen Sie das Gerät vorsichtig, um es nicht zu beschädigen.
• Blockieren Sie nicht die Geräteausgänge.
• Stellen Sie das Gerät nicht in die Nähe von Wärmequellen
(beispielsweise Heizung). Setzen Sie das Gerät keiner direkten
Sonneneinstrahlung aus.
• Stecken Sie den Netzstecker des Geräts auf die dafür vorgesehene Art
und Weise in die Steckdose.
• Das Gerät ist mit einem Überlastungsschutz ausgestattet. Sollte dieser
ersetzt werden müssen, wenden Sie sich an den Kundendienst oder
einen in ähnlicher Weise qualizierte Person.
• Ziehen Sie den Netzstecker des Geräts aus der Steckdose, wenn Sie
dieses für einen längeren Zeitraum nicht verwenden.
• Versuchen Sie keinesfalls, dass Gerät selbst zu warten oder zu
reparieren.
• Der Netzstecker dient dazu, das Gerät nach dem Ausschalten vom
Stromnetz zu trennen. Achten Sie darauf, dass der Netzstecker immer
frei zugänglich ist.
• Setzen Sie das Gerät keinem Spritzwasser aus und stellen Sie keine mit
Flüssigkeit gefüllten Objekte, wie beispielsweise Vasen, auf das Gerät.
• Setzen Sie die Batterien keiner extremen Hitze wie beispielsweise
Sonnenlicht oder Feuer aus.
• Behindern Sie die Belüftung des Geräts keinesfalls durch Blockieren der
Belüftungsönungen mit Gegenständen wie beispielsweise Zeitungen,
Tischdecken, Vorhängen etc.
• Vergewissern Sie sich, dass ein Mindestabstand von 5 mm zu allen
Seiten des Geräts eingehalten wird.
• Stellen Sie keine Zündquellen mit oener Flamme, wie beispielsweise
angezündete Kerzen, auf das Gerät.
• Entsorgen Sie Altbatterien umweltgerecht.
• Verwenden Sie das Gerät nur bei gemäßigtem Klima, nicht bei
tropischem Klima.
Kinder ab 8 Jahren, psychisch, sensorisch und körperlich eingeschränkte
Menschen dürfen das Gerät nur benutzen, wenn sie vorher von einer für
sie verantwortlichen Aufsichtsperson ausführlich mit den Funktionen und
den Sicherheitsvorkehrungen vertraut gemacht wurden und die damit
verbundenen Risiken verstehen.

6
DE
GERÄTEÜBERSICHT
Vorderseite
Rückseite

7
DE
1 Tonabnehmer und Nadel 13 USB-Anschluss
2 Plattenteller 14 Magnetischer Adapter
3 Tonarm 15 LCD-Bildschirm
4 Lautsprecher 16 Menü/Info Taste
5 Cue-Level 17 Eingabe/Schlummertaste
6 Wiedergabe/ Pause-Taste 18 Einstellungen
7 Kopplungs-/Suchtaste
(PAIR/SCAN)
19 Modus
20 Abspielgeschwindigkeit
8 Wecker 21 AUX-Eingang
9 Schlaf 22 Kopfhöreranschluss
10 Standby 23 Stromversorgung
11 Sendersuche 24 Netzschalter
12 Lautstärkeregler
INBETRIEBNAHME UND BEDIENUNG
Vor der Inbetriebnahme
• Entnehmen Sie das Gerät vorsichtig aus der Verpackung und entfernen
Sie das Verpackungsmaterial vollständig.
• Wickeln Sie das Netzkabel vollständig ab.
• Stellen Sie das Gerät auf eine stabile, ache Oberäche, die in der Nähe
einer Steckdose und außerhalb von starken Magnetfeldern liegt.
Inbetriebnahme
• Verbinden Sie den Netzstecker des Geräts mit der Steckdose.
• Entfernen Sie die weiße Plastikabdeckung vom Plattenspielerstift,
indem Sie diese in Richtung des Pfeils abziehen.
• Achten Sie während der Verwendung des Geräts darauf, den
Plattenspielerstift nicht zu beschädigen.
• Dieses Produkt ist dafür ausgelegt mit einem Netzgerät (12 V 1 A) zu
funktionieren. Dieses Gerät mit einem anderen Netzteil zu verwenden,
kann Schäden verursachen.

8
DE
HINWEIS: Das Gerät ist mit einem Standardnetzstecker ausgestattet. Wenn
Dieser Netzstecker nicht in Ihre Steckdose passt, versuchen Sie bitte nicht,
diesen durch Feilen passend zu machen. Wenn dieser Stecker nicht in Ihre
Steckdose passt, ist Ihre Steckdose vermutlich veraltet und nicht gepolt.
Sie sollten Ihre Steckdose in diesem Fall von einem qualizierten Elektriker
austauschen lassen.
Gerät einschalten
• Drücken Sie die POWER-Taste auf der Rückseite Ihres Geräts, so dass
diese in Position „I“ ist und drücken Sie anschließend die STANDBY-
Taste auf dem vorderen Bedienfeld. Der Bildschirm wird nun „Strom an“
anzeigen.
• Zum Ausschalten des Geräts drücken Sie die POWER-Taste auf der
Rückseite des Geräts, so dass diese in Position „O“ ist.
HINWEIS: Zur Reduzierung des Stromverbrauchs schaltet sich das Gerät,
wenn es über 20 Minuten lang keinen Audiosignaleingang registriert,
automatisch ab. Um das Gerät wieder einzuschalten und die Wiedergabe
fortzusetzen, müssen Sie es über die POWER-Taste zunächst abschalten
und nach ungefähr 5 Sekunden wieder einschalten.
PHONO-MODUS
1. Schalten Sie das Gerät ein.
2. Drücken Sie die MODE-Taste, um den Phono-Modus auszuwählen. Der
Bildschirm zeigt „Phono“ an.
3. Drehen Sie am Geschwindigkeitsregler auf der Rückseite des Geräts,
um die gewünschte Wiedergabegeschwindigkeit für den von Ihnen
gewählten Titel einzustellen (33
1
⁄3, 45 oder 78 U/min).
4. Entfernen Sie die Nadelschutzkappe vom Tonabnehmer.
5. Entriegeln Sie die Tonarmhalterung. Verwenden Sie den Tonarmhebel,
um den Tonarm anzuheben.
6. Bewegen Sie den Tonarm über die Schallplatte, und positionieren Sie
diesen an der Stelle, von welcher Sie die Wiedergabe starten möchten.
Verwenden Sie den Tonarmhebel zurück zur Auageposition. Der
Tonarm senkt sich langsam auf die Schallplatte und die Wiedergabe
beginnt.
7. Drehen Sie am Laustärkeregler, um die gewünschte
Wiedergabelautstärke einzustellen.
8. Am Ende der Wiedergabe stoppt der Tonarm automatisch.
HINWEIS: Drehen oder stoppen Sie den Plattenteller keinesfalls manuell.
Das manuelle Bewegen oder das Belasten des Plattentellers ohne den
Tonarm vorher zu xieren kann zu Schäden am Tonarm führen.

9
DE
RADIO
1. Schalten Sie das Gerät ein.
2. Drücken Sie die MODE-Taste, um den UKW-Modus auszuwählen. Der
Bildschirm zeigt „UKW“ an.
3. Drücken Sie die Taste „Koppelung/Suche“, um die automatische
Sendersuche zu starten. Sie können auch den TUNE-Knopf drehen,
um den gewünschten Sender auszuwählen. Wenn Sie einen Sender
einstellen, zeigt der Bildschirm „St“ an.
4. Drücken Sie währen des UKW-Betriebs die MENU/INFO-Taste, um
auf dem Bildschirm folgende Informationen anzuzeigen: Radio Text/
Programmart/Signalstärke/Zeit/Datum etc.
5. Wenn Sie die Wiedergabe beenden möchten, drücken Sie die POWER-
Taste, um das Gerät auszuschalten.
DAB-Modus
1. Schalten Sie das Gerät ein.
2. Drücken Sie die MODE-Taste, um den DAB-Modus auszuwählen. Der
Bildschirm zeigt „DAB“ an. Das Gerät startet automatisch die DAB-
Sendersuche, bis ein DAB-Sender empfangen wird.
3. Drücken Sie während des DAB-Betriebs einmal die MENU/INFO-
Taste. Der Bildschirm zeigt „Sendersuche“ an. Drücken Sie die ENTER/
SNOOZE-Taste und drehen Sie am TUNE-Knopf. Die Anzeigen „Lokaler
Sendersuchlauf“, „Vollständiger Sendersuchlauf“ und „Manuelle
Sendereinstellung“ werden in dieser Reihenfolge auf dem Bildschirm
des Geräts erscheinen. Sie können die von Ihnen gewünschte
Einstellung auswählen und diese durch Drücken der SELECT-Taste
bestätigen.
4. Bei der manuellen Sendersuche, drehen Sie so lange den TUNE-Knopf,
bis Sie den von Ihnen gewünschten DAB-Sender gefunden haben. Sie
können den Sender auswählen, indem Sie die ENTER/SNOOZE-Taste
drücken. Während der Sendersuche zeigt der Bildschirm „St“ an.
5. Drücken Sie im manuellen Suchmodus die PAIR/SCAN-Taste und die
automatische Sendersuche wird gestartet.
6. Zum Beenden der Wiedergabe drücken Sie die POWER-Taste, um das
Gerät auszuschalten.
Senderspeicherung im DAB-/UKW-Modus
1. Drehen Sie im DAB-/UKW-Modus den TUNE-Knopf, um den
Radiosender, den Sie gerne speichern würden, auszuwählen.
2. Drücken Sie die PRESET-Taste. Der Bildschirm zeigt „Voreinstellung 1
leer“ an.
3. Drücken Sie zum Bestätigen die ENTER-Taste. Das Display zeigt dann
„Voreinstellung 1 gespeichert“ an.

10
DE
4. Wiederholen Sie die Schritte 1-3 für alle Radiosender, die Sie speichern
möchten. Im DAB- oder UKW-Modus können jeweils maximal 20 Sender
gespeichert werden.
5. Zur Wiedergabe eines gespeicherten Senders, drücken Sie die PRESET-
Taste und drehen Sie den TUNE-Knopf so lange, bis Sie bei dem von
Ihnen gewünschten gespeicherten Sender angelangt sind. Drücken Sie
nun die ENTER-Taste, um die Wiedergabe des Senders zu starten.
BT-MODUS
1. Schalten Sie das Gerät ein.
2. Drücken Sie die Taste MODE um wählen Sie den BT-Modus aus.
„BTverbinden“ wird auf dem Bildschirm angezeigt.
3. Schalten Sie Ihr externes BT-Gerät ein, suchen Sie nach „Verticalo SE
DAB+“ und koppeln Sie Ihr Gerät.
4. Wenn Ihr externes BT-Gerät erfolgreich mit dem Plattenspieler
gekoppelt wurde, ertönt vom Plattenspieler ein kurzes
Bestätigungsgeräusch.
5. Der Bildschirm zeigt „BT verbunden“ an.
6. Wählen Sie einen Titel auf dem externen BT-Gerät aus und starten Sie
die Wiedergabe.
7. Um zum nächsten oder vorherigen Titel zu springen, drehen Sie
entweder am TUNE-Knopf oder Sie wählen auf Ihrem externen BT-Gerät
einen anderen Titel aus.
8. Zum Deaktivieren von BT können Sie entweder mit Ihrem Gerät in
einen anderen Modus wechseln oder einfach die BT-Funktion auf Ihrem
externen Gerät ausschalten.
USB-MODUS
1. Schalten Sie das Gerät ein.
2. Drücken Sie die MODE-Taste und wählen Sie den USB-Modus aus.
„USB“ wird auf dem Bildschirm angezeigt.
3. Stecken Sie einen USB-Stick in den USB-Anschluss. Der Bildschirm
zeigt für einige Sekunden „Lesen“ an und die Wiedergabe startet
anschließend automatisch. Wenn kein USB-Stick verbunden ist, zeigt
der Bildschirm „NO USB“ an.
4. Während der Wiedergabe, drücken Sie zum Pausieren die
WIEDERGABE/PAUSE-Taste. Drücken Sie diese zum Fortsetzen der
Wiedergabe erneut.
5. Um zum nächsten oder vorherigen Titel zu springen, drehen Sie am
TUNE-Knopf.

11
DE
AUX-EINGANG
1. Schalten Sie das Gerät ein.
2. Verbinden Sie Ihr externes Gerät über ein 3,5-mm-Audiokabel mit dem
AUX-Anschluss an der Rückseite Ihres Geräts.
3. Drücken Sie die MODE-Taste und wählen Sie den AUX-IN-Modus aus.
„AUX IN“ wird auf Ihrem Bildschirm angezeigt.
4. Starten Sie die Wiedergabe auf Ihrem externen Gerät.
ZEIT UND DATUM EINSTELLEN
1. Drücken Sie im DAB-Wiedergabemodus die MENU/INFO-Taste. Drehen
Sie nun am TUNE-Knopf und wählen Sie „SYSTEM“ aus. Der Bildschirm
zeigt nun „Hauptmenü“ an.
2. Drücken Sie die ENTER/SNOOZE-Taste. Der Bildschirm zeigt „Zeit
Einstellung“ an.
3. Drücken Sie die ENTER/SNOOZE-Taste erneut. „Uhrzeit einstellen“ wird
auf dem Bildschirm angezeigt.
4. Drücken Sie erneut die ENTER/SNOOZE-Taste. Der Bildschirm zeigt
„Uhrzeit einstellen 00:00“ (Stunde:Minute) an. Stellen Sie durch Drehen
des TUNE-Knopfs die gewünschte Uhrzeit ein. Zum Speichern der
Einstellung drücken Sie die ENTER/SNOOZE-Taste.
5. Drehen Sie erneut am TUNE-Knopf. „Datum einstellen“ wird auf dem
Bildschirm angezeigt. Drücken Sie erneut die ENTER/SNOOZE-Taste
um in den Einstellungsmodus zu gelangen. Das Display zeigt dann das
Datum „01.01.2016“ an. Drehen Sie am TUNE-Knopf, um das gewünschte
Datum einzustellen. Zum Speichern des von Ihnen eingestellten Datums
drücken Sie die ENTER/SNOOZE-Taste.
6. Wenn Sie den TUNE-Knopf erneut drehen, zeigt der Bildschirm
„Auto update“ an Drücken Sie die ENTER/SNOOZE-Taste, um in den
Einstellungsmodus zu gelangen. „Vom Radio“ oder „Kein Update“ wird
auf dem Bildschirm angezeigt, wenn Sie am TUNE-Knopf drehen. Sie
können die von Ihnen gewünschte Einstellung auswählen und diese
durch Drücken der ENTER/SNOOZE-Taste bestätigen.
7. Drehen Sie erneut am TUNE-Knopf, wird „12/24 Stundenformat
einstellen“ auf dem Bildschirm angezeigt. Drücken Sie die ENTER/
SNOOZE-Taste, um in den Einstellungsmodus zu gelangen. „12
Stundenformat“ oder „24 Stundenformat“ wird auf dem Bildschirm
angezeigt, wenn Sie am TUNE-Knopf drehen. Sie können das von Ihnen
gewünschte Stundenformat auswählen und die Auswahl durch Drücken
der ENTER/SNOOZE Taste bestätigen.

12
DE
WECKER
• Drücken Sie die ALARM-Taste, um in das Menü zur Weckereinstellung
zu gelangen. Drehen Sie am TUNE-Knopf, um eine der unten
aufgelisteten Funktionen auszuwählen und drücken Sie die ENTER/
SNOOZE-Taste, um die gewünschte Alarmeinstellung zu bestätigen.
A. Alarm1/Alarm2: Drehen Sie zur Auswahl am TUNE-Knopf und drücken
Sie die ENTER/SNOOZE-Taste zum Bestätigen.
B. Alarmaktivierung: Zum Einstellen des Alarms drücken Sie die ALARM-
Taste. Der Bildschirm zeigt dann „Alarm1:aus“ oder „Alarm2:aus“ an.
Wenn Sie die ENTER/SNOOZE-Taste drücken, wird „Alarm Detail aus“
auf dem Bildschirm angezeigt. Bei erneutem Drücken der ENTER/
SNOOZE-Taste erscheint auf dem Bildschirm die Anzeige „Alarm Detail
an“. Drehen Sie nun am TUNE-Knopf, um die von Ihnen gewünschte
Weckzeit einzustellen.
C. Weckzeit einstellen: Drücken Sie die ENTER/SNOOZE-Taste. Der
Bildschirm zeigt „Zeit: 00:00“ (Stunde:Minute) an. Drehen Sie am TUNE-
Knopf, um die gewünschte Weckzeit einzustellen, und bestätigen Sie
diese durch Drücken der ENTER/SNOOZE-Taste.
D. Alarmwiederholung: Drehen Sie am TUNE-Knopf, um zwischen
„täglich/einmalig“ auszuwählen, und bestätigen Sie Ihre Auswahl mit
der ENTER/SNOOZE-Taste. Wenn „täglich“ ausgewählt wurde, verbleibt
das Wecksymbol permanent auf dem Bildschirm, es sei denn, die
Weckfunktion wird deaktiviert.
E. Alarmtyp: Drehen Sie am TUNE-Knopf, um zwischen DAB/UKW/
BUZZER auszuwählen, und bestätigen Sie Ihre Auswahl mit der ENTER/
SNOOZE-Taste.
F. Alarmlautstärke: Drehen Sie den TUNE-Knopf bis zur gewünschten
Lautstärke auf und bestätigen Sie Ihre Auswahl mit der ENTER/
SNOOZE-Taste.
G. Alarm aus/speichern: Drehen Sie am TUNE-Knopf bis zur gewünschten
Funktion und bestätigen Sie Ihre Auswahl mit der ENTER/SNOOZE-
Taste.
HINWEISE:
• Es ist sehr wichtig, dass der Alarm so eingestellt wird, dass er auf der
Position „an“ ist und das Alarmsymbol auf dem Bildschirm angezeigt
wird.

13
DE
• Nachdem der Alarm aktiviert wurde wird er, wenn die aktuelle Uhrzeit
mit der von Ihnen eingestellten Weckzeit übereinstimmt, ertönen.
• Wenn der Alarm ertönt, drücken Sie die ENTER/SNOOZE-Taste zum
Aktivieren der Schlummerfunktion. 5 Minuten später, wird der Alarm
erneut ertönen.
• Um die Alarmfunktion permanent auszuschalten, befolgen Sie den
Schritt H. „Alarm aus/speichern“ im obigen Abschnitt. Der Alarm ist
dann ausgeschaltet und das Alarmsymbol wird nicht mehr auf dem
Bildschirm angezeigt.
• Wenn ein täglicher Wecker eingestellt wurde, verbleibt das
Alarmsymbol auf dem Bildschirm und der Wecker ertönt am nächsten
eingestellten Tag wieder, es sei denn, der Wecker wurde ausgeschaltet.
• Wenn Sie den Netzstecker des Geräts aus der Steckdose ziehen,
werden die Uhrzeit- und die Alarmeinstellungen gelöscht. Sie müssen
beides neu einstellen, wenn Sie das Gerät wieder einschalten.
Schlafmodus
• Drücken Sie die SLEEP-Taste und der Bildschirm zeigt „Sleep time
o“ an. Drücken Sie die SLEEP-Taste erneut, um das Zeitintervall
auszuwählen, nach dem das Gerät automatisch in den Ruhezustand
wechseln soll. Sie können zwischen 15, 30, 45 60 und 90 Minuten
auswählen. Das Zeitsymbol wird nach Ihrer Auswahl auf dem Bildschirm
angezeigt.
• Drücken Sie erneut die SLEEP-Taste, wird der Bildschirm die noch
verbleibende Zeit bis zum Ruhezustand anzeigen. Durch erneutes
Drücken der SLEEP-Taste wird der Ruhezustand deaktiviert und das
Zeitsymbol verschwindet vom Bildschirm.
REINIGUNG UND PFLEGE
Gehäusereinigung
• Sie sollten das Gehäuse so peglich wie jedes Ihrer Möbelstücke
behandeln.
• Reiben Sie das Gehäuse, wenn es eingestaubt ist, mit einem weichen,
abriebfesten Staubtuch ab. Wenn das Gehäuse durch Fingerabdrücke
verunreinigt ist, können Sie diese mit einem hochwertigen
kommerziellen Entstaubungs- und Polierspray entfernen. Achten Sie
hierbei darauf, dass Sie keine Plastik- oder Metallteile des Geräts damit
besprühen. Wir empfehlen Ihnen deshalb, den Reiniger direkt auf das
Staubtuch zu sprühen, damit nicht versehentlich Bestandteile aus Plastik
und Metall besprüht werden.
14
DE
Möbelschutz
• Dieses Gerät ist mit Anti-Rutsch-Gummifüßen ausgestattet, um zu
verhindern, dass das Gerät sich während der Bedienung bewegt.
Diese Füße wurden aus nicht rutschendem Gummi hergestellt,
welches so entwickelt wurde, dass es keine Kratzer und Flecken auf
den Möbeln hinterlässt. Es ist jedoch möglich, dass einige ölbasierte
Möbelpolituren, Holzschutzmittel und Reinigungssprays die Gummifüße
aufweichen lassen und das diese dadurch Flecken oder Gummireste auf
den Möbeln hinterlassen. Um Schäden an Ihren Möbeln zu vermeiden,
wird empfohlen, dass Sie selbstklebende Filzunterlagen erwerben und
diese unter die Gummifüße kleben, bevor Sie das Gerät auf exklusive
Holzmöbel stellen.
HINWEISE ZUR ENTSORGUNG
Wenn es in Ihrem Land eine gesetzliche Regelung
zur Entsorgung von elektrischen und elektronischen
Geräten gibt, weist dieses Symbol auf dem Produkt
oder auf der Verpackung darauf hin, dass dieses
Produkt nicht im Hausmüll entsorgt werden darf.
Stattdessen muss es zu einer Sammelstelle für
das Recycling von elektrischen und elektronischen
Geräten gebracht werden. Durch regelkonforme
Entsorgung schützen Sie die Umwelt und die
Gesundheit Ihrer Mitmenschen vor negativen
Konsequenzen. Informationen zum Recycling
und zur Entsorgung dieses Produkts, erhalten
Sie von Ihrer örtlichen Verwaltung oder Ihrem
Hausmüllentsorgungsdienst.

15
DE
SPEZIELLE ENTSORGUNGSHINWEISE FÜR
VERBRAUCHER IN DEUTSCHLAND
Entsorgen Sie Ihre Altgeräte fachgerecht. Dadurch wird gewährleistet,
dass die Altgeräte umweltgerecht verwertet und negative Auswirkungen
auf die Umwelt und menschliche Gesundheit vermieden werden. Bei der
Entsorgung sind folgende Regeln zu beachten:
• Jeder Verbraucher ist gesetzlich verpichtet, Elektro- und
Elektronikaltgeräte (Altgeräte) sowie Batterien und Akkus
getrennt vom Hausmüll zu entsorgen. Sie erkennen die
entsprechenden Altgeräte durch folgendes Symbol der
durchgestrichene Mülltonne (WEEE Symbol).
• Sie haben Altbatterien und Altakkumulatoren, die nicht vom Altgerät
umschlossen sind, sowie Lampen, die zerstörungsfrei aus dem
Altgerät entnommen werden können, vor der Abgabe an einer
Entsorgungsstelle vom Altgerät zerstörungsfrei zu trennen.
• Bestimmte Lampen und Leuchtmittel fallen ebenso unter das Elektro-
und Elektronikgesetz und sind dementsprechend wie Altgeräte zu
behandeln. Ausgenommen sind Glühbirnen und Halogenlampen.
Entsorgen Sie Glühbirnen und Halogenlampen bitte über den Hausmüll,
sofern Sie nicht das WEEE Symbol tragen.
• Jeder Verbraucher ist für das Löschen von personenbezogenen Daten
auf dem Elektro- bzw. Elektronikgerät selbst verantwortlich.
Rücknahmepicht der Vertreiber
Vertreiber mit einer Verkaufsäche für Elektro- und Elektronikgeräte von
mindestens 400 Quadratmetern sowie Vertreiber von Lebensmitteln
mit einer Gesamtverkauläche von mindestens 800 Quadratmetern, die
mehrmals im Kalenderjahr oder dauerhaft Elektro- und Elektronikgeräte
anbieten und auf dem Markt bereitstellen, sind verpichtet,
1 bei der Abgabe eines neuen Elektro- oder Elektronikgerätes an einen
Endnutzer ein Altgerät des Endnutzers der gleichen Geräteart, das
im Wesentlichen die gleichen Funktionen wie das neue Gerät erfüllt,
am Ort der Abgabe oder in unmittelbarer Nähe hierzu unentgeltlich
zurückzunehmen und
2 auf Verlangen des Endnutzers Altgeräte, die in keiner äußeren
Abmessung größer als 25 Zentimeter sind, im Einzelhandelsgeschäft
oder in unmittelbarer Nähe hierzu unentgeltlich zurückzunehmen; die
Rücknahme darf nicht an den Kauf eines Elektro- oder Elektronikgerätes
geknüpft werden und ist auf drei Altgeräte pro Geräteart beschränkt.

16
DE
• Bei einem Vertrieb unter Verwendung von Fernkommunikationsmitteln
ist die unentgeltliche Abholung am Ort der Abgabe auf Elektro- und
Elektronikgeräte der Kategorien 1, 2 und 4 gemäß § 2 Abs. 1 ElektroG,
nämlich „Wärmeüberträger“, „Bildschirmgeräte“ (Oberäche von mehr
als 100 cm²) oder „Großgeräte“ (letztere mit mindestens einer äußeren
Abmessung über 50Zentimeter) beschränkt. Für andere Elektro- und
Elektronikgeräte (Kategorien 3, 5, 6) ist eine Rückgabemöglichkeit in
zumutbarer Entfernung zum jeweiligen Endnutzer zu gewährleisten.
• Altgeräte dürfen kostenlos auf dem lokalen Wertstohof oder in
folgenden Sammelstellen in Ihrer Nähe abgegeben werden:
www.take-e-back.de
• Für Elektro- und Elektronikgeräte der Kategorien 1, 2 und 4 an bieten
wir auch die Möglichkeit einer unentgeltlichen Abholung am Ort der
Abgabe. Beim Kauf eines Neugeräts haben sie die Möglichkeit eine
Altgerätabholung über die Webseite auszuwählen.
• Batterien können überall dort kostenfrei zurückgegeben werden, wo sie
verkauft werden (z. B. Super-, Bau-, Drogeriemarkt). Auch Wertsto- und
Recyclinghöfe nehmen Batterien zurück. Sie können Batterien auch per
Post an uns zurücksenden. Altbatterien in haushaltsüblichen Mengen
können Sie direkt bei uns von Montag bis Freitag zwischen 08:00 und
16:00 Uhr unter der folgenden Adresse unentgeltlich zurückgeben:
Chal-Tec Fulllment GmbH
Norddeutschlandstr. 3
47475 Kamp-Lintfort
• Wichtig zu beachten ist, dass Lithiumbatterien aus Sicherheitsgründen
vor der Rückgabe gegen Kurzschluss gesichert werden müssen (z. B.
durch Abkleben der Pole).
• Finden sich unter der durchgestrichenen Mülltonne auf der Batterie
zusätzlich die Zeichen Cd, Hg oder Pb ist das ein Hinweis darauf, dass
die Batterie gefährliche Schadstoe enthält. (»Cd« steht für Cadmium,
»Pb« für Blei und »Hg« für Quecksilber).
Hinweis zur Abfallvermeidung
Indem Sie die Lebensdauer Ihrer Altgeräte verlängern, tragen Sie dazu
bei, Ressourcen eizient zu nutzen und zusätzlichen Müll zu vermeiden.
Die Lebensdauer Ihrer Altgeräte können Sie verlängern indem Sie defekte
Altgeräte reparieren lassen. Wenn sich Ihr Altgerät in gutem Zustand
bendet, könnten Sie es spenden, verschenken oder verkaufen.

17
EN
Dear Customer,
Congratulations on purchasing this device. Please read
the following instructions carefully and follow them to
prevent possible damages. We assume no liability for
damage caused by disregard of the instructions and
improper use. Scan the QR code to get access to the
latest user manual and more product information.
CONTENTS
Technical Data 18
Declaration of Conformity 18
Safety Instructions 19
Device Overview 20
Commissioning and Operation 21
Phono Mode 22
Radio 23
BT Mode 24
USB Mode 24
AUX IN 24
Setting the Time and Date 25
Alarm 25
Cleaning and Care 27
Disposal Considerations 28

18
EN
TECHNICAL DATA
Item number 10034590
Power supply
230 V ~ 50 Hz
Max. power consumption (Watt)
12 W
Turntable speed
33
1
⁄3, 45, 78 rpm
FM radio
87.5 – 108 MHz
DAB+ radio 174.928 – 239.200 MHz
BT frequency 2400 – 2483.5 MHz
BT radio-frequency power (max.) 4 dBm
Connections USB (for MP3 playback);
AUX;
Headphone jack
DECLARATION OF CONFORMITY
Manufacturer:
Chal-Tec GmbH, Wallstrasse 16, 10179 Berlin,
Germany.
Importer for Great Britain:
Berlin Brands Group UK Limited
PO Box 42
272 Kensington High Street
London, W8 6ND
United Kingdom
Hereby, Chal-Tec GmbH declares that the radio
equipment type Verticalo SE DAB is in compliance
with Directive 2014/53/EU. The full text of the EU
declaration of conformity is available at the following
internet address: use.berlin/10034590
For Great Britain: Hereby, Chal-Tec GmbH declares
that the radio equipment type Verticalo SE DAB is in
compliance with the relevant statutory requirements.
The full text of the declaration of conformity is
available at the following internet address:
use.berlin/10034590

19
EN
SAFETY INSTRUCTIONS
• Observe all notes listed in the operating instructions.
• Do not use the unit near water or in a humid environment.
• Make sure that no liquid is spilled over the unit and the unit openings.
• Move the unit carefully to avoid damaging it.
• Do not block the device outputs.
• Do not place the unit near heat sources (e.g. heating). Do not expose
the device to direct sunlight.
• Plug the power plug of the unit into the power outlet in the manner
intended.
• The device is equipped with overload protection. Should this need to be
replaced, contact customer service or a similarly qualied person.
• Unplug the unit from the wall outlet if it will not be used for a long
period of time.
• Do not attempt to service or repair the unit yourself.
• The mains plug is used to disconnect the device from the mains after it
has been switched o. Make sure that the mains plug is always freely
accessible.
• Do not expose the device to splash water or place objects lled with
liquid, such as vases, on the device.
• Do not expose the batteries to extreme heat such as sunlight or re.
• Do not obstruct the ventilation of the unit by blocking the ventilation
openings with objects such as newspapers, tablecloths, curtains, etc..
• Ensure that a minimum distance of 5 mm to all sides of the unit is
maintained.
• Do not place sources of open ame ignition, such as lit candles, on the
unit.
• Dispose of used batteries in an environmentally friendly manner.
• Use the device only in temperate climate, not in tropical climate.
This device may be only used by children 8 years old or older and
persons with limited physical, sensory and mental capabilities and/
or lack of experience and knowledge, provided that they have been
instructed in use of the device by a responsible person who understands
the associated risks.

20
EN
DEVICE OVERVIEW
Front view
Rear

21
EN
1 Cartridge and Stylus 13 USB socket
2 Turntable 14 Magnetic Adapter
3 Tone Arm 15 LCD Screen
4 Speakers 16 MENU/INFO Button
5 Cue Level 17 ENTER/SNOOZE Button
6 PLAY/PAUSE Button 18 PRESET Button
7 PAIR/SCAN Button 19 MODE Button
8 ALARM Button 20 Speed Control Knob
9 SLEEP Button 21 AUX IN Jack
10 STANDBY Button 22 EARPHONE Jack
11 TUNE Knob 23 Power Jack
12 VOLUME Knob 24 Power Switch
COMMISSIONING AND OPERATION
Before start-up
• Carefully remove the device from its packaging and completely remove
the packaging material.
• Unwind the power cord completely.
• Place the product on a stable, at surface near a wall outlet and away
from strong magnetic elds.
Start-up
• Connect the mains plug of the device to the socket.
• Remove the white plastic cover from the turntable pin by pulling it in
the direction of the arrow.
• When using the unit, be careful not to damage the turntable pin.
• This product is designed to work with an AC adapter (12 V 1 A). Using this
product with any other AC adapter may cause damage.
NOTE: The device is equipped with a standard mains plug. If this power plug
does not t into your outlet, do not attempt to le it. If this plug does not
t into your outlet, your outlet is probably obsolete and not polarized. You
should have your outlet replaced by a qualied electrician.
22
EN
Switch on the device
• Turn on the unit: press the POWER button (on the back of the unit) to
position ”I”, and then press the STANDBY button at the front panel.
“Power On” will be shown on the screen.
• Turn o the unit: press the POWER button (on the back of the unit) to
position ”O”.
NOTE: To help save power consumption, if there is no audio signal input
for about 20 minutes while the unit is powered on, the unit will power o
automatically. To turn power back on and resume playing, you will need to
turn o the power rst, after 5 seconds turn it back on to continue.
PHONO MODE
1. Turn on the unit.
2. Press the MODE button to select the PHONO mode. “PHONO”will be
shown on the screen.
3. Rotate the SPEED CONTROL KNOB (on the back of the unit) to the
correct speed (33
1
⁄3, 45 or 78 rpm) for the track you have selected.
4. Remove the stylus protector from the stylus assembly.
5. Relase the tone arm lock. Use the Cue lever to lift up the tone arm.
6. Move the tone arm over the record where play is desired to begin. Use
the Cue Lever back to the down position. The tone arm will descend
slowly onto the record and begin to play.
7. Rotate the volume control knob to get desired sound level.
8. At the end of the record, the tone arm will stop automatically.
NOTE: Do not turn or stop the turntable manually. Moving or jarring the
turntable without securing the tone arm clamp could result in damage to
the tone arm.

23
EN
RADIO
1. Turn on the unit
2. Press the MODE button to select the FM mode. “FM” will be shown on
the screen.
3. Press the PAIR/SCAN to start auto-search the FM stations. Or rotate the
TUNE knob to select the desired FM stations. If you tune to a FM stereo
station, the “St” will be shown on the display.
4. During FM working mode, press the MENU/INFO button to see the
following information on the screen: Radio Text / Program Type /
Signal strength / Time / Date, etc.
5. When you nished listening, press the POWER button to turn o the
unit.
DAB Mode
1. Turn on the unit.
2. Press the MODE button to select the DAB mode. “DAB”will be shown on
the screen. And the unit will scan the DAB station automatically until it
receives the DAB station.
3. During DAB working mode, press the MENU/INFO button once,
“Station scan” will be shown on the screen, press the ENTER/SNOOZE
button and rotate the TUNING knob, “Local scan” “Full scan” and
“Manual tune” will be shown on the screen orderly, you can choose the
scan type, press the SELECT button to conrm.
4. In Manual tune mode, rotate the TUNING knob to select the DAB
station manually. Select the desired DAB station and press the ENTER/
SNOOZE button to conrm the playing. If you tune to a DAB stereo
station, the “St” will be shown on the display.
5. In Scan mode, press the PAIR/SCAN button to start auto-search the DAB
stations.
6. When you nished listening, press the POWER button to turn o the
unit.
Memory Function in DAB/FM Mode
1. In DAB/FM playing mode, rotate the TUNE knob to choose the desired
radio station that you would like to saved.
2. Press the PRESET button , “Preset 1 empty “ will be shown on the screen.
3. Press the ENTER button to conrm and “Preset 1 saved” will be shown
on the screen.
4. Repeat the steps 1-3 for additional radio station you like to saved. A
maximum of 20 stations can be saved in DAB or FM mode.
5. Play the saved stations, press the PRESET button, rotate the TUNE knob
to select the desired saved station, then press the ENTER button to
conrm the play.

24
EN
BT MODE
1. Turn on the unit.
2. Press the MODE button to select the BT mode. “BT Connecting” will be
shown on the screen.
3. Turn on your BT device and search for “Verticalo SE DAB+” and pair.
4. Once your BT device is successfully paired with the unit, you will hear
a short conrmation sound from the unit. The display will show “BT
connected”.
5. Select and play the audio les though your BT device.
6. To skip to the next or previous track, rotate the “TUNE’ of the unit or
select from your BT device.
7. To stop this function, switch to other mode or shut down your BT of
your BT device.
USB MODE
1. Turn on the unit.
2. Press the MODE button to select the USB mode. “USB”will be shown on
the screen.
3. Insert a USB disk into the USB socket. “Reading” will be shown for a few
seconds, playback will start automatically. If no USB disk, “NO USB” will
be shown on the screen.
4. During the playback, press the PLAY/PAUSE button to pause, press it
again to resume playback.
5. To skip to the next or previous track by rotating the TUNE knob.
AUX IN
1. Turn on the unit.
2. Connect the 3.5 mm audio cable between your external device and the
AUX jack of the back of the unit.
3. Press the MODE button to select the AUX IN mode. “AUX IN ”will be
shown on the screen.
4. Play the music from your external device from the unit.

25
EN
SETTING THE TIME AND DATE
1. In DAB playing mode, press the MENU/INFO button to choose SYSTEM
by rotating the TUNE knob, “Main menu” will be shown on the screen.
2. Press the ENTER/SNOOZE button, “Time setup”will be shown on the
screen.
3. Press the ENTER/SNOOZE button again, “Set clock” will be shown on
the screen.
4. Press the ENTER/SNOOZE button again, “Set clock 00:00”(hour:minute)
will be shown on the screen. Rotate the TUNE knob and press the
ENTER/SNOOZE button to set and conrm the time.
5. Rotate the TUNING knob again, “Set date” will be shown on the screen,
press ENTER/SNOOZE button to enter setting date mode, “01-01-2016”
will be shown on the screen. Rotate the TUNING knob and press the
ENTER/SNOOZE button to set and conrm the date.
6. Rotating the TUNE knob again, “Auto update” will be shown on the
screen, press the ENTER/SNOOZE button to enter the setting mode.
“From radio” or “No update” will be shown on the screen by rotating the
TUNE knob. You may choose the desired update mode by pressing the
ENTER/SNOOZE button to conrm.
7. Rotate the TUNE knob once again, Set 12/24 hour “ will be shown on
the screen, press the ENTER/SNOOZE button to enter the setting mode.
“Set 12 hour” or “ Set 24 hour” will be shown on the screen by rotating
the TUNE knob. You may choose the desired mode by pressing the
ENTER/SNOOZE button to conrm.
ALARM
• Press the ALARM button to enter the alarm detail menu, rotate the
TUNE knob for below details, and press the ENTER/SNOOZE button to
set the Alarm detail:
A. Alarm1 / Alarm2: Rotate the TUNE knob to select, press the ENTER/
SNOOZE button to conrm.
B. Alarm activation: To set the alarm clock on, press the ALARM button,
“Alarm1:o” or “Alarm2 :o” will be shown on the screen. Press the
ENTER/SNOOZE button, “Alarm detail o “ will be shown on the
screen, press the ENTER/SNOOZE button again, “Alarm detail on” will
be shown on the screen, rotate the TUNE knob to set alarm time.
C. Set alarm time: Press the ENTER/SNOOZE button, “Time: 00:00”
(hour:minute) will be shown on the screen. Rotate the TUNE knob and
press the ENTER/SNOOZE button to set and conrm the time.

26
EN
D. Repeat alarm (Days): Turn the TUNE button to select between „Daily/
Once“ and conrm your selection with the ENTER/SNOOZE button.
If „Daily“ is selected, the alarm icon will remain permanently on the
screen unless the alarm is disabled.
E. Alarm type (Mode): Turn the TUNE knob to select between DAB/FM/
BUZZER and press the ENTER/SNOOZE button to conrm.
F. Set alarm volume: Rotate the TUNE knob to the expected volume,
press the ENTER/SNOOZE button to conrm.
G. O/Save: Rotate the TUNE knob to the desired function, press the
ENTER/SNOOZE button to conrm.
NOTES:
• It is very importance to set the alarm to be ON position, and the alarm
symbol will be shown on the display.
• Once the alarm has been set and activated, when the time on the clock
is the same as the alarm time that has been set, the unit will ring.
• When the alarm clock is ringing, press the ENTER/ SNOOZE button to
activate the snooze function. 5 minutes later the alarm will ring again.
• To turn o the alarm function permanently, follow the step G “O/
Save” (in the section above) to set it to the O position, the alarm is
now turned o and the alarm symbol disappears.
• If a daily alarm has been set, the alarm symbol will remain on the
screen and the alarm will sound again on the next set day unless the
alarm has been turned o.
• If you unplug the unit from the wall outlet, the time and alarm settings
will be cleared. You must reset both when you turn the power back on.
Sleep Mode
• Press the SLEEP button, it will show “Sleep time o” on the screen. Then
üress the SLEEP button again to select the time interval after which the
unit will automatically enter sleep mode. You can select from 15, 30, 45,
60, 90 minutes. The time symbol will be displayed on the screen after
your selection.
• To cancel the SLEEP function, press the SLEEP button, it will show the
current sleep time. Press the SLEEP button again, the time symbol will
disappear and “Sleep time o” is shown on the screen.

27
EN
CLEANING AND CARE
Case cleaning
• You should treat the case as carefully as any of your furniture.
• When the cabinet is dusty, rub it with a soft, abrasion-resistant cloth.
If the case is contaminated with ngerprints, you can remove them
with a high-quality commercial dust remover and polishing spray. Be
careful not to spray any plastic or metal parts on the unit. We therefore
recommend that you spray the cleaner directly onto the dust cloth to
prevent accidental spraying of plastic and metal parts. We therefore
recommend that you spray the cleaner directly onto the dust cloth to
prevent accidental spraying of plastic and metal parts.
Furniture protection
• This unit is equipped with anti-slip rubber feet to prevent the unit from
moving during operation. These feet are made of non-slip rubber which
is designed to leave no scratches or stains on the furniture. However, it
is possible that some oil-based furniture polishes, wood preservatives
and cleaning sprays may soften the rubber feet, leaving stains or
rubber residue on the furniture. To avoid damage to your furniture, it is
recommended that you purchase self-adhesive felt pads and stick them
under the rubber feet before placing the appliance on exclusive wooden
furniture.

28
EN
DISPOSAL CONSIDERATIONS
If there is a legal regulation for the disposal of
electrical and electronic devices in your country,
this symbol on the product or on the packaging
indicates that this product must not be disposed
of with household waste. Instead, it must be taken
to a collection point for the recycling of electrical
and electronic equipment. By disposing of it in
accordance with the rules, you are protecting the
environment and the health of your fellow human
beings from negative consequences. For information
about the recycling and disposal of this product,
please contact your local authority or your household
waste disposal service.

29
FR
Chère cliente, cher client,
Toutes nos félicitations pour l’acquisition de ce nouvel
appareil. Veuillez lire attentivement et respecter
les instructions de ce mode d’emploi an d’éviter
d’éventuels dommages. Nous ne saurions être tenus
pour responsables des dommages dus au non-respect
des consignes et à la mauvaise utilisation de l’appareil.
Scannez le QR-Code pour obtenir la dernière version
du mode d‘emploi ainsi que d‘autres informations
concernant le produit :
SOMMAIRE
Fiche technique 30
Déclaration de conformité 30
Aperçu de l‘appareil 32
Mise en marche et utilisation 33
Mode phono 34
Radio 35
Mode BT 36
Mode USB 36
Entrée AUX 37
Réglage de la date et de l‘heure 37
Réveil 38
Nettoyage et entretien 39
Conseils pour le recyclage 40

30
FR
FICHE TECHNIQUE
Numéro d'article 10034590
Alimentation
230 V ~ 50 Hz
Consommation maximale
12 W
Vitesses de lecture
33
1
⁄3, 45, 78 U/min
Radio FM
88 – 108 MHz
Radio DAB+
174,928 – 239,200 MHz
BT fréquence
2400 – 2483,5 MHz
BT puissance de radiofréquence
(max.)
4 dBm
Connexions USB (pour la lecture des MP3);
Entrée AUX;
Prise casque
DÉCLARATION DE CONFORMITÉ
Fabricant :
Chal-Tec GmbH, Wallstraße 16, 10179 Berlin,
Allemagne.
Importateur pour la Grande Bretagne :
Berlin Brands Group UK Limited
PO Box 42
272 Kensington High Street
London, W8 6ND
United Kingdom
Le soussigné, Chal-Tec GmbH, déclare que
l’équipement radioélectrique du type VerticaloSEDAB
est conforme à la directive 2014/53/UE. Le texte
complet de la déclaration UE de conformité est
disponible à l’adresse internet suivante :
use.berlin/10034590

31
FR
CONSIGNES DE SÉCURITÉ
• Respectez toutes les consignes du mode d‘emploi.
• L‘appareil ne doit pas être utilisé à proximité de l‘eau ou dans un
environnement humide.
• Assurez-vous qu‘aucun liquide n‘est renversé sur l‘appareil ou dans ses
ouvertures.
• Déplacez l‘appareil avec précaution an de ne pas l‘endommager.
• Ne bloquez pas les sorties de l‘appareil.
• Ne placez pas l‘appareil à proximité de sources de chaleur (chauage
par ex). N‘exposez pas l‘appareil à la lumière directe du soleil.
• Insérez la che secteur de l‘appareil dans la prise de la manière prévue.
• L‘appareil est équipé d‘une protection contre les surcharges. Si celle-ci
doit être remplacée, contactez le service client ou une personne de
qualication similaire.
• Débranchez l‘appareil de la prise si vous ne comptez pas l‘utiliser
pendant une longue période.
• N‘essayez jamais de réparer vous-même l‘appareil ou d‘en eectuer la
maintenance.
• La che secteur sert à déconnecter l‘appareil du secteur après l‘avoir
éteint. Assurez-vous que la che d‘alimentation est toujours librement
accessible.
• N‘exposez pas l‘appareil aux éclaboussures d‘eau et ne placez pas
dessus des objets remplis de liquide, tels que des vases.
• N‘exposez pas les piles à une chaleur extrême telle que la lumière du
soleil ou le feu.
• N‘obstruez en aucun cas la ventilation de l‘appareil en bloquant les
ouvertures avec des objets tels que des journaux, des nappes, des
rideaux, etc.
• Assurez-vous qu‘il y a un espace minimum de 5 mm sur tous les côtés
de l‘appareil.
• Ne placez pas de sources d‘inammation à amme nue, telles que des
bougies allumées, sur l‘appareil.
• Jetez les piles usagées dans les règles du respect de l‘environnement.
• Utilisez l‘appareil uniquement dans un climat tempéré, non sous un
climat tropical.
Les enfants de plus de 8 ans et les personnes aux capacités mentales,
physiques et psychiques réduites ne doivent utiliser l‘appareil que si
elles ont été formées en détail au fonctionnement et aux précautions
de sécurité par une personne responsable de leur sécurité et qu‘elles
peuvent comprendre les risques associés.

32
FR
APERÇU DE L‘APPAREIL
Face avant
Dos de l‘appareil

33
FR
1 Tête de lecture et aiguille 13 Port USB
2 Platine 14 Centreur magnétique
3 Bras de lecture 15 Ecran LCD
4 Enceinte 16 Touche menu/info
5 Cue-Level 17 Touche de saisie / veille
6 Touche de lecture/ pause 18 Paramètres
7 Touche de recherche /
d‘appairage (PAIR/SCAN)
19 Mode
20 Vitesse de lecture
8 Réveil 21 Entrée AUX
9 Nuit 22 Prise casque
10 Standby 23 Alimentation
11 Recherche de station 24 Interrupteur d‘alimentation
12 Réglage du volume
MISE EN MARCHE ET UTILISATION
Avant la mise en marche
• Retirez soigneusement l‘appareil de son emballage et retirez
complètement le matériau d‘emballage.
• Déroulez complètement le cordon d‘alimentation.
• Placez l‘appareil sur une surface plane et stable à proximité d‘une prise
électrique et à l‘écart des champs magnétiques puissants.
Mise en marche
• Branchez la che de l‘appareil sur la prise.
• Retirez le couvercle en plastique blanc de la tête de lecture de la platine
en la tirant dans le sens de la èche.
• Veillez à ne pas endommager l‘aiguille de la platine pendant l‘utilisation
de l‘appareil.
• Ce produit est conçu pour fonctionner avec une alimentation (12 V 1 A).
L‘utilisation de cet appareil avec un adaptateur secteur diérent peut
provoquer des dommages.

34
FR
REMARQUE : L‘appareil est équipé d‘une prise d‘alimentation standard. Si
cette che d‘alimentation ne rentre pas dans votre prise, veuillez ne pas
essayer de la faire rentrer en la limant. Si cette che ne correspond pas à
votre prise, celle-ci est probablement obsolète et non polarisée. Dans ce
cas, vous devez faire remplacer votre prise par un électricien qualié.
Pour allumer l‘appareil
• Appuyez sur la touche POWER à l‘arrière de votre appareil pour qu‘elle
soit en position „I“, puis appuyez sur la touche STANDBY du panneau
avant. L‘écran aichera maintenant „Power On“.
• Pour éteindre l‘appareil, appuyez sur la touche POWER à l‘arrière de
l‘appareil pour qu‘elle soit en position „O“.
REMARQUE : Pour réduire la consommation d‘énergie, l‘appareil s‘éteint
automatiquement s‘il n‘enregistre aucune entrée de signal audio pendant
plus de 20 minutes. Pour rallumer l‘appareil et reprendre la lecture, vous
devez d‘abord l‘éteindre à l‘aide du bouton POWER et le rallumer après
environ 5 secondes.
MODE PHONO
1. Allumez l‘appareil.
2. Appuyez sur la touche MODE pour sélectionner le mode Phono. L‘écran
aiche „Phono“.
3. Tournez la commande de vitesse à l‘arrière de l‘appareil pour régler la
vitesse de lecture correspondant à la piste que vous avez sélectionnée
(33 1⁄3, 45 ou 78 tr / min).
4. Retirez le capuchon de l‘aiguille de la cartouche.
5. Déverrouillez le support du bras de lecture. Utilisez le levier du bras de
lecture pour soulever le bras de lecture.
6. Déplacez le bras de lecture sur le disque et placez-le là où vous
souhaitez commencer la lecture. Remettez le levier du bras en position
de repos. Le bras de lecture descend lentement sur le disque et la
lecture commence.
7. Tournez la touche de volume pour régler le volume.
8. Le bras de lecture s‘arrête automatiquement à la n de la lecture.
REMARQUE : Ne jamais tourner ou arrêter la platine manuellement. Faire
bouger ou appuyer sur la platine sans d‘abord xer le bras de lecture peut
endommager celui-ci.

35
FR
RADIO
1. Allumez l‘appareil.
2. Appuyez sur la touche MODE pour sélectionner le mode FM. L‘écran
aiche „FM“.
3. Appuyez sur la touche „Pairing / Search“ pour lancer la recherche
automatique des stations. Vous pouvez également tourner la touche
TUNE pour sélectionner la station souhaitée. Lorsque vous réglez une
station, l‘écran aiche „St“.
4. En mode FM, appuyez sur la touche MENU / INFO pour aicher les
informations suivantes à l‘écran : texte radio / type de programme /
puissance du signal / heure / date, etc.
5. Lorsque vous souhaitez arrêter la lecture, appuyez sur la touche POWER
pour éteindre l‘appareil.
Mode DAB
1. Allumez l‘appareil.
2. Appuyez sur la touche MODE pour sélectionner le mode DAB. L‘écran
aiche „DAB“. L‘appareil démarre automatiquement la recherche de
station DAB jusqu‘à ce qu‘une station DAB soit reçue.
3. En mode DAB, appuyez sur la touche MENU / INFO. L‘écran aiche
„Recherche de chaîne“. Appuyez sur la touche ENTER /SNOOZE et
tournez le bouton TUNE. Les voyants „Local Channel Search ”,“ Full
Channel Search ”et“ Manual Tuning ”apparaîtront dans cet ordre sur
l‘écran de l‘appareil. Vous pouvez sélectionner le paramètre souhaité et
le conrmer en appuyant sur la touche SELECT.
4. Lorsque vous recherchez des stations manuellement, tournez le bouton
TUNE jusqu‘à ce que vous ayez trouvé la station DAB souhaitée. Vous
pouvez sélectionner la station en appuyant sur la touche ENTER /
SNOOZE. Pendant la recherche de station, l‘écran aiche „St“.
5. Appuyez sur la touche PAIR / SCAN en mode de recherche manuelle
pour commencer la recherche automatique des stations.
6. Pour arrêter la lecture, appuyez sur la touche POWER pour éteindre
l‘appareil.
Mémorisation de station en mode DAB/FM
1. En mode DAB / FM, tournez le bouton TUNE pour sélectionner la
station de radio que vous souhaitez mémoriser.
2. Appuyez sur la touche PRESET. L‘écran aiche „Default 1 empty“.
3. Appuyez sur la touche ENTER pour conrmer. L‘écran aiche alors
„Preset 1 sauvegardé“.

36
FR
4. Répétez les étapes 1 à 3 pour toutes les stations de radio que vous
souhaitez enregistrer. Vous pouvez enregistrer un maximum de 20
stations en mode DAB ou FM.
5. Pour écouter une station mémorisée, appuyez sur la touche PRESET
et tournez le bouton TUNE jusqu‘à ce que vous ayez atteint la station
souhaitée. Appuyez maintenant sur la touche ENTER pour commencer la
lecture de la station.
MODE BT
1. Allumez l‘appareil.
2. Appuyez sur la touche MODE pour sélectionner le mode BT. „Connect
BT“ s‘aiche à l‘écran.
3. Allumez votre appareil BT externe, recherchez „Verticalo SE DAB +“ et
associez votre appareil.
4. Lorsque votre appareil BT externe a été correctement couplé avec la
platine, vous entendrez un bref son de conrmation de la platine.
5. L‘écran aiche „BT connecté“.
6. Sélectionnez un titre sur le périphérique BT externe et lancez la lecture.
7. Pour passer à la piste suivante ou précédente, tournez la touche TUNE
ou sélectionnez une autre piste sur votre appareil BT externe.
8. Pour désactiver BT, vous pouvez soit passer à un autre mode avec votre
appareil, soit simplement désactiver la fonction BT sur votre appareil
externe.
MODE USB
1. Allumez l‘appareil.
2. Appuyez sur la touche MODE et sélectionnez le mode USB. „USB“
s‘aiche à l‘écran.
3. Insérez une clé USB dans le port USB. L‘écran aiche „Lire“ pendant
quelques secondes et la lecture démarre alors automatiquement. Si
aucune clé USB n‘est connectée, l‘écran aiche „NO USB“.
4. Pendant la lecture, appuyez sur la touche PLAY / PAUSE pour faire une
pause. Appuyez à nouveau pour reprendre la lecture.
5. Pour passer à la piste suivante ou précédente, tournez le bouton TUNE.

37
FR
ENTRÉE AUX
1. Allumez l‘appareil.
2. Branchez votre appareil externe au connecteur AUX à l‘arrière de votre
appareil à l‘aide d‘un câble audio 3,5 mm.
3. Appuyez sur la touche MODE et sélectionnez le mode AUX-IN. „AUX IN“
s‘aiche sur votre écran.
4. Lancez la lecture sur votre appareil externe.
RÉGLAGE DE LA DATE ET DE L‘HEURE
1. En mode de lecture DAB, appuyez sur la touche MENU / INFO. Tournez
maintenant le bouton TUNE et sélectionnez „SYSTEM“. L‘écran aiche
maintenant „Menu principal“.
2. Appuyez sur la touche ENTER / SNOOZE. L‘écran aiche „Réglage de
l‘heure“.
3. Appuyez à nouveau sur la touche ENTER / SNOOZE. „Set time“ s‘aiche
à l‘écran.
4. Appuyez à nouveau sur la touche ENTER / SNOOZE. L‘écran aiche „Set
time 00:00“ (heure: minute). Réglez l‘heure souhaitée en tournant le
bouton TUNE. Appuyez sur la touche ENTER / SNOOZE pour enregistrer
le paramètre.
5. Tournez à nouveau le bouton TUNE. „Régler la date“ s‘aiche à l‘écran.
Appuyez à nouveau sur la touche ENTER / SNOOZE pour accéder au
mode de réglage. L‘écran aiche alors la date „01/01/2016“. Tournez le
bouton TUNE pour régler la date souhaitée. Pour enregistrer la date que
vous avez dénie, appuyez sur la touche ENTER / SNOOZE.
6. Lorsque vous tournez à nouveau le bouton TUNE, l‘écran aiche „Auto
update“. Appuyez sur la touche ENTER / SNOOZE pour entrer dans
le mode de réglage. „From radio“ ou „No update“ s‘aiche à l‘écran
lorsque vous tournez le bouton TUNE. Vous pouvez sélectionner le
paramètre souhaité et conrmer en appuyant sur la touche ENTER /
SNOOZE.
7. Si vous tournez à nouveau le bouton TUNE, l‘écran aiche „Régler le
format 12/24 heures“. Appuyez sur la touche ENTER / SNOOZE pour
accéder au mode de réglage. „Format 12 heures“ ou „Format 24 heures“
s‘aiche à l‘écran lorsque vous tournez le bouton TUNE. Vous pouvez
sélectionner le format d‘heure souhaité et conrmer votre sélection en
appuyant sur la touche ENTER / SNOOZE.

38
FR
RÉVEIL
• Appuyez sur la touche ALARM pour accéder au menu de réglage de
l‘alarme. Tournez le bouton TUNE pour sélectionner l‘une des fonctions
répertoriées ci-dessous et appuyez sur la touche ENTER / SNOOZE pour
conrmer le réglage d‘alarme souhaité.
A. Alarm1/Alarm2 : Tournez le bouton TUNE pour sélectionner et appuyez
sur ENTER / SNOOZE pour conrmer.
B. Activation de l‘alarme : Pour régler l‘alarme, appuyez sur la touche
ALARM. L‘écran aiche alors „Alarm1: o“ ou „Alarm2: o“. Lorsque
vous appuyez sur la touche ENTER / SNOOZE, „Alarm Detail O“
s‘aiche à l‘écran. Lorsque vous appuyez à nouveau sur la touche ENTER
/ SNOOZE, „Alarm Detail On“ apparaît à l‘écran. Maintenant, tournez le
bouton TUNE pour régler l‘heure de réveil souhaitée.
C. Réglage de l‘heure de réveil : Appuyez sur la touche ENTER /
SNOOZE. L‘écran aiche „Heure: 00:00“ (heure: minute). Tournez le
bouton TUNE pour régler l‘heure d‘alarme souhaitée et conrmez en
appuyant sur ENTER / SNOOZE.
D. Répétition de l‘alarme : Tournez le bouton TUNE pour choisir entre
„quotidiennement / une fois“ et conrmez votre sélection avec ENTER
/ SNOOZE. Si „quotidien“ est sélectionné, le symbole d‘alarme restera
sur l‘écran en permanence à moins que la fonction d‘alarme ne soit
désactivée.
E. Type d‘alarme : Tournez le bouton TUNE pour choisir entre DAB / FM /
BUZZER et conrmez votre sélection avec la touche ENTER / SNOOZE.
F. Volume de l‘alarme : Tournez le bouton TUNE jusqu‘au volume
souhaité et conrmez votre sélection avec ENTER / SNOOZE.
G. Désactiver / enregistrer l‘alarme : Tournez le bouton TUNE sur la
fonction souhaitée et conrmez votre sélection avec la touche ENTER /
SNOOZE.
REMARQUES :
• Il est très important que l‘alarme soit réglée en position „on“ et que le
symbole d‘alarme s‘aiche à l‘écran.
• Une fois l‘alarme activée, elle retentira si l‘heure actuelle correspond à
l‘heure de l‘alarme que vous avez dénie.
• Lorsque l‘alarme sonne, appuyez sur la touche ENTER / SNOOZE pour
activer la fonction de répétition. 5 minutes plus tard, l‘alarme retentit à
nouveau.

39
FR
• Pour désactiver dénitivement l‘alarme, suivez l‘étape H. „Alarme
désactivée / enregistrée“ dans la section ci-dessus. L‘alarme est alors
désactivée et le symbole d‘alarme ne s‘aiche plus à l‘écran.
• Si vous avez réglé un réveil quotidien, le symbole de l‘alarme reste à
l‘écran et le réveil sonnera à nouveau le jour réglé suivant, sauf si le
réveil a été éteint.
• Si vous débranchez l‘appareil, les paramètres d‘heure et d‘alarme sont
supprimés. Vous devez réinitialiser les deux lorsque vous rallumez
l‘appareil.
Mode nuit
• Appuyez sur la touche SLEEP, l‘écran aiche „Sleep time o“. Appuyez
à nouveau sur la touche SLEEP pour sélectionner l‘intervalle de temps
après lequel l‘appareil doit automatiquement se mettre en veille. Vous
pouvez choisir entre 15, 30, 45, 60 et 90 minutes. Le symbole de l‘heure
s‘aiche à l‘écran après votre sélection.
• Si vous appuyez à nouveau sur la touche SLEEP, l‘écran aichera le
temps restant jusqu‘à la mise en veille. Une nouvelle pression sur la
touche SLEEP désactive l‘arrêt automatique et le symbole de l‘heure
disparaît de l‘écran.
NETTOYAGE ET ENTRETIEN
Nettoyage du boîtier
• Traitez le boîtier avec autant de soin que n‘importe lequel de vos
meubles.
• Lorsqu‘il est poussiéreux, essuyez le boîtier avec un chion doux
résistant à l‘abrasion. Si le boîtier est contaminé par des empreintes
digitales, vous pouvez les retirer avec un produit du commerce
de haute qualité et un spray de polissage. Assurez-vous de ne pas
vaporiser de pièces en plastique ou en métal de l‘appareil. Nous vous
recommandons donc de vaporiser le nettoyant directement sur le
plumeau an que les composants en plastique et en métal ne soient pas
accidentellement pulvérisés.

40
FR
Protection des meubles
• Cet appareil est équipé de pieds en caoutchouc antidérapants pour
empêcher l‘appareil de bouger pendant le fonctionnement. Ces pieds
en caoutchouc antidérapant ont été développés pour ne pas laisser de
rayures et de taches sur les meubles. Cependant, il est possible que
certains produits de polissage à base d‘huile pour meubles, produits de
préservation du bois et sprays de nettoyage ramollissent les pieds en
caoutchouc, laissant des taches ou des résidus de caoutchouc sur les
meubles. Pour éviter d‘endommager vos meubles, il est recommandé
d‘acheter des tampons de feutre auto-adhésifs et de les coller sous les
pieds en caoutchouc avant de placer l‘appareil sur des meubles en bois
précieux.
CONSEILS POUR LE RECYCLAGE
S‘il existe une réglementation pour l‘élimination ou le
recyclage des appareils électriques et électroniques
dans votre pays, ce symbole sur le produit ou sur
l‘emballage indique que cet appareil ne doit pas
être jeté avec les ordures ménagères. Vous devez le
déposer dans un point de collecte pour le recyclage
des équipements électriques et électroniques.
La mise au rebut conforme aux règles protège
l‘environnement et la santé de vos semblables des
conséquences négatives. Pour plus d‘informations
sur le recyclage et l‘élimination de ce produit, veuillez
contacter votre autorité locale ou votre service de
recyclage des déchets ménagers.

41
ES
Estimado cliente,
Le felicitamos por la adquisición de este producto.
Lea atentamente el siguiente manual y siga
cuidadosamente las instrucciones de uso con el n de
evitar daños posibles. La empresa no se responsabiliza
de los daños ocasionados por un uso indebido del
producto o por haber desatendido las indicaciones
de seguridad. Escanee el siguiente código QR para
obtener acceso a la versión más actual de la guía del
usuario y más información sobre el producto.
ÍNDICE
Datos técnicos 42
Declaración de conformidad 42
Descripción del producto 44
Puesta en marcha y funcionamiento 45
Modo fono 46
Radio 47
Modo BT 48
Modo USB 48
AUX IN 49
Conguración de hora y fecha 49
Alarma 50
Limpieza y cuidado 51
Retirada del aparato 52

42
ES
DATOS TÉCNICOS
Número del artículo 10034590
Potencia
230 V ~ 50 Hz
Consumo máximo
12 W
Velocidad de giro
33
1
⁄3, 45, 78 U/min
Radio FM
87,5 – 108 MHz
Radio DAB+ 174,928 – 239,200 MHz
BT frecuencia 2400 – 2483,5 MHz
BT potencia de radiofrecuencia
(max.)
4 dBm
Entradas USB (para reproductor MP3);
entrada AUX;
conector para auriculares
DECLARACIÓN DE CONFORMIDAD
Fabricante:
Chal-Tec GmbH, Wallstraße 16, 10179 Berlín, Alemania.
Importador para Gran Bretaña:
Berlin Brands Group UK Limited
PO Box 42
272 Kensington High Street
London, W8 6ND
United Kingdom
Por la presente, Chal-Tec GmbH declara que el tipo de
equipo radioeléctrico Verticalo SE DAB es conforme
con la Directiva 2014/53/UE. El texto completo de la
declaración UE de conformidad está disponible en la
dirección Internet siguiente: use.berlin/10034590

43
ES
INSTRUCCIONES DE SEGURIDAD
• Observe todas las instrucciones del manual de instrucciones.
• El dispositivo no debe utilizarse cerca del agua o en un ambiente
húmedo.
• Tenga cuidado de no derramar ningún líquido sobre la unidad o las
aberturas de la misma.
• Mueva la unidad con cuidado para no dañarla.
• No bloquee las salidas del dispositivo.
• No coloque el dispositivo cerca de fuentes de calor (como radiadores).
• No exponga el dispositivo a la luz solar directa.
• Inserte el enchufe del dispositivo en la toma de corriente de la forma
prevista.
• El dispositivo está equipado con protección contra sobrecargas. Si
necesita ser reemplazado, contacte con el servicio de atención al cliente
o con una persona con una cualicación similar.
• Desenchufe este producto de la toma de corriente cuando no lo utilice
durante un período de tiempo prolongado.
• Nunca intente reparar el producto usted mismo.
• El enchufe se utiliza para desenchufar el producto de la toma de
corriente después de apagarlo. Asegúrate de que el enchufe esté
siempre libremente accesible.
• No exponga el dispositivo a salpicaduras de agua ni coloque objetos
llenos de líquidos, como jarrones, sobre el aparato.
• No exponga las pilas a un calor extremo, como la luz del sol o el fuego.
• No obstruya la ventilación del aparato bloqueando los oricios de
ventilación con objetos como periódicos, manteles, cortinas, etc.
• Asegúrate de que haya una distancia mínima de 5 mm a todos los lados
de la unidad.
• No coloque fuentes de llamas desnudas, como velas encendidas, sobre
el dispositivo.
• Deshágase de las pilas usadas de forma respetuosa con el medio
ambiente.
• Utilice el dispositivo sólo en climas moderados, no en climas tropicales.
Los niños a partir de los 8 años de edad y las personas con
discapacidades mentales, sensoriales y físicas sólo podrán utilizar el
dispositivo si un supervisor responsable los ha familiarizado a fondo
con las funciones y las precauciones de seguridad y si comprenden los
riesgos asociados.

44
ES
DESCRIPCIÓN DEL PRODUCTO
Parte frontal
Parte posterior

45
ES
1 Fonocaptor y aguja 13 Entrada USB
2 Plato de tocadiscos 14 Adaptador magnético
3 Brazo del fonocaptor 15 Pantalla LCD
4 Altavoz 16 Botón Menu/Info
5 Palanca 17 Botón Enter/Snooze
6 Tecla de reproducción/pausa 18 Tecla de conguración
7 Tecla para conexión/búsqueda
(PAIR/SCAN)
19 Modo
20 Velocidad de lectura
8 Despertador 21 Entrada AUX
9 Función nocturna 22 Entrada auriculares
10 Standby 23 Suministro eléctrico
11 Búsqueda de canales 24 Encendido/apagado
12 Ajustar el volumen
PUESTA EN MARCHA Y FUNCIONAMIENTO
Antes de la puesta en marcha
• Retire cuidadosamente el dispositivo de su embalaje y retire el material
de embalaje por completo.
• Desenrolla completamente el cable de alimentación.
• Coloque la unidad en una supercie estable y plana, cerca de una toma
de corriente y lejos de campos magnéticos fuertes.
Puesta en marcha
• Conecte el enchufe del aparato a la toma de corriente.
• Retire la cubierta de plástico blanco del pasador del tocadiscos tirando
de él en la dirección de la echa.
• Tengan cuidado de no dañar el pasador del tocadiscos mientras se usa
la máquina.
• Este producto está diseñado para funcionar con una fuente de
alimentación de 12V 1A. El uso de este producto con otro adaptador de
CA puede causar daños.

46
ES
NOTA: el aparato está equipado con un enchufe estándar. Si este enchufe
no encaja en su toma de corriente, por favor no lo fuerce. Si este enchufe no
encaja en su toma de corriente, su toma de corriente probablemente esté
anticuada y no polarizada. En este caso, debería hacer que un electricista
cualicado le cambie la toma de corriente.
Encender el aparato
• Ponga la tecla POWER en la parte trasera del aparato en la posición “I”
y pulse la tecla STANDBY en la parte delantera. La pantalla mostrará
POWER ON.
• Para apagarlo pulse el POWER en la parte trasera del aparato para que
vuelva a la posición “0”.
NOTA: Para reducir el consumo de energía, el aparato se apagará
automáticamente si no se detecta ninguna entrada de señal de audio
durante más de 20 minutos. Para volver a encender la alimentación
y reanudar la reproducción, pulse el botón POWER para apagar la
alimentación y vuelva a encenderla después de unos 5 segundos.
MODO FONO
1. Encienda el aparato
2. Pulse la tecla MODE para seleccionar el modo FONO. En la pantalla
aparecerá “FONO”.
3. Seleccione la velocidad con el mando de control de velocidad (en la
parte posterior) adecuada para la pista que haya seleccionado (33 1⁄3,
45 o 78 rpm).
4. Retire el protector de la aguja.
5. Retire el seguro del brazo. Use la palanca para levantar el brazo.
6. Mueva el brazo sobre el disco hasta el lugar donde quiera comenzar.
Baje la palanca. El brazo desciende despacio hasta el disco y comienza
la reproducción.
7. Seleccione el volumen deseado con el mando de volumen.
8. Al nal del disco el brazo se detiene automáticamente.
NOTA: No pare el disco manualmente. Mover o hacer temblar el plato sin
tener el brazo asegurado puede dañarlo.

47
ES
RADIO
1. Encienda el aparato
2. Pulse la tecla MODE para seleccionar el modo FM. En la pantalla
aparecerá “FM”.
3. Pulse la tecla PAIR/SCAN para buscar estaciones FM o gire el mando
de TUNE. Si sintoniza una emisora FM estéreo en la pantalla aparecerá
“st”.
4. Durante la reproducción pulse la tecla MENU/INFO para que se muestre
la siguiente información: Nombre del programa/tipo de programa/
fuerza de la señal/hora/Fecha, etc.
5. Cuando termine pulse el botón POWER para apagar el aparato.
Modo DAB
1. Encienda el aparato
2. Pulse la tecla MODE para seleccionar el modo DAB. En la pantalla
aparecerá “DAB”. El aparato buscará automáticamente una emisora
DAB.
3. Durante al reproducción DAB pulse la tecla MENU/INFO una vez.
“Station Scan” (escáner de emisoras) aparecerá en la pantalla. Pulse
ENTER/SNOOZE y use el mando TUNING. En la pantalla aprarecerá
“Local Scan”, “Full scan” y “manual scan”seleccione el tipo de escáner
que quiere con la tecla SELECT.
4. En el modo manual gire el mando del TUNING para seleccionar
una emisora DAB. Elija la emisora DAB y pulse ENTER/SNOOZ
para conrmar. Si sintoniza una emisora DAB estéreo en la pantalla
aparecerá “St”.
5. En el modo Scan pulse la tecla PAIR/SCAN para empezar a buscar
estaciones DAB.
6. Cuando termine pulse el botón POWER para apagar el aparato.
Función memoria en modo DAB/FM.
1. En el modo DAB/KW, gira el mando TUNE para seleccionar la emisora
de radio que quieres guardar.
2. Presiona el botón PRESET. La pantalla muestra “Preset 1 en blanco”.
3. Pulse el botón ENTER para conrmar. La pantalla mostrará
“Preselección 1 almacenada”.

48
ES
4. Repita los pasos 1-3 para cada estación de radio que quiera almacenar.
En el modo DAB o FM, puede almacenar hasta 20 estaciones a la vez.
5. Para reproducir una emisora preseleccionada, pulse el botón PRESET
y gire el mando TUNE hasta llegar a la emisora preseleccionada que
desee. Ahora pulse el botón ENTER para iniciar la reproducción de la
emisora.
MODO BT
1. Encienda el dispositivo.
2. Presione el botón MODE para seleccionar el modo BT. En la pantalla
aparece “Connect BT”.
3. Encienda su dispositivo BT externo, busque “Verticalo SE DAB+” y
empareje su dispositivo.
4. Cuando su dispositivo BT externo se empareje con éxito con el
tocadiscos, se oirá un breve sonido de conrmación del tocadiscos.
5. La pantalla muestra “BT conectado”.
6. Seleccione una pista en el dispositivo BT externo e inicie la
reproducción.
7. Para saltar a la pista siguiente o anterior, gire el botón TUNE o
seleccione una pista diferente en su dispositivo BT externo.
8. Para desactivar la BT, puede cambiar a otro modo con su dispositivo o
simplemente apagar la función BT en su dispositivo externo.
MODO USB
1. Encienda el aparato
2. Pulse la tecla MODE para seleccionar el modo USE. En la pantalla
aparecerá “USB”.
3. Inserte una memoria en la entrada USB, en la pantalla aparecerá
“Reading” (leyendo), la reproducción comenzará automáticamente
pasados unos segundos. Si no se pudiera leer en la pantalla aparece
“NO USB”.
4. Durante la reproducción pulse PLAY/PAUSE para pausar y para volver a
reproducir.
5. Para saltar una pista o retroceder gire el mando de TUNE.

49
ES
AUX IN
1. Encienda el aparato
2. Conecte un cable de audio de 3.5 mm en el conector AUX en la parte
posterior del aparato.
3. Pulse MODE para seleccionar AUX IN. “AUX IN” aparecerá en la
pantalla.
4. Reproduzca la música desde el dispositivo externo.
CONFIGURACIÓN DE HORA Y FECHA
1. En el modo de reproducción DAB, presione el botón MENU/INFO. Ahora
gira el botón de TUNE y selecciona “SISTEMA”. En la pantalla aparecerá
el “Menú Principal”.
2. Pulse el botón ENTER/SNOOZE. En la pantalla aparecerá “Ajuste de la
hora”.
3. Pulse el botón ENTER/SNOOZE de nuevo. En la pantalla aparecerá
“Setting Time”.
4. Pulse el botón ENTER/SNOOZE de nuevo. En la pantalla aparecerá
“Ajustando la hora 00:00” (hora:minuto). Gire el botón de sintonía para
jar el tiempo deseado. Pulse el botón ENTER/SNOOZE para guardar la
conguración.
5. Gire el botón de TUNE de nuevo. En la pantalla aparece “Ajuste de
la fecha”. Pulse el botón ENTER/SNOOZE de nuevo para entrar en el
modo de conguración. La pantalla mostrará la fecha “01.01.2016”. Gire
la perilla de TUNE para jar la fecha deseada. Para guardar la fecha que
ha establecido, pulse el botón ENTER/SNOOZE.
6. Cuando gira el botón TUNE de nuevo, la pantalla muestra “Auto update”
Presione el botón ENTER/SNOOZE para entrar en el modo de ajuste.
“From Radio” o “No Update” se muestra en la pantalla cuando se gira
la perilla de TUNE. Puede seleccionar el ajuste que desee y conrmarlo
pulsando el botón ENTER/SNOOZE.
7. Al girar de nuevo el mando TUNE, se muestra en la pantalla “Set 12/24
hour format”. Pulse el botón ENTER/SNOOZE para entrar en el modo
de conguración. “Formato de 12 horas” o “Formato de 24 horas”
se muestra en la pantalla cuando se gira la perilla de TUNE. Puede
seleccionar el formato de hora que desee y conrmar la selección
pulsando el botón ENTER/SNOOZE..

50
ES
ALARMA
• Presione el botón ALARM para entrar en el menú de ajuste de la alarma.
Gire la perilla TUNE para seleccionar una de las funciones enumeradas
a continuación y presione el botón ENTER/SNOOZE para conrmar el
ajuste de alarma deseado.
A. Alarma 1/Alarma 2: Gire el mando TUNE para selecciona y pulse
ENTER/SNOOZE para conrmar.
B. Activación de la alarma: para encender la alarma pulse la tecla
ALARM, en la pantalla aparecerá “Alarm1 :o” o “Alarm2 :o”
(apagadas). Pulse el botón ENTER/SNOOZE, en la pantalla aparecerá
“Alarm detail o”, vuelva a pulsar ENTER/SNOOZE y en la pantalla
aparecerá “Alarm detail on” gire el mando TUNE para congurar la hora
de la alarma.
C. Congurar hora de alarma: pulse ENTER/SNOOZE, en la pantalla se
muestra “Time: 00:00” (hora:minuto). Gire el mando del TUNE para
conrmar la hora.
D. Repetición de la alarma (días): gire el mando TUNE para seleccionar
entre “diaria/una vez” y conrme la selección con la tecla ENTER/
SNOOZE. Si selecciona “diaria” el icono de la alarma aparecerá en la
pantalla permanentemente a no ser que la desactive.
E. Tipo de alarma (modo): gire el mando TUNE para seleccionar entre
“DAB/FM/BUZZER” y conrme la selección con la tecla ENTER/
SNOOZE.
F. Conguración del volumen de la alarma: gire el mando TUNE para
seleccionar el volumen deseado y conrme la selección con la tecla
ENTER/SNOOZE.
G. OFF/Save (apagar/guardar): gire el mando TUNE para seleccionar
entre apagar o guardar y conrme la selección con la tecla ENTER/
SNOOZE.
NOTAS:
• Es muy importante congurar la alarma en la posición ON y el símbolo
aparecerá en la pantalla.
• Una vez congurada y activada la alarma, cuando la hora del reloj
coincida con la de la alarma, el aparato sonará.
• Cuando suene la alarma pulse ENTER/SNOOZE para activar la función
de retardado. La alarma volverá a sonar 5 minutos después.

51
ES
• Para apagar la alarma permanentemente siga lo indicado en el punto
G de la sección anterior “O/save” (apagar/guardar). Si lo pone en la
posición OFF la alarma se apaga y el icono desaparece de la pantalla.
• Si hay congurada una alarma diaria, el icono de la alarma permanece
en la pantalla y la alarma suena al día siguiente excepto si se desactiva.
• Si desenchufa el aparato la hora y la alarma se desconguran y deberá
volver a congurarlas cuando lo enchufe de nuevo.
Modo dormir
• Pulse el botón SLEEP en la pantalla aparece “Sleep time o”. Pulso de
nuevo ese botón para seleccionar el intervalo de tiempo que quiere
establecer hasta que el aparato se apague automáticamente. Puede
seleccionar 15, 30, 45, 60, 90 minutos. Los minutos seleccionados
aparecerán en la pantalla.
• Para cancelar el modo dormir pulse el botón SLEEP y se mostrara
el tiempo que queda. Pulse ese botón de nuevo y el símbolo
desaparecerá. En la pantalla aparecerá “Sleep time o”, modo dormir
apagado.
LIMPIEZA Y CUIDADO
Limpieza de las supercies externas
• Deberías tratar el caso tan cuidadosamente como cualquiera de tus
muebles.
• Cuando la caja esté polvorienta, frótala con un paño suave y no
abrasivo. Si el armario está sucio por las huellas dactilares, puede
eliminarlas con un aerosol comercial de alta calidad para eliminar
el polvo y pulir. Tenga cuidado de no rociar ninguna parte plástica
o metálica de la unidad. Por lo tanto, recomendamos que rocíe el
limpiador directamente sobre el plumero para evitar que se rocíen
accidentalmente piezas de plástico y metal.
52
ES
Protección de muebles
• Este dispositivo está equipado con patas de goma antideslizantes para
evitar que el dispositivo se mueva durante su funcionamiento. Estos
pies están hechos de goma antideslizante, que ha sido desarrollada
para que no deje arañazos y manchas en los muebles. Sin embargo,
es posible que algunos pulidores de muebles a base de aceite,
conservantes de madera y aerosoles de limpieza puedan ablandar
las patas de goma, dejando manchas o residuos de goma en los
muebles. Para evitar que se dañen los muebles, se recomienda comprar
almohadillas de eltro autoadhesivas y pegarlas bajo las patas de goma
antes de colocar el aparato en los muebles de madera exclusivos.
RETIRADA DEL APARATO
Si en su país existe una disposición legal relativa a
la eliminación de aparatos eléctricos y electrónicos,
este símbolo estampado en el producto o en
el embalaje advierte que no debe eliminarse
como residuo doméstico. En lugar de ello, debe
depositarse en un punto de recogida de reciclaje
de aparatos eléctricos y electrónicos. Una gestión
adecuada de estos residuos previene consecuencias
potencialmente negativas para el medio ambiente
y la salud de las personas. Puede consultar más
información sobre el reciclaje y la eliminación de este
producto contactando con su administración local o
con su servicio de recogida de residuos.

53
IT
Gentile cliente,
La ringraziamo per aver acquistato il nostro prodotto.
La preghiamo di leggere attentamente le seguenti
istruzioni e di seguirle per evitare eventuali danni. Si
declina ogni responsabilità per danni derivati da una
mancata osservazione delle istruzioni e da un uso
improprio del dispositivo. Per accedere alla versione
aggiornata del manuale di istruzioni e ottenere
ulteriori informazioni sul prodotto, scannerizzare il
seguente codice QR.
INDICE
Dati tecnici 54
Dichiarazione di conformità 54
Descrizione del prodotto 56
Messa in funzione e utilizzo 57
Modalità phono 58
Radio 59
Modalità BT 60
Modalità USB 60
AUX IN 61
Impostare data e ora 61
Sveglia 62
Pulizia e manutenzione 63
Smaltimento 64

54
IT
DATI TECNICI
Numero articolo 10034590
Alimentazione
230 V ~ 50 Hz
Consumo massimo
12 W
Velocità di riproduzione
33
1
⁄3, 45, 78 U/min
Radio FM
87,5 – 108 MHz
Radio DAB+ 174,928 – 239,200 MHz
BT frequenza 2400 – 2483,5 MHz
BT potenza a radiofrequenza (max.) 4 dBm
Connessioni USB (per riprodurre MP3);
ingresso AUX;
connessione cuie
DICHIARAZIONE DI CONFORMITÀ
Produttore:
Chal-Tec GmbH, Wallstraße 16, 10179 Berlino,
Germania.
Importatore per la Gran Bretagna:
Berlin Brands Group UK Limited
PO Box 42
272 Kensington High Street
London, W8 6ND
United Kingdom
Il fabbricante, Chal-Tec GmbH, dichiara che il tipo di
apparecchiatura radio Verticalo SE DAB è conforme
alla direttiva 2014/53/UE. Il testo completo della
dichiarazione di conformità UE è disponibile al
seguente indirizzo Internet: use.berlin/10034590

55
IT
AVVERTENZE DI SICUREZZA
• Rispettare tutte le avvertenze elencate nel manuale di istruzioni.
• Non usare il dispositivo vicino all’acqua o in ambienti umidi.
• Assicurarsi che non vengano versati liquidi sul dispositivo o sulle
aperture.
• Spostare il dispositivo con cura per non danneggiarlo.
• Non bloccare le uscite del dispositivo.
• Non collocare il dispositivo in prossimità di fonti di calore (per esempio
riscaldamento) e non esporlo ai raggi del sole diretto.
• Inserire correttamente la spina del dispositivo nella presa.
• Il prodotto è dotato di un dispositivo di protezione da sovraccarico. In
caso di sostituzione rivolgersi al servizio assistenza o a una persona
qualicata.
• Togliere la spina dalla presa se non si utilizza il dispositivo per un lungo
periodo di tempo.
• Non provare assolutamente a riparare il dispositivo autonomamente o a
eseguire manutenzioni.
• La spina serve a staccare il dispositivo dalla corrente dopo lo
spegnimento. Assicurarsi che la spina sia sempre accessibile.
• Non esporre il dispositivo a spruzzi d’acqua e non collocarci sopra
oggetti colmi di liquidi, come ad esempio vasi.
• Non esporre le pile al calore estremo come ad esempio ai raggi solari o
al fuoco.
• Non impedire l’aerazione del dispositivo bloccando le aperture con
oggetti quali giornali, tovaglie, tende ecc.
• Assicurarsi che venga rispettata la distanza minima di 5 mm attorno al
dispositivo.
• Non posizionare fonti di ignizione a amme libere come candele accese
sul dispositivo.
• Smaltire le pile esauste secondo le disposizioni vigenti.
• Utilizzare il dispositivo solo con temperature miti e non tropicali.
Questo dispositivo può essere utilizzato dai bambini maggiori di 8 anni
e dalle persone con limitate capacità siche, sensoriali o mentali, solo se
sono stati informati sulle funzioni del dispositivo e sono consapevoli dei
rischi e dei pericoli connessi.
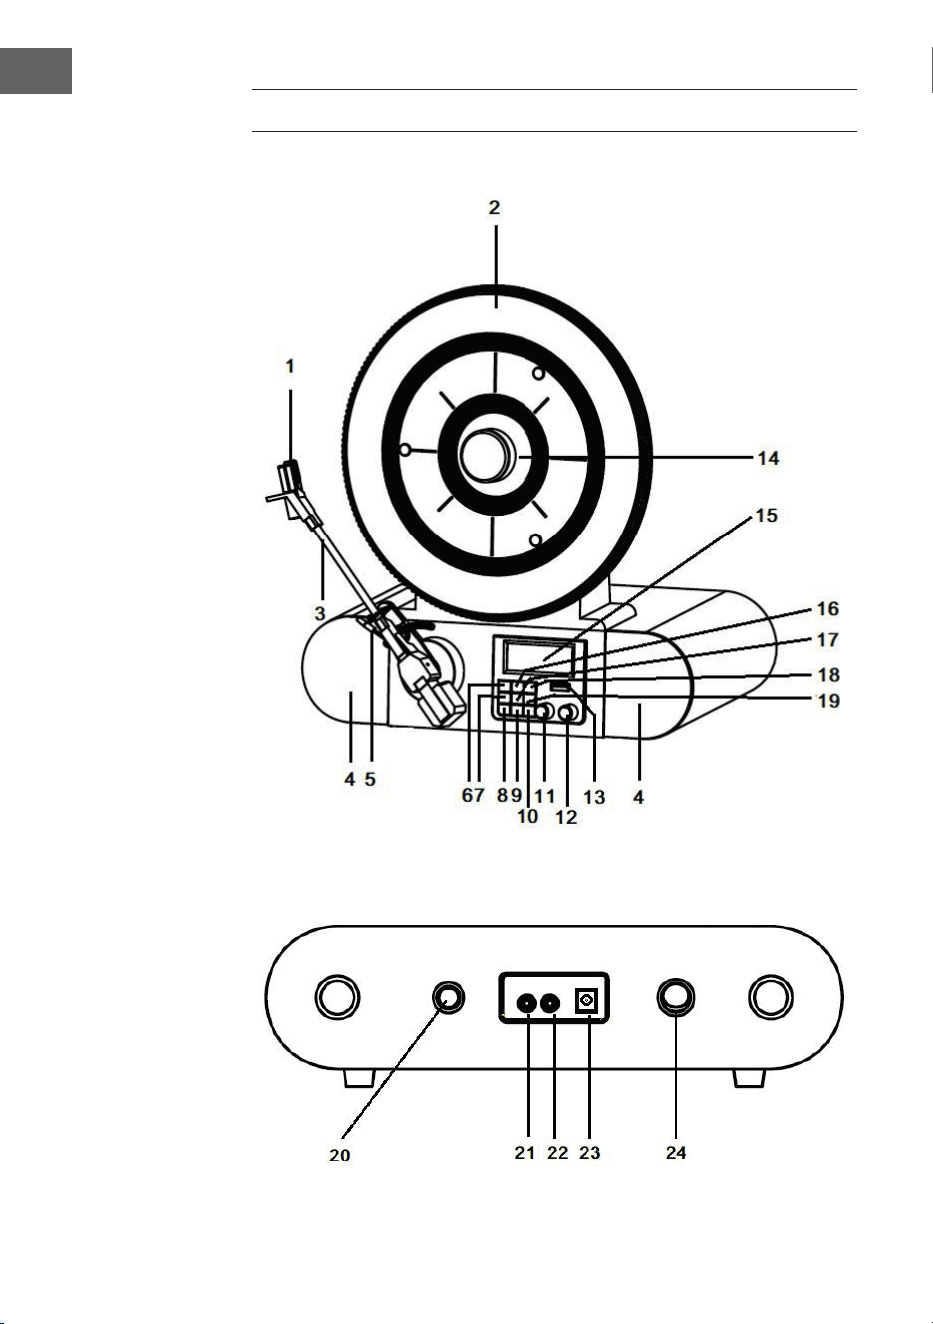
56
IT
DESCRIZIONE DEL PRODOTTO
Parte frontale
Parte posteriore

57
IT
1 Pick-up e puntina 13 Connessione USB
2 Piatto 14 Adattatore magnetico
3 Braccio 15 Display LCD
4 Altoparlante 16 Tasto menù/informazioni
5 Livello cue 17 Invio/tasto snooze
6 Tasto riproduzione/pausa 18 Impostazioni
7 Tasto di accoppiamento/ricerca
(PAIR/SCAN)
19 Modalità
20 Velocità di riproduzione
8 Sveglia 21 Ingresso AUX
9 Funzione notturna 22 Connessione cuie
10 Standby 23 Alimentazione
11 Ricerca stazioni 24 Interruttore
12 Regolatore volume
MESSA IN FUNZIONE E UTILIZZO
Prima della messa in funzione
• Togliere il dispositivo con cautela dalla confezione e rimuovere
completamente il materiale d’imballaggio.
• Svolgere completamente il cavo d’alimentazione.
• Sistemare il dispositivo su una supercie piana e stabile in prossimità di
una presa e all’esterno di forti campi magnetici.
Messa in funzione
• Inserire la spina del dispositivo nella presa.
• Rimuovere la copertura di plastica bianca dalla puntina del giradischi
tirandola in direzione della freccia.
• Durante l’utilizzo del dispositivo assicurarsi di non danneggiare la
puntina.
• Questo prodotto è stato concepito per funzionare con un alimentatore
(12 V 1 A). Collegare il dispositivo a un alimentatore diverso può causare
danni.
58
IT
NOTA: Il dispositivo dispone di una spina standard. Se la spina non
entra nella presa non provare a inserirla ugualmente limandola. Signica
presumibilmente che la presa è obsoleta o non polarizzata. In questo caso
va sostituita da un elettricista qualicato.
Accendere il dispositivo
• Premere il tasto POWER sul retro del dispositivo in modo tale che si
trovi in posizione “I”. Dopodiché premere il tasto STANDBY sul pannello
di controllo anteriore. Sul display appare “POWER ON”.
• Per spegnere il dispositivo premere il tasto POWER sul retro in modo
tale che si trovi in posizione “O”.
NOTA: per ridurre il consumo di energia il dispositivo si spegne
automaticamente dopo 20 minuti se non registra alcun segnale audio in
ingresso. Per accenderlo nuovamente e proseguire la riproduzione bisogna
prima spegnerlo con il tasto POWER e riaccenderlo dopo 5 secondi.
MODALITÀ PHONO
1. Accendere il dispositivo.
2. Premere il tasto MODE per selezionare la modalità Phono. Sul display
appare “Phono”.
3. Ruotare la manopola della velocità sul retro del dispositivo per
impostare la velocità di riproduzione desiderata per il brano selezionato
(33 1/3, 45 o 78 giri/min).
4. Rimuovere il cappuccio copripuntina.
5. Sbloccare il supporto del braccio. Utilizzare la leva per alzare il braccio.
6. Muovere il braccio sul disco e posizionarlo nel punto dove si desidera
iniziare la riproduzione e abbassare la leva: il braccio si abbassa piano
sul disco e la riproduzione ha inizio.
7. Per regolare il volume girare la relativa manopola.
8. Alla ne della riproduzione il braccio si ferma automaticamente.
NOTA: non girare o fermare mai il piatto manualmente. Muovere
manualmente o caricare il piatto senza ssare prima il braccio, può arrecare
danni al braccio.

59
IT
RADIO
1. Accendere il dispositivo.
2. Premere il tasto MODE per selezionare la modalità FM. Sul display
appare “FM”.
3. Premere il tasto “Accoppiamento/Ricerca” per iniziare la ricerca
automatica delle stazioni. E’ possibile anche ruotare la manopola TUNE
per selezionare l’emittente desiderata. Quando viene impostata una
stazione, sul display appare “St”.
4. Premere il tasto MENU/INFO mentre è in funzione la modalità FM per
visualizzare sul display le seguenti informazioni: radio testo/tipo di
programma/potenza del segnale/ora/data ecc.
5. Se si vuole terminare la riproduzione premere il tasto POWER per
spegnere il dispositivo.
Modalità DAB
1. Accendere il dispositivo.
2. Premere il tasto MODE per selezionare la modalità DAB. Sul display
appare “DAB”. Il dispositivo inizia automaticamente la ricerca delle
stazioni DAB nché non ne trova una.
3. Premere il tasto MENU/INFO mentre è in funzione la modalità DAB.
Premere il tasto ENTER/SNOOZE e ruotare la manopola TUNE. Sul
display appariranno nella seguente sequenza “Ricerca emittenti locali”,
“Ricerca emittenti completa” e “Impostazione manuale stazioni”. E’
possibile selezionare l’impostazione desiderata confermandola con il
tasto SELECT.
4. Mentre si cerca la stazione manualmente, ruotare la manopola TUNE
nché non si trova l’emittente DAB desiderata. Si può selezionare la
stazione premendo il tasto ENTER/SNOOZE. Durante la ricerca delle
stazioni sul display appare “St”.
5. Nella modalità di ricerca manuale premere il tasto PAIR/SCAN per
iniziare la ricerca automatica delle emittenti.
6. Per terminare la riproduzione premere il tasto POWER: il dispositivo si
spegnerà.
Memorizzare le stazioni in modalità DAB/FM
1. Ruotare la manopola TUNE in modalità DAB/FM per selezionare
l’emittente che si vuole memorizzare.
2. Premere il tasto PRESET. Sul display appare “Impostazione di default 1
vuota”.
3. Premere il tasto ENTER per confermare. Sul display appare
“Impostazione di default 1 salvata”.

60
IT
4. Ripetere i passaggi 1-3 per tutte le emittenti da memorizzare. E’
possibile salvare 20 stazioni al massimo sia nella modalità DAB sia FM.
5. Per riprodurre una stazione salvata premere il tasto PRESET e ruotare
la manopola TUNE nché non si trova la stazione salvata desiderata.
Premere il tasto ENTER per riprodurre la stazione.
MODALITÀ BT
1. Accendere il dispositivo.
2. Premere il tasto MODE e selezionare la modalità BT. Sul display appare
“Collegare BT”.
3. Accendere il dispositivo BT esterno, cercare “Verticalo SE DAB+” e
accoppiare il dispositivo.
4. Quando l’accoppiamento tra il dispositivo BT e il giradischi è avvenuto
con successo, il giradischi emette un breve suono di conferma.
5. Sul display appare “BT connesso”.
6. Selezionare un brano dal dispositivo BT esterno e avviare la
riproduzione.
7. Per saltare al prossimo o al precedente brano girare la manopola TUNE
o selezionarne un altro sul dispositivo esterno BT.
8. Per disattivare il BT basterà cambiare modalità sul dispositivo o
spegnere la funzione BT sul dispositivo esterno.
MODALITÀ USB
1. Accendere il dispositivo.
2. Premere il tasto MODE e selezionare la modalità USB. Sul display
appare “USB”.
3. Inserire la chiavetta USB nel collegamento USB. Sul display appare per
alcuni secondi “Leggere” e la riproduzione si avvia automaticamente. Se
la chiavetta USB non è collegata sul display appare “NO USB”.
4. Durante la riproduzione premere il tasto RIPRODUZIONE/PAUSE
per mettere in pausa. Premere nuovamente il tasto per proseguire la
riproduzione.
5. Per saltare al prossimo o al precedente brano ruotare la manopola
TUNE.

61
IT
AUX IN
1. Accendere il dispositivo.
2. Collegare il dispositivo esterno tramite un cavo audio da 3,5 mm con il
collegamento AUX sul retro del dispositivo.
3. Premere il tasto MODE e selezionare la modalità AUX-IN. Sul display
appare “AUX IN”.
4. Avviare la riproduzione sul dispositivo esterno.
IMPOSTARE DATA E ORA
1. In modalità di riproduzione DAB premere il tasto MENU/INFO. Ruotare
la manopola TUNE e selezionare “SYSTEM”. Sul display appare “Menù
principale”.
2. Premere il tasto ENTER/SNOOZE. Sul display appare “Impostazione
tempo”.
3. Premere nuovamente il tasto ENTER/SNOOZE. Sul display appare
“Impostare l’ora”.
4. Premere nuovamente il tasto ENTER/SNOOZE. Sul display appare
“Impostare l’ora 00:00” (ora:minuti). Impostare l’ora desiderata
ruotando la manopola TUNE. Premere il tasto ENTER/SNOOZE per
salvare l’impostazione.
5. Ruotare nuovamente la manopola TUNE. Sul display appare “Impostare
l’ora”. Premere nuovamente il tasto ENTER/SNOOZE per accedere alla
modalità impostazioni. Sul display appare la data “01.01.2016”. Ruotare
la manopola TUNE per impostare la data. Premere il tasto ENTER/
SNOOZE per salvare la data impostata.
6. Se si ruota nuovamente la manopola TUNE sul display appare “Auto
update”. Premere il tasto ENTER/SNOOZE per accedere alla modalità
impostazioni. Ruotando la manopola TUNE sul display appare “Dalla
radio” o “Nessun update”. E’ possibile selezionare l’impostazione
desiderata confermandola premendo il tasto ENTER/SNOOZE.
7. Ruotando nuovamente la manopola TUNE sul display appare
“Impostare il formato ora 12/24”. Premere il tasto ENTER/SNOOZE
per accedere alla modalità impostazioni. Ruotando la manopola TUNE
sul display appare “Formato ora 12” o “Formato ora 24”. E’ possibile
selezionare il formato ora desiderato confermando con il tasto ENTER/
SNOOZE.

62
IT
SVEGLIA
• Premere il tasto ALARM per accedere al menù impostazioni della
sveglia. Ruotare la manopola TUNE per selezionare una delle funzioni
sottoelencate. Premere il tasto ENTER/SNOOZE per confermare
l’impostazione sveglia desiderata.
A. Sveglia1/Sveglia2: Ruotare la manopola TUNE confermando con il
tasto ENTER/SNOOZE.
B. Attivazione sveglia: Per impostare la sveglia premere il tasto ALARM.
Sul display appare “Alarm1:o” o “Alarm2:o”. Premendo il tasto
ENTER/SNOOZE sul display appare “Dettaglio sveglia o”. Premendo
nuovamente il tasto ENTER/SNOOZE sul display appare “Dettaglio
sveglia on”. Ruotare la manopola TUNE per impostare l’orario sveglia
desiderato.
C. Impostare la sveglia: Premere il tasto ENTER/SNOOZE. Sul display
appare “Tempo: 00:00” (ora:minuti). Ruotare la manopola TUNE per
impostare l’orario della sveglia e confermare con il tasto ENTER/
SNOOZE.
D. Ripetizione sveglia: Ruotare la manopola TUNE per selezionare
“quotidianamente/una volta” e confermare con il tasto ENTER/
SNOOZE. Se è stato selezionato “quotidianamente”, il simbolo della
sveglia resta permanentemente sul display, a meno che la funzione
sveglia venga disattivata.
E. Tipo di sveglia: Ruotare la manopola TUNE per selezionare DAB/FM/
BUZZER e confermare con il tasto ENTER/SNOOZE.
F. Volume sveglia: Ruotare la manopola TUNE no a raggiungere il
volume desiderato e confermare con il tasto ENTER/SNOOZE.
G. Sveglia o/salvare: Ruotare la manopola TUNE no alla funzione
desiderata e confermare con il tasto ENTER/SNOOZE.
NOTE:
• È molto importante che la sveglia venga impostata in modo tale
da essere sulla posizione “on” e che il simbolo della sveglia venga
visualizzato sul display.
• Dopo aver impostato la sveglia questa suonerà se l’ora attuale e la
sveglia impostata coincidono.
• Quando la sveglia suona premere il tasto ENTER/SNOOZE per attivare
la funzione snooze. 5 minuti dopo la sveglia suonerà di nuovo.

63
IT
• Per cancellare denitivamente la funzione sveglia seguire il punto H
“Sveglia o/salvare” nel precedente capitolo. La sveglia è spenta e il
simbolo della sveglia non viene più visualizzato sul display.
• Se si imposta la funzione di sveglia giornaliera, sul display appare
il simbolo permanentemente e la sveglia suona di nuovo il giorno
seguente, a meno che non venga disattivata.
• Quando si toglie la spina del dispositivo dalla presa, le impostazioni
dell’ora e della sveglia si cancellano. Andranno impostate nuovamente
quando si accenderà il dispositivo.
Modalità sleep
• Se si preme il tasto SLEEP sul display appare “Sleep time o”. Premere
nuovamente il tasto SLEEP per selezionare l’intervallo di tempo
secondo il quale il dispositivo dovrà andare automaticamente in
modalità riposo. E’ possibile selezionare 15, 30, 45, 60 e 90 minuti. Il
simbolo dell’ora selezionata viene visualizzato sul display.
• Se si preme nuovamente il tasto SLEEP sul display apparirà il tempo
rimanente prima di andare in modalità riposo. Premendo ancora il tasto
SLEEP la modalità riposo si disattiva e il simbolo dell’ora sparisce dal
display.
PULIZIA E MANUTENZIONE
Pulizia dell’alloggiamento
• L’alloggiamento va curato esattamente nello stesso modo in cui si cura
un mobile.
• Pulire l’alloggiamento con uno straccio per la polvere morbido e
antiabrasivo. Se ci sono impronte digitali, vanno rimosse con uno spray
detergente e antipolvere di alta qualità. Fare attenzione a non spruzzare
parti di plastica o metalliche del dispositivo. Per questo motivo
consigliamo di spruzzare il detergente direttamente sullo straccio per
evitare di spruzzare per errore componenti metalliche o di plastica.
64
IT
Protezione per i mobili
• Questo dispositivo dispone di piedini di gomma antiscivolo per evitare
che si sposti durante il funzionamento. I piedini sono fatti di gomma
antiscivolo creata in modo tale da non lasciare grai e macchie sui
mobili. È però possibile che alcune cere per mobili a base di olio,
prodotti protettivi per il legno e spray detergenti ammorbidiscano i
piedini, che quindi lasciano macchie o residui di gomma sui mobili. Per
evitare che questi si danneggino, si consiglia di comprare dei feltrini
adesivi e apporli sotto i piedini di gomma prima di posizionare il
dispositivo sopra mobili esclusivi.
SMALTIMENTO
Se nel proprio paese si applicano le
regolamentazioni inerenti lo smaltimento di
dispositivi elettrici ed elettronici, questo simbolo
sul prodotto o sulla confezione segnala che questi
prodotti non possono essere smaltiti con i riuti
normali e devono essere portati a un punto di
raccolta di dispositivi elettrici ed elettronici. Grazie
al corretto smaltimento dei vecchi dispositivi si
tutela il pianeta e la salute delle persone da possibili
conseguenze negative. Informazioni riguardanti
il riciclo e lo smaltimento di questi prodotti si
ottengono presso l’amministrazione locale oppure il
servizio di gestione dei riuti domestici.