ZEPHYRONLINE.COM
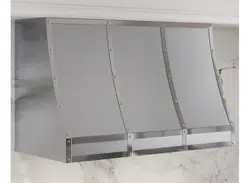
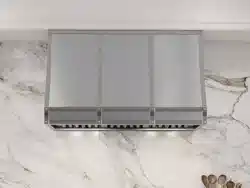
Alto Custom Hood
Installation Instructions
JUL26.0101
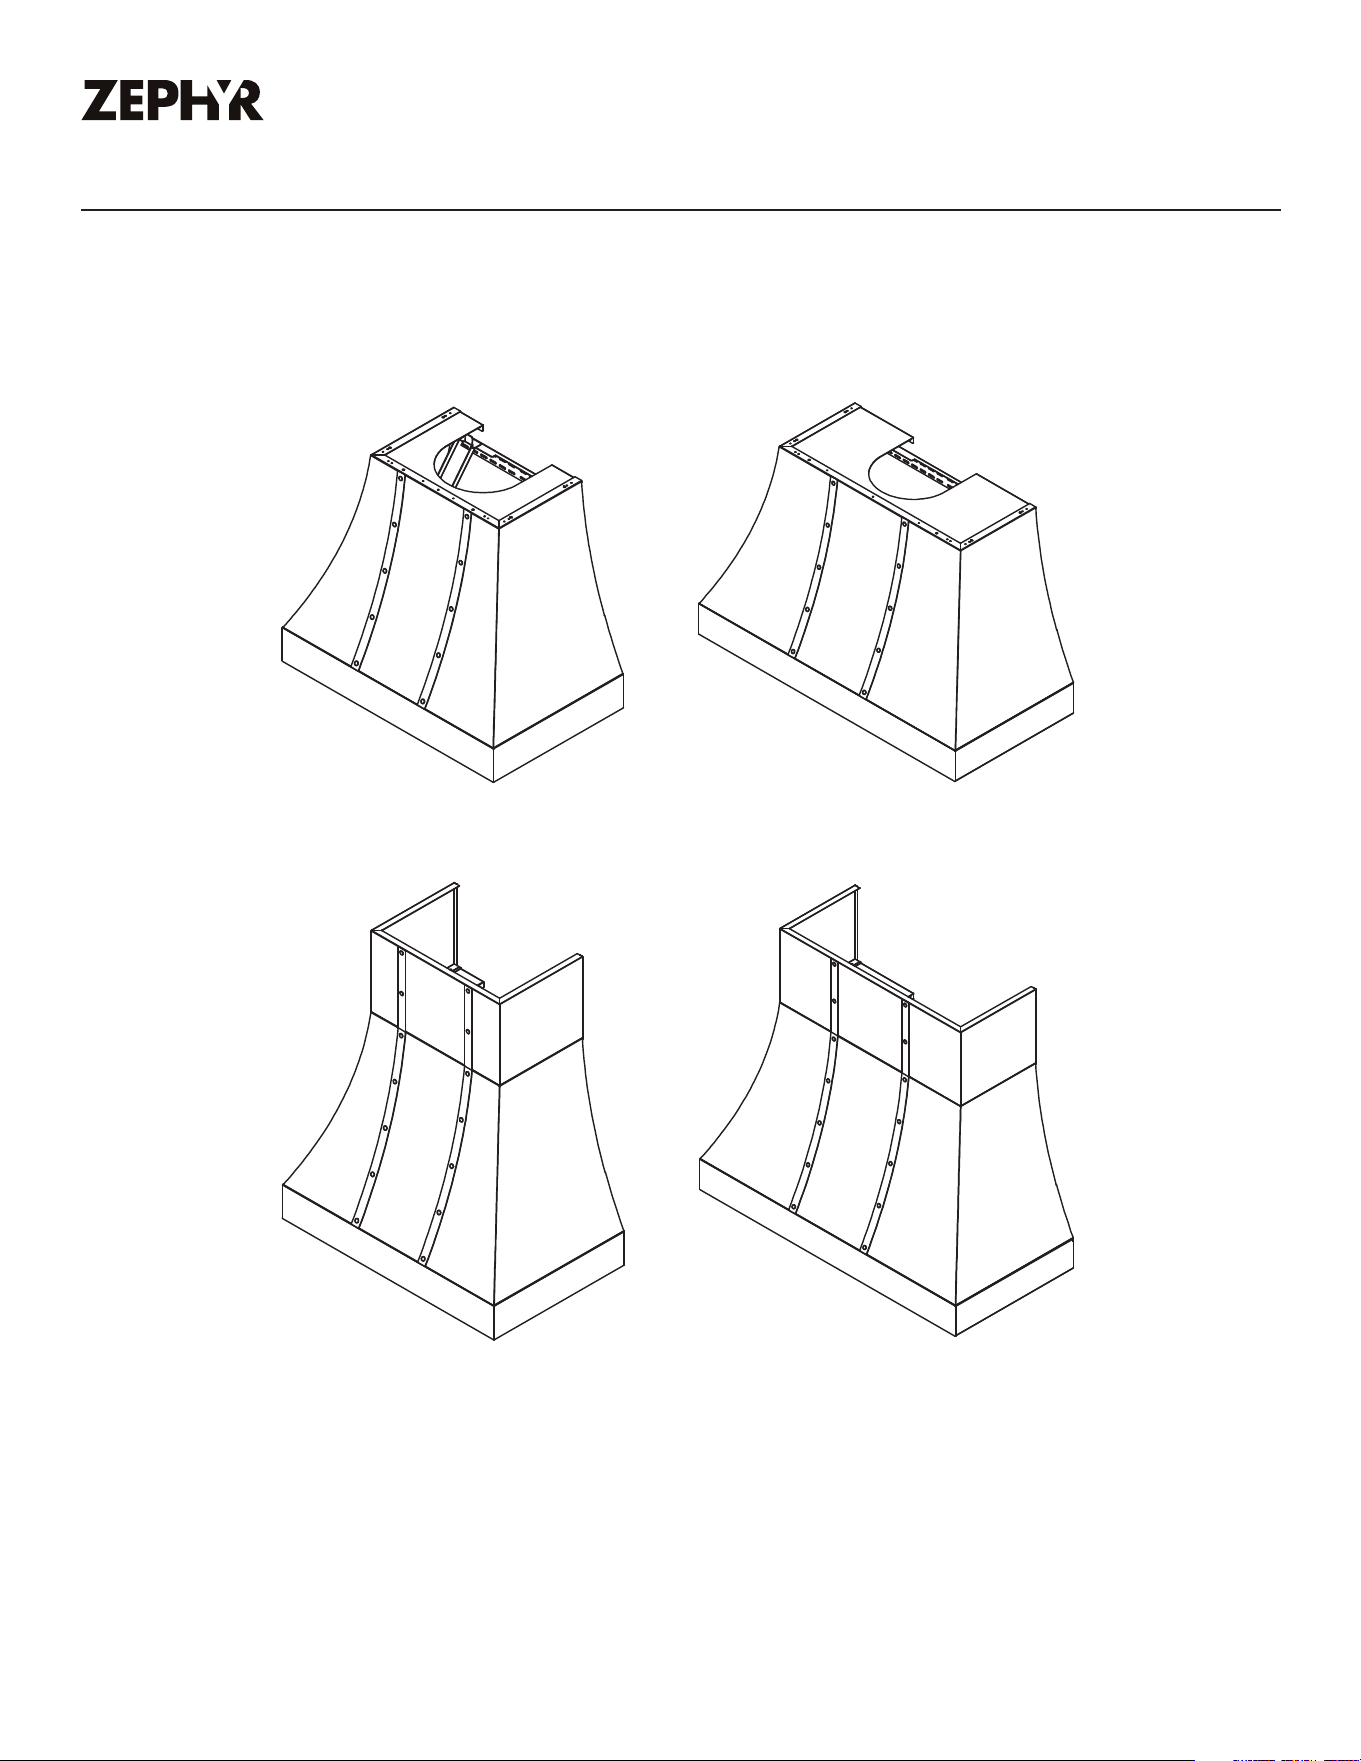
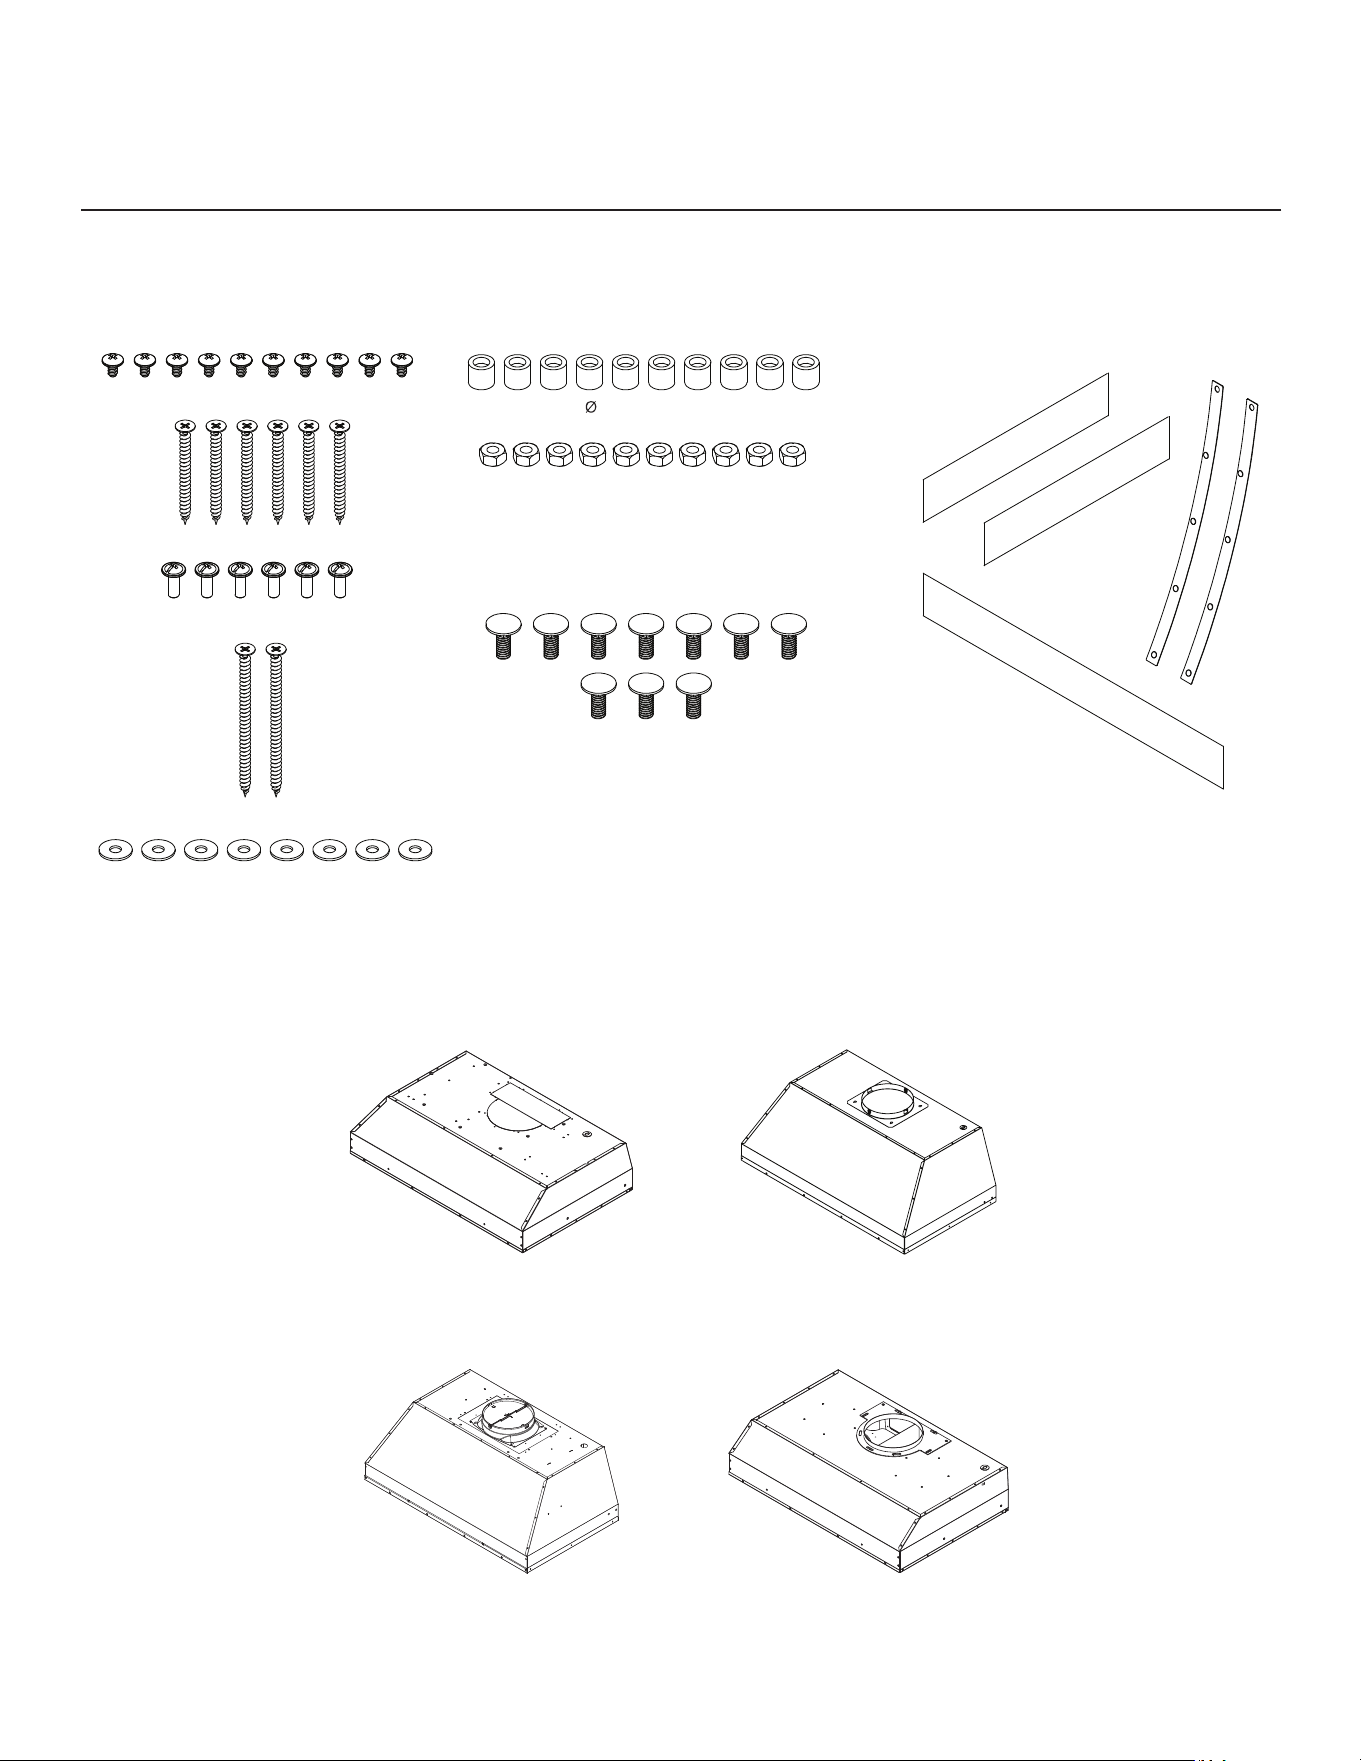
CHAL36ASX
CHAL36ASX + DC23612AS
(with optional duct cover)
CHAL48ASX
CHAL48ASX + DC24812AS
(with optional duct cover)
2
Product Specications
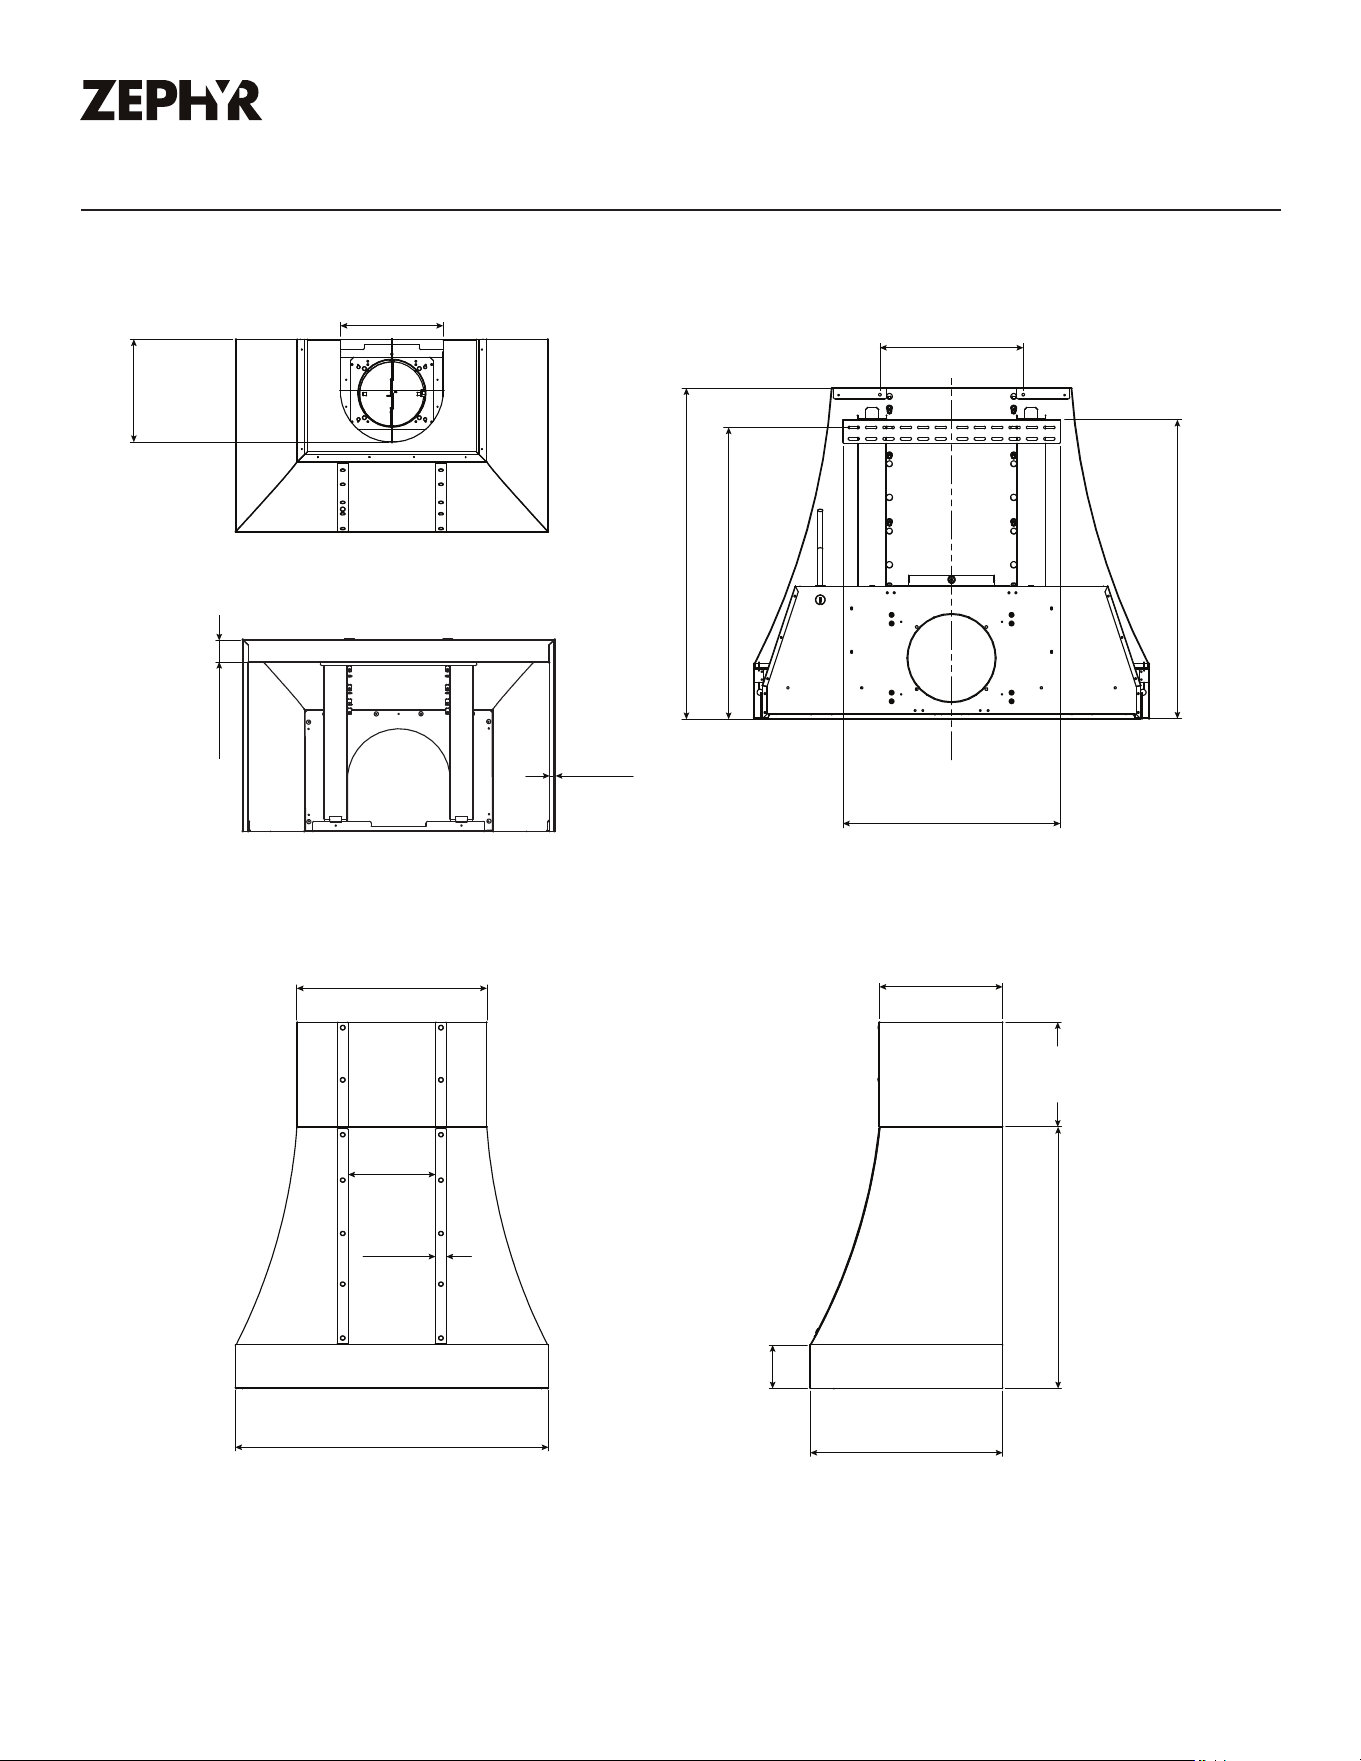
List of Materials
AK9134xS - CHAL36ASX AK9234xS - CHAL36ASX
AK9246xS - CHAL48ASX
AK9434xS - CHAL36ASX
AK9446xS - CHAL48ASX
AK9534xS - CHAL36ASX
AK9546xS - CHAL48ASX
Hood Insert Compatibility
Below are the hood inserts compatible with the Alto custom hood. The inserts are sold separately.
(10) M6
(10) M6
(10) M4 x 8
(6) #10 x 2"
(6) 3/16 x 1/2
(2) #10 x 3"
(8) 5 x 14 x 1
Hood Installation Screws
(10) 11*10.3 bushings
Hood Banding Hardware
Hood Rivet Bolts, SS
(2) Side Horizontal
Banding, SS
(1) Front Horizontal
Banding, SS
(2) Vertical
Banding, SS
Hood Banding Components
3
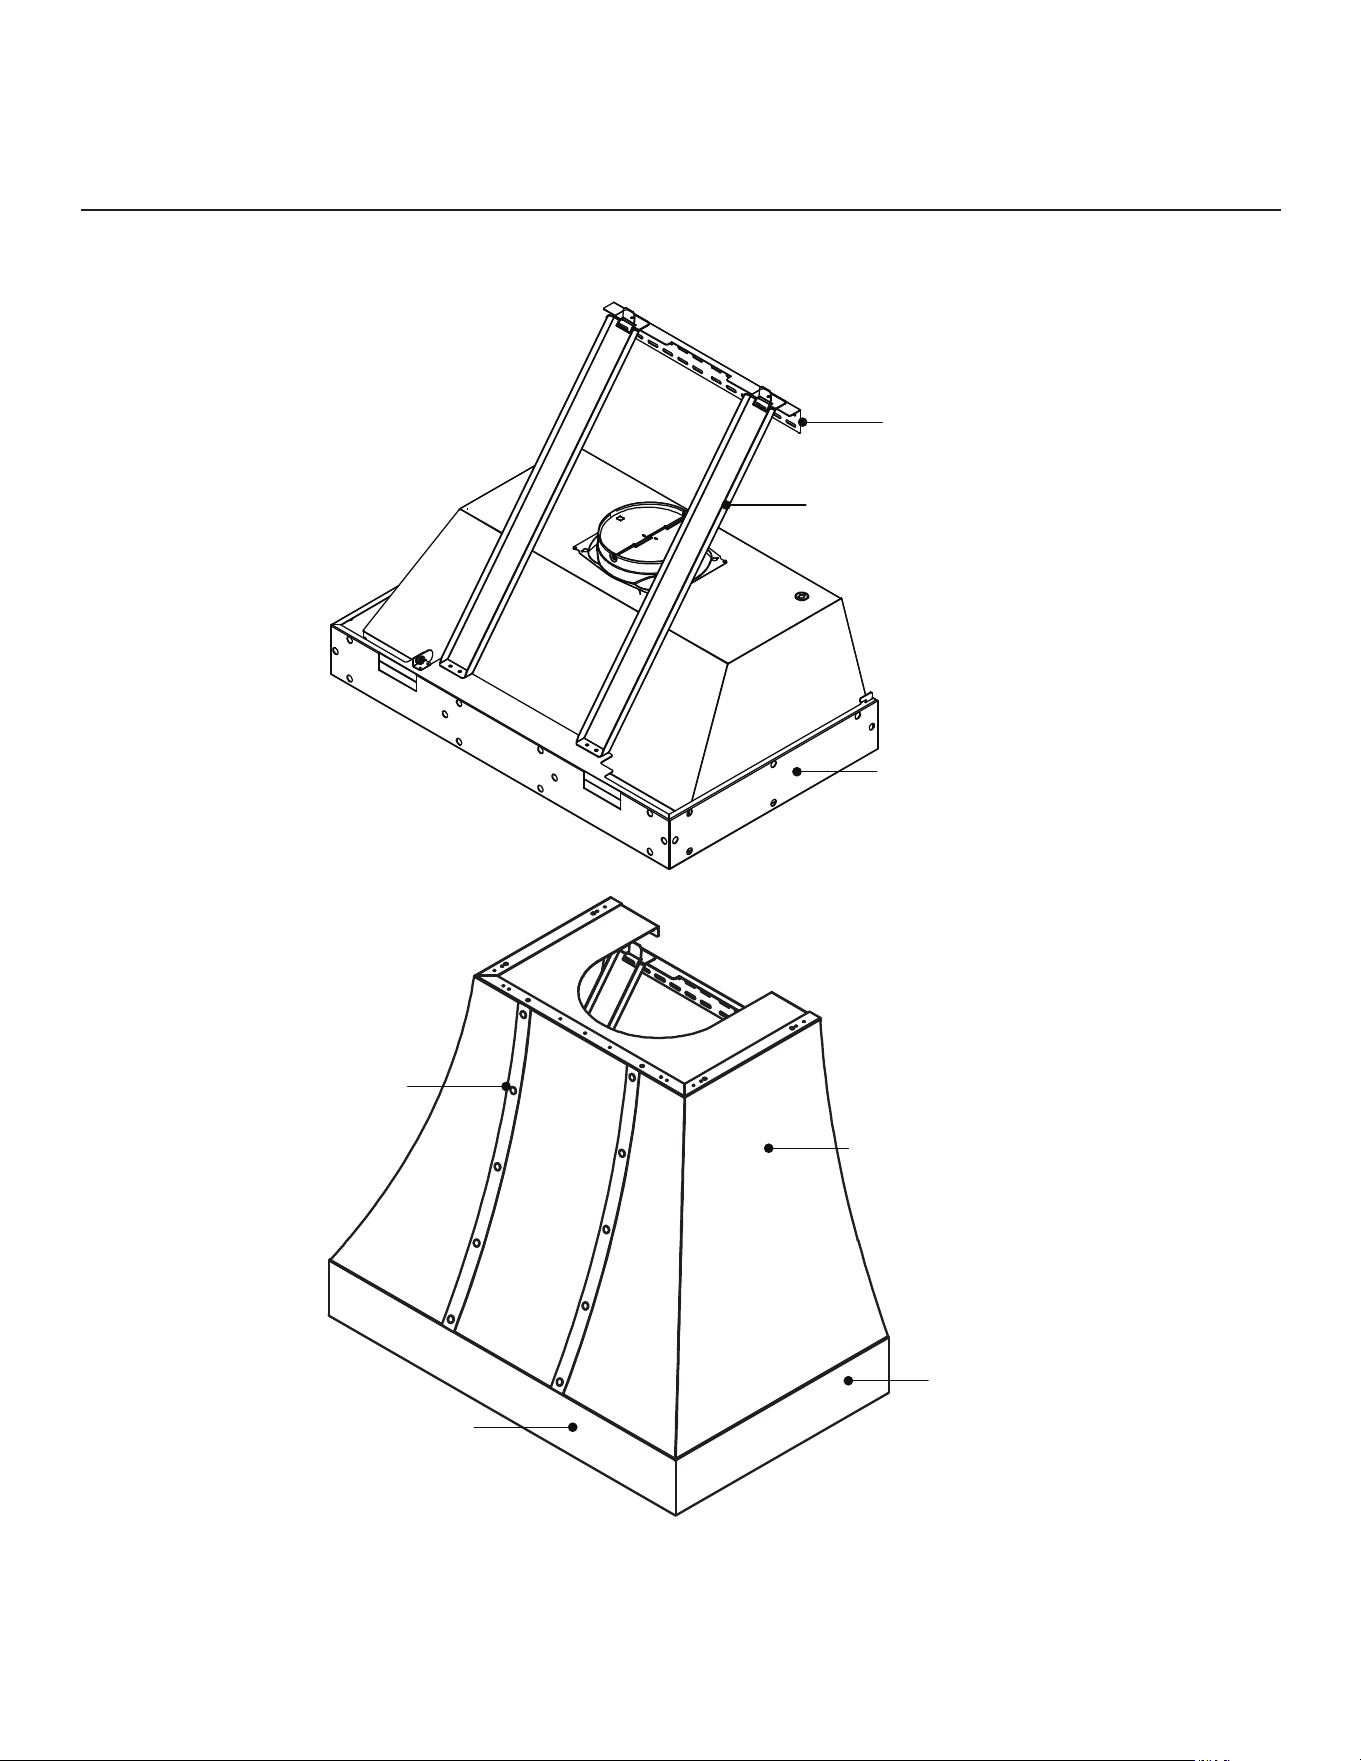
Dimensions
Product Specications
TOP
SIDE
FRONT
BACK
BOTTOM
11-3/4”
11-13/16”
30”
26-
3/8”
13”
27-1/16”
C/L
2-11/16”
11/16”
(36”) 21-
13/16”
(48”) 33-
13/16”
10”
1-
1/4”
(36”) 35-
15/16”
(48”) 47-
7/8”
14”
(without duct covers) 0”
(DC23612AS &DC24812AS) 12”
30”
5”
22-1/16”
(36”) 19-11/16”
(48”) 31-
5/8”
NOTE: The duct cover accessories are sold separately.
ZEPHYRONLINE.COM
4
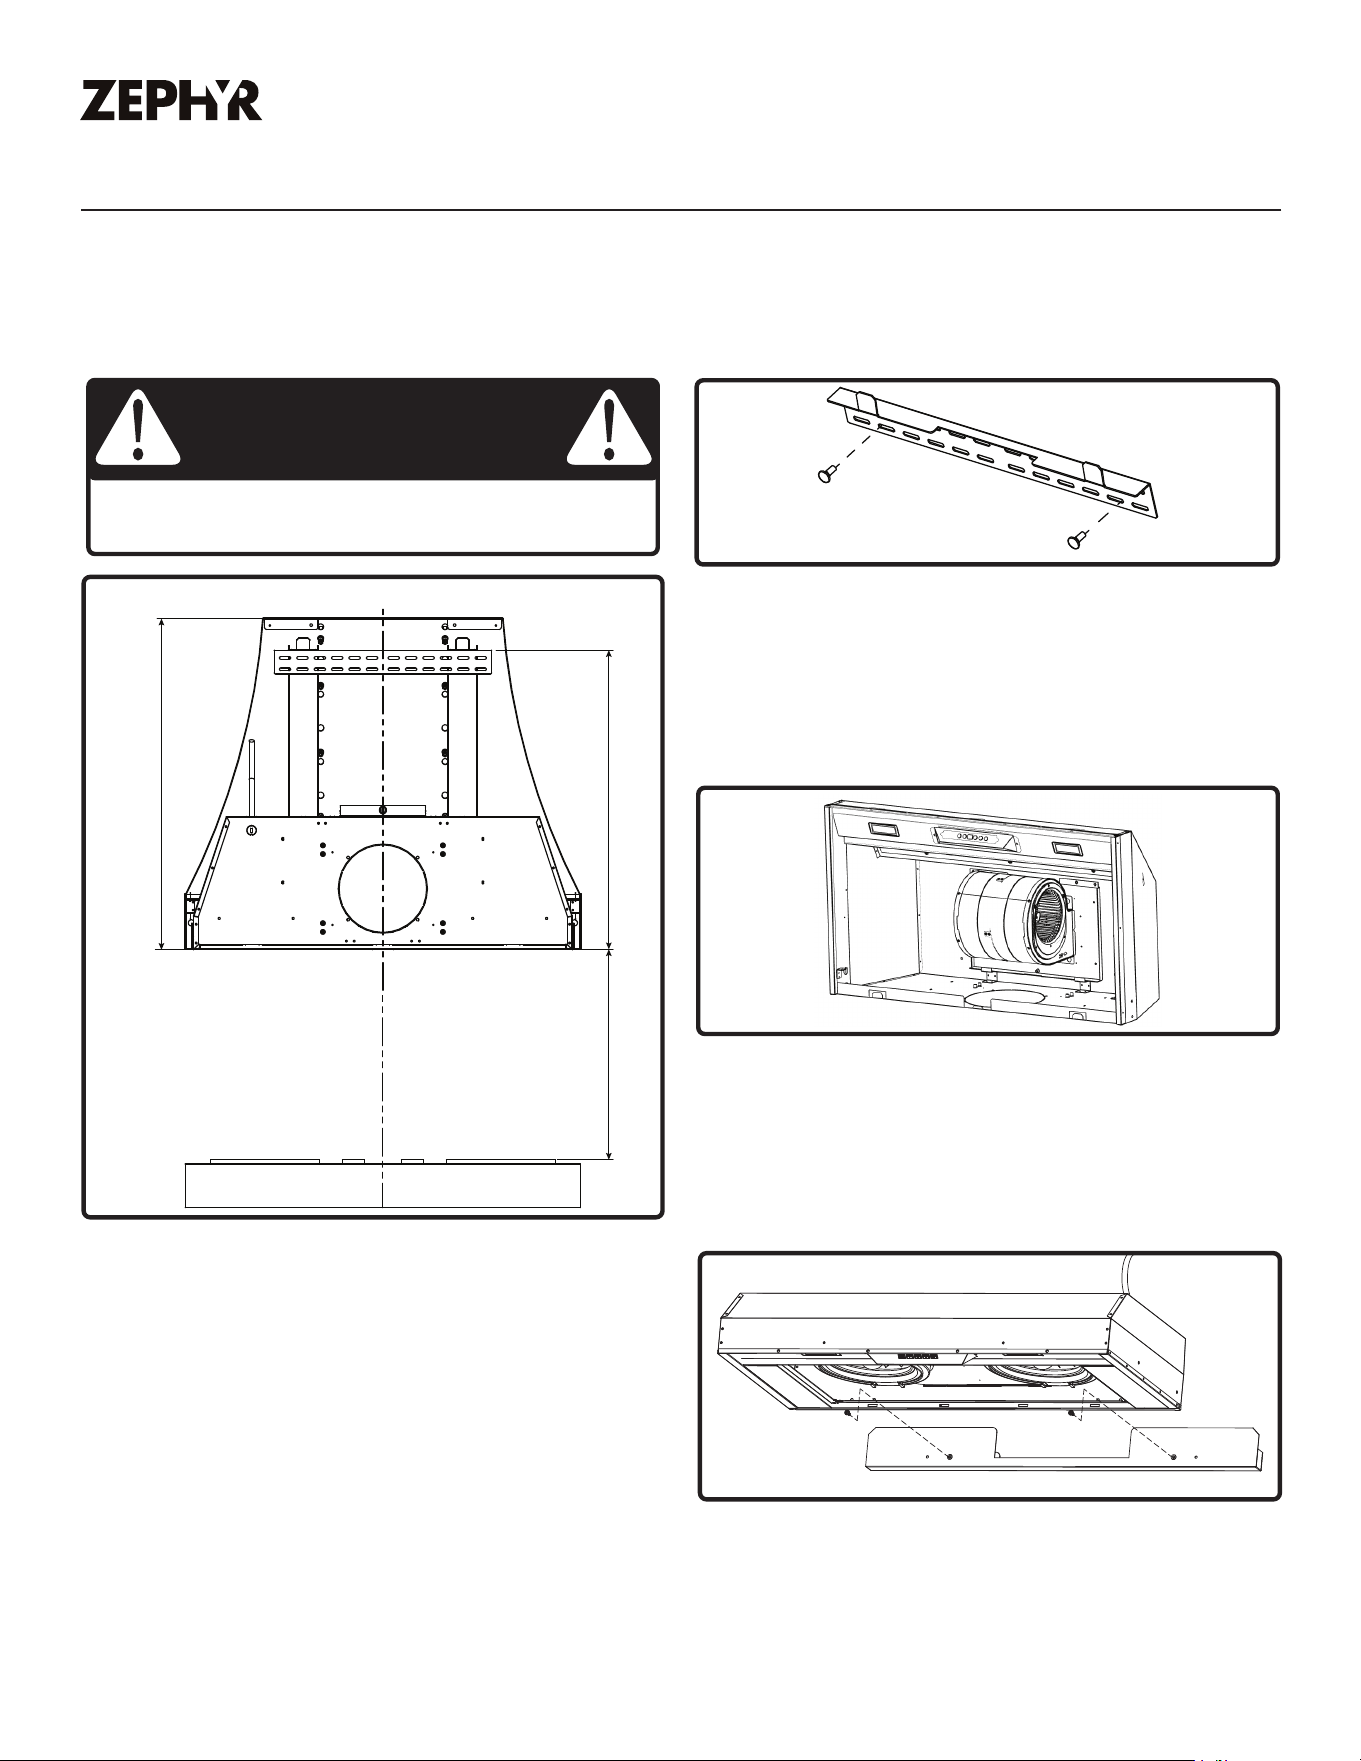
Part Identication
Product Specications
Mounting Bracket
Long Bracket
Lower Support Frame
Top Canopy
Vertical Banding
Side Horizontal
Banding
Front Horizontal
Banding
5
Installing the Alto Custom Hood
Refer to the installation manual of your specific hood insert and read all warnings prior to installing
your product. To install the Alto Custom Metal Hood, CHAL-A, please follow the instructions below.
Installation Instructions
30”
27-
1/16”
C/L
24” - 36”
A
1. Determine the hood mounting height above
the cooking surface, 24” - 36”. Add 27-1/16”
to this number and mark Line A, which is
where the top of the mounting bracket should
be installed.
NOTE: If the optional 12” duct cover is used,
factor its height when mounting and adjust
accordingly.
2. Center, level, and install the mounting bracket
for the custom hood onto the wall by using
(2) #10 x 3” screws with (2) 5 x 14 x 1 washers.
Make sure to secure the screws into wall studs.
Ensure the hooks on the mounting bracket are
pointed upward.
3. Prepare your Zephyr hood insert (sold
separately) by following the instructions
included with the insert. The filters and any
panels, such as side or bottom panels, will
need to be removed prior to installing the
insert into your Alto custom hood.
TOP
BOTTOM
WARNING
Carefully remove all protective film prior to installation. Take
care during assembly not to scratch any components.
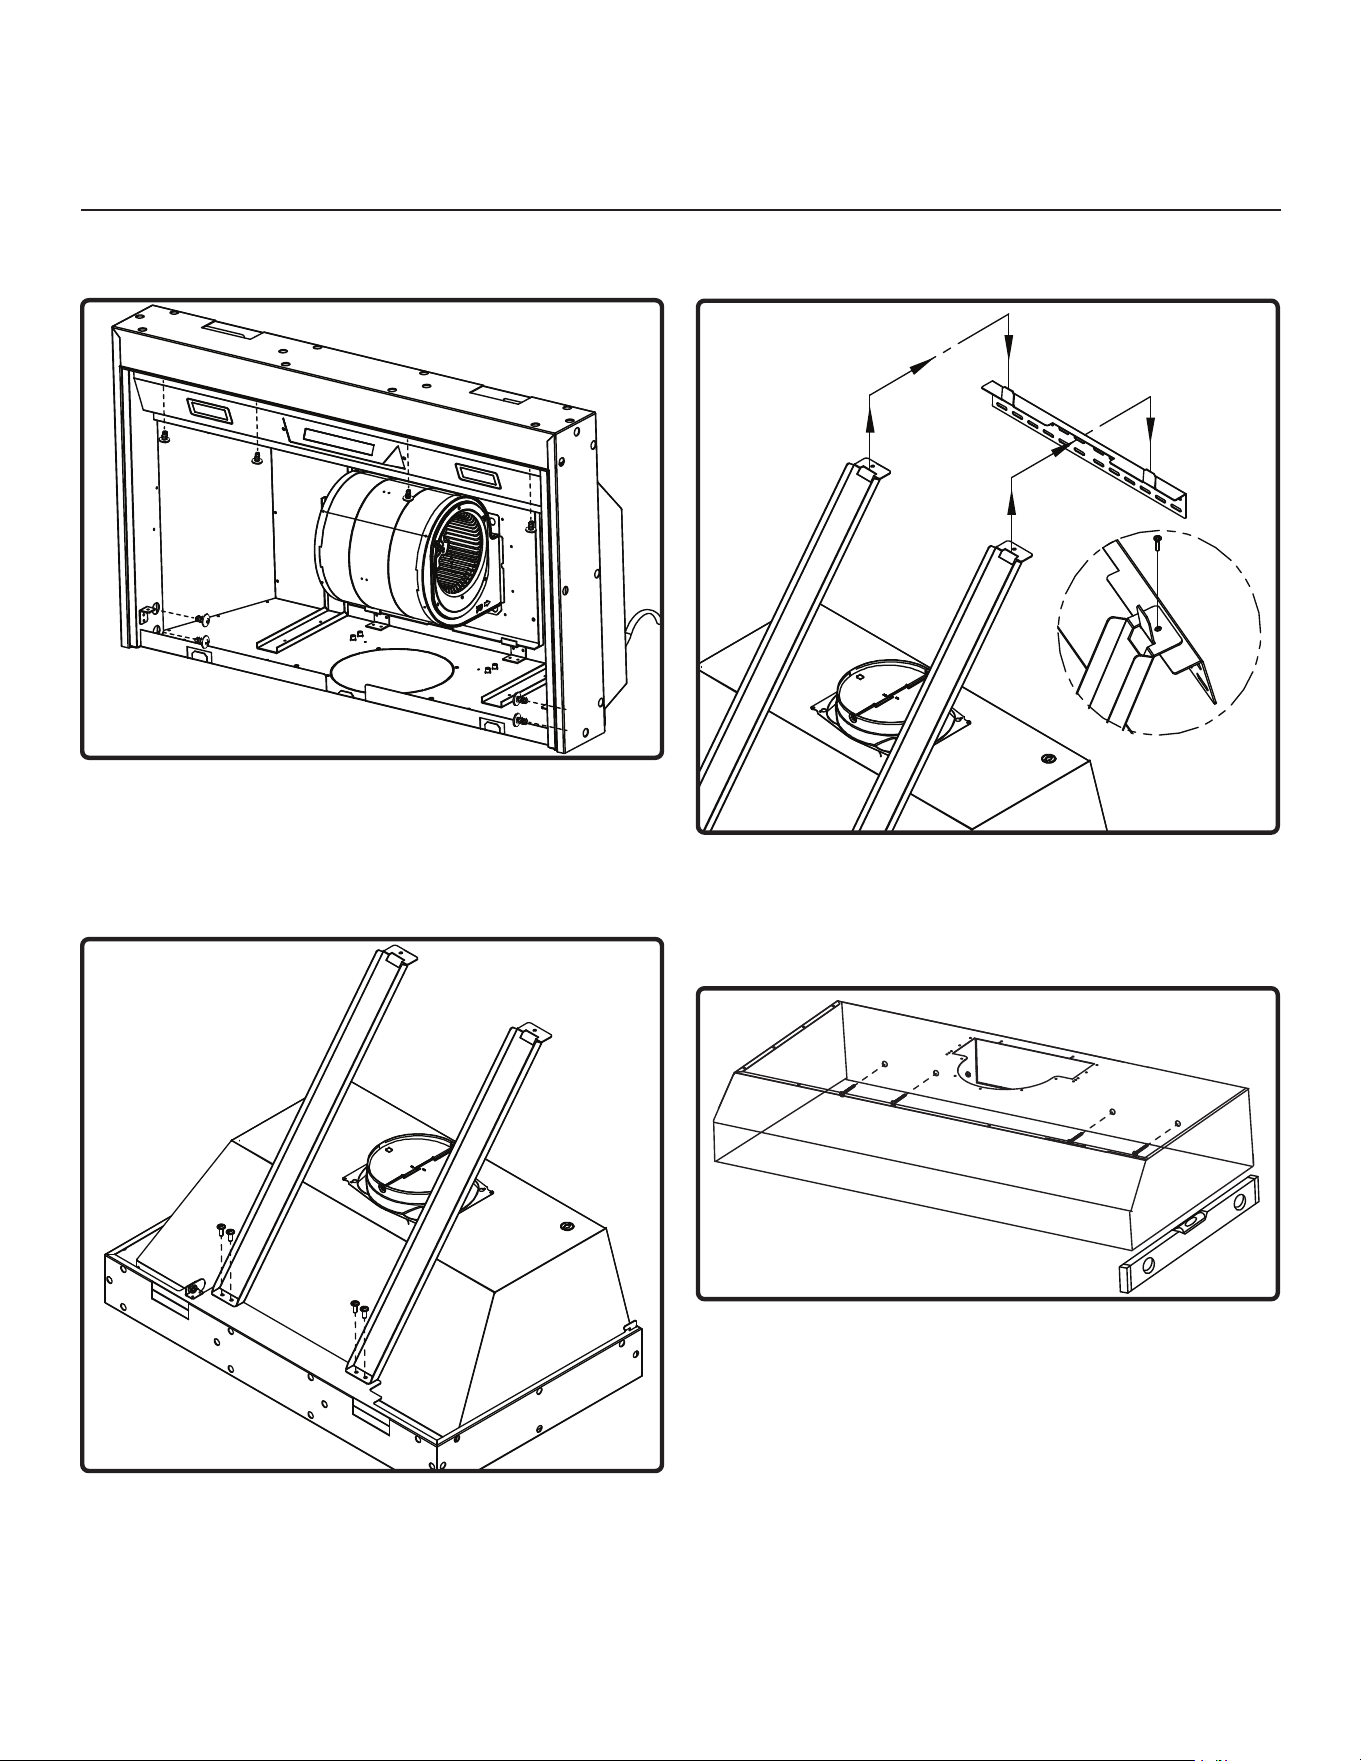
4. This step applies to insert models AK91 & AK95
only. For models AK92 & AK94, skip to the
next step. Secure the filler panel to the back
of the insert using (2) 3/16 x 1/2 screws.
ZEPHYRONLINE.COM
6
Installation Instructions
Installing the Alto Custom Hood
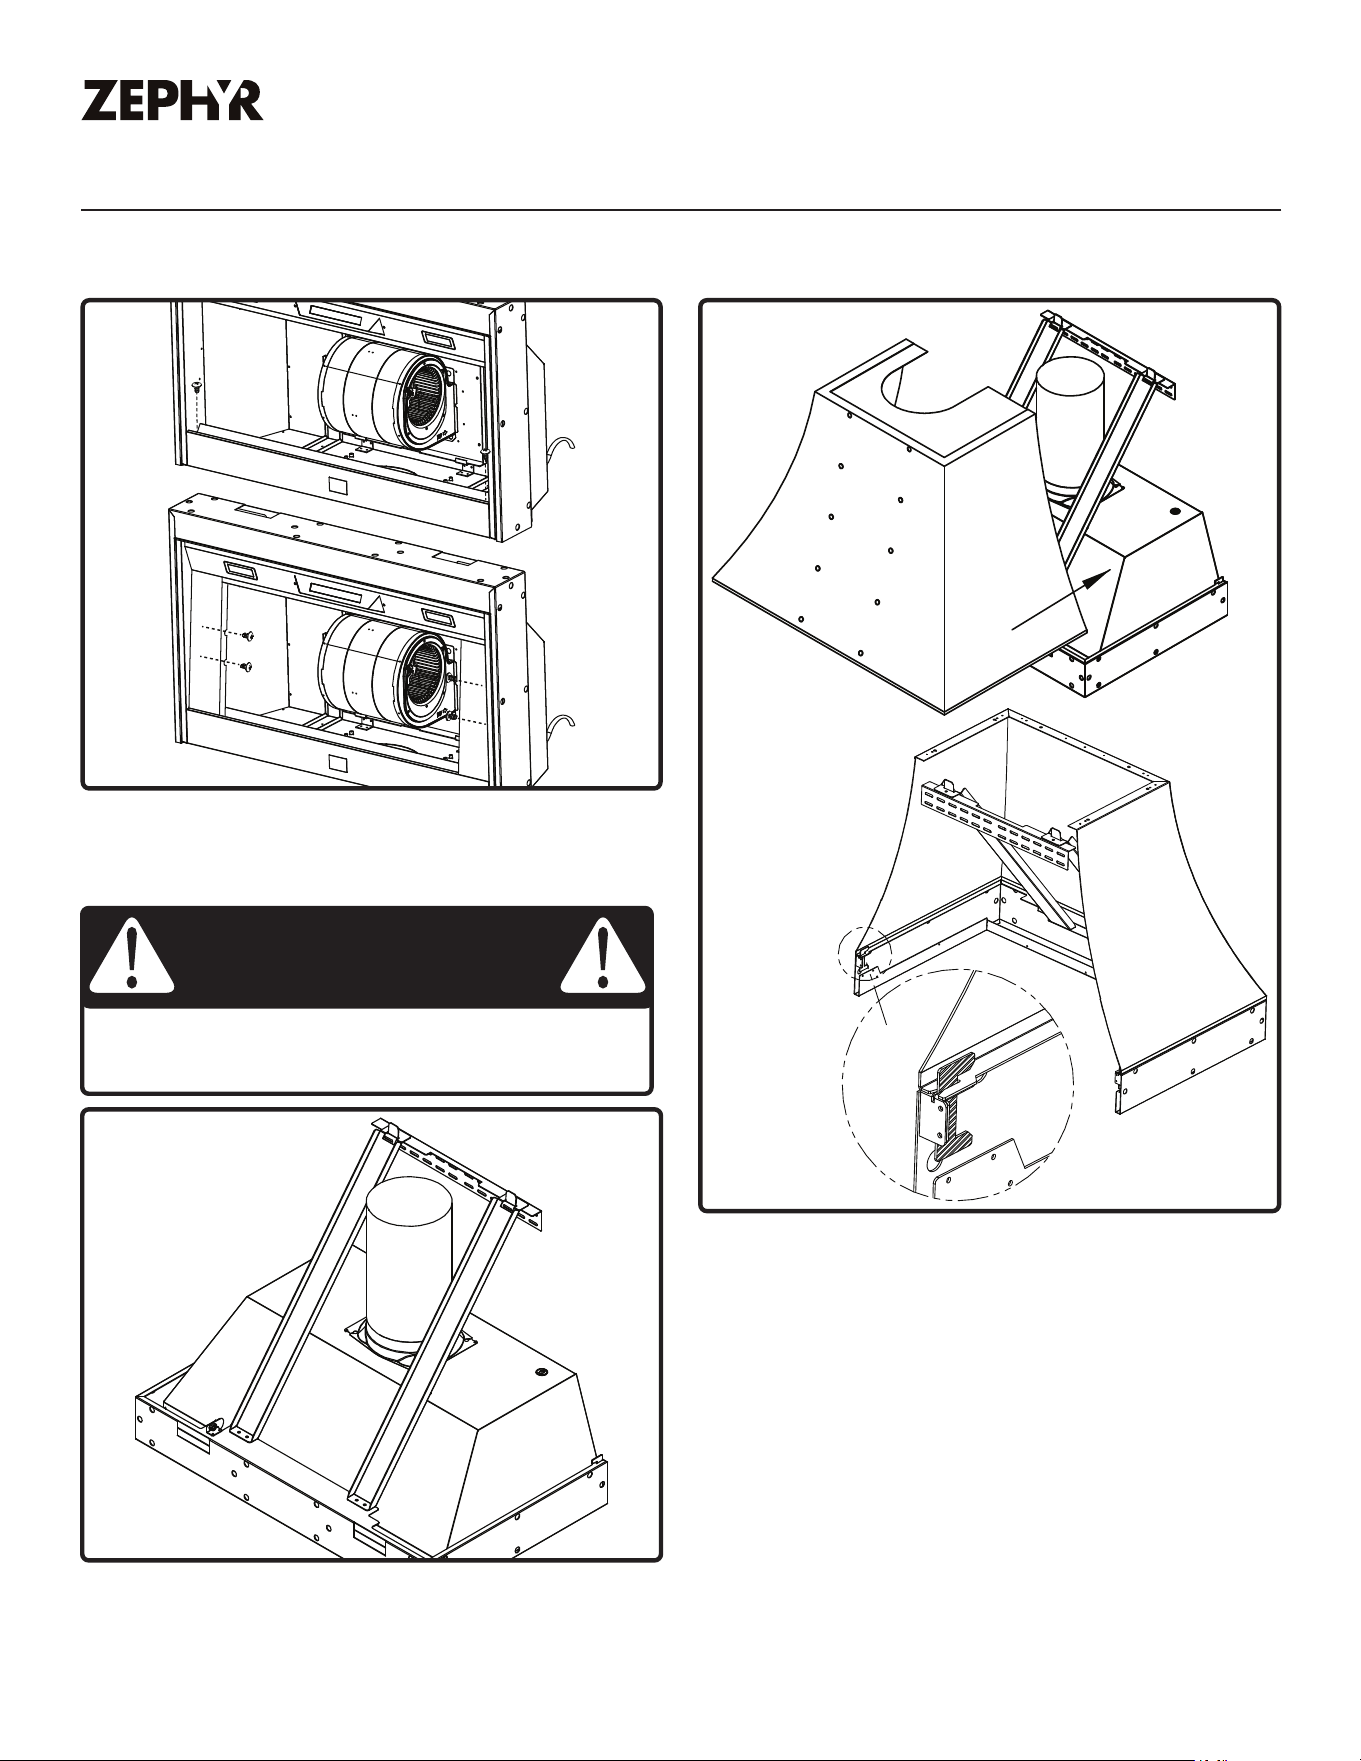
6. Place the hood insert right side up and secure
two long brackets by (4) 3/16 x 1/2 screws; (2)
screws per bracket.
7. Lift the hood insert and latch the open slots
from the long bracket onto the hooks on the
mounting bracket. Secure the brackets with
(2) M4 x 8 screws.
5. Lay the hood insert back on a stable surface
before placing the lower support frame on top
of the insert and securing it with (8) M4 x 8
screws; (4) screws in the front and (2) screws
per side.
8. Use a spirit level to ensure the bottom portion
of the lower support frame is level. Ensure
back to front and left to right are level.
Further secure the hood insert by installing
(4) #10 x 2” screws with (4) 5 x 14 x 1 washers
through the insert and into the wall.
NOTE: The hood must be level prior to
installing the top canopy. Failure to level
the hood may result in misalignment of the
top canopy and front and side horizontal
banding.
7
10. Connect the hood insert to power and
ducting. Refer to the hood insert installation
manual for detailed instructions.
Installing the Alto Custom Hood
WARNING
Electrical wiring must be done by qualified person(s) in
accordance with all applicable codes and standards. Turn o
electrical power at service entrance before wiring.
9. Reinstall all panels to the hood insert by
following the instructions from the insert
manual in reverse.
FRONT
REAR
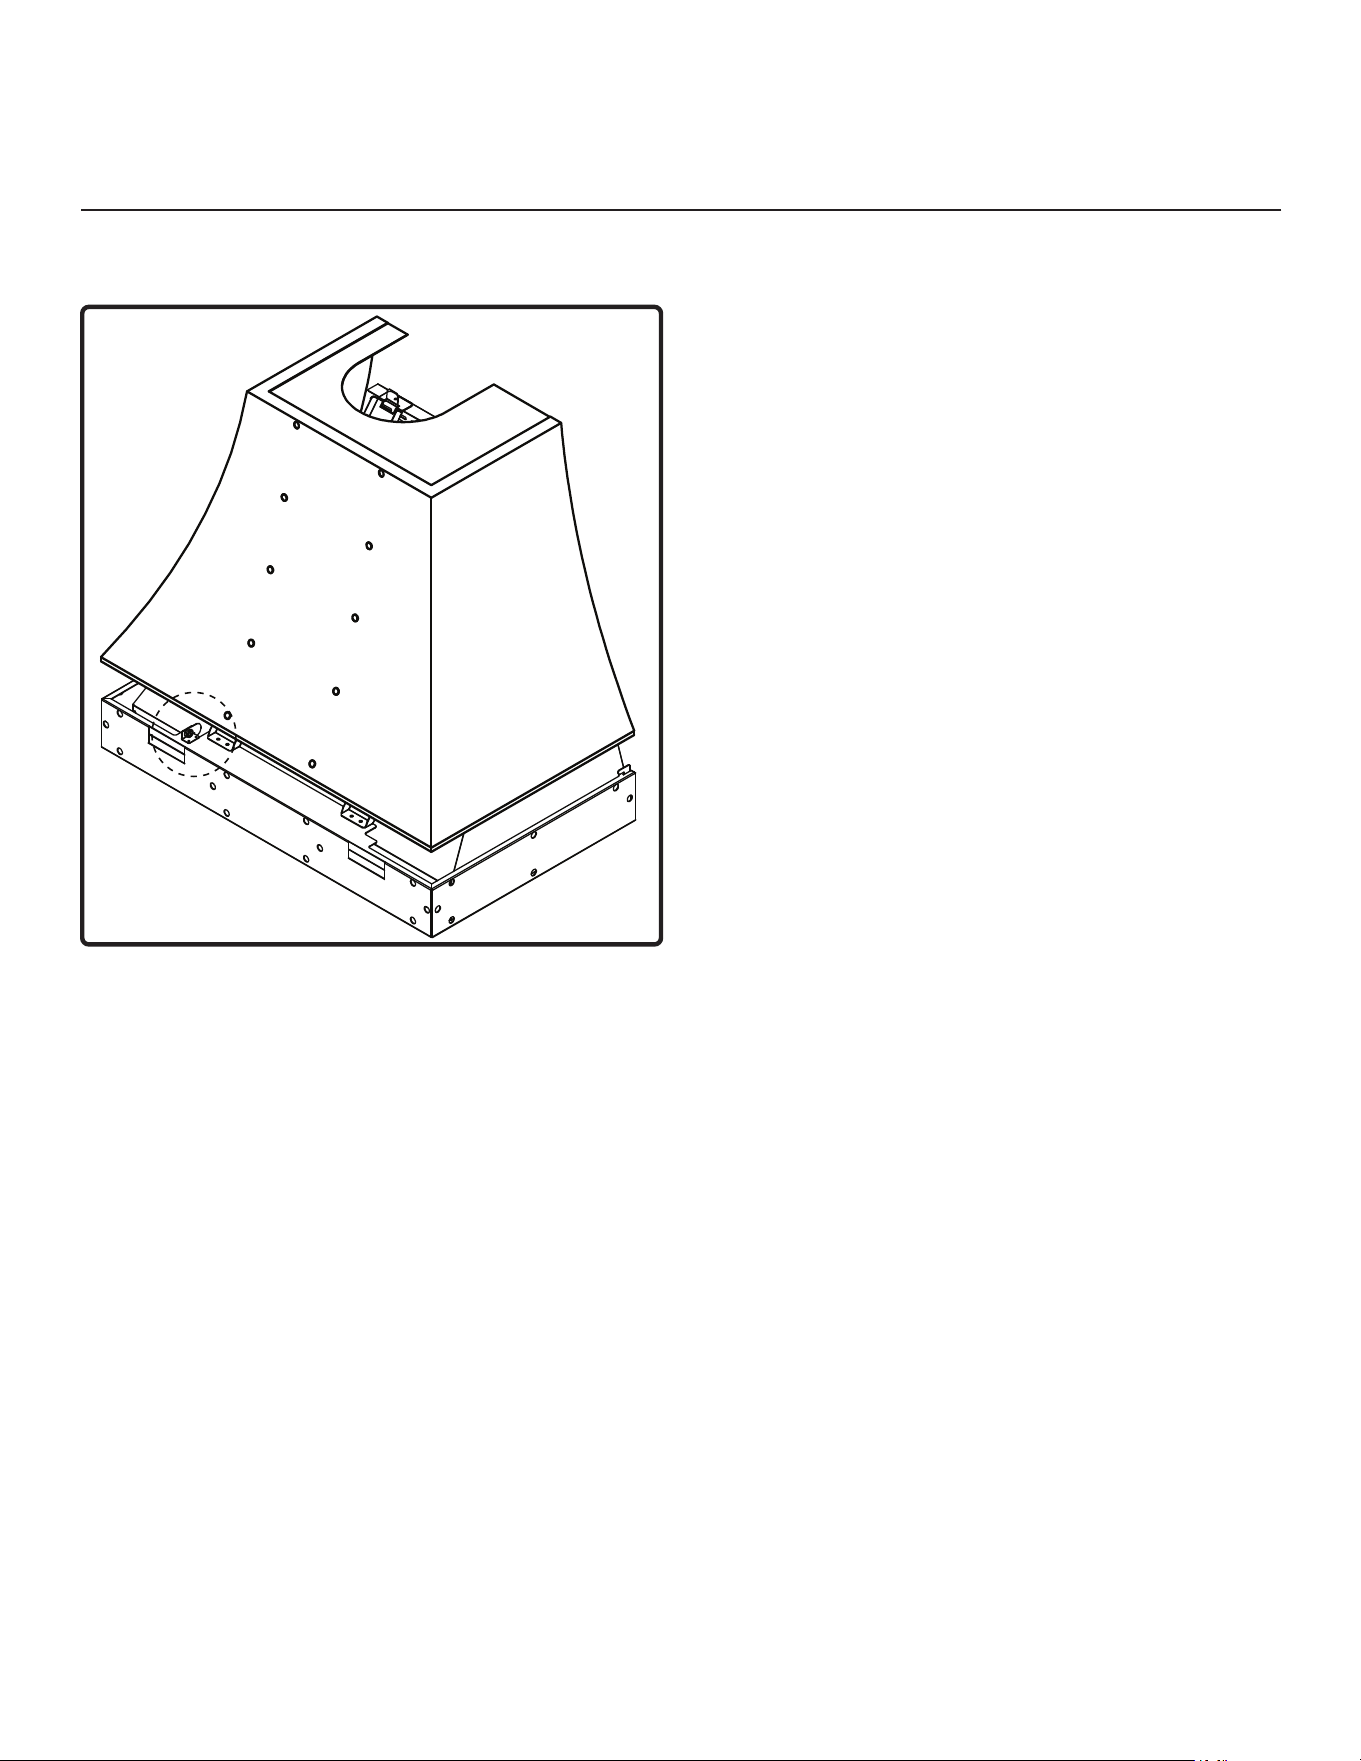
11. Install the top canopy. Each side on the
bottom of the top canopy has a small notch
that slides over a hook and attaches to the
lower support frame.
NOTE: If installing an optional duct cover, first
assemble the duct cover banding and then
attach it to the top canopy. Complete this
assembly before installing it to the bottom trim.
See the duct cover assembly instructions for
more information.
Installation Instructions
ZEPHYRONLINE.COM
8
Installing the Alto Custom Hood
Installation Instructions
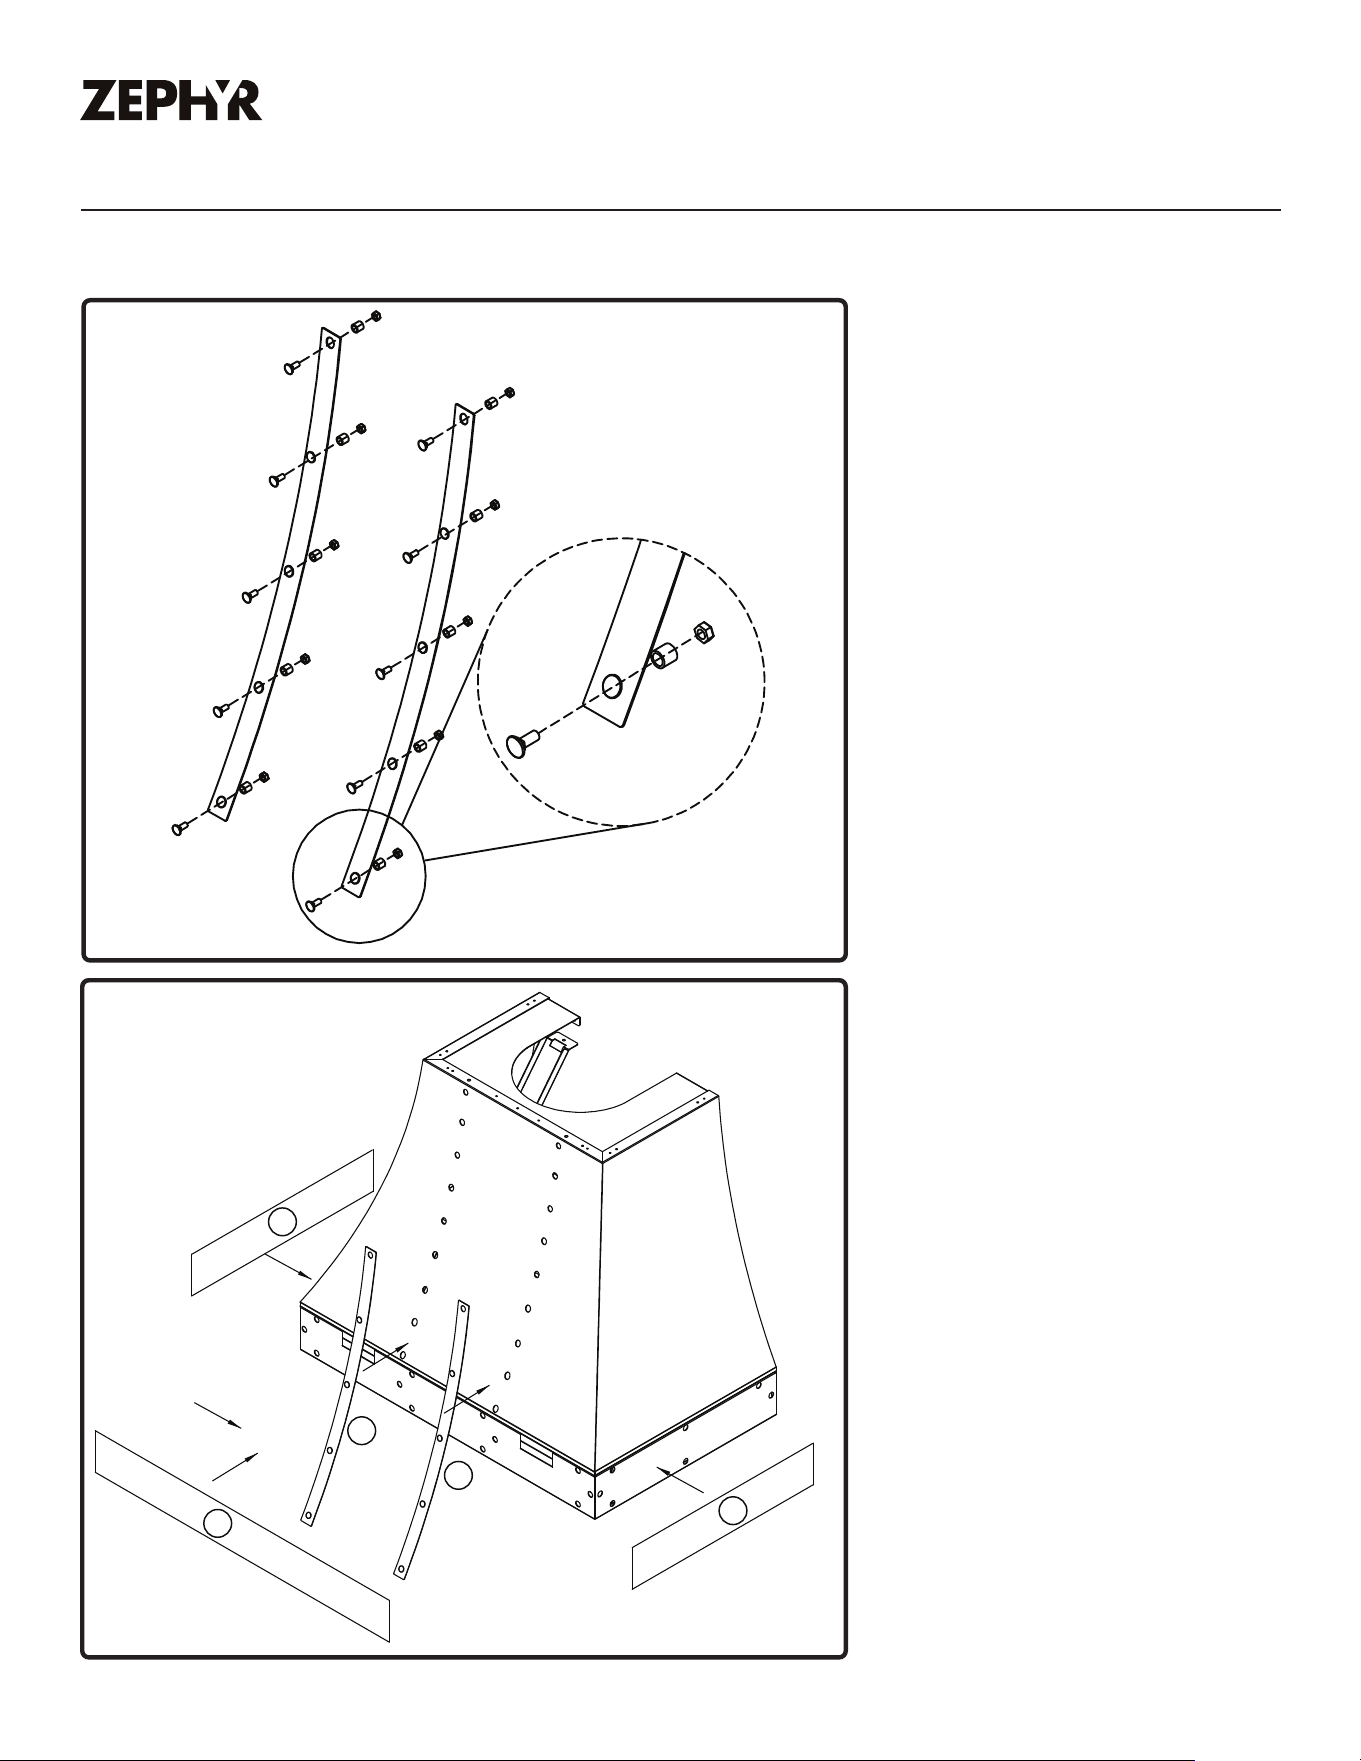
12. To prevent the top canopy from being pulled
forward, ensure the two C-hooks on the front
bottom of the top canopy is secured to the
lower support frame. The C-hooks will rotate
and latch onto the lower support frame.
13. If the top canopy needs to be removed,
first remove the front horizontal banding (if
applied) and unlatch the C-hooks, releasing
the top canopy from the lower support frame.
9
Installation Instructions
Installing the Banding
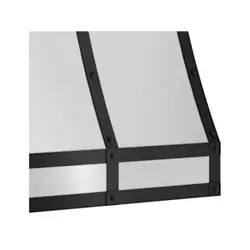
1. The banding is assembled by
inserting an M6 hood rivet bolt
through the banding rivet hole
and secured on the other side
with an 11*10.3 bushing and
M6 nut. Repeat this process for
every hole on each banding.
2. Install the banding by inserting
it into the top canopy. The
magnets on the top canopy will
secure the banding.
NOTE: If the rivets are not lining
up with the holes on the
Alto body while installing
the bands, flip the bands
around and retry.
3. Attach the side trims onto the
hood insert trim followed by the
front trim. The hood insert trim
will be secured by the built-in
magnets.
NOTE: The front and side trims
have a polished and brushed
side. Adhere the brushed
side against the magnets.
1
1
2
2
3
ZEPHYRONLINE.COM

10
Maintenance
Cleaning the Alto Custom Metal Hood
Clean periodically with warm soapy water and a clean cotton cloth or micro fiber cloth. Always rub
in the direction of the stainless steel grain. To remove heavier grease build up use a liquid degreaser
detergent. While cleaning, carefully clean around the areas with the banding as some of the bands
are held up magnetically, which may fall o if cleaning too vigorously.
After cleaning, use a non-abrasive stainless steel polish/cleaners to polish and bu out the stainless
luster and grain. Always scrub lightly with a clean cotton cloth or micro fiber cloth and bu in the
direction of the stainless steel grain.
► Do not use corrosive detergents, abrasive detergents or oven cleaners.
► Do not use any product containing chlorine bleach or any product containing chloride.
► Do not use steel wool or abrasive scrubbing pads which will scratch and damage surface.
11
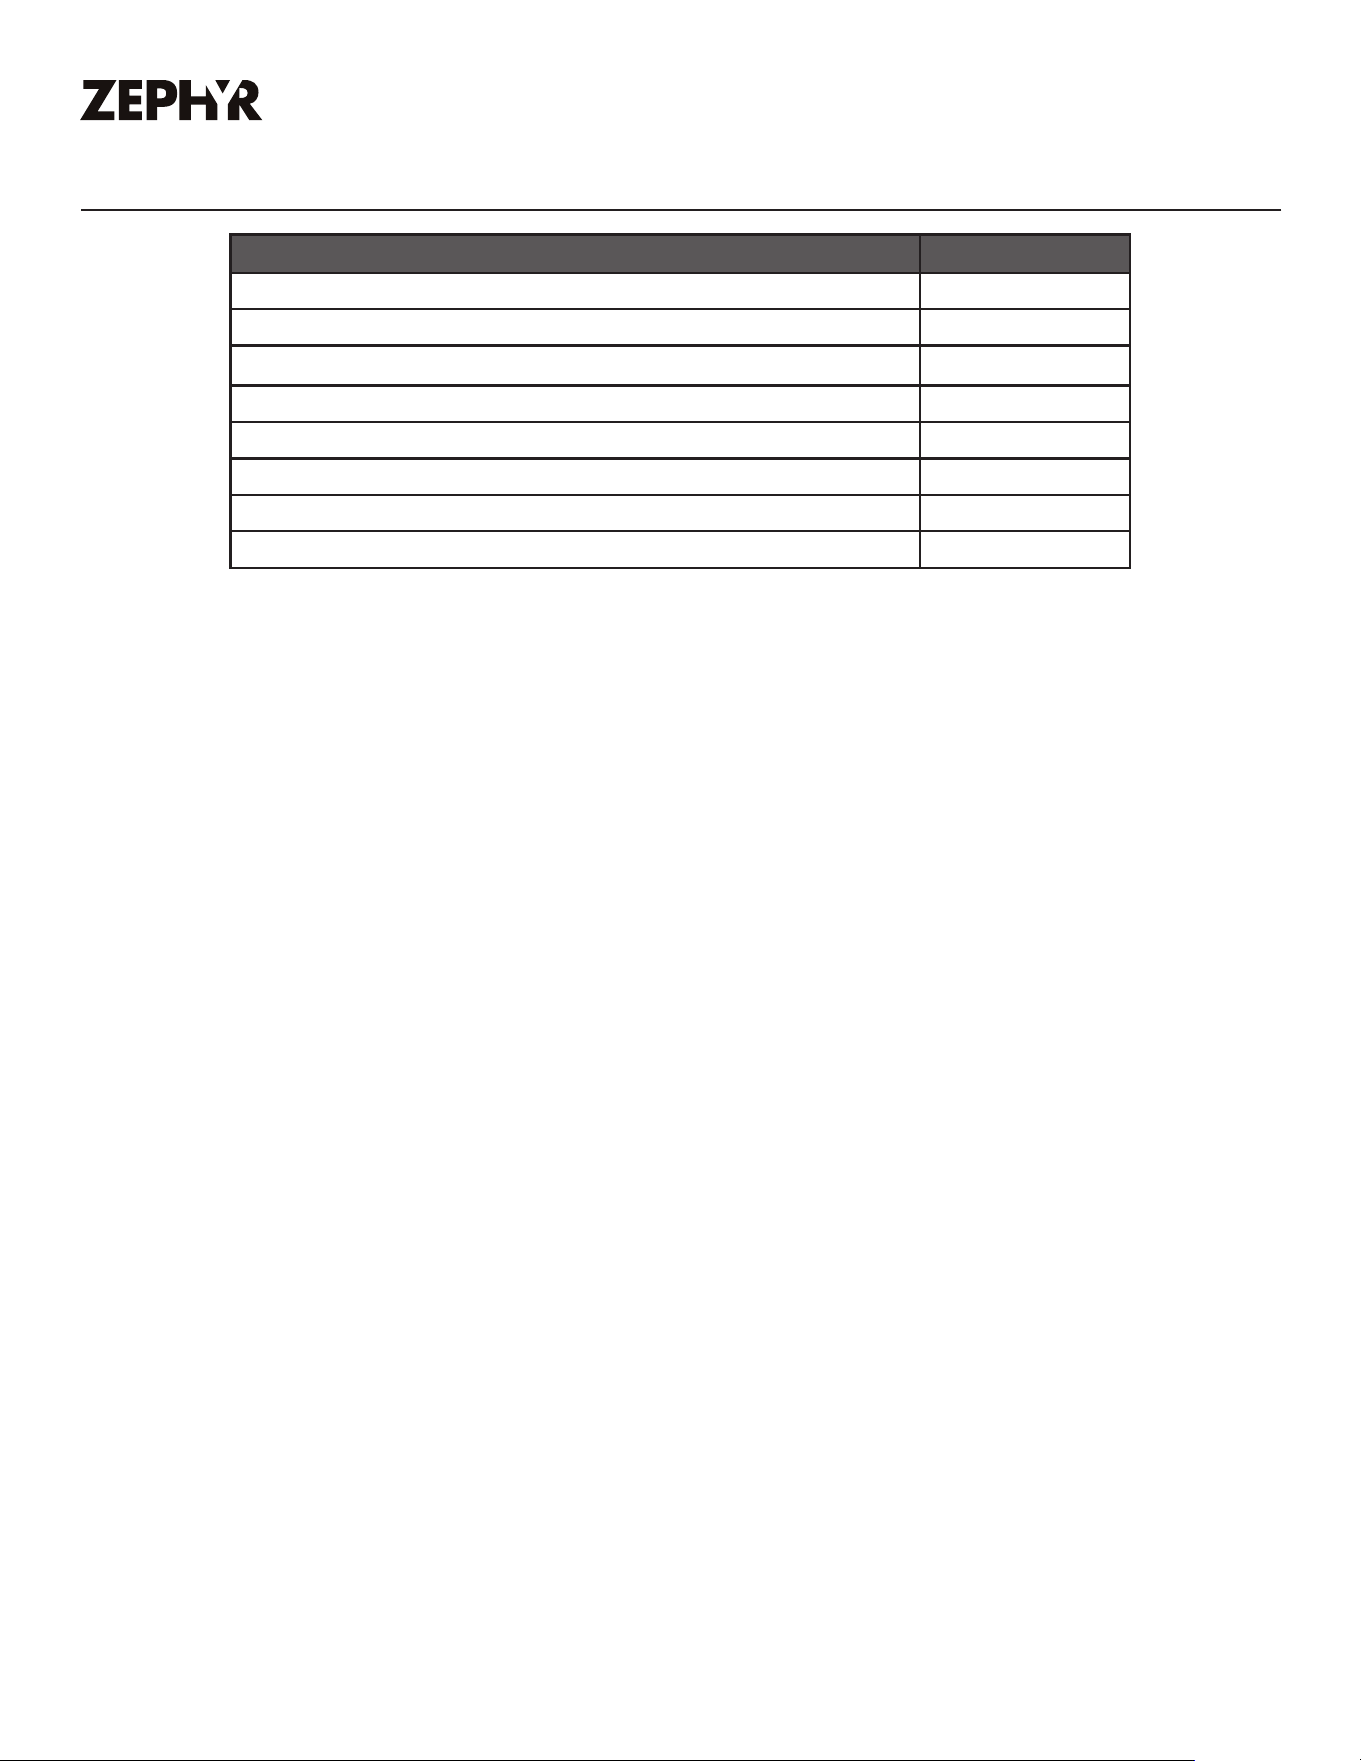
List of Parts & Accessories
Optional Accessories Part Number
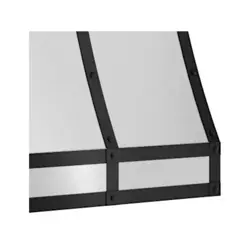
Alto Duct Cover, 36in, 12in tall, SS, with SS Banding DC23612AS
Alto Duct Cover, 48in, 12in tall, SS, with SS Banding DC24812AS
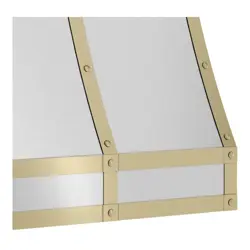
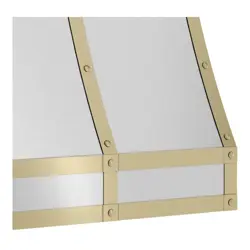
Alto Hood Banding Kit, 36in, Polished Gold BKAL36APG
Alto Hood Banding Kit, 36in, Polished Copper BKAL36APC
Alto Hood Banding Kit, 48in, Polished Gold BKAL48APG
Alto Hood Banding Kit, 48in, Polished Copper BKAL48APC
Alto Duct Cover Banding Kit, 12in, Polished Gold BKDC212APG
Alto Duct Cover Banding Kit, 12in, Polished Copper BKDC212APC
To order parts, visit us online at http://store.zephyronline.com.
ZEPHYRONLINE.COM

12
Limited Warranty
Two Year Limited Warranty for Parts: For two years
from the date of your original purchase of the
Products, we will provide, free of charge, Products or
parts to replace those that failed due to manufac-
turing defects subject to the exclusions and limita-
tions below. We may choose, in our sole discretion,
to repair or replace parts before we elect to replace
the Products.
To Obtain Service Under Limited Warranty: To qualify
for warranty service, you must: (a) notify us at the
address or telephone number stated below within 60
days of the discovery of the defect; (b) give the
model number and serial number (if applicable); and
(c) describe the nature of any defect in the Product
or part. At the time of the request for warranty service,
you must present evidence of your proof of purchase
and proof of the original purchase date. If we deter-
mine that the warranty exclusions listed above apply
or if you fail to provide the necessary documentation
to obtain service, you will be responsible for all
shipping and other costs related to the services. This
warranty is not extended or restarted upon warranty
repair or replacements.
Zephyr Ventilation, LLC (referred to herein as “we” or “us”) warrants to the original consumer purchaser
(referred to herein as “you” or “your”) of Zephyr products (the “Products”) that such Products will be free from
defects in materials or workmanship as follows:
alterations that impact serviceability of the Products. (I)
Damage to personal property or food spoilage from
use of this product. If you are outside our service area,
additional charges may apply for shipping costs for
warranty repair at our designated service locations and
for the travel cost to have a service technician come
to
your home to repair, remove or reinstall the Products. All
Products must be installed by a qualified professional installer
to be eligible for warranty repairs or service.
Limitations of Warranty: OUR OBLIGATION TO REPAIR OR
REPLACE, AT OUR OPTION, SHALL BE YOUR SOLE AND EXCLU-
SIVE REMEDY UNDER THIS WARRANTY. WE SHALL NOT BE LIABLE
FOR INCIDENTAL, CONSEQUENTIAL OR SPECIAL DAMAGES
ARISING OUT OF OR IN CONNECTION WITH THE USE OR
PERFORMANCE OF THE PRODUCTS. THE EXPRESS WARRANTIES
IN THE PRECEDING SECTION ARE EXCLUSIVE AND IN LIEU OF ALL
OTHER EXPRESS WARRANTIES. WE HEREBY DISCLAIM AND
EXCLUDE ALL OTHER EXPRESS WARRANTIES FOR THE PRODUCTS,
AND DISCLAIM AND EXCLUDE ALL WARRANTIES IMPLIED BY
LAW, INCLUDING THOSE OF MERCHANTABILITY AND FITNESS
FOR A PARTICULAR PURPOSE.
Some states or provinces do not allow limitations on the
duration of an implied warranty or the exclusion or
limitation of incidental or consequential damages, so
the above limitations or exclusions may not apply to
you. To the extent that applicable law prohibits the
exclusion of implied warranties, the duration of any
applicable implied warranty is limited to the same
two-year and one-year periods described above if
permitted by applicable law. Any oral or written
description of the Products is for the sole purpose of
identifying the Products and shall not be construed as
an express warranty. Prior to using, implementing or
permitting use of the Products, you shall determine the
suitability of the Products for the intended use, and you
shall assume all risk and liability whatsoever in connec-
tion with such determination. We reserve the right to
use functionally equivalent refurbished or recondi-
tioned parts or Products as warranty replacements or
as part of warranty service. This warranty is not transfer-
able from the original purchaser and only applies to the
consumer residence where the Product was originally
installed located in the United States and Canada. This
warranty is not extended to resellers.
Please check our website for any additional Product information, www.zephyronline.com.
Zephyr Ventilation Service Department, 2277 Harbor Bay Parkway, Alameda, CA 94502 1-888-880-8368
SEP25.0301
Warranty Exclusions: This warranty covers only repair or
replacement, at our option, of defective Products or
parts and does not cover any other costs related to
the Products including but not limited to: (a) normal
maintenance and service required for the Products
and consumable parts such as gaskets, filters, light
bulbs, fuses; (b) any Products or parts which have
been subject to freight damage, misuse, negligence,
accident, faulty installation or installation contrary to
recommended installation instructions, improper
maintenance or repair (other than by us); (c) com-
mercial or government use of the Products or use
otherwise inconsistent with its intended purpose; (d)
natural wear of the finish of the Products or wear
caused by improper maintenance, use of corrosive
and abrasive cleaning products, pads, and oven
cleaner products; (e) chips, dents or cracks caused
by abuse or misuse of the Products; (f) service trips to
your home to teach you how to use the Products; (g)
damage to the Products caused by accident, fire,
floods, acts of God; or (h) Custom installations or
TO OBTAIN SERVICE UNDER WARRANTY OR FOR ANY SERVICE RELATED QUESTIONS
United States Customers please call: 1-888-880-8368 or contact us at: zephyronline.com/contact
Canada Customers please call: 1-888-812-8311 or Email: [email protected]
Limited Warranty