— 1 —
------------- Overview
Fingerprint + password + face recognition intelligent door lock module is characterized by
simple operation and high safety factor of door lock.
------------- Product Features
Fingerprint + password + face recognition, so that the door lock security is more secure;
Reasonable collocation of various functions, simple and easy to remember operation;
Intelligent voice and display menu navigation, human-computer interaction, humanized operation;
With unlocking record query function, always grasp the use of the door lock
------------ Product Application
1. Residential
2. Modern office, office building, school
3. Organs and departments

— 2 —
1. specifications
Serial
Numb
er
Parameter Name
Specifications
1
Comparison mode
1: N
2
Acquisition head type
Self-learning capacitive pressing type fingerprint head
3
Acquisition head
resolution
508dpi
4
Rejection rate
<< 0.1%
5
false recognition rate
< 0.001%
6
Fingerprint collection
range
± 180 °
7
Type
M1
8
User Capacity
50 faces, fingerprints up to 40,There is no upper limit for
number passwords. The total number of users is
252.
9
Operation record
Scroll 5 00 bar
10
Battery life
Opening times ≥ 3000 times
11
Operating voltage
6.0V ~ 8.4V, low-voltage alarm voltage ±0.2V 6.8
12
dynamic power
consumption
≤ 1A (no motor action, no sound)
13
Static power
consumption
≤ 200uA (average power consumption)
14
Verification time
≤ 2 s, including the whole process of fingerprint
collection, comparison and unlocking signal output
15
Keyboard Type
touch sensing
16
OLED display
0.96” OLED
17
External emergency
power supply
5V1A Micro USB or TYPE-C
18
Antistatic ability
≥ 8KV (contact type) ≥ 15KV( non-contact type)
19
Storage temperature
25 ℃ -80 ℃
20
Working temperature
-2 5 ℃ ~ 70 ℃
21
Ambient humidity
15%RH ~ 93%RH

— 3 —
2. Setting Description
Doorbell function 2.1
Touch the button with your finger and the smart lock will ring the doorbell.
Restore factory settings 2.2
At the same time, long press the built-in unlock and close lock keys on the rear panel, ring 5 times, and
the voice prompt "restore factory settings, press the# key for confirmation, press the * key for cancellation"
and press#The system restarts to the factory mode.
Under the factory state, any face, fingerprint, can be unlocked, the initial password is 123456. After
performing the factory setting operation, the set door opening direction and torque parameters cannot be
cleared.
Low battery indication 2.3
The system power is less than 25%. When unlocking, the system will voice prompt "The power is
insufficient, please replace the battery ." The battery can still be unlocked about 50 times, but please charge
it in time (or replace the battery).
2.4 external USB emergency power supply
When the battery is dead or the power is too low, the data cable can be connected to the charging
treasure and inserted into the USB port on the front lock body to supply power to the lock as an emergency
power supply.
The fully automatic USB emergency power supply scheme uses the method of recharging the
rechargeable battery, so it takes about 30 seconds to unlock the USB cable.
Illegal user alarm 2.5
5 consecutive input error fingerprint, password , the system prompts "illegal user, illegal
invasion, the owner has been notified". The system locks for 90 seconds after the fifth alarm, during which
time it does not respond to any user action. Unlock after 90 seconds.
Virtual bit password 2.6
The room door lock increases the digital password virtual bit function. When using the password to
unlock, the user can add numbers before and after the correct password and press the "#" key to confirm,
which can increase the security of the digital password, but the total length of the input shall not exceed 16
digits. If the password is "010010", enter " 001001000" to unlock.
3. user settings
Preparation of 3.1
When using it for the first time, please fully charge the battery, put it in the battery box, cover it back to the battery cover,
and the smart lock enters the standby state.
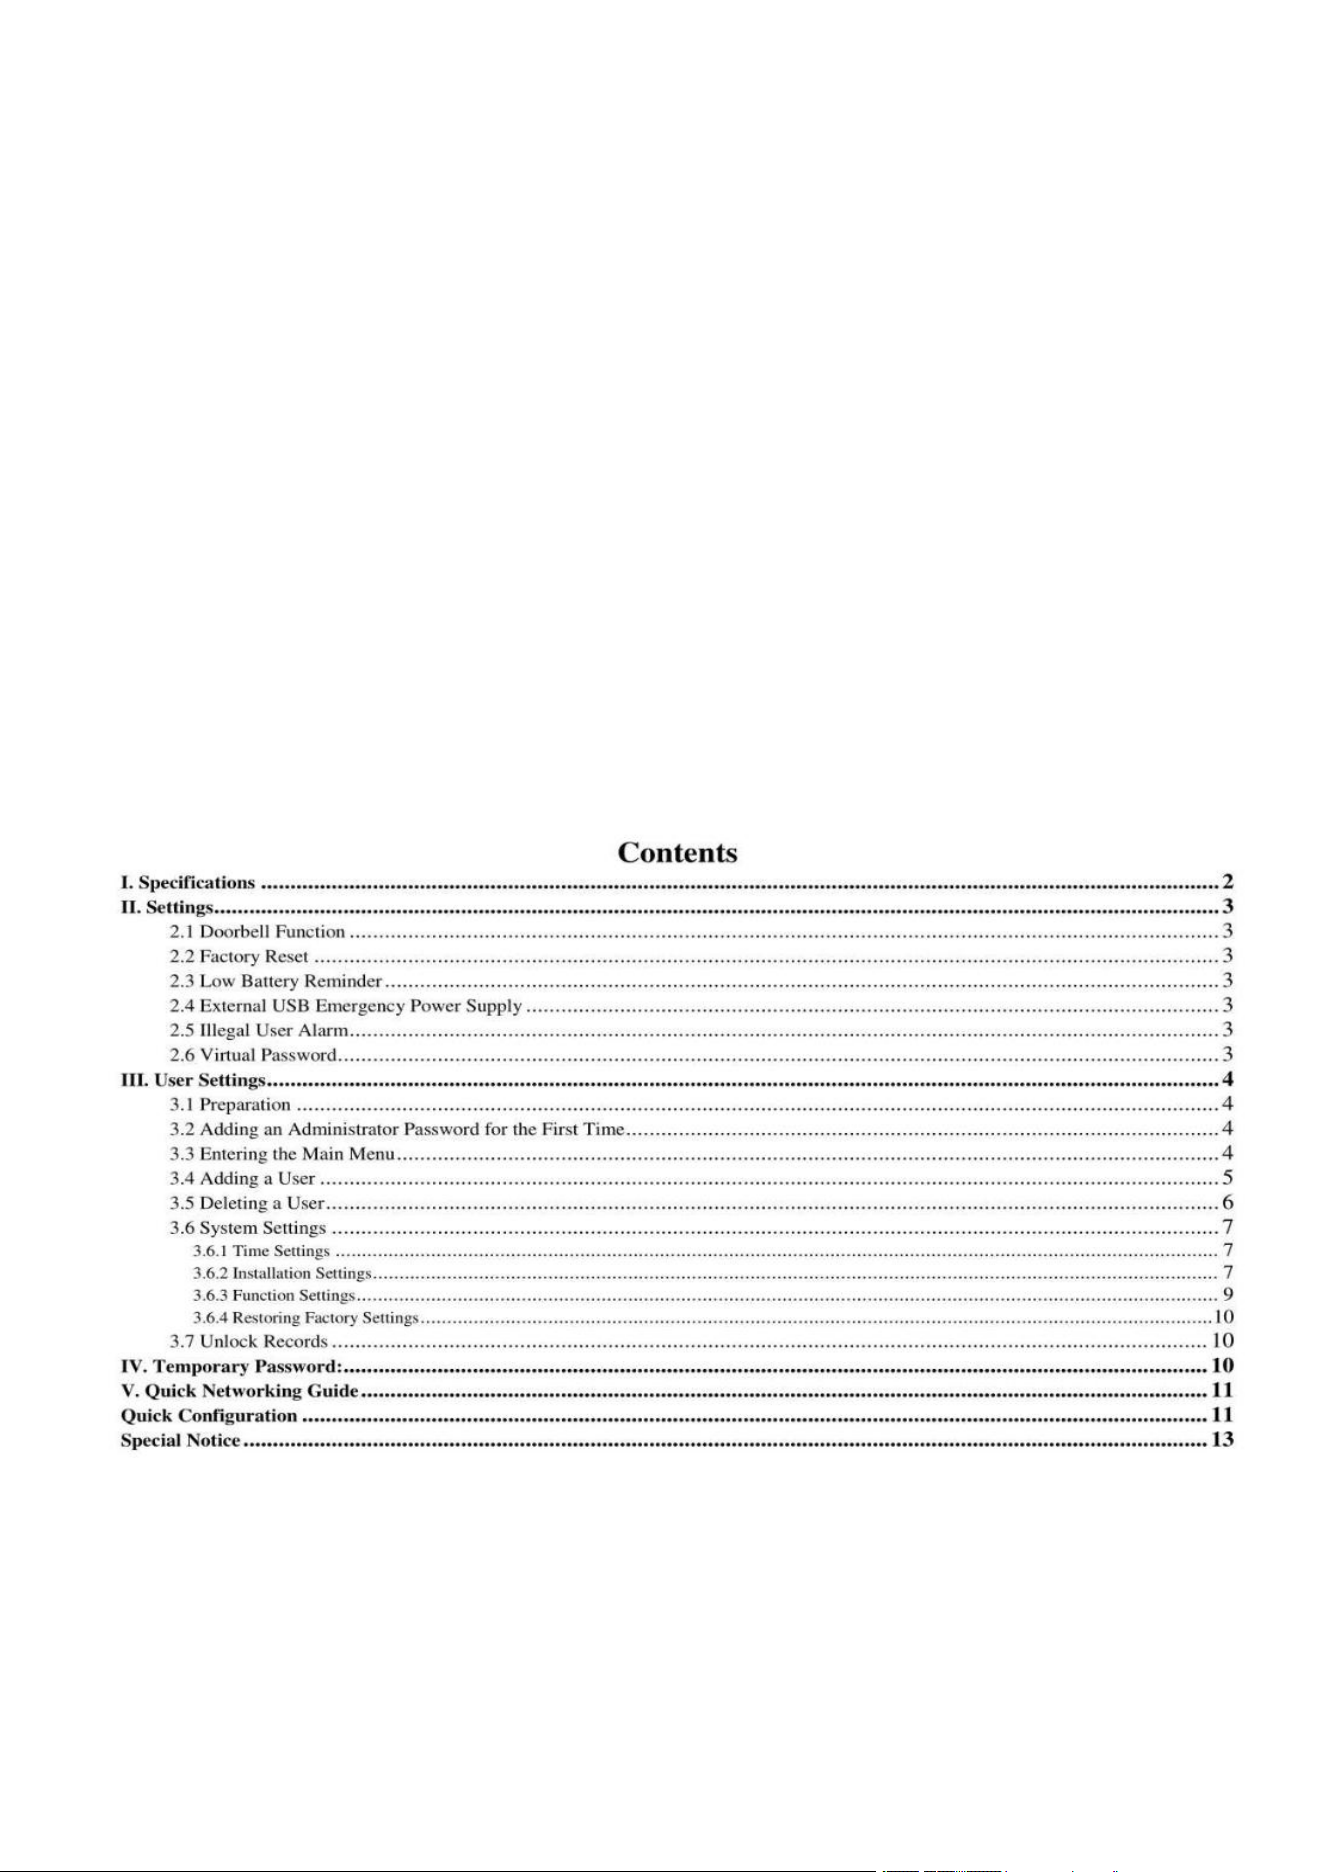
Initial use of add administrator password 3.2
Intelligent door
lock
xx-xx-xx xx:xx
Intelligent door
lock
Press the# key to
enter the settings
Add Administrative
User
Please enter a 6-
digit password
Press
"*"
Press "#"
Please re-enter the
same password
User: 001
Added successfully
Enter
password
Enter the same
password
1. Short press the * key, and then press the # key, the voice prompt "add management user, please enter a 6 -digit password,
press# key to confirm ", the user enters a 6- digit password and presses# key to confirm
2. The voice prompt "Please re-enter", and then enter the same set of passwords

— 4 —
1.Registered
User
2.Delete User
3.System
Settings
1.
Registration
1. Register
Administrator
2.
Registered
1. A
registered
1.
Registration
1. Register
ordinary users
2.
Registered
3. Voice prompt "user 001 added successfully ," the system automatically jumps to the main menu, and the user exits or
performs other operations according to voice navigation.
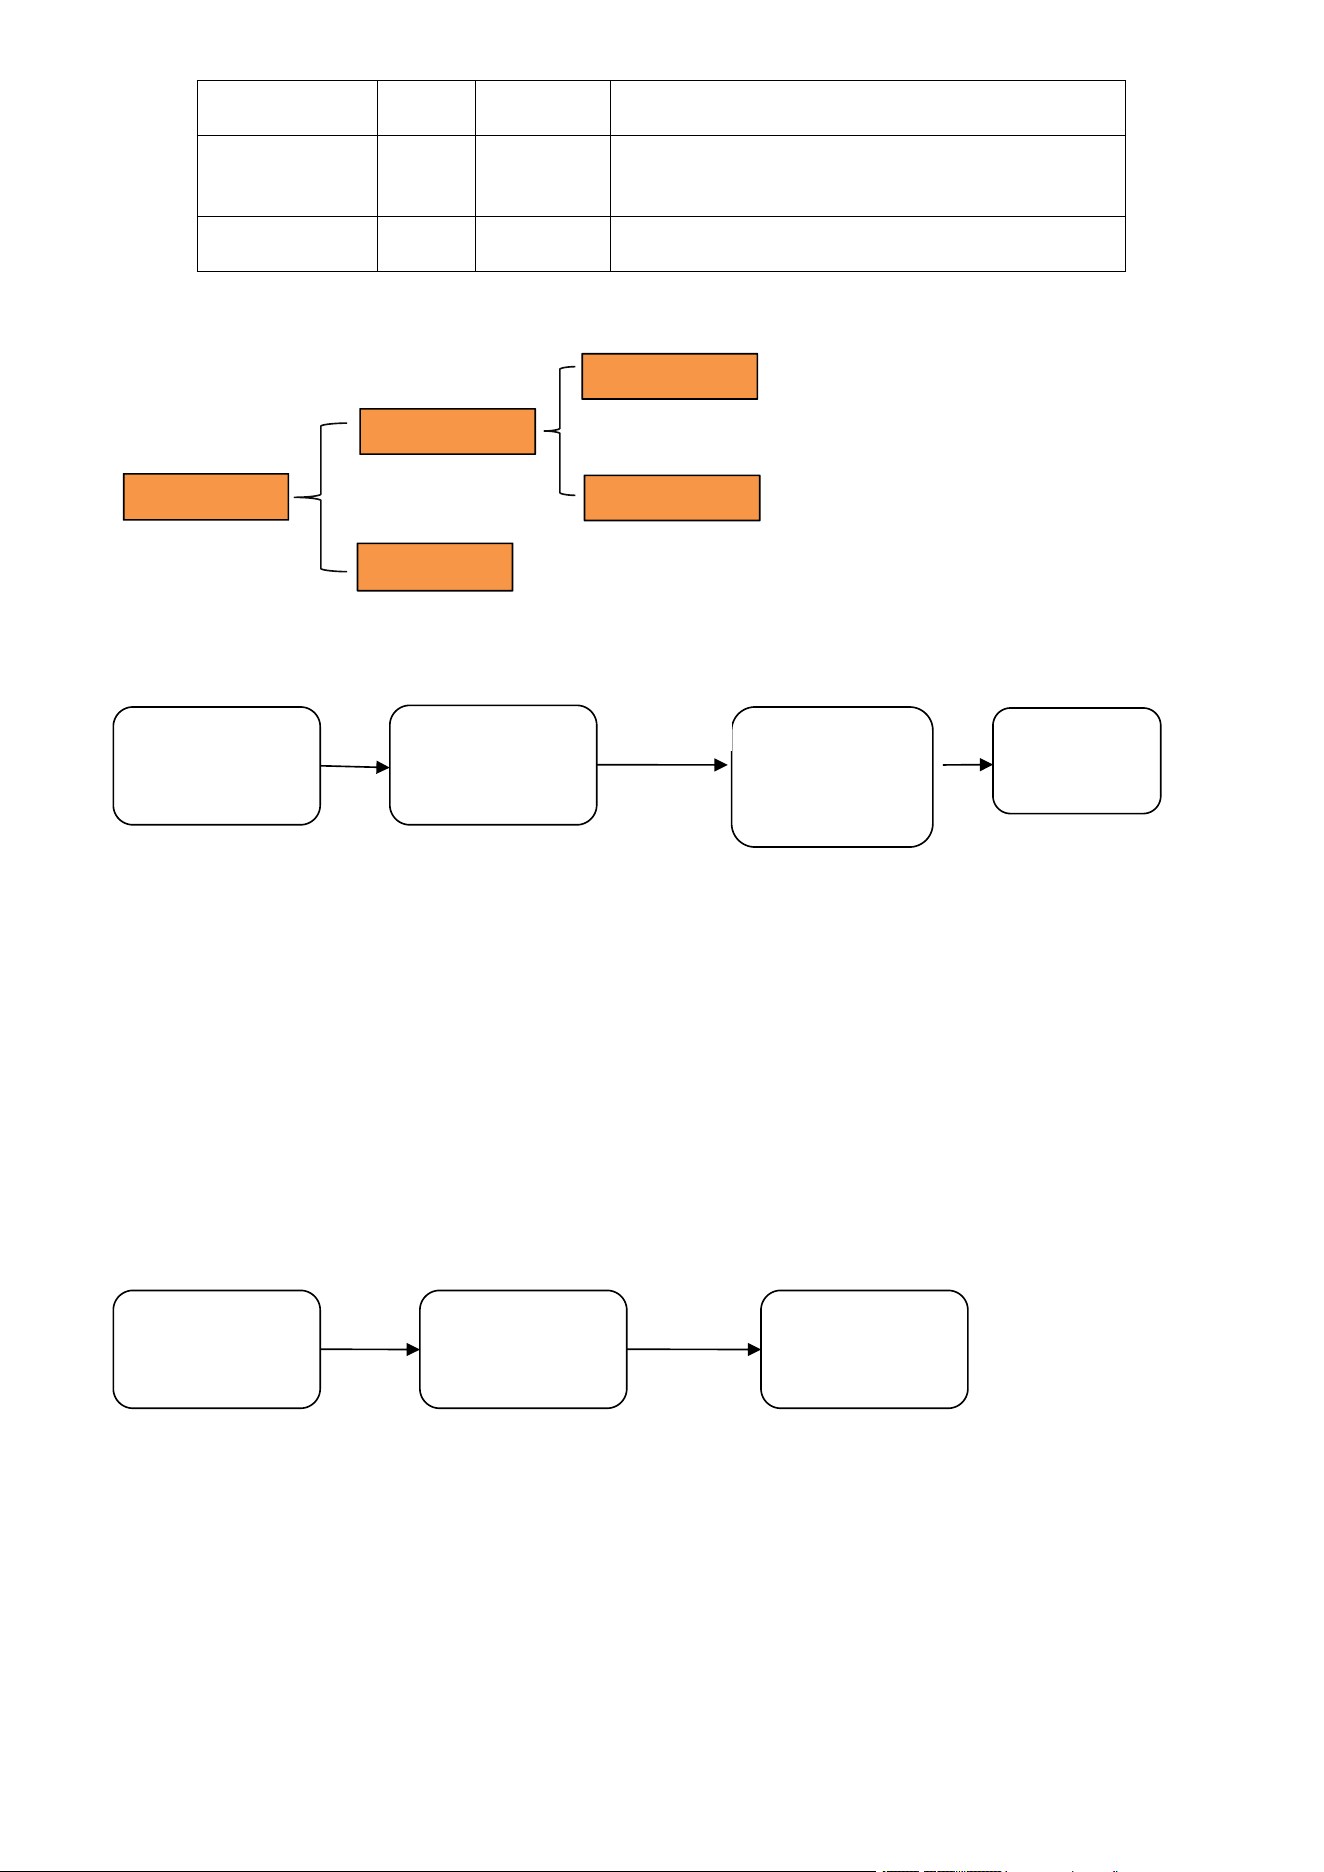
Enter the main menu 3.3
Light up the touch screen and press the "*" key and then press the " #" key to enter the main menu or press the unlock
and lock buttons built in the rear panel at the same time. Access to the main menu must be verified by entering the
administrator information.
After entering the main menu, the voice prompt "please press the number key to select the operation", the user can
press the corresponding number key to select the operation according to the menu number. In the initial state, the
administrator information is password 123456 or any "face user". After the administrator succeeds in verification, the
administrator can carry out function management. Voice broadcast: "Please press the number keys to operate". The
management menu is shown in the figure.
Function menu diagram
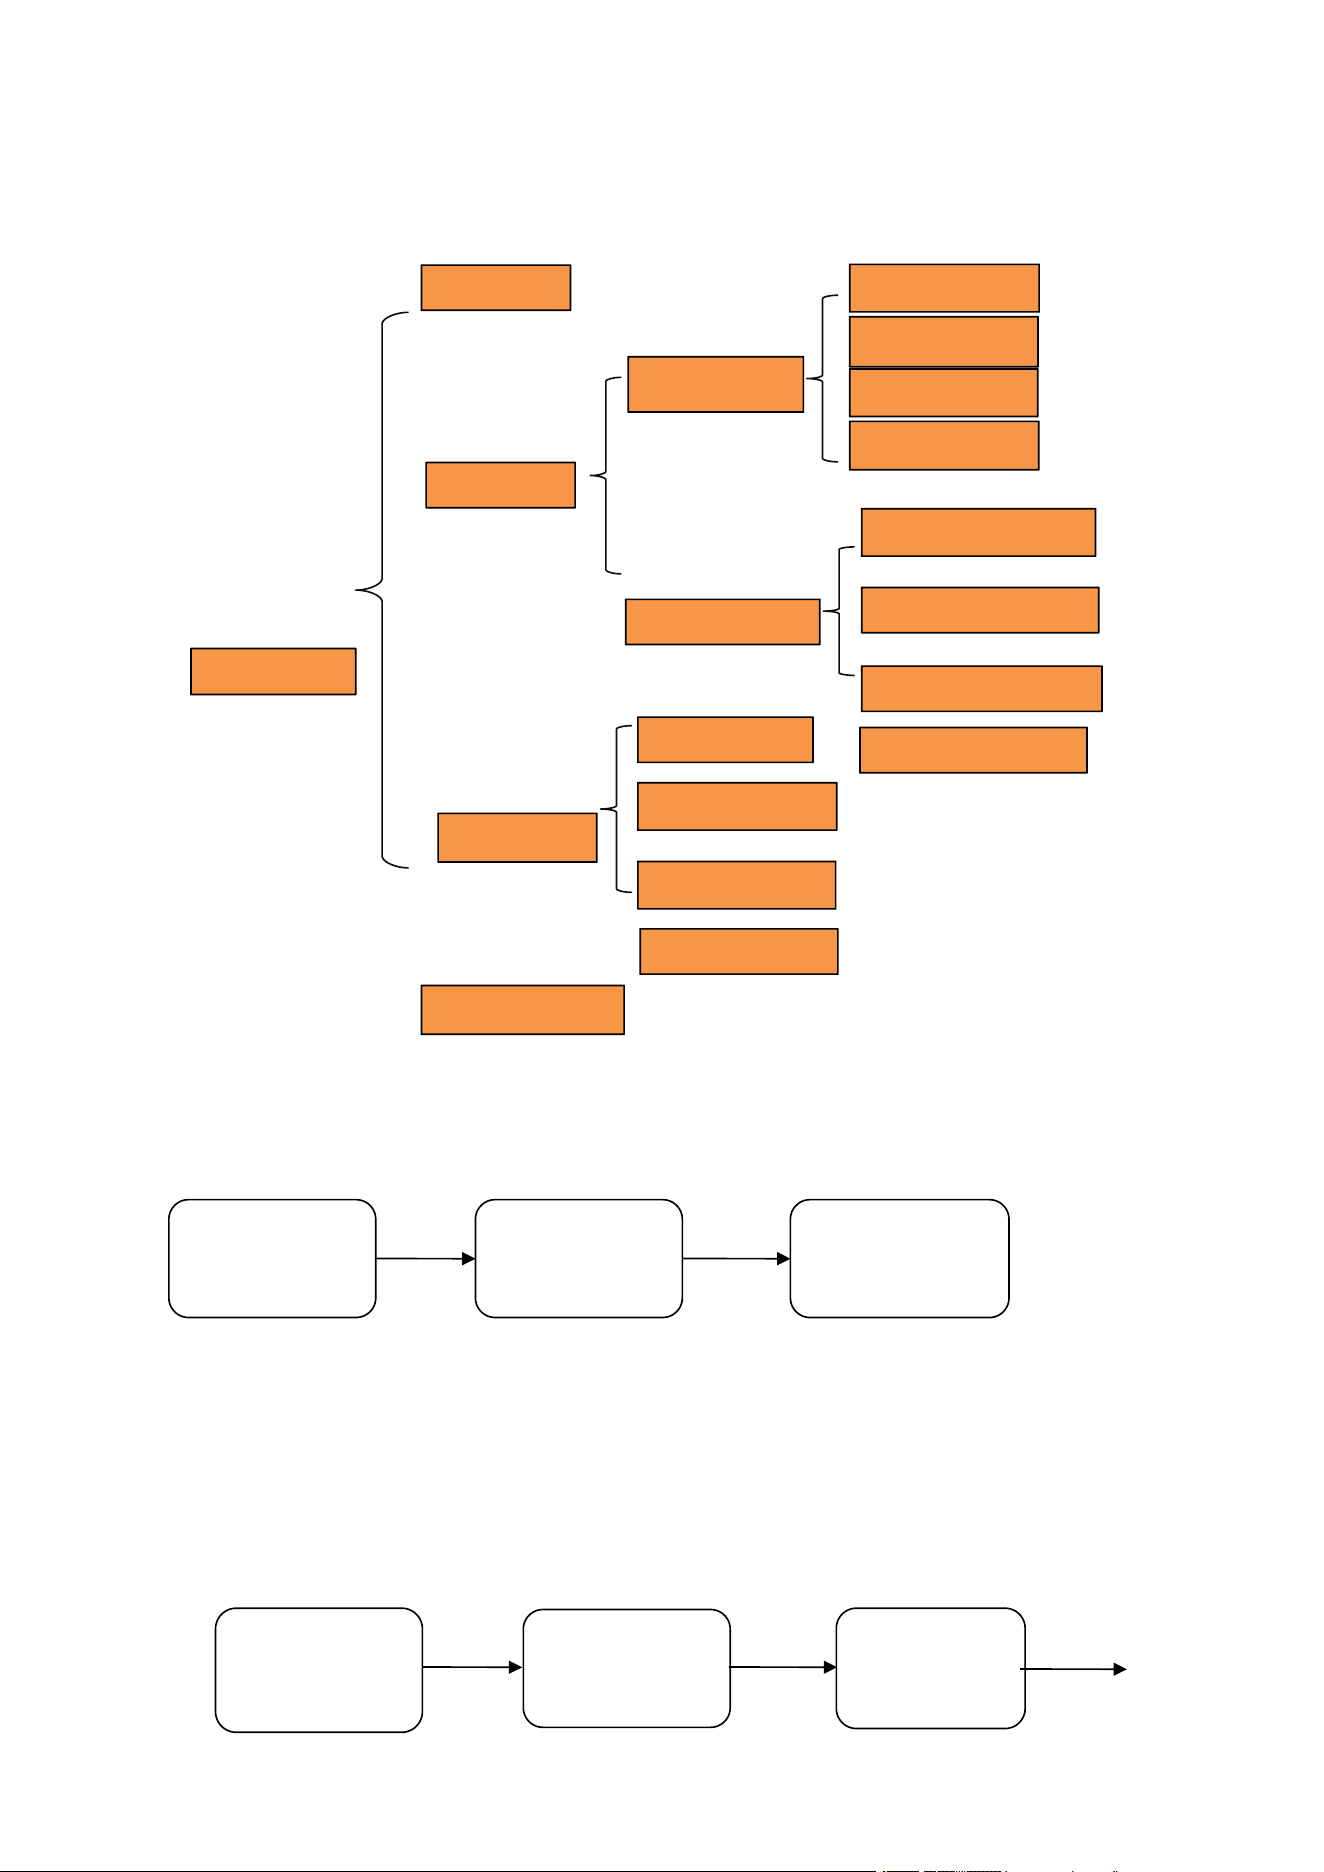
Add user 3.4
1. Add users
2. Delete User
3. System Settings
4. Unlock record
1. Register
Administrator
2. Register ordinary
users
Please enter the
fingerprint,
password, face to
add
Press
1
Press 1
or 2
Adding fingerprint 1: the user places his finger on the fingerprint sensor, and the voice prompt "please press the finger
again". the user places the same finger on the sensor, and inputs continuously. the voice prompt "successfully added, can
be added continuously, please press the * key to exit". In order to make subsequent verification of fingerprints easier to
use, when collecting fingerprints, try to collect several times at different positions of the same finger.
2 to add a password: the user enters a 6 -digit password, press the# key to confirm, the voice prompt "please enter again",
the user enters the same password. Voice prompt "add successfully, can be added continuously, exit, please press the *
key"
3 the registered face: when registering a face user, the front face must be recognized first, and the distance is within 65cm
to ensure the quality of the registered face.
— 5 —
1. Delete the
fi er card
1. Verify
Deletion
2. Delete
User
1. Delete a
fa
2. Number
deletion
User Settings
Quantit
y
Coding
range
Description
Administrator
9
001-009
Administrator rights can add or delete
ordinary users
(including normal user permissions)
Ordinary User
291
010-291
Ordinary users can be face, fingerprint, password,
and can only unlock
Delete User 3 .5
Verify Delete User 1
1. Add users
2. Delete User
3. System Settings
4. Unlock record
1. Verify Deletion
2. Number deletion
Press
2
1. Delete
fingerprint
password
2. Delete Face
Pre
ss 1
Please verify
the user to be
deleted
Press 1
Verify that the user is deleted. The voice prompt "Please verify the user to be deleted", the user can enter the user to
verify the deletion:
Number 01 user cannot be deleted
Fingerprint: The finger that will delete the fingerprint is placed on the fingerprint sensor.
Password: Enter the password you want to delete.
Face: Point the camera at the face.
If the user exists in the system, the voice prompt "delete successfully, can be deleted continuously, please press the *
key to exit"; If the user does not exist, the voice prompt "operation failed".
2 Delete user by number
1. Add users
2. Delete User
3. System Settings
4. Unlock record
1. Verify Deletion
2. Number
deletion
Press
2
Please enter the
user number to
delete
Press
2
The voice prompt "Enter the user number to be deleted", and the user can enter a three-digit user number, such as
"001". If the user exists in the system, a voice prompt "deletion succeeded" is performed, and if the user does not exist, a
voice prompt "operation failed" is performed ".
The voice prompt "can be continuously deleted, please press the * key to exit ", and the user can continuously enter the
user number to delete the user.
Number 01 user cannot be deleted
— 6 —
1. Time
setting
1. Door lock
setting
1. Door opening
direction [left]
2. Lock back
time [2s]
3. [Off]
Delayed Lock
4. Motor torque
[high]
2.
Installation
1. Human body
sensor switch [off]
2. Face
recognition
2. Voice induction
[off]
System
settings
3. Human body
sensing distance
1. Networking
Settings
4. Anti-return time
[15]
2. Volume setting
[High]
3. Function
setting
3. Anti-prying
setting [OFF]
4. Language
Settings
4. Restore factory
settings
System settings 3.6
3.6.1 Time setting
1. Add users
2. Delete User
3. System Settings
4. Unlock record
1. Time setting
2. Installation
Settings
3. Function setting
4. Restore factory
settings
Press
3
Please enter time:
20__/__/__
__:__
Press
1
Voice prompt "Please enter time", and enter time according to the time format displayed in the interface. For
example, "2025/ 06/03 12:01", enter "2506031201" in turn.
3.6.2 Installation settings
Door opening direction setting
1. Time setting
2. Installation
Settings
3. Function setting
4. Restore factory
settings
1. Door lock
setting
2. Face recognition
settings
Press
2
1. Door opening
direction [left]
2. Lock back
time [2s]
3. Delay lock [0s]
4. Torque setting
[high]
Press
1
Press
1
Press the number 1 to set the door opening direction. If the position of the lock is on the right side of the
door, the door opening direction shall be set as the door opening direction [left]; if the position of the lock is on
— 7 —
the left side of the door, the door opening direction shall be set as the door opening direction [right].
Lock time
1. Time setting
2. Installation
Settings
3. Function setting
4. Restore factory
settings
1. Door lock
setting
2. Face recognition
settings
1. Door opening
direction [left]
2. Lock back time
[2s]
3. Delay lock [0s]
4. Torque setting
[high]
Press
2
Press
1
Press
2
Press the number 2 to set the automatic lock back time. The locking time setting is mainly aimed at the pop-
up time of the lock tongue of the lock body, and the set time range is between 2s and 9s.
Delay lock 3
1. Time setting
2. Installation
Settings
3. Function setting
4. Restore factory
settings
1. Door lock
setting
2. Face recognition
settings
Press
2
1. Door opening
direction [left]
2. Lock back time
[2s]
3. Delay lock [0s]
4. Torque setting
[high]
Press
1
Press
3
Press the number 3 to set whether the delay locking function is enabled. Delay locking refers to the
automatic locking of the door within the system setting time, and the user can choose to set the locking time
related, 5S, 10S, 15S, 20S,30s.
Torque setting
1. Time setting
2. Installation
Settings
3. Function setting
4. Restore factory
settings
1. Door lock
setting
2. Face recognition
settings
Press
2
1. Door opening
direction [left]
2. Lock back time
[2s]
3. Delay lock [0s]
4. Torque setting
[high]
Press
1
Press
4
Press the number "4" to set the size of the motor rotation force, the user can choose: torque setting [low],
torque setting [medium] , torque setting [high].
Human body induction switch
1. Time setting
2. Installation
Settings
3. Function setting
4. Restore factory
settings
1. Door lock setting
2. Face recognition
settings
Press
2
1. Human body
induction [off]
2. Human body
induction voice [off]
3. Human body
sensing distance
[low]
Press
2
Press
1
Option 1 is to sense whether someone is nearby, and if someone wakes up the fingerprint and the
light board, if there is no sense after 4S, it will re-enter the sleep state (off by default)
Human body induction voice 6
1. Time setting
2. Installation
Settings
3. Function setting
4. Restore factory
settings
1. Door lock setting
2. Face recognition
settings
Press
2
1. Human body
induction [off]
2. Human body
induction voice [off]
3. Human body
sensing distance
[low]
Press
2
Press
2
2 option to wake up the face of the language prompt (default off)
— 8 —
Human body sensing distance 7
1. Time setting
2. Installation
Settings
3. Function setting
4. Restore factory
settings
1. Door lock setting
2. Face recognition
settings
Press
2
1. Human body
induction [off]
2. Human body
induction voice [off]
3. Human body
sensing distance
[low]
Press
2
Press
3
Option 3 is infrared sensing distance, if you use infrared, the low is 70cm sensing, and the high is 90cm sensing
(default low)
3.6.3 Function setting
Networking Configuration
1. Add users
2. Delete User
3. System Settings
4. Unlock record
1. Time setting
2. Installation
Settings
3. Function setting
4. Restore factory
settings
Press
3
1. Start the
distribution
network
2. Volume setting
3. Anti-prying
setting
4. Language
Settings
Press
3
Press
1
By number" 1" key, voice prompt "operation successful", at this time the user can use the mobile phone to
correctly match the network ( detailed operation of networked products is shown in the appendix of the
manual.).
The distribution network function only supports one mobile phone for distribution network. If the network
configuration is entered again, the last distribution network data will be automatically cleared. Please operate
carefully.
Volume settings 2
1. Add users
2. Delete User
3. System Settings
4. Unlock record
1. Time setting
2. Installation
Settings
3. Function setting
4. Restore factory
settings
Press
3
1. Start the
distribution
network
2. Volume setting
[High]
3. Anti-prying
setting [OFF]
4. Language
Settings [Medium]
Press
3
Press
2
Press the number "2" to select the volume size, the user can choose to set the lock time, low, high.
3 Anti- tamper switch
— 9 —
1. Add users
2. Delete User
3. System Settings
4. Unlock record
1. Time setting
2. Installation
Settings
3. Function setting
4. Restore factory
settings
Press
3
1. Start the
distribution
network
2. Volume setting
[High]
3. Anti-prying
setting [OFF]
4. Language
Settings [Medium]
Press
3
Press
3
Press the number 3 to select whether to turn on the anti-pry alarm. If the anti-pry alarm is turned on, the lock
body will sound an alarm if the door lock is pried. If the lock has been correctly distributed, the anti-pry alarm
message will be pushed to the user's mobile phone.
Language settings 4
1. Add users
2. Delete User
3. System Settings
4. Unlock record
1. Time setting
2. Installation
Settings
3. Function setting
4. Restore factory
settings
Press
4
1. Chinese √
2. English
Press
3
1. Start the
distribution
network
2. Volume
setting [High]
3. Anti-prying
setting [OFF]
4. Language
Settings
[Medium]
Press
Press the number "4" to enter the language settings, the user can choose Chinese or English way to use the
smart door lock. After the language is switched, the default language settings cannot be restored even if the factory
settings are restored. Please operate with caution. (If the language setting option is not displayed in the function list,
language switching is not supported)
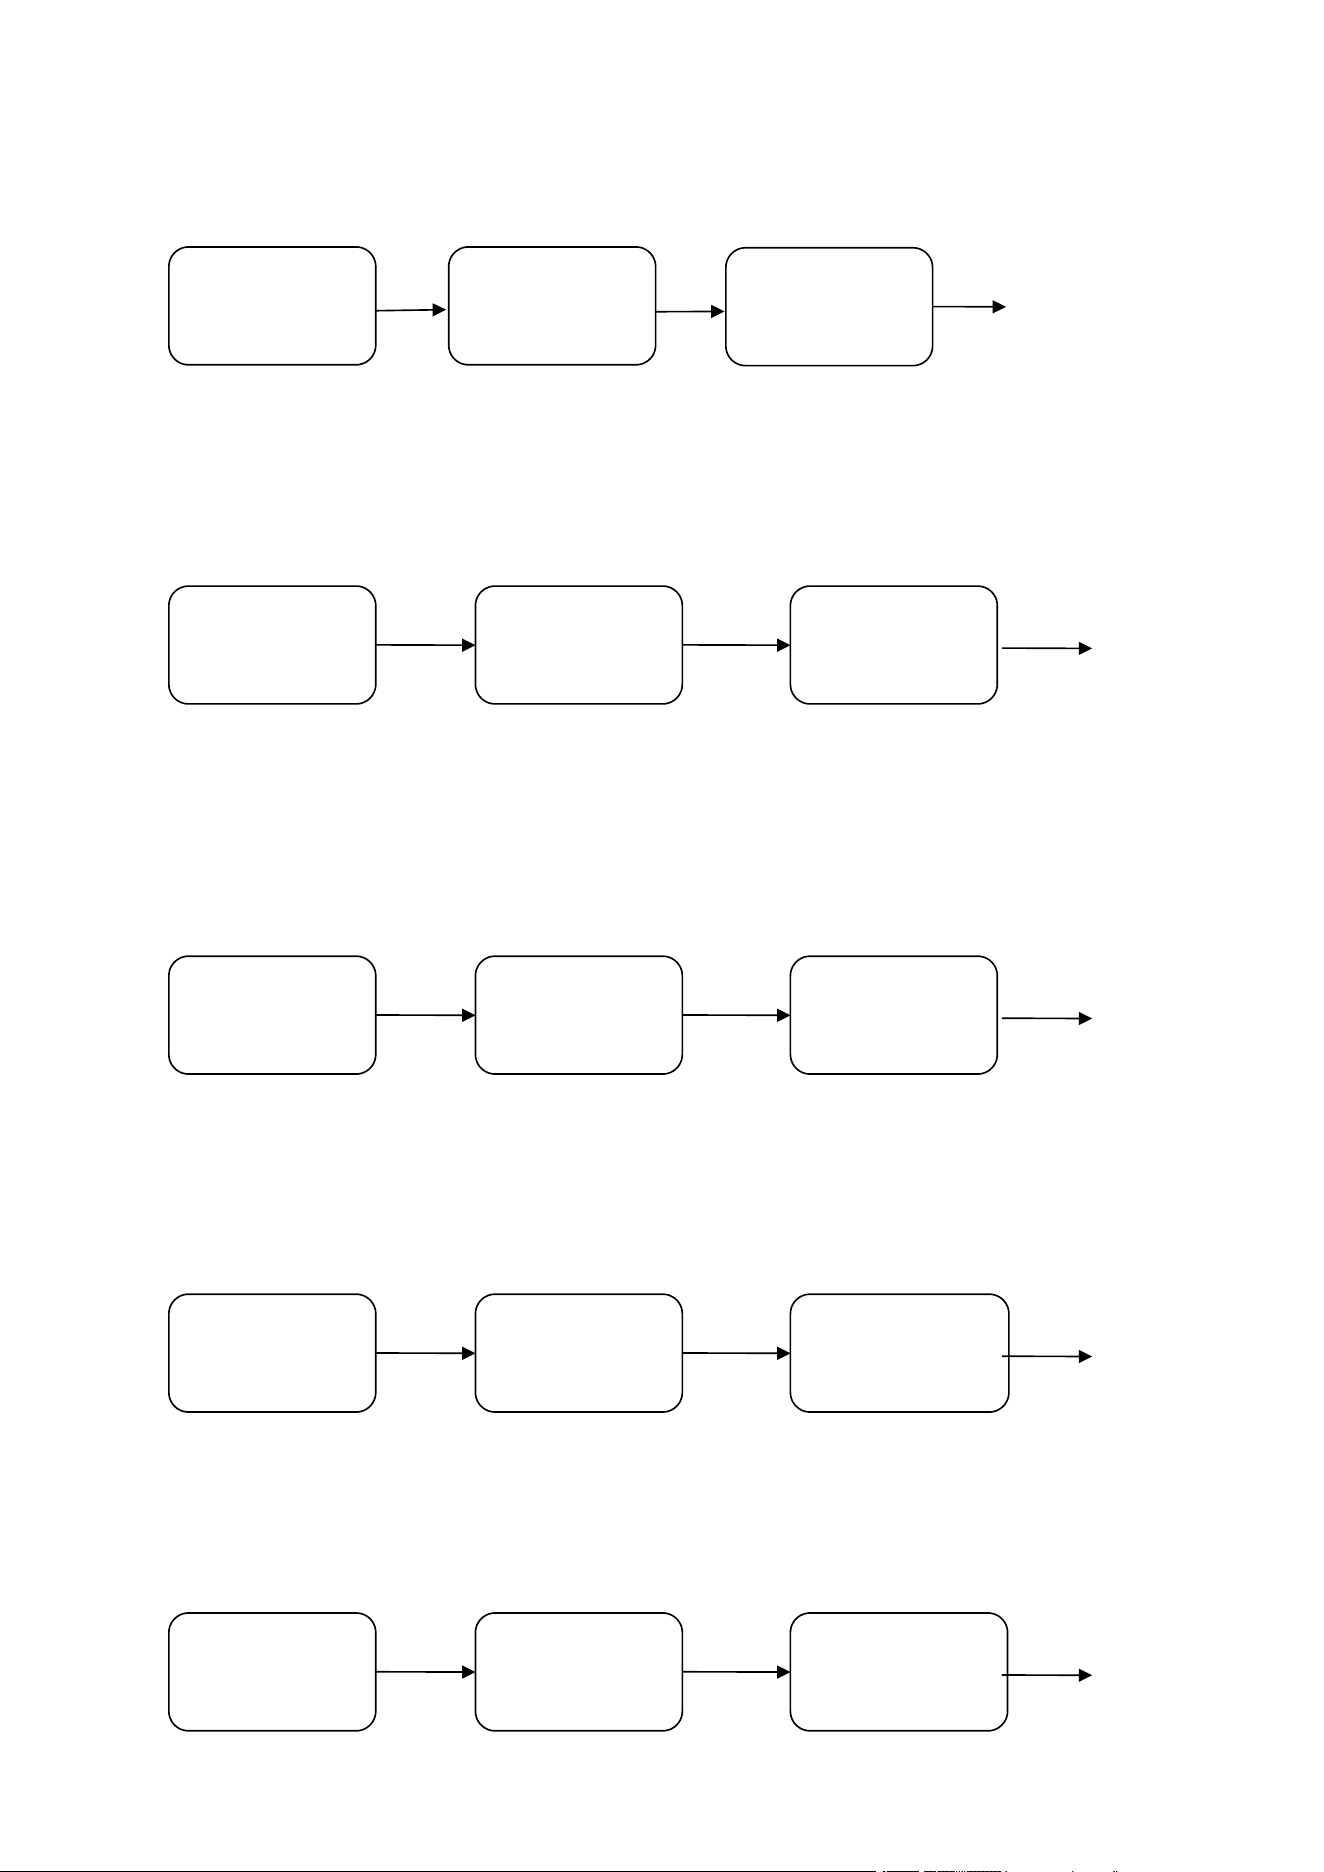
3.6.4 Restore factory settings
1. Add users
2. Delete User
3. System Settings
4. Unlock record
1. Time setting
2. Installation
Settings
3. Function setting
4. Restore factory
settings
Press
3
Restore factory
settings
No (*) Yes (#)
Press
4
Press the "4" key to enter the factory reset menu, press the " *" key to cancel the operation, press the "#" key to
confirm the factory reset. After the factory settings are restored, all user data will be cleared. Users should exercise
caution.
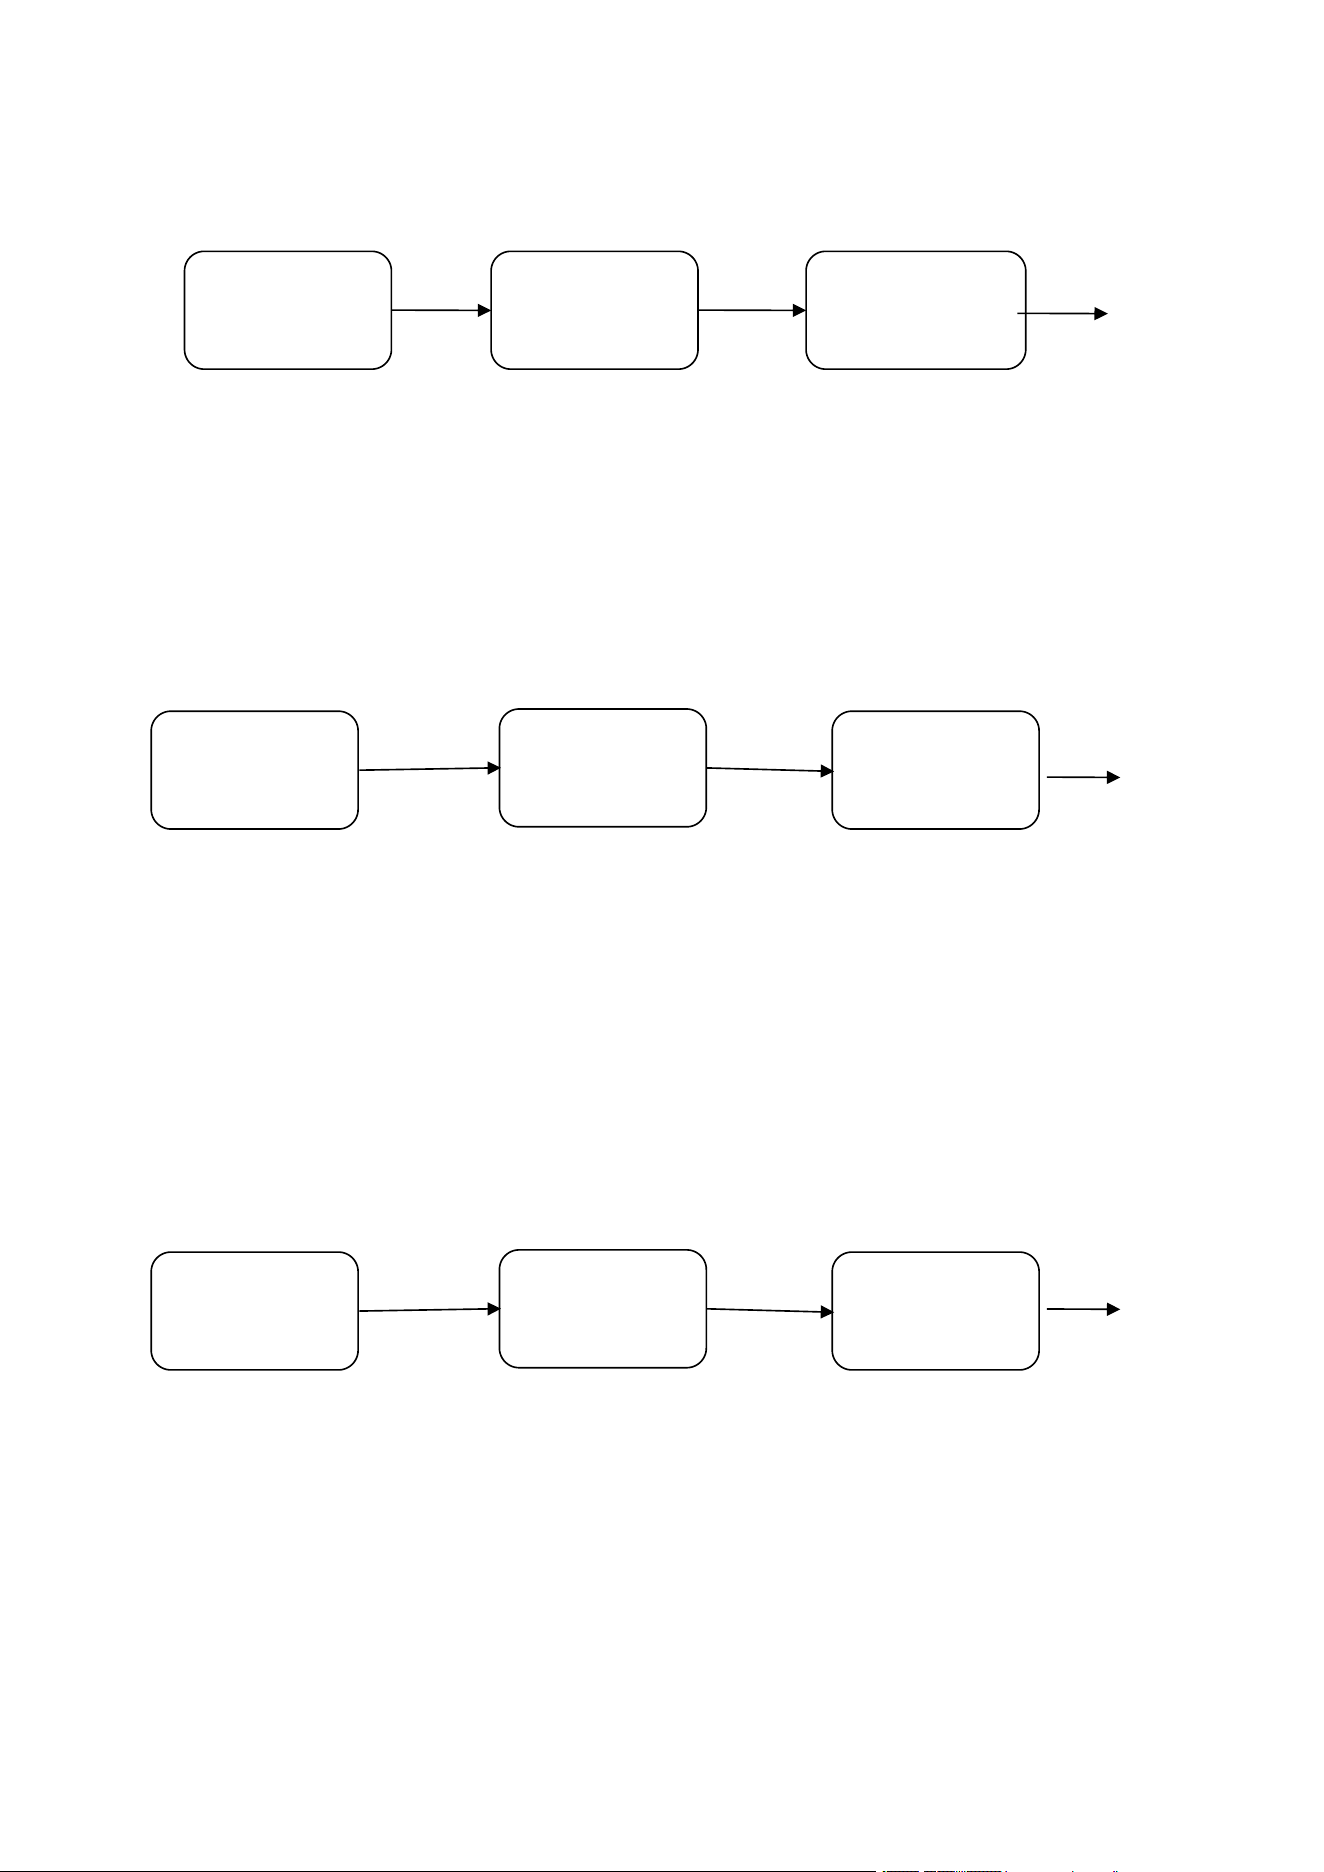
Unlock record of 3.7
Query User Quantity
You can query the specific number of added management users, common users and limited-time users by
pressing the number 1.
— 10
—
1. Add users
2. Delete User
3. System Settings
4. Unlock record
1. Press the previous
record of 4
2. Press 6 to the next
record
Press
4
xxx
xxxx
ID:xxx
xx/xx/xx xx:xx
Press the key 4 to enter the reading record query interface. Press the "4" key to view the previous unlocking
record, and press the " 6" key to view the next unlocking record. Press the key * to return to the previous menu.
The system stores up to 500 records.
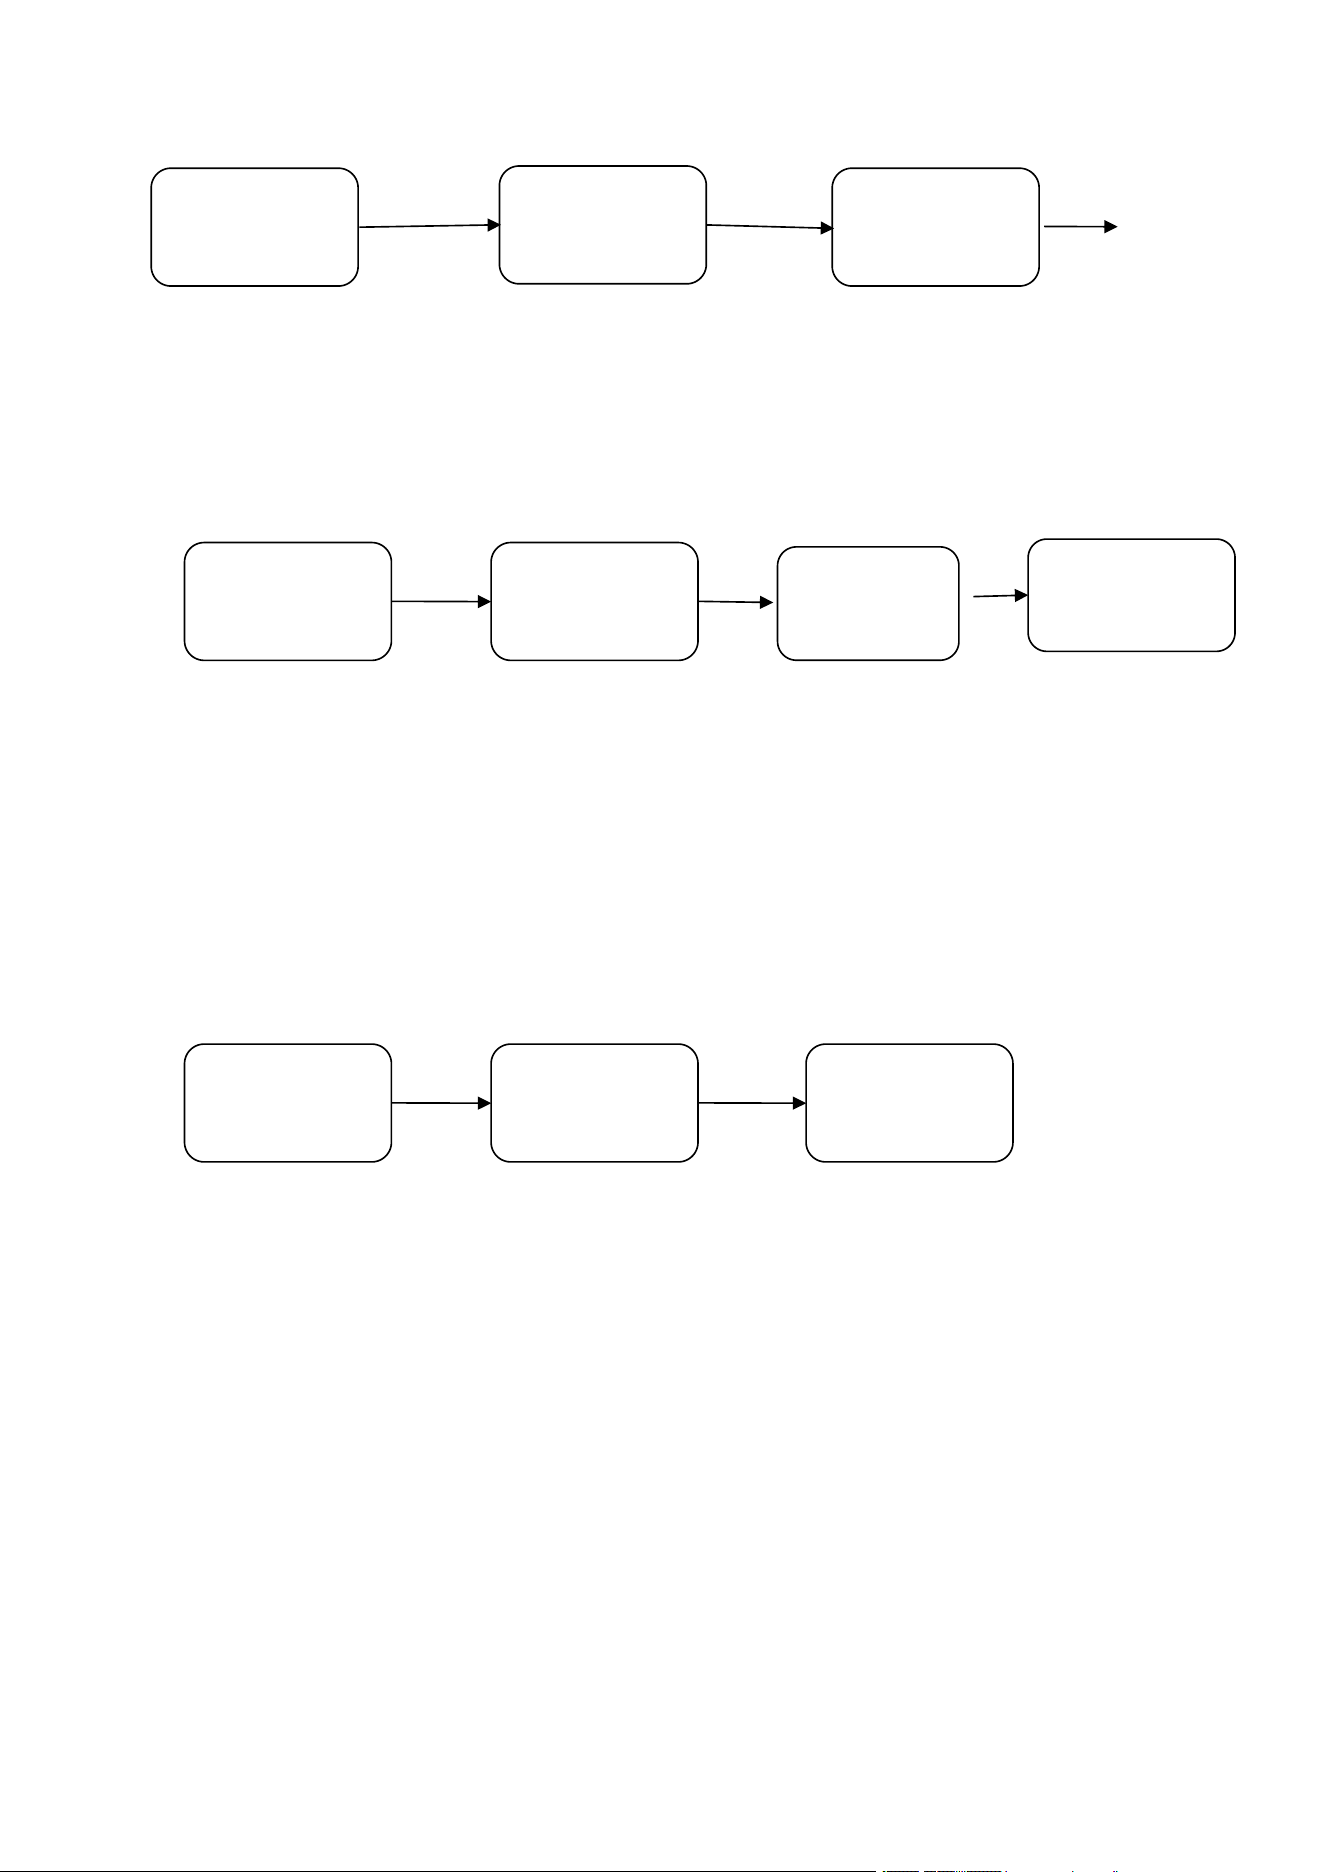
4 Temporary password
WeChat scans the lower two-dimensional code and enters the WeChat applet;
After registering the password administrator, use WeChat applet "USmartLocK" to use the
administrator's digital password to obtain a temporary password composed of 10 digits. The 12 -digit
password defaults to the first ten digits to produce the temporary password, which will expire after
unlocking once (the password information will be cleared in 10 minutes).
Note: This setting must be consistent with the mobile phone time, otherwise it cannot be used.
5 Networking Quick Operation Guide
Quick Configuration
(1) Networking Settings: Download "Graffiti" APP from Mobile Phone Application Mall.
After the download is successful, press the "networking settings" of the device, and the device will enter the distribution network
state at this time (at the same time, the device will make "drops" every 1s, and there will be no "drops" 45s timeout after 25s, and the
device will automatically exit the distribution network state)
— 11
—
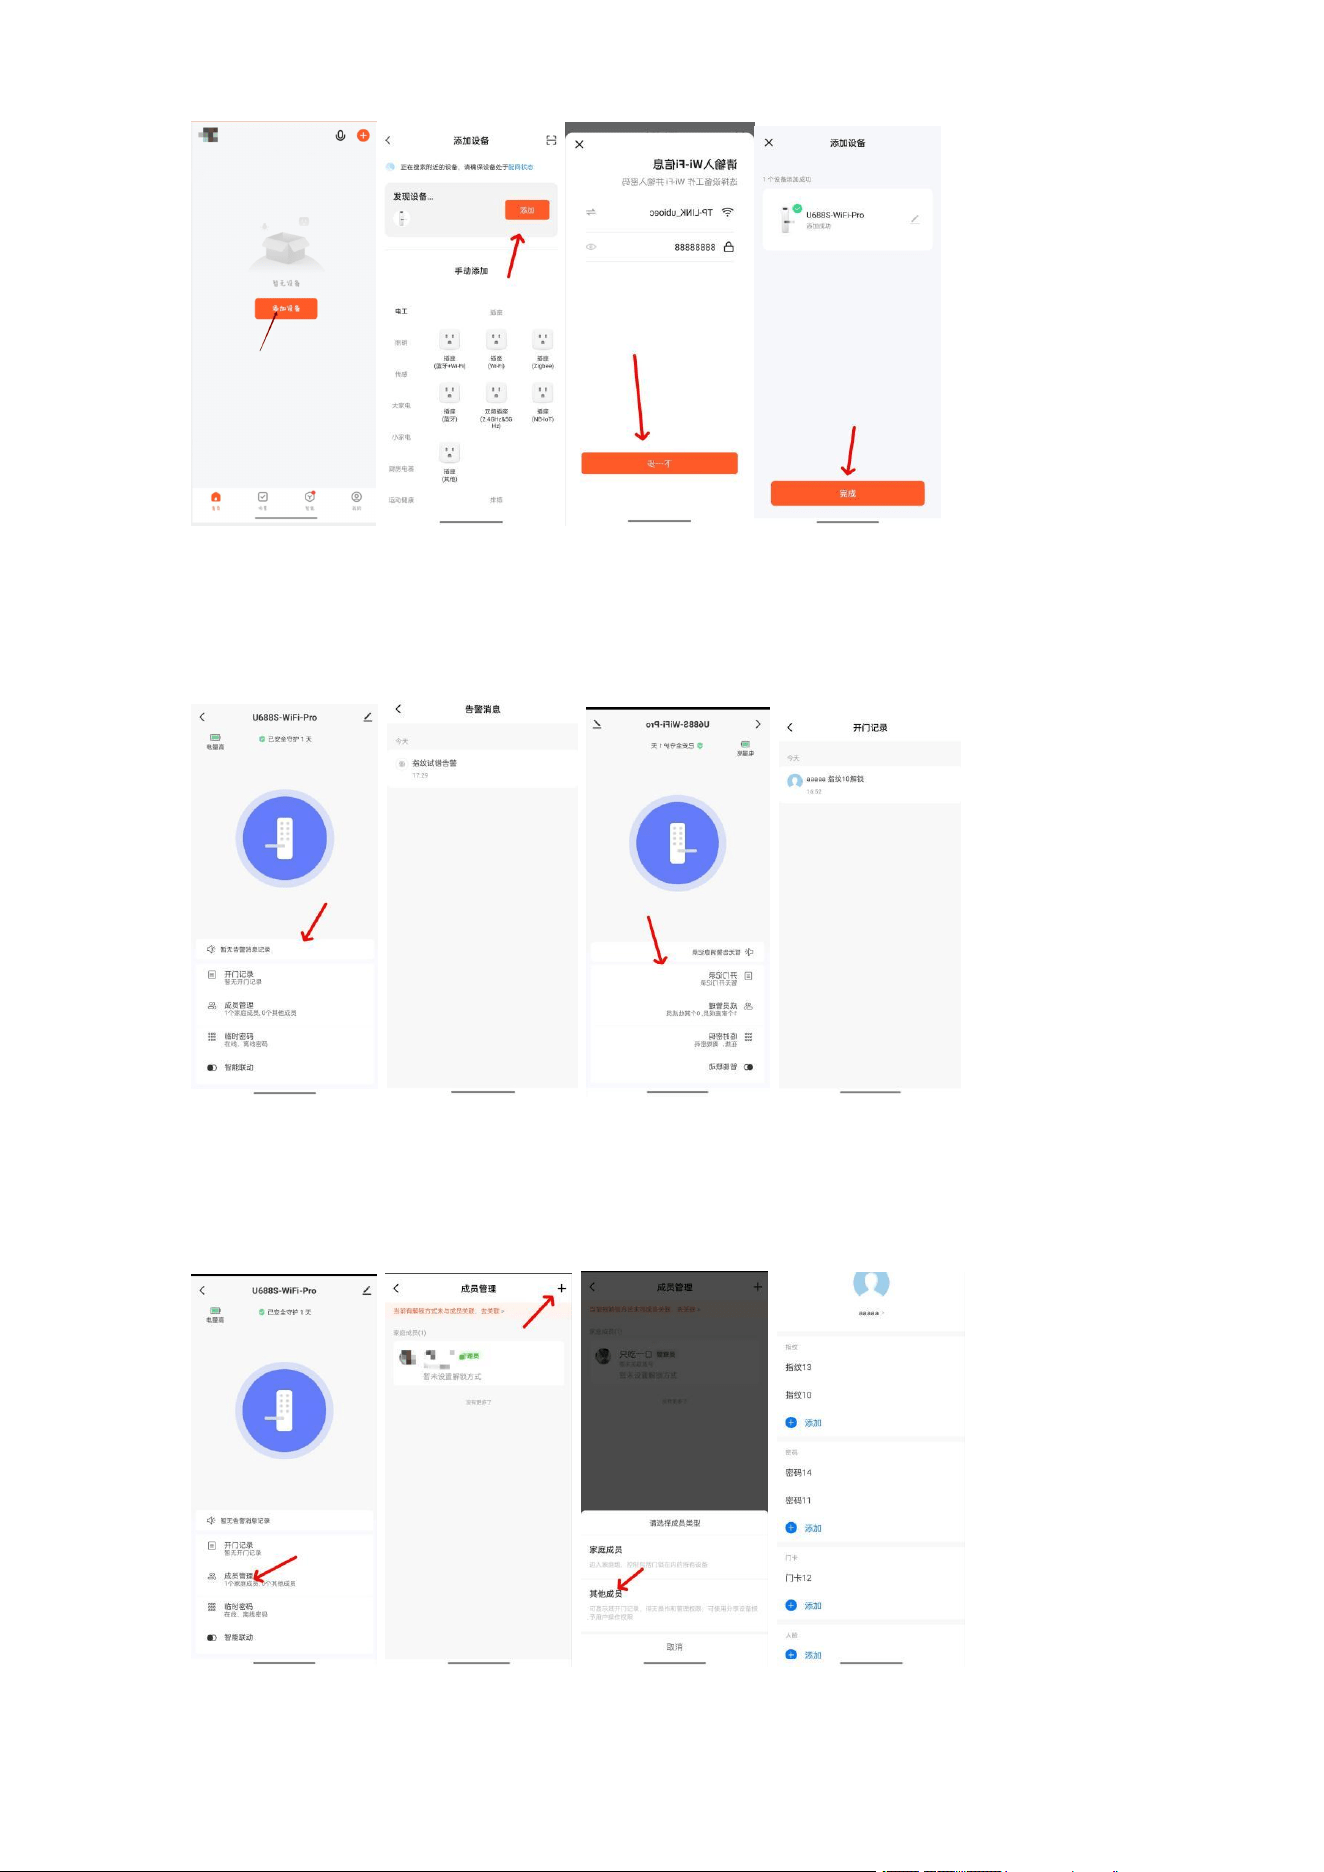
Home page Click Add Device. 2. Turn WIFI on 3. Enter the password point for WIFI. 4. The name of the device will be displayed after
successful addition.
Under the condition, click Next.
Plus.
5. Click the alarm record to enter the page to view the alarm information. 6. You can click on the door opening record to view the
unlocking information.

— 12
—
Click on the member management can be in the APP management to add users (fingerprint, password) unlock information.
Click on the temporary password can be set one-time password and unlimited number of passwords, one-time password unlock a failure,
unlimited number of passwords can be used multiple times.
9.
Click intelligent linkage to set message prompts in different states.
Special statement
Please refer to the actual product, and the instructions are for reference only.
APP and product equipment firmware will be updated from time to time. If there is any upgrade, please upgrade
online without notice. The instructions are for reference only.
The instructions may contain technical inaccuracies, inconsistencies with product functions or misprints, and the
Company's final interpretation shall prevail.

FCC Statement
Note: This equipment has been tested and found to comply with the limits for a Class B digital device, pursuant to part 15 of the FCC
Rules. These limits are designed to provide reasonable protection against harmful interference in a residential installation. This
equipment generates, uses and can radiate radio frequency energy and, if not installed and used in accordance with the instructions,
may cause harmful interference to radio communications. However, there is no guarantee that interference will not occur in a particular
installation. If this equipment does cause harmful interference to radio or television reception, which can be determined by turning the
equipment off and on, the user is encouraged to try to correct the interference by one or more of the following measures:
—Reorient or relocate the receiving antenna.
—Increase the separation between the equipment and receiver.
—Connect the equipment into an outlet on a circuit different from that to which the receiver is connected.
—Consult the dealer or an experienced radio/TV technician for help.
This device complies with part 15 of the FCC Rules. Operation is subject to the following two conditions:(1) This device may not cause
harmful interference, and (2) this device must accept any interference received, including interference that may cause undesired
operation.
Any changes or modifications not expressly approved by the party responsible for compliance could void the user's authority to operate
the equipment.
This equipment complies with FCC radiation exposure limits set forth for an uncontrolled environment. This equipment should be
installed and operated with minimum distance 20cm between the radiator & your body.