
User Guide
Smart Wi-Fi Door Lock
©2024 TP-Link 1910013805 REV1.0.0

Contents
About This Guide ·········································································· 1
Introduction ·····················································································2
Check Door Lock Compatibility ············································5
Install Your Doorbell ······································································6
Set Up Your Door Lock ······························································ 7
Manage Your Door Lock ····························································8
Create a PIN Code ·········································································9
Add a User & Register Their Fingerprint ·························13
Check Event Log ·········································································17
Share Your Device ······································································ 18
Manage Device Settings ························································ 19
Remove Your Door Lock ·························································33
Authentication ·············································································· 36
1
About This Guide
This guide provides a brief introduction to the Smart Wi-Fi Door Lock and the Tapo app, as well as regulatory information.
Please note that features available in Tapo may vary by model and software version. Tapo availability may also vary by region. All images, steps, and
descriptions in this guide are only examples and may not reect your actual Tapo Camera experience.
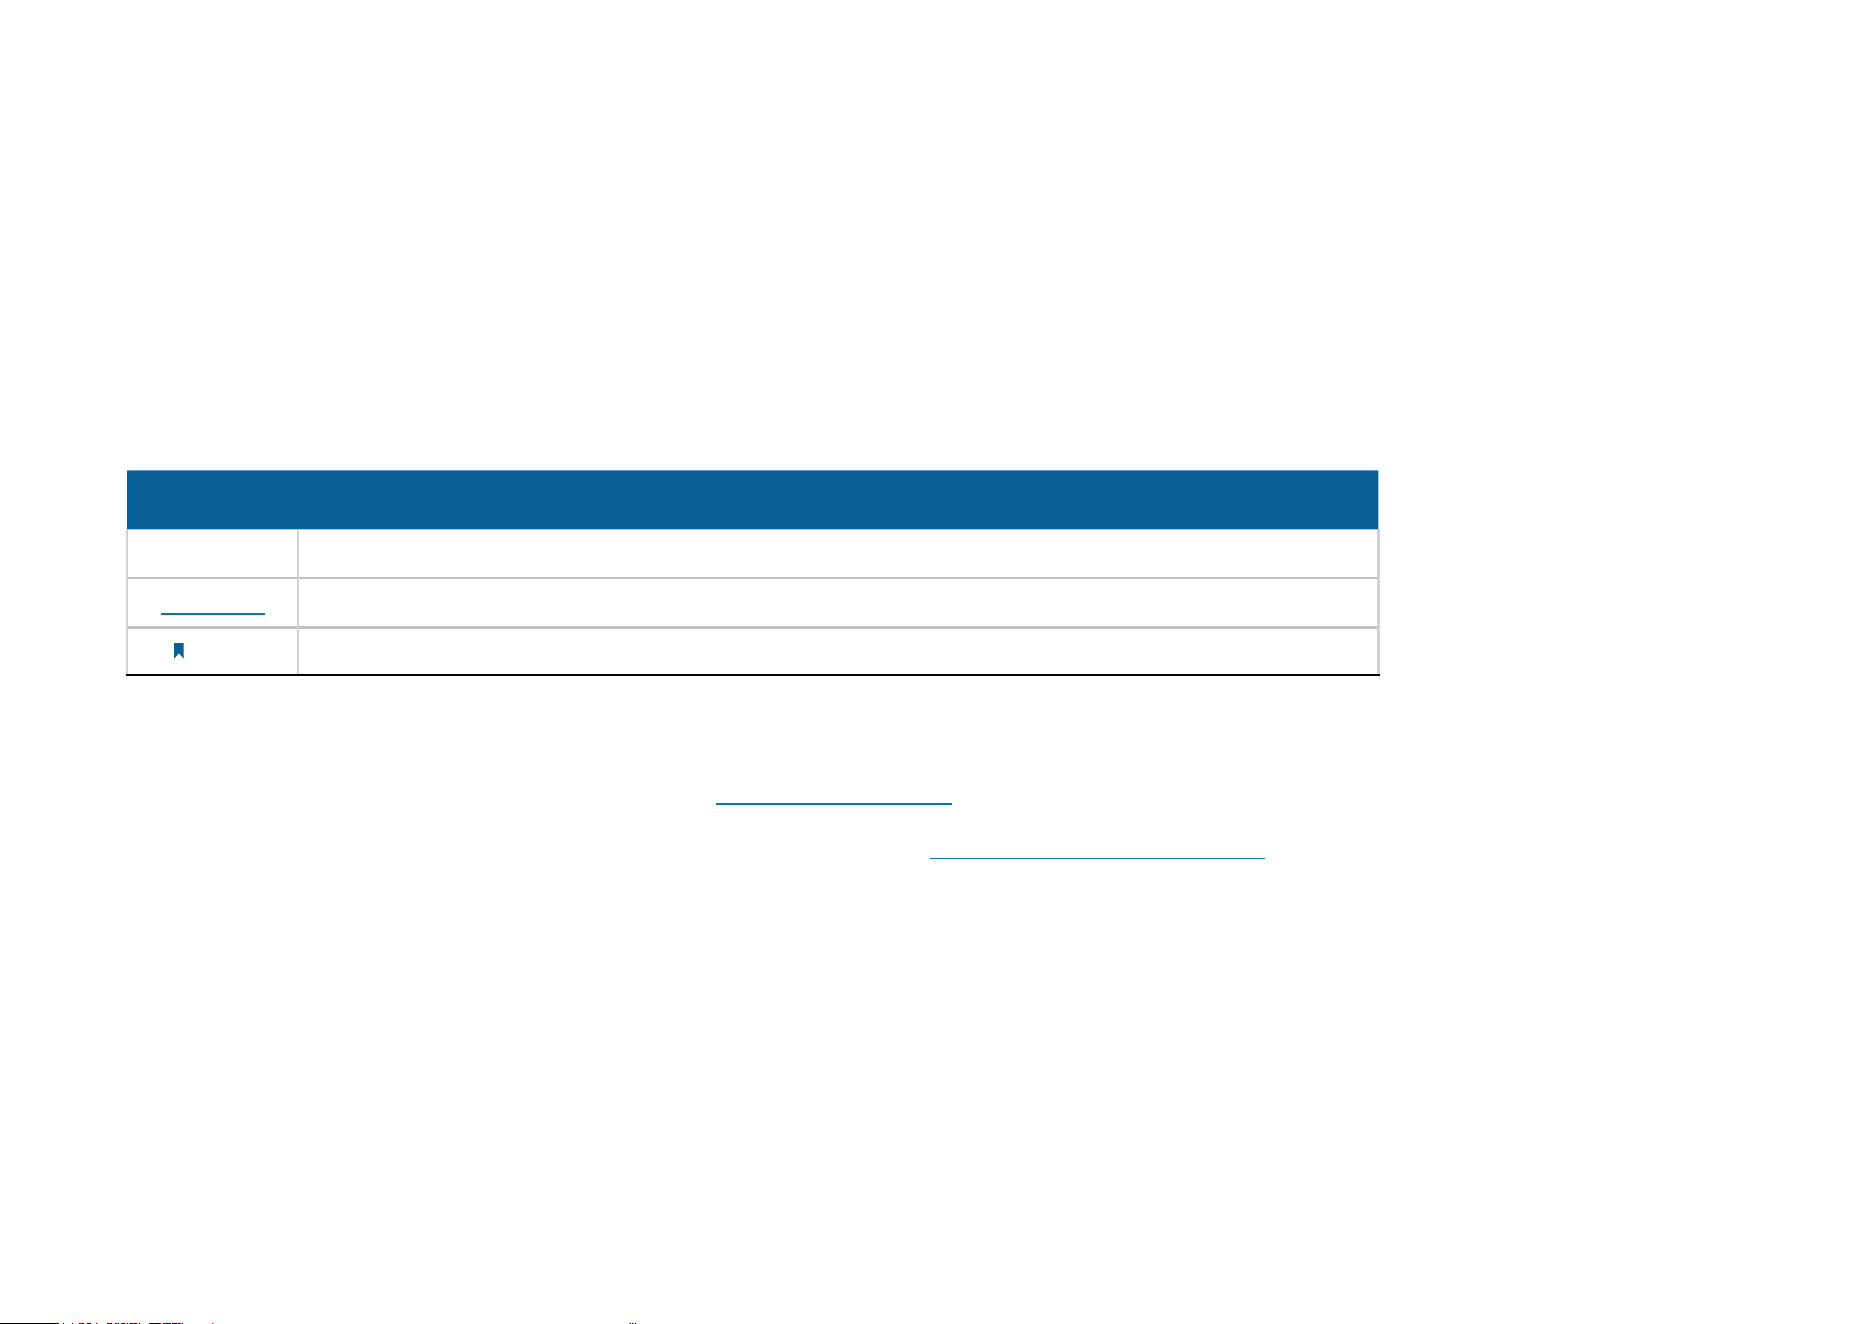
Conventions
In this guide, the following convention is used:
Convention Description
Blue
Key information appears in blue, including management page text such as menus, items, buttons and so on.
Underline
Hyperlinks are in blue and underlined. You can click to redirect to a website.
Note:
Ignoring this type of note might result in a malfunction or damage to the device.
More Info
• Specications can be found on the product page at https://www.tapo.com.
• Our Technical Support and troubleshooting information can be found at https://www.tapo.com/support/.

2
Introduction
Replace your existing door lock with a smarter one and unlock with the Tapo app, by ngerprint, Bluetooth, keypad, Smart Assistant, or with included
backup keys. With ANSI/BHMA Grade 2 certication, the door lock surpasses Grade 3 locks by providing superior durability and higher security
standards, making it ideal for those seeking enhanced protection.
• 6 Ways to Securely Access – Unlock with the Tapo app, by ngerprint, Bluetooth, keypad, Smart
Assistant, or with included backup keys.
• Rapid Fingerprint Recognition – Recognizes and unlocks in seconds and stores up to 100
ngerprints.
• 1-Year Battery Life – Operates for one year before requiring maintenance or recharging.
• USB-C Charging – Built-in USB-C port on the battery for easy, convenient recharging.
• Smart Home Integration – Works with Alexa, Google Home, and Samsung SmartThings.
• Peek-Proof Passcodes – Enter decoy digits before and after your passcode for added security.
• Manage Resident & Guest Access – Manage resident and guest access with one-time or
scheduled codes.
• Auto Lockout & Real-Time Alerts – Automatic lockouts after failed attempts and real-time alerts
for suspicious activity keep your home secure.
• Detailed Activity Log – Track every lock and unlock for ultimate security awareness.
• Built-in Doorbell – A built-in doorbell complements the door lock for a more secure entryway.
• Quick & Easy Installation – Tapo DL110 boasts a hassle-free setup with all mounting tools
included.
• Built to Brave the Elements – IP65-rated (exterior assembly) for year-round protection against
dust and extreme weather.
3
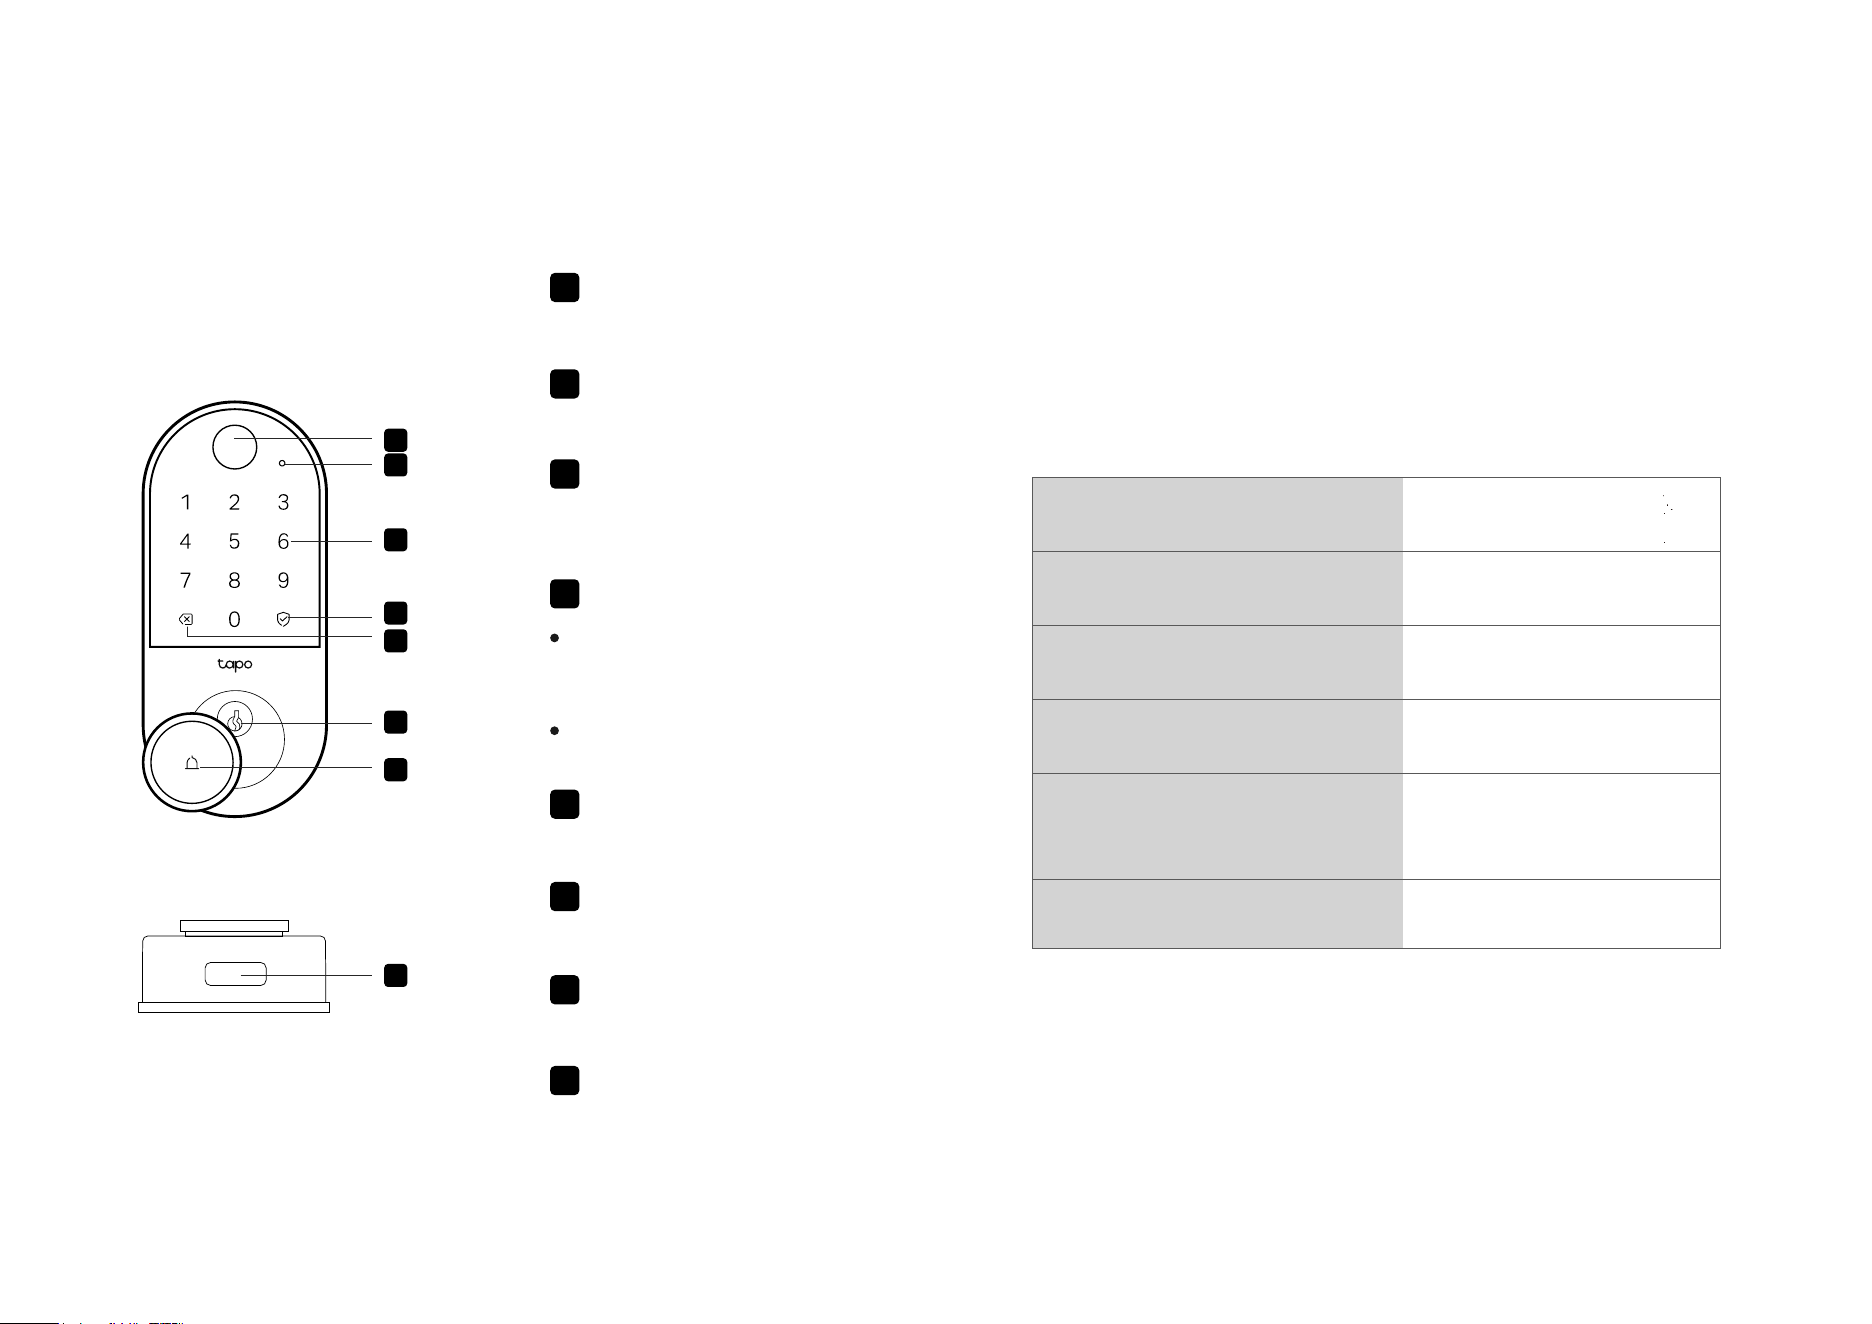
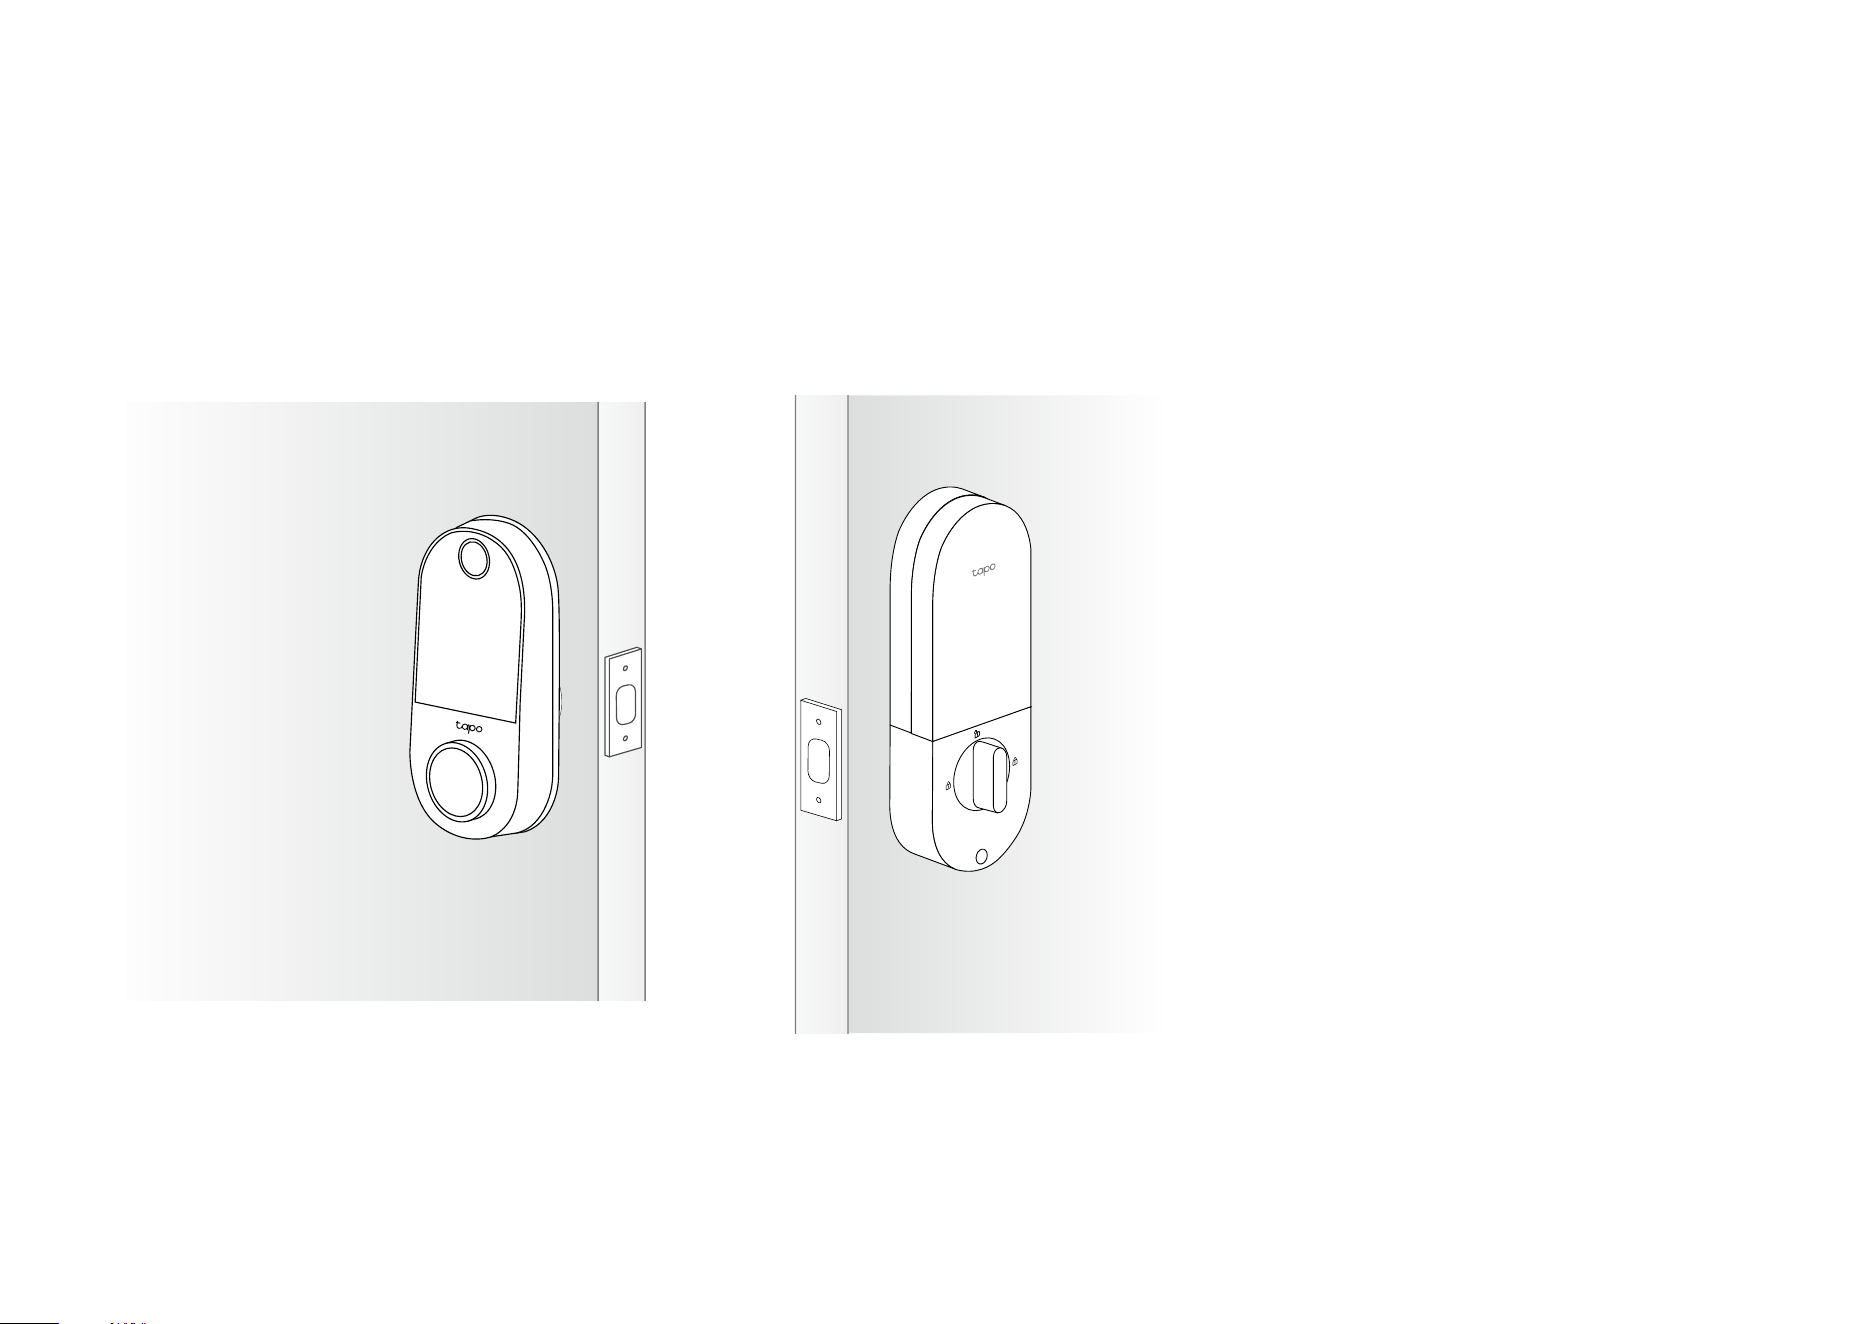
Appearance - Exterior Assembly
2
1
6
4
5
3
7
8
2
Status LED
Indicates the status of your device.
1
Fingerprint Scanner
Lock/unlock with your ngerprint.
7 Ring Button
Press to ring the built-in doorbell.
3
Key Pad
Lock/unlock the door by entering
your PIN code.
4
Unlocking/Locking Button
When you enter your PIN code
starting with scramble digits, press
this button to conrm unlocking.
5
Backspace
Press to delete the digit you entered.
8 Type-C Port
Connect to a power outlet to provide
a temporary power supply.
Press this button independently to
lock the door.
6
Lock Cylinder
Used to unlock via the provided keys.
Status LED Indications
Blinking red and green
Blinking amber
Blinking green
Solid red, then turn o
after 3 seconds
Low battery
Lock updating
Updating failed
Ready for setup
Pulsing green Connecting to Wi-Fi
Blinking red three times Door jammed
4
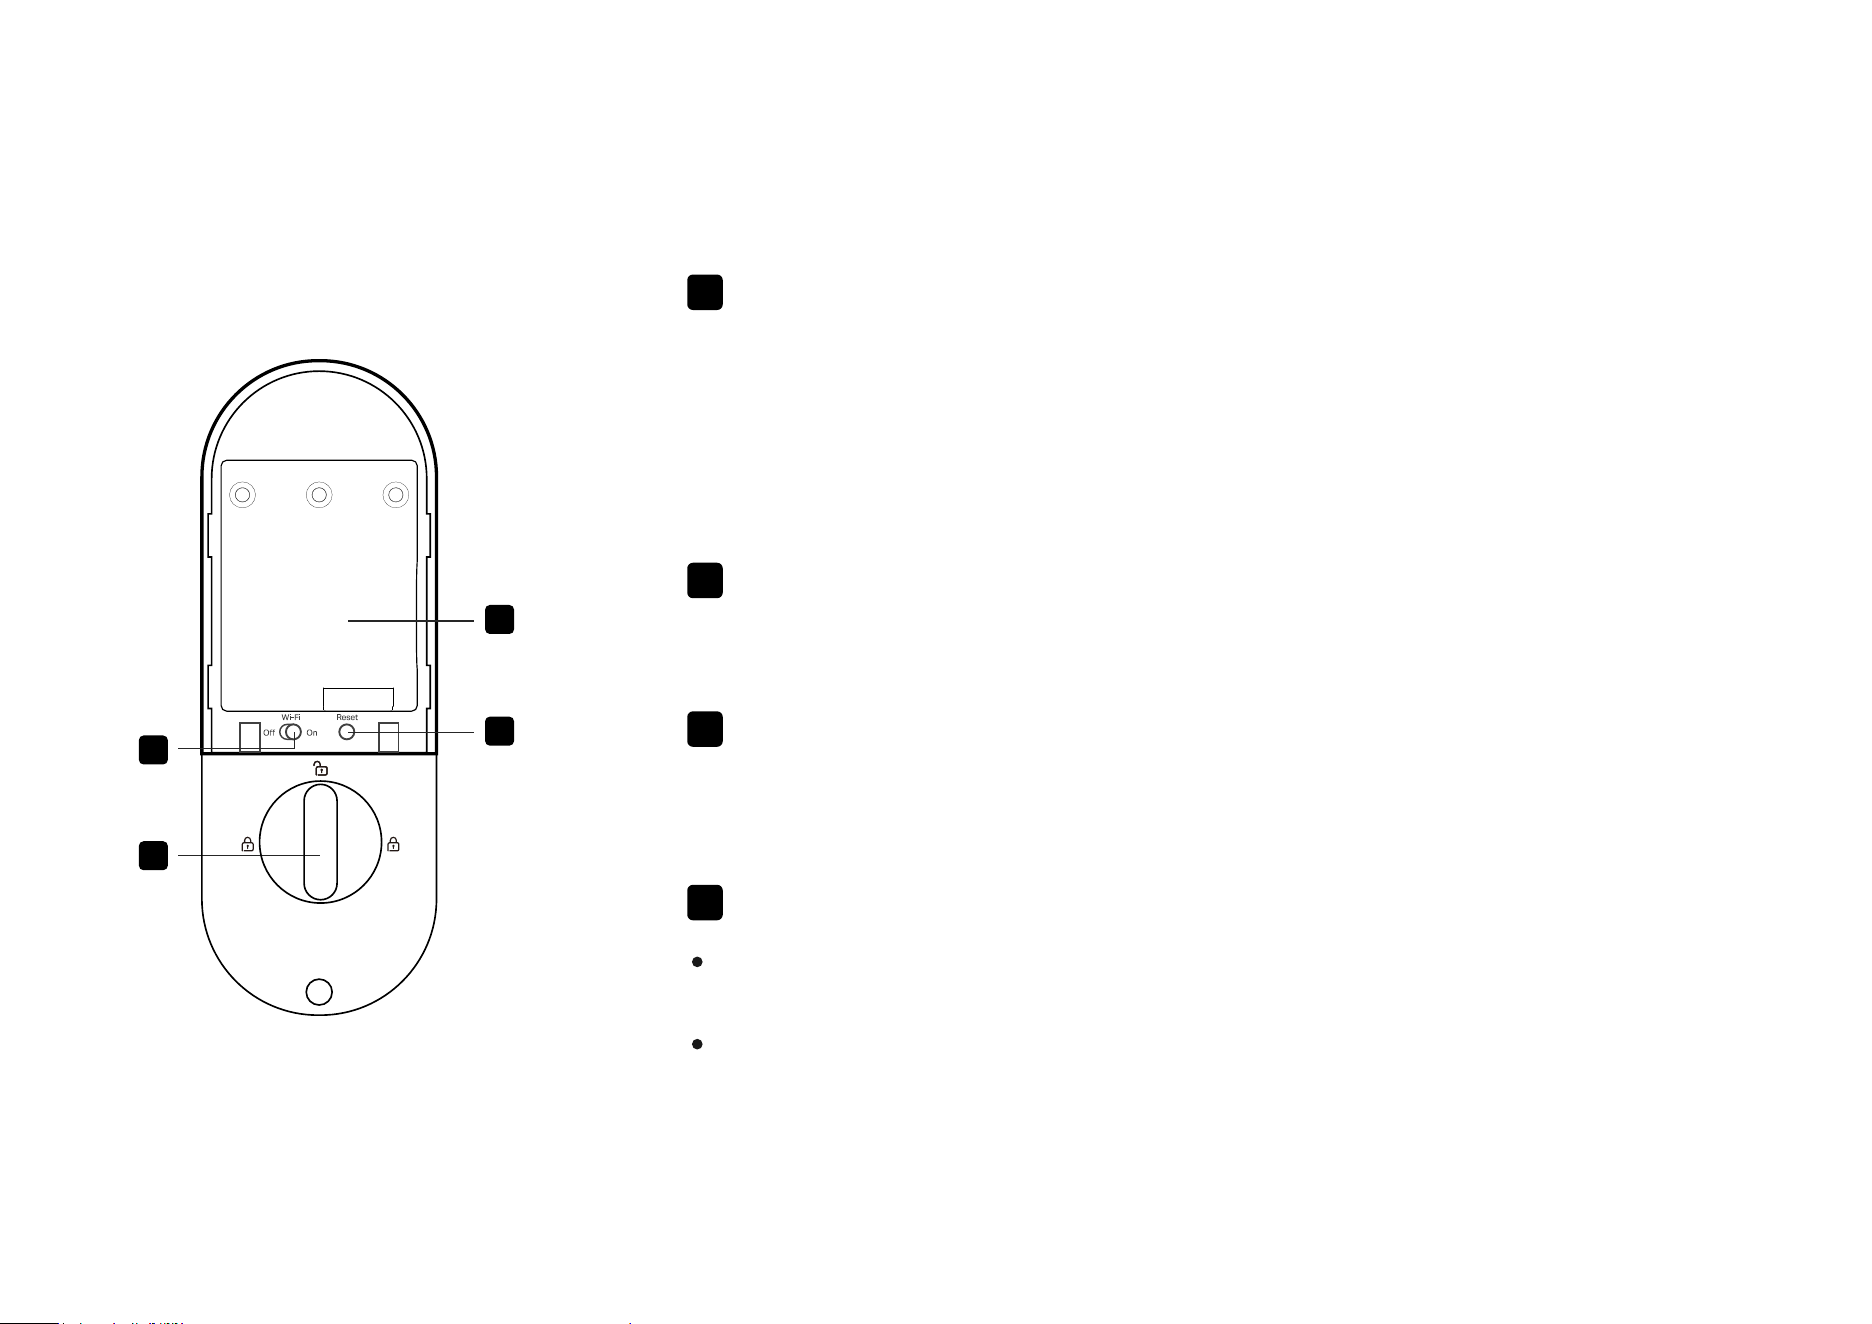
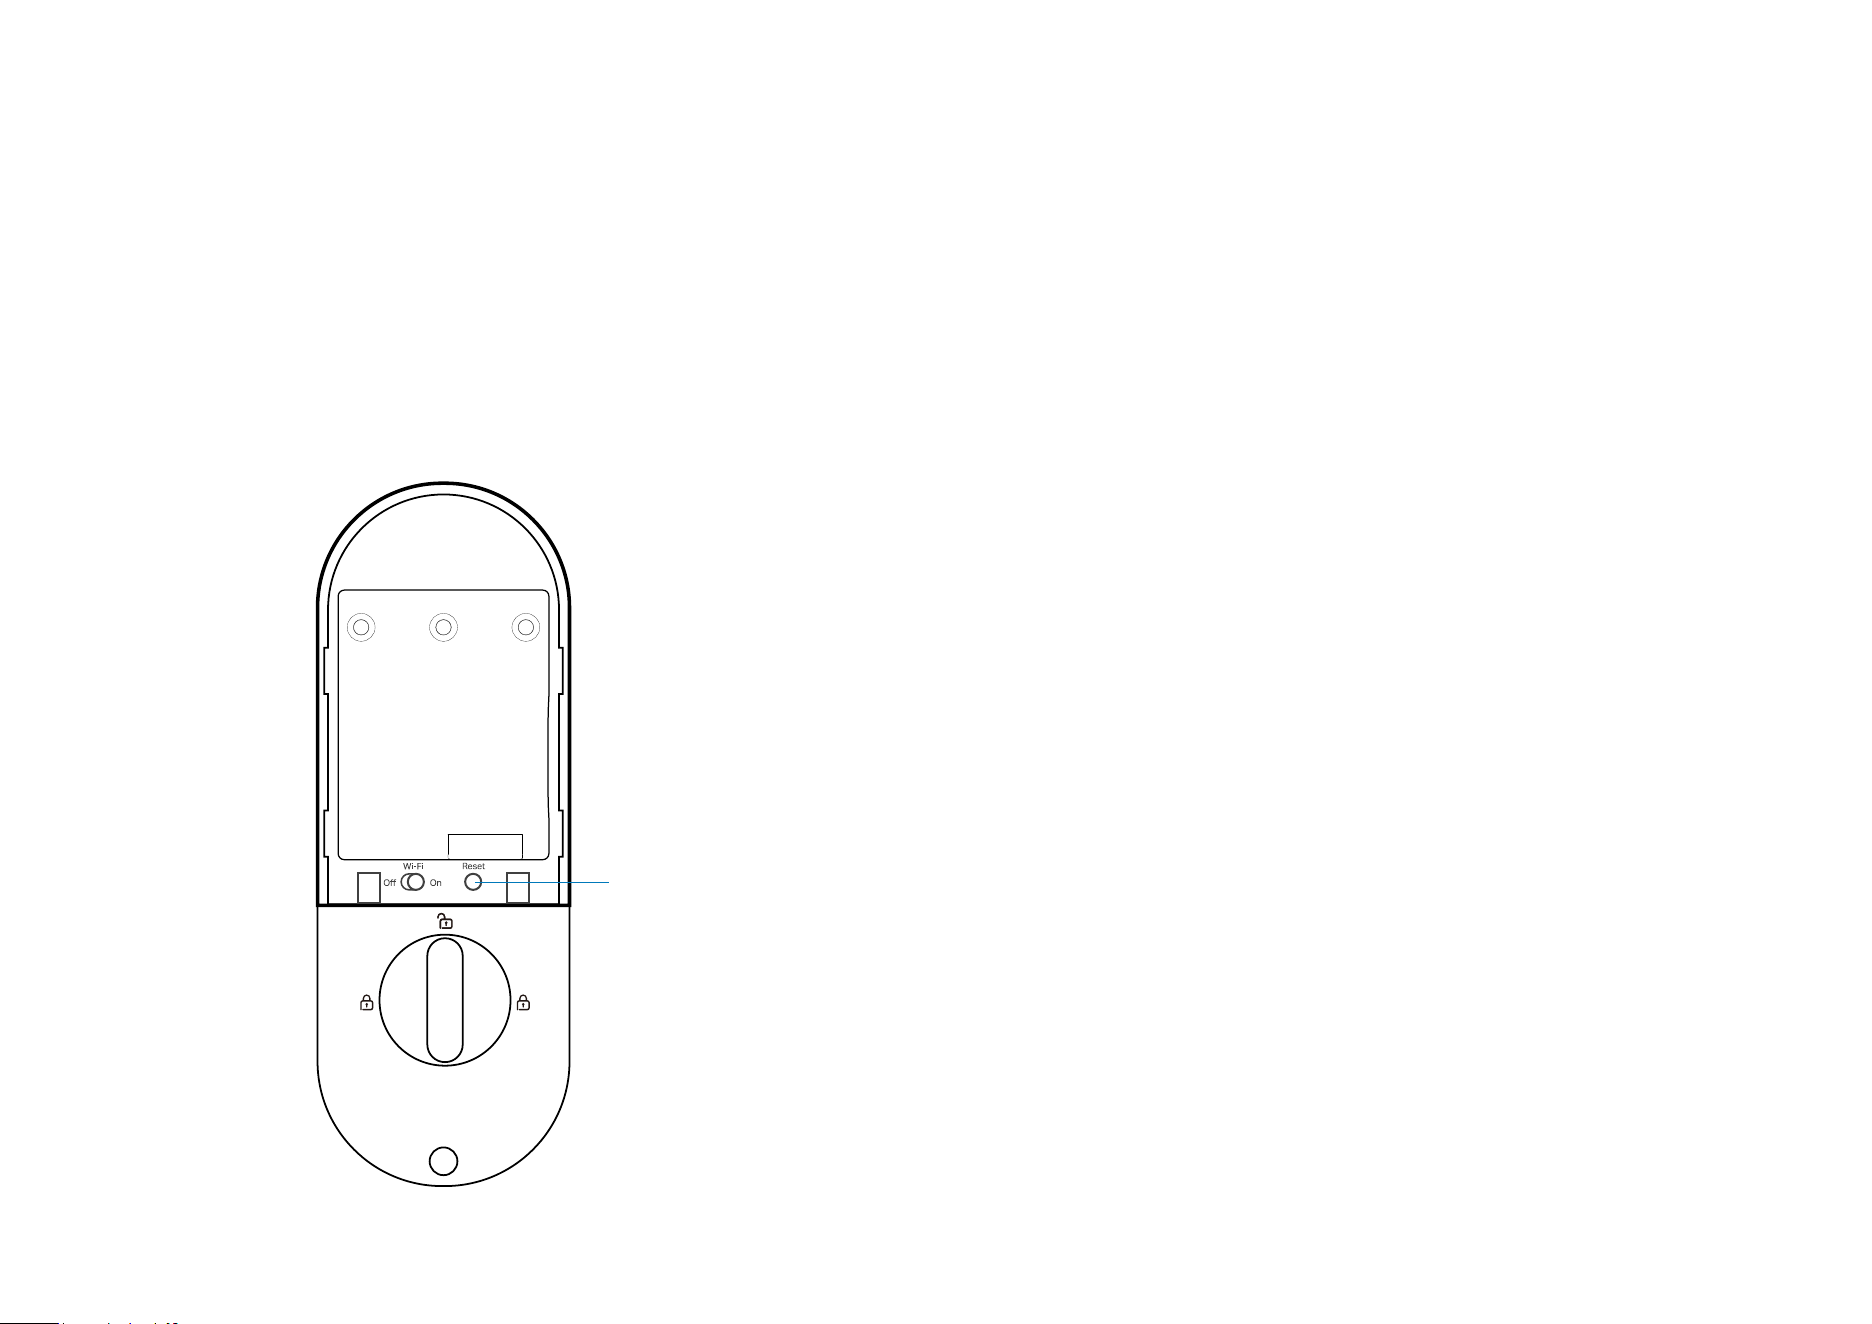
Appearance - Interior Assembly
2
4
1
Wi-Fi On/O Button
Turn on Wi-Fi and connect your
device to a Wi-Fi network for remote
control.
Turn o Wi-Fi and only control your
device locally via Bluetooth.
2
Thumb Latch
Rotate to lock/unlock the door.
3
Battery Compartment
Insert the provided battery to power
your lock.
4
Reset
Press and hold for 5 seconds to
reset Wi-Fi settings.
Press and hold for 10 seconds to
reset to factory default settings.
3
1
5
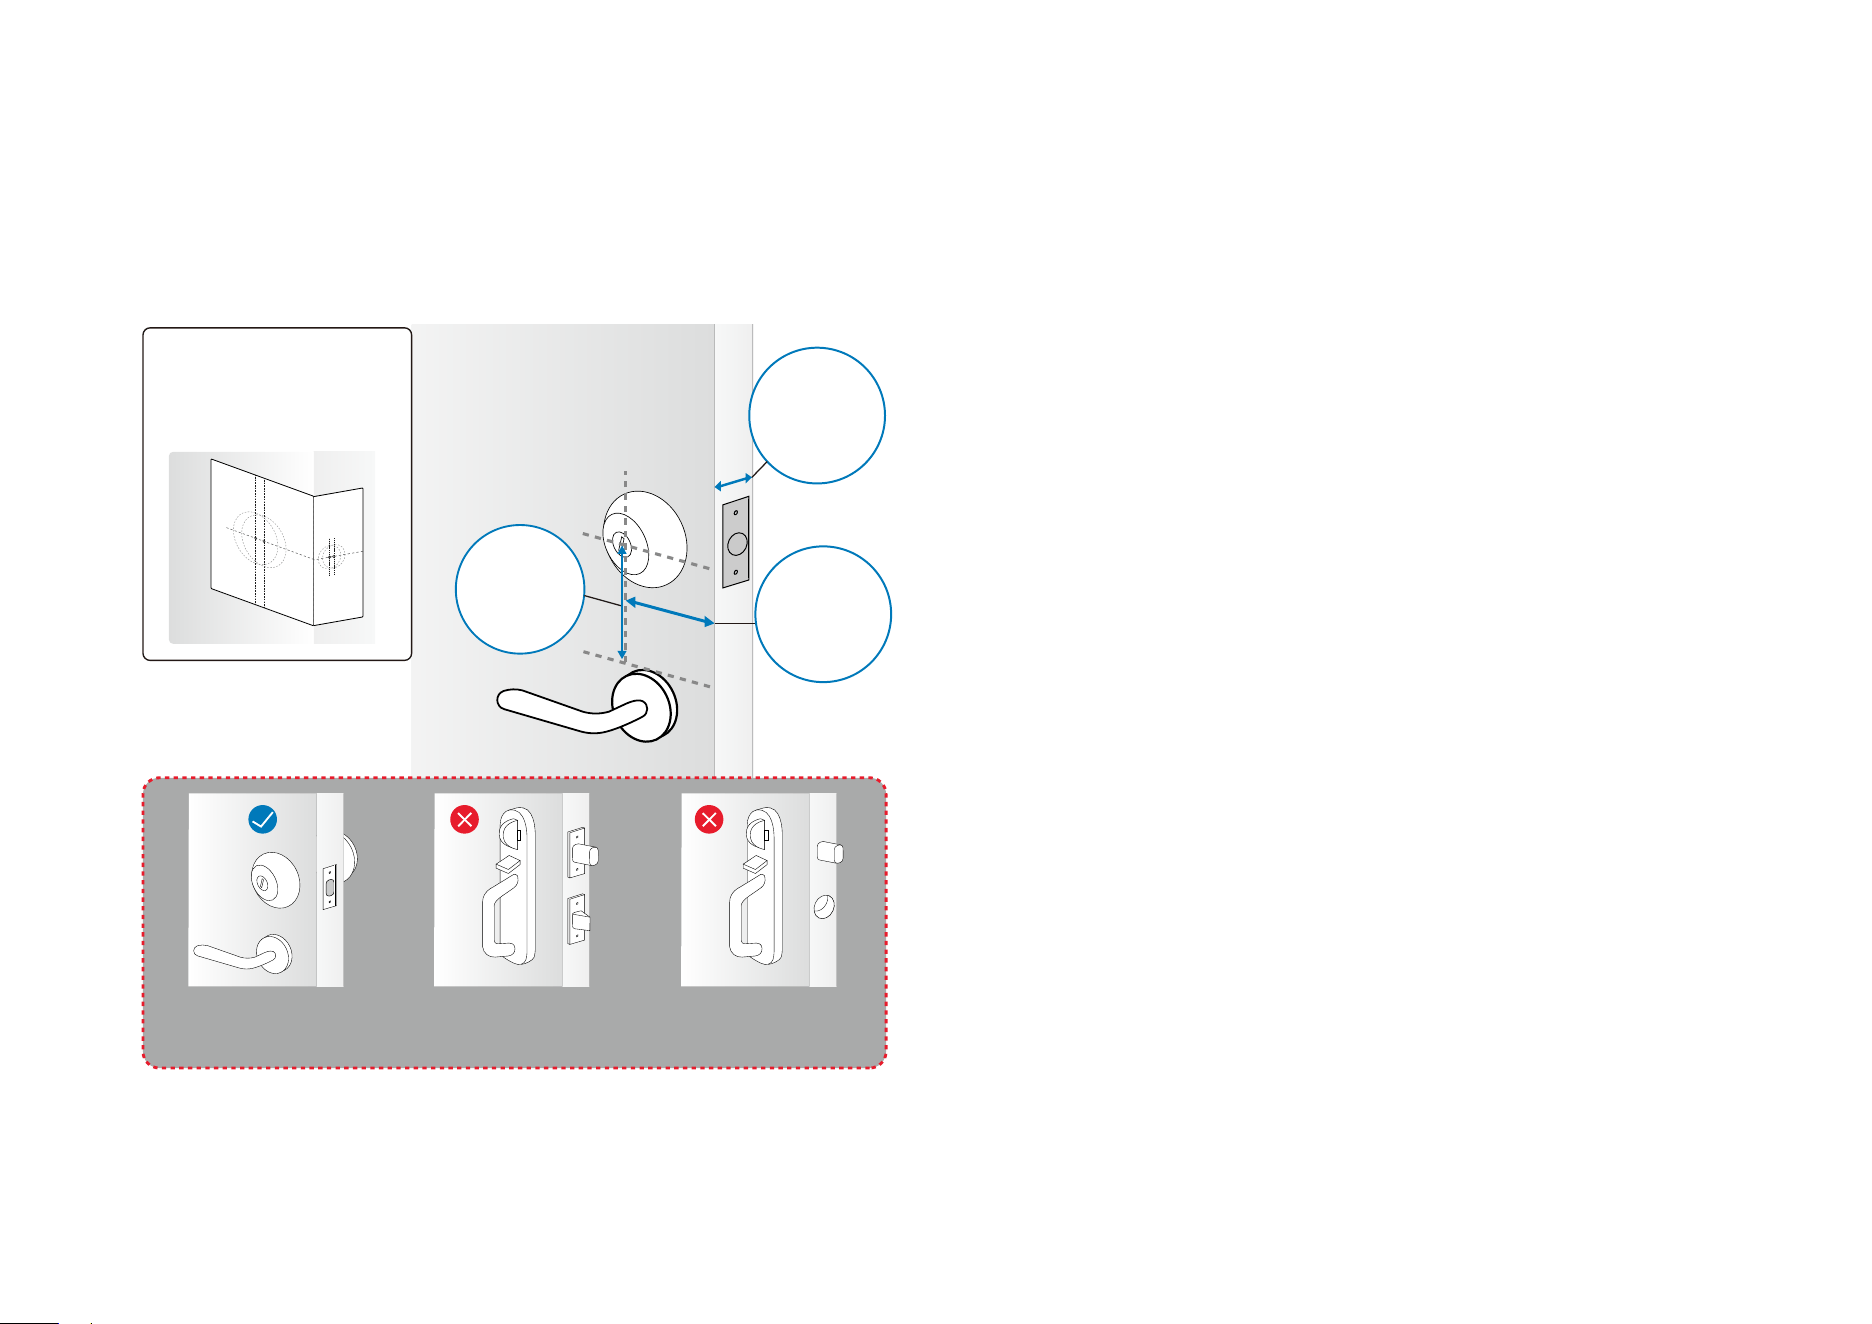
Check Door Lock Compatibility
Place the measuring template on the door, aligning the door edge line with the door edge. Use the dimensions on the template to measure your door.
Door
Thickness
1-3/8’’ to
2-11/64’’
(35-55 mm)
Minimum
Distance
2-9/16’’ (65
mm)
Backset
2-3/8’’ (60 mm)
or 2-3/4’’ (70
mm)
Use the measuring
template to measure
your door.
5
Compatible with
Single Cylinder
Integrated Locks
Not Compatible
Mortise Locks
Not Compatible
6
Install Your Doorbell
Check the FAQ to install your new door lock: https://www.tp-link.com/hk/support/faq/4052/
TOP
[OUTSIDE] [INSIDE]
7
Set Up Your Door Lock
After installing the door lock, follow the steps below to set up the door lock.
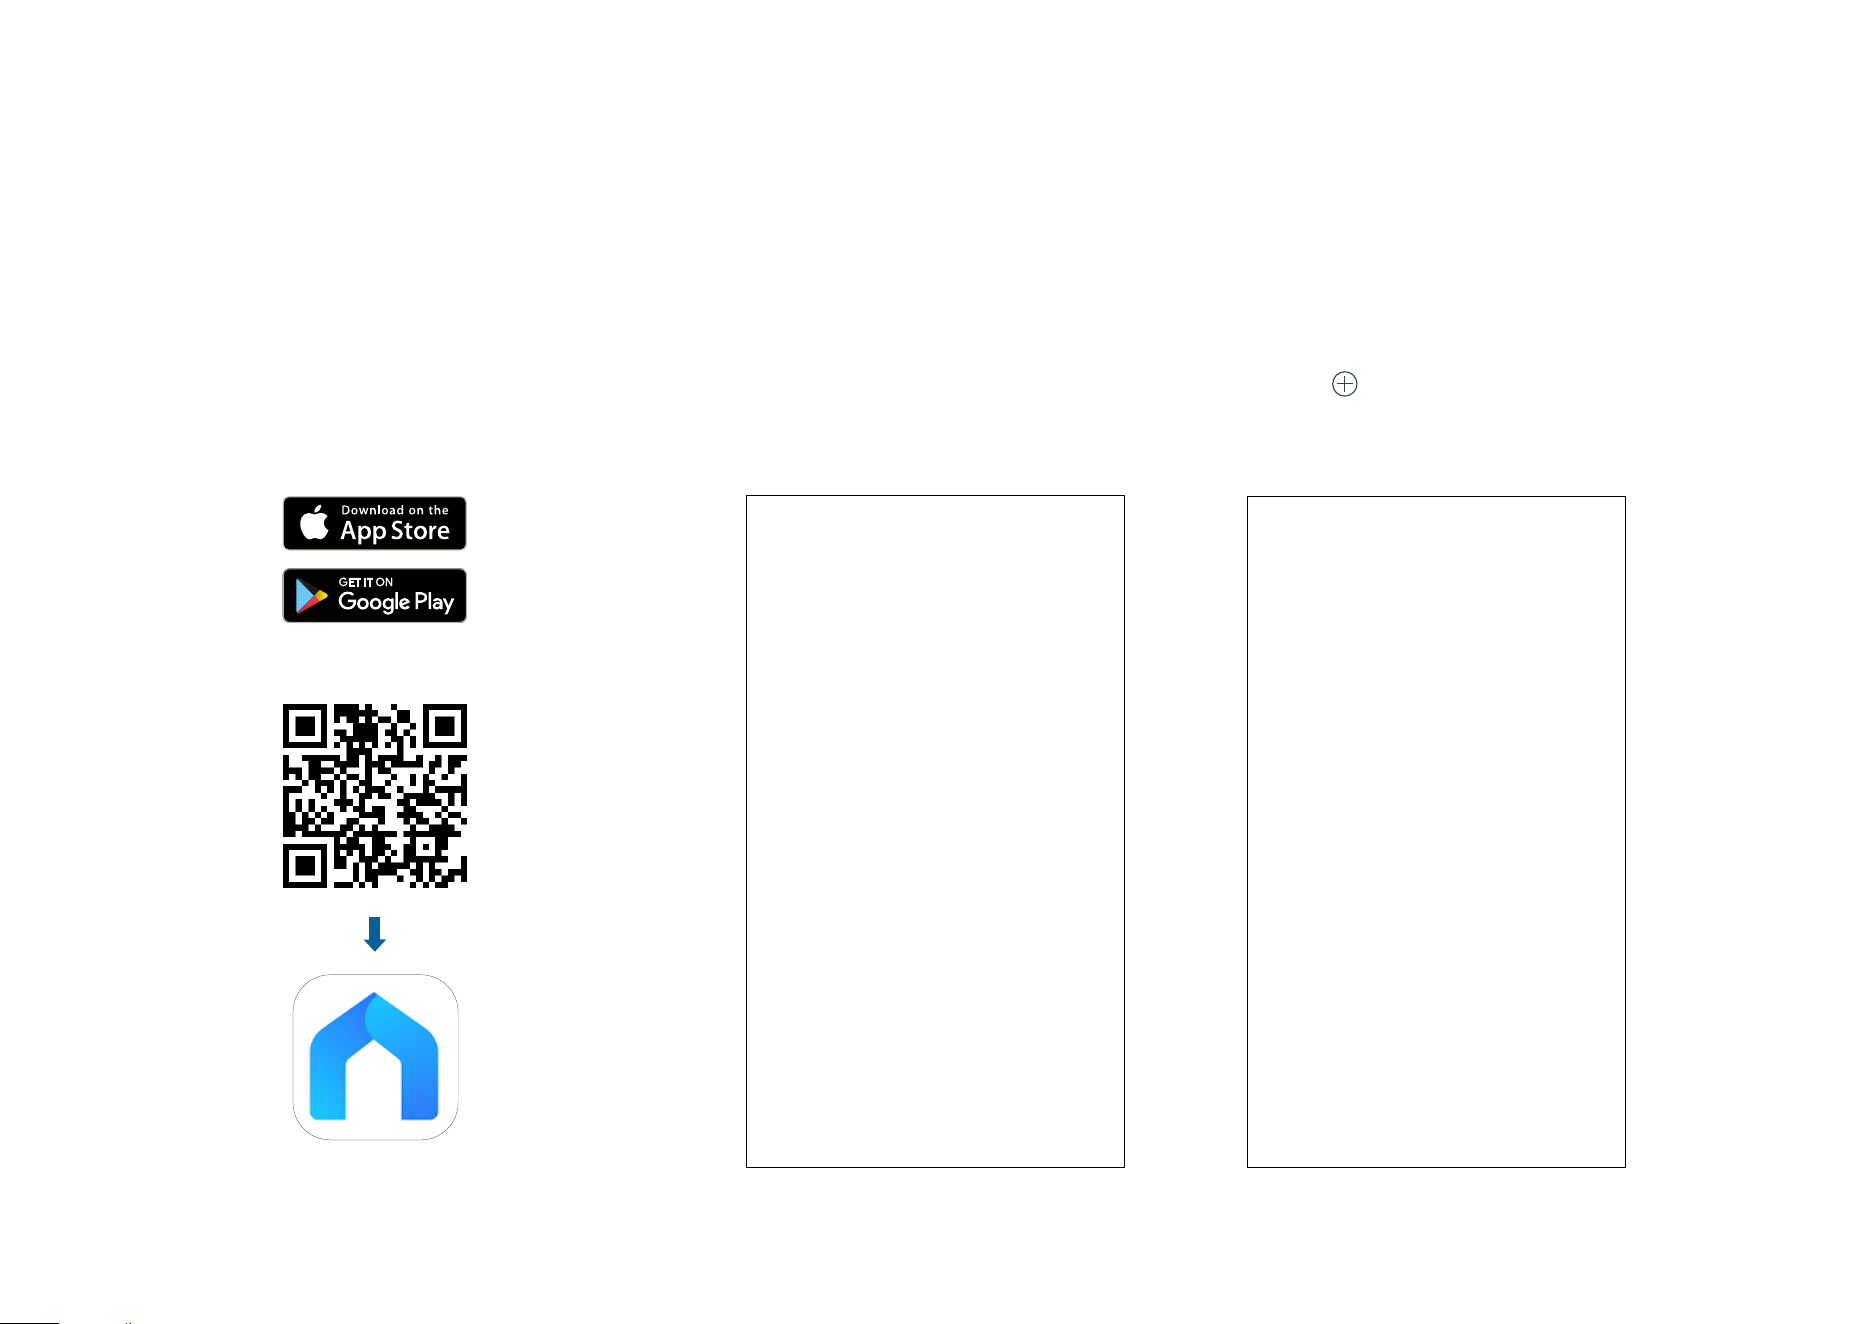
Step 1. Download Tapo App
Get the Tapo app from the App Store or
Google Play, or by scanning the QR code
below.
Step 2. Log In
Open the app, and log in with your TP-Link ID.
If you don't have an account, create one rst.
OR
Step 3. Add Your Device
Tap the button in the app and search for
your model. Follow the app instructions to set
up your door lock.

8
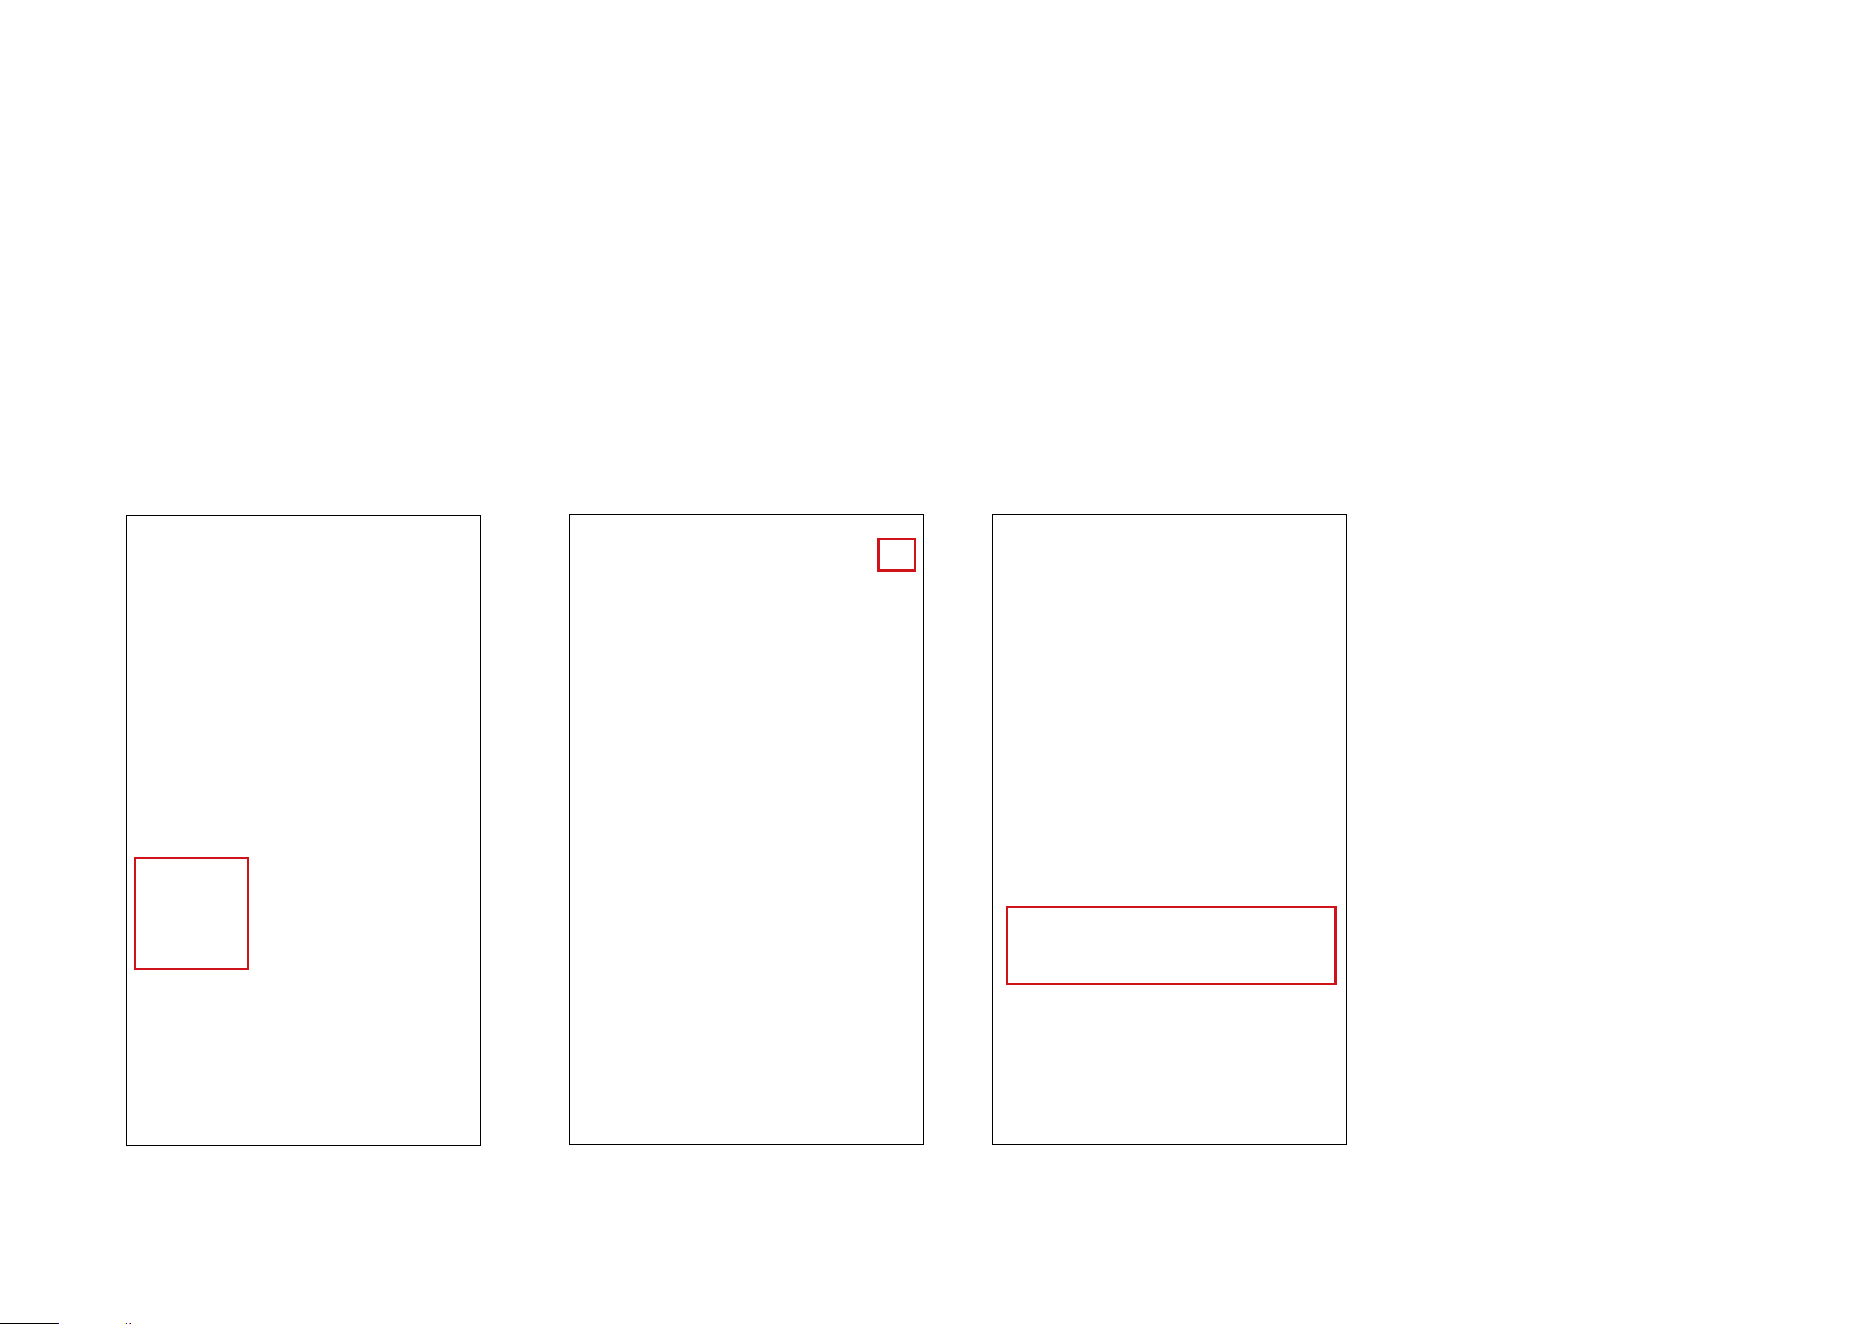
Manage Your Door Lock
After setup, your device will be listed on the Home page. You can tap your device to manage it.
1. Home Page
You can check your battery, favorite/unfavorite, and remove
your device on the Home page.
2. Status Page
Lock/unlock your door, set a PIN code, add a user & register their
ngerprint, check event log, check/set Smart Actions, and share your
device.
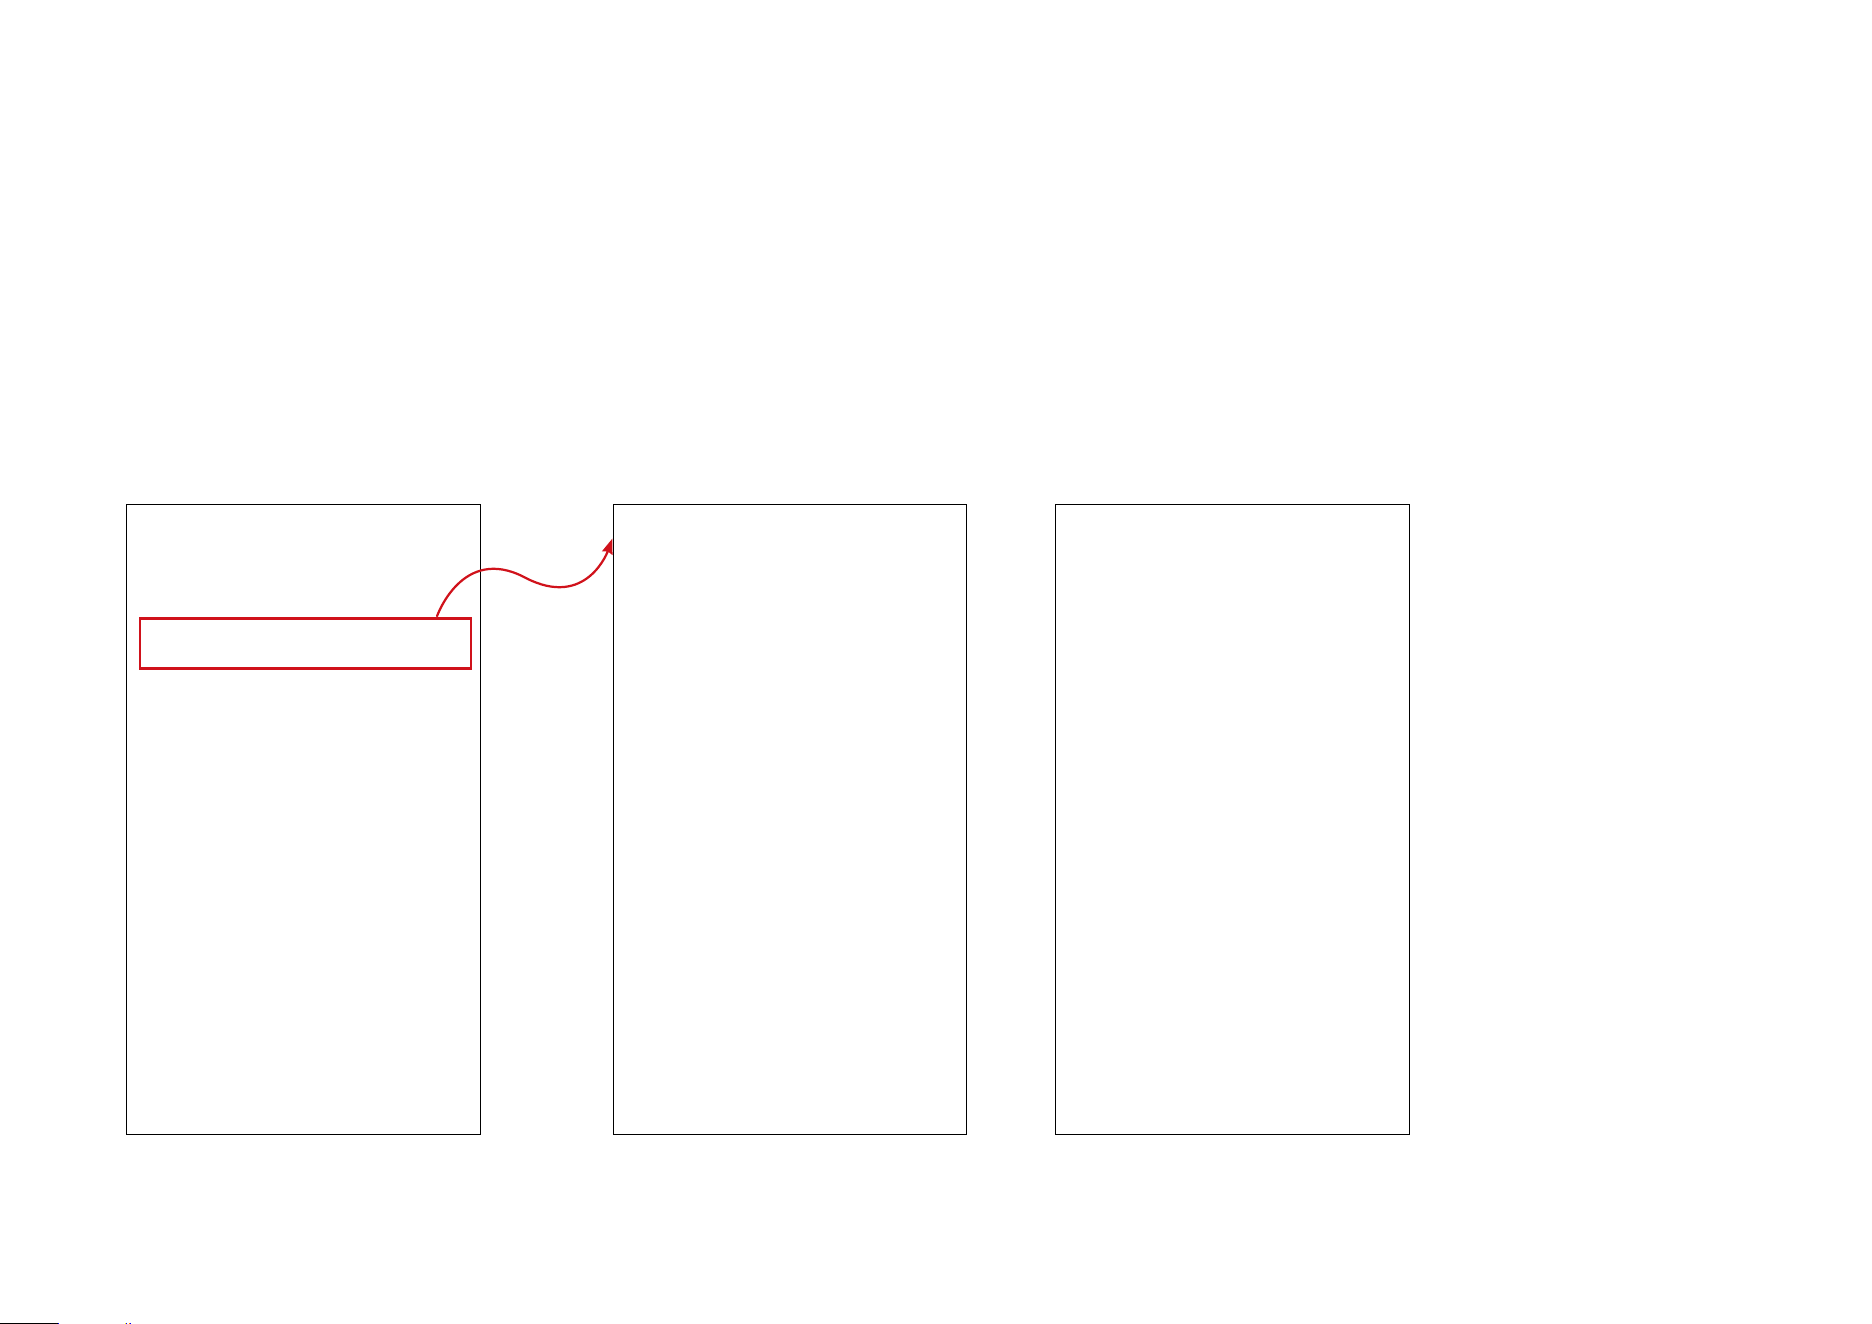
9
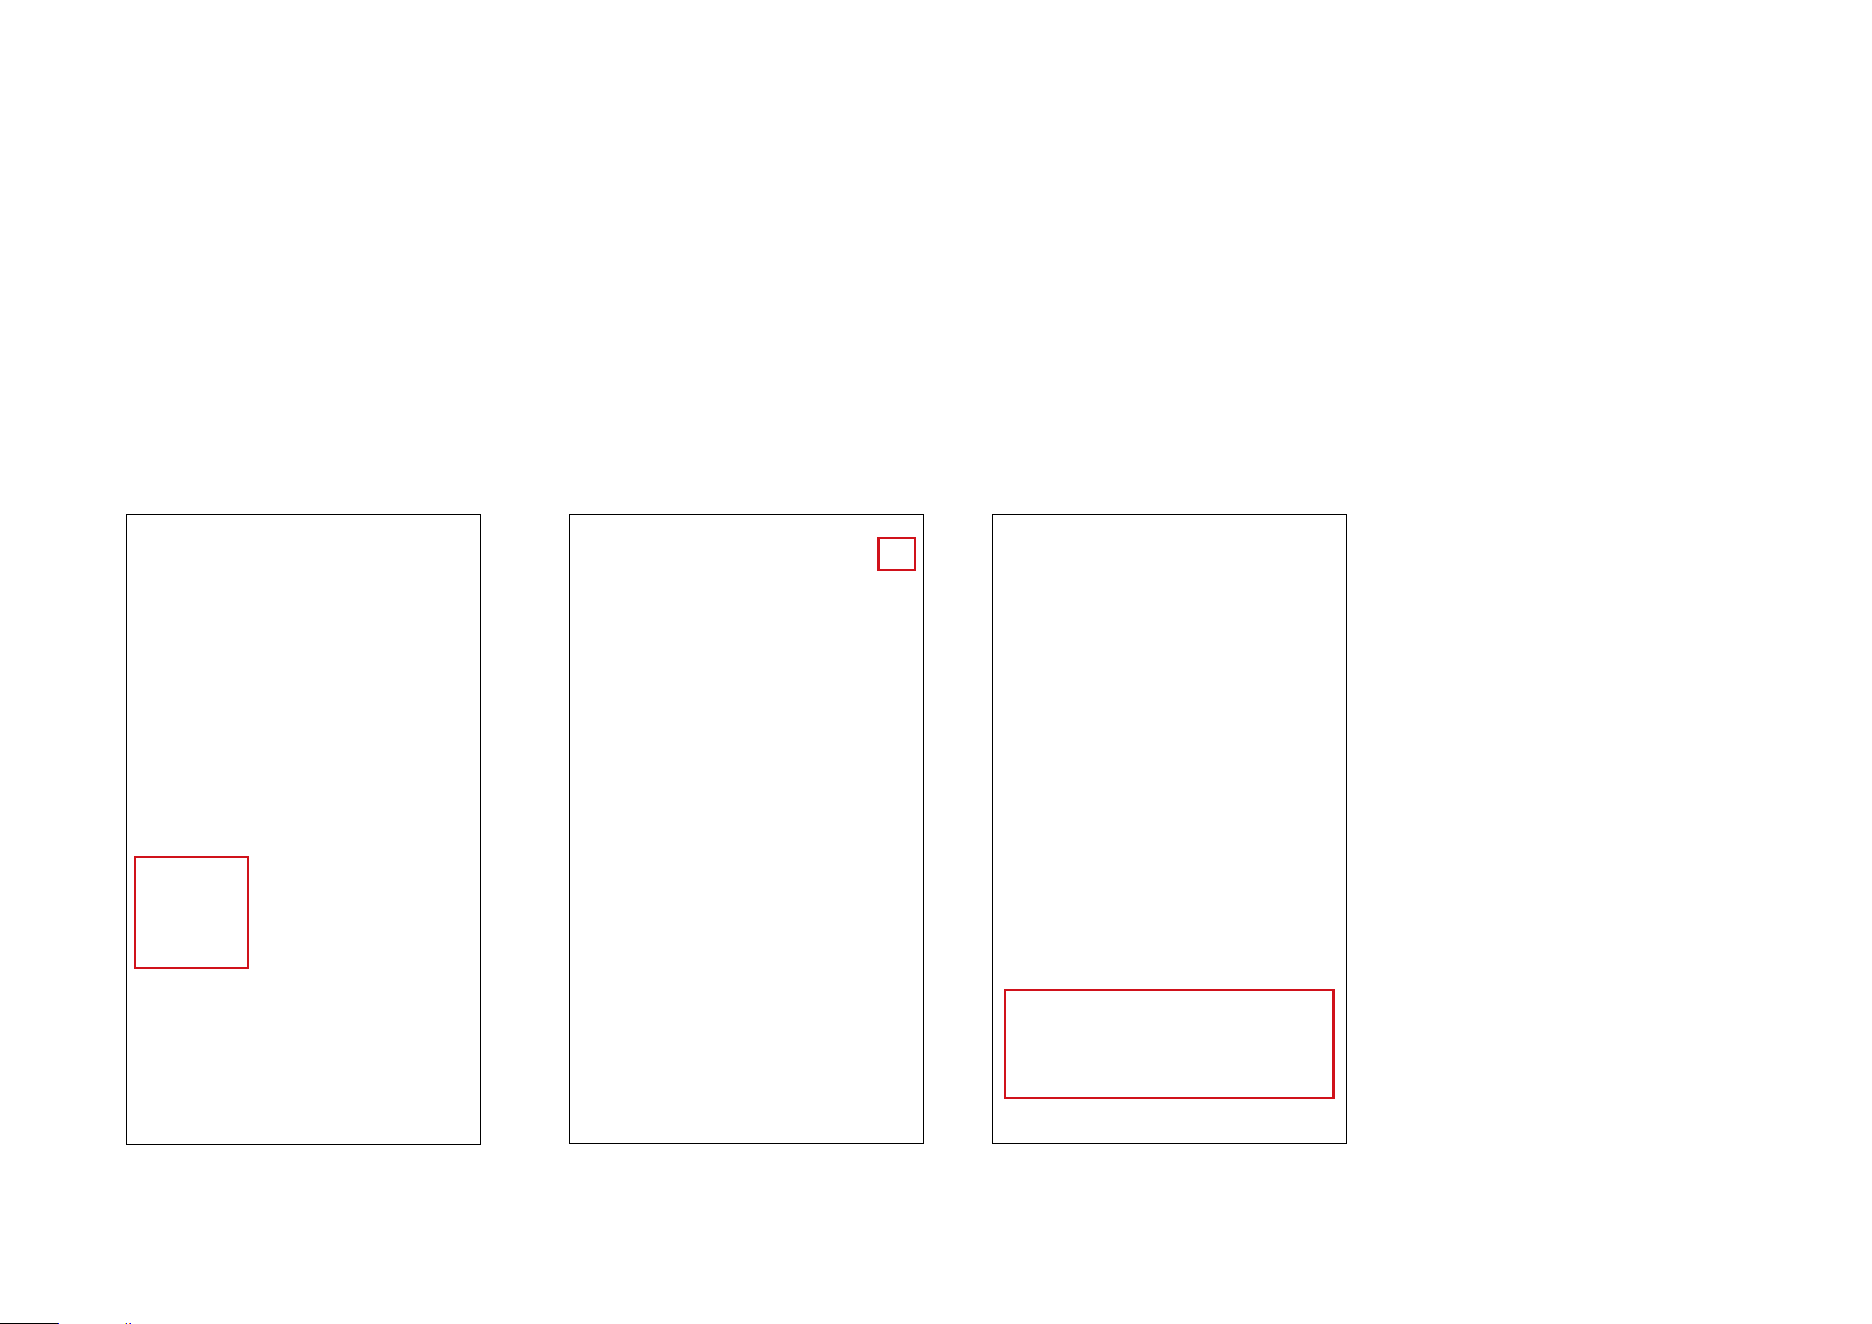
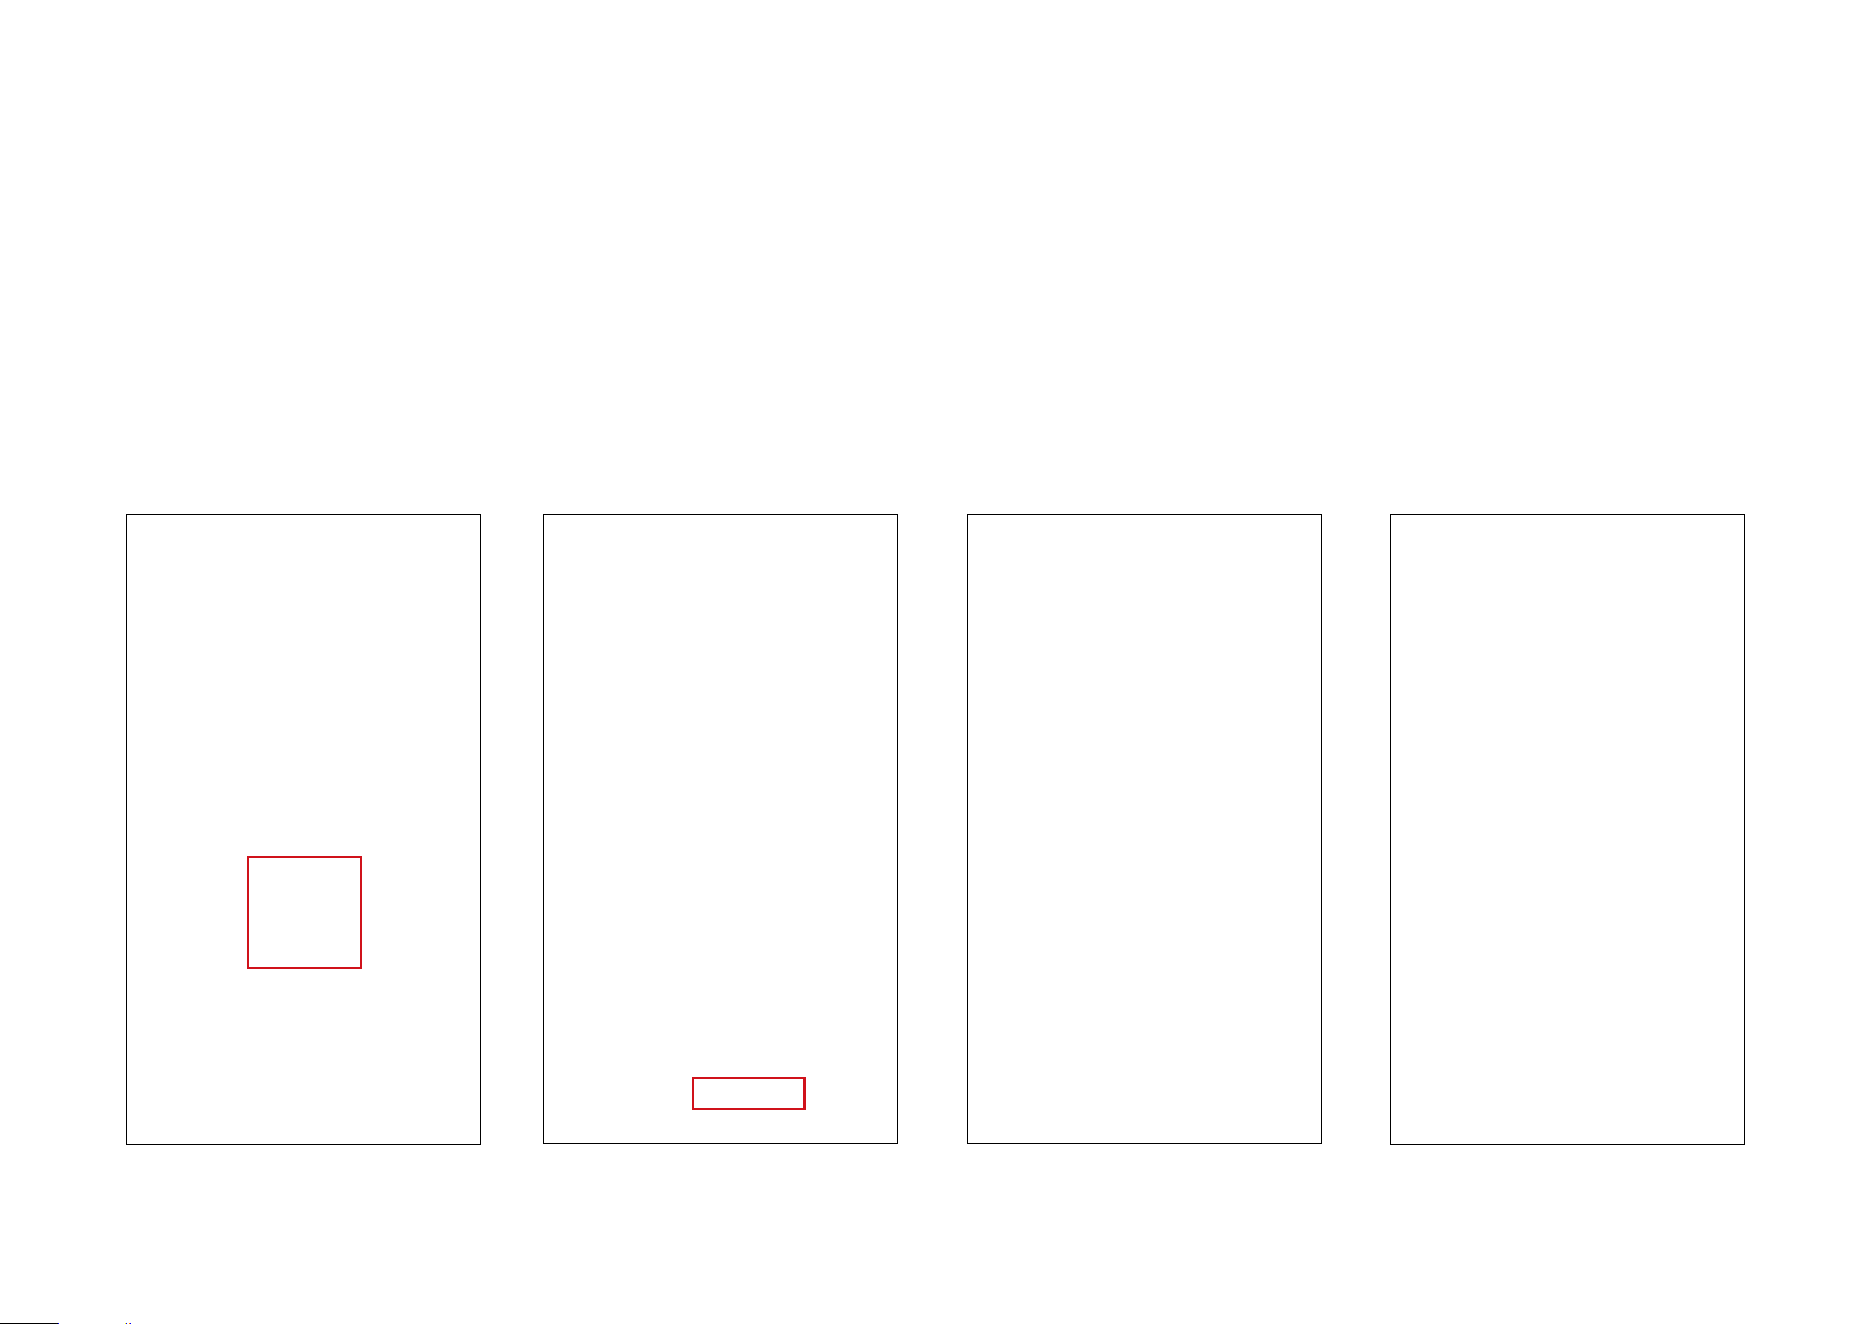
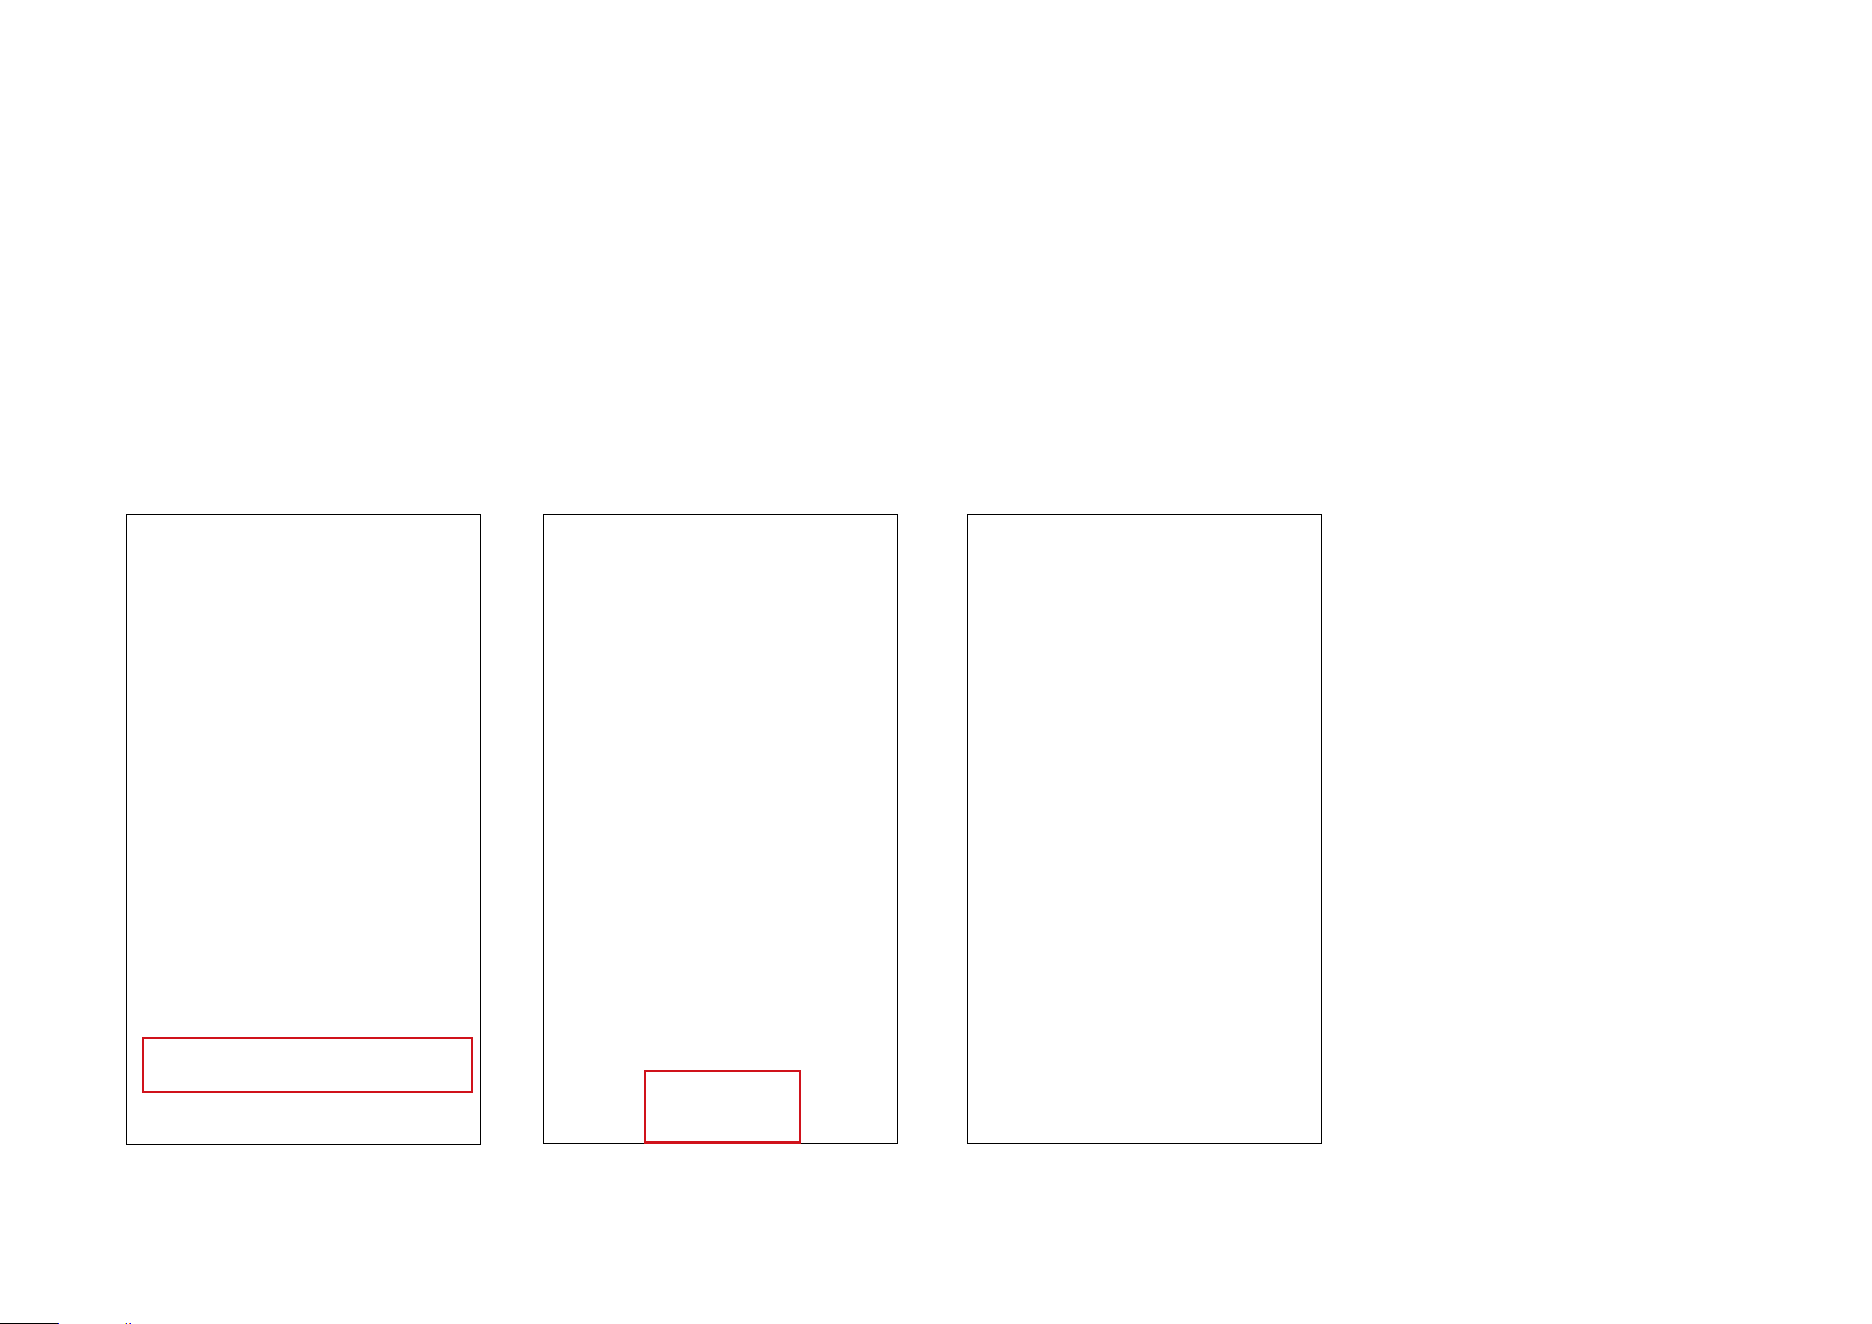
Create a PIN Code
1. Tap PIN Code on the Status page, then the + icon, and then select One-Time Code.
• One-Time Code
A one-time code is only eective once. You can set a one-time code for the house cleaning or pet feeding.

10
2. Set a code and its eective time, then name your code. A one-time code is created successfully.
11
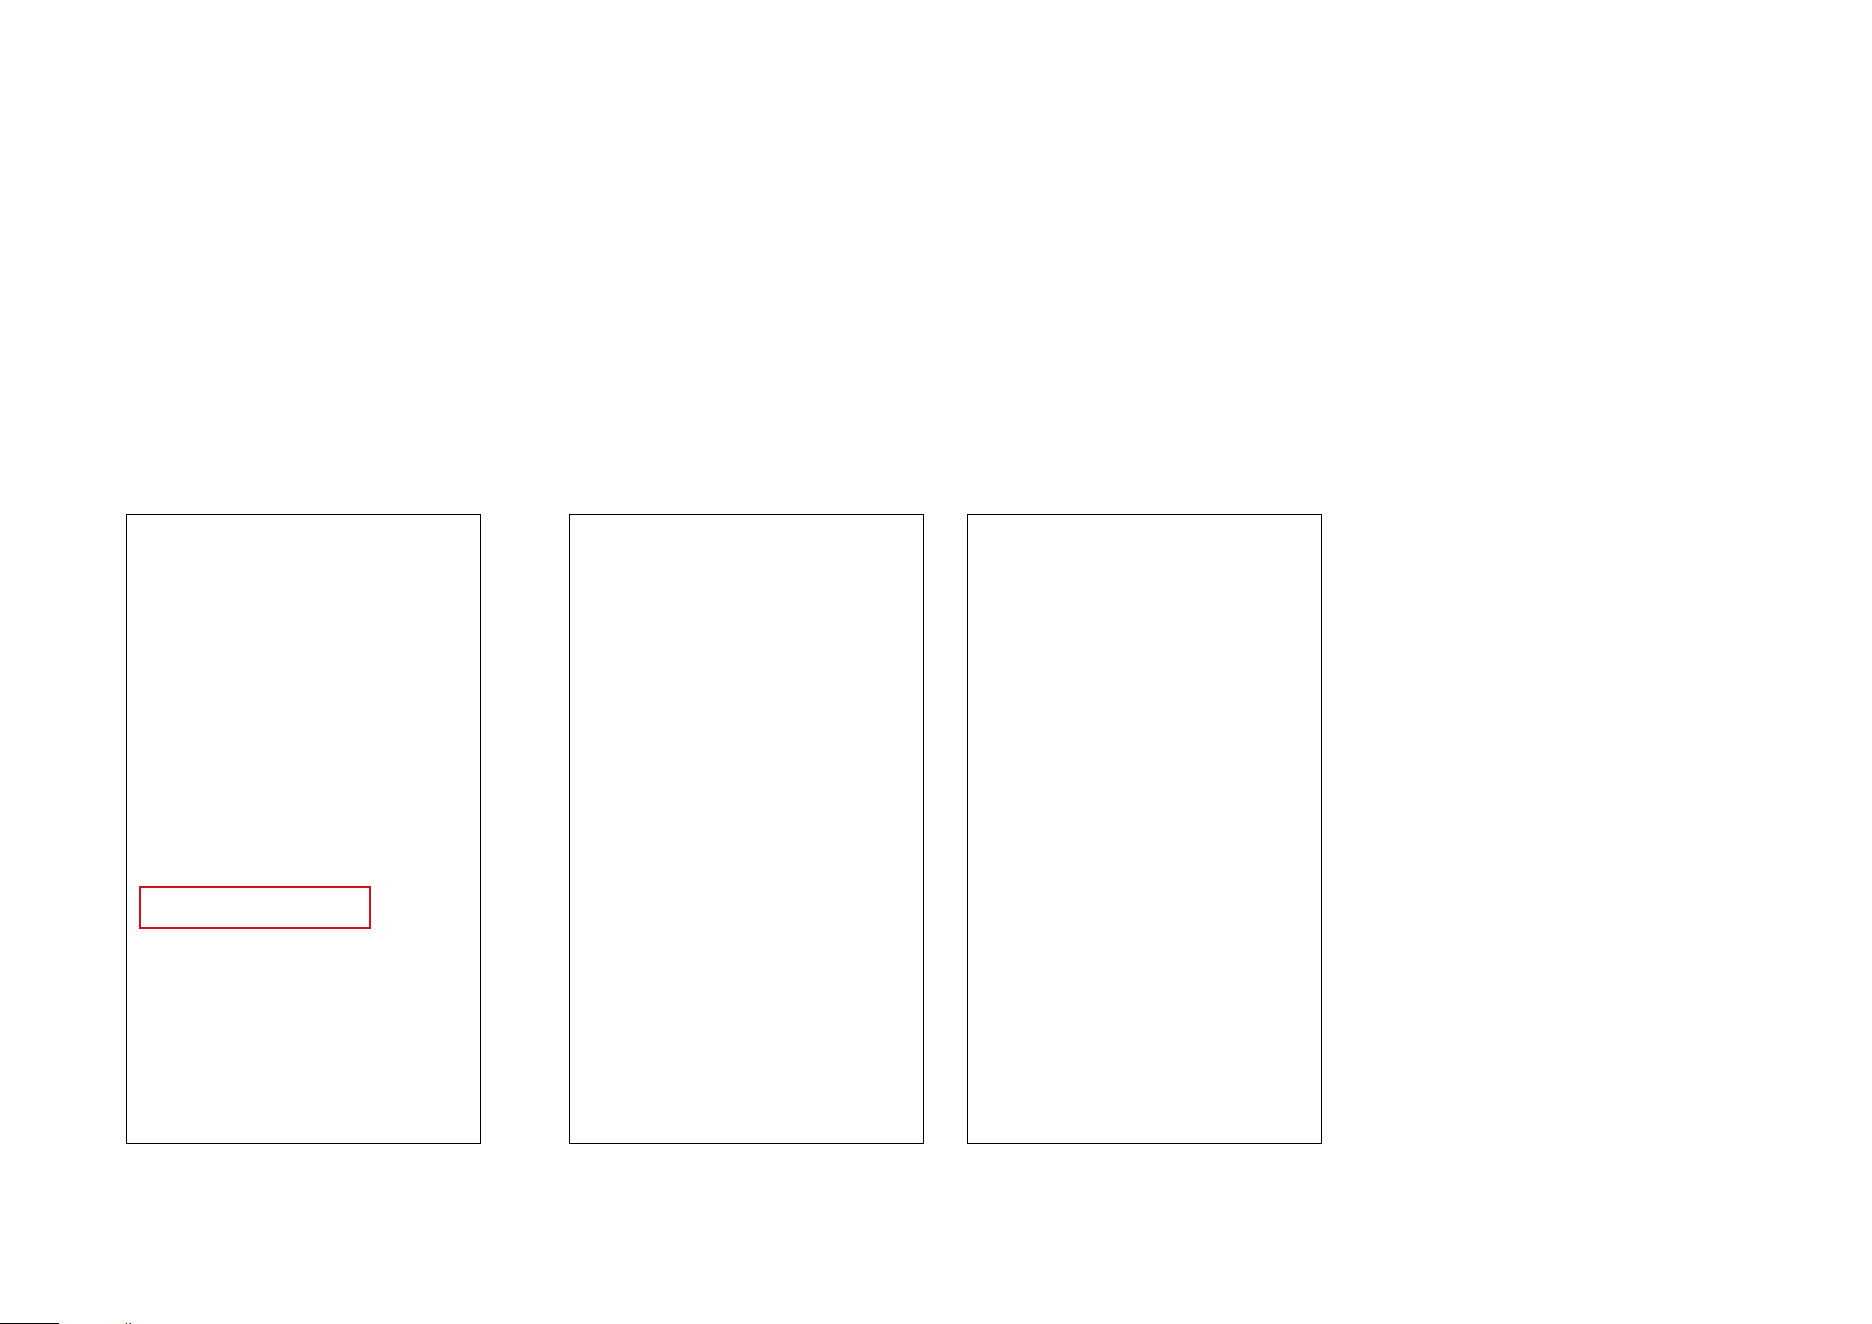
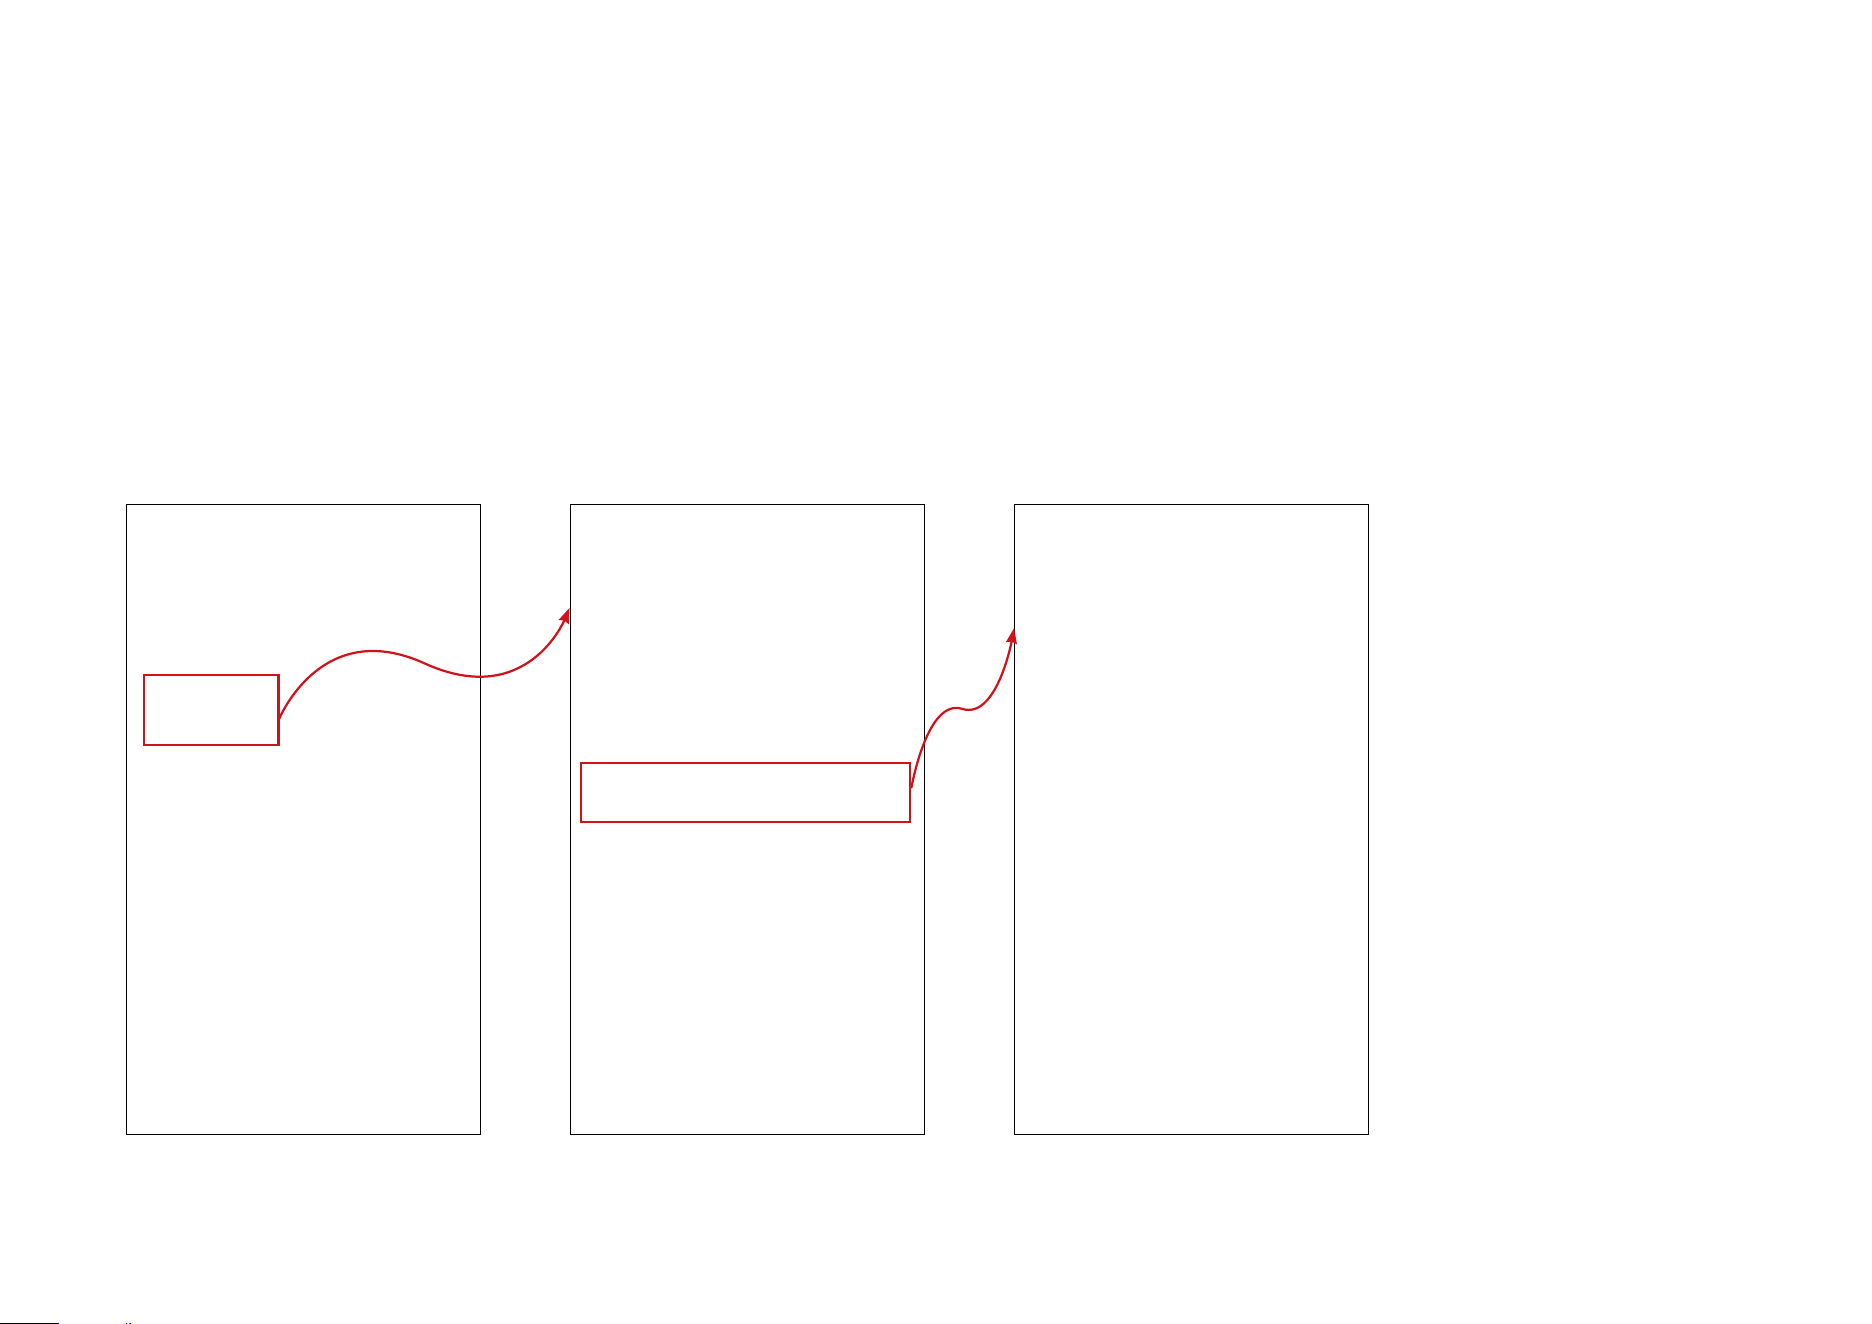
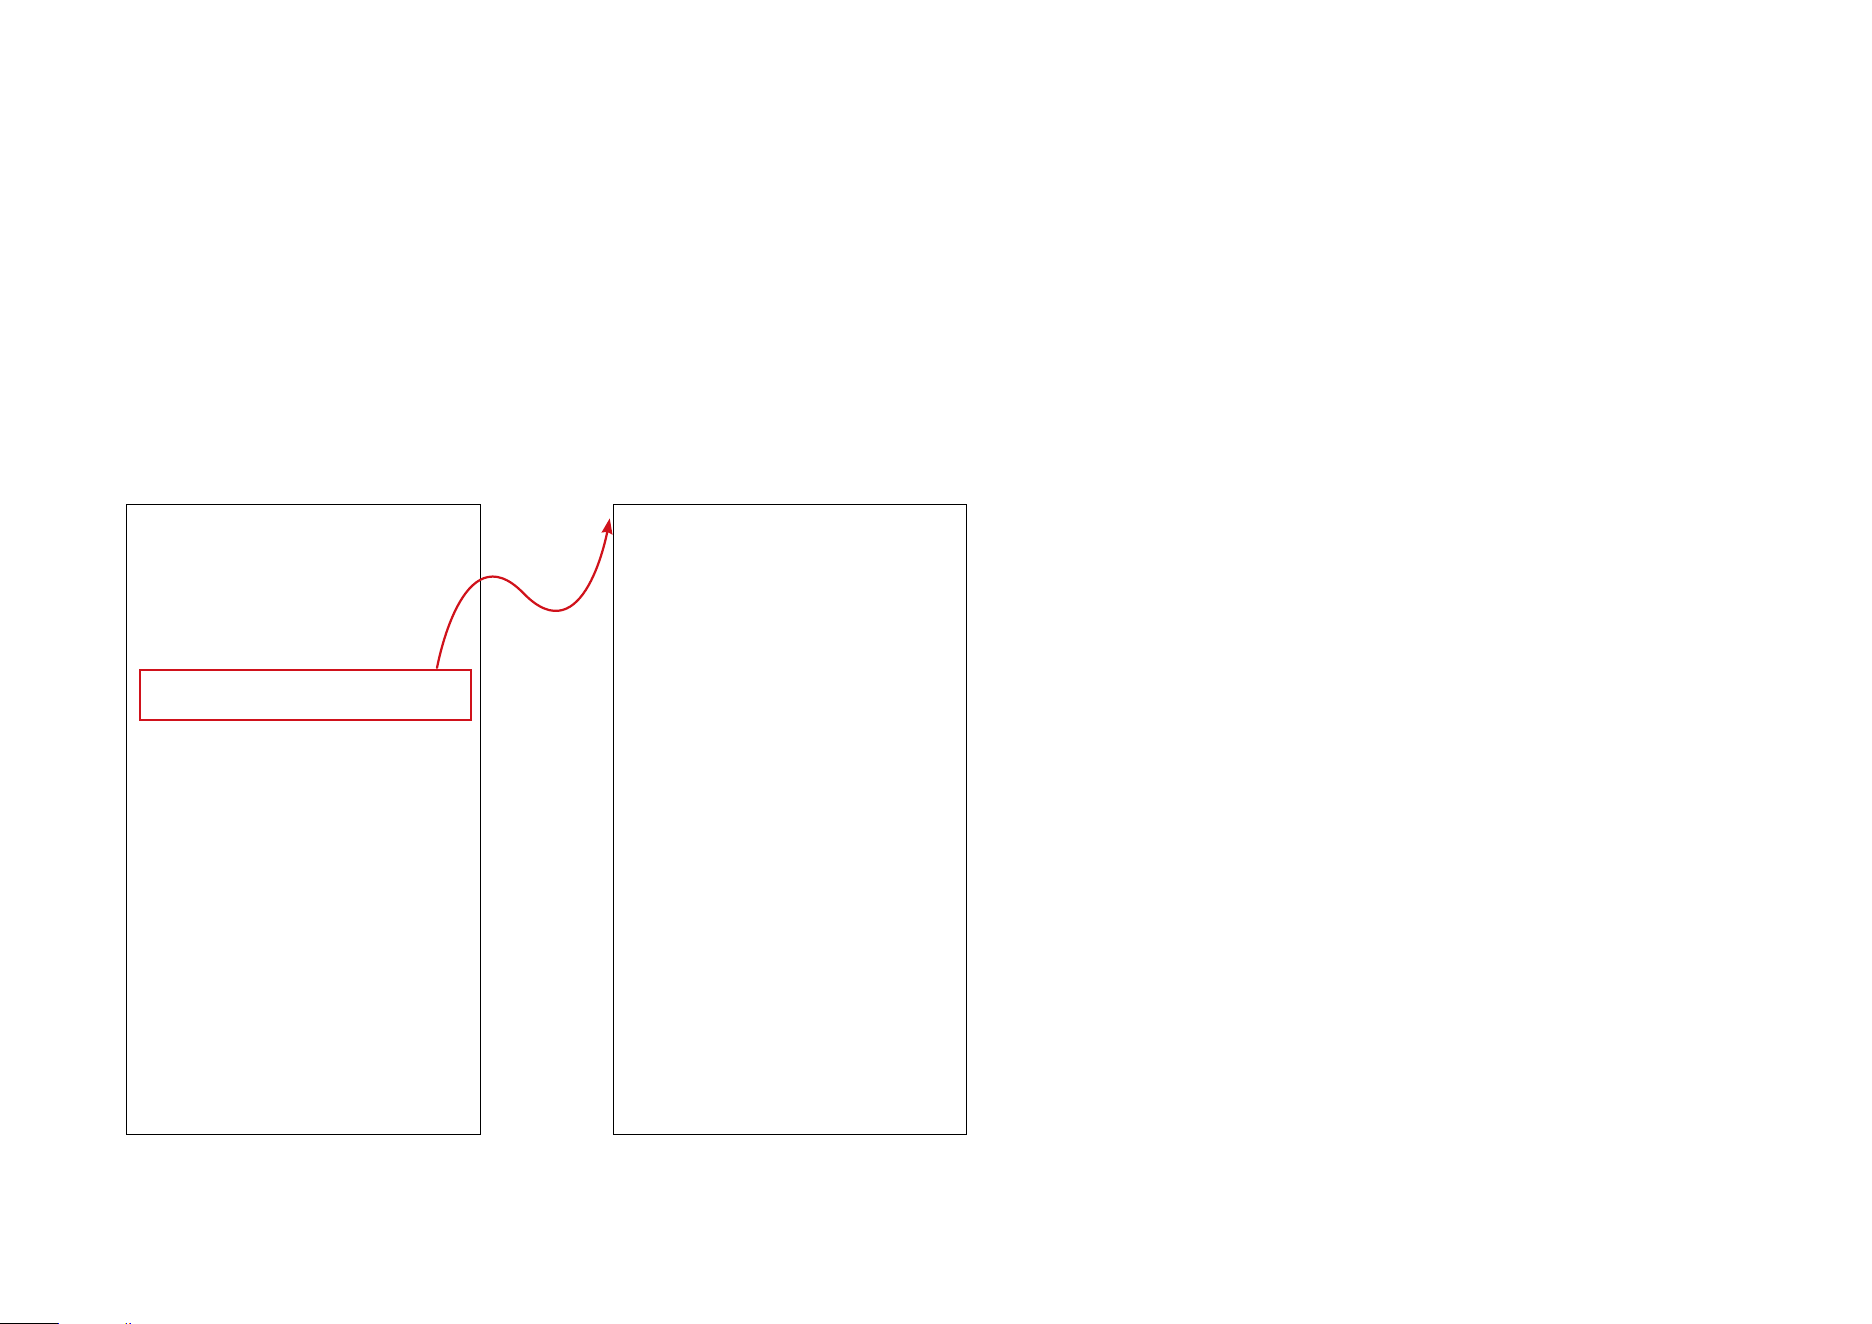
Create a PIN Code
1. Tap PIN Code on the Status page, then the + icon, and then select Normal Code.
• Normal Code
A normal code can be used repeatedly within your set eective time.

12
2. Set a code and its eective time, then name your code. A normal code is created successfully.
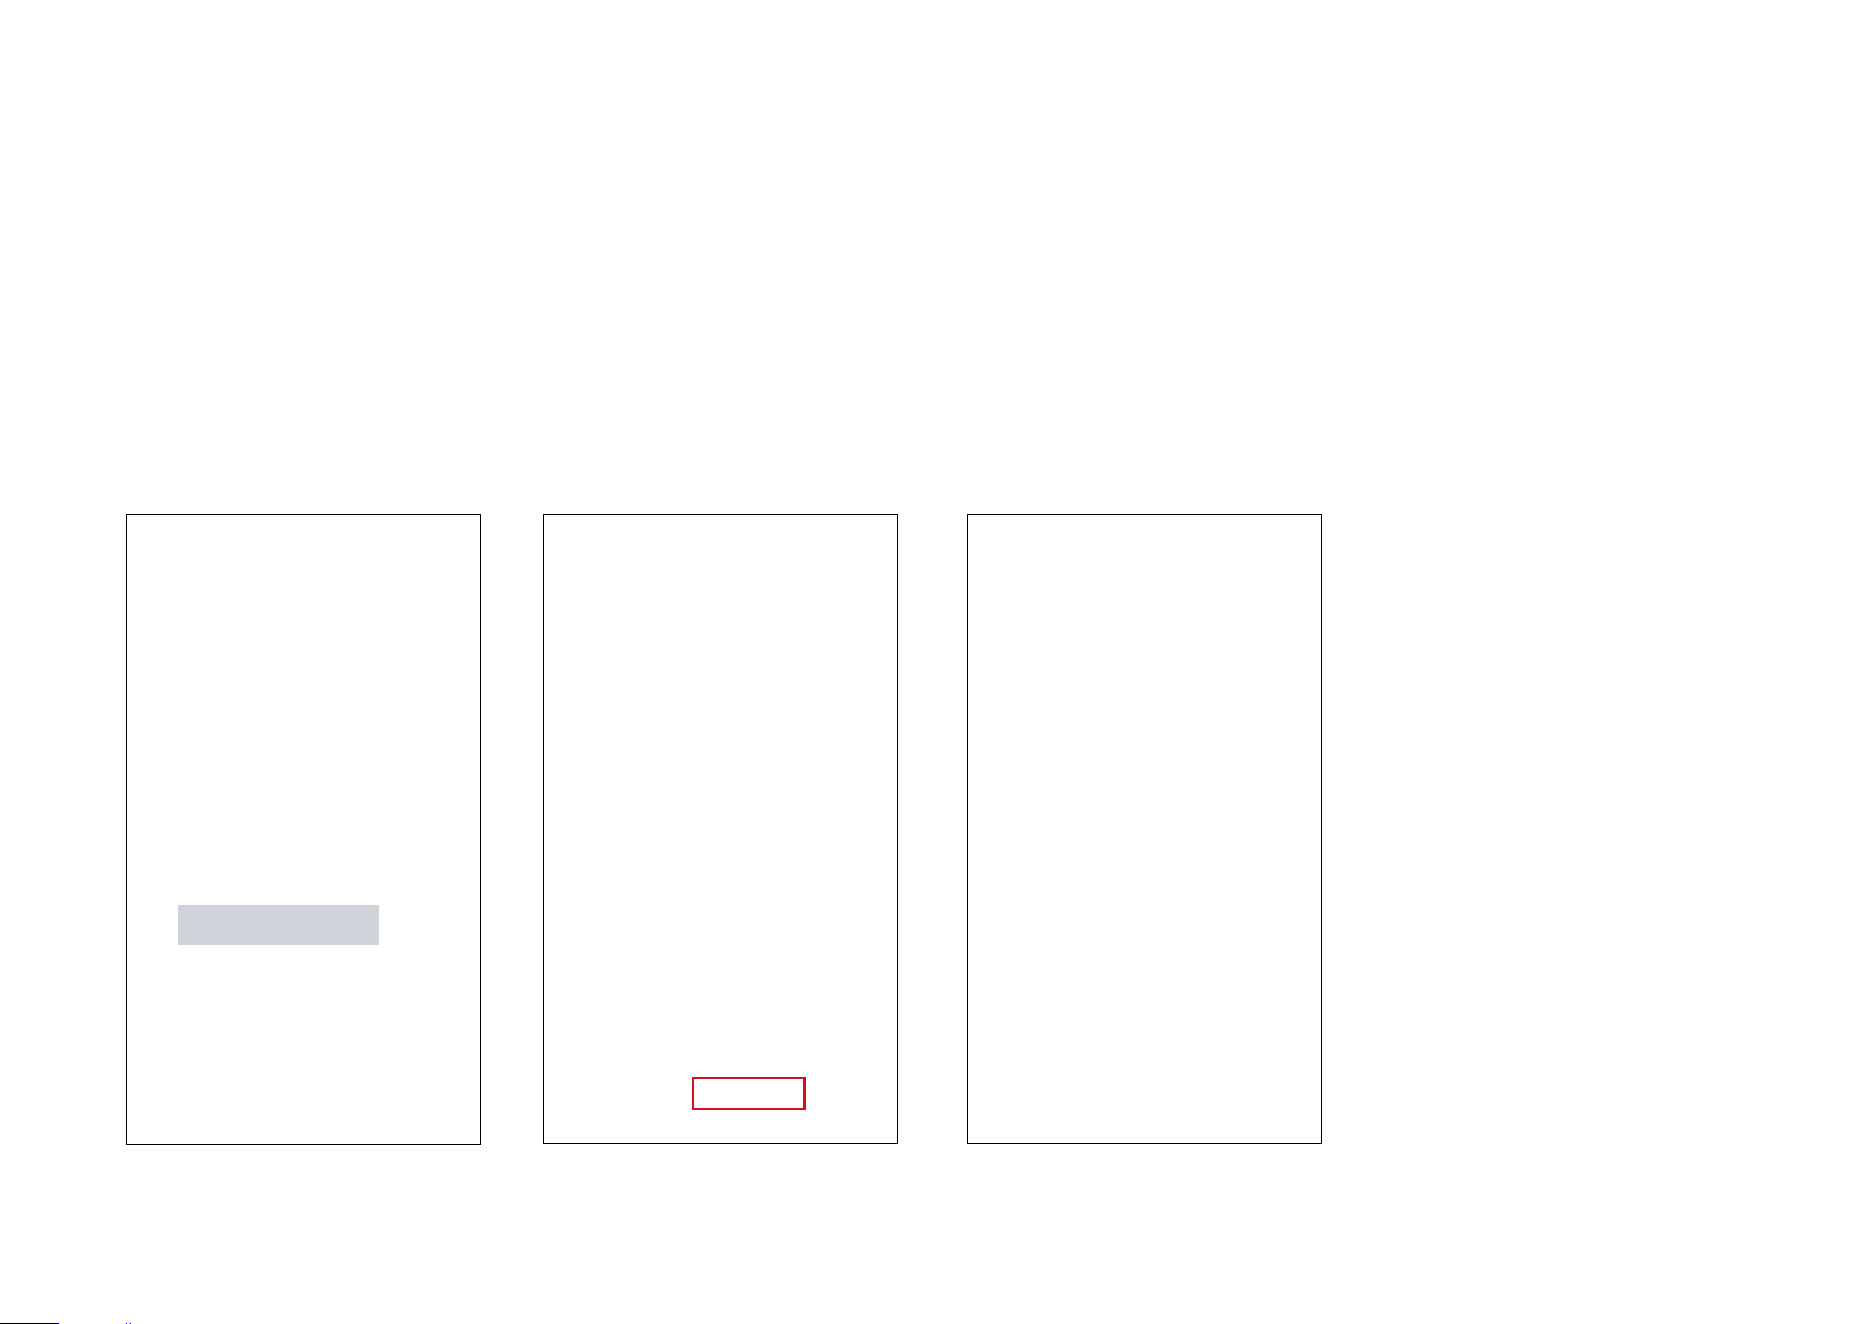
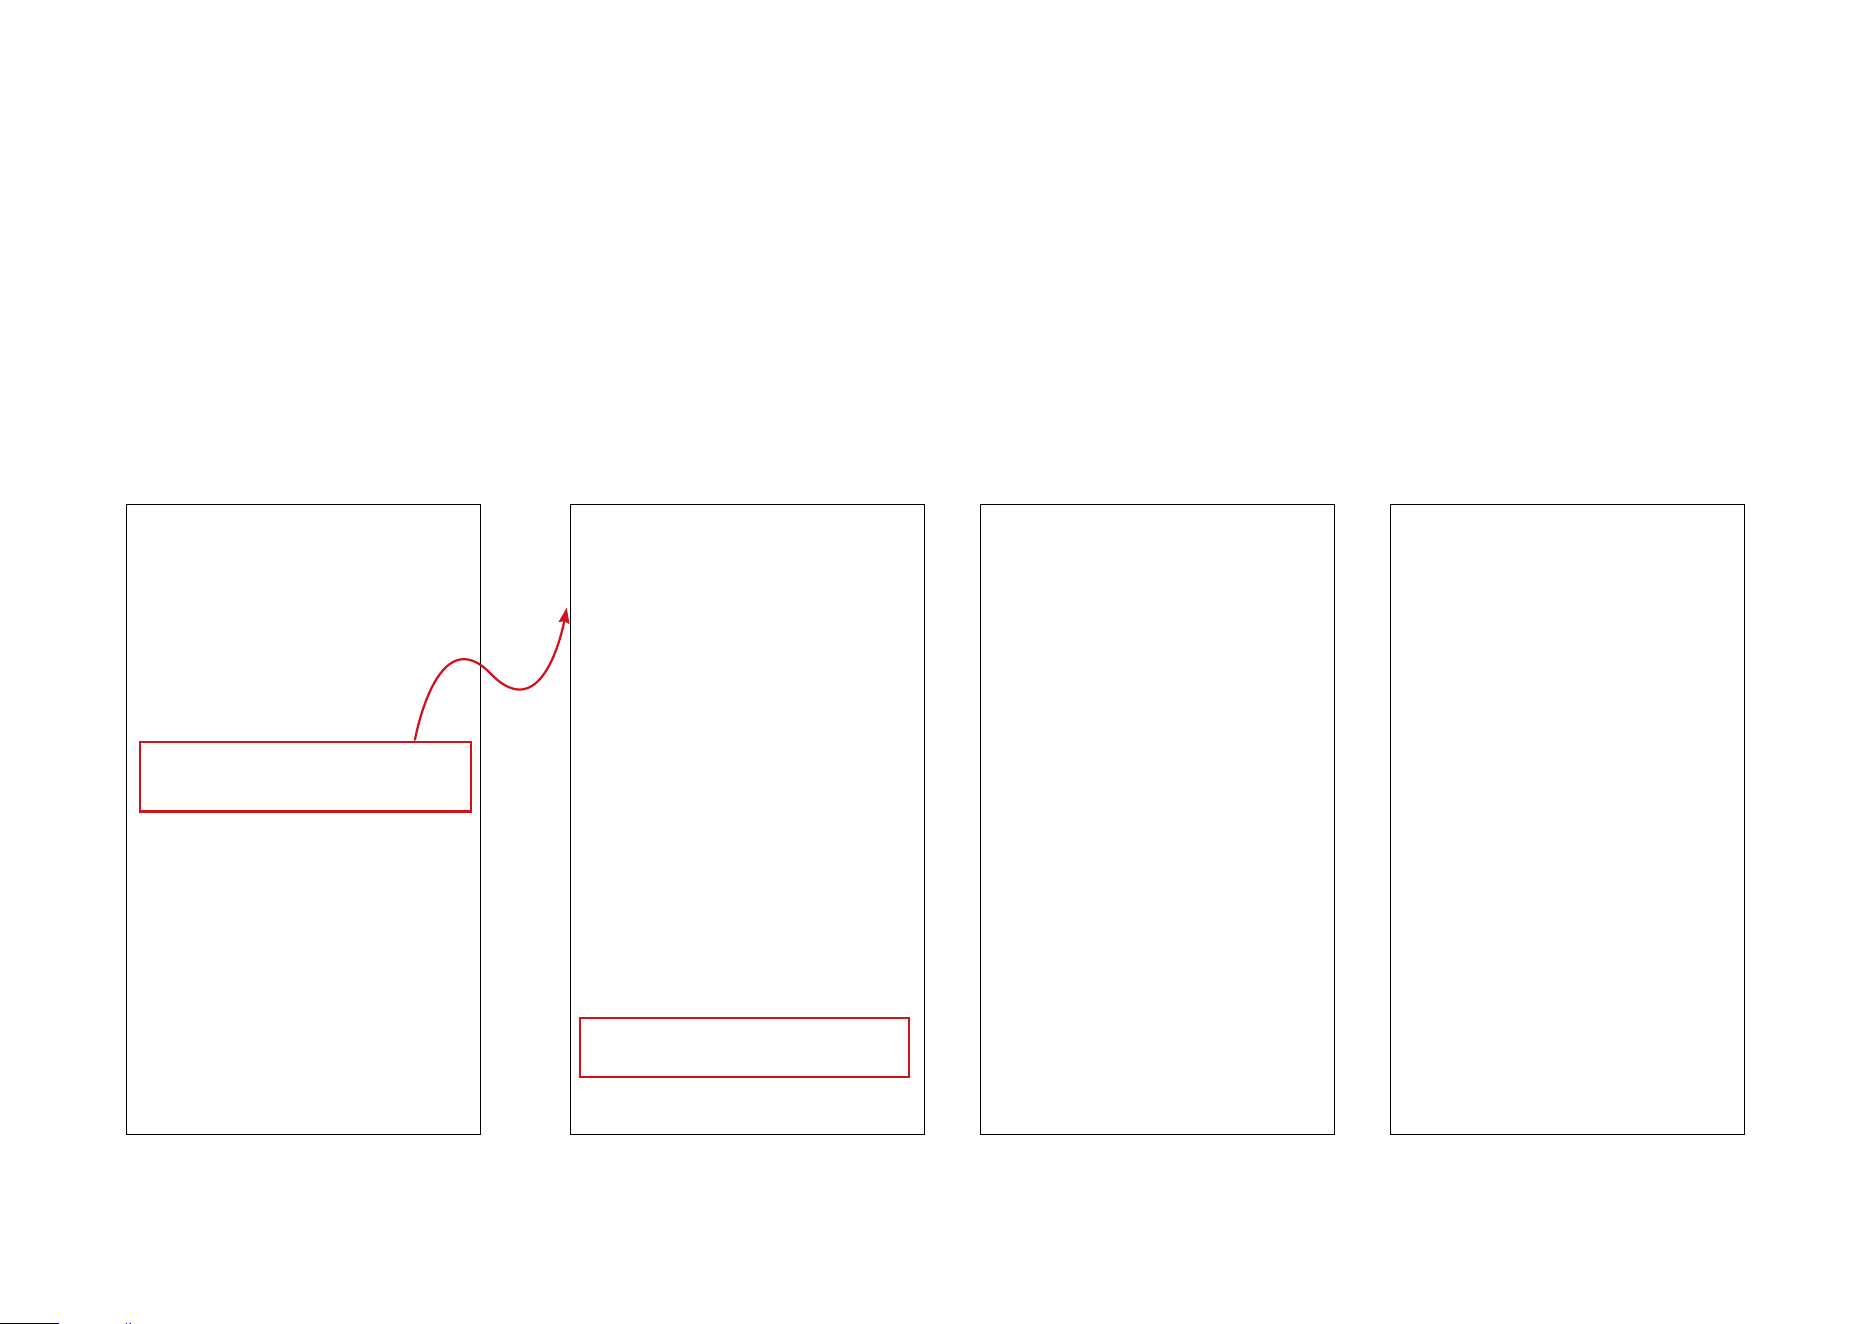
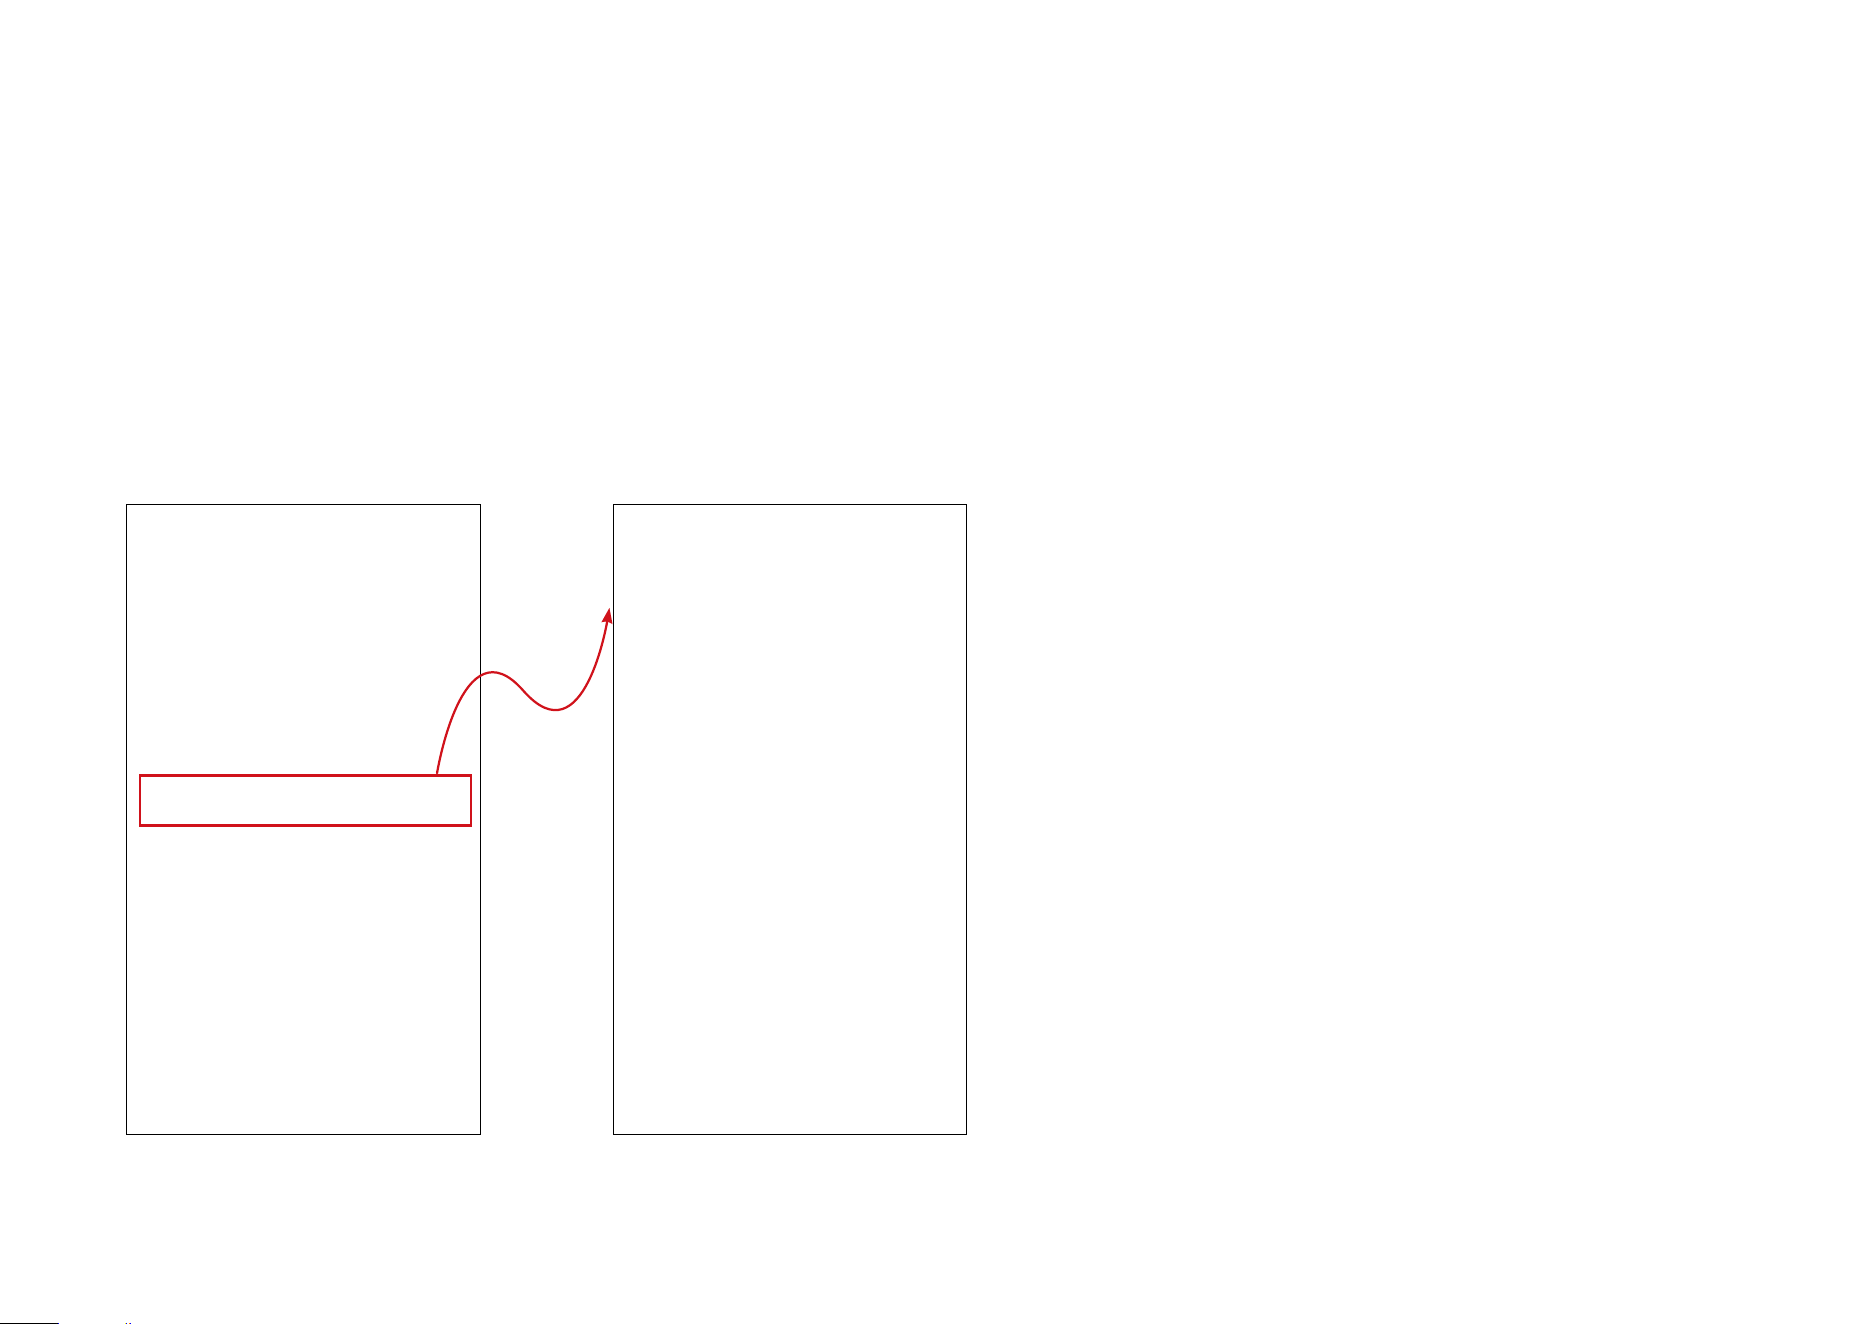
13
Add a User & Register Their Fingerprint
1. Tap Member & Fingerprints on the Status page, then Add User. Give this users a name for easier identity and set its avatar.
14
2. This user is added successfully. You can add his/her ngerprint so that he/she can unlock via the registered ngerprint.
Ta p Add Fingerprint and follow instructions to register the ngerprint of the added user. Then name the registered ngerprint.

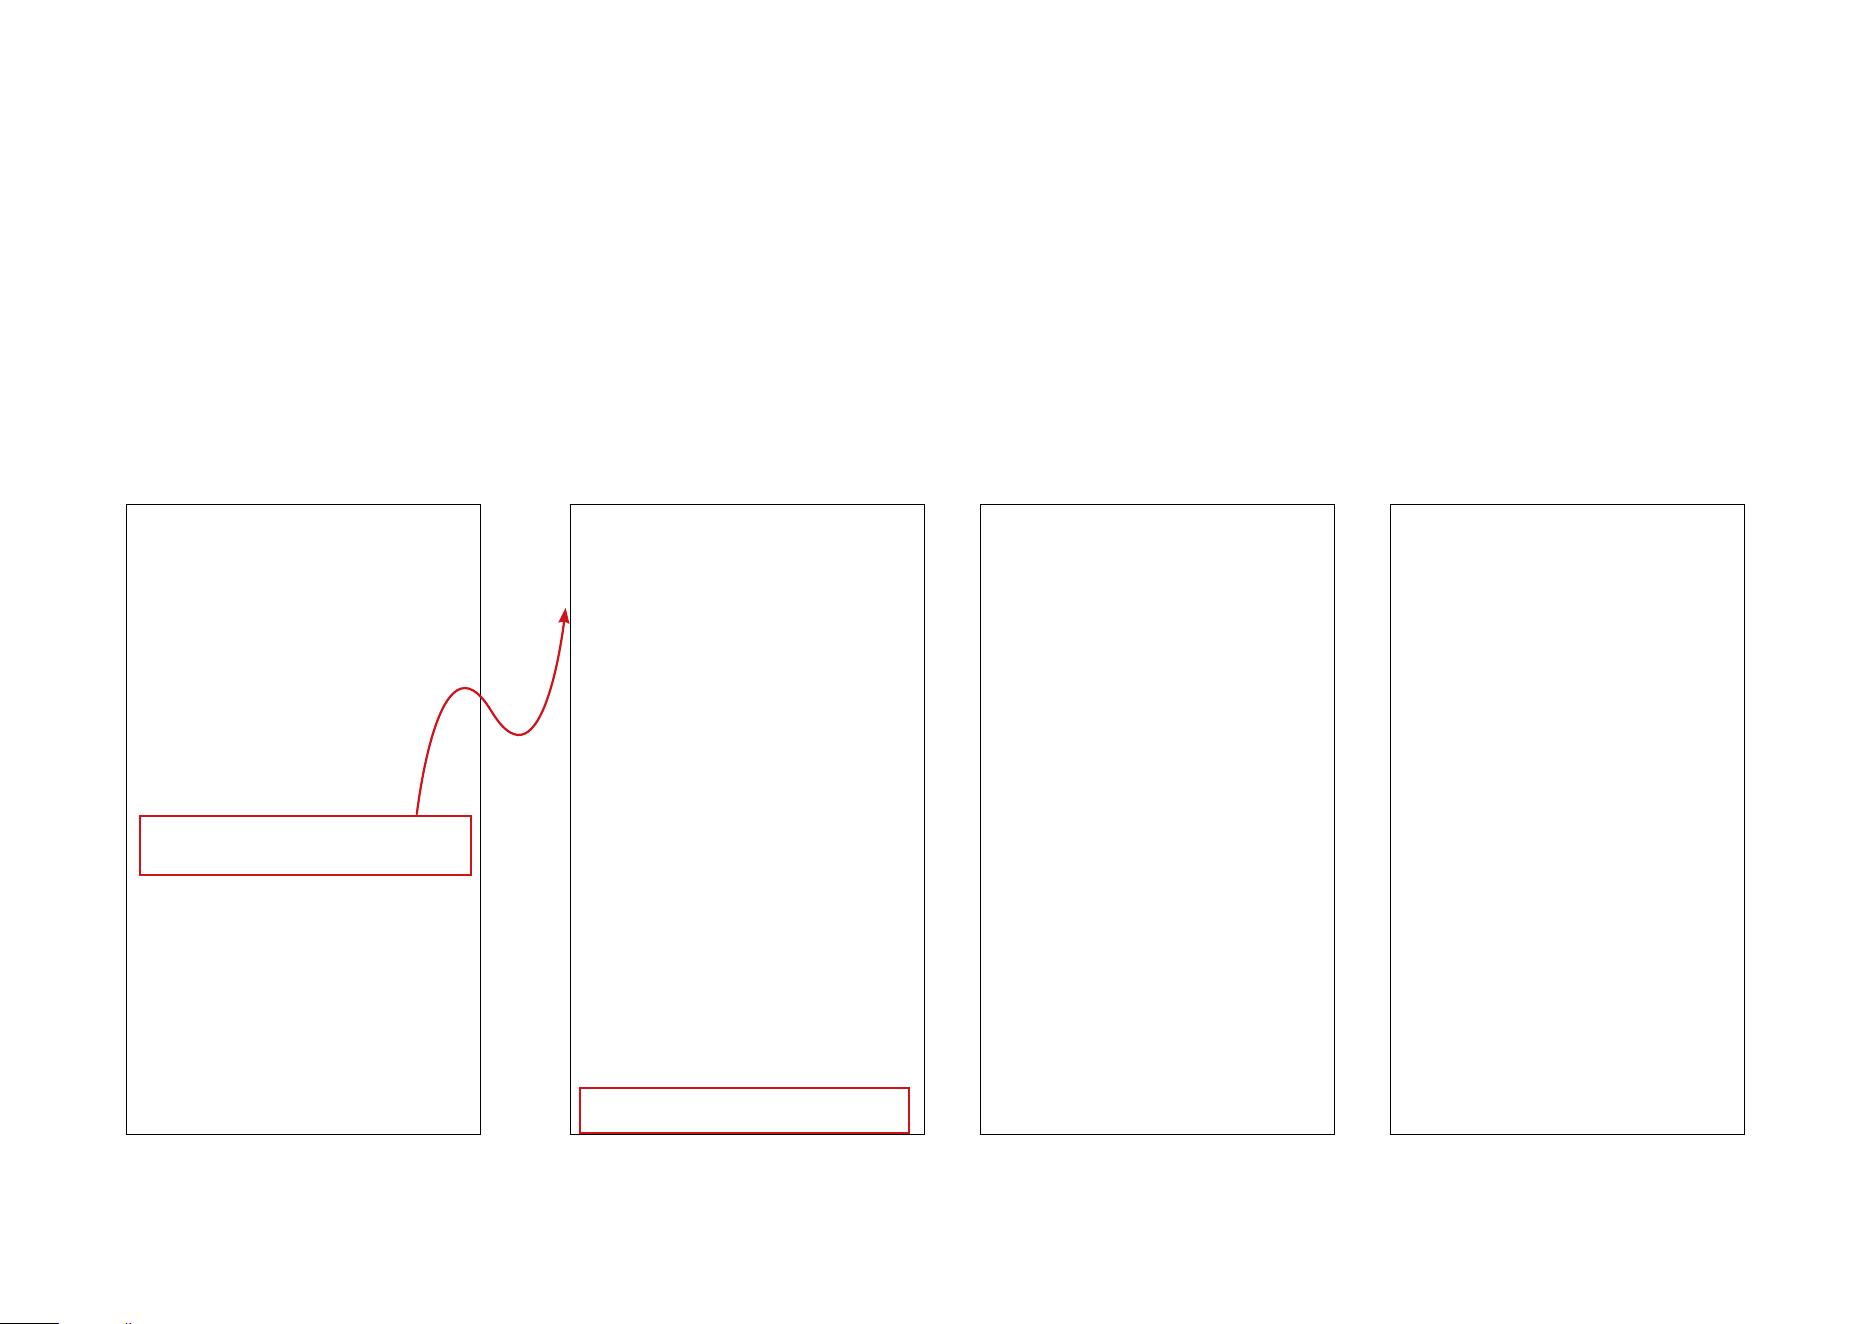
15
3. If you want this user to manage your door lock, you can share your door lock with this user and set his/her access permissions.
Ta p TP-Link ID. Binding the user's TP-Link ID to share the lock with him/her. Then assign Advanced or Basic access permissions to this user.
16
4. Enter the user's TP-Link ID and wait for him/her to accept the invitation.
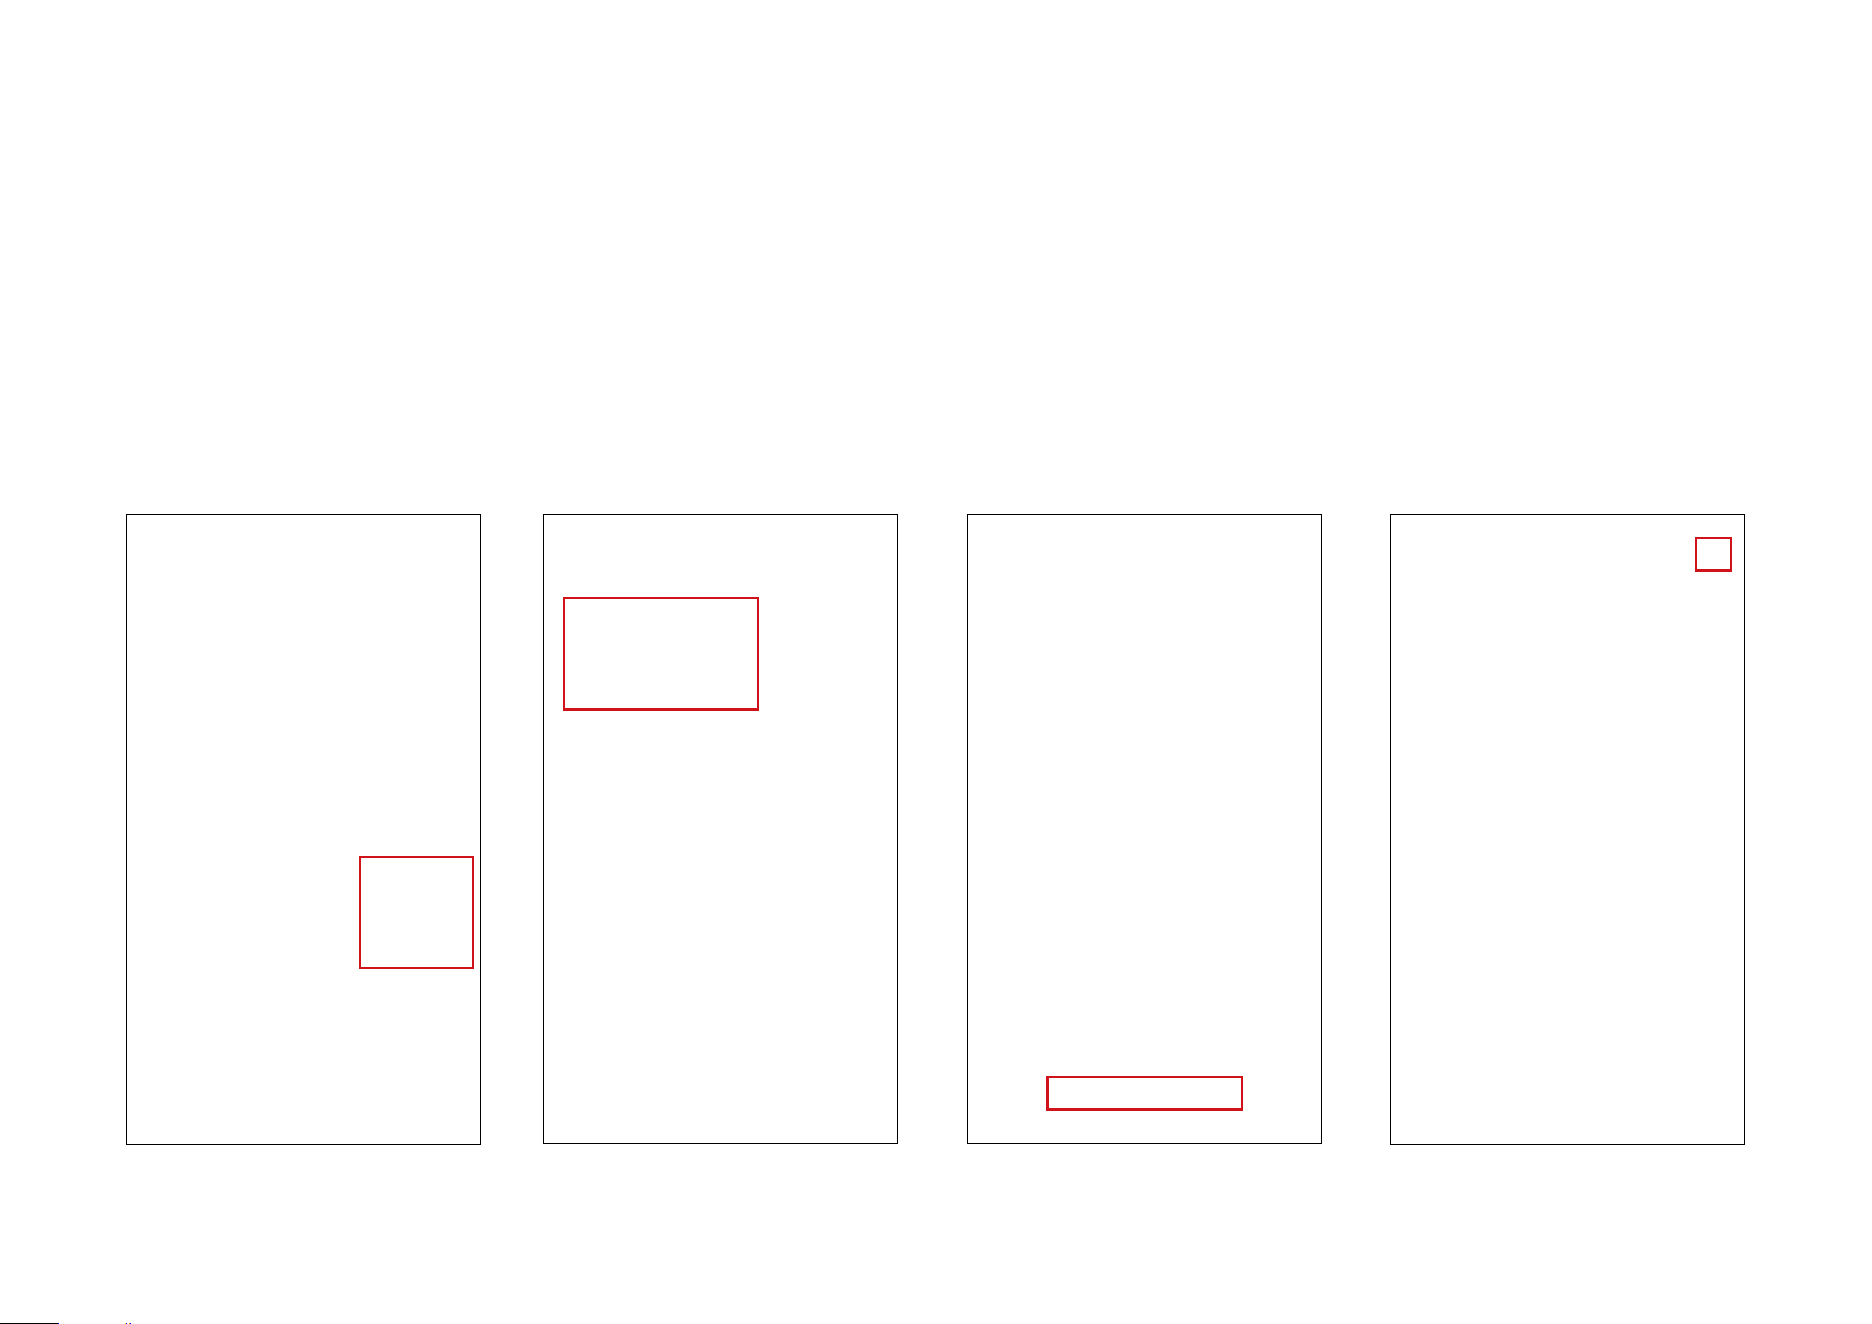
17
Check Event Log
Tap Event Log on the Status page. If you want to save the log to the Cloud, you can enable Log Backup.
You can tap the icon on the upper right corner to check the event log in its timeline.
18
Share Your Device
Share your door lock with family member to let them manage your door lock. You can set their access permissions.
Ta p Device Sharing. You can select added users whose TP-Link ID has not been bound or add a new user. Then refer to step 3-4 of “Add a User &
Register Their Fingerprint” to bind the user's TP-Link ID to share the lock with him/her and assign Advanced or Basic access permissions to this user.
19
Manage Device Settings
Tap on the Status page to enter the Device Settings page.
1. Set Doorbell Settings
Enable the built-in doorbell of your lock and set its volume. You can also pair chimes with the door lock so the chimes will ring when the
doorbell is pressed.
20
2. Set an Emergency Code
Set an emergency code to unlock during emergent cases. The emergency code is only eective once within the valid time. You can
generate up to 16 emergency codes every 4 hours. You can share the code as you need.
21
3. Set Lock Settings
Set how to lock your door. If One-Touch Locking is selected, you can enable Auto Lock in case you forget to to lock the door. You can also
set a Disable Auto Lock schedule to disable auto lock within set time. If you select Veried Locking, it's recommended that you disable
Auto Lock to prevent unintended locking of the door.
22
4. Security Settings-Door Jam Alarm
Your device will sound an alarm when the door is jammed.
23
4. Security Settings-Wrong-Try Protection
When the failed ngerprint attempts reach the limit you set, you can use the PIN code to unlock. If the limit of PIN code attempts is
reached, both methods will be in lockdown for the time your set.
24
4. Security Settings-Scramble PIN Code
Enter decoy digits before and after your passcode for added security.
25
4. Security Settings-App Lock/Unlock
Set whether to allow locking/unlocking via the Tapo app.
26
4. Security Settings-Touch ID Verication
Verify yourself with Touch ID before you can control the lock. Touch ID adds a layer of security to your door lock.
27
5. Voice Prompts
Enable to activate voice prompts for your operation.
28
6. Calibrate Your Lock
Calibrate your lock for optimal performance.
29
7. Network Connection
Check your lock's Wi-Fi connection status. With Wi-Fi connected, you can control your door lock remotely.
Tap Set Up Wi-Fi Network and follow instructions to connect your lock to a Wi-Fi network. When Wi-Fi is connected, you can check the
network name, signal or switch to another Wi-Fi.
30
8. Back Up Event Log
Enable Log Backup to save the log to the Cloud. If you don't want to save the log to the Cloud, you can disable this feature and choose
whether to clear historical log saved on the Cloud.
31
9. Notications
Choose whether to receive locking/unlocking notications.
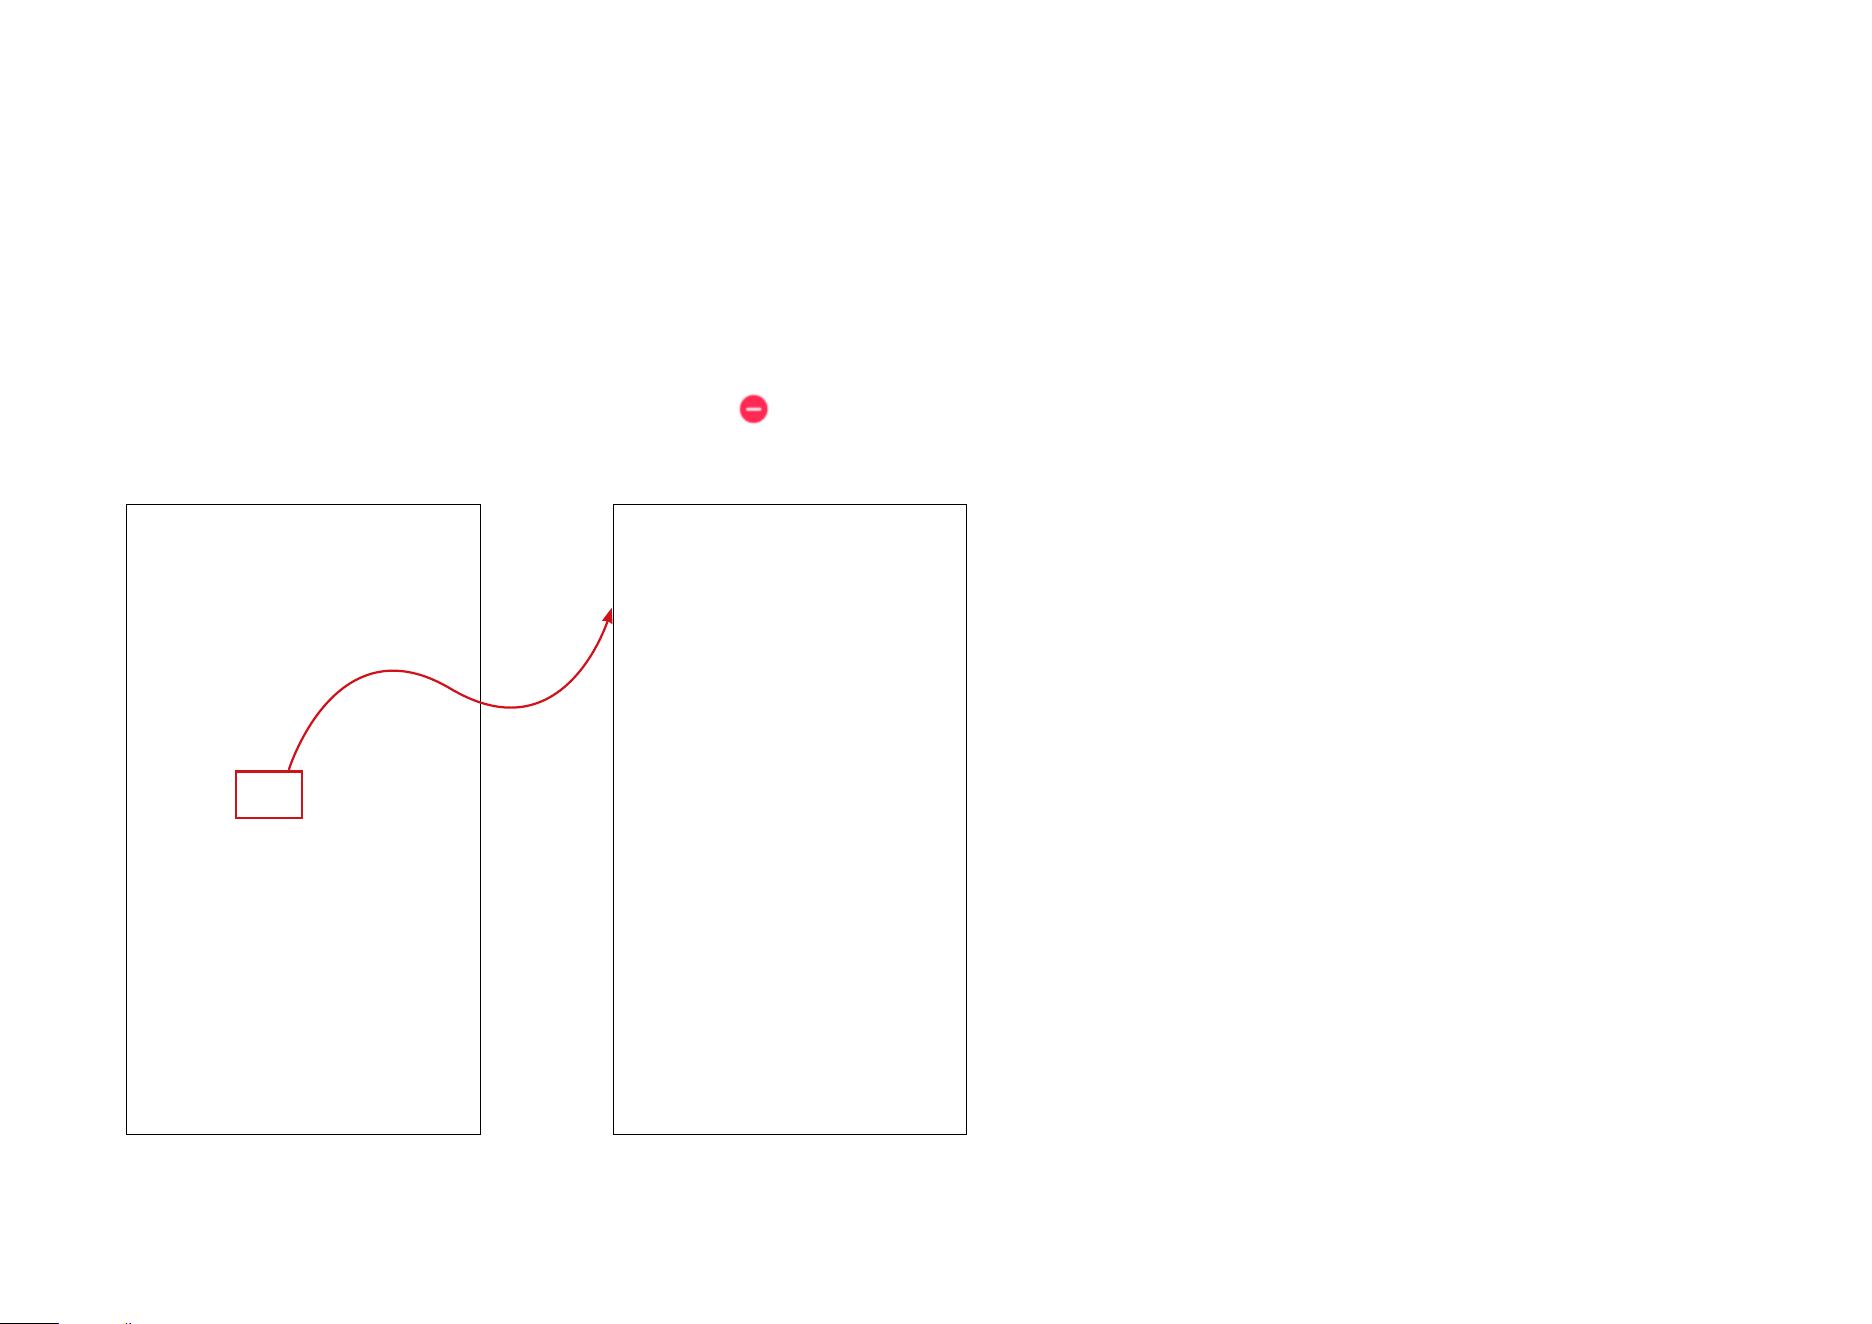
33
Remove Your Door Lock
There are 3 ways to remove your door lock.
Method 1. Remove Device on the Home Page
Long press your device on the Home page and tap
.

34
Method 2. Remove Device on the Settings Page
Tap Remove Lock on the Settings page.
35
Method 3. Press the Reset Button on the Device
Remove the battery cover and press and hold for 10 seconds to reset to factory default settings.
Pressing and holding for 5 seconds will reset Wi-Fi and keep other settings.
Reset Button

36
Authentication
FCC compliance information statement
Product Name: Tapo Smart Wi-Fi Door Lock
Model Number: Tapo DL110
Responsible Party:
TP-Link Systems Inc.
Address: 10 Mauchly, Irvine, CA 92618
Website: https://www.tp-link.com/us/
Tel: +1 626 333 0234
Fax: +1 909 527 6804
E-mail: [email protected]om
This equipment has been tested and found to comply with the limits for a Class B digital device, pursuant to part 15 of the FCC Rules. These limits are
designed to provide reasonable protection against harmful interference in a residential installation. This equipment generates, uses and can radiate
radio frequency energy and, if not installed and used in accordance with the instructions, may cause harmful interference to radio communications.
However, there is no guarantee that interference will not occur in a particular installation. If this equipment does cause harmful interference to radio
or television reception, which can be determined by turning the equipment off and on, the user is encouraged to try to correct the interference by
one or more of the following measures:
• Reorient or relocate the receiving antenna.
• Increase the separation between the equipment and receiver.
• Connect the equipment into an outlet on a circuit different from that to which the receiver is connected.
• Consult the dealer or an experienced radio/ TV technician for help.
This device complies with part 15 of the FCC Rules. Operation is subject to the following two conditions:
1. This device may not cause harmful interference.

37
2. This device must accept any interference received, including interference that may cause undesired operation.
Any changes or modifications not expressly approved by the party responsible for compliance could void the user’s authority to operate the
equipment.
Note: The manufacturer is not responsible for any radio or TV interference caused by unauthorized modifications to this equipment. Such modifications
could void the user’s authority to operate the equipment.
FCC RF Radiation Exposure Statement
This equipment complies with FCC RF radiation exposure limits set forth for an uncontrolled environment. This device and its antenna must not be
co-located or operating in conjunction with any other antenna or transmitter.
“To comply with FCC RF exposure compliance requirements, this grant is applicable to only Mobile Configurations. The antennas used for this
transmitter must be installed to provide a separation distance of at least 20 cm from all persons and must not be co-located or operating in conjunction
with any other antenna or transmitter.”
We, TP-Link Systems Inc., has determined that the equipment shown as above has been shown to comply with the applicable technical standards,
FCC part 15. There is no unauthorized change is made in the equipment and the equipment is properly maintained and operated.
Issue Date: 2024-09-11

38
Canadian Compliance Statement
This device contains licence-exempt transmitter(s)/receiver(s) that comply with Innovation, Science and Economic Development Canada’s licence-
exempt RSS(s). Operation is subject to the following two conditions:
1. This device may not cause interference.
2. This device must accept any interference, including interference that may cause undesired operation of the device.
L’émetteur/récepteur exempt de licence contenu dans le présent appareil est conforme aux CNR d’Innovation, Sciences et Développement
économique Canada applicables aux appareils radio exempts de licence. L’exploitation est autorisée aux deux conditions suivantes :
1. l’appareil ne doit pas produire de brouillage;
2. l’utilisateur de l’appareil doit accepter tout brouillage radioélectrique subi, meme si le brouillage est susceptible d’en compromettre le fonctionnement
Radiation Exposure Statement:
This equipment complies with IC radiation exposure limits set forth for an uncontrolled environment. This equipment should be installed and operated
with minimum distance 20cm between the radiator & your body.
Déclaration d’exposition aux radiations:
Cet équipement est conforme aux limites d’exposition aux rayonnements IC établies pour un environnement non contrôlé. Cet équipement doit être
installé et utilisé avec un minimum de 20 cm de distance entre la source de rayonnement et votre corps.
Industry Canada Statement
CAN ICES-3 (B)/NMB-3(B)
Safety Information
• Never touch the product with wet hands.
• Do not disassemble, repair or modify the product.
• Do not use the device where wireless devices are not allowed.
• Do not use the product if the casing has been broken. Danger of electric shock.
• Keep the device away from fire or hot environments. DO NOT immerse in water or any other liquid.
• Do not place near automatically controlled devices such as fire alarms. Radio waves emitted from this product may cause such devices to
malfunction resulting in an accident.

39
• Observe restrictions on using wireless products in fuel depots, chemical plants or when blasting operations are in progress.
• Do not use liquid to clean the product. Only use a dry cloth.
• Never put metal objects inside the product. If a metal object enters the product turn off the circuit breaker and contact an authorised electrician.
• This product is not intended to be used when providing medical care. Consult the manufacturer of any personal medical devices, such as
pacemakers or hearing aids to determine if they are adequality shielded from external RF (radio frequency) energy.
• Do not use this product in health care facilities. Hospitals or health care facilities may be using equipment that could be sensitive to external RF
energy.
• Do not use this product near water for example near a bath tub, wash bowl, kitchen sink or laundry tub, in a wet basement or near a swimming
pool.
• The product should be kept free from excessive smoke, dust or high temperature and vibration.
• This product should not be exposed to direct sunlight
• Do not place heavy objects on top of the product.
• This product may interfere with other electronic products such as TV, radios, personal computers, phones or other wireless devices.
• This equipment shall be installed at a height of fewer than 2 meters when sticking to a clean wall.
• Interior Assembly Operating Temperature: -10 °C ~ 55°C (14°F ~ 131°F)
• Exterior Assembly Operating Temperature: -30 °C ~ 70°C (-22°F ~ 158°F)
CAUTION!
Avoid replacement of a battery with an incorrect type that can defeat a safeguard.
Avoid disposal of a battery into re or a hot oven, or mechanically crushing or cutting of a battery, that can result in an explosion.
Do not leave a battery in an extremely high temperature surrounding environment that can result in an explosion or the leakage of ammable
liquid or gas.
Do not leave a battery subjected to extremely low air pressure that may result in an explosion or the leakage of ammable liquid or gas.
Please read and follow the above safety information when operating the device. We cannot guarantee that no accidents or damage will occur due to
improper use of the device. Please use this product with care and operate at your own risk.
40
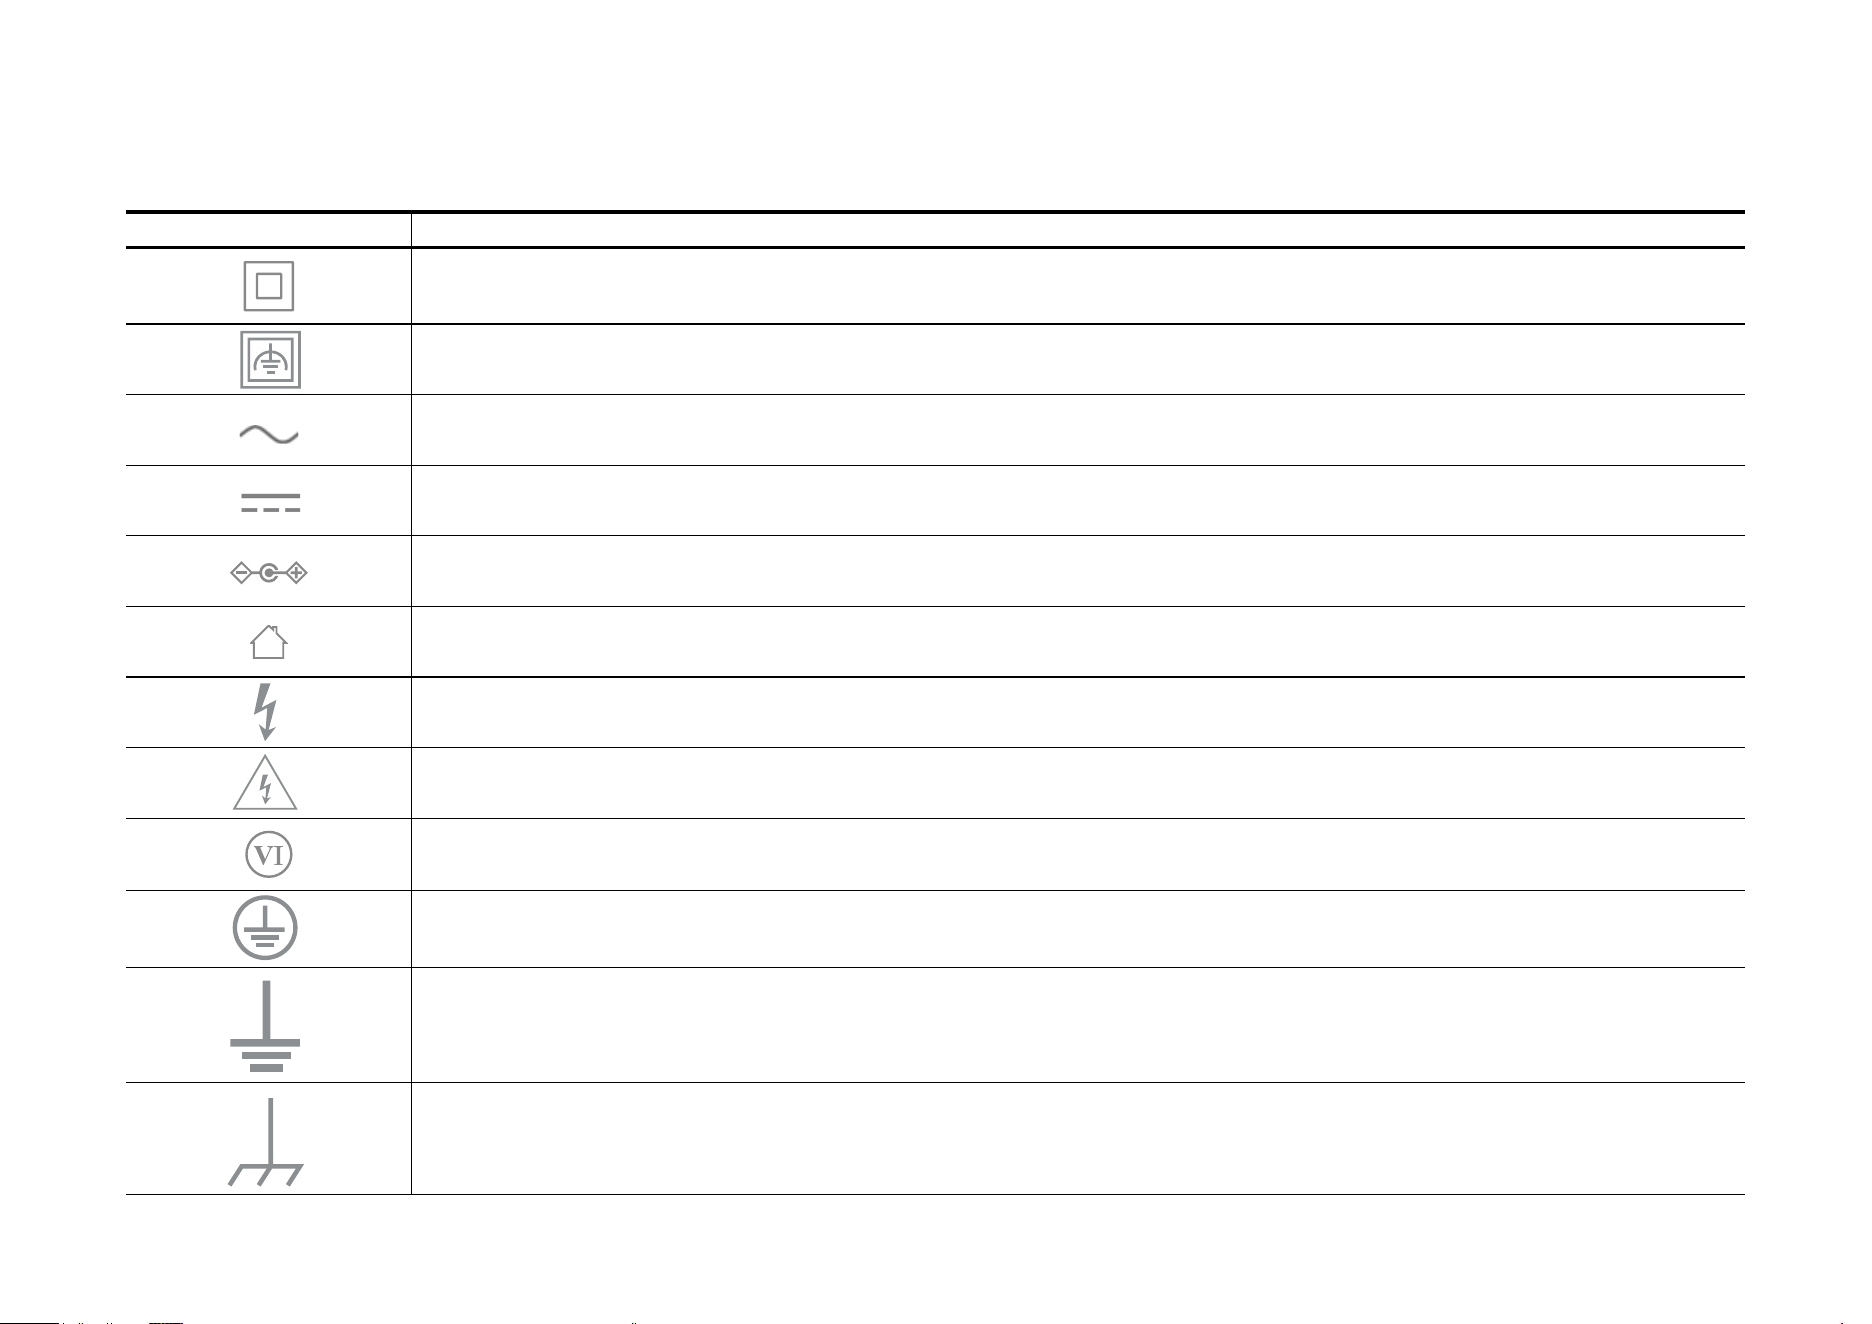
Explanation of the symbols on the product label
Note: The product label is on the bottom of the product. Symbols may vary from products.
Symbol Explanation
Class II equipment
Class II equipment with functional earthing
Alternating current
DC voltage
Polarity of output terminals
Indoor use only
Dangerous voltage
Caution, risk of electric shock
Energy efficiency Marking
Protective earth
Earth
Frame or chassis
41
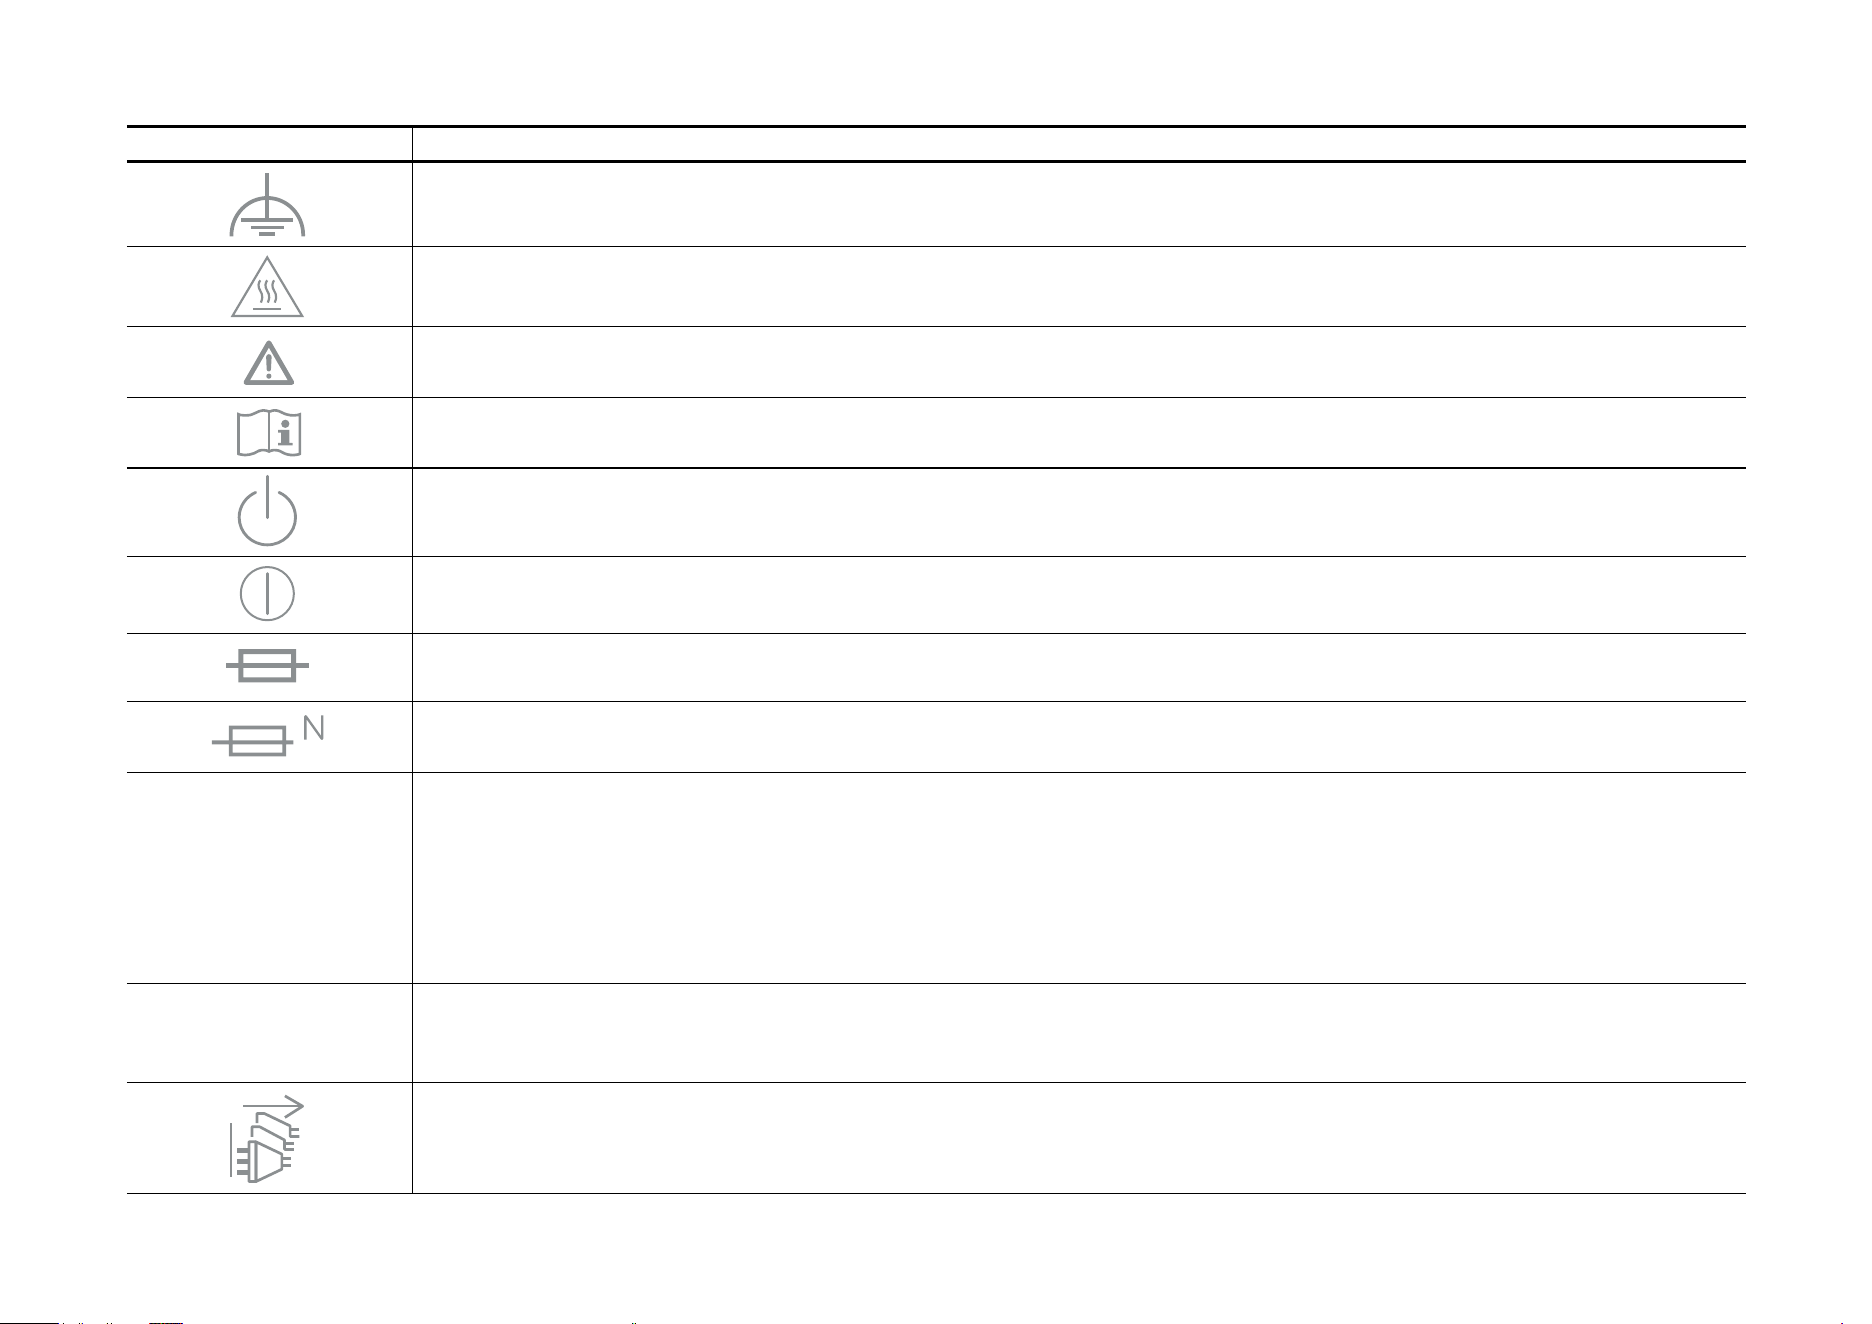
Symbol Explanation
Functional earthing
Caution, hot surface
Caution
Operator’s manual
Stand-by
“ON”/”OFF” (push-push)
Fuse
Fuse is used in neutral N
RECYCLING
This product bears the selective sorting symbol for Waste electrical and electronic equipment (WEEE). This means
that this product must be handled pursuant to European directive 2012/19/EU in order to be recycled or dismantled to
minimize its impact on the environment.
User has the choice to give his product to a competent recycling organization or to the retailer when he buys a new
electrical or electronic equipment.
Caution, avoid listening at high volume levels for long periods
Disconnection, all power plugs

42
Symbol Explanation
m Switch of mini-gap construction
µ
Switch of micro-gap construction (for US version)
Switch of micro-gap / micro-disconnection construction (for other versions except US)
ε Switch without contact gap (Semiconductor switching device)