Eagle Foodservice Equipment, Eagle MHC, and SpecFAB
®
are divisions of Eagle Group. ©2023 by the Eagle Group
• 100 Industrial Boulevard, Clayton, Delaware 19938-8903 U.S.A.
• Phone: 302/653-3000 • 800/441-8440 • Fax: 302/653-2065
• www.eaglegrp.com • www.eaglegrpnews.com • www.eaglemhc.com
(continued on page 2)
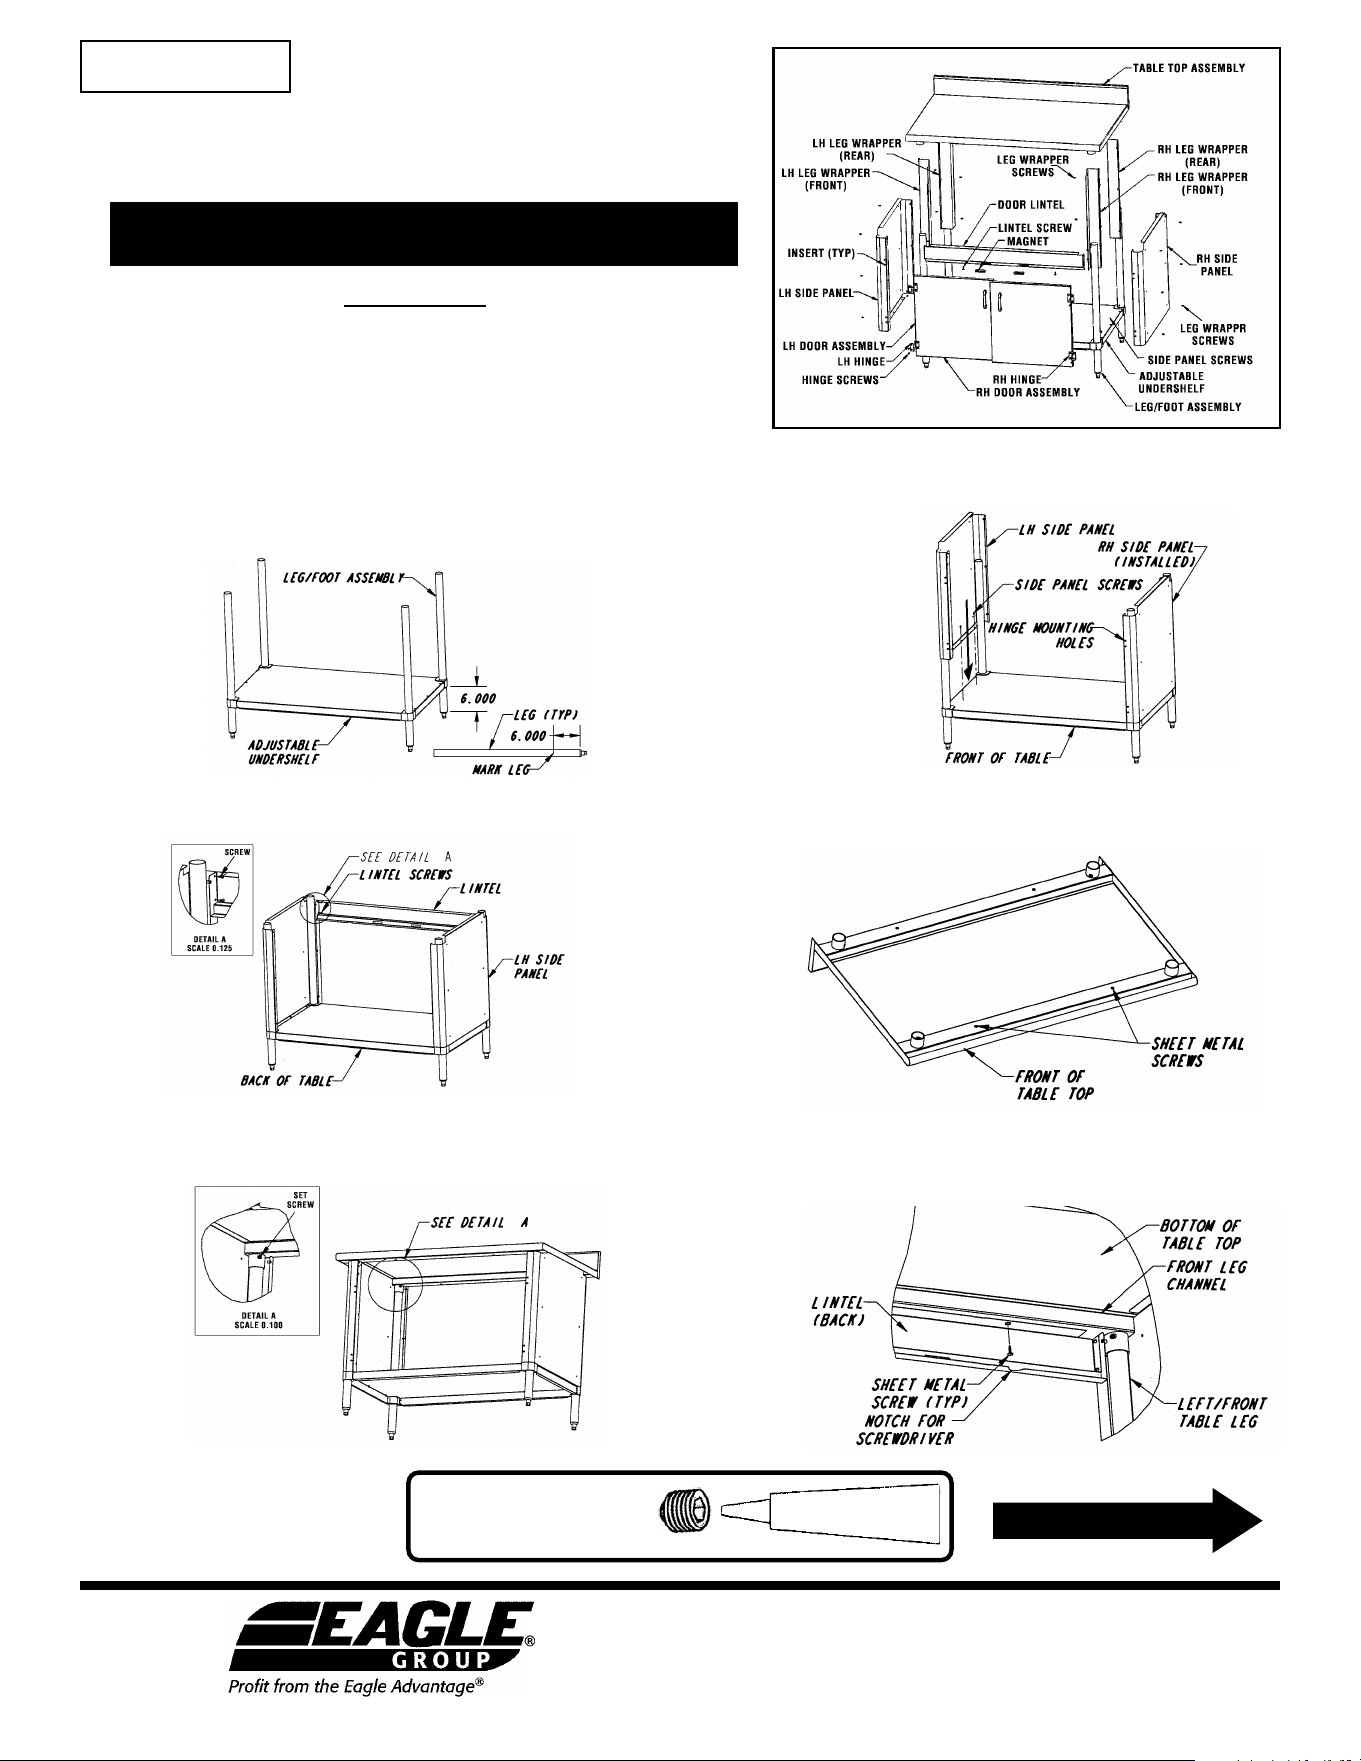
INSTALLATION INSTRUCTIONS
Table with Cabinet Kit –
Hinged Doors
EG10005 Revised 03/23
CAUTION
I
NSPECT CONTENTS IMMEDIATELY AND FILE CLAIM
WITH DELIVERING CARRIER FOR ANY DAMAGE.
SAVE YOUR BOX AND ALL PACKING MATERIALS.
YOU ARE RESPONSIBLE FOR DAMAGE TO YOUR UNIT
IF RETURNED IMPROPERLY PACKED
.
(1) With set screws* provided, attach leg/foot assemblies to the
adjustable undershelf. Leave 6” from the bottom of casting to
bottom of leg (as shown).
(3) Attach lintel with screws at the designated areas.
(5) Secure table top to legs by tightening set screw* with allen
(hex) wrench. Typical (4) places (lintel not shown for clarity).
(6) Re-install the sheet metal screws thru the designated
holes in the lintel. The holes should match with leg channel
holes (diagram shows back side of lintel).
(2) Slide side panels over leg/foot assemblies and attach
with screws.
(4) Remove sheet metal screws from the front table top
channel only (save screws for later reinstallment).
INSTRUCTION SHEET
#346310
Set screws must be filled
with NSF-approved sealant.
* To meet NSF standards:
*
set screw
NSF-approved sealant.
2
(continued from front page)
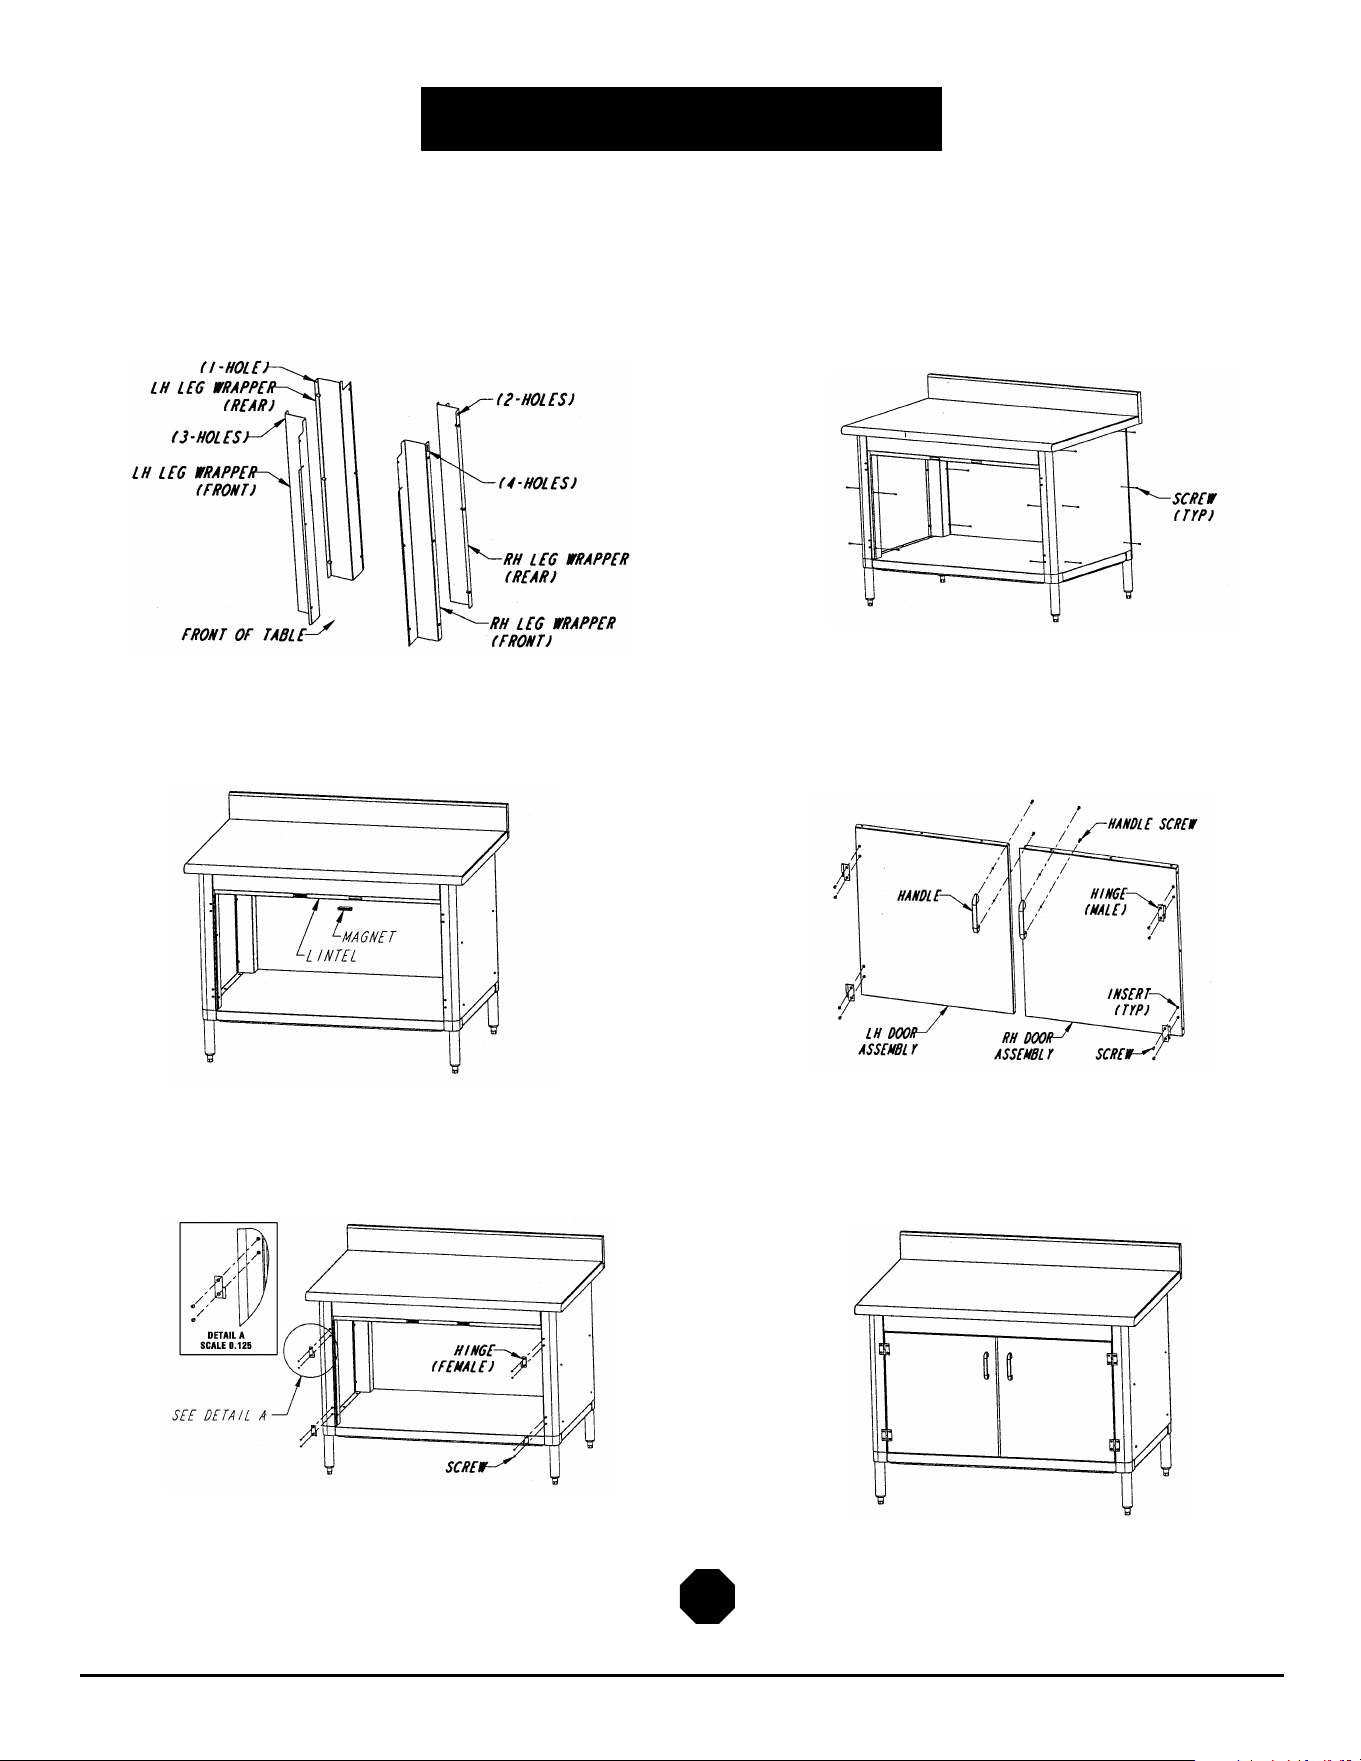
ASSEMBLY INSTRUCTIONS
Table with Cabinet Kit – Hinged Doors
(7) Determine leg wrapper positions according to hole
designations. Diagram shows how they would appear
under the table top.
(8) Diagram shows all leg wrappers in place with screw
placements. Six screws secure each leg wrapper
(some screws not shown).
(9) Magnets snap-in to lintel cutouts from the front (left magnet
shown installed).
(10) Attach the door handles with the screws (pre-installed).
Attach (pin) hinges to inserts with screws so that the
pin faces down.
(11) Install (female) hinges to side panel inserts (female adapter
should be on the bottom).
(12) Install right and left hand door assemblies by sliding
(male) pinned hinges on doors to female hinges on
side panels.
(End)
(5) Remove sheet metal screws from the front
tabletop channel only.
(6) Secure table top to legs by tightening set screw* with allen
(hex) wrench. Typical (4) places (lintel not shown for clarity).
3
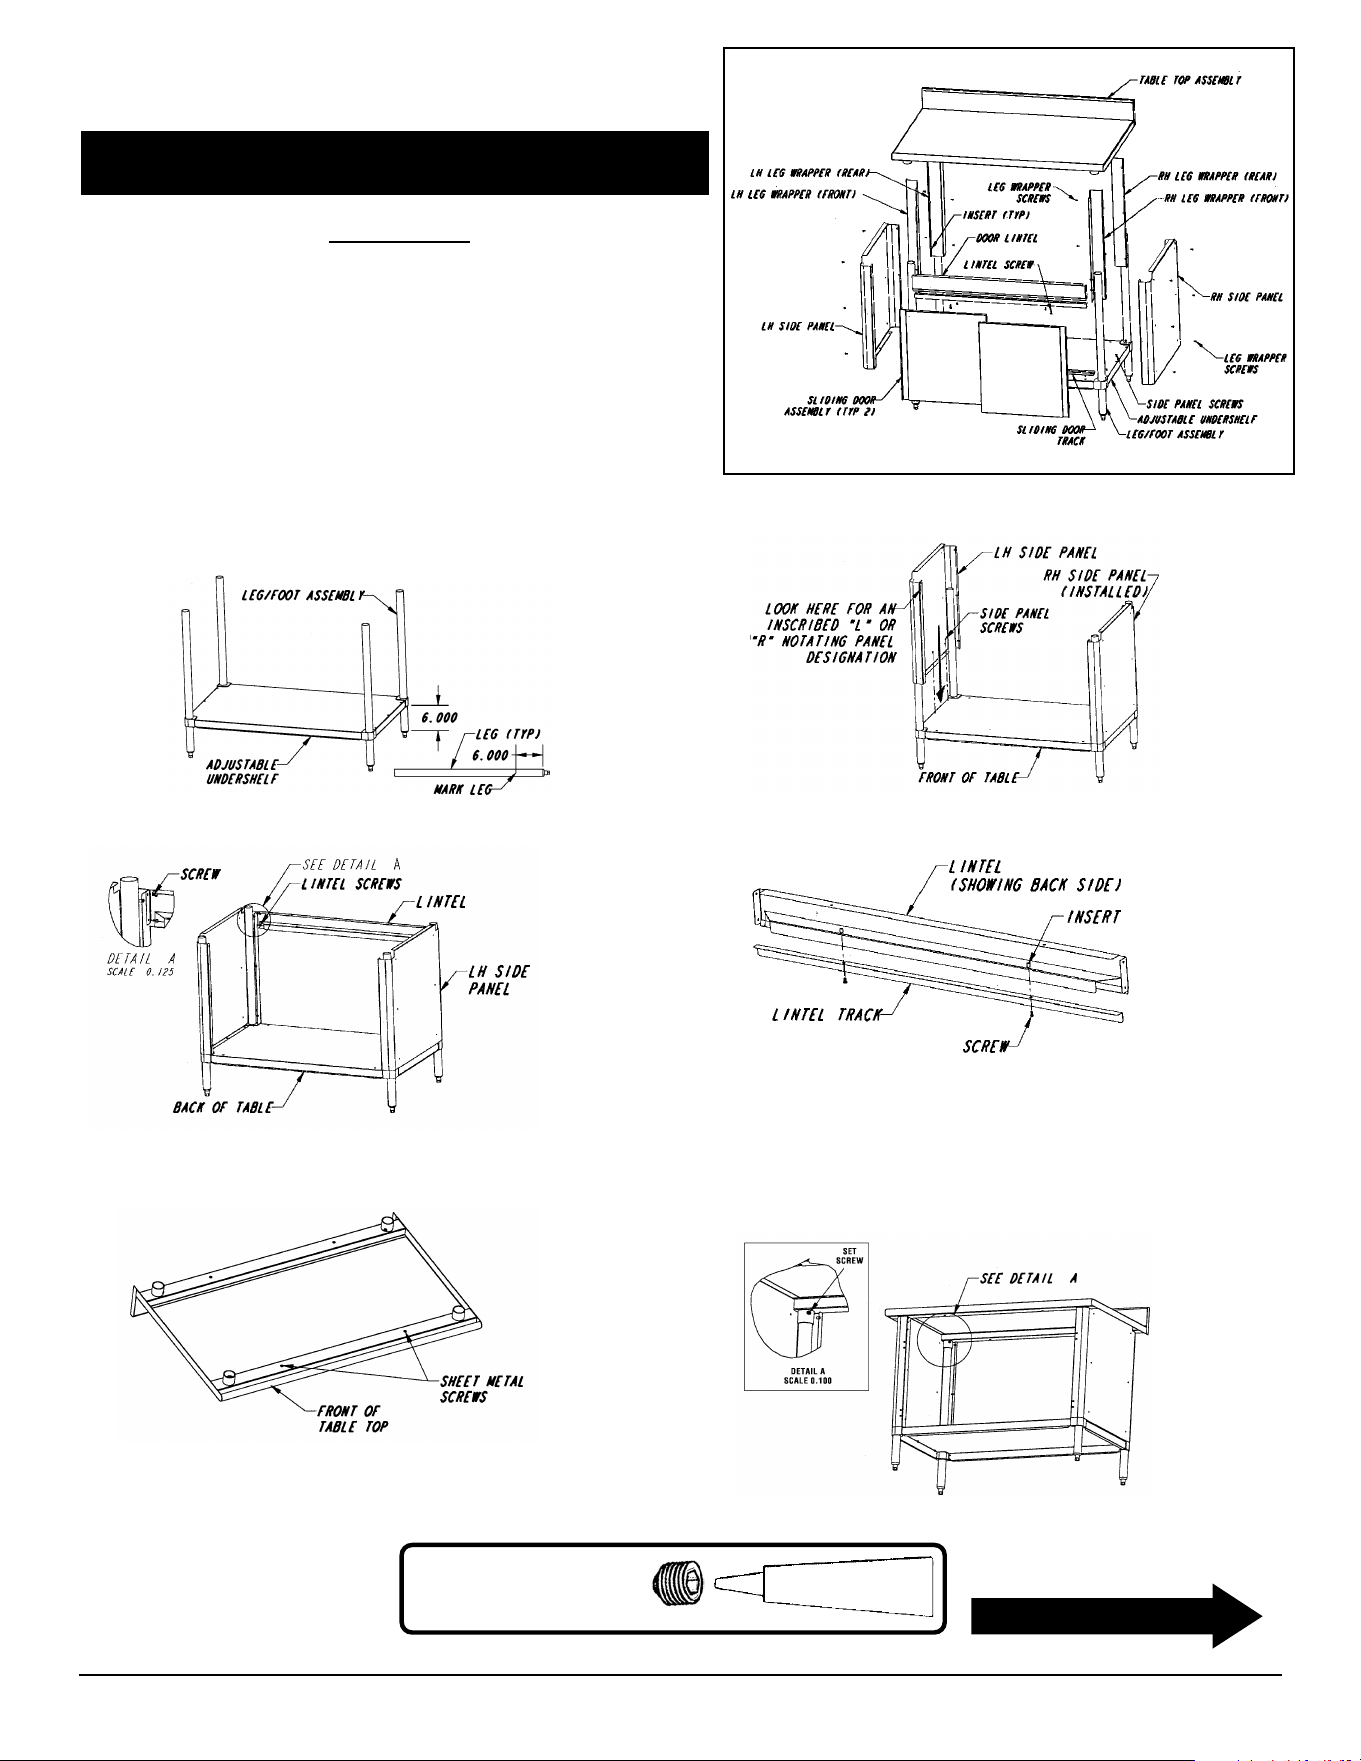
INSTALLATION INSTRUCTIONS
Table with Cabinet Kit –
Sliding Doors
CAUTION
INSPECT CONTENTS IMMEDIATELY AND FILE CLAIM
WITH DELIVERING CARRIER FOR ANY DAMAGE.
SAVE YOUR BOX AND ALL PACKING MATERIALS.
YOU ARE RESPONSIBLE FOR DAMAGE TO YOUR
UNIT IF RETURNED IMPROPERLY PACKED
.
(1) With set screws* provided, attach leg/foot assemblies to the
adjustable undershelf. Leave 6˝ from the bottom of casting to
bottom of leg (as shown).
(3) Attach lintel with screws at the designated areas. (4) Attach lintel track to lintel with screws.
(continued on back page)
(2) Slide side panels over leg/foot assemblies and
attach with screws.
Set screws must be filled
with NSF-approved sealant.
* To meet NSF standards:
*
set screw
NSF-approved sealant.
Eagle Foodservice Equipment, Eagle MHC, and SpecFAB
®
are divisions of Eagle Group. ©2023 by the Eagle Group
• 100 Industrial Boulevard, Clayton, Delaware 19938-8903 U.S.A.
• Phone: 302/653-3000 • 800/441-8440 • Fax: 302/653-2065
• www.eaglegrp.com • www.eaglegrpnews.com • www.eaglemhc.com
(continued from page 3)
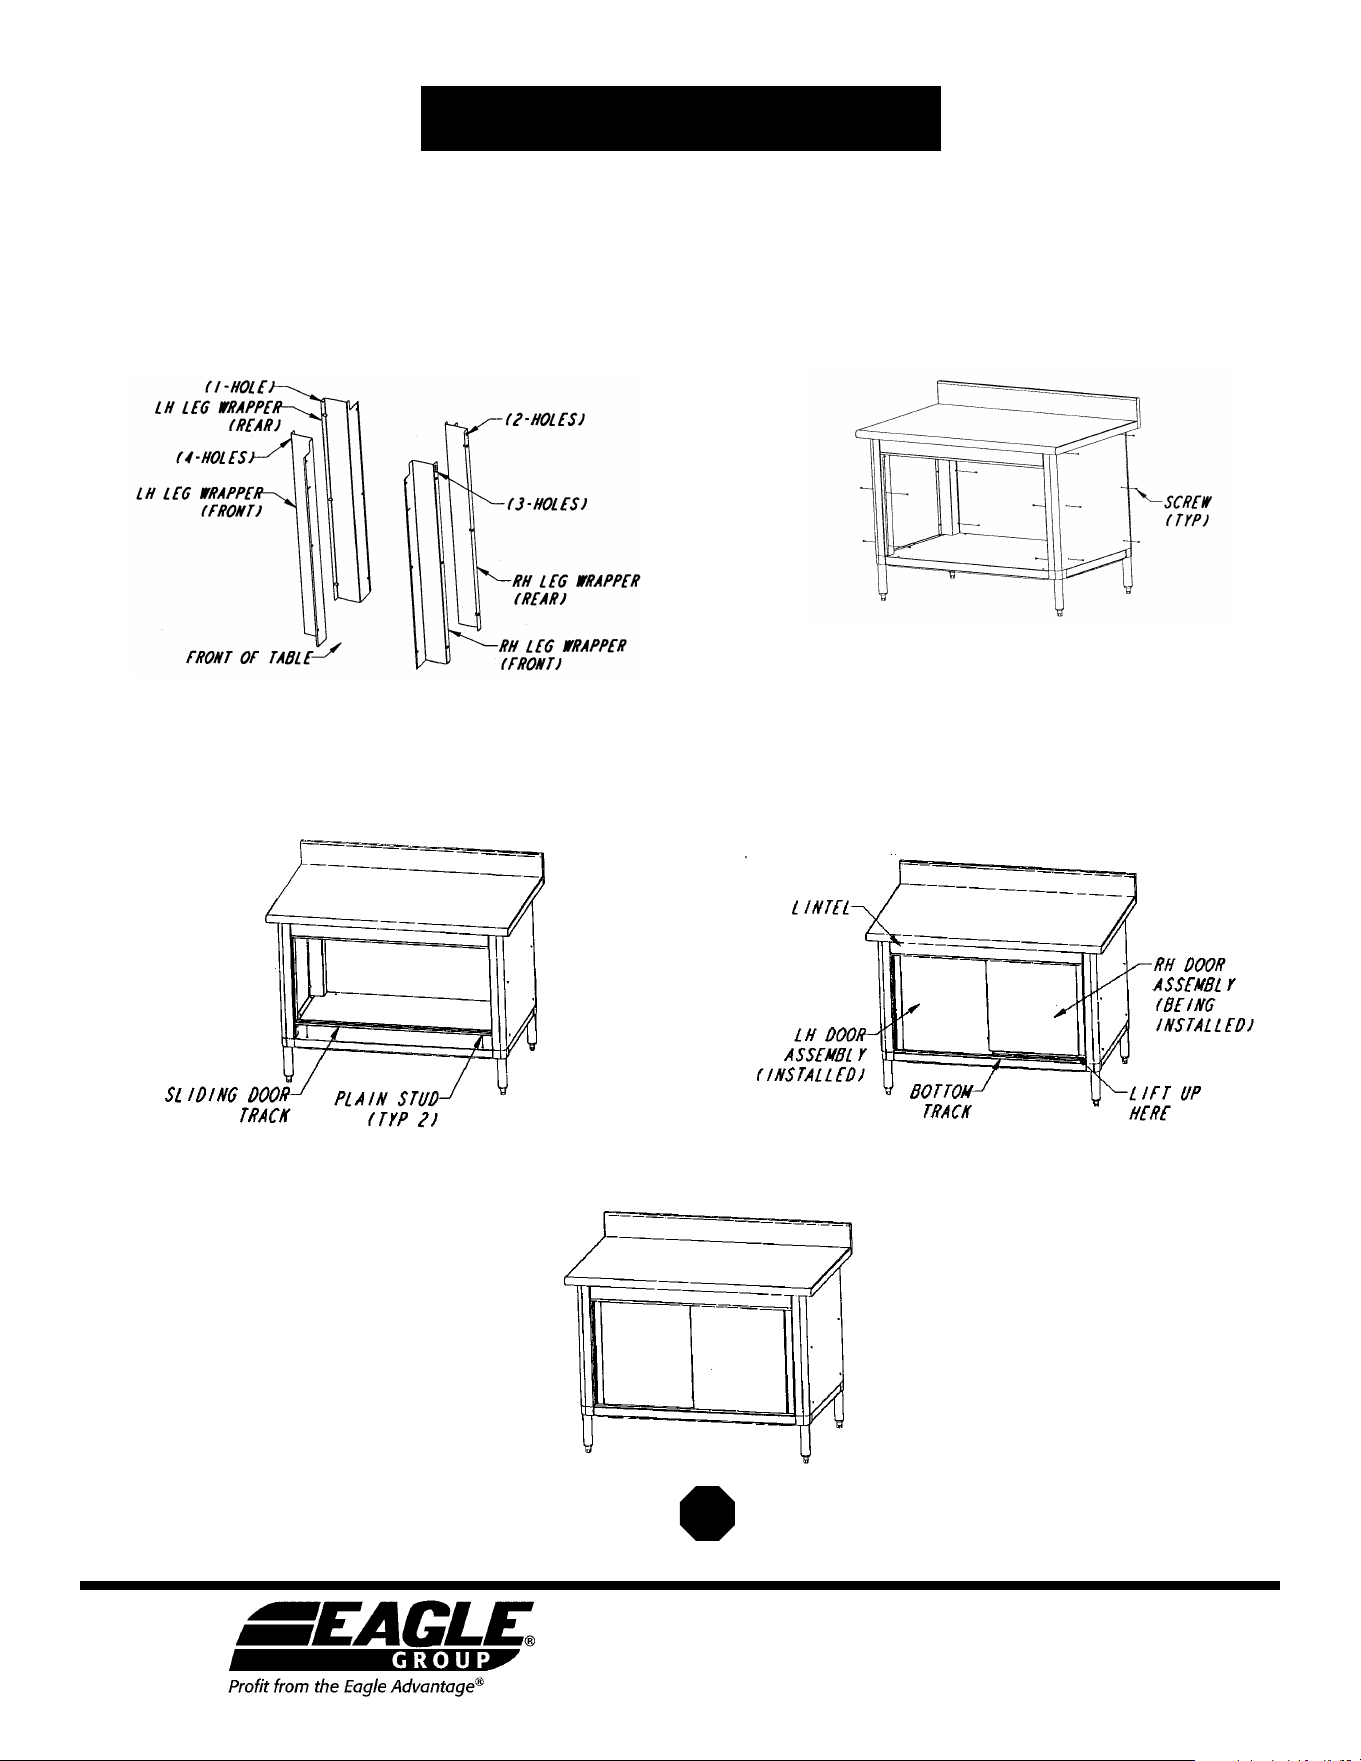
ASSEMBLY INSTRUCTIONS
Table with Cabinet Kit – Sliding Doors
(7) Determine leg wrapper positions according to hole
designations. Diagram shows how they would appear
under the tabletop.
(8) Diagram shows all leg wrappers in place with screw
placements. Six screws secure each leg wrapper
(some screws not shown).
(9) Install sliding door track by placing the plain stud
(pre-installed on track) in the predrilled holes of the
adjustable undershelf.
(10) Install sliding doors by placing them behind the lintel
into their separate tracks. Lift up on the bottom of the
door to clear bottom track and place in corresponding
track. (Place door in rear track first.)
Assembly is complete.
(End)