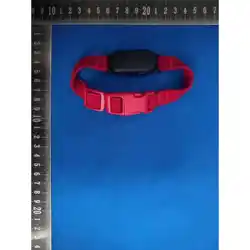

Meowarykey
User Manual
Product Name
Meowarykey
Model
1.0
Document Version
V1.0
Release Date
August 6, 2026
⚠ Please read this manual carefully before use and keep it for
future reference.

1 Safety Precautions
To ensure your beloved pet's safe and comfortable use of this product, please
read the following safety precautions carefully before use.
⚠ Warning
• This product is intended for healthy adult cats only; it is not suitable for
kittens.
• Do not fasten the collar too tightly; leave enough room to insert two fingers,
so as not to restrict the cat's breathing or movement.
• The collar is not a toy. Do not let your cat chew or pull on it, to prevent
accidental ingestion of small parts.
• Use the original charging base when charging.
• Do not disassemble or repair the product yourself, as this may cause damage
or create a safety hazard.
⚠ Note

• Check the collar's fit and your cat's skin condition regularly; if you notice any
abnormality such as redness, swelling, or hair loss, remove the collar
immediately and consult a veterinarian.
• Keep the collar and its small accessories out of reach of infants and young
children.
• For first-time wearing, we recommend 2–4 hours per day initially, then
gradually increase the duration to help your cat adjust.
2 Product Overview
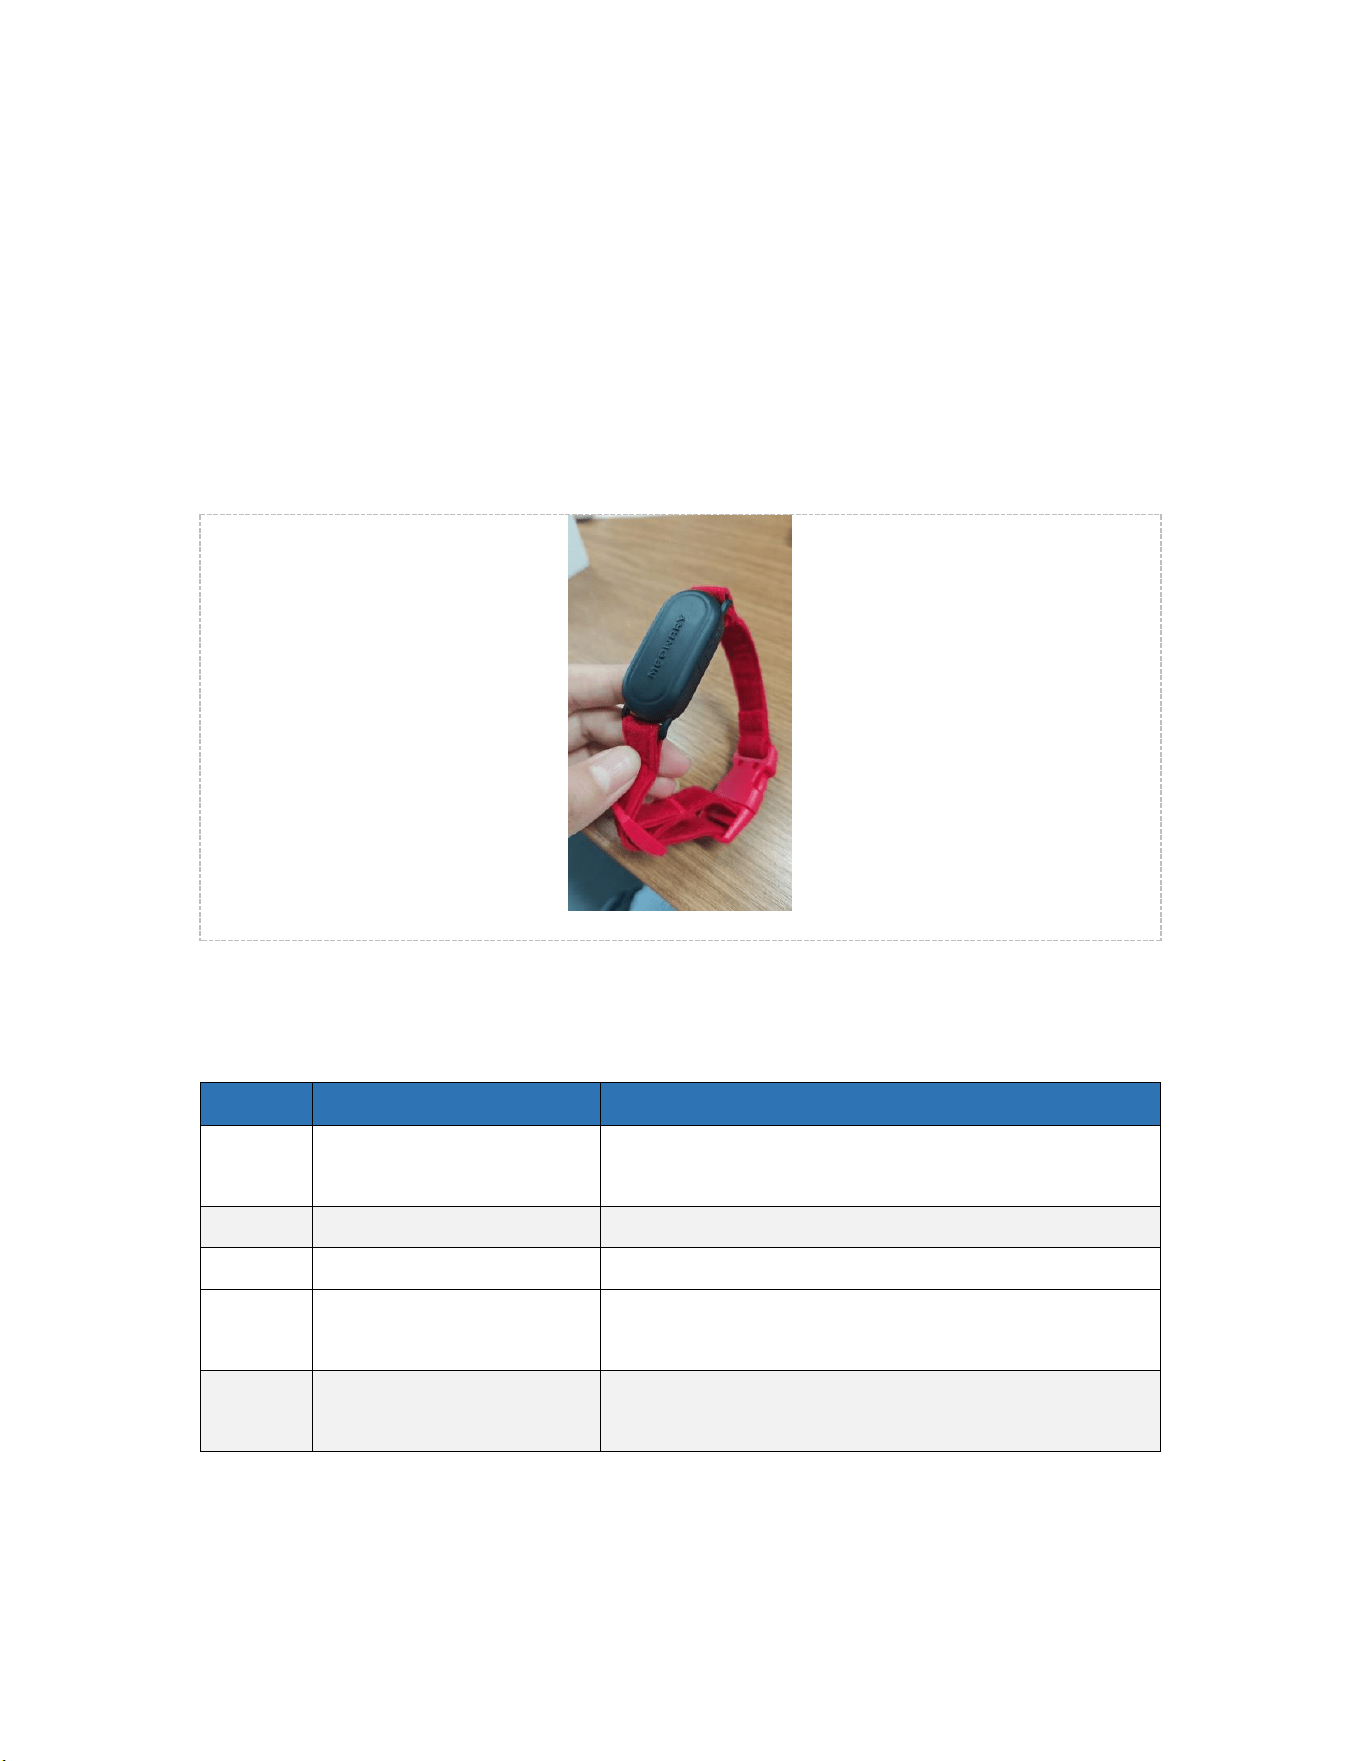
2.1 Appearance and Component Description
No.
Component Name
Function Description
①
Pairing Button
Press and hold for 5 seconds to enter pairing
mode
②
Status Indicator
Shows device working status (green/red)
③
QR Code Label
Used to scan and bind the device in the app
⑤
Pet Collar
Worn around the cat's neck; soft and skin-
friendly
⑥
Adjustment Buckle
Adjusts collar size to fit cats of different body
types
2.2 Indicator Light Status Description
Indicator
Location
Indicator Status
Color
Meaning
Collar
Green light
blinking
Green
Device is in pairing mode,
waiting for Bluetooth connection
Collar
No indicator
-
Normal operation / daily use
status (light off by default,
power-saving design)
Collar
Red light blinking
Red
Charging in progress
Collar
Red light solid
Red
Fully charged
Charging Base
White breathing
light blinking
White
Charging in progress
3 First-Time Use — Collar Binding Guide
This chapter walks you through the first-time binding of the collar step by step.
Please follow the steps in order.
3.1 Preparation Before Binding
• Make sure the collar has sufficient battery (we recommend fully charging it
before first use)
• Make sure Bluetooth is enabled on your phone
• Make sure you have a 2.4GHz WiFi network at home (5GHz WiFi is not
supported)
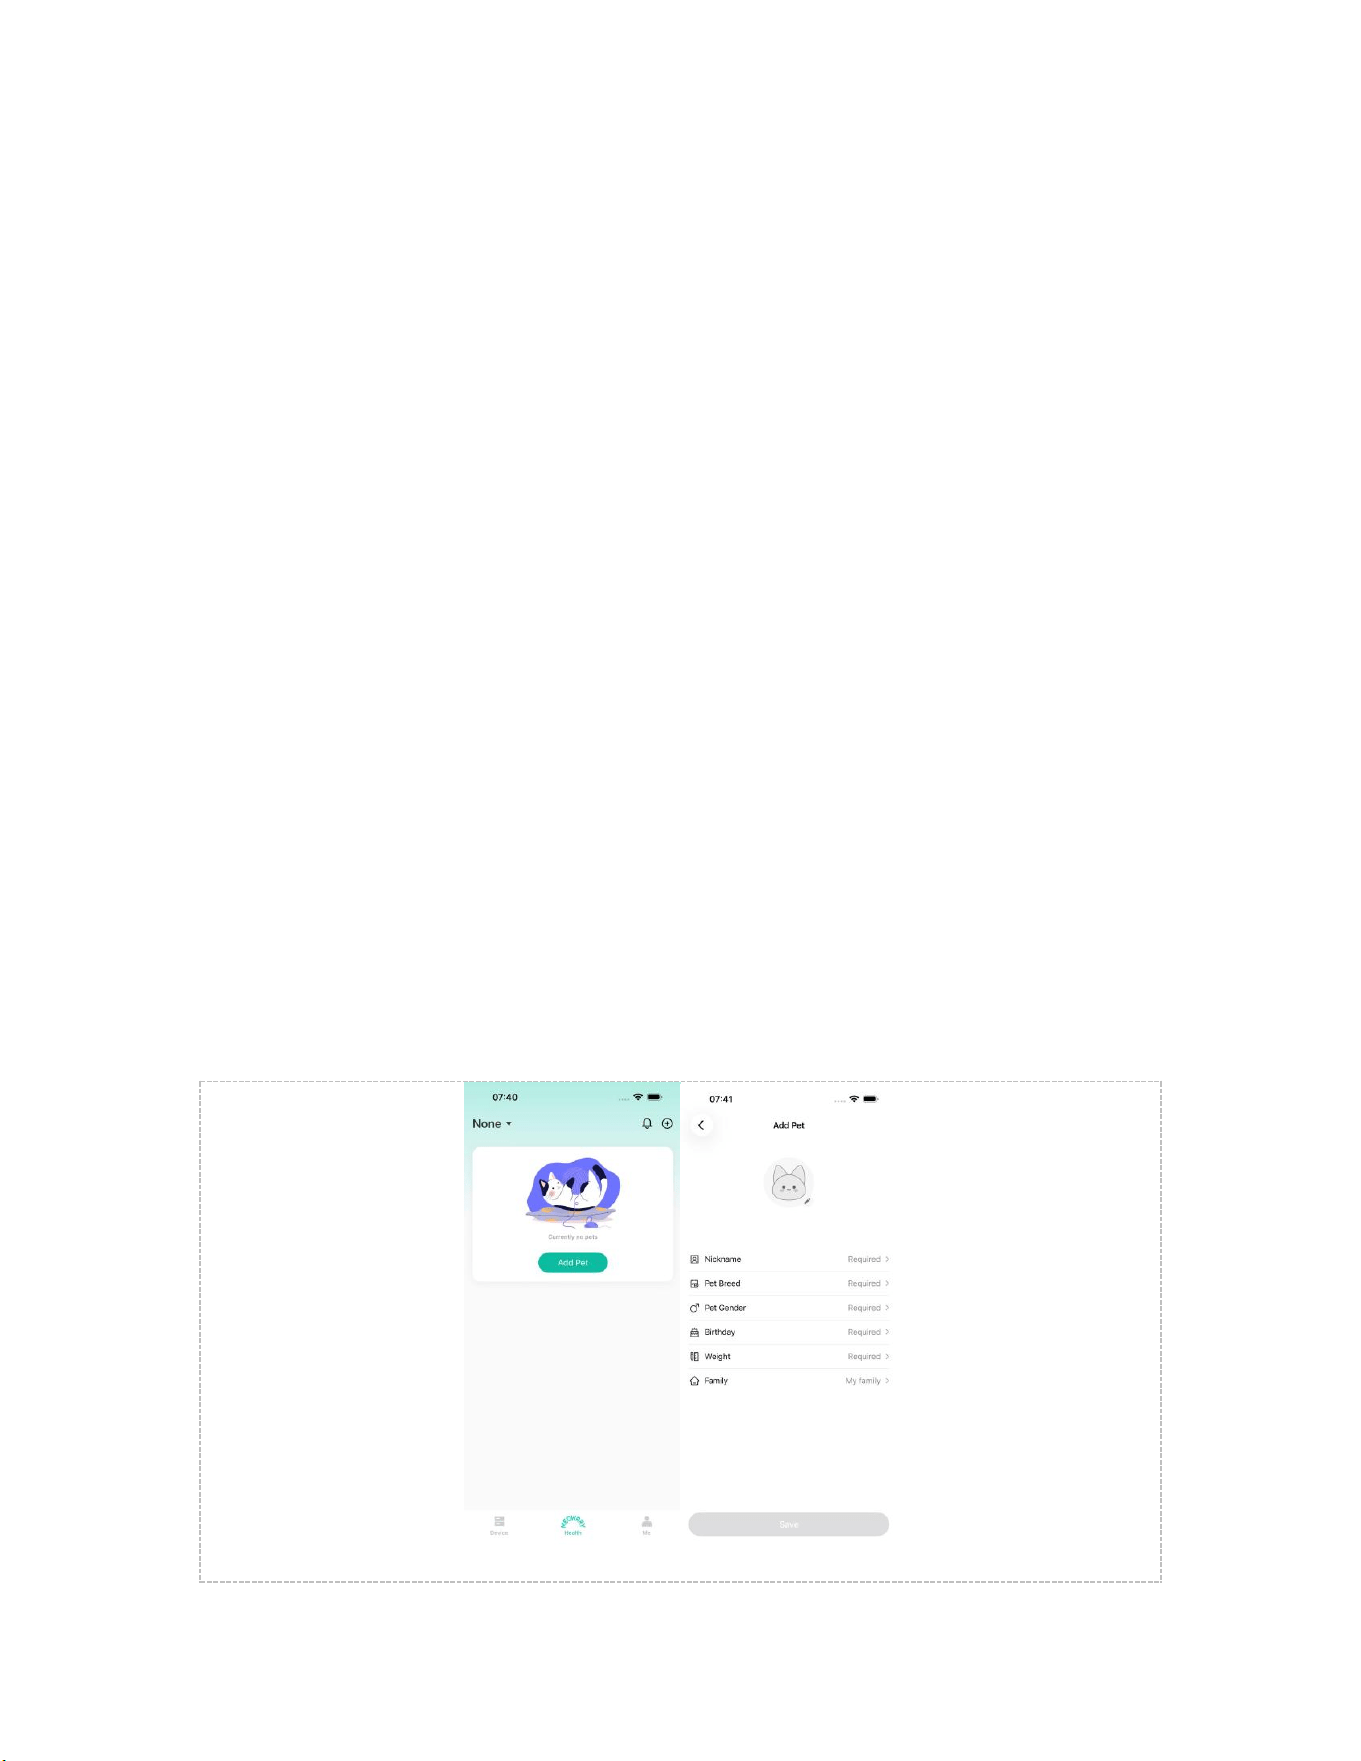
3.3 Step 2: Add Pet Information
Before binding the collar, please first add your pet's information in the app:
Steps:
• After logging into the app, tap the "Add Pet" button on the home screen
• Fill in the pet's basic information: name, gender, age, weight, breed, and
household information
• Upload a pet avatar
• Tap "Save" to finish adding the pet
💡 Tip: Accurately entering your pet's weight and other information helps produce more
precise health data analysis.

3.4 Step 3: Power On and Enter Pairing Mode
Steps:
• Locate the power button on the collar (on the front side of the collar)
• Press and hold the power button for 5 seconds until the indicator light turns
on
• Watch the indicator light: when the green light starts blinking, the device has
entered pairing mode
• Keep the collar powered on and proceed to the next step
⚠ Note:
• If the green light does not blink, press and hold for 5 seconds again, or check
whether the collar has enough battery
• Pairing mode lasts about 5 minutes; if it times out, power the collar on again
to re-enter pairing mode
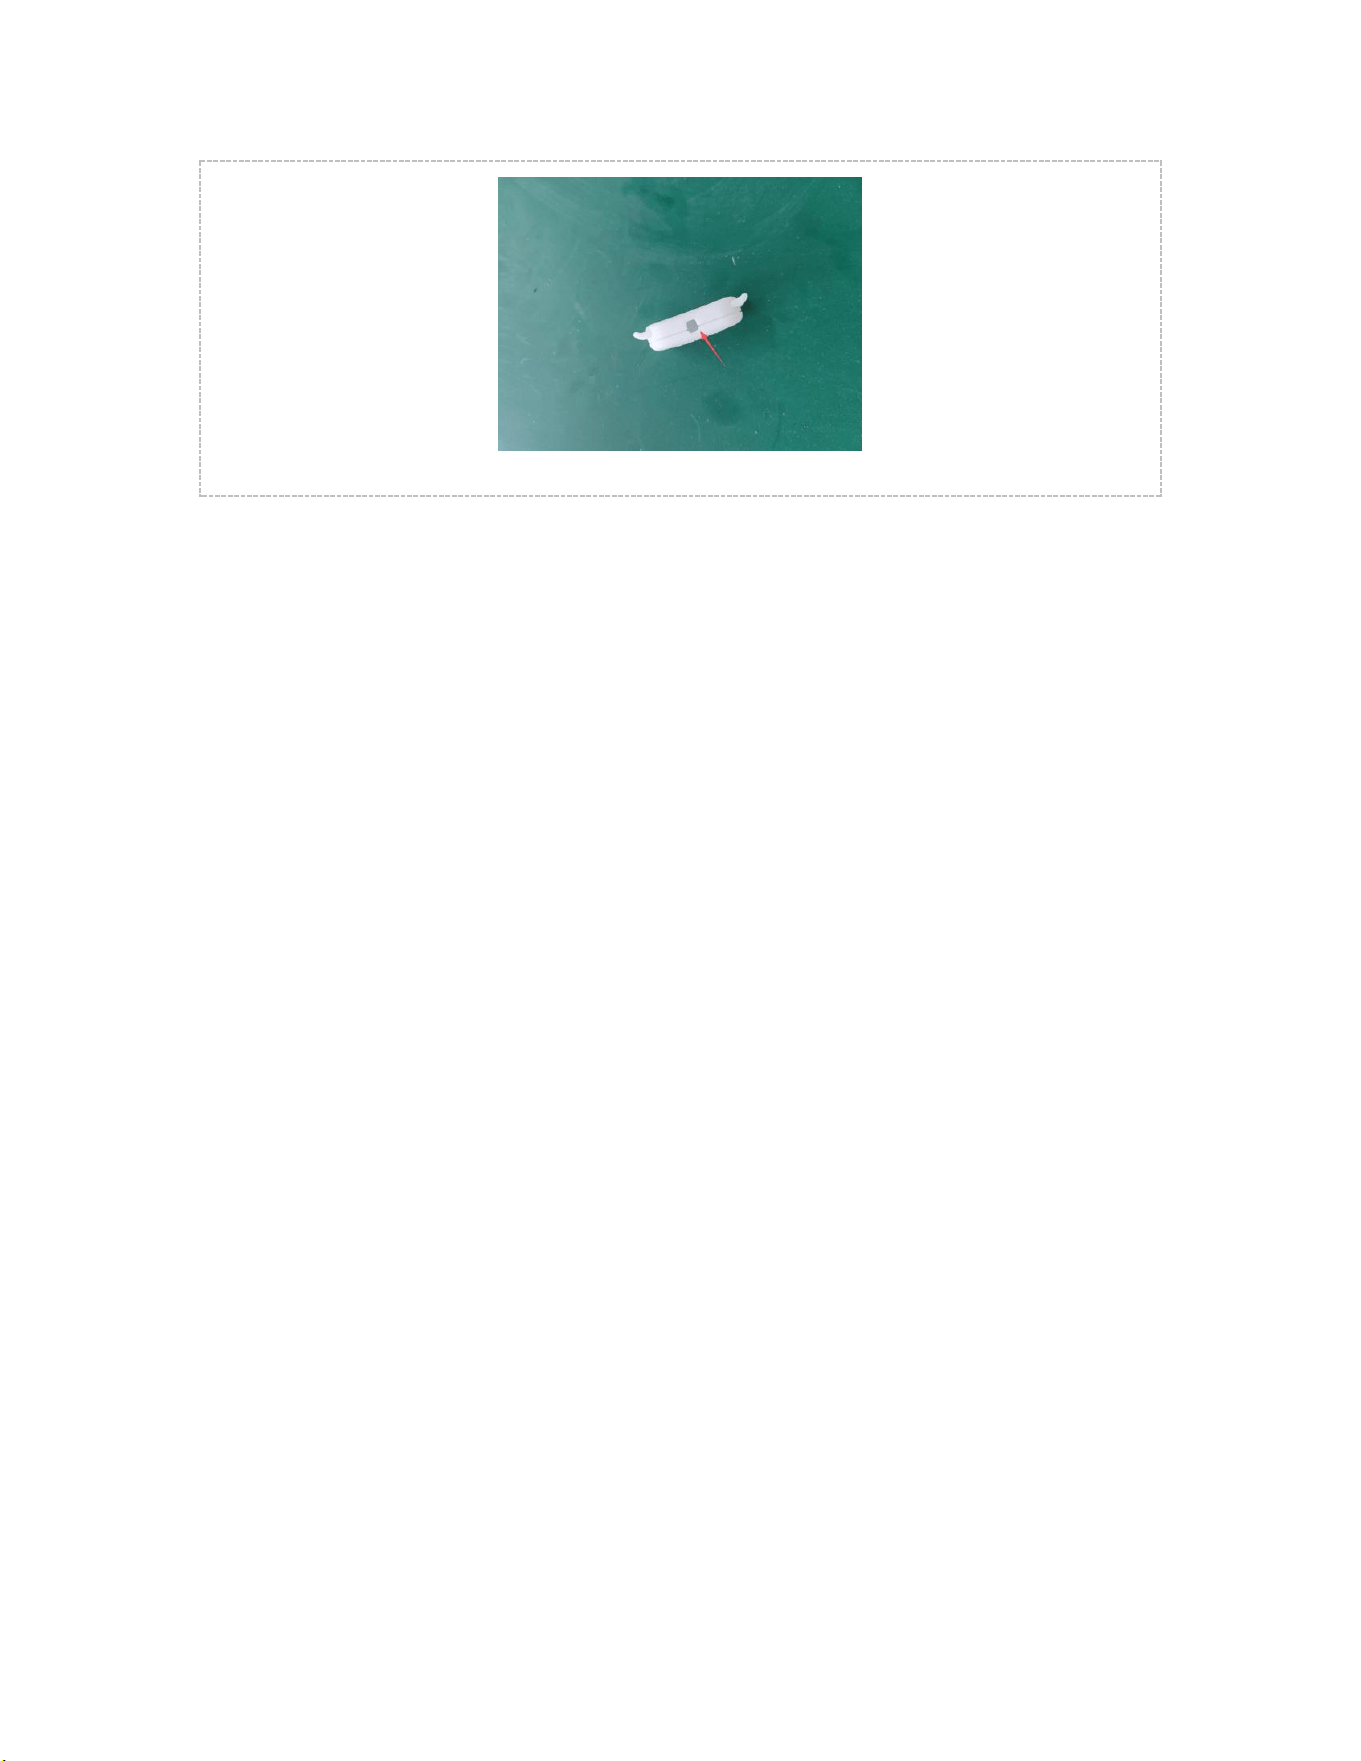
Figure 3-4 Illustration of pressing and holding the power button
3.5 Step 4: Scan to Bind the Collar (Bluetooth Connection)
Steps:
• Open the app, go to the "Device" page, and tap "Scan"
• Scan the QR code on the collar
• The app will automatically search for nearby collars via Bluetooth
• Once a device is found, tap the device name to bind your pet
💡 Tip: Make sure Bluetooth is enabled on your phone and keep the collar within 1 meter
of the phone.
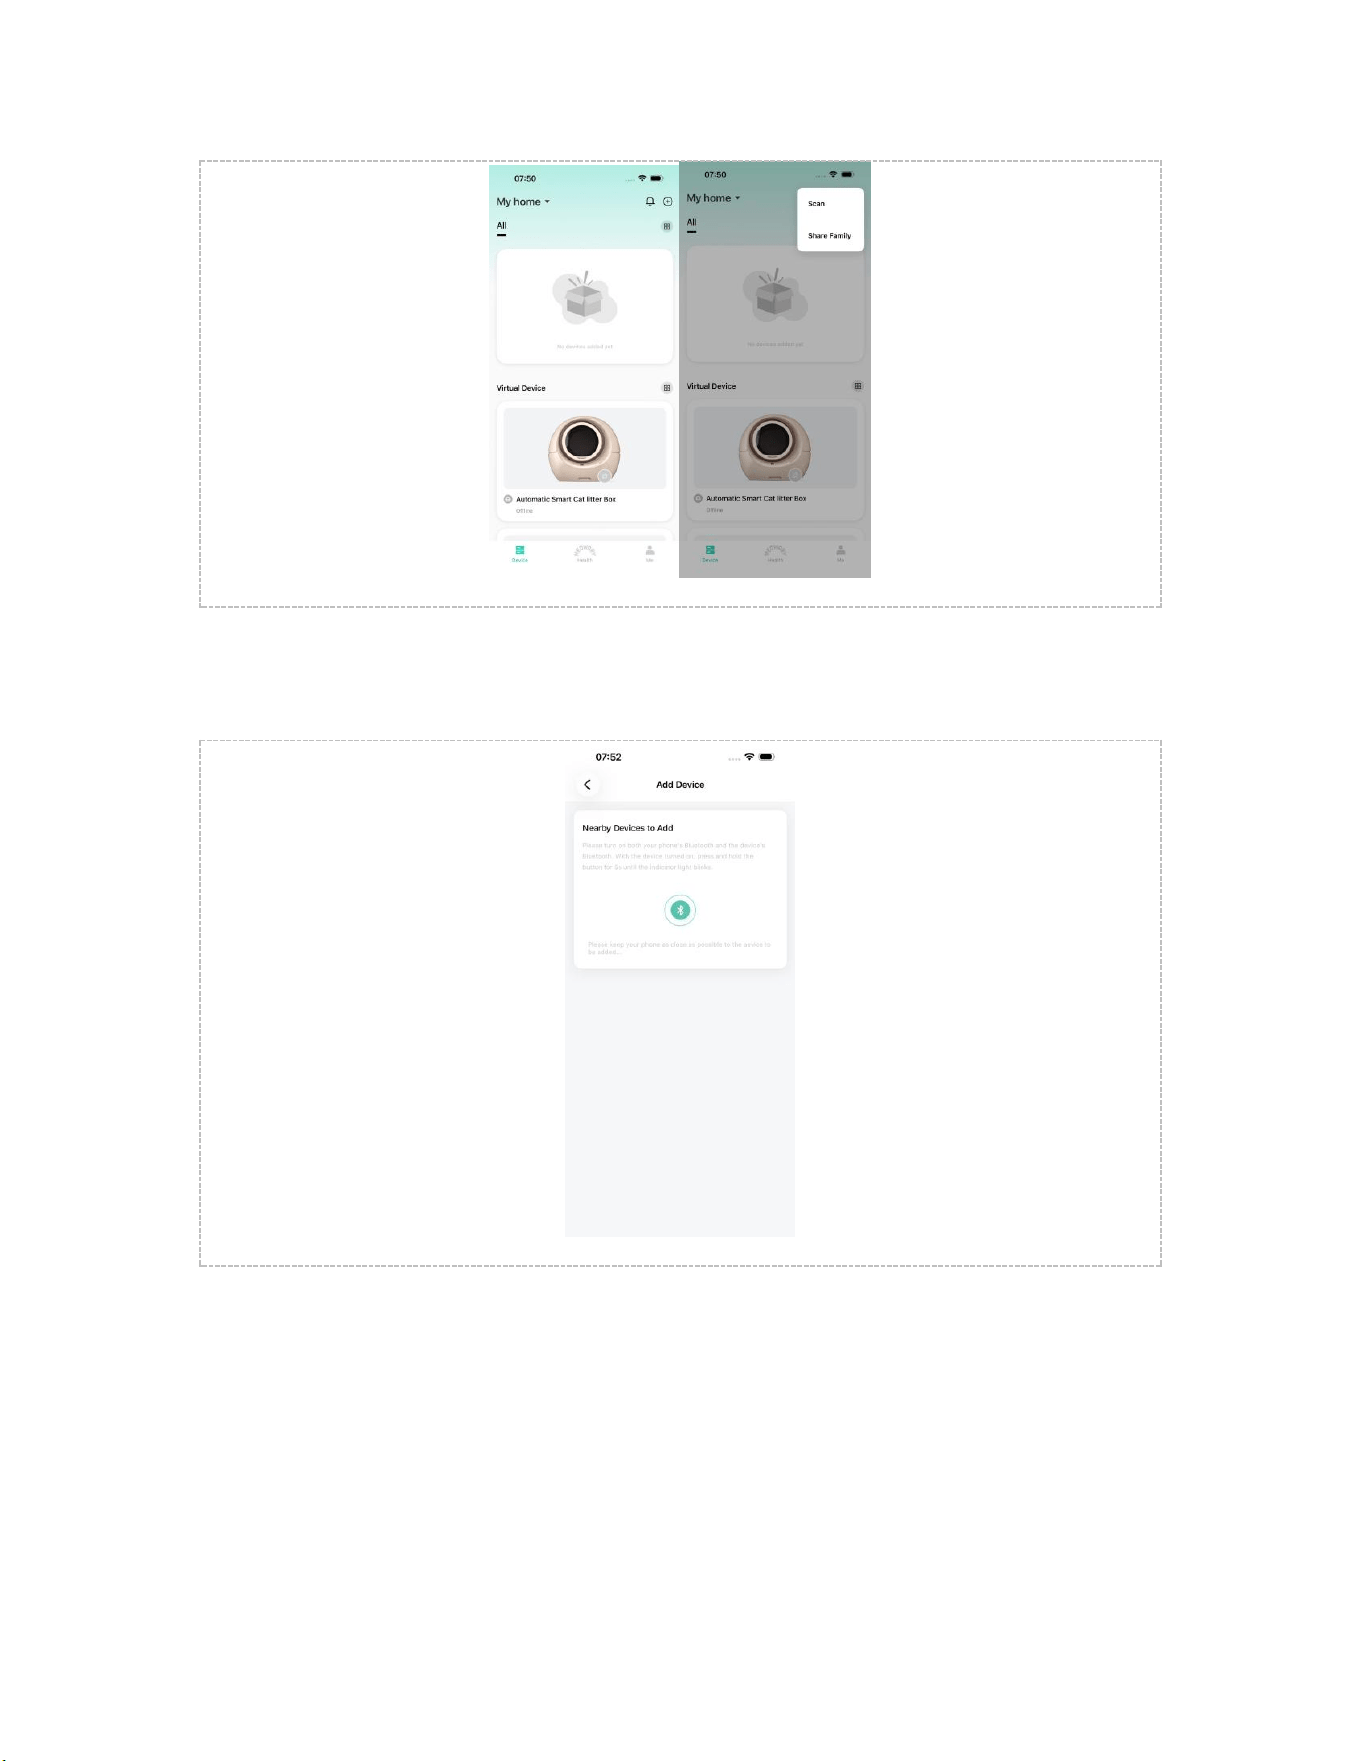
Figure 3-5 Screenshot of the app's Add Device screen
Figure 3-5 Screenshot of the Bluetooth device search screen

3.6 Step 5: Bind the Pet
After the Bluetooth connection is established, you need to bind the collar to your
pet:
Steps:
• Select the pet you added earlier from the list
• After confirming the pet information is correct, tap "Confirm Binding" to
proceed
💡 Tip: One collar can be bound to only one pet. After binding, you can view that pet's
health data in the app at any time.
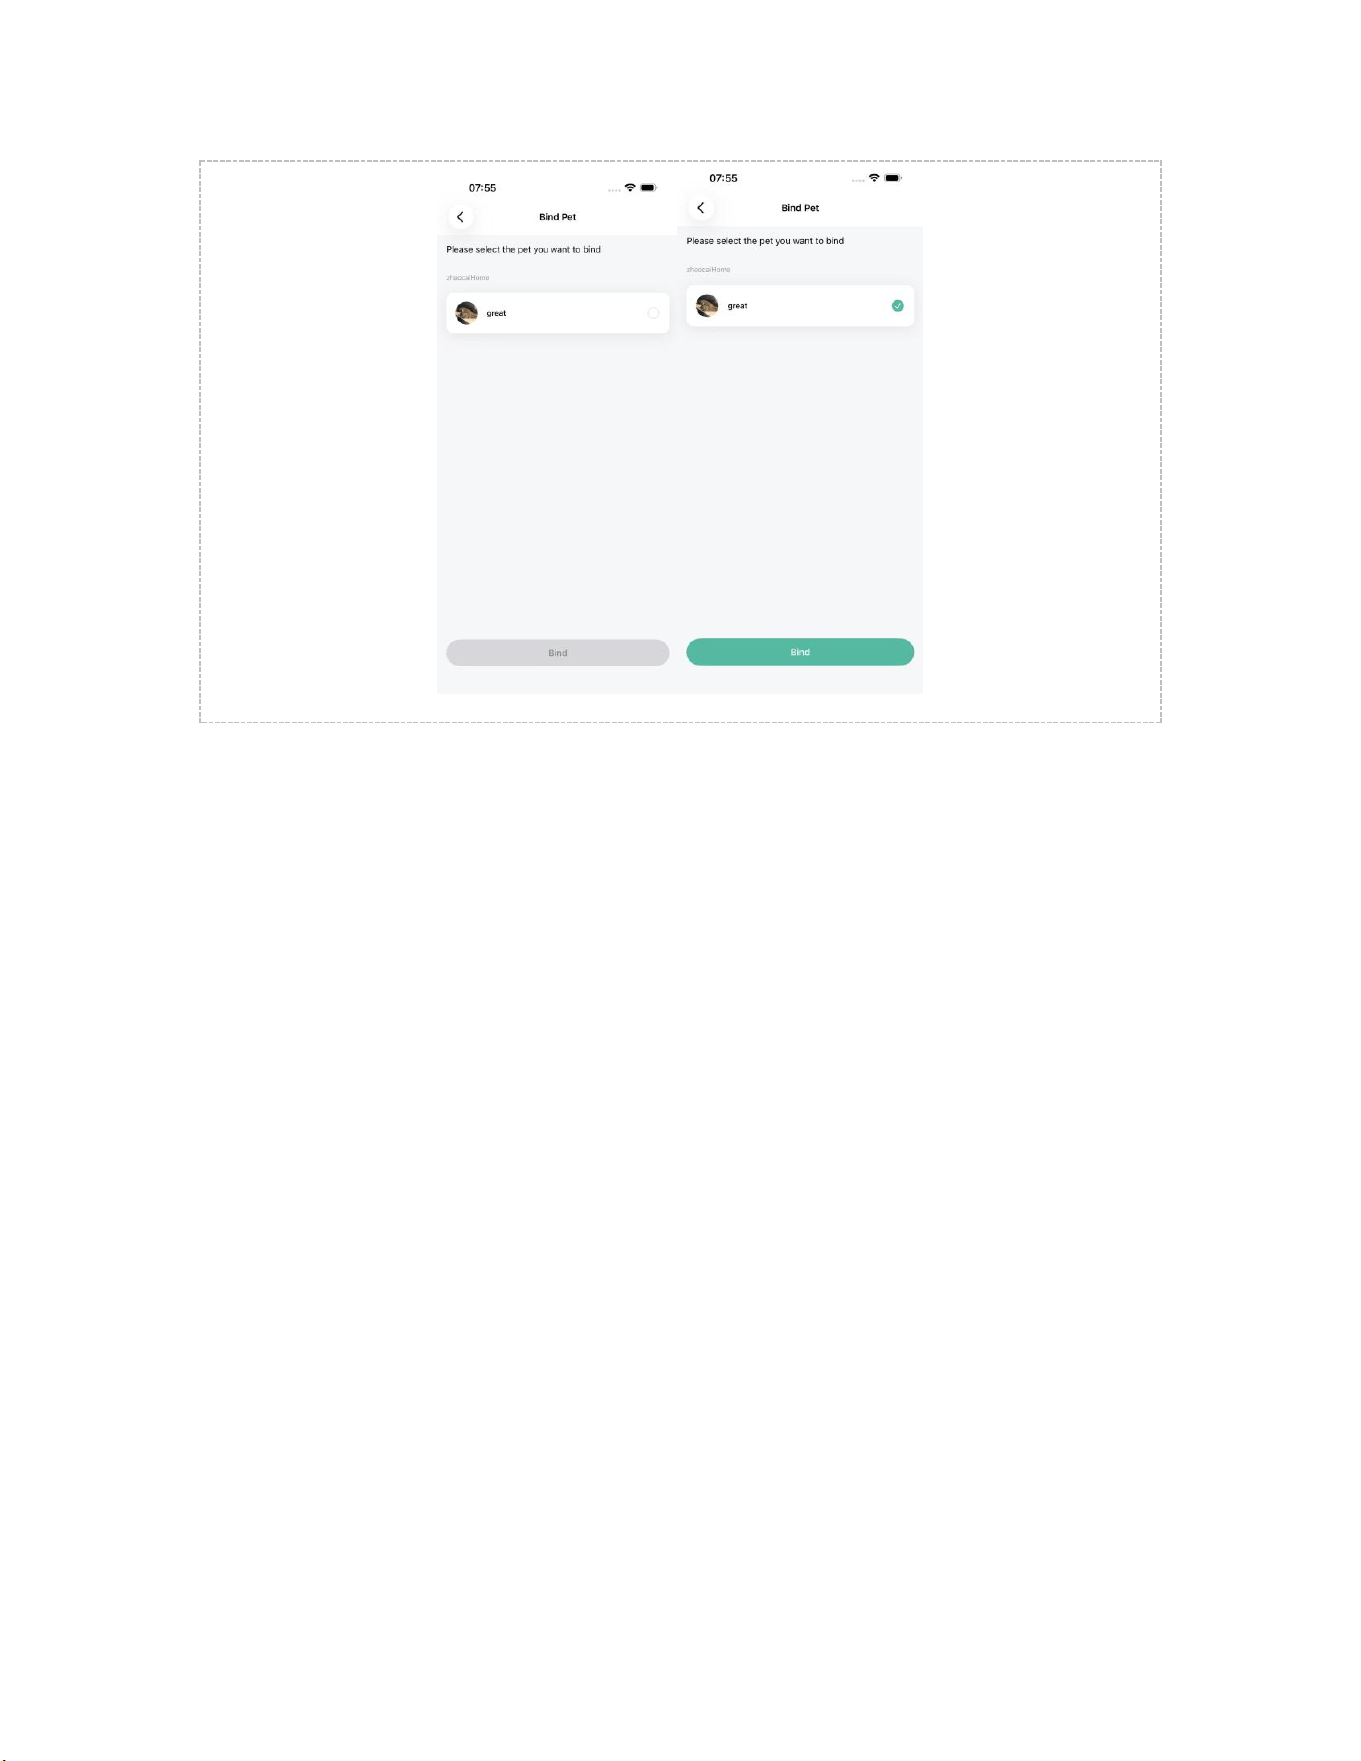
Figure 3-6 Screenshot of selecting the pet to bind

3.7 Step 6: Connect to WiFi Network
You need to configure the WiFi network so the collar can sync its data to the
cloud:
Steps:
• Tap the "Select WiFi" button
• The app automatically lists the WiFi name your phone is currently connected
to (or detects nearby WiFi); select the WiFi and confirm it is correct
• Enter the WiFi password
• Tap "Next"
• Wait for the collar to finish binding (about 7–8 seconds)
• A "Binding Successful" prompt means the configuration is complete
⚠ Note:
• Only 2.4GHz WiFi is supported; 5GHz WiFi is not supported
• Make sure the WiFi password is entered correctly, paying attention to
upper/lower case
• During network configuration, keep the collar and phone in an area with good
WiFi signal
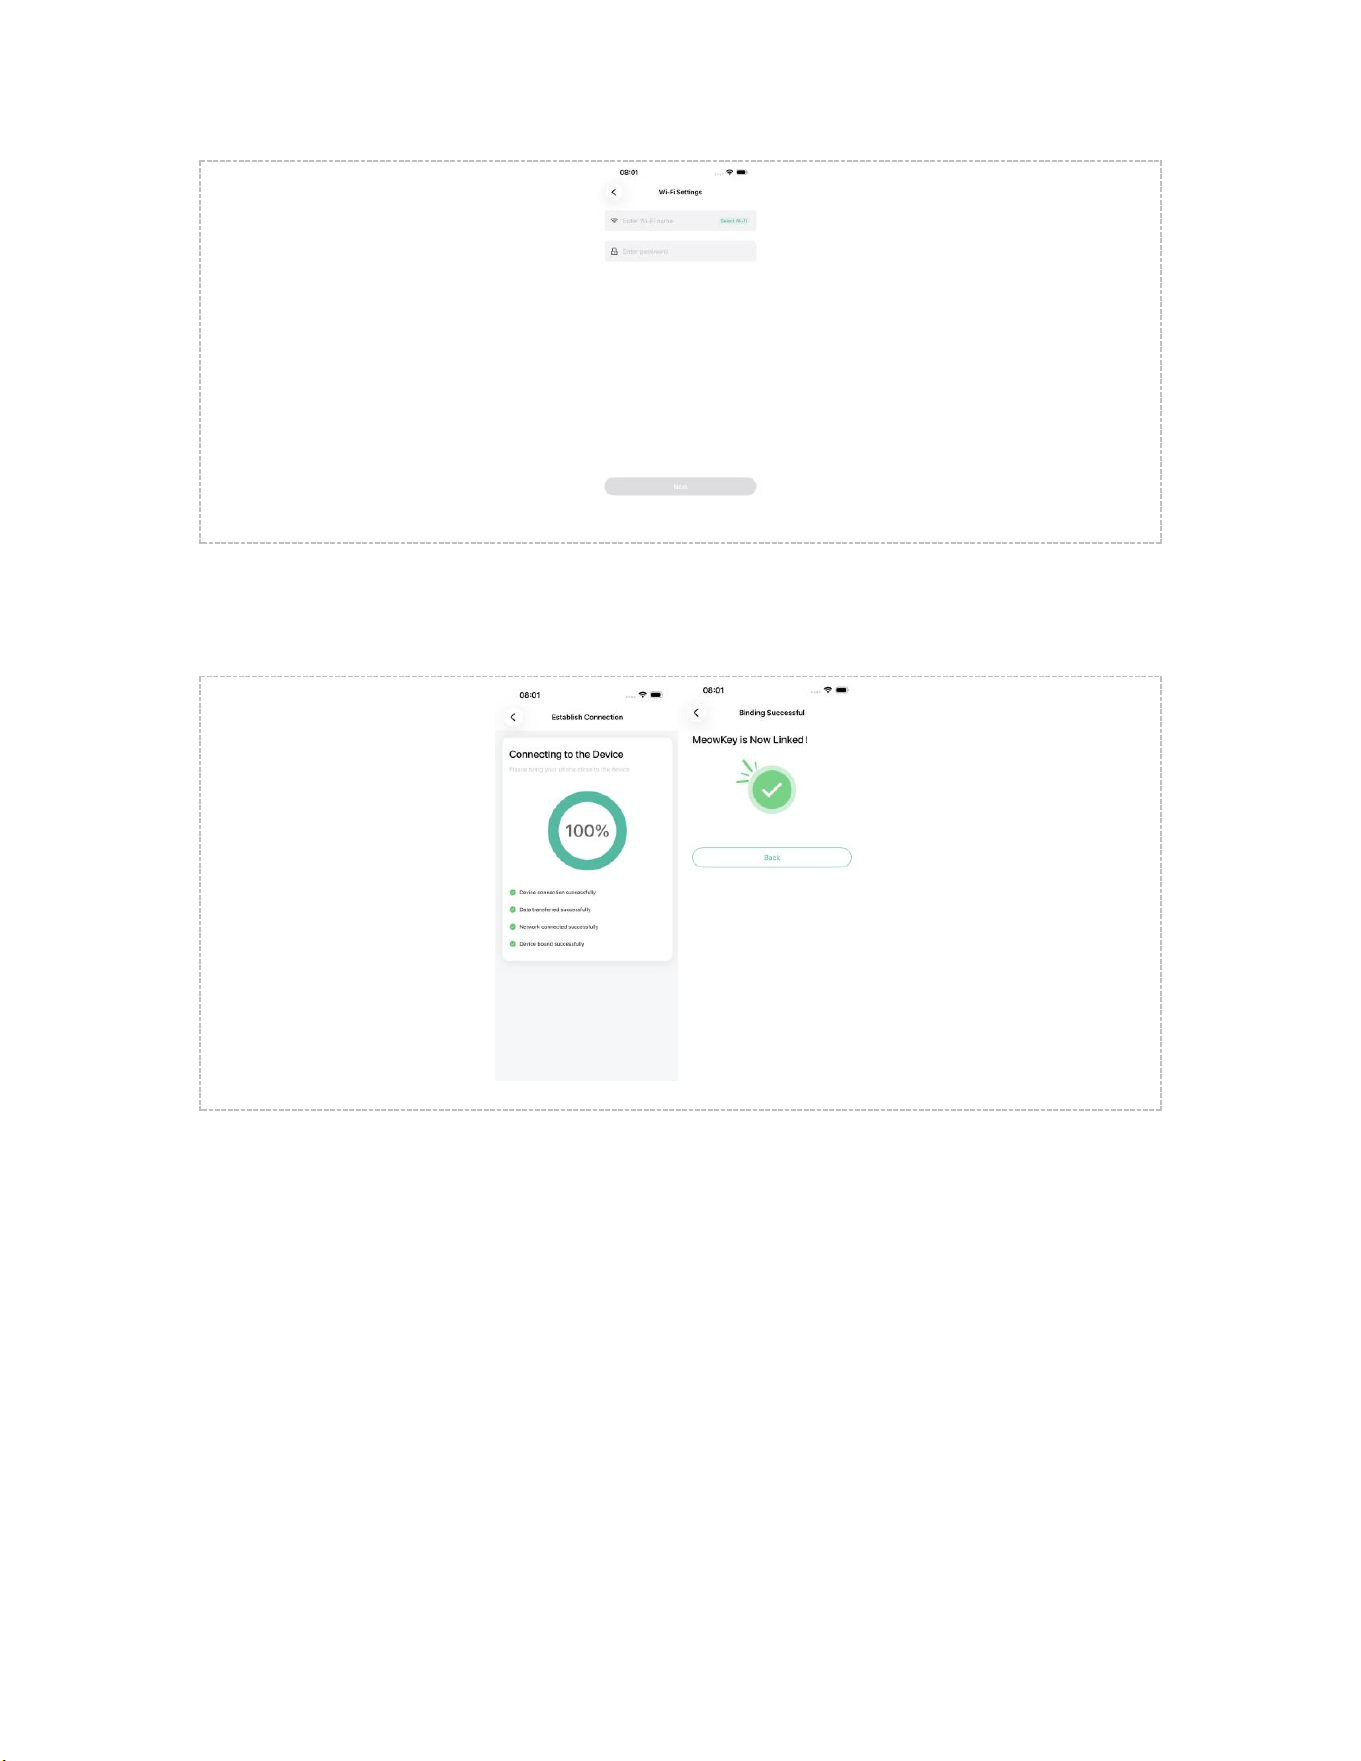
Figure 3-7 Screenshot of the WiFi configuration screen
Figure 3-7 Screenshots of network configuration in progress / successful

3.8 Binding Successful
Congratulations! You have successfully completed the entire collar
binding process.
After binding is successful:
• The bound device will be shown on the app home screen
• The collar automatically transmits data to the app every 12 minutes
• Data in the app is updated with statistics on an hourly basis
Next, you can:
• Put the collar on your cat to start health monitoring
• View sleep and activity data in the app
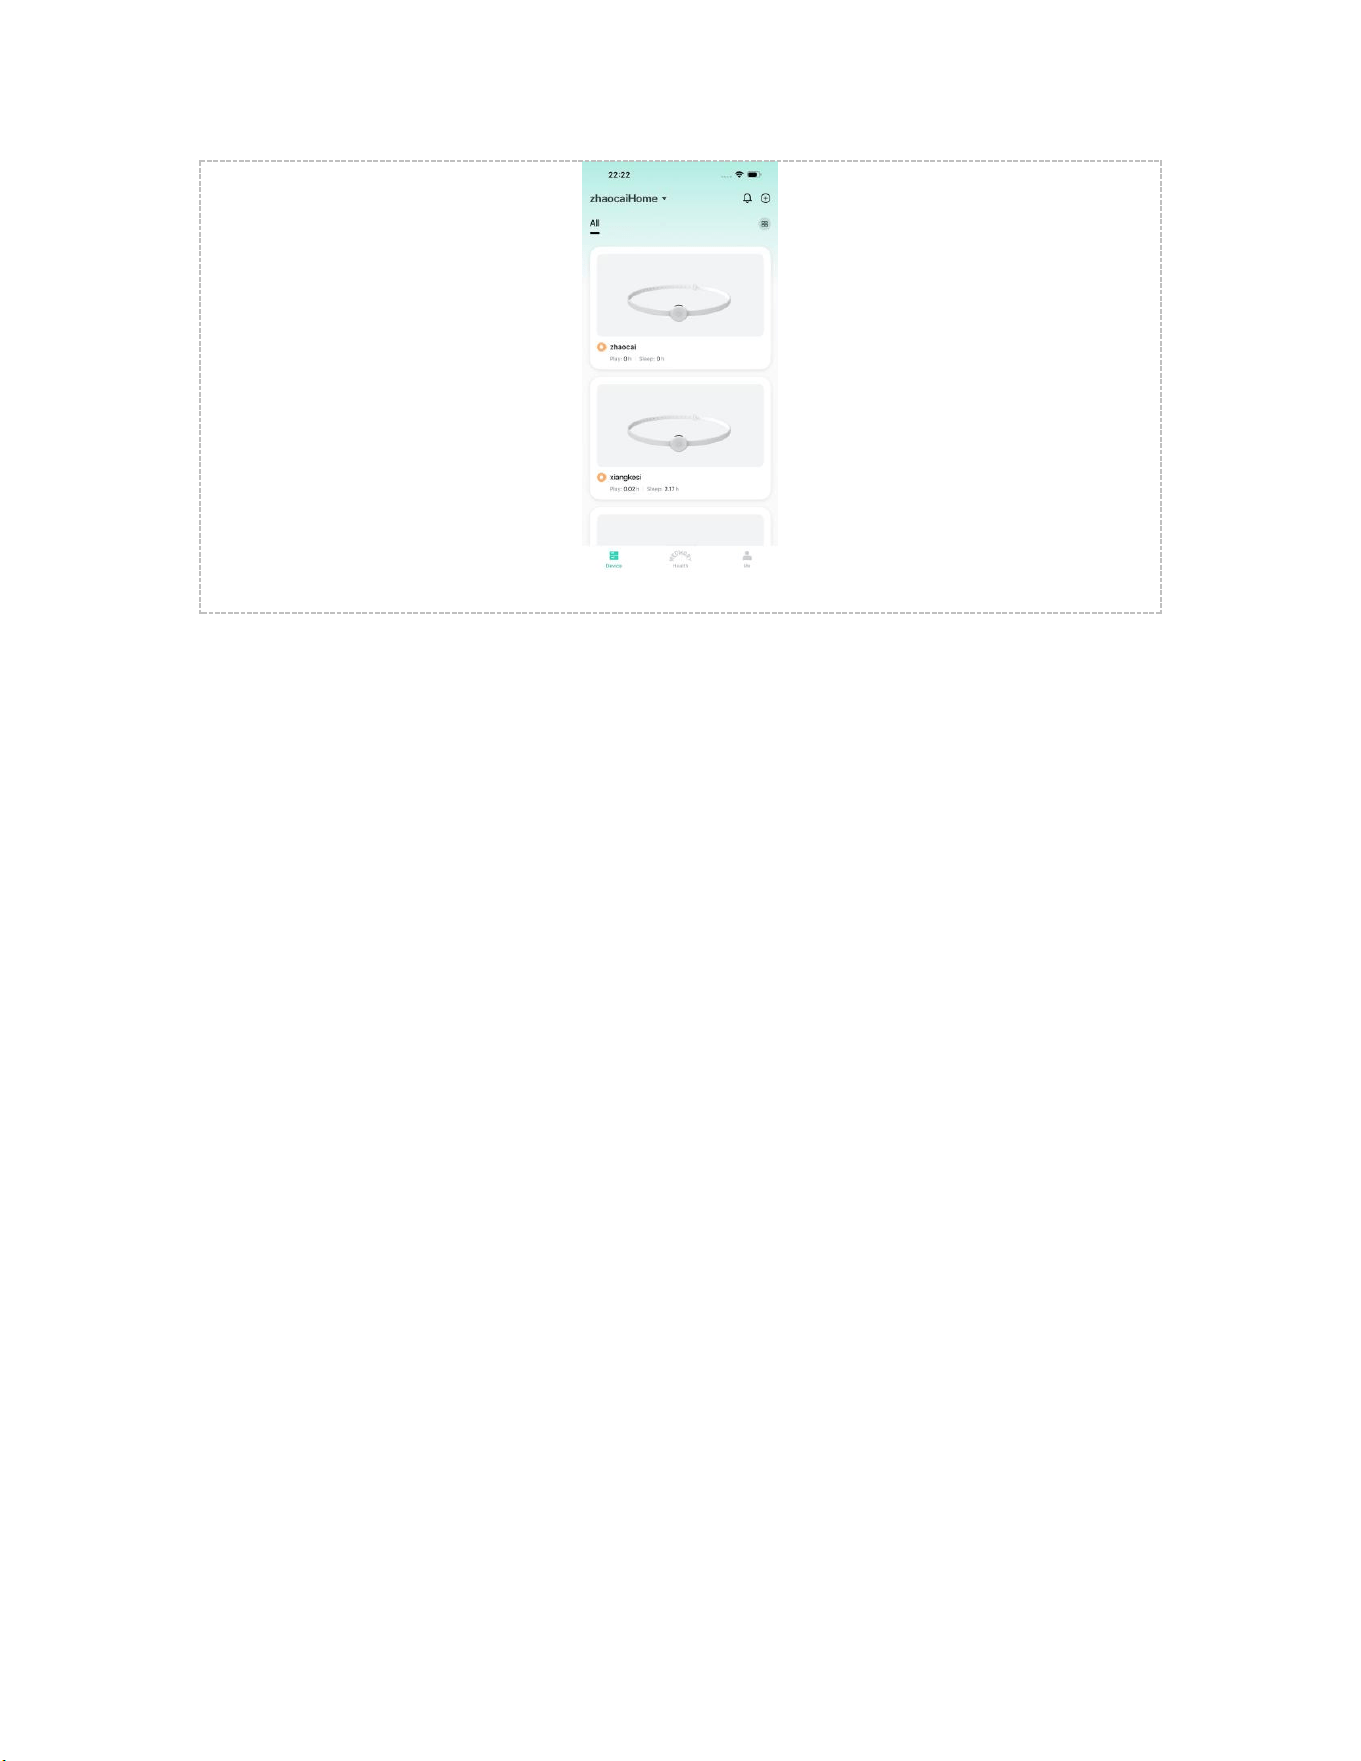
Figure 3-8 Screenshots of binding successful / app home screen

4 Daily Use
4.1 Wearing Method
The correct way of wearing the collar is very important for your cat's comfort and
safety:
• When putting it on, keep the collar's button facing upward
• Adjust the tightness: there should be enough room to easily insert two fingers
between the collar and the neck
4.2 Charging Instructions
Charging steps:
• Step 1: Place the collar into the charging area of the base in the correct
orientation
• Step 2: Confirm it is properly seated, then charging begins
⚠ Important Notes:
• You must place the collar correctly in the charging area as required; otherwise
it will not charge
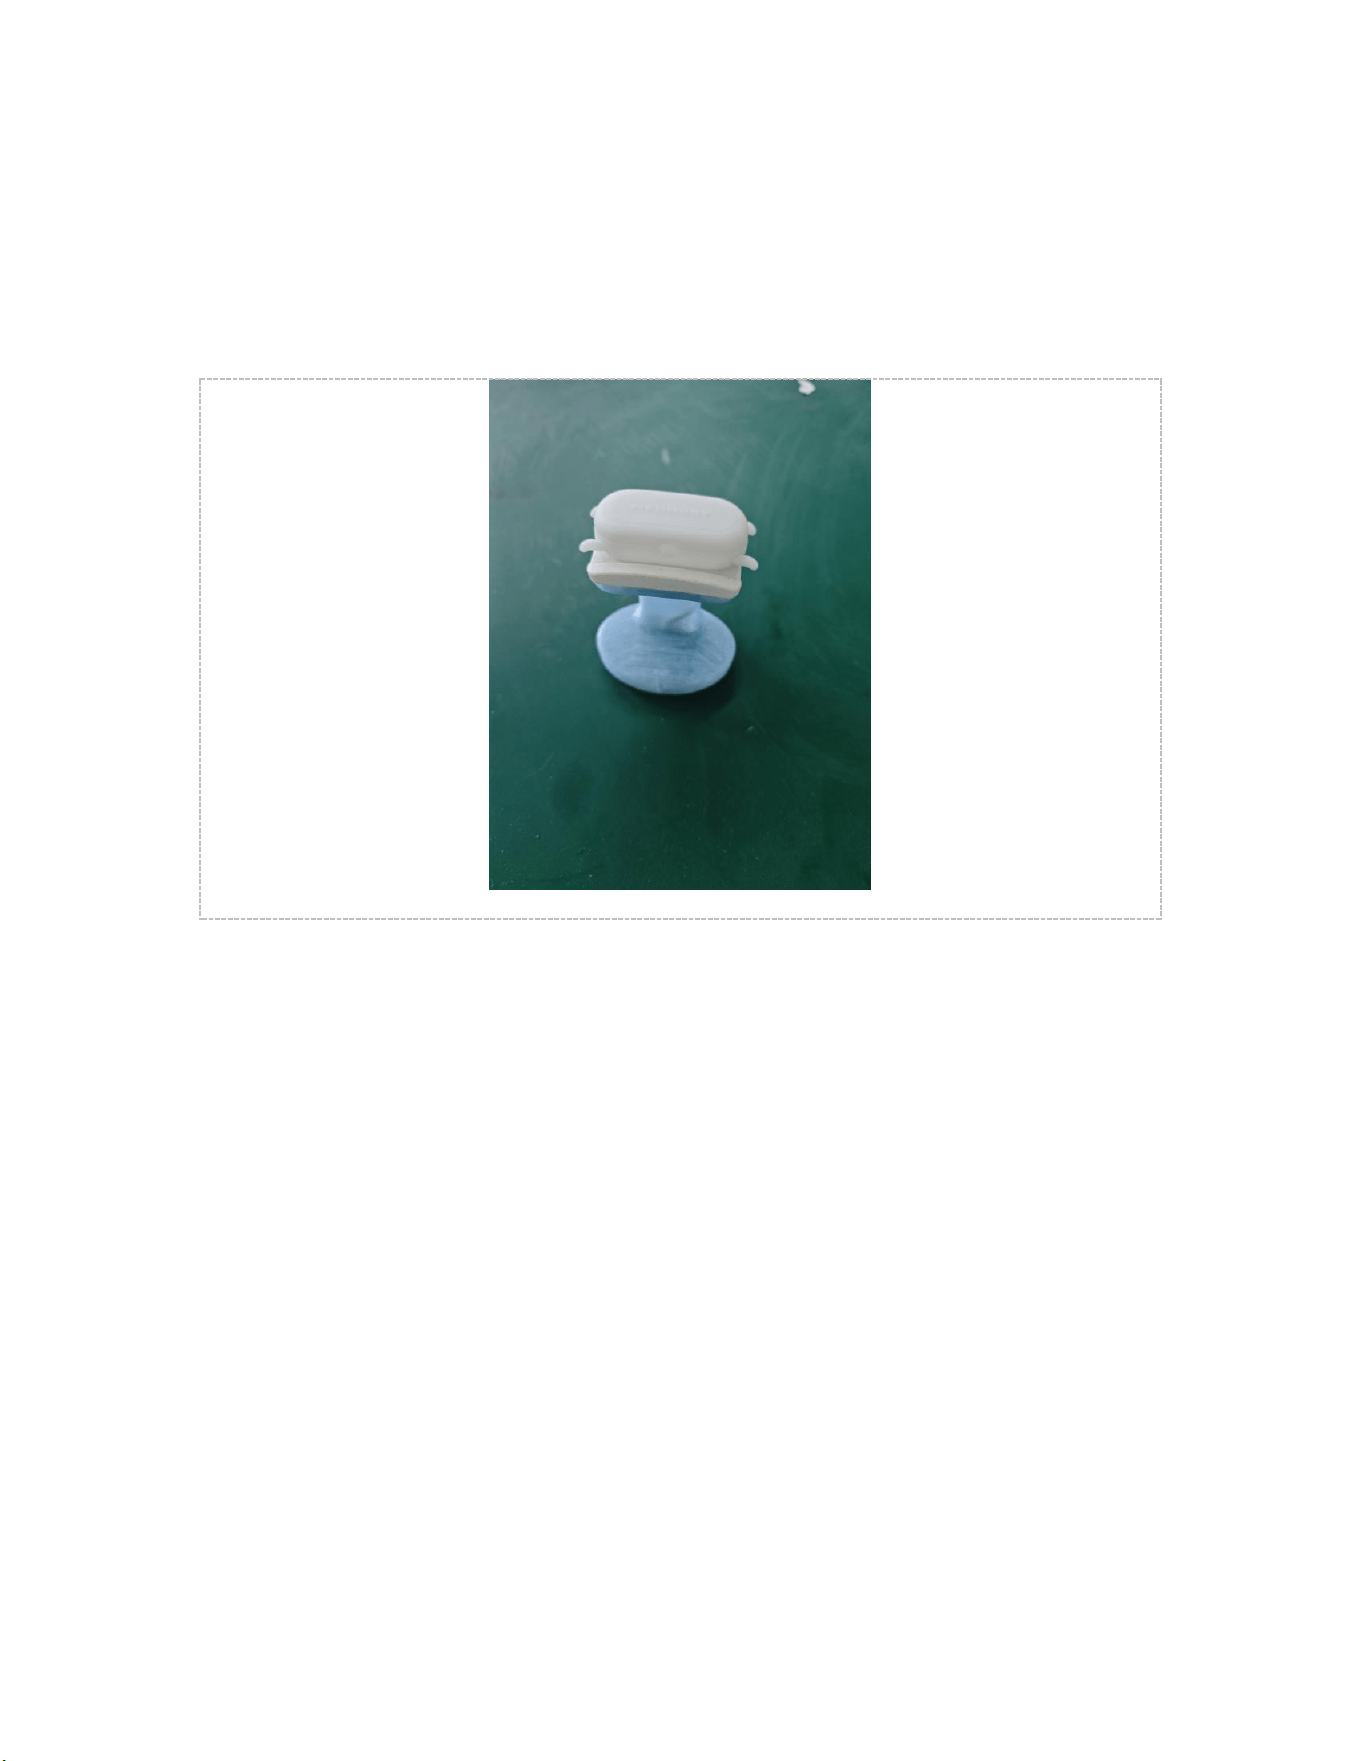
• Use the included charging base; avoid third-party chargers
• A full charge takes about 2–3 hours
Figure 4-2 Illustration of the charging base and correct placement
7 Frequently Asked Questions and
Troubleshooting
If you encounter a problem, please consult the table below first. If it remains
unresolved, contact after-sales service.

Fault Symptom
Possible Cause
Solution
Collar won't power
on
Battery depleted
Incorrect power-on
method
1. Place it on the charging base and
charge for 30 minutes, then try
again
2. Make sure you press and hold the
power button for over 5 seconds
until the indicator light turns on
App cannot find
the collar
Collar has not entered
pairing mode
Bluetooth not enabled
on phone
Too far away
1. Press and hold the power button
for 5 seconds and confirm the green
light blinks (pairing mode)
2. Check that Bluetooth is enabled
on your phone
3. Move the collar close to the
phone (within 1 meter)
QR scan binding
failed
QR code is
blurry/damaged
Camera permission not
granted
Network error
1. Check whether the QR code on
the collar is clear and wipe it clean
2. Make sure the app has camera
permission
3. Check that the phone's network
connection is normal
WiFi connection
failed
Wrong WiFi password
5GHz WiFi not
supported
Weak WiFi signal
1. Make sure the WiFi password is
entered correctly, paying attention
to case
2. Confirm you are using 2.4GHz
WiFi
3. Move the collar closer to the
router and try again
Data not updating
Collar battery depleted
WiFi disconnected
App version too old
1. Check the collar's battery and
charge it promptly
2. Confirm the WiFi network is
working
3. Update the app to the latest
version
Inaccurate data
Incorrect wearing
position
1. Adjust the wearing position to
ensure a snug fit on the neck

Collar too loose
Cat engaged in intense
activity
2. Adjust the tightness to prevent
the collar from sliding
3. The data are estimates for
reference only and are not a basis
for medical diagnosis
Cat resists wearing
it
Not used to wearing it
at first
Collar too tight
1. Start with shorter wearing periods
and gradually increase them
2. Make sure the collar fits
comfortably and does not cause
discomfort
No response when
charging
Not placed correctly in
the charging area
Charging area is dirty
Charging base or cable
damaged
1. Confirm the collar is placed
correctly in the charging area of the
base
2. Clean the charging contacts on
the collar and base with a cotton
swab
3. Try a different charging cable or
base
4. Check whether the indicator on
the charging base lights up
💡 If none of the above methods solves the problem, please contact customer service. Do
not disassemble the device yourself.

FCC Warning
This device complies with Part 15 of the FCC Rules. Operation is subject to the following two
conditions:
(1) This device may not cause harmful interference, and (2) this device must accept any
interference received, including interference that may cause undesired operation.
NOTE 1: This equipment has been tested and found to comply with the limits for a Class B digital
device, pursuant to part 15 of the FCC Rules. These limits are designed to provide reasonable
protection against harmful interference in a residential installation. This equipment generates,
uses and can radiate radio frequency energy and, if not installed and used in accordance with
the instructions, may cause harmful interference to radio communications. However, there is no
guarantee that interference will not occur in a particular installation. If this equipment does
cause harmful interference to radio or television reception, which can be determined by turning
the equipment off and on, the user is encouraged to try to correct the interference by one or
more of the following measures:
- Reorient or relocate the receiving antenna.
- Increase the separation between the equipment and receiver.
-Connect the equipment into an outlet on a circuit different from that to which the receiver is
connected.
-Consult the dealer or an experienced radio/TV technician for help.
NOTE 2: Any changes or modifications to this unit not expressly approved by the party
responsible for compliance could void the user's authority to operate the equipment.
The device has been evaluated to meet general RF exposure requirement. The device can be
used in portable exposure condition without restriction.