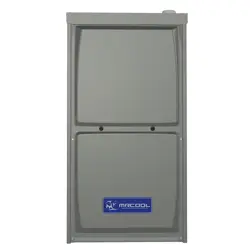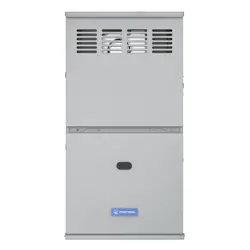

The Signature Series is NOT designed for amateur installation. Installation SHOULD be performed by an authorized technician.
Please read this manual carefully before installation and keep it for future reference.
Owner & Installation
Manual
Signature Series
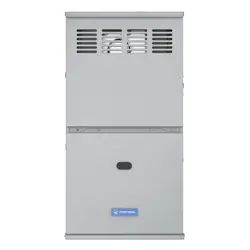
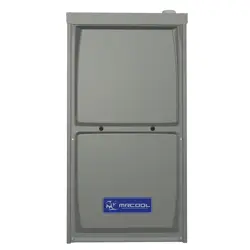
MGD*96SE*XA Gas Furnace
Due to updates and constantly improving performance, the information and
instructions within this manual are subject to change without notice. Please visit
www.mrcool.com/documentation to ensure you have the latest version of this manual.
Version Date: 07-29-22
The Signature Series is NOT designed for amateur installation. Installation SHOULD be performed by an authorized technician.
Please read this manual carefully before installation and keep it for future reference.
507769C05 Page 1 of 55
mrcool.com
(P) 507769C05
*P507769C05*
Manufactured By
MRCOOL LLC
Hickory, KY 42051
This manual must be left with the homeowner for future reference.
This is a safety alert symbol and should never be ignored. When you see this symbol on labels or in manuals, be alert
to the potential for personal injury or death.
Improper installation, adjustment, alteration, service
or maintenance can cause property damage, personal
injury or loss of life. Installation and service must be
performed by a licensed professional installer (or
equivalent), service agency or the gas supplier.
WARNING
As with any mechanical equipment, personal injury can
result from contact with sharp sheet metal edges. Be
careful when you handle this equipment.
CAUTION
Table of Contents
Unit Dimensions ..........................................................2
Parts Arrangement.......................................................3
Gas Furnace ................................................................4
Shipping and Packing List ...........................................4
Safety Information .......................................................4
General ........................................................................6
Combustion, Dilution & Ventilation Air .........................6
Installation ...................................................................9
Filters .........................................................................12
Duct System ..............................................................12
Venting Practices .......................................................15
Condensate Piping ....................................................30
Gas Piping .................................................................33
Electrical ....................................................................36
Unit Start-Up ..............................................................40
Testing for Proper Venting and Sucient Combustion
Air for Non-Direct Vent Applications ..........................44
Other Unit Adjustments..............................................45
Blower Performance Data .........................................46
Service.......................................................................48
Planned Service ........................................................54
Repair Parts List ........................................................54
INSTALLATION INSTRUCTIONS
MGD*96SE*XA
Warm Air Gas Furnace
Downow Air Discharge
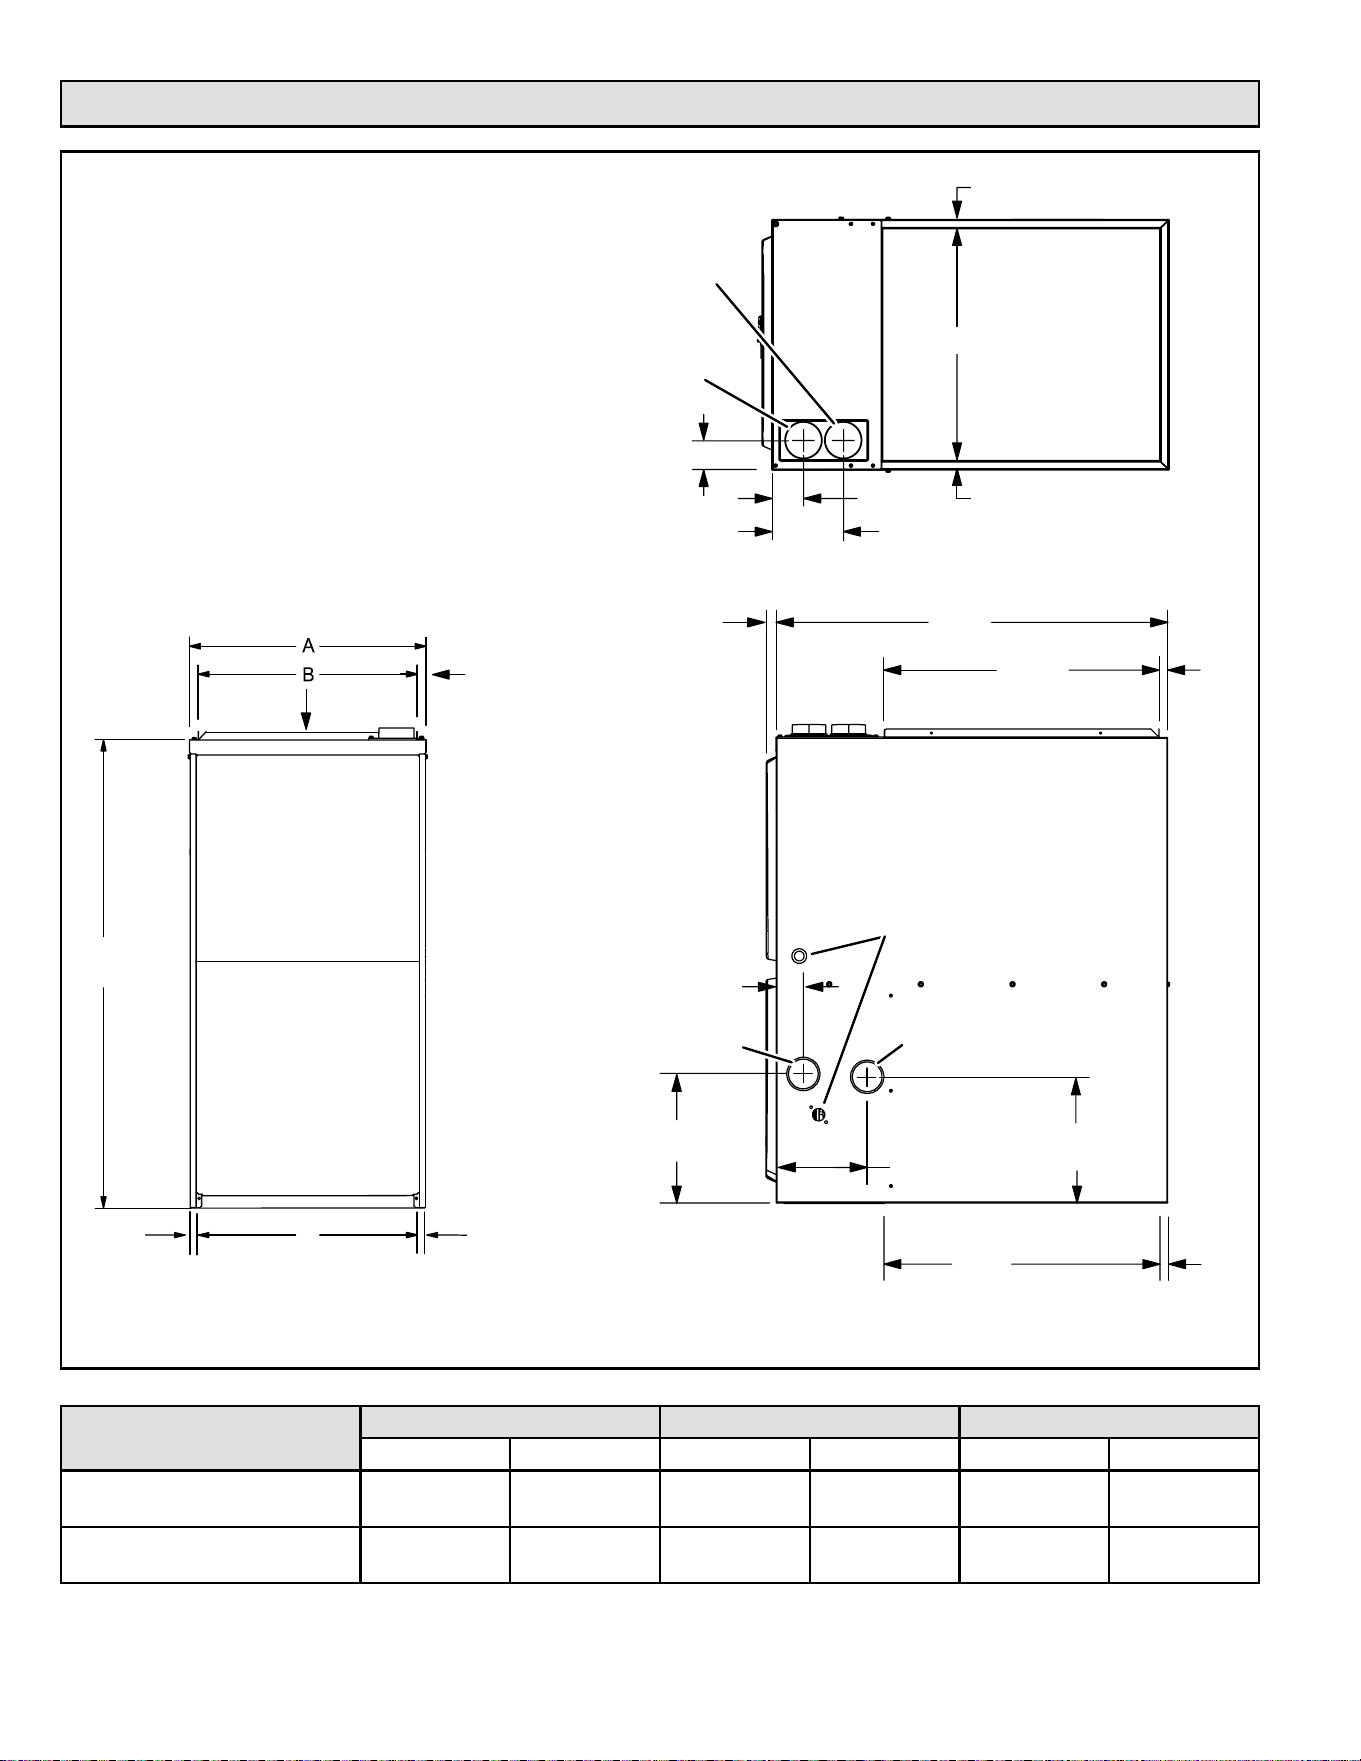
507769C05Page 2 of 55
mrcool.com
EXHAUST AIR
OUTLET
COMBUSTION
AIR INTAKE
2−1/16 (52)
GAS PIPING INLET
(Either Side)
ELECTRICAL INLET
(Either Side)
Return Air
Opening
WEIV EDIS
TOP VIEW
27−3/4
19−1/4
(489)
9−1/8 (232) Right
6−9/16 (167) Left
2 (51)
Either Side
3/4
(19)
B
Supply
Air
9/16
(14)
9/16
(14)
9/16
(14)
19−7/16
(494)
CONDENSATE
TRAP CONNECTION
5
(127)
6−1/2 (165)
Either Side
2−1/4
(57)
(Either Side)
1 (25)
Front Panel
(705)
AIR FLOW
33
(838)
C
3/4
(19)
3/4
(19)
FRONT VIEW
Supply
Air
9/16
(14)
9
(229)
Unit Dimensions
Capacity
A B C
in. mm in. mm in. mm
045-B3
070-B4
17-1/2 446 16-3/8 416 16 406
090-C4
110-C5
21 533 19-7/8 504 19-1/2 495
507769C05 Page 3 of 55
mrcool.com
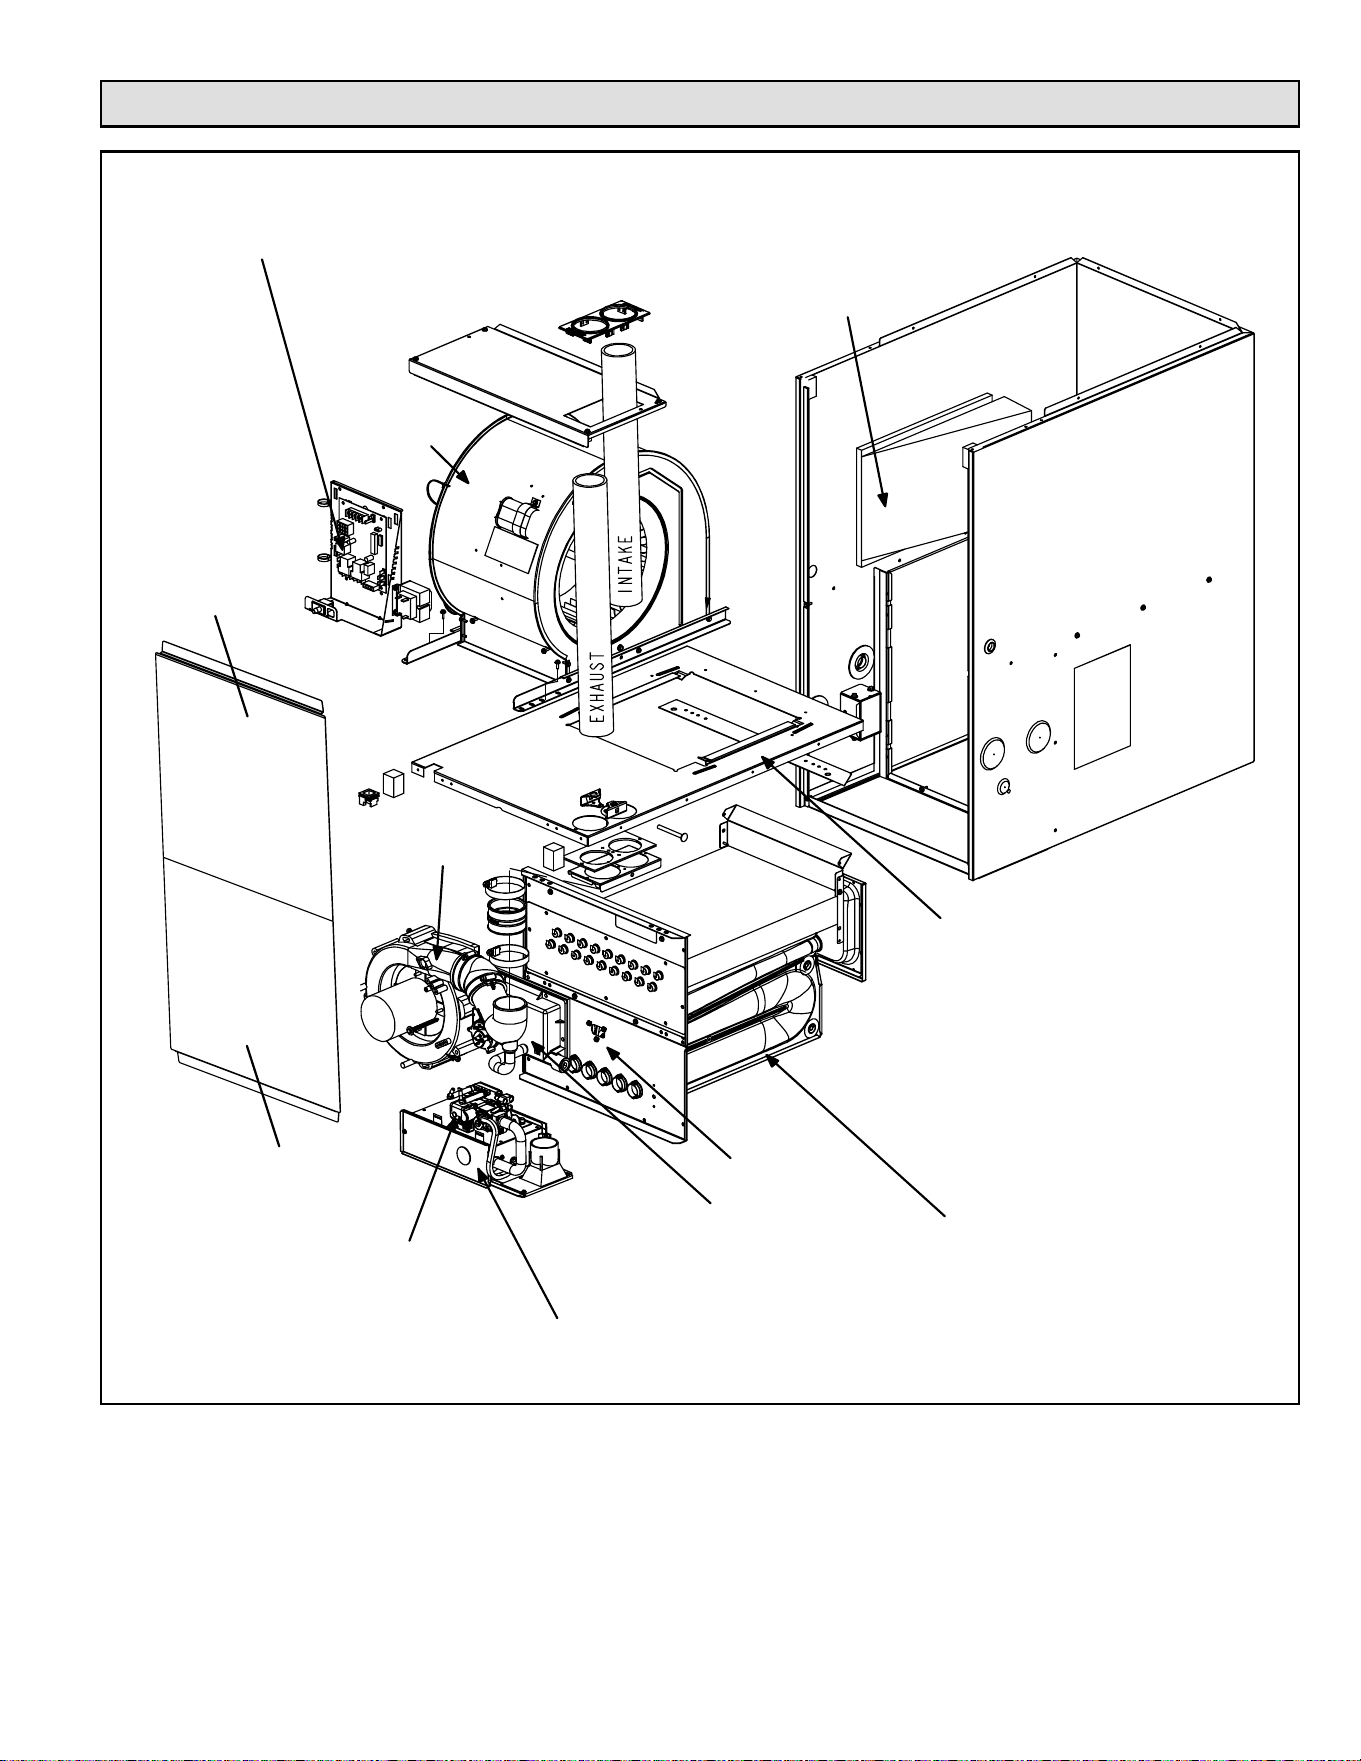
Figure 1.
CONTROL BOX
(Includes integrated control,
transformer and door switch)
BAG ASSEMBLY
BLOWER MOTOR
(hidden)
COMBUSTION
AIR INDUCER
BURNER BOX ASSEMBLY
(includes flame sensor, rollout switches and ignitor)
GAS VALVE
BLOWER DECK
HEAT EXCHANGER
COLD END HEADER BOX
PRIMARY LIMIT
BLOWER
ACCESS PANEL
HEATING
ACCESS PANEL
COMPARTMENT
COMPARTMENT
Parts Arrangement
507769C05Page 4 of 55
mrcool.com
Gas Furnace
This Category IV gas furnace is shipped ready for
installation in the downow position.
The furnace is equipped for installation in natural gas
applications. A conversion kit (ordered separately) is
required for use in propane/LP gas applications.
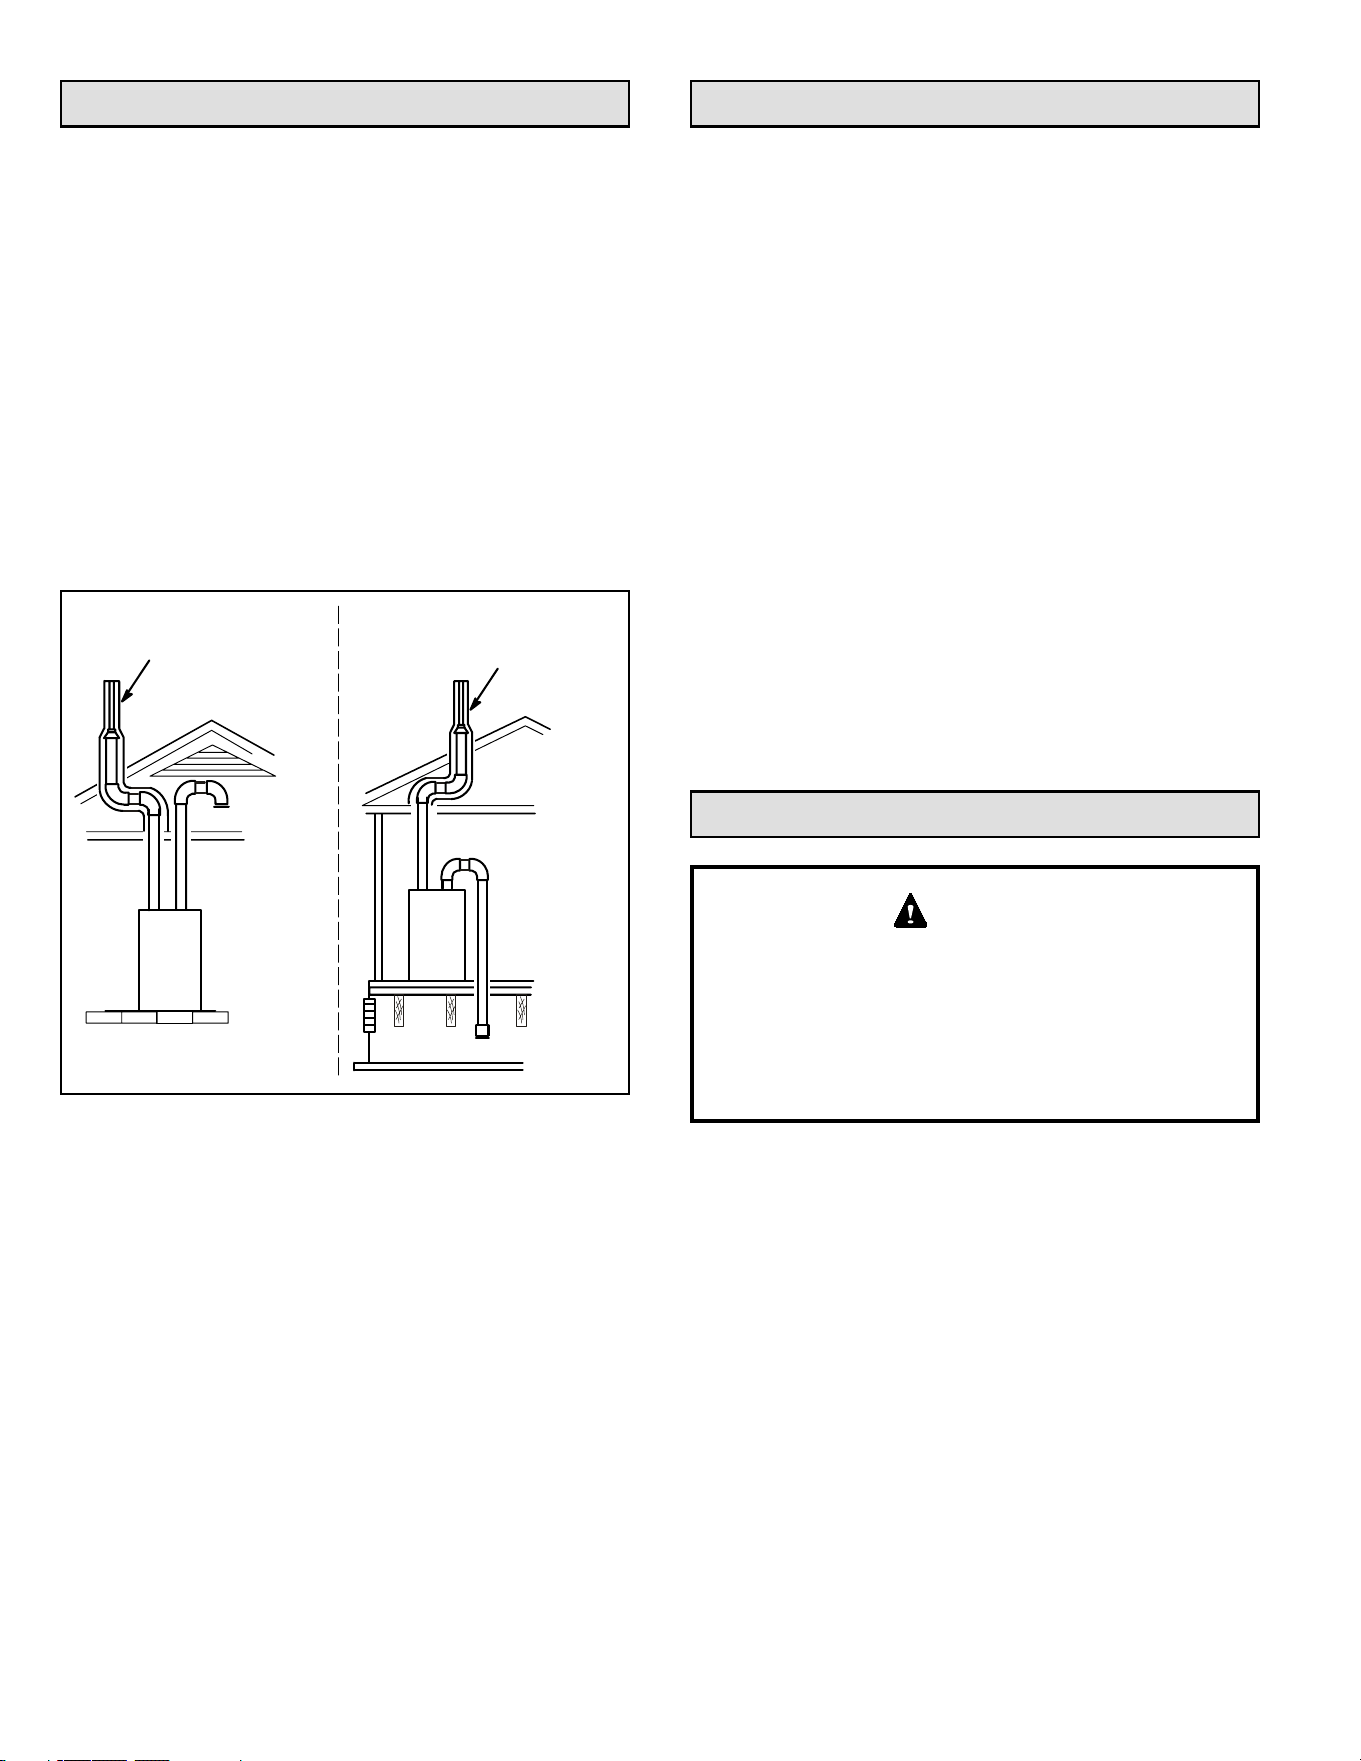
This unit can be installed as either a Direct Vent or a Non-
Direct Vent gas central furnace
NOTE: In Direct Vent installations, combustion air is taken
from outdoors and ue gases are discharged outdoors. In
Non-Direct Vent installations, combustion air is taken from
indoors or ventilated attic or crawlspace and ue gases
are discharged outdoors. See Figure 2 for applications
involving roof termination.
Figure 2.
NON-DIRECT VENT
INSTALLATION
NON-DIRECT VENT
INSTALLATION
COMBUSTION
AIR INTAKE INSIDE
VENTILATED
CRAWL SPACE
COMBUSTION
AIR INTAKE INSIDE
VENTILATED
ATTIC SPACE
EXHAUST
OUTLET
EXHAUST
OUTLET
Shipping and Packing List
1 - Assembled Gas Unit
1 - Bag assembly containing the following:
1 - Snap bushing
1 - Snap Plug
1 - Wire tie
1 - Condensate trap
1 - Condensate trap cap
1 - Condensate trap clamp
1 - 2” diameter debris screen
1 - 3/4” Threaded street elbow
NOTE: The required bellows grommet is eld-provided.
See the Gas Piping section for relevant diagrams.
Check equipment for shipping damage. If you nd any
damage, immediately contact the last carrier.
Please refer to specication sheets for available
accessories.
Safety Information
DANGER OF EXPLOSION!
There are circumstances in which odorant used with
LP/Propane gas can lose its scent. In case of a leak,
LP/Propane gas will settle close to the oor and may be
dicult to smell. An LP/Propane leak detector should be
installed in all LP applications.
DANGER
Use only the type of gas approved for use with this furnace.
Refer to unit nameplate.
This unit is CSA International certied to ANSI Z21.47 and
CSA 2.3 standards.
Building Codes
In the USA, installation of gas furnaces must conform with
local building codes. In the absence of local codes, units
must be installed according to the current National Fuel
Gas Code (ANSI Z223.1/NFPA 54). The National Fuel Gas
Code is available from the American National Standards
Institute, Inc., 11 West 42nd Street, New York, NY 10036.
In Canada, installation must conform with current National
Standard of Canada CSA-B149 Natural Gas and Propane
Installation Codes, local plumbing or waste water codes
and other applicable local codes.
507769C05 Page 5 of 55
mrcool.com
In order to ensure proper unit operation in non-direct vent
applications, combustion and ventilation air supply must
be provided according to the current National Fuel Gas
Code or CSA-B149 standard.
Locations and Clearances
This furnace is CSA International certied for installation
clearances to combustible material as listed on the unit
nameplate and in the table in Figure 13. Accessibility
and service clearances must take precedence over re
protection clearances.
NOTE: When furnace is installed on a combustible oor,
a downow combustible ooring base must be installed
between the furnace and the oor.
For installation in a residential garage, the furnace must be
installed so that the burner(s) and the ignition source are
located no less than 18 inches (457 mm) above the oor.
The furnace must be located or protected to avoid physical
damage by vehicles. When a furnace is installed in a public
garage, hangar, or other building that has a hazardous
atmosphere, the furnace must be installed according to
recommended good practice requirements and current
National Fuel Gas Code or CSA B149 standards.
NOTE: Furnace must be adjusted to obtain a temperature
rise within the range specied on the unit nameplate.
Failure to do so may cause erratic limit operation and
premature heat exchanger failure.
This gas furnace must be installed so that its electrical
components are protected from water.
Installed in Combination with a Cooling Coil
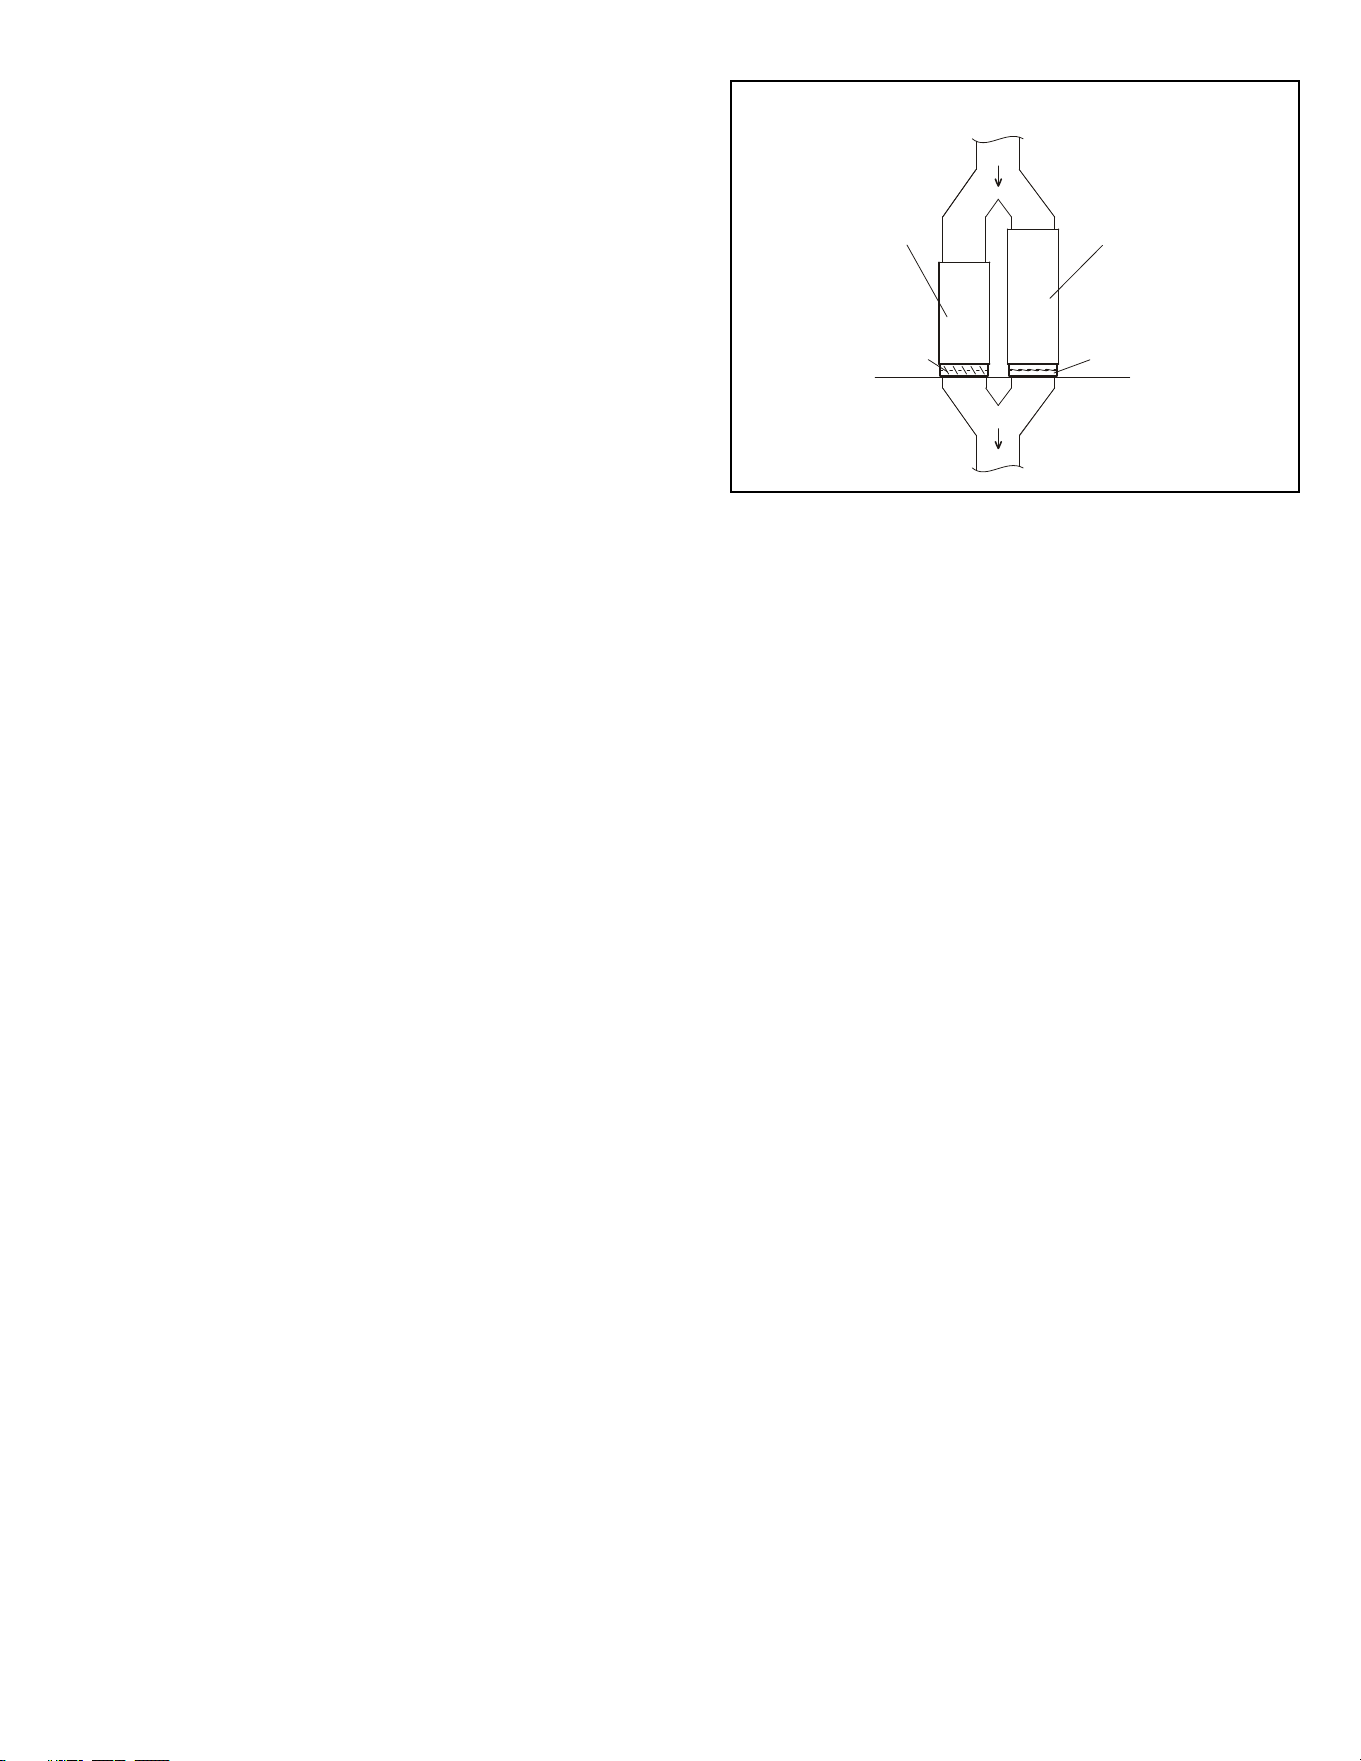
When this furnace is used with cooling units (Figure 3),
it shall be installed in parallel with, or on the upstream
side of, cooling units to avoid condensation in the heating
compartment. With a parallel ow arrangement, a damper
(or other means to control the ow of air) must adequately
prevent chilled air from entering the furnace. If the damper
is manually operated, it must be equipped to prevent
operation of either the heating or the cooling unit, unless it
is in the full HEAT or COOL setting.
When installed, this furnace must be electrically grounded
according to local codes. In addition, in the United States,
installation must conform with the current National
Electric Code, ANSI/NFPA No. 70. The National Electric
Code (ANSI/NFPA No. 70) is available from the following
address:
National Fire Protection Association
1 Battery March Park
Quincy, MA 02269
In Canada, all electrical wiring and grounding for the unit
must be installed according to the current regulations of
the Canadian Electrical Code Part I (CSA Standard C22.1)
and/or local codes.
Heating Unit Installed Parallell to Air Handler Unit
AIR HANDLER
GAS UNIT
Dampers
(open during cooling
operation only)
Dampers
(open during heating
operation only)
Figure 3.
NOTE: This furnace is designed for a minimum continuous
return air temperature of 60°F (16°C) or an intermittent
operation down to 55°F (13°C) dry bulb for cases where a
night setback thermostat is used. Return air temperature
must not exceed 85°F (29°C) dry bulb.
This gas furnace may be installed in alcoves, closets,
attics, basements, garages, and utility rooms.
This furnace design has NOT been CSA certied for
installation in mobile homes, recreational vehicles, or
outdoors.
Never use an open ame to test for gas leaks. Check all
connections using a commercially available soap solution
made specically for leak detection.
Use of Furnace as a Construction Heater
Units may be used for heating of buildings or structures
under construction, if the following conditions are met to
ensure proper operation.
DO NOT USE THE UNIT FOR CONSTRUCTION HEAT
UNLESS ALL OF THE FOLLOWING CRITERIA ARE
MET:
a. Furnace must be in its nal location. The vent system
must be permanently installed per these installation
instructions.
b. Furnace must be installed as a two pipe system
and one hundred percent (100%) outdoor air must
be provided for combustion air requirements during
construction.
c. A room thermostat must control the furnace. The use
of xed jumpers that will provide continuous heating is
prohibited.
d. The input rate and temperature rise must be set per
the furnace rating plate.
e. Supply and Return air ducts must be provided and
sealed to the furnace. Return air must be terminated
outside of the space where furnace is installed.
507769C05Page 6 of 55
mrcool.com
f. Return air temperature range between 60°F (16°C)
and 80°F (27°C) must be maintained.
g. MERV 11 or greater air lters must be installed in
the system and must be regularly inspected and
maintained (e.g., regular static checks and replaced at
end of life) during construction.
h. Blower and vestibule access panels must be in place
on the furnace at all times.
i. The furnace heat exchanger, components, duct
system, and evaporator coils must be thoroughly
cleaned following nal construction clean−up.
j. Air lters must be replaced upon construction
completion.
k. All furnace operating conditions (including ignition,
input rate, temperature rise and venting) must
be veried in accordance with these installation
instructions.
EQUIPMENT MAY EXPERIENCE PREMATURE
COMPONENT FAILURE AS A RESULT OF FAILURE TO
FOLLOW THE ABOVE INSTALLATION INSTRUCTIONS.
FAILURE TO FOLLOW THE ABOVE INSTALLATION
INSTRUCTIONS VOIDS THE MANUFACTURER’S
EQUIPMENT LIMITED WARRANTY. MRCOOL
DISCLAIMS ALL LIABILITY IN CONNECTION WITH
INSTALLER’S FAILURE TO FOLLOW THE ABOVE
INSTALLATION INSTRUCTIONS.
NOTWITHSTANDING THE FOREGOING, INSTALLER
IS RESPONSIBLE FOR CONFIRMING THAT THE USE
OF CONSTRUCTION HEAT IS CONSISTENT WITH
THE POLICIES AND CODES OF ALL REGULATING
ENTITIES. ALL SUCH POLICIES AND CODES MUST BE
ADHERED TO.
General
These instructions are intended as a general guide and do
not supersede local codes in any way. Consult authorities
having jurisdiction before installation.
In addition to the requirements outlined previously, the
following general recommendations must be considered
when installing one of these furnaces:
• Place the furnace as close to the center of the air
distribution system as possible. The furnace should
also be located close to the vent termination point.
• When the furnace is installed in non-direct vent
applications, do not install the furnace where drafts
might blow directly into it. This could cause improper
combustion and unsafe operation.
• When the furnace is installed in a non-direct vent
applications, do not block the furnace combustion air
opening with clothing, boxes, doors, etc. Air is needed
for proper combustion and safe unit operation.
• When the furnace is installed in an attic or other
insulated space, keep insulation away from the
furnace.
• When the furnace is installed in an unconditioned
space, consider provisions required to prevent freezing
of the condensate drain system.
NOTE: The Commonwealth of Massachusetts stipulates
these additional requirements:
• Gas furnaces shall be installed by a licensed plumber
or tter only.
• The gas cock must be “T handle” type.
• When a furnace is installed in an attic, the passageway
to and service area surrounding the equipment shall
be oored.
These units should not be installed in areas normally
subject to freezing temperatures.
CAUTION
Combustion, Dilution & Ventilation Air
If this unit is installed as a Non-Direct Vent Furnace, follow
the guidelines in this section.
NOTE: In Non-Direct Vent Installations, combustion air is
taken from indoors and ue gases are discharged outdoors.
In the past, there was no problem in bringing in sucient
outdoor air for combustion. Inltration provided all the air
that was needed. In today’s homes, tight construction
practices make it necessary to bring in air from outside
for combustion. Take into account that exhaust fans,
appliance vents, chimneys, and replaces force additional
air that could be used for combustion out of the house.
Unless outside air is brought into the house for combustion,
negative pressure (outside pressure is greater than inside
pressure) will build to the point that a down draft can
occur in the furnace vent pipe or chimney. As a result,
combustion gases enter the living space creating a
potentially dangerous situation.
In the absence of local codes concerning air for combustion
and ventilation, use the guidelines and procedures in this
section to install these furnaces to ensure ecient and safe
operation. You must consider combustion air needs and
requirements for exhaust vents and gas piping. A portion
of this information has been reprinted with permission from
the National Fuel Gas Code (ANSI-Z223.1/NFPA 54). This
reprinted material is not the complete and ocial position
of ANSI on the referenced subject, which is represented
only by the standard in its entirely.
In Canada, refer to the CSA B149 Installation codes.
507769C05 Page 7 of 55
mrcool.com
Insucient combustion air can cause headaches,
nausea, dizziness or asphyxiation. It will also cause
excess water in the heat exchanger resulting in rusting
and premature heat exchanger failure. Excessive
exposure to contaminated combustion air will result
in safety and performance related problems. Avoid
exposure to the following substances in the combustion
air supply:
• Permanent wave solutions
• Chlorinated waxes and cleaners
• Chlorine base swimming pool chemicals
• Water softening chemicals
• De-icing salts or chemicals
• Carbon tetrachloride
• Halogen type refrigerants
• Cleaning solvents (such as perchloroethylene)
• Printing inks, paint removers, varnishes, etc.
• Hydrochloric acid
• Cements and glues
• Antistatic fabric softeners for clothes dryers
• Masonry acid washing materials
WARNING
All gas-red appliances require air for the combustion
process. If sucient combustion air is not available,
the furnace or other appliance will operate ineciently
and unsafely. Enough air must be provided to meet the
needs of all fuel-burning appliances and appliances such
as exhaust fans which force air out of the house. When
replaces, exhaust fans, or clothes dryers are used at the
same time as the furnace, much more air is required to
ensure proper combustion and to prevent a down draft.
Insucient air causes incomplete combustion which can
result in carbon monoxide.
In addition to providing combustion air, fresh outdoor air
dilutes contaminants in the indoor air. These contaminants
may include bleaches, adhesives, detergents, solvents
and other contaminants which can corrode furnace
components.
The requirements for providing air for combustion and
ventilation depend largely on whether the furnace is
installed in an unconned or a conned space.
Unconned Space
An unconned space is an area such as a basement
or large equipment room with a volume greater than 50
cubic feet (1.42 m³) per 1,000 Btu (.29 kW) per hour of
the combined input rating of all appliances installed in that
space. This space also includes adjacent rooms which are
not separated by a door. Though an area may appear to
be unconned, it might be necessary to bring in outdoor air
for combustion if the structure does not provide enough air
by inltration.
Do not install the furnace in a corrosive or contaminated
atmosphere. Meet all combustion and ventilation air
requirements, as well as all local codes.
CAUTION
If the furnace is located in a building of tight construction
with weather stripping and caulking around the windows
and doors, follow the procedures in the “Air from Outside”
section.
Conned Space
A conned space is an area with a volume less than 50
cubic feet (1.42 m³) per 1,000 Btu (.29 kW) per hour of
the combined input rating of all appliances installed in that
space. This denition includes furnace closets or small
equipment rooms.
When the furnace is installed so that supply ducts carry
air circulated by the furnace to areas outside the space
containing the furnace, the return air must be handled by
ducts which are sealed to the furnace casing and which
terminate outside the space containing the furnace. This
is especially important when the furnace is mounted on
a platform in a conned space such as a closet or small
equipment room. Even a small leak around the base of the
unit at the platform or at the return air duct connection can
cause a potentially dangerous negative pressure condition.
Air for combustion and ventilation can be brought into the
conned space either from inside the building or from
outside.
Air from Inside
If the conned space that houses the furnace adjoins a
space categorized as unconned, air can be brought in
by providing two permanent openings between the two
spaces. Each opening must have a minimum free area of 1
square inch (645 mm²) per 1,000 Btu (.29 kW) per hour of
total input rating of all gas-red equipment in the conned
space. Each opening must be at least 100 square inches
(64516 mm²). One opening shall be within 12 inches (305
mm) of the top of the enclosure and one opening within 12
inches (305 mm) of the bottom. See Figure 4.
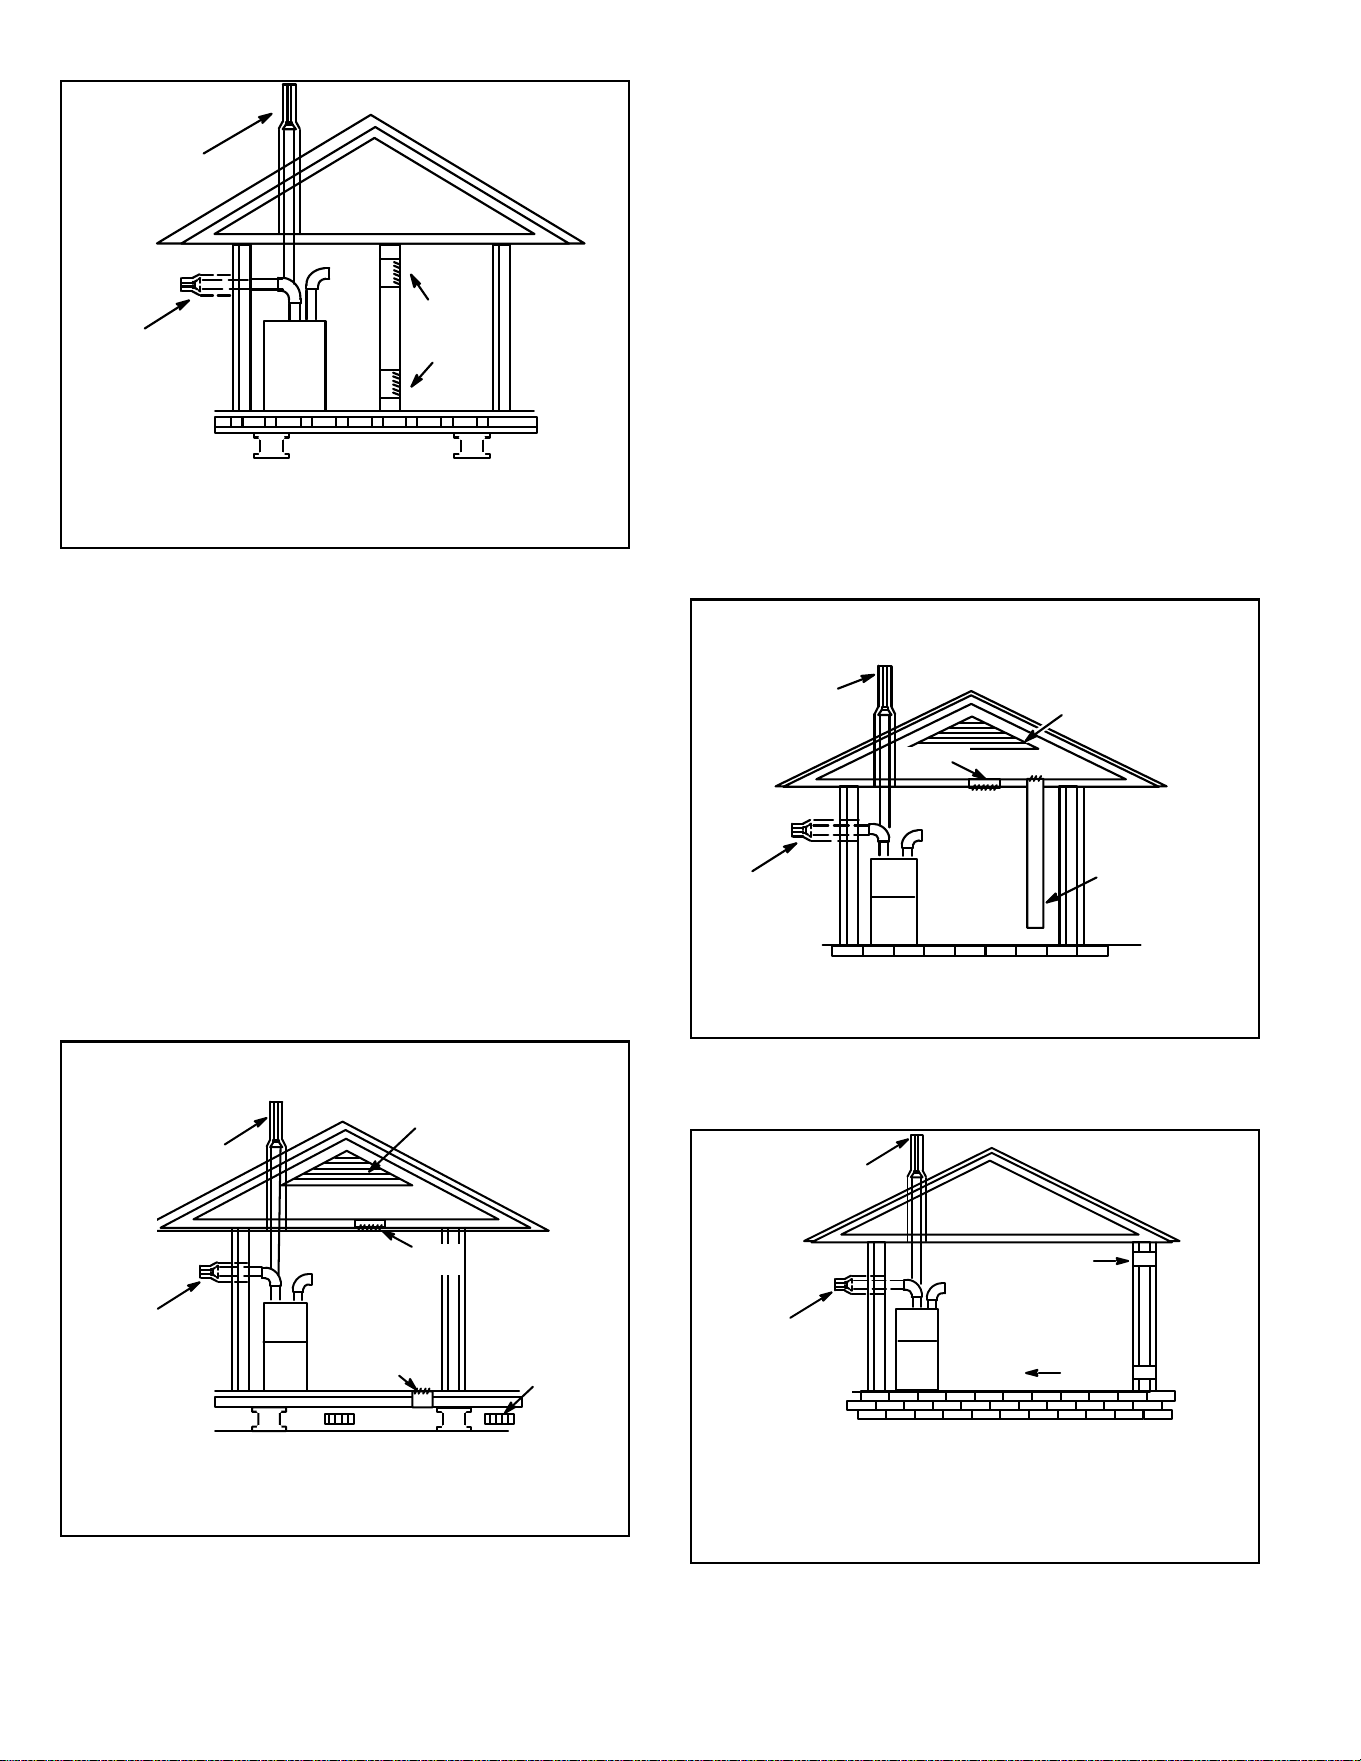
507769C05Page 8 of 55
mrcool.com
Figure 4. Equipment in Conned Space - All Air from
Inside
OPENINGS
(To Adjacent
Unconned
Space)
NOTE : Each opening shall have a free area of at least one square inch
per 1,000 Btu (645 mm
2
per .29 kW) per hour of the total input rating of
all equipment in the enclosure, but not less than 100 square inches
(64516 mm
2
ROOF TERMINATED
EXHAUST PIPE
SIDE WALL
TERMINATED
EXHAUST PIPE
(ALTERNATE
LOCATION)
FURNACE
).
Air from Outside
If air from outside is brought in for combustion and
ventilation, the conned space shall be provided with two
permanent openings. One opening shall be within 12” (305
mm) of the top of the enclosure and one within 12” (305 mm)
of the bottom. These openings must communicate directly
or by ducts with the outdoors or spaces (crawl or attic) that
freely communicate with the outdoors or indirectly through
vertical ducts. Each opening shall have a minimum free
area of 1 square inch per 4,000 Btu (645 mm² per .59 kW)
per hour of the total input rating of all equipment in the
enclosure (see Figure 5 and Figure 6). It is also permissible
to bring air for combustion from a ventilated attic (Figure 8)
or ventilated crawl space (Figure 9).
(Inlet Air from Crawl Space and Outlet Air to Ventilated Attic)
NOTE: The inlet and outlet air openings shall each have a free area
of at least one square inch per 4,000 Btu (645 mm
2
per 1.17 kW) per
hour of the total input rating of all equipment in the enclosure.
OUTLET
AIR
INLET
AIR
VENTILATION
LOUVERS
(For unheated
crawl space)
FURNACE
ROOF TERMINATED
EXHAUST PIPE
VENTILATION LOUVERS
(Each end of attic)
SIDE WALL
TERMINATED
EXHAUST PIPE
(ALTERNATE
LOCATION)
Figure 5. Equipment in Conned Space - All Air from
Outside
When communicating with the outdoors through horizontal
ducts, each opening shall have a minimum free area of 1
square inch (645 mm²) per 2,000 Btu (.56 kW) per hour of
the total input rating of all equipment in the enclosure. See
Figure 7.
When ducts are used, they shall be of the same cross-
sectional area as the free area of the openings to which
they connect. The minimum dimension of rectangular
air ducts shall be no less than 3 inches (75 mm). In
calculating free area, the blocking eect of louvers, grilles,
or screens must be considered. If the design and free area
of protective covering is not known for calculating the size
opening required, it may be assumed that wood louvers
will have 20 to 25 percent free area and metal louvers and
grilles will have 60 to 75 percent free area. Louvers and
grilles must be xed in the open position or interlocked
with the equipment so that they are opened automatically
during equipment operation.
Figure 6. Equipment in Conned Space - All Air from
Outside
(All Air Through Ventilated Attic)
NOTE: The inlet and outlet air openings shall each have a free area of
at least one square inch per 4,000 Btu (645 mm
2
per 1.17 kW) per hour
of the total input rating of all equipment in the enclosure.
OUTLET
AIR
VENTILATION LOUVERS
(Each end of attic)
INLET AIR
(Ends 12" above
bottom)
ROOF TERMINATED
EXHAUST PIPE
SIDE WALL
TERMINATED
EXHAUST PIPE
(ALTERNATE
LOCATION)
FURNACE
Figure 7. Equipment in Conned Space - all Air from
Outside
OUTLET AIR
INLET AIR
NOTE: Each air duct opening shall have a free area of at least one
square inch per 2,000 Btu (645 mm
2
per .59 kW) per hour of the total
input rating of all equipment in the enclosure. If the equipment room
is located against an outside wall and the air openings communi-
cate directly with the outdoors, each opening shall have a free area
of at least 1 square inch per 4,000 Btu (645 mm
2
per 1.17 kW) per
hour of the total input rating of all other equipment in the enclosure.
ROOF TERMINATED
EXHAUST PIPE
SIDE WALL
TERMINATED
EXHAUST PIPE
(ALTERNATE
LOCATION)
FURNACE
507769C05 Page 9 of 55
mrcool.com
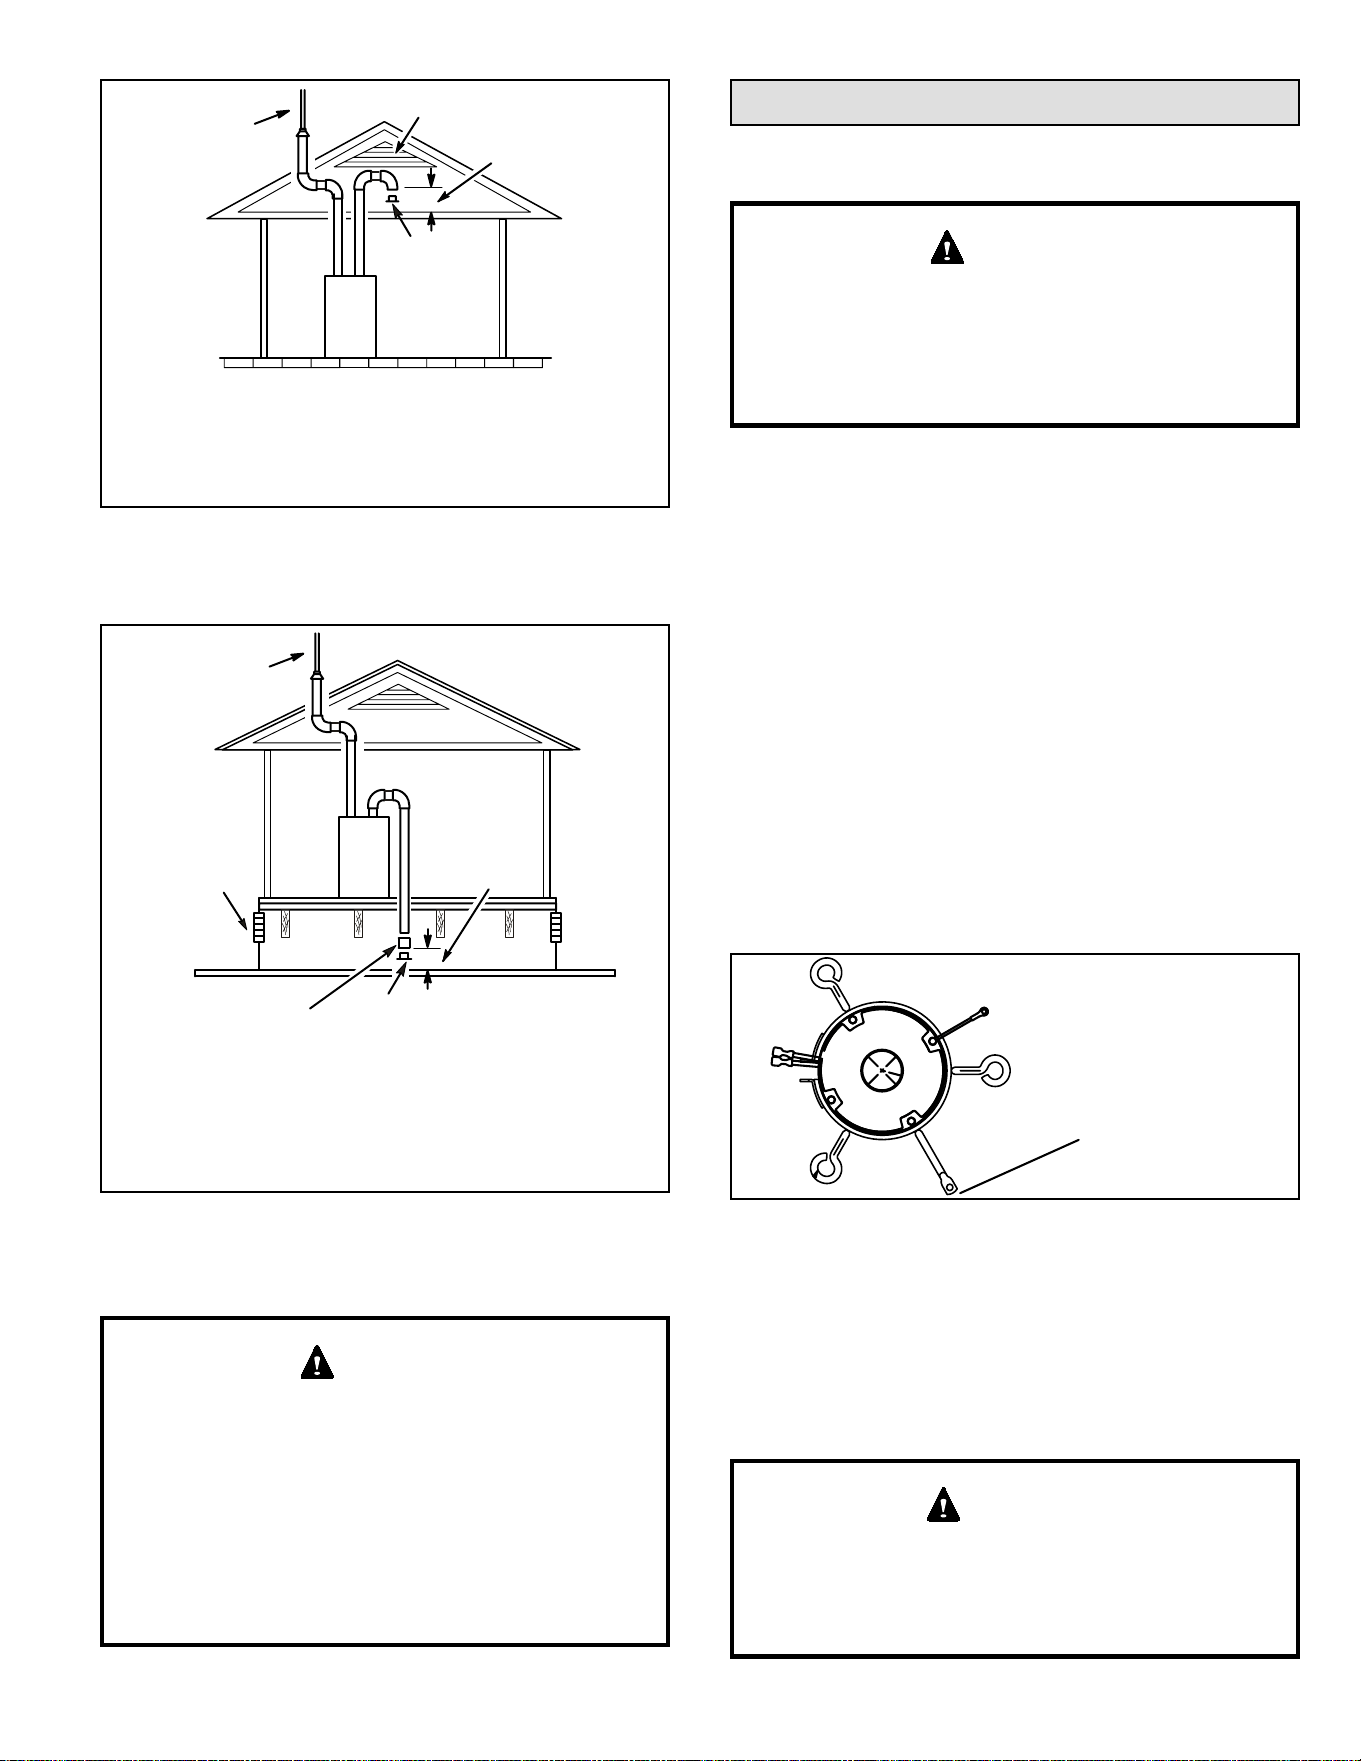
Figure 8. Equipment in Conned Space
(Inlet Air from Ventilated Attic and Outlet Air to
Outside)
Ventilation Louvers
Inlet Air
(Minimum 12 in.
(305mm) above
Attic Floor)
Roof Terminated
Exhaust Pipe
Furnace
*Intake Debris
Screen
(Provided)
* See Maximum Vent Lengths table
NOTE-The inlet and outlet air openings shall each have a
free area of at least one square inch per 4,000 Btu (645mm
2
per 1.17kW) per hour of the total input rating of all equipment
in the enclosure.
Figure 9. Equipment in Conned Space
(Inlet Air from Ventilated Crawl Space and Outlet Air
to Outside)
Roof Terminated
Exhaust Pipe
Furnace
Ventilation
Louvers
(Crawl Space)
*Intake Debris Screen Provided
Inlet Air
Minimum
12 in. (305mm)
above Crawl
Space Floor
Coupling or
3 in. to 2 in.
Transition
(Field Provided)
* See Maximum Vent Lengths table
NOTE-The inlet and outlet air openings shall each have a
free area of at least one square inch per 4,000 Btu (645mm
2
per 1.17kW) per hour of the total input rating of all equipment
in the enclosure.
If this unit is being installed in an application with
combustion air coming in from a space serviced by an
exhaust fan, power exhaust fan, or other device which
may create a negative pressure in the space, take care
when sizing the inlet air opening. The inlet air opening
must be sized to accommodate the maximum volume
of exhaust air as well as the maximum volume of
combustion air required for all gas appliances serviced
by this space.
CAUTION
Installation
Setting Equipment
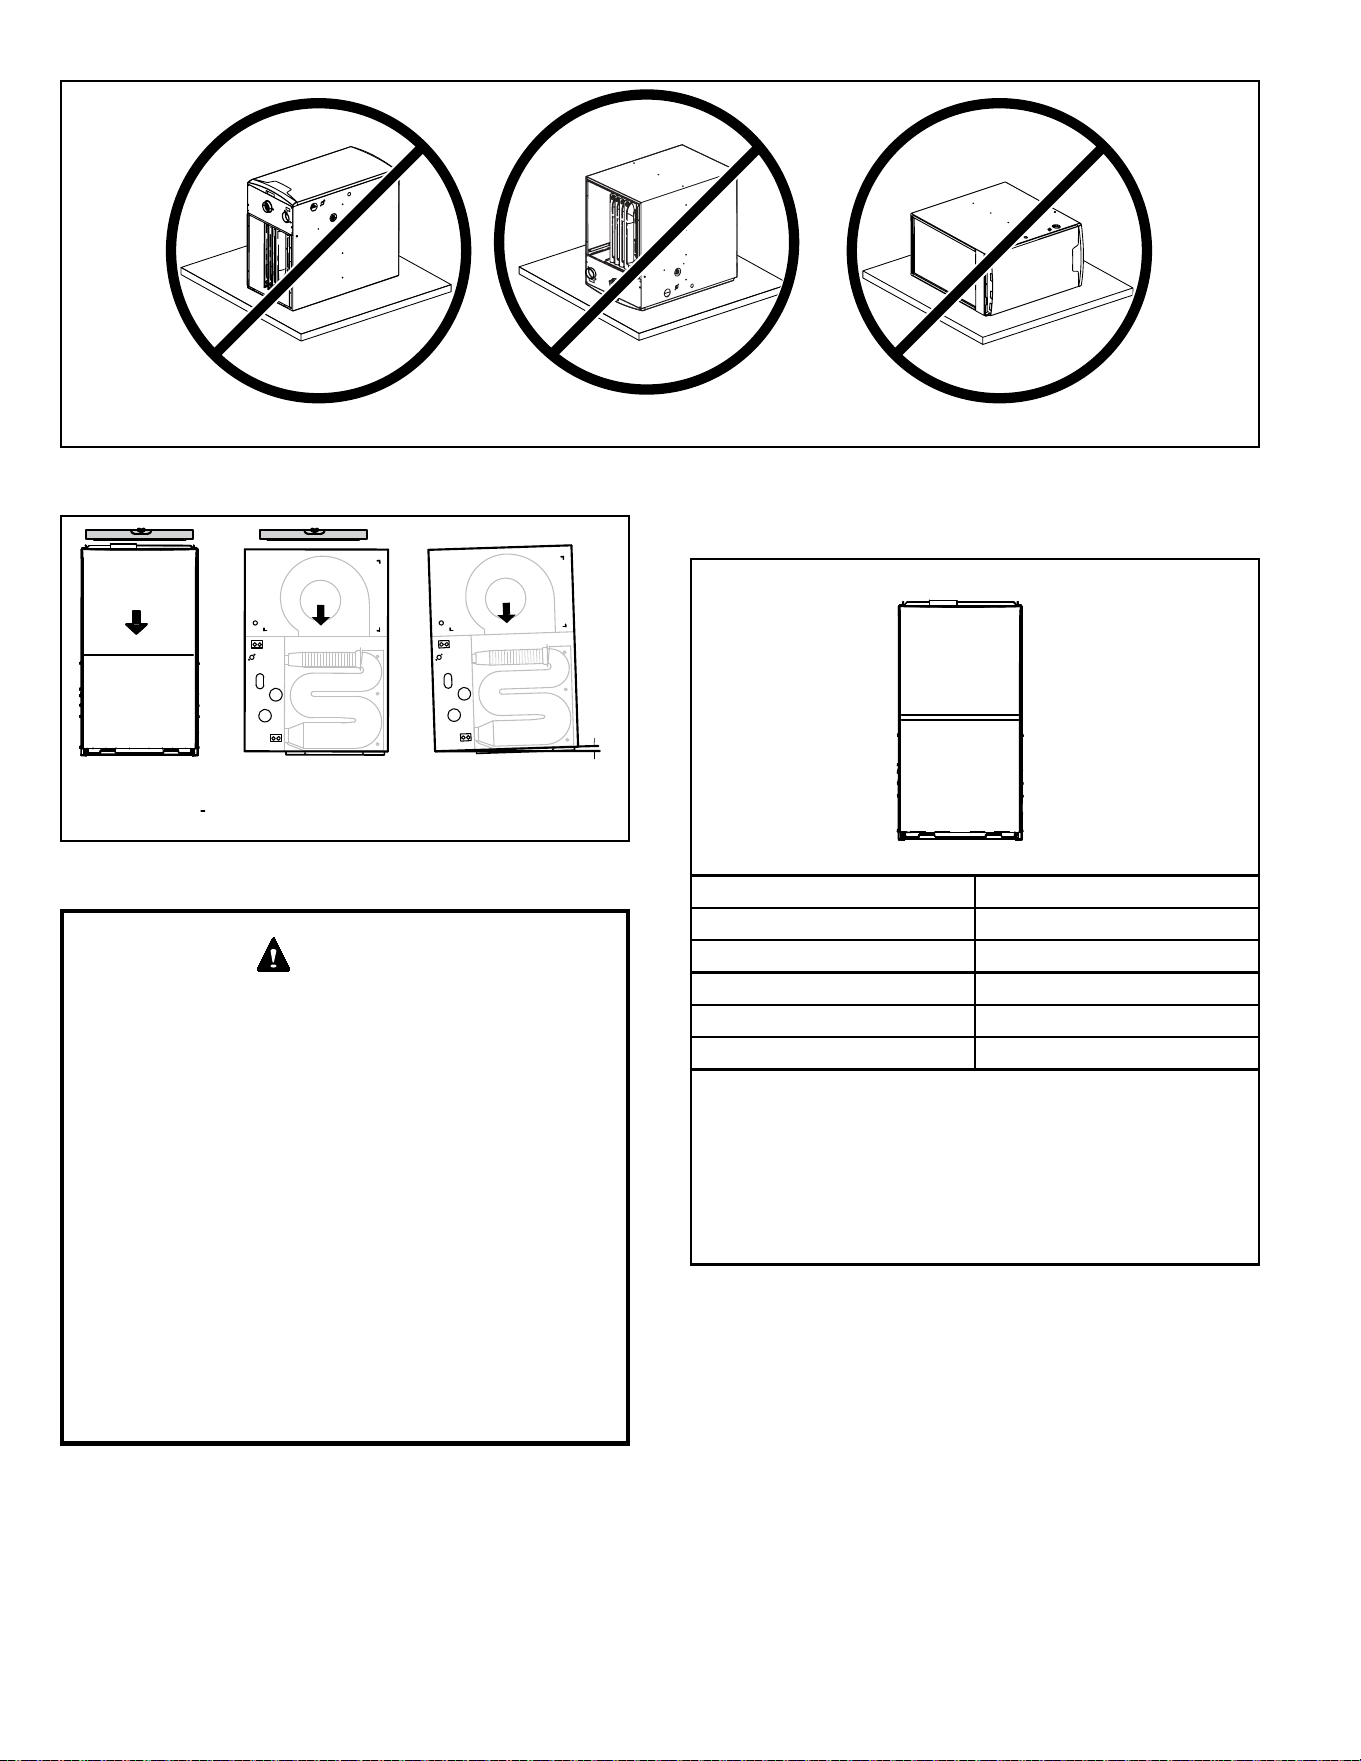
Do not install the furnace on its front, back or in the
horizontal position. See Figure 11. Do no connect the
return air ducts to the back of the furnace. Doing so
will adversely aect the operation of the safety control
devices, which could result in personal injury or death.
CAUTION
Select a location that allows for the required clearances
that are listed on the unit nameplate. Also consider gas
supply connections, electrical supply, vent connection,
condensate trap and drain connections, and installation
and service clearances [24 inches (610 mm) at unit front].
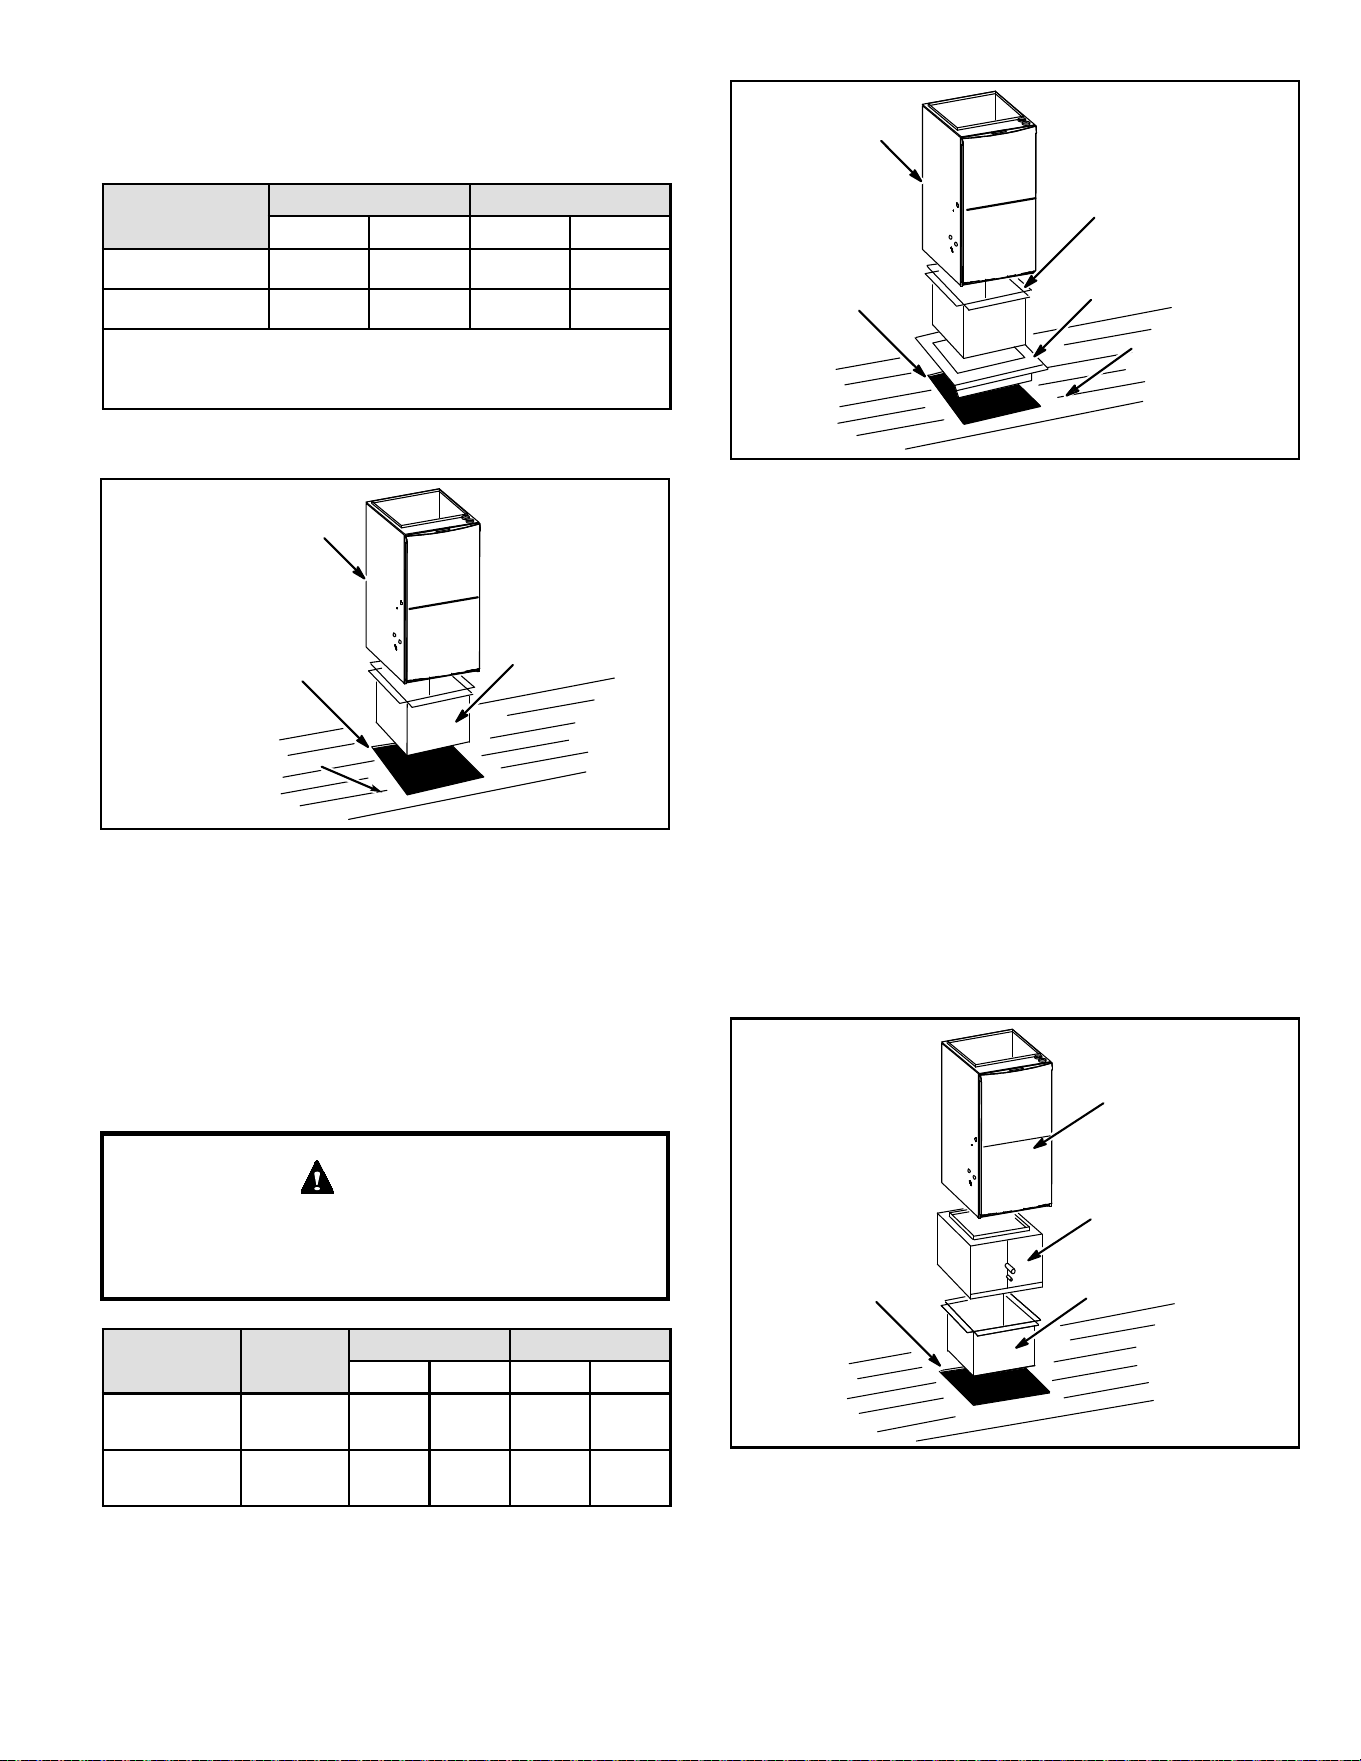
The unit must be level from side to side. Tilt the unit slightly
(maximum 1/2 in. from level) from back to front to aid in the
draining of the heat exchanger. See Figure 12.
Shipping Bolt Removal
Units with a 1/2 hp & 3/4 hp blower motors are equipped
with three exible legs and one rigid leg. The rigid leg
is equipped with a shipping bolt and a at white plastic
washer (rather than the rubber mounting grommet used
with a exible mounting leg). See Figure 10. The bolt and
washer must be removed before the furnace is placed into
operation. After the bolt and washer have been removed,
the rigid leg will not touch the blower housing.
Figure 10.
RIGID LEG
(Remove shipping bolt
and washer)
Units with 1/2 or 3/4 HP Blower Motor
NOTE: These units may be equipped with a shipping pad
under the blower housing. Remove the shipping pad prior
to operation.
Allow for clearances to combustible materials as indicated
on the unit nameplate. Minimum clearances for closet or
alcove installations are shown in Figure 13.
Blower access panel must be securely in place when
blower and burners are operating. Gas fumes, which
could contain carbon monoxide, can be drawn into
living space resulting in personal injury or death.
WARNING
507769C05Page 10 of 55
mrcool.com
NOTE - Do not install the furnace on its front, back or in the horizontal position
Front
Back
Horizontal
Figure 11.
Refer to Figure 13 for clearances in downow applications.
Top
Bottom
Left Side Right Side
Top 0
*Front 0
Back 0
Sides 0†
Vent 0
Floor NC ‡
*Front clearance in alcove installation must be 24 in. (610 mm).
Maintain a minimum of 24 in. (610 mm) for front service access.
†Allow proper clearances to accommodate condensate trap.
‡The furnace may be installed on a combustible wood oor if an optional
additive base is installed between the furnace and the combustible oor.
Figure 13. Downow Application Installation
Clearances
Top 0
*Front 0
Back 0
Sides 0†
Vent 0
Floor NC‡
*Front clearance in alcove installation must be 24 in. (610
mm). Maintain a minimum of 24 in. (610 mm) for front service
access.
†Allow proper clearances to accommodate condensate trap.
‡The furnace may be installed on a combustible wood oor if
an optional additive base is installed between the furnace and
the combustible oor.
Installation on Non-Combustible Flooring
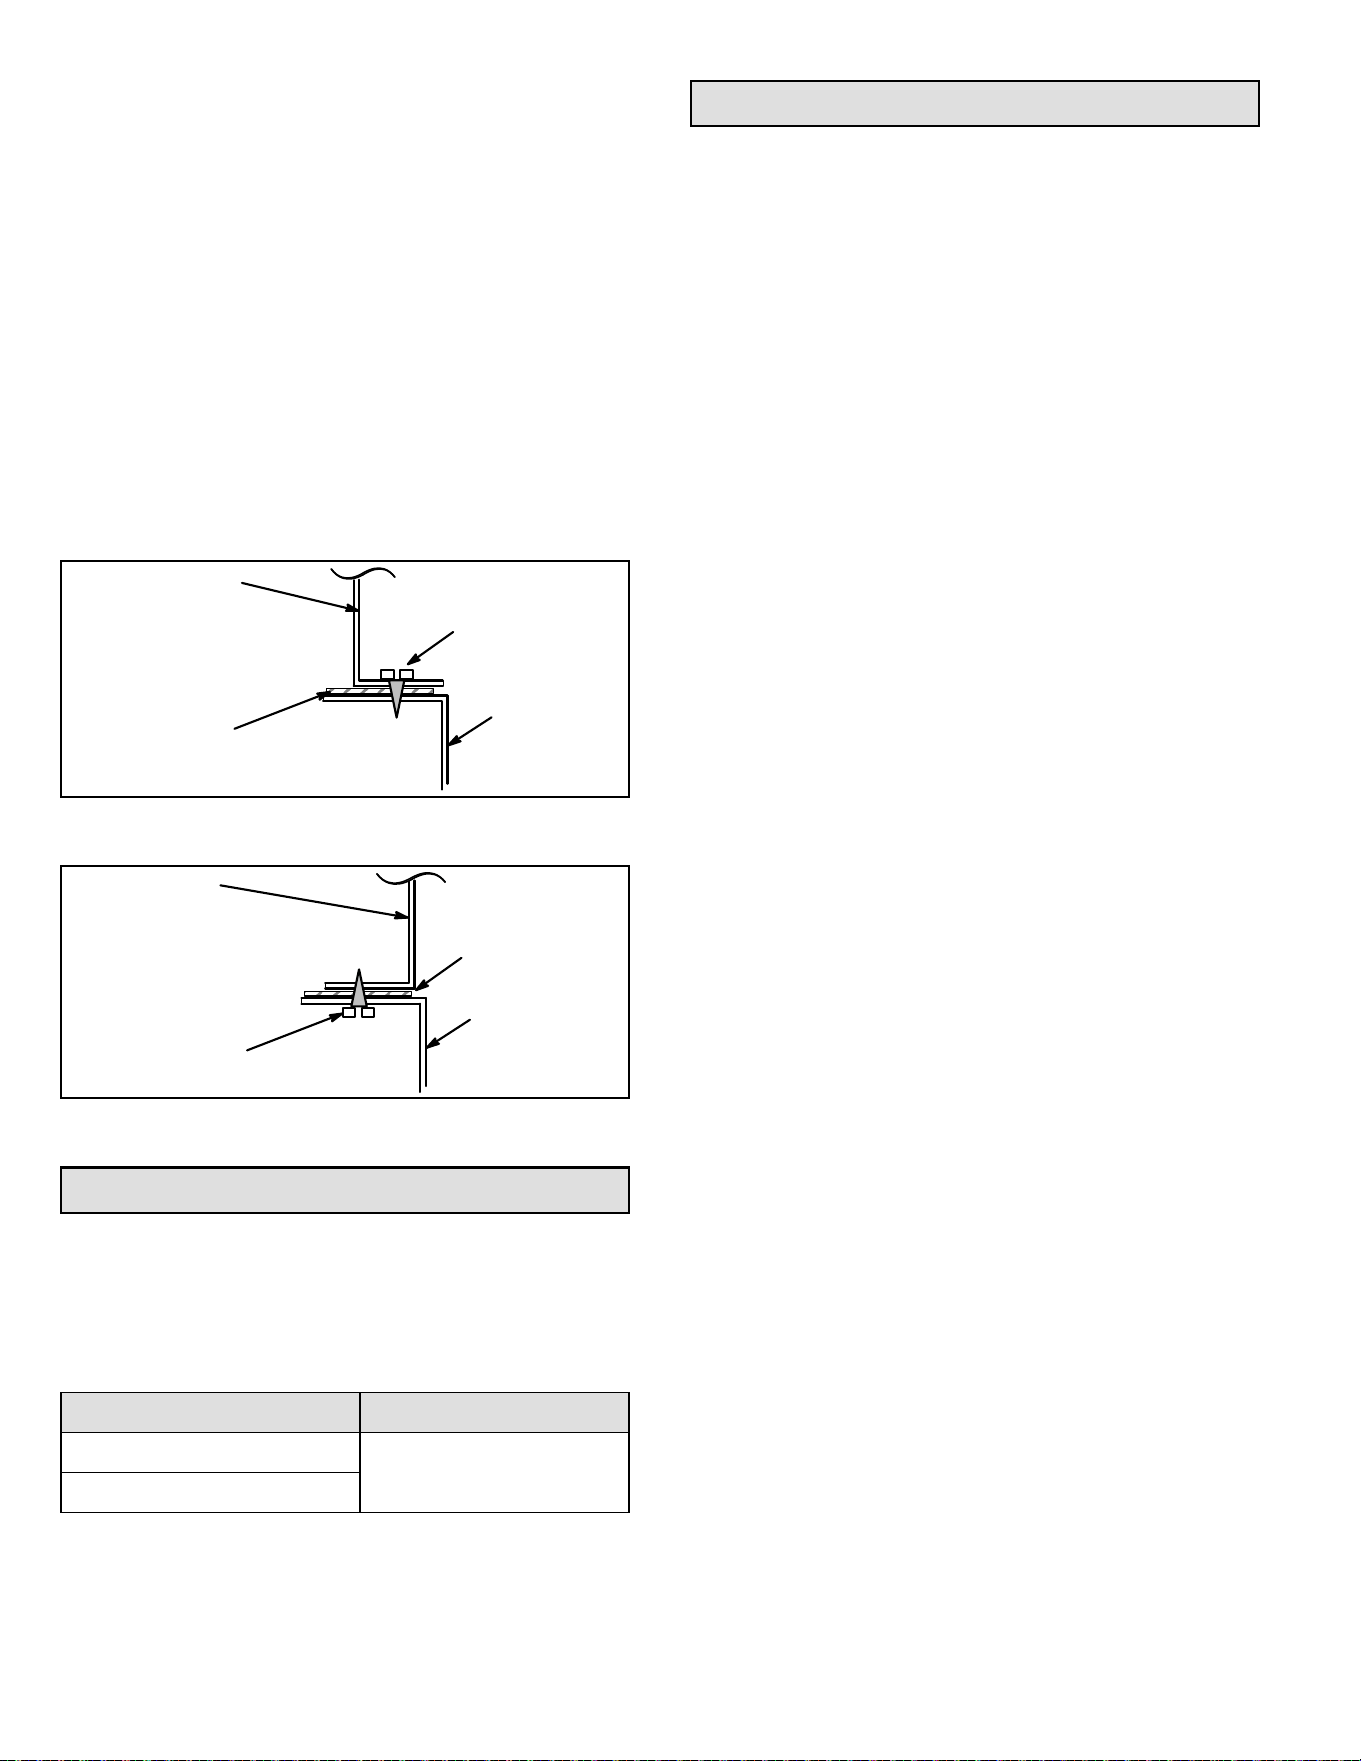
See Figure 14
1. Cut oor opening keeping in mind clearances listed
on unit rating plate. Also keep in mind gas supply
connections, electrical supply, ue and air intake
connections and sucient installation and servicing
clearances. See Table 1 for correct oor opening size.
2. Flange warm air plenum and lower the plenum into the
opening.
Figure 12. Setting Equipment
FRONT VIEW SIDE VIEW
AIR FLOW
AIR FLOW
1/2"
max.
AIR FLOW
SIDE VIEW
Unit must be level side−to−side. Unit may be positioned
from level to 1/2" toward the front to aid in draining.
Improper installation of the furnace can result in
personal injury or death. Combustion and ue products
must never be allowed to enter the return air system or
air in the living space. Use sheet metal screws and joint
tape to seal return air system to furnace.
In platform installations with furnace return, the furnace
should be sealed airtight to the return air plenum. A door
must never be used as a portion of the return air duct
system. The base must provide a stable support and an
airtight seal to the furnace. Allow absolutely no sagging,
cracks, gaps, etc.
For no reason should return and supply air duct systems
ever be connected to or from other heating devices
such as a replace or stove, etc. Fire, explosion, carbon
monoxide poisoning, personal injury and/or property
damage could result.
WARNING
The unit may be installed three ways in downow
applications: on non-combustible ooring, on combustible
ooring using an additive base, or on a reverse-ow
cooling coil cabinet. Do not drag the unit across the oor
in the downow position. Floor and furnace ange damage
will result.
507769C05 Page 11 of 55
mrcool.com
3. Set the unit over the plenum and seal the plenum to
the unit.
4. Ensure that the seal is adequate.
Table 1. Non-Combustible Floor Opening Size
Cabinet Width
Front to Rear Side to Side
in. mm in. mm
B (17.5”) 19-3/4 502 16-5/8 422
C (21”) 19-3/4 502 20-1/8 511
NOTE: Floor opening dimensions listed are 1/4 inch (6 mm)
larger than the unit opening. See dimension drawing on Page
2.
Figure 14.
SUPPLY AIR
PLENUM
PROPERLY
SIZED FLOOR
OPENING
FURNACE
NON-COMBUSTIBLE
FLOORING
Installation on Combustible Flooring
See Figure 15
1. When unit is installed on a combustible oor, a
downow combustible ooring base must be installed
between the furnace and the oor. The base must be
ordered separately. See Table 2 for opening size to
cut in oor.
The furnace and combustible ooring base shall not be
installed directly on carpeting, tile, or other combustible
material other than wood ooring.
CAUTION
Table 2. Combustible Floor Base Opening Size
Cabinet
Width
Catalog
Number
Front to Rear Side to Side
in. mm in. mm
B (17.5”) 11M60 22 559 18-3/4 476
C (21”) 11M61 22 559 22-3/4 578
Figure 15.
FURNACE
SUPPLY AIR
PLENUM
COMBUSTIBLE
FLOORING BASE
PROPERLY
SIZED FLOOR
OPENING
FLOORING
COMBUSTIBLE
2. After opening is cut, set the combustible ooring base
into opening.
3. Check berglass strips on the combustible ooring
base to make sure they are properly glued and
positioned.
4. Lower supply air plenum into the combustible ooring
base until plenum anges seal against berglass
strips.
NOTE: Be careful not to damage berglass strips.
Check for a tight seal.
5. Set the furnace over the plenum.
6. Ensure that the seal between the furnace and plenum
is adequate.
Installation on Cooling Coil Cabinet
See Figure 16
Figure 16.
COOLING COIL
PLENUM
PROPERLY
SIZED FLOOR
OPENING
FURNACE
NOTE: Downow combustible ooring kit is not used.
1. Refer to reverse-ow coil installation instructions for
correctly sized opening in oor and installation of
cabinet.
507769C05Page 12 of 55
mrcool.com
2. When cooling cabinet is in place, set and secure the
furnace according to the instructions that are provided
with the cooling coil. Secure the furnace to the cabinet.
3. Seal the cabinet and check for air leaks.
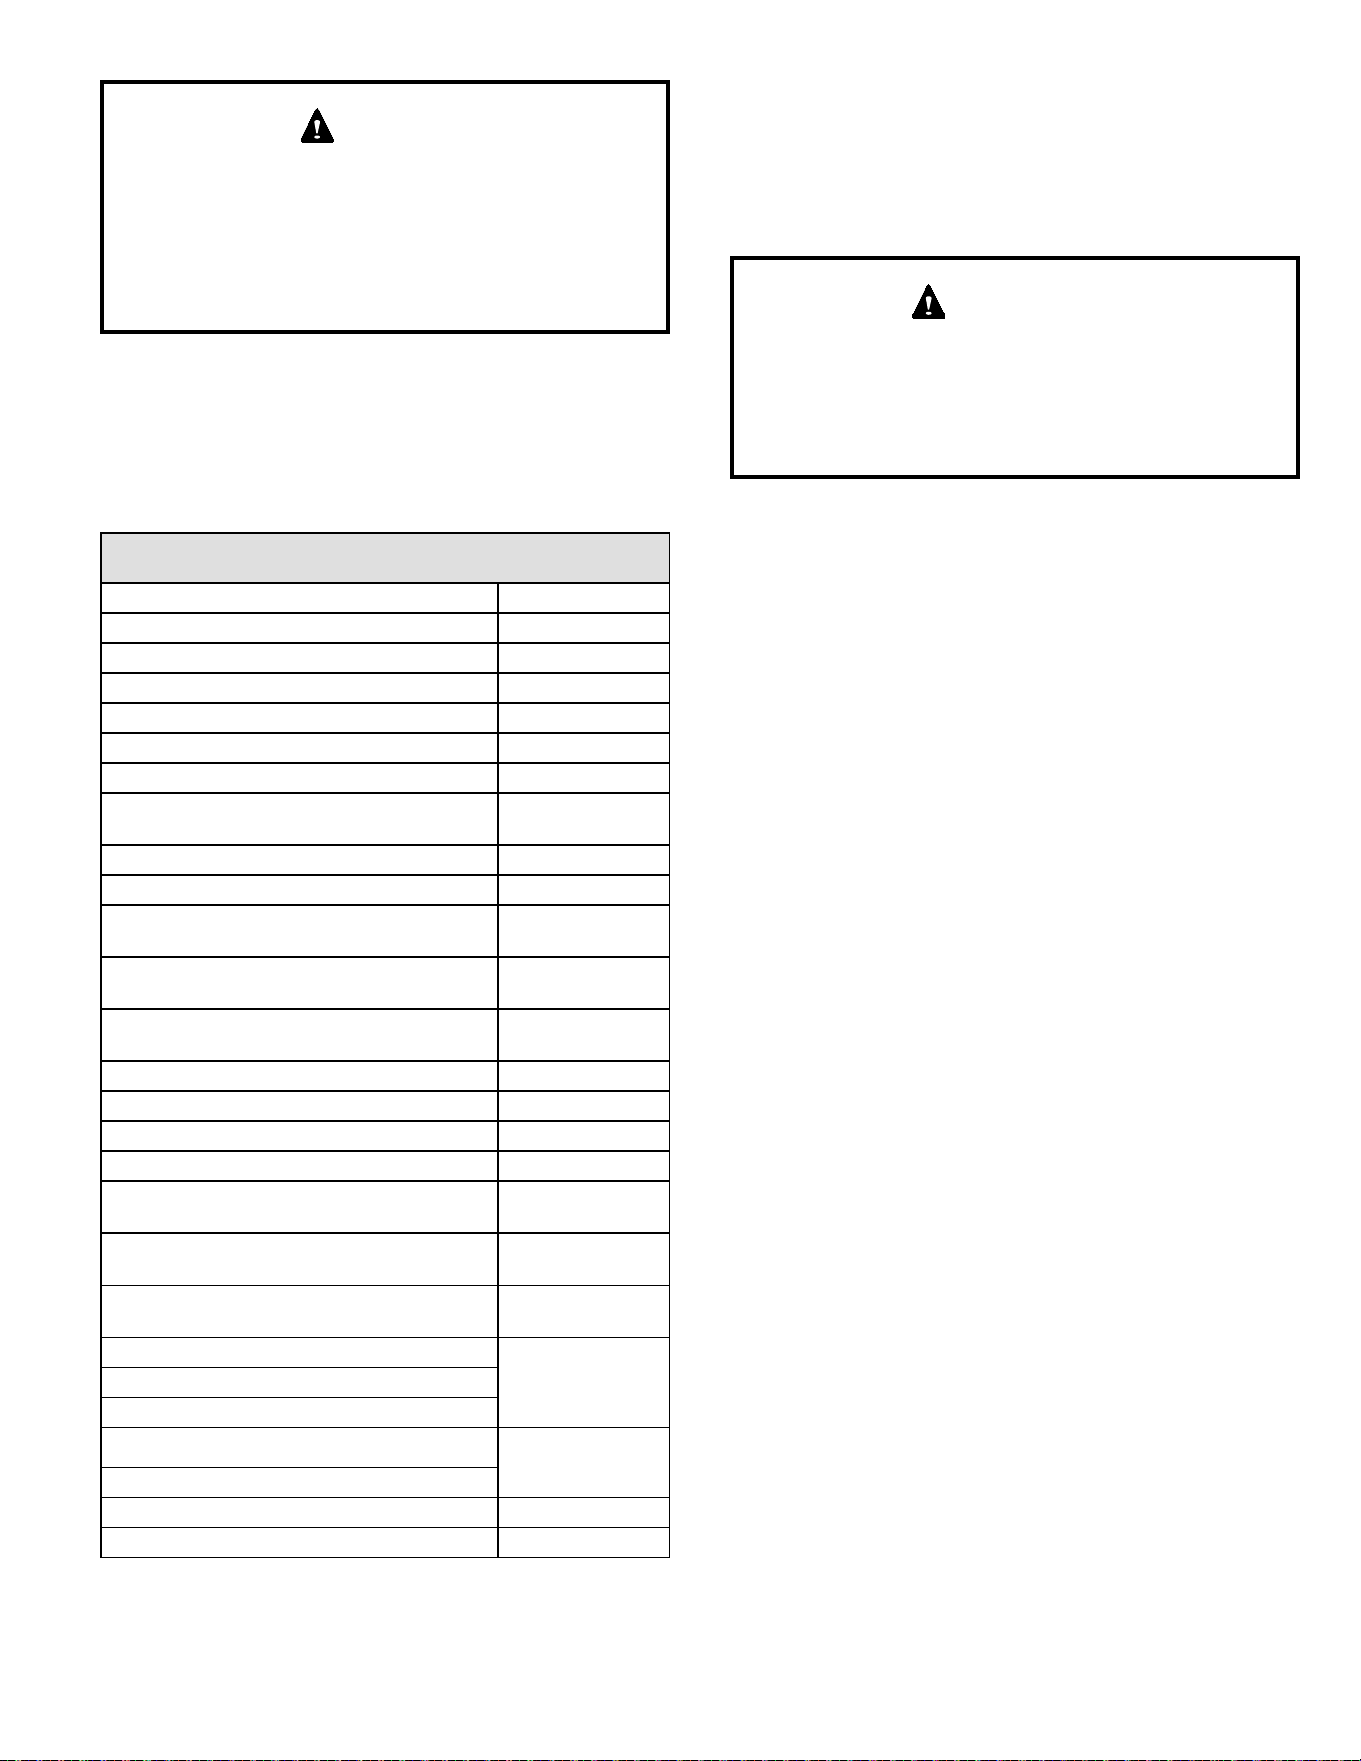
Return Air Opening - Downow Units
Return air may be brought in only through the top opening of
a furnace installed in the downow position. The following
steps should be taken when installing plenum:
1. Bottom edge of plenum should be anged with a
hemmed edge (see Figure 17 or Figure 18).
2. Sealing strips should be used to ensure an airtight
seal between the cabinet and the plenum.
3. In all cases, plenum should be secured to top of
furnace using sheet metal screws.
4. Make certain that an adequate seal is made.
Figure 17.
SECURE FROM
OUTSIDE CABINET
PLENUM
(Field Provided)
SEALING STRIP
(Field Provided)
Side View
CABINET
SIDE PANEL
Figure 18.
SECURE FROM
INSIDE CABINET
PLENUM
(Field Provided)
SEALING STRIP
(Field Provided)
Side View
CABINET
SIDE PANEL
Filters
This unit is not equipped with a lter or rack. A eld provided
lter is required for the unit to operate properly. Table 3 lists
recommended lter sizes.
A lter must be in place whenever the unit is operating.
Furnace Cabinet Width Filter Size
B (17.5”)
16 x 25 x 1 (1)
C (21”)
Table 3. Filter Size
Duct System
Use industry-approved standards to size and install the
supply and return air duct system. This will result in a quiet
and low-static system that has uniform air distribution.
NOTE: This furnace is not certied for operation in heating
mode (indoor blower operating at selected heating speed)
with an external static pressure which exceeds 0.5 inches
w.c. Operation at these conditions may result in improper
limit operation.
Supply Air Plenum
If the furnace is installed without a cooling coil, a removable
access panel should be installed in the supply air duct. The
access panel should be large enough to permit inspection
(by reected light) of the heat exchanger for leaks after the
furnace is installed. The furnace access panel must always
be in place when the furnace is operating and it must not
allow leaks into the supply air duct system.
Return Air Plenum
NOTE: Return air must not be drawn from a room where
this furnace, or any other gas-fueled appliance (i.e., water
heater), or carbon monoxide-producing device (i.e., wood
replace) is installed.
When return air is drawn from a room, a negative pressure
is created in the room. If a gas appliance is operating in
a room with negative pressure, the ue products can be
pulled back down the vent pipe and into the room. This
reverse ow of the ue gas may result in incomplete
combustion and the formation of carbon monoxide gas.
This toxic gas might then be distributed throughout the
house by the furnace duct system.
Use berglass sealing strips, caulking, or equivalent
sealing method between the plenum and the furnace
cabinet to ensure a tight seal. If a lter is installed, size the
return air duct to t the lter frame.
Pipe & Fittings Specications
All pipe, ttings, primer and solvent cement must conform
with American National Standard Institute and the American
Society for Testing and Materials (ANSI/ASTM) standards.
The solvent shall be free owing and contain no lumps,
undissolved particles or any foreign matter that adversely
aects the joint strength or chemical resistance of the
cement. The cement shall show no gelation, stratication,
or separation that cannot be removed by stirring. Refer to
Table 4 below for approved piping and tting materials.
507769C05 Page 13 of 55
mrcool.com
Solvent cements for plastic pipe are ammable liquids
and should be kept away from all sources of ignition.
Do not use excessive amounts of solvent cement when
making joints. Good ventilation should be maintained to
reduce re hazard and to minimize breathing of solvent
vapors. Avoid contact of cement with skin and eyes.
CAUTION
Use PVC primer and solvent cement or ABS solvent
cement meeting ASTM specications; refer to Table 4.
As an alternate, use all purpose cement, to bond ABS,
PVC, or CPVC pipe when using ttings and pipe made of
the same materials. Use transition solvent cement when
bonding ABS to either PVC or CPVC.
Table 4.
Piping and Fittings Specications
Schedule 40 PVC (Pipe) D1785
Schedule 40 PVC (Cellular Core Pipe) F891
Schedule 40 PVC (Fittings) D2466
Schedule 40 CPVC (Pipe) F441
Schedule 40 CPVC (Fittings) F438
SDR-21 PVC or SDR-26 PVC (Pipe) D2241
SDR-21 CPVC or SDR-26 CPVC (Pipe) F442
Schedule 40 ABS Cellular Core DWV
(Pipe)
F628
Schedule 40 ABS (Pipe) D1527
Schedule 40 ABS (Fittings) D2468
ABS-DWV (Drain Waste & Vent)
(Pipe & Fittings)
D2661
PVC-DWV (Drain Waste & Vent)
Pipe & Fittings)
D2665
PRIMER & SOLVENT CEMENT
ASTM
SPECIFICATION
PVC & CPVC Primer F656
PVC Solvent Cement D2564
CPVC Solvent Cement F493
ABS Solvent Cement D2235
PVC/CPVC/ABS All Purpose Cement For
Fittings & Pipe of the same material
D2564, D2235,
F493
ABS to PVC or CPVC Transition Solvent
Cement
D3138
CANADA PIPE & FITTING & SOLVENT
CEMENT
MARKING
PVC & CPVC Pipe and Fittings
ULCS636PVC & CPVC Solvent Cement
ABS to PVC or CPVC Transition Cement
POLYPROPYLENE VENTING SYSTEM
ULC-S636
PolyPro® by Duravent
InnoFlue® by Centrotherm ULC-S636
ECCO Polypropylene Vent
TM
ULC-S636
Low temperature solvent cement is recommended during
cooler weather. Metal or plastic strapping may be used as
vent pipe hangers. Uniformly apply a liberal coat of PVC
primer for PVC or use a clean dry cloth for ABS to clean
inside socket surface of tting and male end of pipe to
depth of tting socket.
The exhaust and intake connections are made of PVC.
Use PVC primer and solvent cement when using PVC
vent pipe. When using ABS vent pipe, use transitional
solvent cement to make connections to the PVC tting
in the unit.
IMPORTANT
Canadian Applications Only
Pipe, ttings, primer and solvent cement used to vent
(exhaust) this appliance must be certied to ULC S636 and
supplied by a single manufacturer as part of an approved
vent (exhaust) system. When bonding the vent system to
the furnace, use ULC S636 approved One-Step Transition
Cement to bond the pipe to the ue collar. In addition, the
rst three feet of vent pipe from the furnace ue collar must
be accessible for inspection.
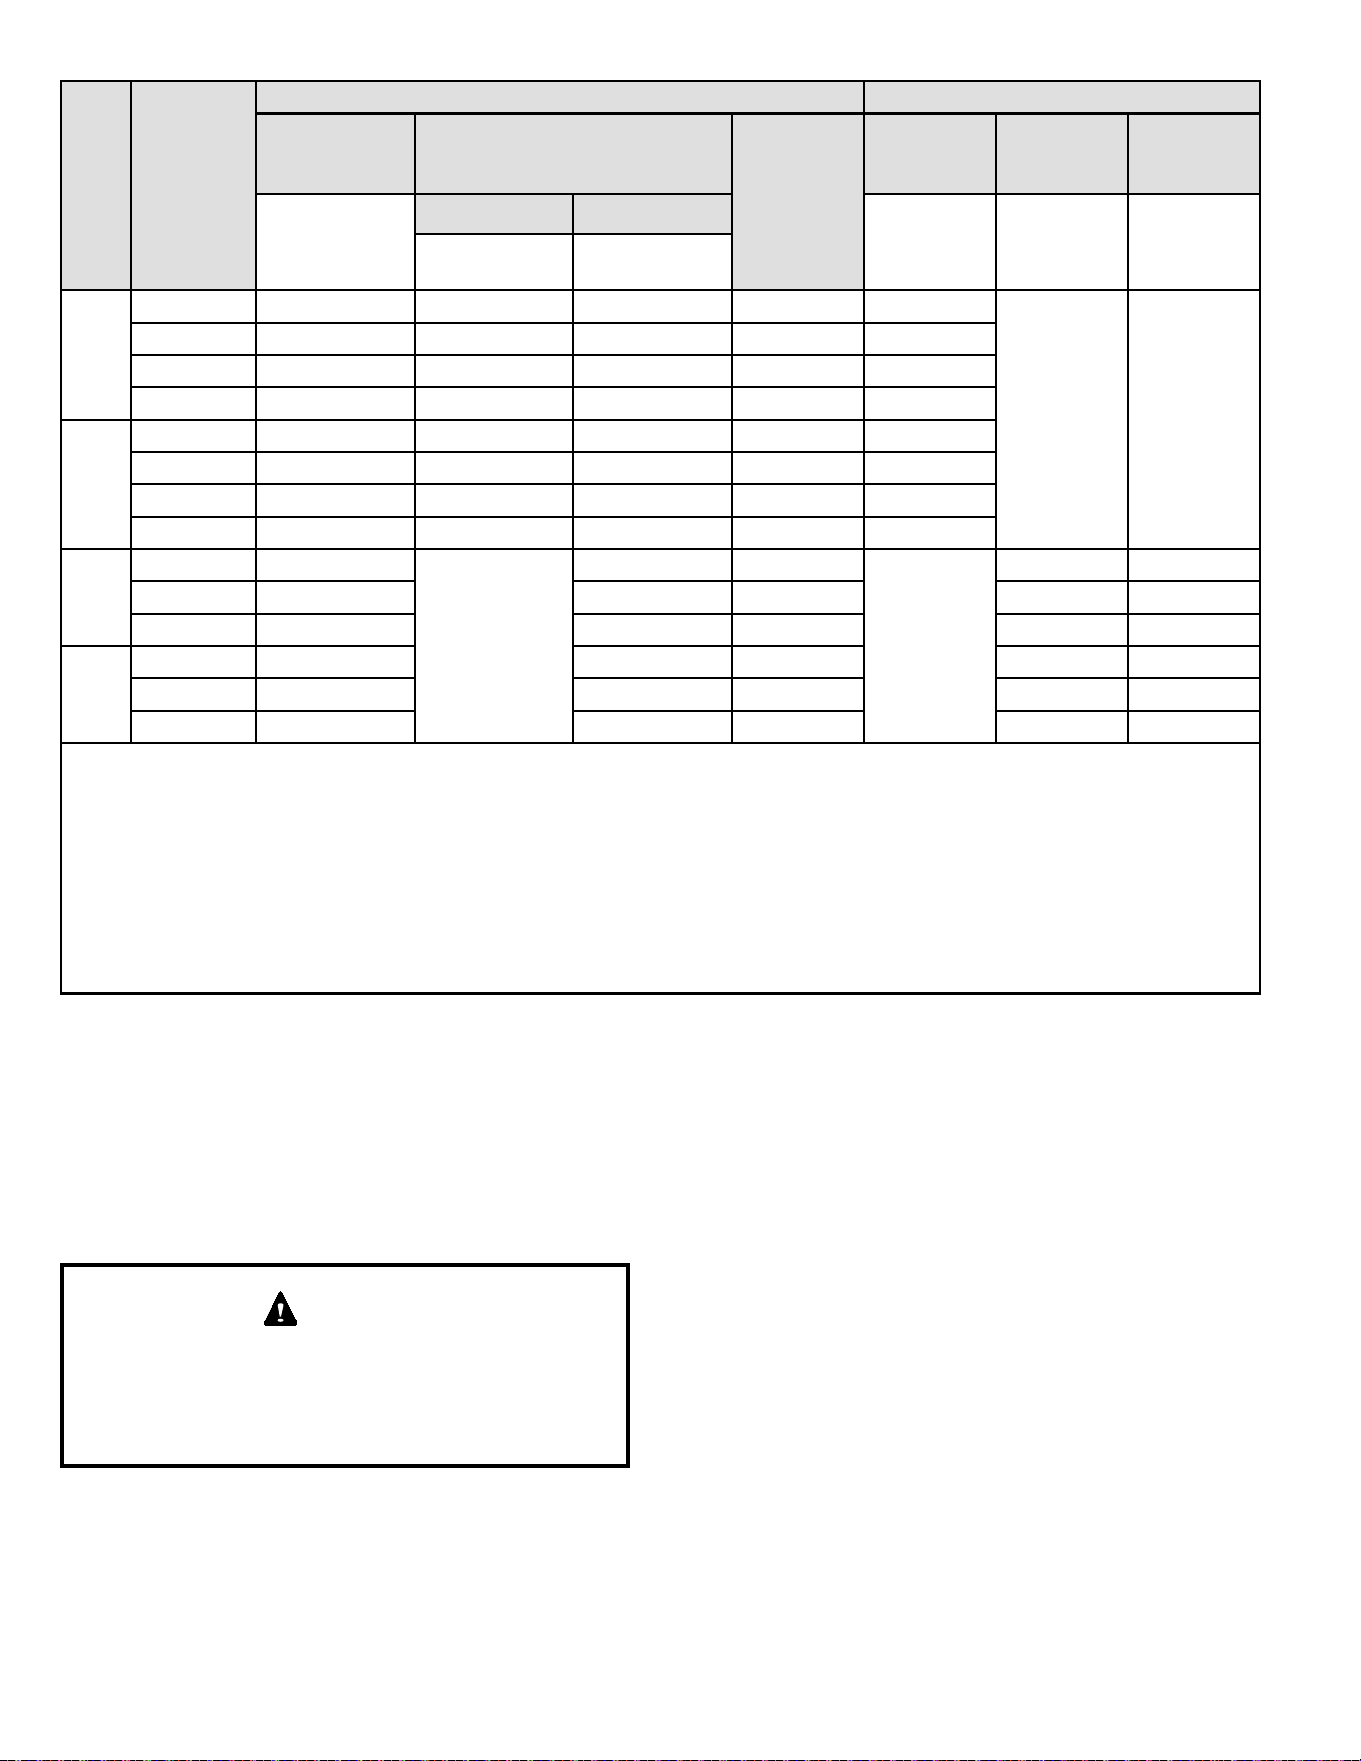
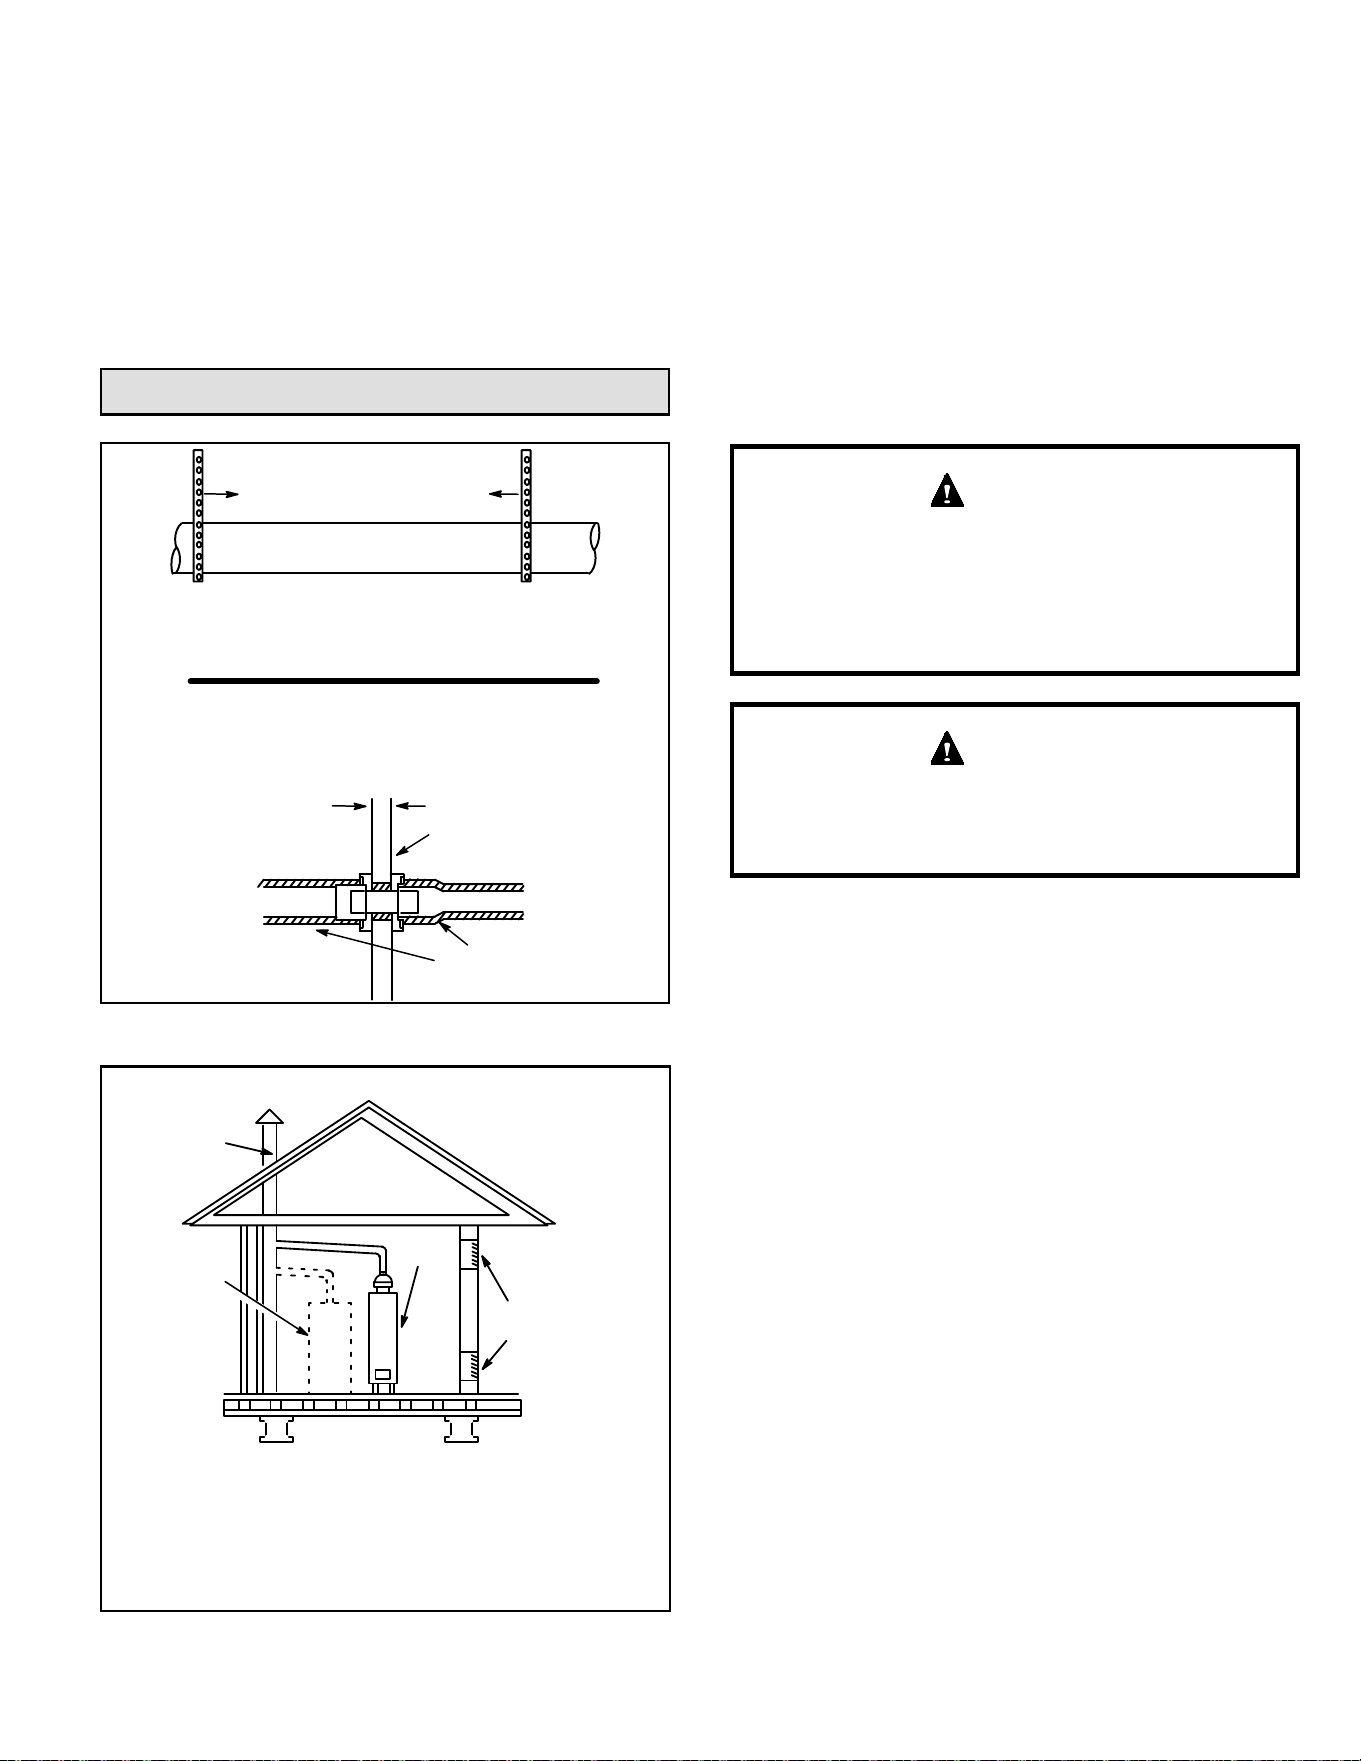
Table 5 Lists the available exhaust termination kits. All vent
terminations are PVC.
507769C05Page 14 of 55
mrcool.com
Capacity
Vent Pipe
Dia.
(in.)
Standard Concentric
Flush Mount Kit Wall Kit
Field
Fabricated
1-1/2 inch 2 inch 3 inch
51W11 (US)
51W12 (CA)
2 inch 3 inch
71M80 (US)
4
44W92
(CA)
69M29 (US)
4
44W92
(CA)
60L46 (US)
4
444W93
(CA)
22G44 (US)
4
30G28 (CA)
44J40 (US)
4
81J20 (CA)
045
1
1-1/2
3
YES YES
1
YES
5
YES
2
YES
N/A N/A
2
3
YES YES
1
YES
5
YES
2
YES
2-1/2
3
YES YES
1
YES
5
YES
2
YES
3
3
YES YES
1
YES
5
YES
2
YES
070
1
1-1/2 3YES YES
1
YES
5
YES
2
YES
2 3YES YES
1
YES
5
YES
2
YES
2-1/2
3
YES YES
1
YES
5
YES
2
YES
3
3
YES YES
1
YES
5
YES
2
YES
090
2
3
YES
N/A
YES
5
YES
N/A
YES YES
2-1/2
3
YES YES
5
YES YES YES
3
3
YES YES
5
YES YES YES
110
2 YES YES
5
YES YES YES
2-1/2 YES YES
5
YES YES YES
3 YES YES
5
YES YES YES
NOTE - Standard Terminations do not include any vent pipe or elbows external to the structure. Any vent pipe or elbows external to the structure must be included in total
vent length calculations. See vent length tables.* Kits must be properly installed according to kit instructions.
1Requires eld-provided outdoor 1-1/2” exhaust accelerator.
2Concentric kits 71M80 and 44W92 include 1-1/2” outdoor accelerator, when used with 045 and 070 input models. When using 1-1/2 in. piping, the pipe must transition to
2in. pipe when used with the concentrci kit.
3 Flush mount kits 51W11 and 51W12 includes 1-1/2 in. outdoor exhaust accelerator, required when used with 045, 070 and 090 input models. When using 1-1/2 in. piping,
the pipe must transition to 2in. pipe when used with the ush mount kit.
4 Termination kits 30G28, 44W92, 44W93 and 81J20 are certied to ULC S636 for use in Canada only.
5 See table 10 for vent accelerator requirements
6 2inch to 1-1/2 inch reducer required. must be ed required.
Table 5. Outdoor Termination Kits Usage
Joint Cementing Procedure
All cementing of joints should be done according to the
specications outlined in ASTM D 2855.
NOTE: A sheet metal screw may be used to secure the
intake pipe to the connector, if desired. Use a drill or self
tapping screw to make a pilot hole.
DANGER OF EXPLOSION!
Fumes from PVC glue may ignite during system check.
Allow fumes to dissipate for at least 5 minutes before
placing unit into operation.
DANGER
1. Measure and cut vent pipe to desired length.
2. Debur and chamfer end of pipe, removing any ridges
or rough edges. If end is not chamfered, edge of pipe
may remove cement from tting socket and result in a
leaking joint.
3. Clean and dry surfaces to be joined.
4. Test t joint and mark depth of tting on outside of pipe.
5. Uniformly apply a liberal coat of PVC primer for PVC
or use a clean dry cloth for ABS to clean inside socket
surface of tting and male end of pipe to depth of tting
socket.
6. Promptly apply solvent cement to end of pipe and
inside socket surface of tting. Cement should be
applied lightly but uniformly to inside of socket. Take
care to keep excess cement out of socket. Apply
second coat to end of pipe.
NOTE: Time is critical at this stage. Do Not allow
Primer to dry before applying cement.
7. Immediately after applying last coat of cement to pipe,
and while both inside socket surface and end of pipe
are wet with cement, forcefully insert end of pipe into
socket until it bottoms out. Turn PVC pipe 1/4 turn
during assembly (but not after pipe is fully inserted) to
distribute cement evenly. Do not turn ABS or cellular
core pipe.
507769C05 Page 15 of 55
mrcool.com
NOTE: Assembly should be completed within 20
seconds after last application of cement. Hammer
blows should not be used when inserting pipe.
8. After assembly, wipe excess cement from pipe at end
of tting socket. A properly made joint will show a bead
around its entire perimeter. Any gaps may indicate
an improper defective assembly due to insucient
solvent.
9. Handle joints carefully until completely set.
Exhaust Piping
See Figure 22
1. In areas where piping penetrates joist or interior walls,
hole must be large enough to allow clearance on all
sides of pipe through center of hole using a hanger.
2. When furnace is installed in a residence where unit
is shut down for an extended period of time, such
as a vacation home, make provisions for draining
condensate collection trap and lines.
3. Route piping to outside of structure. Continue with
installation following instructions given in piping
termination section.
Do not discharge exhaust into an existing stack or
stack that also serves another gas appliance. If vertical
discharge through an existing unused stack is required,
insert PVC pipe inside the stack until the end is even
with the top or outlet end of the metal stack.
CAUTION
The exhaust vent pipe operates under positive pressure
and must be completely sealed to prevent leakage of
combustion products into the living space.
CAUTION
Vent Piping Guidelines
This gas furnace can be installed as either a Non-Direct
Vent or a Direct Vent gas central furnace.
NOTE: In non-Direct Vent installations, combustion air is
taken from indoors and ue gases are discharged outdoors.
In Direct Vent installations, combustion air is taken from
outdoors and ue gases are discharged outdoors.
Intake and exhaust pipe sizing - Size pipe according to
Table 6 and Table 7A through Table 7D. Table 6 lists the
minimum vent pipe lengths permitted. Table 7A through
Table 7D list the maximum pipe lengths permitted.
Regardless of the diameter of pipe used, the standard roof
and wall terminations described in section Exhaust Piping
Terminations should be used. Exhaust vent termination
pipe is sized to optimize the velocity of the exhaust gas as
it exits the termination.
In some applications which permit the use of several
dierent sizes of vent pipe, a combination vent pipe may
be used. Contact MRCOOL for assistance in sizing vent
pipe in these applications.
Venting Practices
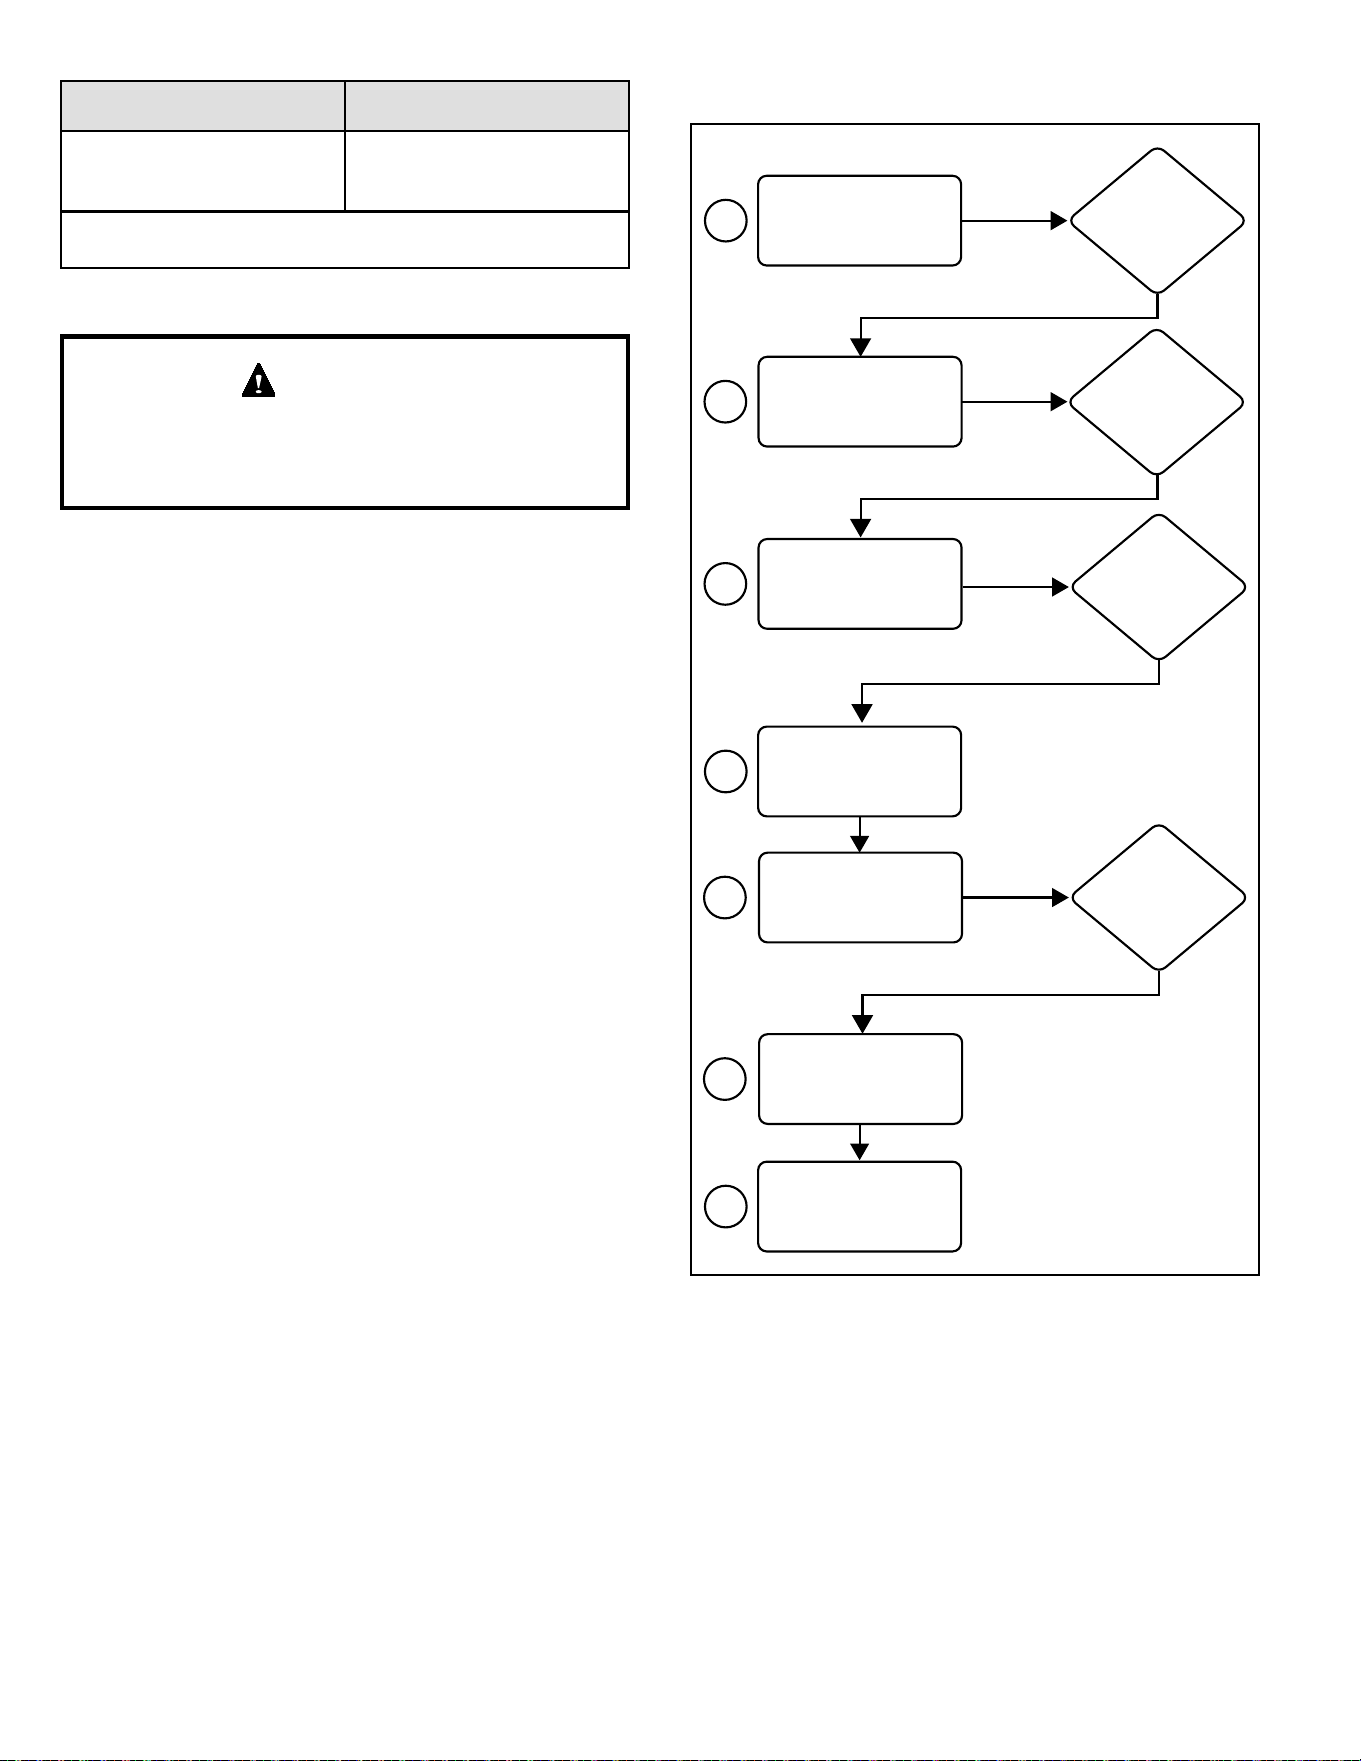
Figure 19. Piping Suspension Guidelines
* See Table 4 for allowable pipe.
NOTE: Isolate piping at the point where it exits the outside wall or
roof in order to prevent transmission of vibration to the structure.
SCHEDULE 40
PVC − 5’
all other pipe* − 3’
Wall
edistuoedisni
24" maximum
3/4" minimum
Wall Thickness Guidelines
insulation
(if required)
Figure 20.
CHIMNEY
OR GAS
VENT
(Check sizing
for remaining
appliance)
FURNACE
(Removed from
from common
vent system)
WATER
HEATER
OPENINGS
(To Adjacent
Room)
REPLACING FURNACE THAT
WAS PART OF A COMMON
VENT SYSTEM
If this gas furnace replaces a furnace which was
commonly vented with another gas appliance,
the size of the existing vent pipe for that gas appliance
must be checked. Without the heat of the original
furnace flue products, the existing vent pipe is
probably oversized for the single water heater or
other appliance. The vent should be checked for
proper draw with the remaining appliance.
507769C05Page 16 of 55
mrcool.com
Table 6. Minimum Vent Pipe Length
Capacity Min. Vent Length*
045, 070, 090, 110
15 ft. or
5 ft. plus 2 elbows or
10 ft. plus 1 elbow
* Any approved termination may be added to the minimum
length listed.
Do not use screens or perforated metal in exhaust or
intake terminations. Doing so will cause freeze-ups and
may block the terminations.
IMPORTANT
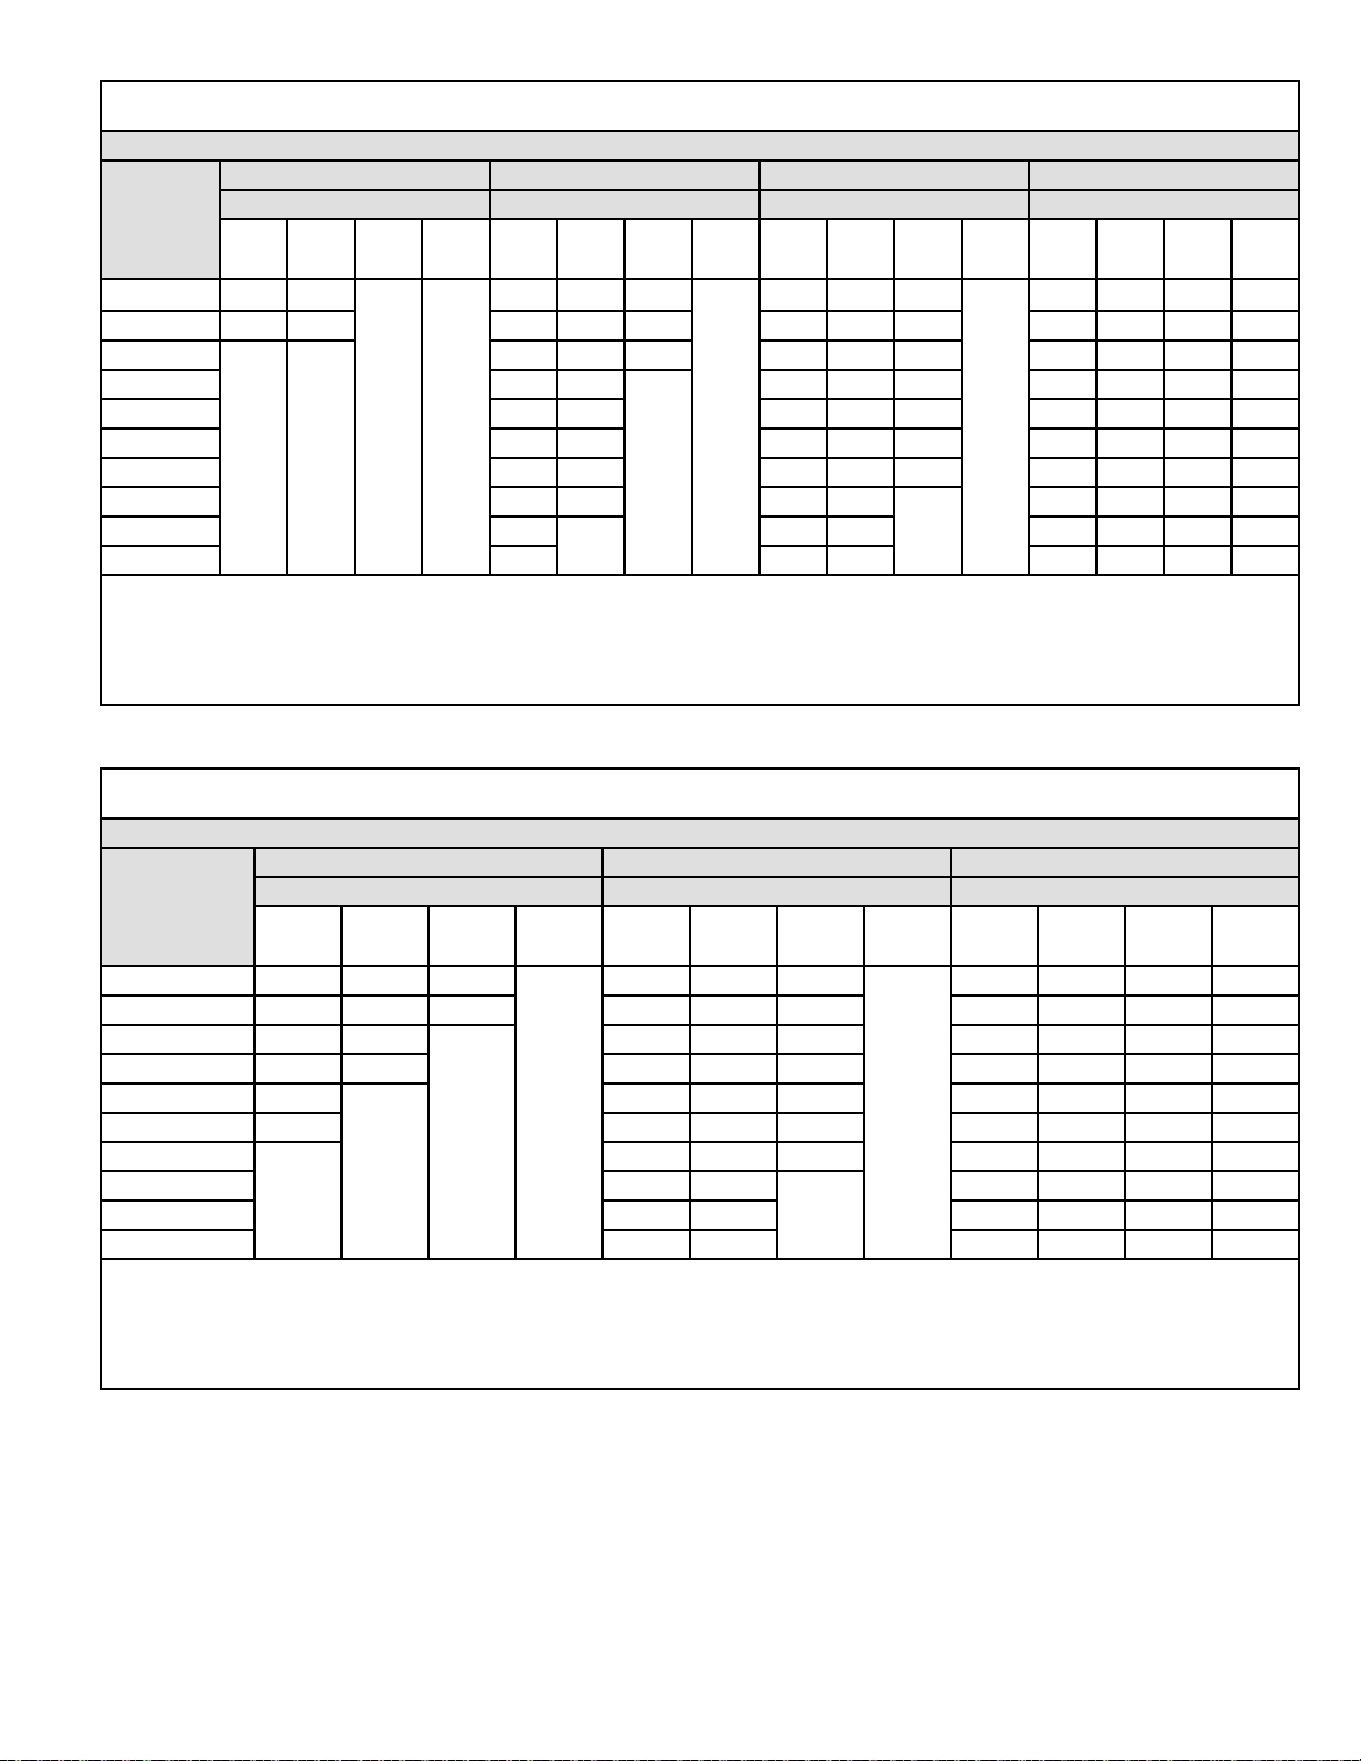
Use the following steps to correctly size vent pipe diameter.
045, 070,
090, 110
Standard or
Concentric?
See Table 5
Intake or
Exhaust?
1-1/2”, 2”,
2-1/2”, or 3”
Furnace capacity?
1
Which termination?
2
Which needs most
elbows?
3
How many?
4
Desired pipe size?
5
What is the altitude?
6
Use Table 7 to find
max pipe length.
7
Figure 21.
507769C05 Page 17 of 55
mrcool.com
Maximum Allowable Intake or Exhaust Vent Length in Feet
Standard Termination at Elevation 0 - 2,000 ft
Number of
90° Elbows
Used
1-1/2” Pipe 2” Pipe 2-1/2" Pipe 3" Pipe
Capacity Capacity Capacity Capacity
045 070 090 110 045 070 090 110 045 070 090 110 045 070 090 110
1 15 15
n/a n/a
61 46 24
n/a
100 80 43
n/a
127 127 108 108
2 10 10 56 41 19 95 75 38 122 122 103 103
3
n/a n/a
51 36 14 90 70 33 117 117 98 98
4 46 31
n/a
85 65 28 112 112 93 93
5 41 26 80 60 23 107 107 88 88
6 36 21 75 55 18 102 102 83 83
7 31 16 70 50 13 97 97 78 78
8 26 11 65 45
n/a
92 92 73 73
9 21
n/a
60 40 87 87 68 68
10 16 55 35 82 82 63 63
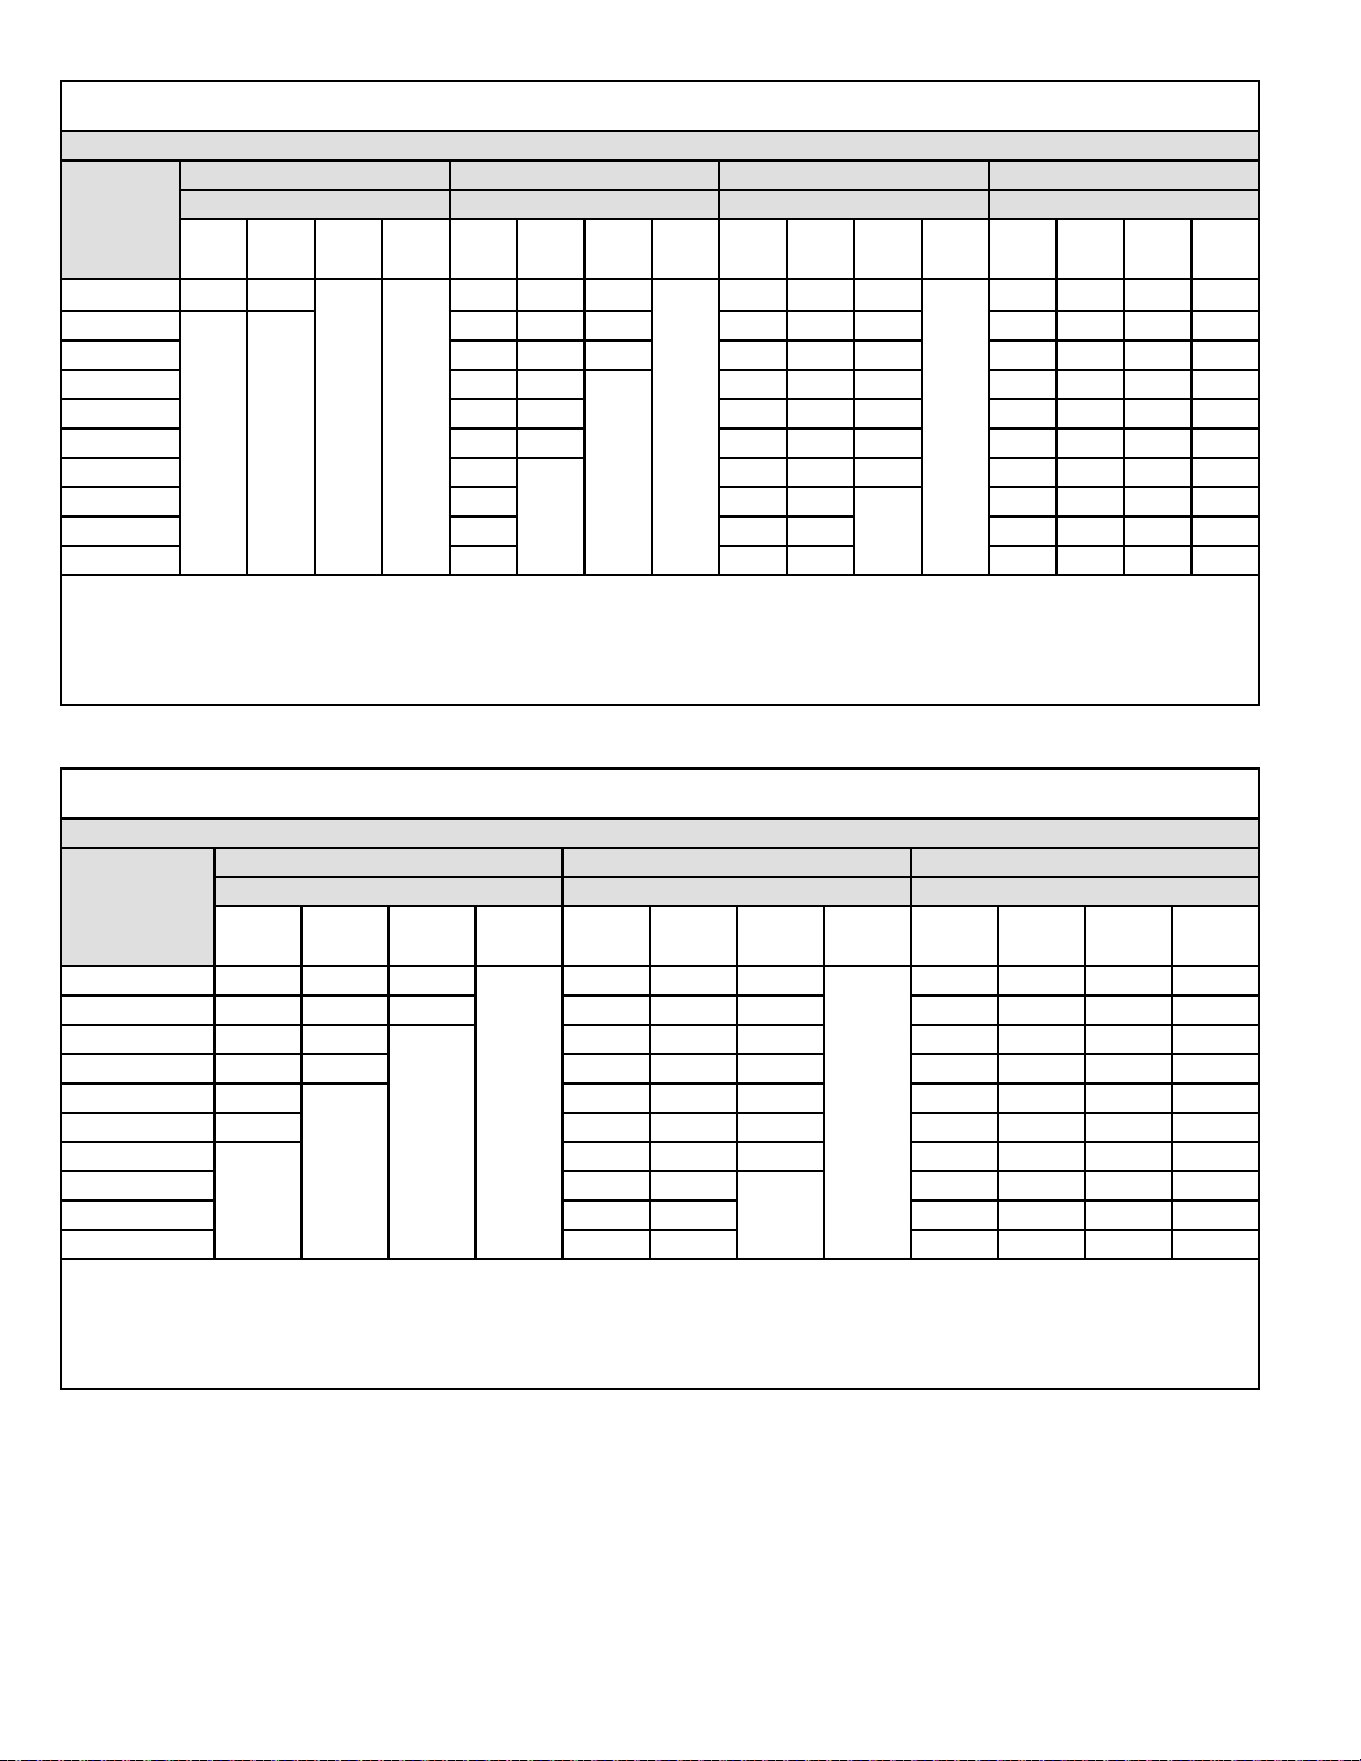
NOTE - Size intake and exhaust pipe length separately. Values in table are for Intake OR Exhaust, not combined total. Both Intake
and Exhaust must be same pipe size.
NOTE - Additional vent pipe and elbows used to terminate the vent pipe outside the structure must be included in the total vent length
calculation.
Table 7A.
Maximum Allowable Intake or Exhaust Vent Length in Feet
Standard Termination at Elevation 2,001 - 10,000 ft
Number of 90°
Elbows Used
2” Pipe 2-1/2" Pipe 3" Pipe
Capacity Capacity Capacity
045 070 090 110 045 070 090 110 045 070 090 110
1 35 25 15
n/a
100 73 43
n/a
127 127 108 108
2 30 20 10 95 68 38 122 122 103 103
3 25 15
n/a
90 63 33 117 117 98 98
4 20 10 85 58 28 112 112 93 93
5 15
n/a
80 53 23 107 107 88 88
6 10 75 48 18 102 102 83 83
7
n/a
70 43 13 97 97 78 78
8 65 38
n/a
92 92 73 73
9 60 33 87 87 68 68
10 55 28 82 82 63 63
NOTE - Size intake and exhaust pipe length separately. Values in table are for Intake OR Exhaust, not combined total. Both Intake
and Exhaust must be same pipe size.
NOTE - Additional vent pipe and elbows used to terminate the vent pipe outside the structure must be included in the total vent length
calculation.
Table 7B.
507769C05Page 18 of 55
mrcool.com
Maximum Allowable Intake or Exhaust Vent Length in Feet
Concentric Termination at Elevation 0 - 2,000 ft
Number of
90° Elbows
Used
1-1/2” Pipe 2” Pipe 2-1/2" Pipe 3" Pipe
Capacity Capacity Capacity Capacity
045 070 090 110 045 070 090 110 045 070 090 110 045 070 090 110
1 10 10
n/a n/a
53 38 22
n/a
90 70 39
n/a
111 111 104 104
2
n/a n/a
48 33 17 85 65 34 106 106 99 99
3 43 28 12 80 60 29 101 101 94 94
4 38 23
n/a
75 55 24 96 96 89 89
5 33 18 70 50 19 91 91 84 84
6 28 13 65 45 14 86 86 79 79
7 23 60 40 9 81 81 74 74
8 18 55 35
n/a
76 76 69 69
9 13 50 30 71 71 64 64
10 n/a 45 25 66 66 59 59
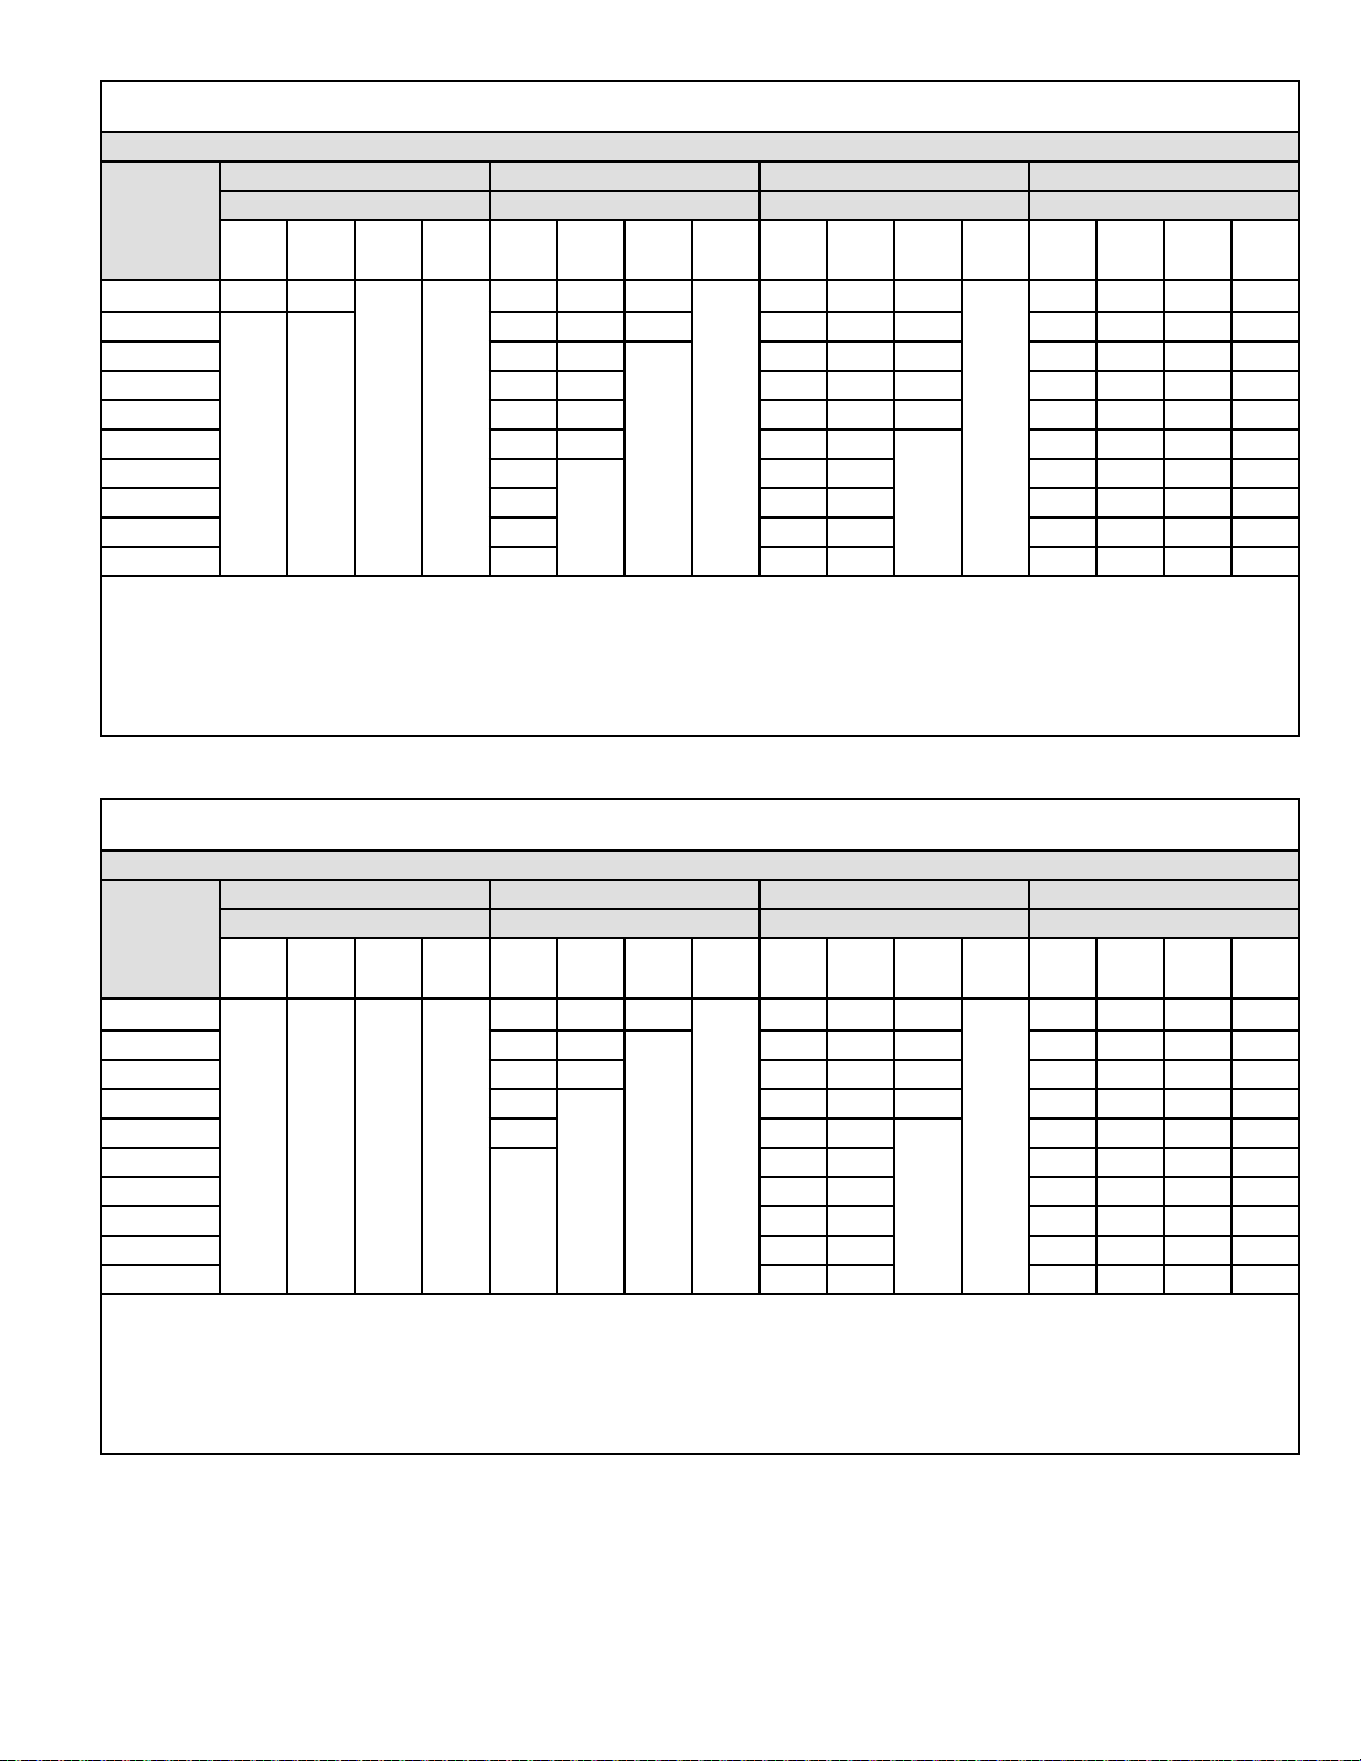
NOTE - Size intake and exhaust pipe length separately. Values in table are for Intake OR Exhaust, not combined total. Both Intake
and Exhaust must be same pipe size.
NOTE - Additional vent pipe and elbows used to terminate the vent pipe outside the structure must be included in the total vent length
calculation.
Table 7C.
Maximum Allowable Intake or Exhaust Vent Length in Feet
Concentric Termination at Elevation 2,001 - 10,000 ft
Number of 90°
Elbows Used
2” Pipe 2-1/2" Pipe 3" Pipe
Capacity Capacity Capacity
045 070 090 110
030/
045
070 090 110
030/
045
070 090 110
1 35 25 15
n/a
90 63 39
n/a
111 111 104 104
2 30 20 10 85 58 34 106 106 99 99
3 25 15
n/a
80 53 29 101 101 94 94
4 20 10 75 48 24 96 96 89 89
5 15
n/a
70 43 19 91 91 84 84
6 10 65 38 14 86 86 79 79
7
n/a
60 33 9 81 81 74 74
8 55 28
n/a
76 76 69 69
9 50 23 71 71 64 64
10 45 18 66 66 59 59
NOTE - Size intake and exhaust pipe length separately. Values in table are for Intake OR Exhaust, not combined total. Both Intake
and Exhaust must be same pipe size.
NOTE - Additional vent pipe and elbows used to terminate the vent pipe outside the structure must be included in the total vent length
calculation.
Table 7D.
507769C05 Page 19 of 55
mrcool.com
Maximum Allowable Exhaust Vent Lengths With Furnace Installed in a Closet or Basement Using Ventilated Attic or Crawl
Space For Intake Air in Feet
Standard Termination at Elevation 0 - 2,000 ft
Number of
90° Elbows
Used
1-1/2” Pipe 2” Pipe 2-1/2" Pipe 3" Pipe
Capacity Capacity Capacity Capacity
045 070 090 110 045 070 090 110 045 070 090 110 045 070 090 110
1 10 10
n/a n/a
51 36 14
n/a
85 65 28
n/a
107 107 88 88
2
n/a n/a
46 31 9 80 60 23 102 102 83 83
3 41 26
n/a
75 55 18 97 97 78 78
4 36 21 70 50 13 92 92 73 73
5 31 16 65 45 8 87 87 68 68
6 26 11 60 40
n/a
82 82 63 63
7 21
n/a
55 35 77 77 58 58
8 16 50 30 72 72 53 53
9 11 45 25 67 67 48 48
10 n/a 40 20 62 62 43 43
NOTE - Size intake and exhaust pipe length separately. Values in table are for Intake OR Exhaust, not combined total. Both Intake
and Exhaust must be same pipe size.
NOTE - Additional vent pipe and elbows used to terminate the vent pipe outside the structure must be included in the total vent length
calculation.
NOTE - Contact your local FTC if more than 85ft of venting is needed.
Table 8A.
Maximum Allowable Exhaust Vent Lengths With Furnace Installed in a Closet or Basement Using Ventilated Attic or Crawl
Space For Intake Air in Feet
Standard Termination at Elevation 2,001 - 10,000 ft
Number of
90° Elbows
Used
1-1/2” Pipe 2” Pipe 2-1/2" Pipe 3" Pipe
Capacity Capacity Capacity Capacity
045 070 090 110 045 070 090 110 045 070 090 110 045 070 090 110
1
n/a n/a n/a n/a
30 20 10
n/a
80 53 28
n/a
107 107 88 88
2 25 15
n/a
75 48 23 102 102 83 83
3 20 10 70 43 18 97 97 78 78
4 15
n/a
65 38 13 92 92 73 73
5 10 60 33
n/a
87 87 68 68
6
n/a
55 28 82 82 63 63
7 50 23 77 77 58 58
8 45 18 72 72 53 53
9 40 13 67 67 48 48
10 35 n/a 62 62 43 43
NOTE - Size intake and exhaust pipe length separately. Values in table are for Intake OR Exhaust, not combined total. Both Intake
and Exhaust must be same pipe size.
NOTE - Additional vent pipe and elbows used to terminate the vent pipe outside the structure must be included in the total vent length
calculation.
NOTE - Contact your local FTC if more than 85ft of venting is needed.
Table 8B.
507769C05Page 20 of 55
mrcool.com
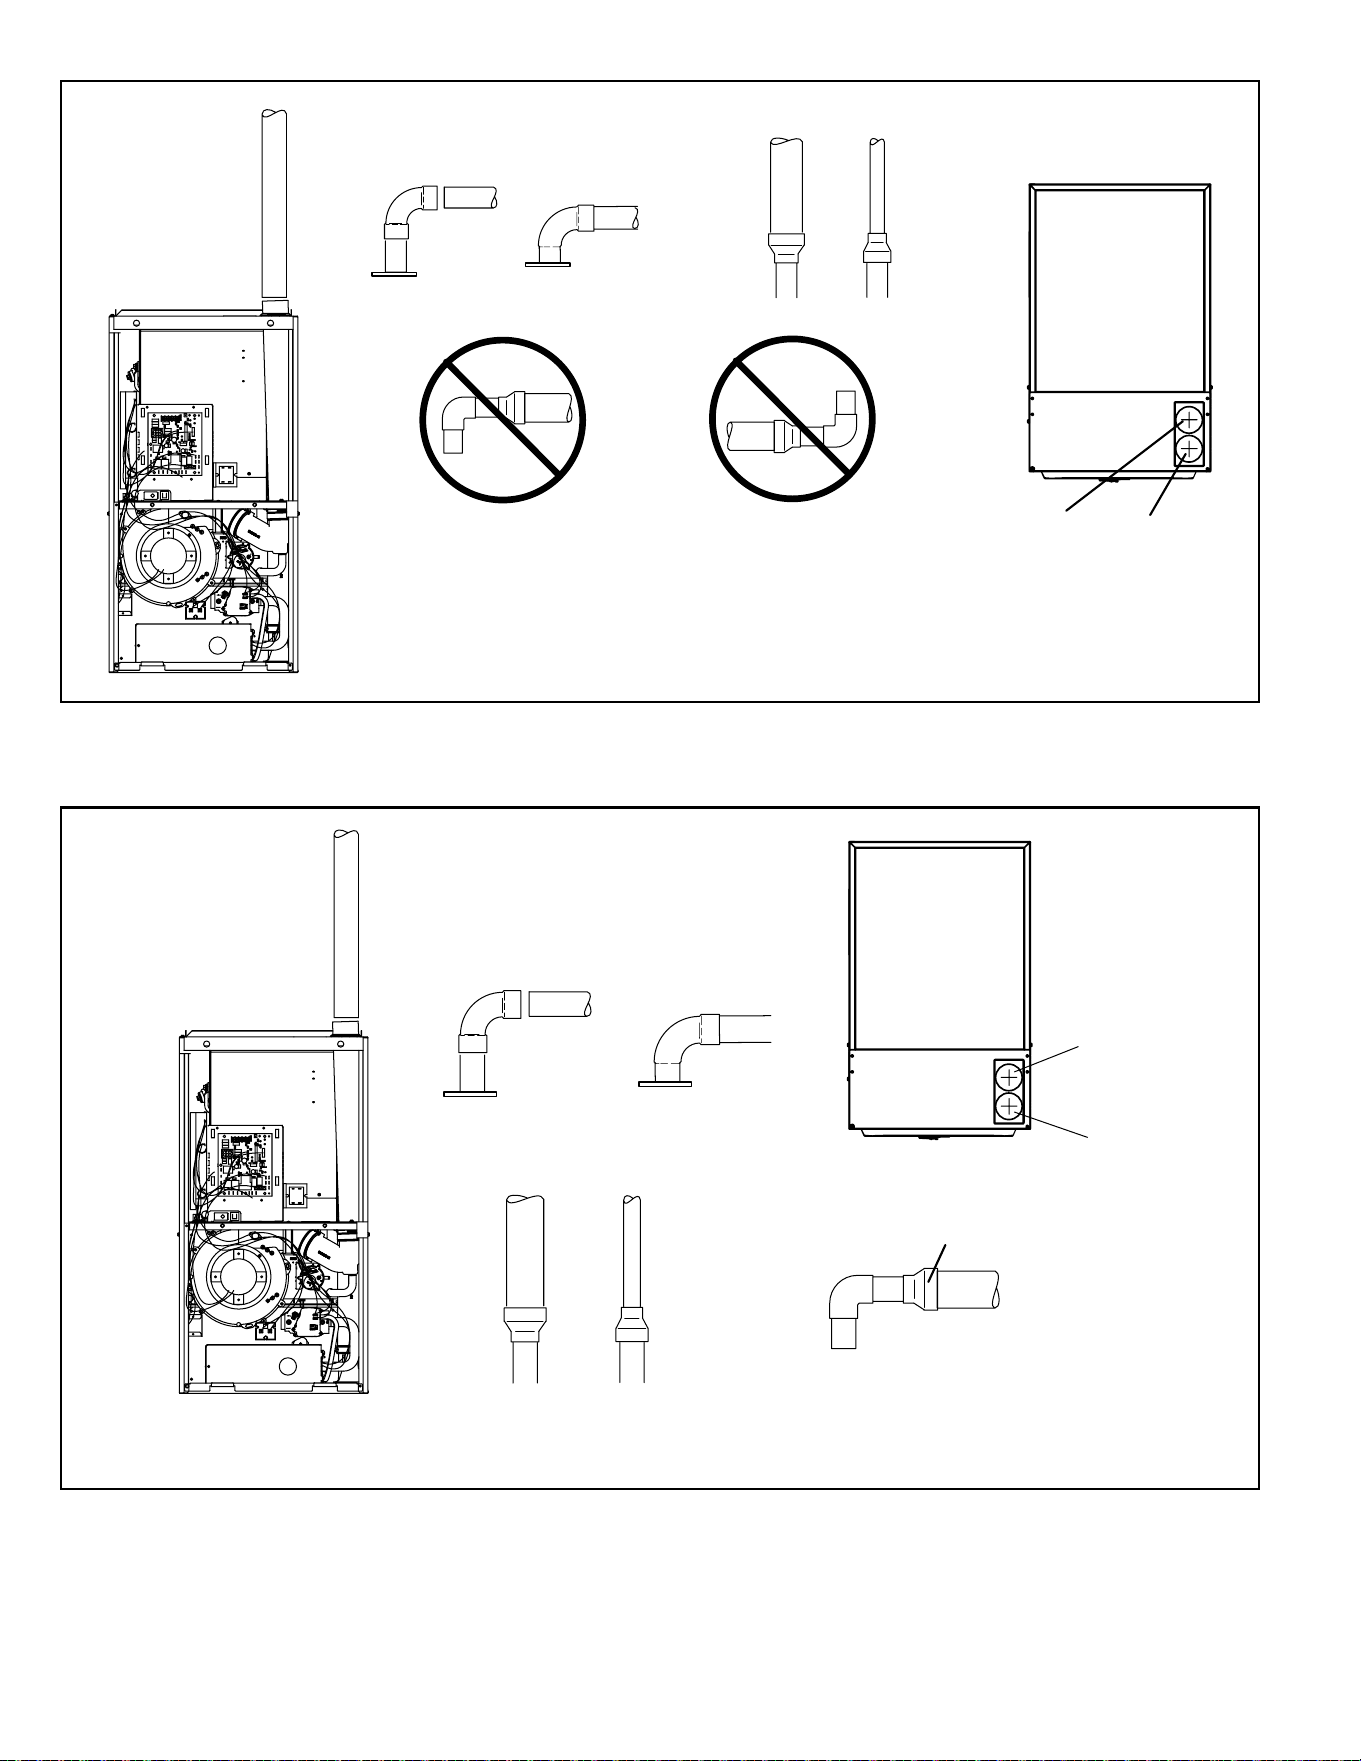
Figure 22. Typical Exhaust Pipe Connections
Pipe size determined in table 7.
2”
TOP VIEW
EXHAUST
INTAKE
2”
2”
2”
2”
or
TRANSITION
3”
*2”
*2”
1-1/2”
or
TRANSITION
NOTE: 1-1/2” Vent Pipe
Diameter Allowed Only
on 045/070 Units
DO NOT transition
from larger to smaller
pipe in horizontal runs
of exhaust pipe.
DO NOT transition
from smaller to larger
pipe in horizontal runs
of exhaust pipe.
* When transitioning up in pipe size, use the shortest length of 2” PVC pipe possible.
NOTE: Exhaust pipe and intake pipe must be the same diameter.
Figure 23. Typical Intake Pipe Connections (Direct Vent Applications)
2”
Pipe size determined in table 7.
2”
2”
2”
2”
or
TOP VIEW
EXHAUST
INTAKE
TRANSITION
3”
*2”
*2”
TRANSITION
3”
*2”
*2”
1-1/2”
or
TRANSITION
NOTE: 1-1/2” Vent Pipe
Diameter Allowed Only
on 045/070 Units
* When transitioning up in pipe size, use the shortest length of 2” PVC pipe possible.
NOTE: Exhaust pipe and intake pipe must be the same diameter.
507769C05 Page 21 of 55
mrcool.com
Intake Piping
This furnace may be installed in either direct vent or non-
direct vent applications. In non-direct vent applications,
when intake air will be drawn into the furnace from
the surrounding space, the indoor air quality must be
considered. Guidelines listed in Combustion, Dilution and
Ventilation Air section must be followed.
Follow the next two steps when installing the unit in Direct
Vent applications, where combustion air is taken from
outdoors and ue gases are discharged outdoors. The
provided air intake screen must not be used in direct vent
applications (outdoors).
1. Use cement or a sheet metal screw to secure the
intake pipe to the inlet air connector.
2. Route piping to outside of structure. Continue with
installation following instructions given in general
guide lines for piping terminations and intake and
exhaust piping terminations for direct vent sections.
Refer to Table 7A through Table 7D for pipe sizes.
Follow the next steps when installing the unit in Non-Direct
Vent applications where combustion air is taken from
indoors and ue gases are discharged outdoors.
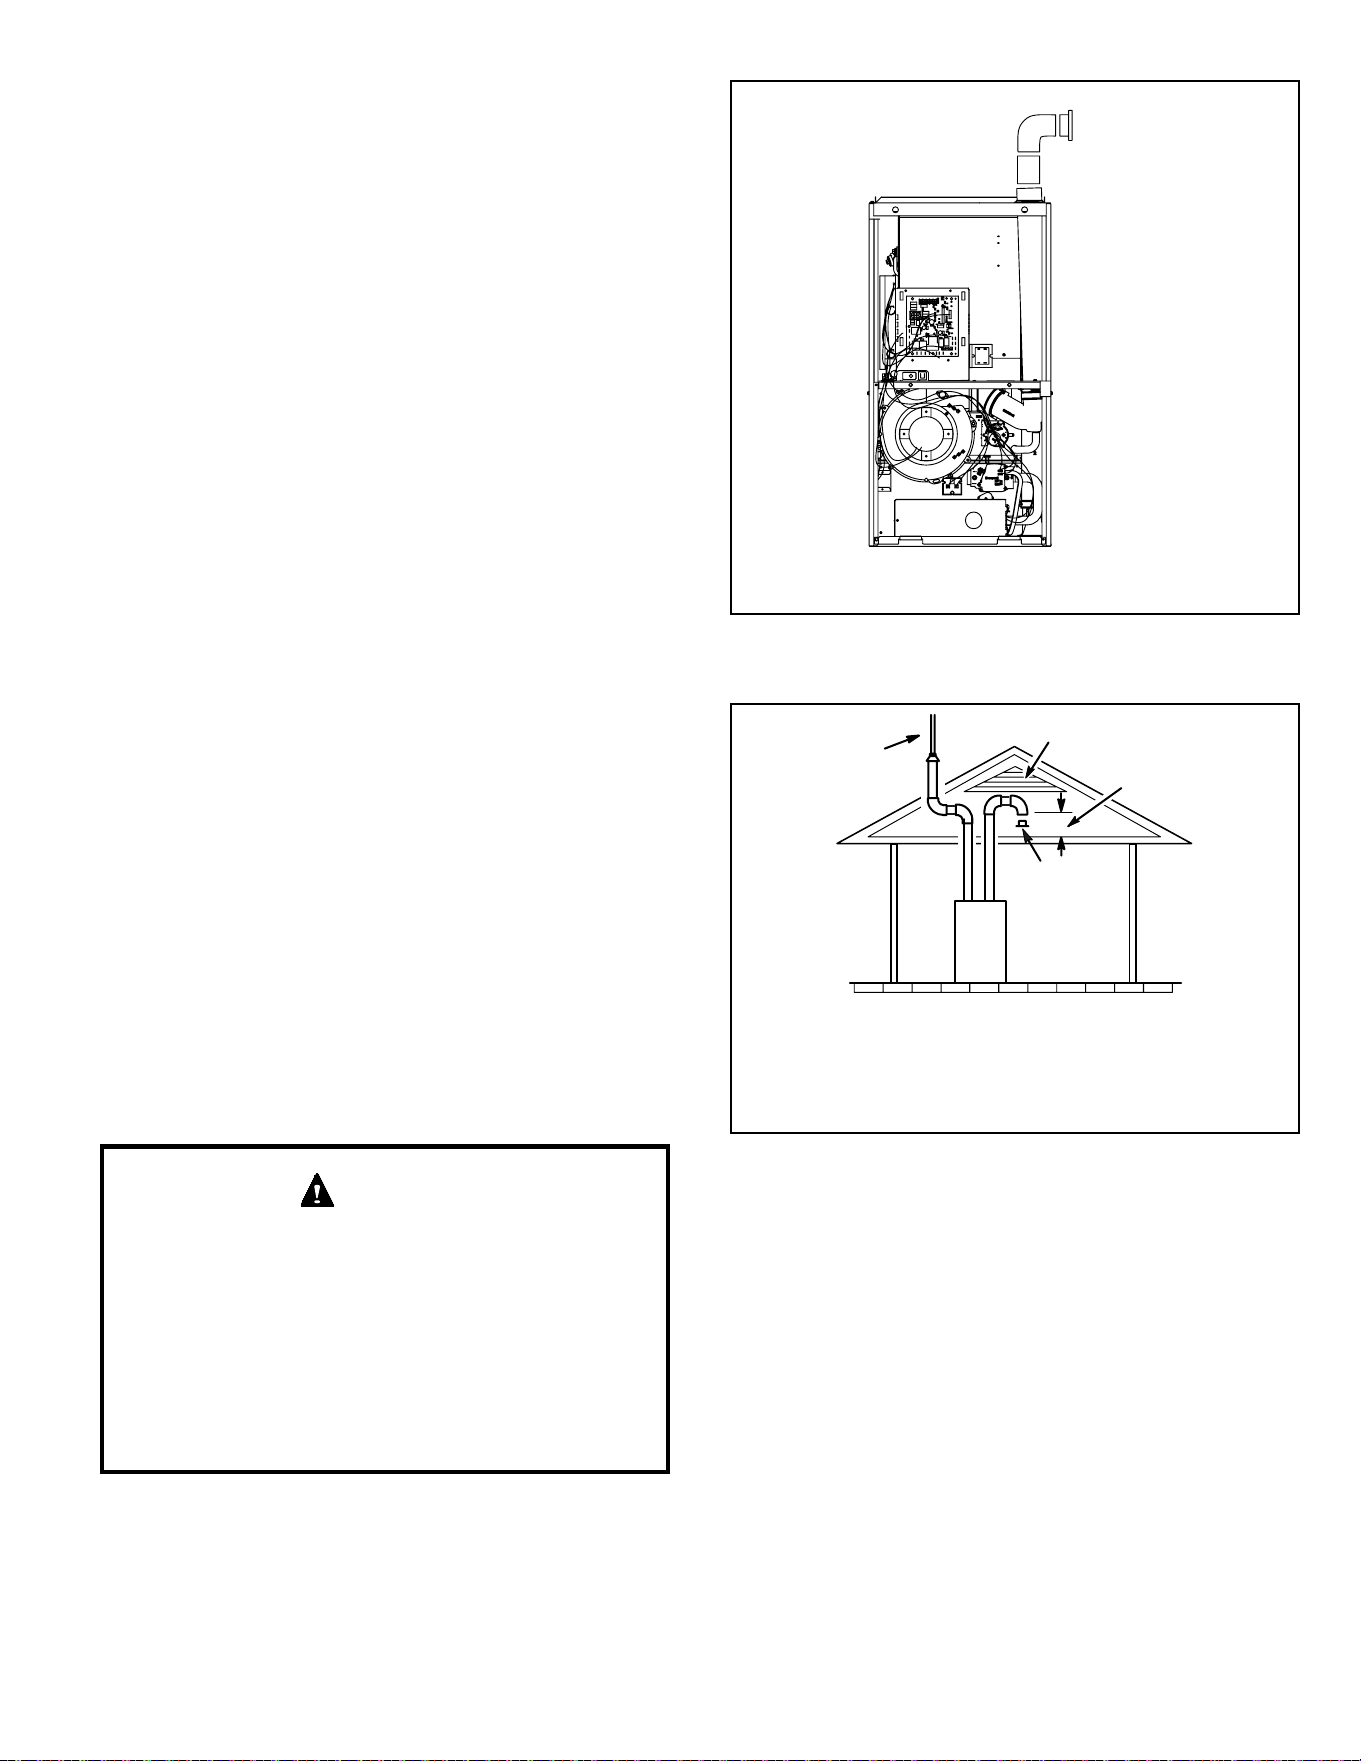
1. Use eld-provided materials and the factory-provided
air intake screen to route the intake piping as shown
in Figure 24. Maintain a minimum clearance of 3” (76
mm) around the air intake opening. The air intake
opening (with the protective screen) should always be
directed forward, or sideways.
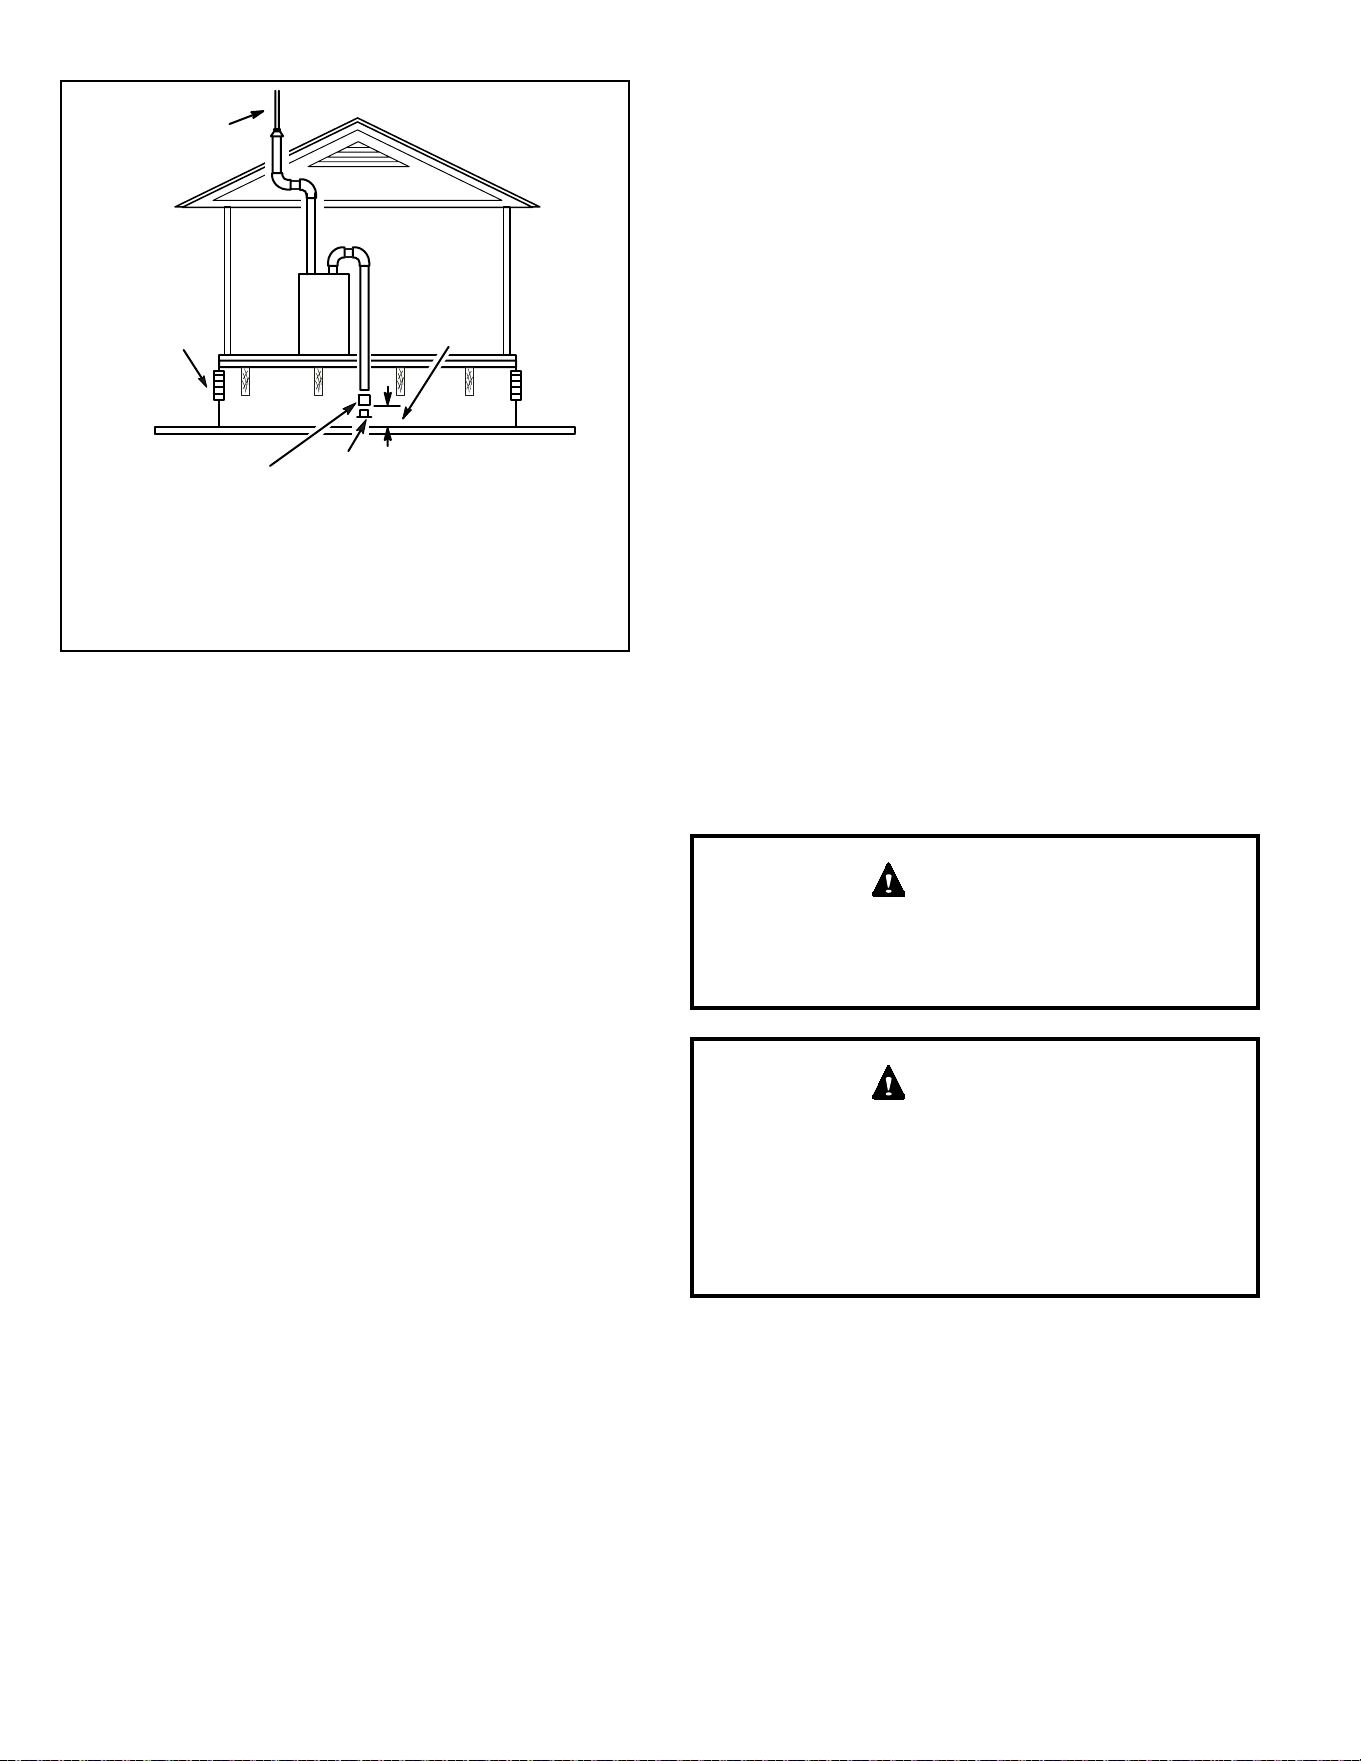
2. If intake air is drawn from a ventilated attic (Figure
25) or ventilated crawlspace (Figure 26) the exhaust
vent length must not exceed those listed in Table
8A through Table 8B. If 3” diameter pipe is used,
reduce to 2” diameter pipe at the termination point to
accommodate the debris screen.
3. Use cement to secure the intake pipe to the connector,
if desired.
If this unit is being installed in an application with
combustion air coming in from a space serviced by an
exhaust fan, power exhaust fan, or other device which
may create a negative pressure in the space, take care
when sizing the inlet air opening. The inlet air opening
must be sized to accommodate the maximum volume
of exhaust air as well as the maximum volume of
combustion air required for all gas appliances serviced
by this space.
CAUTION
Intake
Debris
Screen
(Provided)
NOTE: Debris screen and elbow may be rotated so that the
screen may be positioned to face forward or to either side.
Figure 24. Typical Air Intake Pipe Connections
Non-Direct Vent Applications
Figure 25. Equipment in Conned Space
(Inlet Air from Ventilated Attic and Outlet Air to
Outside)
Ventilation Louvers
Inlet Air
(Minimum 12 in.
(305mm) above
Attic Floor)
Roof Terminated
Exhaust Pipe
Furnace
*Intake Debris
Screen
(Provided)
* See Maximum Vent Lengths table
NOTE-The inlet and outlet air openings shall each have a
free area of at least one square inch per 4,000 Btu (645mm
2
per 1.17kW) per hour of the total input rating of all equipment
in the enclosure.
507769C05Page 22 of 55
mrcool.com
Figure 26. Equipment in Conned Space
(Inlet Air from Ventilated Crawl Space and Outlet Air
to Outside)
Roof Terminated
Exhaust Pipe
Furnace
Ventilation
Louvers
(Crawl Space)
*Intake Debris Screen Provided
Inlet Air
Minimum
12 in. (305mm)
above Crawl
Space Floor
Coupling or
3 in. to 2 in.
Transition
(Field Provided)
* See Maximum Vent Lengths table
NOTE-The inlet and outlet air openings shall each have a
free area of at least one square inch per 4,000 Btu (645mm
2
per 1.17kW) per hour of the total input rating of all equipment
in the enclosure.
At vent termination, care must be taken to maintain
protective coatings over building materials (prolonged
exposure to exhaust condensate can destroy protective
coatings). It is recommended that the exhaust outlet not be
located within 6 feet (1.8 m) of a condensing unit because
the condensate can damage the painted coating.
NOTE: If winter design temperature is below 32° F (0° C), it
is recommended that the exhaust piping be insulated with
1/2” (13 mm), Armaex or equivalent when run through an
unconditioned area. In extremely cold climate areas with
temperature below 20° F (6.7° C) it is recommended that
3/4” (19 mm) Armaex or equivalent be used. Insulation on
outside runs of exhaust pipe may be painted or wrapped
to protect insulation from deterioration in accordance with
the insulation manufacturers recommendation. Exhaust
pipe insulation may not be necessary in some specic
applications.
NOTE: During extremely cold temperatures, below
approximately 20° F (6° C), units with long runs of vent
pipe through unconditioned space, even when insulated,
may form ice in the exhaust termination that prevents the
unit from operating properly. Longer run times of at least 5
minutes will alleviate most icing problems. Also, a heating
cable may be installed on exhaust piping and termination
to prevent freeze-ups. Heating cable installation kits are
available, see unit specication sheets for part numbers.
Do not use screens or perforated metal in exhaust
terminations. Doing so will cause freeze-ups and may
block the terminations.
IMPORTANT
For Canadian Installations Only
In accordance to CSA International B149 installation
codes, the minimum allowed distance between the
combustion air intake inlet and the exhaust outlet of
other appliances shall not be less than 12 inches (305
mm).
IMPORTANT
General Guidelines for Vent Terminations
In Non-Direct Vent applications, combustion air is taken
from indoors and the ue gases are discharged to the
outdoors. This unit is then classied as a non-direct vent,
Category IV gas furnace.
In Direct Vent applications, combustion air is taken from
outdoors and the ue gases are discharged to the outdoors.
This unit is then classied as a direct vent, Category IV gas
furnace.
In both Non-Direct Vent and Direct Vent applications, the
vent termination is limited by local building codes. In the
absence of local codes, refer to the current National Fuel
Gas Code ANSI Z223-1/NFPA 54 in U.S.A., and current
CSA-B149 Natural Gas and Propane Installation Codes in
Canada for details.
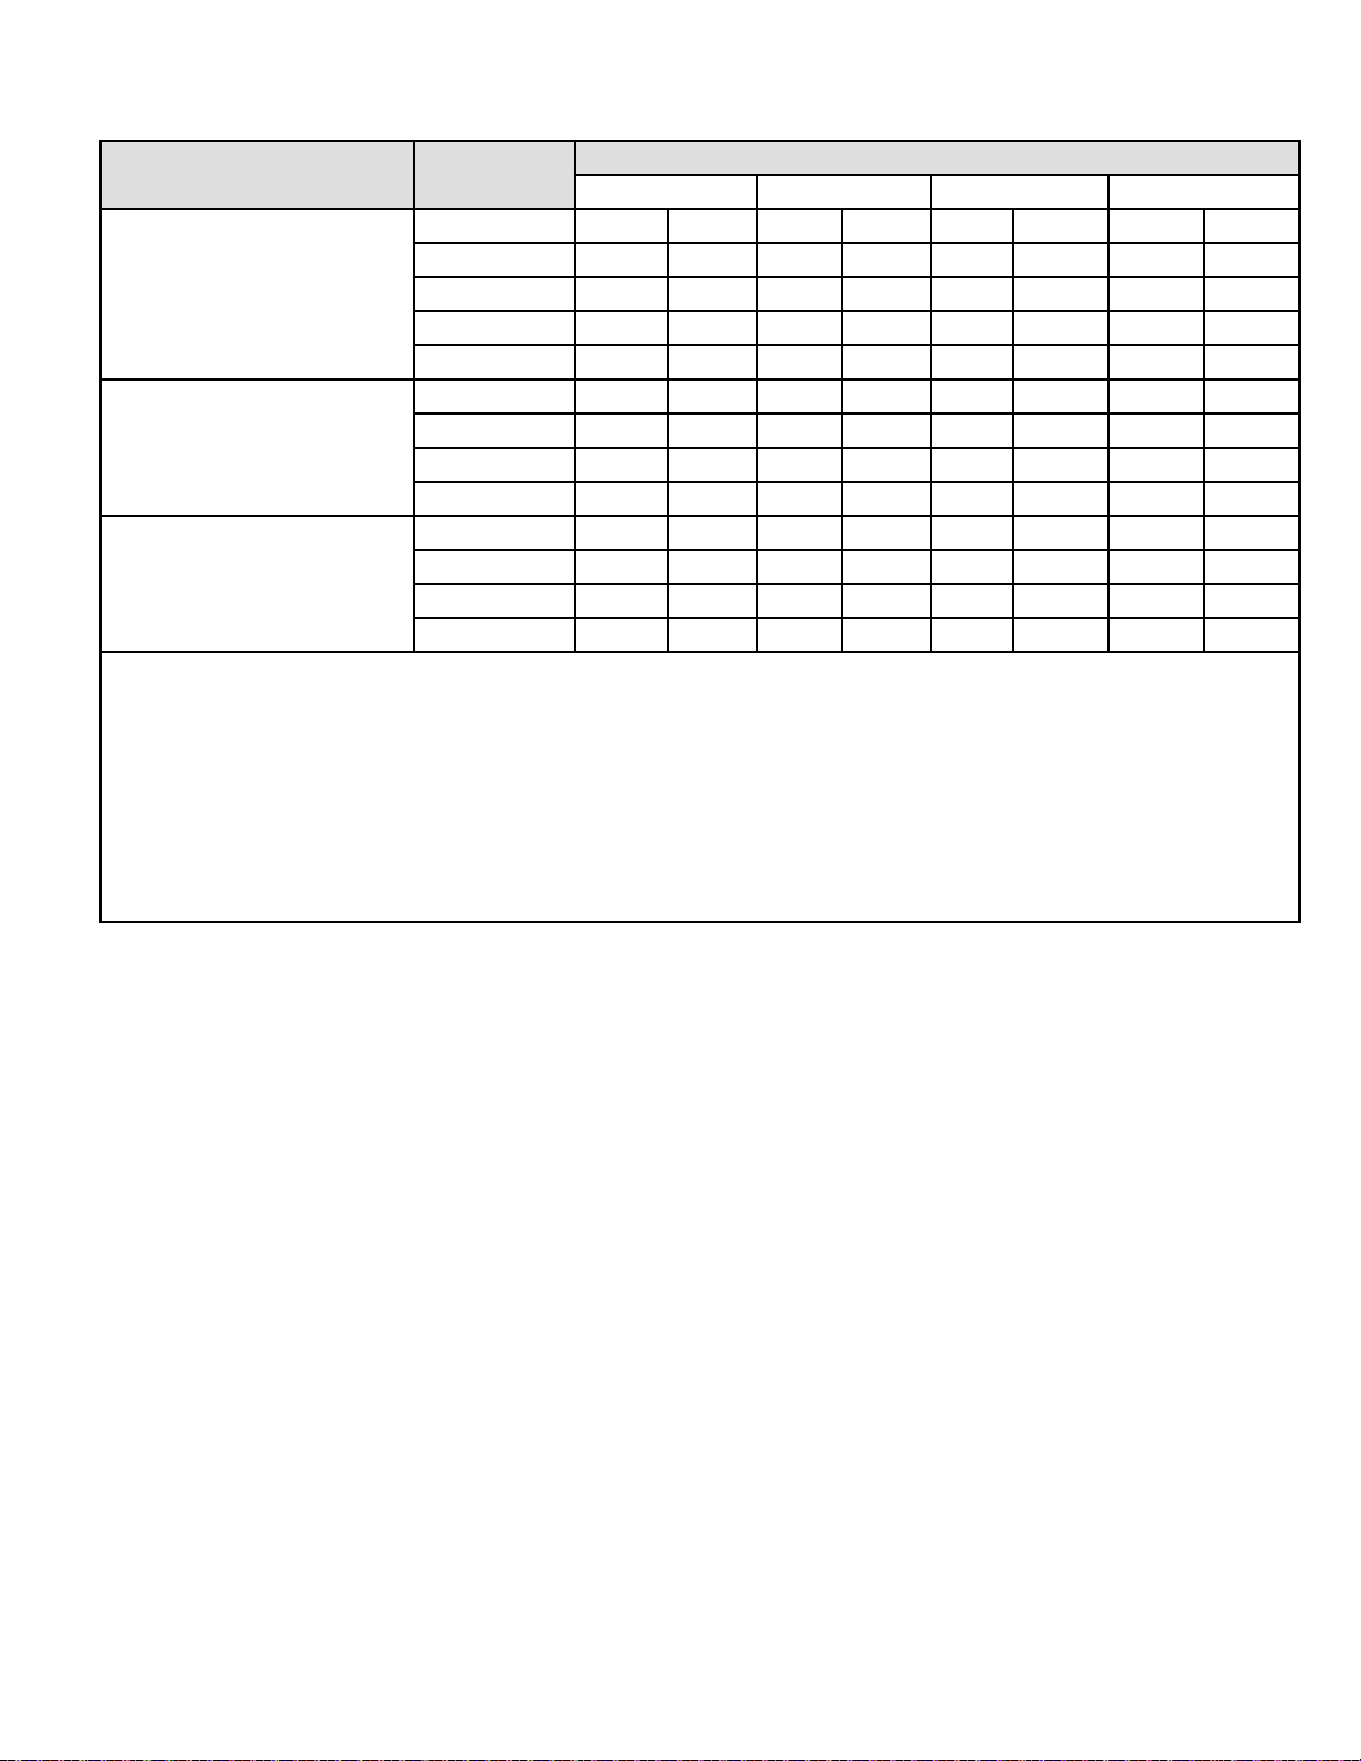
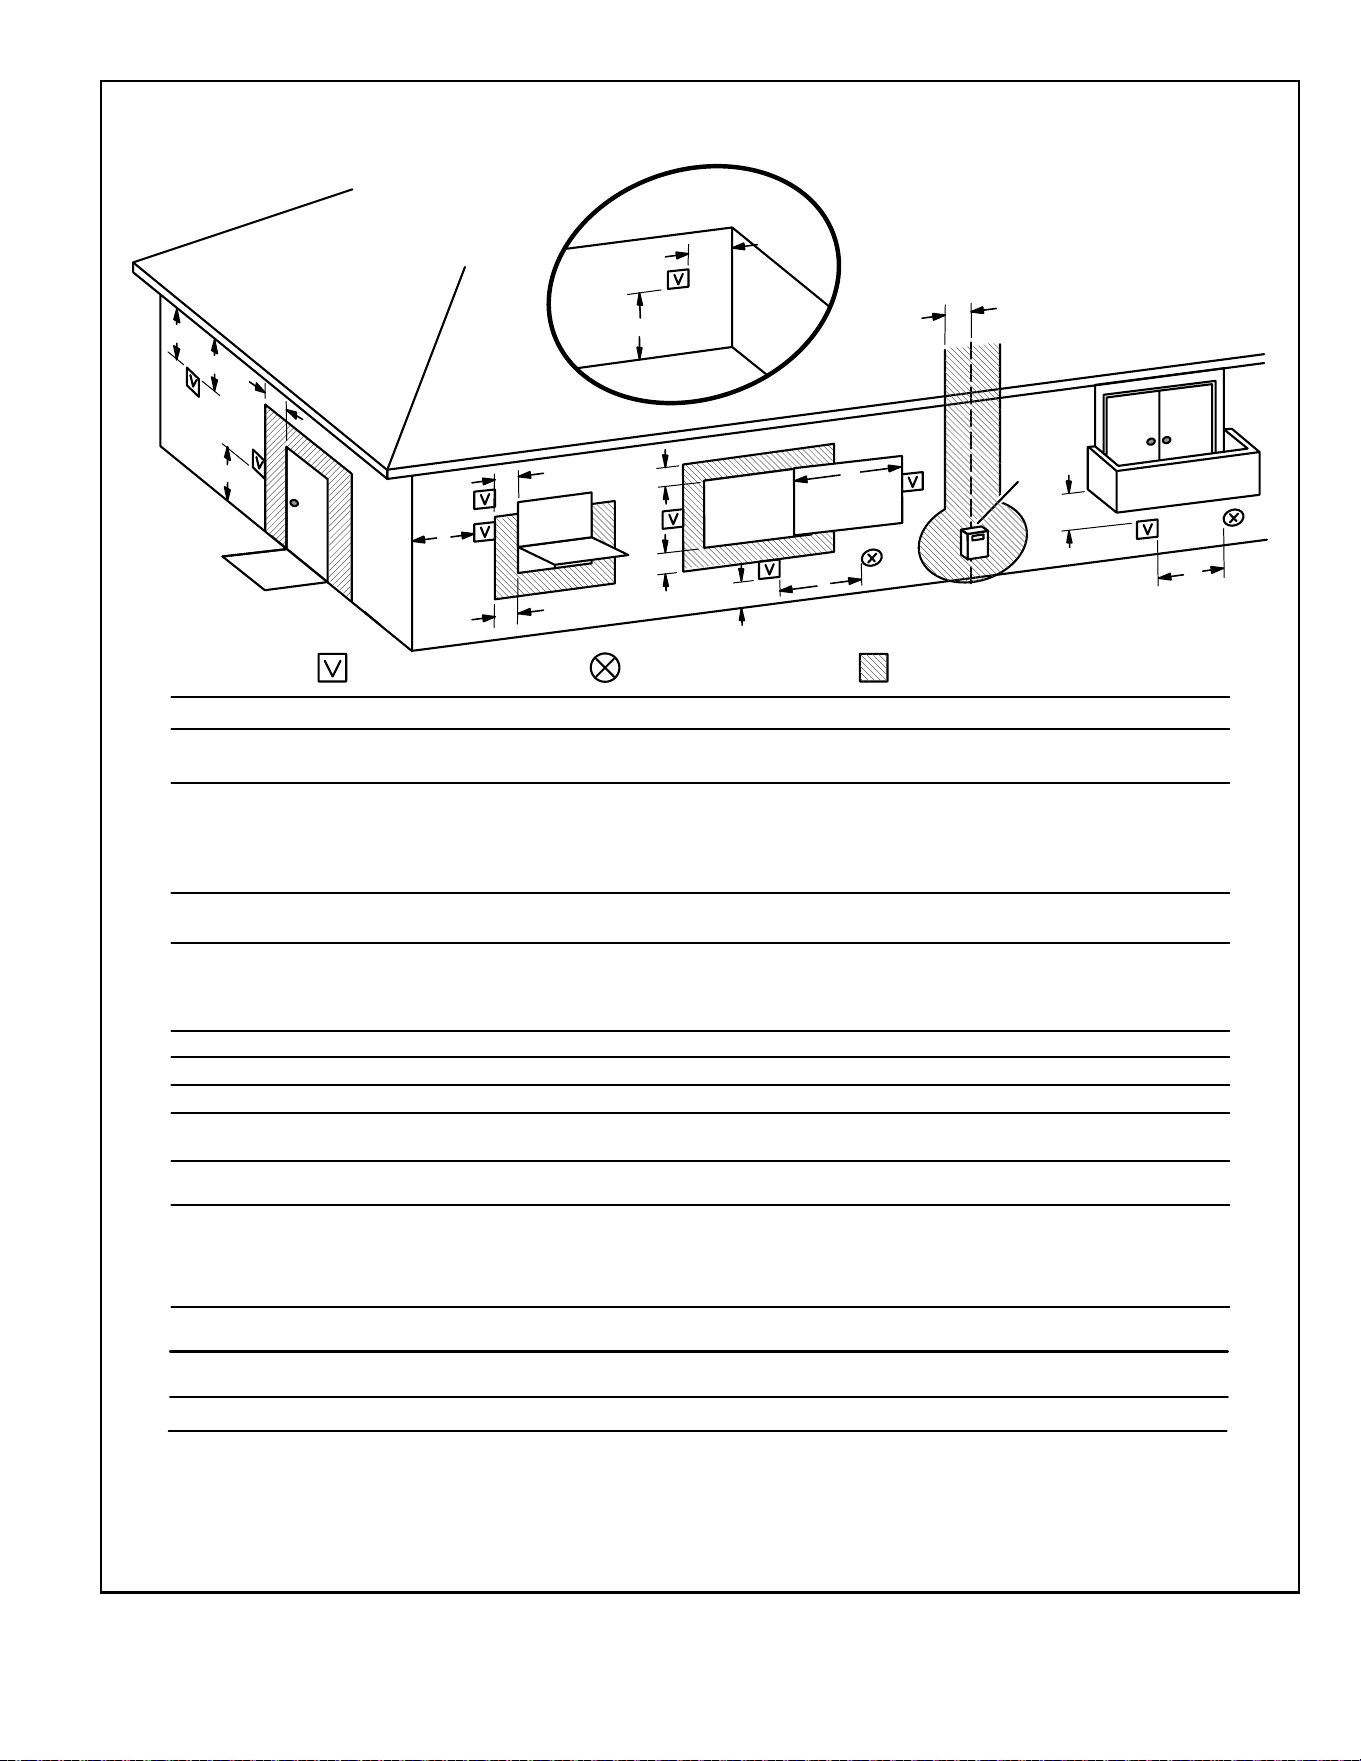
Position termination according to location given in Figure
27 or Figure 28. In addition, position termination so it is
free from any obstructions and 12” above the average
snow accumulation.
507769C05 Page 23 of 55
mrcool.com
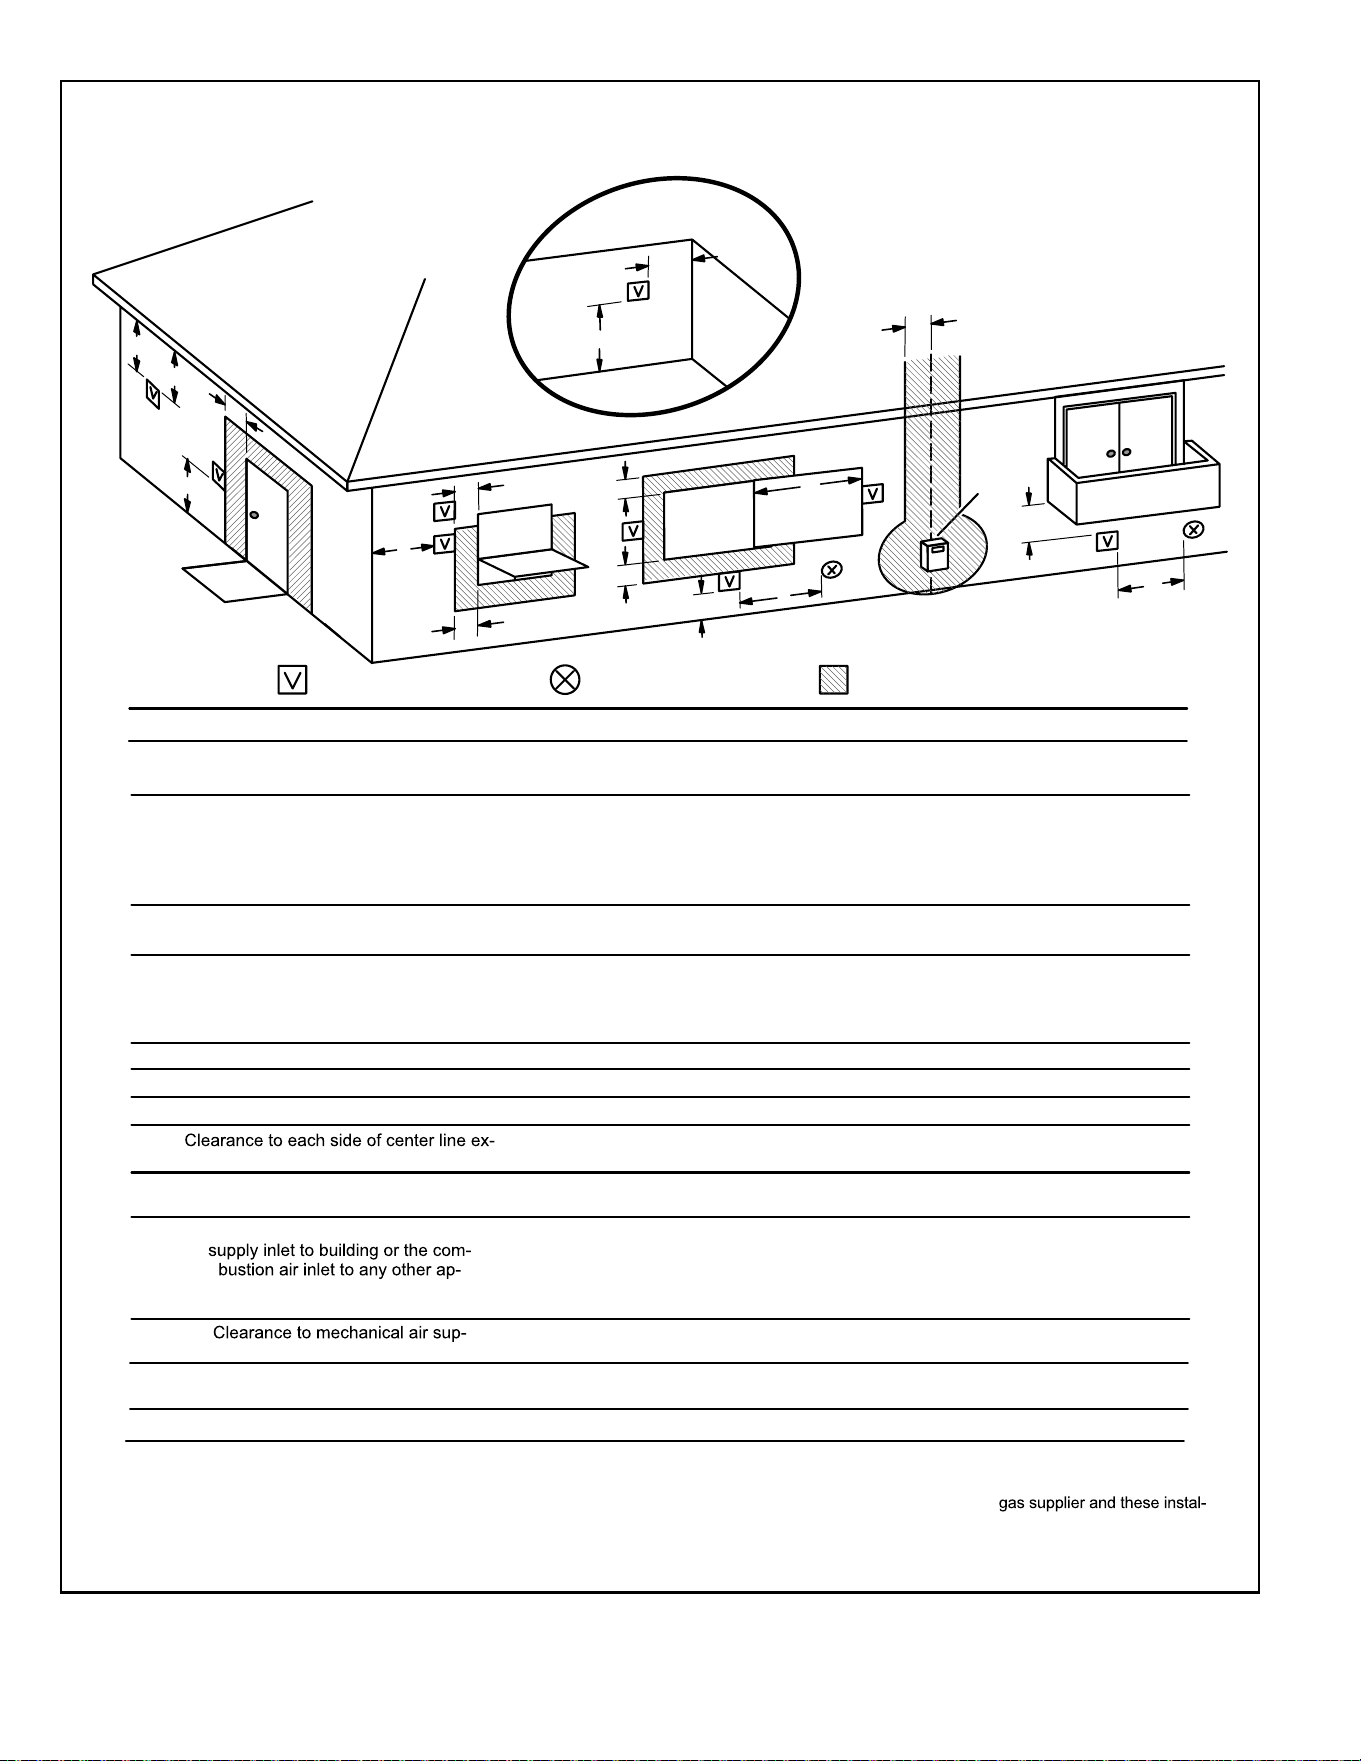
Maximum Allowable Exhaust Vent Pipe Length
3
(in ft.) without Insulation in Unconditioned Space for Winter Design
Temperatures Single - Stage High Eciency Furnace
Winter Design Temperatures
1
ºF (ºC)
Vent Pipe
Diameter
Unit Input Size
045 070 090 110
32 to 21
(0 to -6)
PVC
2
PP PVC
2
PP PVC
2
PP PVC
2
PP
1-1/2 in. 20 N/A 20 N/A N/A N/A N/A N/A
2 in. 18 16 31 28 50 48 30 30
2-1/2 in. 13 N/A 24 N/A 42 N/A 36 N/A
3 in. 9 9 18 18 35 35 29 29
20 to 1
(-7 to -17)
1-1/2 in. 15 N/A 20 N/A N/A N/A N/A N/A
2 in. 9 8 18 16 32 29 27 24
2-1/2 in. 5 N/A 13 N/A 24 N/A 20 N/A
3 in. 1 1 8 8 19 19 14 14
0 to -20
(-18 to -29)
1-1/2 in. 10 N/A 15 N/A N/A N/A N/A N/A
2 in. 5 3 12 10 22 19 18 15
2-1/2 in. 1 N/A 7 N/A 15 N/A 12 N/A
3 in. N/A N/A 2 2 10 10 7 7
1
Refer to 99% Minimum Design Temperature table provided in the current edition of the ASHRAE Fundamentals Handbook.
2
Poly-Propylene vent pipe (PP) by Duravent and Centrotherm
3
Vent length in table is equivalent length. Each elbow is equivalent to 5ft of straight pipe and should be included when measuring
total length.
NOTE - Concentric terminations are the equivalent of 5’ and should be considered when measuring pipe length.
NOTE - Maximum uninsulated vent lengths listed may include the termination (vent pipe exterior to the structure ) and cannot exceed
5 linear feet or the maximum allowable intake or exhaust vent length listed in Table 7A through Table 7D or Table 8A through Table
8B.
NOTE - If insulation is required an unconditioned space, it must be located on the pipe closed to the furnace.
Table 9.
507769C05Page 24 of 55
mrcool.com
VENT TERMINATION CLEARANCES
FOR NON-DIRECT VENT INSTALLATIONS IN THE US AND CANADA
K
D
E
L
B
C
F
G
A
B
J
A
M
I
H
INSIDE CORNER
DETAIL
VENT TERMINAL
AIR SUPPLY INLET
AREA WHERE TERMINAL
IS NOT PERMITTED
Fixed
Closed
Operable
B
Fixed
Closed
Operable
B
B
A =
B =
C =
D =
E =
F =
G =
H =
I =
J =
K =
L =
M =
US Installations
1
Canadian Installations
2
12 inches (305mm) or 12 in. (305mm)
above average snow accumulation.
12 inches (305mm) or 12 in. (305mm)
above average snow accumulation.
Clearance above grade, veranda,
porch, deck or balcony
Clearance to window or
door that may be opened
4 feet (1.2 m) below or to side of opening;
1 foot (30cm) above opening
6 inches (152mm) for appliances <10,000
Btuh (3kw), 12 inches (305mm) for
appliances > 10,000 Btuh (3kw) and
<100,000 Btuh (30kw), 36 inches (.9m)
for appliances > 100,000 Btuh (30kw)
Clearance to permanently
closed window
Vertical clearance to ventilated soffit
located above the terminal within a
horizontal distance of 2 feet (610 mm)
from the center line of the terminal
Clearance to unventilated soffit
Clearance to outside corner
Clearance to inside corner
tended above meter / regulator assembly
Clearance to service regulator
vent outlet
Clearance to non-mechanical air
pliance
ply inlet
Clearance above paved sidewalk or
paved driveway located on public property
Clearance under veranda, porch, deck or balcony
* 12
”
* Equal to or greater than soffit depth.
*
* 3 feet (.9m
)
* 12
”
3 feet (.9m) within a height 15 feet (4.5m)
above the meter / regulator assembly
3 feet (.9m)
6 inches (152mm) for appliances <10,000
Btuh (3kw), 12 inches (305mm) for
appliances > 10,000 Btuh (3kw) and
<100,000 Btuh (30kw), 36 inches (.9m)
for appliances > 100,000 Btuh (30kw)
3 feet (.9m) above if within 10 feet
(3m) horizontally
6 feet (1.8m)
7 feet (2.1m)†
12 inches (305mm)‡
1
In accordance with the current ANSI Z223.1/NFPA 54 Natural Fuel Gas Code
2
In accordance with the current CSA B149.1, Natural Gas and Propane Installation Code
† A vent shall not terminate directly above a sidewalk or paved driveway that is
located between two single family dwellings and serves both dwellings.
‡
4 feet (1.2 m) below or to side of opening;
1 foot (30 cm) above opening
7 feet (2.1m)†
* Equal to or greater than soffit depth.
* Equal to or greater than soffit depth.
* Equal to or greater than soffit depth.
* No minimum to outside corner * No minimum to outside corner
3 feet (.9m) within a height 15 feet (4.5m)
above the meter / regulator assembly
*12 inches (305mm)‡
**
*For clearances not specified in ANSI Z223.1/NFPA 54 or CSA
B149.1, clearance will be in accordance with local installation
codes and the requirements of the
lation instructions.”
Permitted only if veranda, porch, deck or balcony is fully open on a minimum of
two sides beneath the floor. Avoiding this location is recommended if possible.
Figure 27. Vent Termination Clearances
For Non-Direct Vent Installations in the USA and Canada
507769C05 Page 25 of 55
mrcool.com
VENT TERMINATION CLEARANCES
FOR DIRECT VENT INSTALLATIONS IN THE USA AND CANADA
K
D
E
L
B
C
F
G
A
B
J
A
M
I
H
INSIDE CORNER
DETAIL
VENT TERMINAL
AIR SUPPLY INLET
AREA WHERE TERMINAL
IS NOT PERMITTED
Fixed
Closed
Operable
B
Fixed
Closed
Operable
B
B
A =
B =
C =
D =
E =
F =
G =
H =
I =
J =
K =
L =
M =
US Installations
1
Canadian Installations
2
12 inches (305mm) or 12 in. (305mm)
above average snow accumulation.
12 inches (305mm) or 12 in. (305mm)
above average snow accumulation.
Clearance above grade, veranda,
porch, deck or balcony
Clearance to window or
door that may be opened
6 inches (152mm) for appliances <10,000
pliances > 10,000 Btuh (3kw) and <50,000
pliances > 50,000 Btuh (15kw)
6 inches (152mm) for appliances <10,000
Btuh (3kw), 12 inches (305mm) for
appliances > 10,000 Btuh (3kw) and
<100,000 Btuh (30kw), 36 inches (.9m)
for appliances > 100,000 Btuh (30kw)
Clearance to permanently
closed window
Vertical clearance to ventilated soffit
located above the terminal within a
horizontal distance of 2 feet (610mm)
from the center line of the terminal
Clearance to unventilated soffit
Clearance to outside corner
Clearance to inside corner
tended above meter / regulator assembly
Clearance to service regulator
vent outlet
Clearance to non-mechanical air
pliance
ply inlet
Clearance above paved sidewalk or
paved driveway located on public property
Clearance under veranda, porch, deck or balcony
* 12
”
*
*
* 7 feet (2.1m)
3 feet (.9m) within a height 15 feet (4.5m)
above the meter / regulator assembly
3 feet (.9m)
6 inches (152mm) for appliances <10,000
pliances > 10,000 Btuh (3kw) and <50,000
pliances > 50,000 Btuh (15kw)
6 inches (152mm) for appliances <10,000
Btuh (3kw), 12 inches (305mm) for
appliances > 10,000 Btuh (3kw) and
<100,000 Btuh (30kw), 36 inches (.9m)
for appliances > 100,000 Btuh (30kw)
3 feet (.9m) above if within 10 feet
(3m) horizontally
6 feet (1.8m)
7 feet (2.1m)†
12 inches (305mm)‡
1
In accordance with the current ANSI Z223.1/NFPA 54 Natural Fuel Gas Code
2
In accordance with the current CSA B149.1, Natural Gas and Propane Installation Code
*For clearances not specified in ANSI Z223.1/NFPA 54 or CSA
B149.1, clearance will be in accordance with local installation
codes and the requirements of the gas supplier and these
installation instructions.”
† A vent shall not terminate directly above a sidewalk or paved driveway that is located
between two single family dwellings and serves both dwellings.
* 12”
* Equal to or greater than so
ffit depth* Equal to or greater than soffit depth
* Equal to or greater than soffit depth * Equal to or greater than soffit depth
* No minimum to outside corner
* No minimum to outside corner
3 feet (.9m) within a height 15 feet (4.5m)
above the meter / regulator assembly
3 feet (.9m)
*
*12 inches (305mm)‡
Btuh (3kw), 9 inches (228mm) for ap-
Btuh (15kw), 12 inches (305mm) for ap-
Clearance to each side of center line ex-
Btuh (3kw), 9 inches (228mm) for ap-
Btuh (15kw), 12 inches (305mm) for ap-
supply inlet to building or the com-
bustion air inlet to any other ap-
Clearance to mechanical air sup-
‡
Permitted only if veranda, porch, deck or balcony is fully open on a minimum of
two sides beneath the floor. Avoiding this location is recommended if possible.
Figure 28. Vent Termination Clearances
For Direct Vent installations in the USA and Canada
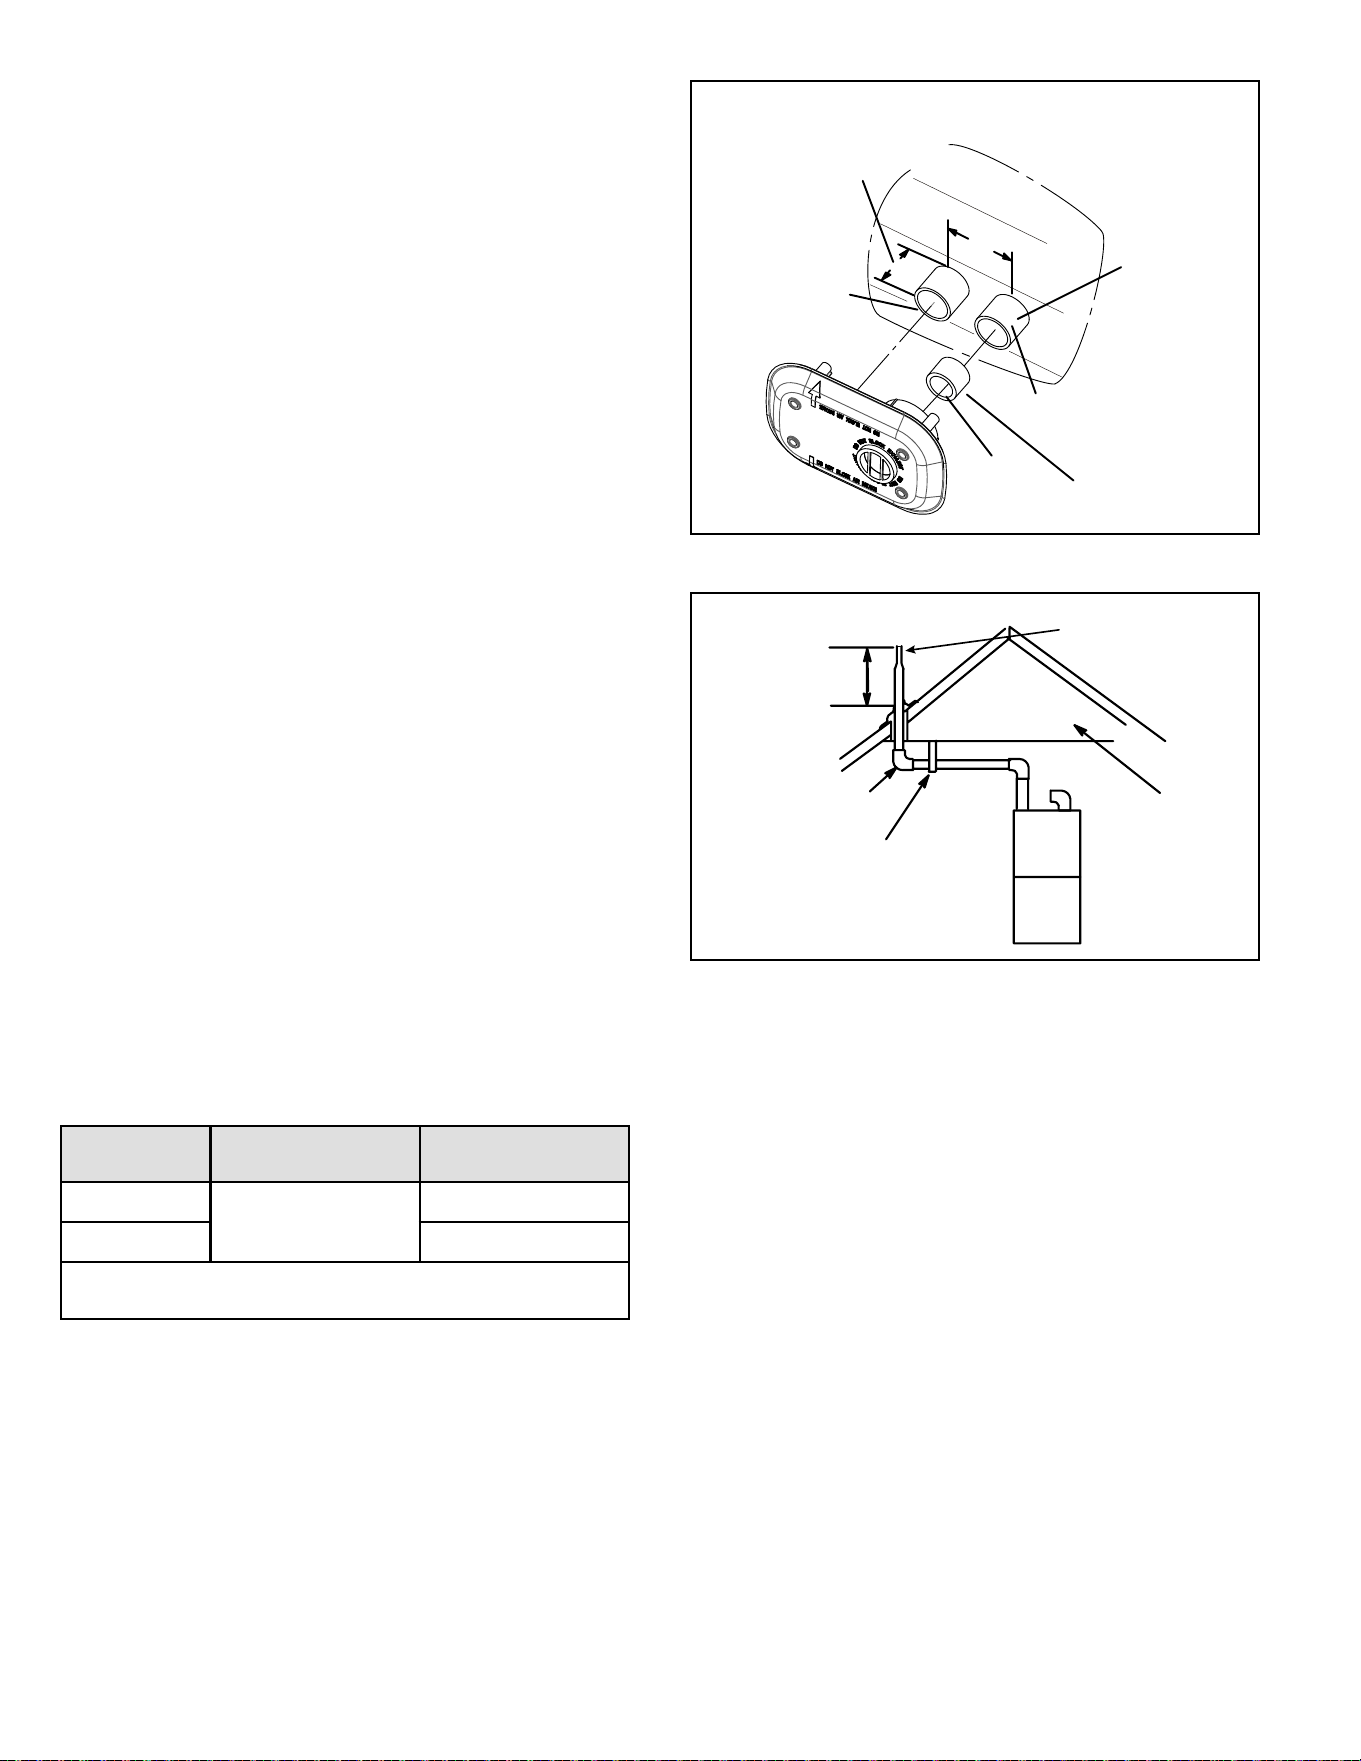
507769C05Page 26 of 55
mrcool.com
Details of Intake and Exhaust Piping
Terminations for Direct Vent Installations
NOTE: In Direct Vent installations, combustion air is taken
from outdoors and ue gases are discharged to outdoors.
NOTE: Flue gas may be slightly acidic and may adversely
aect some building materials. If any vent termination
is used and the ue gases may impinge on the building
material, a corrosion-resistant shield (minimum 24 inches
square) must be used to protect the wall surface. If the
optional tee is used, the protective shield is required.
The shield should be constructed using wood, plastic,
sheet metal or other suitable material. All seams, joints,
cracks, etc. in the aected area should be sealed using an
appropriate sealant. See Figure 31.
Intake and exhaust pipes may be routed either horizontally
through an outside wall or vertically through the roof. In
attic or closet installations, vertical termination through the
roof is preferred. Figure 29 through Figure 37 show typical
terminations.
1. Exhaust and intake exits must be in same pressure
zone. Do not exit one through the roof and one on the
side. Also, do not exit the intake on one side and the
exhaust on another side of the house or structure.
2. Intake and exhaust pipes should be placed as close
together as possible at termination end (refer to
illustrations). Minimum separation is 3” (76 mm)
on roof terminations and 6” (152 mm) on side wall
terminations.
3. On roof terminations, the intake piping should terminate
straight down using two 90° elbows (see Figure 30).
4. Exhaust piping must terminate straight out or up as
shown. A reducer may be required on the exhaust
piping at the point where it exits the structure to
improve the velocity of exhaust away from the intake
piping. See Table 10.
Capacity Exhaust Pipe Size
Termination Pipe
Size
*045, *070
2” (51 mm), 2-1/2”
(64 mm), 3” (76 mm)
1-1/2” (38 mm)
*090, 110 2” (51 mm)
*045, 070 and 090 units with the ush-mount termination must
use the 1-1/2” accelerator supplied with the kit.
Table 10. Exhaust Pipe Termination Size Reduction
5. On eld supplied terminations for side wall exit,
exhaust piping may extend a maximum of 12 inches
(305 mm) for 2” PVC and 20 inches (508 mm) for 3”
(76 mm) PVC beyond the outside wall. Intake piping
should be as short as possible. See Figure 31.
NOTE: Care must be taken to avoid recirculation of
exhaust back into intake pipe.
Figure 29. Flush Mount Side Wall Termination
2" EXTENSION
FOR 2" PVC PIPE
1" EXTENSION
FOR 3" PVC PIPE
1−1/2" ACCELERATOR
(all −45, −070 and −090 units)
FURNACE
EXHAUST
PIPE
FURNACE
INTAKE PIPE
4’’
GLUE EXHAUST
END FLUSH INTO
TERMINATION
FLAT SIDE
51W11
UNCONDITIONED
ATTIC SPACE
3” (76MM) OR
2” (51MM) PVC
PROVIDE SUPPORT
FOR EXHAUST LINES
12” (305MM)
ABOVE AVE.
SNOW
ACCUMULATION
SIZE PER EXHAUST PIPE
TERMINATION SIZE
REDUCTION TABLE
Figure 30. Non-Direct Vent Roof Termination Kit
(15F75 or 44J41)
6. On eld supplied terminations, a minimum distance
between the end of the exhaust pipe and the end of
the intake pipe without a termination elbow is 8” and a
minimum distance of 6” with a termination elbow. See
Figure 31.
7. If intake and exhaust piping must be run up a side
wall to position above snow accumulation or other
obstructions, piping must be supported every 24” (610
mm) as shown in Figure 31.
When exhaust and intake piping must be run up an
outside wall, the exhaust piping must be terminated
with pipe sized per Table 9. The intake piping may be
equipped with a 90° elbow turndown. Using turndown
will add 5 feet (1.5 m) to the equivalent length of the
pipe.
8. Based on the recommendation of the manufacturer, a
multiple furnace installation may use a group of up to
four terminations assembled together horizontally, as
shown in Figure 36.
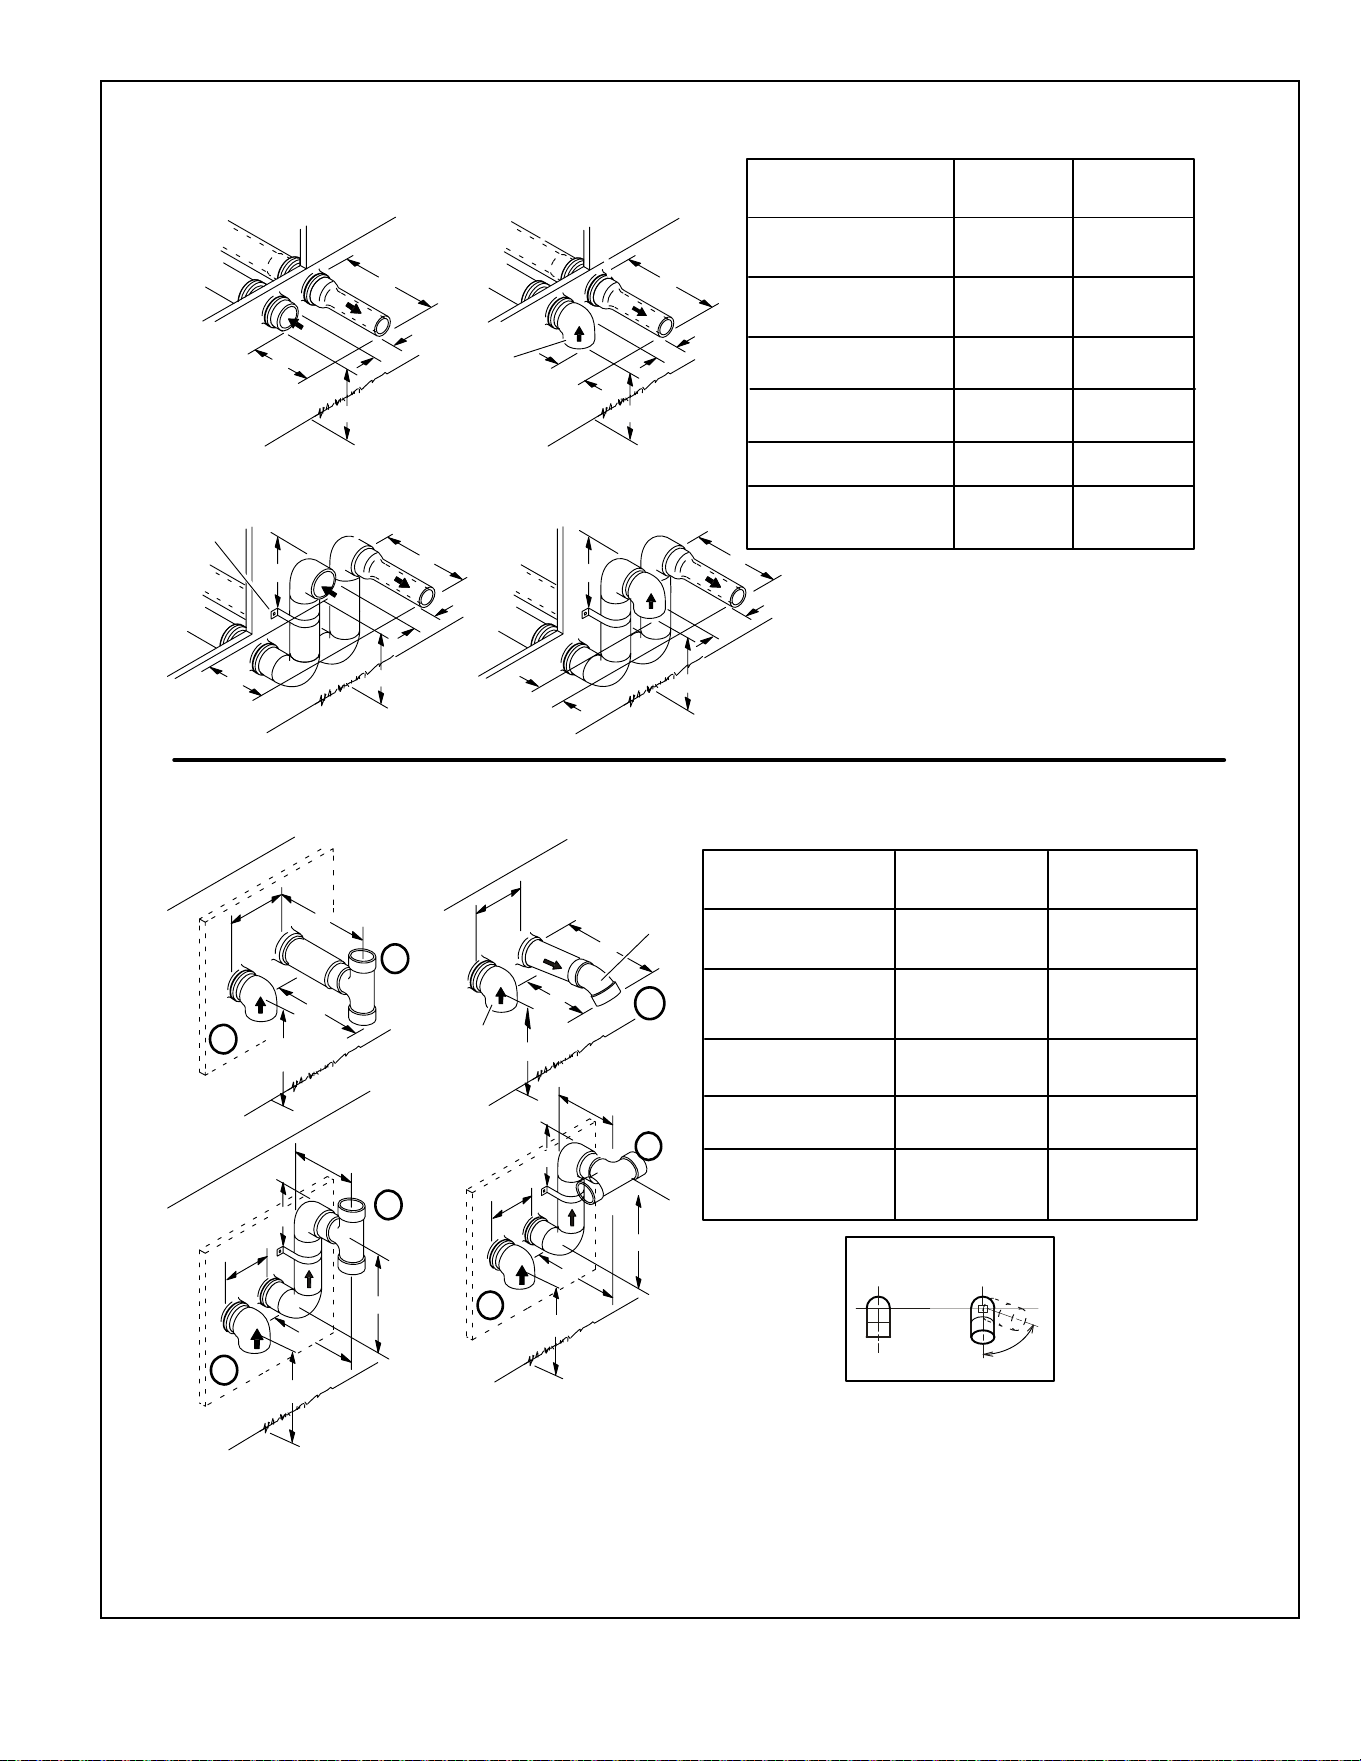
507769C05 Page 27 of 55
mrcool.com
* Use wall support every 24” (610 mm). Use two
wall supports if extension is greater than
24” (610 mm) but less than 48” (1219 mm).
NOTE − One wall support must be within 6” (152 mm)
from top of each pipe (intake and exhaust) to prevent
movement in any direction.
NOTE − FIELD−PROVIDED
REDUCER MAY BE
REQUIRED TO ADAPT
LARGER VENT PIPE SIZE
TO TERMINATION
STRAIGHT
APPPLICATION
EXTENDED
APPLICATION
D
B
D
B
A
2” (51mm)
Vent Pipe
3” (76mm)
Vent Pipe
A− Minimum clearance
above grade or average
snow accumulation
B− Maximum horizontal
separation between
intake and exhaust
D− Maximum exhaust
pipe length
E− Maximum wall support
distance from top of each
pipe (intake/exhaust)
12” (305 mm)
12” (305 mm)
12” (305 mm)
6” (152 mm)6” (152 mm)
6” (152 mm)6” (152 mm)
8” (203 mm)8” (203 mm)
20” (508 mm)
6” (152 mm)6” (152 mm)
A
Intake
Elbow
* WALL
SUPPORT
B
A
D
E
B
D
E
A
ALTERNATE TERMINATIONS (TEE & FORTY−FIVE DEGREE ELBOWS ONLY)
C2 -Minimum from end of
exhaust to inlet of intake
C1 -Minimum from end of
exhaust to inlet of intake
FIELD FABRICATED WALL TERMINATION
C1
C2
C1
C2
Front View of
Intake and Exhaust
Intake
Exhaust
C
B
1
2
D
A
C
3
Intake
Elbow
Exhaust
B
A
D
2” (51MM)
Vent Pipe
3” (76MM)
Vent Pipe
A− Clearance above
grade or average snow
accumulation
B− Horizontal
separation between
intake and exhaust
C− Minimum from
end of exhaust to
inlet of intake
D− Exhaust pipe length
E− Wall support distance
from top of each pipe
(intake/exhaust)
12” (305 mm) Min. 12” (305 mm) Min.
6” (152 mm) Min.
24” (610 mm) Max.
9” (227 mm) Min.
12” (305 mm) Min.
16” (405 mm) Max.
6” (152 mm) Max.
6” (152 mm) Min.
24” (610 mm) Max.
9” (227 mm) Min.
12” (305 mm) Min.
20” (508 mm) Max.
6” (152 mm) Max.
D
C
12”
1
2
E
B
A
1
The exhaust termination tee should be connected to the 2” or 3” PVC flue pipe as shown in the illustration.
Do not use an accelerator in applications that include an exhaust termination tee.
The accelerator is not required.
2
As required. Flue gas may be acidic and may adversely affect some building materials. If a side wall vent
termination is used and flue gases will impinge on the building materials, a corrosion-resistant shield
(24 inches square) should be used to protect the wall surface. If optional tee is used, the protective shield
is recommended. The shield should be constructed using wood, sheet metal or other suitable material.
All seams, joints, cracks, etc. in affected area, should be sealed using an appropriate sealant.
3
Exhaust pipe 45° elbow can be rotated to the side away from the combustion air inlet to direct exhaust
away from adjacent property. The exhaust must never be directed toward the combustion air inlet.
D
C
12”
1
2
E
B
A
Figure 31.
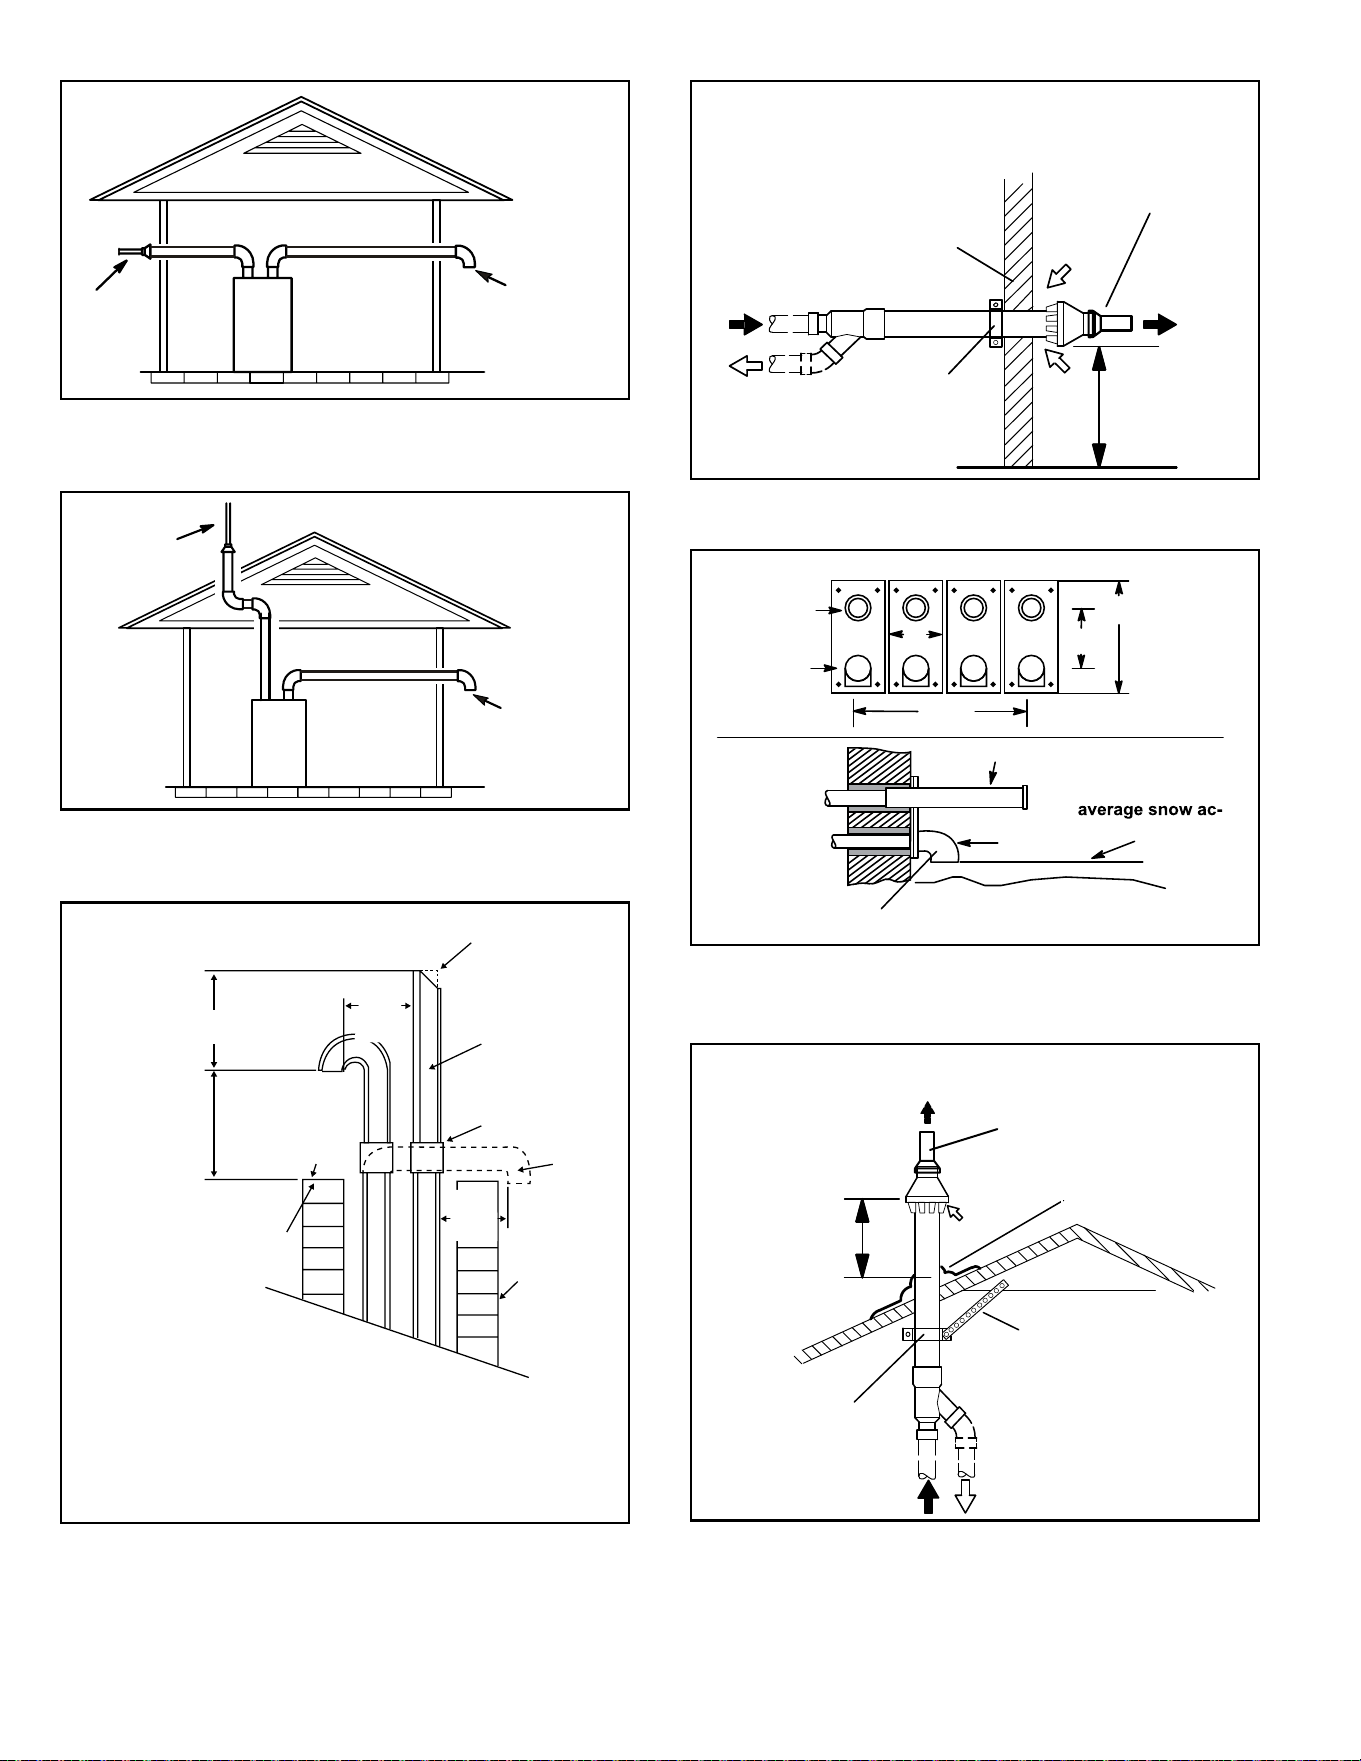
507769C05Page 28 of 55
mrcool.com
Figure 32. Exiting Exhaust and Intake Vent
(no common pressure zone)
Exhaust
Pipe
Furnace
Inlet Air
Minimum 12 in.
(305MM) above
grade or snow
accumulation
Roof T
erminated
Exhaust Pipe
Furnace
Inlet Air
Minimum 12 in.
(305MM) above
grade or snow
accumulation
Figure 33. Exiting Exhaust and Intake Vent
(no common pressure zone)
STRAIGHT-CUT OR
ANGLE-CUT IN DIRECTION
OF ROOF SLOPE *
EXHAUST VENT
1/2” (13mm)
WEATHERPROOF
INSULATION
SHOULDER OF FITTINGS
PROVIDE SUPPORT
OF PIPE ON TOP PLATE
ALTERNATE
INTAKE PIPE
INTAKE PIPE
INSULATION (optional)
EXTERIOR
PORTION OF
CHIMNEY
INSULATE
TO FORM
SEAL
SHEET
METAL TOP
PLATE
8” - 12”
(203mm - 305mm)
* SIZE TERMINATION
PIPE PER EXHAUST
PIPE TERMINATION
SIZE REDUCTION
TABLE
3” - 8”
(76mm -
203mm)
3” - 8”
(76mm -
203mm)
Minimum 12” (305mm)
above chimney top
plate or average snow
accumulation
NOTE − Do not discharge exhaust gases directly into any chimney
or vent stack. If vertical discharge through an existing unused
chimney or stack is required, insert piping inside chimney until the
pipe open end is above top of chimney and terminate as illustrated.
In any exterior portion of chimney, the exhaust vent must be
insulated.
Figure 34. Direct Vent Application Using Existing
Chimney
Figure 35. Direct Vent Concentric Wall Termination
12" (305mm) Min.
above grade or
average snow
accumulation.
71M80, 69M29 or 60L46 (US)
44W92 or 44W93 (Canada)
INTAKE
AIR
INTAKE
AIR
INTAKE
AIR
OUTSIDE
WALL
GRADE
CLAMP
(Not Furnished)
FIELD−PROVIDED
REDUCER MAY BE REQUIRED
TO ADAPT LARGER VENT
PIPE SIZE TO TERMINATION
EXHAUST
VENT
1−1/2" (38mm) accelerator
provided on 71M80 & 44W92
EXHAUST
VENT
EXHAUST
VENT
INTAKE
AIR
5-1/2”
(140mm)
Front View
12”
(305mm)
5”
(127mm)
18” MAX.
(457mm)
EXHAUST VENT
INTAKE
AIR
Inches (mm)
Side View
12” (305mm) Min.
above grade or
cumulation.
optional intake elbow
Figure 36. Optional Vent Termination for Multiple Unit
Installation of Direct Vent Wall Termination Kit
Figure 37. Direct Vent Concentric Rooftop
Termination
71M80, 69M29 or 60L46 (US)
44W92 or 44W93 (Canada)
Minimum
Above Average
Snow
Accumulation
SHEET METAL STRAP
(Clamp and sheet metal strap
must be field installed to support
the weight of the termination kit.)
FLASHING
(Not Furnished)
CLAMP
FIELD−PROVIDED
REDUCER MAY BE REQUIRED
TO ADAPT LARGER VENT
PIPE SIZE TO TERMINATION
1 1/2" (38mm) accelerator
provided on 71M80 & 44W92
12” (305mm)
INTAKE
AIR
EXHAUST
VENT
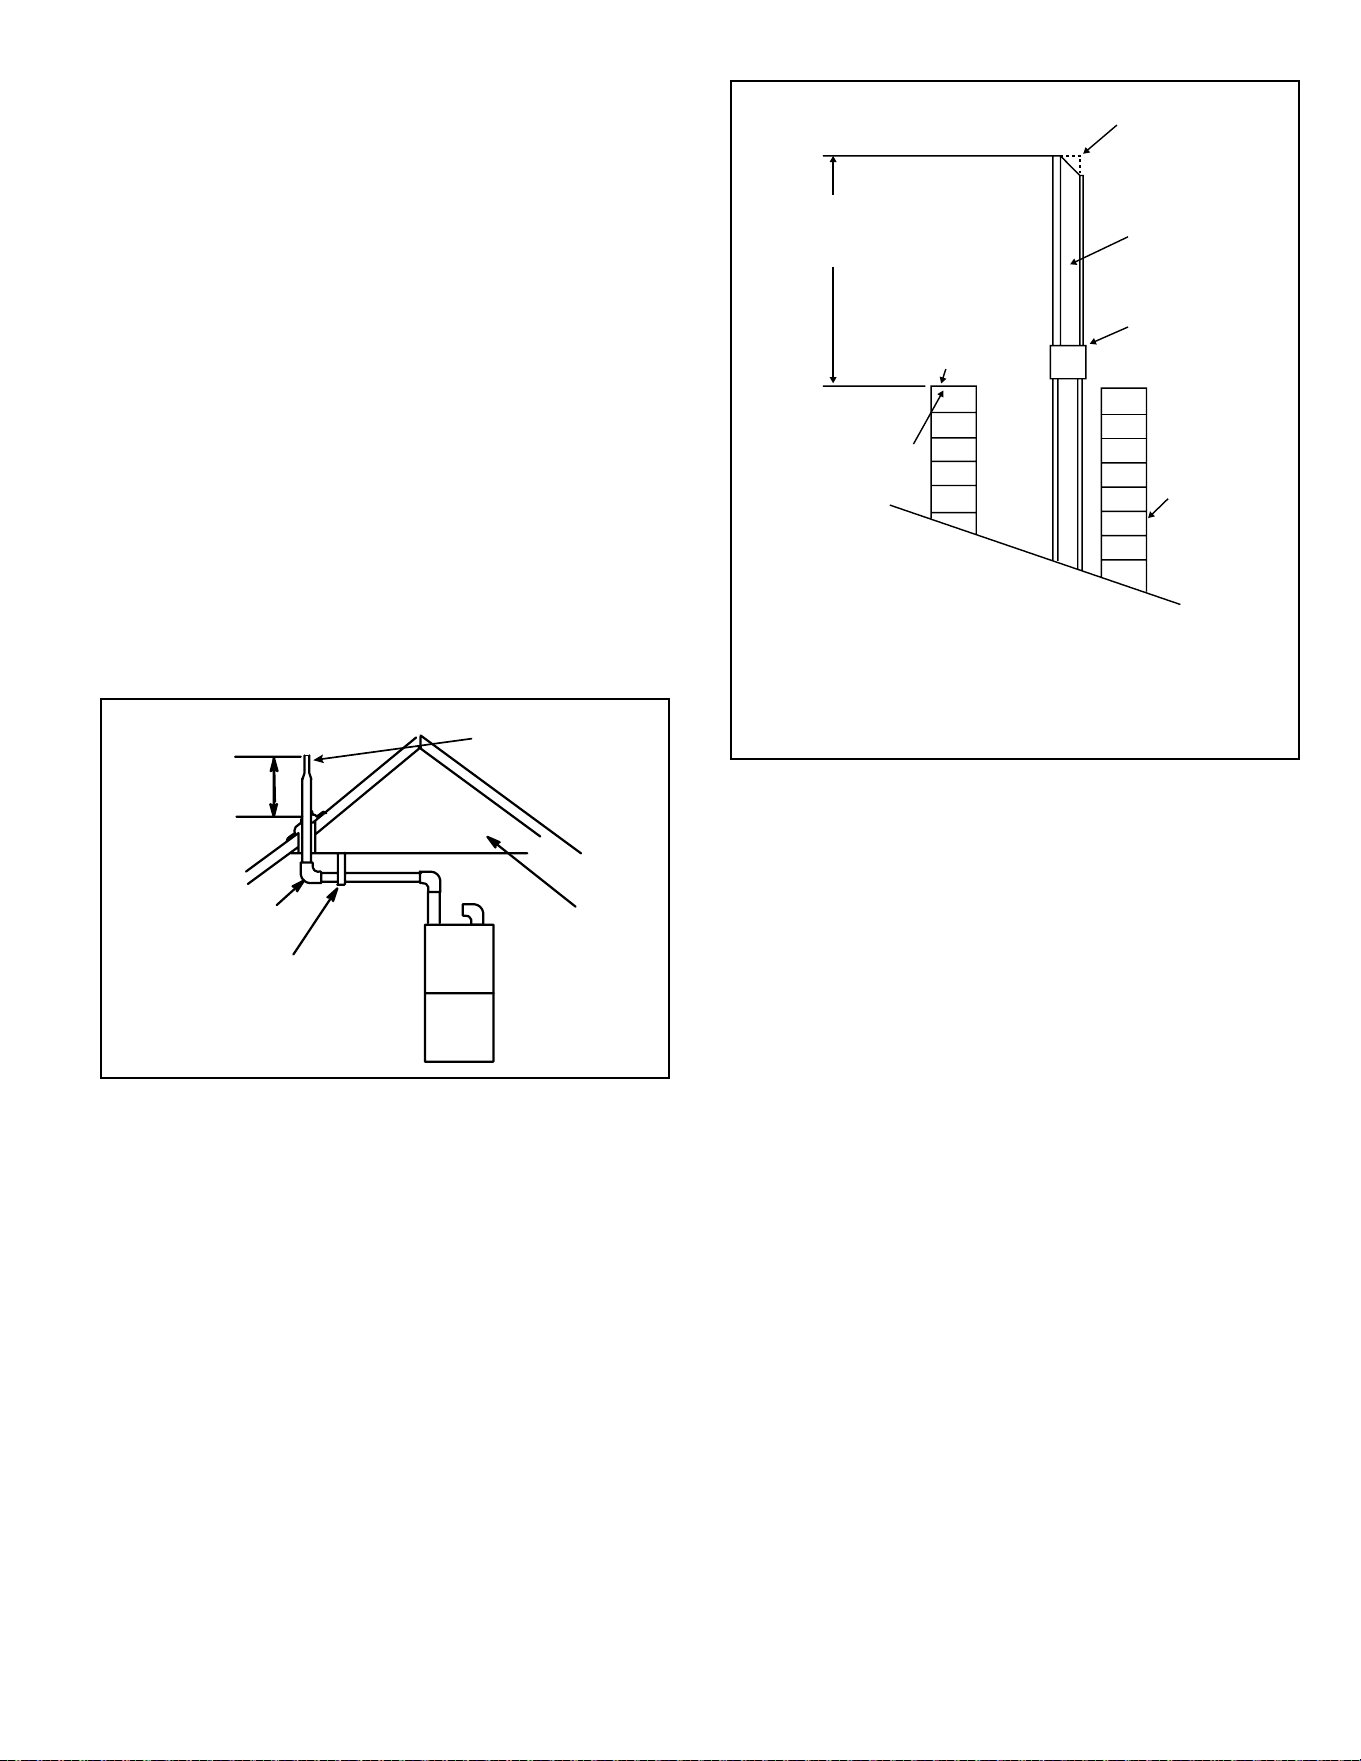
507769C05 Page 29 of 55
mrcool.com
Details of Exhaust Piping Terminations for Non-
Direct Vent Applications
Exhaust pipe may be routed either horizontally through
an outside wall or vertically through the roof. In attic or
closet installations, vertical termination through the roof
is preferred. Figure 38 through Figure 39 show typical
terminations.
1. Exhaust piping must terminate straight out or up as
shown. The termination pipe must be sized as listed
in Table 7A through Table 7D. The specied pipe size
ensures proper velocity required to move the exhaust
gases away from the building.
2. On eld supplied terminations for side wall exit,
exhaust piping may extend a maximum of 12 inches
(305 mm) for 2” PVC and 20” (508 mm) for 3” (76 mm)
PVC beyond the outside wall.
3. If exhaust piping must be run up a sidewall to position
above snow accumulation or other obstructions, piping
must be supported every 24” (610 mm). When exhaust
piping must be run up an outside wall, any reduction in
exhaust pipe size must be done after the nal elbow.
Figure 38. Non-Direct Vent Roof Termination Kit
(15F75 or 44J41)
UNCONDITIONED
ATTIC SPACE
3” (76MM) OR
2” (51MM) PVC
PROVIDE SUPPORT
FOR EXHAUST LINES
12” (305MM)
ABOVE AVE.
SNOW
ACCUMULATION
SIZE PER EXHAUST PIPE
TERMINATION SIZE
REDUCTION TABLE
Figure 39. Non-Direct Vent Application Using Existing
Chimney
STRAIGHT-CUT OR
ANGLE-CUT IN DIRECTION
OF ROOF SLOPE *
EXHAUST VENT
1/2” (13mm)
WEATHERPROOF
INSULATION
SHOULDER OF FITTINGS
PROVIDE SUPPORT
OF PIPE ON TOP PLATE
INTAKE PIPE
INSULATION (optional)
EXTERIOR
PORTION OF
CHIMNEY
INSULATE
TO FORM
SEAL
SHEET
METAL TOP
PLATE
* SIZE TERMINATION PIPE PER EXHAUST
PIPE TERMINATION SIZE REDUCTION TABLE
Minimum 12” (305mm)
above chimney top
plate or average snow
accumulation
NOTE − Do not discharge exhaust gases directly into any chimney
or vent stack. If vertical discharge through an existing unused
chimney or stack is required, insert piping inside chimney until the
pipe open end is above top of chimney and terminate as illustrated.
In any exterior portion of chimney, the exhaust vent must be
insulated.
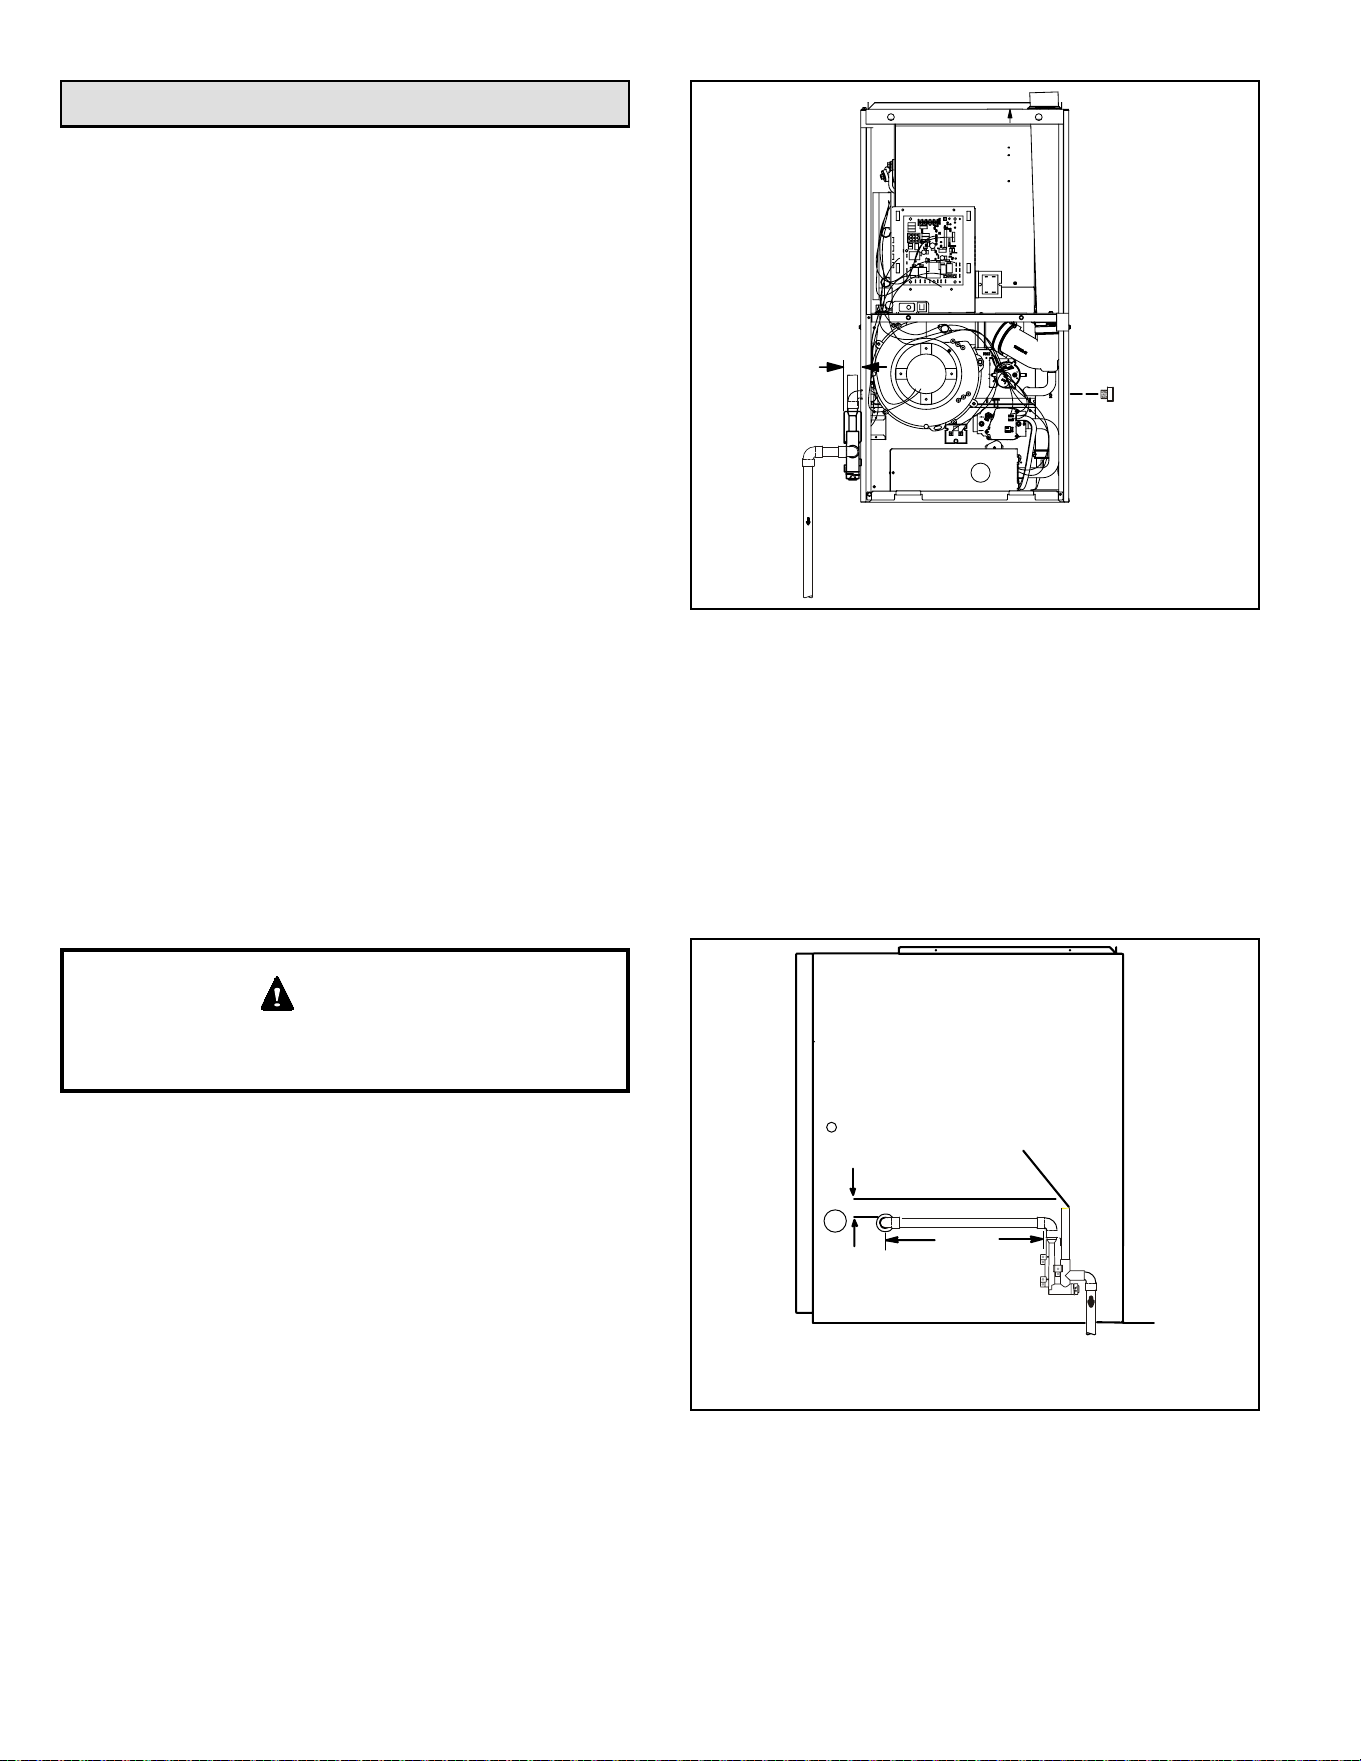
507769C05Page 30 of 55
mrcool.com
Condensate Piping
This unit is designed for either right or left side exit of
condensate piping in downow applications. Refer to
Figure 41 for condensate trap locations.
NOTE: If necessary the condensate trap may be installed
up to 5” away using PVC pipe from the furnace. Piping
from furnace must slope down a minimum of 1/4” per ft.
toward trap.
1. Determine which side condensate piping will exit the
unit, location of trap, eld-provided ttings and length
of PVC pipe required to reach available drain.
2. Use a large at head screw driver or a 1/2” drive
socket extension and remove plug (Figure 41) from
the cold end header box at the appropriate location
on the side of the unit. Install provided 3/4 NPT street
elbow tting into cold end header box. Use Teon tape
or appropriate pipe dope.
3. Install the cap over the clean out opening at the base
of the trap. Secure with clamp. See Figure 46.
4. Install drain trap using appropriate PVC ttings, glue
all joints. Glue the provided drain trap as shown in
Figure 46. Route the condensate line to an open drain.
Condensate line must maintain a 1/4” downward slope
from the furnace to the drain.
5. If unit will be started immediately upon completion of
installation, prime trap per procedure outlined in Unit
Start-Up section.
Do Not use copper tubing or existing copper condensate
lines for drain line.
CAUTION
Figure 41. Condensate Trap and Plug Locations
Trap
(same on
right side)
Plug
(same on left
side)
1-1/2 in.
Condensate line must slope downward away from the
trap to drain. If drain level is above condensate trap,
condensate pump must be used. Condensate drain line
should be routed within the conditioned space to avoid
freezing of condensate and blockage of drain line. If
this is not possible, a heat cable kit may be used on the
condensate trap and line. Heating cable kit is available in
various lengths: 6 ft. (1.8 m) - kit no. 26K68; 24 ft. (7.3 m) -
kit no. 26K69; and 50 ft. (15.2 m) - kit no. 26K70.
Figure 42. Condensate Trap Location
(shown with right side exit of condensation)
5’ max.
to drain
1” min.
2” max.
Trap can be installed a maximum
of 5ft. from furnace (*PVC only)
Field Provided Vent
1” min. 2” max. above
condensate drain.
*Piping from furnace must slope down a
minimum 1/4” per ft. toward trap
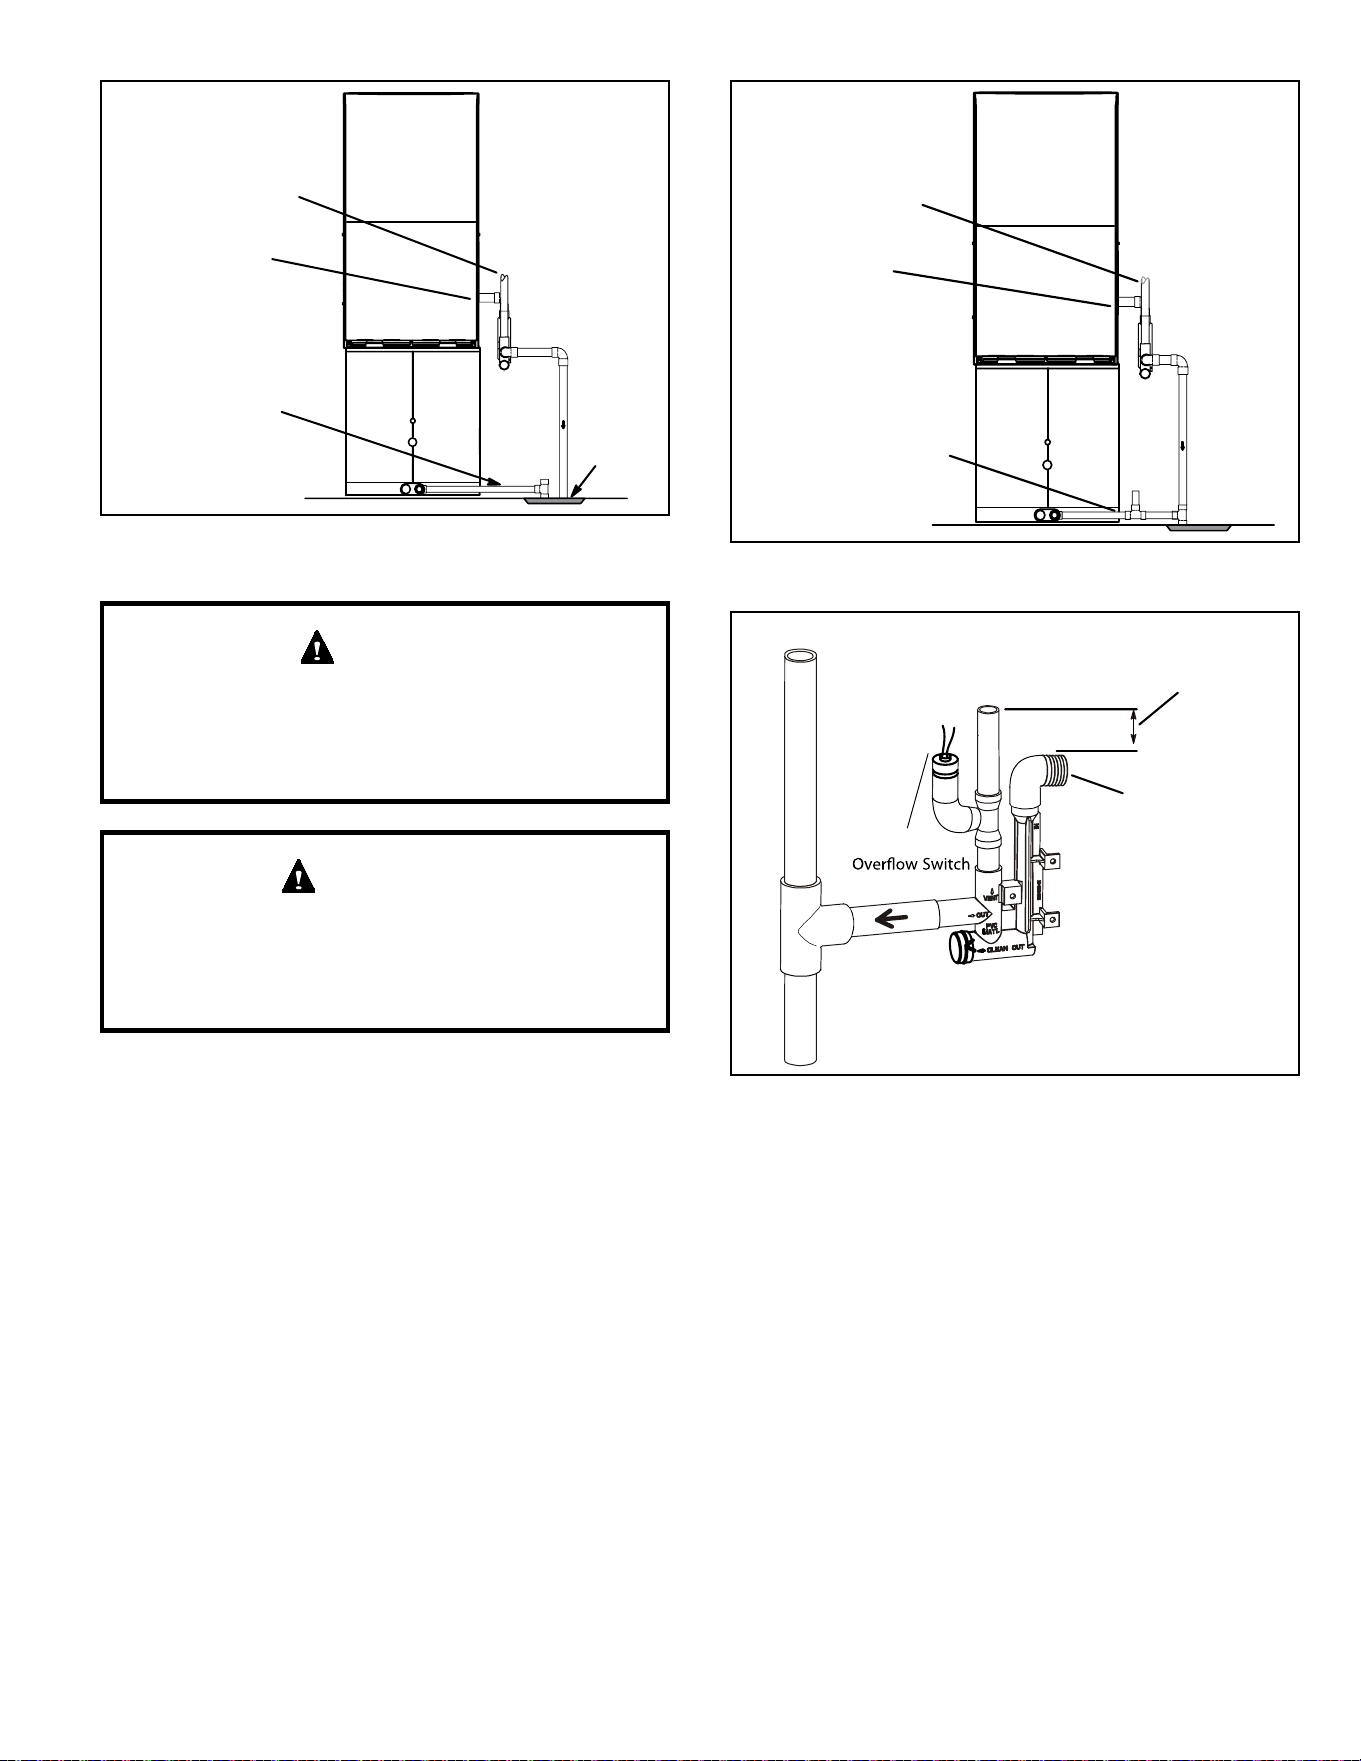
507769C05 Page 31 of 55
mrcool.com
Figure 43. Unit with Cooling Coil Using Separate
Drain
Drain
Field Provided Vent
1” min. 2” max. above
condensate drain.
Condensate Drain
Connection
Evaporator Drain Line
(vent required)
A separate drain line must be run to the drain from the
condensate trap to ensure proper drainage and pressure
switch operation. DO NOT connect the condensate trap
drain into the drain line from the evaporator coil.
CAUTION
When combining the furnace and evaporator coil
drains together, the A/C condensate drain outlet must
be vented to relieve pressure in order for the furnace
pressure switch to operate properly.
IMPORTANT
Figure 44. Evaporator Coil Using a Common Drain
Field Provided Vent
1” min. 2” max. above
condensate drain.
Evaporator Drain Line
(vent required)
Condensate Drain
Connection
FurnaceCondensate
Drain
Connection
From Evaporator Coil
Optional
Field Provided Vent
1” min. 2” max. above
condensate drain.
Figure 45. Condensate Trap with Optional Overow
Switch
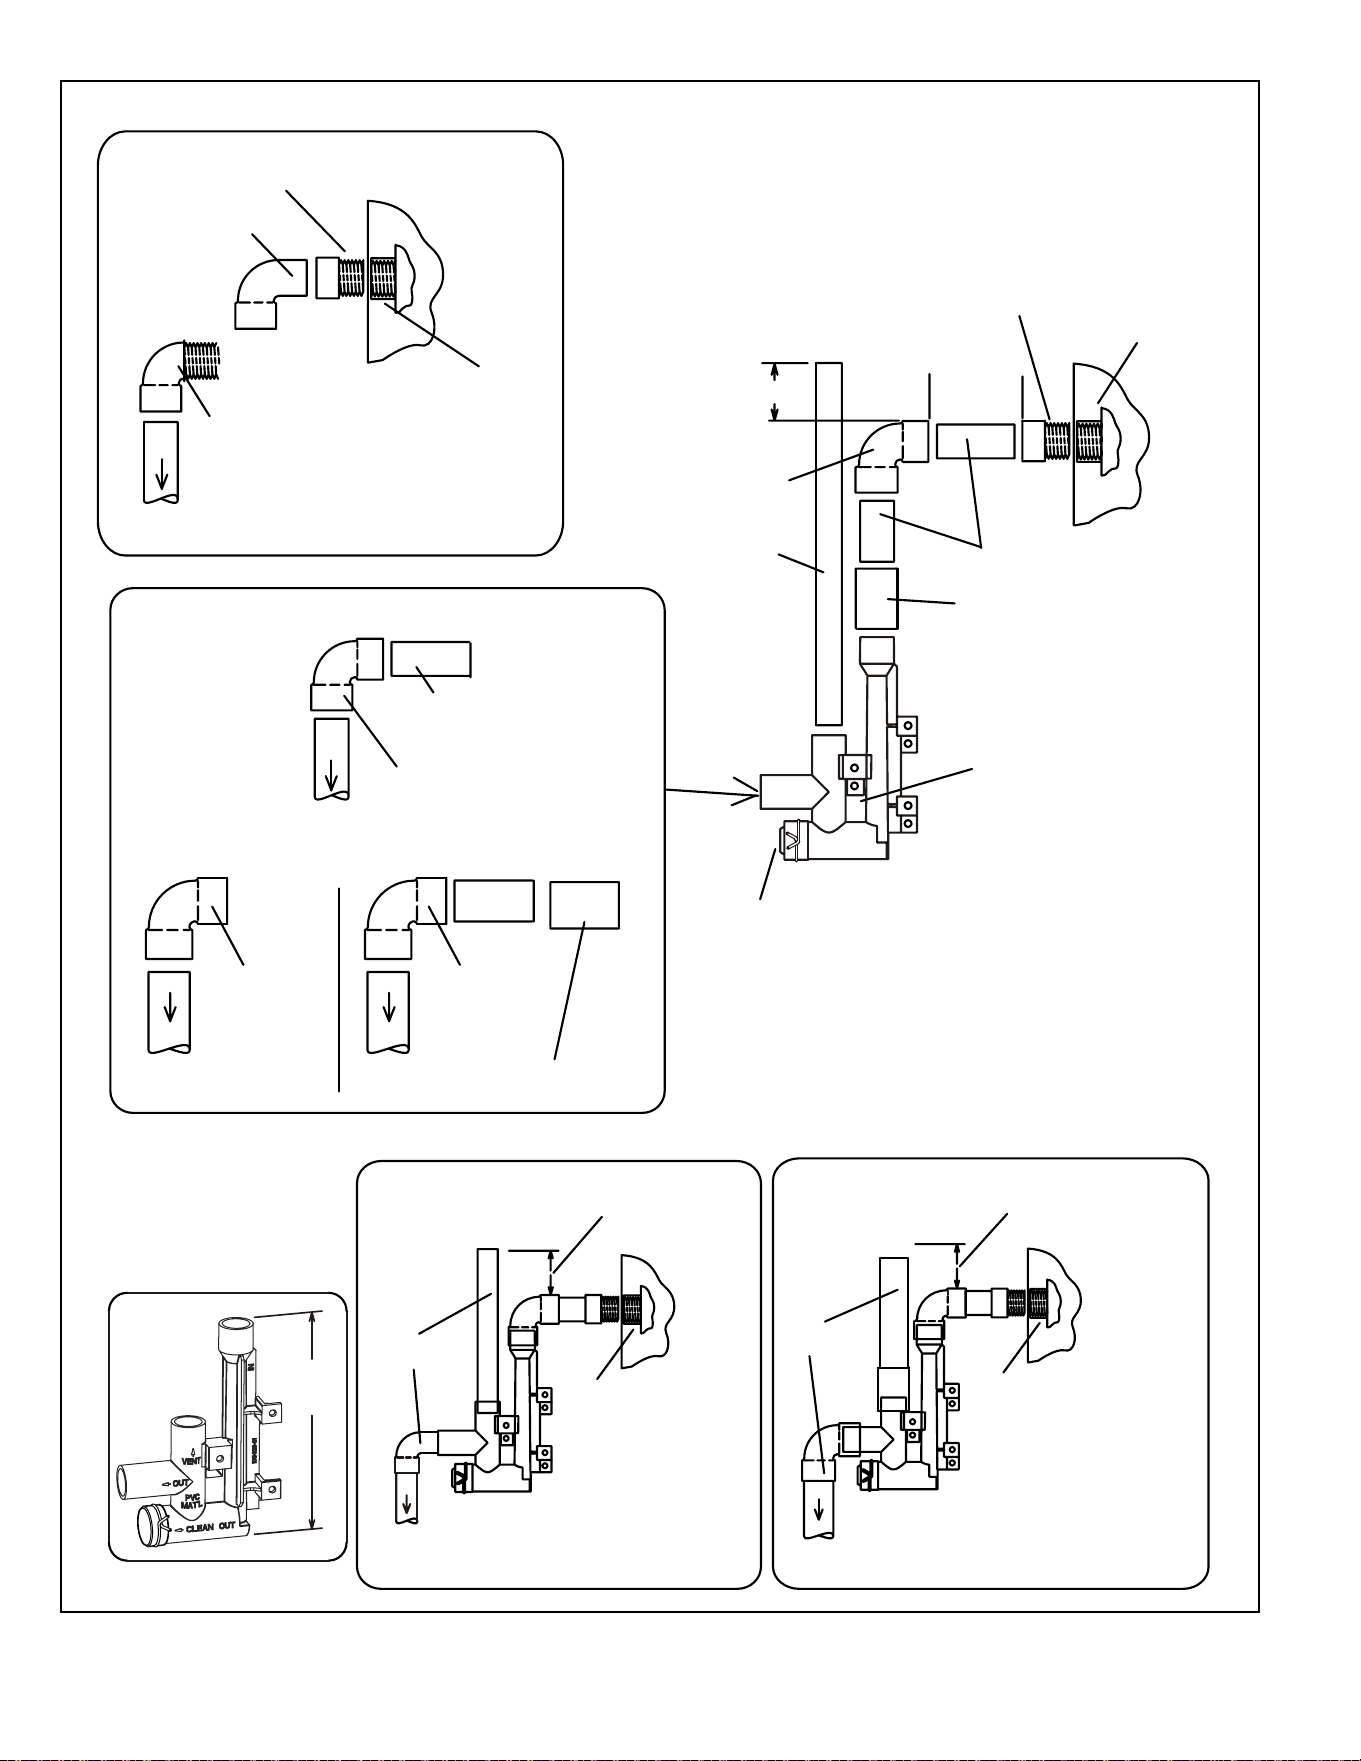
507769C05Page 32 of 55
mrcool.com
Figure 46. Trap Drain Assembly Using 1/2” PVC or 3/4” PVC
Drain Trap
Assembly
(Furnished)
V
ent
Drain Trap
Clean Out
5 Feet
Maximum
Coupling 3/4 inch slip X slip
(Not Furnished)
90°
Elbow 3/4 inch PVC
(Not Furnished)
3/4 inch PVC Pipe
(Not Furnished)
1/2 inch PVC Pipe
(Not Furnished)
Condensate Drain
Connection In Unit
Drain Assembly for 1/2 inch Drain Pipe
90° Elbow
3/4 inch PVC
(Not Furnished)
Coupling 3/4 inch slip X slip
(Not Furnished)
To
Drain
To
Drain
90° Elbow
3/4 inch PVC
(Not Furnished)
To
To
Drain
90° Elbow
1/2 inch PVC
(Not Furnished)
1/2 inch PVC Pipe
(Not Furnished)
Drain Assembly for 3/4 inch Drain Pipe
Condensate Drain
Connection In Unit
Condensate Drain
Connection In Unit
Vent
To
Drain
Condensate Drain
Connection In Unit
Optional Condensate Drain Connection
Optional DrainPiping FromTrap
DrainTrap Assembly
(Furnished)
DrainTrap Assembly with 1/2 inch Piping
DrainTr ap Assembly with 3/4 inch Piping
1/2 inch
3/4 inch
1(25 mm) Min.
2 (50 mm) Max.
AboveTop Of
Condensate Drain
Connection In Unit
1 (25 mm) Min. 2 (50 mm) Max. AboveTop
Of Condensate Drain Connection In Unit
1 (25 mm) Min. 2 (50 mm) Max. AboveTop
Of Condensate Drain Connection In Unit
Trap
Vent
To
Drain
7
(178)
Adapter 3/4 inch slip X
3/4 inch mpt (not furnished)
90° Street Elbow
3/4 inch PVC
(not furnished)
90° Street Elbow
3/4 inch PVC
( furnished)
Adapter 3/4 inch slip X
3/4 inch mpt (not furnished)
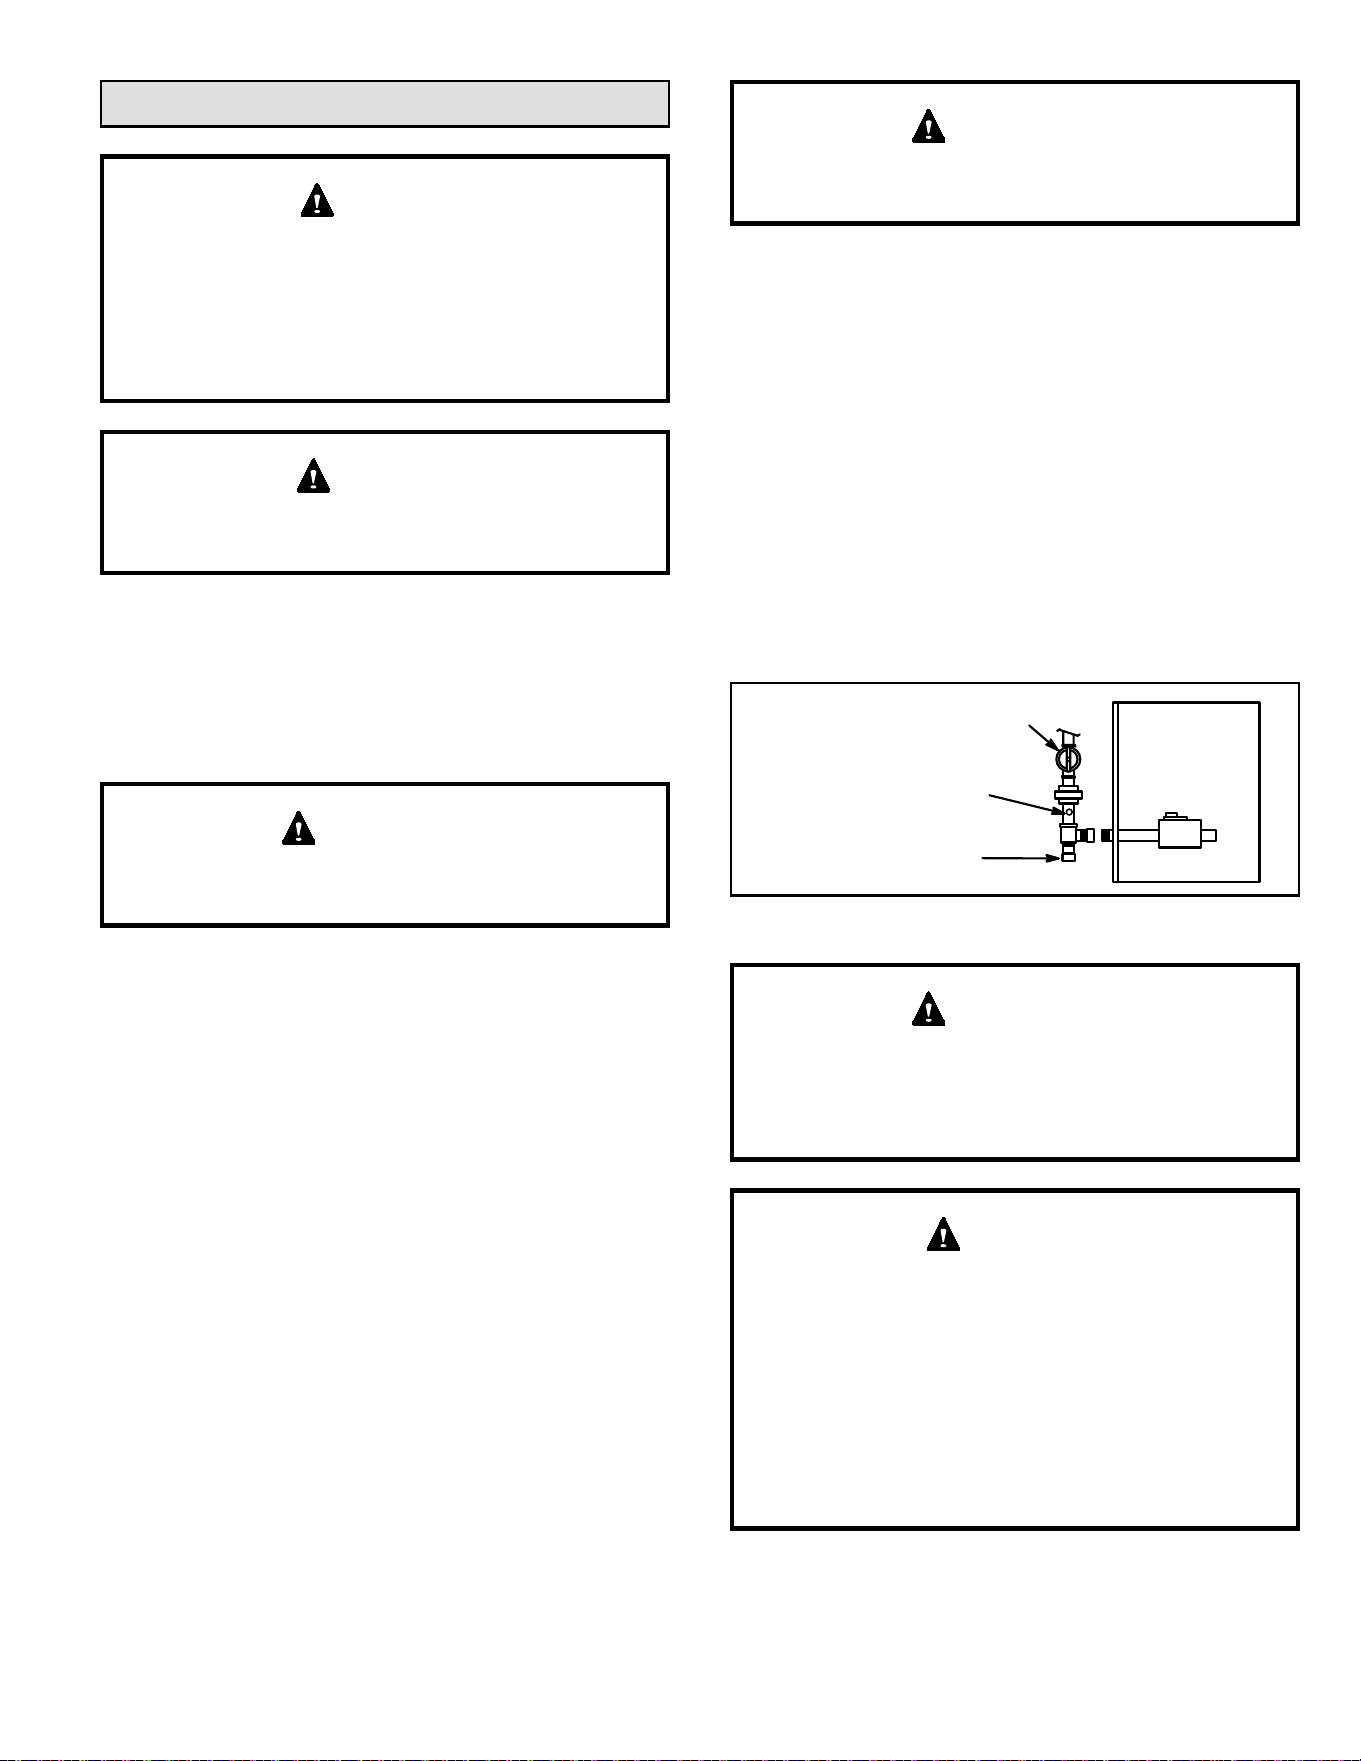
507769C05 Page 33 of 55
mrcool.com
Gas Piping
If a exible gas connector is required or allowed by
the authority that has jurisdiction, black iron pipe shall
be installed at the gas valve and extend outside the
furnace cabinet. The exible connector can then be
added between the black iron pipe and the gas supply
line.
CAUTION
Do Not exceed 600 in. lbs. (50 ft. lbs.) torque when
attaching the gas piping to the gas valve.
WARNING
1. Gas piping may be routed into the unit through either
the left or right hand side. Supply piping enters into the
gas valve from the side of the valve as shown in Figure
48. Move bellows grommet to side of the cabinet which
the gas line enters. Ensure opposite gas line entrance
is plugged with supplied plug.
A low inlet pressure switch in LP/propane applications
is recommended.
IMPORTANT
2. When connecting gas supply, factors such as length
of run, number of ttings and furnace rating must be
considered to avoid excessive pressure drop. Table 11
lists recommended pipe sizes for typical applications.
NOTE: Use two wrenches when connecting gas piping
to avoid transferring torque to the manifold.
3. Gas piping must not run in or through air ducts,
clothes chutes, chimneys or gas vents, dumb waiters
or elevator shafts. Center gas line through piping hole.
Gas line should not touch side of unit. See Figure 48.
4. Piping should be sloped 1/4 inch per 15 feet (6 mm per
5.6 m) upward toward the gas meter from the furnace.
The piping must be supported at proper intervals,
every 8 to 10 feet (2.44 to 3.05 m), using suitable
hangers or straps. Install a drip leg in vertical pipe runs
to serve as a trap for sediment or condensate.
5. A 1/8” N.P.T. plugged tap or pressure post is located
on the gas valve to facilitate test gauge connection.
See Figure 47.
6. In some localities, codes may require installation of a
manual main shut o valve and union (furnished by
installer) external to the unit. Union must be of the
ground joint type.
Compounds used on threaded joints of gas piping must
be resistant to the actions of liquied petroleum gases.
IMPORTANT
Leak Check
After gas piping is completed, carefully check all eld-
installed piping connections for gas leaks. Use a
commercially available leak detecting solution specically
manufactured for leak detection. Never use an open ame
to test for gas leaks.
The furnace must be isolated from the gas supply
system by closing the individual manual shut-o valve
during any gas supply system at pressures greater than
or equal to 1/2 psig (3.48 kPa, 14 inches w.c.). This
furnace and its components are designed, manufactured
and independently certied to comply with all applicable
ANSI/CSA standards. A leak check of the furnace and its
components is not required.
Figure 47.
MANUAL MAIN SHUT−OFF
VALVE WILL NOT HOLD
NORMAL TEST PRESSURE
CAP
FURNACE
ISOLATE
GAS VALVE
1/8" N.P.T. PLUGGED TAP
When testing pressure of gas lines, gas valve must be
disconnected and isolated (see Figure 47). Gas Valves
can be damaged if subjected to pressures greater than
1/2 psig (3.48 kPa).
IMPORTANT
FIRE OR EXPLOSION HAZARD
Failure to follow the safety warnings exactly could
result in serious injury, death, or property damage.
Never use an open ame to test for gas leaks. Check
all connections using a commercially available soap
solution made specically for leak detection. Some
soaps used for leak detection are corrosive to certain
metals. Carefully rinse piping thoroughly after leak test
has been completed.
WARNING
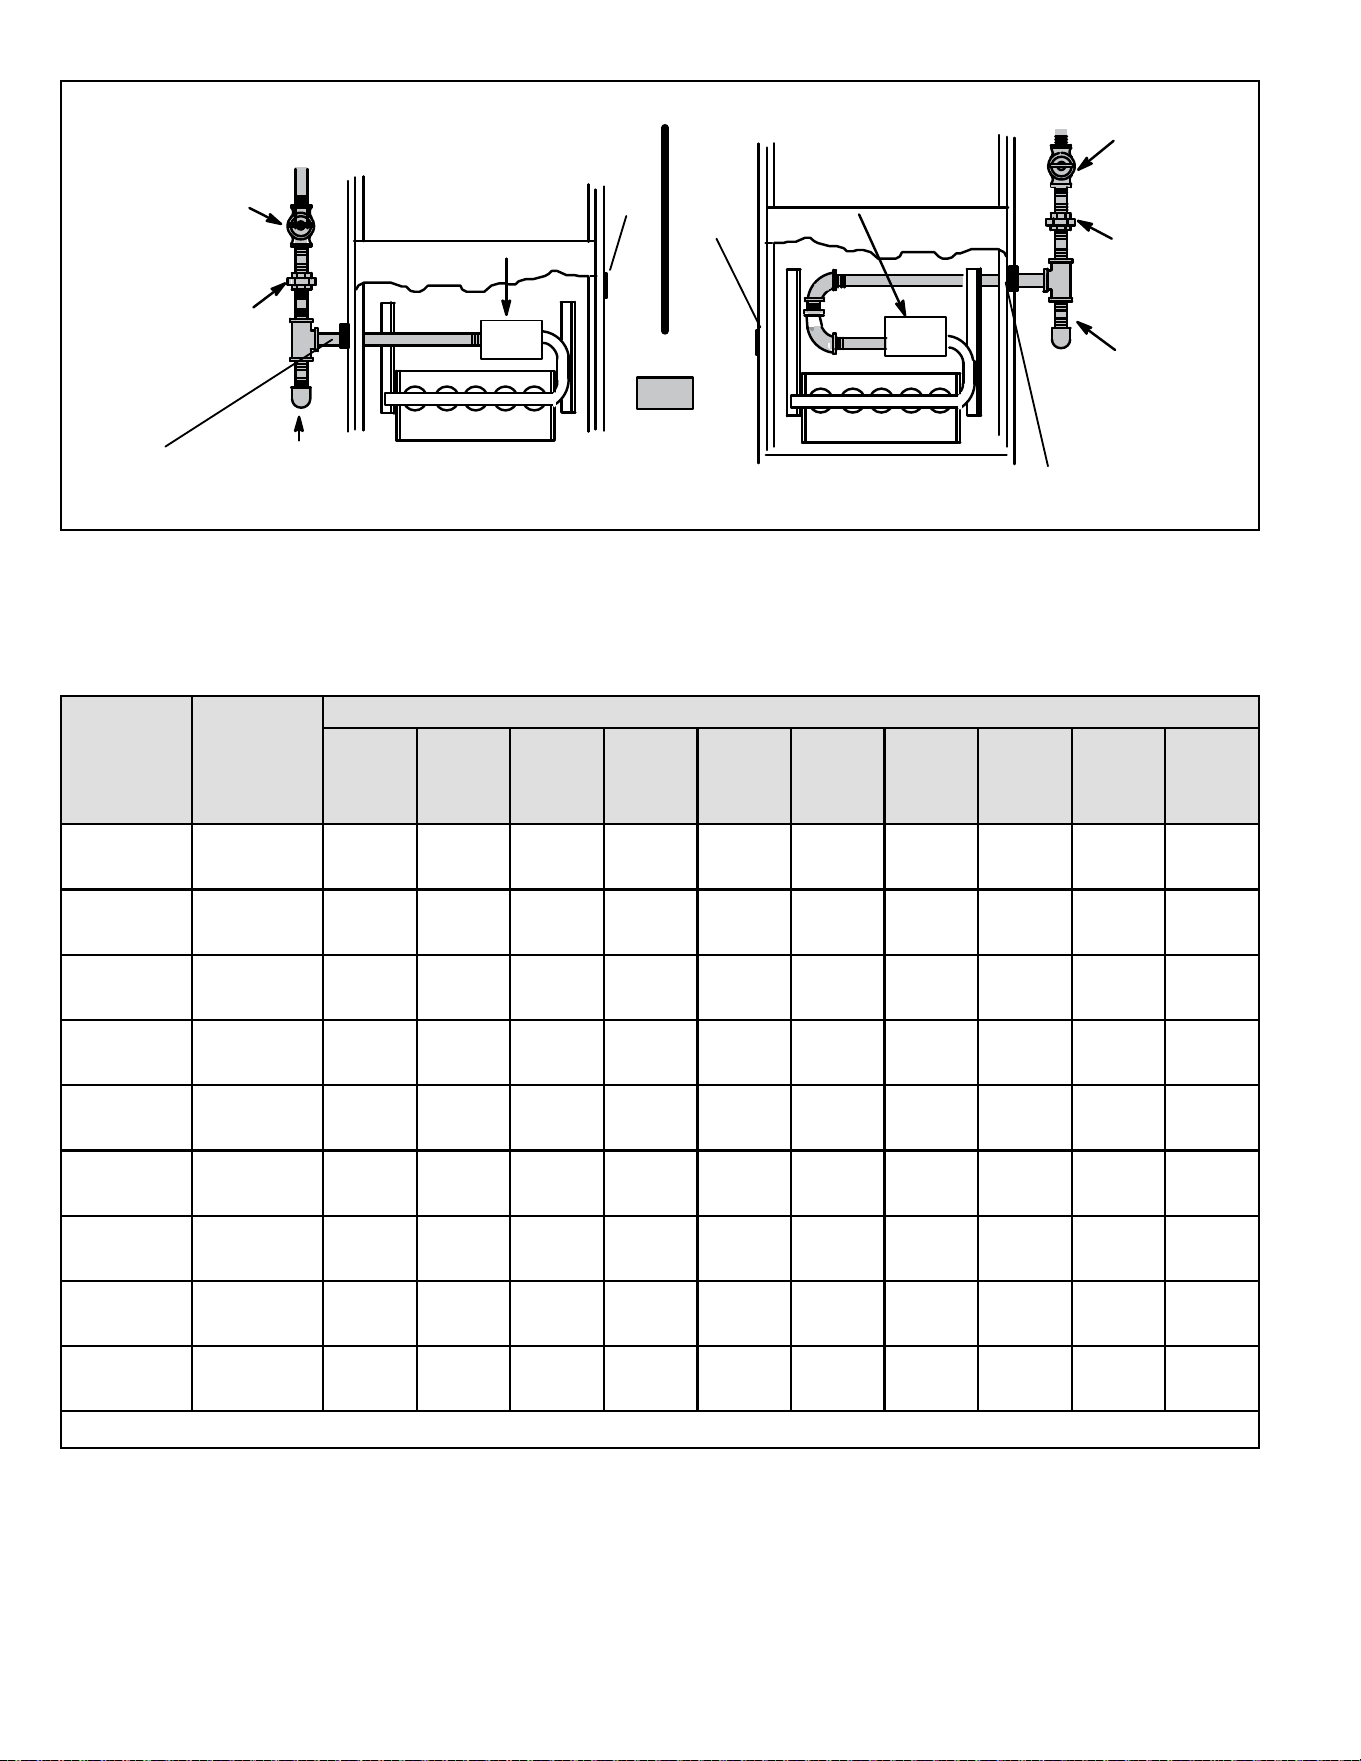
507769C05Page 34 of 55
mrcool.com
Figure 48.
GROUND
JOINT
UNION
AUTOMATIC
GAS VALVE
(with manual
shut−o valve)
FIELD
PROVIDED
AND INSTALLED
GROUND
JOINT
UNION
Left Side Piping
(Standard)
Right Side Piping
(Alternate)
AUTOMATIC
GAS VALVE
(with manual
shut−o valve)
DRIP LEG
DRIP LEG
MANUAL
MAIN SHUT−OFF
VALVE
(With 1/8 in. NPT
Plugged Tap Shown)
MANUAL
MAIN SHUT−OFF
VALVE
(With 1/8 in. NPT
Plugged Tap
Shown)
NOTE − BLACK IRON PIPE ONLY TO BE ROUTED INSIDE OF CABINET
Bellows Grommet
Bellows Grommet
Plug
Plug
Table 11.
Gas Pipe Capacity - FT³/HR (kL/HR)
Nominal
Iron Pipe
Size -
inches
(mm)
Internal
Diameter
- inches
(mm)
Length of Pipe - feet (m)
10
(3.048)
20
(6.096)
30
(9.144)
40
(12.192)
50
(15.240)
60
(18.288)
70
(21.336)
80
(24.384)
90
(27.432)
100
(30.480)
1/2
(12.7)
.622
(17.799)
175
(4.96)
120
(3.40)
97
(2.75)
82
(2.32)
73
(2.07)
66
(1.87)
61
(1.73)
57
(1.61)
53
(1.50)
50
(1.42)
3/4
(19.05)
.824
(20.930)
360
(10.19)
250
(7.08)
200
(5.66)
170
(4.81)
151
(4.28)
138
(3.91)
125
(3.54)
118
(3.34)
110
(3.11)
103
(2.92)
1
(25.4)
1.049
(26.645)
680
(19.25)
465
(13.17)
375
(10.62)
320
(9.06)
285
(8.07)
260
(7.36)
240
(6.80)
220
(6.23)
205
(5.80)
195
(5.52)
1-1/4
(31.75)
1.380
(35.052)
1400
(39.64)
950
(26.90)
770
(21.80)
660
(18.69)
580
(16.42)
530
(15.01)
490
(13.87)
460
(13.03)
430
(12.18)
400
(11.33)
1-1/2
(38.1)
1.610
(40.894)
2100
(59.46)
460
(41.34)
1180
(33.41)
990
(28.03)
900
(25.48)
810
(22.94)
750
(21.24)
690
(19.54)
650
(18.41)
620
(17.56)
2
(50.8)
2.067
(52.502)
3950
(111.85)
2750
(77.87)
2200
(62.30)
1900
(53.80)
1680
(47.57)
1520
(43.04)
1400
(39.64)
1300
(36.81)
1220
(34.55)
1150
(32.56)
2-1/2
(63.5)
2.469
(67.713)
6300
(178.39)
4350
(123.17)
3520
(99.67)
3000
(84.95)
2650
(75.04)
2400
(67.96)
2250
(63.71)
2050
(58.05)
1950
(55.22)
1850
(52.38)
3
(76.2)
3.068
(77.927)
11000
(311.48)
7700
(218.03)
6250
(176.98)
5300
(150.07)
4750
(134.50)
4300
(121.76)
3900
(110.43)
3700
(104.77)
3450
(97.69)
3250
(92.03)
4
(101.6)
4.026
(102.260)
23000
(651.27)
15800
(447.39)
12800
(362.44)
10900
(308.64)
9700
(274.67)
9700
(274.67)
8100
(229.36)
7500
(212.37)
7200
(203.88)
6700
(189.72)
NOTE: Capacity given in cubic feet of gas per hour (kilo liters of gas per hour) and based on 0.60 specic gravity gas.
507769C05 Page 35 of 55
mrcool.com
Removal of the Furnace from Common Vent
In the event that an existing furnace is removed from
a venting system commonly run with separate gas
appliances, the venting system is likely to be too large to
properly vent the remaining attached appliances.
Conduct the following test while each appliance is operating
and the other appliances (which are not operating) remain
connected to the common venting system. If the venting
system has been installed improperly, you must correct the
system as indicated in the general venting requirements
section.
CARBON MONOXIDE POISONING HAZARD
Failure to follow the steps outlined below for each
appliance connected to the venting system being
placed into operation could result in carbon monoxide
poisoning or death.
The following steps shall be followed for each appliance
connected to the venting system being placed into
operation, while all other appliances connected to the
venting system are not in operation.
WARNING
1. Seal any unused openings in the common venting
system.
2. Inspect the venting system for proper size and
horizontal pitch. Determine that there is no blockage,
restriction, leakage, corrosion, or other deciencies
which could cause an unsafe condition.
3. Close all building doors and windows and all doors
between the space in which the appliances remaining
connected to the common venting system are located
and other spaces of the building. Turn ON clothes
dryers and any appliances not connected to the
common venting system. Turn ON any exhaust fans,
such as range hoods and bathroom exhausts, so they
will operate at maximum speed. Do not operate a
summer exhaust fan. Close replace dampers.
4. Follow the lighting instructions. Turn ON the appliance
that is being inspected. Adjust the thermostat so that
the appliance operates continuously.
5. After the main burner has operated for 5 minutes, test
for leaks of ue gases at the draft hood relief opening.
Use the ame of a match or candle.
6. After determining that each appliance connected to
the common venting system is venting properly, (step
3) return all doors, windows, exhaust fans, replace
dampers, and any other gas burning appliances to
their previous mode of operation.
7. If a venting problem is found during any of the
preceding tests, the common venting system must be
modied to correct the problems.
Resize the common venting system to the minimum vent
pipe size determined by using the appropriate tables in
Appendix G. These are in the current standards of the
National Fuel Gas Code ANSI Z223.1.
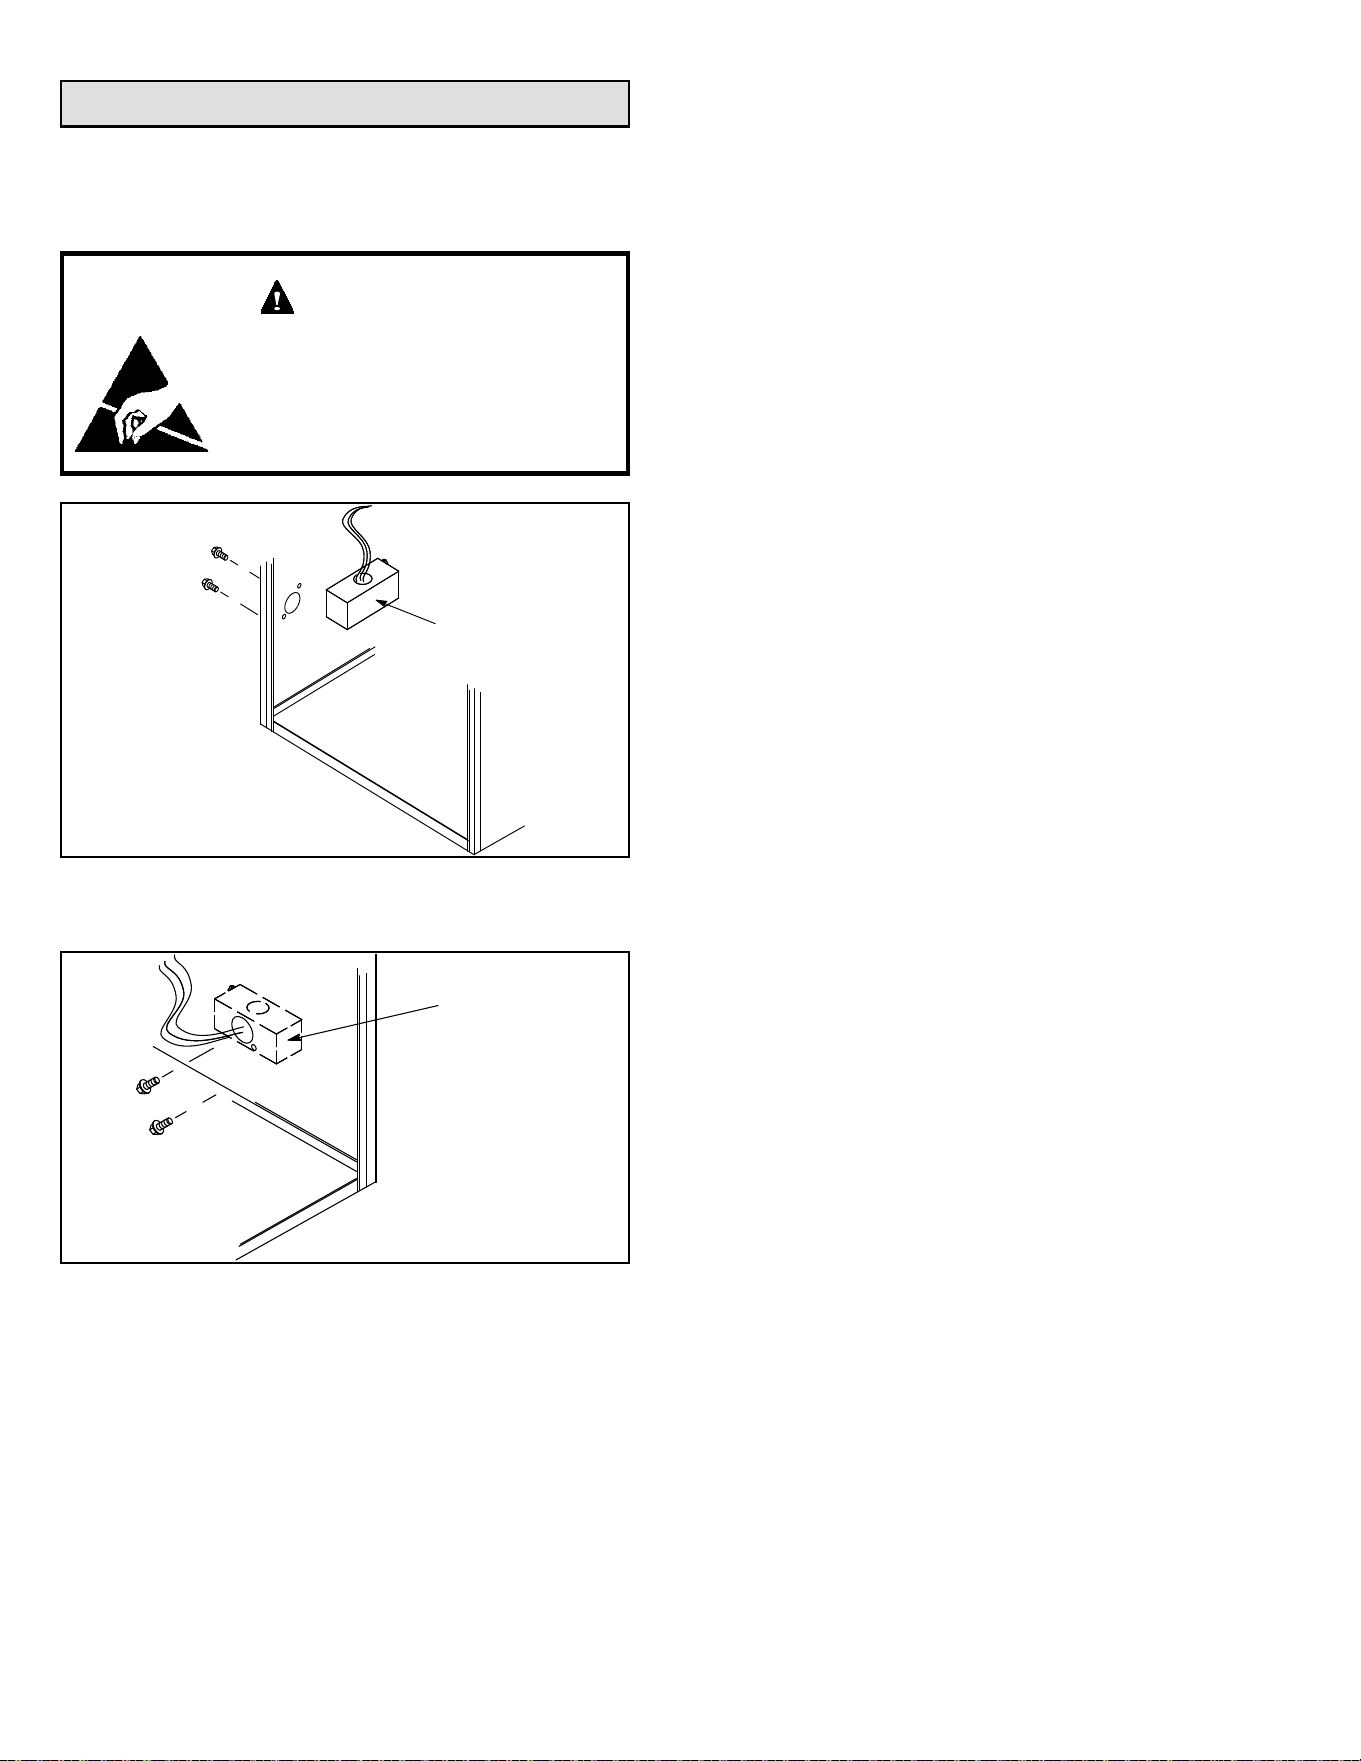
507769C05Page 36 of 55
mrcool.com
Electrical
ELECTROSTATIC DISCHARGE (ESD)
Precautions and Procedures
Electrostatic discharge can aect
electronic components. Take
precautions to neutralize electrostatic
charge by touching your hand and tools
to metal prior to handling the control.
CAUTION
Figure 49. Interior Make-Up Box
(Factory - Installed Left Side)
MAKE−UP
BOX INSIDE
CABINET
Left side
Figure 50. Exterior Make-Up Box
(Field Provided Right Side)
MAKE−UP
BOX
OUTSIDE
CABINET
Right Side
The unit is equipped with a eld makeup box on the left
hand side of the cabinet. A eld-provided make-up box can
be installed on the exterior of the right side of the furnace
to facilitate installation. Seal unused openings on left side
with plugs removed from right side. Secure the excess wire
to the existing harness to protect it from damage.
Refer to Figure 52 for eld wiring and Figure 53 for
schematic wiring diagram and troubleshooting.
The power supply wiring must meet Class I restrictions.
Protected by either a fuse or circuit breaker, select circuit
protection and wire size according to unit nameplate.
NOTE: Unit nameplate states maximum current draw.
Maximum Over-Current Protection allowed is 15 AMP.
Holes are on both sides of the furnace cabinet to facilitate
wiring.
Install a separate (properly sized) disconnect switch near
the furnace so that power can be turned o for servicing.
Before connecting the thermostat or the power wiring,
check to make sure the wires will be long enough for
servicing at a later date. Make sure that thermostat wire
is long enough to facilitate future removal of blower for
service.
Complete the wiring connections to the equipment. Use the
provided unit wiring diagram and the eld wiring diagram
shown in Figure 52. Use 18 gauge wire or larger that is
suitable for Class II rating for thermostat connections.
Electrically ground the unit according to local codes or,
in the absence of local codes, according to the current
National Electric Code (ANSI/HFPA No. 70) for the USA
and current Canadian Electric Code Part 1 (CSA standard
C22.1) for Canada. A green ground wire is provided in the
eld makeup box.
NOTE: The gas furnace contains electronic components
that are polarity sensitive. Make sure that the furnace is
wired correctly and is properly grounded.
Accessory Terminals
One line voltage “ACC” 1/4” spade terminal is provided
on the furnace control board. Any accessory rated up to
one amp can be connected to this terminal with the neutral
leg of the circuit being connected to one of the provided
neutral terminals. If an accessory rated at greater than one
amp is connected to this terminal, it is necessary to use an
external relay. See Figure 54 or Figure 55 for control board
conguration. This terminal is energized when the indoor
blower is operating.
One line voltage “120 HUM” 1/4” spade terminal is provided
on the furnace integrated control board. See Figure 54 or
Figure 55 for integrated control conguration. This terminal
is energized in the heating mode when the combustion air
inducer is operating. Any humidier rated up to one amp
can be connected to this terminal with the neutral leg of
the circuit being connected to one of the provided neutral
terminals. If a humidier rated at greater than one amp
is connected to this terminal, it is necessary to use an
external relay.
One 24V “H” 1/4” spade terminal is provided on the furnace
integrated control board. See Figure 54 or Figure 55 for
control board conguration. The terminal is energized
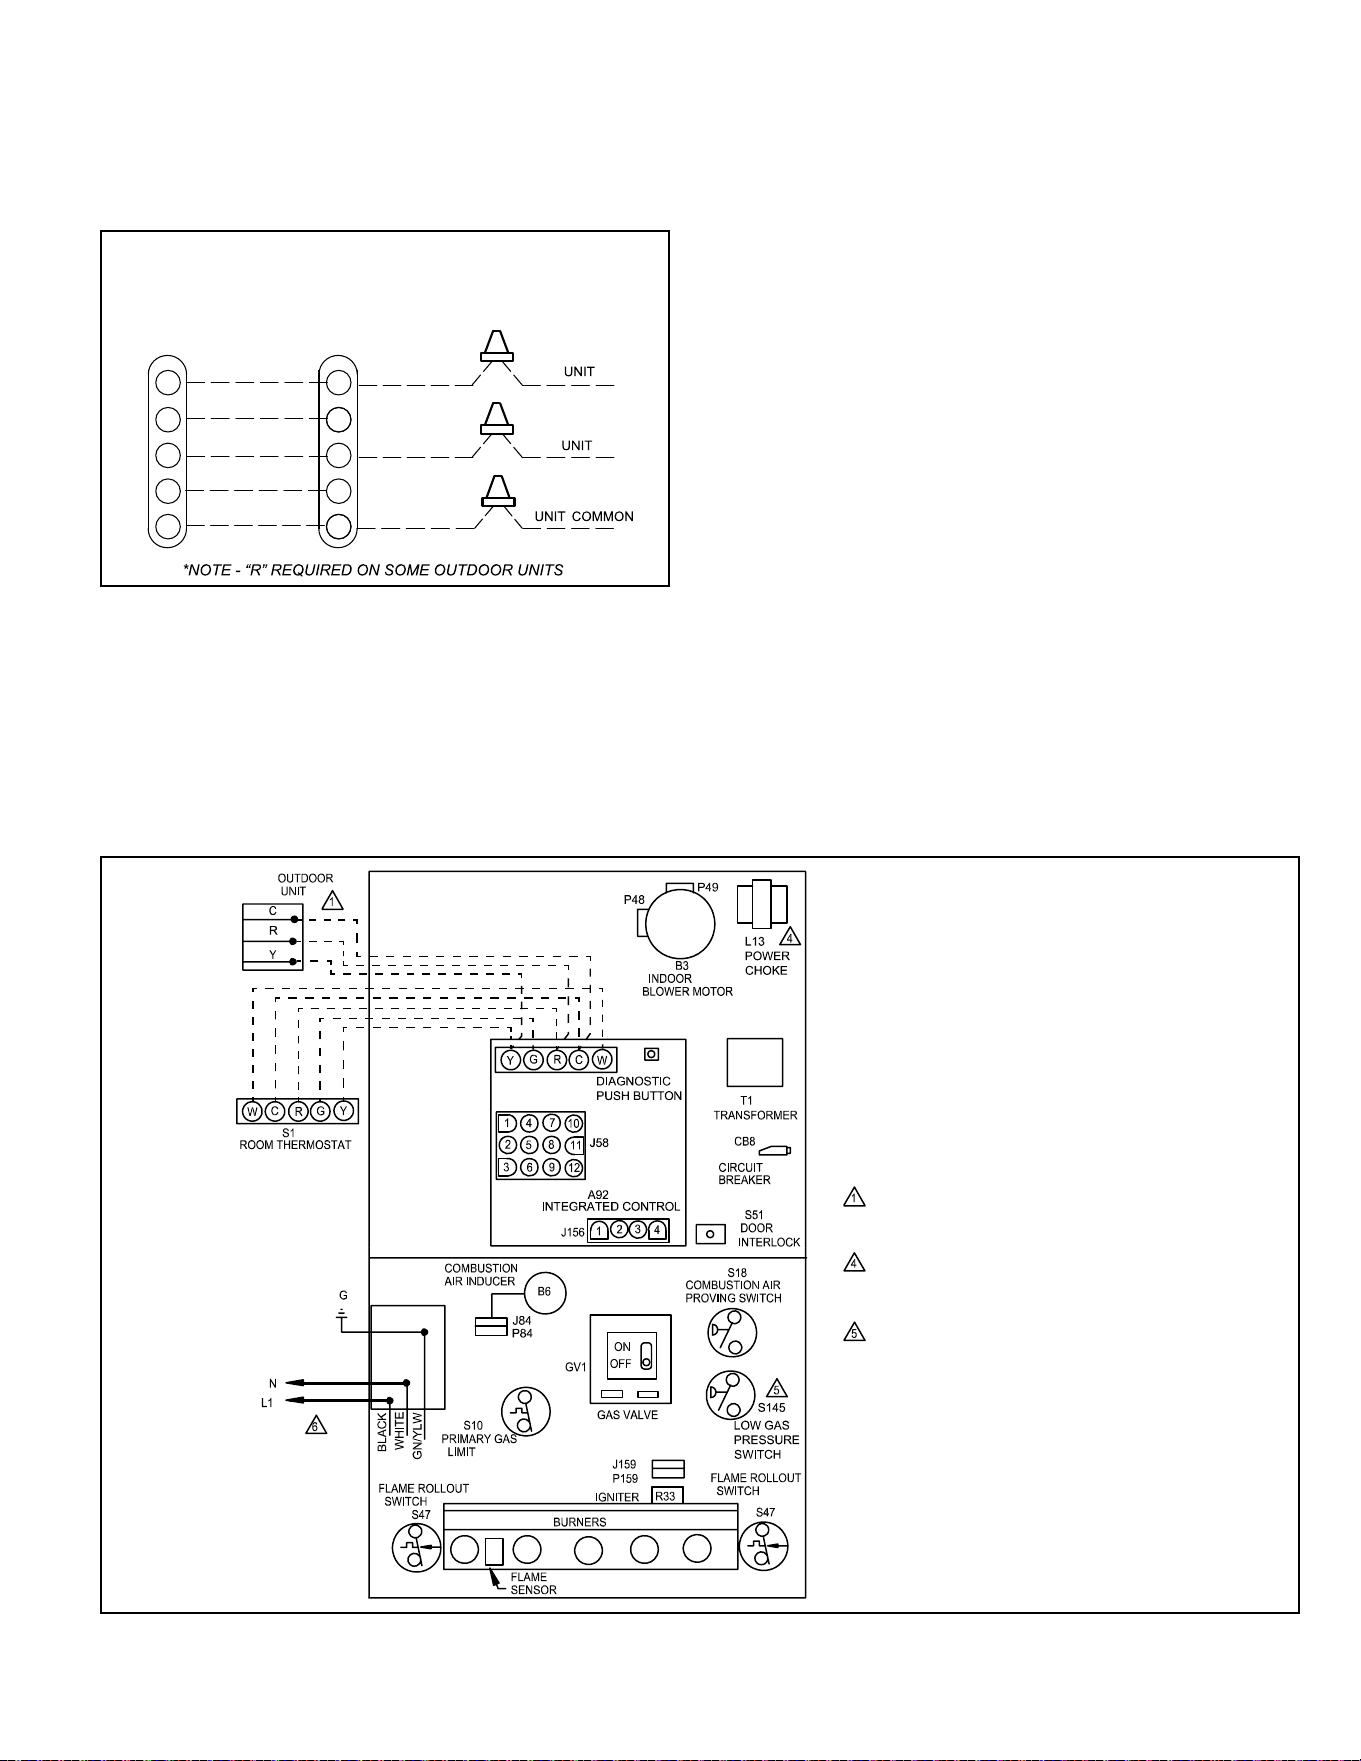
507769C05 Page 37 of 55
mrcool.com
Figure 52. Typical Field Wiring Diagram
NOTE-
IF ANY WIRE IN THIS APPLIANCE IS REPLACED,
IT MUST BE REPLACED WITH WIRE OF LIKE
SIZE, RATING, INSULATION THICKNESS AND
TERMINATION.
WARNING-
ELECTRIC SHOCK HAZARD. CAN CAUSE
INJURY OR DEATH. UNIT MUST BE GROUNDED
IN ACCORDANCE WITH NATIONAL AND LOCAL
CODES.
‘R’ IS REQUIRED ON SOME OUTDOOR UNITS
L13 POWER CHOKE USED ON 3/4 AND 1 HP
ONLY
S145 IS USED WITH GAS VALVE WHEN APPLIED
IN LP GAS UNTIS
in the heating mode when the combustion air inducer is
operating and the pressure switch is closed. Any humidier
rated up to 0.5 amp can be connected to this terminal with
the ground leg of the circuit connected to ground or the “C”
terminal.
Figure 51. Furnace & Condensing Unit Thermostat
Designations
Thermostat Furnace Condensing
Unit
(Refer to specic thermostat and outdoor unit.)
COMMON
POWER
HEAT
INDOOR BLOWER
Y
C
R
G
W1
Y
C
R
G
W
COOLING
CONDENSING
CONDENSING
*CONDENSING
Install the room thermostat according to the instructions
provided with the thermostat. See Figure 51 for thermostat
designations. If the furnace is being matched with a
heat pump, refer to the FM21 installation instruction or
appropriate dual fuel thermostat instructions.
Indoor Blower Speeds
1. When the thermostat is set to “FAN ON”, the indoor
blower will run continuously on the fan speed when
there is no cooling or heating demand. See Table 22
for allowable continuous circulation speeds.
2. When the furnace is running in the heating mode, the
indoor blower will run on the heating speed.
3. When there is a cooling demand, the indoor blower will
run on the cooling speed.
Generator Use - Voltage Requirements
The following requirements must be kept in mind when
specifying a generator for use with this equipment:
• The furnace requires 120 volts ± 10% (Range: 108
volts to 132 volts).
• The furnace operates at 60 Hz ± 5% (Range: 57 Hz
to 63 Hz).
• The furnace integrated control requires both polarity
and proper ground. Both polarity and proper grounding
should be checked before attempting to operate the
furnace on either permanent or temporary power.
• Generator should have a wave form distortion of less
than 5% THD (Total Harmonic Distortion).
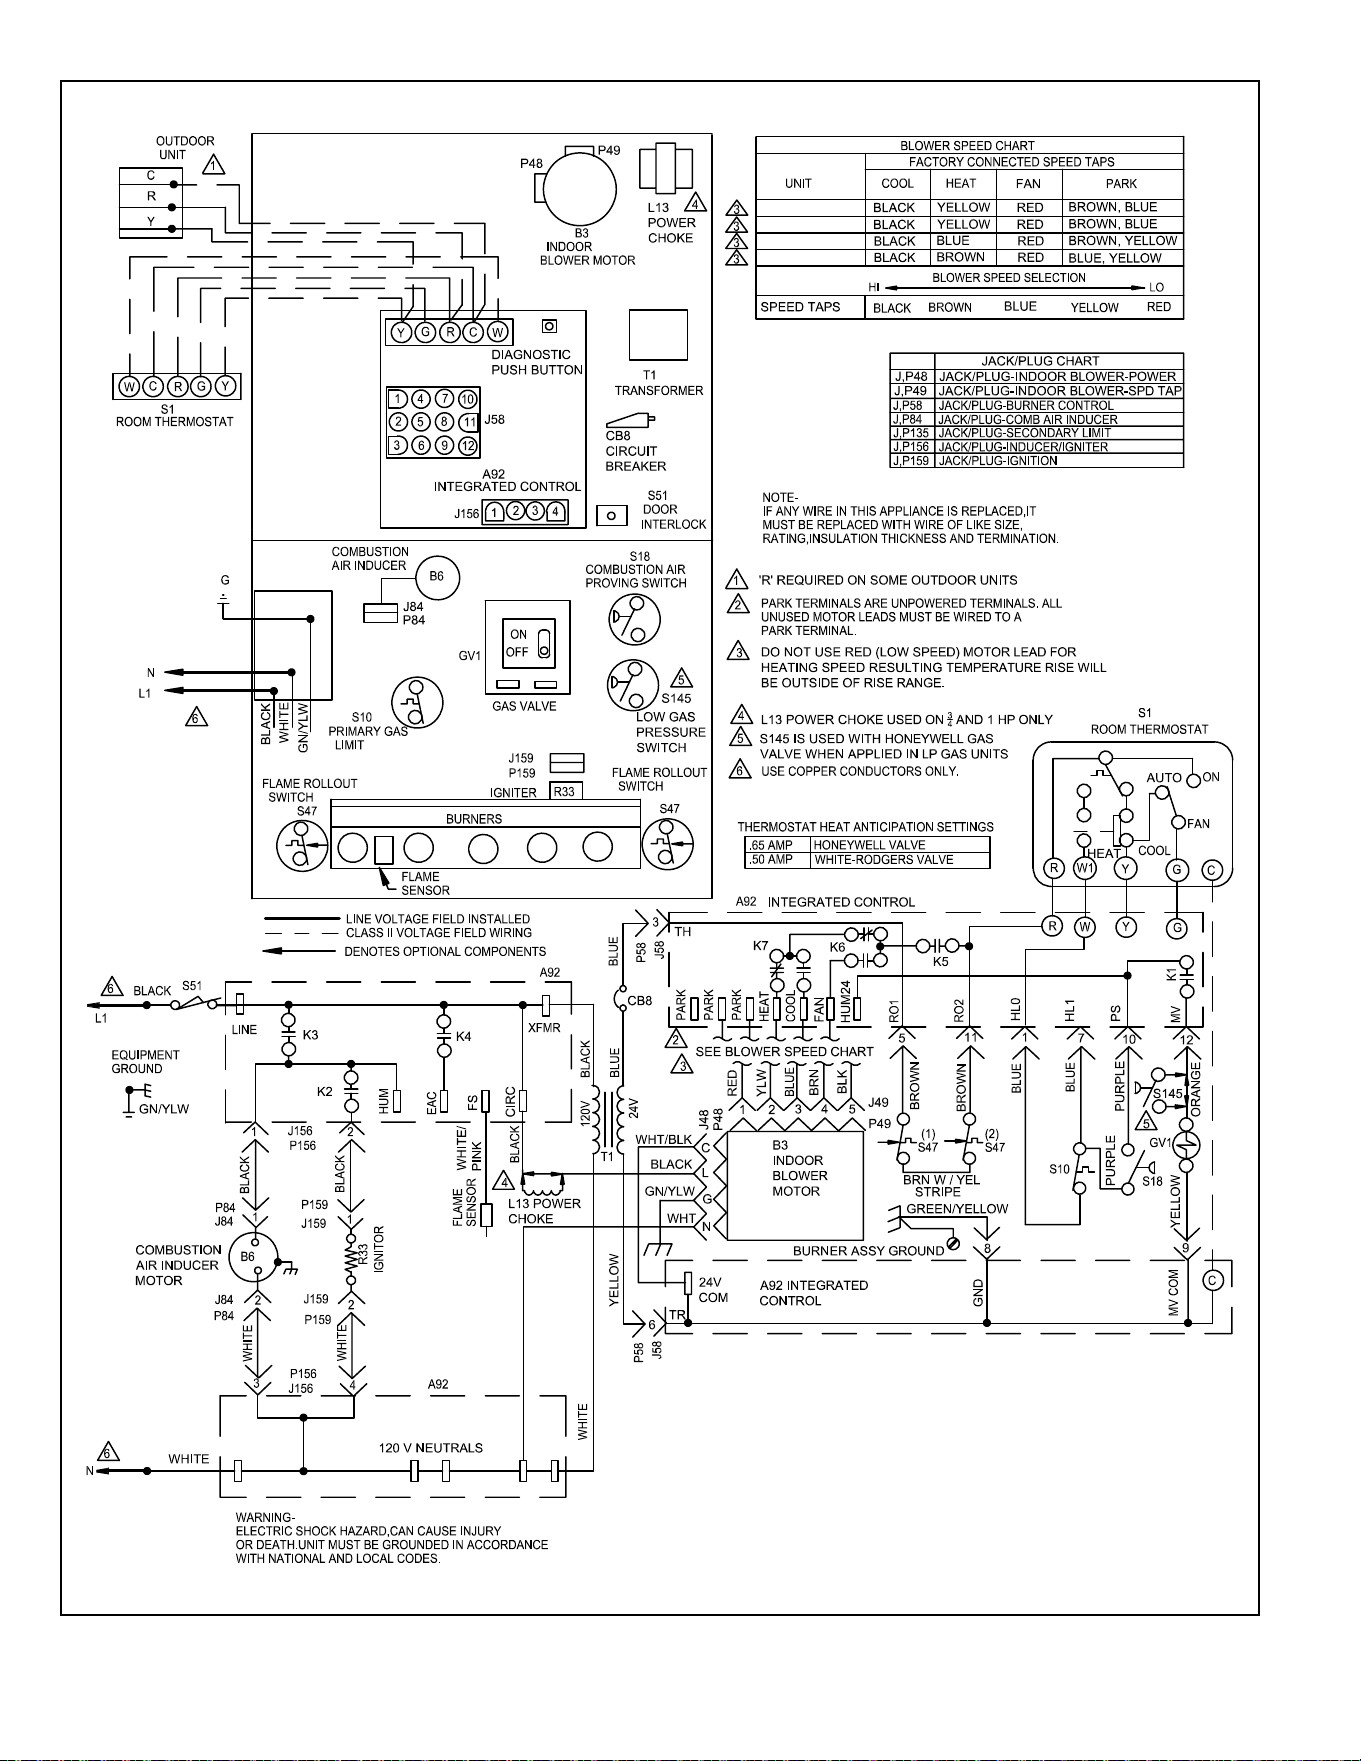
507769C05Page 38 of 55
mrcool.com
045*B3
070*B4
090*C4
110*C5
Figure 53. Typical Wiring Diagram
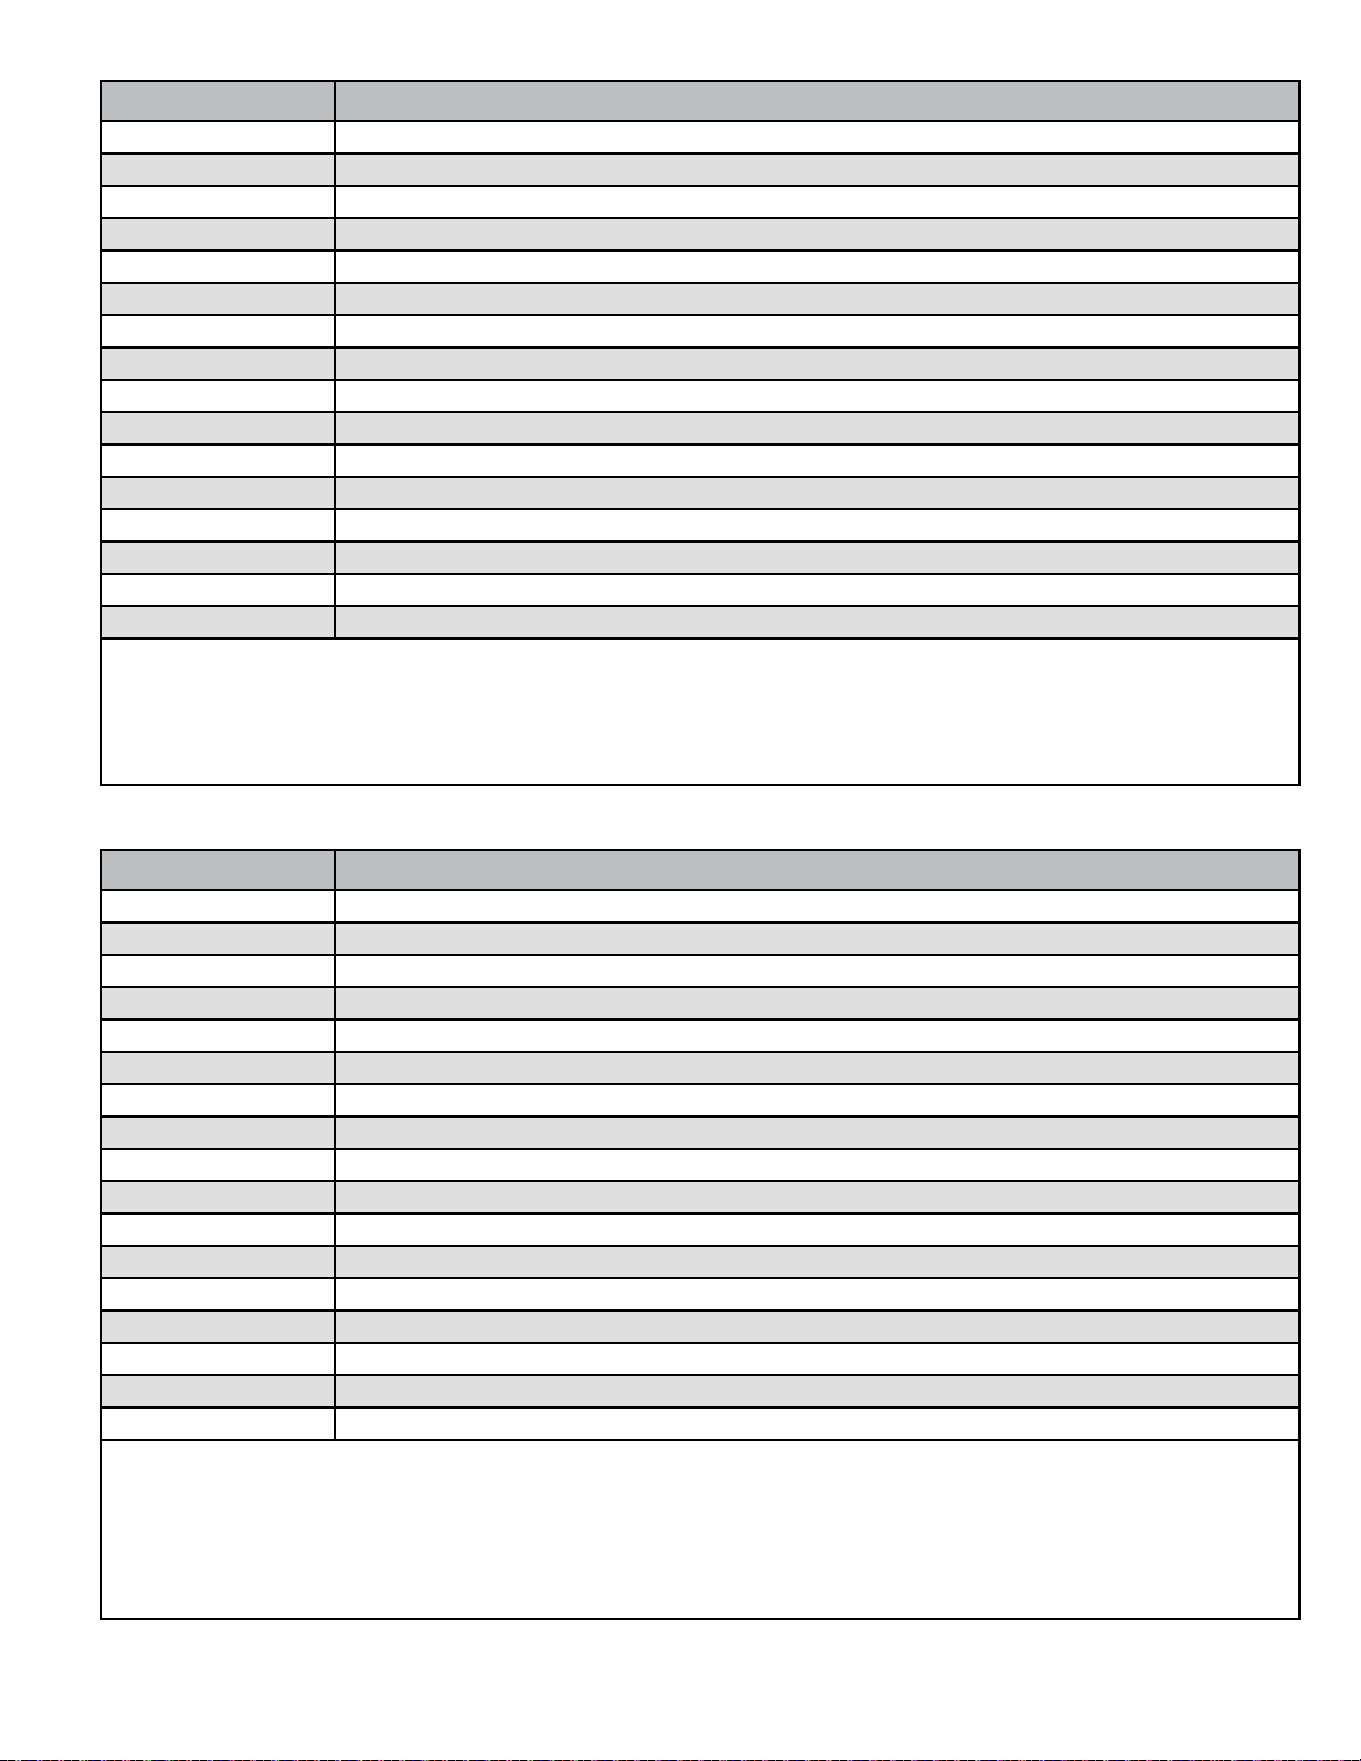
507769C05 Page 39 of 55
mrcool.com
Red LED Flash Code
2
Diagnostic Codes / Status of Furnace
O No power to control or control hardware fault detected
Heartbeat
1
Normal operation - idle, continuous fan, cool
Continuous Rapid Flash Call for heat / burner operation
1 Flash Reverse line voltage polarity
2 Flashes Improper earth ground
3 Flashes Burner failed to light, or lost ame during heat demand
4 Flashes Low ame signal - check ame sensor
5 Flashes Watchguard - burner failed to light, exceeded maximum number of retries or recycles
6 Flashes Not used
7 Flashes Primary or Secondary limit open or watchguard mode - limit switch open longer than 3 minutes
8 Flashes Rollout switch open
9 Flashes Pressure switch failed to close or opened during heat demand
10 Flashes Watchguard - Pressure switch opened 5 times during one heat demand
11 Flashes Pressure switch stuck closed prior to activation of combustion air inducer
12 Flashes Flame sensed without gas valve energized
13 Flashes Low line voltage
1
A “heartbeat” is indicated by a “slow ash” - 1 sec on 1 sec o, repeating
2
Error codes are indicated by a “rapid ash” - the LED ashes X times at 1/2 sec on, 1/2 sec o, remains o for 3 sec, then repeats
NOTE: Last 10 error codes are stored in memory, including when power is shut o to the unit. To recall, press and release button.
Most recent will be displayed rst, LED o for 3 sec, then next error code is displayed, etc. To clear error codes, depress and hold
button longer than 5 sec.
Table 12. Diagnostic Codes for 103217-03 Control
Red LED Flash Code
2
Diagnostic Codes / Status of Furnace
O No power to control or control hardware fault detected
On Board Fault Detected
Fast Heartbeat
3
Call for Heat / Burner Operation
Slow Heartbeat
1
Normal Operation – Idle, Continuous Fan, or Cool
1 Flash
2
Reverse Line Voltage Polarity or Phasing of 120V power
2 Flashes
2
Improper earth ground
3 Flashes
2
Burner failed to light, or lost ame during heat demand
4 Flashes
2
Low ame signal - check ame sensor
5 Flashes
2
Watchguard – burner failed to light, exceeded maximum number of retries/recycles, 1 hour lockout
6 Flashes
2
Not used
7 Flashes
2
Primary or Secondary limit switch open or Watchguard mode – Limit Switch open longer than 3 minutes
8 Flashes
2
Rollout switch open
9 Flashes
2
Pressure switch failed to close or opened during heat demand
10 Flashes
2
Watchguard - Pressure switch opened 5 times during one heat demand
11 Flashes
2
Pressure switch stuck closed prior to activation of combustion air inducer
12 Flashes
2
Flame sensed without gas valve energized
13 Flashes
2
Low line voltage
1
A slow heartbeat is indicated by 1 sec on / 1 sec o. It is used for idle, continuous fan and cool modes.
2
Error codes are indicated by a “rapid ash” - the LED ashes X times at 1/2 sec on / 1/2 sec o, remains o for 2 sec, then repeats.
3
A fast heartbeat is indicated by 1/2 sec on / 1/2 sec o. It is only used during a heat call.
NOTE: Last 10 error codes are stored in memory, including when power is shut o to the unit. To recall, press and release button.
Most recent will be displayed rst, LED o for 3 sec, then next error code is displayed, etc. To clear error codes, depress and hold
button longer than 5 sec.
Table 13. Diagnostic Codes for 107163-01 Control
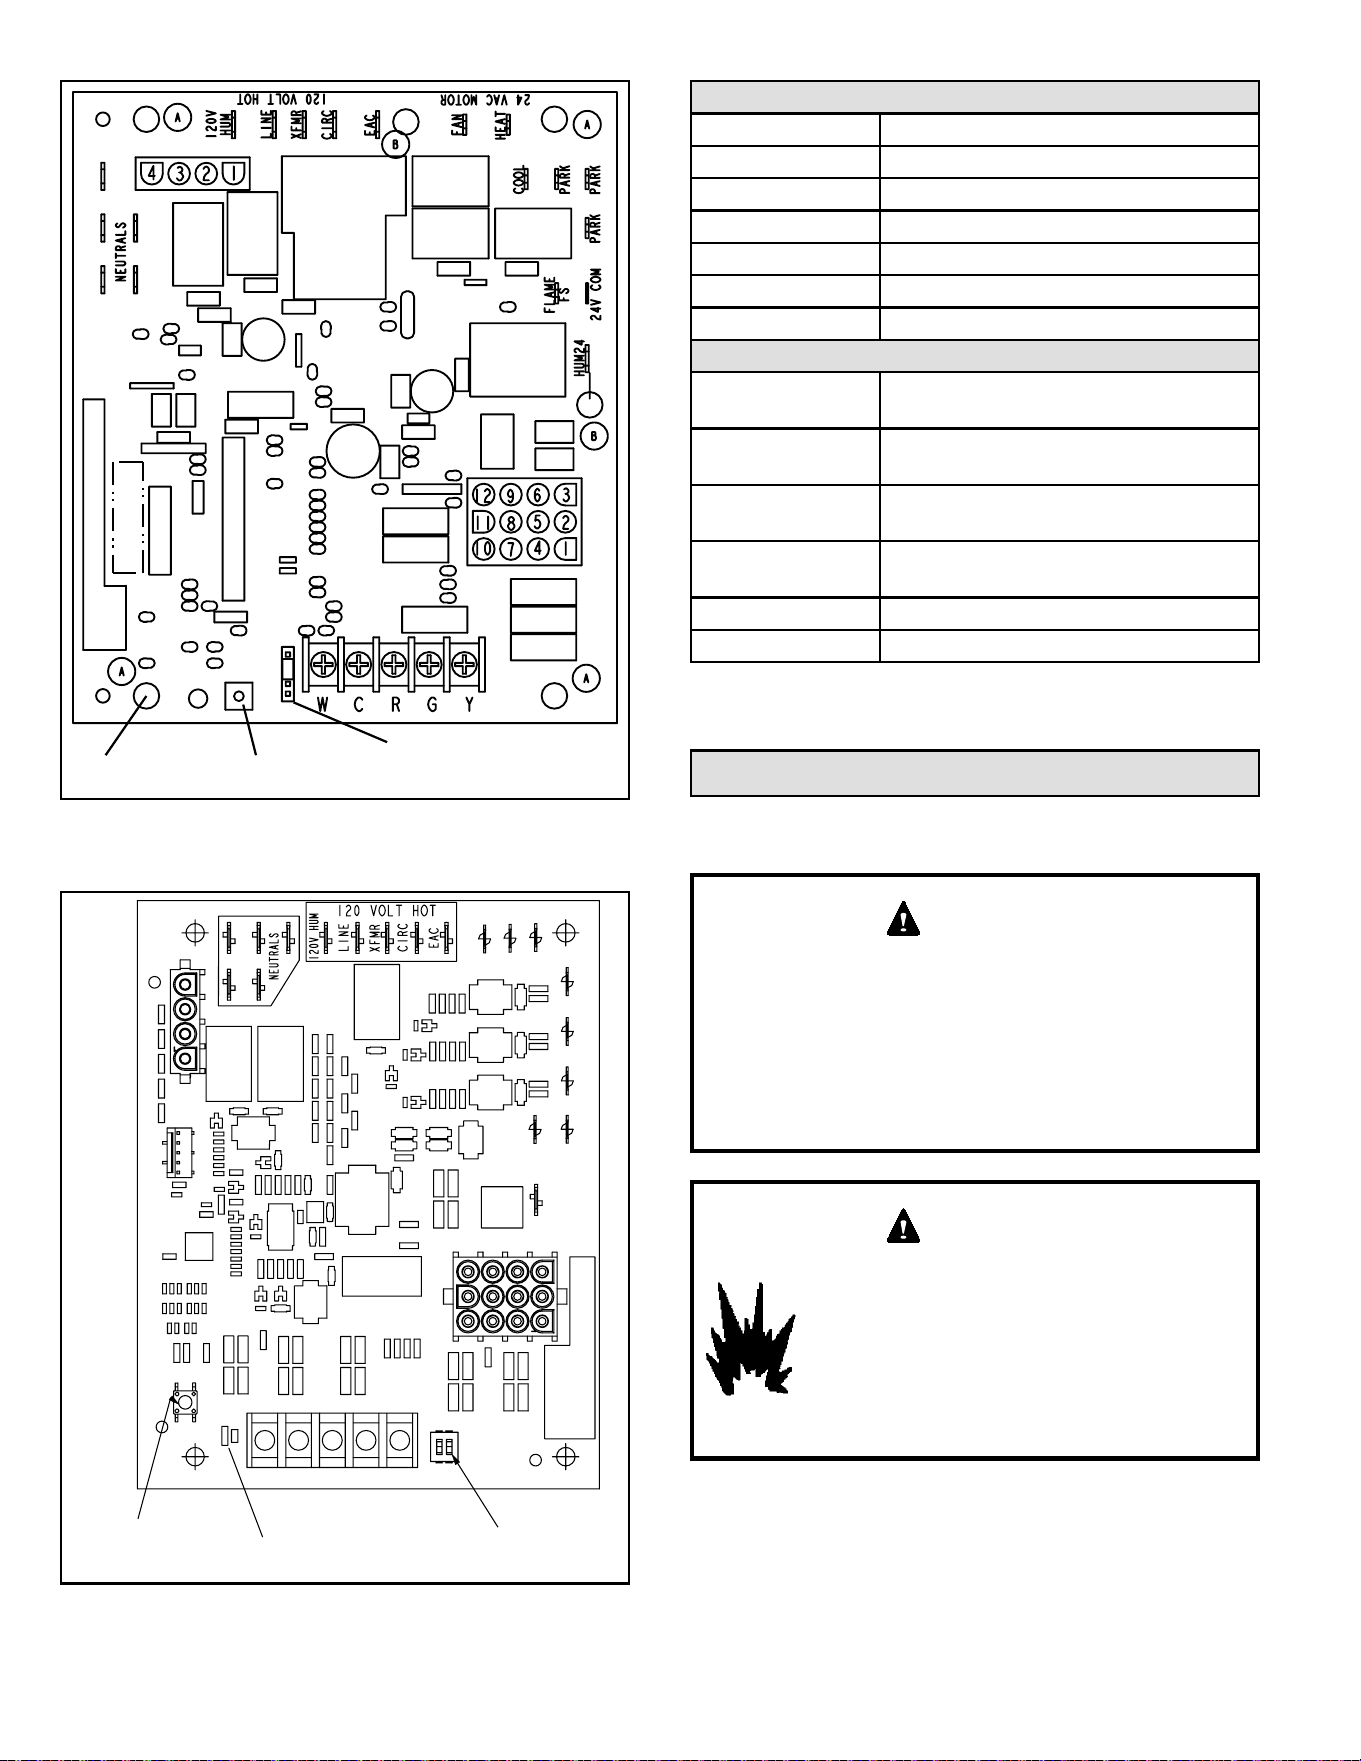
507769C05Page 40 of 55
mrcool.com
Figure 54. 103217-03 Integrated Control
(Automatic Hot Surface Ignition System)
RED LED
RECALL BUTTON
BLOWER OFF DELAY
Figure 55. 107163-01 Integrated Control
Heating Blower Off
Delay Selector Switch
Diagnostic LED
Push Button
Error Recall
PARK
HUM24
FS
24VCOM COOL
HEAT FAN
WCRGY
1/4” Quick Connect Terminal Designations
120V HUM Power for Humidier (120VAC)
LINE Incoming Power Line (120VAC)
XFMR Transformer Primary (120VAC)
CIRC Indoor Blower Motor (120VAC)
EAC Electronic Air Cleaner (120VAC)
HUM24 Power For Humidier (24VAC)
NEUTRALS (5) Neutral
3/16” Quick Connect Terminal Designations
COOL
Cool Speed From Indoor Blower Motor
(24VAC)
HEAT
Heat Speed From Indoor Blower Motor
(24VAC)
FAN
Continuous Fan Speed From Indoor
Blower Motor (24VAC)
PARK (3)
Terminals For Unused Motor Speed
Taps
FS Flame Sensor Electrode (120VAC)
24V COM Common (24VAC)
Table 14. Terminal Designations
(Applicable to 103217-03 and 107163-01 Controls)
Unit Start-Up
FOR YOUR SAFETY READ BEFORE OPERATING
Do not use this furnace if any part has been underwater.
A ood-damaged furnace is extremely dangerous.
Attempts to use the furnace can result in re or explosion.
Immediately call a qualied service technician to inspect
the furnace and to replace all gas controls, control
system parts, and electrical parts that have been wet or
to replace the furnace, if deemed necessary.
WARNING
Danger of explosion. Can cause injury or
product or property damage. Should the gas
supply fail to shut o or if overheating
occurs, shut o the gas valve to the furnace
before shutting o the electrical blower
deck, before performing any service
procedure.
WARNING
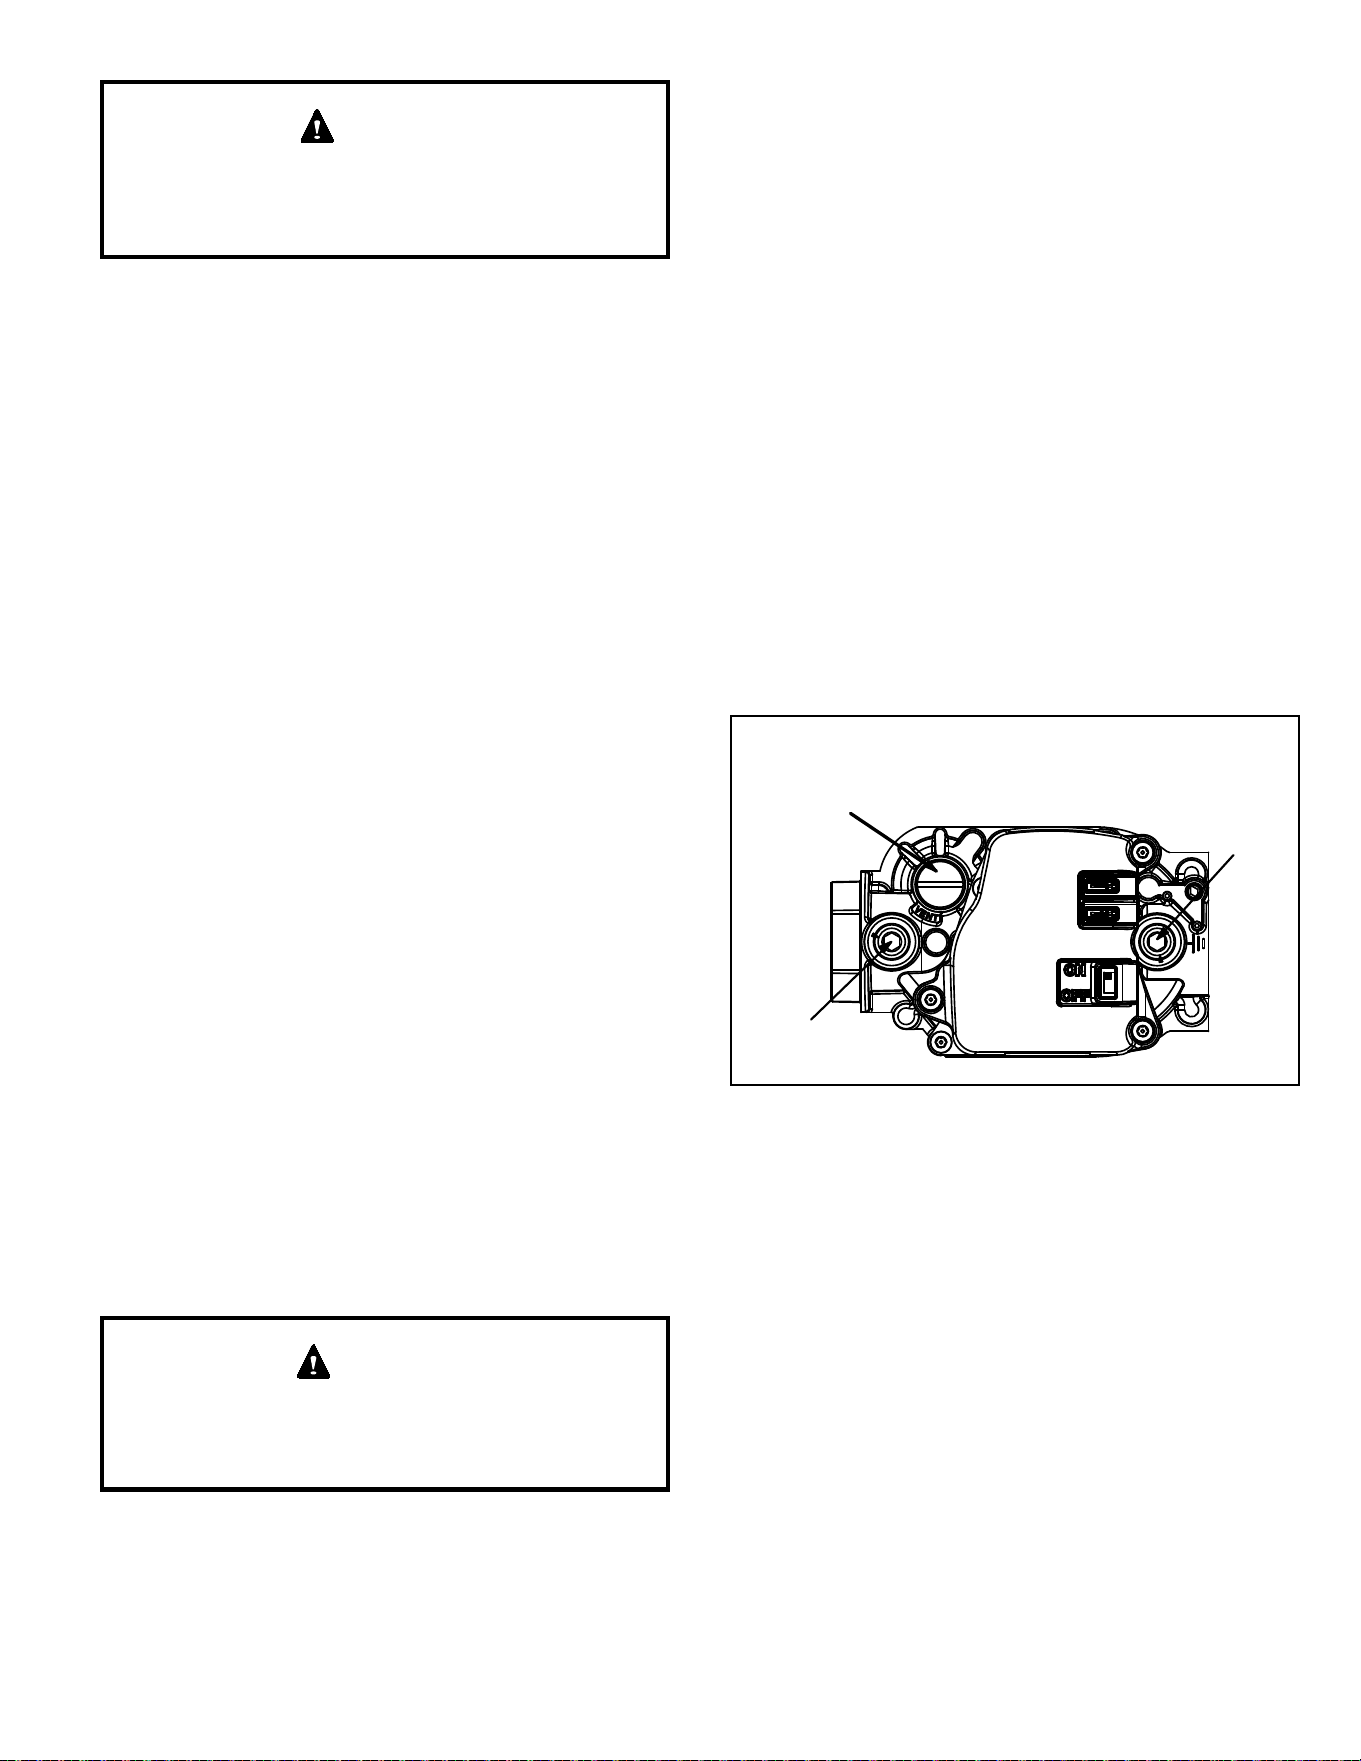
507769C05 Page 41 of 55
mrcool.com
Before attempting to perform any service or
maintenance, turn the electrical power to unit OFF at
disconnect switch.
CAUTION
BEFORE LIGHTING the unit, smell all around the furnace
area for gas. Be sure to smell next to the oor because
some gas is heavier than air and will settle on the oor.
The gas valve on the unit is equipped with a gas control
switch (lever). Use only your hand to move switch. Never
use tools. If the switch will not move by hand, do not try to
repair it. Force or attempted repair may result in a re or
explosion.
Placing the Furnace into Operation
This furnace is equipped with an automatic hot surface
ignition system. Do not attempt to manually light burners
on this furnace. Each time the thermostat calls for heat, the
burners will automatically light. The ignitor does not get hot
when there is no call for heat on these units.
Priming Condensate Trap
The condensate trap should be primed with water prior
to start-up to ensure proper condensate drainage. Either
pour 10 . oz. (300 ml) of water into the trap, or follow
these steps to prime the trap:
1. Follow the lighting instructions to place the unit into
operation.
2. Set the thermostat to initiate a heating demand.
3. Allow the burners to re for approximately 3 minutes.
4. Adjust the thermostat to deactivate the heating
demand.
5. Wait for the combustion air inducer to stop. Set the
thermostat to initiate a heating demand and again
allow the burners to re for approximately 3 minutes.
6. Adjust the thermostat to deactivate the heating demand
and wait for the combustion air inducer to stop. At this
point, the trap should be primed with sucient water to
ensure proper condensate drain operation.
If you do not follow these instructions exactly, a re
or explosion may result causing property damage,
personal injury or death.
WARNING
Gas Valve Operation
See Figure 56
1. STOP! Read the safety information at the beginning
of this section.
2. Set the thermostat to the lowest setting.
3. Turn OFF all electrical power to the unit.
4. This furnace is equipped with an ignition device which
automatically lights the burners. Do not try to light the
burners by hand.
5. Remove the heating compartment access panel.
6. Move gas valve switch to OFF. See Figure 56.
7. Wait ve minutes to clear out any gas. If you then
smell gas, STOP! Immediately call your gas supplier
from a neighbor’s phone. Follow the gas supplier’s
instructions. If you do not smell gas go to next step.
8. Move gas valve switch to ON. See Figure 56.
9. Replace the heating compartment access panel.
10. Turn on all electrical power to the unit.
11. Set the thermostat to desired setting.
NOTE: When unit is initially started, steps 1 through
11 may need to be repeated to purge air from gas line.
12. If the appliance will not operate, follow the instructions
“Turning O Gas to Unit” and call your service
technician or gas supplier.
MANIFOLD
PRESSURE
OUTLET
INLET
PRESSURE
PORT
MANIFOLD
PRESSURE
ADJUSTMENT
SCREW
(UNDER CAP)
Figure 56.
Gas Valve Shown In “ON’ Position
Turning O Gas to Unit
1. Set the thermostat to the lowest setting.
2. Turn o all electrical power to the unit if service is to
be performed.
3. Remove the heating compartment access panel.
4. Move gas valve switch to OFF.
5. Replace the heating compartment access panel.
Failure to Operate
If the unit fails to operate, check the following:
1. Is the thermostat calling for heat?
2. Are access panels securely in place?
3. Is the main disconnect switch closed?
4. Is there a blown fuse or tripped breaker?
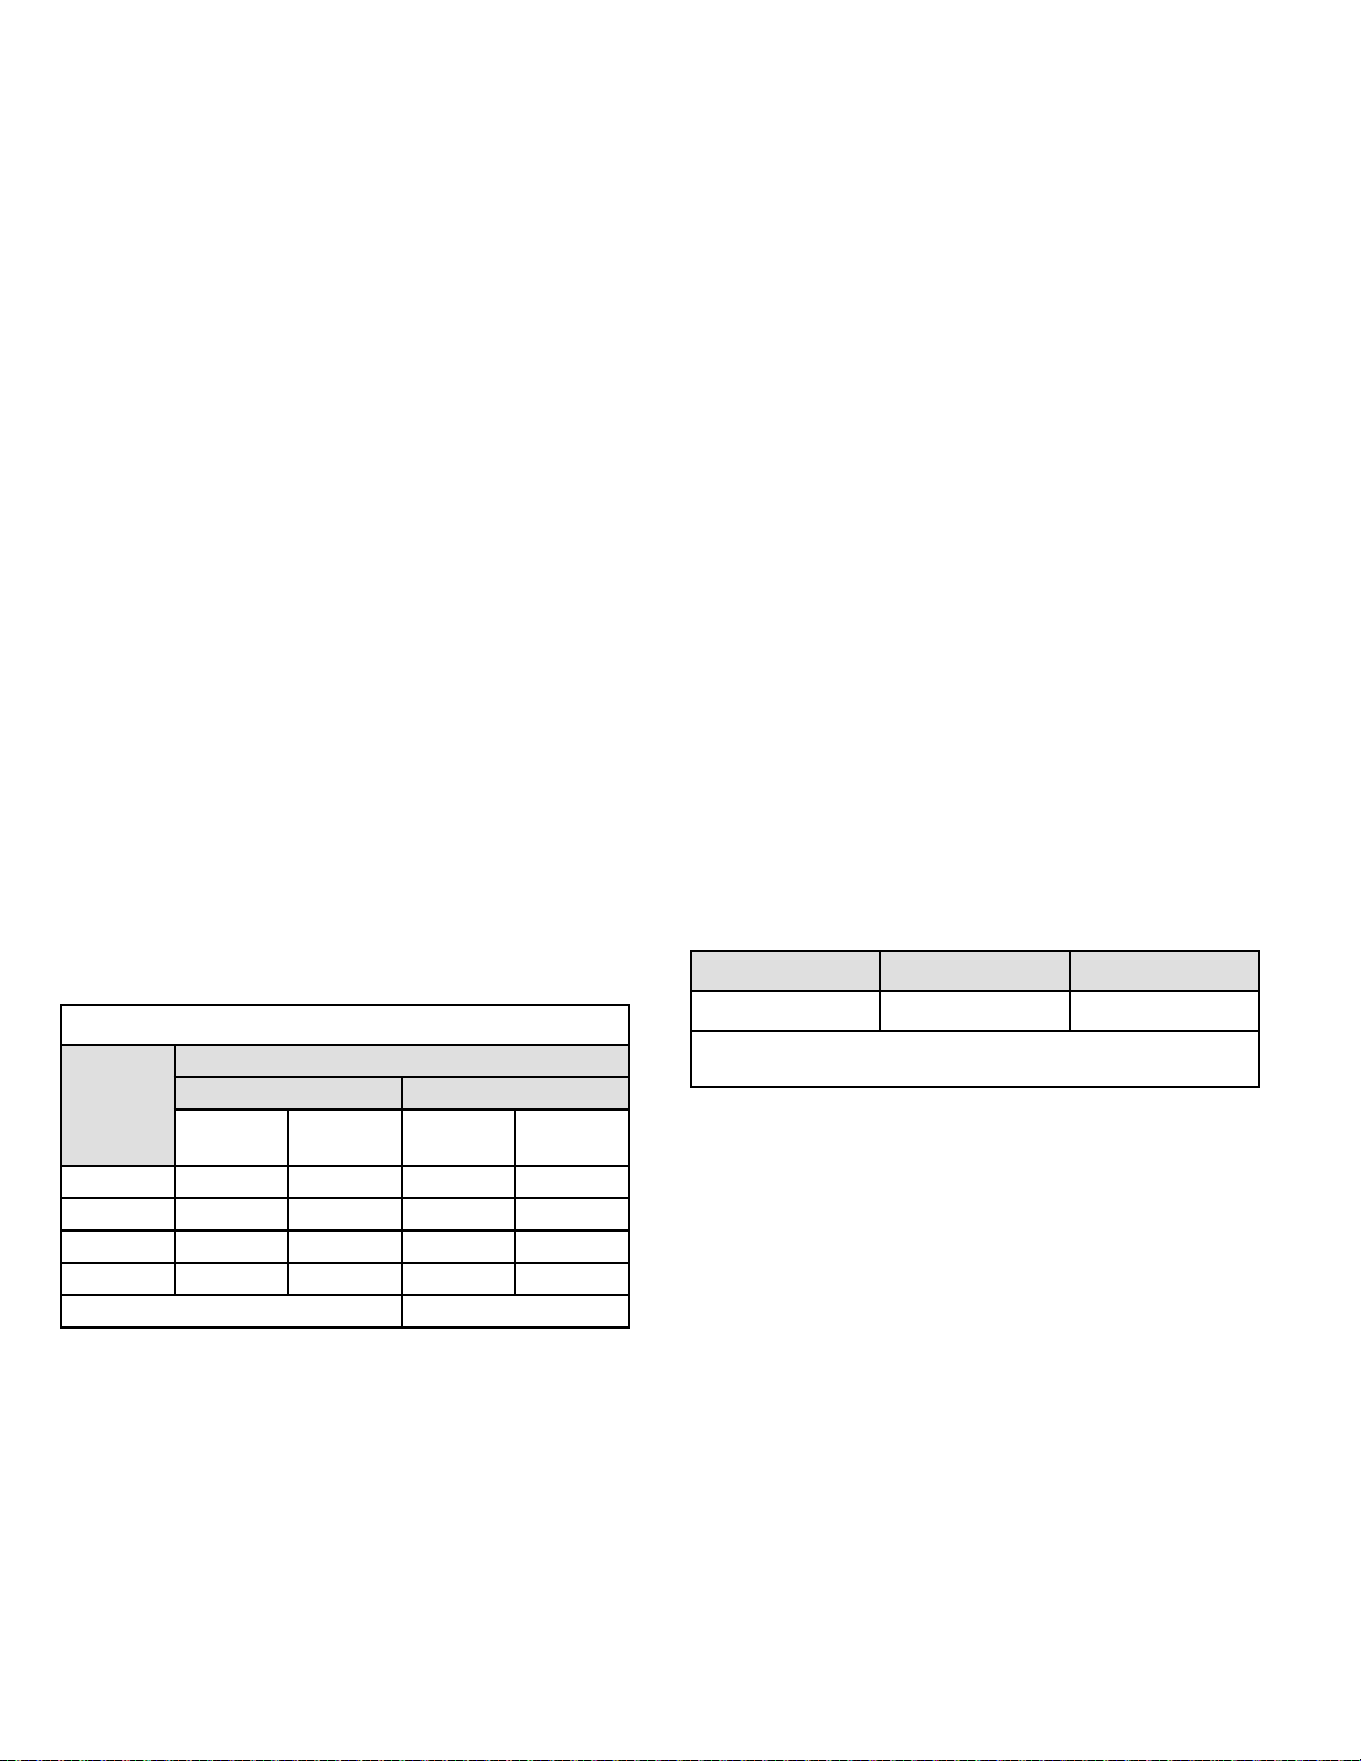
507769C05Page 42 of 55
mrcool.com
5. Is the lter dirty or plugged? Dirty or plugged lters will
cause the limit control to shut the unit o.
6. Is gas turned on at the meter?
7. Is the manual main shut–o valve open?
8. Is the internal manual shut–o valve open?
9. Is the unit ignition system in lockout? If the unit locks
out again, inspect the unit for blockages.
Heating Sequence of Operation
1. When thermostat calls for heat, combustion air inducer
starts.
2. Combustion air pressure switch proves blower
operation. Switch is factory set and requires no
adjustment.
3. After a 15 second pre-purge, the hot surface ignitor
energizes.
4. After a 20 second ignitor warm-up period, the gas
valve solenoid opens. A 4-second “Trial for Ignition”
period begins.
5. Gas is ignited, ame sensor proves the ame, and the
combustion process continues.
6. If ame is not detected after rst ignition trial, the
ignition control will repeat steps 3 and 4 four more
times before locking out the gas valve. The ignition
control will then automatically repeat steps 1 through
6 after 60 minutes. To interrupt the 60 minute lockout
period, move thermostat from “Heat” to “OFF” then
back to “Heat”. Heating sequence then restarts at step
1.
Gas Pressure Adjustment
Gas Flow (Approximate)
Gas Meter Clocking Chart
Capacity
Seconds for One Revolution
Natural LP
1 cu ft
Dial
2 cu ft
Dial
1 cu ft
Dial
2 cu ft
Dial
-045 80 160 200 400
-070 55 110 136 272
-090 41 82 102 204
-110 33 66 82 164
Natural - 1000 btu/cu ft LP - 2500 btu/cu ft
Table 15.
NOTE: To obtain accurate reading, shut o all other gas
appliances connected to meter.
Furnace should operate at least 5 minutes before checking
gas ow. Determine time in seconds for two revolutions of
gas through the meter. (Two revolutions assures a more
accurate time.) Divide by two and compare to time in Table
15. If manifold pressure matches Table 17 and rate is
incorrect, check gas orices for proper size and restriction.
Remove temporary gas meter if installed.
Supply Pressure Measurement
A threaded plug on the inlet side of the gas valve provides
access to the supply pressure tap. Remove the threaded
plug, install a eld-provided barbed tting and connect a
manometer to measure supply pressure. Replace the
threaded plug after measurements have been taken.
Manifold Pressure Measurement
1. Remove the threaded plug from the outlet side of
the gas valve and install a eld provided barbed
tting. Connect to a manometer to measure manifold
pressure.
2. Start unit and allow 5 minutes for unit to reach steady
state.
3. While waiting for the unit to stabilize, observe the
ame. Flame should be stable and should not lift from
burner. Natural gas should burn blue.
4. After allowing unit to stabilize for 5 minutes, record
manifold pressure and compare to value given in
Table 17.
NOTE: Shut unit o and remove manometer as soon as an
accurate reading has been obtained. Take care to remove
barbed tting and replace threaded plug.
Proper Combustion
Furnace should operate minimum 15 minutes with correct
manifold pressure and gas ow rate before checking
combustion. Take combustion sample beyond the ue
outlet and compare to the tables below. The maximum
carbon monoxide reading should not exceed 100 ppm.
Table 16.
Unit CO
2
% for Nat CO
2
% for L.P.
All 7.2 - 8.2 8.6 - 9.6
The maximum carbon monoxide reading should not exceed
100 ppm.
High Altitude Information
NOTE: In Canada, certication for installations at
elevations over 4500 feet (1372 m) is the jurisdiction of
local authorities.
Units may be installed at altitudes up to 10,000 ft. above
sea level. See Table 17 for de-rate manifold values. Units
installed at altitude of 7501 - 10,000 feet require an orice
change. Units installed at altitudes of 4501 - 10,000 feet
(1373 to 3048 m) require a pressure switch change which
can be ordered separately. Table 18 and Table 19 list
conversion kit and pressure switch requirements at varying
altitudes.
The combustion air pressure switch is factory-set and
requires no adjustment.
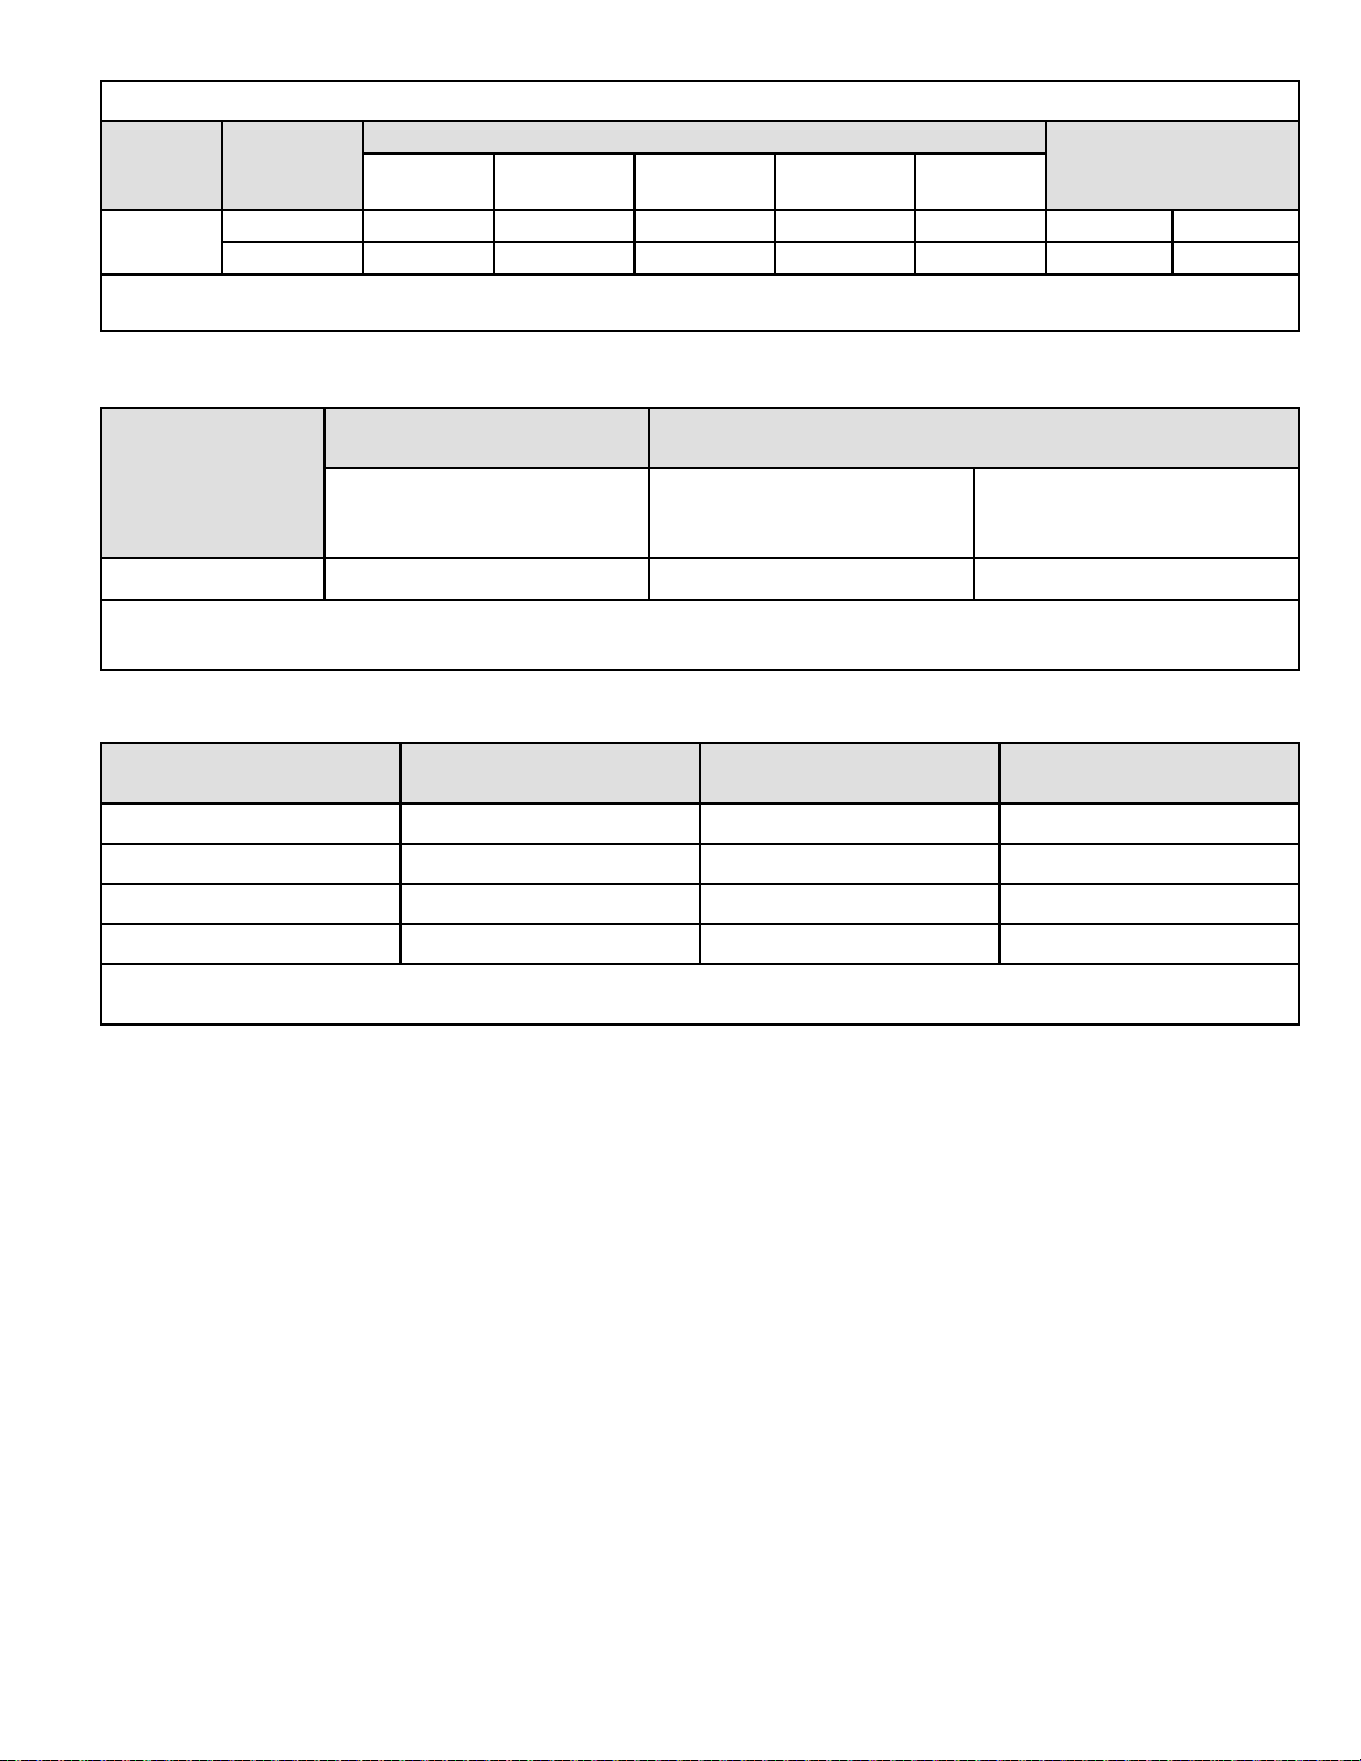
507769C05 Page 43 of 55
mrcool.com
Table 17.
Manifold and Supply Line Pressure 0-10,000 ft.
Capacity Gas
Manifold Pressure in. w.g.
Supply Line Pressure
in. w.g.
0-10,000 ft.
0-4500 ft. 4501-5500 ft. 5501-6500 ft. 6501-7500 ft.
7501-10000
ft.
All Sizes
Natural 3.5 3.3 3.2 3.1 3.5 4.5 13.0
LP / Propane 10.0 9.4 9.1 8.9 10.0 11.0 13.0
NOTE: A natural to LP propane gas changeover kit is necessary to convert this unit. Refer to the changeover kit installation
instruction for the conversion procedure.
Capacity
0 - 7,500 ft
(0 - 2,286 m)
7,501 - 10,000 ft
(2,286 - 3048m)
Natural to LP/Propane
High Altitude Natural Burner
Orice Kit
High Altitude LP/Propane
Burner Orice Kit
All 11K49 73W37 11K44
Pressure switch is factory set. No adjustment necessary. All models use the factory-installed pressure switch from 0-4500 feet (0-
1370 m).
Table 18. Burner Orice Conversion Kits at Varying Altitudes
Capacity
0 - 4500 ft
(0 - 1,373m)
4501 - 7500 ft
(1371 - 2286m)
7501 - 10000 ft
(2286 - 3048m)
045 No Change 11U65 11U66
070 No Change 11U70 11U68
090 No Change 11U71 11U68
110 No Change 11U70 11U68
Pressure switch is factory set. No adjustment necessary. All models use the factory-installed pressure switch from 0-4500 feet (0-
1370 m).
Table 19. Pressure Switch Requirements at Varying Altitudes
507769C05Page 44 of 55
mrcool.com
Testing for Proper Venting and Sucient Combustion Air for Non-Direct Vent Applications
CARBON MONOXIDE POISONING HAZARD
Failure to follow the steps outlined below for each
appliance connected to the venting system being
placed into operation could result in carbon monoxide
poisoning or death.
The following steps shall be followed for each appliance
connected to the venting system being placed into
operation, while all other appliances connected to the
venting system are not in operation.
WARNING
After the gas furnace has been started, the following
test should be conducted to ensure proper venting and
sucient combustion air has been provided to the unit as
well as to other gas red appliances which are separately
vented.
If this furnace replaces a Category I furnace which was
commonly vented with another gas appliance, the size
of the existing vent pipe for that gas appliance must be
checked. Without the heat of the original furnace ue
products, the existing vent pipe is probably oversized for
the single water heater or other appliance. The vent should
be checked for proper draw with the remaining appliance.
The test should be conducted while all appliances (both
in operation and those not in operation) are connected to
the venting system being tested. If the venting system has
been installed improperly, or if provisions have not been
made for sucient amounts of combustion air, corrections
must be made as outlined in the previous section.
1. Seal any unused openings in the venting system.
2. Visually inspect the venting system for proper size
and horizontal pitch. Determine there is no blockage
or restriction, leakage, corrosion, or other deciencies
which could cause an unsafe condition.
3. To the extent that it is practical, close all building doors
and windows and all doors between the space in
which the appliances connected to the venting system
are located and other spaces of the building.
4. Close replace dampers.
5. Turn on clothes dryers and any appliances not
connected to the venting system. Turn on any exhaust
fans, such as range hoods and bathroom exhausts, so
they will operate at maximum speed. Do not operate
a summer exhaust fan.
6. Follow the lighting instruction to place the appliance
being inspected into operation. Adjust thermostat so
appliance will operate continuously.
7. Use the ame of a match or candle to test for spillage
of ue gases at the draft hood relief opening after 5
minutes of main burner operation.
8. If improper venting is observed during any of the
above tests, the venting system must be corrected or
sucient combustion/makeup air must be provided.
The venting system should be resized to approach the
minimum size as determined by using the appropriate
tables in appendix G in the current standards of the
National Fuel Gas Code ANSI-Z223.1/NPFA 54 in the
U.S.A., and the appropriate Natural Gas and Propane
appliances venting sizing tables in the current standard
of the CSA-B149 Natural Gas and Propane Installation
Codes in Canada.
9. After determining that each appliance remaining
connected to the common venting system properly
vents when tested as indicated in step 3, return doors,
windows, exhaust fans, replace dampers and any
other gas burning appliance to their previous condition
of use.
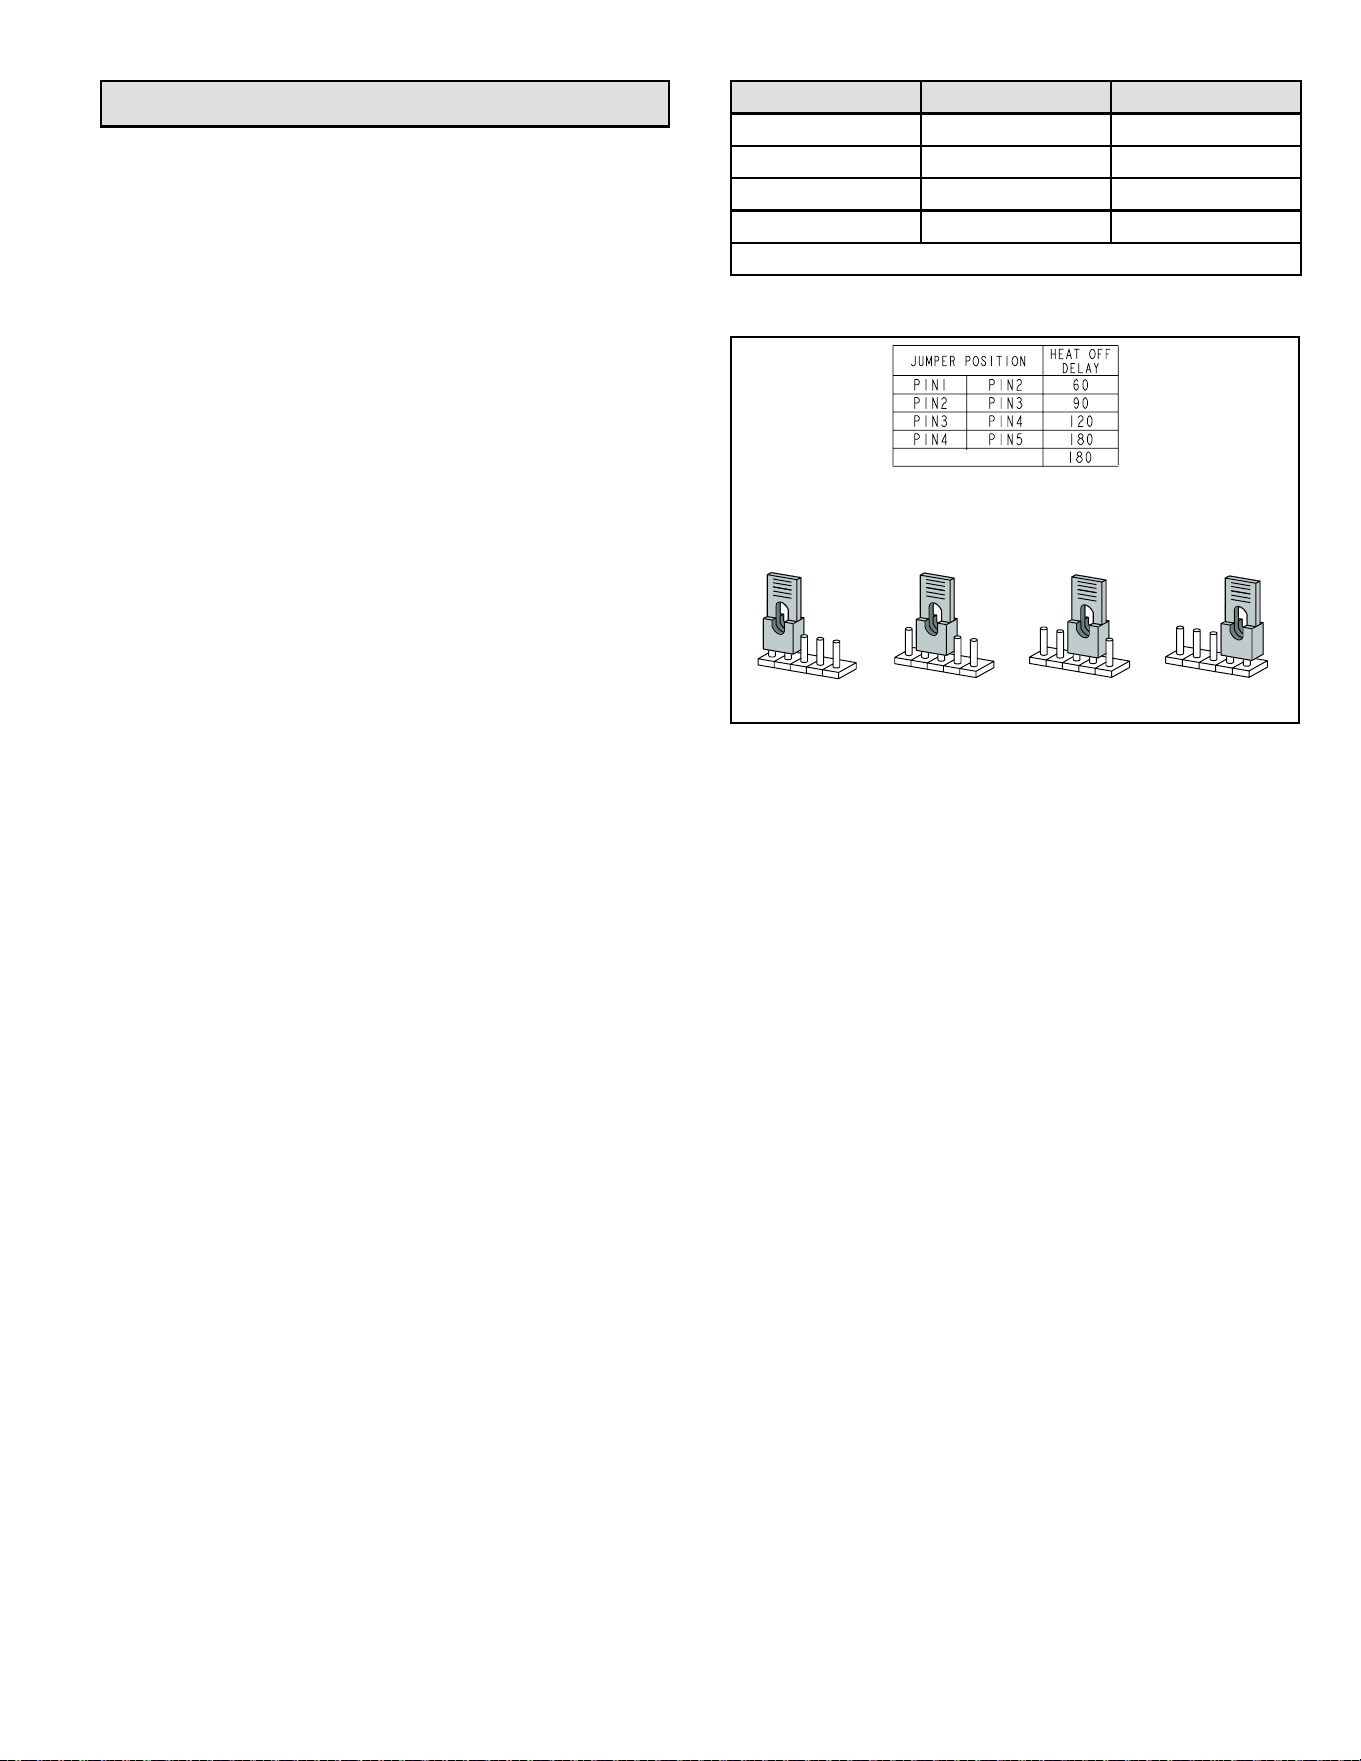
507769C05 Page 45 of 55
mrcool.com
Other Unit Adjustments
Primary Limit
The primary limit is located on the heating compartment
vestibule panel. This limit is factory set and requires no
adjustment.
Flame Rollout Switches (Two)
These manually reset switches are located on the front of
the burner box. These limits are factory set and require no
adjustment.
Pressure Switch
The pressure switch is located in the heating compartment
on the cold end header box. This switch checks for proper
combustion air inducer operation before allowing ignition
trial. The switch is factory set and must not be adjusted.
Temperature Rise
After the furnace has been started and supply and return
air temperatures have been allowed to stabilize, check
the temperature rise. If necessary, adjust the blower
speed to maintain the temperature rise within the range
shown on the unit nameplate. See Table 21 for allowable
heating speeds. Increase the blower speed to decrease
the temperature. Decrease the blower speed to increase
the temperature rise. Failure to adjust the temperature rise
may cause erratic limit operation.
Fan Control
Ignition Control 103217-03
The fan on time of 45 seconds is not adjustable. The heat
fan o delay (amount of time that the blower operates after
the heat demand has been satised) may be adjusted by
changing the jumper position across the ve pins on the
integrated control. The unit is shipped with a factory fan
o delay setting of 90 seconds. The fan o delay aects
comfort and is adjustable to satisfy individual applications.
Adjust the fan o delay to achieve a supply air temperature
between 90° and 110° F at the moment that the blower
is de-energized. Longer o delay settings provide lower
return air temperatures; shorter settings provide higher
return air temperatures. See Figure 57.
Ignition Control 107163-01
The heat fan-on time of 30 seconds is not adjustable The
heat fan-o delay (amount of time that the blower operates
after the heat demand has been satised) may be adjusted
by changing the two position dip switch on the integerated
control, to one of four slections. Blower o delay is factory
set at 90 seconds. For other blower o delay settings,
please refer to Table 20.
SW2-1 SW2-2
60 OFF ON
90* OFF OFF
120 ON OFF
180 ON ON
* Factory setting
Table 20. Blower Delay Select
Figure 57. Heat Fan O Time in Seconds
To adjust fan-off timing, reposition jumper across pins to
achieve desired setting.
NO JUMPER
60
90
120
180
60
90
120
180
60
90
120
180
60
90
120
180
60 Second
off Time
90 Second
off Time
120 Second
off Time
180 Second
off Time
Constant Torque Motor
These units are equipped with a constant torque ECM
motor. It has a DC motor coupled to an electronic control
module,both contained in the same motor housing. The
motor is programmed to provide constant torque at each of
the ve selectable speeds. The motor has ve speed taps.
Each tap requires 24 volts to energize.
Thermostat Heat Anticipation
Set the heat anticipator setting (if adjustable) according to
the amp draw listed on the wiring diagram that is attached
to the unit.
Exhaust and Air Intake Pipe
1. Check exhaust and air intake connections for tightness
and to make sure there is no blockage.
2. Is pressure switch closed? Obstructed exhaust pipe
will cause unit to shut o at pressure switch. Check
termination for blockages.
3. Obstructed pipe or termination may cause rollout
switches to open. Reset manual ame rollout switches
on burner box assembly if necessary.
Electrical
1. Check all wiring for loose connections.
2. Check for the correct voltage at the furnace (with
furnace operating). Correct voltage is 120 VAC ± 10%.
3. Check amp–draw on the blower motor with the blower
compartment access panel in place.
Motor Nameplate____________ Actual____________
507769C05Page 46 of 55
mrcool.com
Blower Speeds
Follow the steps below to change the blower speeds.
1. Turn o electrical power to furnace.
2. Remove blower compartment access panel.
3. Disconnect existing speed tap at control board speed
terminal.
NOTE: Termination of any unused motor leads must
be insulated.
4. Place unused blower speed tap on integrated control
“PARK” terminal or insulate.
5. Refer to blower speed selection chart on unit wiring
diagram for desired heating or cooling speed. See
Blower performance data beginning on the next page.
See Table 21 for allowable heating speeds.
6. Connect selected speed tap at control board speed
terminal.
7. Re-secure blower access panel.
8. Turn on electrical power to furnace.
9. Recheck temperature rise.
Electronic Ignition
The integrated control has an added feature of an internal
Watchguard control. The feature serves as an automatic
reset device for integrated control lockout caused by
ignition failure. This type of lockout is usually due to low
gas line pressure. After one hour of continuous thermostat
demand for heat, the Watchguard will break and remake
thermostat demand to the furnace and automatically reset
the integrated control to begin the ignition sequence.
Blower Performance Data
MGD96SE045B3XA Performance (Less Filter)
External
Static
Pressure
in. w.c.
Air Volume / Watts at Dierent Blower Speeds
High Medium-High Medium Medium-Low Low
cfm watts cfm watts cfm watts cfm watts cfm watts
0.00 1455 370 1275 255 1175 190 920 90 865 85
0.10 1425 375 1250 260 1145 200 885 100 830 90
0.20 1395 380 1225 265 1115 210 850 110 795 95
0.30 1365 385 1195 275 1085 220 815 115 750 105
0.40 1325 385 1170 290 1045 230 770 130 700 110
0.50 1245 370 1130 300 1010 240 720 135 660 120
0.60 1180 360 1095 305 970 245 675 140 605 125
0.70 1100 330 1045 310 935 255 615 150 560 130
0.80 980 295 1000 290 895 260 580 155 505 135
MGD96SE070B4XA Performance (Less Filter)
External
Static
Pressure
in. w.c.
Air Volume / Watts at Dierent Blower Speeds
High Medium-High Medium Medium-Low Low
cfm watts cfm watts cfm watts cfm watts cfm watts
0.00 1720 510 1545 355 1340 235 1240 190 1020 95
0.10 1700 530 1505 360 1310 245 1195 200 955 110
0.20 1675 545 1465 370 1275 255 1155 205 895 115
0.30 1640 555 1420 380 1230 270 1120 215 835 125
0.40 1600 565 1380 395 1180 280 1060 225 785 135
0.50 1560 570 1340 400 1140 290 1015 235 715 145
0.60 1500 565 1300 420 1095 305 965 245 640 150
0.70 1405 540 1255 430 1040 315 910 255 585 160
0.80 1325 515 1215 445 990 320 865 265 525 170
NOTE: All air data is measured external to unit without lter (not furnished - eld provided)
507769C05 Page 47 of 55
mrcool.com
MGD96SE090C4XA Performance (Less Filter)
External
Static
Pressure
in. w.c.
Air Volume / Watts at Dierent Blower Speeds
High Medium-High Medium Medium-Low Low
cfm watts cfm watts cfm watts cfm watts cfm watts
0.00 1760 435 1555 280 1405 230 1315 175 1190 135
0.10 1730 445 1515 300 1375 240 1280 190 1150 145
0.20 1700 455 1475 315 1350 250 1245 205 1115 155
0.30 1670 465 1445 330 1310 265 1200 220 1070 165
0.40 1640 480 1410 340 1265 275 1160 230 1025 175
0.50 1590 485 1380 345 1225 285 1125 235 985 185
0.60 1530 465 1340 360 1195 295 1085 245 945 195
0.70 1445 450 1315 370 1150 305 1065 255 895 200
0.80 1350 420 1280 375 1115 315 1015 265 860 210
MGD96SE110C5XA Performance (Less Filter)
External
Static
Pressure
in. w.c.
Air Volume / Watts at Dierent Blower Speeds
High Medium-High Medium Medium-Low Low
cfm watts cfm watts cfm watts cfm watts cfm watts
0.00 2115 669 1895 466 1710 356 1605 285 1415 209
0.10 2090 686 1845 476 1670 368 1570 299 1380 217
0.20 2060 701 1790 487 1630 375 1520 315 1320 222
0.30 2020 711 1760 498 1590 393 1470 324 1280 236
0.40 1980 734 1715 511 1545 403 1420 342 1220 247
0.50 1935 740 1690 525 1500 418 1370 347 1170 264
0.60 1895 749 1625 536 1460 423 1335 358 1110 269
0.70 1830 738 1600 548 1410 438 1280 367 1080 286
0.80 1765 723 1550 564 1370 456 1240 387 1010 290
NOTE: All air data is measured external to unit without lter (not furnished - eld provided)
Allowable Heating Speeds
Model Red Yellow Blue Brown Black
045 Allowed Factory Setting Allowed Not Allowed Not Allowed
070 Allowed Factory Setting Allowed Not Allowed Not Allowed
090 Allowed Factory Setting Allowed Allowed Not Allowed
010 Allowed Allowed Allowed Factory Setting Not Allowed
Table 21.
Allowable Circulation Speeds
Model Red Yellow Blue Brown Black
All Models Factory Setting Not Allowed Not Allowed Not Allowed Not Allowed
Table 22.
507769C05Page 48 of 55
mrcool.com
Service
ELECTRICAL SHOCK, FIRE, OR EXPLOSION
HAZARD.
Failure to follow safety warnings exactly could result in
dangerous operation, serious injury, death or property
damage.
Improper servicing could result in dangerous operation,
serious injury, death, or property damage.
Before servicing, disconnect all electrical power to
furnace.
When servicing controls, label all wires prior to
disconnecting. Take care to reconnect wires correctly.
Verify proper operation after servicing.
WARNING
At the beginning of each heating season, system should
be checked as follows by a qualied service technician:
Blower
Check the blower wheel for debris and clean if necessary.
The blower motors are pre-lubricated for extended bearing
life. No further lubrication is needed.
The blower access panel must be securely in place
when the blower and burners are operating. Gas fumes,
which could contain carbon monoxide, can be drawn
into living space resulting in personal injury or death.
WARNING
Filters
All air lters are installed external to the unit. Filters should
be inspected monthly. Clean or replace the lters when
necessary to ensure proper furnace operation. Table 3 lists
recommended lter sizes.
Exhaust and Air Intake Pipes
Check the exhaust and air intake pipes and all connections
for tightness and to make sure there is no blockage.
NOTE: After any heavy snow, ice or frozen fog event the
furnace vent pipes may become restricted. Always check
the vent system and remove any snow or ice that may be
obstructing the plastic intake or exhaust pipes.
Electrical
1. Check all wiring for loose connections.
2. Check for the correct voltage at the furnace (furnace
operating). Correct voltage is 120 VAC ± 10%.
3. Check amp-draw on the blower motor with the blower
compartment access panel in place.
Motor Nameplate____________ Actual____________
Winterizing and Condensate Trap Care
1. Turn o power to the furnace.
2. Have a shallow pan ready to empty condensate water.
3. Remove the clean out cap from the condensate trap
and empty water. Inspect the trap then reinstall the
clean out cap.
Cleaning Heat Exchanger
If cleaning the heat exchanger becomes necessary,
follow the below procedures and refer to Figure 1 when
disassembling unit. Use papers or protective covering in
front of furnace while removing heat exchanger assembly.
1. Turn o electrical and gas supplies to the furnace.
2. Remove the furnace access panels.
3. Disconnect the 2 wires from the gas valve.
4. Remove gas supply line connected to gas valve.
Remove gas valve/manifold assembly.
5. Remove sensor wire from sensor. Disconnect 2 pin
plug from the ignitor.
6. Disconnect wires from ame rollout switches.
7. Loosen clamps at vent elbow. Disconnect condensate
drain tubing from ue collar and remove the vent
elbow.
8. Remove four burner box screws at the vestibule panel
and remove burner box. Set burner box assembly
aside.
NOTE: If necessary, clean burners at this time. Follow
procedures outlined in Burner Cleaning section.
9. Mark and disconnect all combustion air pressure
tubing from cold end header collector box.
10. Mark and remove wires from pressure switches.
Remove pressure switches. Keep tubing attached to
pressure switches.
11. Disconnect the plug from the combustion air inducer.
Remove two screws which secure combustion air
inducer to collector box. Remove combustion air
inducer assembly. Remove ground wire from vest
panel.
12. Remove electrical junction box from the side of the
furnace.
13. Mark and disconnect any remaining wiring to heating
compartment components. Disengage strain relief
bushing and pull wiring and bushing through the hole
in the blower deck.
14. Remove the primary limit from the vestibule panel.
15. Remove two screws from the front cabinet ange at
the blower deck. Spread cabinet sides slightly to allow
clearance for removal of heat exchanger.

507769C05 Page 49 of 55
mrcool.com
16. Remove screws along vestibule sides and bottom
which secure vestibule panel and heat exchanger
assembly to cabinet. Remove two screws from blower
rail which secure bottom heat exchanger ange.
Remove heat exchanger from furnace cabinet.
17. Back wash heat exchanger with soapy water solution
or steam. If steam is used it must be below 275°F
(135°C).
18. Thoroughly rinse and drain the heat exchanger. Soap
solutions can be corrosive. Take care to rinse entire
assembly.
19. Reinstall heat exchanger into cabinet making sure
that the clamshells of the heat exchanger assembly
are resting on the support located at the rear of the
cabinet. Remove the indoor blower to view this area
through the blower opening.
20. Resecure the supporting screws along the vestibule
sides and bottom to the cabinet. Reinstall blower and
mounting screws.
21. Reinstall cabinet screws on front ange at blower
deck.
22. Reinstall the primary limit on the vestibule panel.
23. Route heating component wiring through hole in
blower deck and reinsert strain relief bushing.
24. Reinstall electrical junction box.
25. Reinstall the combustion air inducer. Reconnect the
combustion air inducer to the wire harness.
26. Reinstall pressure switches and reconnect pressure
switch wiring.
27. Carefully connect combustion air pressure switch
hosing from pressure switches to proper stubs on cold
end header collector box.
28. Reinstall condensate trap.
29. Reconnect exhaust piping and exhaust drain tubing.
30. Reinstall burner box assembly in vestibule area.
31. Reconnect ame rollout switch wires.
32. Reconnect sensor wire and reconnect 2 pin plug from
ignitor.
33. Secure burner box assembly to vestibule panel using
four existing screws. Make sure burners line up in
center of burner ports.
34. Reinstall gas valve manifold assembly. Reconnect gas
supply line to gas valve.
35. Reconnect 2 wires to gas valve.
36. Replace the blower compartment access panel.
37. Refer to instruction on verifying gas and electrical
connections when re-establishing supplies.
38. Follow lighting instructions to light and operate furnace
for 5 minutes to ensure that heat exchanger is clean
and dry and that furnace is operating properly.
39. Replace heating compartment access panel.
Cleaning the Burner Assembly
1. Turn o electrical and gas power supplies to furnace.
Remove upper and lower furnace access panels.
2. Disconnect the 2 pin plug from the gas valve.
3. Remove the burner box cover.
4. Disconnect the gas supply line from the gas valve.
Remove gas valve/manifold assembly.
5. Mark and disconnect sensor wire from the sensor.
Disconnect 2 pin plug from the ignitor at the burner
box.
6. Remove four screws which secure burner box
assembly to vest panel. Remove burner box from the
unit.
7. Use the soft brush attachment on a vacuum cleaner
to gently clean the face of the burners. Visually
inspect the inside of the burners and crossovers for
any blockage caused by foreign matter. Remove any
blockage.
8. Reconnect the sensor wire and reconnect the 2 pin
plug to the ignitor wiring harness.
9. Reinstall the burner box assembly using the existing
four screws. Make sure that the burners line up in the
center of the burner ports.
10. Reinstall the gas valve manifold assembly. Reconnect
the gas supply line to the gas valve. Reinstall the
burner box cover.
11. Reconnect 2 pin plug to gas valve.
12. Replace the blower compartment access panel.
13. Refer to instruction on verifying gas and electrical
connections when re-establishing supplies.
14. Follow lighting instructions to light and operate furnace
for 5 minutes to ensure that heat exchanger is clean
and dry and that furnace is operating properly.
15. Replace heating compartment access panel.
507769C05Page 50 of 55
mrcool.com
Troubleshooting: Heating Sequence of Operation
HEATING SEQUENCE OF OPERATION
NORMAL HEATING MODE
ABNORMAL HEATING MODE
CONTROL SELF-CHECK OKAY?
BURNER OFF?
NORMAL OPERATION:
LED SLOW FLASH
NO
YES
YES
GAS VALVE OFF. COMBUSTION AIR INDUCER OFF.
INDOOR BLOWER DELAY OFF.
LED SLOW FLASH
(RESET CONTROL BY TURNING MAIN POWER OFF.)
LED FLASHES CODE 1 - POLARITY
REVERSED.
POWER ON
IS POLARITY CORRECT?
ROLLOUT SWITCH CLOSED?
THERMOSTAT CALLS FOR HEAT:
LED SLOW FLASH
IS COMBUSTION AIR
PRESSURE SWITCH OPEN?
LED FLASHES CODE 8 - ROLLOUT SWITCH OPEN.
GAS VALVE OFF. COMBUSTION AIR INDUCER ON.
INDOOR BLOWER ON.
SEQUENCE HOLDS UNTIL ROLLOUT SWITCH CLOSES
AND POWER IS RESET OR T'STAT IS INTERRUPTED
FOR MINIMUM OF 1 SECOND.
LED FLASHES CODE 12 - FLAME SENSED
WITHOUT GAS VALVE ENERGIZED.
GAS VALVE OFF. COMBUSTION AIR INDUCER ON.
INDOOR BLOWER ON HEATING SPEED.
LED FLASHES CODE 11 - PRESSURE
SWITCH CLOSED.
GAS VALVE OFF COMBUSTION AIR
INDUCER OFF. INDOOR BLOWER
OFF WITH DELAY.
(Sequence holds until pressure switch
opens or thermostat resets control.)
NO
NO
YES
YES
IS VOLTAGE
ABOVE 70 VOLTS?
LED FLASHES CODE 13 - LOW LINE VOLTAGE.
CONTROL WILL NOT RESPOND TO A CALL FOR
HEATING UNTIL VOLTAGE RISES ABOVE 75 VOLTS.
NO
NO
NO
IS COMBUSTION AIR INDUCER
ENERGIZED?
HAS COMBUSTION AIR PRESSURE
SWITCH CLOSED IN 2.5 MINUTES?
YES
YES
LED FLASHES CODE 9 - PRESSURE SWITCH FAILED
TO CLOSE OR OPENED DURING HEAT DEMAND.
PRESSURE SWITCH IS IN WATCHGUARD MODE. GAS
VALVE OFF. COMBUSTION AIR INDUCER OFF.
INDOOR BLOWER OFF WITH DELAY. IS 5‐MINUTE
RESET PERIOD COMPLETE?
NO
PRIMARY LIMIT SWITCH. CLOSED?
YES
YES
CONTINUED NEXT PAGE
LED FLASHES CODE 7 - PRIMARY
LMIT OPEN. COMBUSTION AIR
INDUCER OFF.I NDOOR BLOWER ON
NO
YES
NO
YES
IS THERE A PROPER GROUND?
YES
NO
LED FLASHES CODE 2 - IMPROPER
GROUND.
YES
YES
507769C05 Page 51 of 55
mrcool.com
Troubleshooting: Heating Sequence of Operation (continued)
HEATING SEQUENCE CONTINUED
EDOM GNITAEH LAMRONBAEDOM GNITAEH LAMRON
FLAME RECTIFICATION CURRENT
CHECK. CAN FLAME BE PROVEN WITHIN
4 SECONDS AFTER GAS VALVE OPENS?
(0.5 microamps)
FLAME PRESENT?
INDOOR BLOWER ON
AFTER 30-SECOND DELAY
PRIMARY LIMIT SWITCH CLOSED?
COMBUSTION AIR PRESSURE
SWITCH CLOSED?
LED FLASHES CODE 4 - LOW
FLAME SIGNAL.
(Does not affect operation of control)
LED FLASHES CODE 7 - PRIMARY LIMIT OPEN
GAS VALVE DE-ENERGIZED.
COMBUSTION AIR INDUCER DE-ENERGIZED.
INDOOR BLOWER ON UNTIL SWITCH CLOSES.
LIMIT SWITCH CLOSED?
GAS VALVE DE-ENERGIZED.
COMBUSTION AIR INDUCER ON.
INDOOR BLOWER OFF WITH DELAY
HAS CAI SWITCH CLOSED IN 2.5 MINUTES?
15‐SECOND COMBUSTION AIR INDUCER PREPURGE
INITIATED BY CLOSED PRESSURE SWITCH.
YES
IGNITOR WARM‐UP -- 20 SECONDS.
YES
YES
FLAME STABILIZATION PERIOD.
GAS VALVE OFF. COMBUSTION AIR INDUCER ON.
INDOOR BLOWER OFF.
HAS CONTROL FAILED TO SENSE FLAME FOR
FIVE CONSECUTIVE TRIES DURING A SINGLE
HEAT DEMAND?
LED SIGNAL WATCHGUARD FAILURE CODE
WATCHGUARD MODE. GAS VALVE OFF.
COMBUSTION AIR INDUCER OFF.
INDOOR BLOWER OFF WITH DELAY
IS 60‐MINUTE RESET PERIOD COMPLETE?
YES
4 SECONDS
YES
HAS CONTROL RESET IGNITION
SEQUENCE FOUR TIMES?
FLAME SIGNAL 1.5 MICROAMPS OR GREATER?
YES
YES
YES
ROLLOUT SWITCH CLOSED?
LED FLASHES CODE 8 - ROLLOUT SWITCH OPEN.
GAS VALVE POWER OFF. COMBUSTION AIR INDUCER POWER
ON. INDOOR BLOWER ON SEQUENCE HOLDS UNTIL ROLLOUT
SWITCH IS RESET AND MAIN POWER IS INTERRUPTED OR
THERMOSTAT IS CYCLED OFF/ON FOR 1 SEC. MINIMUM.
YES
THERMOSTAT DEMAND SATISFIED.
LED SLOW FLASH.
COMB. AIR INDUCER CONTINUES 5‐SECOND
POST PURGE AFTER T'STAT DEMAND IS SATISFIED.
INDOOR AIR BLOWER COMPLETES SELECTED “OFF”
DELAY BEFORE SHUTTING OFF.
YES
NO
5‐MINUTE PRESSURE SWITCH
WATCHGUARD MODE.
YES
IS VOLTAGE ABOVE 70 VOLTS?
LED FLASHES CODE 13 -
LOW LINE VOLTAGE.
ONCE VOLTAGE IS ABOVE
75 VOLTS, HEATING
SEQUENCE RESTARTS.
NO
YES
YES
YES
NO
NO
NO
NO
NO
NO
YES
YES
NO
NO
NO
YES
YES
HAS PRIMARY LIMIT RESET
TIME EXCEEDED 3 MINUTES?
LED FLASHES CODE
7 - PRIMARY LIMIT
OPEN. GAS VALVE,
COMB. AIR INDUCER
ER OFF. LEDs SIGNAL
LIMIT SWITCH OPEN
UNTIL MAIN
POWER IS
INTERRUPTED OR
T'STAT IS CYCLED
OFF/ON FOR 1 SEC.
MINIMUM. 60-MINUTE
RIOD STARTS AT
TIME LIMIT CLOSES.
IS 60-MIN. PERIOD
COMPLETE?
NO
YES
4‐SECOND TRIAL FOR IGNITION.
GAS VALVE OPENS. IGNITOR ENERGIZED FOR
FIRST 3 SECONDS OF THE TRIAL.
LED FLASHES
CODE 10
1 HR PRESSURE
SWITCH
WATCHGUARD
MODE
HAS PRESSURE SWITCH OPENED 5
TIMES IN SAME HEAT DEMAND
NO
YES
507769C05Page 52 of 55
mrcool.com
Troubleshooting: Cooling Sequence of Operation
COOLING SEQUENCE OF OPERATION
EDOM GNILOOC LAMRONBAEDOM GNILOOC LAMRON
IGNITION CONTROL MAIN POWER ON.
CONTROL SELF DIAGNOSTIC CHECK.
IS CONTROL OPERATING NORMALLY?
YES
LED FLASHES CODE 1 POLARITY REVERSED
CONTROL WILL CONTINUE TO CALL FOR COOLING IN
THIS CONDITION.
POWER ON
LED FLASHES STEADY - CIRCUIT BOARD FAILURE
GAS VALVE OFF. COMBUSTION AIR INDUCER OFF.
INDOOR BLOWER OFF WITH NORMAL DELAY.
INTERRUPT MAIN POWER TO RESET CONTROL.
YES
IS POLARITY CORRECT?
ROLLOUT SWITCH MONITORED CONTINUOUSLY.
IS ROLLOUT SWITCH CLOSED?
LED: SLOW FLASH RATE REMAINS UNCHANGED
THROUGHOUT COOLING CYCLE.
THERMOSTAT CALLS FOR COOLING.
COMPRESSOR CONTACTOR AND SYSTEM FAN
ENERGIZED WITH 2‐SECOND DELAY
(COOLING SPEED)
COMPRESSOR OFF.
THERMOSTAT OPENS.
SYSTEM FAN AND EAC TERM. OFF
WITH 45‐SECOND DELAY.
NO
NO
LED FLASHES CODE 8 ROLLOUT SWITCH OPEN. GAS
VALVE OFF. COMBUSTION AIR INDUCER ON. INDOOR
BLOWER ON. SEQUENCE HOLDS UNTIL ROLLOUT SWITCH
CLOSES AND MAIN POWER IS INTERRUPTED OR
THERMOSTAT IS CYCLED OFF/ON FOR 1 SEC. MINIMUM.
IS VOLTAGE
ABOVE 70 VOLTS?
LED FLASHES CODE 13 LOW VOLTAGE. CONTROL
WILL CONTINUE TO CALL FOR COOLING
IN THIS CONDITION.
YES
YES
NO
NO
IS THERE A PROPER GROUND?
YES
NO
LED FLASHES CODE 2 IMPROPER GROUND
CONTROL WILL CONTINUE TO CALL FOR COOLING
IN THIS CONDITION.
507769C05 Page 53 of 55
mrcool.com
Troubleshooting: Continuous Fan Sequence of Operation
CONTINUOUS FAN / ACCESSORIES SEQUENCE OF OPERATION
LED: SLOW FLASH RATE REMAINS
UNCHANGED THROUGHOUT SEQUENCE.
MANUAL FAN SELECTION MADE AT THERMOSTAT.
CONTROL (G) ENERGIZES SYSTEM FAN AT FAN
SPEED. EAC TERMINAL IS ENERGIZED.
THERMOSTAT CALLS FOR HEAT (W).
THERMOSTAT CALLS FOR COOLING.
THERMOSTAT OPENS.
SYSTEM FAN SWITCHED TO COOL SPEED.
EAC TERM. REMAINS ON.
THERMOSTAT OPENS.
MANUAL FAN SELECTION MADE AT THERMOSTAT.
CONTROL (G) ENERGIZES SYSTEM FAN AT FAN
SPEED. EAC TERM. ENERGIZED.
NO
YES
YES
NO
SYSTEM FAN SWITCHES TO HEAT SPEAD AFTER 30
SECOND DELAY. EAC AND HUM TERMINALS REMAIN ON.
SYSTEM FAN CONTINUES FAN SPEED WITHOUT
INTERRUPTION. EAC TERMINAL REMAIN ON.
HUM TERMINALS ARE ENERGIZED WITH
COMBUSTION AIR BLOWER.
HUM. TERMINALS OFF AFTER POST PURGE
BY COMBUSTION AIR INDUCER. SYTEM FAN
SWITCHES TO FAN SPEED AFTER BLOWER
OFF DELAY. EAC CONTINUES WITHOUT
INTERUPTION.
507769C05Page 54 of 55
mrcool.com
Repair Parts List
The following repair parts are available through MRCOOL dealers. When ordering parts, include the complete furnace model
number listed on the CSA nameplate. All service must be performed by a licensed professional installer (or equivalent),
service agency, or gas supplier.
Cabinet Parts
• Upper Access Panel
• Blower Access Panel
• Top Cap
Control Panel Parts
• Transformer
• Integrated Control Board
• Door Interlock Switch
Blower Parts
• Blower Wheel
• Motor
• Motor Mounting Frame
• Motor Capacitor
• Blower Housing Cuto Plate
Heating Parts
• Flame Sensor
• Heat Exchanger Assembly
• Gas Manifold
• Combustion Air Inducer
• Gas Valve
• Main Burner Cluster
• Main Burner Orices
• Pressure Switch
• Ignitor
• Primary Limit Control
• Flame Rollout Switches
Planned Service
A service technician should check the following items during an annual inspection. Power to the unit must be shut o for
safety.
Fresh air grilles and louvers (on the unit and in the
room where the furnace is installed) - Must be open and
unobstructed to provide combustion air.
Burners - Must be inspected for rust, dirt, or signs of water.
Vent pipe - Must be inspected for signs of water, cracked,
damaged or sagging pipe, or disconnected joints.
Unit appearance - Must be inspected for rust, dirt, signs of
water, burnt or damaged wires, or components.
Blower access door - Must be properly in place and
provide a seal between the return air and the room where
the furnace is installed.
Return air duct - Must be properly attached and provide
an air seal to the unit.
Operating performance - Unit must be observed during
operation to monitor proper performance of the unit and
the vent system.
Combustion gases - Flue products must be analyzed and
compared to the unit specications.
Problems detected during the inspection may make it
necessary to temporarily shut down the furnace until the
items can be repaired or replaced.
Instruct the homeowners to pay attention to their
furnace. Situations can arise between annual furnace
inspections that may result in unsafe operation. For
instance, items innocently stored next to the furnace may
obstruct the combustion air supply. This could cause
incomplete combustion and the production of carbon
monoxide gas.

507769C05 Page 55 of 55
mrcool.com
Requirements for Commonwealth of Massachusetts
Modications to NFPA-54, Chapter 10
Revise NFPA-54 section 10.8.3 to add the following
requirements:
For all side wall, horizontally vented, gas-fueled equipment
installed in every dwelling, building or structure used in
whole or in part for residential purposes, including those
owned or operated by the Commonwealth and where the
side wall exhaust vent termination is less than seven (7)
feet above the nished grade in the area of the venting,
including but not limited to decks and porches, the following
requirements shall be satised:
1. INSTALLATION OF CARBON MONOXIDE
DETECTORS. At the time of installation of the side
wall, horizontally vented, gas-fueled equipment, the
installing plumber or gas tter shall observe that a
hard-wired carbon monoxide detector with an alarm
and battery backup is installed on the oor level where
the gas equipment is to be installed. In addition, the
installing plumber or gas tter shall observe that a
battery-operated or hard-wired carbon monoxide
detector with an alarm is installed on each additional
level of the dwelling, building or structure served by the
side wall, horizontally vented, gas-fueled equipment.
It shall be the responsibility of the property owner to
secure the services of qualied licensed professionals
for the installation of hard-wired carbon monoxide
detectors.
a. In the event that the side wall, horizontally
vented, gas-fueled equipment is installed in a
crawl space or an attic, the hard-wired carbon
monoxide detector with alarm and battery backup
may be installed on the next adjacent oor level.
b. In the event that the requirements of this subdivision
cannot be met at the time of completion of
installation, the owner shall have a period of thirty
(30) days to comply with the above requirements;
provided, however, that during said thirty (30)
day period, a battery-operated carbon monoxide
detector with an alarm shall be installed.
2. APPROVED CARBON MONOXIDE DETECTORS.
Each carbon monoxide detector as required in
accordance with the above provisions shall comply
with NFPA 720 and be ANSI/UL 2034 listed and IAS
certied.
3. SIGNAGE. A metal or plastic identication plate shall
be permanently mounted to the exterior of the building
at a minimum height of eight (8) feet above grade
directly in line with the exhaust vent terminal for the
horizontally vented, gas-fueled heating appliance or
equipment. The sign shall read, in print size no less
than one-half (1/2) inch in size, “GAS VENT DIRECTLY
BELOW. KEEP CLEAR OF ALL OBSTRUCTIONS.”
4. INSPECTION. The state or local gas inspector of the
side wall, horizontally vented, gas-fueled equipment
shall not approve the installation unless, upon
inspection, the inspector observes carbon monoxide
detectors and signage installed in accordance with the
provisions of 248 CMR 5.08(2)(a) 1 through 4.
EXEMPTIONS: The following equipment is exempt
from 24 CMR 5.08(2)(a) 1 through 4:
1. The equipment listed in Chapter 10 entitled “Equipment
Not Required to Be Vented” in the most current edition
of NFPA 54 as adopted by the Board; and
2. Product Approved side wall, horizontally vented, gas-
fueled equipment installed in a room or structure
separate from the dwelling, building or structure used
in whole or in part for residential purposes.
MANUFACTURER REQUIREMENTS - GAS EQUIPMENT
VENTING SYSTEM PROVIDED.
When the manufacturer of Product Approved side wall,
horizontally vented, gas-fueled equipment provides a
venting system design or venting system components
with the equipment, the instructions provided by the
manufacturer for installation of the equipment and the
venting system shall include:
1. Detailed instructions for the installation of the venting
system design or the venting system components: and
2. A complete parts list for the venting system design or
venting system.
MANUFACTURER REQUIREMENTS - GAS EQUIPMENT
VENTING SYSTEM NOT PROVIDED.
When the manufacturer of Product Approved sidewall,
horizontally vented, gas-fueled equipment does not
provide the parts for venting the ue gases, but identies
“special venting systems,” the following requirements shall
be satised by the manufacturer:
1. The referenced “special venting system” instructions
shall be included with the appliance or equipment
installation instructions; and
2. The “special venting systems” shall be Product
Approved by the Board, and the instructions for that
system shall include a parts list and detailed installation
instructions.
A copy of all installation instructions for all Product
Approved side wall, horizontally vented, gas-fueled
equipment, all venting instructions, all parts lists
for venting instructions, and/or all venting design
instructions shall remain with the appliance or
equipment at the completion of the installation.
The design and specifications of this product and/or manual are subject to change without prior notice.
Consult with the sales agency or manufacturer for details.
Signature Series
MGD*96SE*XA Gas Furnace
ELECTRICIAN and/or HVAC TECHNICIAN:
LICENSE #:
INSTALLATION DATE:
INSTALLATION LOCATION:
SERIAL NUMBER: