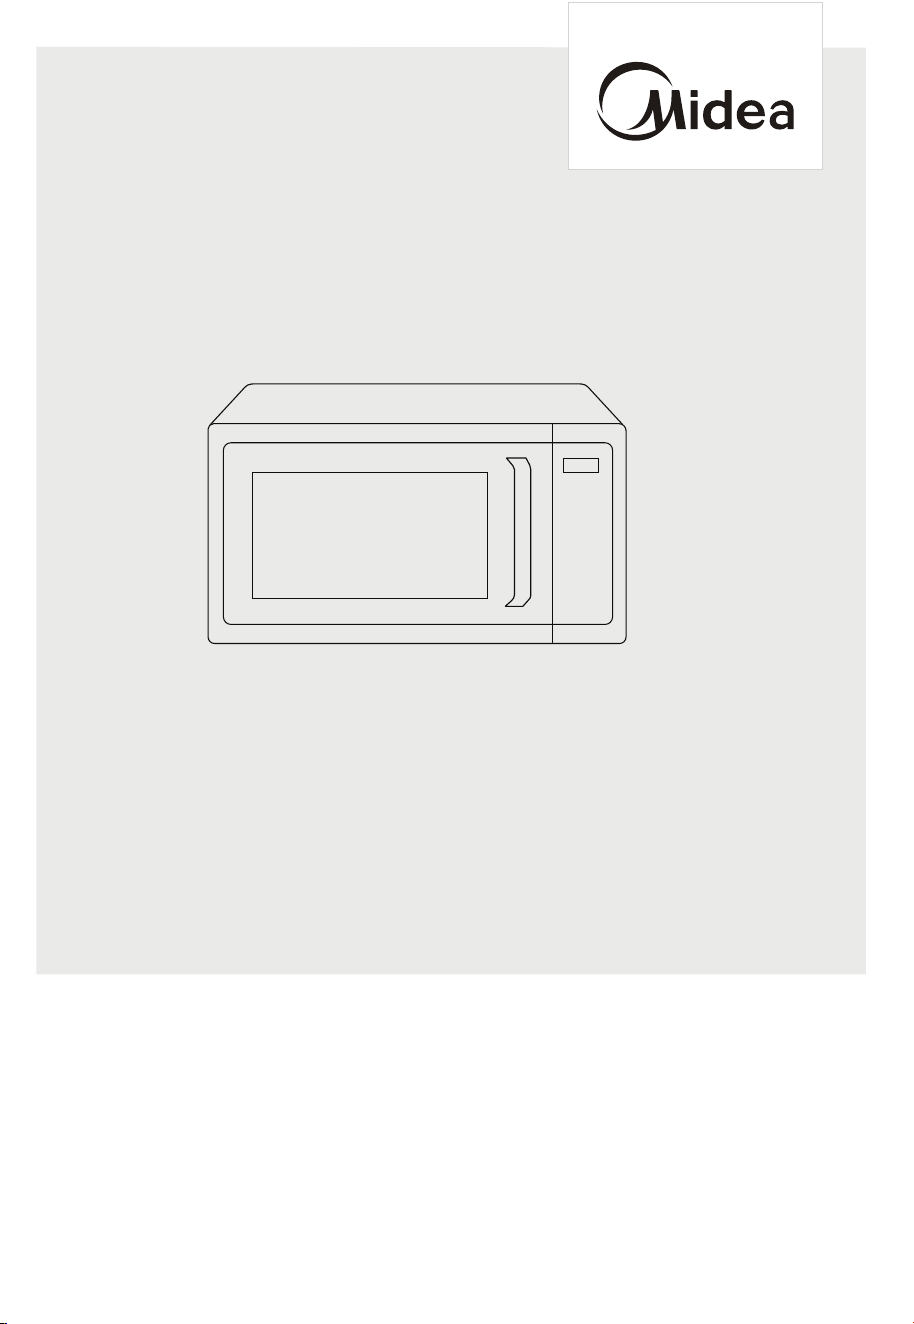
MICROWAVE OVEN
MMC12S2FHST
USER MANUAL
Warning notices: Before using this product, please read this manual carefully and keep it for future reference.
The design and specifications are subject to change without prior notice for product improvement. Consult
with your dealer or manufacturer for details.
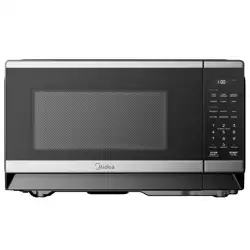
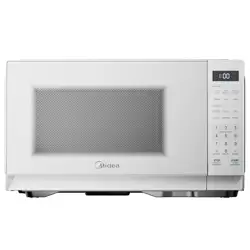
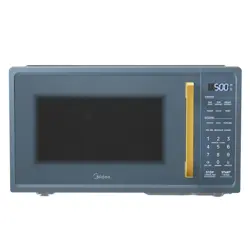
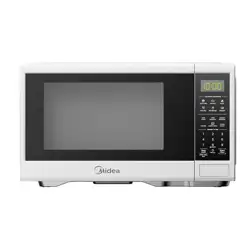
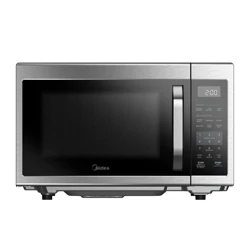
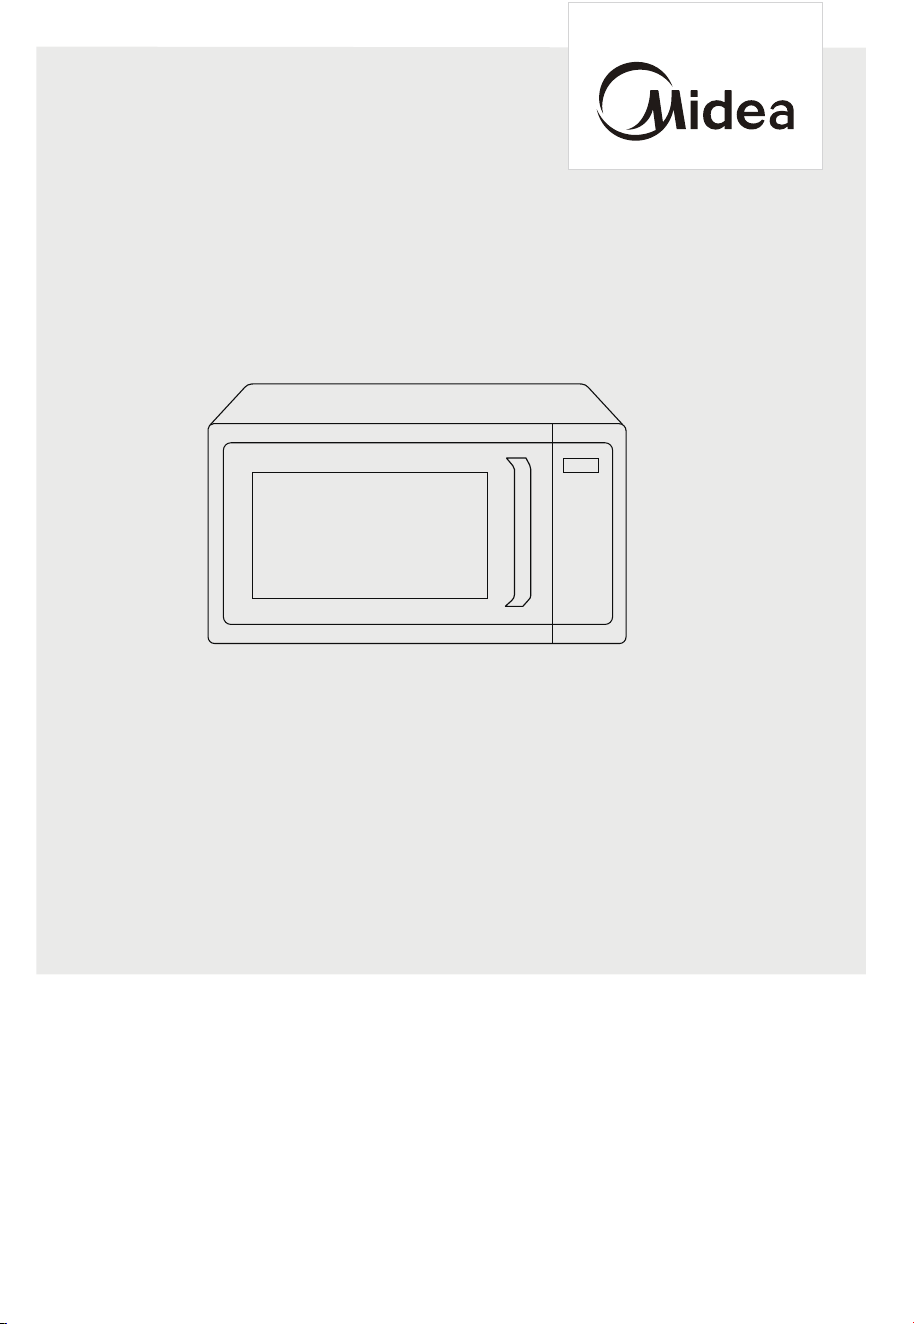
The diagram above is just for reference. Please take the appearance of the actual product as the standard.

02
THANK YOU LETTER
Thank you for choosing Midea! Before using your new Midea product, please read
this manual thoroughly to ensure that you know how to operate the features and
CONTENTS
THANK YOU LETTER
------------------------------------------------- 02
SAFETY INSTRUCTIONS
--------------------------------------------- 03
SPECIFICATION
-------------------------------------------------------- 13
PRODUCT OVERVIEW
------------------------------------------------ 14
PRODUCT INSTALLATION
------------------------------------------ 15
OPERATION
TROUBLE SHOOTING
-----------------------------------------------
---------------------------------------
---------------------------------------
30
TRADEMARKS, COPYRIGHTS AND LEGAL STATEMENT
DISPOSAL AND RECYCLING
DATA PROTECTION NOTICE
32
33
34
---------------------------------------------------------------
16
-----
03
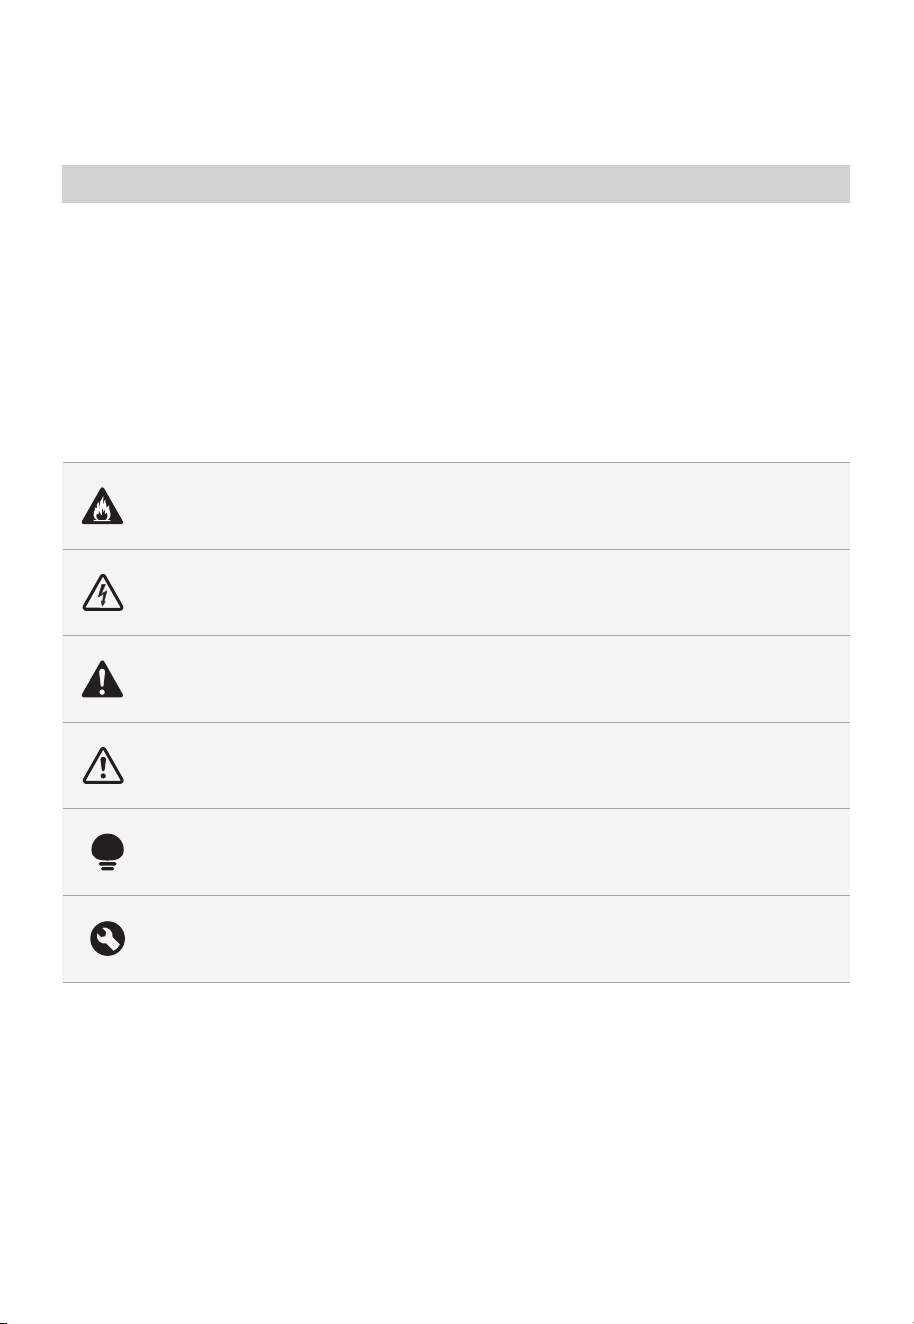
Danger
This symbol indicates that there are dangers to the life and health of
persons due to extremely flammable gas.
Warning of electrical voltage
This symbol indicates that there is a danger to life and health of
persons due to voltage.
Warning
The signal word indicates a hazard with a medium level of risk which, if
not avoided, may result in death or serious injury.
Caution
The signal word indicates a hazard with a low degree of risk which, if
not avoided, may result in minor or moderate injury.
Attention
The signal word indicates important information (e.g. damage to
property), but not danger.
Observe instructions
This symbol indicates that a service technician should only operate and
maintain this appliance in accordance with the operating instructions.
Intended Use
SAFETY INSTRUCTIONS
Read these operating instructions carefully and attentively before using/commissioning the
unit and keep them in the immediate vicinity of the installation site or unit for later use!
The following safety guidelines are intended to prevent unforeseen risks or damage from
unsafe or incorrect operation of the appliance. Please check the packaging and appliance
on arrival to make sure everything is intact to ensure safe operation. If you find any
damage, please contact the retailer or dealer. Please note modifications or alterations to
the appliance are not allowed for your safety concern. Unintended use may cause
hazards and loss of warranty claims.
Explanation of Symbols

04
a. Do not attempt to operate this oven with the door
open since open door operation can result in harmful
exposure to microwave energy.
It is important not to defeat or tamper with the safety
interlocks.
b. Do not place any object between the oven front face
and the door or allow soil or cleaner residue to
accumulate on sealing surfaces.
c. Do not operate the oven if it is damaged. It is
particularly important that the oven door closes
properly and that there is no damage to the:
- DOOR (bent)
- HINGES AND LATCHES (broken or loosened)
- DOOR SEALS AND SEALING SURFACES
d. The oven should not be adjusted or repaired by
anyone except properly qualified service personnel.
PRECAUTIONS TO AVOID
POSSIBLE EXPOSURE TO
EXCESSIVE
MICROWAVE
ENERGY

IMPORTANT SAFETY
INSTRUCTIONS
When using electrical appliances basic safety
precautions should be followed, including the following:
WARNING
1. Read all instructions before using the appliance.
2. Read and follow the specific: "PRECAUTIONS TO
AVOID POSSIBLE EXPOSURE TO EXCESSIVE
MICROWAVE ENERGY" found on page 04.
3. This appliance must be grounded. Connect only to
properly grounded outlet. See "GROUNDING
INSTRUCTIONS" found on page 08.
4. Install or locate this appliance only in accordance
with the provided installation instructions.
5. Some products such as whole eggs and sealed
containers - for example, closed glass jars - are able
to explode and should not be heated in this oven.
6. Use this appliance only for its intended use as
described in the manual. Do not use corrosive
chemicals or vapors in this appliance. This type of
oven is specifically designed to heat, cook or dry
food. It is not designed for industrial or laboratory
use.
7. HOT CONTENTS CAN CAUSE SEVERE BURNS. DO
NOT ALLOW CHILDREN TO USE THE MICRO
WAVE. Use caution when removing hot items.
8. Do not operate this appliance if it has a damaged
cord or plug, if it is not working properly, or if it has
been damaged or dropped.
To reduce the risk of burns, electric shock, fire, injury to
persons or exposure to excessive microwave energy:
05
9. This appliance should be serviced only by qualified
service personnel. Contact nearest authorized
service facility for examination, repair, or adjustment.
10. Do not cover or block any openings on the
appliance.
11. Do not store this appliance outdoors. Do not use
this product near water - for example, near a
kitchen sink, in a wet basement, near a swimming
pool, or similar location.
12. Do not immerse cord or plug in water.
13. Keep cord away from heated surface.
14. Do not let cord hang over edge of table or counter.
15. When cleaning surfaces of door and oven that
comes together on closing the door, use only mild,
nonabrasive soaps, or detergent applied with a
sponge or soft cloth.
16. To reduce the risk of fire in the oven cavity:
1). Do not overcook food. Carefully attend
appliance when paper, plastic, or other
combustible materials are placed inside the oven
to facilitate cooking.
2). Remove wire twist-ties from paper or plastic
bag before placing bag in oven.
3). If material inside of the oven ignite, keep oven
circuit breaker panel.
4). Do not use the cavity for storage purposes. Do
not leave paper products, cooking utensils, or
food in the cavity when not in use.
06
overheated beyond the boiling point without
appearing to be boiling. Visible bubbling or boiling
when the container is removed from the microwave
oven is not always present.
THIS COULD RESULT IN VERY HOT LIQUID
SUDDENLY BOILING OVER WHEN THE CONTAINER
IS DISTURBED OR A SPOON OR OTHER UTENSIL IS
INSERTED INTO THE LIQUID.
To reduce the risk of injury to persons:
1) Do not overheat the liquid.
2) Stir the liquid both before and halfway through
heating it.
3) Do not use straight-sided containers with narrow
necks.
4) After heating, allow the container to stand in the
microwave oven for a short time before removing
the container.
5) Use extreme care when inserting a spoon or other
utensil into the container.
SAVE THESE INSTRUCTIONS
HOUSEHOLD USE ONLY
(NOT FOR COMMERCIAL USE)
07
08
GROUNDING INSTALLATION
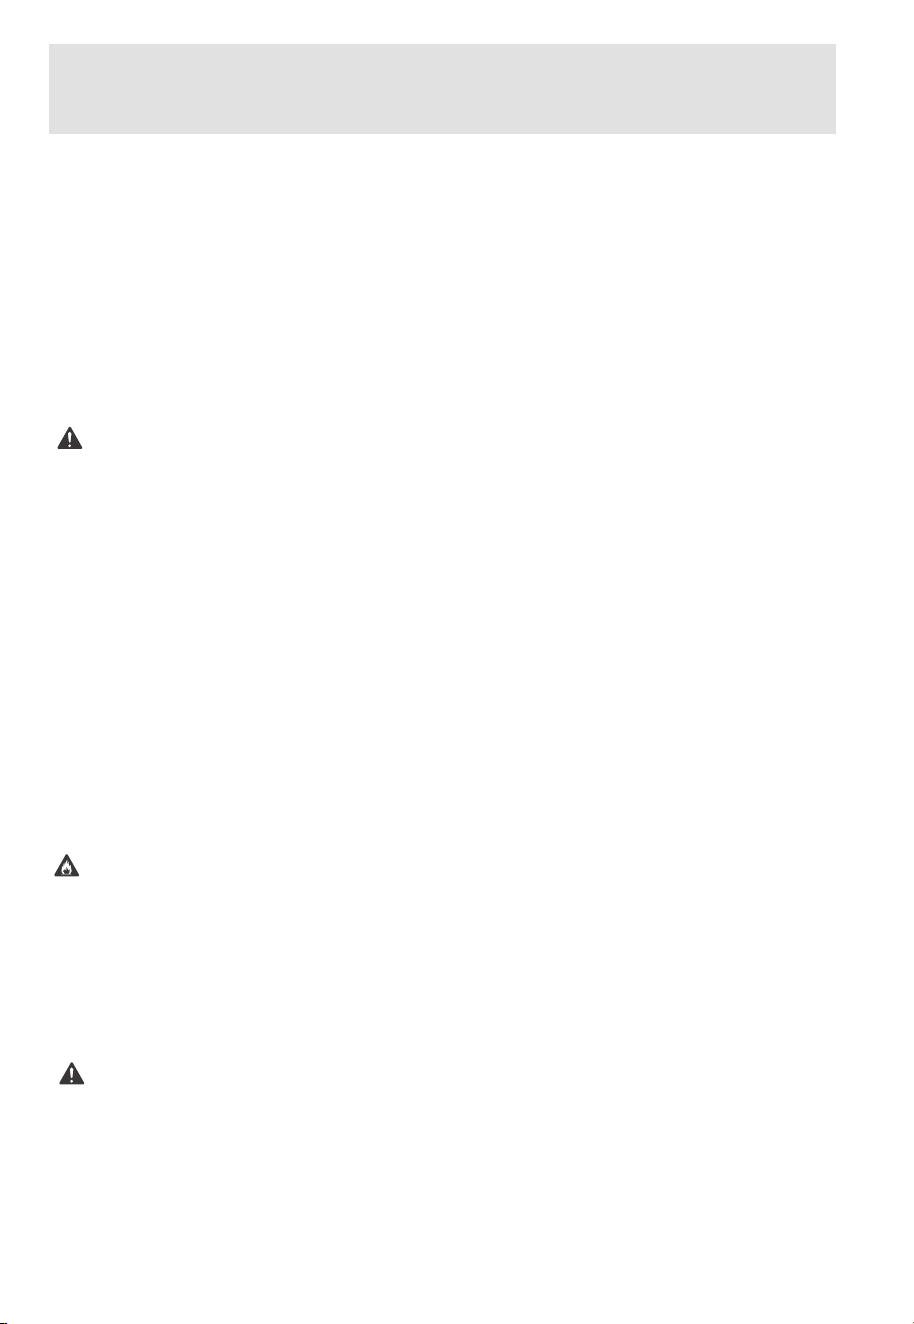
WARNING
DANGER
Electric Shock Hazard:
Touching some of the internal components can cause
serious personal injury or death. Do not disassemble this
appliance.
Improper use of the grounding can result in a risk of
electric shock.
Consult a qualified electrician or serviceman if the
grounding instructions are not completely understood,
or if doubt exists as to whether the appliance is
properly grounded. If it is necessary to use an extension
cord, use only a 3-wire extension cord that has a
3-blade grounded plug, and 3-slot receptacle that will
accept the plug on the appliance. The marked rating of
the extension cord shall be equal to or greater than the
electrical rating of the appliance.
This appliance must be grounded. In the event of an
electrical short circuit, grounding reduces the risk of
electric shock by providing an escape wire for the
electric current. This appliance is equipped with a
cord having a grounding wire with a grounding plug.
The plug must be plugged into an outlet that is
properly installed and grounded.
WARNING
Electric Shock Hazard
Improper use of the grounding can result in electric
shock. Do not plug into an outlet until appliance is
properly installed and grounded.

09
A short power-supply cord is provided to reduce the
risks resulting from becoming entangled in or tripping
over a longer cord.
Longer cord sets or extension cords are available and
may be used if care is exercised in their use.
If a long cord or extension cord is used:
1) The marked electrical rating of the cord set or
extension cord should be at least as great as the
electrical rating of the appliance.
2) The extension cord must be a grounding-type
3-wire cord.
3) The longer cord should be arranged so that it will not
drape over the counter top or tabletop where it can
be pulled on by children or tripped over
unintentionally.
CLEANING
Be sure to unplug the appliance from the power supply.
1. Clean the cavity of the oven after using with a slightly
damp cloth.
2. Clean the accessories in the usual way in soapy water.
3. The door frame and seal and neighbouring parts must
be cleaned carefully with a damp cloth when they are
dirty.
4. Do not use harsh abrasive cleaners or sharp metal
scrapers to clean the oven door glass since they can
scratch the surface, which may result in shattering of
the glass.
5. Cleaning Tip---For easier cleaning of the cavity walls
that the food cooked can touch: Place half a lemon in
a bowl, add 300ml (1/2 pint) water and heat on 100%
microwave power for 10 minutes. Wipe the oven clean
using a soft, dry cloth.
•
•
RADIO INTERFERENCE
10
Operation of the microwave oven may cause interference
to your radio, TV or similar equipment.
When there is interference, it may be reduced or
eliminated by taking the following measures:
1) Clean door and sealing surface of the oven.
2) Reorient the receiving antenna of radio or television.
3) Relocate the microwave oven with respect to
the receiver.
4) Move the microwave oven away from the receiver.
branch circuits.
This equipment generates, uses and can radiate radio
frequency energy and, if not installed and used in
accordance with the instructions, may cause harmful
interference to radio communications. However, there
is no guarantee that interference will not occur in a
particular installation. If this equipment does cause
harmful interference to radio or television reception,
which can be determined by turning the equipment
the interference by one or more of the following
measures:
—Reorient or relocate the receiving antenna.
—Increase the separation between the equipment
and receiver.
—Connect the equipment into an outlet on a circuit
—Consult the dealer or an experienced radio/TV
technician for help.
•
This device complies with part 18 of the FCC Rules.

11
UTENSILS
CAUTION
Personal Injury Hazard:
Tightly-closed utensils could explode. Closed containers
should be opened and plastic pouches should be pierced
before cooking.
See the instructions on "Materials you can use in
microwave oven or to be avoided in microwave oven."
There may be certain non-metallic utensils that are not
safe to use for microwaving. If in doubt, you can test the
utensil in question following the procedure below.
Utensil Test:
• Fill a microwave-safe container with 1 cup of cold
water (250ml) along with the utensil in question.
• Cook on maximum power for 1 minute.
• Carefully feel the utensil. If the empty utensil is warm,
do not use it for microwave cooking.
• Do not exceed 1 minute cooking time.
12
Materials you can use in microwave oven
Utensils Remarks
Browning dish
Follow manufacturer’s instructions. The bottom of browning
dish must be at least 3/16 inch (5mm) above the turntable.
Incorrect usage may cause the turntable to break. (For the
model with a turntable)
Dinnerware
Microwave-safe only. Follow manufacturer's instructions. Do
not use cracked or chipped dishes.
Glass jars
Always remove lid. Use only to heat food until just warm.
Most glass jars are not heat resistant and may break.
Glassware
Heat-resistant oven glassware only. Make sure there is no
metallic trim. Do not use cracked or chipped dishes.
Oven cooking bags
Follow manufacturer’s instructions. Do not close with metal
tie. Make slits to allow steam to escape.
Paper plates and cups
Use for short–term cooking/warming only. Do not leave
oven unattended while cooking.
Paper towels
Use to cover food for reheating and absorbing fat. Use with
supervision for a short-term cooking only.
Parchment paper
Use as a cover to prevent splattering or a wrap for
steaming.
Plastic
Microwave-safe only. Follow the manufacturer’s instructions.
Should be labeled "Microwave Safe". Some plastic
containers soften, as the food inside gets hot. "Boiling
bags" and tightly closed plastic bags should be slit, pierced
or vented as directed by package.
Plastic wrap
Microwave-safe only. Use to cover food during
cooking to
retain moisture. Do not allow plastic wrap to touch food.
Thermometers Microwave-safe only (meat and candy thermometers).
Wax paper Use as a cover to prevent splattering and retain moisture.
Materials to be avoided in microwave oven
Utensils Remarks
Aluminum tray May cause arcing. Transfer food into microwave-safe dish.
Food carton with metal
handle
May cause arcing. Transfer food into microwave-safe dish.
Metal or metal-trimmed
utensils
Metal shields the food from microwave energy. Metal trim
may cause arcing.
Metal twist ties May cause arcing and could cause a fire in the oven.
Paper bags May cause a fire in the oven.
Plastic foam
Plastic foam may melt or contaminate the liquid inside
when exposed to high temperature.
Wood
Wood will dry out when used in the microwave oven and
may split or crack.

13
SPECIFICATION
Model
MMC12S2FHST
Power Supply 120VAC 60Hz
Microwave Input 1500W
Microwave Output 1000W
14
PRODUCT OVERVIEW
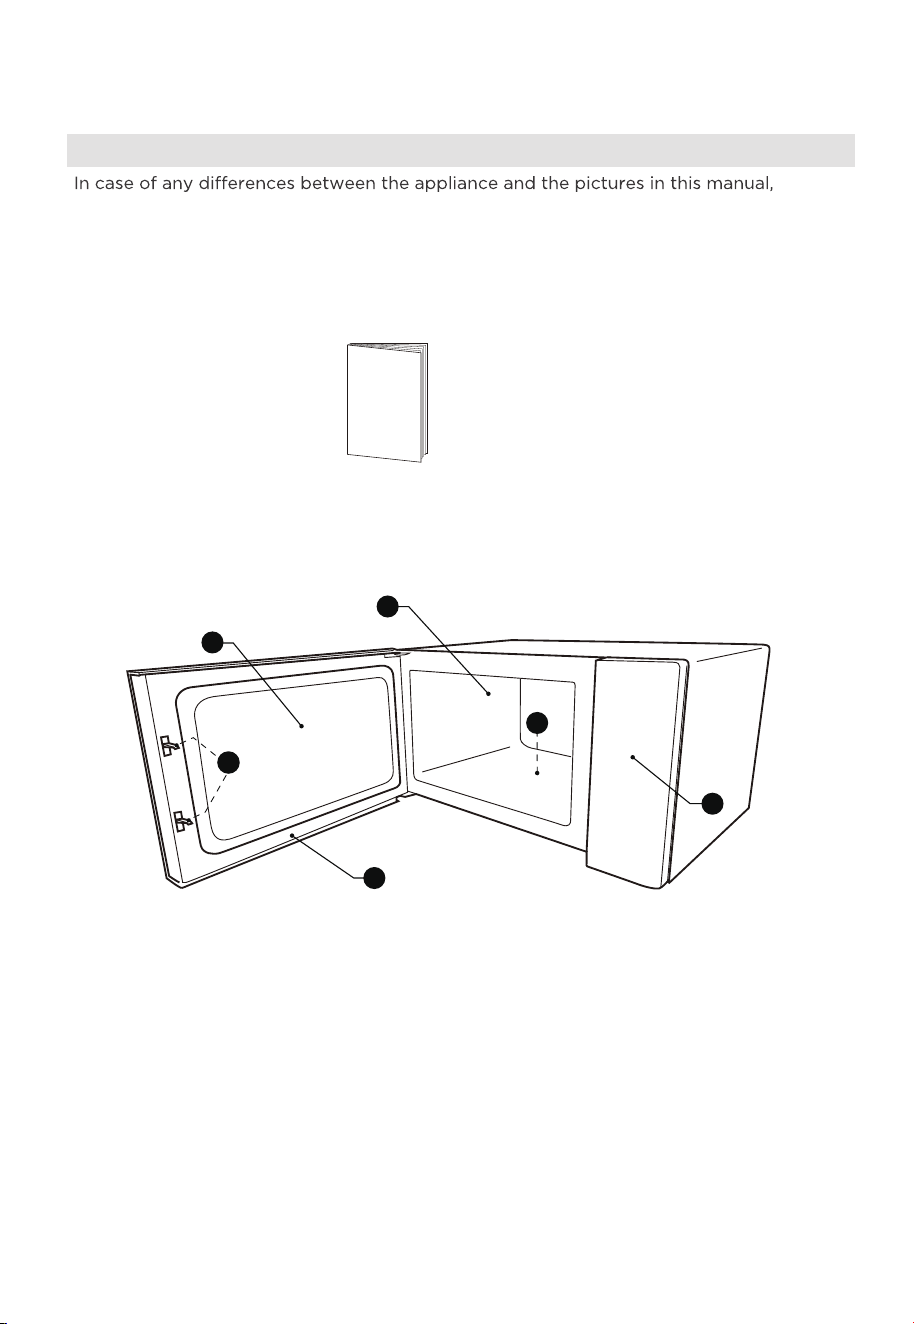
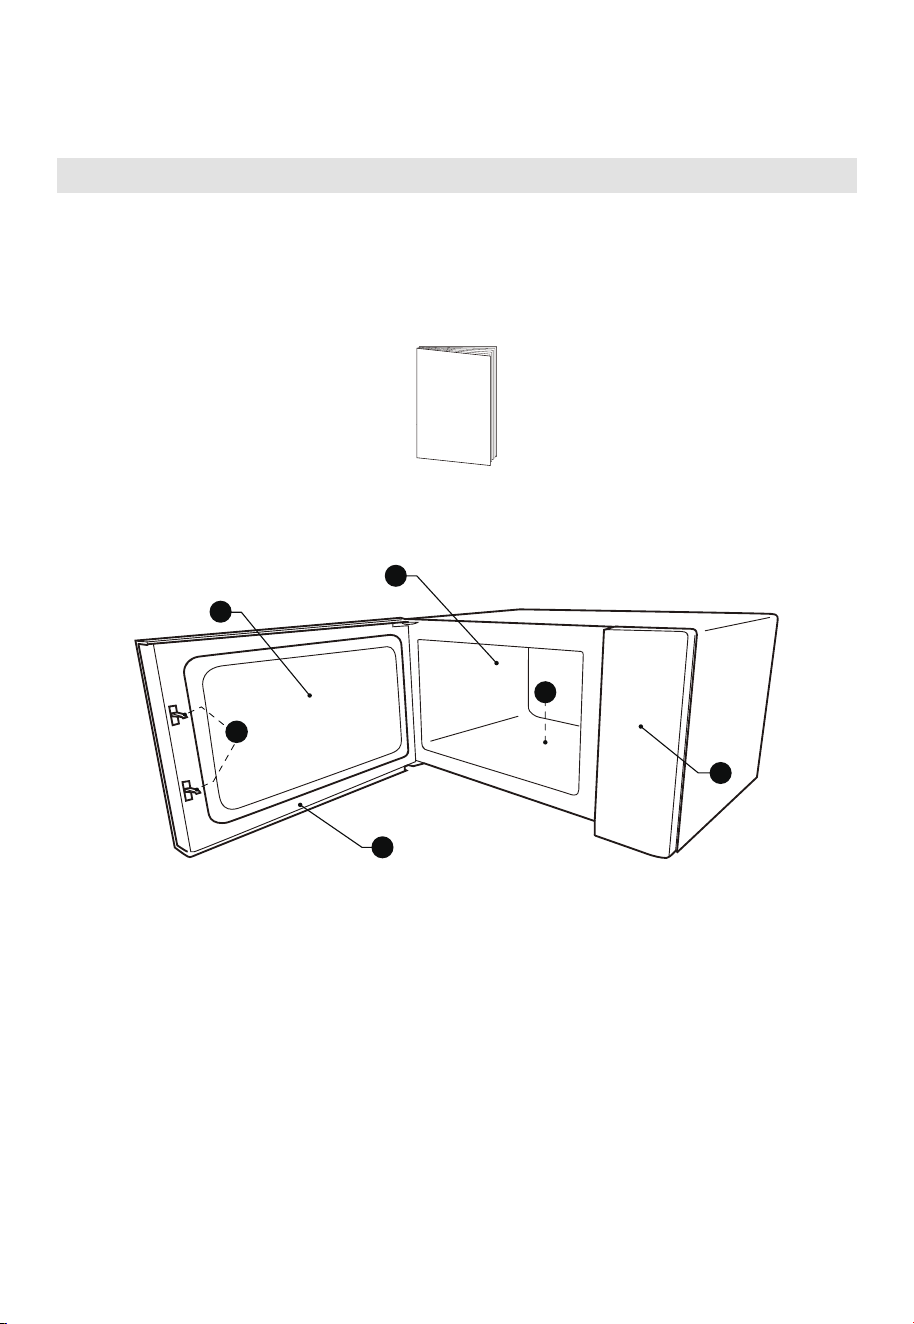
Names of Oven Parts and Accessories
the product shall prevail.
Remove the oven and all materials from the carton and oven cavity.
Your oven comes with the following accessories:
Instruction Manual
A) Safety interlock system
B) Door assembly
C) Observation window
D) Oven cavity
E) Flat heating surface
F) Control panel
F
C
D
E
B
A
15
PRODUCT INSTALLATION
INSTALLATION
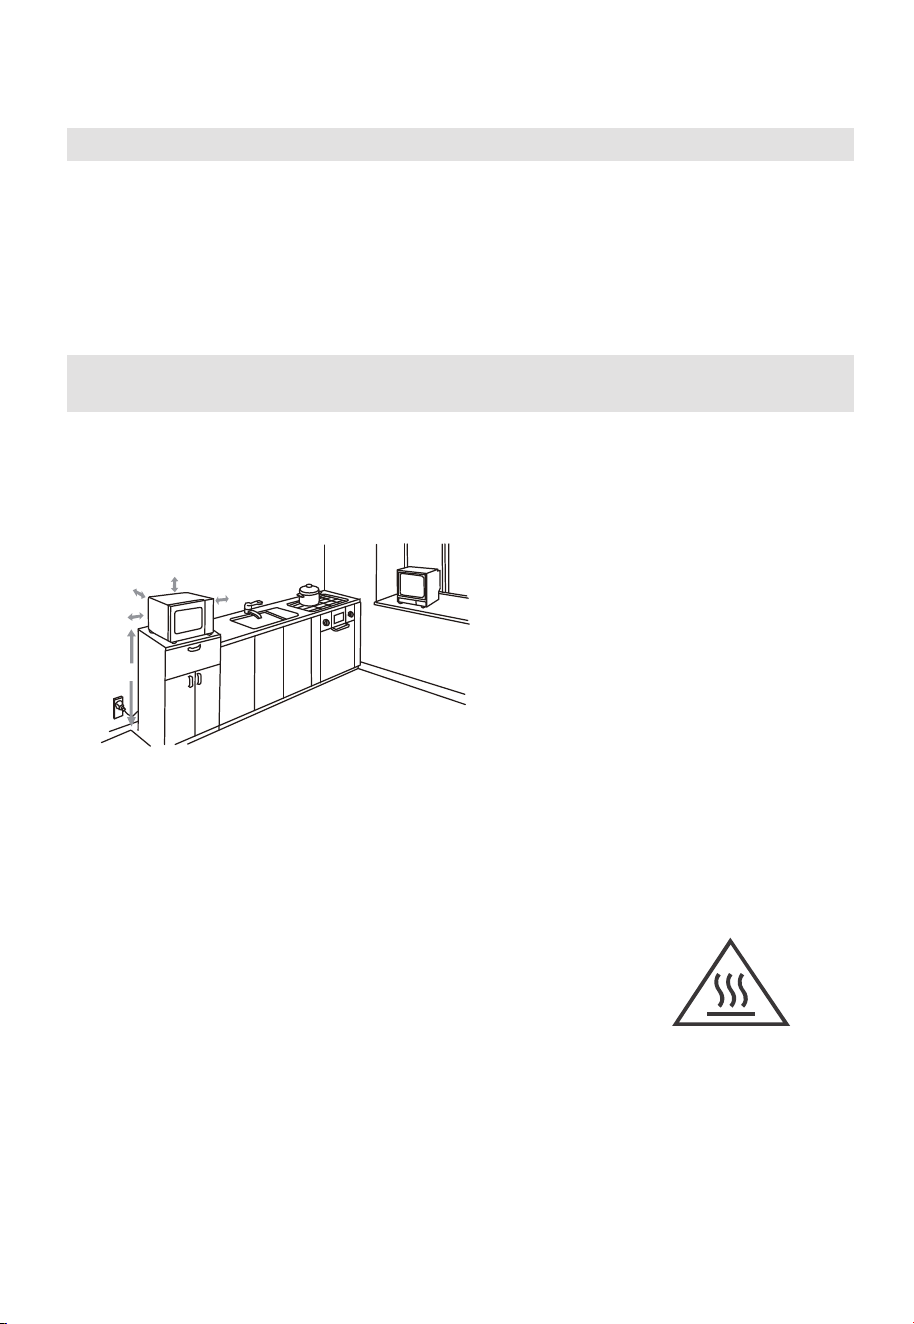
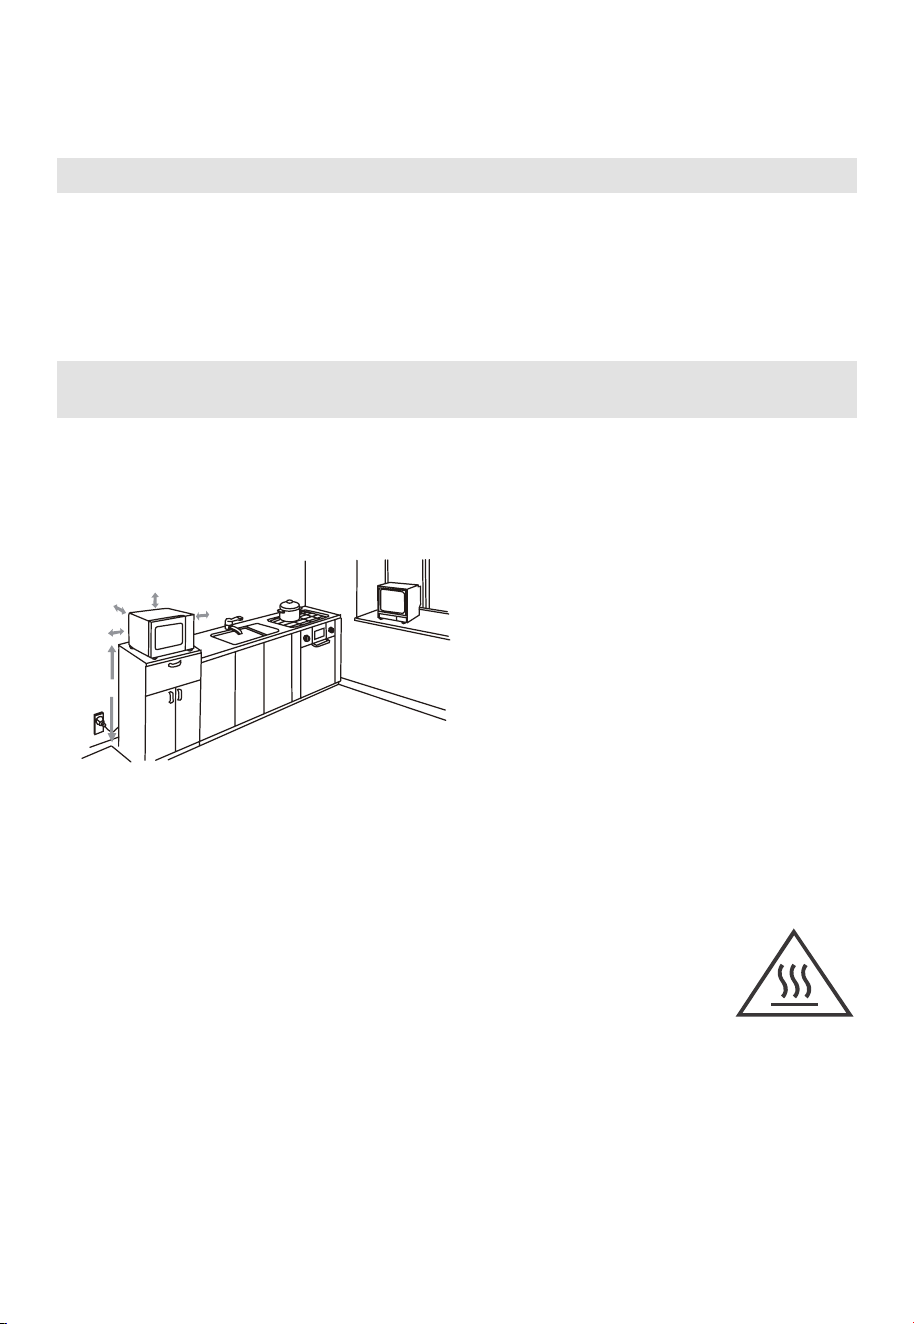
Countertop Installation
A minimum clearance of 3.0 inches
(7.5cm) is required between the oven
and any adjacent walls. One side must
(1) Leave a minimum clearance of 12
inches (30cm) above the oven.
(2) Do not remove the legs from the
bottom of the oven.
(3) Blocking the intake and/or outlet
openings can damage the oven.
(4) Place the oven as far away from
radios and TV as possible.
Operation of microwave oven may
cause interference to your radio or
TV reception.
Plug your oven into a standard
household outlet. Be sure the voltage
and the frequency is the same as the
voltage and the frequency on the
rating label.
WARNING: Do not install oven over a
range cooktop or other heat-producing
appliance. If installed near or over a heat
source, the oven could be damaged and
the warranty would be void.
3.0 inch(7.5cm)
3.0 inch(7.5cm)
12 inch(30cm)
OPEN
1. Select a level surface that provide
enough open space for the intake
and/or outlet vents.
be open. The minimum installation
height is 36 inches (91.4cm).
The accessible surface
may be hot during
operation.
2.
>36 inch(91.4cm)
Remove all packing material and accessories. Examine the oven for any damage
such as dents or broken door. Do not install if oven is damaged.
Cabinet: Remove any protective film found on the microwave oven cabinet
surface. Do not remove the Waveguide cover that is attached to the oven cavity
to protect the magnetron.
16
OPERATION
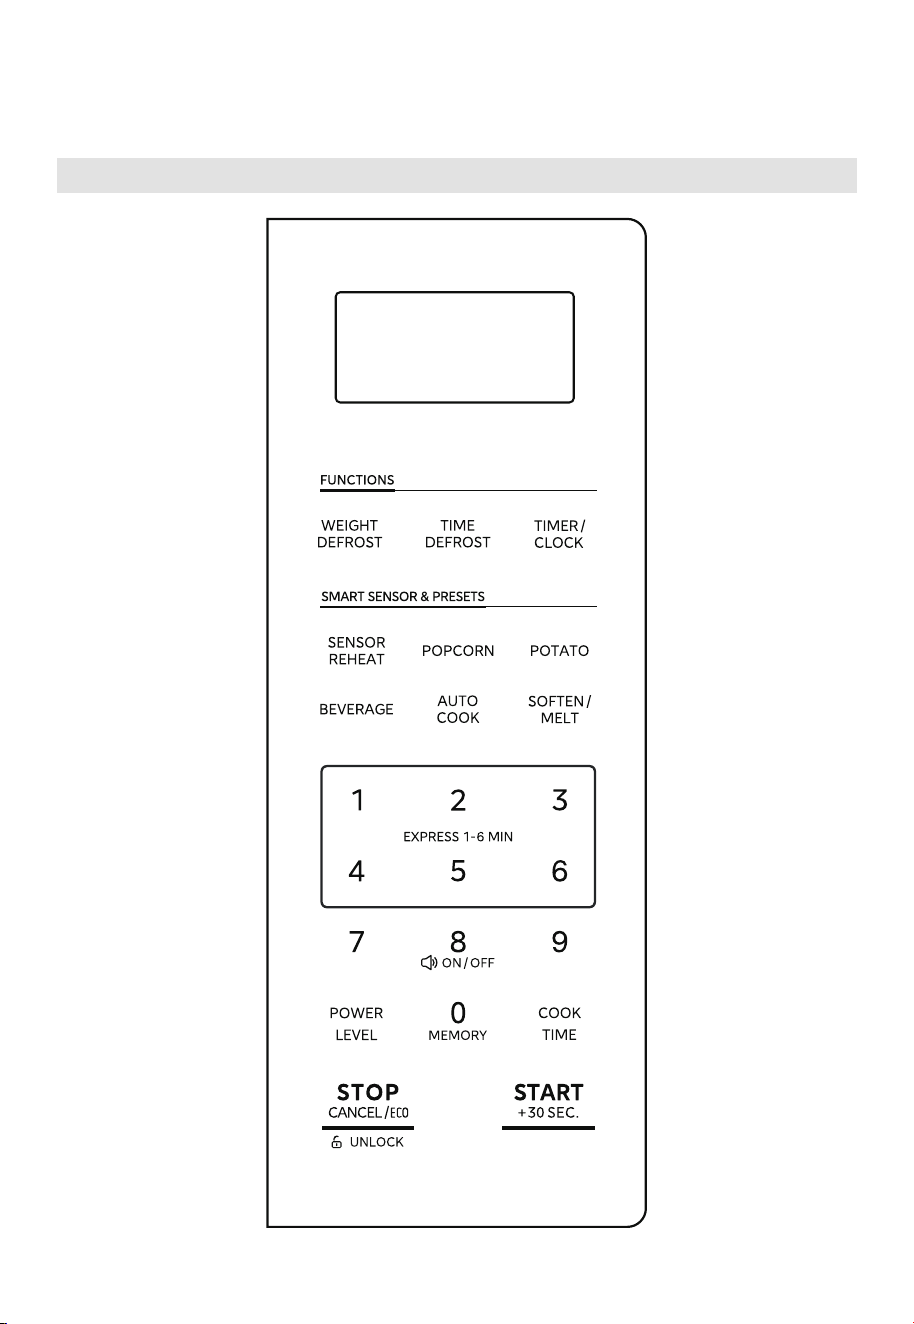
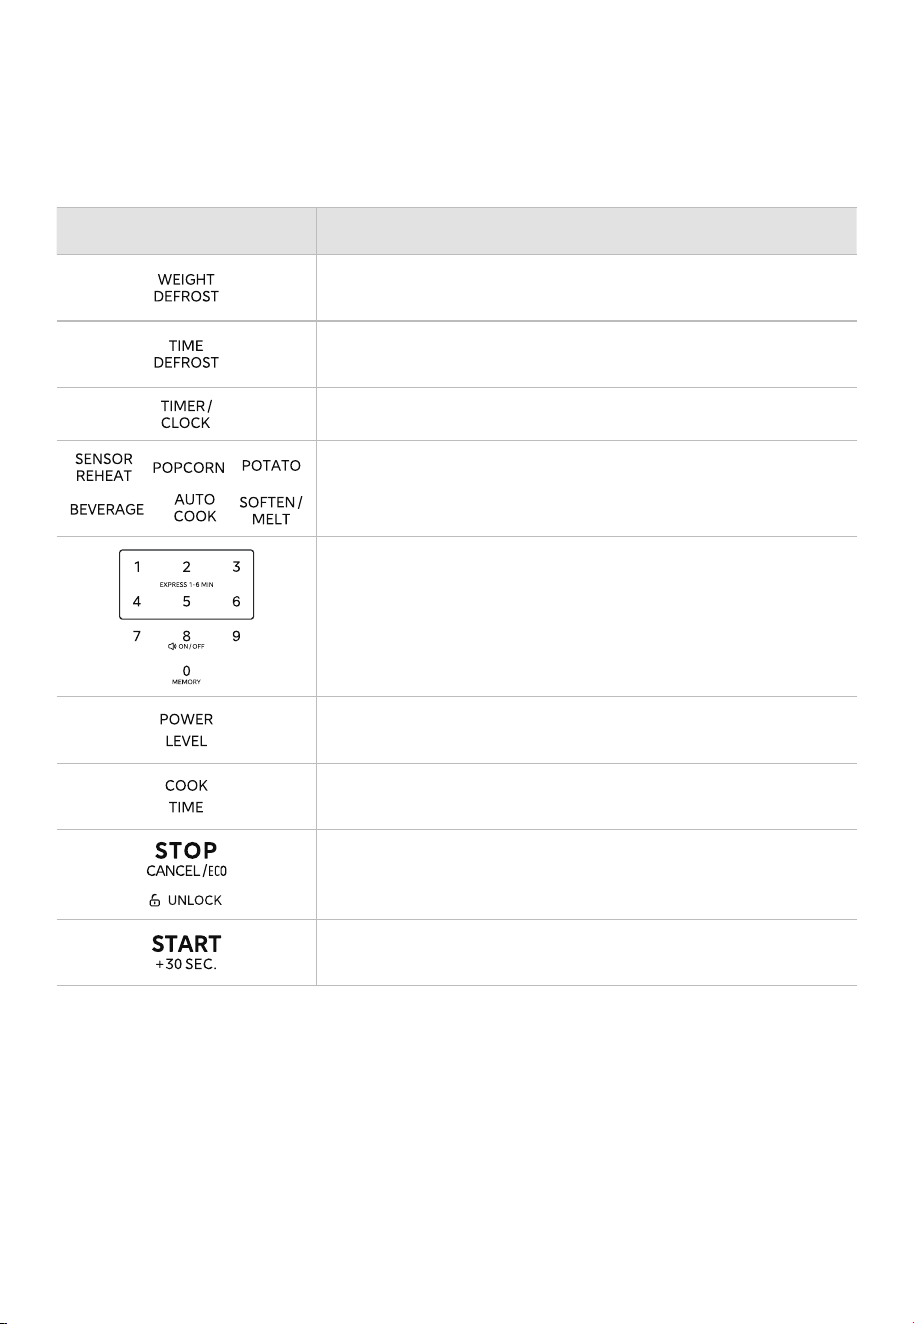
Control Panel
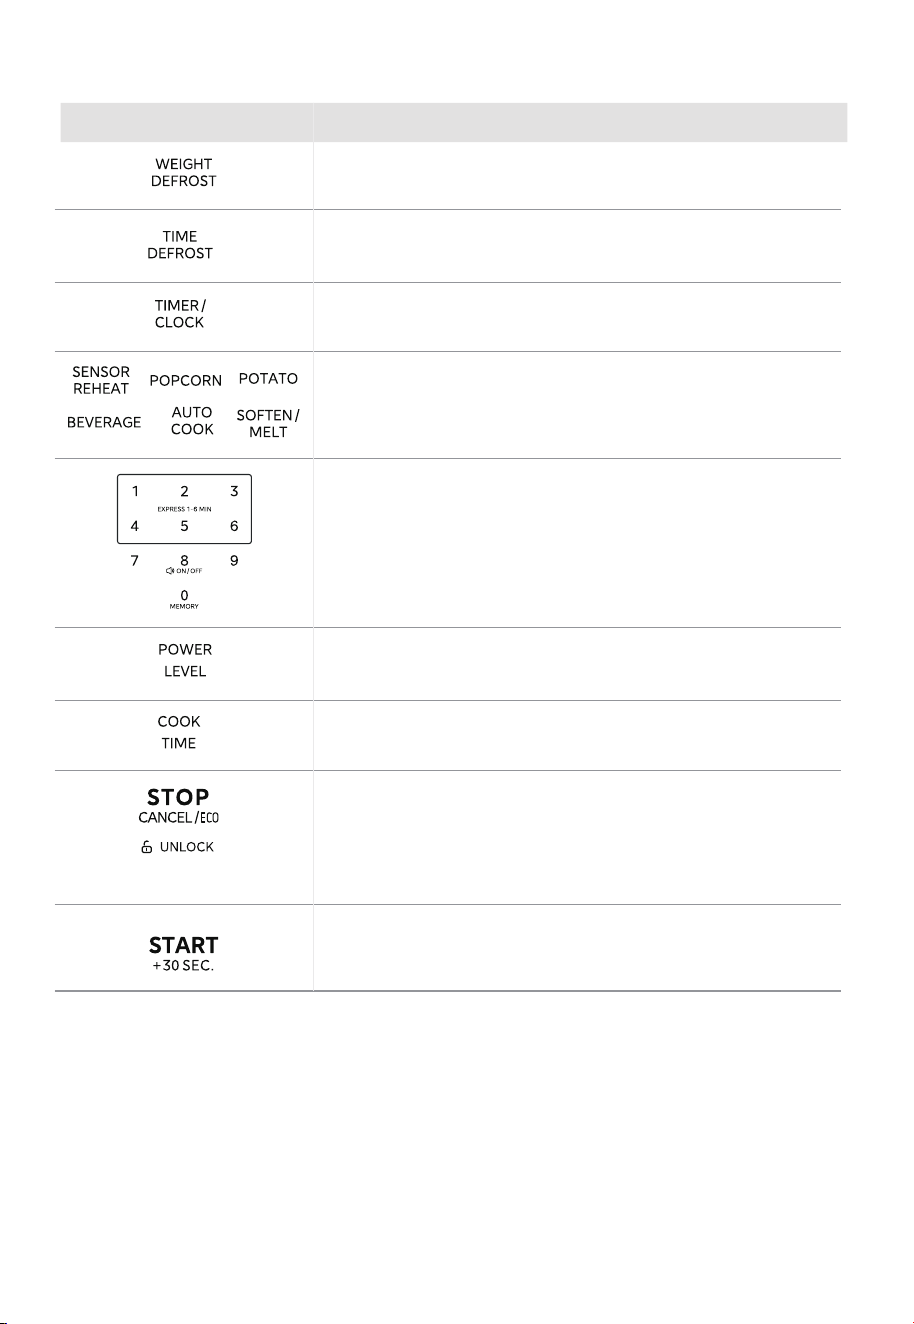
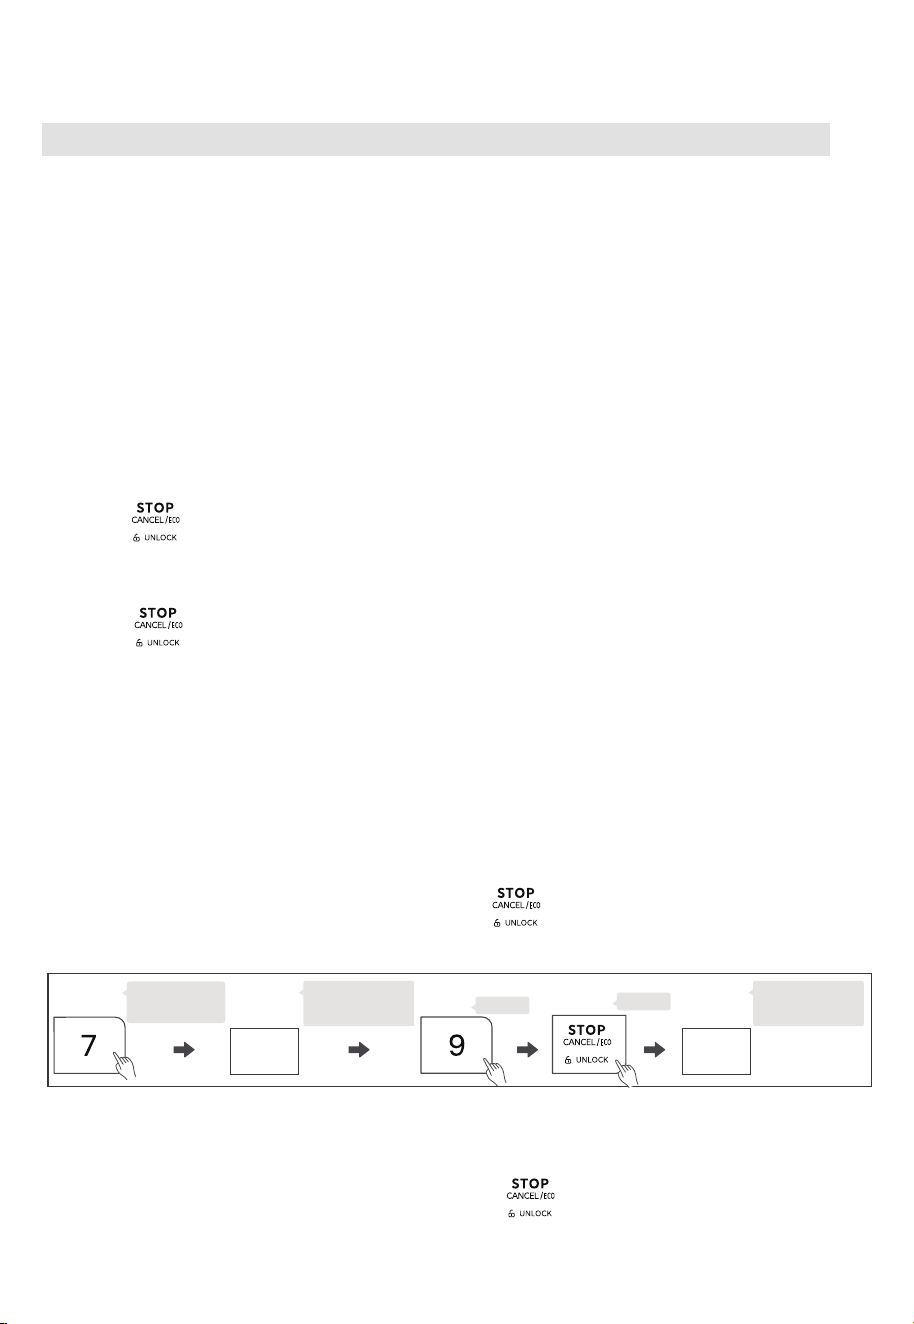
Quickly defrost frozen foods based on the selected
time
Quickly defrost frozen foods based on the selected
weight
Set power level for microwave operation
Countdown timer / Set time of day
Pause active cooking status / Cancel current
operation / Eco function / Lock function for children/
unlock
Start speedy cooking for 30 seconds / Start
operation / Add 30 seconds / Confirm input
Enter the microwave cooking time setting
Auto menu and sensor menu
Use the number keys to enter customized values /
Press the numbers “1-6” to start speedy cooking for 1
to 6 minutes /
Use the number “8” to enter the mute mode setting
17
BUTTON FUNCTION OVERVIEW
Button
Description
18
OPERATION
1. Safety Lock
Safety Lock is a system that safeguards against unintended activation of the oven,
providing a protective measure to ensure child safety.
Press during operation and open the door within 10 seconds, or the
safety lock will re-engage. The door will stay unlocked until cooking is initiated.
Or:
Press within 30 minutes after cooking is complete to manually disable
the door lock and switch to standby mode. If no key is pressed, the safety lock will
automatically disengage after 30 minutes.
Initiating the cooking automatically triggers the lock. The lock will also stay engaged
for 30 minutes after cooking ends.
Safety Lock is active by default. It will only be deactivated if the user chooses to do
so manually. Even in the event of a power disconnection, the oven will preserve the
state of the safety lock, whether it is activated or deactivated.
(1) How the safety lock works
(2) Unlock the door
(3) Deactivate the safety lock
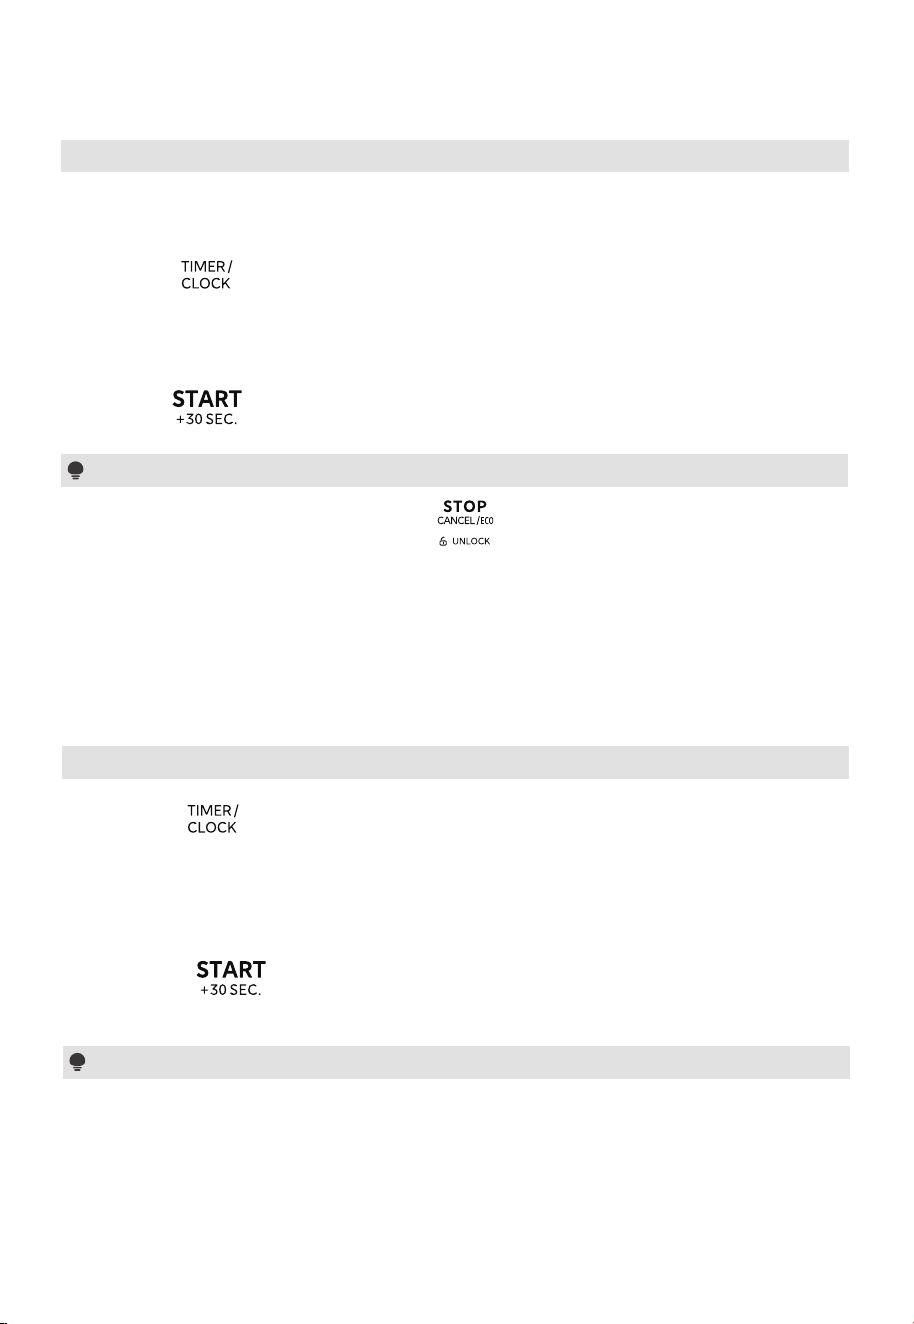
If there are no children in the house, you can choose to permanently deactivate the
safety lock function.
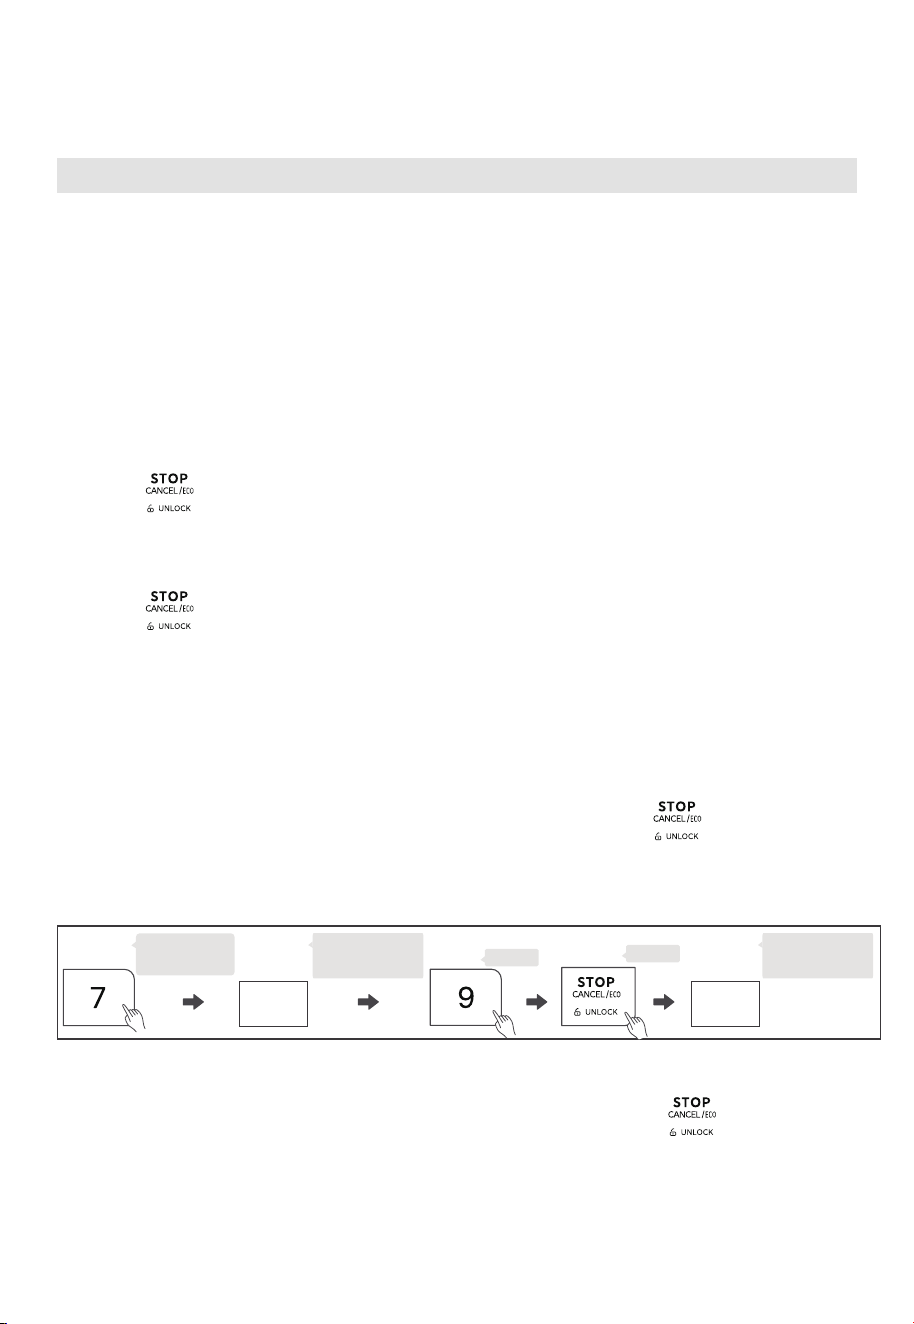
In standby mode, press and hold the number key “7” for two seconds. The screen
will display “Loc”. Then press “9” once and “ ” once in order sequentially.
The screen will display “ULoc”, indicating the successful deactivation of the safety lock.
Once
Once
Press and
hold 2s
The screen
displays
(4) Re-activate the safety lock
ULoc
In standby mode, press and hold the number key “7” for two seconds. The screen
will display “ULoc”. Then press “9” once and “ ” once in order sequentially.
The screen will display “Loc”, indicating the successful deactivation of the safety lock.
The screen
displays
Loc
19
OPERATION
(1) Press “ ” twice and then “00:00” will display.
(2) Press the number keys to enter the current time.
For example, time is 12:10 now, please press “1, 2, 1, 0” in turn.
(3) Press “ ” to confirm. The clock is set.
(1) Press “ ” once and then “00:00” will display.
(2) Press the number keys to set the desired time. The maximum time value is
“99:99”.
(3) Press “ ” to confirm. The timer starts counting down.
Setting the Clock 2.
Notes
(1) In the process of clock setting, if “ ” is pressed or if there is no
operation within 1 minute, the setting is invalid.
(2) To reset the clock, please repeat step 1 to step 3.
(3) The clock is a 12-hour display. If the clock is not set, it will not work when
powered.
3. Setting the Kitchen Timer
The kitchen timer is a timer.
Note
After connecting the oven to the power, the display shows “0:00”, the buzzer
sounds, and the oven enters standby mode.
OPERATION
(1) Press “ ” once, the screen will display “00:00”.
(2) Press the number keys to set the cooking time. The maximum time value is
“99:99”.
(3) Press “ ” once, and “PL10” will display.
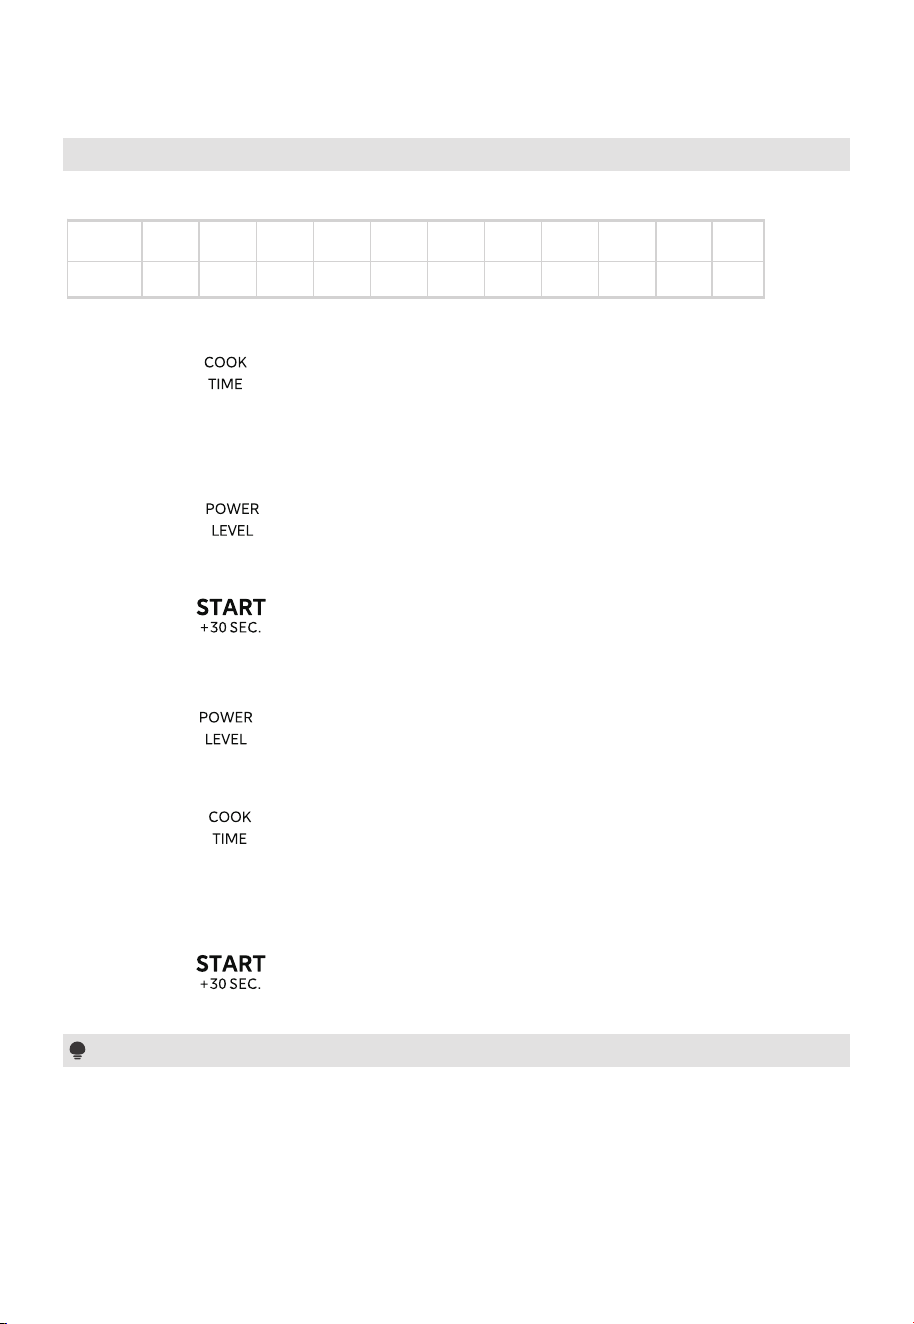
(4) Press the number keys to set the power level. The 11 power levels are available.
(5) Press “ ” to start cooking.
(1) Press “ ” once, and “PL10” will display.
(2) Press the number keys to set the power level. The 11 power levels are available.
(3) Press “ ” once, the screen will display “00:00”.
(4) Press the number keys to set the cooking time. The maximum time value is
“99:99”.
(5) Press “ ” to start cooking.
4. Microwave Cooking
Method 1:
Method 2:
The 11 power levels are available.
Power
Display
100%
PL10
90%
PL9
80%
PL8
70%
PL7
60%
PL6
50%
PL5
40%
PL4
30%
PL3
20%
PL2
10% 0%
PL1
PL0
Note
If “PL0” is selected, the oven will work with a fan for no power. You can use
this level to remove the odor of the oven.
20
OPERATION
5. Speedy Cooking
Note
(1) In standby mode, pressing the number keys 1 to 6 lets you quickly select a
cooking time from 1 to 6 minutes. Then you can press “ ” to increase
the cooking time. The maximum time value is “99:99”.
(2) In standby mode, press “ ” once to cook food at 100% power level
for 30 seconds. Each press on the same key can increase 30 seconds and the
maximum time value is “99:99”.
In the microwave and defrosting by time cooking state, each press on “ ”
can increase the cooking time by 30 seconds (except for the defrosting by weight
and auto menu).
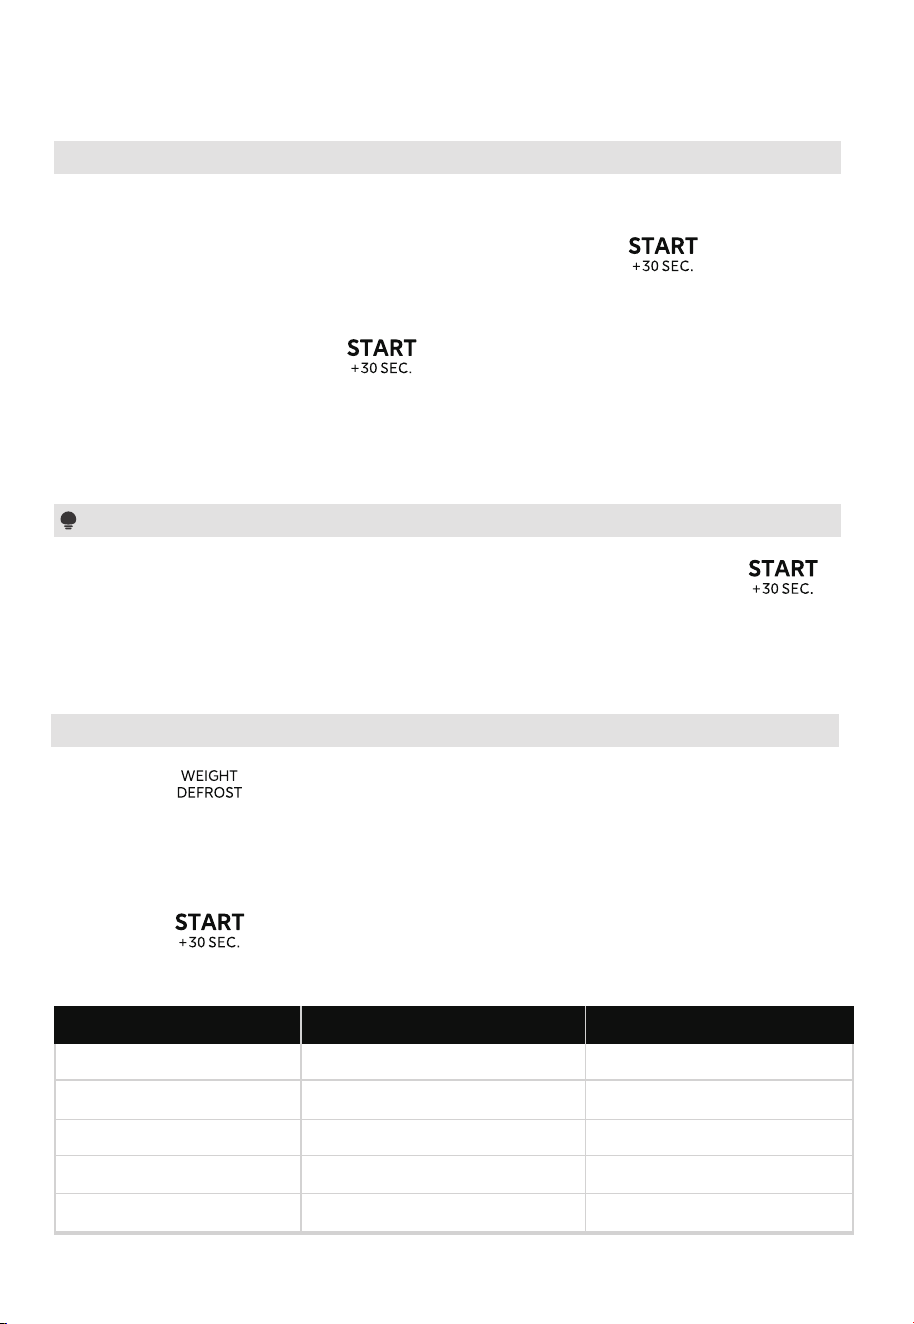
(1) Press “ ” repeatedly to choose the type of the food, and then “dEF1”
to “dEF5” will display.
(2) Press the number keys to set the weight of the food.
(3) Press “ ” to start defrosting.
6. Defrost by Weight
Meat
Chicken
Fish
4~70 Oz
4~70 Oz
4~70 Oz
Vegetable
Bread
4~32 Oz
4~24 Oz
Menu Chart
dEF1
dEF3
dEF4
dEF5
dEF2
21
Menu WeightDisplay
OPERATION
7. Defrost by Time
8. Lock Function for Children
You can use this function to disable the screen buttons and prevent your children
from accidentally turning the oven on.
To activate the lock:
In standby mode, press and hold “ ” for three seconds. A beep sounds,
and the locked icon will display.
To deactivate the lock:
In the locked state, press and hold “ ” for three seconds. A beep sounds.
Notes
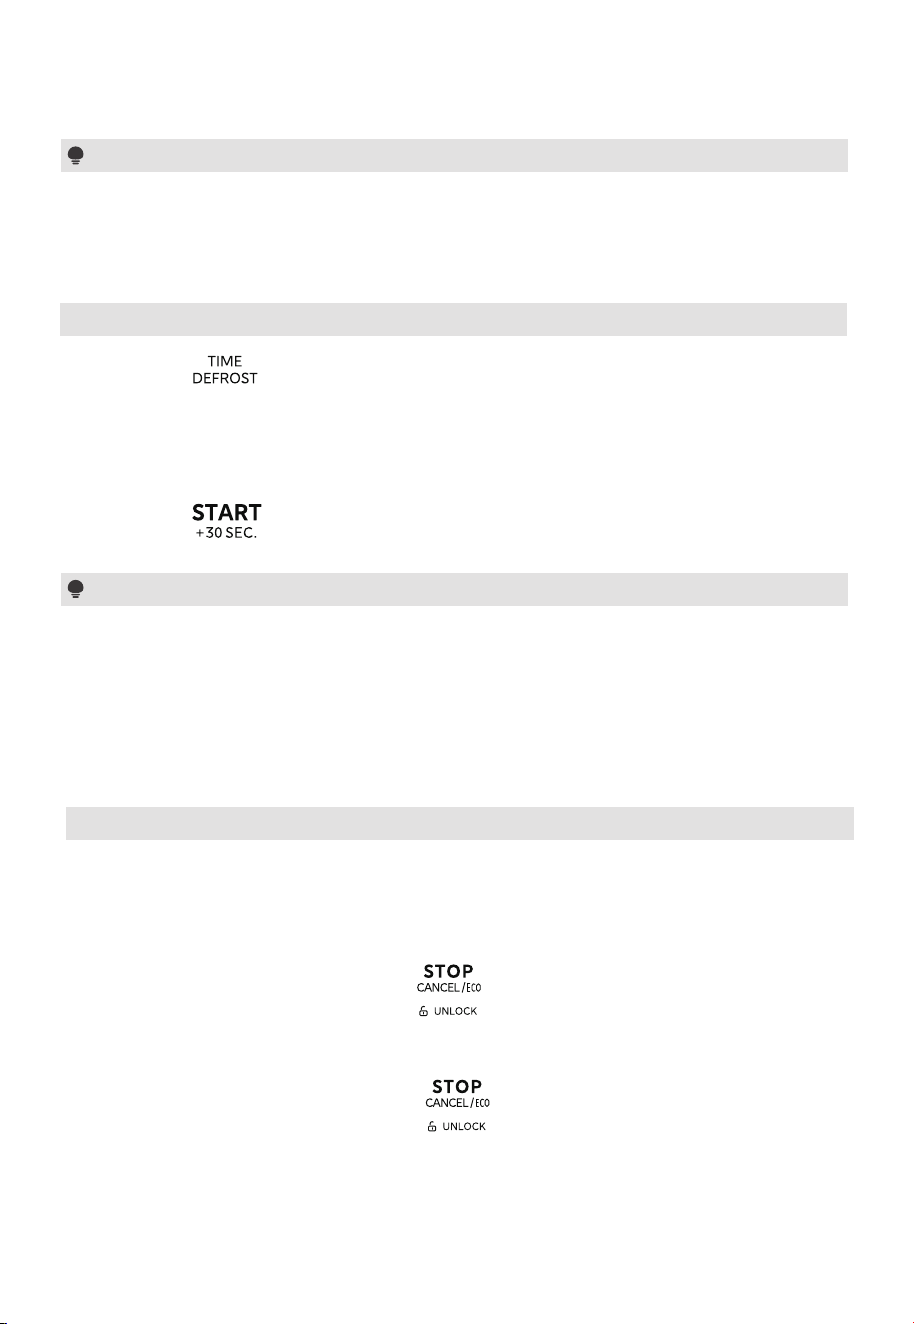
(1) Press “ ” once and then the screen will display “00:00”.
(2) Press the number keys to set the desired defrosting time. The maximum time
value is “99:99”.
(3) Press “ ” to start defrosting.
(1) The buzzer will sound to remind you to turn the food over during defrosting.
If no operation, the oven will continue working.
(2) The defrost power is PL3 and it cannot be changed.
Note
The buzzer will sound to remind you to turn the food over during defrosting.
If no operation, the oven will continue working.
22
OPERATION
9. Multi-Stage Cooking
Example: Defrost food for 10Oz and then cook with 50% microwave power for
7 minutes.
(1) Press “ ” once and then the screen will display “dEF1”.
(2) Press “1”, “0” to set the weight of the food to 10Oz.
(3) Press “ ” once, the screen will display “00:00”.
(4) Press “7”, “0”, and “0” to set the cooking time to 7 minutes.
(5) Press “ ” once and then “PL10” will display.
(6) Press “5” to set the power level to PL5.
(7) Press “ ” to start cooking.
(1) Two cooking stages can be set in multi-stage cooking.
(2) If you set the defrost function, it will work automatically in the first stage.
(3) The kitchen timer, speedy cooking, and auto menu cannot be set as one of
the multi-stage.
Notes
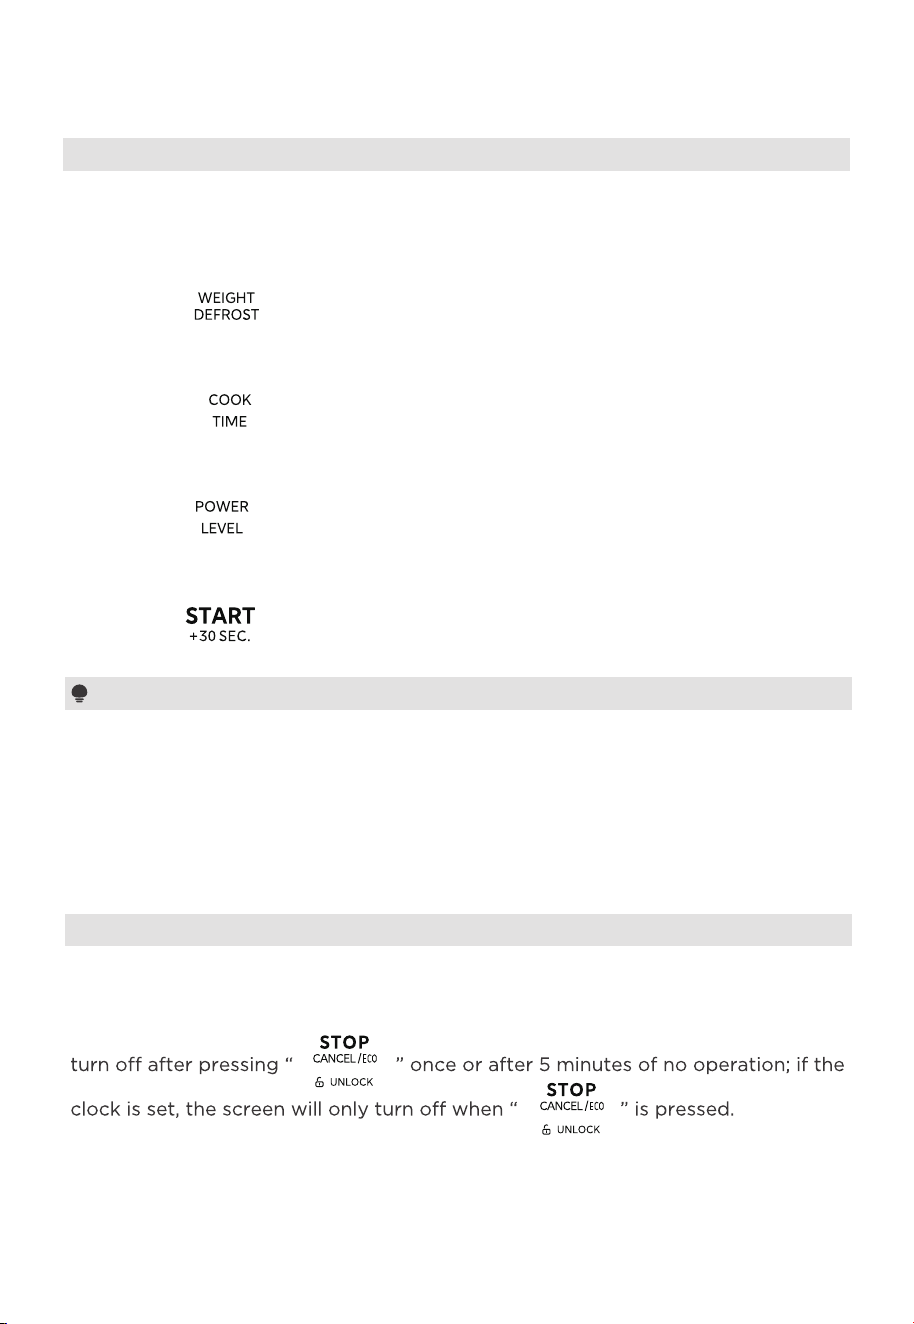
To enter ECO mode:
In standby mode with the oven door closed, if the clock is not set, the screen will
To cancel ECO mode:
In ECO mode, pressing any key or opening the door will cancel it.
10. ECO Function
23
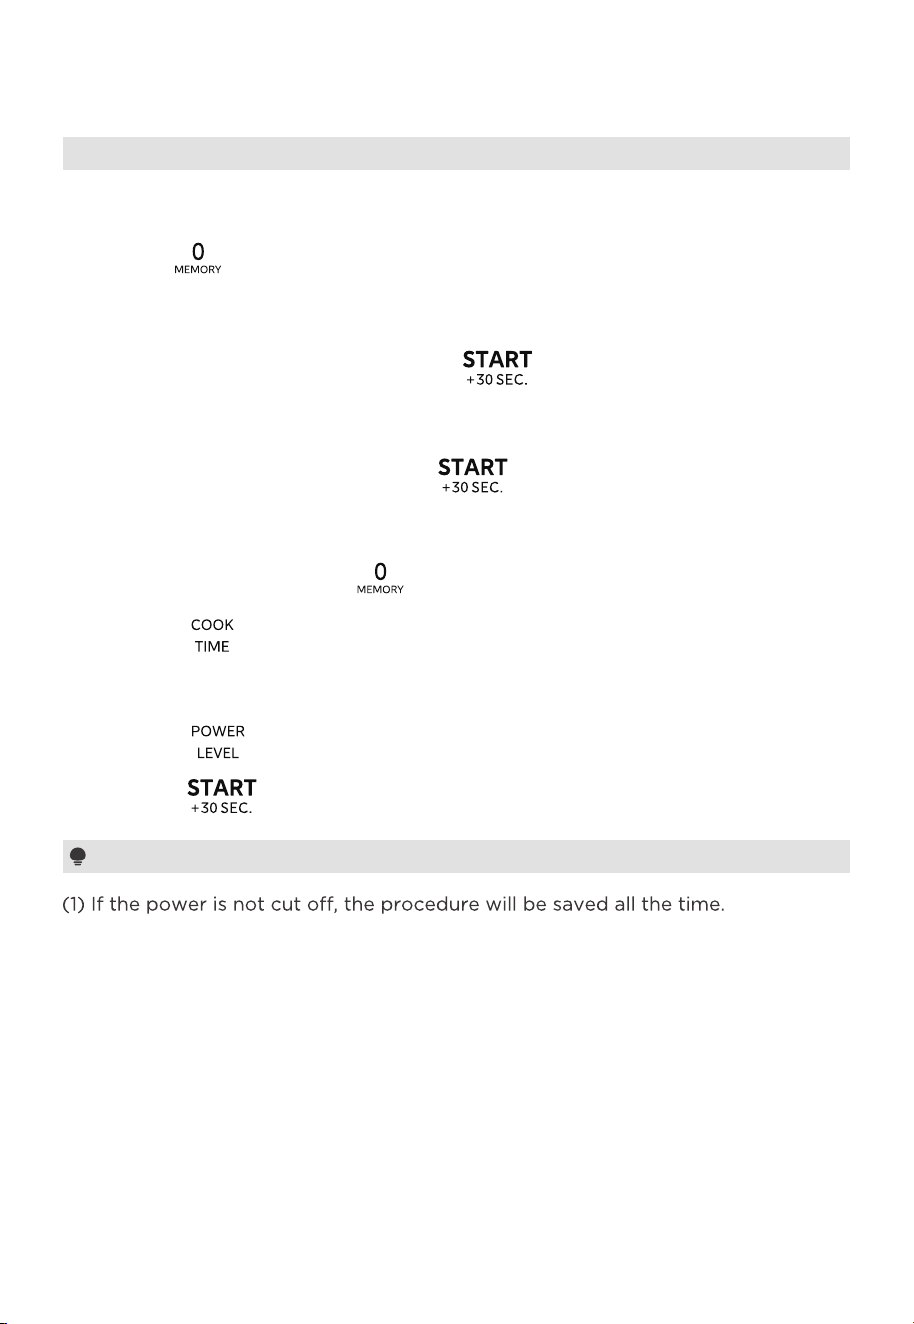
11. Memory Function
Notes
OPERATION
You can save the settings for a dish in the memory and call it up again.
(1) Press “ ” repeatedly to select the memory 1-3 procedure. “1”, “2”, and
“3” will display in order.
(2) If the procedure has been set, press “ ” to start working. Otherwise,
please continue to set.
(3) After finishing the setting, press “ ” once to save the procedure.
Example: Set memory 2 (cook food with 80% microwave power for 3 minutes.)
(1) In standby mode, press “ ” twice, and then the screen will display “2”.
(2) Press “ ” once and then press the number keys “3”, “0”, and “0”
in order.
(3) Press “ ” once and then press the number key “8”.
(4) Press “ ” to save the setting and “2” will display.
(2) The auto menu, kitchen timer, and speedy cooking cannot be set as a
memory function.
24
OPERATION
12. Auto Menu
25
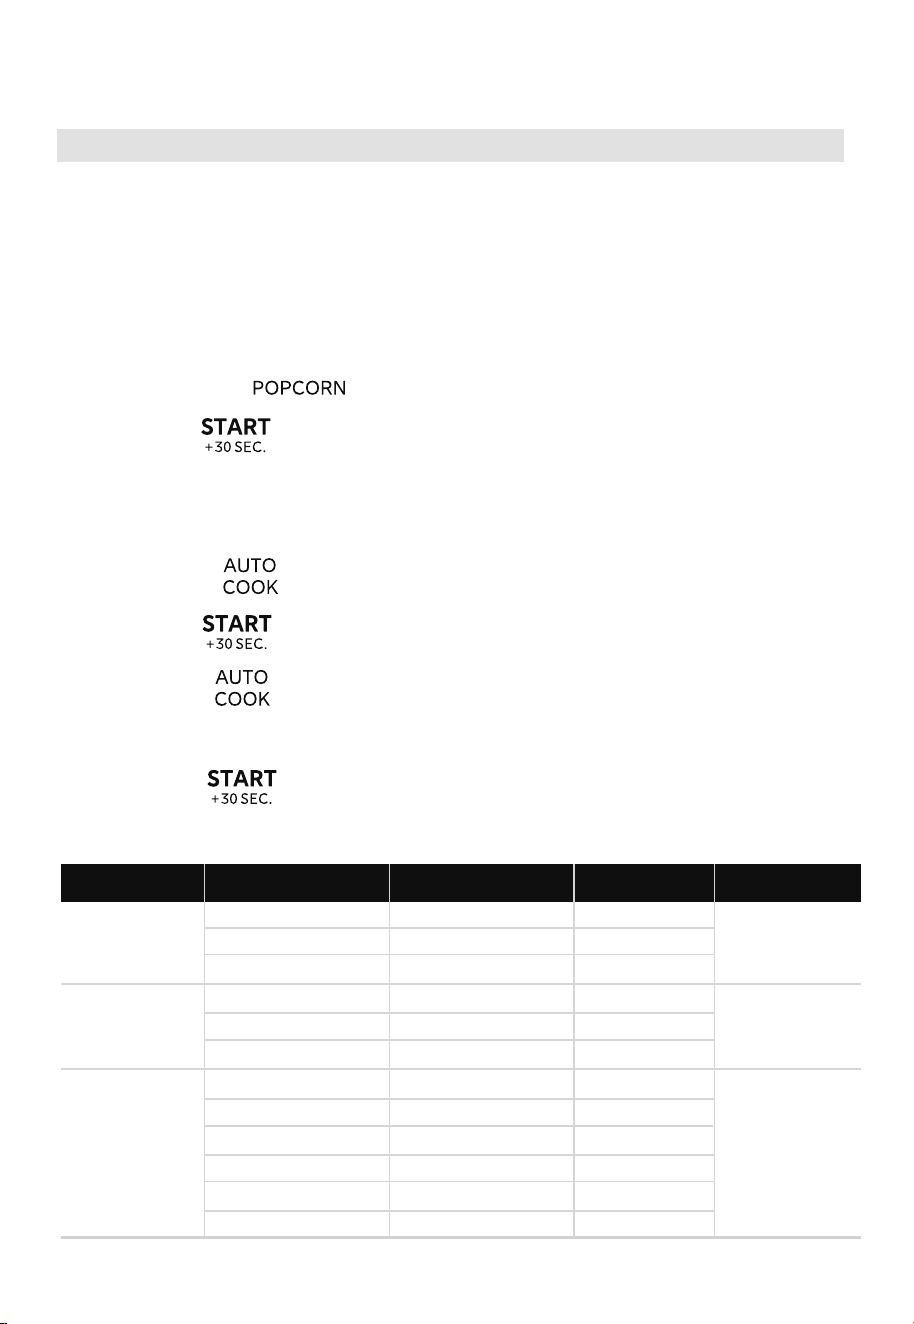
(1) First press the corresponding menu key once, the default weight will display.
(2) Press the corresponding menu key repeatedly or press the corresponding
number key to set the weight of the food.
Example: Press “ ” again or press “2” and then “3.0 Oz” displays.
(1) Press “ ” to start cooking.
(1) Press “ ” repeatedly until “AC10” displays.
(2) Press “ ” to confirm.
(3) Press “ ” repeatedly or press the corresponding number key to
set the weight of the food.
(4) Press “ ” to start cooking.
For “Popcorn”, and “Beverage”:
For “Bacon”:
Menu Chart
Menu Display Power
PL10
PL10
PL10
Popcorn
Beverage
Bacon
Weight
1.75 Oz1
3.0 Oz
1.75 Oz
3.0 Oz
3.3 Oz3.3 Oz
1 Slice
2 Slices
3 Slices
4 Slices
5 Slices
6 Slices
1
2
3
4
5
6
1
2
3
4
5
6
2
3
1 Cup (120ml) 1
2 Cups (240ml) 2
3 Cups (360ml) 3
1
2
3
Number Key
(AC10)
OPERATION
26
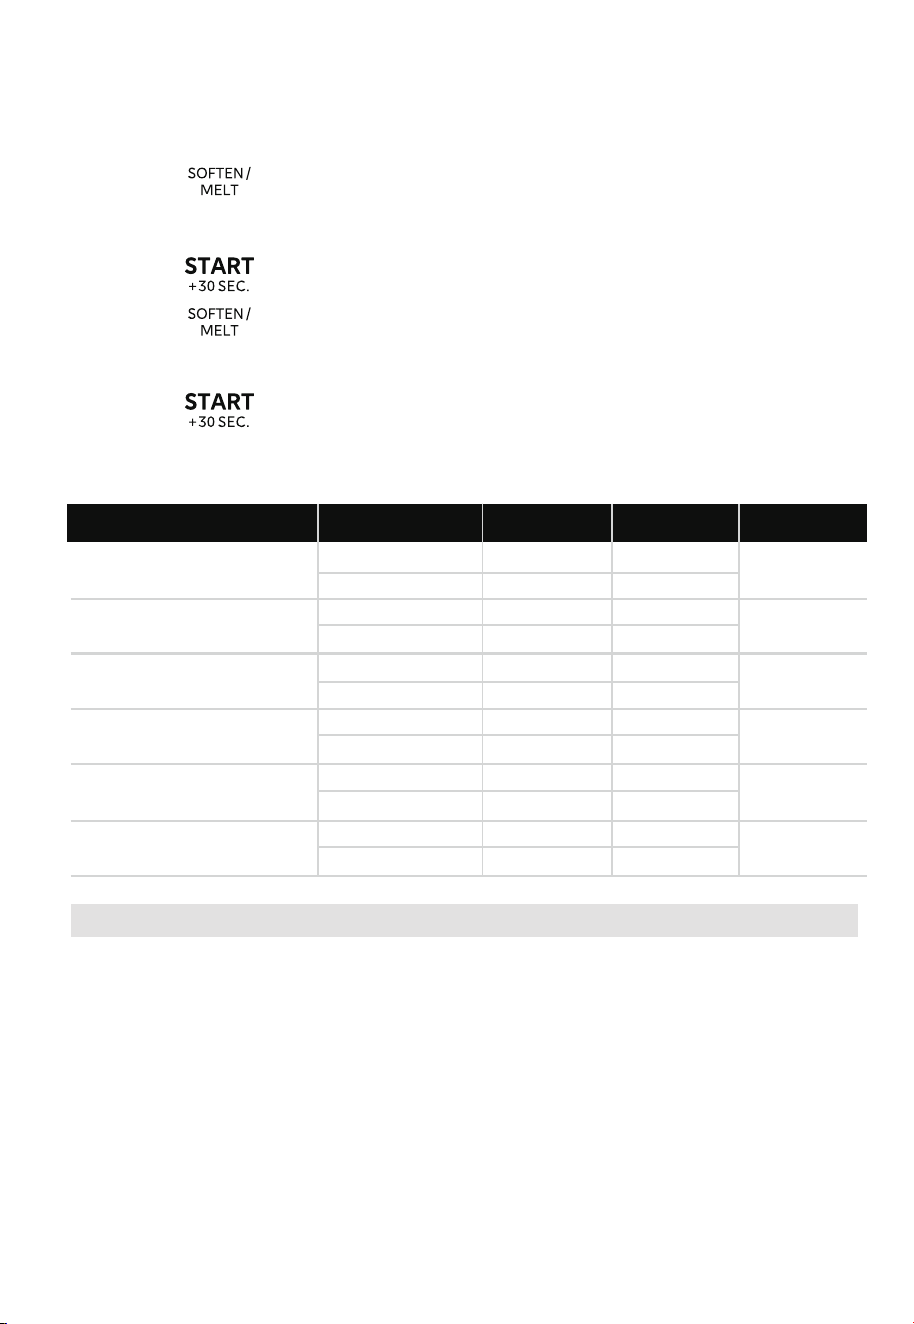
(1) Press “ ” repeatedly to set the type of the food. "So-1, So-2, So-3,
So-4, So-5, So-6" are available.
(2) Press “ ” to confirm.
(3) Press “ ” repeatedly or press the corresponding number key to set the
weight of the food.
(4) Press “ ” to start cooking.
For “Soften/Melt”:
Menu Chart
Menu Display Power
PL5
PL3
PL3
PL5
PL5
PL5
Soften Butter
(So-1)
Soften Cream Cheeese
(So-2)
Soften Ice Cream
(So-3)
Melt Butter
(So-4)
Melt Chocolate
(So-5)
Melt Marshmalls
(So-6)
Weight
4 Oz
8 Oz
4 Oz
8 Oz
5 Oz
10 Oz
1
2
1
2
1
2
4 Oz
8 Oz
3 Oz
8 Oz
Pint
1.5 Quart
4 Oz
8 Oz
4 Oz
8 Oz
5 Oz
10 Oz
4 Oz
8 Oz
3 Oz
8 Oz
16 Oz
48 Oz
1
2
1
2
1
2
Number Key
13. Sensor menu
Sensor cook allows you to cook many of your favorite foods without selecting a
cooking time and power level. The microwave oven automatically determines the
required cooking time for each food item. And the sensor menus will cook with
microwave power.
OPERATION
27
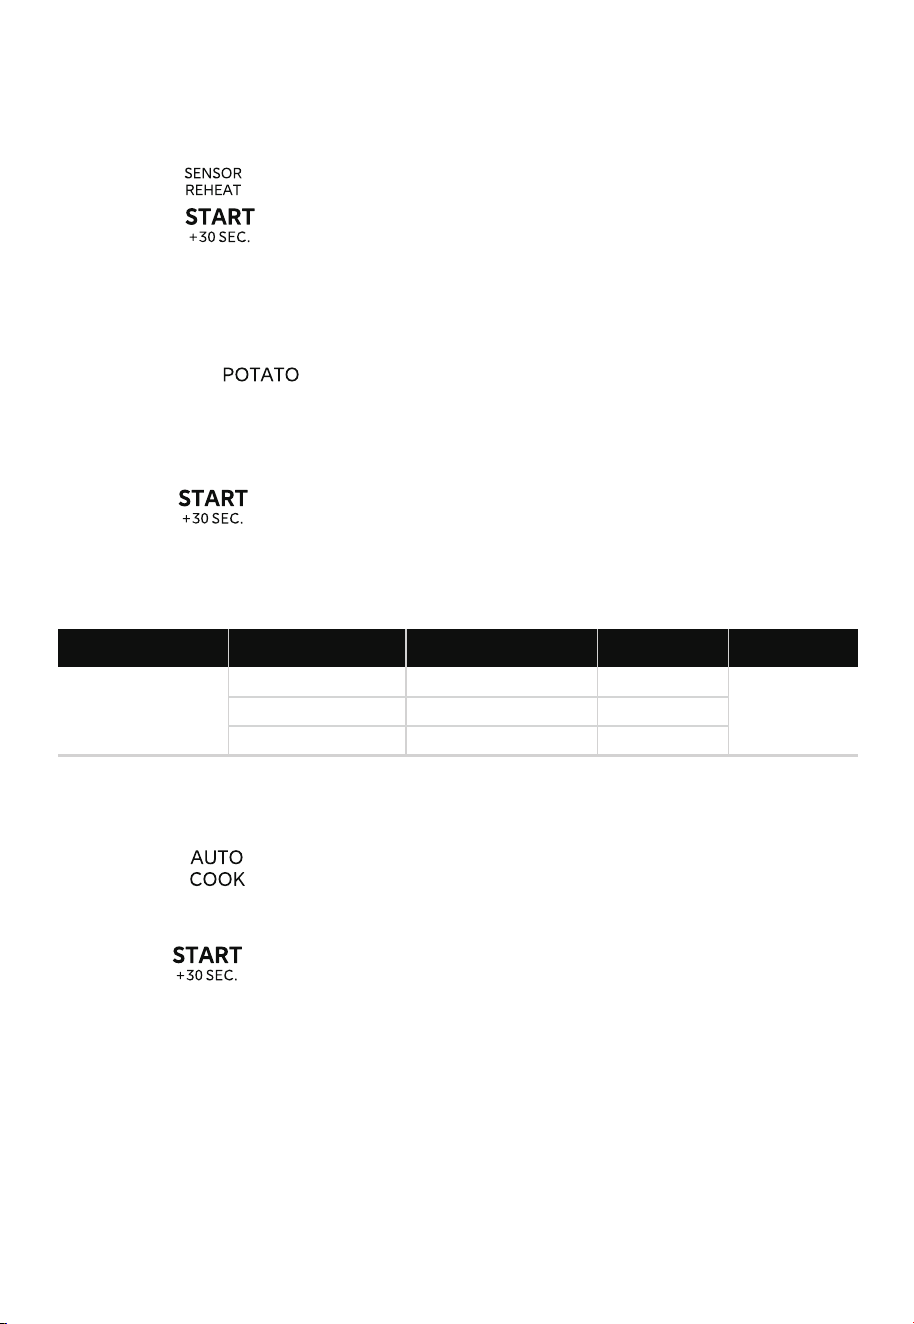
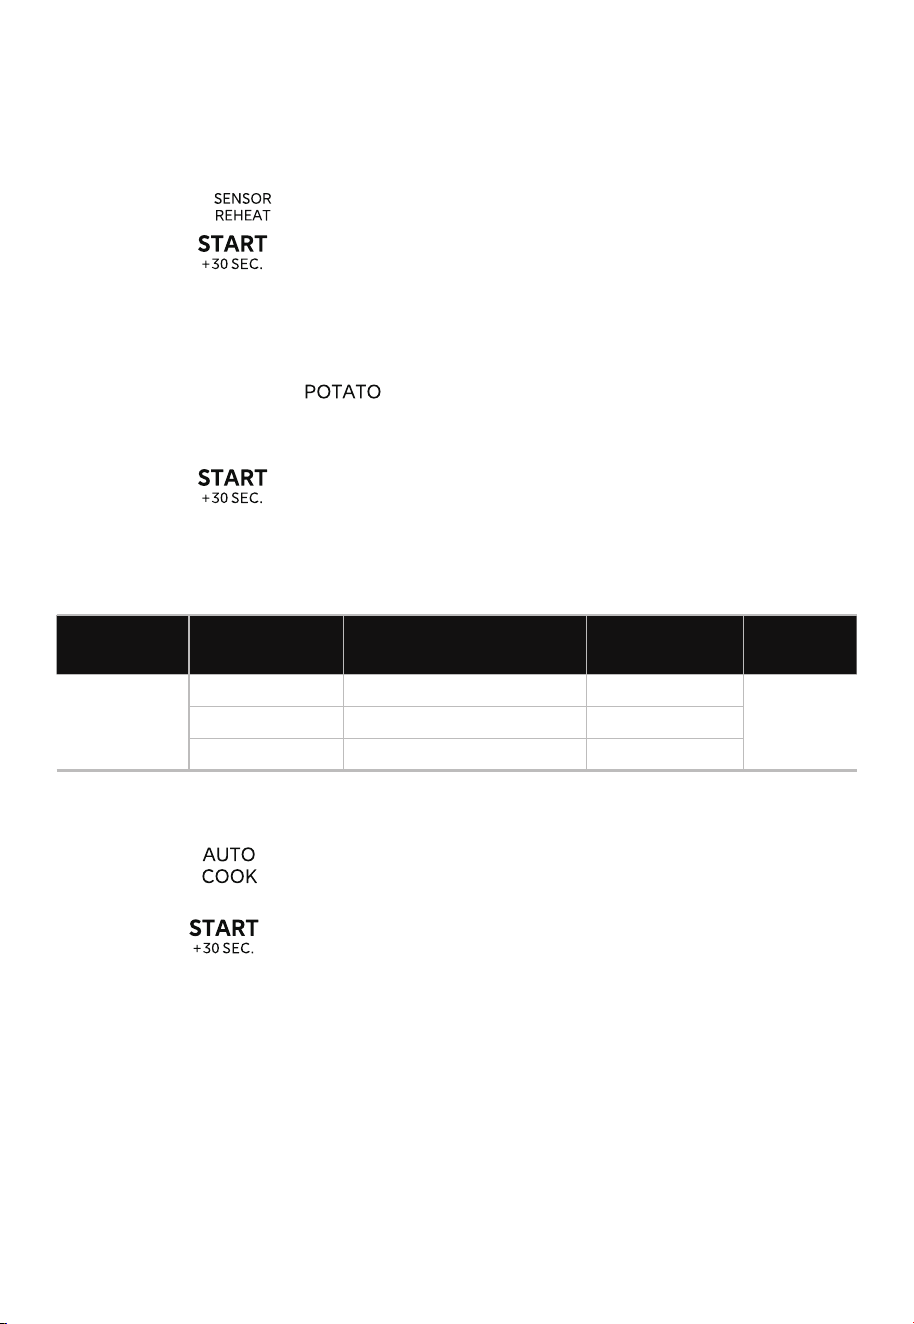
(1) Press “ ” once and then “SC-1” will display.
(2) Press “ ” to start sensing.
When the sensing is complete, the calculated cooking time will start to count down.
For “Sensor Reheat”:
(1) First press “ ” once, and then “1” will display.
(2) Press the corresponding menu key repeatedly or press the corresponding
number key to set the weight of the food.
(3) Press “ ” to start sensing.
When the sensing is complete, the calculated cooking time will start to count down.
For “Potato”:
(1) Press repeatedly to choose the type of the food, and then
“AC01” to “AC09” will display.
(2) Press to start sensing. When the sensing is complete, the calculated
cooking time will start to count down.
For “Auto Cook”:
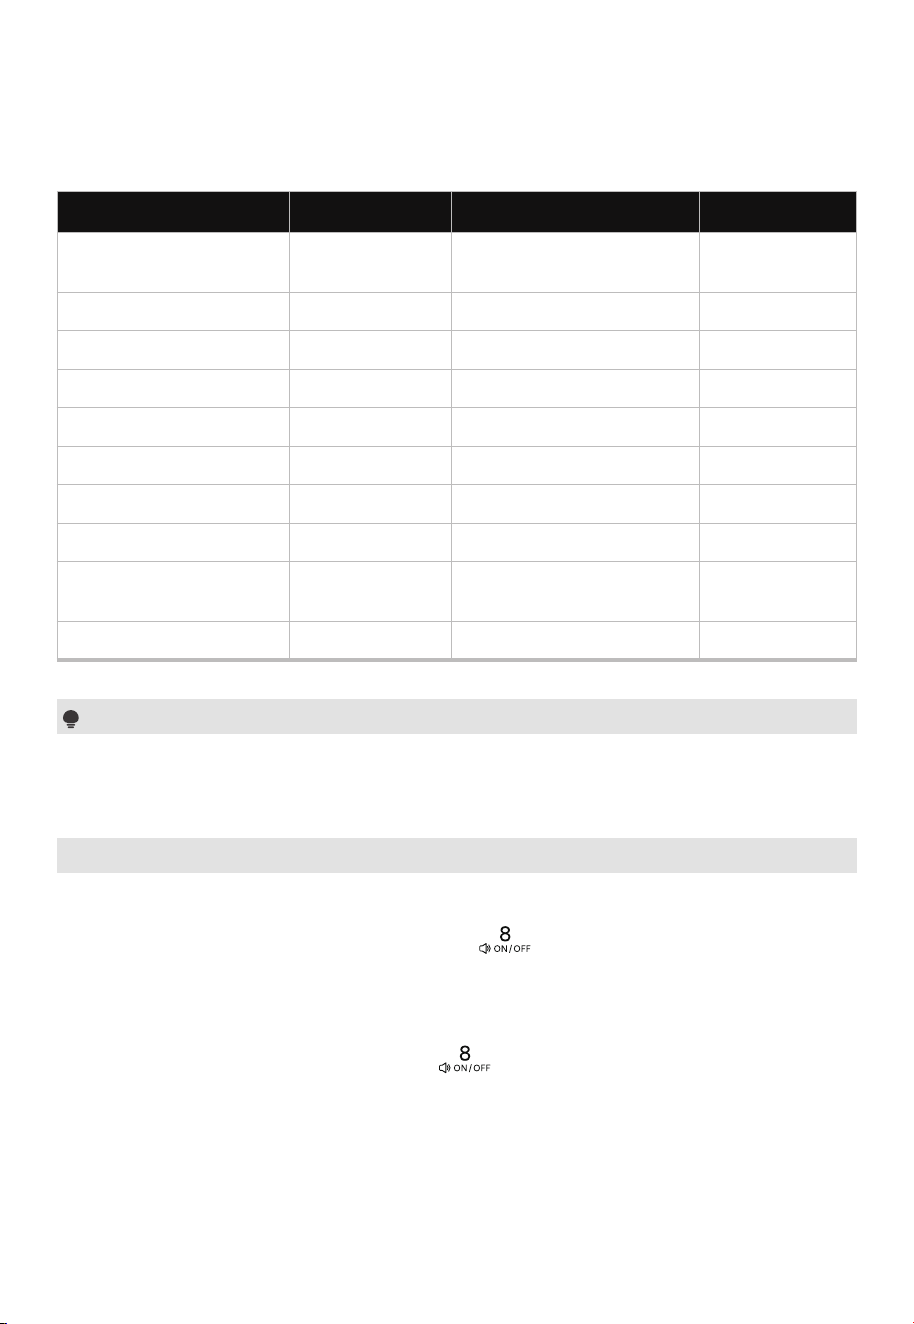
Menu Chart
Menu Display Power
PL10Potato
Weight
1 (about 8 Oz)
2 (about 16 Oz)
3 (about 24 Oz)
1
2
3
1
2
3
Number Key
To activate the mute mode:
In standby mode, press and hold “ ” for three seconds. The buzzer will
sound, and “OFF” will display. When you press the key, it does not make a sound.
To deactivate the mute mode:
In mute mode, press and hold “ ” for three seconds. The buzzer will
sound, and “On” will display.
13. Mute mode
OPERATION
28
Menu Chart
Menu Display Power
PL10Sensor Reheat
Weight
8~16 OzSC-1
PL10/PL8Pizza 6~12 OzAC01
PL10/PL0Frozen Vegetable 6~16 OzAC02
PL10/PL0Fresh Vegetable 6~16 OzAC03
PL10/PL5Oatmeal 2~4 OzAC04
PL10/PL5Soup 1~2 Cups (200ml/cup)AC05
PL10/PL8Pasta 1.75~5.5 OzAC06
PL10/PL5Rice 0.5~1.5 CupsAC07
PL10/PL5Frozen entrée 6~32 OzAC08
PL10/PL0Fish Fillet 4~16 OzAC09
Note
Do not open the oven door during the sensing process, or the program will be
cancelled.
OPERATION
14. Inquiring Function
(1) If the clock has been set, the current time will display for three seconds by pressing
“ ” once in the cooking state.
(2) In the microwave cooking state, press “ ” to inquire about the power level.
It will display for three seconds.
29
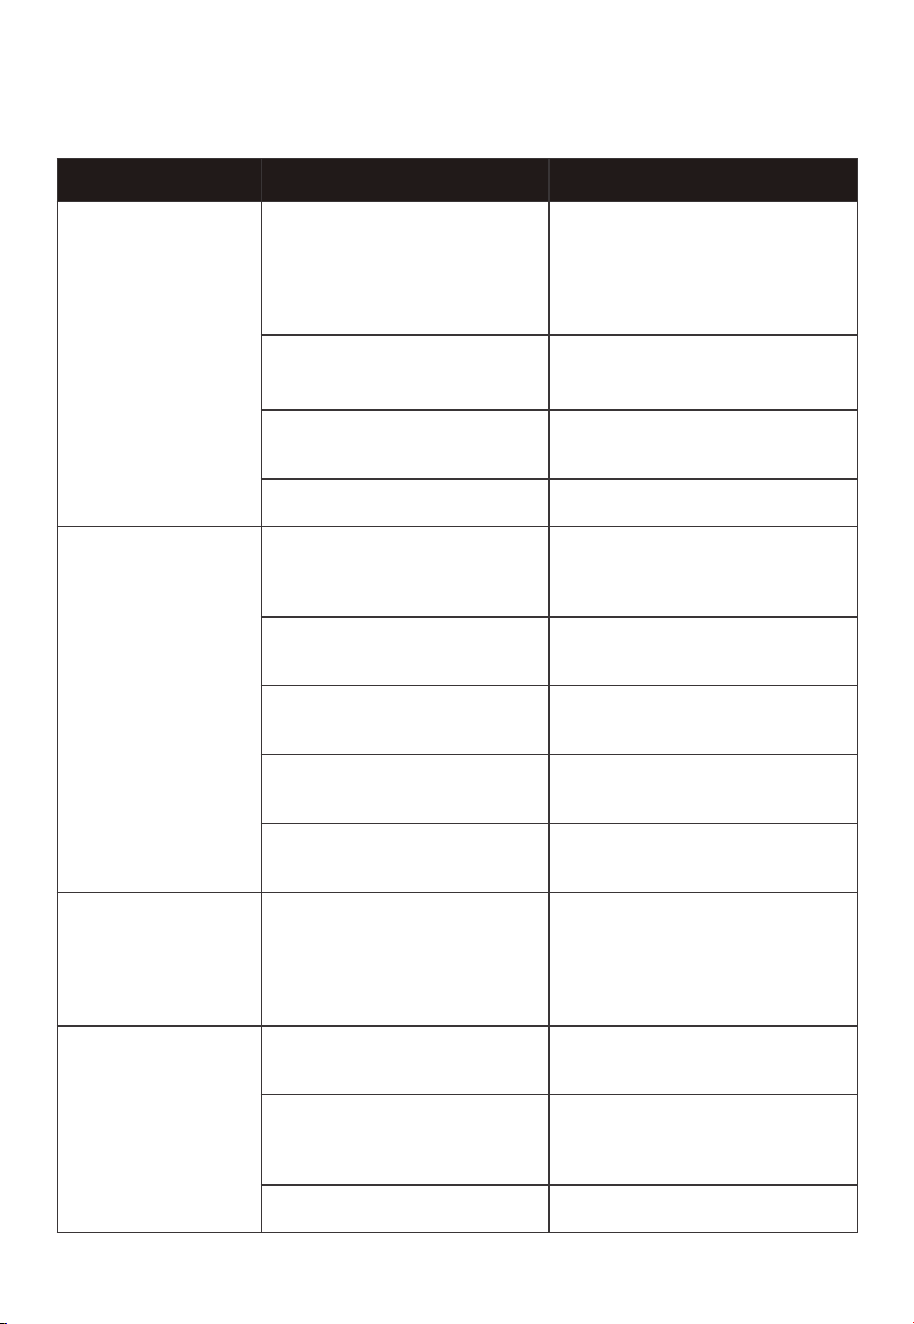
The appliance is
not working.
Make sure the door is properly
closed.
The door is not closed
well.
No heating
COMMON PROBLEM POSSIBLE CAUSE POSSIBLE REMEDY
Troubleshooting
Before calling for service
Malfunctions can occur in all electrical appliances. This does not necessarily mean
there is a defect in the appliance. For this reason, please check the tables to see if you
can correct the malfunction. Read the troubleshooting information before contacting
after-sales service. This will avoid unnecessary repair costs. If you cannot solve it by
yourself, please contact your nearest brand authorized service center.
WARNING-Risk of injury!
Improper repairs are dangerous
Repairs to the appliance should only be carried out by professional technician.
If the appliance is defective, call Customer Service.
Never try to repair a defective or suspected defective appliance by yourself.
There has been a power
cut.
Unplug, then plug again tightly.
Microwave ovens make
noise while working, but
if the noise becomes
unusually loud or unusual,
it may be due to the
turntable was not placed
in the correct position.
(For the model with a
turntable).
Place the turntable in the
correct position.
Noise
The mains plug of the
power cord is not
plugged in.
Check whether the lighting in
your kitchen or other appliances
are working.
Check whether food remains or
foreign material are trapped in
the door, and make sure the
door is properly closed.
The door is not fully
closed.
30
31
COMMON PROBLEM POSSIBLE CAUSE POSSIBLE REMEDY
Troubleshooting
Improper defrosting
The microwave power
setting is set to lower.
The food is colder than
usual.
Materials to be avoided
were used.
The cooking time, and
power level is not suitable.
Use microwave-safe
cookware only.
Unevenly cooked
foods;
Undercooked foods
Materials to be avoided
were used.
The food is not defrosted
completely.
Use microwave-safe
cookware only.
Overcooked foods
The microwave power
setting is set to higher.
The cooking time, and
power level is not suitable.
Use correct the cooking time,
and power level.
The microwave is
sparking, and arcing
occurs.
Materials to be avoided
were used.
Use microwave-safe
cookware only.
It is forbidden to run the oven
without any food inside. It is
very dangerous.
Use correct the cooking time,
and power level.
The food is not turned
over or stirred.
Turn over or stir the food.
Completely defrost food.
Use correct the cooking
time, and power level.
The cooking time, and
power level is not suitable.
The food is not turned or
stirred.
Turn or stir the food from time
to time during cooking.
Spilled food remains in
the cavity.
Clean the cavity with a
wet towel.
-
-
The microwave power
setting is set to lower.
The oven is operated
with no food in it.
logo, word marks, trade name, trade dress and all versions thereof are
trademarks, copyrights and other intellectual property rights, and all goodwill derived
from using any part of an Midea trademark. Use of Midea trademark for commercial
purposes without the prior written consent of Midea may constitute trademark
infringement or unfair competition in violation of relevant laws.
This manual is created by Midea and Midea reserves all copyrights thereof. No entity or
individual may use, duplicate, modify, distribute in whole or in part this manual, or
bundle or sell with other products without the prior written consent of Midea.
All the described functions and instructions were up to date at the time of printing this
manual. However, the actual product may vary due to improved functions and designs.
TRADEMARKS, COPYRIGHTS
AND LEGAL STATEMENT
32
DISPOSAL AND RECYCLING
Important instructions for environment
Compliance with the WEEE Directive and Disposing of the Waster Product:
This product complies with EU WEEE Directive (2012/19/EU). This product bears a
classification symbol for waster electrical and electronic equipment (WEEE).
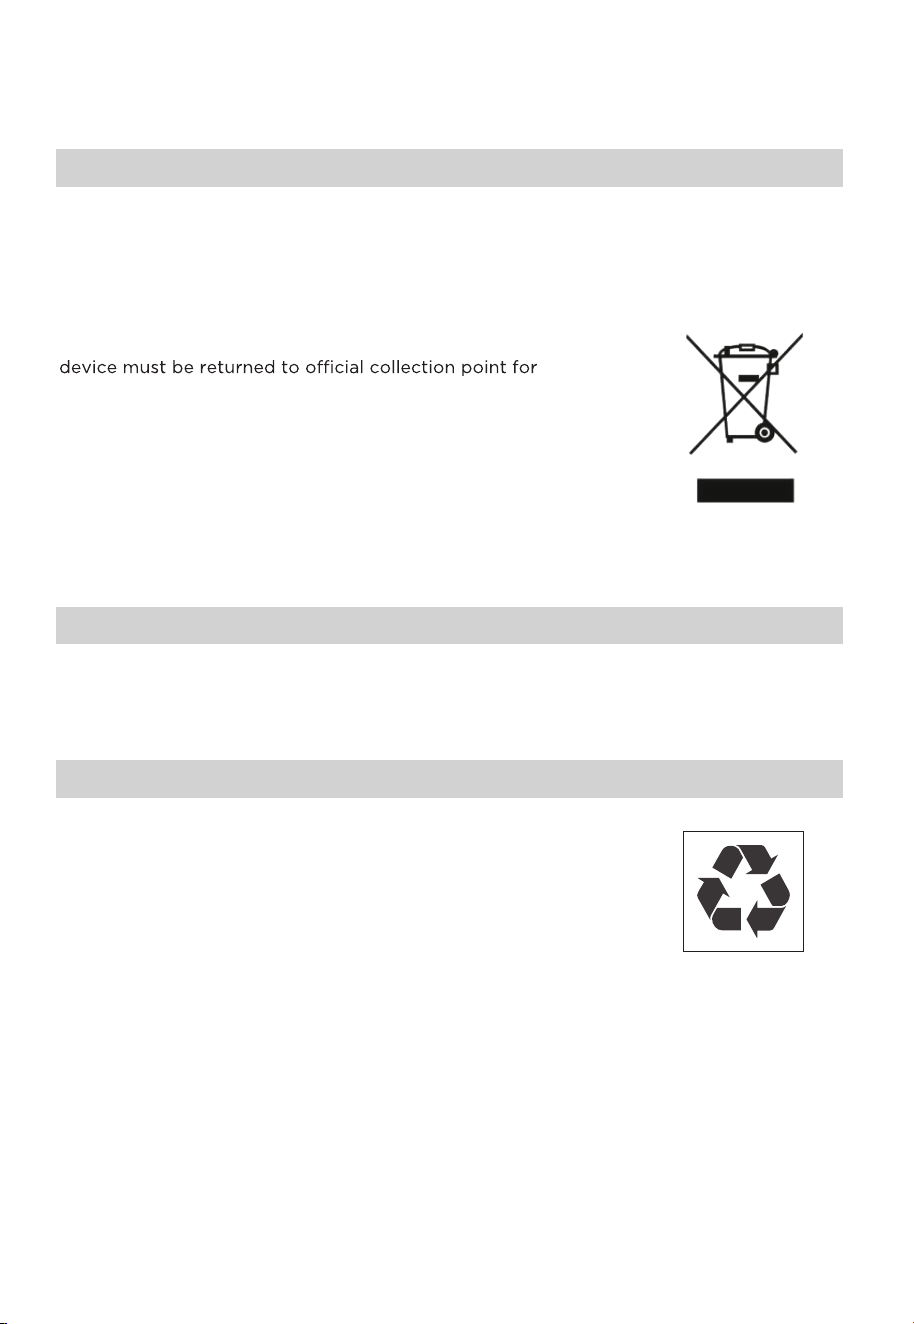
This symbol indicates that this product shall not be disposed
with other household wastes at the end of its service life. Used
recycling of electrical electronic devices. To find these
collection systems please contact to your local authorities or
retailer where the product was purchased. Each household
performs important role in recovering and recycling of old
appliance. Appropriate disposal of used appliance helps
prevent potential negative consequences for the environment
and human health.
Compliance with RoHS Directive
The product you have purchased complies with EU RoHS Directive (2011/65/EU). It does
not contain harmful and prohibited materials specified in the Directive.
Package information
Packaging materials of the product are manufactured from
recyclable materials in accordance with our National Environ-
ment Regulations. Do not dispose of the packaging materials
together with the domestic or other wastes. Take them to the
packaging material collection points designated by the local
authorities.
33

DATA PROTECTION NOTICE
For the provision of the services agreed with the customer,
we agree to comply without restriction with all stipulations of applicable data protection
law, in line with agreed countries within which services to the customer will be delivered,
as well as, where applicable, the EU General Data Protection Regulation (GDPR).
Generally, our data processing is to fulfil our obligation under contract with you and for
product safety reasons, to safeguard your rights in connection with warranty and
product registration questions. In some cases, but only if appropriate data protection is
ensured, personal data might be transferred to recipients located outside of the
European Economic Area.
Further information are provided on request. You can contact our Data Protection
[email protected]. To exercise your rights such as right to object your
personal date being processed for direct marketing purposes, please contact us via
[email protected]. To find further information, please follow the QR Code.
34

6
MMC12S2FHST
HORNO DE MICROONDAS
MANUAL DE USUARIO
Avisos de advertencia: Antes de utilizar este producto, lea atentamente este manual y consérvelo para futuras
referencias.
El diseño y las especificaciones están sujetos a cambios sin previo aviso para mejorar el producto. Consulte con
su distribuidor o fabricante para obtener más detalles.
El diagrama de arriba es solo para referencia. Tome la apariencia del producto real como estándar.

02
CARTA DE AGRADECIMIENTO
¡Gracias por elegir Midea! Antes de utilizar su nuevo producto Midea, lea
detenidamente este manual para asegurarse de conocer cómo operar las funciones y
características de su nuevo aparato de manera segura.
ÍNDICE
CARTA DE AGRADECIMIENTO -----------------------------------02
INSTRUCCIONES DE SEGURIDAD -------------------------------03
ESPECIFICACIÓN --------------------------------------------------- 13
VISIÓN GENERAL DEL PRODUCTO ----------------------------- 14
INSTALACIÓN DEL PRODUCTO ---------------------------------- 15
OPERACIÓN -------------------------------------------------------- 16
SOLUCIÓN DE PROBLEMAS --------------------------------------30
MARCAS COMERCIALES, DERECHOS DE AUTOR Y
DECLARACIÓN LEGAL -------------------------------------------- 32
ELIMINACIÓN Y RECICLAJE -------------------------------------- 33
AVISO DE PROTECCIÓN DE DATOS -----------------------------34
03
INSTRUCCIONES DE SEGURIDAD
Uso Previsto
Las siguientes pautas de seguridad están destinadas a prevenir riesgos imprevistos o
daños derivados de un uso incorrecto o inseguro del aparato. Por favor, revise el embalaje
y el aparato al recibirlo para asegurarse de que todo esté intacto para garantizar un
funcionamiento seguro. Si encuentra algún daño, comuníquese con el minorista o
distribuidor. Tenga en cuenta que no se permiten modificaciones ni alteraciones al aparato
por razones de seguridad. El uso no previsto puede ocasionar riesgos y pérdida de las
reclamaciones de garantía.
Explicación de los Símbolos
Peligro
Este símbolo indica que existen peligros para la vida y la salud de las personas
debido a gases extremadamente inflamables.
Advertencia de tensión eléctrica
Este símbolo indica que existe peligro para la vida y la salud de las personas debido
a la tensión.
Advertencia
La palabra clave indica un peligro con un nivel de riesgo medio que, si no se evita,
puede provocar la muerte o lesiones graves.
Precaución
La palabra clave indica un peligro con un grado bajo de riesgo que, si no se evita,
puede provocar lesiones leves o moderadas.
Atención
La palabra señal indica información importante (por ejemplo, daños a la propiedad),
pero no peligro.
Siga las instrucciones
Este símbolo indica que solo un técnico de servicio debe operar y mantener este
aparato de acuerdo con las instrucciones operativas.
¡Lea cuidadosamente y atentamente estas instrucciones de operación antes de usar o
poner en marcha la unidad y consérvelas cerca del sitio de instalación o de la unidad para
su uso futuro!

04
PRECAUCIONES PARA EVITAR
POSIBLES EXPOSICIONES
AL EXCESO DE ENERGÍA DE
MICROONDAS
a. No intente operar el horno con la puerta abierta,
ya que esta operación resultará en una exposición
prejudicial a la energía de microondas.
Es importante no desactivar ni manipular los
enclavamientos de seguridad.
b. No coloque ningún objeto entre la cara frontal
del horno y la puerta ni permita que se acumule
suciedad o residuos de limpiador en las superficies
de sellado.
c. No opere el horno si está dañado. Es especialmente
importante que la puerta del horno cierre
correctamente y que no haya daños en:
- PUERTA (doblada)
- BISAGRAS Y PESTILLOS (rotos o sueltos)
- JUNTAS DE PUERTAS Y SUPERFICIES DE
SELLADO
d. El horno no debe ser ajustado ni reparado por
nadie que no sea personal de servicio debidamente
calificado.

05
INSTRUCCIONES IMPORTANTES
DE SEGURIDAD
Al utilizar aparatos eléctricos, se deben seguir
precauciones básicas de seguridad, incluyendo las
siguientes:
ADVERTENCIA
Para reducir el riesgo de quemaduras, descargas
eléctricas, incendios, lesiones a personas o exposición
excesiva a energía de microondas:
1. Lea todas las instrucciones antes de usar el aparato.
2. Lea y siga las instrucciones específicas:
"PRECAUCIONES PARA EVITAR POSIBLES
EXPOSICIONES AL EXCESO DE ENERGÍA DE
MICROONDAS" que se encuentran en la página 04.
3. Este aparato debe estar conectado a tierra.
Conéctelo únicamente a una toma de corriente
con conexión a tierra adecuada. Consulte las
"INSTRUCCIONES DE CONEXIÓN A TIERRA" que se
encuentran en la página 08.
4. Instale o ubique este aparato únicamente de acuerdo
con las instrucciones de instalación proporcionadas.
5. Algunos productos, como huevos enteros y
recipientes sellados (por ejemplo, frascos de vidrio
cerrados), pueden explotar y no deben calentarse en
este horno.
6. Utilice este aparato únicamente para el uso
previsto, tal como se describe en el manual. No
utilice productos químicos o vapores corrosivos
en este aparato. Este tipo de horno está diseñado
específicamente para calentar, cocinar o secar
alimentos. No está diseñado para uso industrial o de
laboratorio.

06
7. LOS CONTENIDOS CALIENTES PUEDEN CAUSAR
QUEMADURAS SEVERAS. NO PERMITA QUE LOS
NIÑOS USEN EL HORNO DE MICROONDAS. Tenga
cuidado al retirar artículos calientes.
8. No utilice este aparato si tiene un cable o enchufe
dañado, si no funciona correctamente o si ha sido
dañado o se ha caído.
9. Este aparato debe ser reparado únicamente por
personal de servicio calificado. Comuníquese con
el centro de servicio autorizado más cercano para
examen, reparación o ajuste.
10. No cubra ni bloquee ninguna abertura del aparato.
11. No guarde este aparato al aire libre. No utilice este
producto cerca del agua - por ejemplo, cerca de un
fregadero de cocina, en un sótano húmedo, cerca de
una piscina o en un lugar similar.
12. No sumerja el cable ni el enchufe en agua.
13.
Mantenga el cable alejado de las superficies calientes.
14. No deje que el cable cuelgue del borde de la mesa o
mostrador.
15. Al limpiar las superficies de la puerta y del horno
que entran en contacto al cerrarla, use solo jabones
suaves y no abrasivos, o detergentes aplicados con
una esponja o un paño suave.
16. Para reducir el riesgo de incendio en la cavidad del
horno:
1). No cocine en exceso los alimentos. Preste atención
al aparato cuando coloque papel, plástico u otros
materiales combustibles dentro del horno para
facilitar la cocción.
2). Retire los alambres de las bolsas de papel o
plástico antes de colocarlas en el horno.
3).
Si el material dentro del horno se enciende,
mantenga la puerta del horno cerrada, apague el
horno y desconecte el cable de alimentación, o corte
la corriente en el panel de fusibles o disyuntores.

07
4). No use la cavidad para almacenamiento. No
deje productos de papel, utensilios de cocina o
alimentos en la cavidad cuando no estén en uso.
17. Los líquidos como el agua, el café o el té pueden
sobrecalentarse más allá del punto de ebullición sin
que lo parezca. No siempre hay burbujeo o ebullición
visible cuando se retira el recipiente del horno de
microondas.
ESTO PODRÍA CAUSAR QUE EL LÍQUIDO MUY
CALIENTE HIERVA DE REPENTE CUANDO SE
MUEVE EL RECIPIENTE O SE INSERTA UNA
CUCHARA U OTRO UTENSILIO EN EL LÍQUIDO.
Para reducir el riesgo de lesiones a las personas:
1) No sobrecaliente el líquido.
2) Revuelva el líquido antes y a la mitad de
calentarlo.
3) No utilice recipientes de lados rectos con cuellos
estrechos.
4) Después de calentar, deje reposar el recipiente en
el horno de microondas por un tiempo antes de
sacar el recipiente.
5) Tenga mucho cuidado al insertar una cuchara u
otro utensilio en el recipiente.
GUARDE ESTAS INSTRUCCIONES
PARA USO DOMÉSTICO
ÚNICAMENTE
(NO PARA USO COMERCIAL)
08
INSTALACIÓN CON CONEXIÓN A
TIERRA
Este aparato debe estar conectado a tierra. En caso de
un cortocircuito eléctrico, la conexión a tierra reduce el
riesgo de descarga eléctrica al proporcionar un cable
de escape para la corriente. Este aparato está equipado
con un cable que posee un conductor de conexión
a tierra y un enchufe con puesta a tierra. El enchufe
debe conectarse a una toma de corriente que esté
correctamente instalada y con conexión a tierra.
ADVERTENCIA
El uso inadecuado de la conexión a tierra puede
provocar un riesgo de descarga eléctrica.
Consulte a un electricista o técnico calificado si las
instrucciones de conexión a tierra no se comprenden
completamente o si existen dudas sobre si el aparato está
conectado a tierra correctamente. Si es necesario usar un
cable de extensión, use solo un cable de extensión de 3
hilos que tenga un enchufe de 3 clavijas con conexión a
tierra y un receptáculo de 3 ranuras que acepte el enchufe
en el aparato. La clasificación del cable de extensión debe
ser igual o superior a la clasificación eléctrica del aparato.
PELIGRO
Riesgo de Descarga Eléctrica:
Tocar algunos de los componentes internos puede
causar lesiones personales graves o la muerte. No
desmonte este aparato.
ADVERTENCIA
Riesgo de Descarga Eléctrica
El uso inadecuado de la conexión a tierra puede resultar
en una descarga eléctrica. No conecte el aparato a
una toma de corriente hasta que esté correctamente
instalado y conectado a tierra.

09
Se proporciona un cable de alimentación corto para
reducir los riesgos de enredarse o tropezar con un
cable más largo.
Se encuentran disponibles juegos de cables más largos
o cables de extensión que pueden usarse si se tiene
cuidado al utilizarlos.
Si se utiliza un cable largo o una extensión de cable:
1) La clasificación eléctrica marcada del juego de
cables o del cable de extensión debe ser al menos
tan buena como la clasificación eléctrica del aparato.
2)
El cable de extensión debe ser un cable de 3 hilos a tierra.
3) El cable más largo debe colocarse de manera que no
cuelgue sobre la encimera o la mesa, donde los niños
puedan tirar de él o tropezar sin querer.
LIMPIEZA
Asegúrese de desenchufar el aparato de la fuente de
alimentación.
1. Limpiar la cavidad del horno después de usar con un
paño ligeramente húmedo.
2. Limpie los accesorios con agua y jabón de la forma
habitual.
3. Deben limpiar el marco de la puerta y las juntas y
las partes cercanas cuidadosamente con un paño
húmedo cuando estén sucios.
4. No utilice limpiadores abrasivos fuertes o raspadores
metálicos afilados para limpiar el vidrio de la puerta
del horno, ya que pueden dañar la superficie, lo que
puede provocar la rotura del vidrio.
5.
Consejo de limpieza --- Para limpiar fácilmente las
paredes de la cavidad que los alimentos cocinados
pueden tocar: Coloque medio limón en un tazón,
agregue 300 ml (1/2 pinta) de agua y caliente a 100%
de potencia del horno de microondas durante 10
minutos. Limpie el horno con un paño suave y seco.

10
INTERFERENCIA DE RADIO
• El funcionamiento del horno de microondas puede
causar interferencias en su radio, televisor o equipos
similares.
• Cuando exista interferencia, se puede reducir o
eliminar tomando las siguientes medidas:
1) Limpie la puerta y la superficie de sellado del
horno.
2) Reoriente la antena receptora de radio o televisión.
3) Reubique el horno de microondas con respecto al
receptor.
4) Aleje el horno de microondas del receptor.
5) Enchufe el horno de microondas en un
tomacorriente diferente para que el horno de
microondas y el receptor estén en circuitos
derivados diferentes.
• Este equipo genera, utiliza y puede irradiar
energía de radiofrecuencia. Si no se instala y
opera conforme a las instrucciones, podría causar
interferencias perjudiciales en las comunicaciones
radiales. No obstante, no se garantiza la ausencia
de interferencias en instalaciones particulares. Si
este equipo genera interferencias perjudiciales en
la recepción de radio o televisión (verificable al
apagarlo y encenderlo), se anima al usuario a intentar
corregirlas mediante estas medidas:
— Reoriente o recoloque la antena de recepción.
— Aumente la separación entre el equipo y el
receptor.
— Conecte el equipo al enchufe de un circuito
diferente al que está conectado el receptor.
— Consulte al distribuidor o a un técnico de radio/TV
experimentado para obtener ayuda.
Este dispositivo cumple con la parte 18 de las
Reglas de la FCC.

11
UTENSILIOS
PRECAUCIÓN
Riesgo de Lesiones Personales:
Los utensilios cerrados herméticamente podrían
explotar. Los recipientes cerrados deben abrirse y las
bolsas de plástico deben perforarse antes de cocinar.
Consulte las instrucciones en "Materiales que pueden
usarse en el horno de microondas o que deben evitarse
en el horno de microondas."
Puede haber ciertos utensilios no metálicos que no
sean seguros para usar en el horno de microondas.
En caso de duda, puede probar el utensilio en
cuestión siguiendo el procedimiento que se describe a
continuación.
Prueba de utensilios:
• Llene un recipiente apto para horno de microondas
con 1 taza de agua fría (250 ml) junto con el utensilio
en cuestión.
• Cocine a máxima potencia durante 1 minuto.
• Sienta con cuidado el utensilio. Si el utensilio vacío
está caliente, no lo utilice para cocinar en horno de
microondas.
• No exceda el tiempo de cocción de 1 minuto.
12
Materiales que pueden usarse en el horno de microondas
Utensilios Observaciones
Plato para dorar
Siga las instrucciones del fabricante. La parte inferior del plato
para dorar debe estar al menos 3/16 de pulgada (5mm) por
encima del plato giratorio. El uso incorrecto puede causar que
el plato giratorio se rompa. (Para el modelo con plato giratorio)
Vajilla
Solo apto para horno de microondas. Siga las instrucciones del
fabricante. No utilice vajilla agrietada o con desconchaduras.
Frascos de vidrio
Retire siempre la tapa. Úselo solo para calentar alimentos hasta
que estén tibios.
La mayoría de los frascos de vidrio no son resistentes al calor y
pueden romperse.
Cristalería
Solamente cristalería para horno resistente al calor. Asegúrese
de que no haya molduras metálicas. No utilice vajilla agrietada
o con desconchaduras.
Bolsas para cocinar al horno
Siga las instrucciones del fabricante. No cierre con amarre de
metal. Haga ranuras para permitir que salga el vapor.
Platos y vasos de papel
Uso solo para cocinar/calentar a corto plazo. No deje el horno
desatendido mientras cocina.
Toallas de papel
Úselo para cubrir alimentos para recalentar y absorber grasa.
Úselo con supervisión solo para una cocción a corto plazo.
Papel pergamino
Úselo como cubierta para evitar salpicaduras o como envoltorio
para cocinar al vapor.
Plástico
Solo apto para horno de microondas. Siga las instrucciones del
fabricante.
Debe estar etiquetado como "Apto para Horno de Microondas".
Algunos recipientes de plástico se ablandan a medida que la
comida del interior se calienta. Las "bolsas para hervir" y las
bolsas de plástico bien cerradas deben cortarse, perforarse o
ventilarse según las instrucciones del paquete.
Envoltura de plástico
Solo apto para horno de microondas. Úselo para cubrir los
alimentos durante la cocción para retener la humedad. No
permita que la envoltura de plástico toque los alimentos.
Termómetros
Solo apto para horno de microondas (termómetros para carne
y dulces)
Papel encerado
Úselo como cubierta para evitar salpicaduras y retener la
humedad.
Materiales a evitar en el horno de microondas
Utensilios Observaciones
Bandeja de aluminio
Puede causar arcos eléctricos. Transfiera la comida a un plato
apto para horno de microondas.
Cartón de comida con asa de
metal
Puede causar arcos eléctricos. Transfiera la comida a un plato
apto para horno de microondas.
Utensilios de metal o con
adornos de metal
El metal protege los alimentos de la energía de microondas. Las
molduras metálicas pueden causar arcos eléctricos.
Lazos de torsión de metal
Es posible causar arcos eléctricos y provocar un incendio en el
horno.
Bolsas de papel Pueden provocar un incendio en el horno.
Espuma plástica
La espuma plástica puede derretir o contaminar el líquido del
interior cuando se expone a altas temperaturas.
Madera
La madera se secará cuando se use en el horno de microondas
y tendrá posibilidad de partirse o rajarse.

13
ESPECIFICACIÓN
Modelo MMC12S2FHST
Fuente de Alimentación
120VAC 60Hz
Entrada de Horno de Microondas 1500W
Salida de Horno de Microondas 1000W
14
VISIÓN GENERAL DEL PRODUCTO
Nombres de Piezas y Accesorios del Horno
En caso de diferencias entre el dispositivo y las imágenes de este manual, prevalecerá el
producto.
Retire el horno y todos los materiales del cartón y la cavidad del horno.
Su horno de microondas está equipado con los siguientes accesorios:
Manual de Instrucciones
F
C
D
E
B
A
A) Sistema de enclavamiento de
seguridad
D) Cavidad del horno
B) Conjunto de puerta
E) Superficie plana de
calentamiento
C) Ventana de observación F) Panel de control
15
INSTALACIÓN DEL PRODUCTO
Instalación de Encimera
Retire todo el material de embalaje y accesorios. Inspeccione el horno para ver si
hay daños, como abolladuras o puertas rotas. No instale si el horno está dañado.
Gabinete: Retire cualquier película protectora que se encuentre en la superficie del
gabinete del horno de microondas. No retire la cubierta de guía de onda que está
unida a la cavidad del horno para proteger el magnetrón.
INSTALACIÓN
1. Seleccione una superficie plana
que proporcione suficiente espacio
abierto para aberturas de entrada y/
o salida.
>36 pulgadas
(91,4 cm)
3,0 pulgadas
(7,5 cm)
3,0 pulgadas (7,5 cm)
12 pulgadas (30cm)
ABRIR
Se requiere un espacio libre mínimo de
3,0 pulgadas (7,5 cm) entre el horno y
las paredes adyacentes. Un lado debe
estar abierto. La altura mínima de
instalación es de 36 pulgadas (91,4 cm).
(1) Quede un espacio libre mínimo de
12 pulgadas (30 cm) por encima del
horno.
(2) No quite las patas del fondo del
horno.
(3) Bloquear las aberturas de entrada y
/ o salida puede dañar el horno.
(4) Coloque el horno lo más lejos
posible de radios y televisores.
El funcionamiento de horno
de microondas puede causar
interferencias en la recepción de su
radio y televisión.
2. Conecte el horno en una toma
de corriente estándar del hogar.
Asegúrese de que el voltaje y la
frecuencia sean las mismas que
las indicadas en la etiqueta de
clasificación.
ADVERTENCIA: No instale el horno
sobre una placa de cocción u otro
aparato que genere calor. Si se instala
cerca o sobre una fuente de calor, el
horno podría dañarse, y la garantía
quedaría anulada.
La superficie accesible
puede estar caliente
durante la operación.
16
OPERACIÓN
Panel de Control
17
RESUMEN DE FUNCIONES DE
BOTONES
Botón Descripción
Descongelación rápida de alimentos congelados
según el peso seleccionado
Descongelación rápida de alimentos congelados
según el tiempo seleccionado
Temporizador de cuenta regresiva / Ajuste horario
Menú automático y menú con sensor
Usar teclas numéricas para ingresar valores
personalizados /
Presionar números “1-6” para cocción rápida (1-6
minutos) /
Usar el número “8” para configurar el modo silenciar
Ajustar nivel de potencia para operación de horno
de microondas
Configurar tiempo de cocción en horno de
microondas
Pausar cocción activa / Cancelar operación / Función
ECO / Función de Bloqueo Infantil / Desbloquear
Iniciar cocción rápida (30 segundos) / Comenzar
operación / Añadir 30 segundos / Confirmar entrada
18
OPERACIÓN
1. Bloqueo de Seguridad
El Bloqueo de Seguridad es un sistema que protege contra la activación no
deseada del horno, proporcionando una medida de seguridad para garantizar la
protección infantil.
(1) Cómo funciona el bloqueo de seguridad
El bloqueo se activa automáticamente al iniciar la cocción. El bloqueo
permanecerá activo durante 30 minutos tras finalizar la cocción.
El Bloqueo de Seguridad está activado de manera predeterminada. Sólo se
desactivará si el usuario elige hacerlo manualmente. Incluso en caso de una
desconexión eléctrica, el horno conservará el estado del Bloqueo de Seguridad, ya
sea que esté activado o desactivado.
(2) Desbloquear la puerta
Presione
durante el funcionamiento y abra la puerta dentro de los 10
segundos, o el Bloqueo de Seguridad se activará nuevamente. La puerta
permanecerá desbloqueada hasta que se inicie la cocción.
O:
Presione
dentro de los 30 minutos posteriores a la finalización de la cocción
para desactivar manualmente el bloqueo de la puerta y pasar al modo de
espera. Si no se presiona ninguna tecla, el Bloqueo de Seguridad se desactivará
automáticamente después de 30 minutos.
(3) Desactivar el bloqueo de seguridad
Si no hay niños en la casa, puede optar por desactivar permanentemente la
función de Bloqueo de Seguridad.
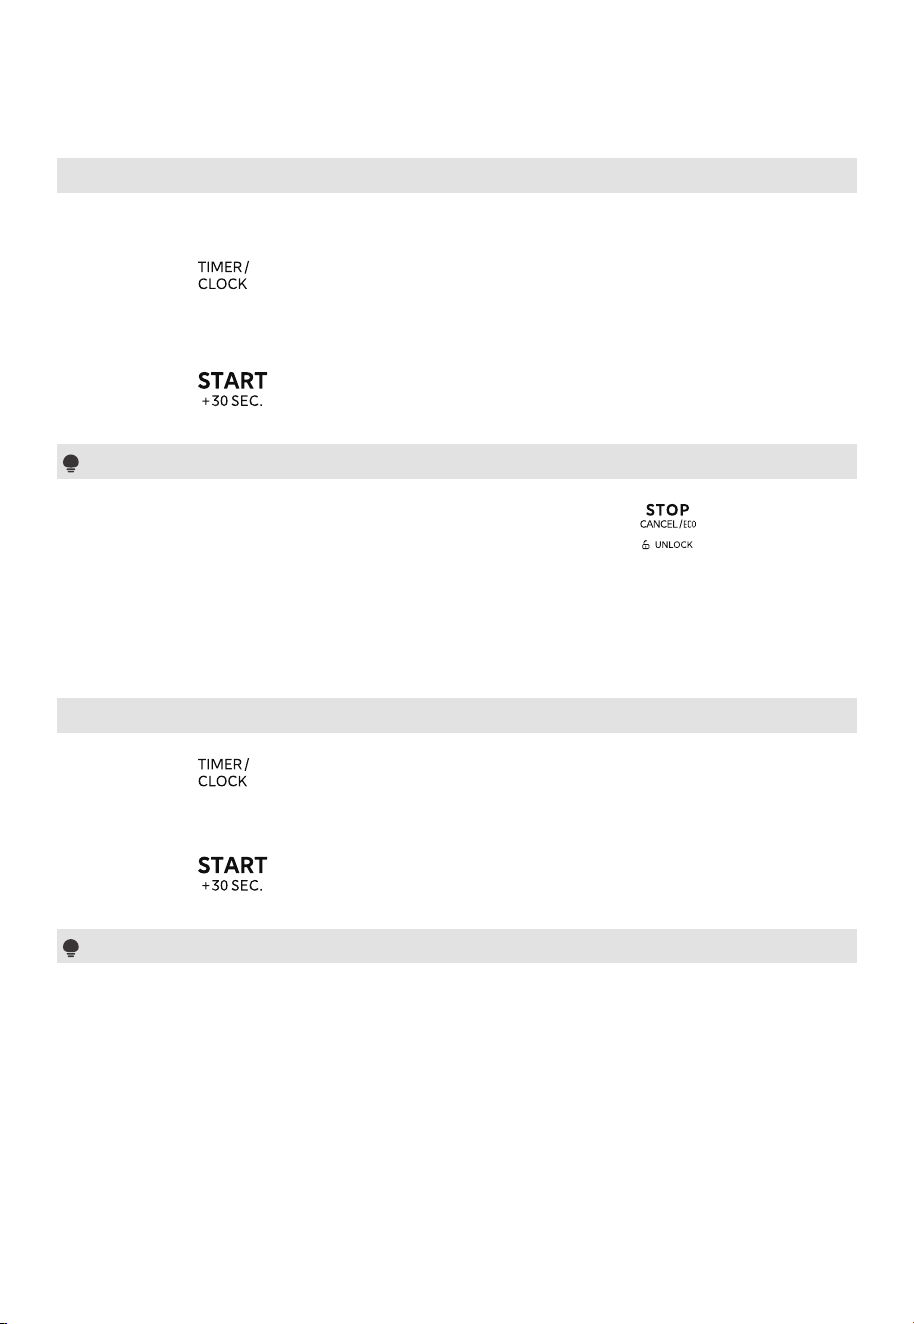
En el modo de espera, mantenga presionada la tecla numérica “7” durante dos
segundos. La pantalla mostrará “Loc”. Luego presione “9” y “
” una vez cada
uno, en secuencia.
La pantalla mostrará “ULoc”, lo que indica que el bloqueo de seguridad se ha
desactivado correctamente.
ULocLoc
Mantenga
presionado
durante 2s
La pantalla
muestra
La pantalla
muestra
Una vez
Una vez
(4) Reactivar el bloqueo de seguridad
En el modo de espera, mantenga presionada la tecla numérica “7” durante dos
segundos. La pantalla mostrará “ULoc”. Luego presione “9” y “
” una vez
cada uno, en secuencia.
La pantalla mostrará “Loc”, lo que indica que el bloqueo de seguridad se ha
desactivado correctamente.
19
OPERACIÓN
2. Configurar el Reloj
Después de conectar el horno a la corriente eléctrica, la pantalla muestra “0:00”,
suena el timbre y el horno entra en modo de espera.
(1) Presione “
” dos veces y luego aparecerá “00:00”.
(2) Presione las teclas numéricas para entrar la hora actual.
Por ejemplo, si ahora son las 12:10, presione “1, 2, 1, 0” sucesivamente.
(3) Presione “
” para confirmar. El reloj está puesto.
Notas
(1) En el proceso de configuración del reloj, si se presiona “
” o si no se
opera dentro de 1 minuto, la configuración no es válida.
(2) Para reiniciar el reloj, repita el paso 1 al paso 3.
(3) El reloj es de visualización de 12 horas. Si el reloj no está configurado, no
funcionará cuando esté encendido.
3. Configurar el Temporizador de Cocina
(1) Presione “
” una vez y luego aparecerá “00:00”.
(2) Presione las teclas numéricas para configurar el tiempo deseado. El valor de
tiempo máximo es “99:99”.
(3) Presione “
” para confirmar. El temporizador comienza la cuenta atrás.
Nota
El temporizador de cocina es un temporizador.
20
OPERACIÓN
4. Cocinar con horno de microondas
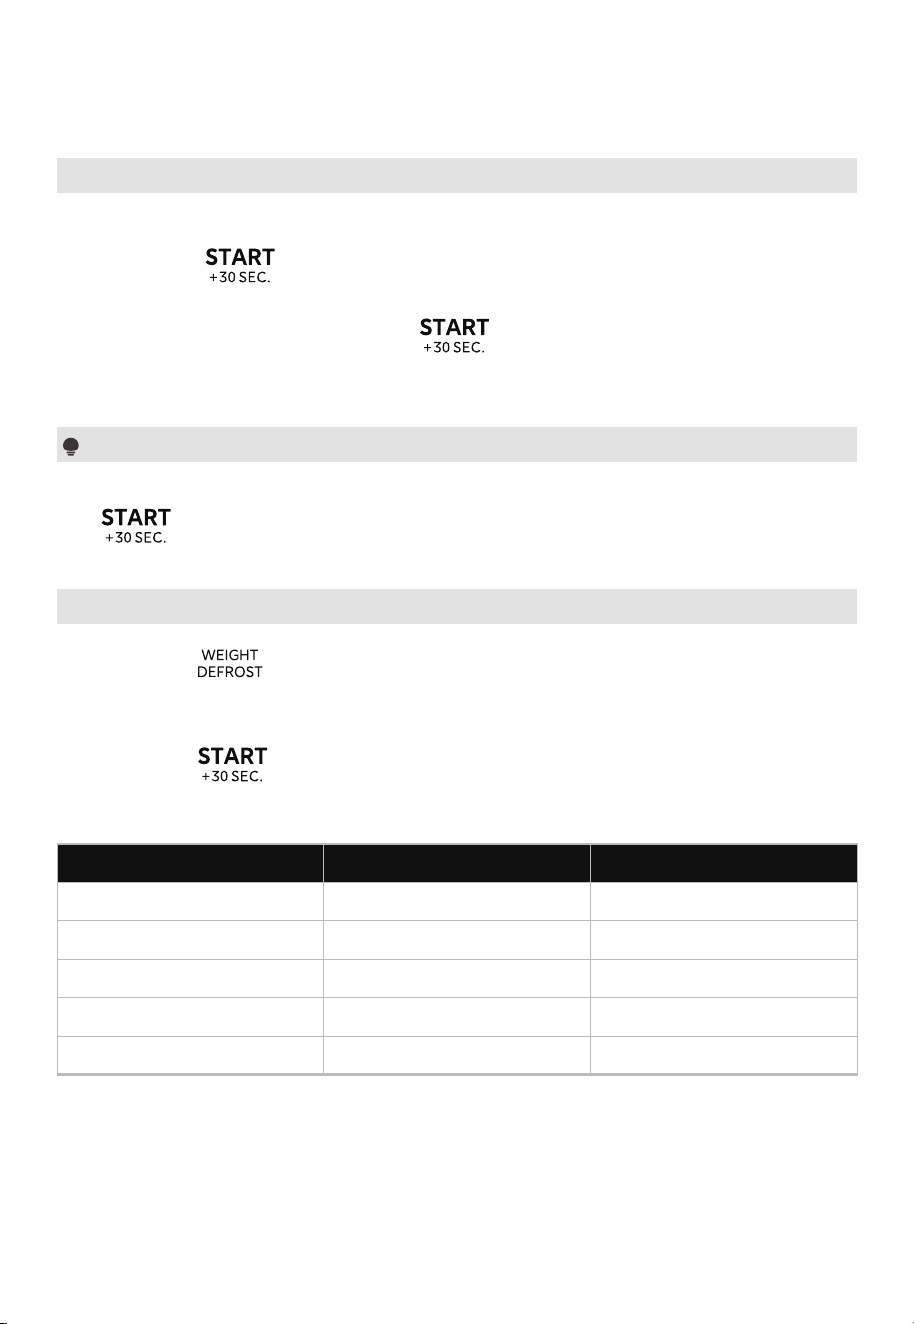
Los 11 niveles de potencia están disponibles.
Potencia 100% 90% 80% 70% 60% 50% 40% 30% 20% 10% 0%
Visualización PL10 PL9 PL8 PL7 PL6 PL5 PL4 PL3 PL2 PL1 PL0
Método 1:
(1) Presione “
” una vez, la pantalla mostrará “00:00”.
(2) Presione las teclas numéricas para configurar el tiempo de cocción. El valor de
tiempo máximo es “99:99”.
(3) Presione “
” una vez y se mostrará “PL10”.
(4) Presione las teclas numéricas para configurar el nivel de potencia. Los 11
niveles de potencia están disponibles.
(5) Presione “
” para iniciar la cocción.
Método 2:
(1) Presione “
” una vez y se mostrará “PL10”.
(2) Presione las teclas numéricas para configurar el nivel de potencia. Los 11
niveles de potencia están disponibles.
(3) Presione “
” una vez, la pantalla mostrará “00:00”.
(4) Presione las teclas numéricas para configurar el tiempo de cocción. El valor de
tiempo máximo es “99:99”.
(5) Presione “
” para iniciar la cocción.
Nota
Si se selecciona “PL0”, el horno funcionará con el ventilador sin aplicar calor.
Puede utilizar este nivel para eliminar los olores del horno.
21
OPERACIÓN
5. Cocina Rápida
(1) En el modo de espera, al presionar las teclas numéricas del 1 al 6 puede
seleccionar rápidamente un tiempo de cocción de 1 a 6 minutos. Luego puede
presionar “
” para aumentar el tiempo de cocción. El valor de tiempo
máximo es “99:99”.
(2) En el modo de espera, presione “
” una vez para cocinar alimentos a un
nivel de potencia del 100% durante 30 segundos. Cada pulsación de la misma
tecla puede aumentar 30 segundos y el valor de tiempo máximo es “99:99”.
Nota
En los modos de microondas y descongelación por tiempo, cada pulsación
de “
” aumenta el tiempo de cocción en 30 segundos, excepto en
descongelación por peso y menú automático.
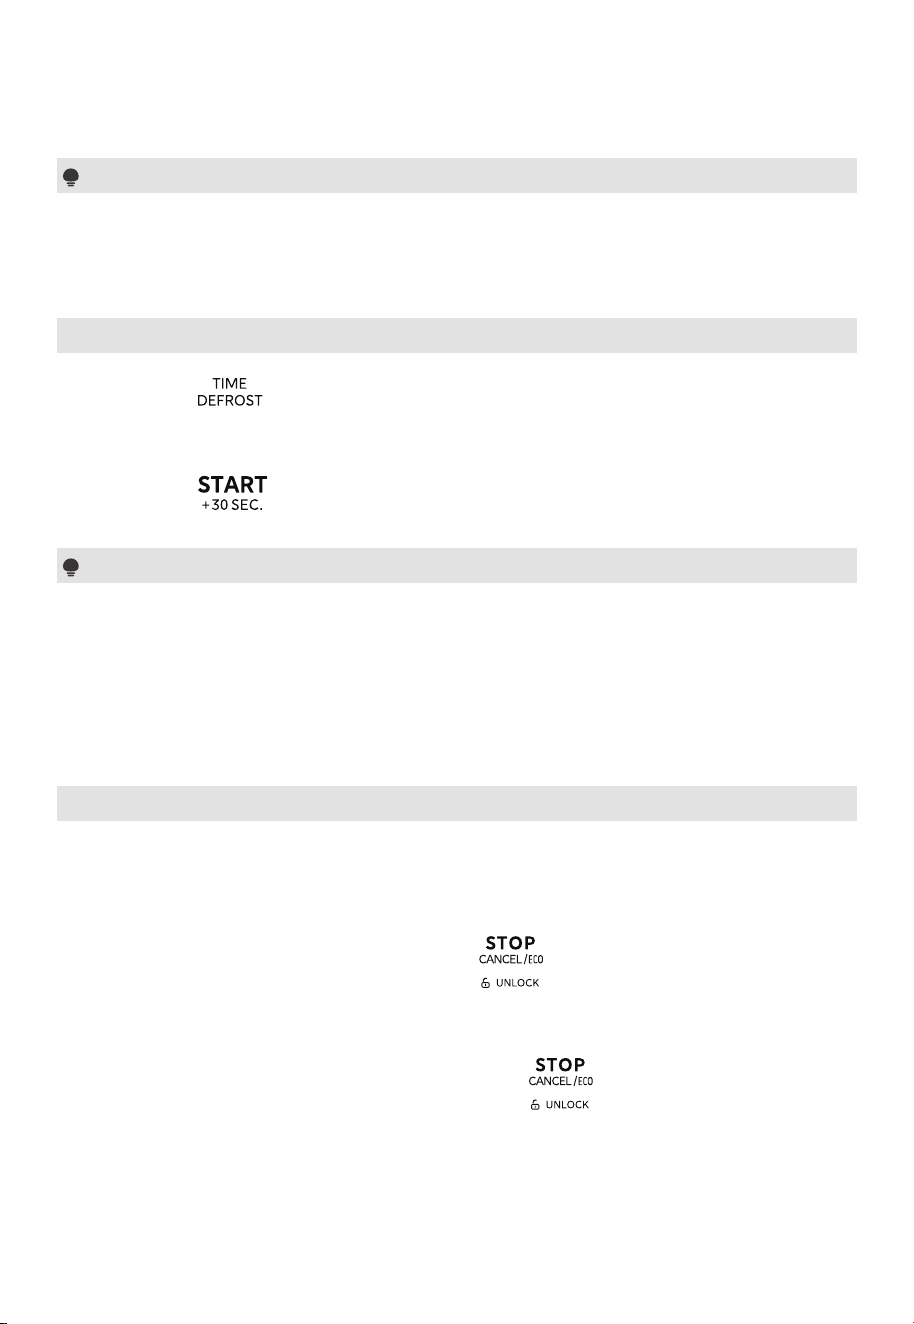
6. Descongelar por Peso
(1) Presione “
” repetidamente para seleccionar el tipo de alimento; luego
se mostrarán “dEF1” a “dEF5”.
(2) Presione las teclas numéricas para configurar el peso de los alimentos.
(3) Presione “
” para iniciar la descongelación.
Tabla de Menú
Visualización Menú Peso
dEF1 Carne 4~70 Oz
dEF2 Pollo 4~70 Oz
dEF3 Pescado 4~70 Oz
dEF4 Hortaliza 4~32 Oz
dEF5 Pan 4~24 Oz
22
OPERACIÓN
Nota
Sonará el timbre para recordarle que debe dar la vuelta a la comida durante la
descongelación.
Si no funciona, el horno seguirá funcionando.
7. Descongelar por Tiempo
(1) Presione “
” una vez y luego la pantalla mostrará “00:00”.
(2) Presione las teclas numéricas para configurar el tiempo deseado de
descongelación. El valor de tiempo máximo es “99:99”.
(3) Presione “
” para iniciar la descongelación.
Notas
(1) Sonará el timbre para recordarle que debe dar la vuelta a la comida durante la
descongelación.
Si no funciona, el horno seguirá funcionando.
(2) La potencia de descongelación es PL3 y no se puede cambiar.
8. Función de Bloqueo Infantil
Puede utilizar esta función para desactivar los botones de la pantalla y evitar que
sus hijos enciendan el horno accidentalmente.
Para activar el bloqueo:
En el modo de espera, mantenga pulsado “
” durante tres segundos. Suena
un pitido y se mostrará el icono bloqueado.
Para desactivar el bloqueo:
En el estado bloqueado, mantenga presionado “
” durante tres segundos.
Suena un pitido.
23
OPERACIÓN
9. Cocción de Varias Etapas
Ejemplo: Descongele los alimentos durante 10Oz y luego cocínelos al 50% de la
potencia del horno de microondas durante 7 minutos.
(1) Presione “
” una vez y luego la pantalla mostrará “dEF1”.
(2) Presione “1” y “0” para establecer el peso de la comida en 10 oz.
(3) Presione “
” una vez, la pantalla mostrará “00:00”.
(4) Presione “7”, “0” y “0” para configurar el tiempo de cocción en 7 minutos.
(5) Presione “
” una vez y luego aparecerá “PL10”.
(6) Presione 5 para establecer el nivel de potencia a PL5.
(7) Presione “
” para iniciar la cocción.
Notas
(1) Se pueden configurar de dos etapas de cocción en la cocción de varias etapas.
(2) Si configura la función de descongelación, funcionará automáticamente en la
primera etapa.
(3) El temporizador de cocina, la cocción rápida y el menú automático no pueden
configurarse como parte de una secuencia de múltiples etapas.
10. Función de ECO
Para ingresar al modo ECO:
En modo de espera con la puerta cerrada, si el reloj no está configurado, la
pantalla se apagará al presionar “ ” una vez o tras 5 minutos de inactividad;
si está configurado, solo se apagará al presionar “ ”.
Para cancelar el modo ECO:
En el modo ECO, presionar cualquier tecla o abrir la puerta lo cancelará.
24
OPERACIÓN
11. Función de Memoria
Puede guardar las configuraciones de un plato en la memoria y volver a llamarlo.
(1) Presione “
” repetidamente para seleccionar el procedimiento de
memoria 1-3. “1”, “2” y “3” se mostrarán en orden.
(2) Si se ha configurado el procedimiento, presione “
” para iniciar. De lo
contrario, continúe con la configuración.
(3) Después de finalizar la configuración, presione “
” una vez para guardar
el procedimiento.
Ejemplo: Establezca la memoria 2 (cocinar alimentos con un 80% de potencia de
horno de microondas durante 3 minutos)
(1) En modo de espera, presione “
” dos veces y luego la pantalla mostrará
“2”.
(2) Presione “
” una vez, luego presione las teclas numéricas “3”, “0”, “0” en
orden.
(3) Presione “
” una vez y luego presione la tecla número “8”.
(4) Presione “
” para guardar la configuración y se mostrará “2”.
Notas
(1) Si no se corta la energía, el procedimiento se guardará todo el tiempo.
(2) El menú automático, el temporizador de cocina y la cocción rápida no se
pueden configurar como funciones de memoria.
25
OPERACIÓN
12. Menú Automático
Para “Palomitas” y “Bebidas”:
(1) Presione la tecla de menú correspondiente una vez; se mostrará el peso
predeterminado.
(2) Presione repetidamente la tecla de menú correspondiente o presione la tecla
numérica correspondiente para configurar el peso del alimento.
Ejemplo: Presione “ ” nuevamente o presione “2”; luego aparecerá “3.0
Oz”.
(1) Presione “
” para iniciar la cocción.
Para “Tocino”:
(1) Presione “
” repetidamente hasta que se muestre “AC10”.
(2) Presione “
” para confirmar.
(3) Presione “
” repetidamente o presione la tecla numérica correspondiente
para configurar el peso del alimento.
(4) Presione “
” para iniciar la cocción.
Tabla de Menú
Menú
Tecla
Numérica
Peso Visualización Potencia
Palomitas
1 1,75 Oz 1,75 Oz
PL102 3,0 Oz 3,0 Oz
3 3,3 Oz 3,3 Oz
Bebidas
1 1 taza (120ml) 1
PL102 2 tazas (240ml) 2
3 3 tazas (360ml) 3
Tocino
(AC10)
1 1 rebanada 1
PL10
2 2 rebanadas 2
3 3 rebanadas 3
4 4 rebanadas 4
5 5 rebanadas 5
6 6 rebanadas 6
26
OPERACIÓN
Para “Ablandar/Derretir”:
(1) Presione “ ” repetidamente para seleccionar el tipo de alimento.
Opciones disponibles: "So-1, So-2, So-3, So-4, So-5, So-6".
(2) Presione “
” para confirmar.
(3) Presione “
” repetidamente o presione la tecla numérica
correspondiente para configurar el peso del alimento.
(4) Presione “
” para iniciar la cocción.
Tabla de Menú
Menú
Tecla
Numérica
Peso Visualización Potencia
Ablandar Mantequilla
(So-1)
1 4 Oz 4 Oz
PL3
2 8 Oz 8 Oz
Ablandar Queso Crema
(So-2)
1 3 oz 3 oz
PL3
2 8 Oz 8 Oz
Ablandar Helado
(So-3)
1 Pinta 16 Oz
PL5
2 1,5 Cuartos 48 Oz
Derretir Mantequilla
(So-4)
1 4 Oz 4 Oz
PL5
2 8 Oz 8 Oz
Derretir Chocolate
(So-5)
1 4 Oz 4 Oz
PL5
2 8 Oz 8 Oz
Derretir Malvaviscos
(So-6)
1 5 Oz 5 Oz
PL5
2 10 Oz 10 Oz
13. Menú de sensores
La función de cocción por sensor le permite cocinar muchos de sus alimentos
favoritos sin necesidad de seleccionar el tiempo de cocción ni el nivel de potencia.
El horno de microondas determina automáticamente el tiempo de cocción
necesario para cada tipo de alimento. Y los menús de sensores cocinarán con
potencia de horno de microondas.
27
OPERACIÓN
Para “Recalentamiento por Sensor”:
(1) Presione “
” una vez y luego aparecerá “SC-1”.
(2) Presione “
” para iniciar la detección.
Al completar el sensado, comenzará la cuenta regresiva del tiempo de cocción
calculado.
Para “Papa”:
(1) Primero presione “
” una vez, y luego aparecerá “1”.
(2) Presione repetidamente la tecla de menú correspondiente o presione la tecla
numérica correspondiente para configurar el peso del alimento.
(3) Presione “
” para iniciar la detección.
Al completar el sensado, comenzará la cuenta regresiva del tiempo de cocción
calculado.
Tabla de Menú
Menú
Tecla
Numérica
Peso Visualización Potencia
Papa
1 1 (más o menos 8 Oz) 1
PL102 2 (más o menos 16 Oz) 2
3 3 (más o menos 24 Oz) 3
Para “Cocción Automática”:
(1) Presione
repetidamente para elegir el tipo de alimento; se mostrarán
“AC01” a “AC09”.
(2) Presione
para iniciar el sensado. Al completarse, comenzará la cuenta
regresiva del tiempo de cocción calculado.
28
OPERACIÓN
Tabla de Menú
Menú Visualización Peso Potencia
Recalentamiento por
Sensor
SC-1 8-16 Oz PL10
Pizza AC01 6~12 Oz PL10/PL8
Verduras Congeladas AC02 6~16 Oz PL10/PL0
Verduras Frescas AC03 6~16 Oz PL10/PL0
Avena AC04 2~4 Oz PL10/PL5
Sopa AC05 1~2 tazas (200 ml/taza) PL10/PL5
Pasta AC06 1,75~5,5 Oz PL10/PL8
Arroz AC07 0,5~1,5 tazas PL10/PL5
Plato principal
congelado
AC08 6~32 Oz PL10/PL5
Filete de pescado AC09 4~16 Oz PL10/PL0
Nota
No abra la puerta del horno durante el proceso de sensado; de lo contrario, el
programa se cancelará.
13. Modo silenciar
Para activar el modo silenciar:
En el modo de espera, mantenga pulsado “
” durante tres segundos. Sonará
el zumbador y aparecerá "OFF" en la pantalla. Al pulsar la tecla, no se emite
ningún sonido.
Para desactivar el modo silenciar:
En modo silenciar, mantenga pulsado “
” durante tres segundos. Sonará el
zumbador y aparecerá "On" en la pantalla.
29
OPERACIÓN
14. Función de Consulta
(1) Si se ha configurado el reloj, la hora actual se mostrará durante tres segundos
al presionar “
” una vez en el estado de cocción.
(2) En el estado de cocción por microondas, presione “
” para consultar el
nivel de potencia.
Se mostrará durante tres segundos.
30
SOLUCIÓN DE PROBLEMAS
Antes de llamar al servicio
En todos los aparatos eléctricos pueden producirse fallos de funcionamiento.
Esto no significa necesariamente que haya un defecto en el aparato. Por este
motivo, le recomendamos consultar las tablas para ver si puede corregir el
mal funcionamiento. Lea la información de solución de problemas antes de
comunicarse con el servicio postventa. Esto evitará costos de reparación
innecesarios. Si no puede resolverlo usted mismo, comuníquese con el centro de
servicio autorizado de la marca más cercano.
ADVERTENCIA - ¡Riesgo de
lesiones!
Las reparaciones inadecuadas son peligrosas
Las reparaciones del aparato solo deben ser realizadas por técnicos profesionales.
Si el aparato está defectuoso, llame al servicio de atención al cliente.
Nunca intente reparar usted mismo un aparato defectuoso o que sospeche que lo
está.
PROBLEMA COMÚN CAUSA POSIBLE REMEDIO POSIBLE
El aparato no
funciona.
El enchufe del cable de
alimentación no está
enchufado.
Desenchufe y vuelva a enchufar
firmemente.
Hubo un corte de
electricidad.
Compruebe si la iluminación
de la cocina u otros
electrodomésticos funcionan.
La puerta no está
completamente cerrada.
Compruebe si hay restos de
comida o material extraño
atrapados en la puerta y
asegúrese de que la puerta esté
correctamente cerrada.
No calienta
La puerta no se cierra
bien.
Asegúrese de que la puerta
esté correctamente cerrada.
Ruido
Los horno de
microondas hacen
ruido al funcionar, pero
si el ruido se vuelve
inusualmente fuerte o
extraño, puede deberse
a que el plato giratorio
no esté bien colocado.
(Para el modelo con
plato giratorio).
Coloque el plato giratorio en la
posición correcta.
31
SOLUCIÓN DE PROBLEMAS
PROBLEMA COMÚN CAUSA POSIBLE REMEDIO POSIBLE
Descongelación
inadecuada
La potencia del horno
de microondas está
configurada en un nivel
bajo.
Los alimentos están más
fríos de lo habitual.
-
Se utilizaron materiales que
deben evitarse.
Utilice únicamente utensilios
de cocina aptos para horno
de microondas.
No son adecuados el
tiempo de cocción ni el
nivel de potencia.
Utilice el tiempo de cocción
y el nivel de potencia
correctos.
La comida no ha sido
volteada ni revuelta.
Voltee o revuelva los
alimentos.
Alimentos
cocinados de
forma desigual;
Alimentos poco
cocidos
La potencia del horno
de microondas está
configurada en un nivel
bajo.
-
Se utilizaron materiales que
deben evitarse.
Utilice únicamente utensilios
de cocina aptos para horno
de microondas.
La comida no se
ha descongelado
completamente.
Descongele completamente
los alimentos.
No son adecuados el
tiempo de cocción ni el
nivel de potencia.
Utilice el tiempo de cocción
y el nivel de potencia
correctos.
La comida no ha sido
volteada ni revuelta.
Voltee o revuelva los
alimentos de vez en cuando
durante la cocción.
Alimentos
recocidos
La potencia del horno
de microondas está
configurada en un nivel alto.
No son adecuados el
tiempo de cocción ni el
nivel de potencia.
Utilice el tiempo de cocción
y el nivel de potencia
correctos.
El horno de
microondas
produce chispas
y se forman arcos
eléctricos.
Se utilizaron materiales que
deben evitarse.
Utilice únicamente utensilios
de cocina aptos para horno
de microondas.
El horno funciona sin
alimentos en su interior.
Está prohibido hacer
funcionar el horno sin
alimentos en el interior. Es
muy peligroso.
La comida derramada
permanece en la cavidad.
Limpie la cavidad con una
toalla húmeda.

32
MARCAS COMERCIALES,
DERECHOS DE AUTOR Y
DECLARACIÓN LEGAL
El logotipo, las marcas denominativas, el nombre comercial, la imagen comercial de
y todas las versiones de los mismos son activos valiosos de Midea Group y/
o sus afiliados ("Midea"), de los cuales Midea posee marcas comerciales, derechos de
autor y otros derechos de propiedad intelectual, y todo el fondo de comercio derivado
del uso cualquier parte de una marca Midea. El uso de la marca registrada Midea con
fines comerciales sin el consentimiento previo por escrito de Midea puede constituir una
infracción de marca registrada o competencia desleal en violación de las leyes pertinentes.
Este manual ha sido creado por Midea, y Midea se reserva todos los derechos de autor
del mismo. Ninguna entidad o individuo puede usar, duplicar, modificar o distribuir
total o parcialmente este manual, ni agruparlo o venderlo con otros productos sin el
consentimiento previo por escrito de Midea.
Todas las funciones e instrucciones descritas estaban actualizadas al momento de imprimir
este manual. Sin embargo, el producto real puede variar debido a mejoras en funciones y
diseños.
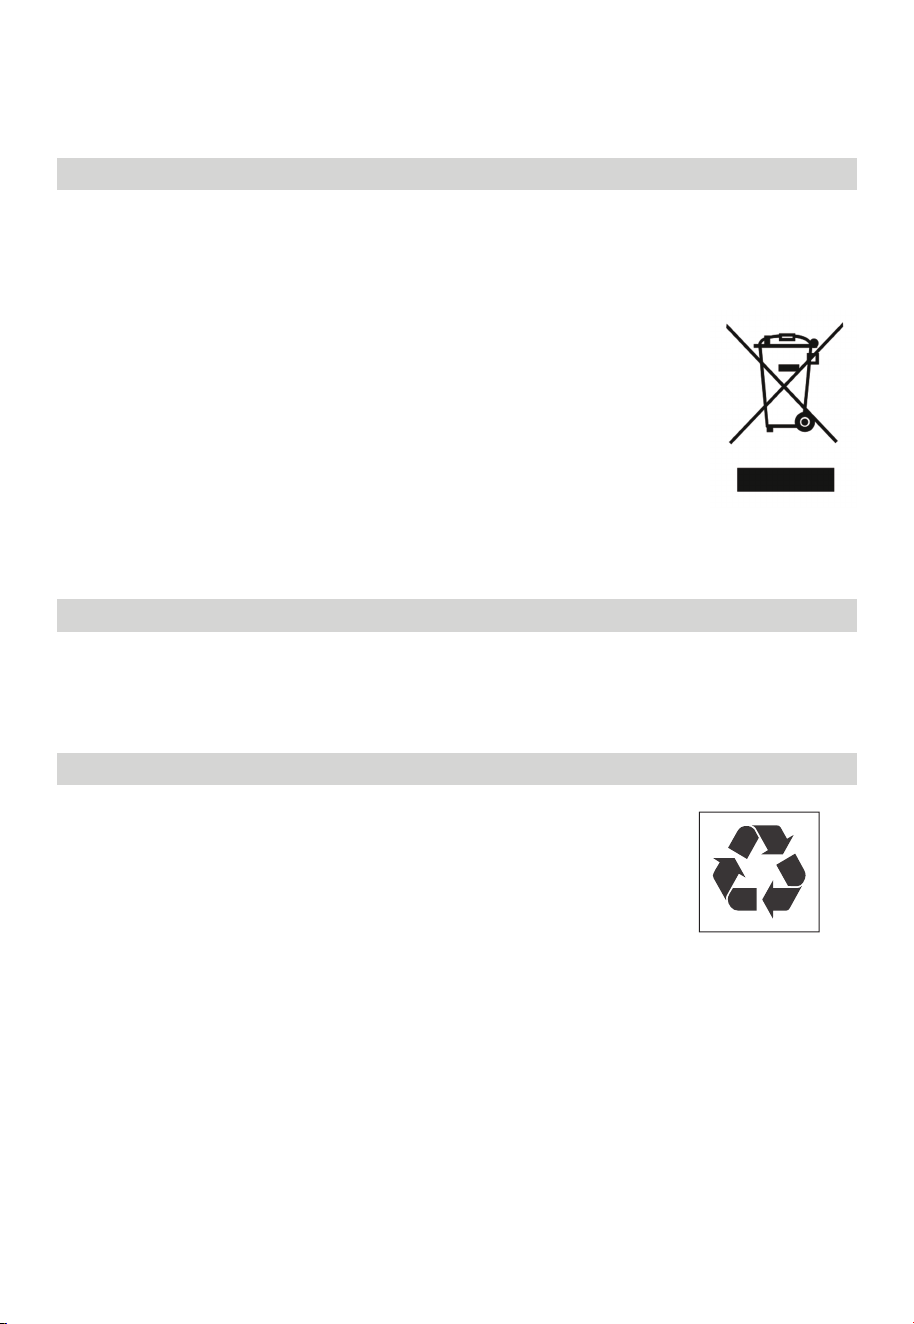
33
ELIMINACIÓN Y RECICLAJE
Instrucciones importantes para el medio ambiente
Cumplimiento de la Directiva RAEE y eliminación del producto de desecho:
Este producto cumple con la Directiva RAEE de la UE (2012/19/UE). Este producto lleva un
símbolo de clasificación de residuos de equipos eléctricos y electrónicos (RAEE).
Este símbolo indica que este producto no debe desecharse
con otros residuos domésticos al final de su vida útil. El
dispositivo usado debe devolverse al punto de recogida oficial
para el reciclaje de dispositivos eléctricos y electrónicos.
Para encontrar estos sistemas de recolección, comuníquese
con las autoridades locales o el minorista donde compró el
producto. Cada hogar desempeña un papel importante en
la recuperación y reciclaje de aparatos viejos. La eliminación
adecuada de los aparatos usados ayuda a prevenir posibles
consecuencias negativas para el medio ambiente y la salud
humana.
Cumplimiento de la Directiva RoHS
El producto que ha adquirido cumple con la Directiva RoHS de la UE (2011/65/UE). No
contiene materiales nocivos y prohibidos especificados en la Directiva.
Información del paquete
Los materiales de empaque del producto están fabricados
con materiales reciclables de acuerdo con nuestras Normas
Ambientales Nacionales. No deseche los materiales de embalaje
junto con los desechos domésticos u otros residuos. Llévelos a
los puntos de recolección de materiales de embalaje designados
por las autoridades locales.

34
AVISO DE PROTECCIÓN DE DATOS
Para la prestación de los servicios acordados con el cliente, nos comprometemos a
cumplir sin restricciones con todas las estipulaciones de la legislación de protección de
datos vigente, de acuerdo con los países dentro de los cuales se proveerán los servicios al
cliente, así como, cuando sea aplicable, el Reglamento General de Protección de Datos de
la UE (GDPR).
En general, nuestro procesamiento de datos es para cumplir con nuestra obligación
bajo contrato con usted y por razones de seguridad del producto, para salvaguardar sus
derechos en relación con la garantía y las cuestiones de registro del producto. En algunos
casos, pero solo si se garantiza una adecuada protección de datos, los datos personales
pueden ser transferidos a destinatarios ubicados fuera del Espacio Económico Europeo.
Más información se proporciona a solicitud. Puede contactar a nuestro Oficial de
Protección de Datos mediante MideaDPO@midea.com. Para ejercer sus derechos, como
el derecho a oponerse al tratamiento de sus datos personales con fines de marketing
directo, contáctenos mediante [email protected]. Para encontrar más información,
escanee el código QR.

6