To use Cam Lock
Fasteners:
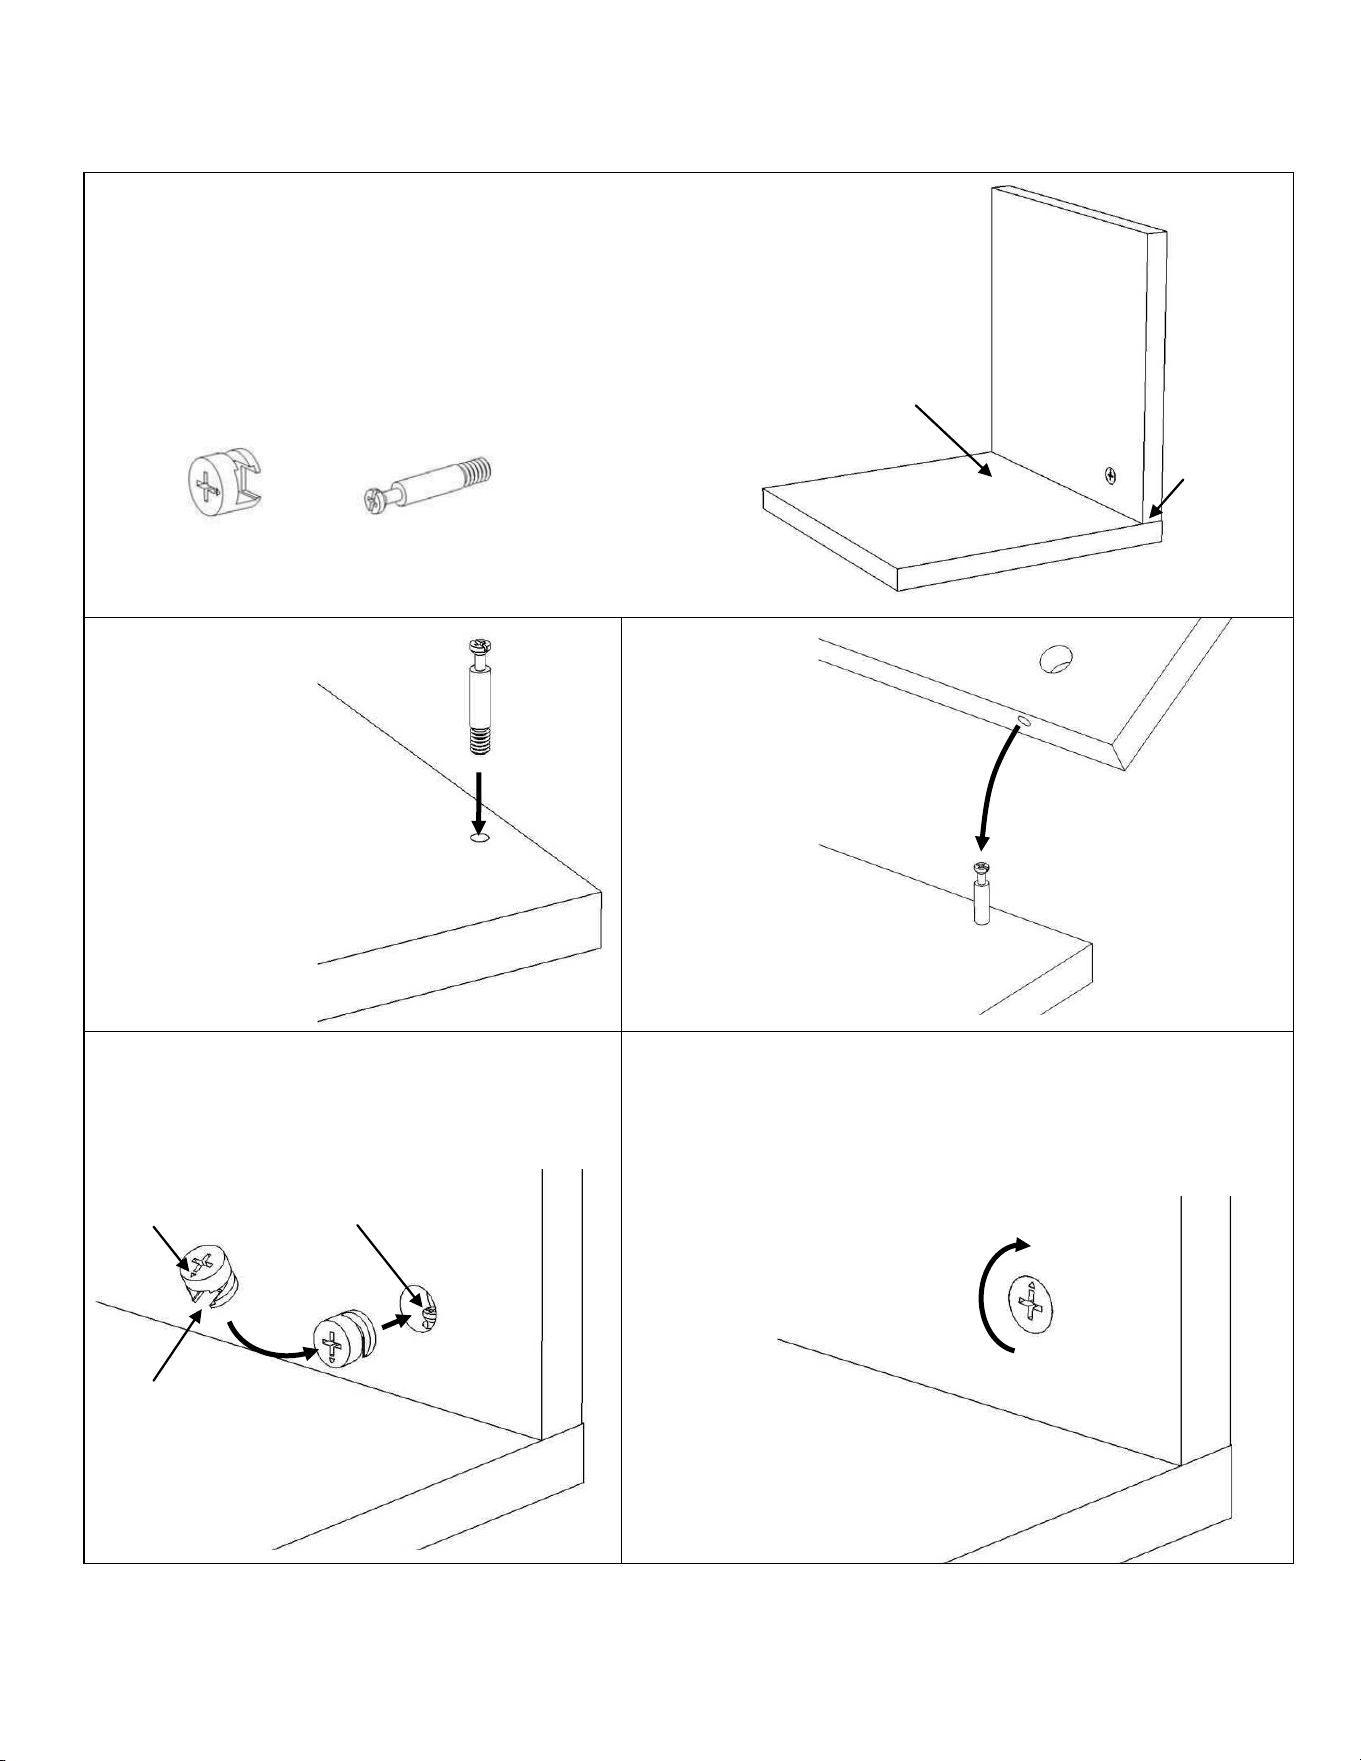
Step 1 - Insert
Cam Pin into the
flat side of a
board. Tighten
only until snug. Do
not over-tighten.
Step 2 - Fit the
hole in the
edge of the
joining board
over the Cam
Pin. The head
of the Cam Pin
will be visible
in the large
hole in the side
of the joining
board, as in
Step 3.
Step 3 - Notice the Cam Lock has a “C”-shaped
back. An arrow on the front points the same
direction as the open section. Insert the Cam Lock
into the large hole so the opening of the “C” fits
over the head of the Cam Pin.
Step 4 - Use a flat screwdriver to turn the Cam Lock clockwise
one half a turn so it locks onto the head of the Cam Pin. Turn
only until it is snug – over-tightening could cause the Cam to
bend or break.
If it will not turn the full amount, turn the Cam Pin out (counter-
clockwise) one full turn, and try the Cam Lock again.
Cam Lock Cam Pin
Board A
Board B
flat side
edge to
join
Cam Lock Fastener Assembly
Cam Locks are fasteners used to join two boards
together, usually the edge of one board (A) to the
flat side of another board (B).
arrow
Open section of back
fits over the head of
the Cam Pin
head of the Cam Pin
Page 3 of 13
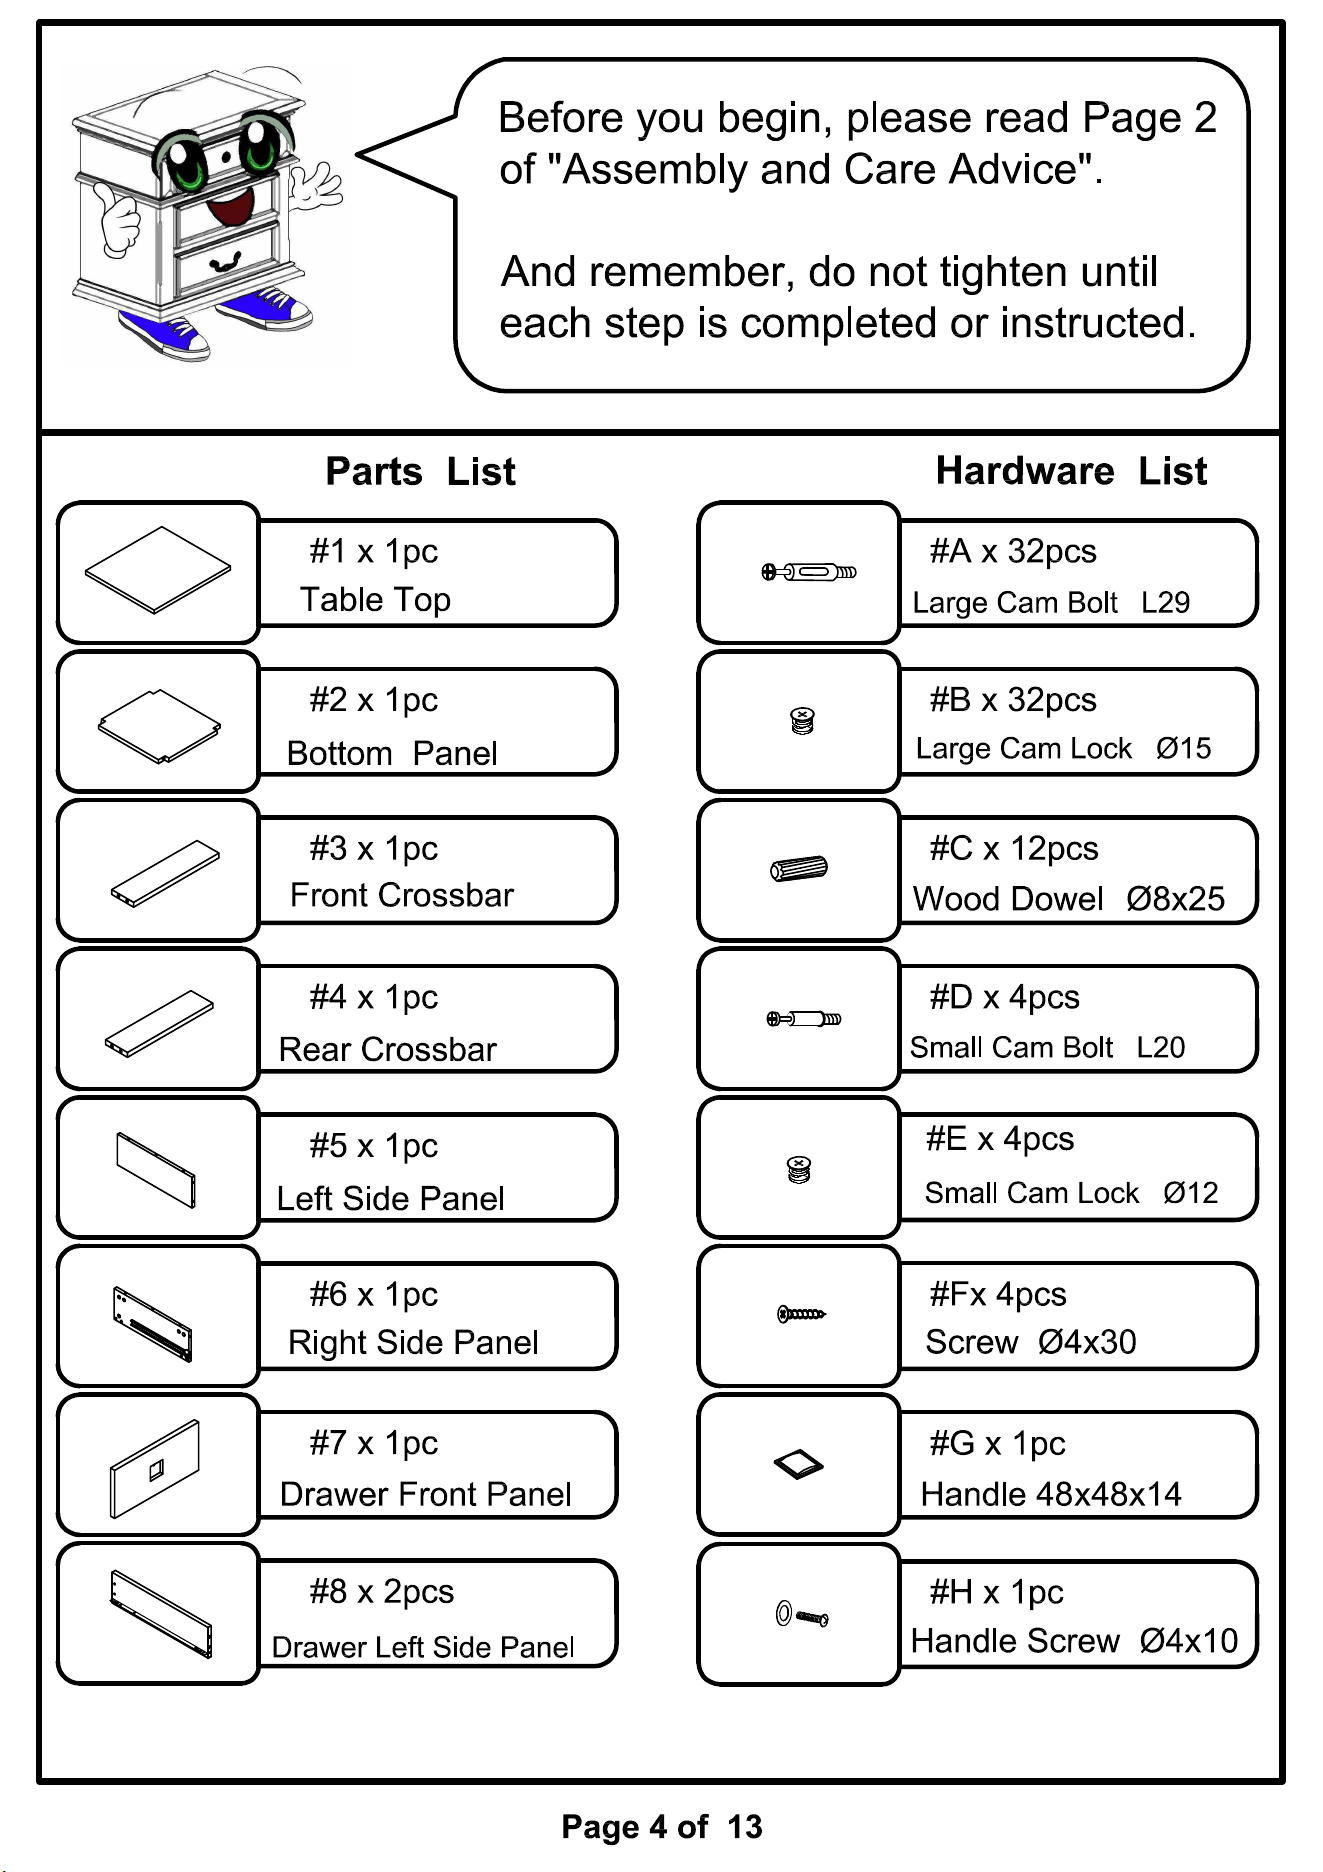
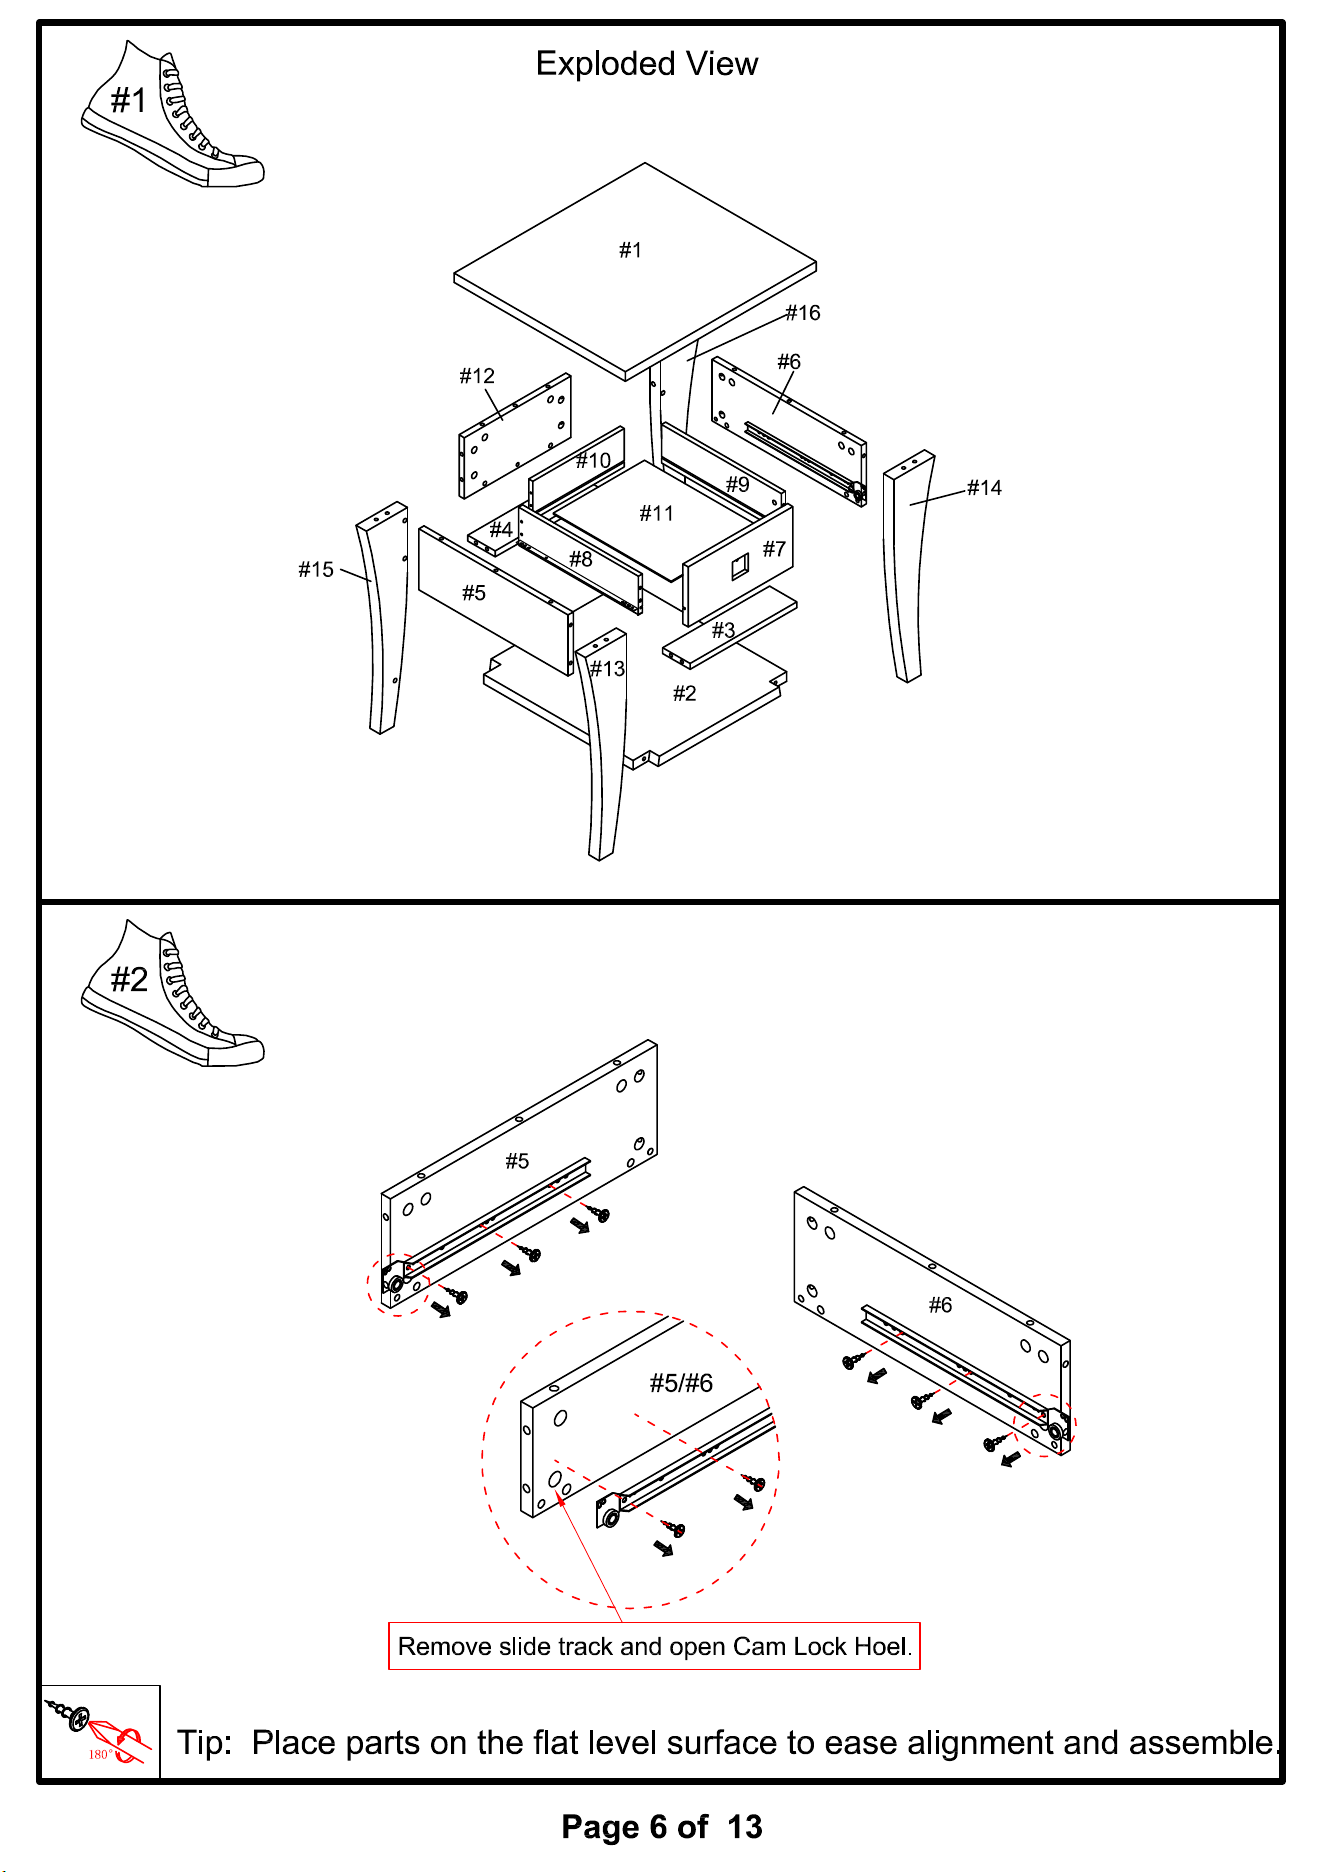
Attach dowels (#C) and cam bolts (#A) to the holes of the left and right side panels (#5,6). Align
front and rear crossbars (#3,4) to the cam bolts (#A) and dowels (#C) of left and right side panels
(#5,6). Secure by using cam locks (#B).
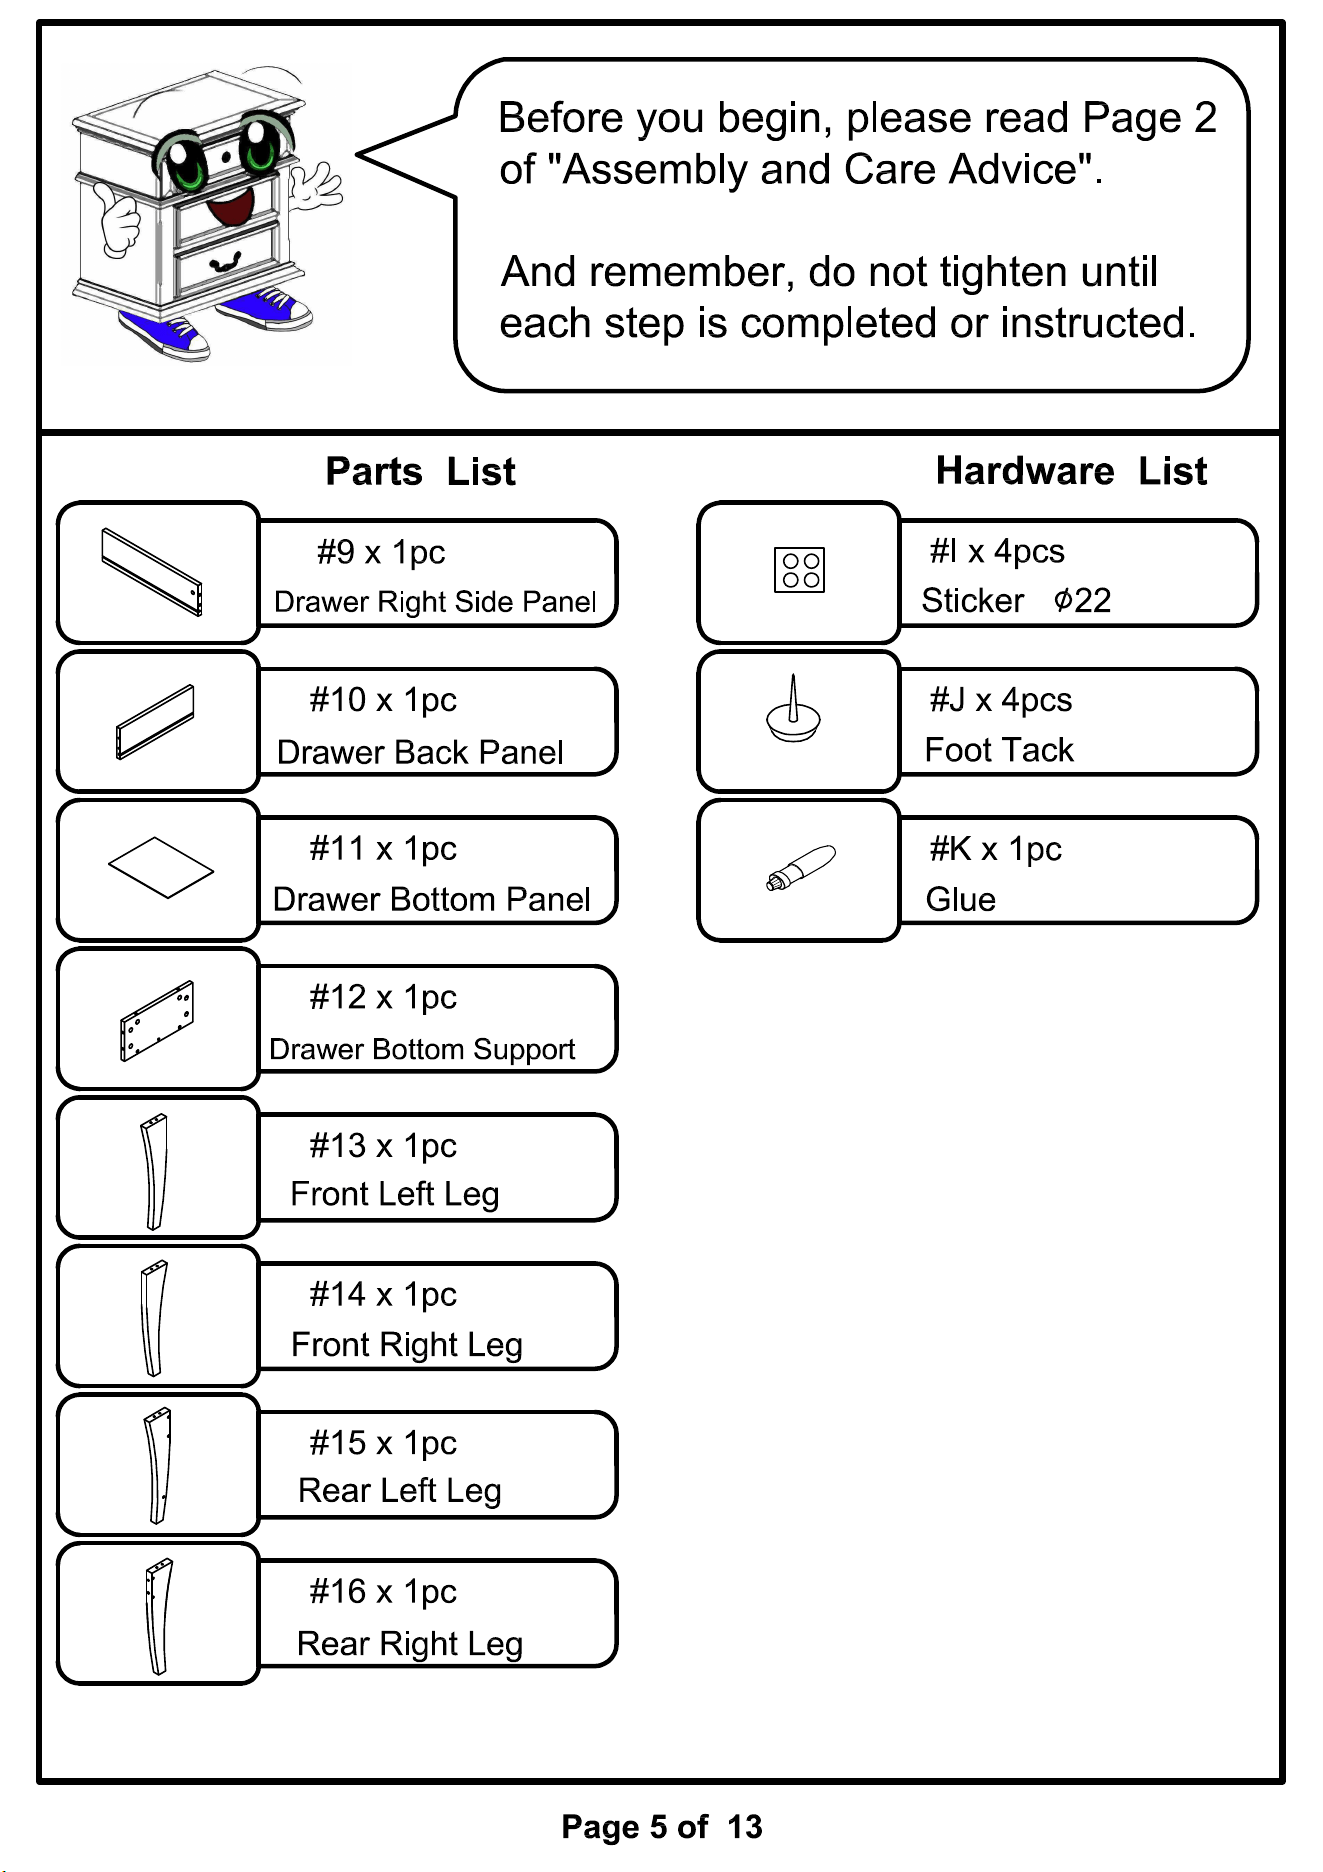
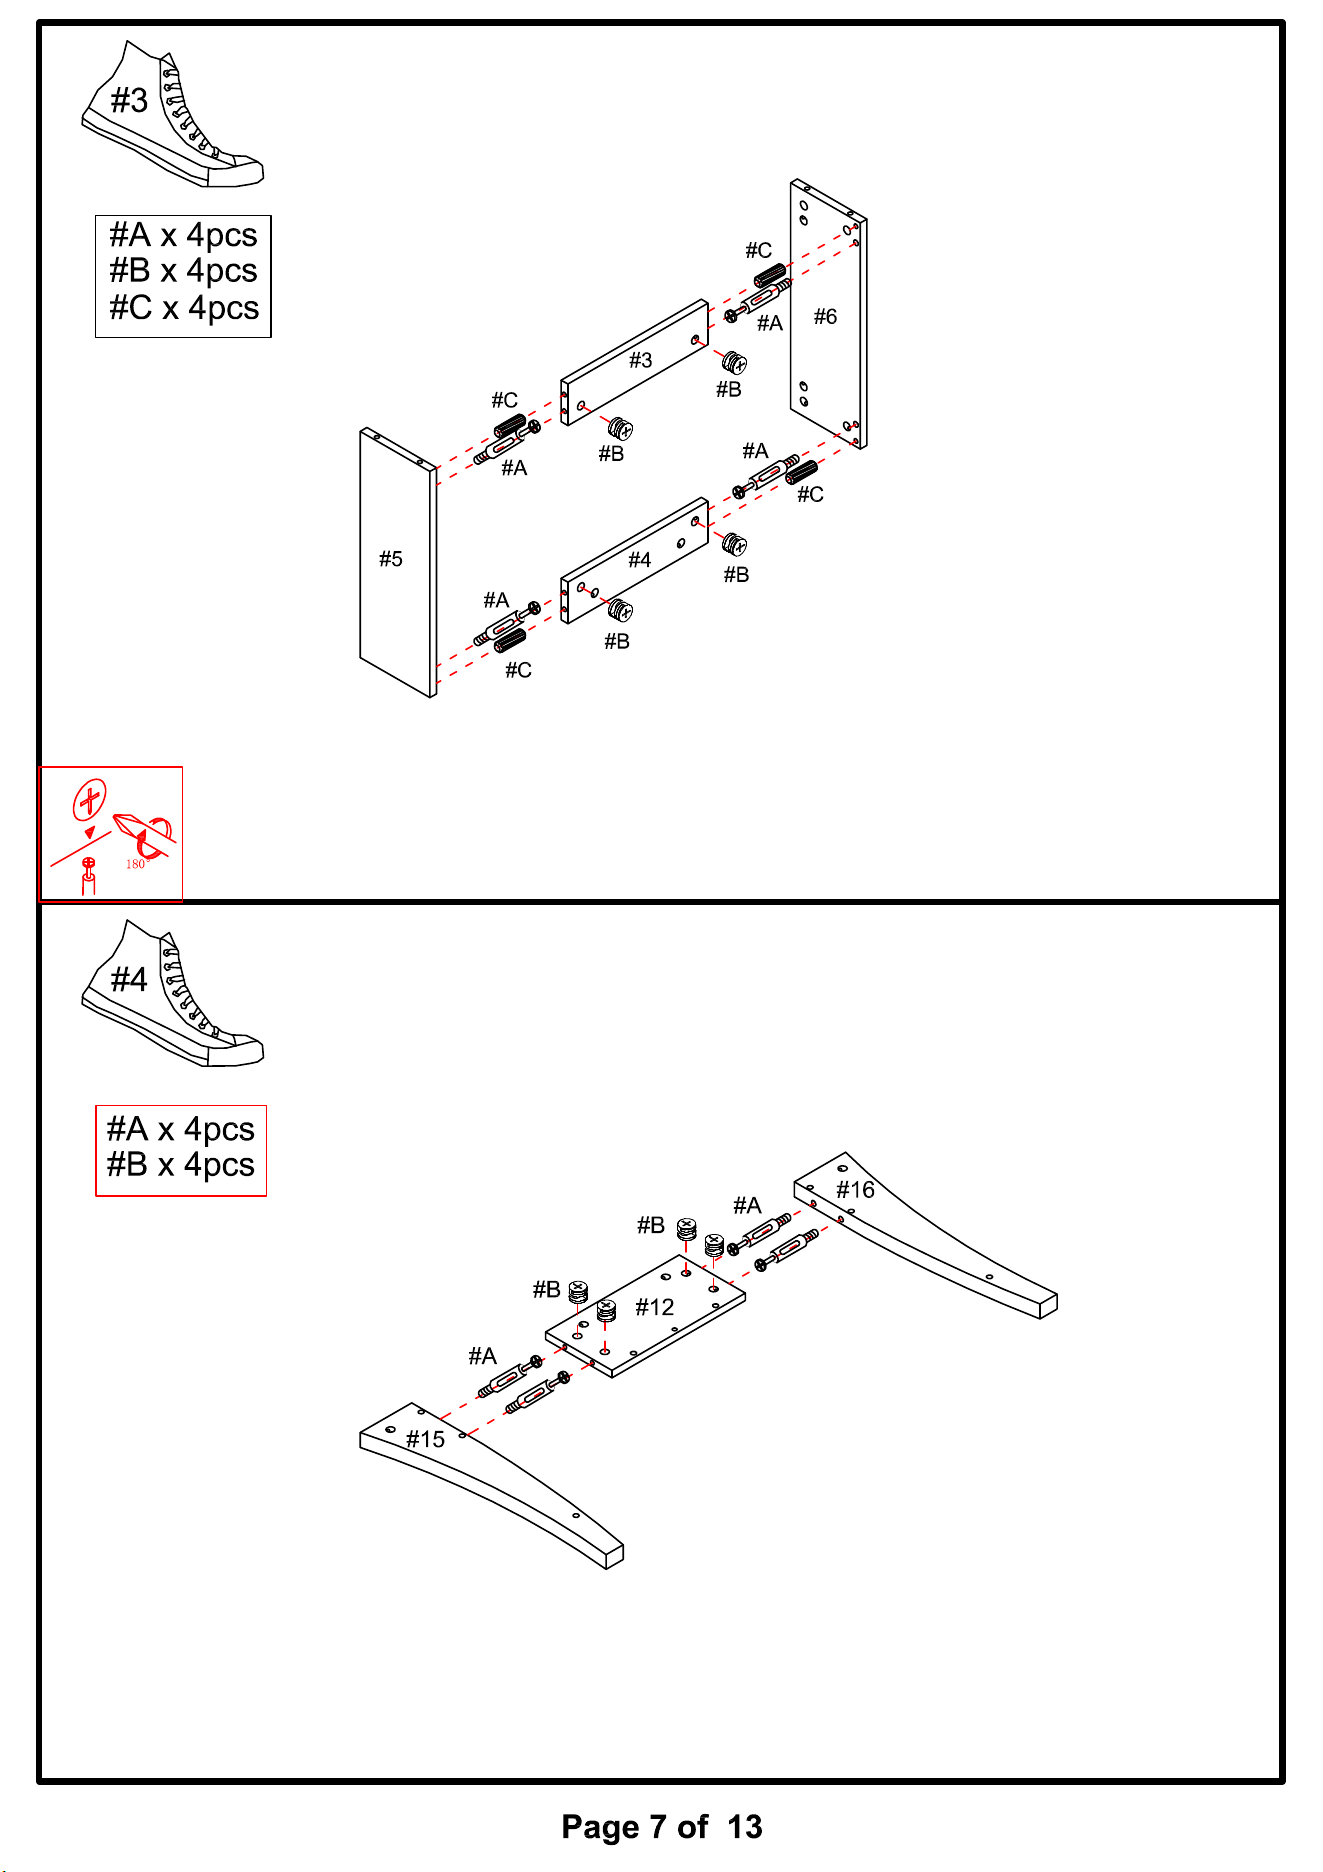
Attach cam bolts (#A) to the holes of the rear left and right legs (#15,16). Align drawer bottom support
(#12) to the cam bolts (#A) of rear left and right legs (#15,16). Secure by using cam locks (#B).
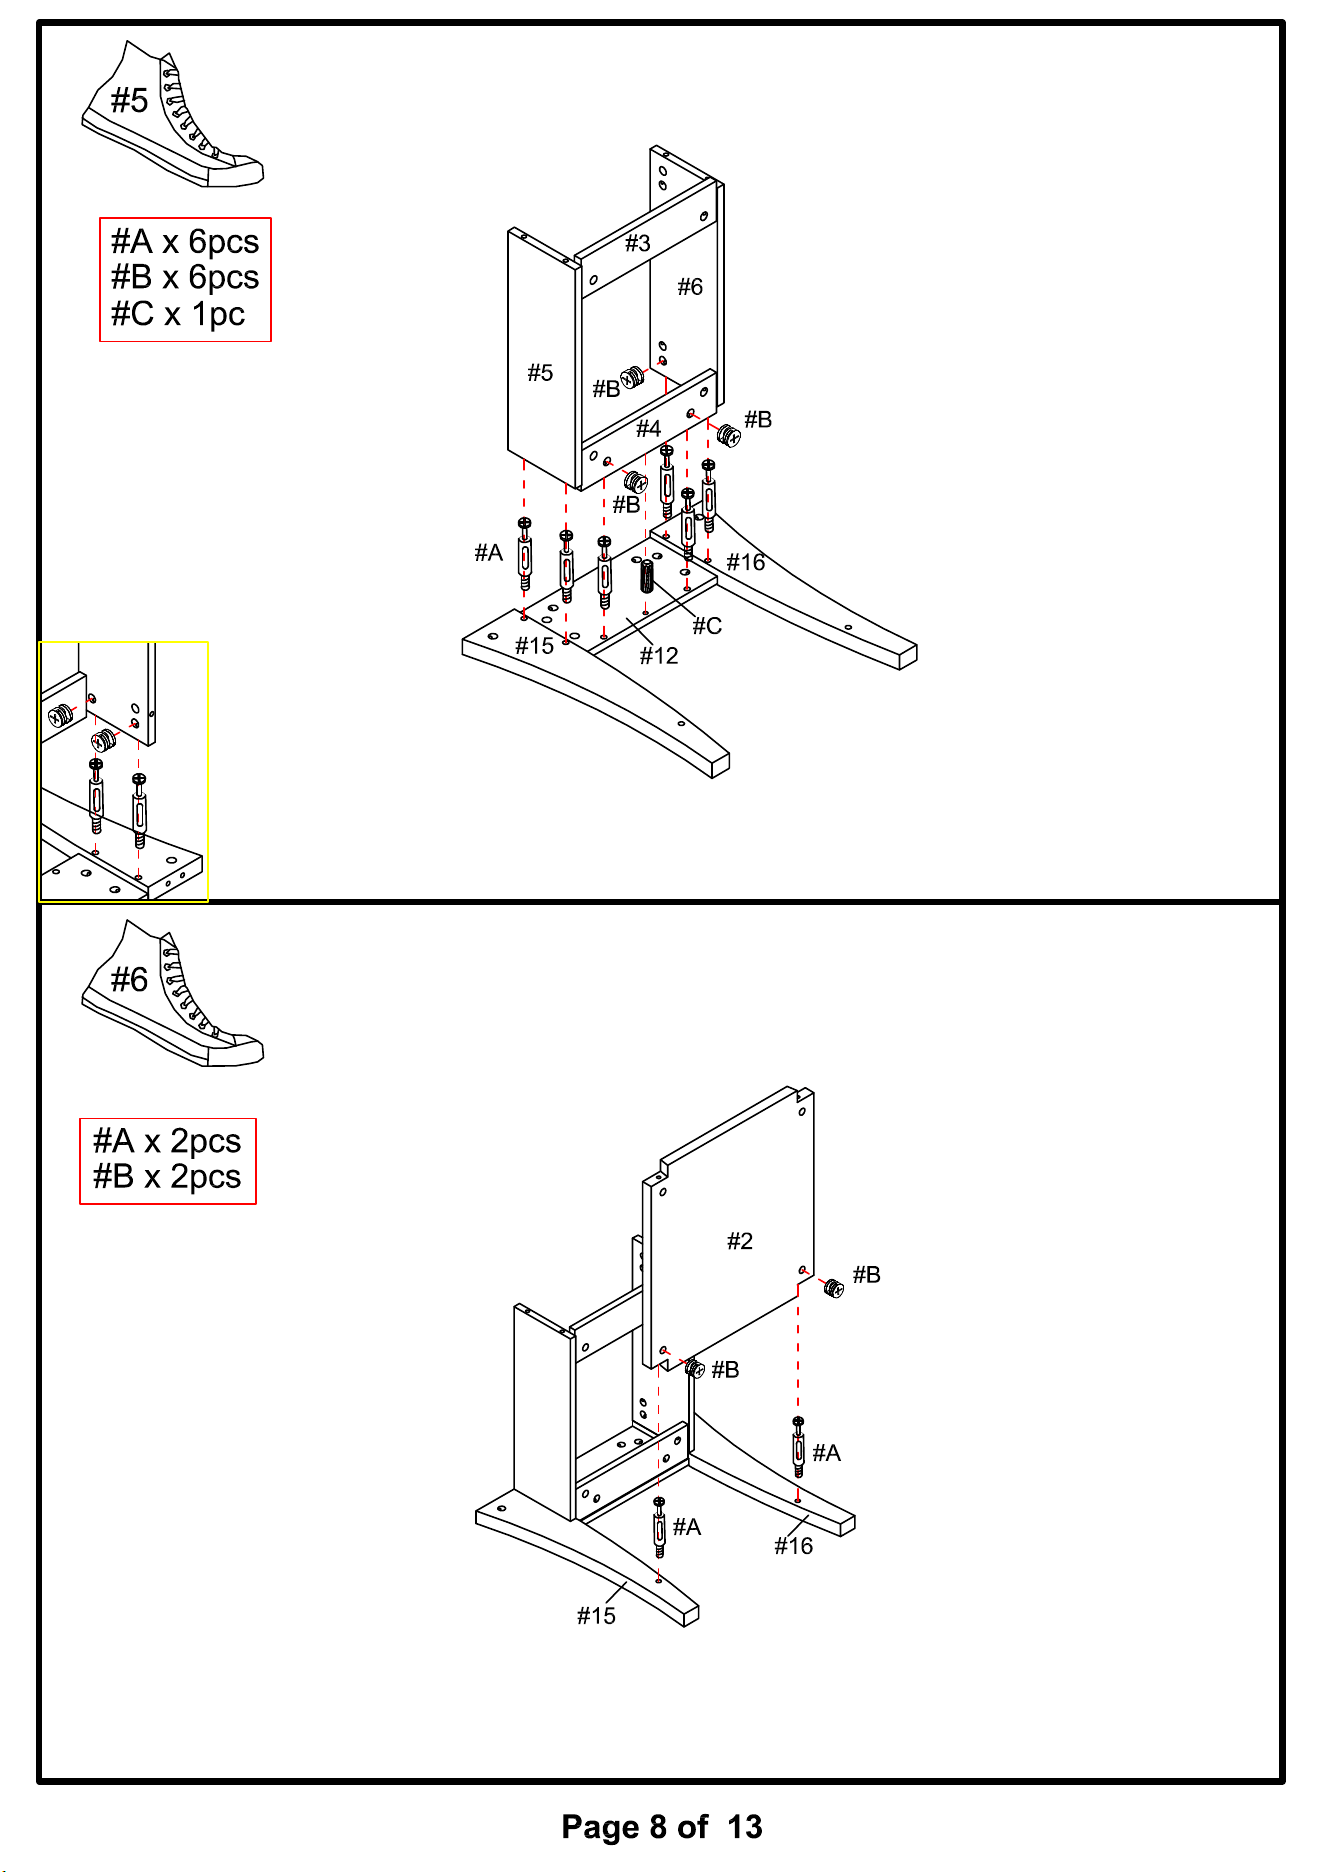
Attach cam bolts (#A) and dowels (#C) to the
holes of the legs (#15,16) and bottom support
(#12). Align side panels (#5,6) and crossbar
(#4) to the cam bolts (#A) and dowels (#C).
Secure by using cam locks (#B).
Attach cam bolts (#A) to the holes of the legs
(#15,16). Align bottom panel (#2) to the cam
bolts (#A) of the legs (#15,16). Secure by
using cam locks (#B).
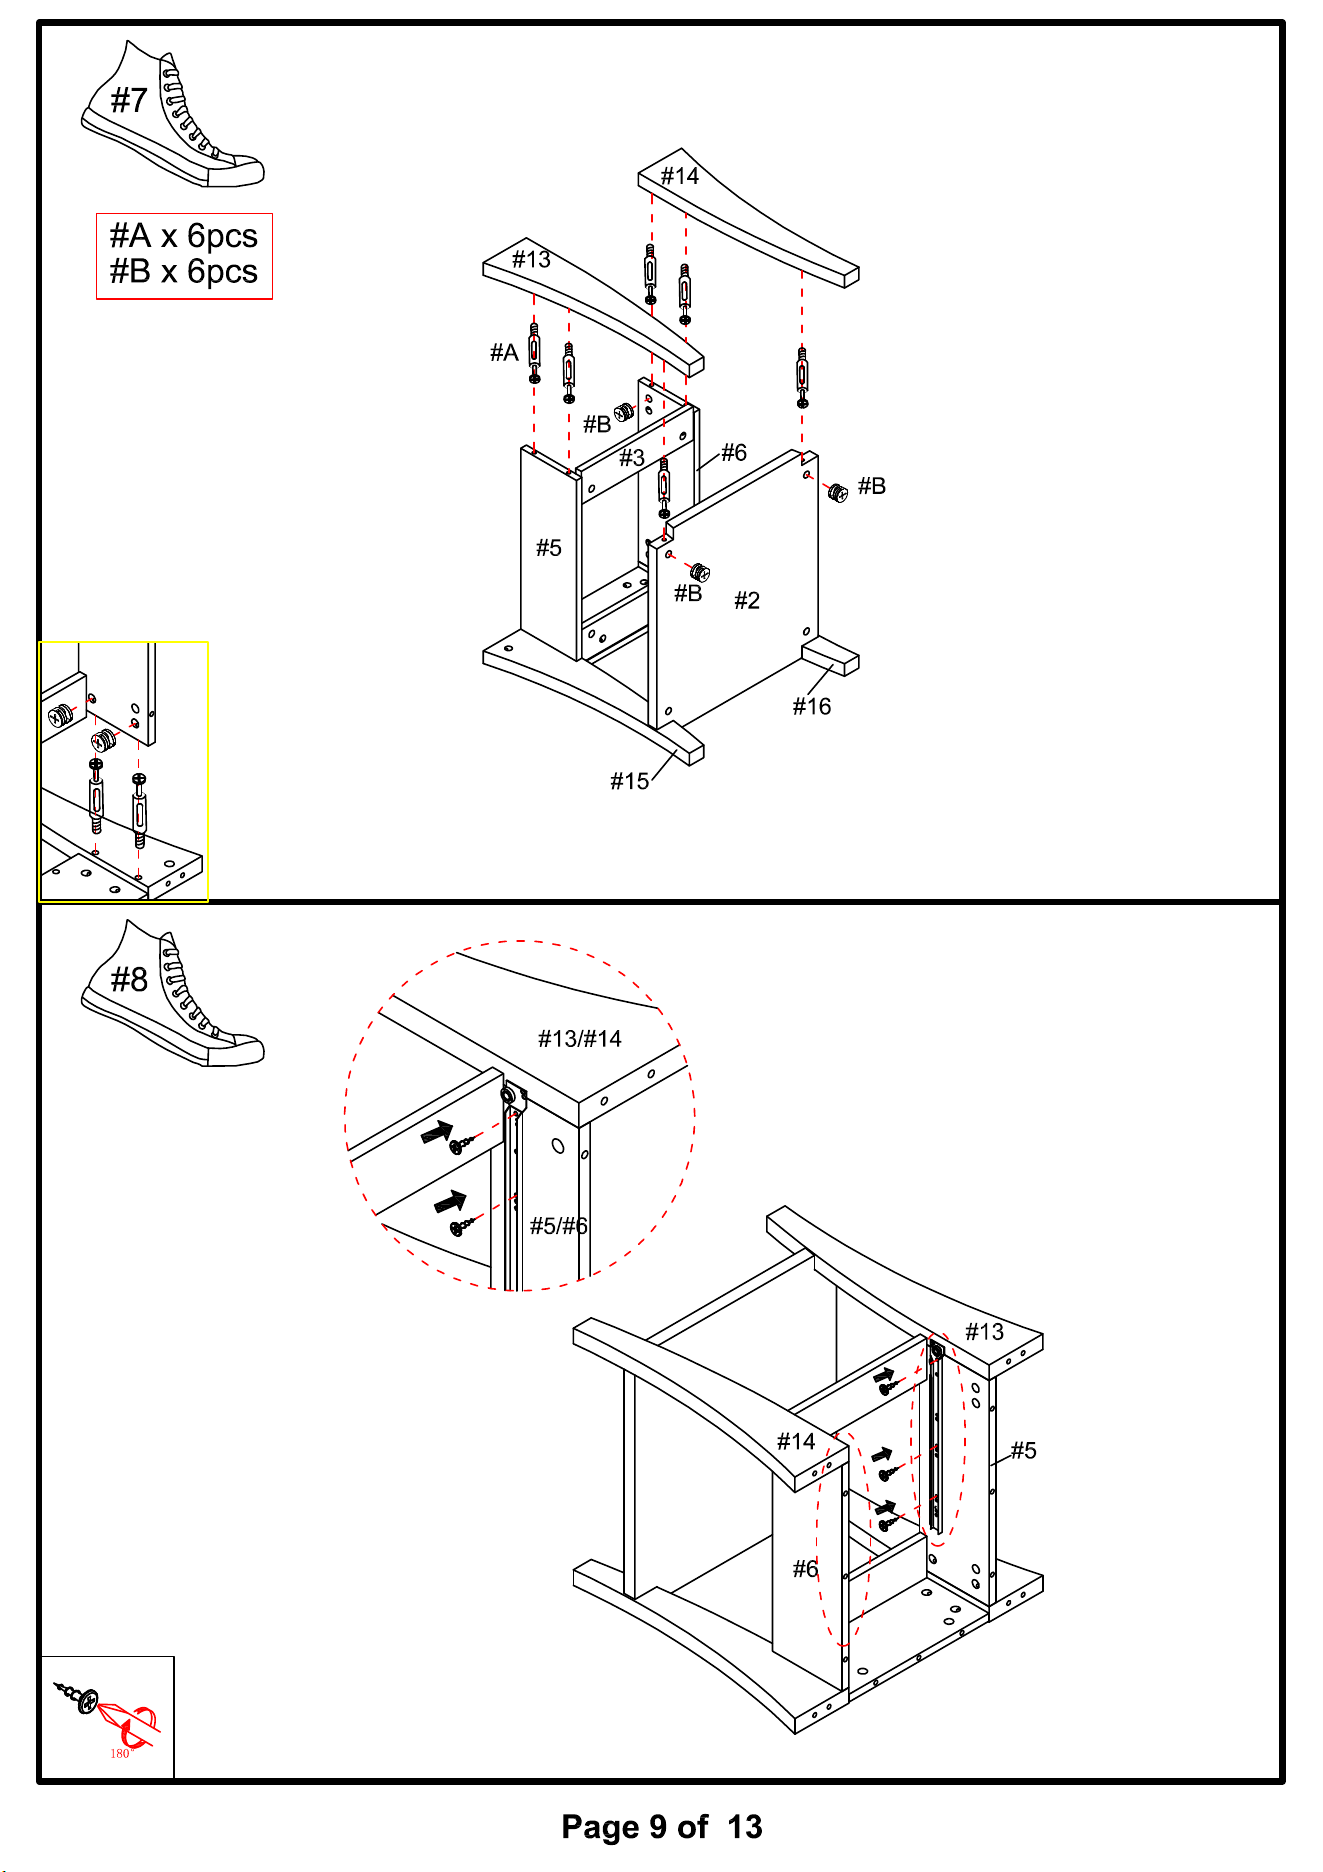
Attach cam bolts (#A) to the holes of the legs
(#13,14). Align legs (#13,14) to the holes of the
product. Secure by using cam locks (#B).
Reattach drawer rails to side panels (#5,6).
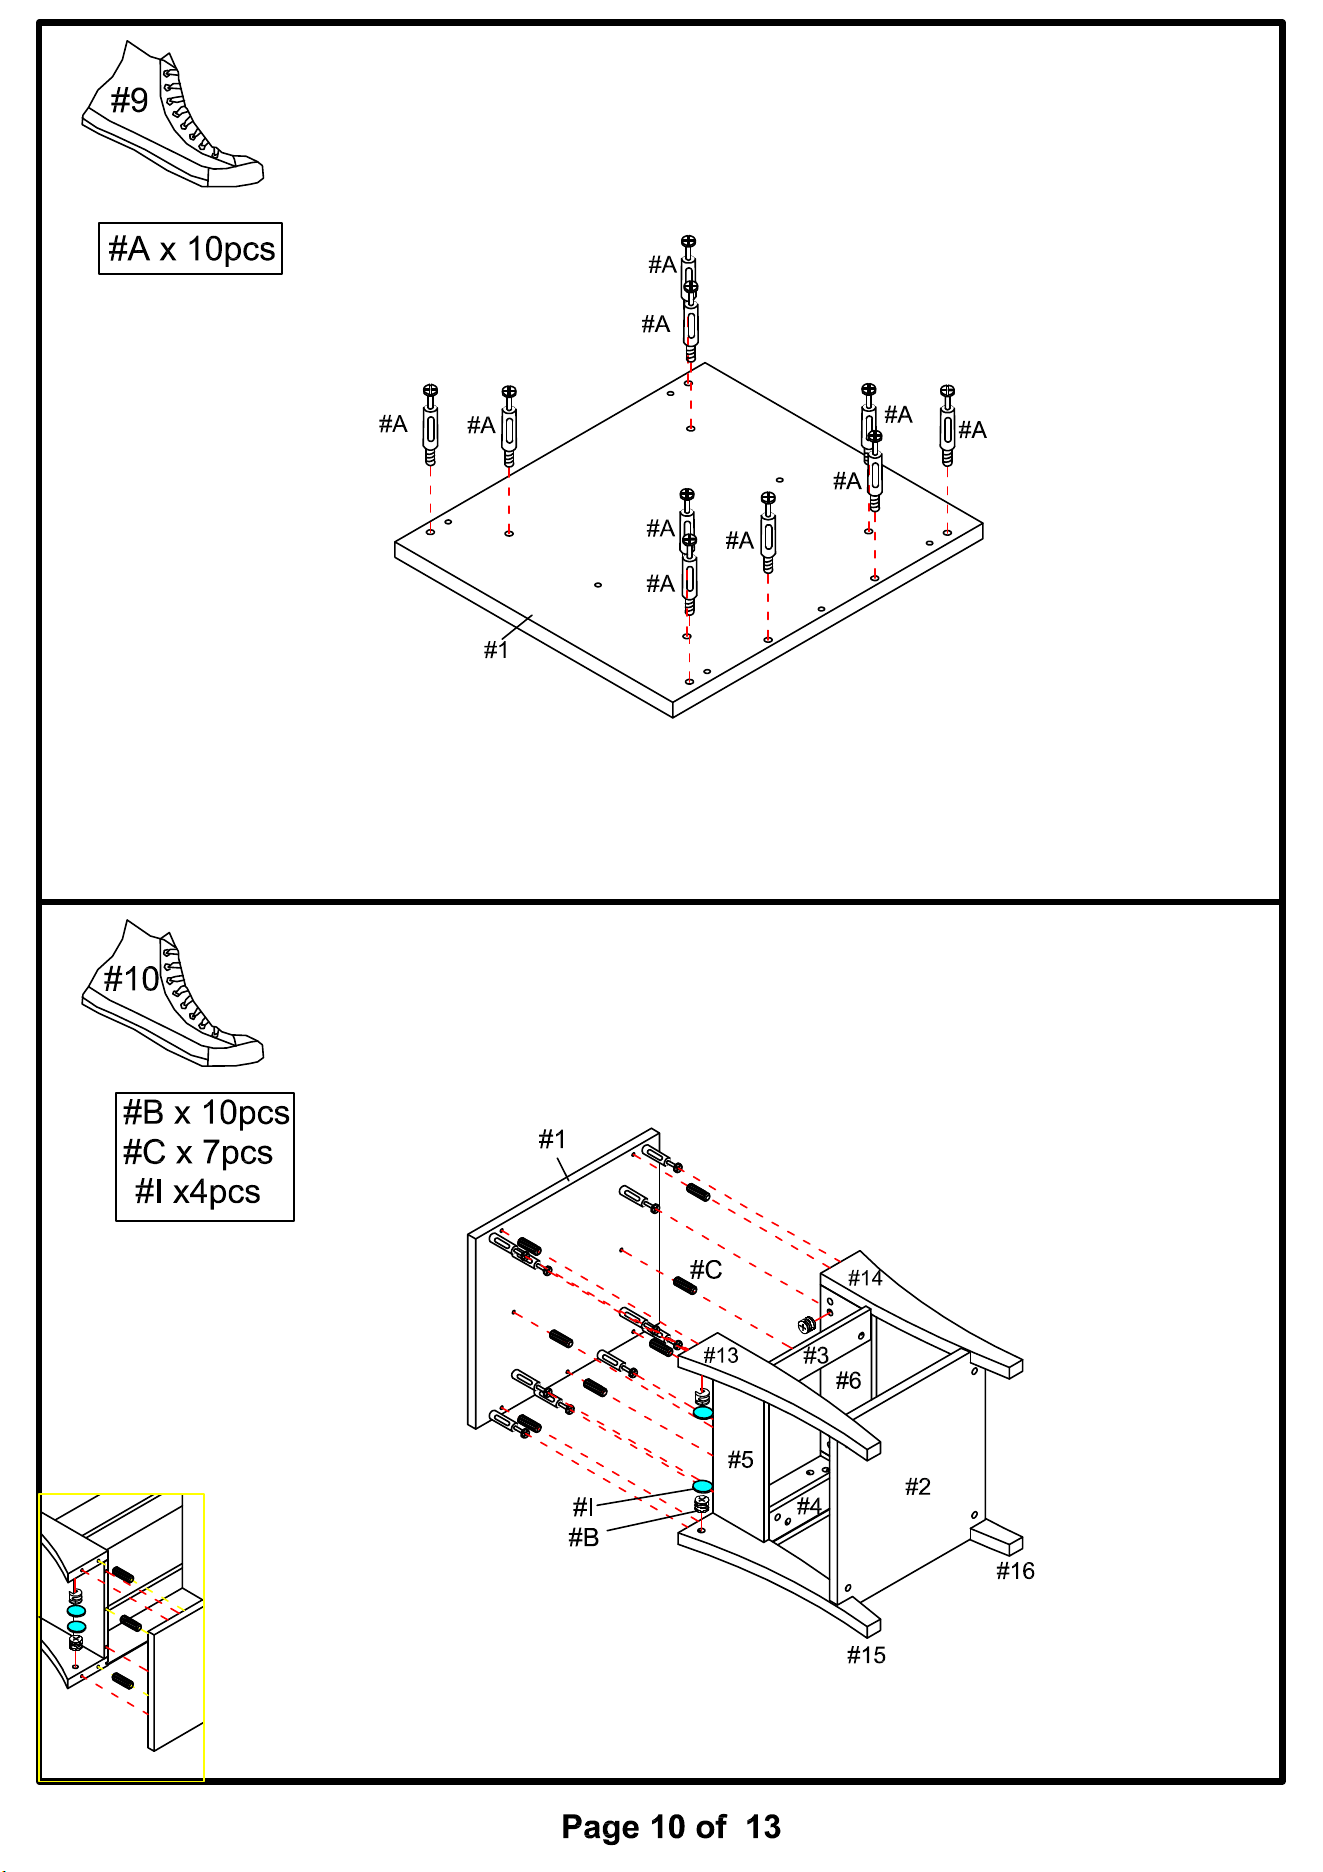
Attach cam bolts (#A) to the holes of the
top panel (#1).
Attach dowels (#C) to the holes of the top panel (#1), then align
top panel (#1) to the holes of the base. Secure by using cam locks
(#B), then cover cam locks (#B) by using stickers (#I).
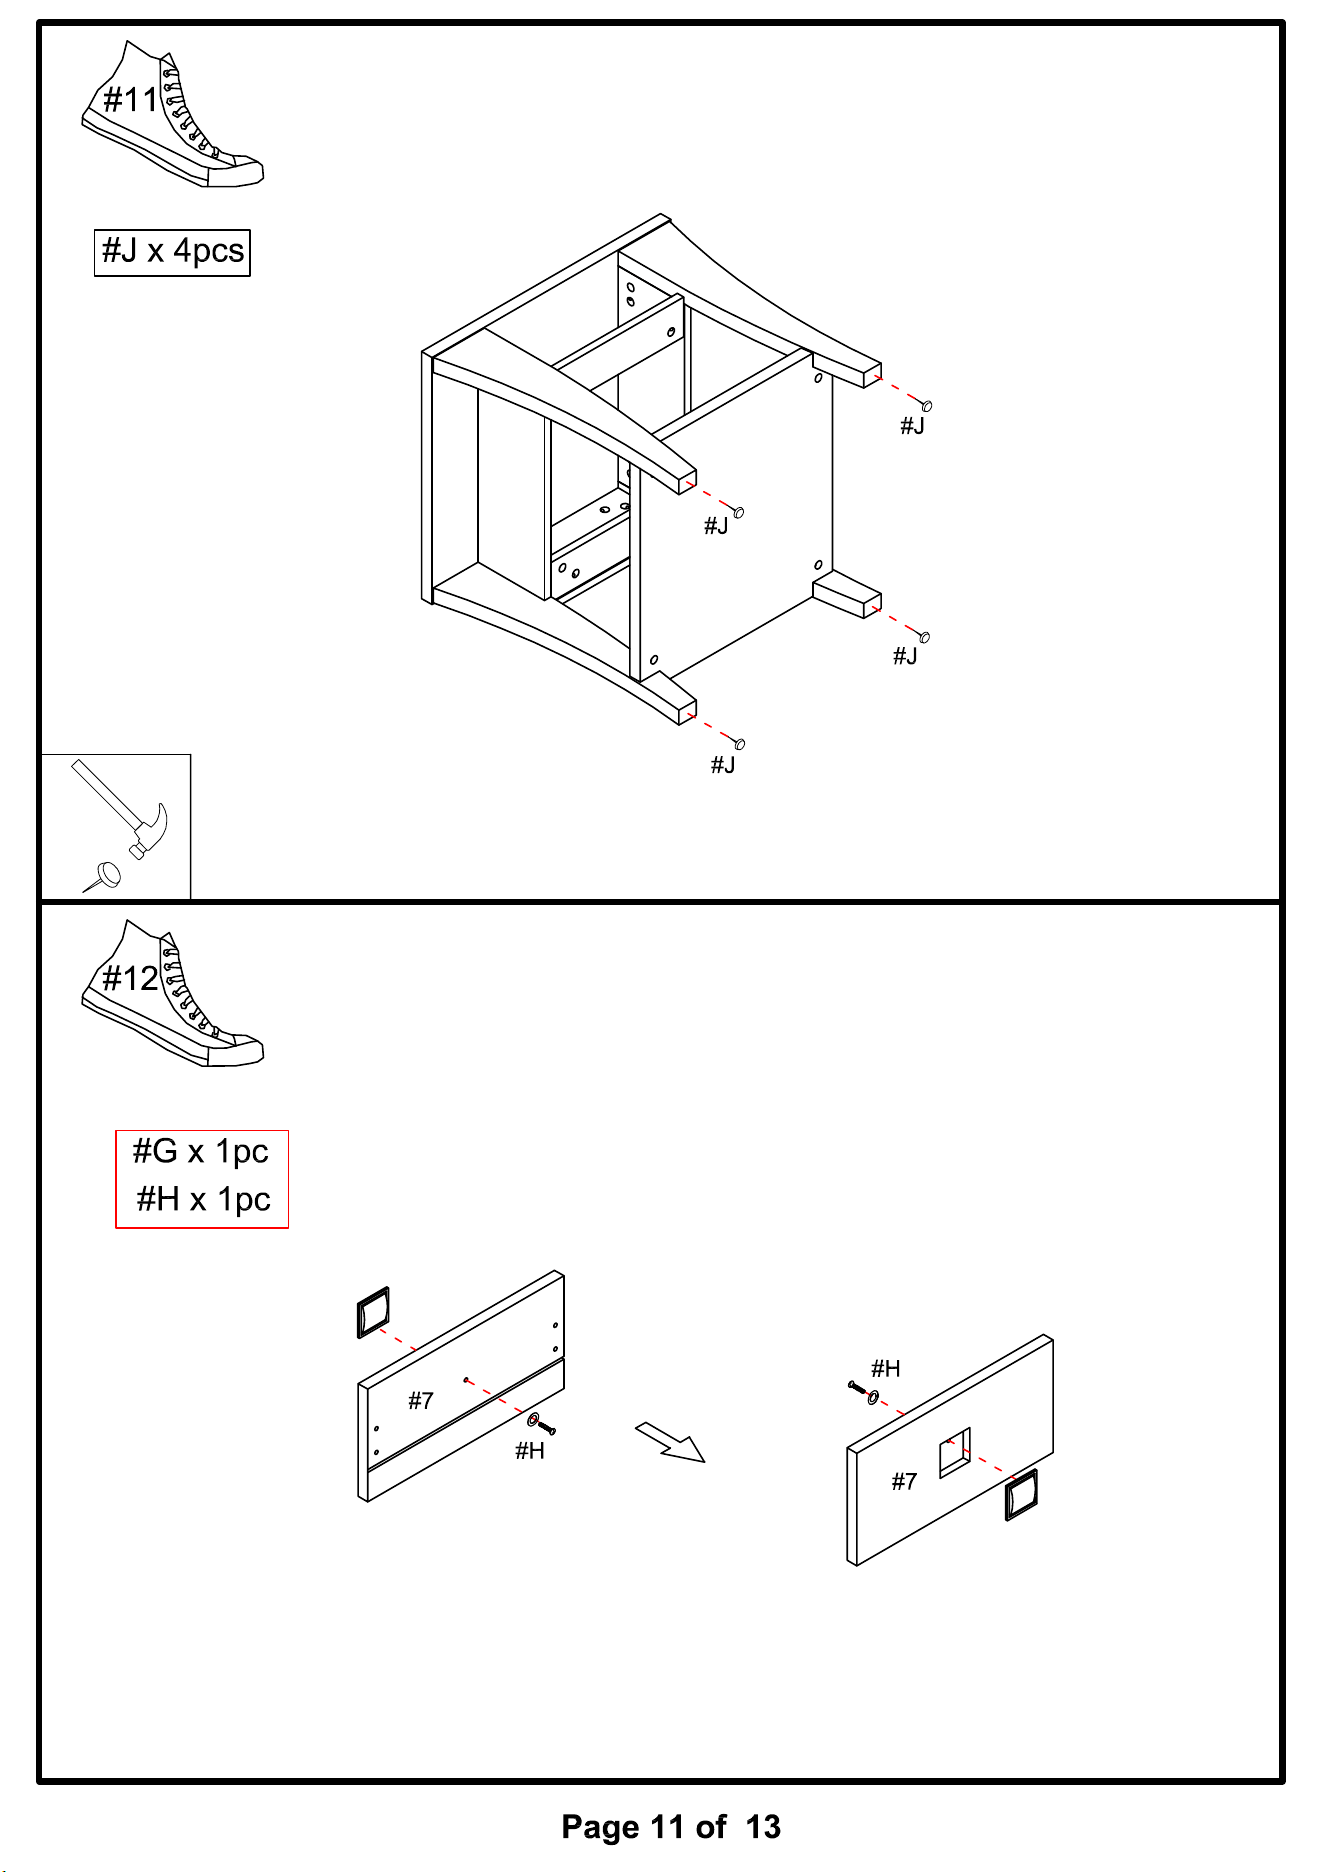
Slightly hammer in the floor protectors (#J).
Align handles to the front drawer panel (#7), then
secure by using bolts and washers (#H).
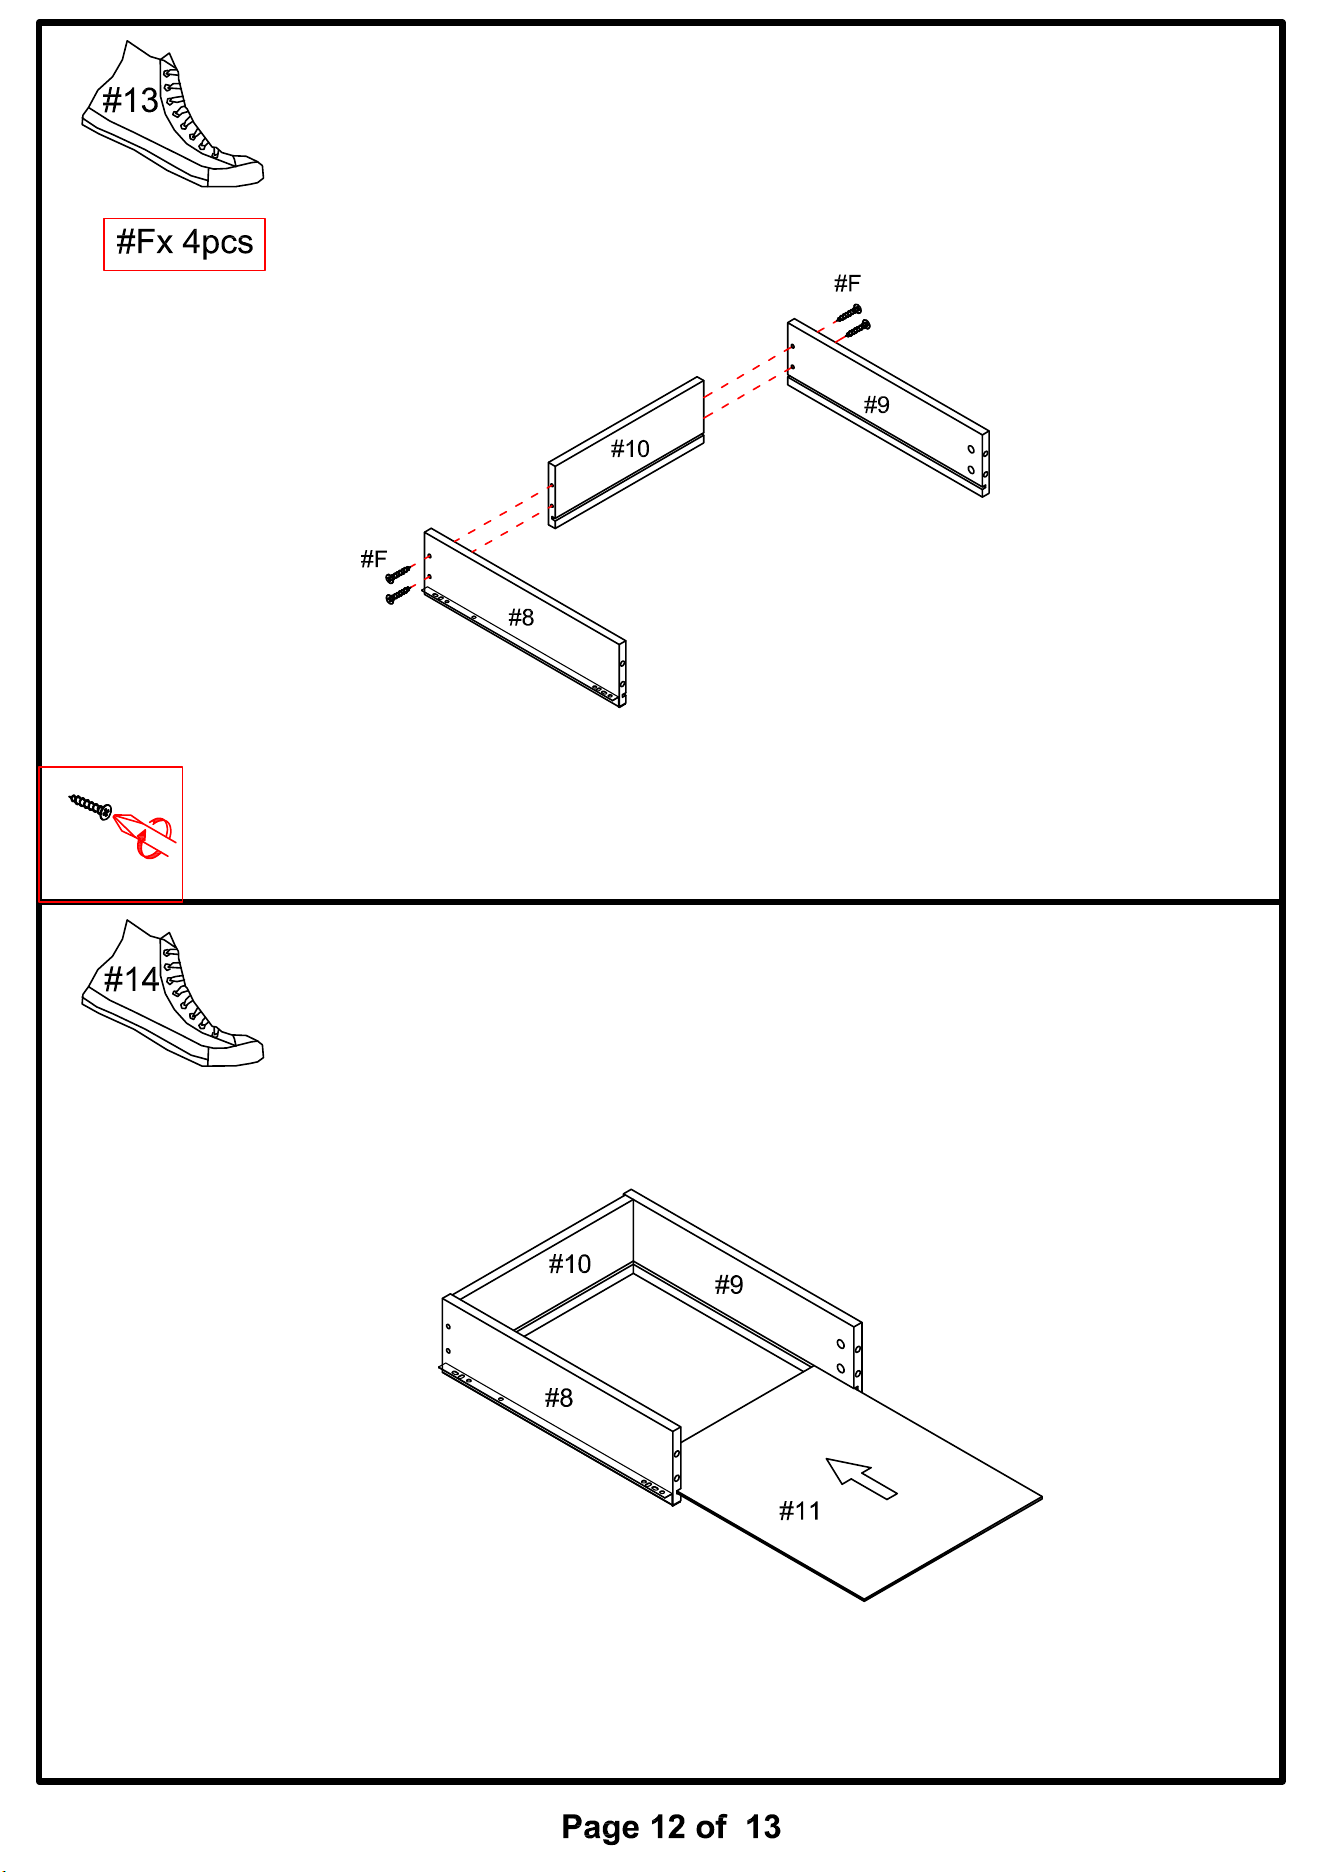
Align side drawer panels (#8,9) to the holes of the back drawer panel (#10),
then secure by using screws (#F).
Align and slide bottom panel (#11) through the thin lined gaps of the drawer panels.
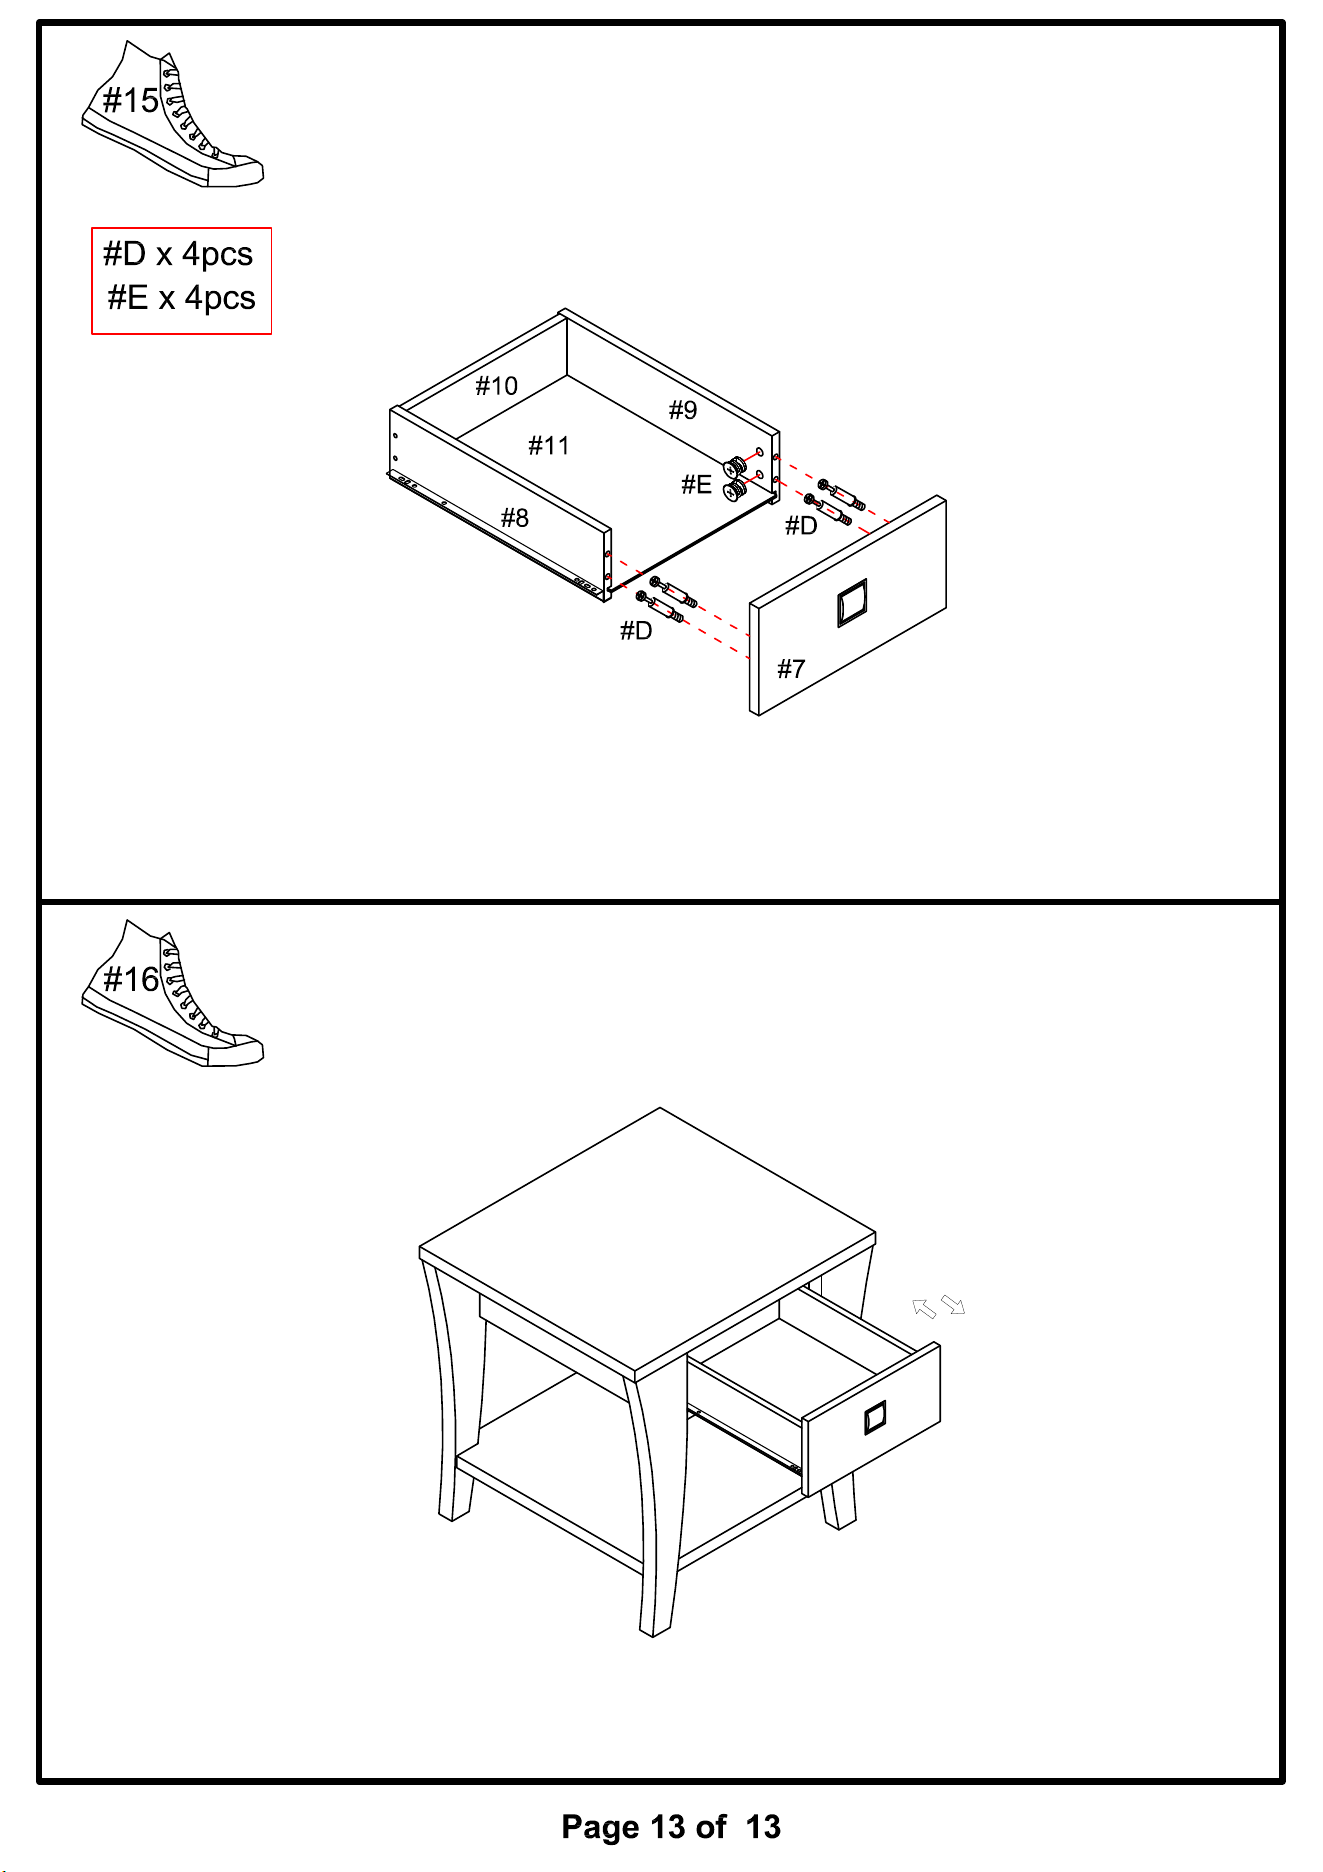
Attach cam bolts (#D) to the holes of the front drawer panels (#7). Align front drawer panel
(#7) to the holes of the drawer. Secure by using cam bolts (#E).
ASSEMBLY COMPLETED