Instruction Manual
2
INTRODUCTION
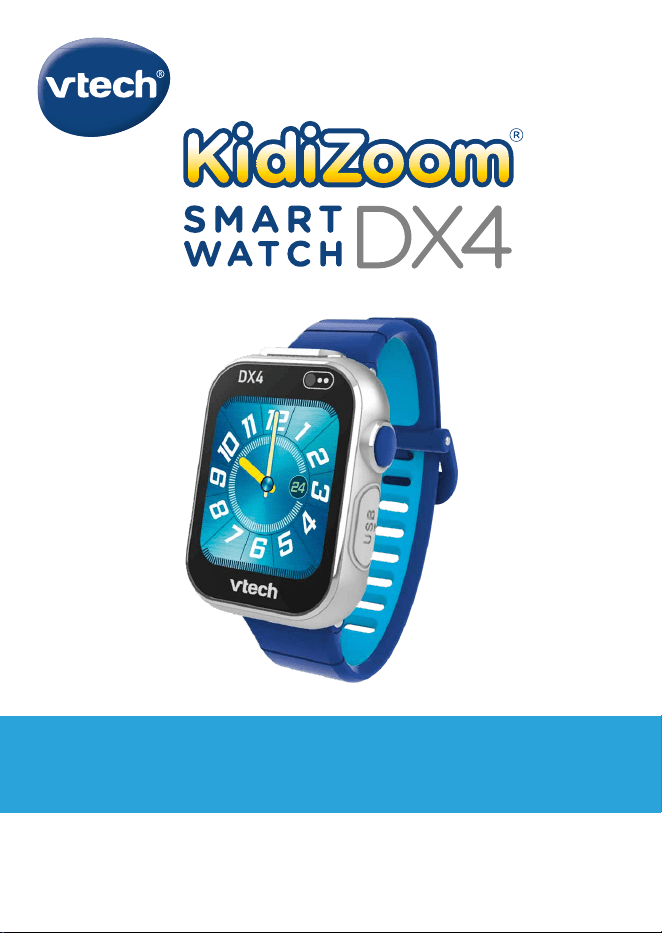
Thank you for purchasing the KidiZoom
®
Smartwatch DX4!
This exciting smart watch features two cameras for your child to capture
everything from action videos to seles. Play games and activities on
the bigger, higher-resolution screen. Tell time with favorite clock faces or
customize your own.
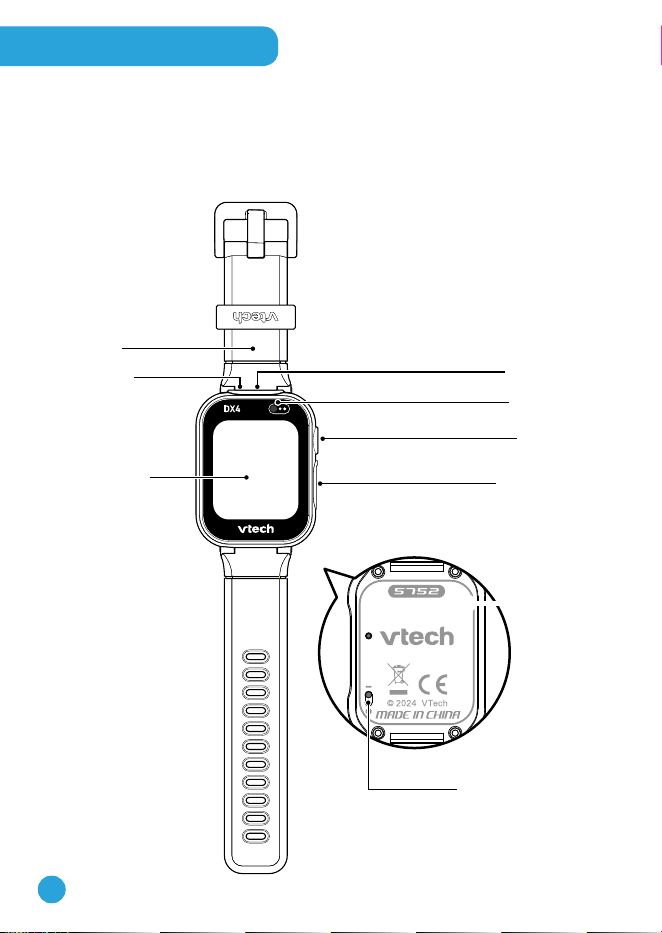
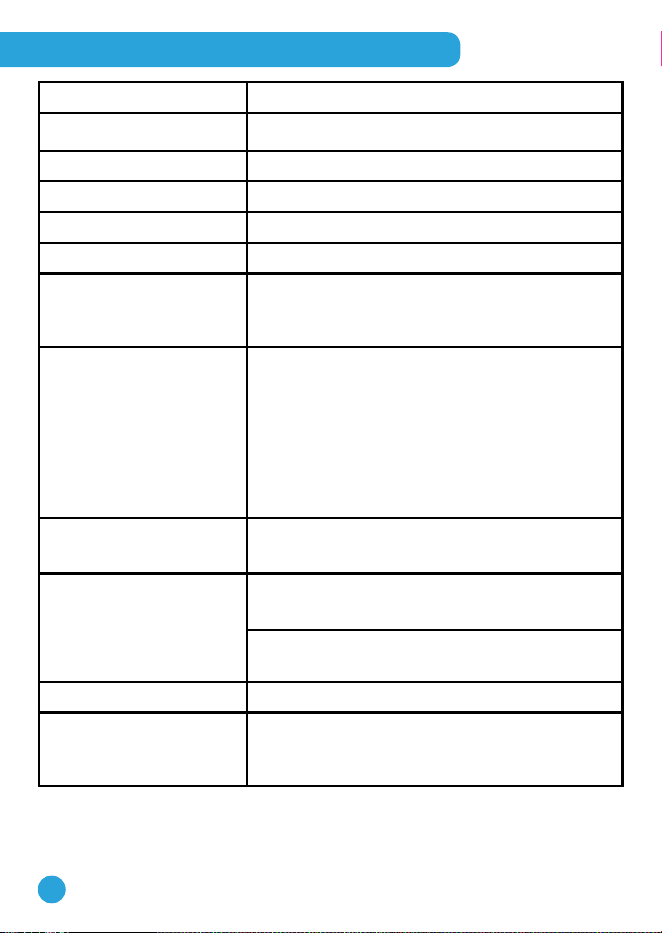
Front Camera
Selfie Camera
Micro-USB Port
Home Button
Master Power Switch
Touch Screen
Wristband
Microphone

3
1. Home Button
From Clock Mode:
Press this button to display the home menu to choose other
activities.
Hold down this button for two seconds to turn the screen off.
From the Home Menu:
Press this button to display the clock screen.
In other activities:
Press this button to return to the previous screen.
2. Micro-USB Port
Connect to your computer with the included Micro-USB Cable to
transfer les and charge the watch.
INCLUDED IN THE PACKAGE
• KidiZoom
®
Smartwatch DX4
• Micro-USB cable
• Quick Start Guide
WARNING
All packing materials such as tape, plastic sheets, packaging locks,
removable tags, cable ties, cords and packaging screws are not part of
this toy and should be discarded for your child's safety.
NOTE
Please save this Instruction Manual as it contains important information.
The battery in this product must not be disposed of with household waste.
This battery is recyclable. Please follow your local recycling regulations.
ATTENTION
Pour la sécurité de votre enfant, débarrassez-vous de tous les produits
d’emballage tels que rubans adhésifs, feuilles de plastique, attaches et
étiquettes. Ils ne font pas partie du jouet.
NOTE
Il est conseillé de conserver ce guide de démarrage rapide car il comporte
des informations importantes.
The label covering the screen of the watch is packing material. Please
remove this label before use.
4
PRODUCT SPECIFICATIONS
Display
1.69" color touch screen
Supported Languages
English, French, Spanish
Photo Resolution
480 X 640 (0.3 MP)
Video Resolution
240 X 320 or 128 X 168
Video Length Limit
60 seconds per le
Focus Range
1.5 feet (45 cm) - ∞
Internal Memory
256 MB built-in memory (shared with
program data; actual memory available for
user storage will be less)
Storage Capacity
Indoor Typical Conditions:
Photos: 1400+
Videos: 10 minutes at 240 X 320
20 minutes at 128 X 168
Note: The storage capacity is an
approximation. The actual amount varies
depending on the shooting environment.
File Format
Photos: Standard Baseline JPEG
Video: AVI (Motion JPEG)
Connectivity
Connect to another KidiZoom
®
Smartwatch
DX4 to play games and send cards.
Micro-USB 2.0 cable (included) for
connecting to computer for file transfer.
Battery
Li-ion battery (not replaceable)
Optimum Operating
and Charging
Temperature
32°F - 104°F (0°C - 40°C)
5
WARNING
Prolonged wearing of any watch can cause skin irritation for some people.
Clean the watch band regularly by wiping it with a damp cloth. Be careful
not to get the watch wet, as this could damage the unit. Do not use soaps
or household cleaners, as they can get trapped under the band and irritate
the skin. Always dry the band before putting it back on. Irritation can also
occur if the band is too tight or too loose. If redness, swelling, itchiness, or
any other irritation occurs, remove the watch and consult a doctor.
GETTING STARTED
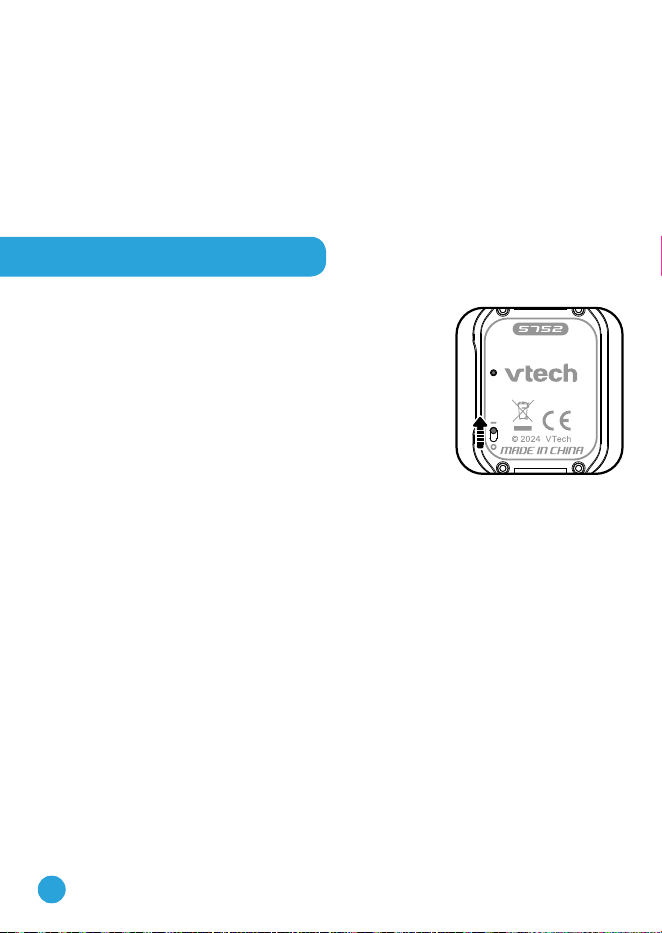
MASTER POWER SWITCH
When you use KidiZoom
®
Smartwatch DX4 for
the rst time, slide the Master Power Switch
(located on the underside of the watch) to the On
position, using a small tool such as a paper clip if
necessary. Fully charge the watch before rst use.
A full charge will take about 3 to 4 hours.
When the Master Power Switch is set to the Off
position, the unit will not function, and the battery
will not charge. Only move the switch to the Off
position if the watch will not be in use for an extended period of time.
Note: It is not necessary to switch off the watch in daily use. Once the
Master Power Switch is Off, the watch will stop functioning. After it is
turned on again, the time and date will have to be reset.
BATTERY RECHARGING
Note: Adult operation required.
The watch should be fully charged before rst use. To do so correctly,
please follow these steps:
• Make sure that the Master Power Switch is set to the On position
before charging.
• Pull up the rubber cover of the Micro-USB Port on the side of the
watch.
• Insert the included Micro-USB Cable (small end) into the Micro-USB
Port on the watch.
6
• Insert the large end of the Micro-USB Cable into a
USB port on your power adapter.
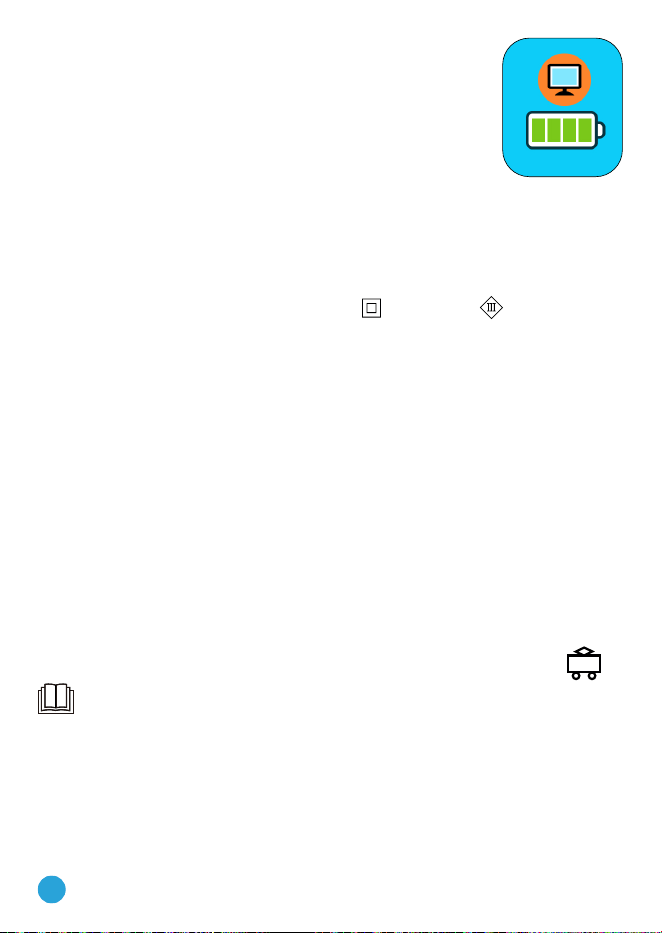
• Once the connection is successful, you will see a
battery recharging symbol appear on the watch
screen.
• Check the charging progress regularly throughout
recharging.
• When the battery is fully charged, a check mark will appear on the
battery icon, then the screen will automatically turn off. You may then
disconnect your fully charged watch from the power adapter.
CHARGING GUIDELINES
Only charge this device using a Class II or Class III power adapter
with 5V (1A or higher) Micro USB output and with applicable country
regulations, international and regional safety standards. Before use, inspect
the cable to conrm that it is in good condition and that there are no breaks
or exposed wires. Ensure there are no particles or liquid (water, juice, etc.)
in either of the connectors before plugging in either end of the cable. The
device should be completely dry with no debris in the cable connectors
when charging. Plug in the cable securely and in the correct orientation. It
is important to keep the device, the cable, and the power adapter in a well-
ventilated area when charging. Do not charge your device on soft surfaces,
such as on a bed or sofa or covered by clothes as they can trap heat around
the device. Typical charging time is approximately 3 to 4 hours. Disconnect
the device when it is fully charged. Do not leave the device charging for
more than 5 hours.
This device does not support wireless charging. Do not put it on a wireless
charger.
Safety information when using power adapters for toys
Warning: Not suitable for children under 3 years. Misuse of power
adapter can cause electrical shock hazard.
• The power adapter used with the electric toy should be regularly
examined for damage to the supply cord, plug, enclosure or other
parts, and in the event of damage, it should not be used until the
damage has been repaired.
• The toy is not to be connected to more than the recommended
number of power adapters where such connection is possible without
the aid of tool or breaking the toy.
7
• This toy should only be used with power adapters suitable for toys.
• A power adapter is not a toy and these products should only be used
under the full supervision of parents.
• Disconnect the toy from the power adapter before cleaning with any
liquids.
• This toy contains batteries that are non-replaceable.
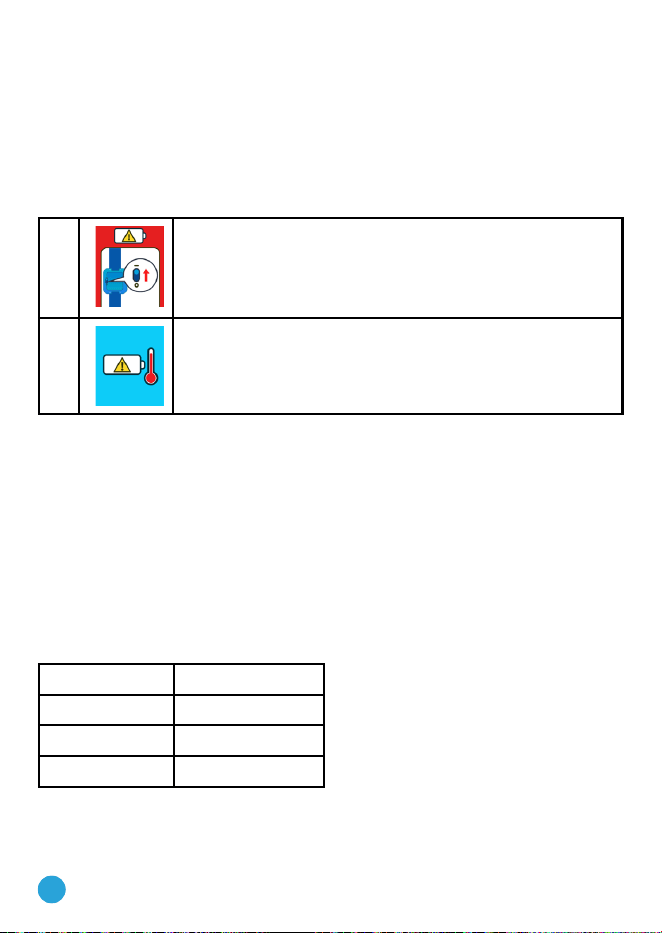
ERROR MESSAGES
1
Master Power Switch Is Off
Slide the Master Power Switch to the On position
before charging the battery.
2
Temperature Out of Range
The charging temperature range should be
32°F - 104°F (0°C - 40°C).
BATTERY LIFE
The time the battery lasts between charges depends on play. Like other
electronic devices, more frequent usage will drain the battery more
quickly. Some activities are more demanding on the battery, such as the
pedometer and taking photos and videos. The remaining battery capacity
will appear in the top right corner of the Home menu screen. When the
battery level is low, recharge the battery before further use. When the
battery level is too low, the watch will not turn on until it is recharged.
Battery Times for Reference
Condition Battery Time
Low Usage 2 weeks
Typical Usage 2 - 3 days
Heavy Usage 1 day
Note: The above battery time assumptions are based on the screen
display set to turn off when not in use. Please see the Settings section for
more details about this option.

8
Battery Maintenance
Charge the battery regularly to keep it operating at optimum performance,
even when the watch isn’t regularly in use. For example, charge the watch
at least once every six months. Slide the Master Power Switch to the Off
position if the watch will not be in use for an extended period of time.
The batteries within this toy are permanently encased. Before giving this
toy to a child make sure there are no signs of damage. Regularly check
the toy and dispose of it immediately if there are any signs of damage.
Do not dispose of the toy in a re, as the batteries may leak and explode.
Keep batteries safely out of children’s reach before disposing of them via
a safe disposal system.
SPLASH-PROOF FOR EVERYDAY PLAY
• Do not put under running water.
• Do not submerge in water. Not suitable for showering, bathing or
swimming.
• Keep the rubber cover over the Micro-USB Port closed tightly while it
is not in use in order to prevent possible water damage.
TO BEGIN USING
KIDIZOOM
®
SMARTWATCH DX4
Make sure the Master Power Switch is set to the On position and that the
battery is fully charged before using the watch.
SELECT A LANGUAGE
The rst time you turn On your watch, press the Home Button.
The language selection screen will appear. Simply tap on your preferred
language, then tap the check mark icon
. If prompted, select the
country also, then tap the check mark icon .
SET DATE AND TIME
Next, the date and time screens will display.
Swipe up or down over the month, day, year, hours and minutes to set the
current date and time. Tap the check mark icon
when you're done.

9
TO BEGIN PLAY
Press the Home Button to go to the Home Menu to access different
activities.
AUTOMATIC SCREEN OFF
To preserve battery life, the screen will automatically shut off after a short
period of time when in Clock mode.
Note: The auto screen-off time can be adjusted in Settings. Please refer to
the Settings section in this guide. From other activities, the watch screen
will return to Clock mode automatically if there is no input for two minutes.
In Camera mode, auto-exit occurs after three minutes of inactivity.
CONNECTING TO A COMPUTER
You can connect the KidiZoom
®
Smartwatch DX4 to a PC or Mac using
the included Micro-USB Cable. To transfer les between your watch and
computer, follow these steps:
• Pull up the rubber cover of the Micro-USB Port on the side of your
watch.
• Insert the Micro-USB Cable (small end) into the Micro-USB Port on
the watch.
• Insert the larger end of the cable into a USB port on your computer.
• You will see a removable drive called VTech 5752. Please use this to
transfer les to and from the watch. There is another removable drive
called VT SYSTEM, which is for storage of system data and should
not be accessed by users.
Note: Once the watch is connected to your computer, do not disconnect
the watch while les are transferring. Only eject the watch from your
computer once it completes transferring les. Once ejected, you can then
physically disconnect the watch from your computer. Ensure the rubber
cover over the micro-USB port is closed tightly.
To Back Up Photos or Videos:
• From your computer, open the DCIM folder on the removable drive
VTech 5752.
• Drag and drop the les to a location on your computer.

10
To Back Up Recorded Sounds:
• From your computer, open the VOICE folder on the removable drive
VTech 5752.
• Drag and drop the les to a location on your computer.
To Transfer Photos or Videos to the KidiZoom
®
Smartwatch DX4
• First, select the photo or video les you would like to download from
your computer.
• Locate and open the DOWNLOAD folder on the removable drive
VTech 5752 and drag and drop the photo or video les into the
PHOTO or VIDEO subfolders.
Note: Do not transfer photo or video les created by other cameras
(except for KidiZoom
®
camera photo or video les) to KidiZoom
®
Smartwatch DX4, as these les may not be compatible.
Minimum System Requirements
PC Hardware Requirements:
CPU: Pentium
®
4 or above
Memory: 256 MB RAM
300 MB Hard disk space
Monitor Resolution: 1024 x 768
USB Port required
PC Software Requirements:
Microsoft
®
Windows
®
10 or above Operating System
Macintosh Hardware Requirements:
Macintosh Computer with an Intel or Apple ARM processor
Memory: 512 MB RAM
300 MB Hard disk space
USB Port required
Macintosh Software Requirements:
macOS 10.13 or above
*Internet connection required for internet-enabled functions on both PC
and Macintosh computers.
Microsoft
®
and Windows logos are trademarks of Microsoft Corporation in the United
States and other countries. Intel
®
, Pentium
®
are trademarks of Intel Corporation in
the United States and other countries. Macintosh and Mac logos are trademarks
of Apple Inc. in the United States and other countries. All other trademarks are the
property of their respective owners.
11
ACTIVITIES
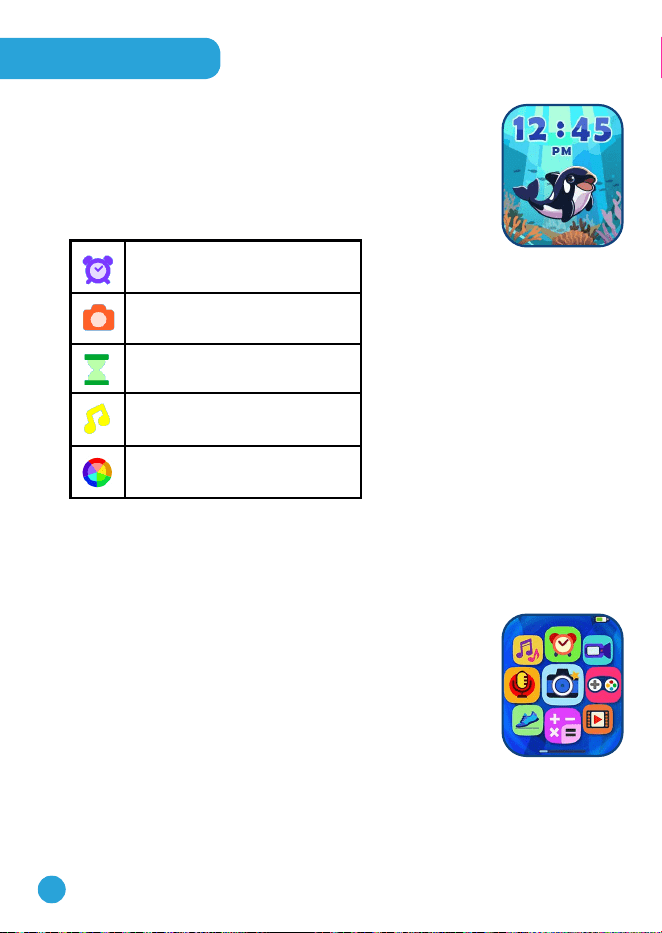
Clock Display
When the screen is off, press the Home Button to show
the clock screen.
• Swipe left or right to see more clock faces.
• Double tap the screen to listen to the current time.
• Some clock faces show functional icons:
Go to Alarm Clock screen
Go to Camera screen
Go to Timer screen
Go to Music Box
Change the color theme
• Press the Home Button to go to the Home Menu and select other
activities.
• Tilt the watch in different angles to experience the 3D clock faces.
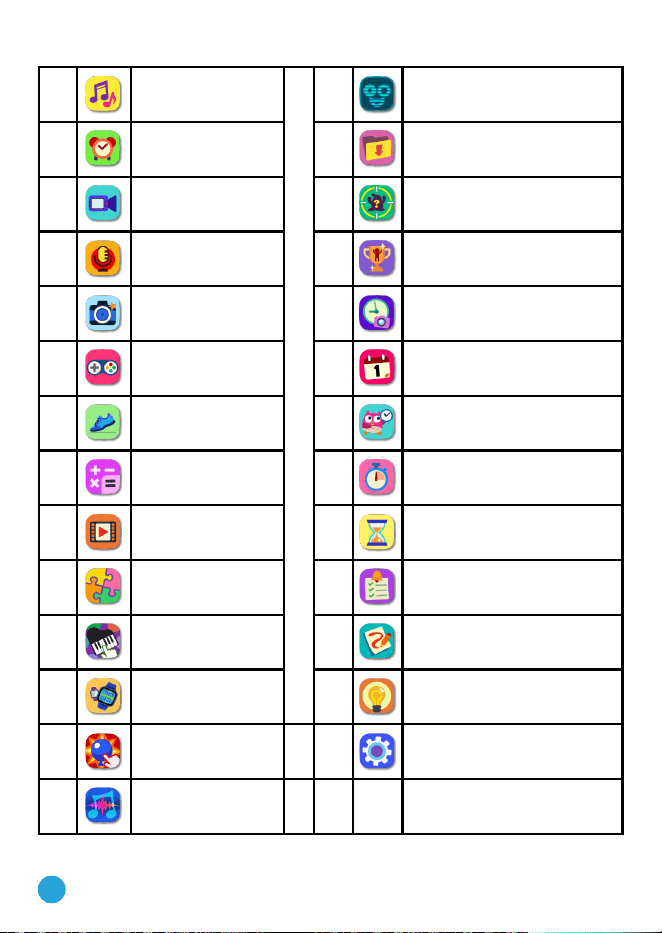
Home Menu
• Swipe left or right to scroll through the menu pages
and tap an icon to enter the activity.
Note: If games are turned off in Settings, the icon
arrangement will be different. The icons for Games,
Monster Catcher, Dash Reaction, Puzzle Solver and
Treasure Hunt (in the Connection Activity) will not
appear in the Home Menu.
12
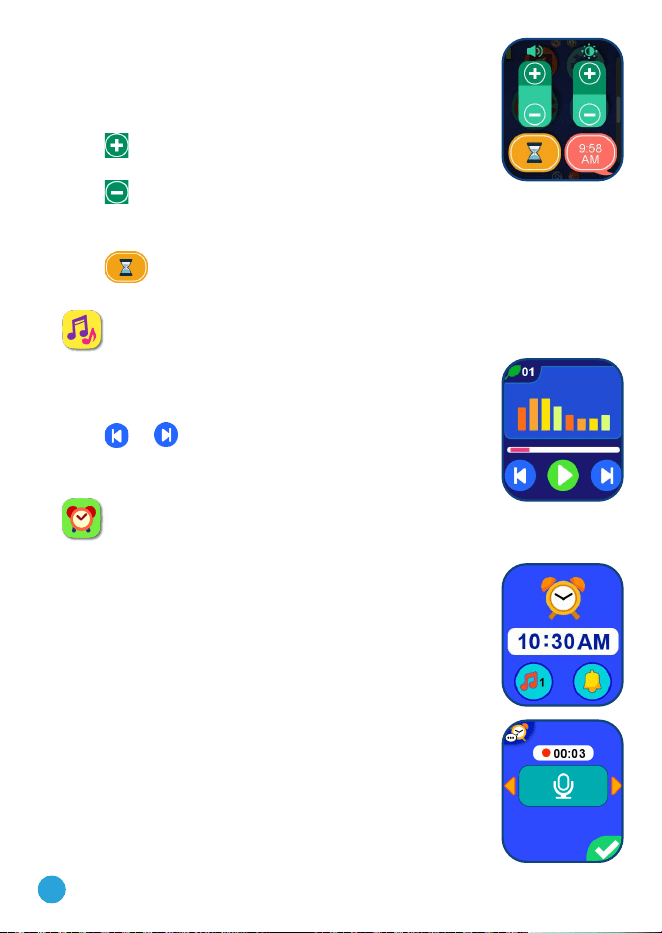
1 Music Player 15 Mind Reading
2
Alarm Clock 16 Downloads
3
Video 17 Monster Catcher
4
Voice Recorder 18 Action Challenges
5
Camera 19 Photo Clock Face Maker
6
Games 20 Calendar
7
Pedometer 21 Time Master
8
Calculator 22 Stopwatch
9
Gallery 23 Timer
10
Puzzle Solver 24 Daily Reminders
11
Tap & Jam 25 Free Draw
12
Connection
Activities
26 Screen Light
13
Dash Reaction 27 Settings
14
Music Composer
13
Shortcut Menu
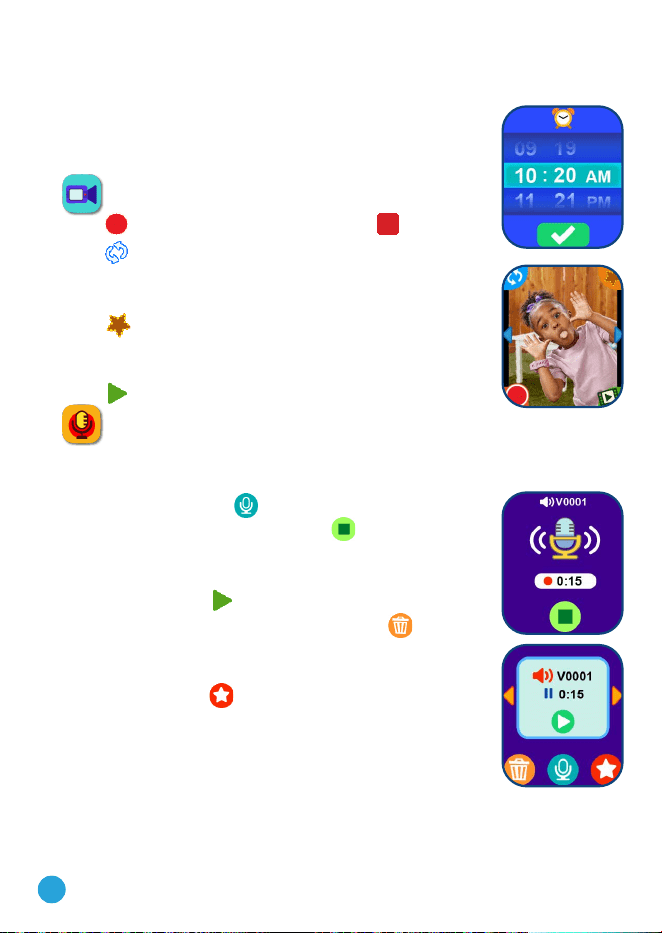
Swipe in from the top or bottom of the screen to display
the Shortcut menu. Here you can quickly adjust the
Volume, Screen Brightness and see the current time.
• Tap
to increase the sound or screen brightness
level.
• Tap
to decrease the sound or screen brightness
level.
• Tap on the time to listen to the current time aloud.
• Tap
to go to the Timer screen.
• Swipe out to hide the Shortcut menu.
1. Music Player
Here you can listen to more than 20 built-in melodies. In
the Album Selection Menu:
• Tap an album icon to start playing that album.
• Tap
or to go to the previous or next song.
Note: To save power, the Music Player will auto exit to
Clock Display mode after playing music for 15 minutes.
2. Alarm Clock
Set an alarm by choosing from a selection of alarm tones and animations.
You can also record your own voice to use as an alarm.
• Tap the Time or Alarm icons to change the alarm
time.
• Tap the Bell icon to toggle the alarm On or Off.
• Tap the Tone icon to display the Alarm Tone
Selection menu.
There are six built-in alarm sounds and one voice
recording alarm. Swipe left or right to preview the
different tones and animations. Tap the tick icon to
conrm your selection.
• To make your own voice alarm, tap the Record icon
to start recording. While recording, tap the Record
14
icon to end the recording, or it will stop automatically after three
seconds. Tap the Play icon to play the recorded voice.
To set the Alarm Time:
• Select the hour and minute by swiping up or down
on the hours, minutes and AM/PM. Tap the green
check mark icon to conrm.
3. Video
• Tap to start recording. To stop, tap .
• Tap
to switch between the Front Camera and
Sele Camera.
• To explore the different video effects, tap the Star
icon
, then swipe or tap on the left or right arrow
to choose an effect. Tap the Star icon again to turn
off the photo effect.
• Tap
to play the last recorded video.
4. Voice Recorder
The Voice Recorder allows you to record your own voice for up to 60
seconds per recording and apply fun voice changing effects.
• Tap the Record icon
to start recording. When
you're nished, tap the Stop icon
.
• Swipe left or right to review the previous or next
recording.
• Tap the play icon
to play the recorded voice le.
• To delete a recording, tap the trash icon
to
display the Delete Menu and tap the check mark
icon to conrm.
• Tap the Star icon
to display the Voice Effects
menu.
On the Voice Effects screen,
• Tap the Left or Right Arrow icon to preview the ve
effects.
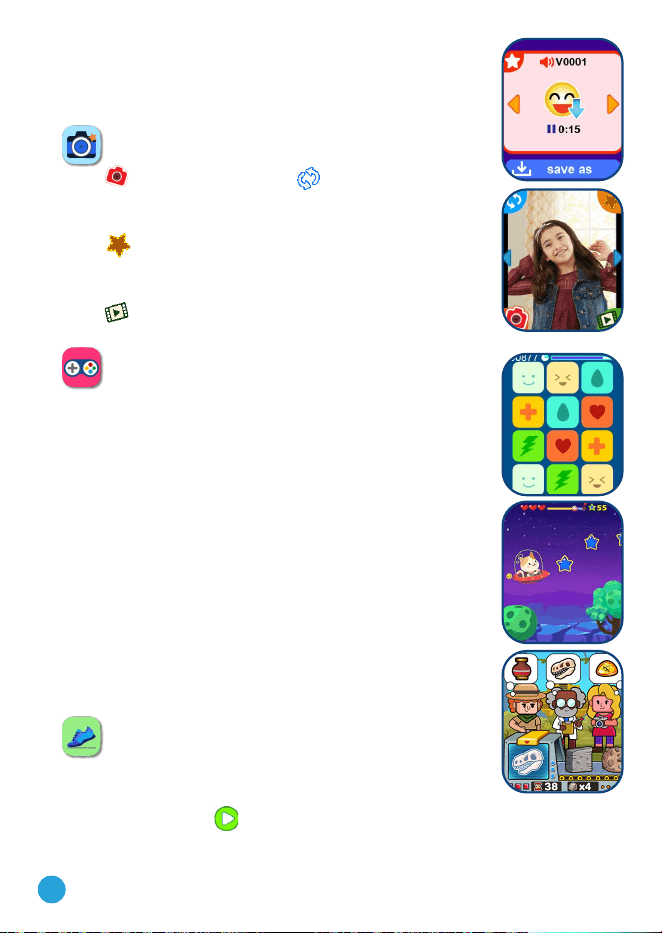
15
• Tap the Save As icon to save the recording with the
selected effect as a new le.
• To exit the Voice Effects screen, tap the Star icon
again or press the Home Button.
5. Camera
• Tap to take a photo. Tap to switch between
the Front Camera and Sele Camera.
• To explore the different photo effects, tap the Star
icon
, then swipe or tap on the left or right arrow
to choose an effect. Tap the Star icon again to turn
off the photo effect.
• Tap
to go to the Playback screen to view your
photo.
6. Games
There are three games in KidiZoom
®
Smartwatch DX4.
Super Tile Match!
Tap to pair the matching tiles! Time's running out fast!
Planet Escape
Collect stars and avoid obstacles to help the UFO reach
the end of the level! The UFO will slowly oat down. Tap
the screen to make it y up.
Fossil Expert
Help the fossil experts nd the fossils they're looking for!
When a fossil goes through the scanner, you'll be able
to see what's inside! Drag the fossil over to the fossil
team member who is looking for it! Try to get all of the
fossils to the correct team member!
7. Pedometer
This is a basic pedometer to count your steps, The
watch should be worn on the wrist for greatest accuracy.
• Tap the Start icon
to start the pedometer, and it will automatically
stop at the end of the day, or when you tap the Stop icon.
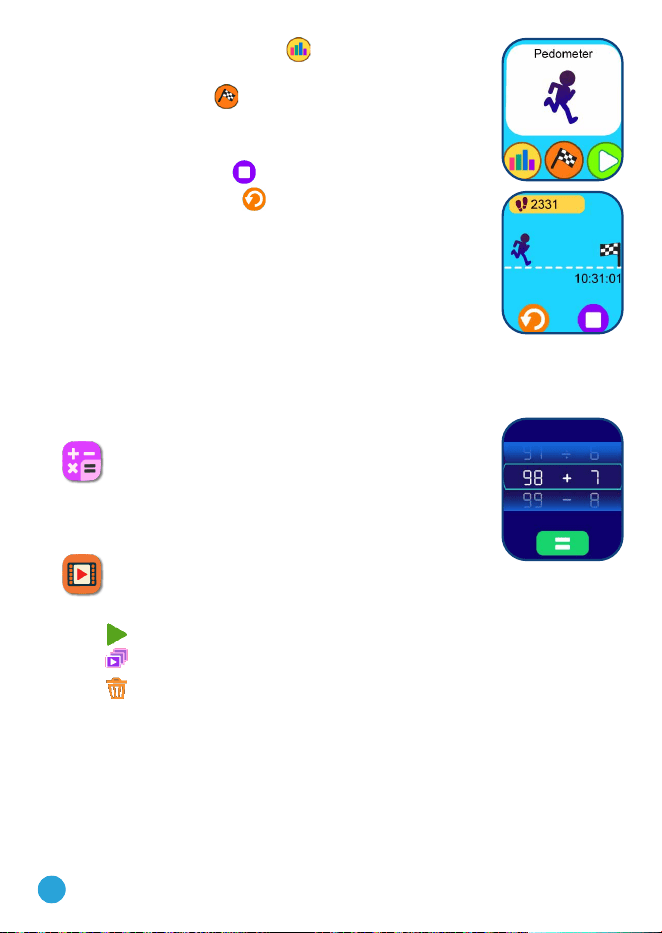
16
• Tap the History Graph icon to look at your past
movement.
• Tap the Goal icon
to set a goal and challenge
yourself or your friends.
Once the pedometer is running:
• Tap the Stop Button
to stop the counter.
• Tap the Reset Button
to reset the counter to
zero.
Note: The pedometer can be set to start automatically
every day in Settings. Please refer to the Settings
section for details.
Note: This kid-friendly pedometer is just for fun and is
not as accurate as a commercial pedometer for adults.
The pedometer only counts movement when it is in the Pedometer
Activity or Clock mode. Entering other activities will suspend the counter.
The pedometer will only count movement if it is worn on the arm that is
moving.
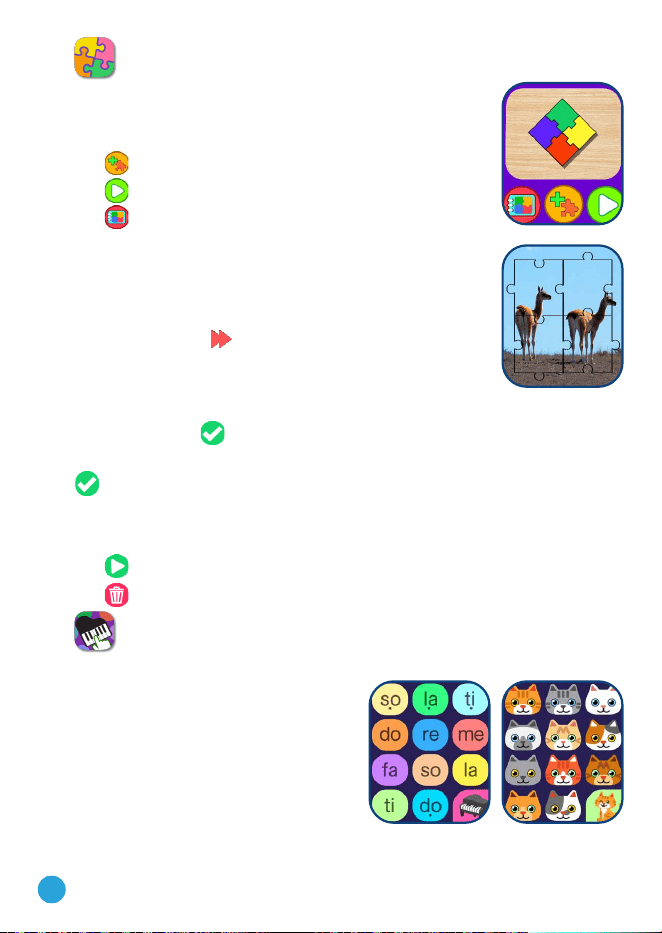
8. Calculator
• Swipe the number or sign to change the value of the
formula.
• Tap the equal sign to go to the result screen.
9. Gallery
Here you can view your photos and videos.
• Tap
to play a video.
• Tap
to view a photo slideshow with music.
• Tap
to display the Delete Menu.
Note: To delete all photos and videos, tap the Down Arrow icon on the
Delete Menu and then follow the instructions to continue. While playing a
video, tap the Rewind or Fast Forward icons to toggle between 1X, 2X and
4X speeds.
17
10. Puzzle Solver
On the KidiZoom
®
Smart Watch DX4, you can create
your own puzzles with photos and enjoy solving them!
In the Start menu,
• Tap
to start creating a new puzzle.
• Tap
to play the puzzle solving game.
• Tap
to view your saved puzzles and manage
them.
While solving a puzzle:
• Drag and drop the puzzle pieces to connect the
matching pieces, then they will snap together.
• Tap the skip icon
to skip the current puzzle and
go to next puzzle.
To create a new puzzle:
First, select a photo. Swipe left or right to scroll through photos, then tap
the check mark icon
to conrm the selection.
Then, select a puzzle style by swiping left and right. Tap the check mark
icon
to conrm.
In the Puzzle Gallery:
• Swipe left or right to scroll through the saved puzzles.
• Tap
to start solving the current puzzle.
• Tap
to display the delete menu.
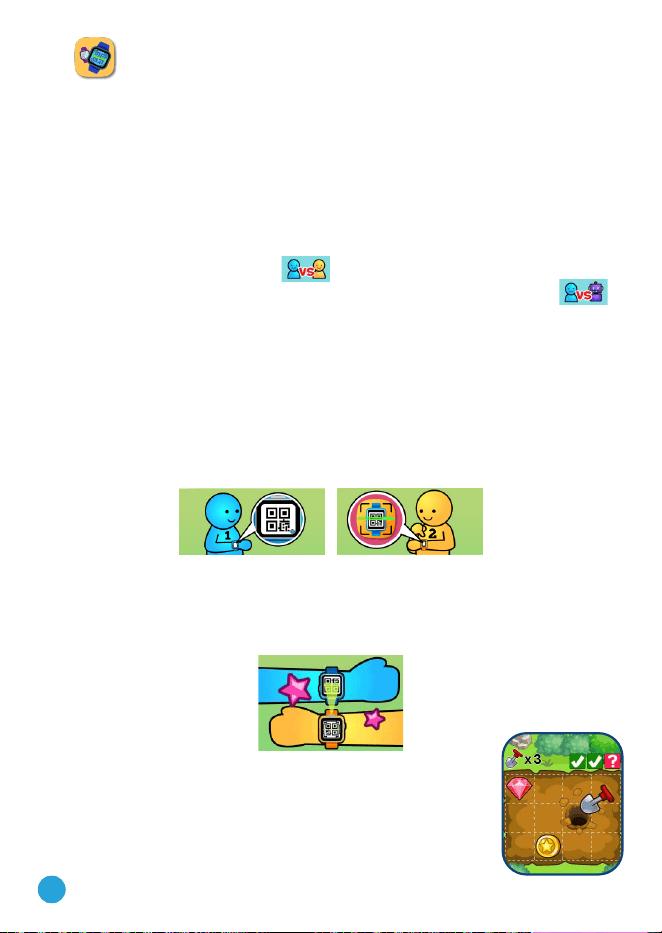
11. Tap & Jam
Make music with different instruments and funny sound effects!
• Tap the icons on screen to
make sounds with the selected
instrument.
• To change to the next instrument
or funny sound, tap the instrument
icon or swipe left and right.
18
12. Connection Activities
You can connect your KidiZoom
®
Smartwatch DX4 with your friend’s
DX4 to play games and send greeting cards. There are three connection
activities:
• Treasure Hunt
• Greeting Card Maker
• Connection Scan
Treasure Hunt
Tap the Play a Friend icon
to connect to another DX4. If you'd
prefer to play against the computer, tap the Play the DX4 icon
to play against the computer.
Tap the Play a Friend icon to see the game map appear. You can then
drag and drop three treasures onto the game map. When you're done,
tap the check mark icon and a pairing code will appear on your DX4
screen.
Next, ask your friend to open the Magic Scan app on their DX4 to
scan the code (refer to the Magic Scan section for more detailed
instructions).
Be sure to hold your watch still as your friend scans the code on
your watch by lining up the code with the target on their screen. The
watches should be about ve to six inches (12–15 cm) apart.
In two-player mode, Player 1 hides three treasures
and then Player 2 attempts to nd them. When
playing against the computer, the DX4 will hide the
treasures. You have ve chances to nd them all!
19
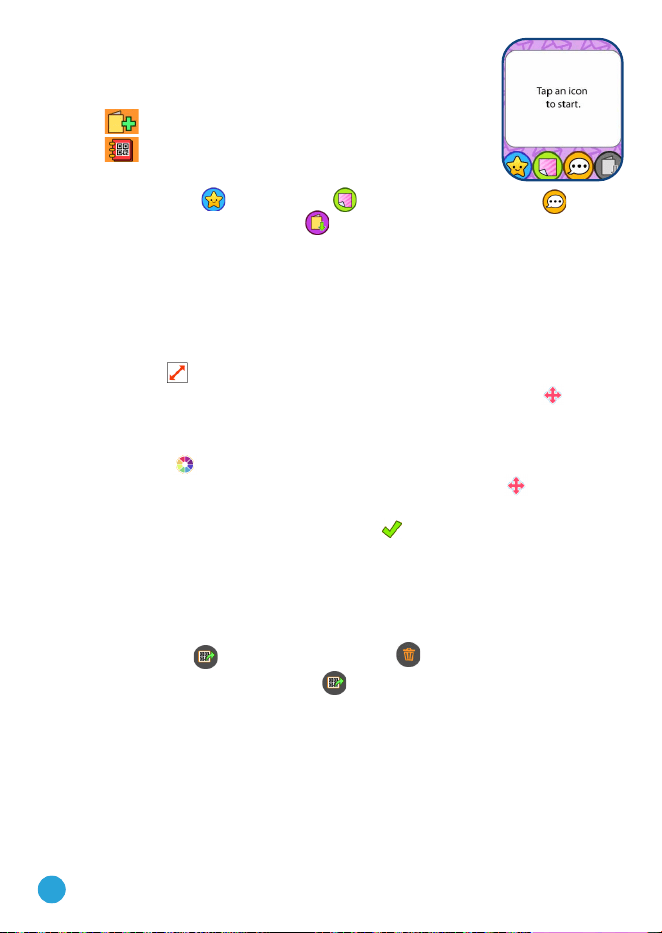
Greeting Card Maker
Create your own greeting card using preset
elements and share it with other DX4 friends.
Tap
to create a new card.
Tap
to view the saved cards.
To create a card, tap the corresponding icon to add
a cartoon image
, background and a preset message . When
the card is done, tap this icon
to save the card. Your saved cards
can be found in the Card Gallery.
A. Adjusting the Card Elements
While adding card elements, tap the Left or Right Arrow icons to
scroll through the options.
You can change the size and position of cartoon images. Tap the
Size icon
and then tap the left arrow to decrease the size, or tap
the right arrow to increase the size. Tap the Position icon and
then drag the cartoon to the position you'd like.
You can change the text color and position of preset text. Tap the
Color icon
and then tap the Left or Right Arrow icons to scroll
through different color options. Tap the Position icon
and then
drag the text to the position you'd like. When you are done adjusting
an element, tap the check mark icon to return to the card editing
menu to make further adjustments or save your card.
B. Card Gallery
Here you can view all the cards you've created or received from
others.
Tap this icon
to share a card or tap to delete it.
When you tap the Share icon
, a code will appear; ask your
friend to open their DX4 Magic Scan app to scan it.
Connection Scan
Use the Connection Scan app to scan a pairing code on your friend's
DX4 to receive a greeting card or Treasure Hunt Game Map.
Be sure to hold your watch still as your friend scans the code on
your watch by lining up the code with the target on their screen. The
watches should be about ve to six inches (12 -15 cm) apart.
20
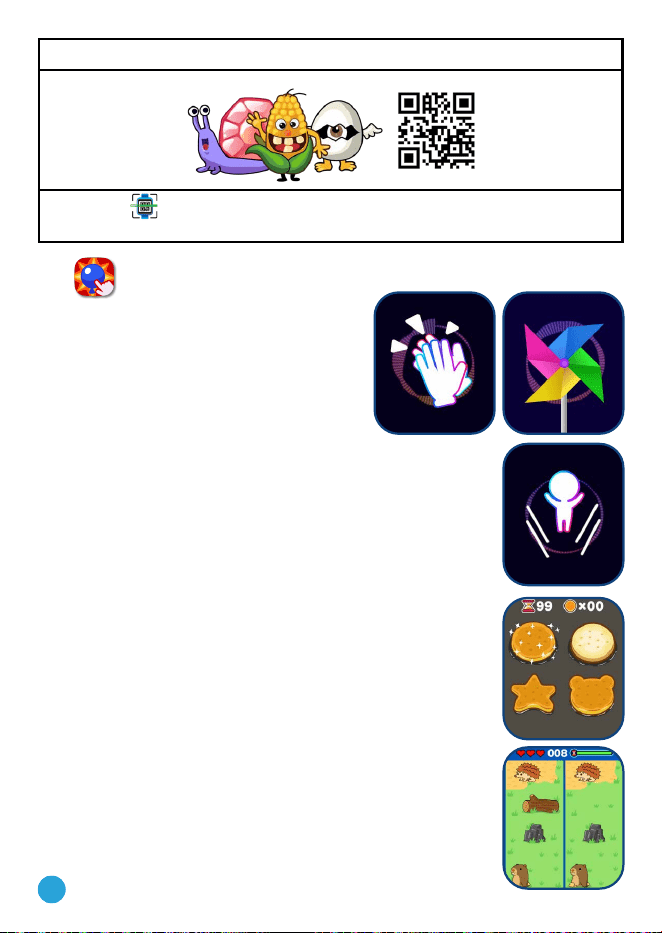
Bonus Game: Monster of the Day!
Use the Connection Scan app on your DX4
to scan the code above and play.
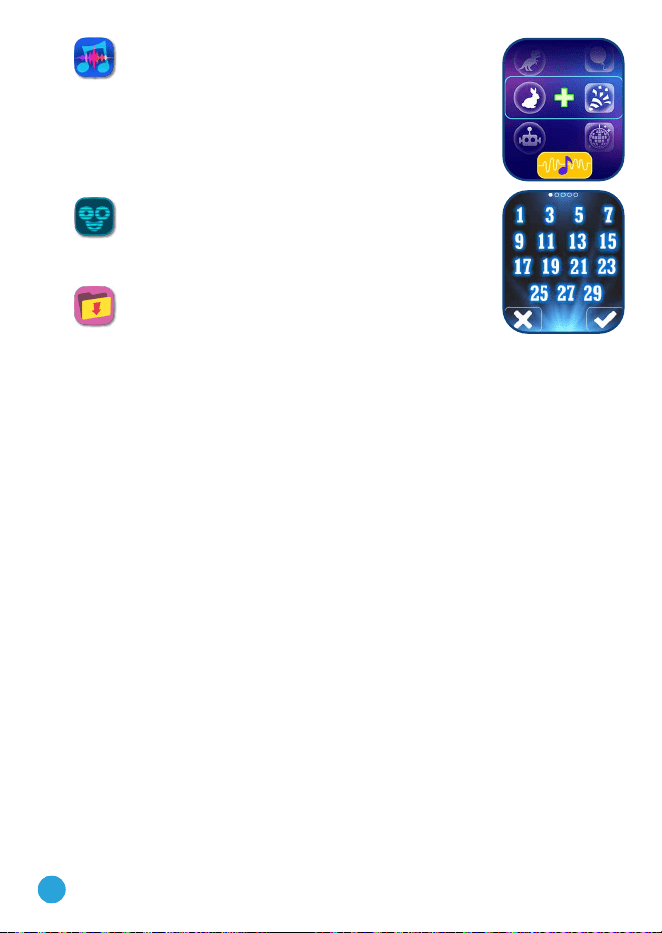
13. Dash Reaction
There are three quick reaction games
in KidiZoom
®
Smartwatch DX4.
• Rapid React
• Pancake Master
• Spot the Difference
Rapid React
Clap! Jump! Blow! Tap! Connect...
React to the prompts as quickly as you can!
Train your reaction time and concentration! Try to
get a high score!
Pancake Master
Wait until the pancakes are perfectly cooked, then
tap them before they get burned!
How many perfect pancakes can you serve before
time is up?
Spot the Difference
Can you spot the difference between the two sides
of the screen?
Tap the difference on either side.
A chance will be deducted for a wrong answer.
21
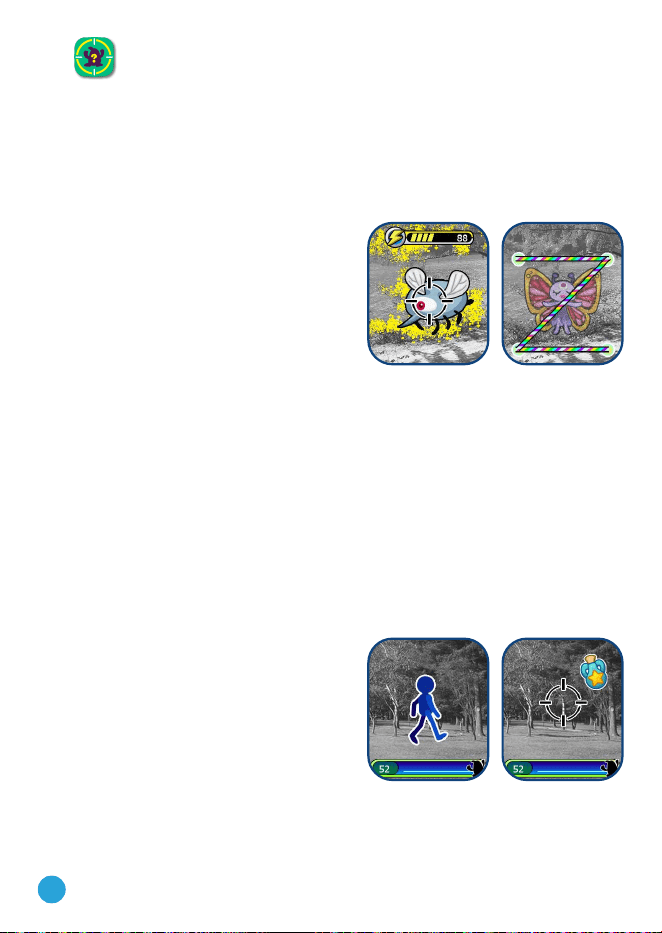
14. Music Composer
Choose two composing elements and DX4 will create a
unique piece of music!
• Scroll through the elements to make the combination
you want, then tap the compose icon to listen to the
music.
15. Mind Reading
Think of a number from 1-30 and DX4 will guess your
number by asking you a few simple questions!
16. Downloads
The Download Manager and any content downloaded
from Learning Lodge
TM
will appear in Downloads. To access downloadable
content, download and install the VTech
®
Learning Lodge
TM
to your
Windows or Mac computer.
Downloading Learning Lodge
TM
Content
Follow these steps to download Learning Lodge
TM
content:
1. Connect KidiZoom
®
Smartwatch DX4 to a Windows or Mac
computer using the included Micro-USB Cable.
2. Click the Download Website link in the drive VTECH 5752 that
appears on your computer, or visit vtechkids.com/download
3. Download and install the correct Learning Lodge
TM
software for your
operating system.
4. Launch the Learning Lodge
TM
application and nd all the great extra
content for your KidiZoom
®
Smartwatch DX4!
Note: For further details about downloading content from the Learning
Lodge
TM
, please refer to the online help section at vtechkids.com/support
Download Manager
Here you can view the memory size of each download or delete
unwanted content to free up memory.
To delete downloads, scroll up or down to select the application to
remove and then tap the Delete icon to display the Delete Menu.
Note: If the downloadable content is accidentally deleted, you may
connect to the Learning Lodge
TM
to re-download the applications.
22
17. Monster Detector
There are invisible monsters hiding all around us! Use the Monster
Catcher on your watch to nd and collect them. Level up as you gain
experience and special awards on your way to nding all 80+ monsters.
There are ve modes: Collecting, Exploration, Monster Book, Monster
Album, Levels and Awards.
A. Collecting Mode
When you rst enter Collecting
mode, the world as seen through
the watch's Front Camera will
appear in black and white. Walking
around powers up the watch and
enables it to see evidence of the
nearest monster. When the screen
shows a large collection of monster particles, tap on the screen to
search for the monster. Now the monster can be revealed! Continue
tapping until the monster's energy is gone.
For some monsters to appear, you will need to cast a spell! Connect
the dots to form the shape shown, and the monster will appear. Every
time you collect a monster your Experience Points (XP) and Magic
Power (MP) will increase.
Note: We suggest playing this game with natural light or in white
lighting. Some lighting conditions, like uorescent or yellow lighting,
may affect the camera's ability to accurately detect colors.
B. Exploration Mode
When you see the Walking icon,
keep walking to reach the next
monster. You can see the distance
to reach the monster on the bottom
of the screen. Pay attention along
the way, as some magic items may
appear as you travel to increase
your MP and XP. Be sure to watch
where you are walking as you go!
The next three modes can be found on the Monster Catcher Main
Menu:
23
C. Monster Book
Learn everything there is to know about all the monsters you've
discovered.
D. Monster Album
Review the photos taken when you've collected monsters.
E. Levels and Awards
Here you can see your XP, MP, current level and all the medals
you've earned.
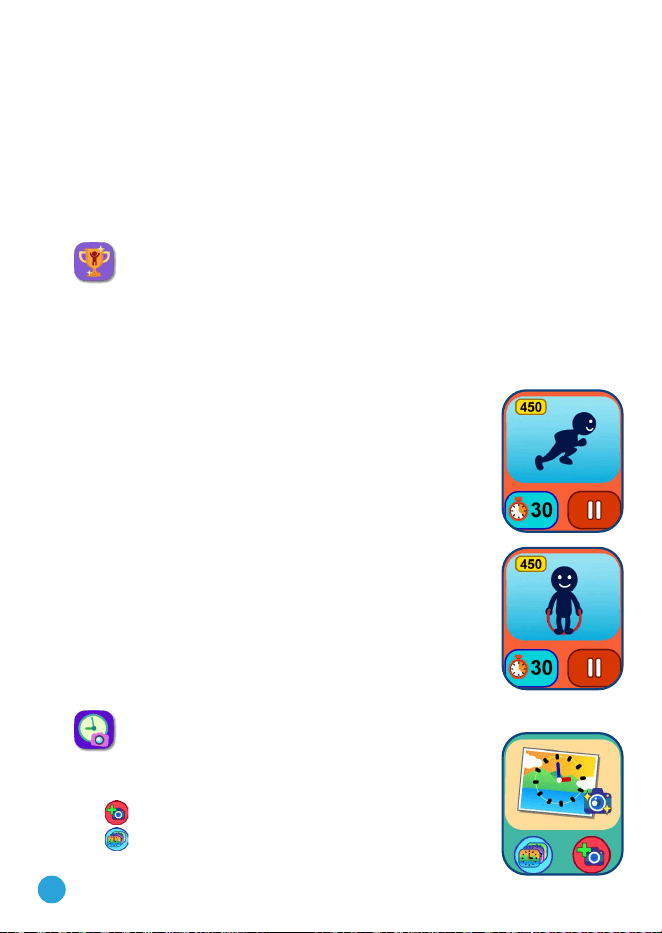
18. Action Challenge
Action Challenge is a fun and active way to challenge yourself. It includes
two activities that count your movements during a period of time: Super
Run and Funky Jump.
Swipe left or right or tap on the arrows to choose a challenge.
Super Run
Tap the Stopwatch icon to set an amount of time.
Tap the Start icon and start running as fast as you
can. When the time is up, it will show your score.
While you run, the character on the screen runs.
The character will try their best to run as fast as you
can. Don’t worry if they can’t keep up!
Funky Jump
Tap the Stopwatch icon to set an amount of time.
Tap the Start icon and start jumping as many times
as you can. When the time is up, it will show your
score.
While you jump, the character on the screen jumps
too!
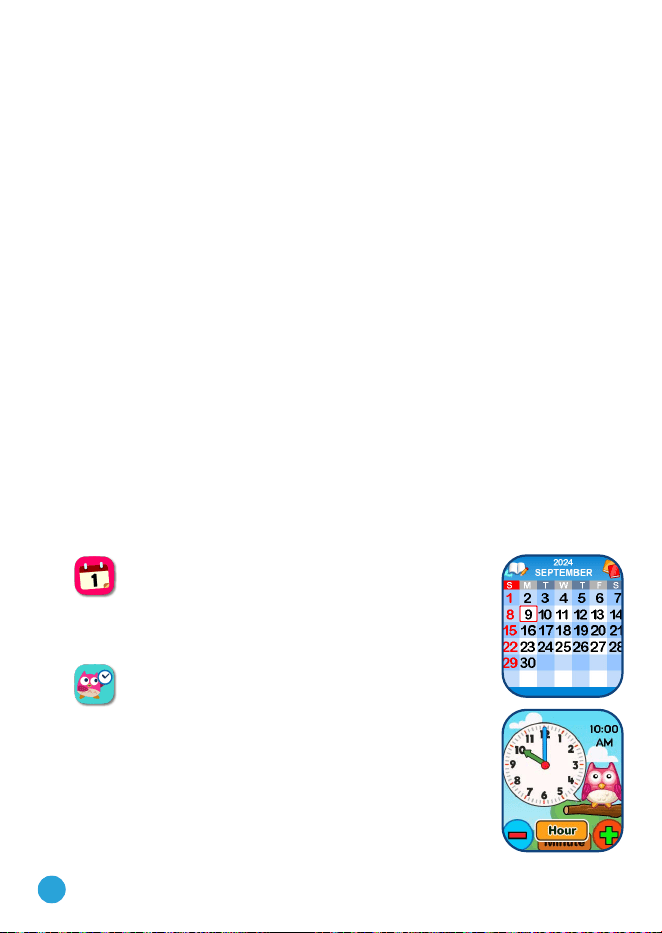
19. Photo Clock Face Maker
With Photo Clock Face Maker you can create custom
clock faces from your own photos.
• Tap
to create a new clock face.
• Tap
to review and edit your saved clock faces.
24
Take a New Photo
• In the Camera screen, swipe left or right or tap the Arrow icons to
select a clock face style.
• Position the watch so the camera screen is framing the image you'd
like to capture, then tap the Camera icon in the lower left corner to
take a picture.
• After you have taken a picture, the image will freeze on the screen.
If you're happy with the image, tap the green check mark icon in the
lower-right corner to create the new clock face. To re-take the picture,
tap the red X icon in the lower-left corner.
Use a Photo from the Camera Roll
• Swipe left or right or tap the Arrow icons to select the photo you would
like to use. Tap the green check mark icon to select an image.
• Next, swipe left, right or tap the Arrow icons to select the clock face
style you would like to use with the selected photo. Tap the green
check mark icon to nish your custom clock face.
Photo Clock Faces Gallery
• Tap the Arrow icons to see all the clock faces you've created.
• Tap the trash icon to display the Delete Menu.
• Tap the Pencil icon to enter Edit mode and select a different clock
style to use with the same image.
Note: Saved photo clock faces will appear on the Clock Display mode
automatically.
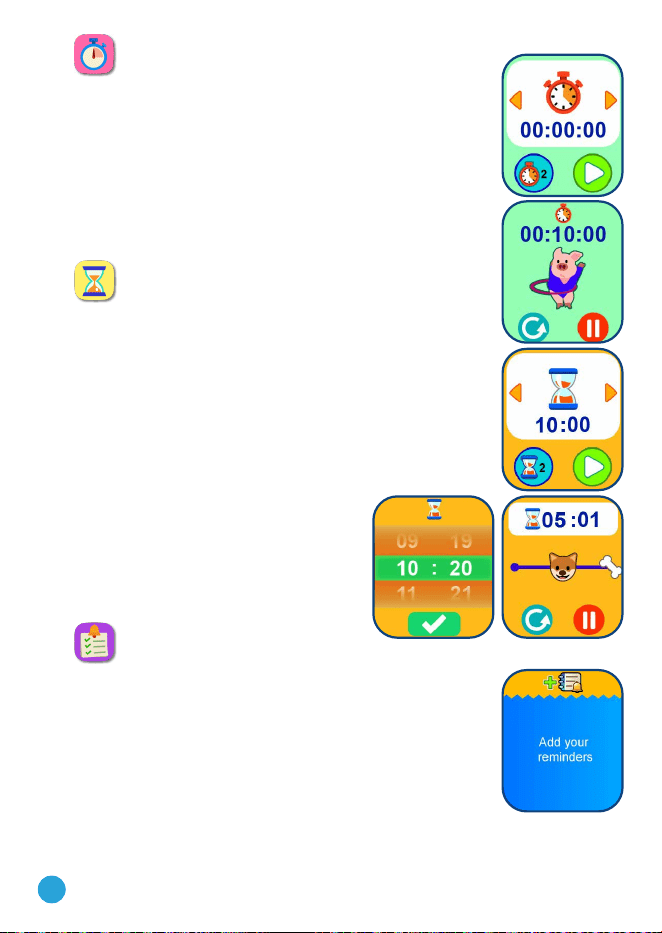
20. Calendar
Explore the Calendar by swiping left or right to see the
next or previous month. Swipe up or down to see the
next or previous year.
21. Time Master
This activity can help you learn how to tell the time!
• Tap the Hour / Minute icon to toggle between
adjusting the hour or minute.
• Tap the Plus or Minus icon to adjust the time by one
hour or minute.
• Tap on the clock or the owl to hear the time spoken.
The owl tells the time in both analog and digital
modes.
25
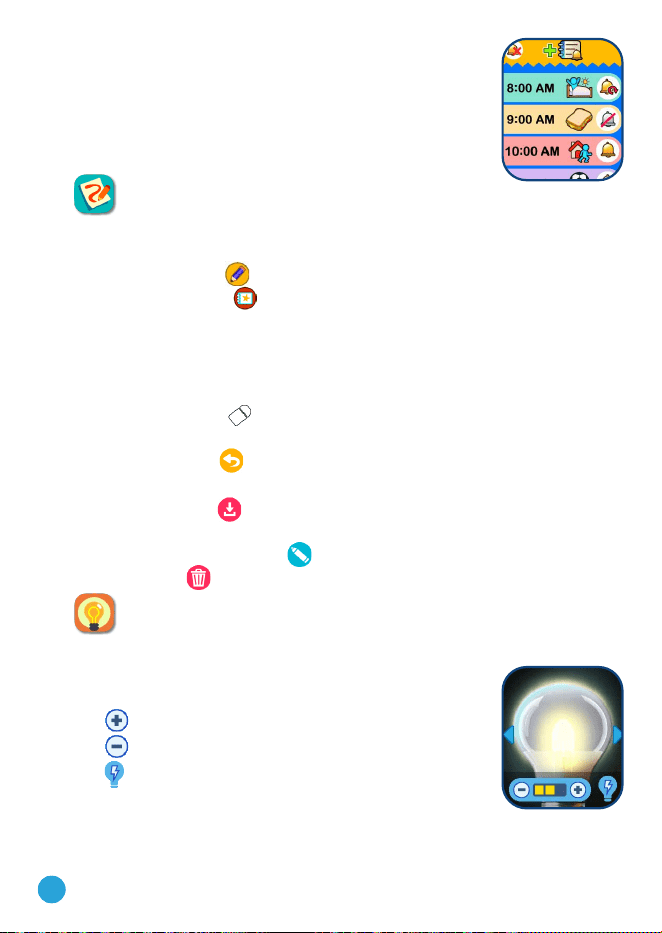
22. Stopwatch
• Tap the Play icon to start the stopwatch.
• Tap the Style icon or swipe left or right to change
the stopwatch style. There are ve fun stopwatch
styles to try!
• While the stopwatch is running, tap the Pause icon
to pause the timer. Tap it again to resume.
• Tap the Stopwatch Reset icon to stop the stopwatch
and reset the timer to zero.
23. Timer
Use this app to set a countdown timer.
• Tap the Play icon to start the timer immediately.
• Tap the Style icon or swipe left or right to change
the timer style. There are ve different timers for you
to try.
• Tap the time to enter Timer Settings. Swipe up or
down on the minutes and seconds to change the
time. Once set, tap the green check mark icon to
conrm.
• While the timer is running, tap the
Pause icon to pause the countdown
and tap it again to resume. Tap
the Timer Reset icon to stop the
countdown and reset the timer.
24. Daily Reminders
With Daily Reminders, you can set your DX4 to help
remind you of up to 30 daily activities.
• Tap the Add Reminder icon at the top of the list to
create a new reminder.
• You can select an event icon or use your own photo
as the event icon.
• Then swipe up or down on the hour and minute to
set the event time.
• Tap the check mark icon when you are done.
26
The reminders are listed by time from morning to
evening.
• Tap a Reminder Bell icon to select remind once,
every day, or to turn it off.
• Tap a Reminder icon to edit it or delete it from your
list.
25. Free Draw
Here you can create your own drawings and save the drawings on the
watch.
• Tap the Pencil icon
to start a new drawing.
• Tap the Gallery icon
to view the saved drawings.
• In the drawing screen, draw on the screen to make drawings. Tap the
up arrow icon to display the Drawing Tool Menu.
• In the Drawing Tool Menu, you can tap on the different colors to
switch the pencil color.
• Tap the eraser icon
to change from pencil mode to erase mode.
Swipe on the screen to erase.
• Tap the Undo icon
to undo the last action (maximum undo 3
times).
• Tap the Save icon
to save the drawing. You can view the drawing
again in the Gallery.
• In Gallery, tap the Edit icon
to further edit the saved drawing. Tap
the Trash icon
to display the delete menu.
26. Screen Light
Here you can select a screen light style and adjust the brightness.
• Tap the arrow icons or swipe left or right to scroll
through the light styles.
• Tap
to increase the brightness level.
• Tap
to decrease the brightness level.
• Tap
to make the screen light ash. Tap it again to
stop ashing.

27
27. Settings
Scroll up or down to select a setting to adjust.
A. Volume
• Tap the plus or minus icons to set the system volume. Tap the
check mark to save.
B. Brightness
• Tap the plus or minus icons to set the screen's brightness. Tap
the check mark to save.
C. Date
• Swipe up or down on the month, day and year to set the date.
• Tap the Date Format icon to change the date format (DD/MM/
YYYY or MM/DD/YYYY).
• Tap the green check mark icon to save.
D. Time
• Swipe to set the time. Tap the Time Format icon to change the
time format (12-Hour or 24-Hour).
• Tap the check mark to save.
E. Pedometer Start Time
You can set a start time for the pedometer. By default, this feature is
disabled.
• Choose Enabled or Disabled, then tap the check mark to conrm.
• If you conrmed the enabled option, you will enter the Pedometer
Start Time Setting screen. Swipe up or down on the hours,
minutes, and AM/PM to set the start time.
• Tap the check mark to save.
• The pedometer will turn off at the end of the day.
F. Wallpaper
• Tap the left or right arrow icons to change the wallpaper.
• Tap the check mark to save your selection.

28
G. Auto Screen Off
Allows you to change or disable the Auto Screen Off timer. Tap the
left and the right arrows to set the time, then tap the check mark icon
to conrm.
Selecting Disable Auto Screen Off will not turn off the screen, but
the screen will dim if there is no input for 30 seconds in Time Display
mode to save power. At this time, operation of the watch will be limited
to showing the time. No other functions will be operational, including
3D clock face effects, until the watch wakes up.
Note: By default, Auto Screen Off is set to 20 seconds. Disabling or
extending the Auto Screen Off time will increase battery consumption
and the time the battery lasts will decrease.
H. Smart Wake Up
• When Smart Wake Up is enabled, you can double tap on the
screen to wake up the watch.
• Tap On/Off to enable or disable this feature, then tap the check
mark icon to conrm.
I. Shake To Tell Time
Enable or disable the Shake to Tell Time function in Time Display
mode. When the watch is in Time Display mode and Shake to Tell
Time is enabled, you can shake the watch three times to hear the time
aloud.
• Tap the option and then tap the check mark to conrm.
J. Video Resolution
There are two resolution options:
128 X 168: The video size is smaller and you can record and save
more videos.
240 X 320: The video quality is better and takes up more memory, so
fewer videos can be saved.
• Tap the option and then tap the check mark to conrm.
K. Memory
See a summary of memory usage or reformat the memory.
Note! Formatting will erase all data on the device, including all
photos, videos, voice les, photo clock faces and downloaded apps.

29
L. Indoor Light Frequency
Use this setting to set the AC power frequency when travelling. If this
is not set correctly, you may see ickering on the preview screen and
photos and videos captured in indoor environments.
• Tap the option and then tap the check mark to conrm.
M. Parental Controls
Access these settings to set the School and Game Limit modes.
Tap
to display the School mode settings screen. You can set a
time at which the mode will start and end, and also set whether the
watch will automatically enter this mode on weekdays, weekends, or
every day.
During the School mode period, only the selected clock face will be
displayed on the watch screen. Other activities cannot be accessed.
Tap
to display the Game Limit mode settings screen. You can
either disable games or set a daily time limit. By default there is no
time limit set. You can choose a limit of 15, 30, 60 or 90 minutes per
day. Once a time limit is reached, games will not be accessible until
the following day. When games are disabled, icons will appear in the
Main Menu in a slightly different conguration.
Note:
• The Parental Controls settings are designed for parents of
children who cannot yet read, as access to the menu is granted by
following simple, on-screen instructions.
• The time limit will reset if the date or time settings are changed.
N. Language
• Tap the language you would like to select, then tap the check
mark to save. If there is a country for your selection, tap on your
country and then tap the check mark again.
O. Factory Reset
Factory Reset will erase content stored in the memory and reset all
system settings to factory defaults.
P. FCC Compliance Statement

30
CARE & MAINTENANCE
1. Keep the rubber cover over the Micro-USB Port closed tightly when
not in use in order to prevent dust or water damage.
2. Keep the watch clean by wiping it with a slightly damp cloth.
3. Keep the watch out of direct sunlight and away from direct heat
sources.
4. Do not drop the watch on a hard surface, expose it to moisture, or
immerse it in water.
5. Keep the lens clean. If the pictures taken are blurry, it could be
because there is dust or dirt on the lens. You can clean the lens by:
• Blowing on the lens.
• Gently wiping the lens with a soft, dry cloth.
WARNING
A very small percentage of the public, due to an existing condition, may
experience epileptic seizures or momentary loss of consciousness when
viewing certain types of ashing colors or patterns.
While KidiZoom
®
Smartwatch DX4 does not contribute to any additional
risks, we do recommend that parents supervise their children while
they play games. If your child experiences dizziness, altered vision,
disorientation, or convulsions, discontinue use immediately and consult
your doctor. Please note that close-range focus on or handling of a
KidiZoom
®
Smartwatch DX4 as a game controller for a prolonged period
of time may cause fatigue or discomfort. We recommend that children take
a 15-minute break for every hour of play.
31
TROUBLESHOOTING
Check this section if you experience difculty operating the KidiZoom
®
Smartwatch DX4.
Problem Correction
The watch
has stopped
working
1. Slide the Master Power Switch Off for 30 seconds.
2. Slide the Master Power Switch On again and then
press the Home Button to turn the watch on. It should
now work properly.
3. If the watch doesn't work, recharge the battery and
repeat steps 1 and 2.
(Refer to the battery recharging section for details.)
Screen is
not working
correctly
1. Slide the Master Power Switch Off for 30 seconds.
2. Slide the Master Power Switch On again and then
press the Home Button to turn the watch on. The
screen should now function normally.
Image
taken is not
clear
1. Make sure the lighting conditions of the shooting
environment are good.
2. Hold the watch still for taking photos.
3. Check to see if the camera lens is clean. If you nd
some dust or dirt on it, please see the steps to clean
the lens in the Care & Maintenance section.
Cannot
connect the
watch to a
computer
1. Check the connections on the cable between the
watch and the computer and review the Connecting to
a Computer section of this guide.
2. Slide the Master Power Switch Off for 30 seconds.
Slide the Master Power Switch On and reconnect the
watch and computer.
32
Cannot
view videos
or photos
loaded from
a computer
Check if the les are in the correct directories on the
KidiZoom
®
Smartwatch DX4. Photos should be put in
the DOWNLOAD\PHOTO folder, and videos should be
put in the DOWNLOAD\VIDEO folder on KidiZoom
®
Smartwatch DX4 when it is connected to a computer.
KidiZoom
®
Smartwatch DX4 only supports the formats
below:
• Photos in Standard Baseline JPEG
• Video in AVI (motion JPEG) created by KidiZoom
®
Smartwatch DX4
Cannot
recognize
the QR
code
• DX4 watches can only recognize codes generated by
DX4 watches.
• DX4 codes can only be recognized by DX4 watches
in Magic Scan, not in Camera mode, and not by any
other devices.

33
IMPORTANT NOTE:
Creating and developing VTech
®
products is accompanied by a
responsibility that we at VTech
®
take very seriously. We make every effort
to ensure the accuracy of the information, which forms the value of our
products. However, errors sometimes can occur. It is important for you
to know that we stand behind our products and encourage you to call
our Consumer Services Department at 1-800-521-2010 in the U.S. or
1-877-352-8697 in Canada, or by going to our website at vtechkids.com
and filling out our Contact Us form located under the Customer Support
link with any problems and/or suggestions that you might have. A service
representative will be happy to help you.
NOTE
This equipment has been tested and found to comply with the limits for a
Class B digital device, pursuant to Part 15 of the FCC Rules. These limits
are designed to provide reasonable protection against harmful interference
in a residential installation. This equipment generates, uses and can radiate
radio frequency energy and, if not installed and used in accordance with
the instructions, may cause harmful interference to radio communications.
However, there is no guarantee that interference will not occur in a particular
installation. If this equipment does cause harmful interference to radio or
television reception, which can be determined by turning the equipment off
and on, the user is encouraged to try to correct the interference by one or
more of the following measures:
• Reorient or relocate the receiving antenna.
• Increase the separation between the equipment and receiver.
• Connect the equipment into an outlet on a circuit different from that to
which the receiver is connected.
• Consult the dealer or an experienced radio / TV technician for help.
34
Supplier’s Declaration of Conformity
47 CFR § 2.1077 Compliance Information
Trade Name: VTech
®
Model: 5752
Product Name: KidiZoom
®
Smartwatch DX4
Responsible Party: VTech Electronics North America, L.L.C.
Address: 1156 W. Shure Drive, Suite 200
Arlington Heights, IL 60004
Website: vtechkids.com
THIS DEVICE COMPLIES WITH PART 15 OF THE FCC RULES.
OPERATION IS SUBJECT TO THE FOLLOWING TWO CONDITIONS:
(1) THIS DEVICE MAY NOT CAUSE HARMFUL INTERFERENCE,
AND (2) THIS DEVICE MUST ACCEPT ANY INTERFERENCE
RECEIVED, INCLUDING INTERFERENCE THAT MAY CAUSE
UNDESIRED OPERATION.
CAN ICES-003(B)/NMB-003(B)
To access the above compliance statement from the product software:
1. From the Main Menu, choose the Settings icon
.
2. Choose FCC Compliance Statement
to see the statement.
CAUTION
Changes or modifications not expressly approved by the party responsible
for compliance could void the user’s authority to operate the equipment.
Shielded cables must be used with this unit to ensure compliance with the
Class B FCC limits.

© 2024 VTech Holdings Limited.
All rights reserved.
IM-575200-000
Version:0
Visit our website for more
information about our products,
downloads, resources and more.
vtechkids.com
vtechkids.ca
Read our complete warranty policy online at
vtechkids.com/warranty
vtechkids.ca/warranty