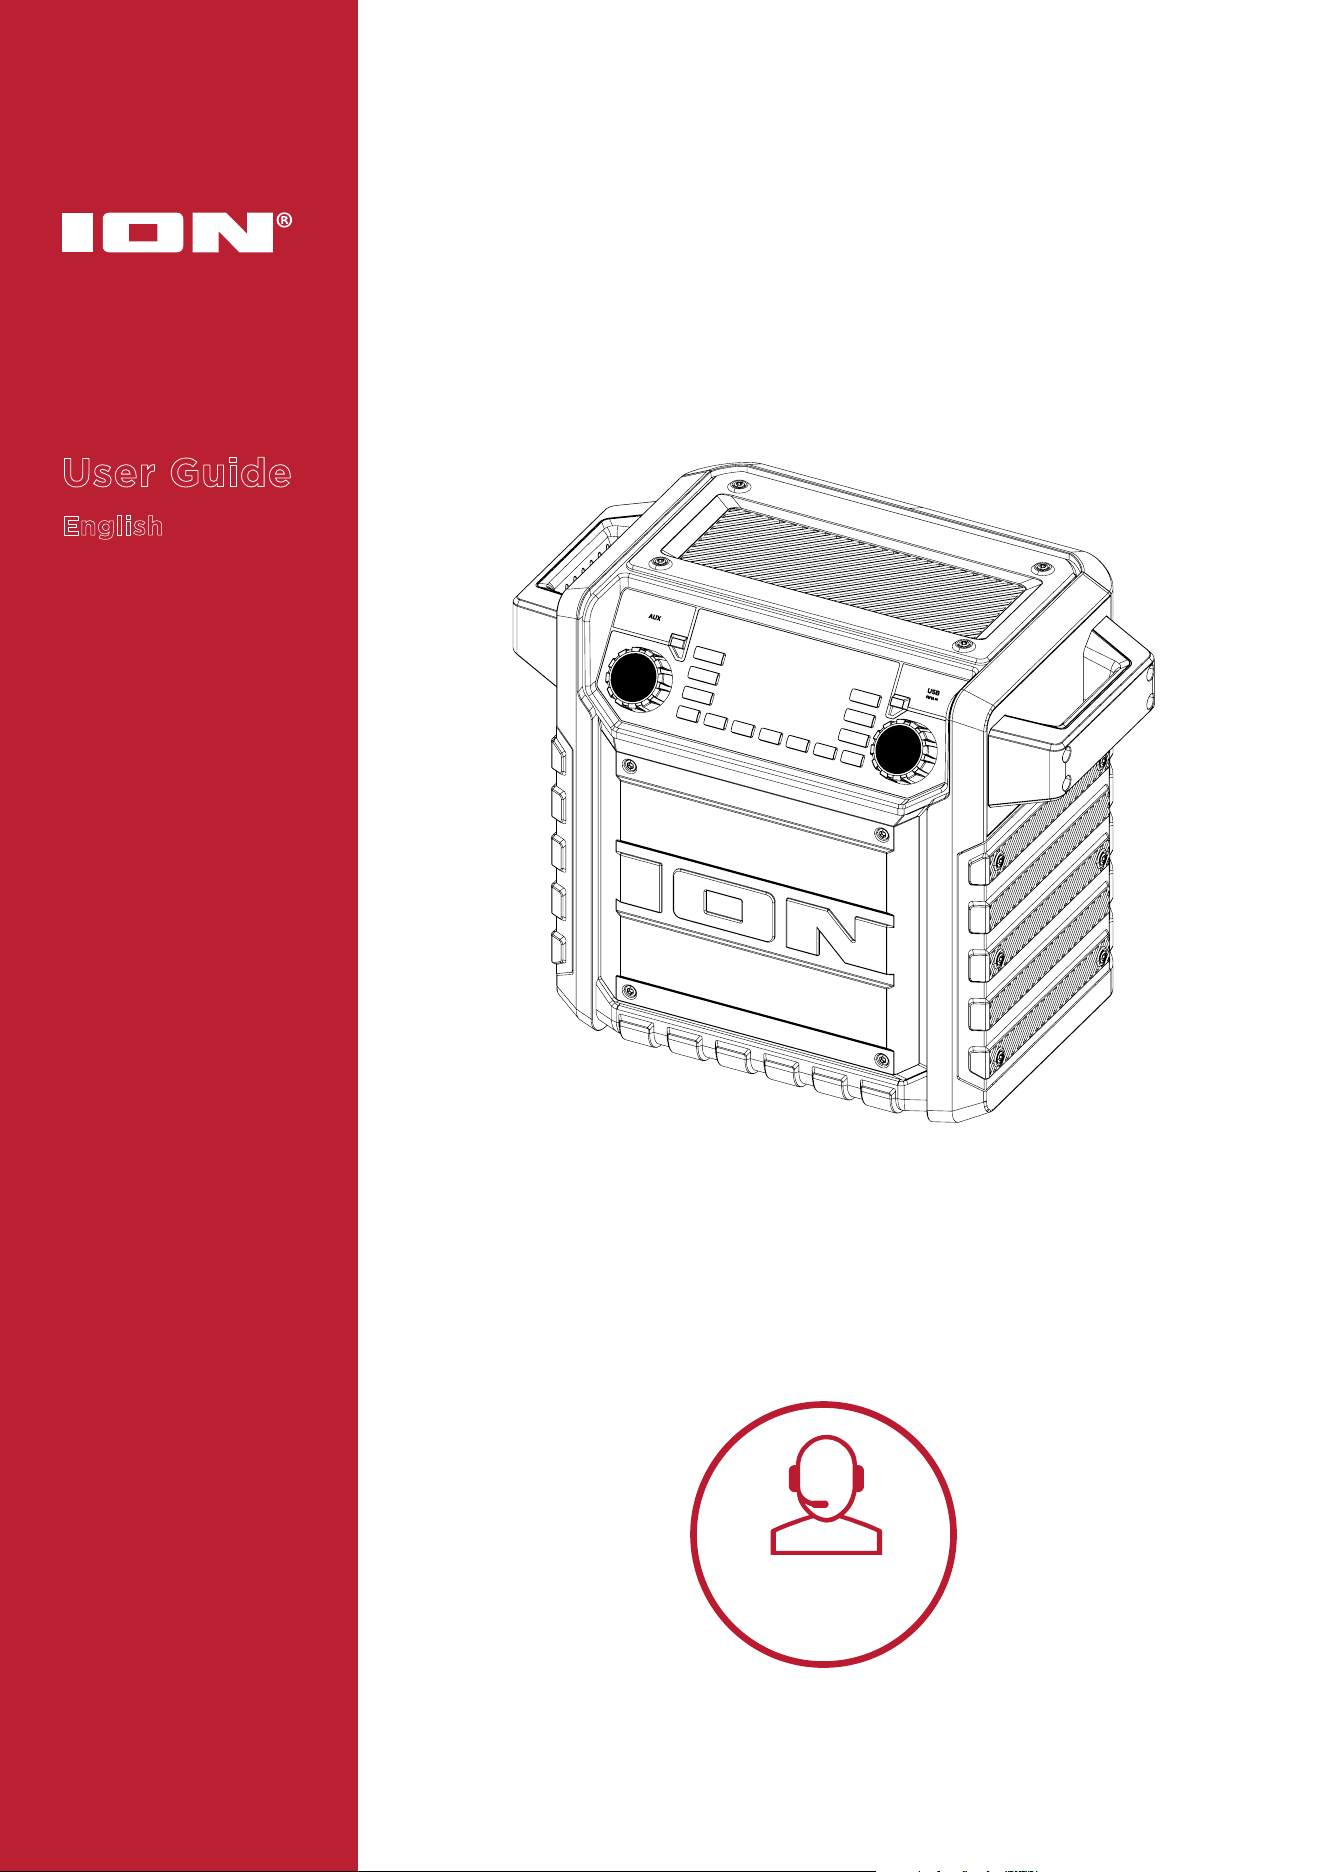
ION Audio Tailgater Classic User Guide
2
I
NTRODUCTION ......................................................................... 3
Box Contents .............................................................................................................. 3
Support ......................................................................................................................... 3
SETUP ........................................................................................ 4
Charging and Battery Information ..................................................................... 4
Outdoor Use and Care ............................................................................................ 5
FEATURES ................................................................................. 6
Front Panel .................................................................................................................. 6
Rear Panel .................................................................................................................... 8
OPERATION ............................................................................... 9
Pairing a Bluetooth® Device .................................................................................. 9
Linking Two Speakers ........................................................................................... 10
Using the Radio ......................................................................................................... 12
Using the USB Charge Port .................................................................................. 13
App Control ................................................................................................................ 14
TROUBLESHOOTING ............................................................... 15
APPENDIX ................................................................................. 16
Technical Specifications ........................................................................................ 16
Trademarks & Licenses .......................................................................................... 17
TABLE OF CONTENTS

ION Audio Tailgater Classic User Guide 3
Thank
you for purchasing the Tailgater Classic speaker. At ION, your entertainment is as
important to us as it is to you. That’s why we design our products with one thing in mind—to
make your life more fun and more convenient.
Note: Before you first use the product, please fully charge the batteries. Your unit was
purposely shipped with a reduced battery charge to ensure safe transit. For optimal charging,
power o the speaker while charging.
Use the included USB-A to USB-C® cable to connect the unit to a 5V, 2A power adapter (not
included) connected to a power outlet and let it charge for up to 4 hours (depending on the
specifications of your adapter). This helps ensure the longest life for your battery.
Box Contents
Tailgater Classic
USB-A to USB-C® Charging Cable (3.28 ft. / 1 m)
Quickstart Guide
Support
For the latest information about this product (documentation, technical specifications, system
requirements, compatibility information, etc.) and product registration, visit i
onaudio.com.
For additional product support, visit i
onaudio.com/support.
INTRODUCTION
ION Audio Tailgater Classic User Guide
4
Charging and Battery Information
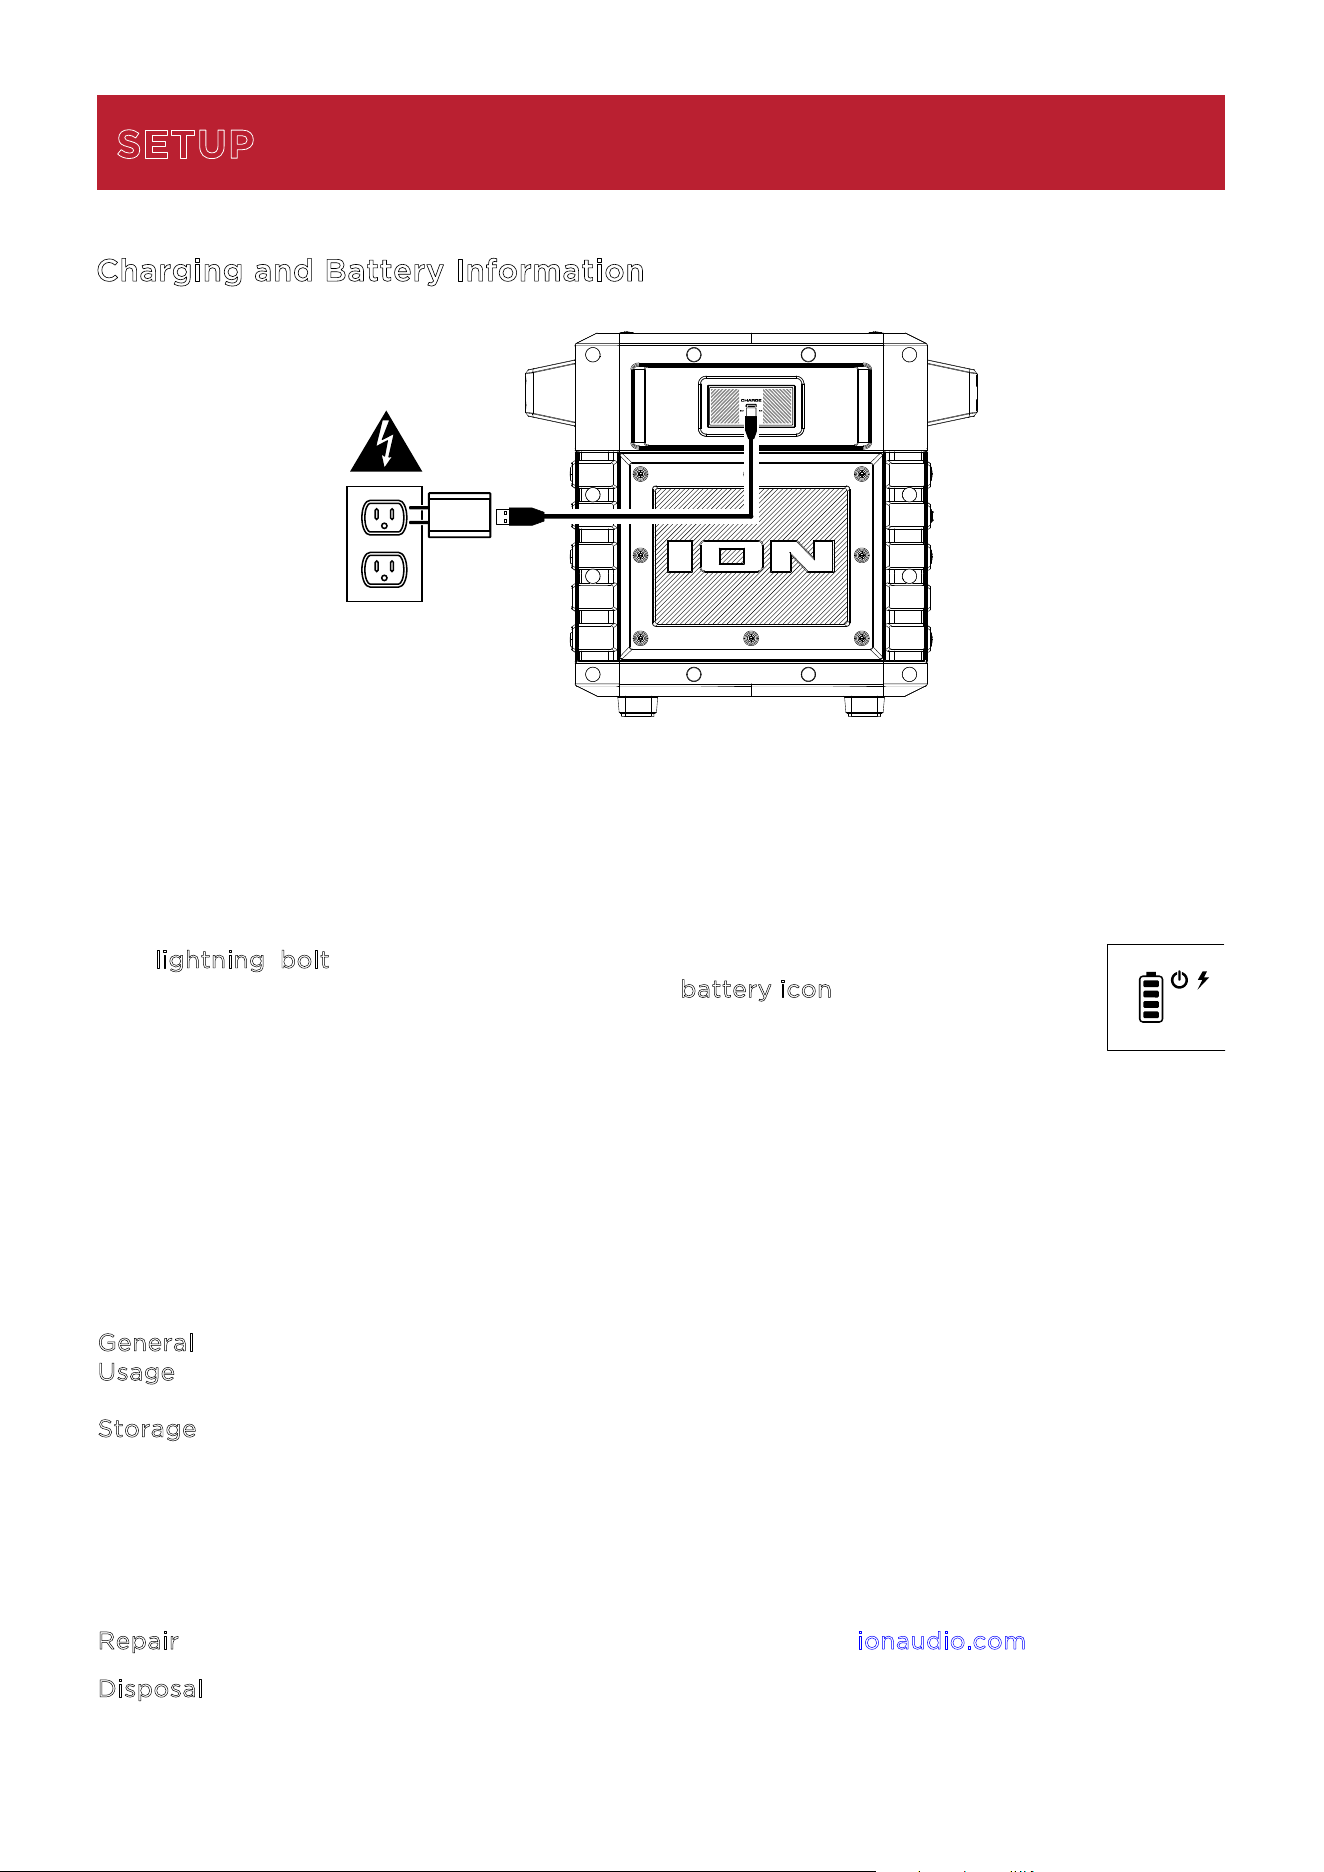
For
the quickest charging time, power o Tailgater Classic and use the included USB-A to
USB-C® charging cable to connect the USB-C® charging port on the rear panel of the speaker
to a USB power adapter (DC 5V 2A, not included) connected to a power outlet, or your
computer (powered on). A full charge can take up to 4 hours, depending on the specifications
of your 5V, 2A adapter.
The l
ightning bolt icon on the display will light up when Tailgater Classic is
connected to a power source and charging. The b
attery icon will fill to display the
battery life percentage. When charging is complete, the lightning bolt icon will
disappear, and the battery icon will be completely filled.
Tailgater Classic will automatically enter a standby mode if no audio is played after 15 minutes
while the lights are on and it is not connected to power. Press any button to wake the unit.
Rechargeable lead-acid batteries are the same type used in automobiles. As with your car
battery, how you use this battery has a significant impact on its lifespan. With proper use and
treatment, a lead-acid battery can last for years. Here are some recommendations for getting
the longest life from the internal battery.
G
eneral
U
sage
Fully charge the battery before using it.
Charge the battery completely after each use.
S
torage For best product longevity, do not store at exceedingly hot (greater than
90°F/32°C) or exceedingly cold (less than 32°F/0°C) temperatures.
It is acceptable to leave your sound system plugged in. This will not overcharge
the battery.
If you leave the battery level low and do not charge it for 3 months, it may
permanently lose capacity.
R
epair If the battery fails to charge, contact ION Audio at ionaudio.com.
D
isposal Bring the unit to a recycling center or dispose of in accordance with local
ordinances.
SETUP

ION Audio Tailgater Classic User Guide
5
O
utdoor Use and Care
Though Tailgater Classic is water-resistant and able to tolerate splashing water, please review
the tips below to get the best performance from your Tailgater Classic:
• Bring Tailgater Classic indoors during extreme weathe
r.
• Please do not place Tailgater Classic in standing water.
• P
lease do not connect the power adapter to a Tailgater Classic in a wet environment. Make
sure the power input, power adapter, and power outlet are all completely dry before making
any connections.
• W
ARNING: Keep any non-water-resistant devices (phones, music players, etc.) in a dry
place where they will not be aected by water and cause a risk of electric shock.
I
ON Audio Tailgater Classic User Guide
6
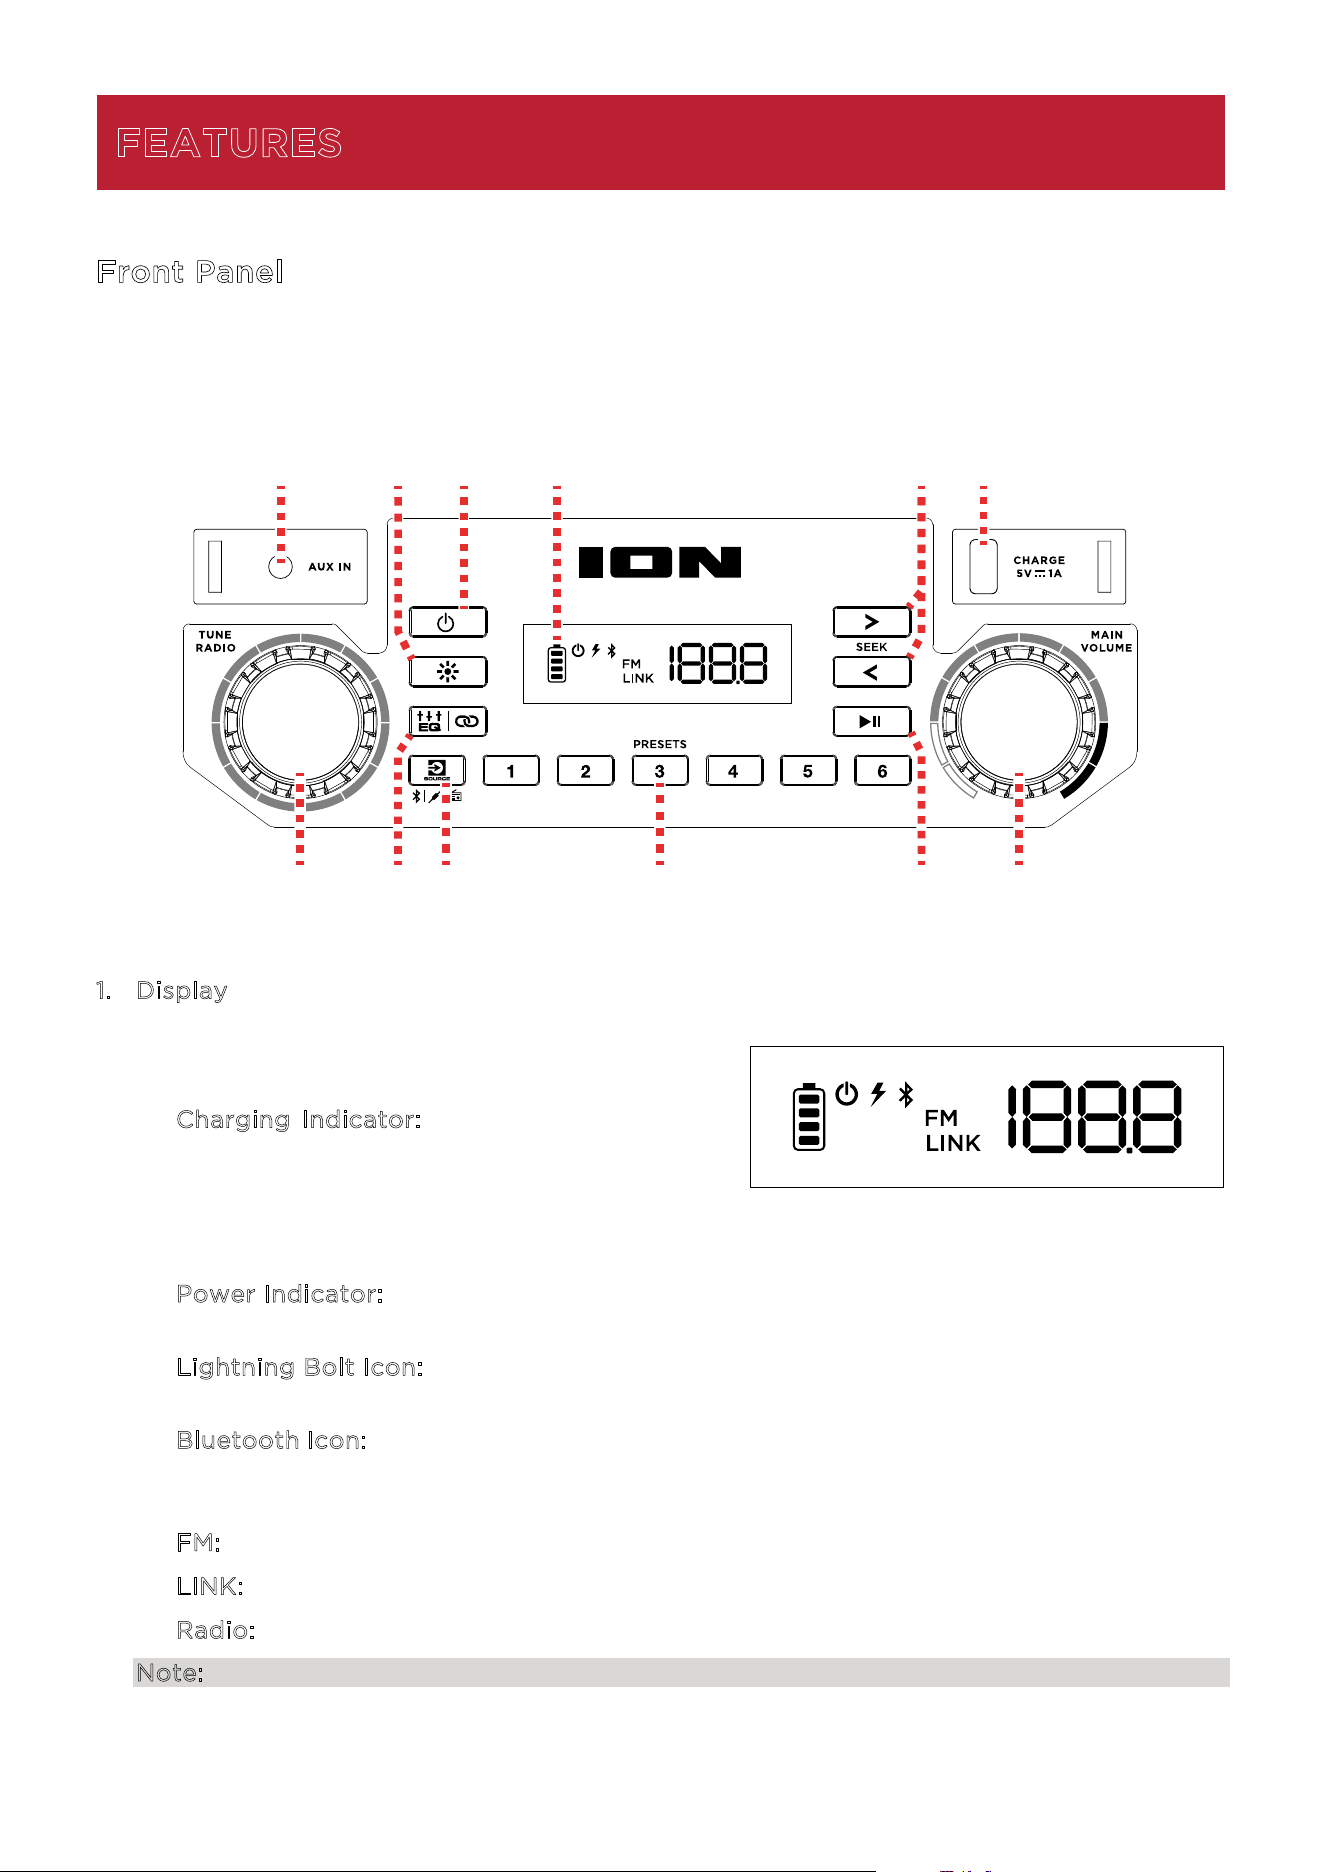
Front Panel
Click a control below to jump to that section.
1
. Display
This screen shows information relevant to the
cur
rent operation on Tailgater Classic.
• C
harging Indicator: When the power cable
is
connected, movement of the top batt
ery
segment
shows the battery is
charging.
When
fully charged, all battery segments will be lit without blinking. When the power
cable is disconnected, the battery segment shows the level of the battery.
• P
ower Indicator: The power indicator will illuminate when Tailgater Classic is powered
on.
• L
ightning Bolt Icon: The lightning bolt icon will illuminate when the IEC power cable is
connected to wall power.
• B
luetooth Icon: The Bluetooth icon will not be lit when Tailgater Classic is first powered
on
(unless it was previously paired with a device). The Bluetooth icon will be lit soli
d
when a device
is paired to Tailgater Classic.
• F
M: This icon will illuminate when using FM Radio mode.
• L
INK: This icon will illuminate when Stereo-Linked to another Tailgater Classic.
• R
adio: These numbers indicate the current radio station in FM Radio mode.
Note: The Display comes with a plastic protector on it. Remove this for optimal viewing.
FEATURES
1
2
7
8
10
11 12
54
6
3
9

ION Audio Tailgater Classic User Guide 7
2. Power Butt
on
Press and hold this button to turn Tailgater Classic on and off.
Double-press this button to turn Voice Prompts on or off.
3. Lights Button
Press this button to cycle through the three brightness levels for the utility light, or to turn
the lights off.
Note: If the lights are on and Tailgater Classic is not connected to a power source, the
speaker will enter a standby mode after 15 minutes if no audio is playing. To wake the unit,
press any button. To continue to use the lights without playing audio, make sure Tailgater
Classic is connectd to a power source.
4. EQ / Stereo-Link™ Button
Press this button to cycle through the Low, Mid, and Hi EQ bands, as shown on the Display.
Then, use the MAIN VOLUME knob to adjust the EQ frequency settings from -6 to +6.
Press and hold this button to start stereo-linking to another Tailgater Classic. See
Operation
>
Linking Two Spea
kers
for more details.
5. Source Button
Press this button to cycle between Bluetooth, Aux, and Radio modes. The current mode
will be shown on the Display.
6. Preset Buttons
In radio mode, press and hold these buttons to save the current station as a preset. Press
and release these buttons to recall the sa
ved station.
7. Next / Previous Buttons
In Bluetooth and USB modes, press the Next button to skip to the following track. Press
the Previous button to go to the beginning of the current, and press it again within one
second to skip to the previous track.
In radio mode, press and hold these buttons to seek the previous or next strong station.
8. Play/Pause Button
Press this button to start and stop Bluetooth or USB audio.
9. Tune Radio Knob
Turn this knob left or right to move to the previous or next radio station.
ION Audio Tailgater Classic User Guide
8
1
0. Main Volume Knob
Turn this knob to adjust the speaker’s overall volume.
1
1. Aux In
This stereo 1/8” (3.5 mm) input can be used to connect a CD player, MP3 player, or other
audio source
.
1
2. USB-A Charge Port (5V, 1A)
You can use this port for charging the USB device, such as a tablet or smartphone. USB
charging only func
tions when the unit’s power is turned on.
Note: To charge smartphones and tablets faster, put the device’s screen to sleep.
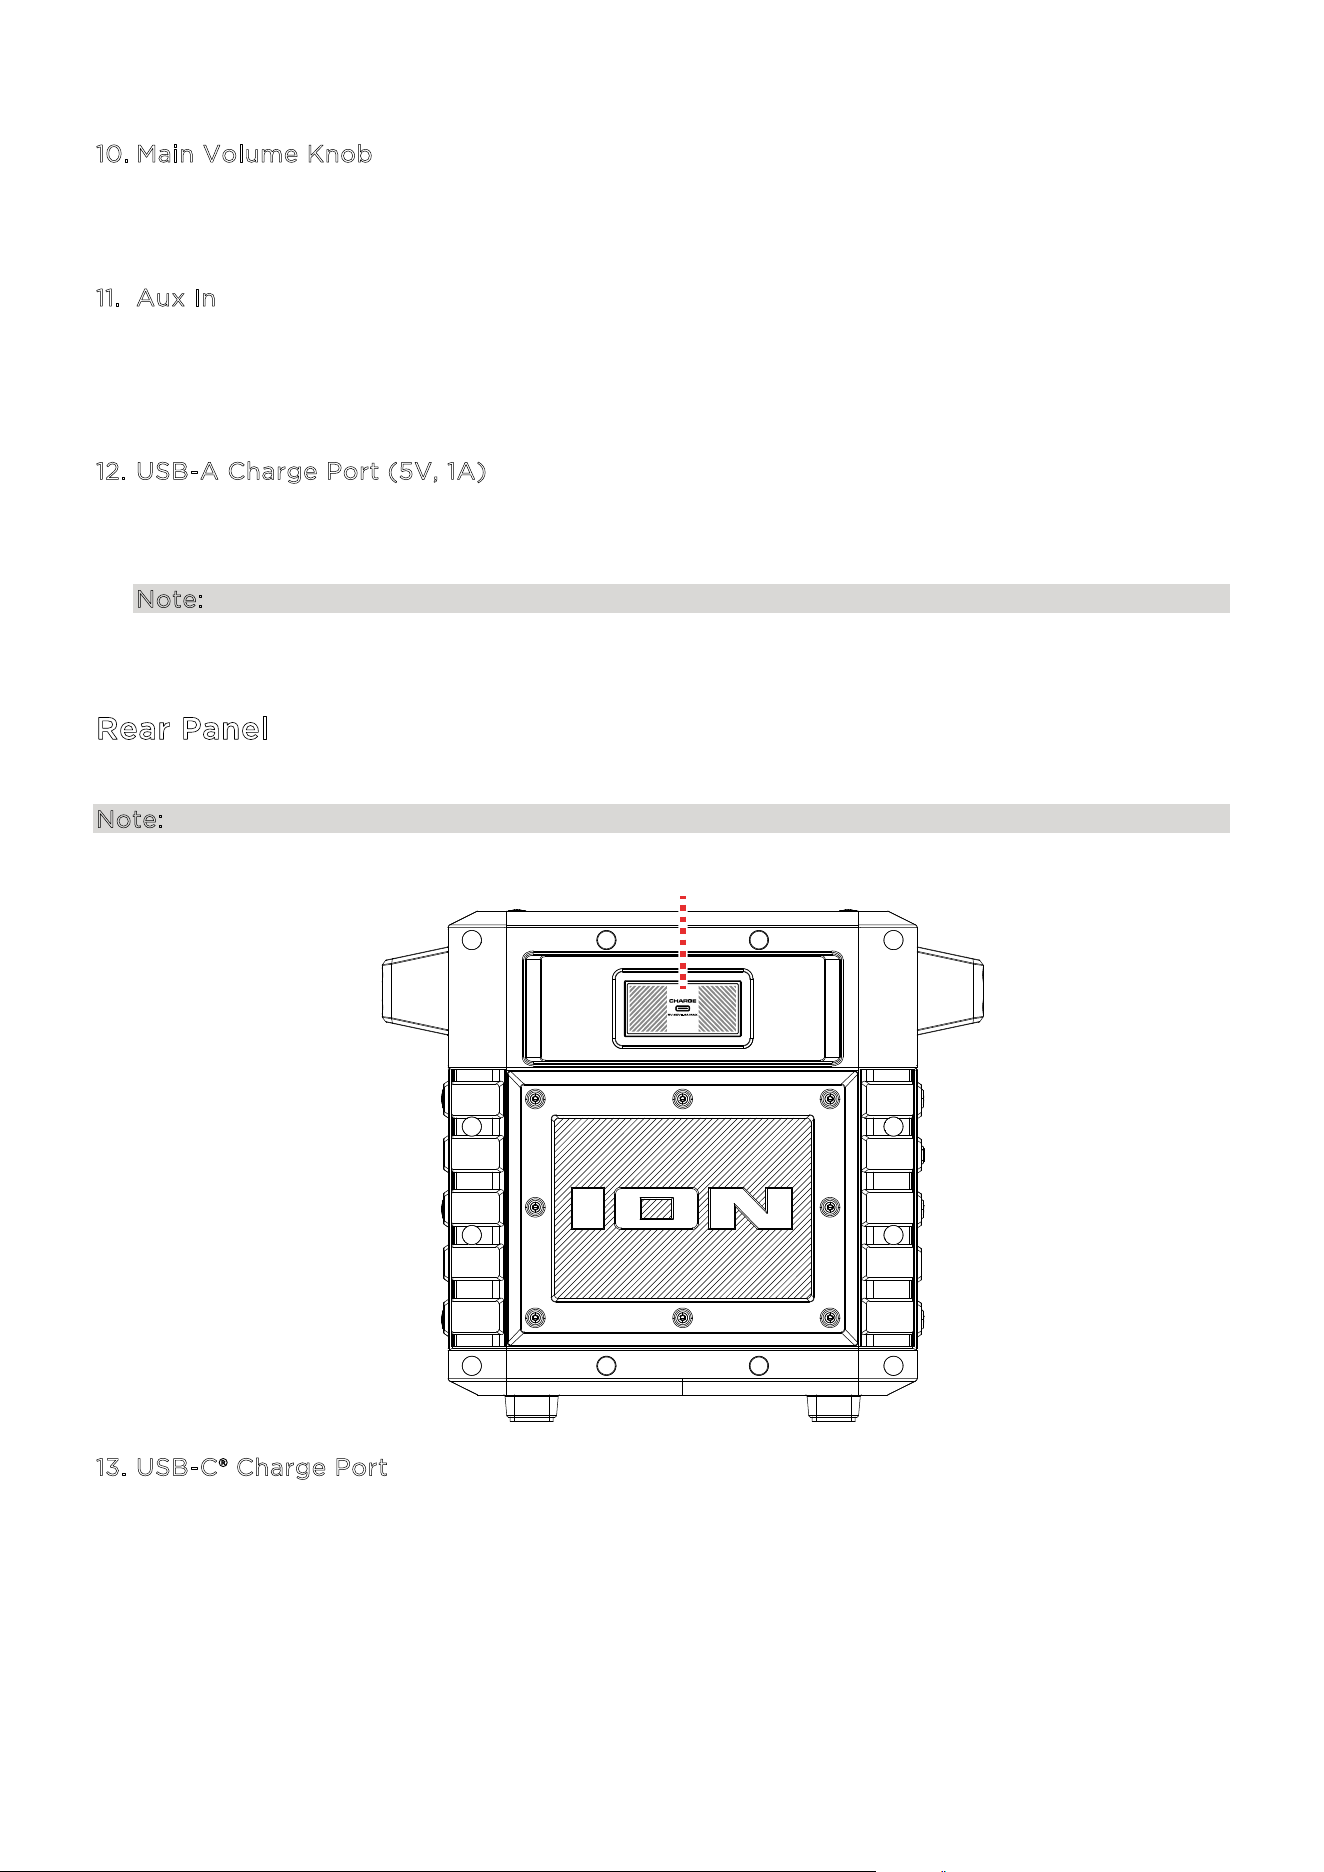
R
ear Panel
Note: Pull the tab on the protective rubber panel to release it and access the rear panel port.
1
3. USB-C® Charge Port
Conn
ect the included USB-A to USB-C® charging cable from this charging port to a USB
power adapter (DC 5V 2A, not included) connected to a power outlet, or to your powered-
on computer.
13
ION Audio Tailgater Classic User Guide 9
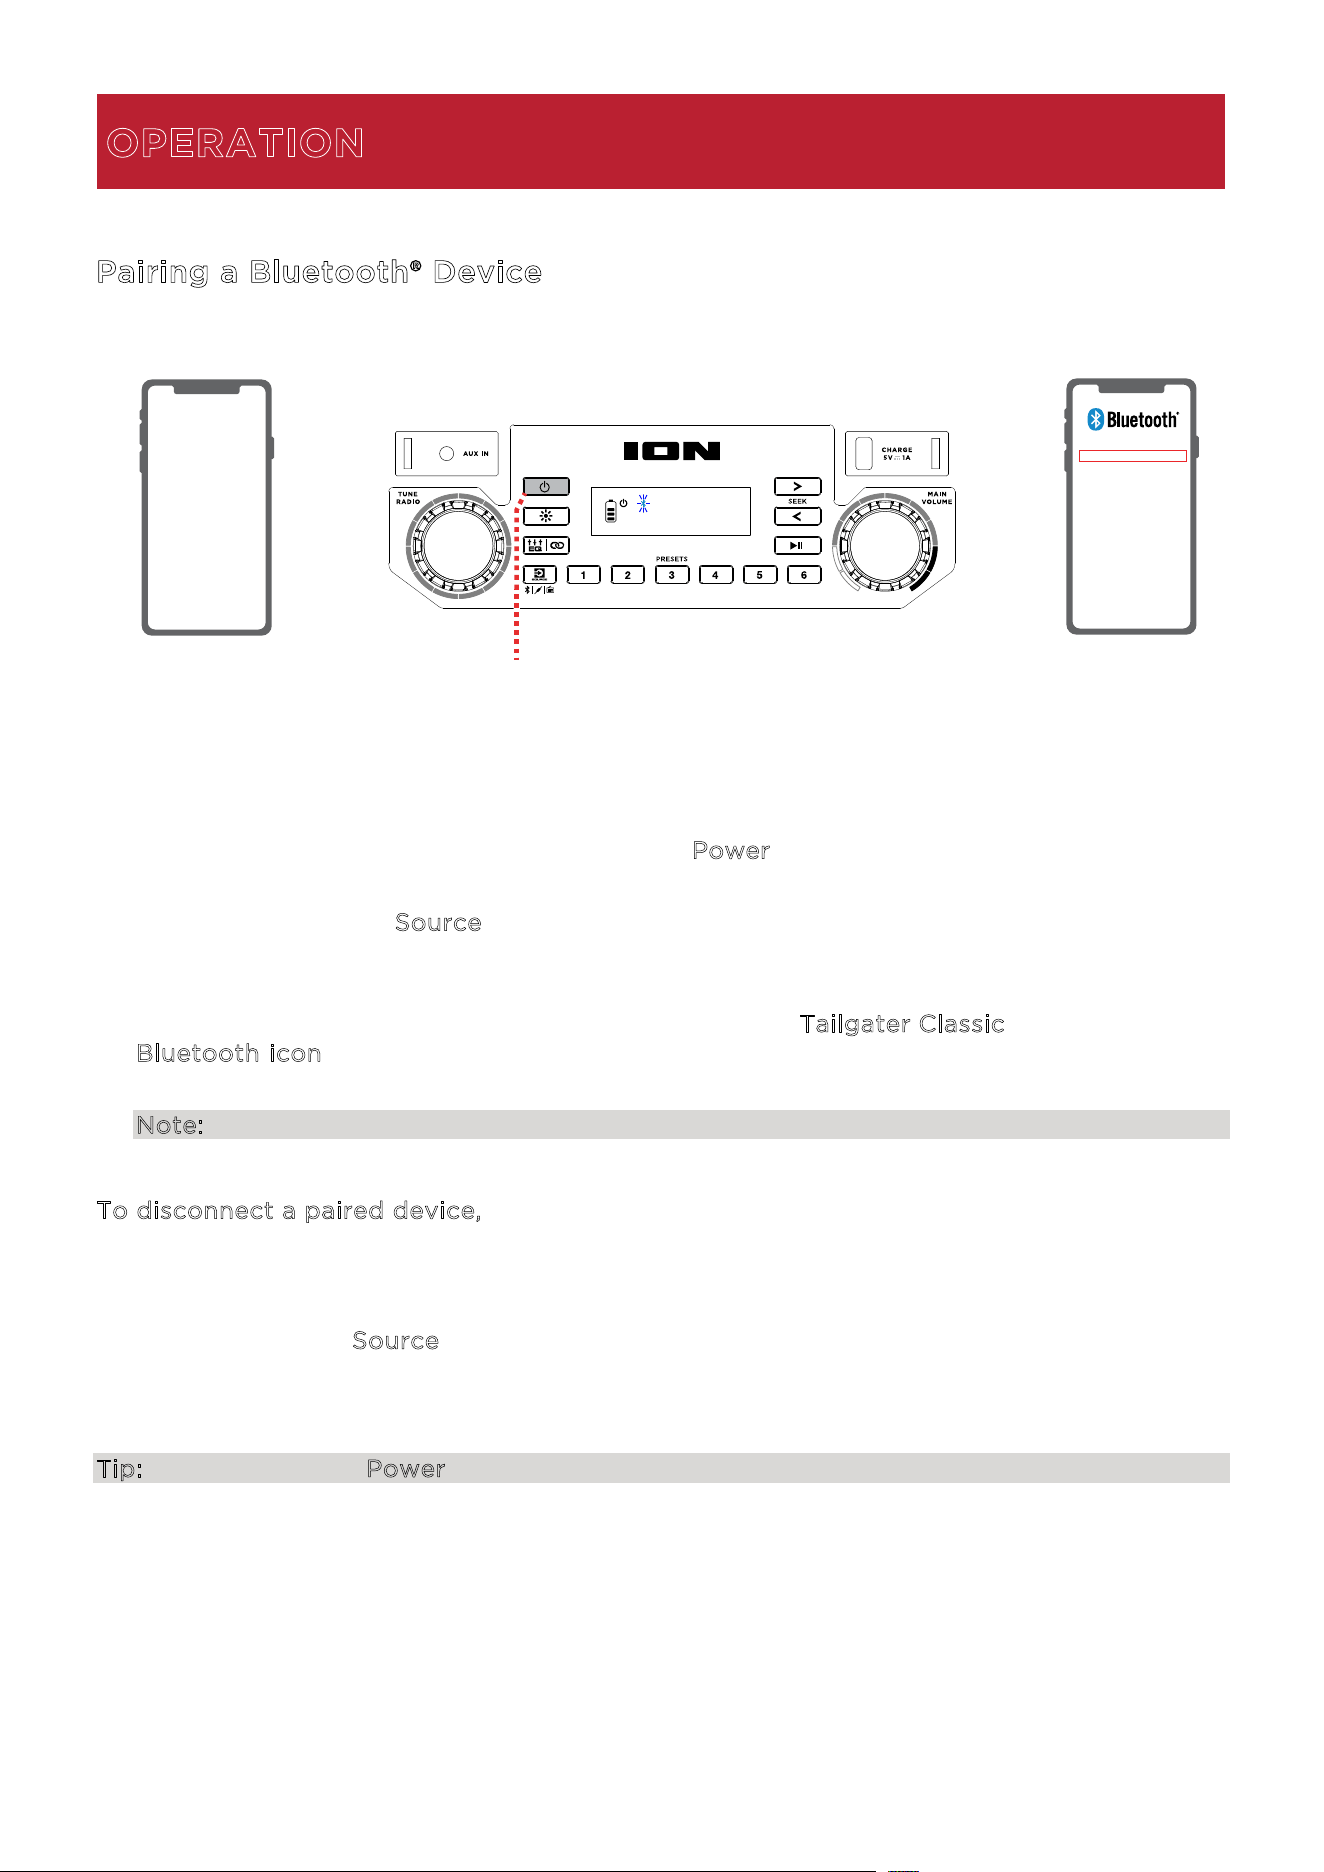
Pairing a Bluetooth® Device
1. Turn on your Bluetooth device.
2. Turn on Tailgater Classic by holding down the P
ower button for 2 seconds.
When the unit is first turned on, it will automatically enter Bluetooth pairing mode. If
necessary, press the S
ource button to select Bluetooth mode. The Bluetooth icon on the
display will flash to indicate the speaker is ready to pair and you will hear “Bluetooth Pairing”
if voice prompts are enabled.
3. Navigate to your device’s Bluetooth setup screen, find T
ailgater Classic, and connect. The
B
luetooth icon will appear in the display, and if voice prompts are enabled, you will hear
“Bluetooth Connected”.
Note: If your Bluetooth device prompts for a pairing code, enter “0000”.
T
o disconnect a paired device, do any of the following:
• Turn o Bluetooth from your device’s Bluetooth settings. The speaker will enter Bluetooth
pairing mode to make it available for another device.
• Double-press the S
ource button.
Once you have disconnected, you will hear “Bluetooth Disconnected” if voice prompts are
enabled.
Tip: Double-press the Power button to turn voice prompts on or o.
OPERATION
1 - POWER ON 2 - PRESS AND HOLD
2 - SELECT
TAILGATER CLASSIC
ION
Audio Tailgater Classic User Guide
10
L
inking Two Speakers
If you would like to play music from a Bluetooth device, you can first “link” two Tailgater
Classic speakers together in order to listen to your music in stereo. One Tailgater Classic will
serve as the left speaker and the other will serve as the right speaker.
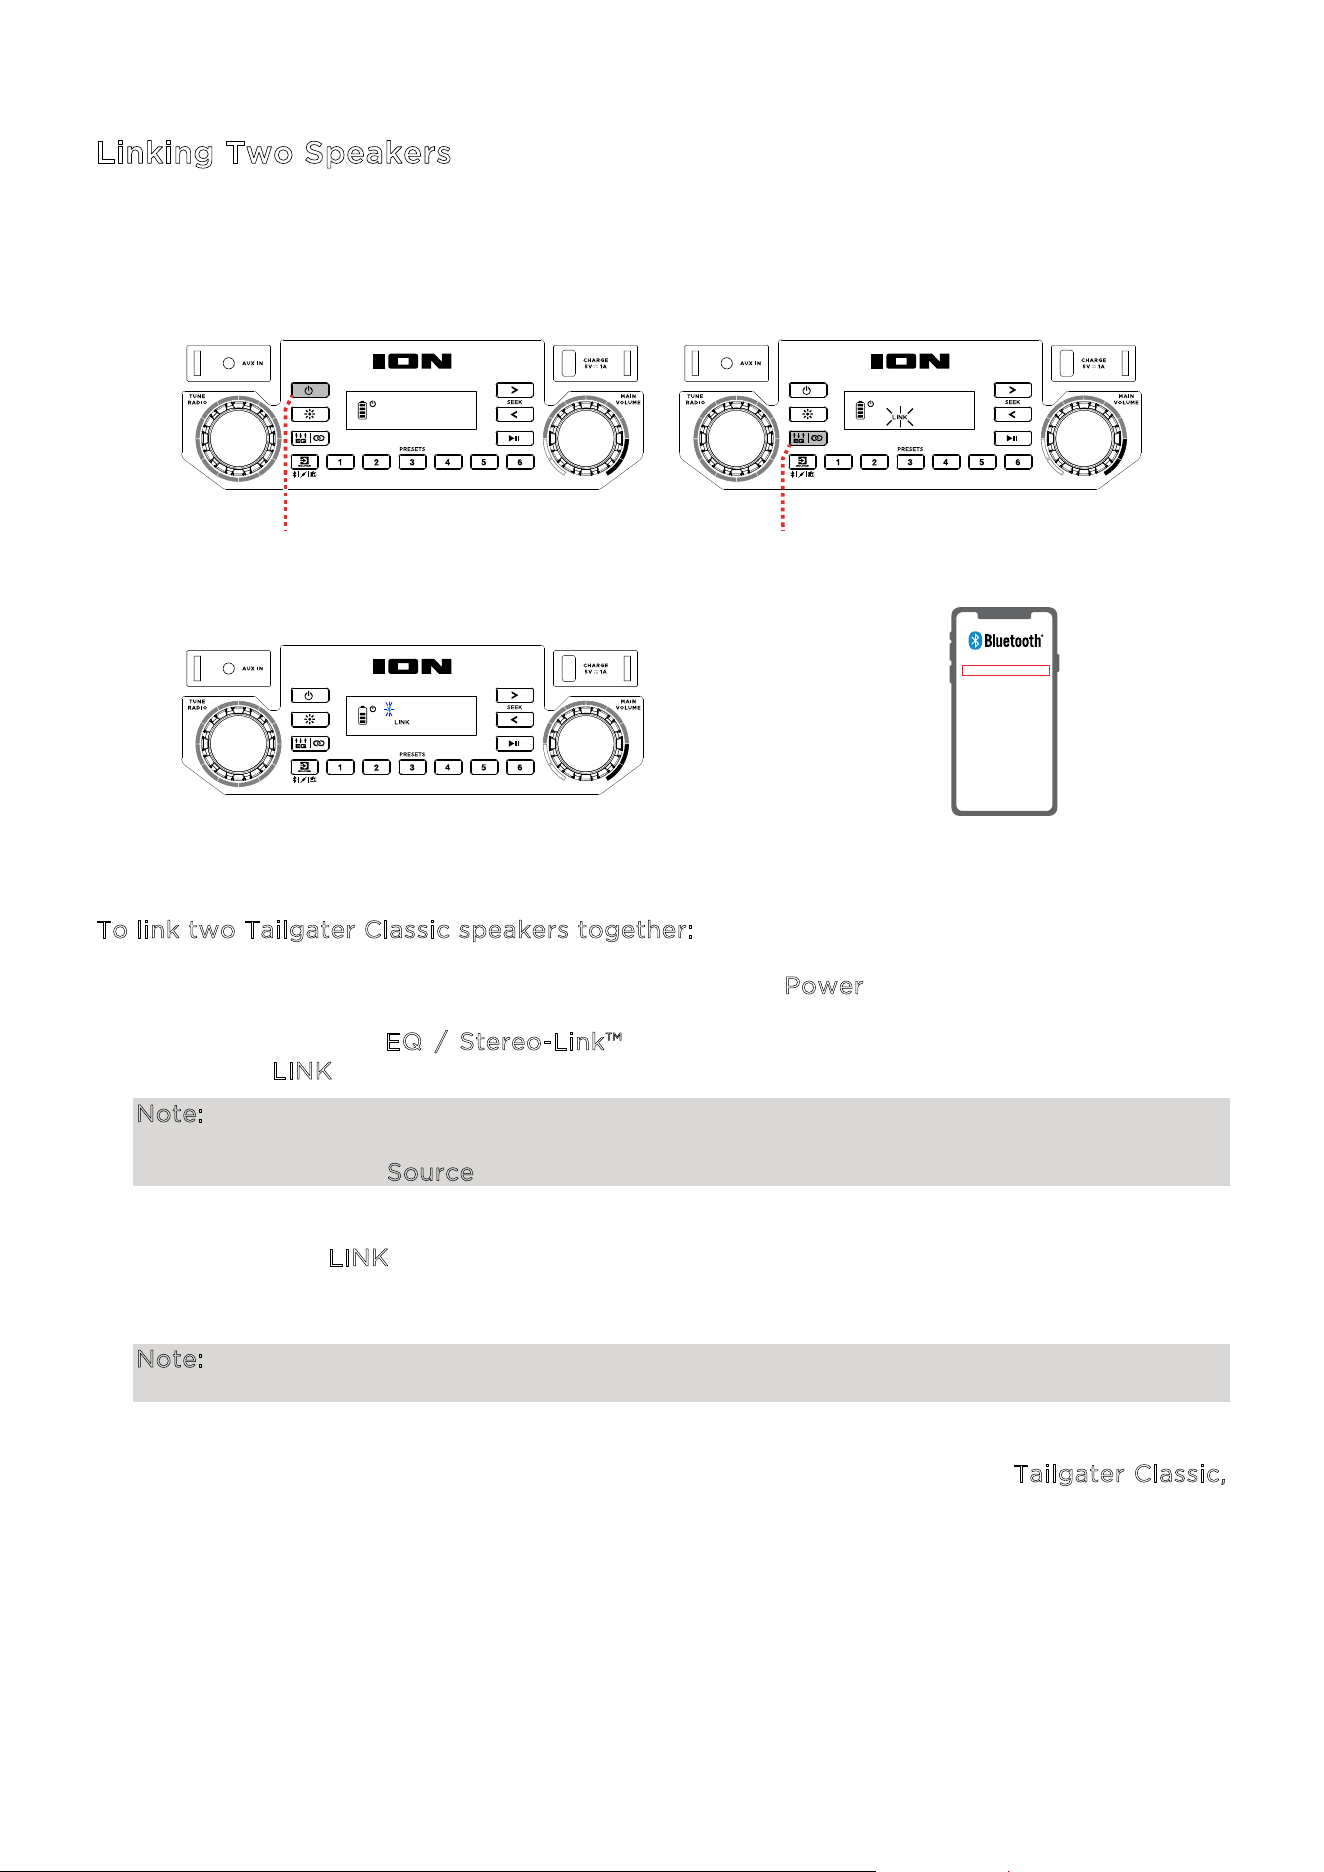
T
o link two Tailgater Classic speakers together:
1. Power on both speakers by pressing and holding the P
ower button.
2. Press and hold the E
Q / Stereo-Link™ button on both speakers to enter Stereo-Link™
mode. The L
INK icon on each display will flash.
Note: When you begin the Stereo-Link™ process, any connected Bluetooth devices will be
automatically disconnected. You can also disconnect your device prior to beginning by
double-pressing the Source button.
3. The speakers will automatically connect. This process may take up to 30 seconds, and once
com
pleted, the L
INK icon will be solidly lit. This first unit entered into Stereo-Link™ mode
will be the primary spea
ker and play the left channel, and the second speaker will be
the
right cha
nnel.
Note: Speakers should be within 50’ (15 m) of each other to properly link. The closer the
two speakers are, the quicker the link is established.
4. Once the speakers are linked, the primary speaker will automatically enter Bluetooth
pairing mode. Navig
ate to your device's Bluetooth settings screen, find T
ailgater Classic,
and connect. When the connection is successful, you will hear "Bluetooth Connected" from
the primary speaker (if voice prompts are enabled). Playback controls are active on both
speakers.
3 - PAIRING
2 - PRESS AND HOLD
BOTH SPEAKERS
1 - PRESS AND HOLD
BOTH SPEAKERS
4 - SELECT
TAILGATER CLASSIC
ION Audio Tailgater Classic User Guide 11
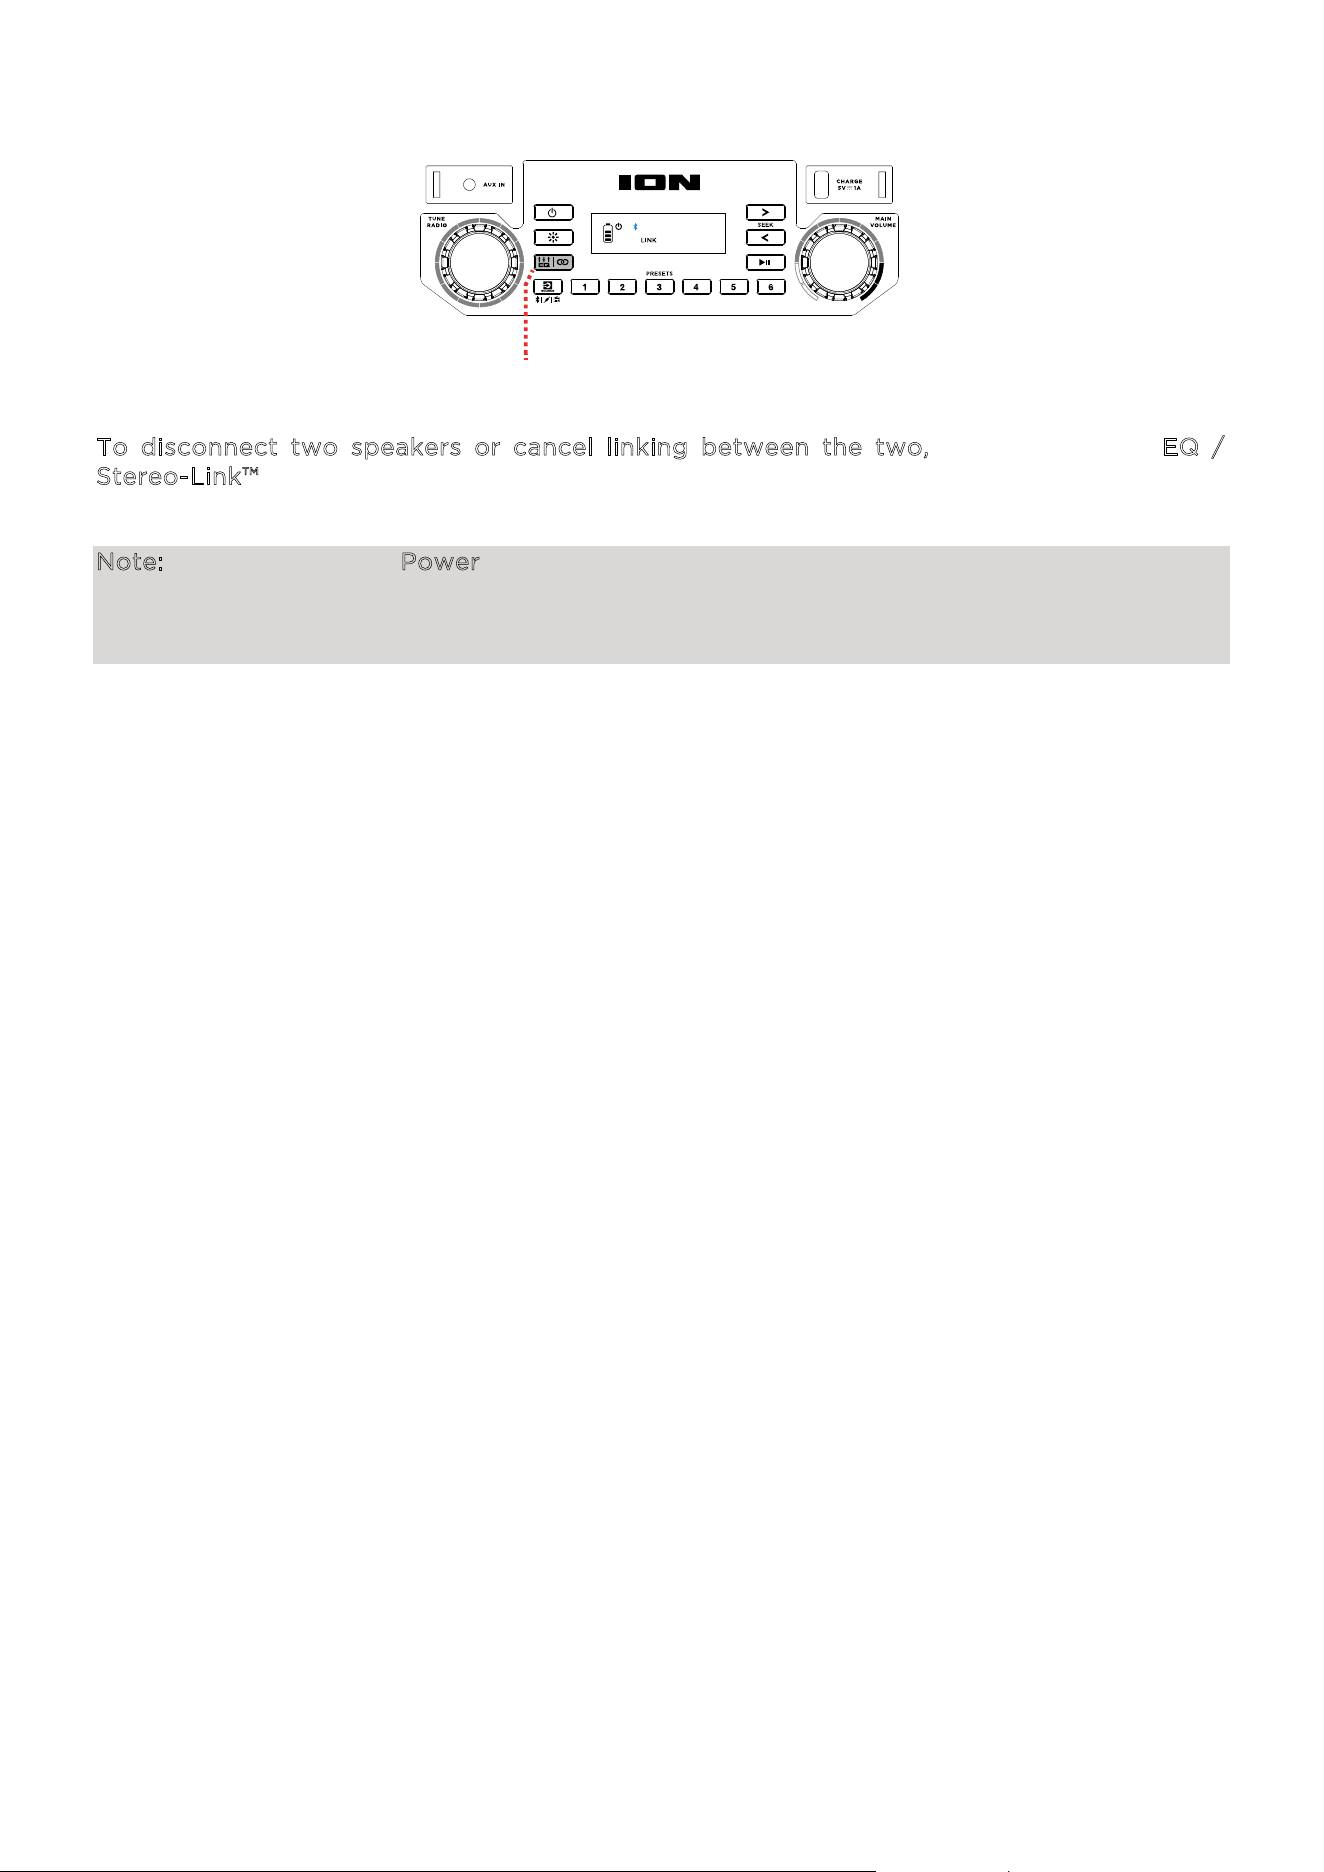
T
o disconnect two speakers or cancel linking between the two, double-press the EQ /
S
tereo-Link™ button on one Tailgater Classic. You will hear "Bluetooth Disconnected" from
the primary speaker to indicate the link has been broken (if voice prompts are enabled.)
Note: Press and hold the Power button on each speaker while in Stereo-Link™ mode to power
o the connected speakers. Tailgater Classic speakers powered o in Stereo-Link™ mode will
automatically enter Stereo-Link™ mode the next time they are powered on and begin
searching for secondary speakers to connect to.
DOUBLE-PRESS
ION Audio Tailgater Classic User Guide
12
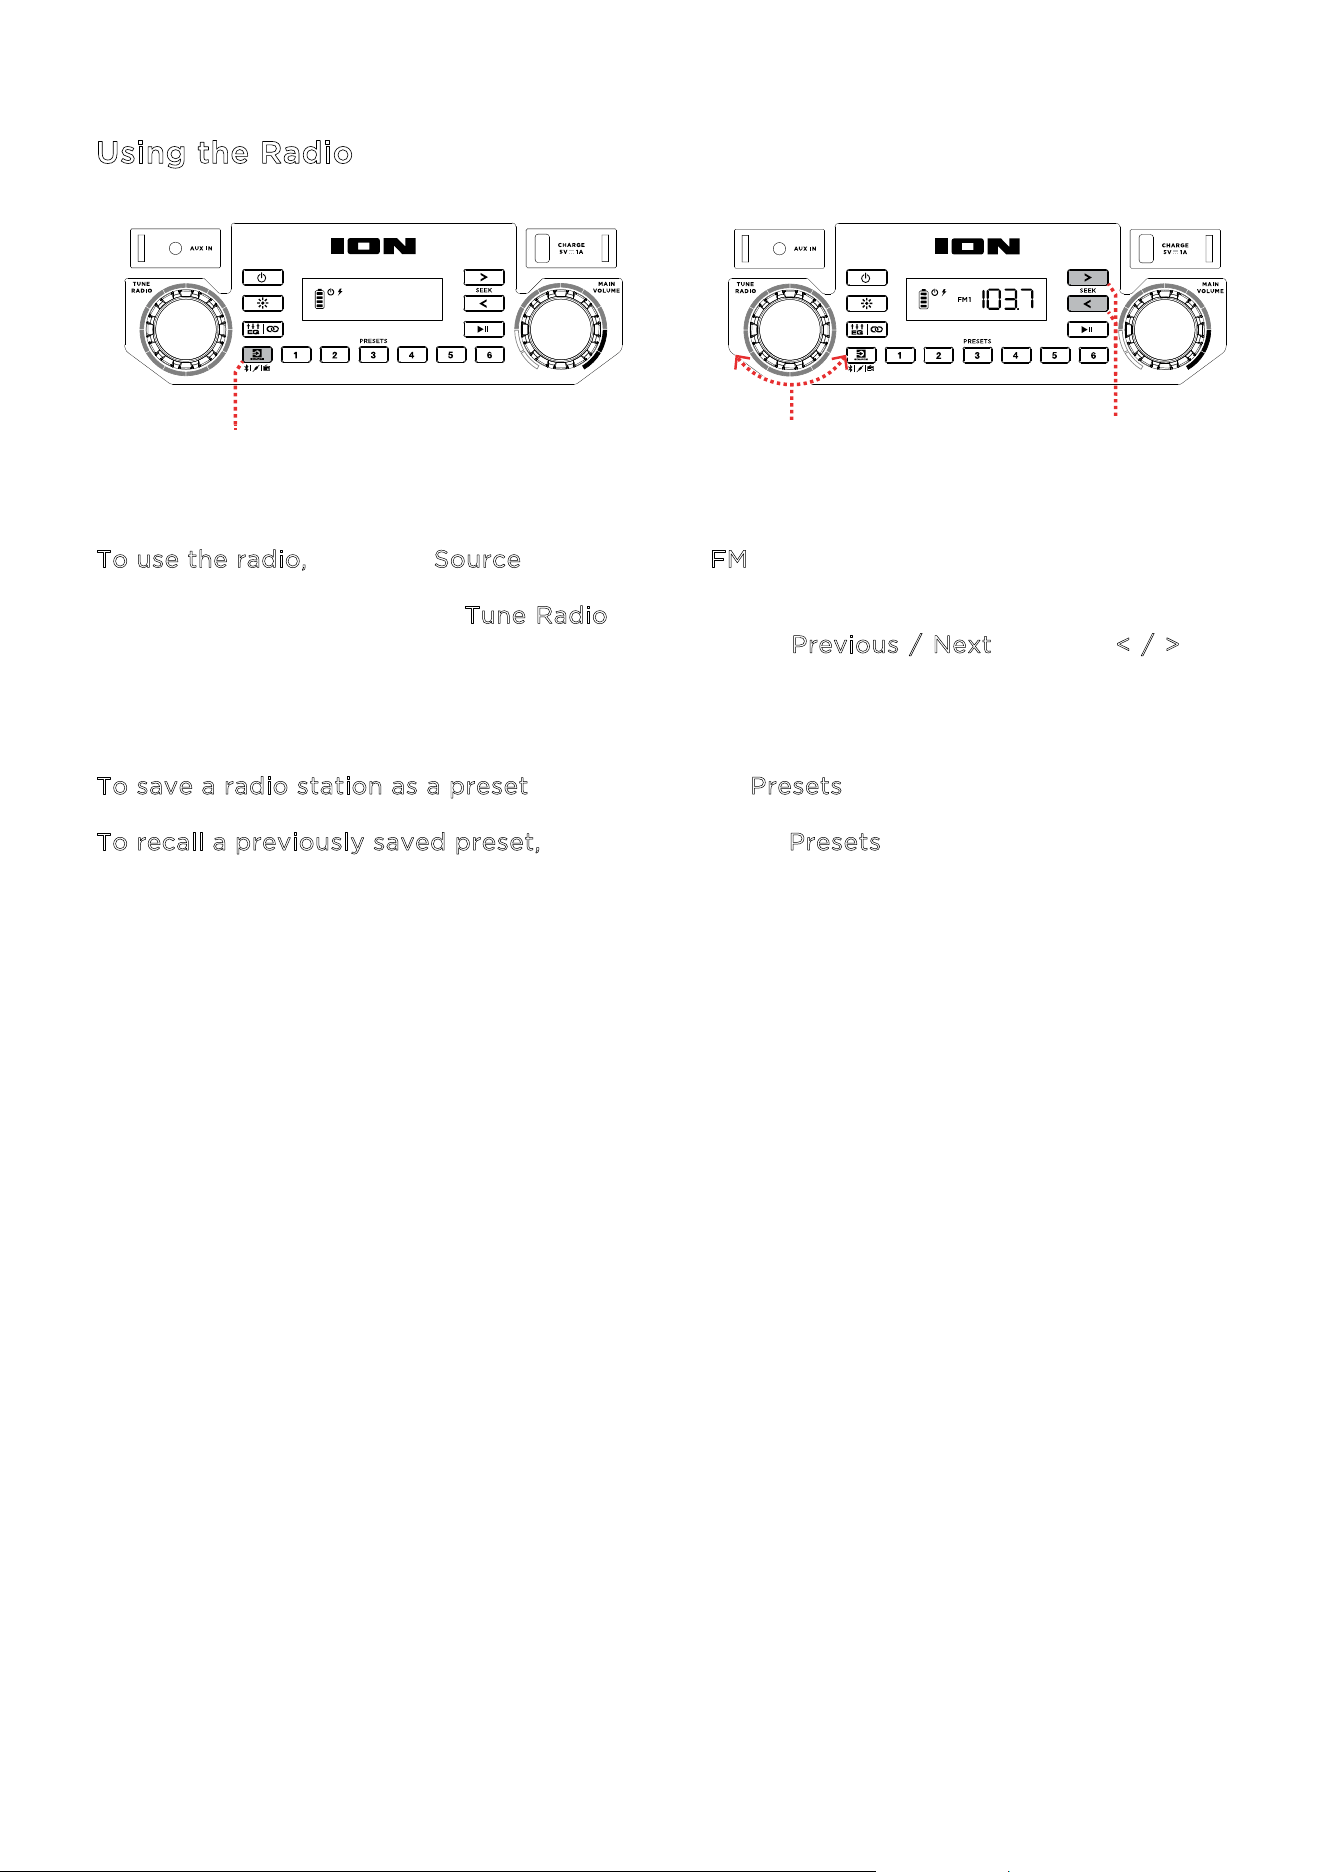
U
sing the Radio
To use the radio, press the Source button so that FM is selected and shown on the display.
While in radio mode, turn the T
une Radio knob left or right to move to the previous or next
available radio station. You can also press and hold the P
revious / Next buttons (< / >) to
seek the previous or next strongest station.
T
o save a radio station as a preset, press and hold a Presets button.
T
o recall a previously saved preset, press and release a Presets button.
PRESS TO SELECT RADIO
TURN TO TUNE PRESS & HOLD
TO SEEK
ION Audio Tailgater Classic User Guide 13
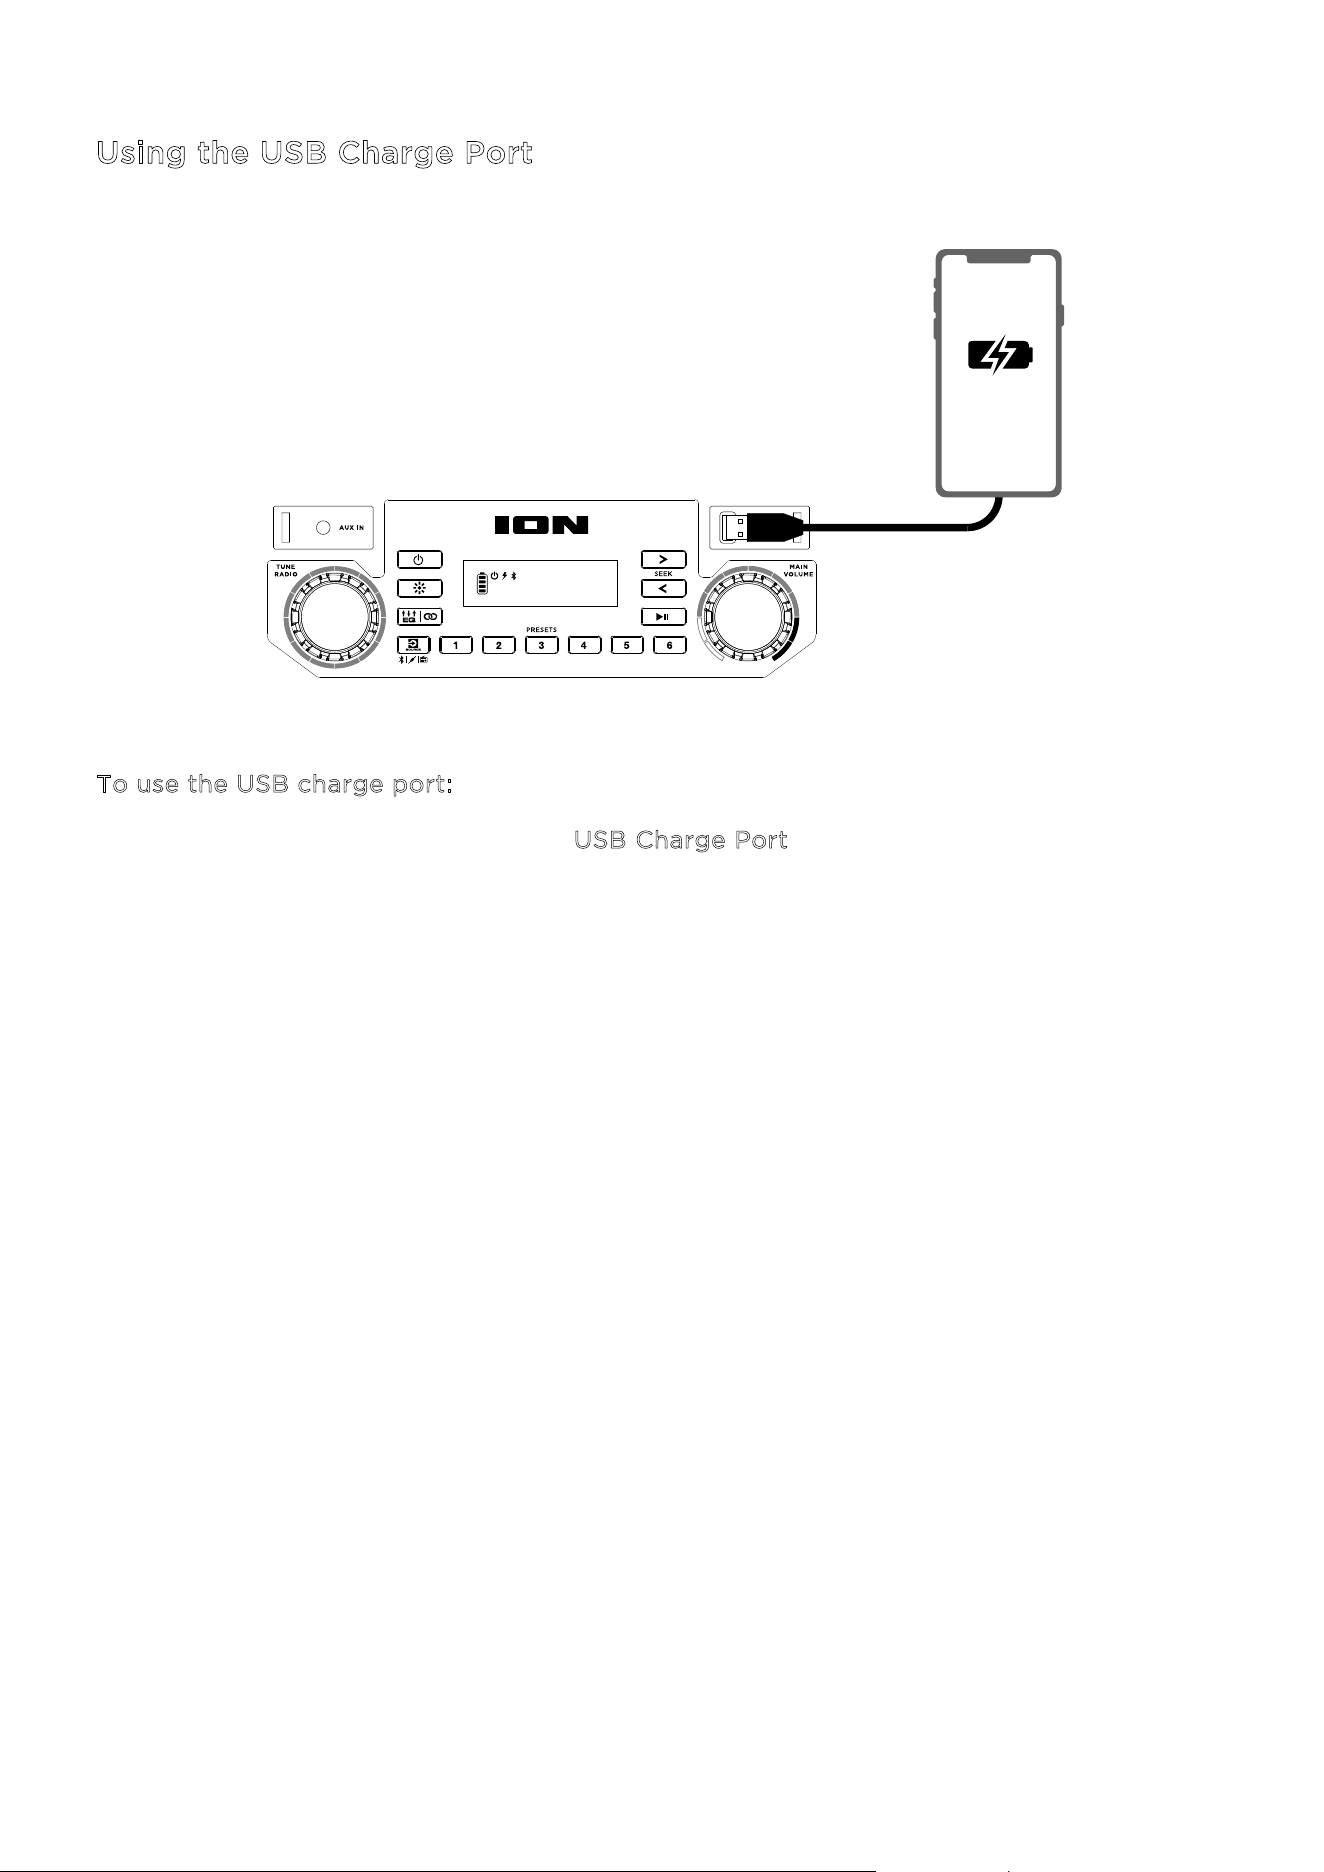
U
sing the USB Charge Port
To use the USB charge port:
1. Connect a USB type-A cable to the U
SB Charge Port on the front panel of your Tailgater
Class
ic speaker (see image).
2. Connect the other end of the cable to the charging input on your smartphone, tablet,
or
other
compatible device.
ION Audio Tailgater Classic User Guide
14
A
pp Control
IMPORTANT: To ensure the best possible experience with the app, use the most current
Android OS or iOS on your device.
F
ollow these steps to download the free app on your device:
1. Open the Apple App Store or Google Play on your device. Then, search for the I
ON Sound
C
ontrol™ app.
2. Follow the on-screen instructions to download and install the app. Once downloaded, the
I
ON Sound Control™ app will appear on your device's home screen.
3. Connect your device to Tailgater Classic via Bluetooth. See O
peration > Pairing a
B
luetooth® Device to learn how to do this.
4. Open the ION Sound Control™ app. If prompted, allow the app to access your device's
Bluetooth and Location Services.
5. Follow the steps on screen to find and connect to your Tailgater Classic. Once connected,
you can control various functions of the speaker, such as:
• V
olume: Adjust the speaker's volume.
• E
Q: Adjust the speaker's equalization.
• V
oice Prompts: Enable or disable the voice prompts.
• L
ights: Change the brightness of the utility lights.
• B
attery Life: Check the speaker’s battery life status.
• S
upport: Visit ionaudio.com, contact Technical Support, and view Warranty information
and Frequently Asked Question
s.
ION Audio Tailgater Classic User Guide 15
I
f the unit is not charging: Make sure the power cable is properly connected to the power
input and the power outlet.
I
f the sound is distorted: Try lowering the volume control of your sound source.
I
hear a hum when cables are connected:
• Disconnect cables from the input jacks to see if it’s a f
aulty cable.
• Make sure the signal cables are not placed near power cables.
• Connect all audio equipment power cables to outlets which share a common
ground.
I
f there is too much bass: Try adjusting the tone or EQ control on the Tailgater Classic or your
sound source to lower the bass level. This will allow you to play the music louder before
clipping (distortion) occurs. You can also check to see if the B
OOM function is enabled, and
disable it by pressing the B
OOM button™.
I
f you cannot connect your audio device to Tailgater Classic via Bluetooth:
• Have your audio device (e.g., smartphone or tablet) and Tailgater Classic as close togeth
er
as
possible while trying to connect. Make sure both the audio device and Tailgater Class
ic
are unobs
tructed by walls, furniture, etc.
• Press the B
luetooth button to disconnect Tailgater Classic
from any other audio device and
restart the search process. If this does not work right away, power o Tailgater Classic and
then power it back on. See O
peration > Pairing a Bluetooth® Device for more information.
• Reset the Bluetooth connection on your audio device by turning Bluetooth o and back
on. You can find this under the Bluetooth menu in the Settings for your phone or other
audio device.
If this does not work, and you have connected to Tailgater Classic
before, find Tailgater
Classic in the list of available or previously connected devices in your audio device's
Bluetooth menu, tap the "gear" or “i” icon located next to it and then select U
npair or
F
orget. Turn Tailgater Classic o and back on and try pairing again once it reappears in
your
available devices list.
Note: If Tailgater Classic has been paired to another audio device recently that is still within
range, you may need to repeat this process with that audio device to fully disconnect.
I
f you experience audio dropouts while playing music from a Bluetooth device, this may be
happening because your unit is trying to link to another speaker. This can occur if you power
o a speaker that was linked to your unit or if you have just turned on your unit and it is in
Stereo-Link™ mode. To stop the audio dropouts, exit Stereo-Link™ mode by double-pressing
the E
Q / Stereo-Link™ button. Alternatively, you can wait for your unit to link to another
speaker if there is one
within range.
TROUBLESHOOTING

ION Audio Tailgater Classic User Guide 16
Technical Specifications
Speakers Low Frequency: 6.5” (165 mm) woofer
High Frequency: 2.0” (61 mm) tweeter
Frequency Response 58 Hz – 22 kHz (-10 dB)
USB-A Charging Port 5V, 1A
Wireless Technology Bluetooth®
- Classic Audio
Wireless Range * Bluetooth Range: Up to 100 ft. (30.5 m)
Stereo-Link™ Range: Up to 50 ft. (15 m) between speakers
Battery Type: Lithium-ion
Capacity: 2600mAh/11.1V, 28.86Wh
Battery Life: 15+ hours **
Charge Time: Up to 4 hours
Power Cable: USB-C Power Cable
Input Voltage: 5V, 3A max
Dimensions
(width x depth x height)
15.98” x 9.76” x 13.74”
406 mm x 248 mm x 349 mm
Weight 19.29 lbs.
8.75 kg
Specifications are subject to change without notice.
* Bluetooth and wireless reception and range are affected by walls, obstructions, and
movement. For optimal performance, place the product so it is unobstructed by walls or
furniture and is raised off the ground.
** Battery performance varies with the features being used on the unit and volume at which
content is being played. In typical usage for audio playback, exclusive of additional features,
the Tailgater Classic battery lasts 15+ hours with speaker volume at 50% and the lights off.
APPENDIX

ION Audio Tailgater Classic User Guide 17
T
rademarks & Licenses
ION Audio is a trade
mark of inMusic Brands, Inc., registered in the U.S. and other countries.
The Bluetooth word mark and logos are owned by the Bluetooth SIG, Inc., and any use of such
marks by ION Audio is under license.
App Store is a trademark of Apple Inc., registered in the U.S. and other countries.
Android and Google Play are registered trademarks of Google Inc. All other product names,
company names, trademarks, or trade names are those of their respective owners.