Smart Bird Feeder User Manual
Scan the QR code to view
the video tutorial
(Browser / QR Code Scanner)
Customer Support Email: [email protected]
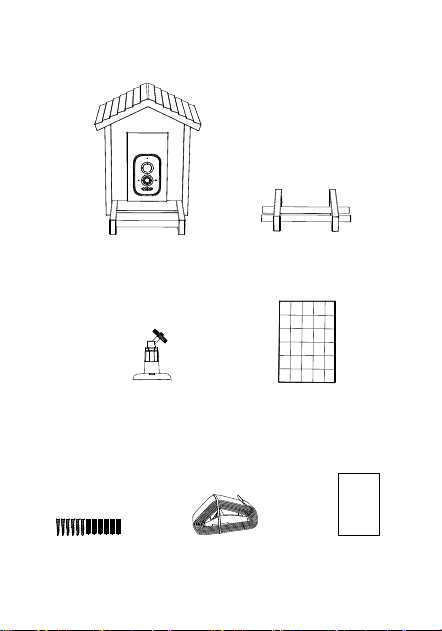
What’s in the Box
user
manual
Feeder + Camera
Solar panel bracket Solar panel
ManualScrew kit *6 Binding straps
Bird Standing Stands
About the Product
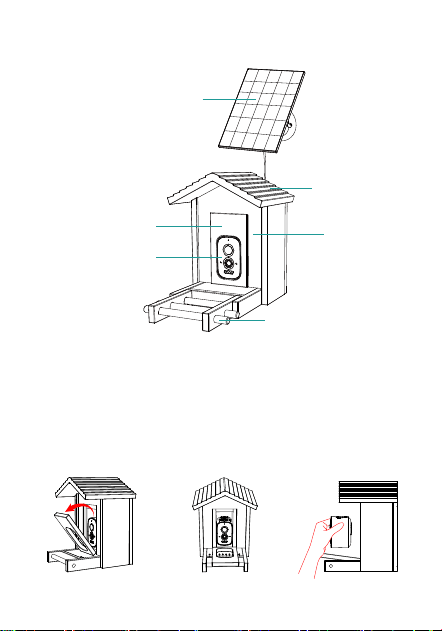
Note: Please open Ŝ Door for storing cameras and remove ŝ Cmaera
from the bird feeder for subsequent operations as shown below :
Ś
ś
Ŝ
ŝ
Ş
Solar panel Door for storing cameras
Camera Bird Standing StandsGrain storage bins
Grain storage bin coversŚ ś Ŝ
ŝ Ş ş
ş
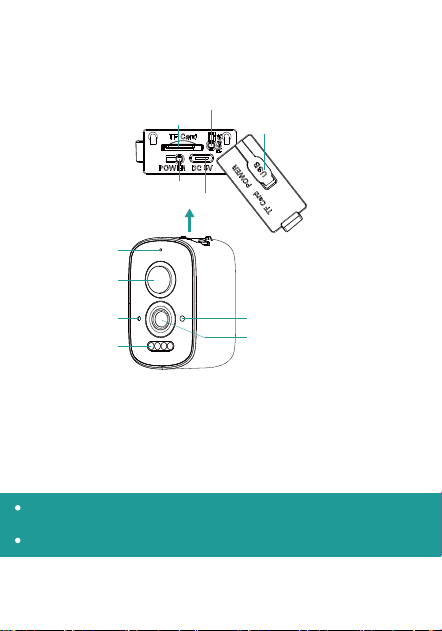
Power Button: Press and hold for 3 to 4 seconds to turn the device on or of
You will hear a voice prompt.
Reset Button: Press and hold for 5 to 10 seconds to restore the device to factory settings.
Before installing or removing the Micro SD card, ensure the device is turned off
or the power supply is disconnected. It is recommended to use cloud storage,
which is safe and reliable for storing alarm records and accessing related video
in real time.
Status light
White light
Lens
Light-sensitive sensor
PIR human sensor
Microphone
Power button
Power interface
Reset button
TF card slot
Silicone cover of power supply port
(Can connect external power
supply/solar panel to charge
the battery of the device)
Status light
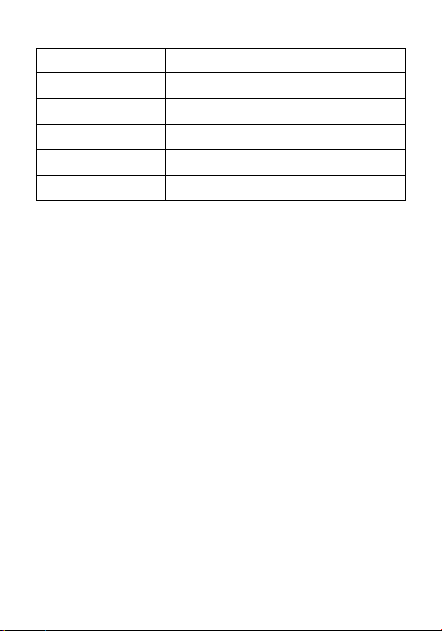
Solid blue Device is on and operating normally
Waiting for network configuration
Device is being accessed by the client
Low battery
Low-power standby/not started
Quickly flashing blue
Slowly flashing blue
Solid red
None
Description
Charging
Fully charge the camera before use
Tip: When the device indicator light turns red, or the APP receives a low battery
alarm, please charge the camera immediately, otherwise the camera will not
be able to turn on when the battery is exhausted, and charging will take
longer. To charge the device, open the silicone cover and use the power
supply port to connect external power/solar panel.
Fully charge the camera before first use. The camera does not come
pre-charged due to safety regulations. Charge it for 5 hours with the
included charging cable (DC5V/1.5A).
Warning
When charging, both the ambient temperature and camera temperatureshould
be above 32°F (0°C). If the camera has been exposed to low temperatures for an
extended period, it should be brought back to room temperature before charging.
Connection and Configuration
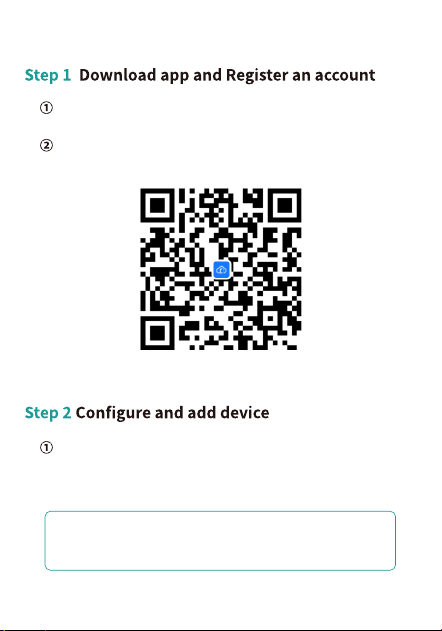
Scan the QR code to download Tris Home or search
Tris Home in mobile application market to download.
Run Tris Home, register an account and login(Support
third-party account)
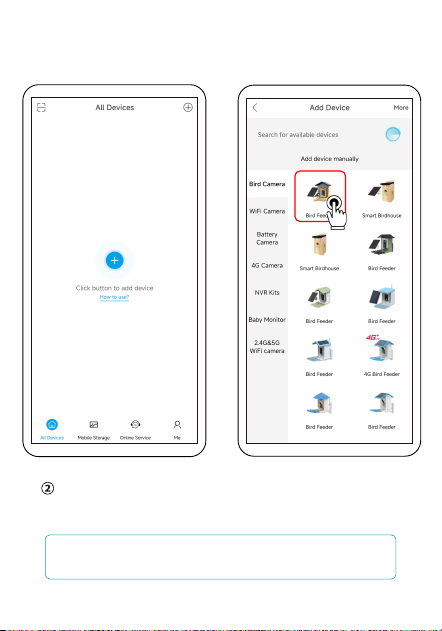
Click "+" in the middle of the APP interface or "+" in the
upper right corner to add device as shown in Figure 1,
select bird feeder as shown in Figure 2.
NOTE: If you are using a dual-band router, please connect your
phone to WIFI on the 2.4G band when configuring the network
for your device
Tris Home
Long press the power button at the top for 3~4 seconds
untill hear a tone, then the blue light will flash as shown in
Figure 3.
Figure 1 Figure 2
NOTE: If you don't hear a tone and the indicator doesn't
light up, please charge your device first
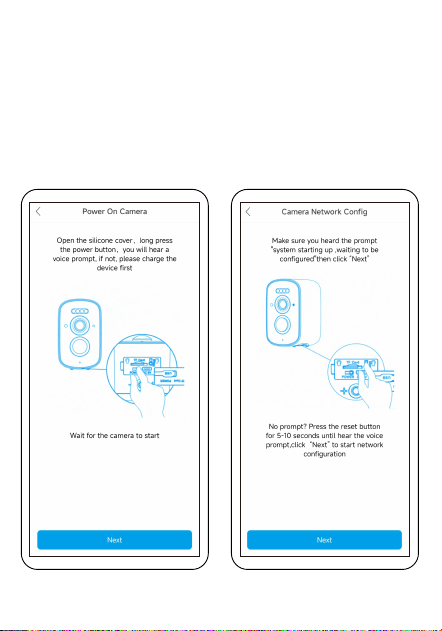
Figure 3 Figure 4
If the blue indicator light is not flashing quickly,Please try to
reset the device by pressing and holding the reset button for
5-10 seconds as shown in Figure 4.
ʏ
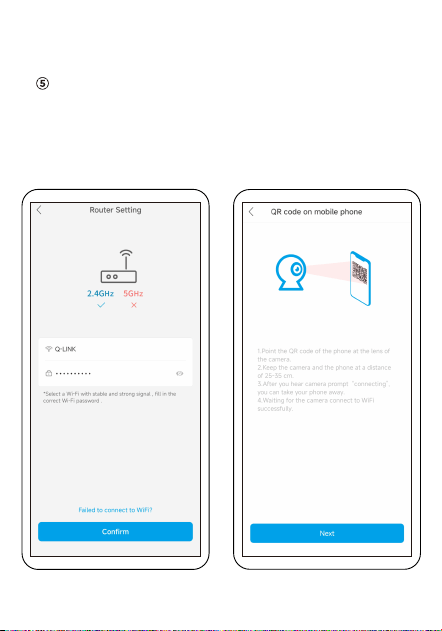
Figure 5 Figure 6
Enter the WIFI password to configure the network as shown
in Figure 5.
Your phone will generate a QR code, place the QR code in
front of the camera about 25-35cm (about 1 ft) as shown in
Figure 6, wait for the configuration to complete as shown in
Figure 7.
ʐ
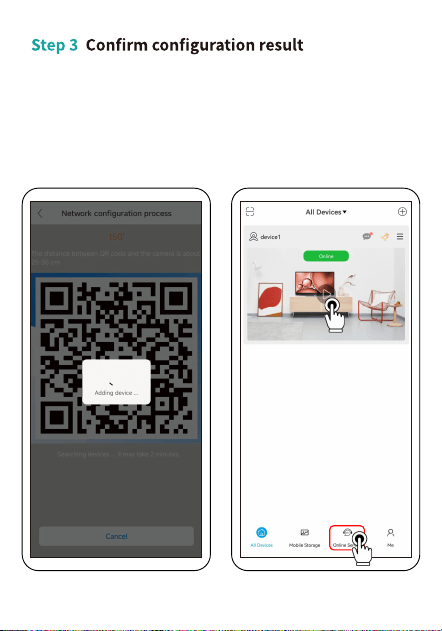
Figure 7 Figure 8
After configuration is successful, jump to device list page,
click the device to open real-time view live or device setting.
If you have any other questions can check in app-online
serviceas shown in Figure 8.
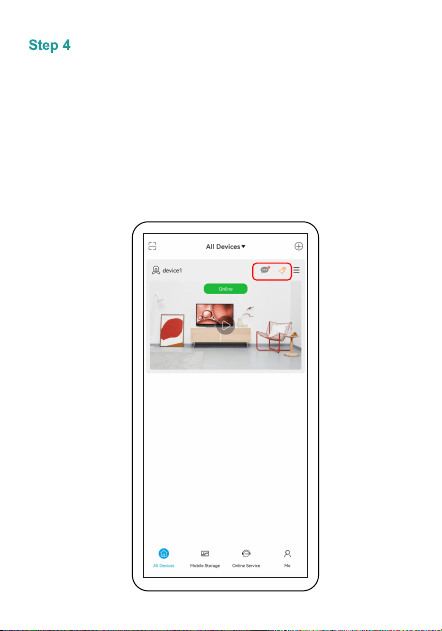
Click on the "Bird" icon to enter the Cloud Service store in
Figure 9, purchase the cloud storage services, which
can identify more than 10K species of birds and save more
than 3-days Loop Alarm record. Now you can experience
one month for free. If the bird comes, the camera will
automatically recognize and save the video to the cloud, and
you will receive a message. Click on the "Cloud Event" icon to
see the bird's video and Wikipedia's introduction to the bird.
Figure 9
Cloud Storage / Bird Recognition
Cloud Event Bird Project
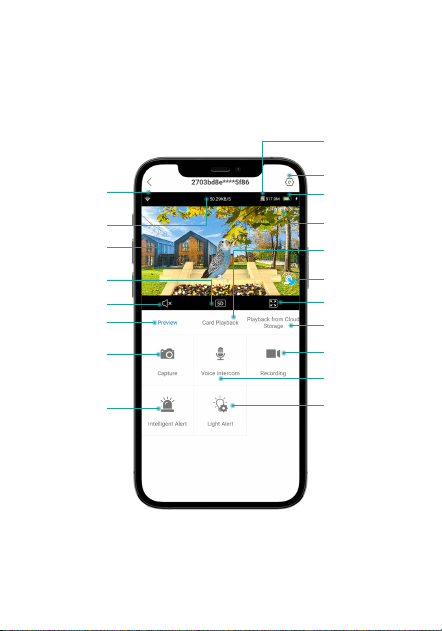
APP Function Introduction
Click for more settings
Click for more settings
Bird feeder camera
battery power display
Local time display
Click to play the videos
saved in the memory card
Click for full-screen view
Click to make a sound
to repel squirrels
Click to record video
(minimum 5 seconds)
Press and hold for
voice intercom
Click to enter the Light
Alert Setting page
Click to enter the
Intelligent Alarm
Setting page
Tap it to save the
screen photo of the
current camcorder
to the album of APP
Live Video can
be previewed
Turn sound on or off
Click to switch SD/HD
Live video
Check the WiFi signal
strength of your
device's environment
Current Internet
Speed Display
Click to playback videos
saved in the cloud storage
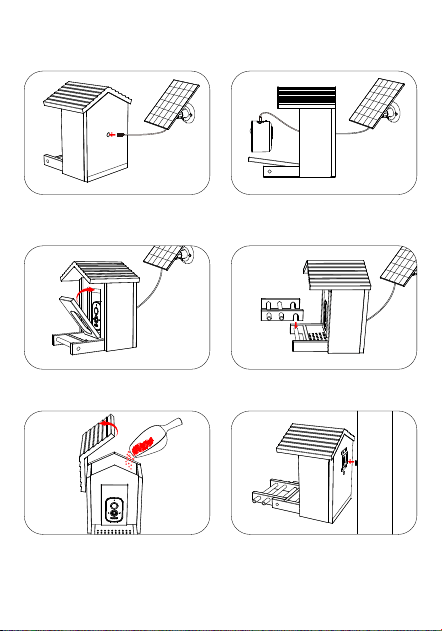
Assembly
Step 1: Pass the solar panel's Type-C
connector through the hole on the back
of the bird feeder.
Step 2: Connecting the camera to the
solar panel.
Step 3: Place the camera inside the
bird feeder and close the door.
Step 4: Installation of Bird Standing
Bracket.
Step 5: Open the Grain storage bin
covers and pour in the bird food.
Step 6: Attach the 2 screws to the tree
and then insert into the holes in the iron
tab bracket on the back of the bird
feeder to secure.
A:1.check if camera battery is charged and if the router network
is normal.
2.Press and hold the power button to power off and restart the
camera.
3.restore factory setting(Press and hold the reset button for 6
seconds until you hear "Restoring to factory settings, do not
power off" and release it), follow instructions to re-add device.
FAQ
A:Only support 2.4 GHz WiFi, if the router's 5G band and 2.4G band
are the same SSID, and you can't connect to the camera successfully,
please turn off the “Dual-band” function in your router settings.
(This function will automatically switch to the 5G band network, resulting
in problems such as not being able to connect or going offline);
If 5G band and 2.4G band are not the same SSID (5G band is xxx-5G),
please connect your cell phone's WIFI to the router's 2.4G SSID
(xxx-2.4G) and then configure the camera.