
2
T
hank you for choosing Acmount jump starter
.
T
o ensure a good user experience, persona
l
s
afety, and property security, please read all o
f
t
he instructions carefully before using thi
s
p
roduct, please keep this manual for eas
y
r
eference.

3
》
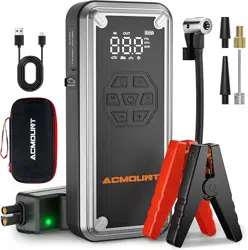
WHAT'S IN THE BOX
Acmount jump starter * 1
Intelligent battery clamps with starter cable * 1
High-quality type-C charging cable * 1
User-friendly manual * 1
Storage bag * 1
》
SPECIFICATIONS
Model number J450
Capacity 14000mAh/51.8Wh
Type-C Input 5V/2A
Discharge temperature range -20℃~+60℃
Charging temperature range
0℃~+45℃
Dimension(LxWxD) 169*82*38(mm)
4
》
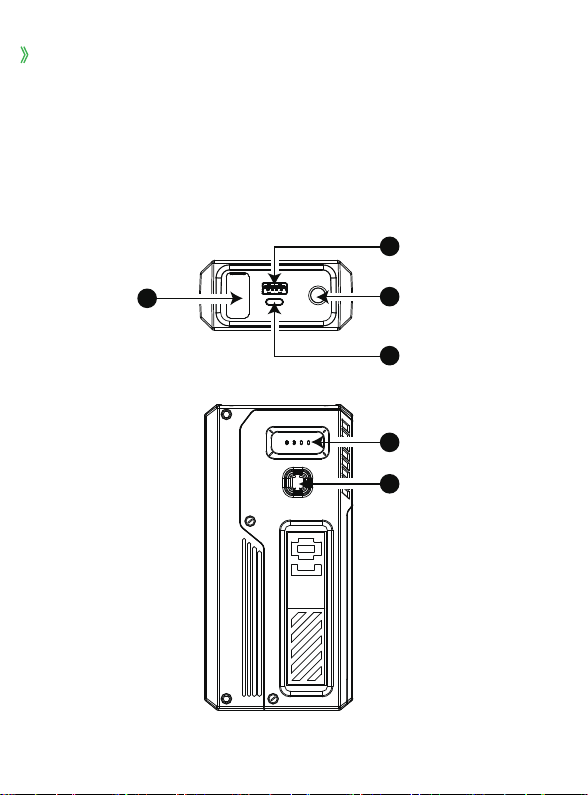
PRODUCT FUNCTION ILLUSTRATION
④ LED flashlight
⑤ USB output interface
⑥ EC5
① Power button
② Indicator light
③ Charging input interface (TYPE-C) output interface
1
2
6
4
3
5
5
》
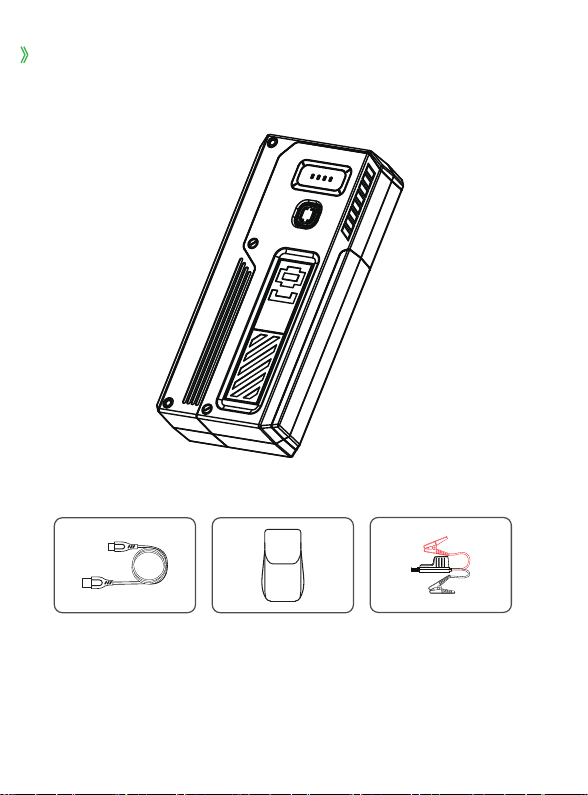
RODUCT DETAILED ACCESSORIES DIAGRAM
Note:
The above pictures are for reference only, please
r
efer to the actual
product!
USB Cable Smart Clamp
Carrying bag
6
》
FUNCTIONAL OPERATION INSTRUCTIONS
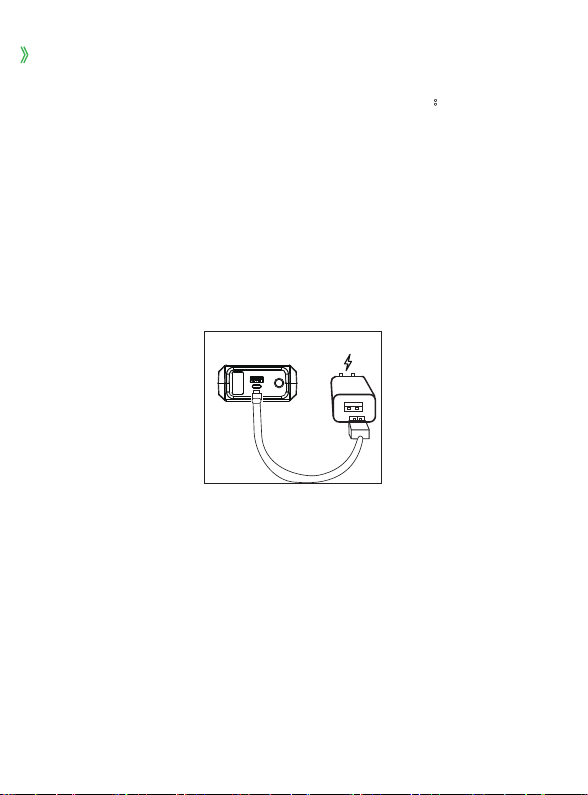
1. How to charge the starting power supply
:
Insert the plug of the charging cable into the charging input interface of
the startup power supply, and plug the other end into the charger
( 5V/2A Above). The indicator light flashes, indicating that charging
has started. When the indicator light stops flashing and all four
power indicator lights light up, it means it is fully charged. After 10
seconds, all the battery indicator lights go out.
2. How to turn on LED lighting:
Short press the function button ① to turn it on, then long press the
function button again to turn o
n the LED lighting function, then short
press the function button, the LED function charges from long on to
SOS, flashing in sequence, and then long press the function button ①
to turn off the LED lighting function.
7
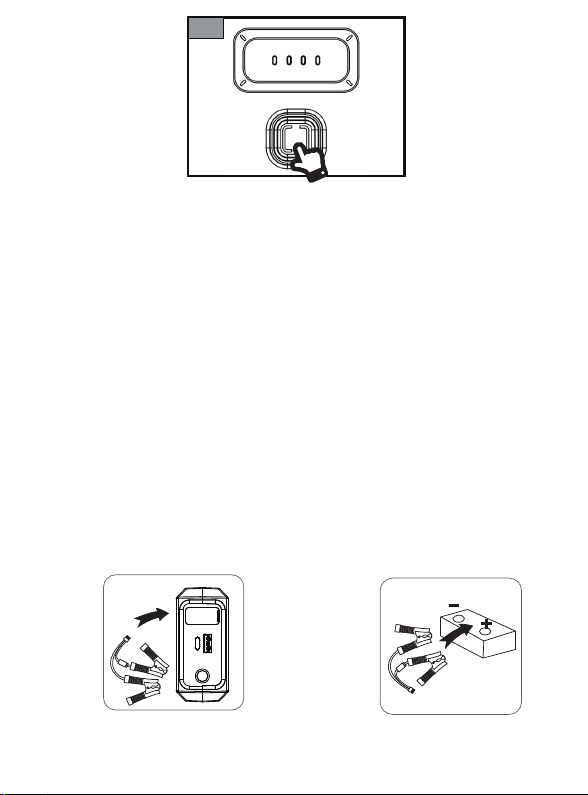
3. How to start the auto:
First check the remaining power of the starting power supply. To ensure
the best starting effect, the starting power needs to be greater than
75%. Connect the positive and negative poles of the matching battery
clamp to the positive and negative poles of the auto battery cable,
clamp red to red, black to black, then insert the plug of the battery
clamp into the starting output interface ⑥ of the starting power supply,
and then twist the auto key to the starting gear to st
art the car. After
successful start-up, first unplug from the product and then remove the
battery clamp. If it does not start successfully, please wait 60 seconds
before repeating the above steps. The operation process is as follows:
Insert the battery clip plug into
the EC5 output interface
Clips connect the positive and
negative terminals of car battery
1
8
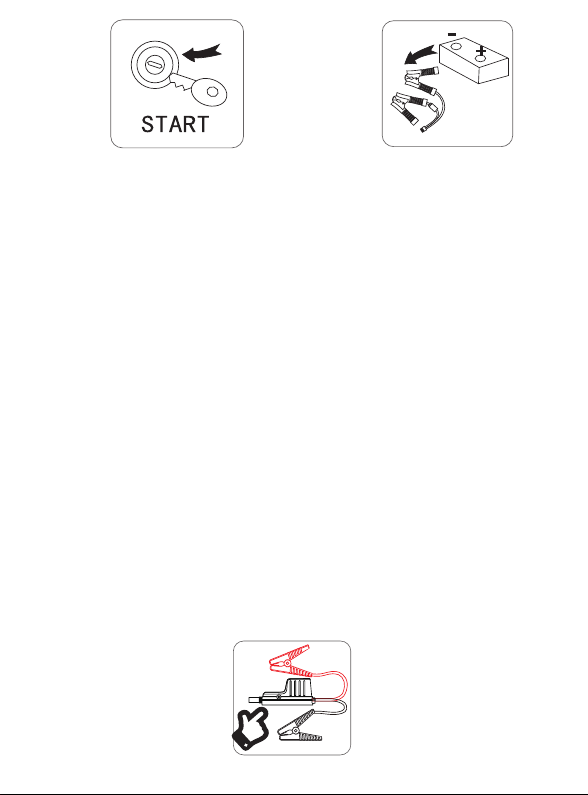
4. How to use the smart clip forced activation function:
If it cannot be started successfully in step 3 or the smart clip cannot
recognize continuity after being correctly connected to the auto battery,
you can use the smart clip forced start function. Connect the positive
and negative poles of the battery clamp to the positive and negative
poles of the car battery cable, red to red, black to black, then insert the
battery clamp plug into the starting output port of the starting power
supply ⑥, and long press
the strong start button on the side of the
smart clip, when the smart clip is forcibly opened, the auto must be
started as soon as possible (note: after the forced function is turned on,
the smart clip protection function becomes invalid, and it is prohibited
to short-circuit the red and black battery clips!)
Start the car
Remove the clips from
car battery

ϵ
35(&$87,216
3OHDVH UHDG WKH IROORZLQJ SUHFDXWLRQV FDUHIXOO\ EHIRUH XVLQJ WR HQVXUH
WKH FRUUHFW DQG VDIH XVH RI WKLV SURGXFW
:KHQ VWDUWLQJ WKH DXWR SOHDVH NHHS D VDIH GLVWDQFH IURP WKH HQJLQH
WR DYRLG SHUVRQDO LQMXU\ FDXVHG E\ WKH URWDWLRQ RI WKH HQJLQH
'R QRW KROG WKH NH\ IRU D ORQJ WLPH WR VWDUW WKH DXWR LI LW IDLOV WR VWDUW
VXFFHVVIXOO\ ZLWKLQ VHFRQGV SOHDVH UHOHDVH WKH NH\ DQG WU\ DJDLQ
ODWHU
:KHQ \RX QHHG WR XVH WKLV SURGXFW WR VWDUW WKH DXWR FRQWLQXRXVO\
SOH
DVH OHDYH LW DW OHDVW PLQXWH DSDUW
$IWHU VWDUWLQJ WKH FDU ZLWK WKH PXOWLIXQFWLRQDO DXWR HPHUJHQF\ SRZHU
3OHDVH GLVFRQQHFW WKH FRQQHFWLRQ ZLWKLQ VHFRQGV DIWHU WKH DXWR
LV VWDUWHG WR DYRLG GDPDJH WR WKH SURGXFW RU HYHQ DQ DFFLGHQW
The EC5 output interface is only used to connect the matching
charger lead to start the auto, please do not use it with other loads
6. Under any circumstances, it is forbidden to short-circuit the positive
and negative poles of the charger lead, or reverse the positive and
negative poles of the charger lead to the auto to avoid safety
accidents!
GR QRW FKDUJH LW LPPHGLDWHO\ ,W QHHGV WR EH SODFHG IRU PLQXWHV IRU
WKH EDWWHU\ WR FRRO GRZQ

ϭϬ
3OHDVH GR QRW FKDUJH WKLV SURGXFW LQ DQ HQYLURQPHQW EHORZ ć RU
DERYH ć
7KLV SURGXFW LV HTXLSSHG ZLWK D EDWWHU\ LQVLGH SOHDVH WDNH
DSSURSULDWH ILUH SUHYHQWLRQ PHDVXUHV ZKHQ XVLQJ LW
3OHDVH GR QRW LQWHQWLRQDOO\ RU XQLQWHQWLRQDOO\ VKRUWFLUFXLW WKH
SRVLWLYH DQG QHJDWLYH SROHV RI WKH (& RXWSXW DQG GR QRW PL[ ZLWK
PHWDO REMHFWV RU VKDUS REMHFWV VXFK DV VFUHZGULYHUVZKHQ VWRULQJ
:KHQ FKLOGUHQ XVH LW WKH\ PXVW EH JXLGHG E\ WKHLU SDUHQWV DQG
RSHUDWH LQ VWULF
W DFFRUGDQFH ZLWK WKH FRQWHQWV RI WKH PDQXDO WR
HQVXUH WKHLU FRUUHFW XVH
'XULQJ XVH RU FKDUJLQJ LI WKH GHYLFH LV VOLJKWO\ KHDWHG LW LV D QRUPDO
SKHQRPHQRQ DQG QRW D PDOIXQFWLRQ
:KHQ XVLQJ WKLV SURGXFW NHHS WKH VXUURXQGLQJ ZHOO YHQWLODWHG GR
QRW EORFN WKH FRROLQJ KROHV DQG GR QRW XVH LW LQ WKH IROORZLQJ
HQYLURQPHQWV
ā
'DPS SODFHV DQG SODFHV HDVLO\ VSODVKHG E\ ZDWHU
ā
3ODFHV HDV\ WR IDOO
ā 3ODFHV ZLWK YLEUDWLRQ FRUURVLRQ GXVW DQG FKHPLFDO JDV KD]DUGV
ā 3ODFHV ZKHUH LQIODPPDEOHV DQG H[SORVLYHV DUH VWRUHG DQG QHDU
KLJKWHPSHUDWXUH KHDW VRXUFHV
:KHQ QRW LQ XVH SOHDVH XQSOXJ DOO H[WHUQDO GHYLFHV WR UHGXFH

ϭϭ
SRZHU FRQVXPSWLRQ
:KHQ QRW LQ XVH IRU D ORQJ WLPH LW LV UHFRPPHQGHG WR NHHS WKH
EDWWHU\ DW D FHUWDLQ OHYHO DQG FKDUJH WKH SURGXFW DW OHDVW RQFH HYHU\
WKUHH PRQWKV
'R QRW VFUXE ZLWK KDUVK FKHPLFDOV VXFK DV VRDS RU RWKHU FOHDQHUV
FRQWDLQLQJ VWURQJ DONDOLV DQG DFLGV
1RQSURIHVVLRQDOV VKRXOG QRW GLVDVVHPEOH WKH PDFKLQH VRDV QRW
WR GDPDJH WKH PDFKLQH RU FDXVH VDIHW\ DFFLGHQWV
3OHDVH GR QRW OLWWHU RU EXUQ GLVFDUGHG EDWWHU\ SURGXFWVSOHDVH WDNH
FDUH RI WKH HQYL
URQPHQW
7KH SRZHU LQGLFDWRU RQ WKH SURGXFW LV RQO\ IRU UHIHUHQFH DQG GRHV
QRW JXDUDQWHH FRPSOHWH DFFXUDF\ ,I WKHUH LV D VOLJKW HUURU LW LV D
QRUPDO SKHQRPHQRQ
$OO SDWWHUQV XVHG LQ WKLV PDQXDO DUH IRU UHIHUHQFH RQO\SOHDVH UHIHU
WR WKH DFWXDO SURGXFW IRU GHWDLOV
ā )5(48(17/< $6.(' 48(67,216
4 $IWHU D IHZ VHFRQGV RI VXFFHVVIXO VWDUWXS LW ZLOO DXWRPDWLFDOO\ WXUQ
RII RU WXUQ RII DV VRRQ DV WKH EDWWHU\ FOLS LV UHPRYHG
$7KLV VLWXDWLRQ LV JHQHUDOO\ FDXVHG E\ WKH FRP
SOHWH GDPDJH RI WKH
DXWR EDWWHU\ZKLFK PXVW EH UHSODFHG ZLWK D QHZ RQH

ϭϮ
4 QR FKDUJLQJ
$ 3OHDVH FKHFN ZKHWKHU WKH FKDUJLQJ FDEOH LV FRUUHFWO\ FRQQHFWHG WR
WKH FKDUJHU DQG ZKHWKHU WKHUH LV HOHFWULFLW\ RQ WKH PDLQV VRFNHW 7U\
WR UHSODFH D FKDUJHU RU FKDUJLQJ FDEOH DQG WU\ DJDLQ WKLV VWDUWXS
SRZHU VXSSO\ FDQ GLUHFWO\ XVH WKH FKDUJHU DQG FDEOH RI WKH PRELOH
SKRQH
4 QR FKDUJH IRU SKRQH
$ 3OHDVH FKHFN ZKHWKHU WKH 86% RXWSXW RI WKH VWDUWXS SRZHU VXSSO\
LV WXUQHG RQ &KHFN ZKHWKHU WKH FKDUJLQJ FDEOH LV GDPDJHG
4 FDQW VWDUW WKH FDU
$ ZKHWK
HU WKH FOLS LV FRQQHFWHG UHOLDEO\ LI WKH EDWWHU\ FDEOH LV GLUW\ RU
VHYHUHO\ FRUURGHG SOHDVH FOHDQ LW XS DQG WU\ DJDLQ ,I LW LV FRQILUPHG
WKDW LW KDV EHHQ FRQQHFWHG LW PD\ EH WKDW WKH DXWR KDV HQWHUHG D
SURWHFWLRQ VWDWH )RU VRPH PRGHOV \RX FDQ WU\ WR NHHS SUHVVLQJ WKH
VWDUW EXWWRQ IRU DERXW VHFRQGV DQG UHOHDVH LW ZKHQ WKH HQJLQH
PRYHV 7KH HQJLQH ZRUNV ZKHQ VWDUWLQJ EXW FDQQRW VWDUW 3OHDVH
FKHFN ZKHWKHU WKH FOLS LV VHFXUHO\ FRQQHFWHG WR WKH FRSSHU KHDG RI
WKH EDWWHU\ FDEOH
,I WKH QHJDWLYH SROH LV FRQQHFWHG WR WKH LURQ VKHOO RI
WKH FDULW ZLOO DIIHFW WKH VWDUWLQJ SHUIRUPDQFH
OI WKH DERYH DQVZHUV FDQQRW VROYH WKH SUREOHP SOHDVH FRQWDFW XV DW
VXSSRUW#DFPRXQWQHW

13
DO NOT DISASSEMBLE THE MACHINE YOURSELF!!!
CUSTOMER SERVICE
1
2+6 Months Limited Warranty Service
L
ifetime Technical Service
F
eel Free to Contact US:
s
upport@acmount.ne t