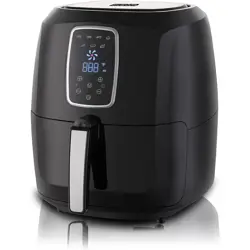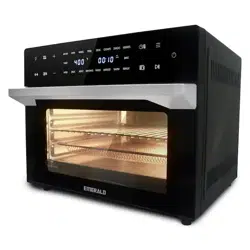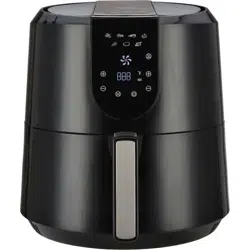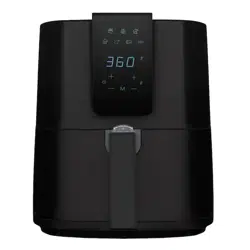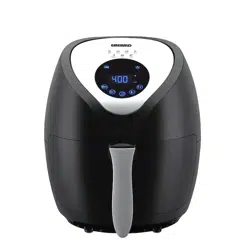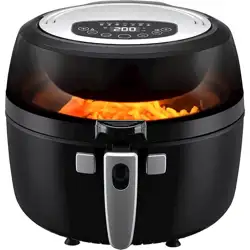
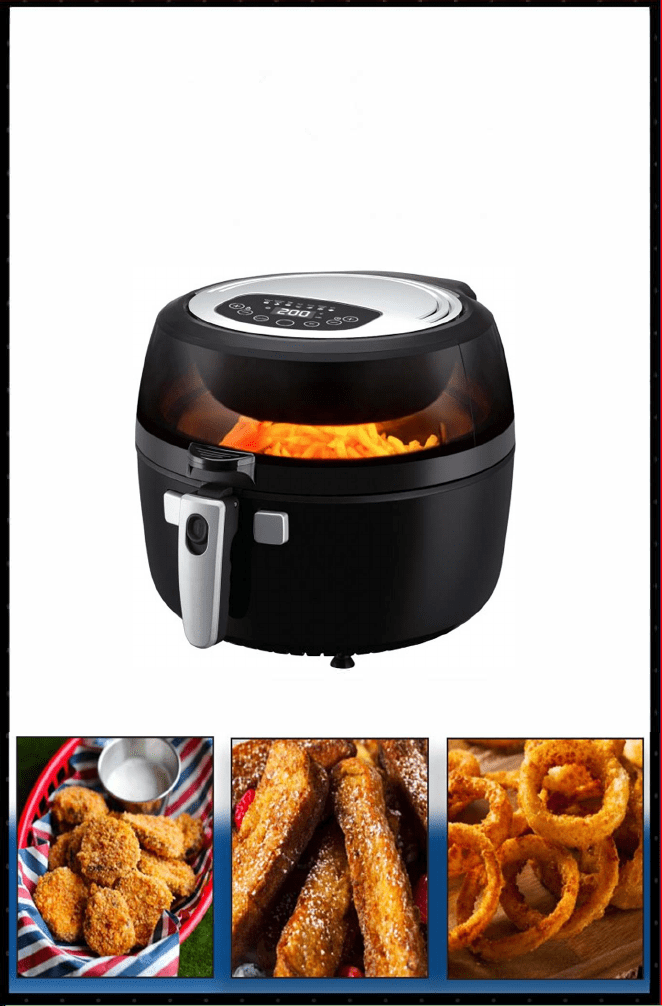
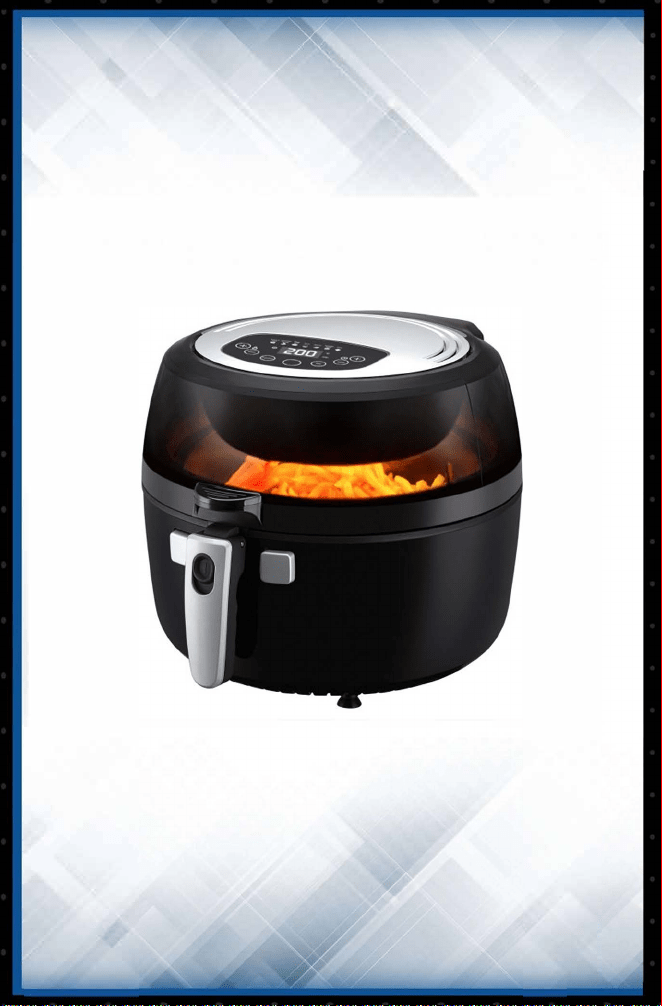
SM-AIR-1808
Page 4 ........................... Safety Warning
Page 8 ............................. Control Panel
Page 9 ................................ Preparation
Page 10 .............................. How to Use
Page 15 ........... Cleaning & Maintenance
Page 16 ....................... TroubleShooting
Page 18 ....................................... Parts
Page 19 .......................... Cooking Chart
Page 20 .................................... Recipes
Recipes
Table of Contents
Instructions for use
SM-AIR-1808
Page 4 ........................... Safety Warning
Page 8 ............................. Control Panel
Page 9 ................................ Preparation
Page 10 .............................. How to Use
Page 15 ........... Cleaning & Maintenance
Page 16 ....................... TroubleShooting
Page 18 ....................................... Parts
Page 19 .......................... Cooking Chart
Page 20 .................................... Recipes
Recipes
Table of Contents
Instructions for use
6
CAUTION
After use, turn off power to the appliance then unplug from the wall
outlet.
Unplug the appliance from outlet when it is not in use or before
cleaning. Allow it to cool down rst before cleaning.
Do not use any accessories that have not been provided with the
appliance.
This appliance is intended to be used indoors.
Do not use outdoors.
Clean and wipe and dry the pan and the basket before placing food
inside.
Do not power on the Air Fryer when the Top Lid is open.
Always unplug the appliance when not in use.
If the appliance is of the grounded type, the extension cord should
be a grounded cord.
To ensure continued protection against risk of electric shock,
connect to properly grounded outlets only.
Some countertop and table surfaces, wood and/ or laminates, are
not designed to withstand prolonged heat generated by certain
appliances. It is recommended by countertop manufacturers that a
hot pad or trivet be placed under your appliance to prevent possible
damage to the surface.
Safety Warning
7
SHORT CORD
A short power cord is provided to reduce the risk of
personal injury resulting from becoming entangled in or tripping over a
longer cord.
Longer power-supply cords or extension cords are available and may be
used if care is exercised in their use.
If an extension cord is used: the marked electrical rating of the extension
cord should be at least as great as the electrical rating of the product;
the extension cord should be arranged so that it will not drape over the
countertop or tabletop where it can unintentionally be pulled on or
tripped over by
children or pets.
PORIZED PLUG
If this appliance is equipped with a polarized plug (one blade is wider
than the other), please follow the below instructions:
reduce the risk of electrical shock, this plug is intended to t into a
polarized outlet only one way. If you are unable to t the plug into the
electrical outlet, try reversing the plug. If the plug still does not t,
contact a qualied electrician. Never use the plug with an extension cord
unless the plug can be fully inserted into the extension cord. Do not alter
the plug of the product or any extension cord being used with this
product. Do not attempt to defeat the safety purpose of the polarized
plug.
Safety Warning
Instructions for use

6
CAUTION
After use, turn off power to the appliance then unplug from the wall
outlet.
Unplug the appliance from outlet when it is not in use or before
cleaning. Allow it to cool down rst before cleaning.
Do not use any accessories that have not been provided with the
appliance.
This appliance is intended to be used indoors.
Do not use outdoors.
Clean and wipe and dry the pan and the basket before placing food
inside.
Do not power on the Air Fryer when the Top Lid is open.
Always unplug the appliance when not in use.
If the appliance is of the grounded type, the extension cord should
be a grounded cord.
To ensure continued protection against risk of electric shock,
connect to properly grounded outlets only.
Some countertop and table surfaces, wood and/ or laminates, are
not designed to withstand prolonged heat generated by certain
appliances. It is recommended by countertop manufacturers that a
hot pad or trivet be placed under your appliance to prevent possible
damage to the surface.
Safety Warning
7
SHORT CORD
A short power cord is provided to reduce the risk of
personal injury resulting from becoming entangled in or tripping over a
longer cord.
Longer power-supply cords or extension cords are available and may be
used if care is exercised in their use.
If an extension cord is used: the marked electrical rating of the extension
cord should be at least as great as the electrical rating of the product;
the extension cord should be arranged so that it will not drape over the
countertop or tabletop where it can unintentionally be pulled on or
tripped over by
children or pets.
PORIZED PLUG
If this appliance is equipped with a polarized plug (one blade is wider
than the other), please follow the below instructions:
reduce the risk of electrical shock, this plug is intended to t into a
polarized outlet only one way. If you are unable to t the plug into the
electrical outlet, try reversing the plug. If the plug still does not t,
contact a qualied electrician. Never use the plug with an extension cord
unless the plug can be fully inserted into the extension cord. Do not alter
the plug of the product or any extension cord being used with this
product. Do not attempt to defeat the safety purpose of the polarized
plug.
Safety Warning
Instructions for use
HOW TO USE
8
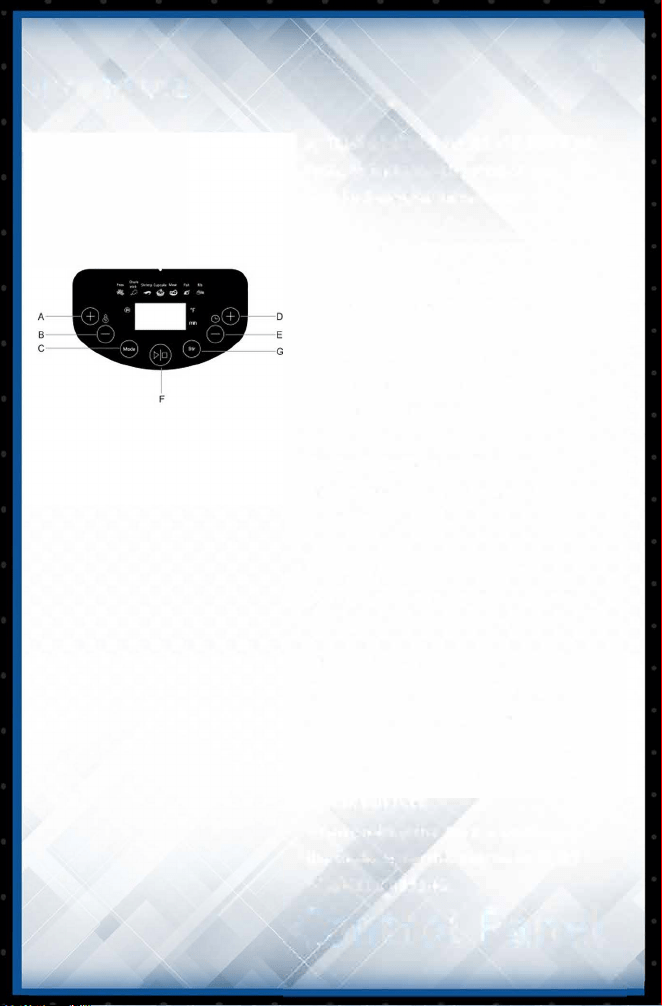
A) TEMPERATURE INCREASE BUTTON:
Press to increase the temperature set
ting by 5-degree increments.
B) TEMPERURE DECREASE BUTTON:
Press to decrease the temperature set
ting by 5-degree increments.
()MENU FUNCTION BUTTON:
Use this button to toggle through
the different menu function.
D) TIMER INCREASE BUTTON:
Each press increases cooking time by
one minute.
E) TIMER DECREASE BUTTON:
Each press decreases cooking time by
one minute.
F)POWER/START BUTTON:
Tap this button once to START,and
after selecting the mode, tap this
button twice to START COOKING, and
also use this tap to CANCEL COOKING
G)STIR BUTTON:
When cooking the food use this button
to START /CANCEL STIRRING.
Control Panel
9
1. Before using your Digital Air Fryer for the rst time, carefully remove
all packaging materials and recycle appropriately.
2. Remove the parts from the box and wash the Drawer Pan and Basket
with warm, soapy water and a non-abrasive sponge. IMPORTANT: DO NOT
IMMERSE THE MAIN HOUSING IN WATER.
Wipe the interior and
exterior of appliance clean with a damp cloth. IMPORTANT: THIS IS NOT
A DEEP FRYER. DO NOT FILL THE APPLIANCE OR ITS DRAWER WITH OIL
OR FRYING FAT.
3. Place the appliance on a flat, horizontal and stable surface (make sure
surface is heat- resistant). Place away from walls and other appliances.
Leave approximately 4 inches of space from nearby objects.
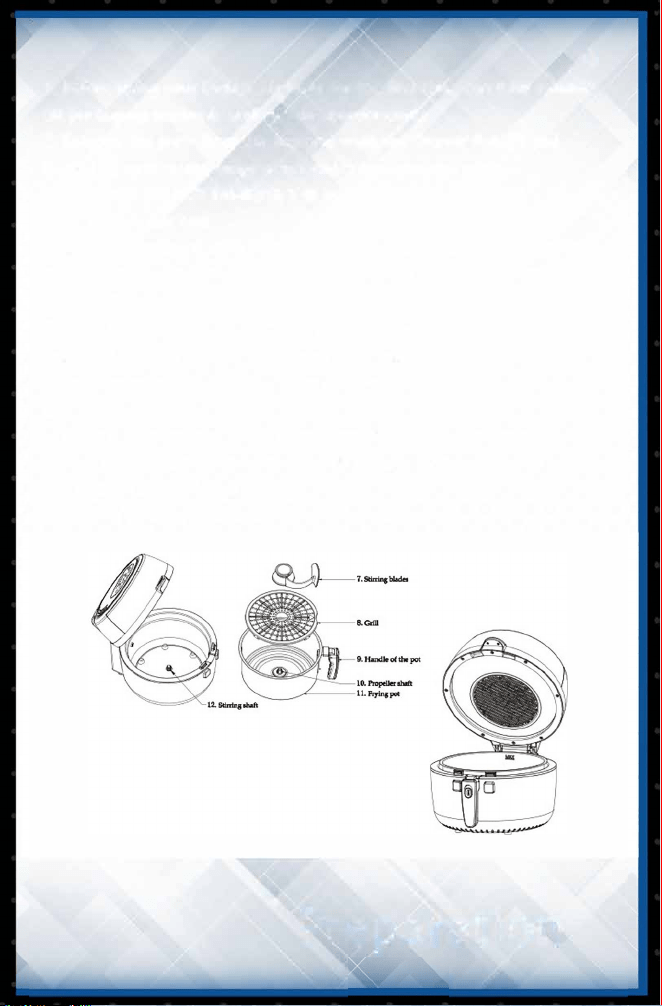
4. Pull the Drawer Pan out by the Handle. Push the Protective Cover and
press down on the Basket Release Button to lift out the Basket.
TIP: Never place food directly into the Drawer Pan.
Preparation
Instructions for use
HOW TO USE
8
A) TEMPERATURE INCREASE BUTTON:
Press to increase the temperature set
ting by 5-degree increments.
B) TEMPERURE DECREASE BUTTON:
Press to decrease the temperature set
ting by 5-degree increments.
()MENU FUNCTION BUTTON:
Use this button to toggle through
the different menu function.
D) TIMER INCREASE BUTTON:
Each press increases cooking time by
one minute.
E) TIMER DECREASE BUTTON:
Each press decreases cooking time by
one minute.
F)POWER/START BUTTON:
Tap this button once to START,and
after selecting the mode, tap this
button twice to START COOKING, and
also use this tap to CANCEL COOKING
G)STIR BUTTON:
When cooking the food use this button
to START /CANCEL STIRRING.
Control Panel
9
1. Before using your Digital Air Fryer for the rst time, carefully remove
all packaging materials and recycle appropriately.
2. Remove the parts from the box and wash the Drawer Pan and Basket
with warm, soapy water and a non-abrasive sponge. IMPORTANT: DO NOT
IMMERSE THE MAIN HOUSING IN WATER.
Wipe the interior and
exterior of appliance clean with a damp cloth. IMPORTANT: THIS IS NOT
A DEEP FRYER. DO NOT FILL THE APPLIANCE OR ITS DRAWER WITH OIL
OR FRYING FAT.
3. Place the appliance on a flat, horizontal and stable surface (make sure
surface is heat- resistant). Place away from walls and other appliances.
Leave approximately 4 inches of space from nearby objects.
4. Pull the Drawer Pan out by the Handle. Push the Protective Cover and
press down on the Basket Release Button to lift out the Basket.
TIP: Never place food directly into the Drawer Pan.
Preparation
Instructions for use
5.
10
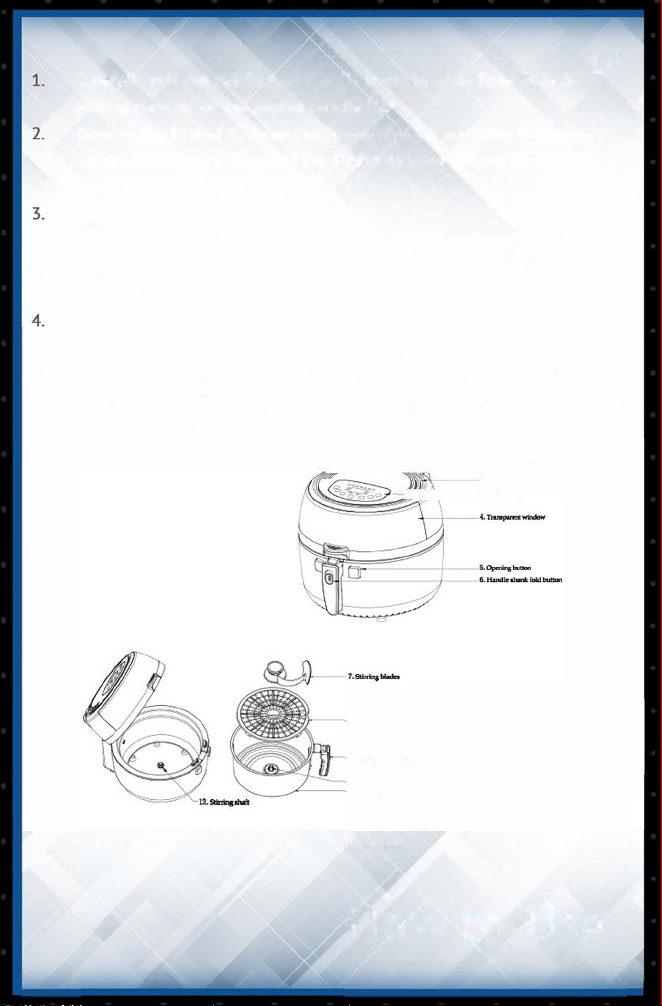
Carefully pull out the Drawer Pan from the Main Fryer Base by
pulling forward on the basket handle.
Remove the Basket from the Drawer Pan, push the Protective Cover,
and press down on the Basket Release Button and lift up on the
basket.
Place ingredients into Basket.
Tl P: - Do not ll the Basket over the MAX ll position. - If cooking
food that expands, make sure the cooked capacity will not exceed
the MAX ll position.
Insert Basket back into the Drawer Pan by inserting into the basket
slot.
Slide Drawer Pan back into the Main Fryer Base. Once in place, the
Air Fryer will beep to let you know it is in position.
,�
-
-1,
2 . �
·
�
-
-•·-
o1
, _
IL
How to Use
3.
11
HOW TO MANUALLY PROGRAM FRYING TIME AND TEMPERATURE:
Plug Power Cord into an electrical outlet.
Gently tap the POWER button, you will hear a beep and the LED screen
will illuminate. The
Digital Display will default to 360 F and 15-minute setting.
TIP: It is recommended to preheat the air fryer on empty at 360 F for 3
min. if the appliance is cold. The initial 15 minutes of use may result in
minimal smell and smoke. This is normal and harmless and comes from
the protective substance applied to the heating elements during
manufacturing.
Press the+/- button for the Temperature setting to adjust to the de
sired temperature. Temperature will increase or decrease in 5-degree
increments.
Press the+/- button for the Timer setting to adjust to the desired
cooking time. Timer will increase or decrease in 1-minute increments.
Tap the START Button once to begin cooking.
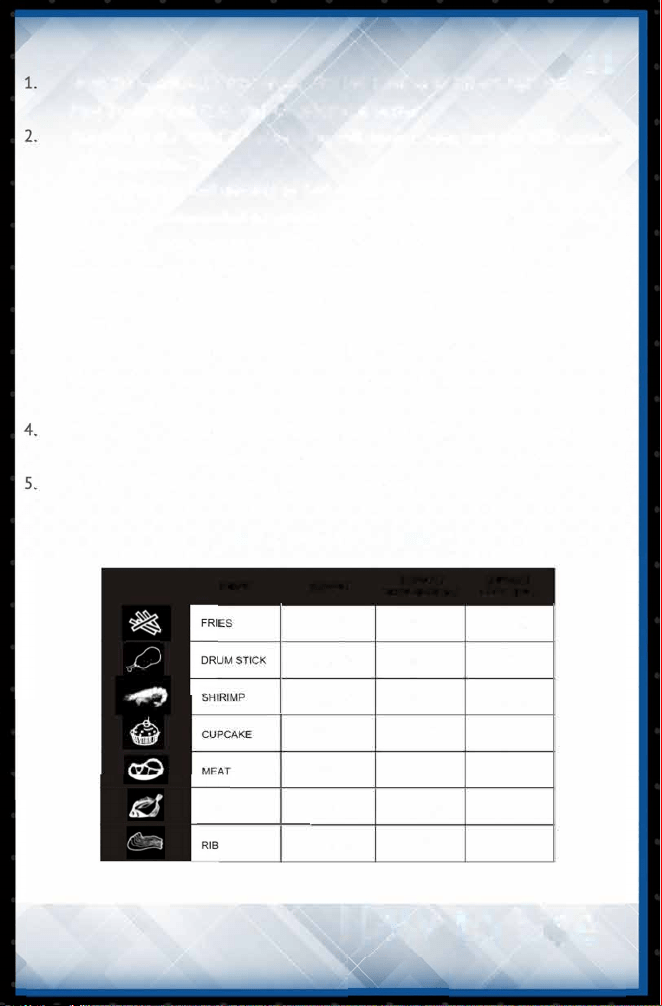
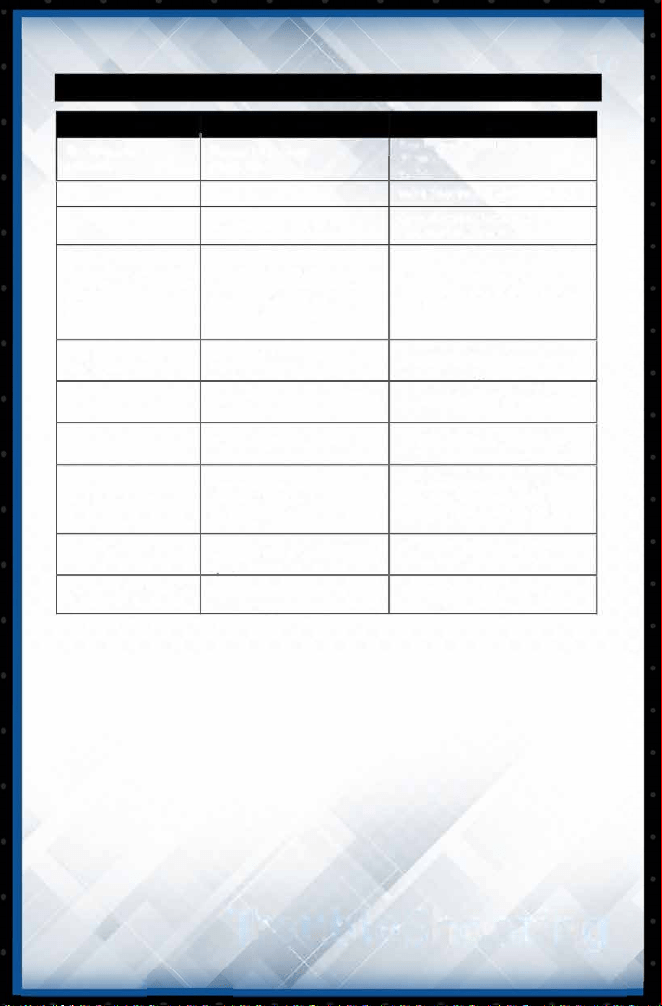
Quick Menu Chart
MENU
FISH
DEFAULT
TEMPERATURE
400
°
F
400
°
F
400
°
F
340
°
F
400
°
F
360
°
F
400
°
F
DEFAULT
COOK TIME
30 min
25 min
12 min
25 min
15 min
15 min
20 min
How to Use
Instructions for use
5.
10
Carefully pull out the Drawer Pan from the Main Fryer Base by
pulling forward on the basket handle.
Remove the Basket from the Drawer Pan, push the Protective Cover,
and press down on the Basket Release Button and lift up on the
basket.
Place ingredients into Basket.
Tl P: - Do not ll the Basket over the MAX ll position. - If cooking
food that expands, make sure the cooked capacity will not exceed
the MAX ll position.
Insert Basket back into the Drawer Pan by inserting into the basket
slot.
Slide Drawer Pan back into the Main Fryer Base. Once in place, the
Air Fryer will beep to let you know it is in position.
,�
-
-1,
2 . �
·
�
-
-•·-
o1
, _
IL
How to Use
3.
11
HOW TO MANUALLY PROGRAM FRYING TIME AND TEMPERATURE:
Plug Power Cord into an electrical outlet.
Gently tap the POWER button, you will hear a beep and the LED screen
will illuminate. The
Digital Display will default to 360 F and 15-minute setting.
TIP: It is recommended to preheat the air fryer on empty at 360 F for 3
min. if the appliance is cold. The initial 15 minutes of use may result in
minimal smell and smoke. This is normal and harmless and comes from
the protective substance applied to the heating elements during
manufacturing.
Press the+/- button for the Temperature setting to adjust to the de
sired temperature. Temperature will increase or decrease in 5-degree
increments.
Press the+/- button for the Timer setting to adjust to the desired
cooking time. Timer will increase or decrease in 1-minute increments.
Tap the START Button once to begin cooking.
Quick Menu Chart
MENU
FISH
DEFAULT
TEMPERATURE
400
°
F
400
°
F
400
°
F
340
°
F
400
°
F
360
°
F
400
°
F
DEFAULT
COOK TIME
30 min
25 min
12 min
25 min
15 min
15 min
20 min
How to Use
Instructions for use
12
QUICK MENU FUNCTION
1.
Plug Power Cord into an electrical outlet.
2.
3.
Gently tap the POWER button, you will hear a beep and the LED
screen will illuminate. The
Digital Display will default to 360 F and 15-minute setting.
TIP: It is recommended to preheat the air fryer on empty at 360 F
for 3 min. if the appliance is cold. The initial 15 minutes of use may
result in minimal smell and smoke. This is normal and harmless and
comes from the protective substance applied to the heating ele
ments during manufacturing.
Press the menu button to cycle through the different Menu
functions. Default Menu Temperatures and Times will appear.
4.
select desired Menu function, tap the START Button to begin
cooking.
5.
Use the+/- buttons to adjust Menu function temperatures or times if
you wish to change the
programmed settings.
Note: The initial 15 minutes of use may result in minimal smell and
smoke. This is normal and harmless and comes from the protective
substance applied to the heating elements during manufacturing.
CANCELING A SELECTION:
1. To Cancel any programmed selection, simply tap the POWER button
to cancel the selection.
2. change a selection, simply press the menu button to cycle
through the other Menu functions.
NOTE: There is no need to press POWER button again when
changing a setting during the cooking process.
How to Use
3.
13
DURING THE COOKING/FRYING PROCESS:
Once you tap the START Button, the Timer will begin counting down
and begin the cooking process.
NOTE: Any excess oil from food will collect at the bottom of the Pan.
Some recipes require stirring/mixing/flipping the contents mid-way
through cooking (see Cooking Time Chart on page 10). You can do this
in the middle of the cooking process by
simply pulling out the basket by grasping the Handle and pull forward
the entire Drawer Pan. The built-in auto sensors will automatically
pause the heating system to allow you to attend to the food.
Shake, stir or flip the contents of the basket using a non-metallic
utensil and then slide Drawer Pan back into the Main Fryer Base.
CAUTION: During cooking, the Drawer Pan and Basket will be very hot,
only use the cool-touch handles or oven mitts.
WHEN COOKING/FRYING IS COMPLETE
When the timer completes its countdown, the air fryer will beep and
stop heating - this signals it is time to remove your food. (Please note
that the fan motor will continue to operate in order to cool down the
Drawer Pan and the Basket this will stop within approximately 30
seconds).
NOTE: You can also switch off the appliance manually by pressing
POWER at any time during
the cooking process.
Carefully pull out the Drawer Pan from the Main Fryer Base by pulling
forward on the basket handle.
How to Use
Instructions for use
12
QUICK MENU FUNCTION
1.
Plug Power Cord into an electrical outlet.
2.
3.
Gently tap the POWER button, you will hear a beep and the LED
screen will illuminate. The
Digital Display will default to 360 F and 15-minute setting.
TIP: It is recommended to preheat the air fryer on empty at 360 F
for 3 min. if the appliance is cold. The initial 15 minutes of use may
result in minimal smell and smoke. This is normal and harmless and
comes from the protective substance applied to the heating ele
ments during manufacturing.
Press the menu button to cycle through the different Menu
functions. Default Menu Temperatures and Times will appear.
4.
select desired Menu function, tap the START Button to begin
cooking.
5.
Use the+/- buttons to adjust Menu function temperatures or times if
you wish to change the
programmed settings.
Note: The initial 15 minutes of use may result in minimal smell and
smoke. This is normal and harmless and comes from the protective
substance applied to the heating elements during manufacturing.
CANCELING A SELECTION:
1. To Cancel any programmed selection, simply tap the POWER button
to cancel the selection.
2. change a selection, simply press the menu button to cycle
through the other Menu functions.
NOTE: There is no need to press POWER button again when
changing a setting during the cooking process.
How to Use
3.
13
DURING THE COOKING/FRYING PROCESS:
Once you tap the START Button, the Timer will begin counting down
and begin the cooking process.
NOTE: Any excess oil from food will collect at the bottom of the Pan.
Some recipes require stirring/mixing/flipping the contents mid-way
through cooking (see Cooking Time Chart on page 10). You can do this
in the middle of the cooking process by
simply pulling out the basket by grasping the Handle and pull forward
the entire Drawer Pan. The built-in auto sensors will automatically
pause the heating system to allow you to attend to the food.
Shake, stir or flip the contents of the basket using a non-metallic
utensil and then slide Drawer Pan back into the Main Fryer Base.
CAUTION: During cooking, the Drawer Pan and Basket will be very hot,
only use the cool-touch handles or oven mitts.
WHEN COOKING/FRYING IS COMPLETE
When the timer completes its countdown, the air fryer will beep and
stop heating - this signals it is time to remove your food. (Please note
that the fan motor will continue to operate in order to cool down the
Drawer Pan and the Basket this will stop within approximately 30
seconds).
NOTE: You can also switch off the appliance manually by pressing
POWER at any time during
the cooking process.
Carefully pull out the Drawer Pan from the Main Fryer Base by pulling
forward on the basket handle.
How to Use
Instructions for use
3.
14
Remove the Basket from the Drawer Pan by pressing down on the
Basket Release
Button and lifting up on the basket.
CAUTION: When sliding out the Drawer Pan be careful of hot air and
steam. Keep hands and face away from the opening.
CAUTION: After cooking, the Drawer Pan and Basket will be
extremely hot to the touch. Do not touch surfaces of the Drawer Pan
or Basket directly.
4. Check that your foods are ready. If not, then place the Basket back
into the Drawer Pan and set the timer for a few more minutes.
5. Empty the contents of the Basket into a bowl or onto a plate. If
necessary, you can also use Tongs to remove foods from the Basket.
TIP: If food contents within Basket are too heavy to lift using the
Basket Handle use oven mitts to carefully pull out the whole Drawer
Pan and Basket together. Place on a at, heat-resistant surface and
use Tongs to remove contents from the Basket. TIP: Do not turn the
Basket and Drawer Pan upside down together, as any excess oil
that has collected in the bottom of the Drawer Pan will be poured
onto the foods.
6. When the next batch of ingredients is ready, the air fryer is instantly
ready to use again.
7. When cooking is complete, the display will show "OFF." Remove the
Power cord from
the electrical outlet.
How to Use
5.
15
The Digital Air Fryer should be cleaned thoroughly after every use.
Make sure the Power cord is disconnected from the electrical outlet
and that the appliance has cooled down before attempting to clean.
The Drawer Pan, Basket and the inside of the appliance have a
nonstick coating. Do not use metal utensils or abrasive cleaning
materials on them, as this can damage the non- stick coating.
Wipe the outside of the appliance with a damp cloth.
CAUTION: Do not allow water to seep into the LED control panel as
that may damage the appliance.
Clean the Drawer Pan and Basket with hot water, dishwashing soap
and a non-abrasive sponge.
You can use a degreaser to remove any stuck-on residue.
NOTE: The Drawer Pan and Basket are dishwasher-safe (top rack only).
TIP: If food residue is stuck to the Basket or the bottom of the Drawer
Pan, place the Basket into the Drawer Pan and ll with dishwashing
soap and water and let soak for 10 minutes.
Clean the inside of the appliance with hot water and a non-abrasive
sponge.
Never immerse the power cord, plug or the appliance body in water or
any other liquids.
Dry all parts after each use, re-assemble and store in a cool, dry loca
tion.
Cleaning and Maintenance
Instructions for use
3.
14
Remove the Basket from the Drawer Pan by pressing down on the
Basket Release
Button and lifting up on the basket.
CAUTION: When sliding out the Drawer Pan be careful of hot air and
steam. Keep hands and face away from the opening.
CAUTION: After cooking, the Drawer Pan and Basket will be
extremely hot to the touch. Do not touch surfaces of the Drawer Pan
or Basket directly.
4. Check that your foods are ready. If not, then place the Basket back
into the Drawer Pan and set the timer for a few more minutes.
5. Empty the contents of the Basket into a bowl or onto a plate. If
necessary, you can also use Tongs to remove foods from the Basket.
TIP: If food contents within Basket are too heavy to lift using the
Basket Handle use oven mitts to carefully pull out the whole Drawer
Pan and Basket together. Place on a at, heat-resistant surface and
use Tongs to remove contents from the Basket. TIP: Do not turn the
Basket and Drawer Pan upside down together, as any excess oil
that has collected in the bottom of the Drawer Pan will be poured
onto the foods.
6. When the next batch of ingredients is ready, the air fryer is instantly
ready to use again.
7. When cooking is complete, the display will show "OFF." Remove the
Power cord from
the electrical outlet.
How to Use
5.
15
The Digital Air Fryer should be cleaned thoroughly after every use.
Make sure the Power cord is disconnected from the electrical outlet
and that the appliance has cooled down before attempting to clean.
The Drawer Pan, Basket and the inside of the appliance have a
nonstick coating. Do not use metal utensils or abrasive cleaning
materials on them, as this can damage the non- stick coating.
Wipe the outside of the appliance with a damp cloth.
CAUTION: Do not allow water to seep into the LED control panel as
that may damage the appliance.
Clean the Drawer Pan and Basket with hot water, dishwashing soap
and a non-abrasive sponge.
You can use a degreaser to remove any stuck-on residue.
NOTE: The Drawer Pan and Basket are dishwasher-safe (top rack only).
TIP: If food residue is stuck to the Basket or the bottom of the Drawer
Pan, place the Basket into the Drawer Pan and ll with dishwashing
soap and water and let soak for 10 minutes.
Clean the inside of the appliance with hot water and a non-abrasive
sponge.
Never immerse the power cord, plug or the appliance body in water or
any other liquids.
Dry all parts after each use, re-assemble and store in a cool, dry loca
tion.
Cleaning and Maintenance
Instructions for use
16
17
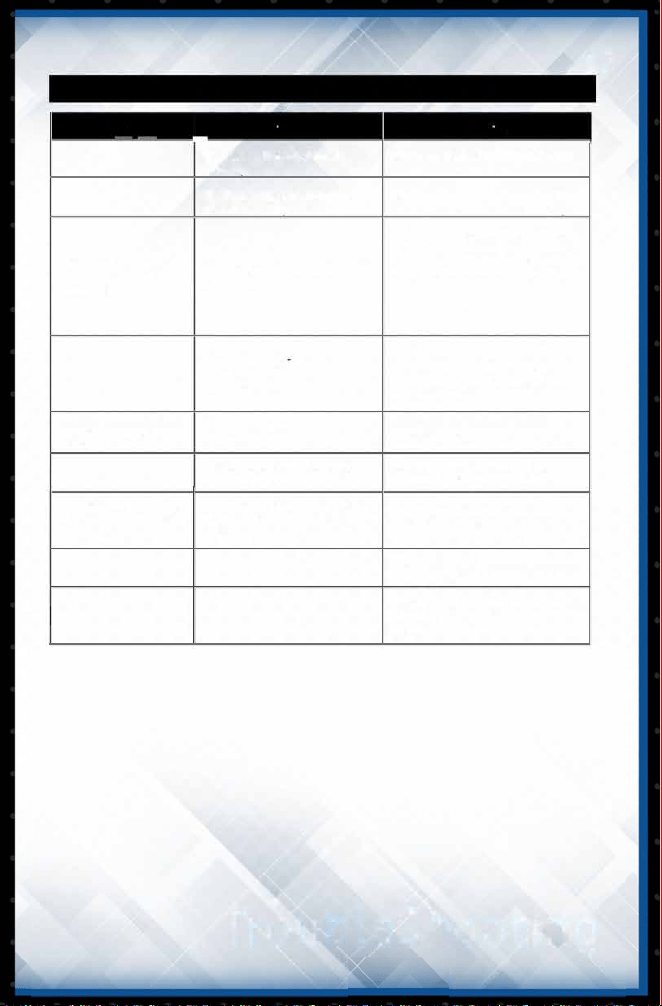
TROUBLESHOOTING GUIDE
TROUBLESHOOTING GUIDE
Problem
Possible cause
Problem
Possible cause
Solution
The airyer ds
The appliance is not
not work.
plugged in.
Solution
Plug the wer cord into an
electrical
outlet.
---------
--
- - - ---
--
The Basket is not aligned
correctlv.
Make sure the Basket is flush with
the Drawer Pan.
You did not press the POWER button.
The appliance is defective.
Contact your store for
return/replacement
The Drawer Pan is not properly
placed into air fryer.
Make sure there is no
obstruction for the Drawer
Pan to dose properly
Air fryer keeps powering During time/temperature selection
Do not wait more than 10-minutes
off while you are trying to process, if ST ART button is not
after making your selections to press
program
pressed within 10-minutes, the
time/temperature. unit will automatically turn off.
START button.
White smoke is emitted
You are preparing food with a high
out of the appliance
during use.
oil content.
W
hen cooking with oily fds, oil will
drain into the Drawer Pan (2). When
the air fryer heats up, the pan heats up
the oil and produces white smoke. This
does not adversely affect the air fryer
or your cooking press.
Food not completely
cooked/fried.
There is too much food in the
Basket.
Use smaller batches of fd in the
Basket . Small batches of fd will
cook more evenly.
The cooking temperature is set too
Increase the temperature setting.
low.
Check "Cking Time Chart" found in
this manual.
Increase the time setting. Check
The cooking time is too short.
"Cking Time Chart" found in this
The pan has built-up
oil residue from
previous uses.
White smoke is caused by oil leftover
in the Drawer Pan. Make sure to
thoroughly dean the Drawer Pan
after every use.
Home-made French fries
Your potatoes are not fresh or are
Make sure to use fresh and firm
are coming out unevenly
potatoes. Not frozen potatoes for
cooked.
frozen.
home-made French ies.
manual.
Certain foods need to be
Potato strips were not thoroughly
Thoroughly rinse sliced potato to
rinsed prior to frying.
remove all starch prior to frying.
Food cooked is uneven. stirred/mixed mid-way through
the cking process.
Fds that overlap inside the Basket
need to be stirred mid-way through
cking. Go to section:
'During the Cooking/Frying Press' in
this manual.
Fried snacks are not
You used a type of snack meant to
Use oven snacks or lightly brush some
be prepared in a traditional deep
crispy.
frver.
oil onto the snacks for a crispier result.
I cannot close the
Drawer Pan properly.
The Basket is too full.
Do not fill the Basket above the
MAX level.
Your home-made French Crispy results are directly linked to
Potato strips need to be thoroughly
fries are not crispy after
the amount of oil and water
dried before adding oil.
air frying.
content of the fresh potato strips.
Slice potato strips thinner if you want
them crispier.
Use a bit more oil on the potato strips
prior to frying if you want crispier
results.
TroubleShooting
TroubleShooting
Instructions for use
16
17
TROUBLESHOOTING GUIDE
TROUBLESHOOTING GUIDE
Problem
Possible cause
Problem
Possible cause
Solution
The airyer ds
The appliance is not
not work.
plugged in.
Solution
Plug the wer cord into an
electrical
outlet.
---------
--
- - - ---
--
The Basket is not aligned
correctlv.
Make sure the Basket is flush with
the Drawer Pan.
You did not press the POWER button.
The appliance is defective.
Contact your store for
return/replacement
The Drawer Pan is not properly
placed into air fryer.
Make sure there is no
obstruction for the Drawer
Pan to dose properly
Air fryer keeps powering During time/temperature selection
Do not wait more than 10-minutes
off while you are trying to process, if ST ART button is not
after making your selections to press
program
pressed within 10-minutes, the
time/temperature. unit will automatically turn off.
START button.
White smoke is emitted
You are preparing food with a high
out of the appliance
during use.
oil content.
W
hen cooking with oily fds, oil will
drain into the Drawer Pan (2). When
the air fryer heats up, the pan heats up
the oil and produces white smoke. This
does not adversely affect the air fryer
or your cooking press.
Food not completely
cooked/fried.
There is too much food in the
Basket.
Use smaller batches of fd in the
Basket . Small batches of fd will
cook more evenly.
The cooking temperature is set too
Increase the temperature setting.
low.
Check "Cking Time Chart" found in
this manual.
Increase the time setting. Check
The cooking time is too short.
"Cking Time Chart" found in this
The pan has built-up
oil residue from
previous uses.
White smoke is caused by oil leftover
in the Drawer Pan. Make sure to
thoroughly dean the Drawer Pan
after every use.
Home-made French fries
Your potatoes are not fresh or are
Make sure to use fresh and firm
are coming out unevenly
potatoes. Not frozen potatoes for
cooked.
frozen.
home-made French ies.
manual.
Certain foods need to be
Potato strips were not thoroughly
Thoroughly rinse sliced potato to
rinsed prior to frying.
remove all starch prior to frying.
Food cooked is uneven. stirred/mixed mid-way through
the cking process.
Fds that overlap inside the Basket
need to be stirred mid-way through
cking. Go to section:
'During the Cooking/Frying Press' in
this manual.
Fried snacks are not
You used a type of snack meant to
Use oven snacks or lightly brush some
be prepared in a traditional deep
crispy.
frver.
oil onto the snacks for a crispier result.
I cannot close the
Drawer Pan properly.
The Basket is too full.
Do not fill the Basket above the
MAX level.
Your home-made French Crispy results are directly linked to
Potato strips need to be thoroughly
fries are not crispy after
the amount of oil and water
dried before adding oil.
air frying.
content of the fresh potato strips.
Slice potato strips thinner if you want
them crispier.
Use a bit more oil on the potato strips
prior to frying if you want crispier
results.
TroubleShooting
TroubleShooting
Instructions for use