- 02 -
Chapter 2 INSTALL ATION
CR1005
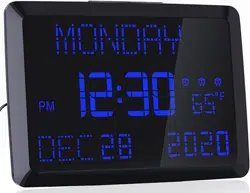
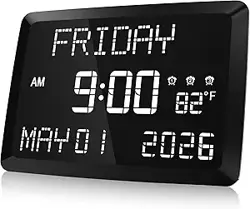
Extra Large Digital Calendar Clock With Thermometer
THE BEST CHOICE FOR YOUR HOME
Version 1.1
Made in PRC
Http://www.raynic.com
Contact our experts
How to Install Clock on wall with mounting rackets
How to Install Clock with Support Brackets
Just follow these two steps to make your clock stand firmly:
Step 1: The top, bottom, left and right points of the bracket should be
pressed into the groove completely(see picture 1 below).
Please note: Be sure to press all four points into the groove.
Step 2: After the four points are pressed into the groove, then slide the
bracket up(see picture 2 below).
Nail the bracket to the wall Stick a circular sticker
Hang up the clock through the hole
1 2
3
4 5 6
Stick a circular sticker
When you can hear the "Ka" sound, it means the installation is successful!
Otherwise, please reinstall.
Finished hanging the clock
- 01 -
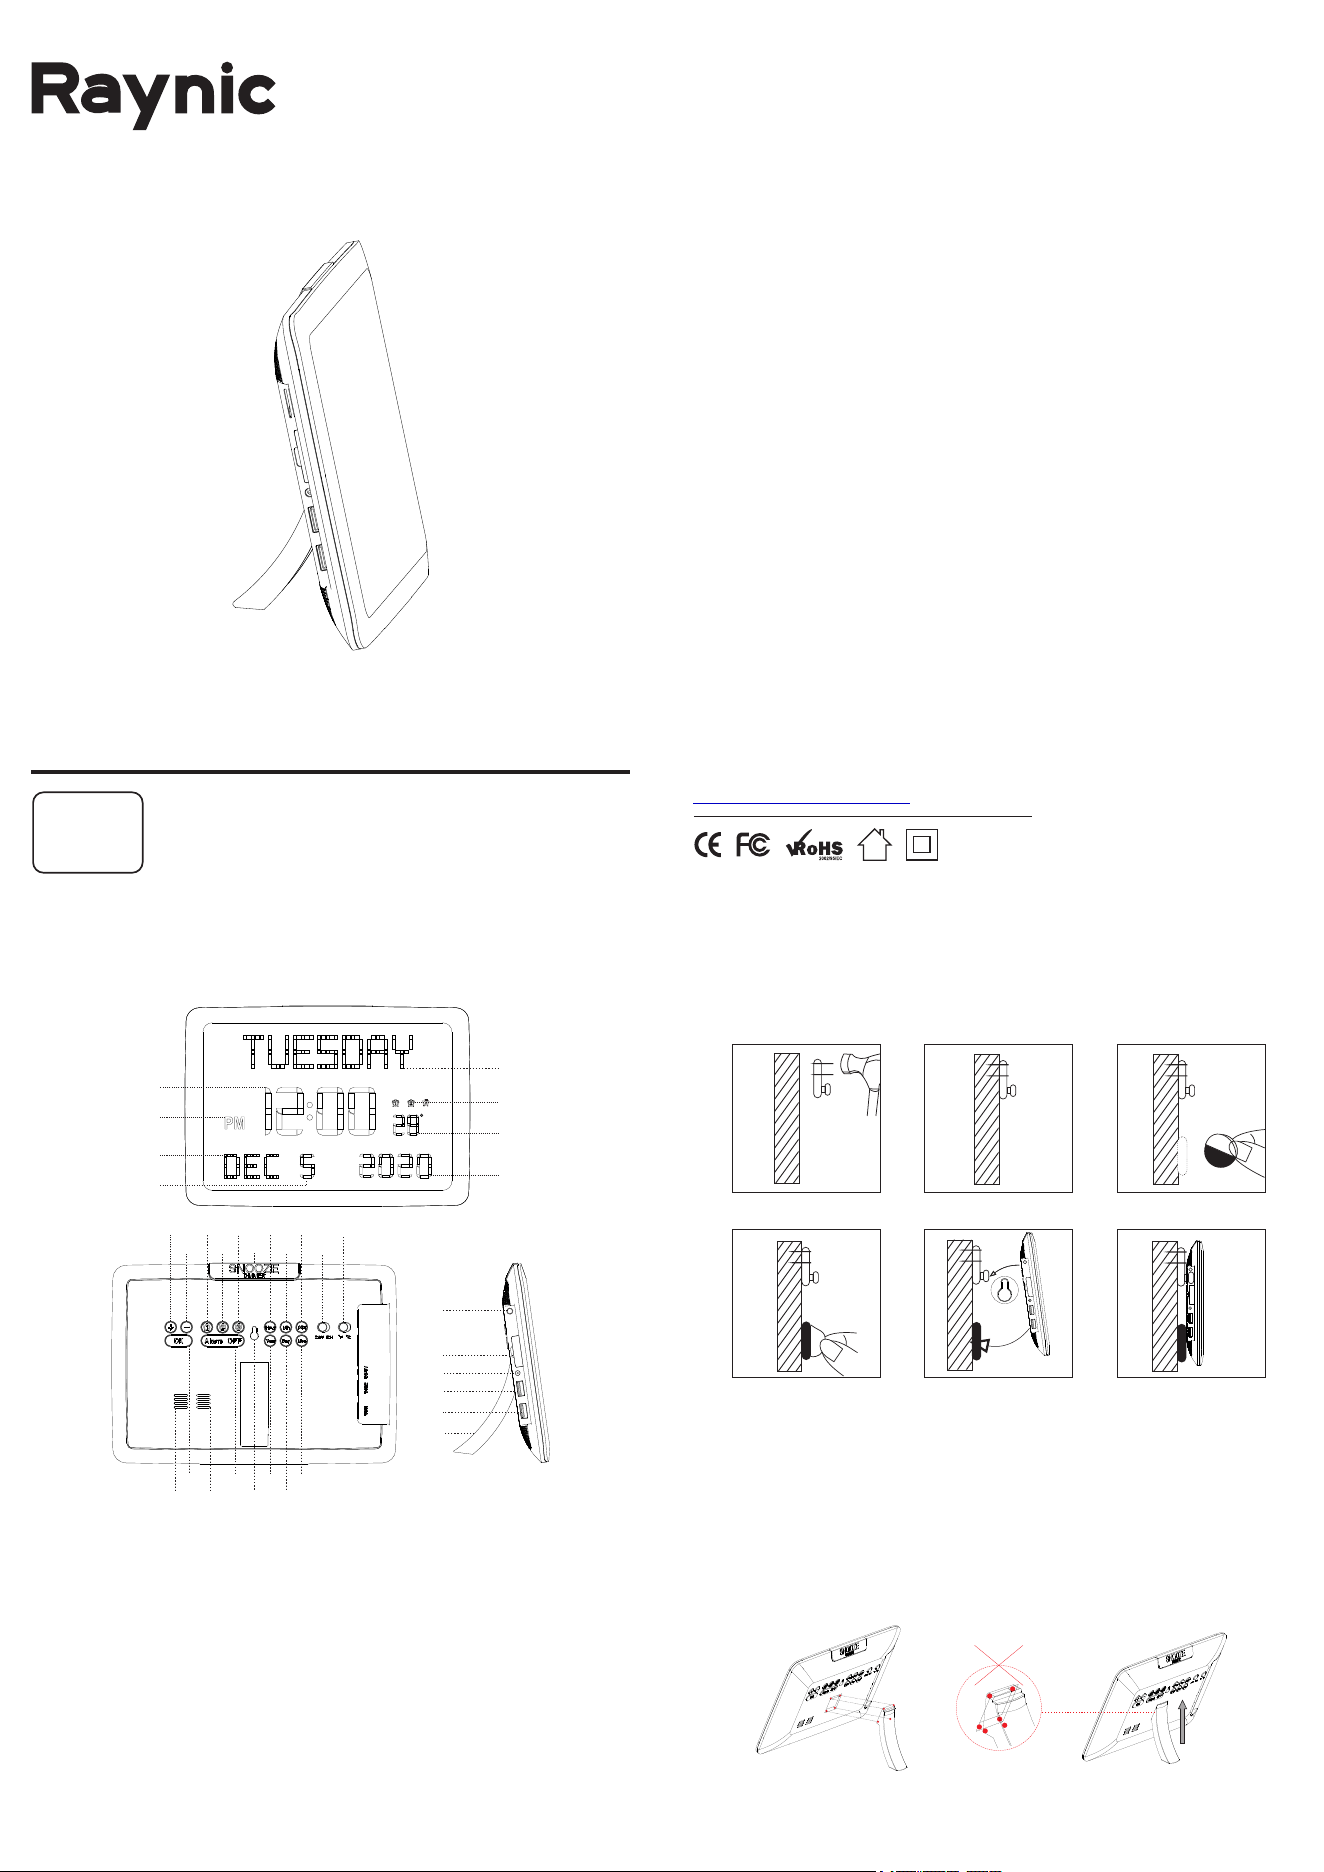
Chapter 1 LOCATION OF CONTROLS
1. WEEK DISPLAY 2. TIME DISPLAY 3. AM/PM INDICATOR
4. ALARM 1 / ALARM 2 / ALARM 3 INDICATOR 5. TEMPERATURE DISPLAY
6. MONTH DISPLAY 7. DATE DISPLAY 8. YEAR DISPLAY
9. NEXT BUTTON 10. PREV BUTTON 11. SAVE BUTTON
12. ALARM 1 BUTTON 13. ALARM 2 BUTTON 14. ALARM3 BUTTON
15. ALARM OFF BUTTON 16. SNOOZE / DIMMER BUTTON
17. YEAR BUTTON 18. DAY BUTTON 19. MONTH BUTTON
20. HOUR BUTTON 21. MINUTE BUTTON 22. DST BUTTON
23. 24 HOUR / 12 HUOR SWITCH BUTTON
24. FAHRENHEIT / CELSIUS SWITCH BUTTON
25. SPEAKER 26. HEAT EMISSION HOLE 27. HANGING HOLE
28. TEMPERATURE INDUCTOR 29. BACKUP BATTERY COMPARTMENT
30. DC POWER INPUT INTERFACE 31. USB OUTPUT CHARGER
32. USB OUTPUT CHARGER 33. BRACKET
9
10
11
12
13
14
15
17
18
19
20
21
22
23
24
25
26 27
16
28
29
30
31
32
33
C
1
2
3
4
5
6
7
8

1. Press once to maintain hour time flashing.
2. Press to increase hour. Press to reduce hour.
3. When you finish the hour adjustment. Press to confirm
the hour setting.
4. Minute time start flashing.
5. Press to increase minute. Press to reduce minute.
6. When you finish the minute adjustment. Press to save all
of above settings.
Note. 1. If you want to set minute directly. Just press .
2. Hold press to adjust automatically. .
- 05 - - 06 -
Chapter 5 YEAR/MONTH/DAY SETTING
1. Press once to maintain year flashing.
2. Press to increase year. Press to reduce year.
3. When you finish the year adjustment. Press to save the
setting.
4. Press once to maintain month flashing.
Other setting is same as <2><3>.
5. Press to maintain date flashing.
Other setting is same as <2><3>.
Chapter 7 TURN OFF ALARM
When the Alarm sounds, you can do either way:
A) Press to temporarily turn the alarm off for 9
minutes, then it will alarm again for each next 9 minutes.
B) Press to turn the alarm off for 24 hours.
You will see the alarm indicator is still on, indicating the alarm
setting is still active and will sound again after 24 hours.
SNOOZE
TEMPERATURE FORMAT SWITCH
If you want to switch Fahrenheit / Celsius. Just slide
IMPORTANT REMINDER
1. It may take 1 minute for the temperature sensor to complete the
initialization.
2. Accuracy of thermometer is 1 degree Celsius.
3. There might be 1-3 degrees Celsius deviation within normal limits
due to unstable air flow and room heating.
Chapter 9 TEMPERATURE
1. Install the CR2032 battery into the backup battery
compartment.
The battery only saves the time and settings in case of power
outage.
2. Plug in power adapter.The device will turn on and the display
will show as below.
- 04 -
Chapter 3 POWERING ON
- 03 -
Chapter 4 TIME SETTING
Hour
+
+
+
OK
OK
24H 12H
Min
HourYear
+
OK
HourMon
Hour
Day
Chapter 6 ALARM SETTING
1. Press , The display shows default time .
2. Press to set alarm hour. hour time start
flashing. Press to adjust hour. Press to confirm.
3. White minute start flashing. Press to adjust
minute. Press to confirm.
4. The display shows , Press to
adjust alarm volume. Press to confirm .
5. The display shows , Press
to adjust alarm period range. MON - SUN / MON- FRI / SAT -
SUN. Press to save all of above settings.
1
Hour
+
OK
Min
OK
OK
+
OK
+
Temporarily turn off alarm
ALARM OFF
C) To cancel all the three alarms, hold press
All of alarms will be canceled. alarm indicator
don’t show on the display.
D) To separately cancel any of the alarms, Press or or
Then press .The indicator light of your
selected alarm ( or or ) will be turn off. means
the alarm has been canceled successfully.
Cancel the alarms
ALARM OFF
1
2
3
1
2
3
ALARM OFF
1
2
3
Chapter 8 DIMMER
Repeatedly press to adjust the brightness of display.
Adjust from the dimmest level to the brightest level as below:
DIMMER 1 DIMMER 2 DIMMER 3 DIMMER 4 DIMMER 5.
DIMMER
°F °C
Plug USB charging cable into device and phone or tablet.
Device can charge both phones or tablets at the same time.
The maximum charge current is 1 Ampere.
Chapter 10 USB CHARGING
For Temporary Time Storage Only, Cannot replace AC POWER.
Install 1 piece of CR2032 coin cell to the proper terminals in the
battery compartment.
Chapter 11 USB CHARGING
+
+
Press once . An hour will be added to the current time. Press
again to turn off DST.
Chapter 11 DST SWITCH
DST
TIME FORMAT SWITCH
If you want to switch 24hour/12hour. Just slide .