
2~4
5
5
6
7~9
13~14
10
CONTENTS
IMPORTANT SAFEGUARDS
PARTS and ACCESSORIES
TECHNICAL SPECIFICATIONS
BEFORE FIRST USE
ASSEMBLE and USE
USING YOUR AIR FRYER
11
CARE & MAINTENANCE
12
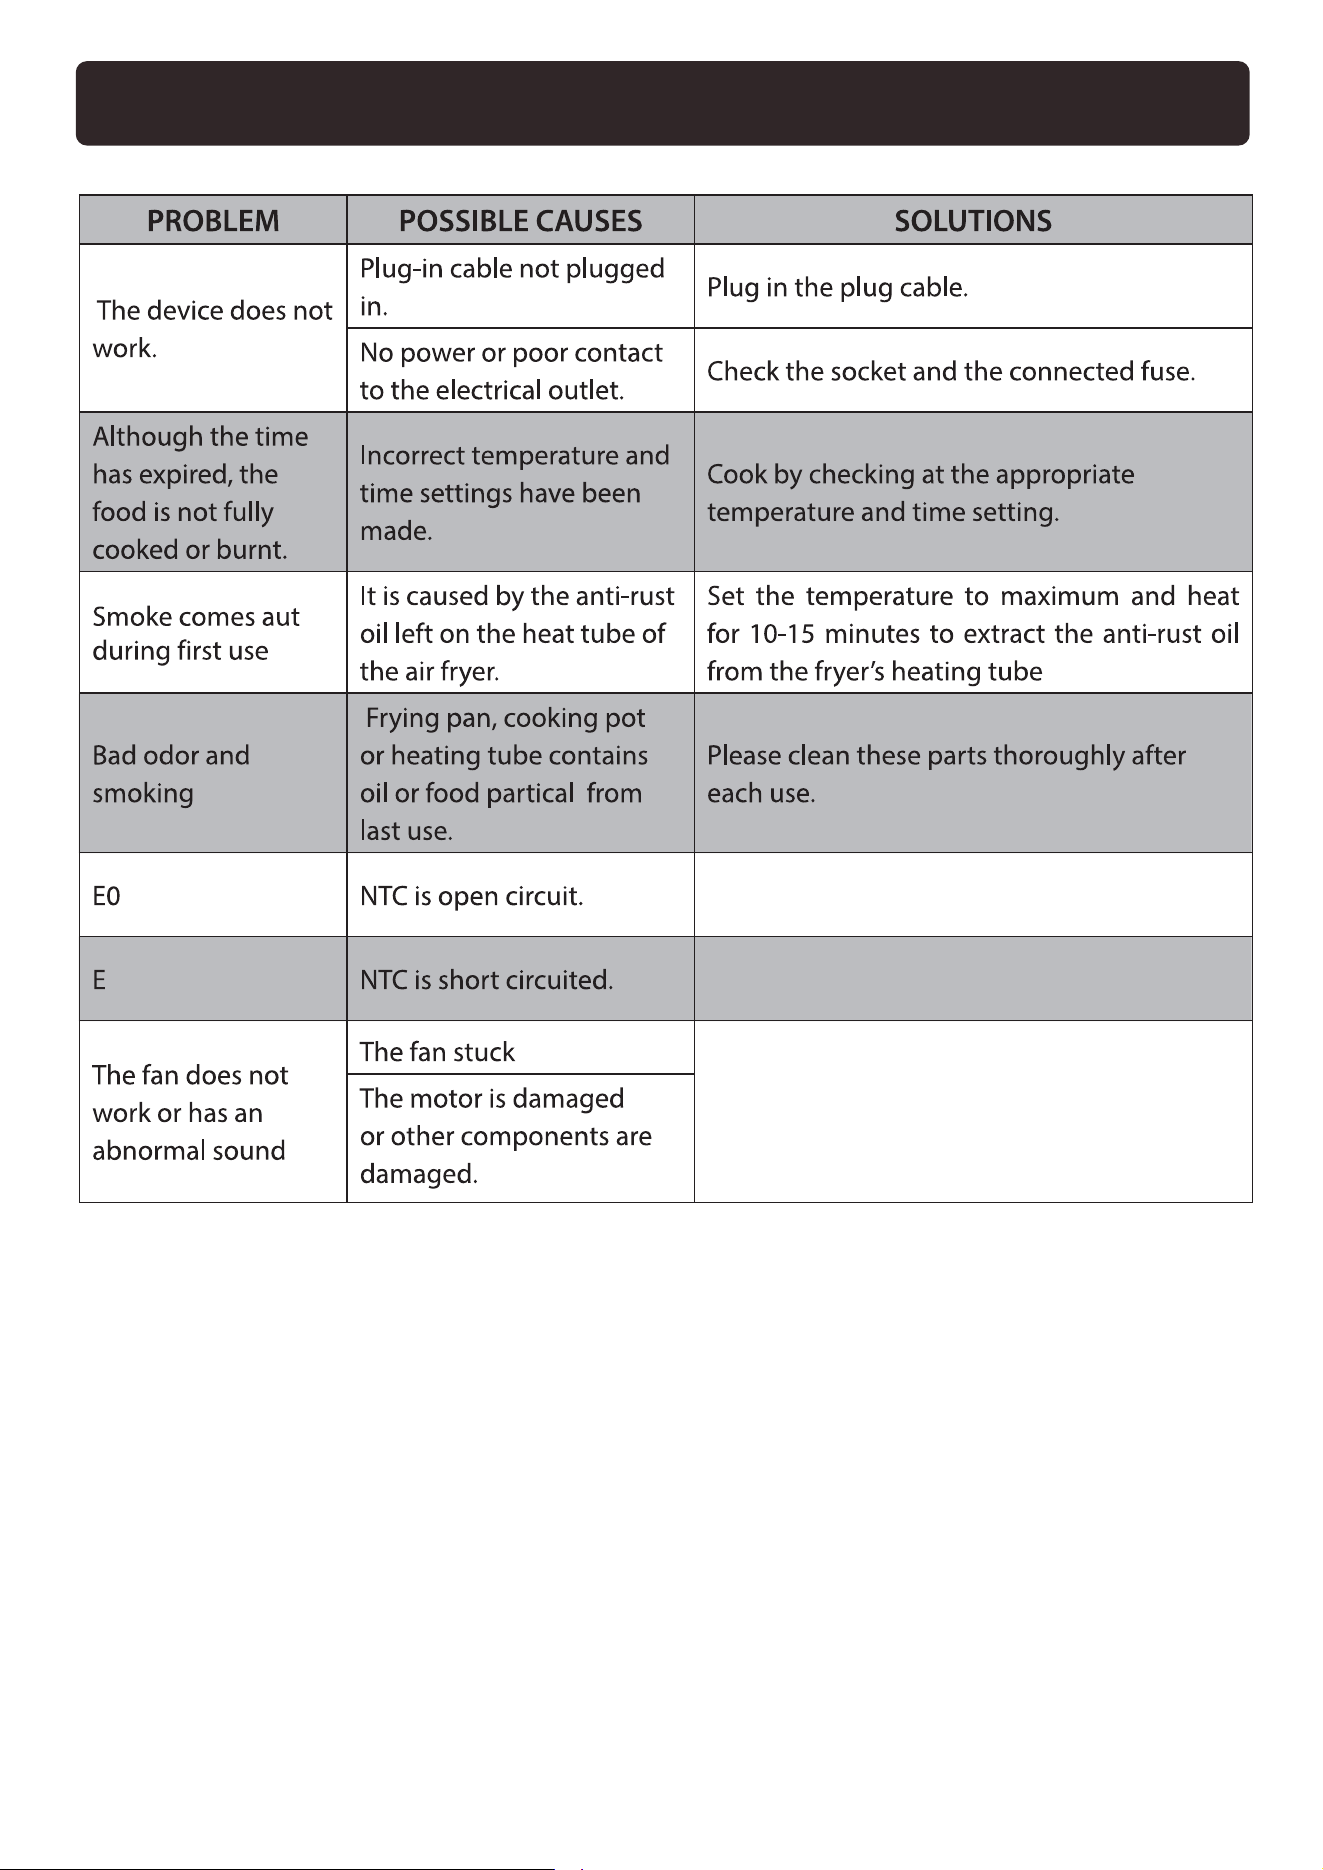
TROUBLESHOTING
13
CLEANING and MAINTENANCE
TRANSPORTATION and SHIPMENT
You will see that you have made a great choice as you will use your
appliance. We intend to offer you more than you have paid. Thank you for
choosing our product. lf you read this user's manual carefully and use your
appliance as described in the manual, you will see how easy will everything
be.Thus, you may obtain the best performance from your appliance.
READ THE INSTRUCTIONS CAREFULLY BEFORE USING THE APPLIANCE
IMPORTANT SAFEGUARDS
AND KEEP THE MANUAL FOR FUTURE REFERENCE.
Important information and recommendations regarding
MEANINGS OF THE SYMBOLS
Following symbols are used in the manual.
the operation of your appliance.
Warnings on personal injury or property damage.
2
1. Read all instructions.
2. Do not touch hot surfaces. Use handles or knobs.
3. To prevent electric shock, do not immerse parts other than the frying
basket and baking tray in water or other liquids.
4. Close supervision is necessary when any appliance is used by or near
children.
5. Unplug from outlet when not in use and before cleaning. Allow to cool
before putting on or taking off parts.
6. Do not operate any appliance with a damaged cord or plug or after the
appliance malfunctions or has been damaged in any manner. Return
appliance to the nearest authorized service facility for examination, repair, or
adjustment.

3
7. The use of accessory attachments not recommended by the appliance
manufacturer may cause injuries.
8. Do not use outdoors.
9. Do not let cord hang over edge of table or counter, or touch hot surfaces.
10. Do not place on or near a hot gas or electric burner, or in a heated oven.
11. Extreme caution must be used when moving an appliance containing hot
oil or other hot liquids.
12. Always attach plug to appliance first, then plug cord into the wall outlet.
To
disconnect, turn any control to "off", then remove plug from wall outlet.
13. Do not use appliance for other than intended use.
14. Save these Instructions.
15. Oversize foods or metal utensils must not be inserted in a toaster-oven as
they may create a fire or risk of electric shock.
16. A fire may occur if the toaster-oven is covered or touching flammable
material, including curtains, draperies, walls, and the like, when in operation.
Do not store any item on top of the appliance when in operation.
17. Do not clean with metal scouring pads. Pieces can break off the pad and
touch electrical parts involving a risk of electric shock.
18. Extreme caution should be exercised when using containers constructed
of other than metal or glass.
19. Do not store any materials, other than manufacturers recommended
accessories, in this oven when not in use.
20. Do not place any of the following materials in the oven: (List all materials
– that is, paper, cardboard, plastic, and the like).
21. Do not cover crumb tray or any part of the oven with metal foil. This will
cause overheating of the oven.

4
22. A short power-supply cord (or detachable power-supply cord) is provided
to reduce the risk resulting from becoming entangled in or tripping over a
longer cord.
23. Longer detachable power-supply cords or extension cords are available
and may be used if care is exercised in their use.
24. If a longer detachable power-supply cord or extension cord is used:
The marked electrical rating of the cord set or extension cord should be at
least as great as the electrical rating of the appliance.
25. The cord should be arranged so that it will not drape over the countertop
or tabletop where it can be pulled on by children or tripped over
unintentionally and If the appliance is of the grounded type, the cord set or
extension cord should be a grounding-type 3-wire cord.
26. An appliance provided with a 2-wire polarized attachment plug shall
include the following or equivalent wording: "This appliance has a polarized
plug (one blade is wider than the other). To reduce the risk of electric shock,
this plug is intended to fit into a polarized outlet only one way. If the plug
does not fit fully into the outlet, reverse the plug. If it still does not fit, contact
a qualified electrician. Do not attempt to modify the plug in any way.
SAVE THESE INSTRUCTIONS!
PARTS and ACCESSORIES
TECHNICAL SPECIFICATIONS
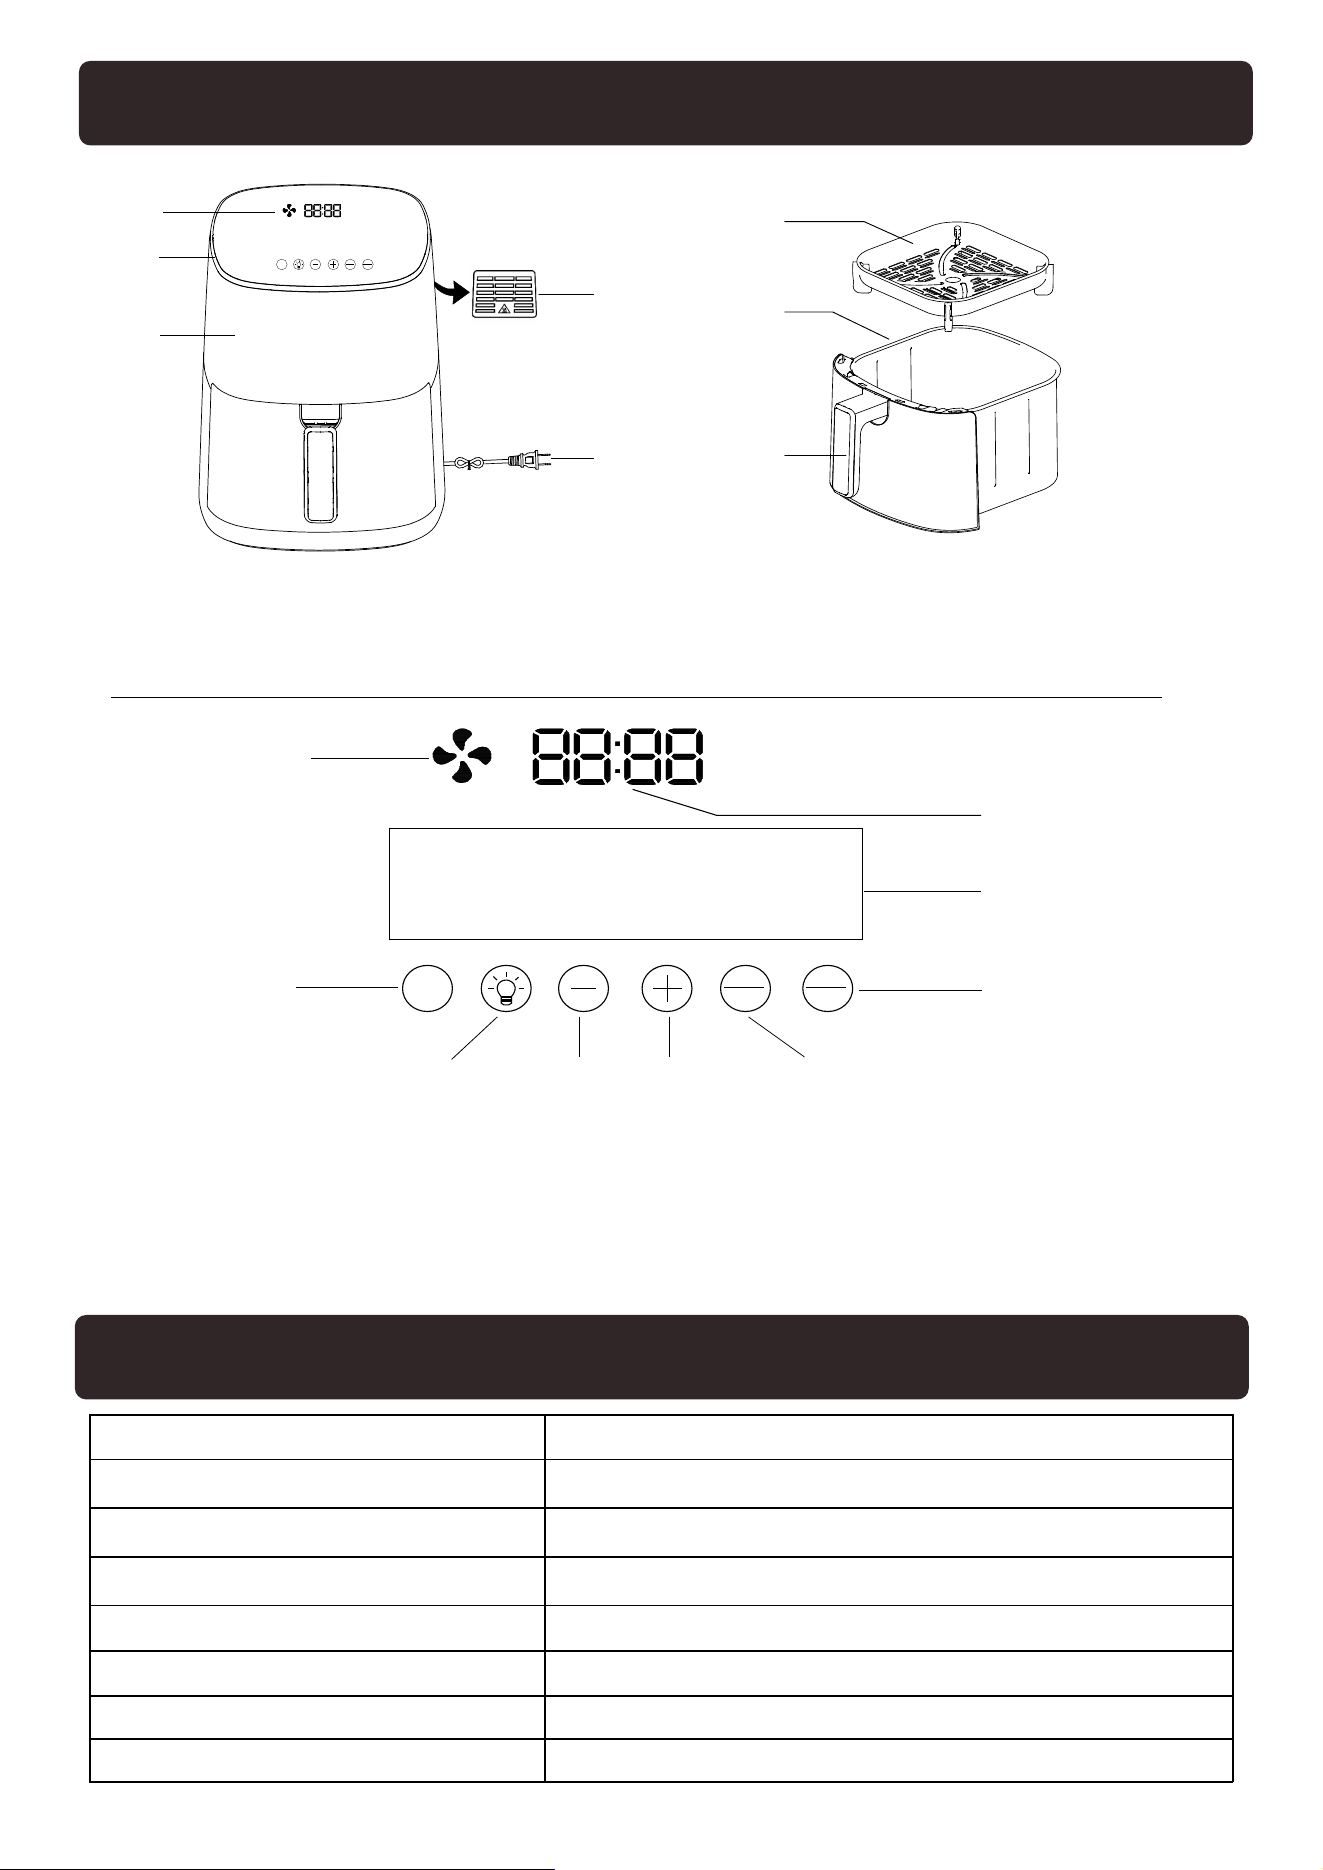
1. Main Unit
2
6
1
7
4
3
5
A1
A2
A3
A9
A4
A8A6A5
8
2. Control Panel 3. Cooking Pot 4. Frying Plate
A1. Temperature/Time Display A3. Cooking Modes
A7
A2. Fan Lamp
A4. Menu
A5. Inner Light On/Off
5. Cooking Pot Handle 6. Air Inlet 7. Air Outlet 8. Cable with Plug
A6. Temp/Time Reduce Button
A7. Temp/Time lncrease Button A8. Temp/Time Switch Button A9. Start/Cancel
VEGE-
TABLES
SEA
FOOD
WINGS
CUSTARD
TART
STEAMFRIES
CHICKEN
DEHY-
DRATE
REHEAT
BAKE
ROAST
AIR
FRY
MIN
°F
Start
Cancel
Time
Temp
MENU
VEGE-
TABLES
SEA
FOOD
WINGS
CUSTARD
TART
STEAMFRIES
CHICKEN
DEHY-
DRATE
REHEAT
BAKE
ROAST
AIR
FRY
MIN
°F
Start
Cancel
Time
Temp
MENU
Model
Powcr Supply
Rated Power
Capacity
Temperature Range
Time Range
Dimensions
Weight
KZ-D6QT-GY / KZ-D6QT-BG
AC 120V, 60Hz
1700W
6.34qt / 6L
40-200°C(105-400℉)
1-12Hours
13.6*10.5*12.9in/345.5*268.2*329.9mm
10 lb / 4.54kg
5
BEFORE FIRST USE
6
1. Remove all packaging from the air fryer, including any temporary stickers.
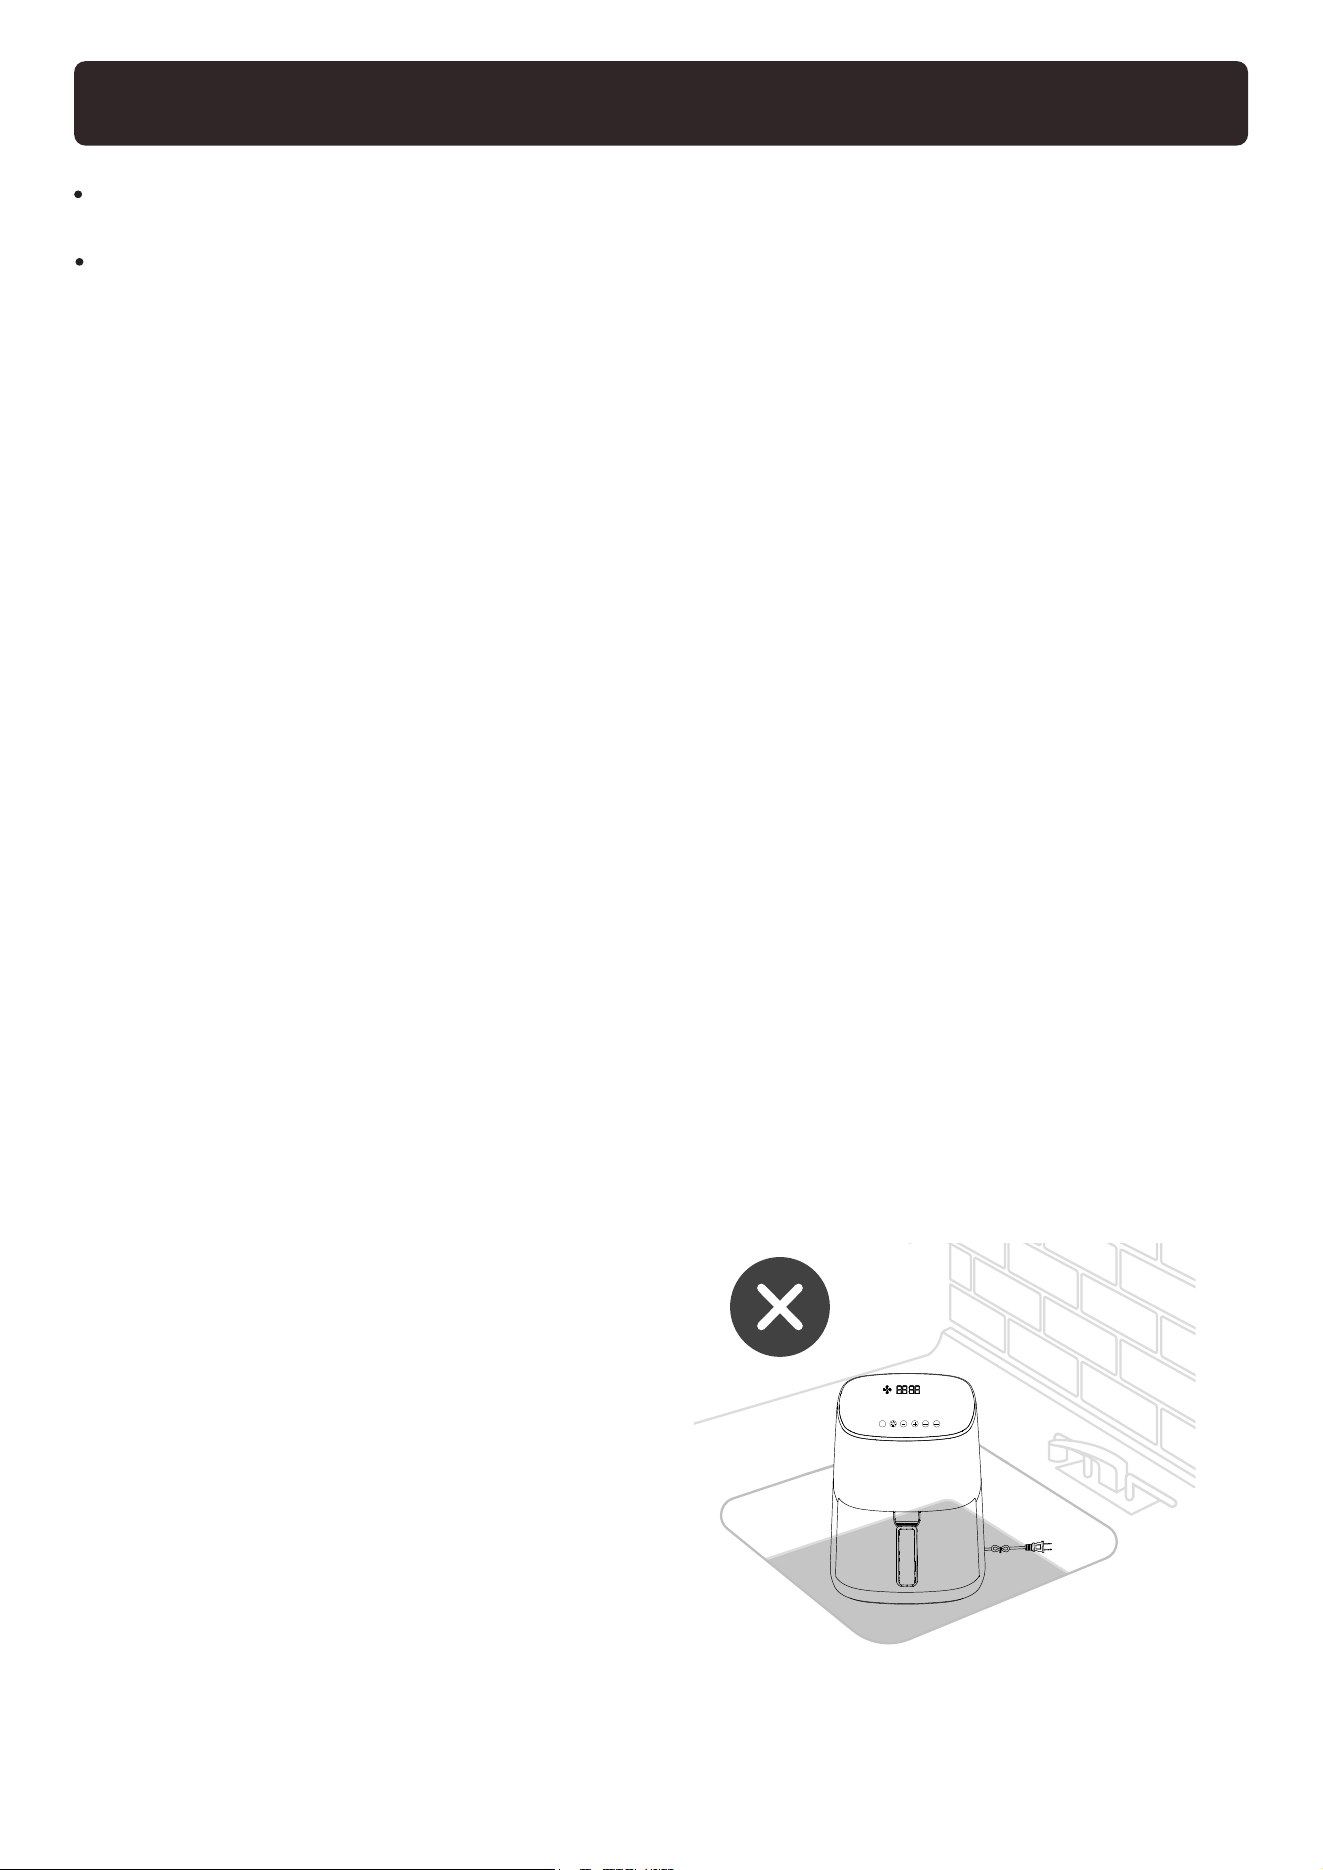
2. Place the air fryer on a stable, level, heat resistant surface, Keep away
from areas that can be damaged by steam (such as walls or cupboards).
3. Hold down the basket release button, and pull the handle to remove
the basket. Remove all plastic from the basket.
4. Wash both the basket and crisper plate thoroughly,using either a
dishwasher or a non-abrasive sponge.
5. Wipe the inside and outside of the air fryer with a slightly moist cloth.
Dry with a towel.
6. Insert the crisper plate back into the basket,and place the basketinside
the air fryer.
Use caution when turning the basket over after cooking, as the hot crisper
plate may fall out and create a safety hazard.
Do not unscrew the basket handle from the basket.
Fiqure 1.1
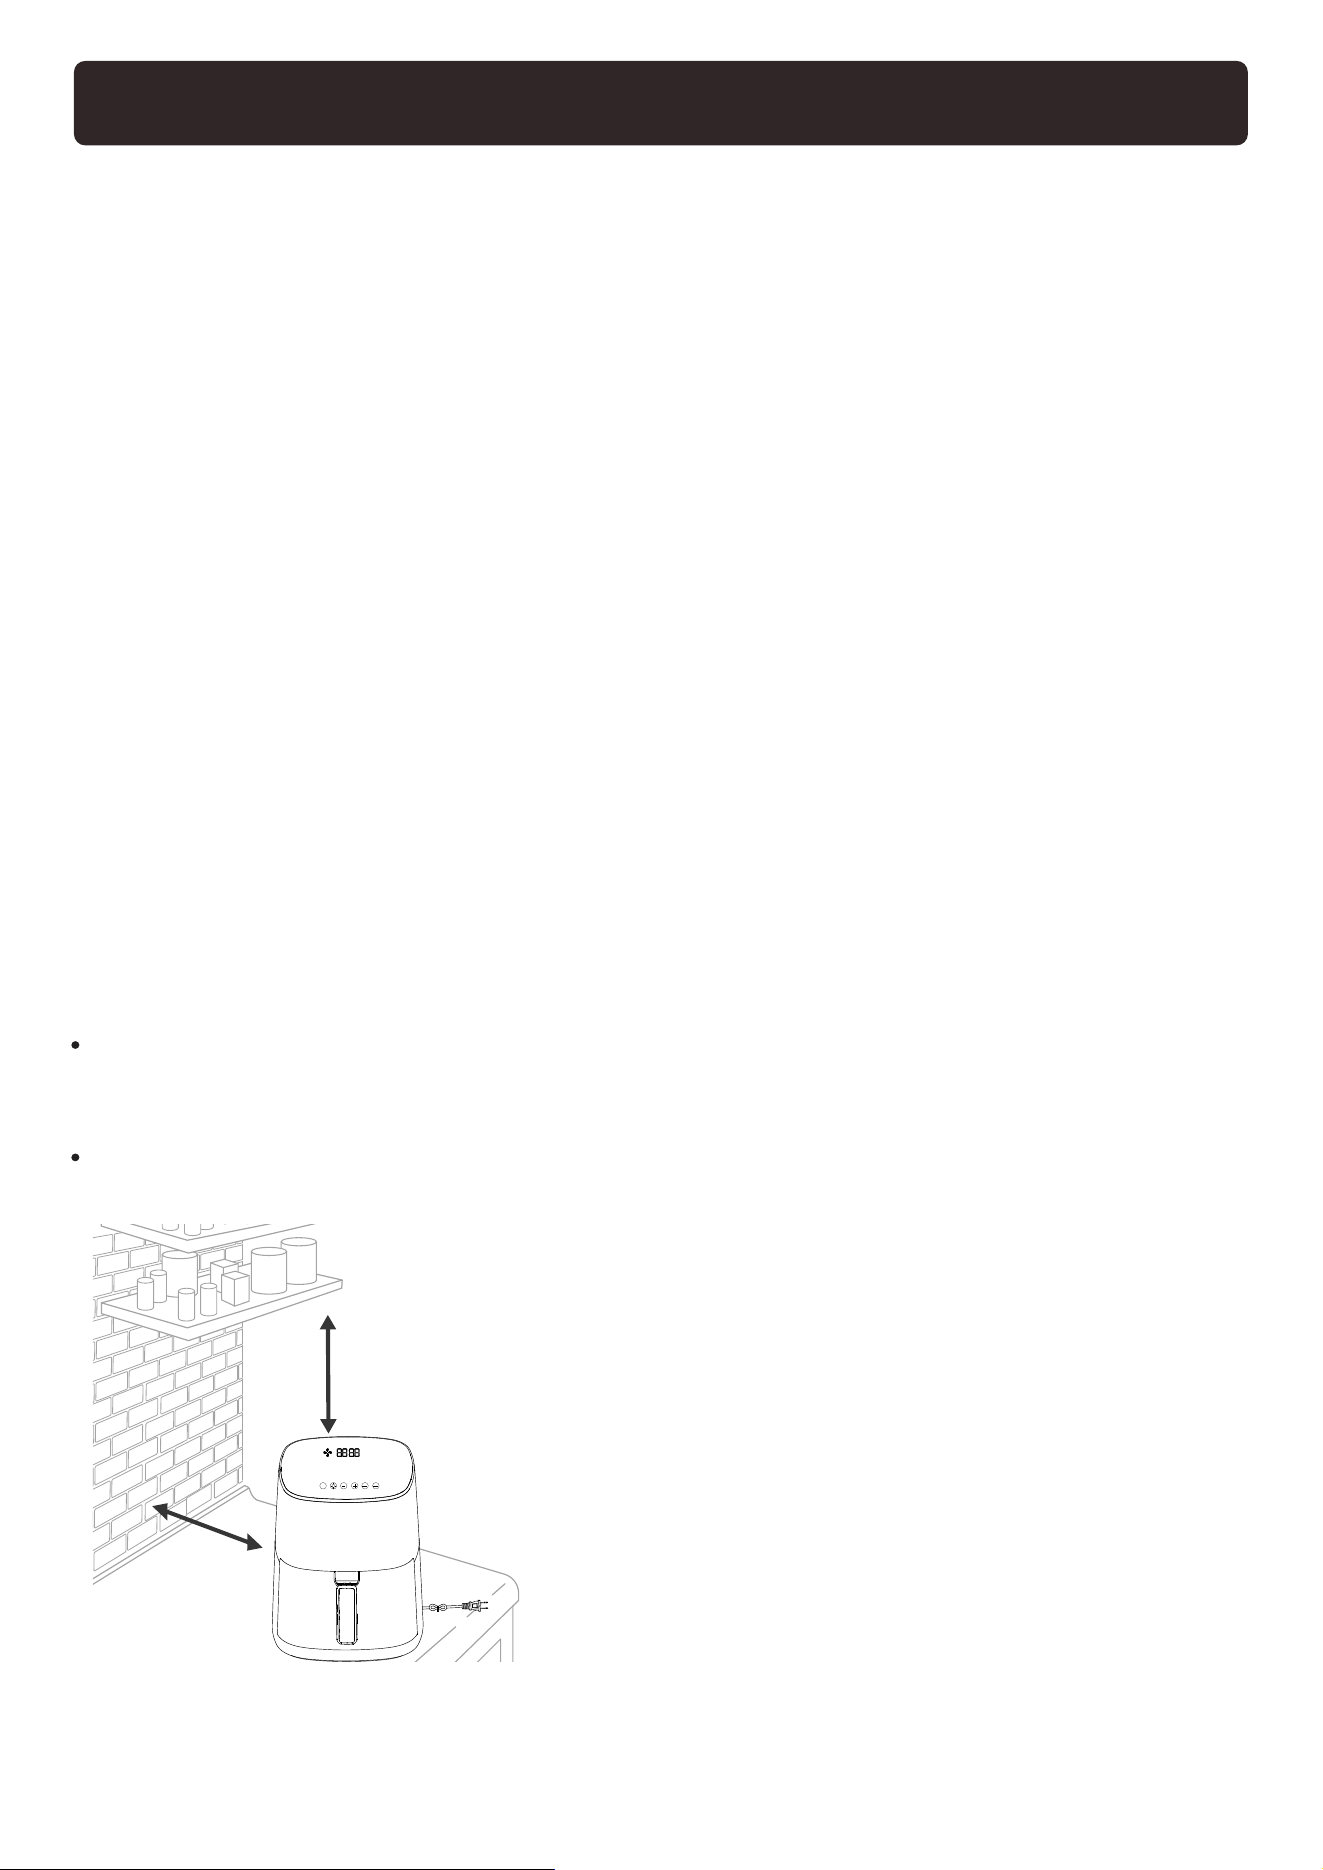
Note: Leave 5 inches / 13cm of space behind and above the air fryer.
[Fiqure 1.1] Leave enough room in front of the air fryer to remove the basket.
Note:
Setting Up
5 inch/
13 cm
5 inch/
13 cm
VEGE-
TABLES
SEA
FOOD
WINGS
CUSTARD
TART
STEAMFRIES
CHICKEN
DEHY-
DRATE
REHEAT
BAKE
ROAST
AIR
FRY
MIN
°F
Start
Cancel
Time
Temp
MENU
ASSEMBLE and USE
7
Before first use remove all packaging material, promotional
labels, and tape from the unit. Clean the main body and
accessories to the Cleaning & Maintenance instructions and
make them ready for use.
At first start-up, the temperature should be set to maximum
and preheated for 10-15 minutes to remove the anti-rust oil
on the surface of the fryer's heating tube. Slight smoke is
normal when the air fryer is used for the first time.
If the temperature and time specified in the cooking mode are suitable
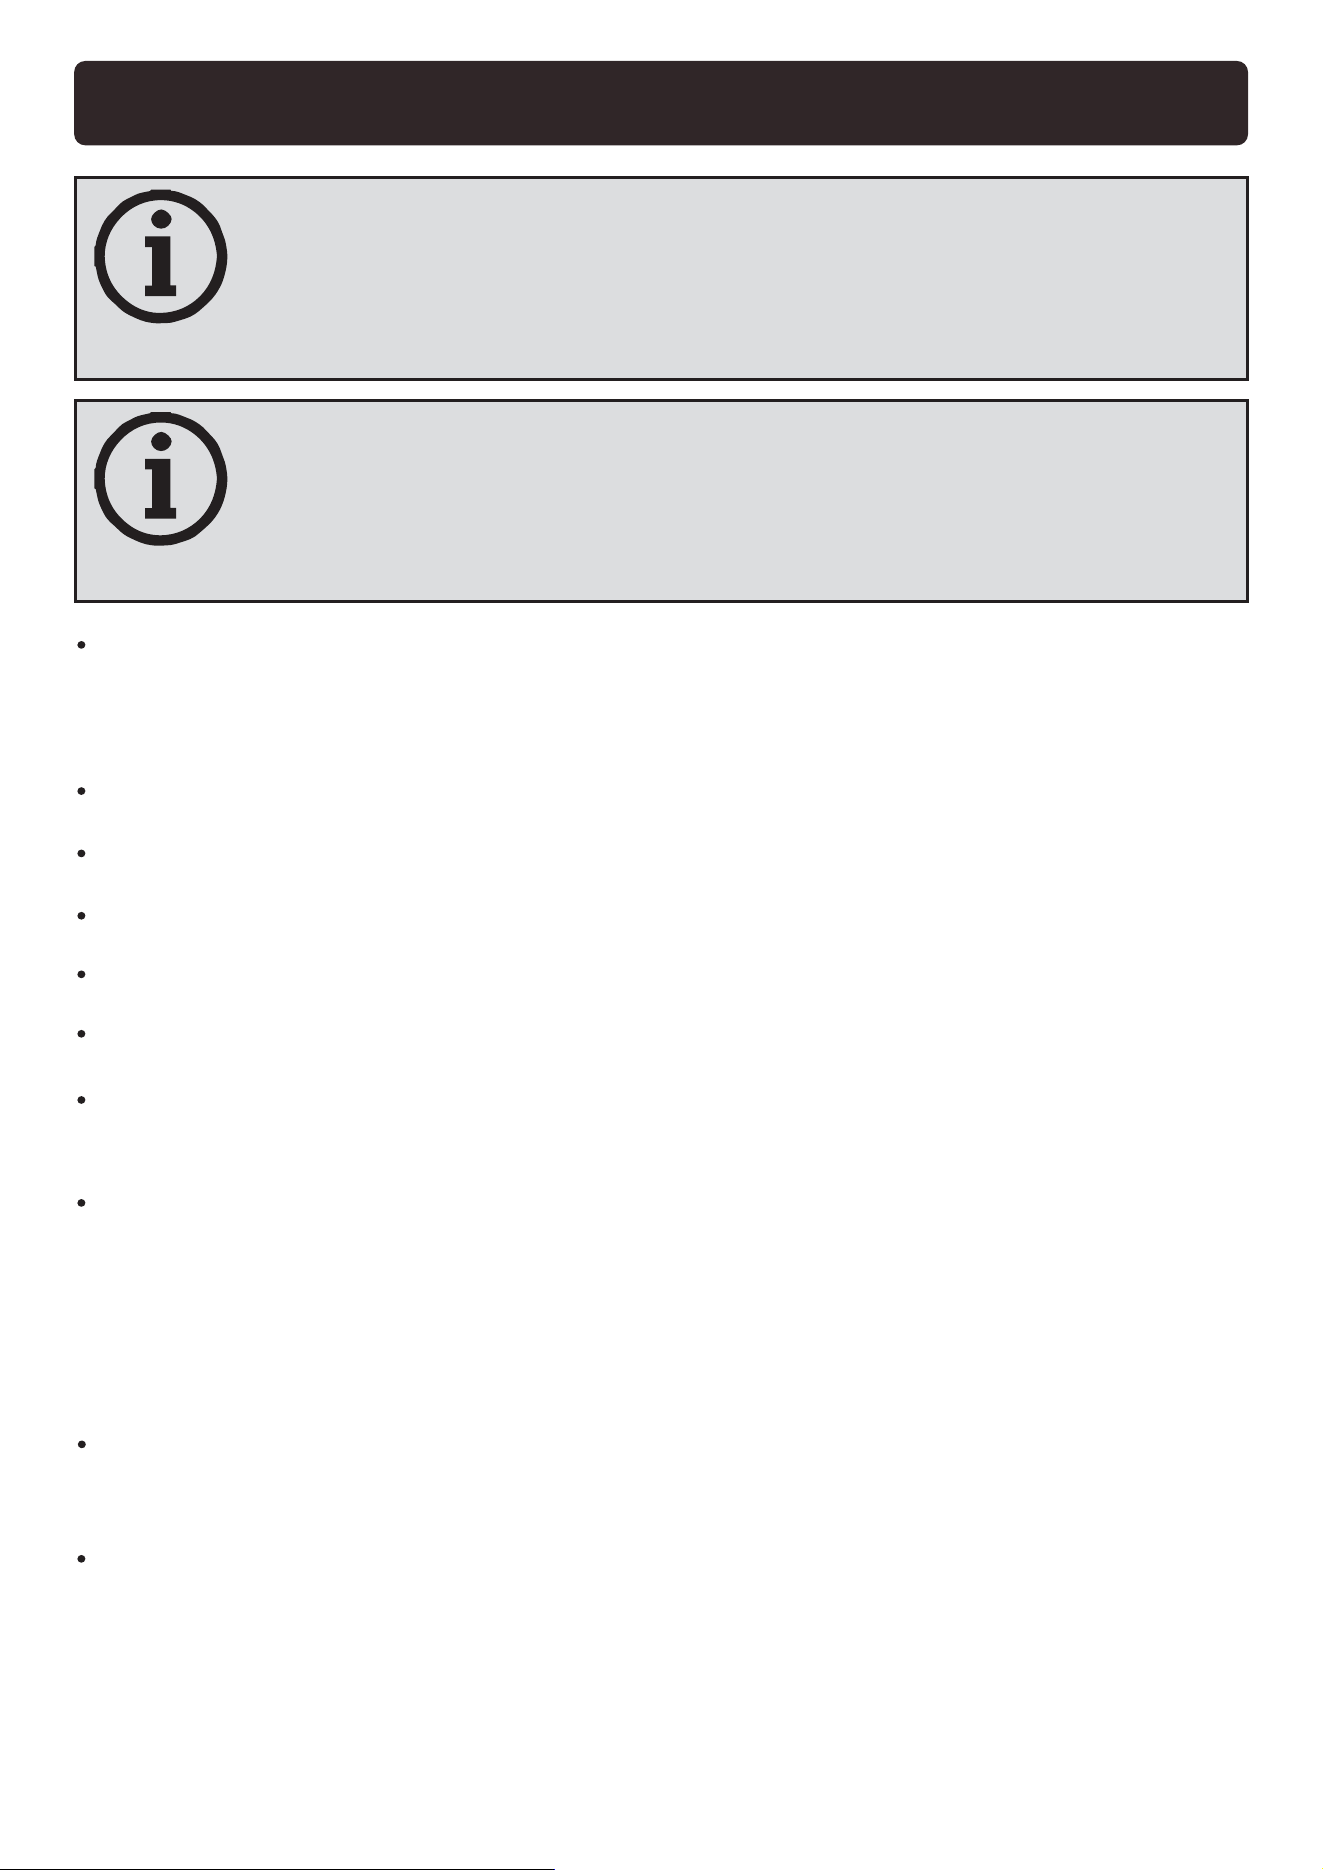
Place your device on a stable, horizontal, flat and heat-resistant surface.
Leave a space of at least 10cm on the top and sides of your device for
air circulation.
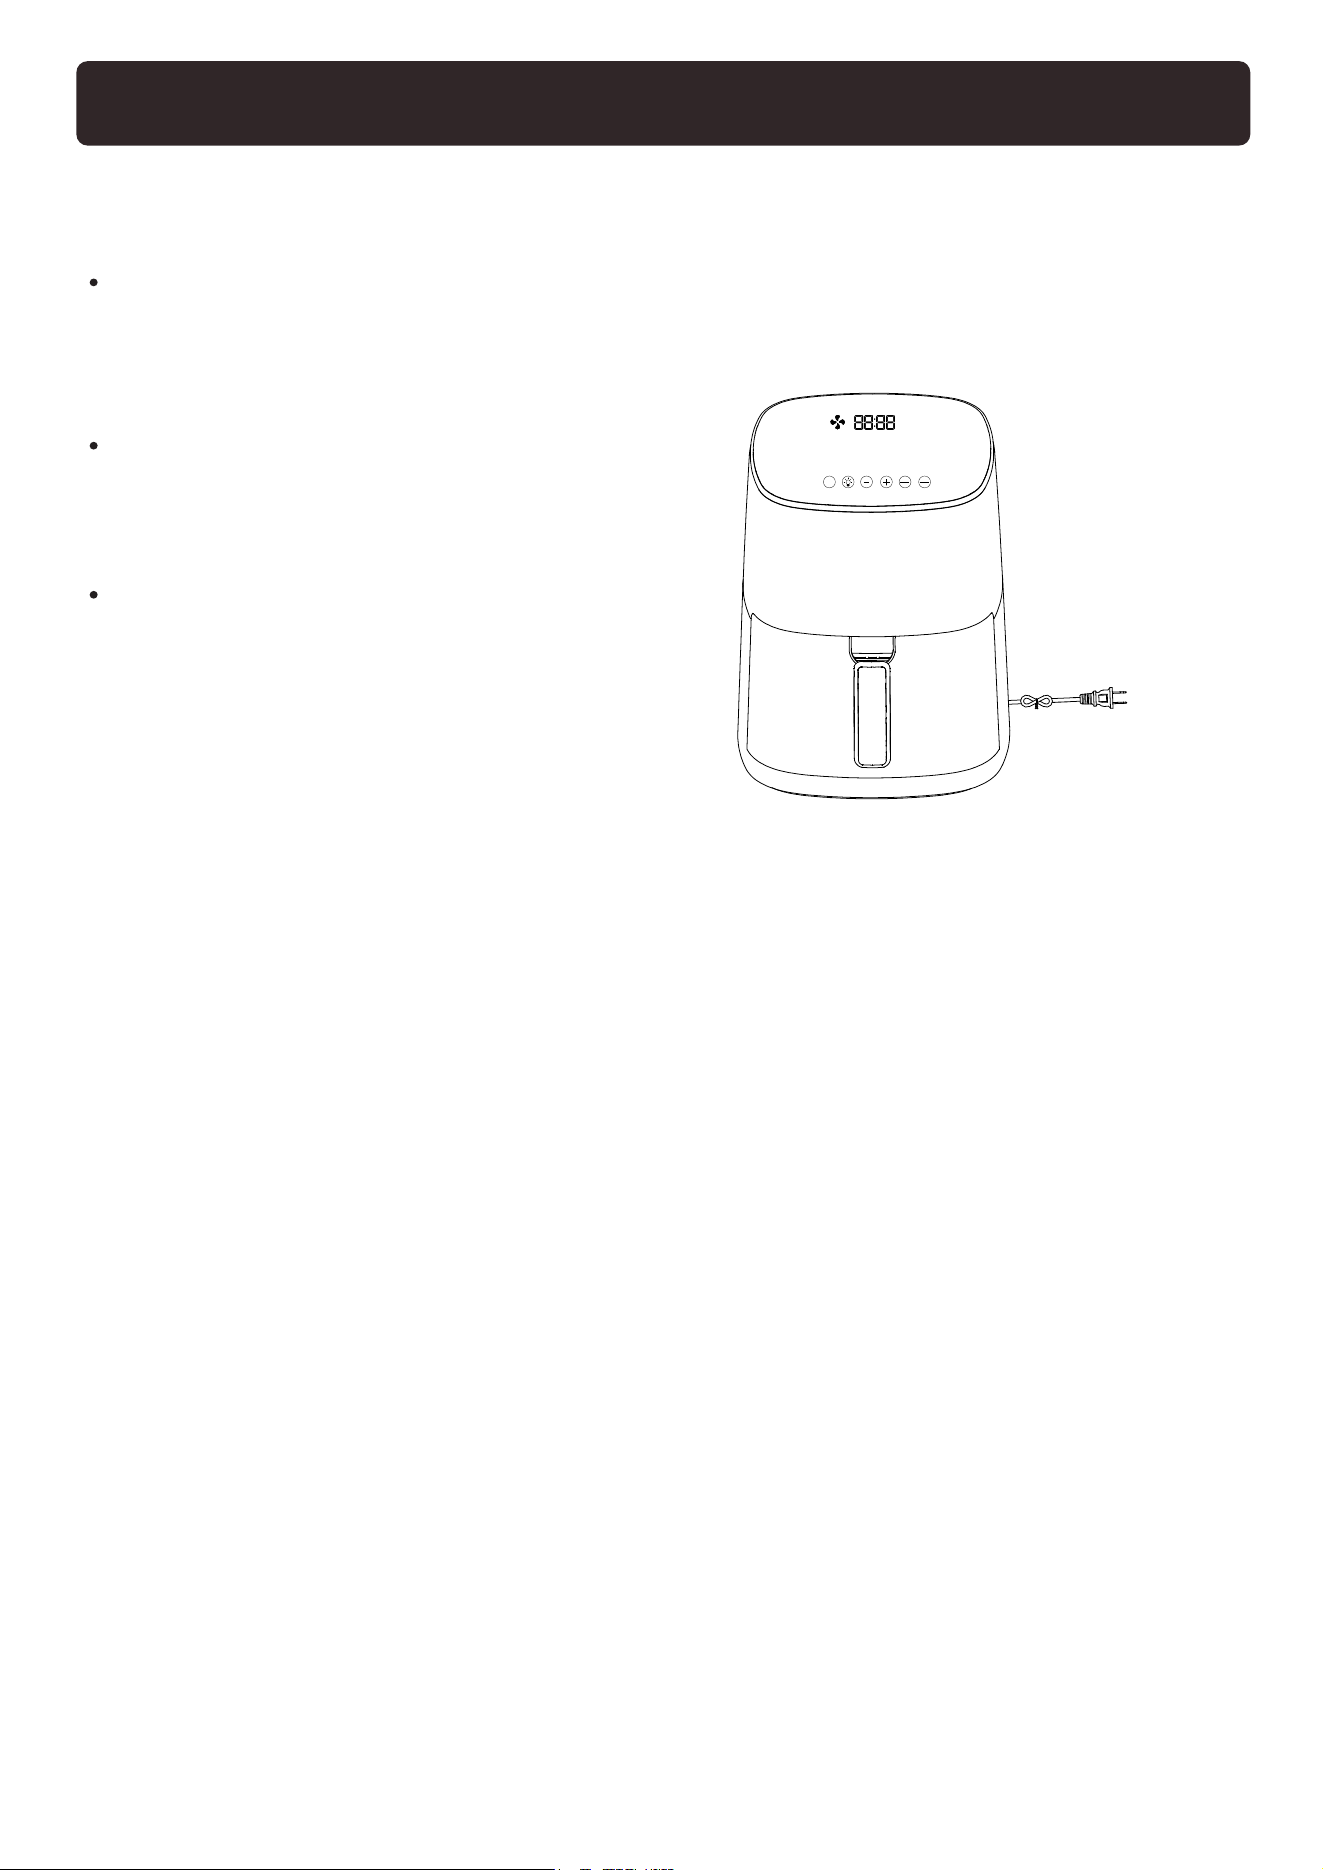
Plug the plug-in cable into the socket.
Insert the cooking pot frying plate.
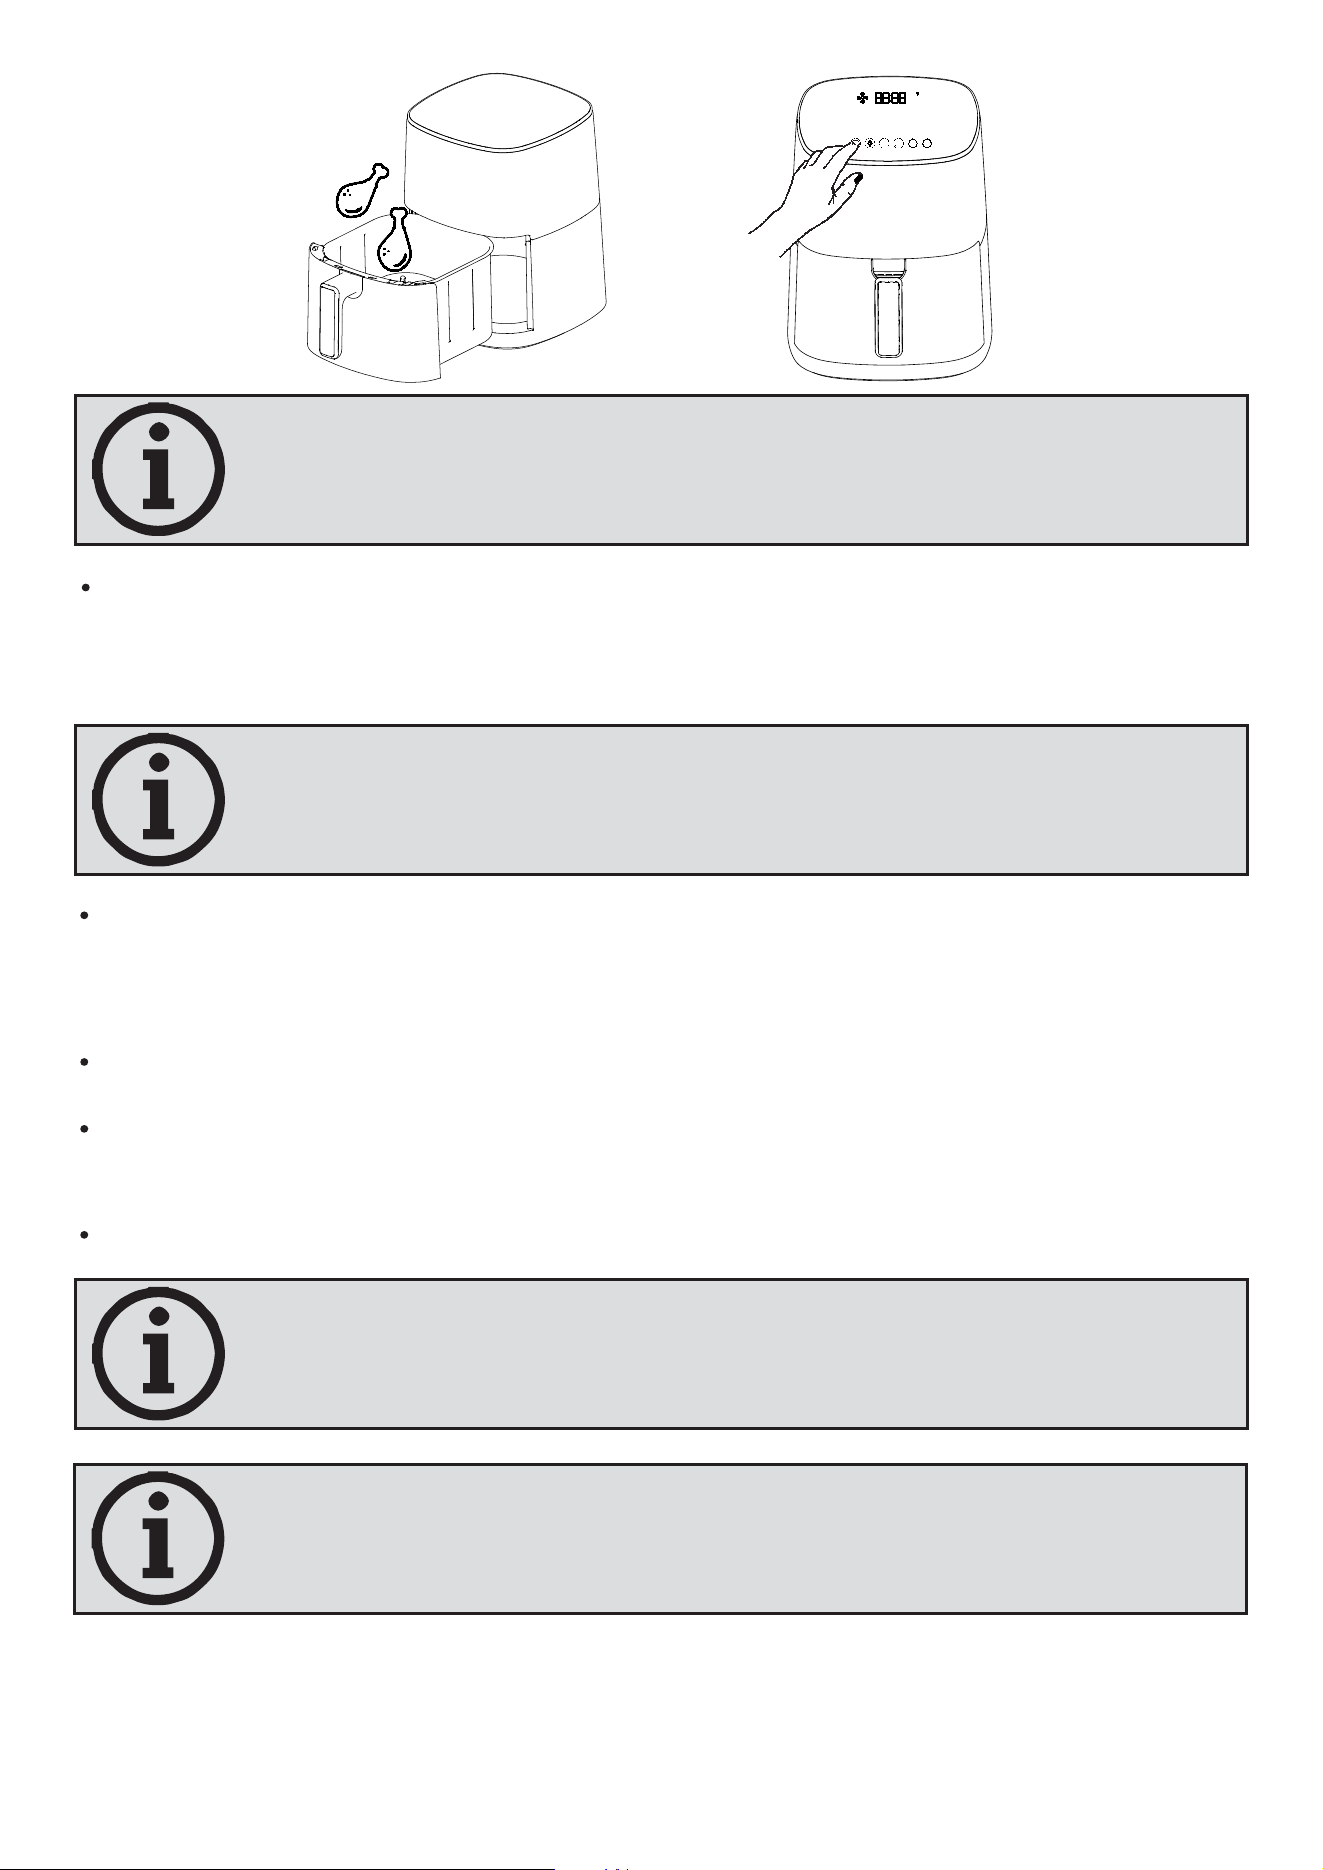
Place the food on the frying plate. Push the cooking pot into the fryer.
The fryer will be ready to cook when the cooking pot is fully inserted.
Press the Start/Stop button on the control panel.
Select the cooking mode according to the food you will cook from the
Menu button.
The highest setting temperature is 400°F and the lowest is 105°F. Long
press can continuouslyincrease or decrease.The longest setting time is 12
Hours, and the shortest is 1 min. Long press can continuously increase
or decrease.
You can increase or decrease the temperature and time specified in the
cooking mode from the control panel.
for you, start cooking by pressing the Start/Stop button.
8
For effective cooking, preheat the fryer before you start
cooking.
If you remove the cooking pot for control purposes during cooking,
your device will turn off. When you push the pot back into place, it
continues to work from where it left off.
Cook your food in a controlled manner. You can increase or decrease
the cooking time and temperature to cook your food to the desired
consistency.
Your appliance will turn off automatically when the cooking time is up.
Remove the cooking pot, press the basket release button, remove the
frying basket and place the food on the serving plate.
Do not pour the food in the cooking pot onto the serving plate
without release the frying basket. Excess oils that flow during
cooking can mix with your food again and affect its flavor.
Do not operate your appliance only with the cooking pot
without the frying plate.
Unplug your device and let it cool down before cleaning.
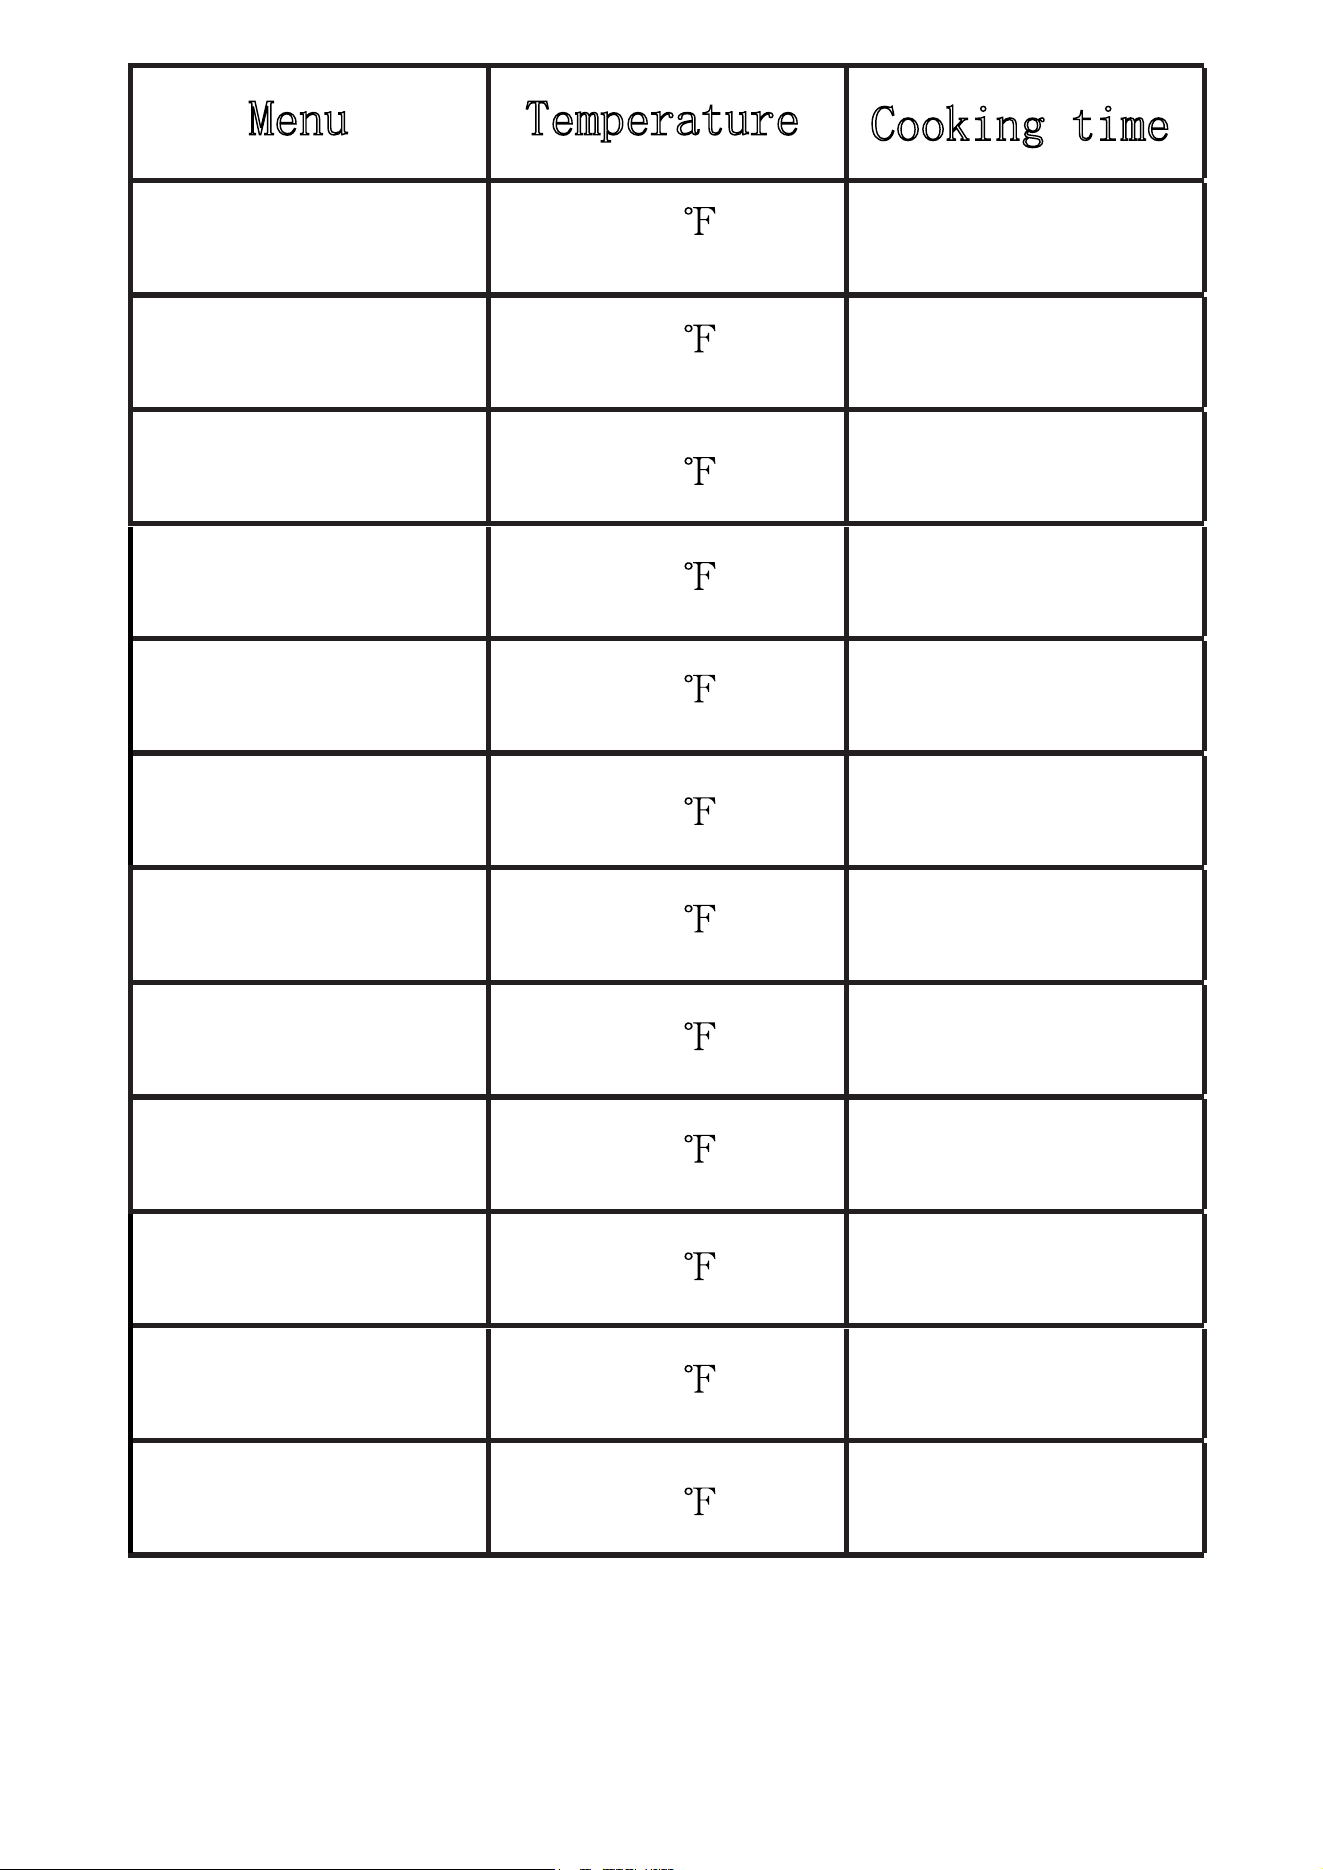
The table below gives information about cooking according to the food
Values foryour taste may differ.You can increase ordecrease thetemperature
and time according to the amount of food or your taste.
For even cooking, pull out the basket halfway through the
cooking time. Shake the cooking pot or turn your food with the
help of tongs and push the pot back into place.
MENU
Time
Temp
Start
Cancel
VEGE
-
TABLES
SEA
FOOD
WINGS
CUSTARD
TART
STEAMFRIES
CHICKEN
DEHY-
DRATE
REHEATBAKEROAST
AIR
FRY
MIN
Menu Temperature
Cooking time
AIR FRY
ROAST
BAKE
REHEAT
DEHYDRATE
CHICKEN
FRIES
STEAM
CUSTARD TART
WINGS
SEAFOOD
VEGETABLES
400
375
325
350
150
350
400
370
340
400
350
365
20min
15min
15min
15min
6hrs
25min
15min
15min
13min
15min
10min
12min
9
USING YOUR AIR FRYER
10
Cooking Functions
Air Frying
Do not place anything on top of your air fryer. This may interfere with
your cooking prgram or cause cracks in the glass on the dispay.
[Figure 2.1]
An air fryer is not a deep fryer.
Do not fill the basket with oil,
frying fat, or any liquid.
When taking the basket out
of the air fryer, be careful
of hot steam.
1. Press the function's button to select the function. The air fryer will
automatically change to the function's default settings.
[Figure 2.1]
3. Press and hold the + or - button to rapidly increase or decrease the
2. You can change a function's time (1-12 Hours), temperature
(105°- 400°F).
time or temperature.
Using a cooking function is the easiest way to air fry. Cooking functions
are programmed with an ideal time and temperature for cooking
4. To go back to a function's default settings, press the function's button
again.
certain foods.
VEGE-
TABLES
SEA
FOOD
WINGS
CUSTARD
TART
STEAMFRIES
CHICKEN
DEHY-
DRATE
REHEAT
BAKE
ROAST
AIR
FRY
MIN
°F
Start
Cancel
Time
Temp
MENU
CARE & MAINTENANCE
11
Note: Make sure the heating coil is
completely dry before turning on the
air fryer.
Always clean the air fryer basket and crisper plate after every use.
Lining the basket with foil (except the crisper plate) may make
cleanup easier.
1. Turn off and unplug the air fryer. Allow it to cool completely before
cleaning. Pull out the basket for faster cooling.
2. Wipe the outside of the air fryer with a moist cloth, if necessary.
3. You can wash the basket and crisper plate with hot, soapy water and
a non-abrasive sponge. Soak if necessary.
Note: The basket and crisper plate have a nonstick coating. Avoid using
metal utensils and abrasive cleaning materials.
4. For stubborn grease:
5. Clean the inside of the air fryer with a slightly moist, non-abrasive
sponge or cloth. Do not immerse in water. [Figure 3.1] lf needed, clean
the heating coil to remove food debris.
[Figure 3.1]
6. Dry before using.
a. In a small bowl, mix 2 Us tbsp/30mL of baking soda and 1 Us tbsp/
15mL of water to form a spreadable paste.
b. Use a sponge to spread the paste on the basket and crisper plate and
scrub. Let the basket and crisper plate sit for 15 minutes before rinsing.
c. Wash basket with soap and water before using.
VEGE-
TABLES
SEA
FOOD
WINGS
CUSTARD
TART
STEAMFRIES
CHICKEN
DEHY-
DRATE
REHEATBAKE
ROAST
AIR
FRY
MIN
°F
Start
Cancel
Time
Temp
MENU
TROUBLESHOTING
12
Send to the maintenance point for
maintenance.
Send to the maintenance point for
Send to the maintenance point for
maintenance.
maintenance.
1

CLEANING and MAINTENANCE
TRANSPORTATION and SHIPMENT
13
Before cleaning your device, be sure to read the Safety Rules.
You should cleaned your device thoroughly after every use.
Before cleaning, you should unplug from the socket and wait for your
device to cool.
Remove the cooking pot and frying basket.
Wipe the inner and outer parts of the main body of your device with a
damp cloth and dry it. Clean metal parts carefully to avoid injury.
Never immerse the main body of your device in water.
The cooking pot and frying basket can be washed by hand.
Use a soft sponge and cleaning brush for hand washing and make sure
to dry it.
Soak in hot soapy water to easily remove burnt oil and food particles.
Clean with a sponge and brush, rinse thoroughly and dry.
Do not use hard scouring pads and abrasive detergents in order not to
damage the main body and accessories of your device.
Keep the packaging and the packaging material for a possible transfer
of the appliance.
Appliance shall be carried in its original package or by wrapping the
appliance with a soft cloth that would protect the surroundings of the
appliance.
Plastic parts may be broken or electrical equipment may be damaged in
case of incorrect packing.
Placing heavy objects on the appliance or its packaging may cause
damage to the appliance.
14
WARNING:
Protect the appliance and accessories from impacts during operation.
Warranty shall be invalid for the damages that occur due to impacts and
dropping.
The legal life cycle of the appliance is 7 years.
Thank you for choosing this product. We strive to provide you with the
best quality products and services in the industry. Should you have
any issues, please don't hesitate to contact us.
Technical Support
(909)4407450