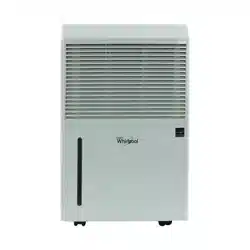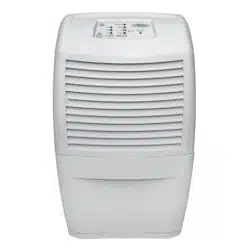
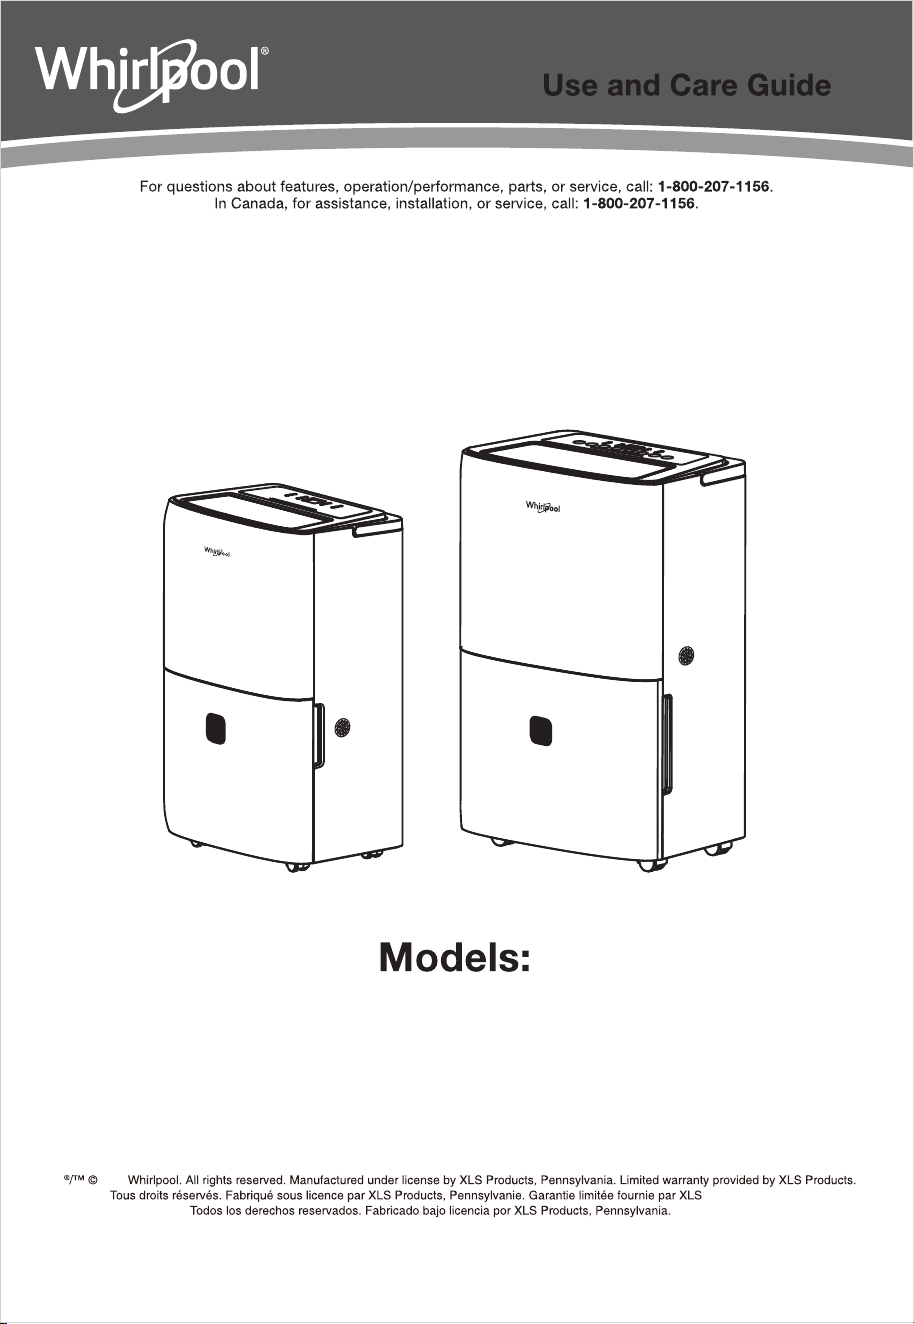
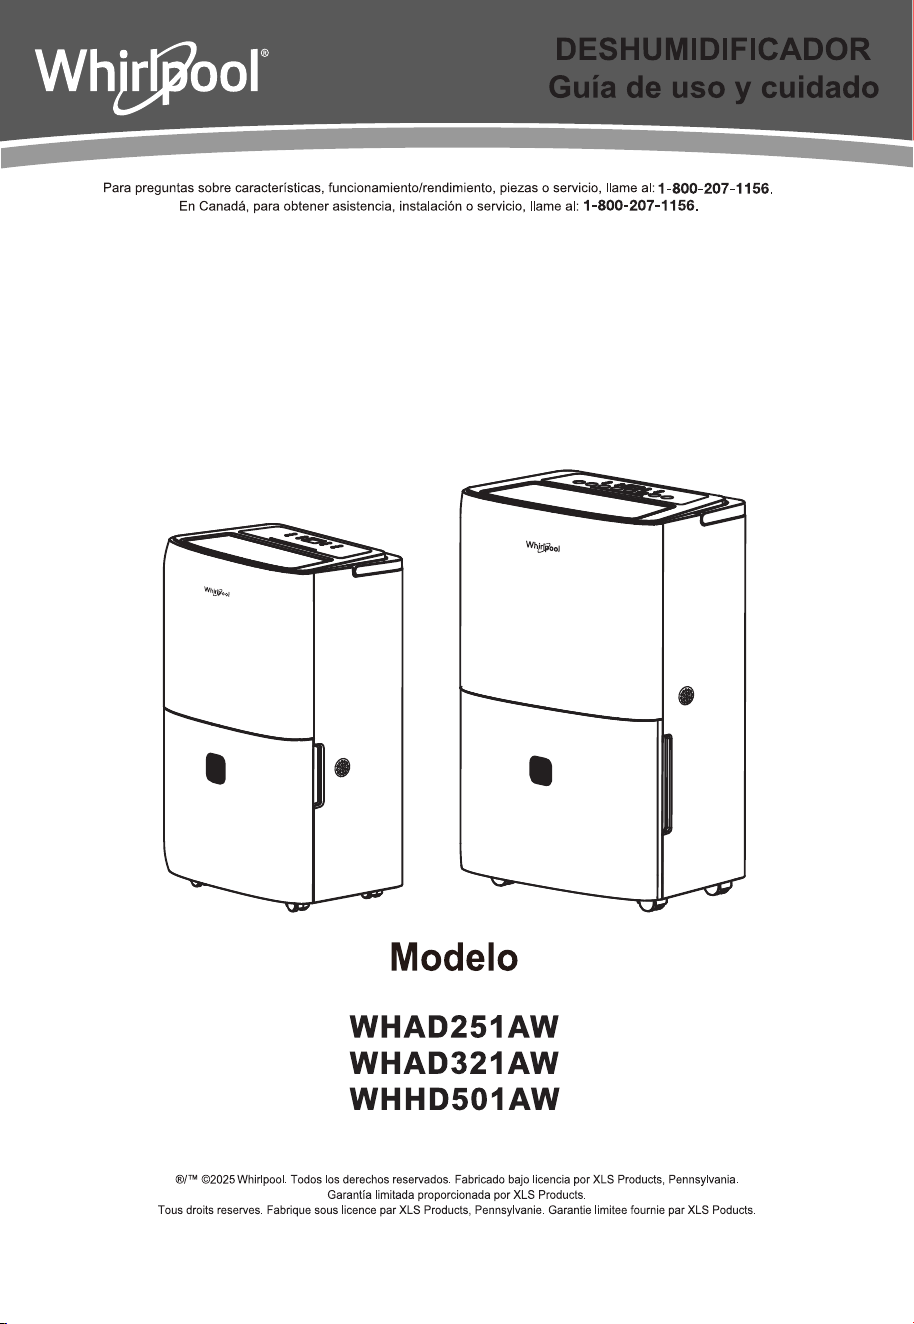
WHAD251AW
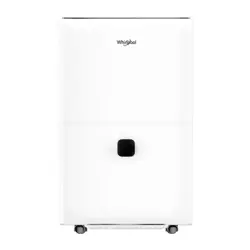
WHAD321AW
WHHD501AW
W11 740391A 09/ 25
DEHUMIDIFIER
2025
Products.
封⾯与封底图⽰如下:
彭丽影
20250917
封⾯封底
徐嘉奇
韦辉学
811310***
****(US).00-SMS
****(US).00-SMS
刘志强
颜永强
何伟杰
W11 740391A 09/ 25
16
2025
Products.
WHAD251AW
WHAD321AW
WHHD501AW
W11740391A
09/25
DEHUMIDIFIER
2025
Products.

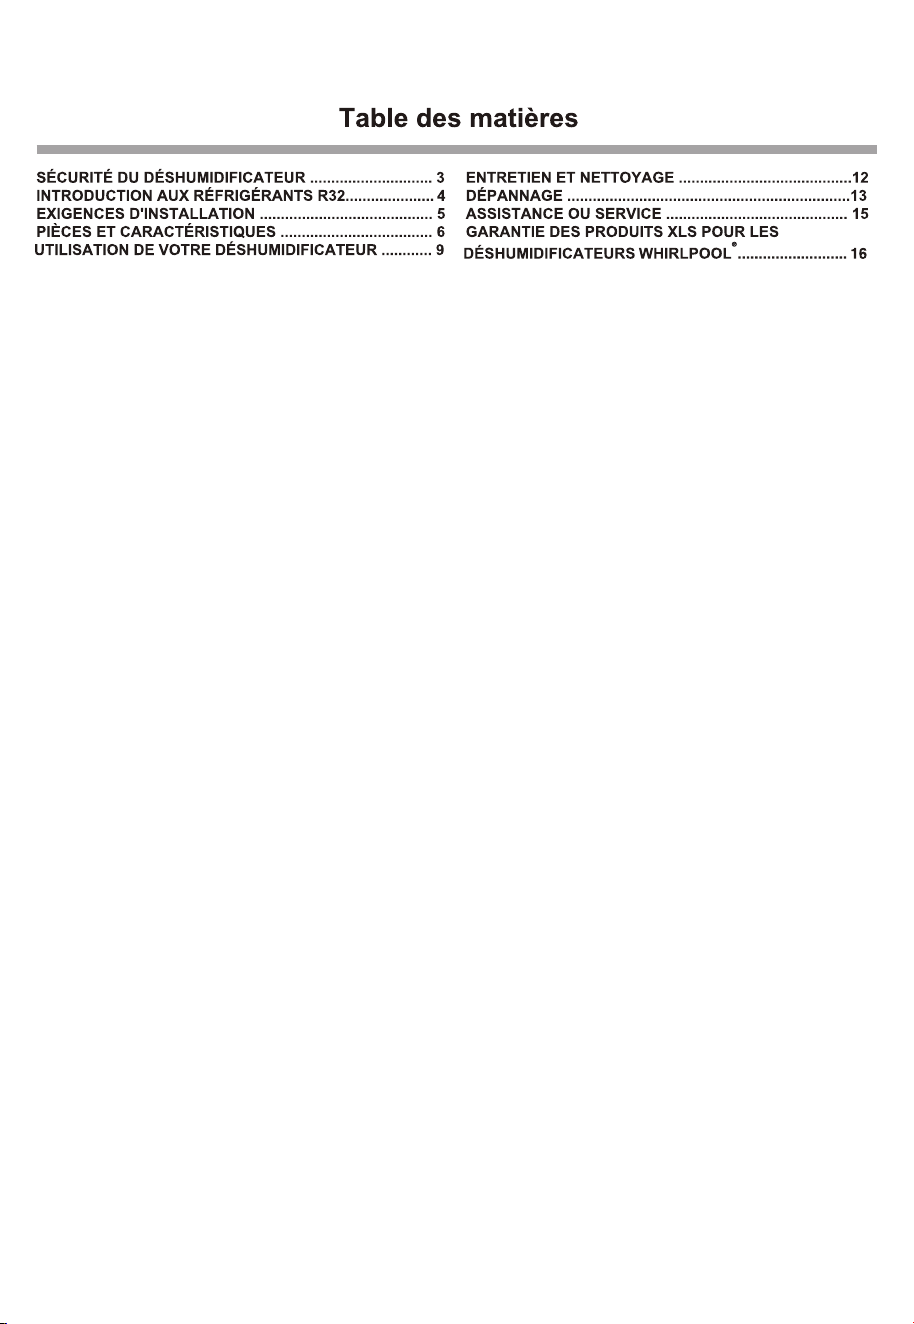
CARE AND CLEANING .................................................... 12
TROUBLESHOOTING ...................................................... 13
ASSISTANCE OR SERVICE ............................................. 15
XLS PRODUCTS WARRANTY FOR
®
WHIRLPOOL DEHUMIDIFIERS ...................................... 16
DEHUMIDIFIER SAFETY ................................................... 3
INTRODUCTION TO REFRIGERANTS R32........................ 4
INSTALLATION REQUIREMENTS ..................................... 5
PARTS AND FEATURES .................................................... 6
USING YOUR DEHUMIDIFIER ........................................... 9
dehumidifier
dehumidifier
dehumidifier
3
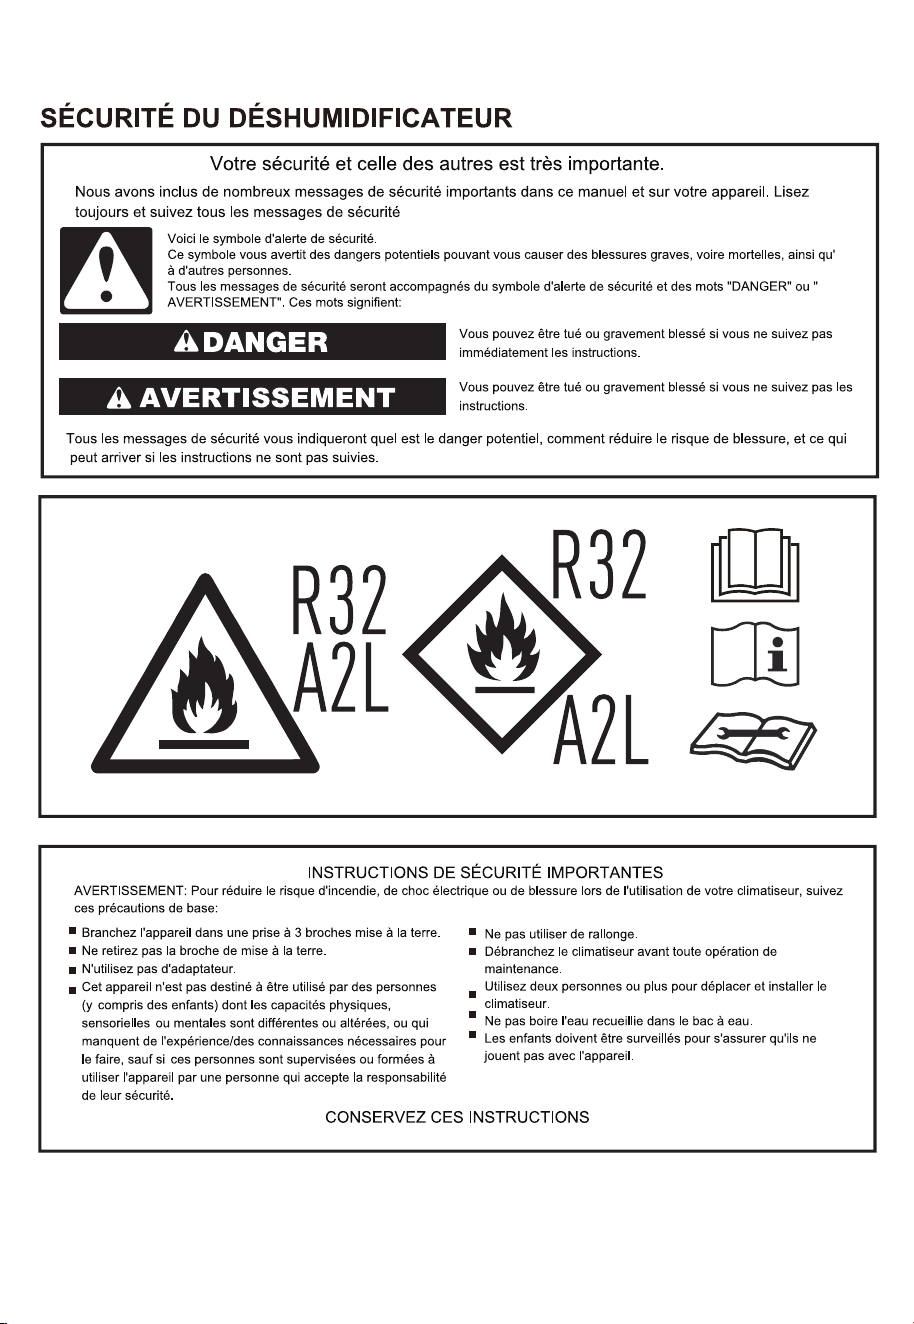
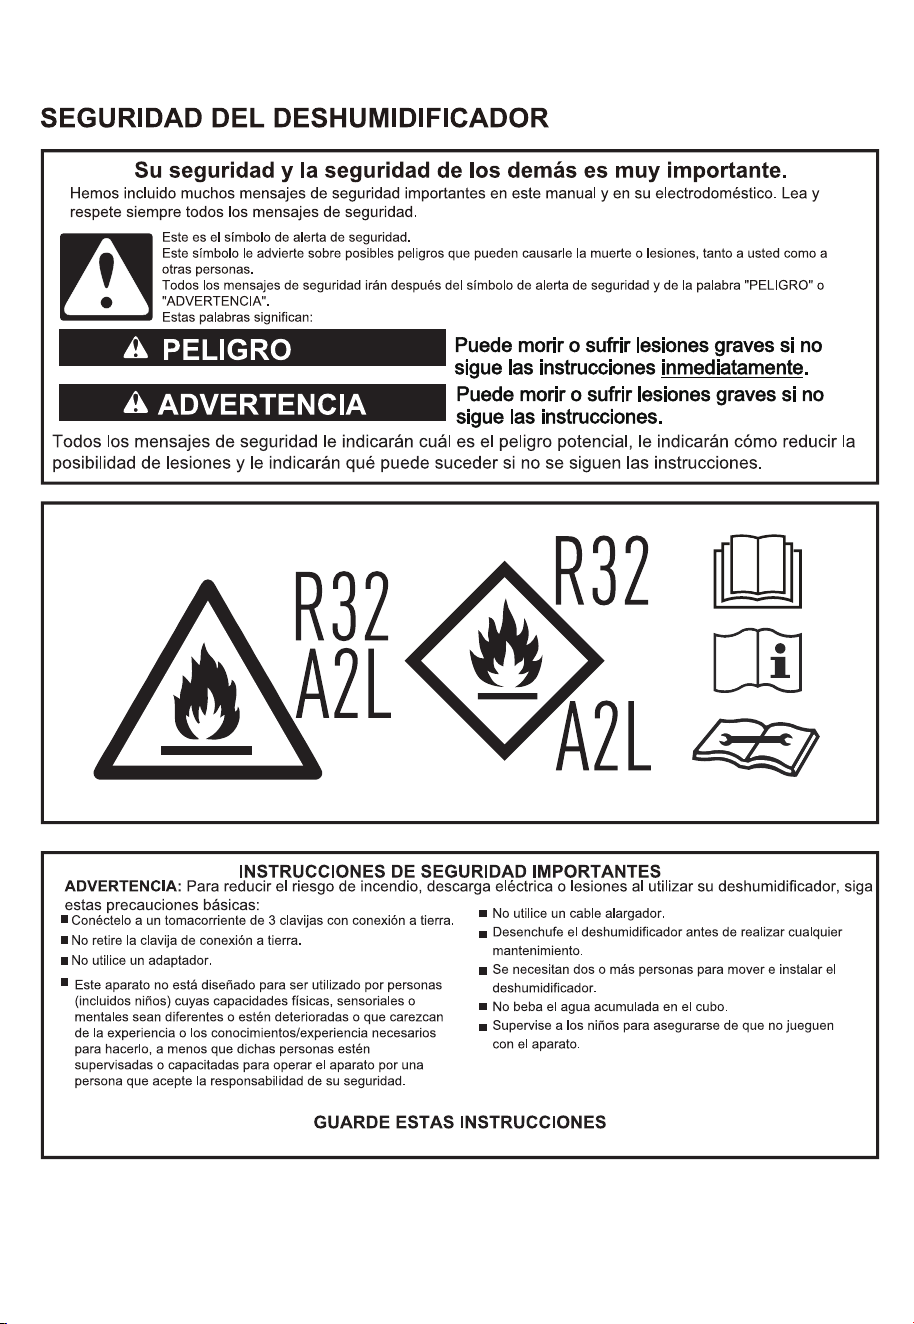
This appliance is for household use only.
Always transport your appliance in a vertical position and place on a stable, level surface during use. If the unit is transported
laying on its side, it should be stood up and left unplugged for at least 6 hours.
dehumidifier
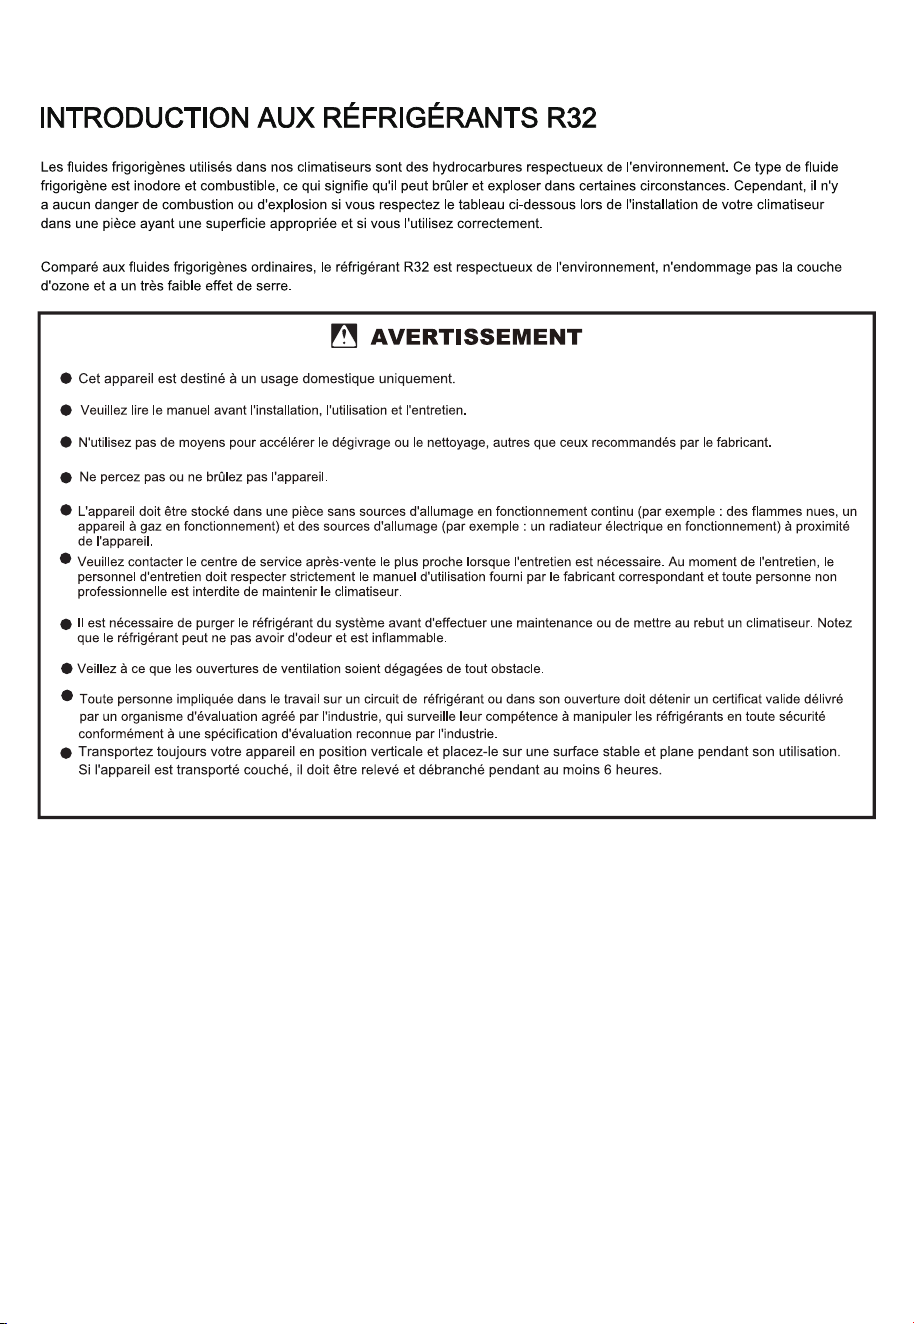
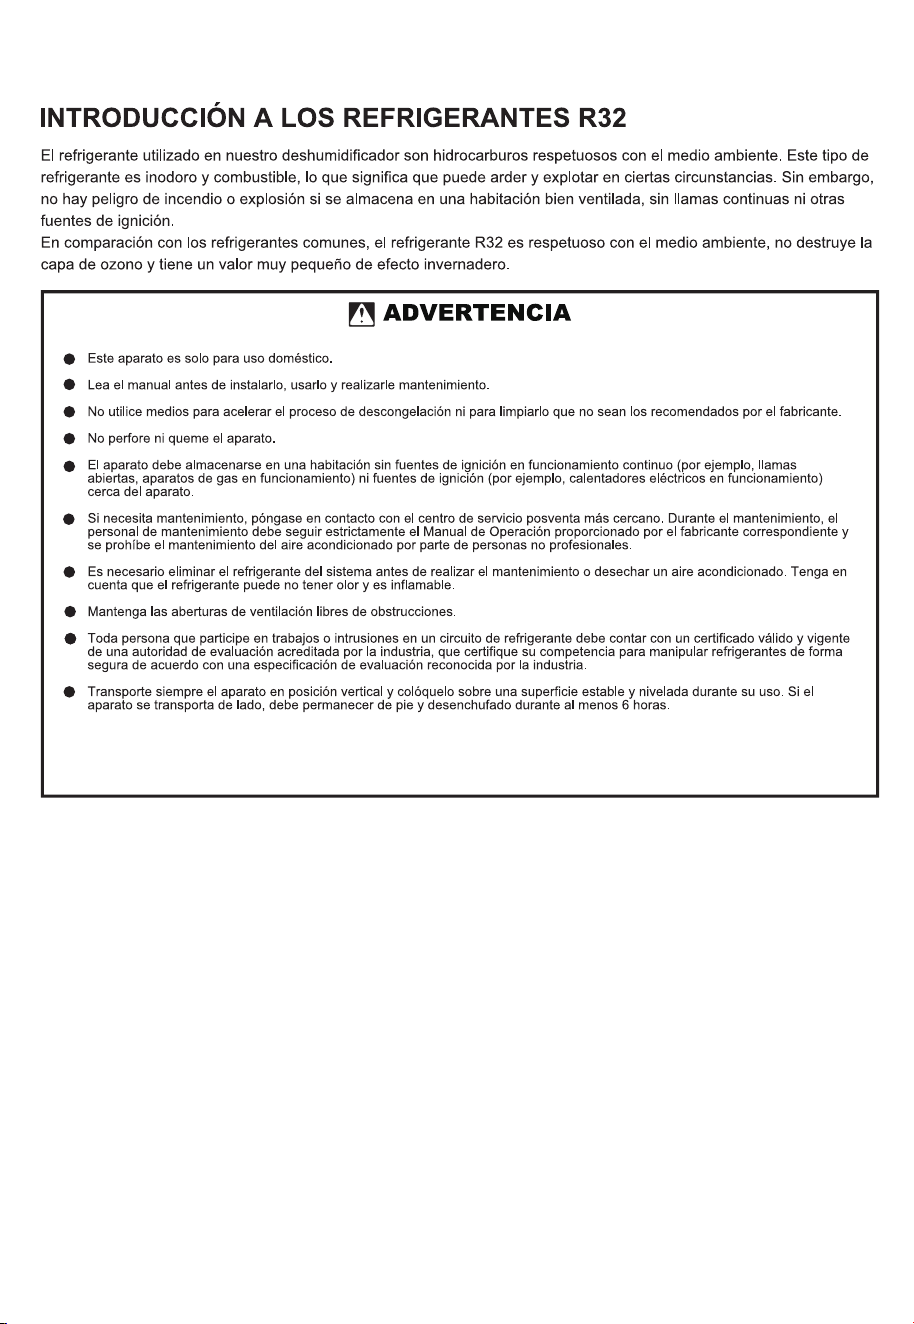
However, there is no danger of burning or exploding
if you store in a well ventilated room without continuously operating flames or other potential ignition.
4
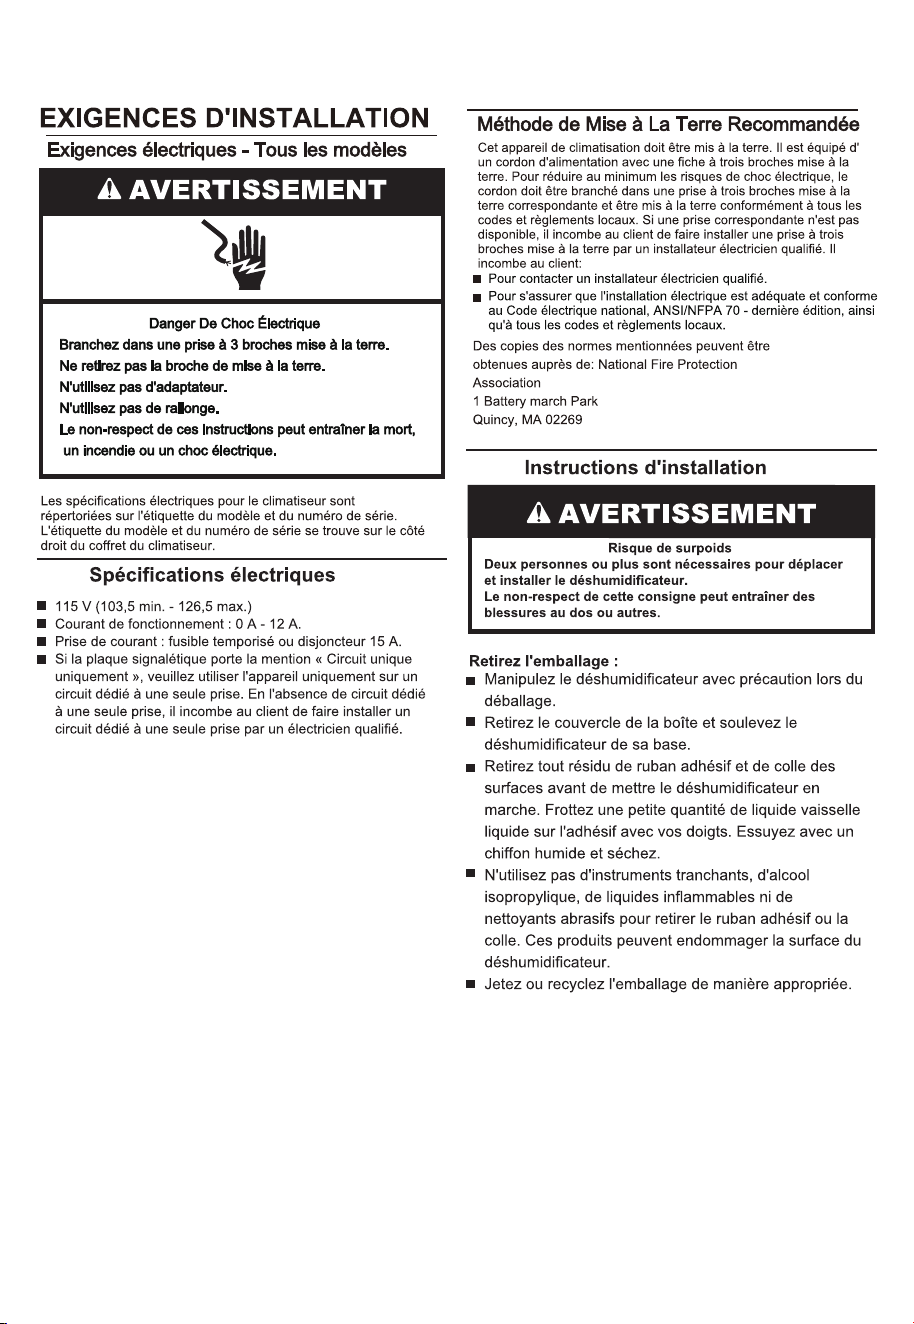
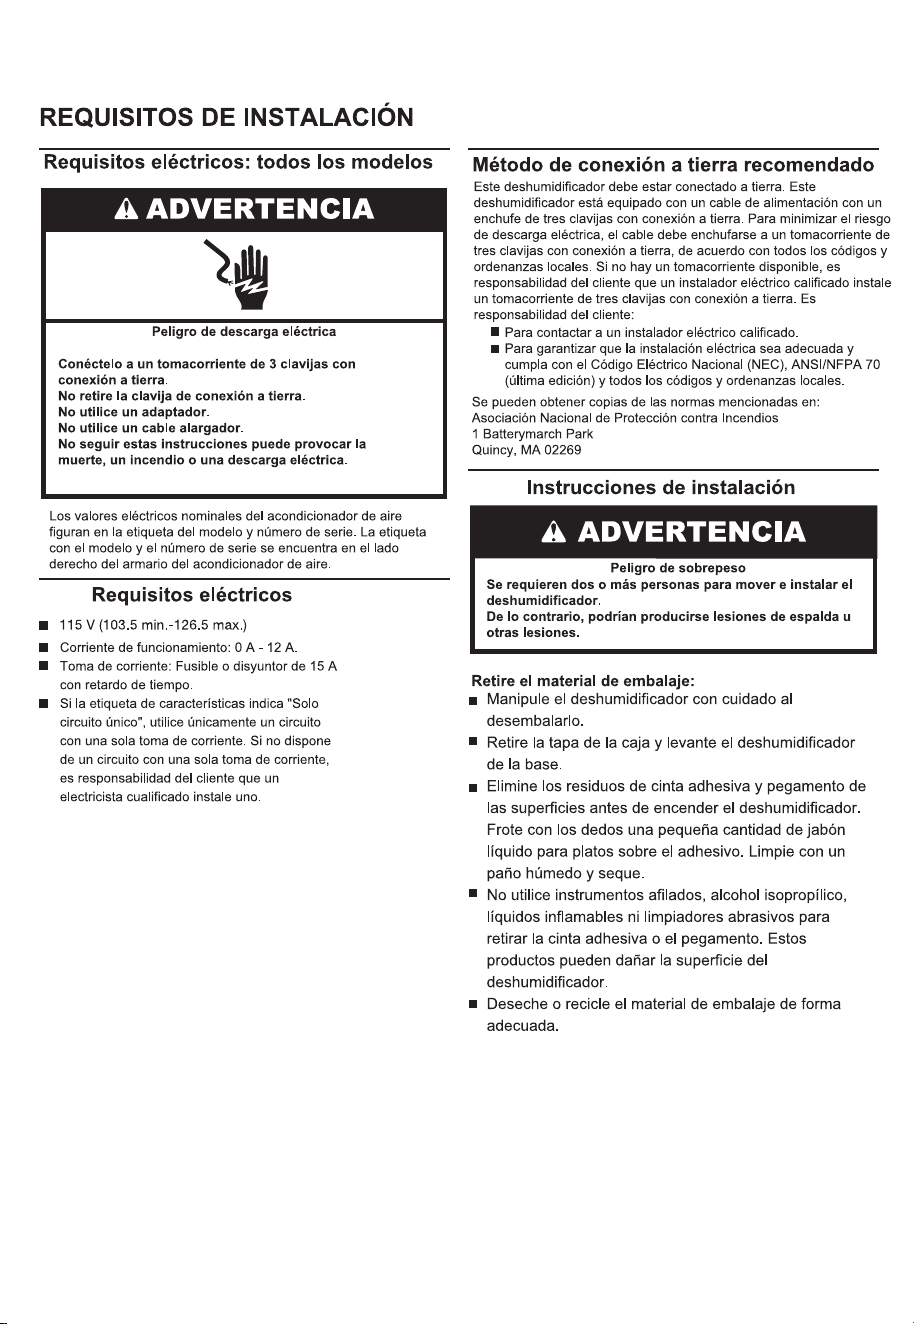
If there is a "Single Circuit Only" label on the rating label, please
use on a
Operating current: 0A - 12A.
Power socket: 15 A time-delay fuse or circuit-breaker.
or
To
To
of the dehumidifier cabinet.
.The serial number label is on the back
5
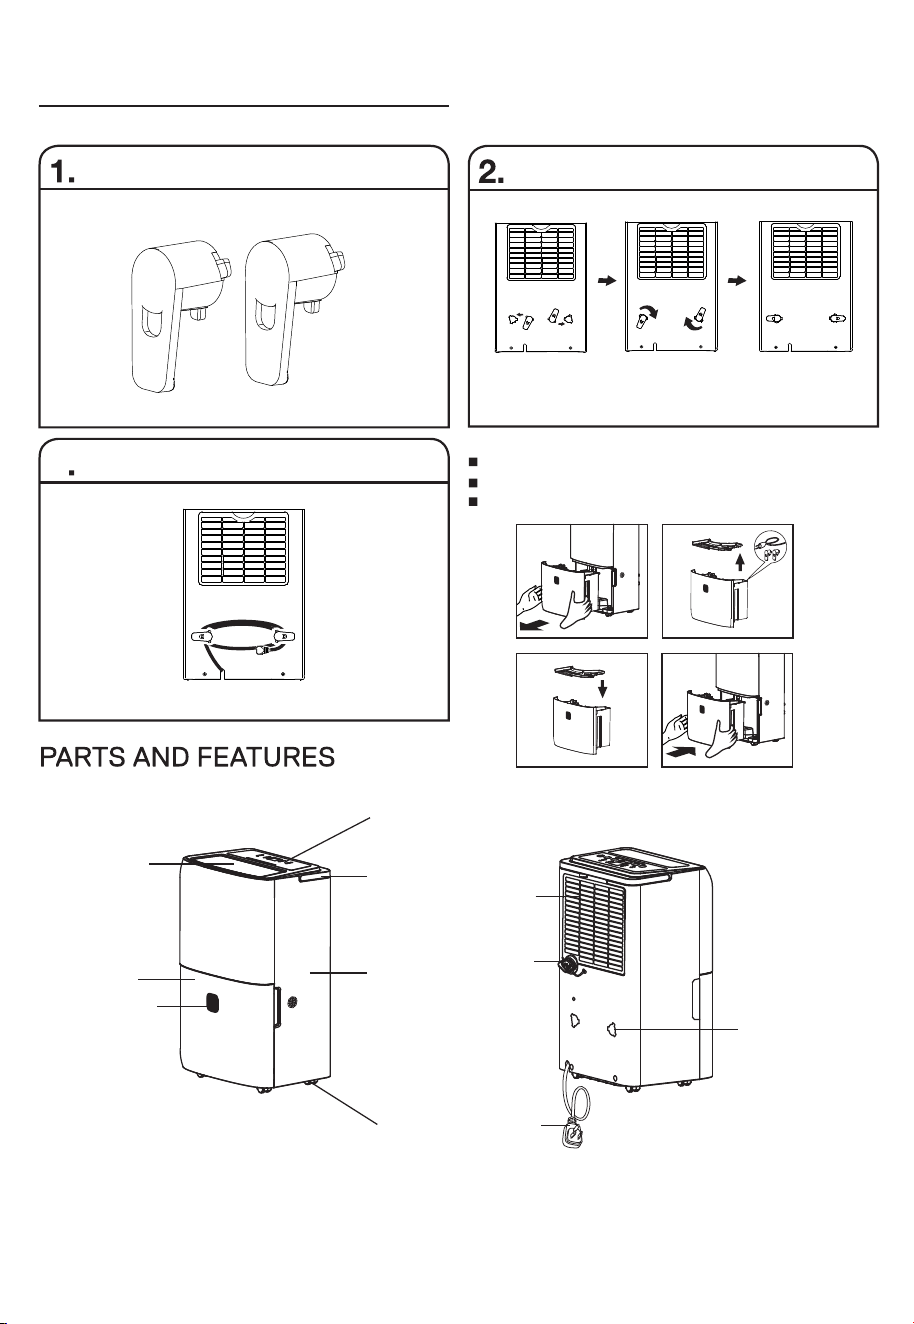
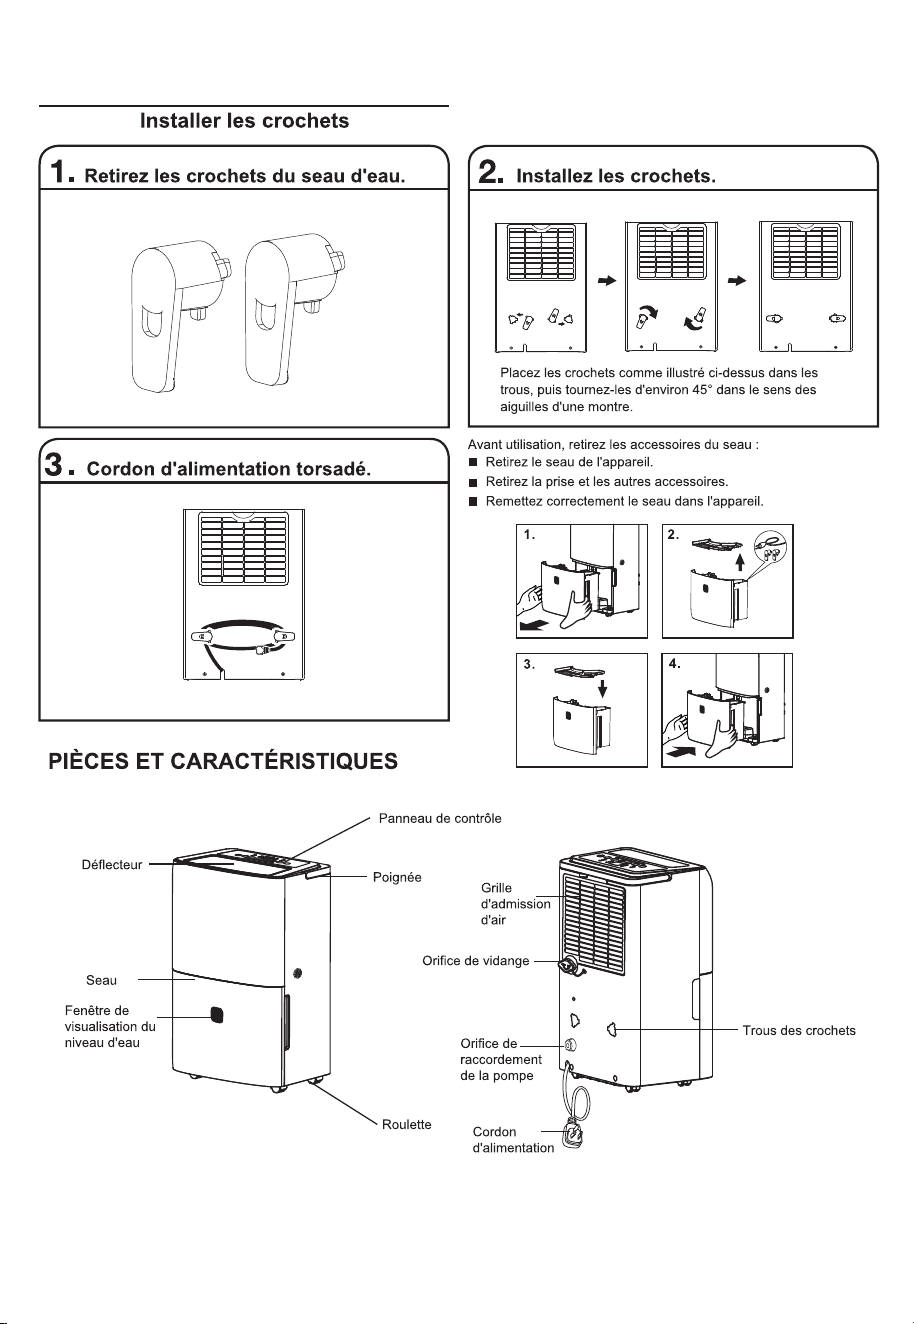
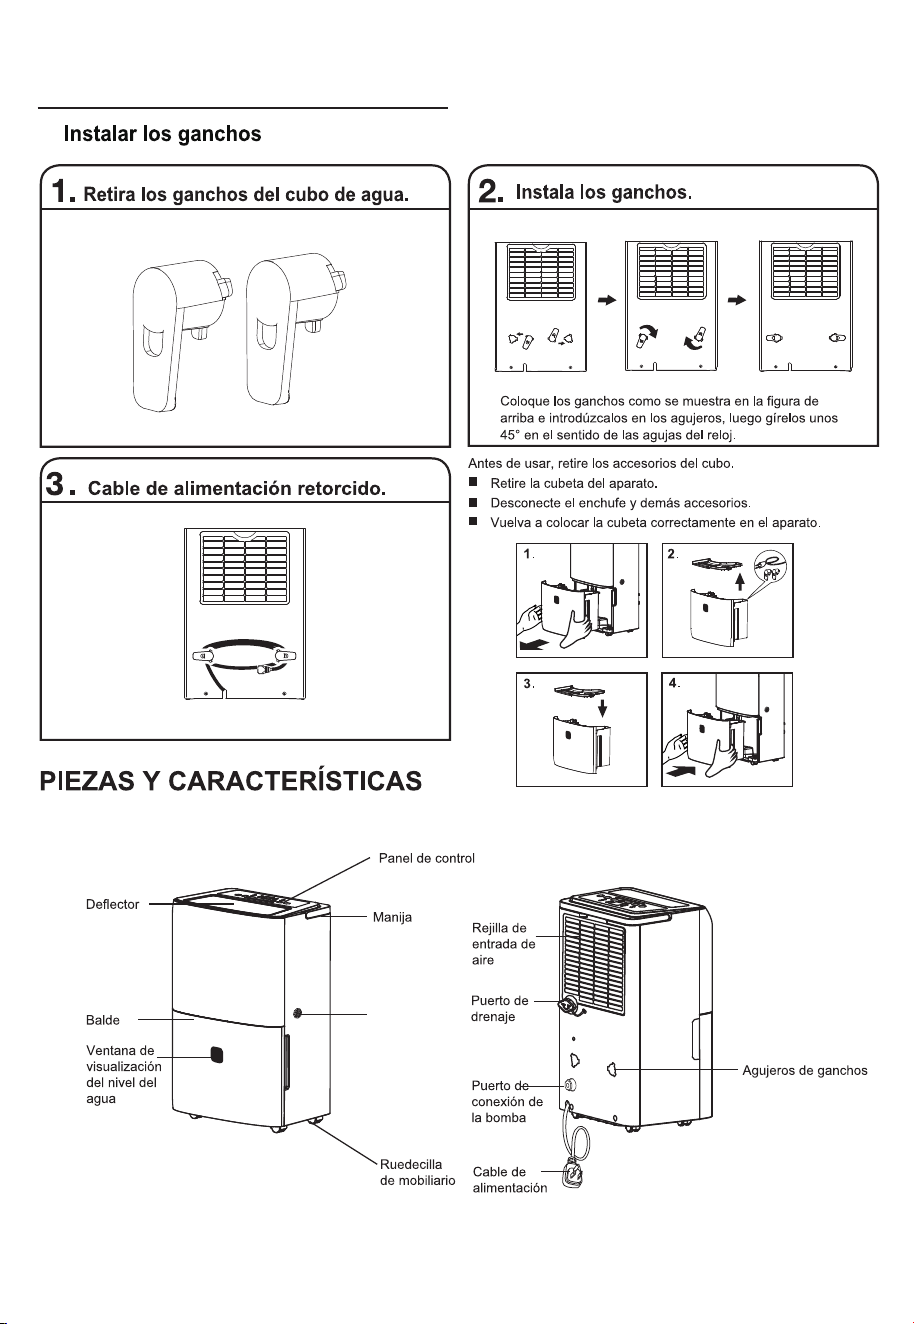
Take the hooks out of the water bucket. Install the hooks.
3
Install The Hooks
Air intake
grille
Power cord
Drain port
Holes of hooks
Control panel
Deflector
Bucket
Water level
view window
Handle
Caster
Before use, remove the accessories from the bucket
Remove the bucket from appliance.
Take out the plug and other accessories.
Correctly put back the bucket into the appliance.
Put the hooks like above figure, and put them in the holes,
then turn round about 45°clockwise.
Twisted power cord.
2.
3.
1.
4.
Humidity
sensor
6
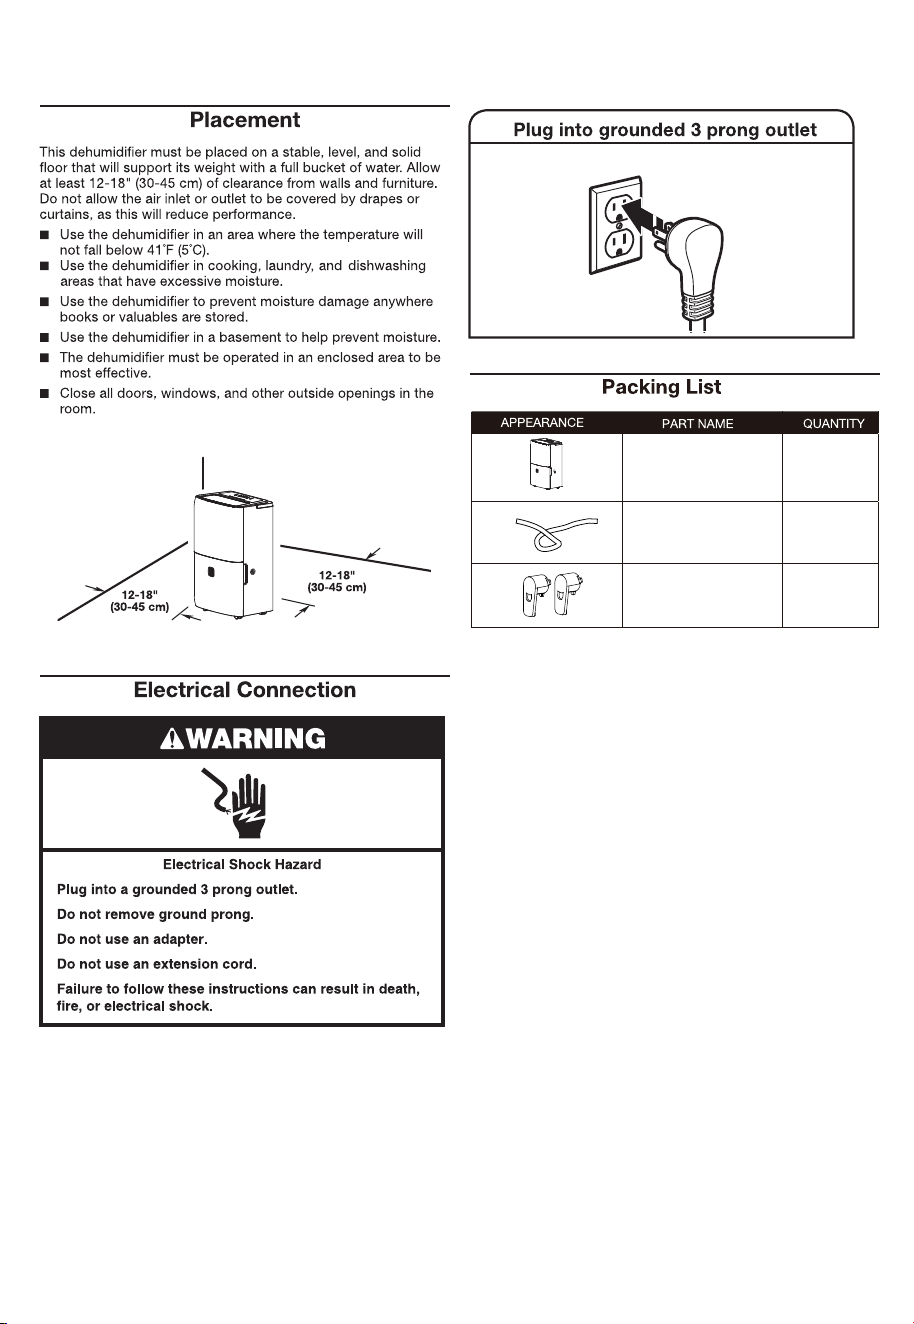
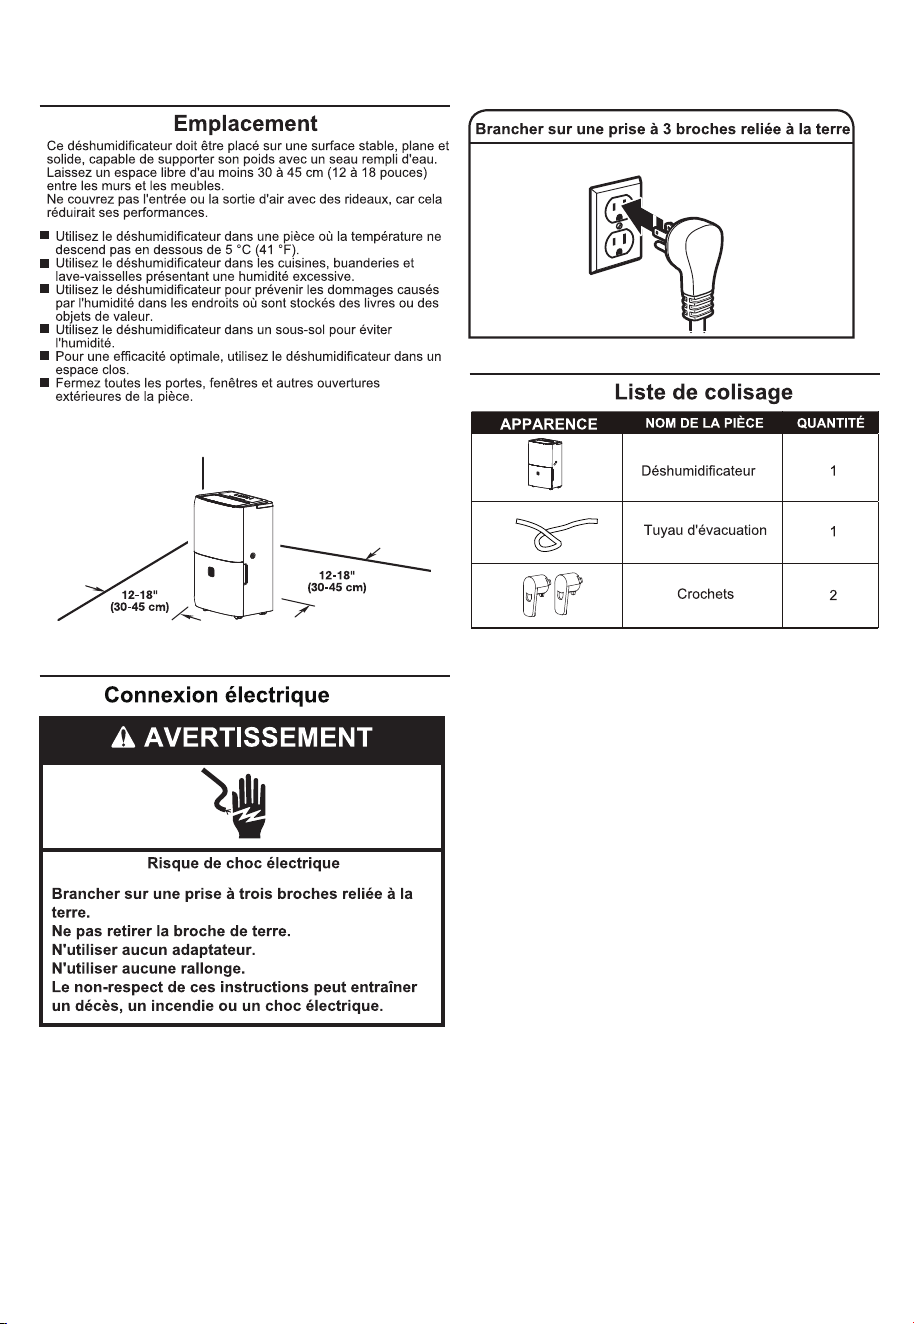
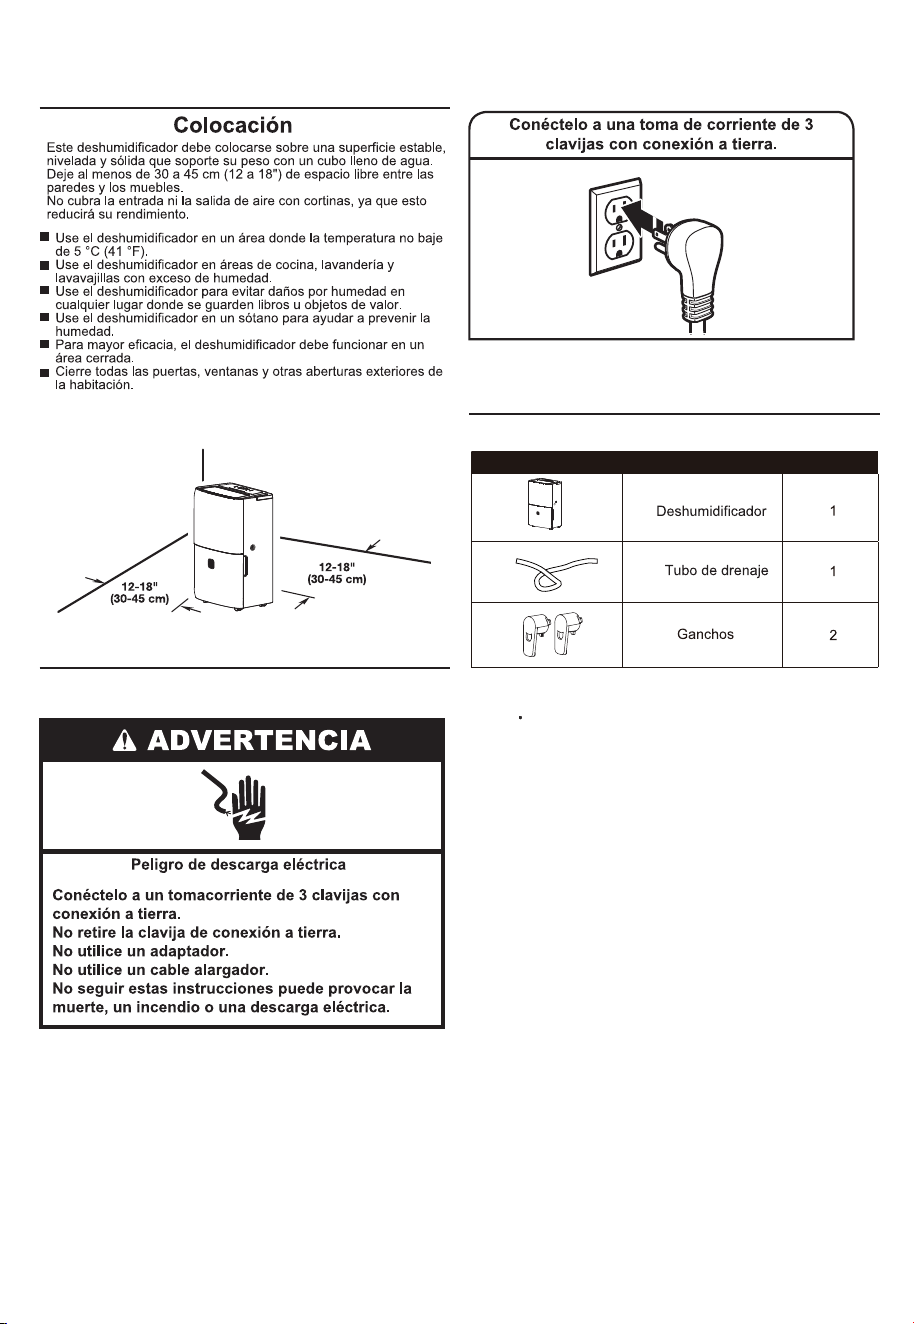
Dehumidifier
1
Drain pipe
1
Hooks
2
7
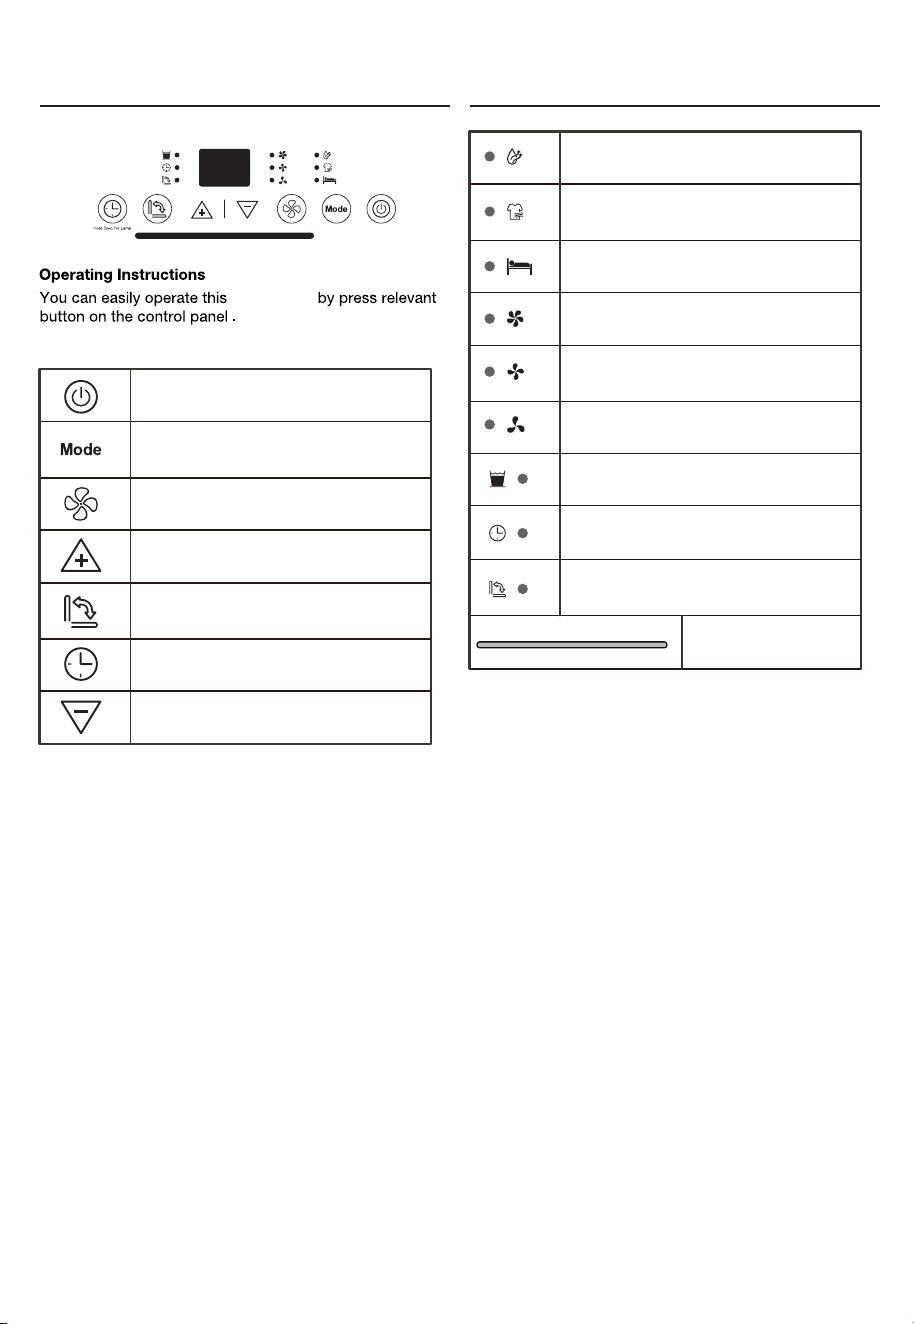
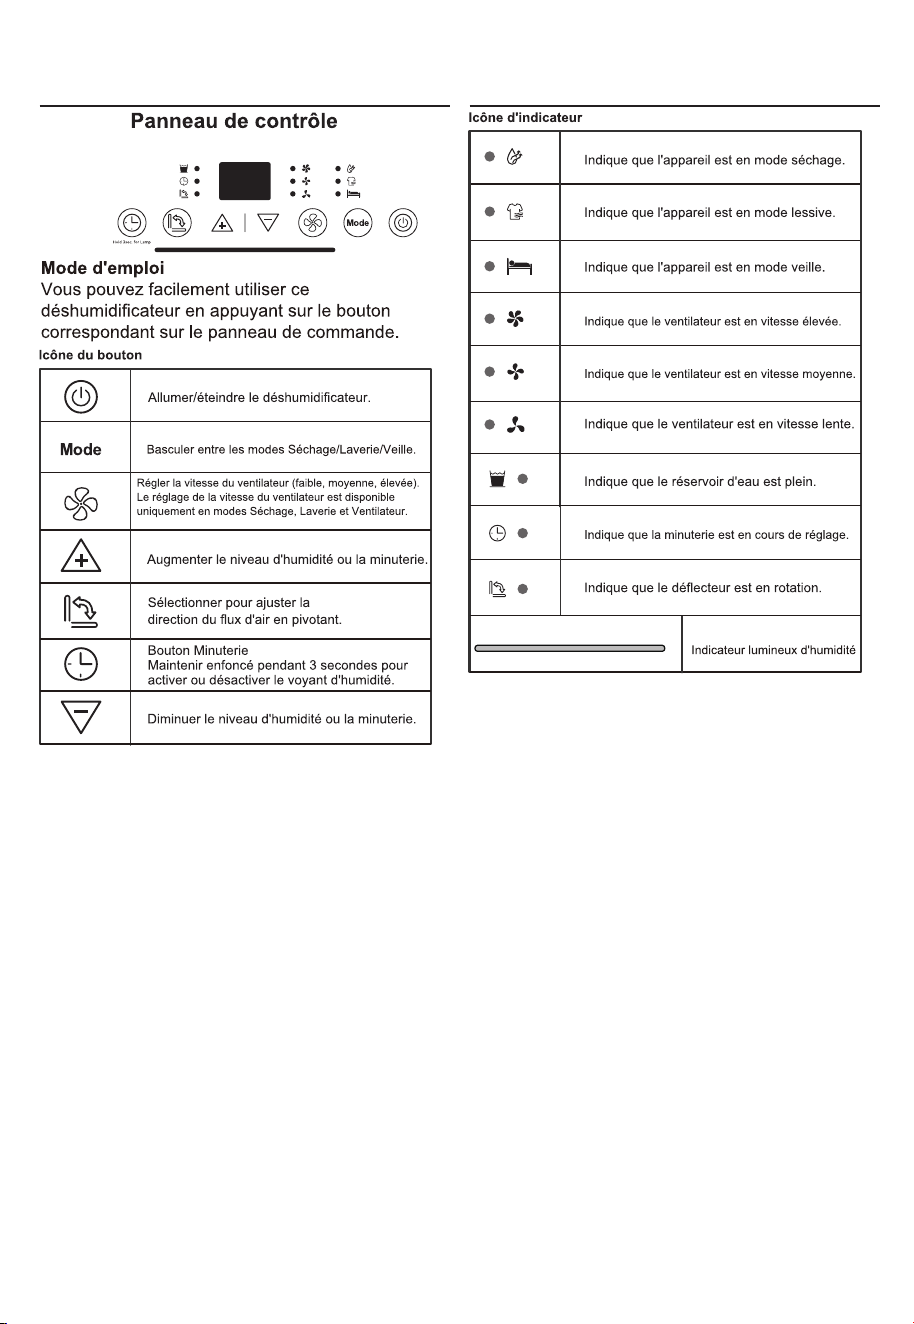
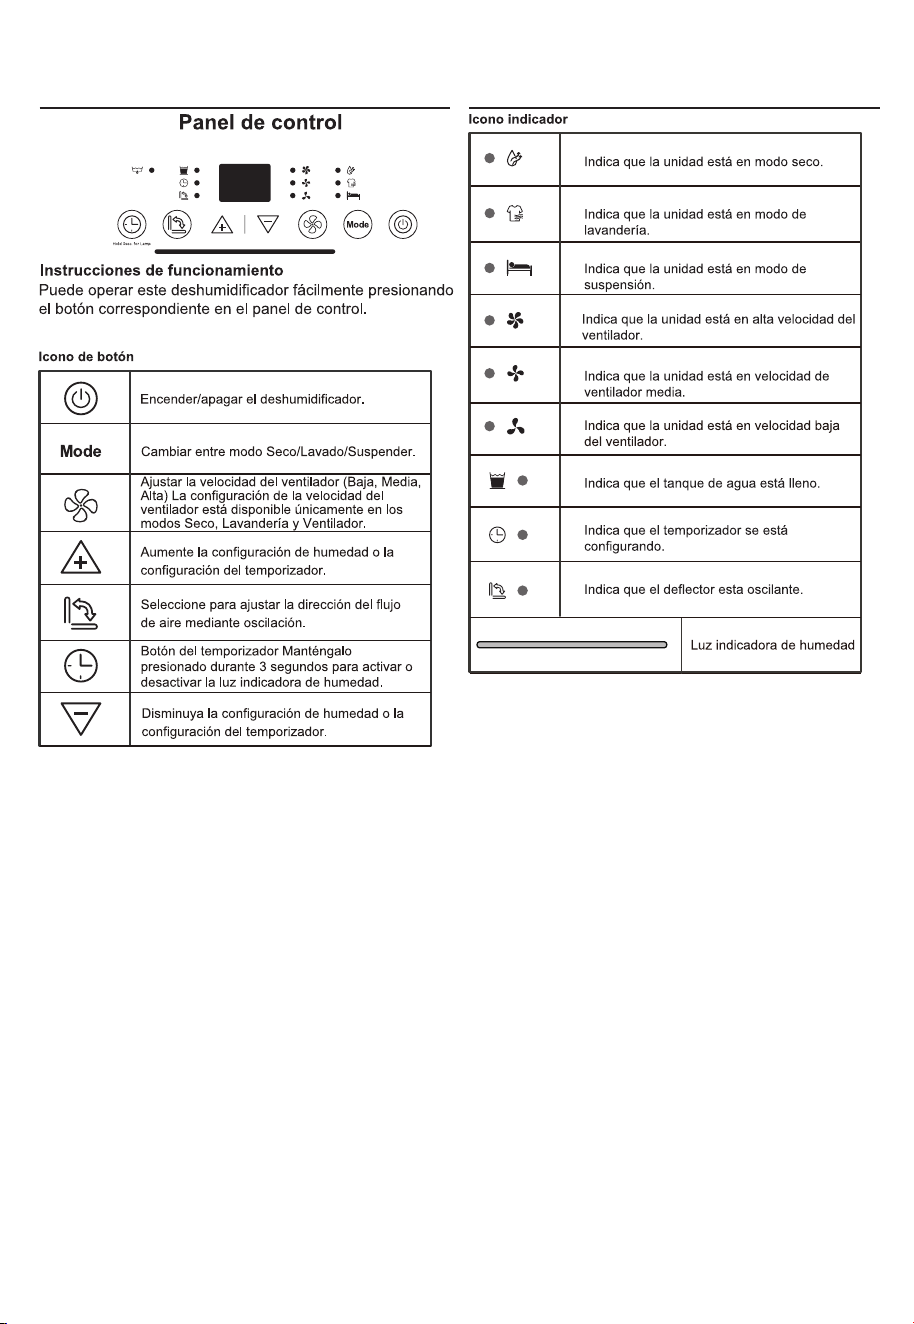
Control Panel
Button icon
Indicator icon
Indicates the unit is in dry mode.
Indicates the unit is in laundry mode.
Indicates the unit is in sleep mode.
Indicates the unit is in high fan speed.
Indicates the unit is in med fan speed.
Indicates the unit is in low fan speed.
Indicates the water tank is full.
Indicates the timer is setting.
Indicates the deflector is swing.
dehumidifier
Humidity indicator light
Turn on/off the dehumidifier.
Switch between Dry/Laundry/Sleep mode.
Adjust fan speed (Low, Med, High)
Fan speed setting is available in Dry and
Laundry, and Fan modes only.
Increase the humidity setting or timer setting.
Select to adjust the airflow
direction by swinging.
Timer button
Press and hold 3 seconds to activate
or cancel the Humidity indicator light.
Decrease the humidity setting or timer setting.
8
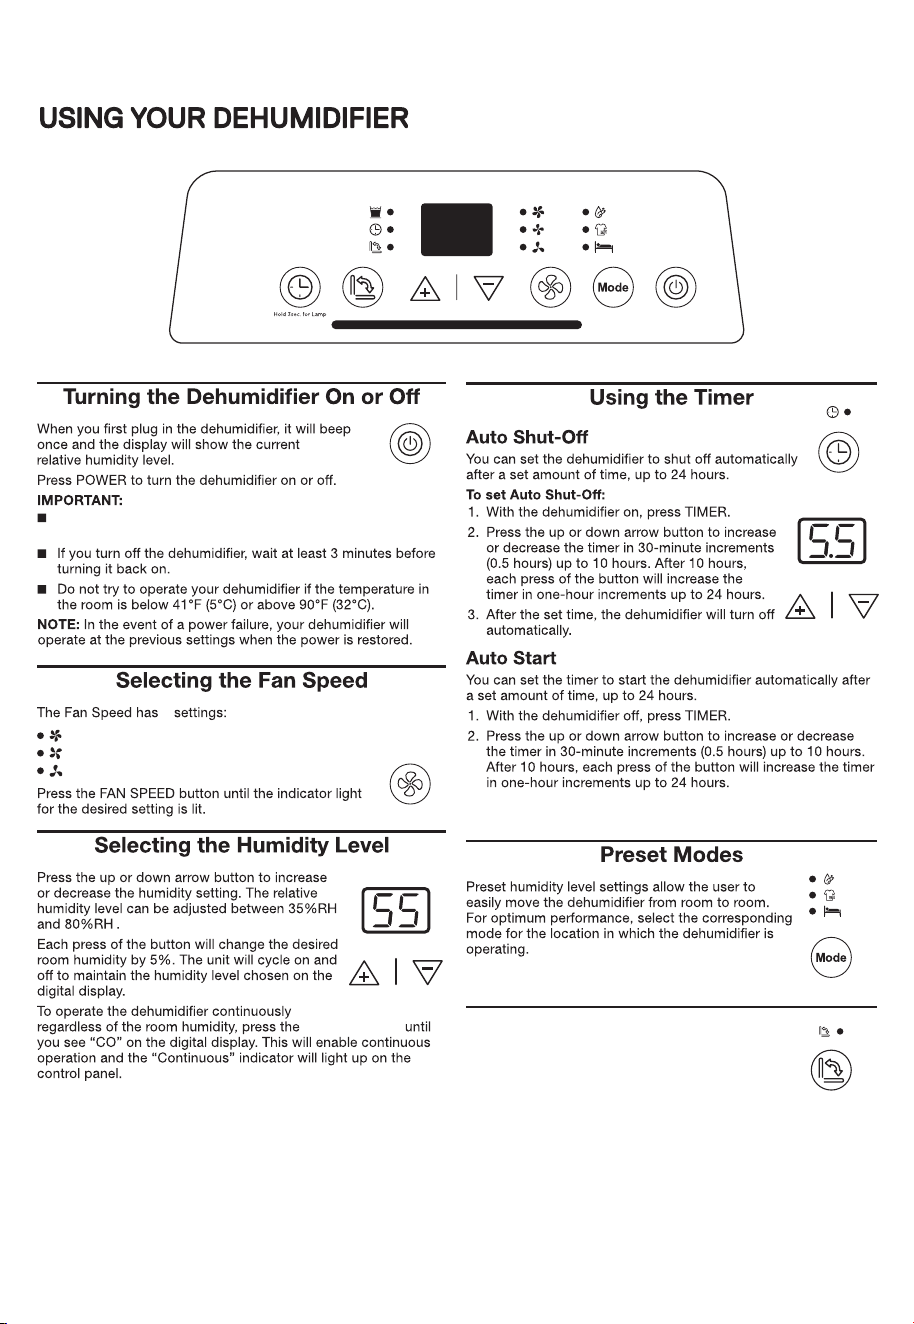
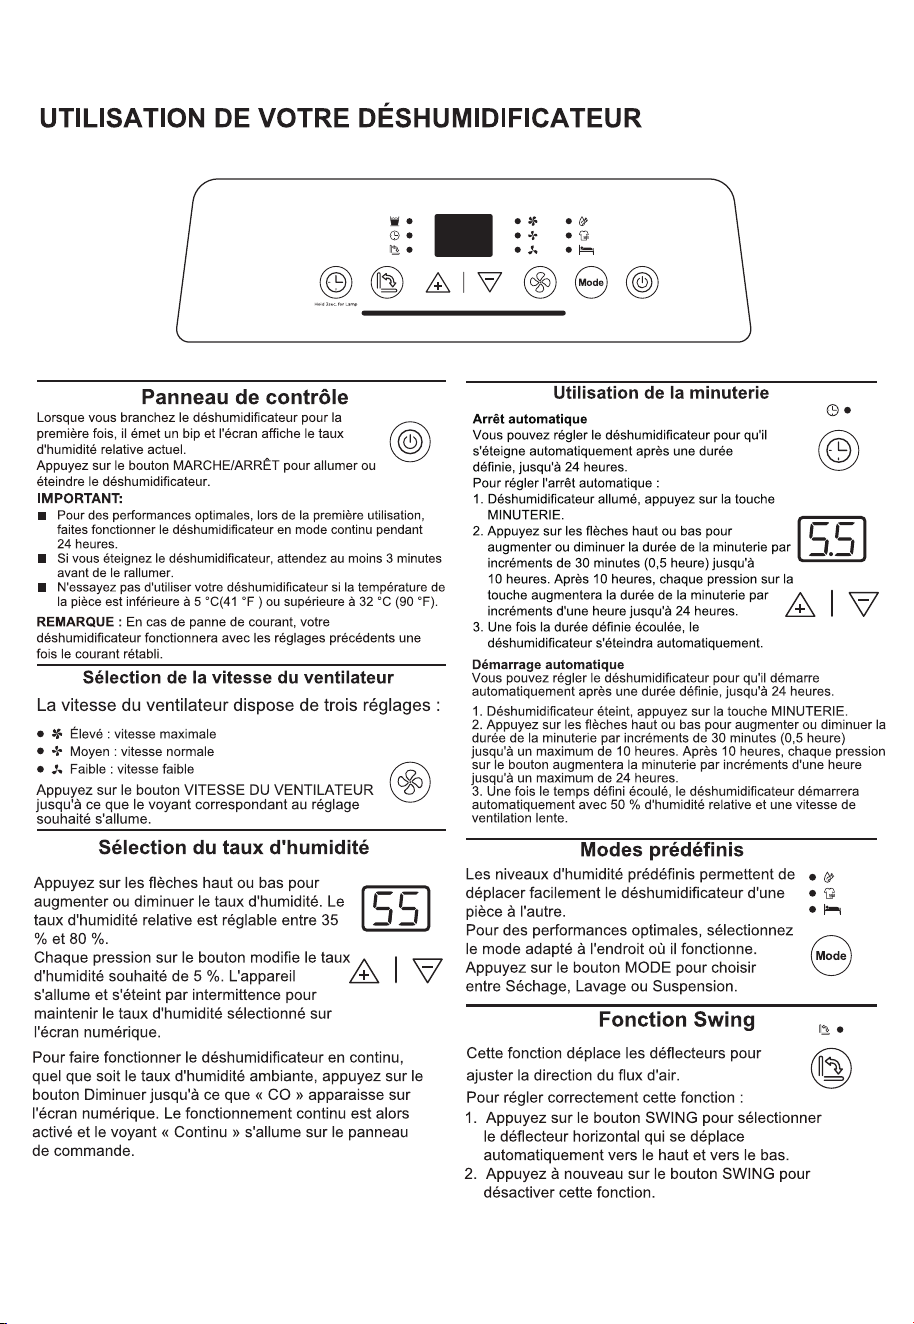
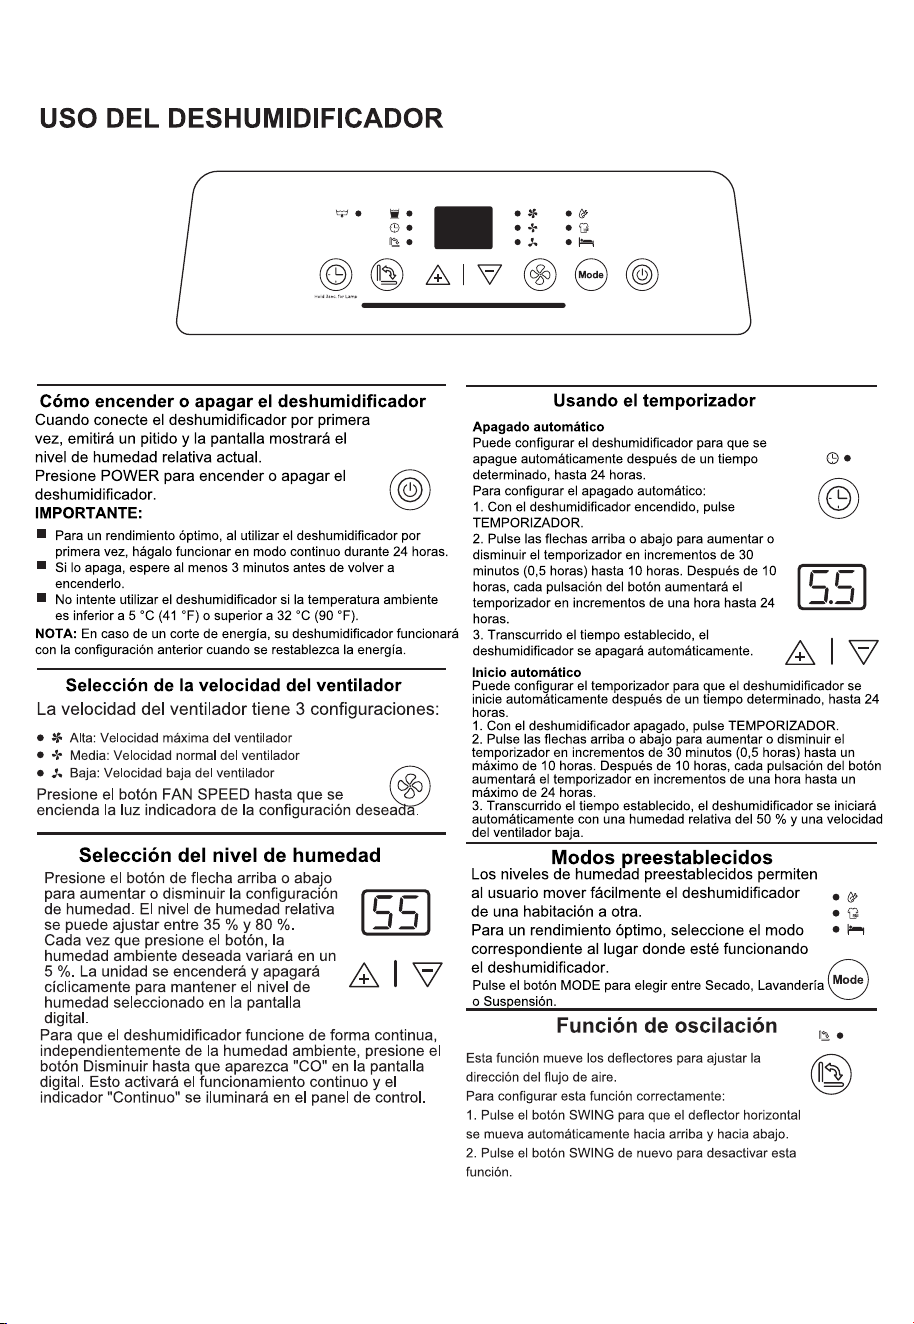
For optimal performance, when first operating the dehumidifier,
run it in Continuous mode for 24 hours.
Decrease button
3. After the set time, the dehumidifier will start automatically
with the setting of 50%RH ,low fan speed.
3
High—Maximum fan speed
Med—Normal fan speed
Low—Low fan speed
Swing function
This function moves the deflectors to adjust the direction
of the air flow.
To set this function correctly:
1. Press the SWING button to select the horizontal deflector to
automatically move up and down.
2. Press the SWING button again to switch off this function.
Press the MODE button to choose from Dry, Laundry,
or Sleep.
9
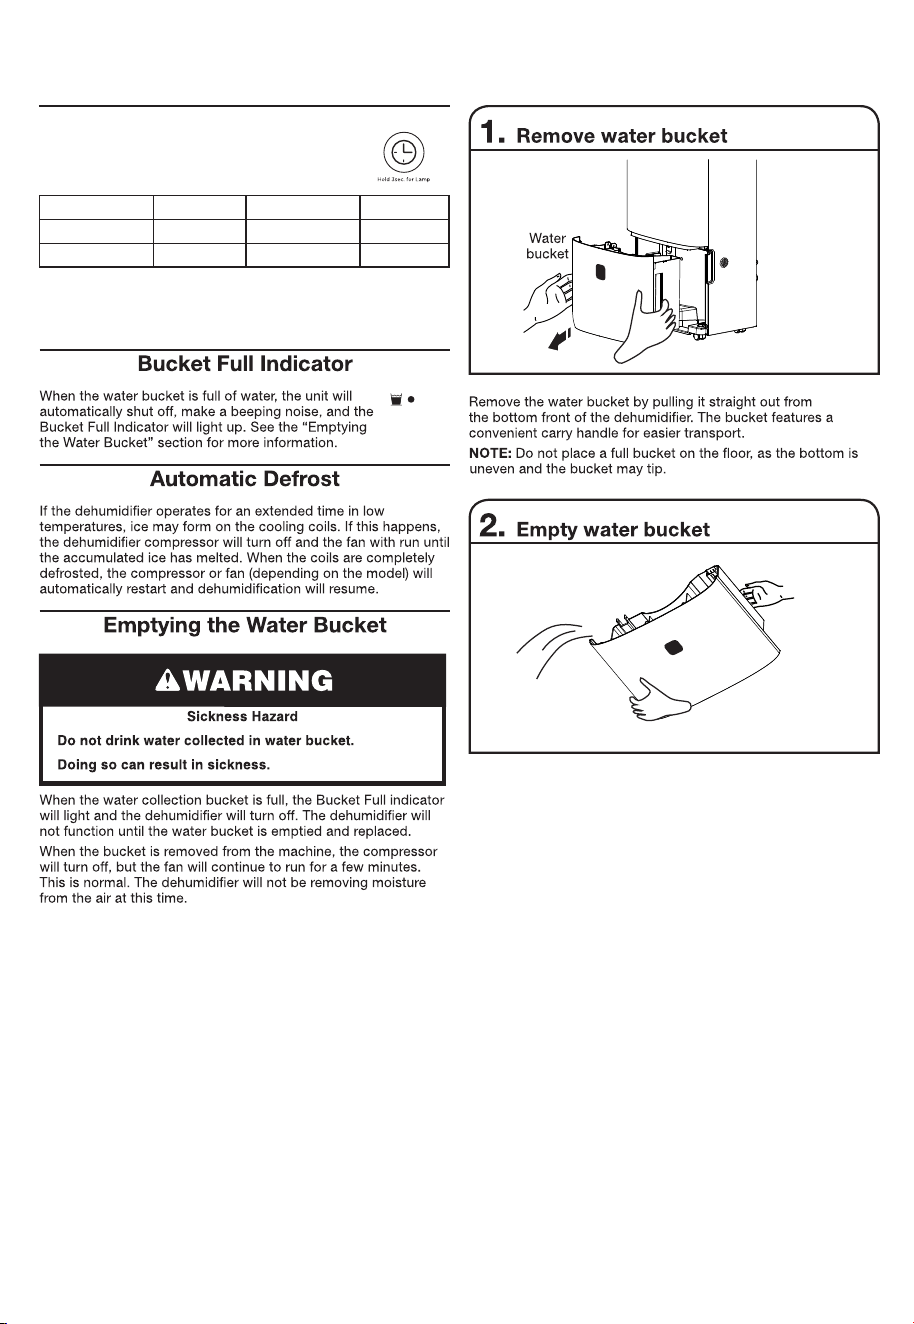
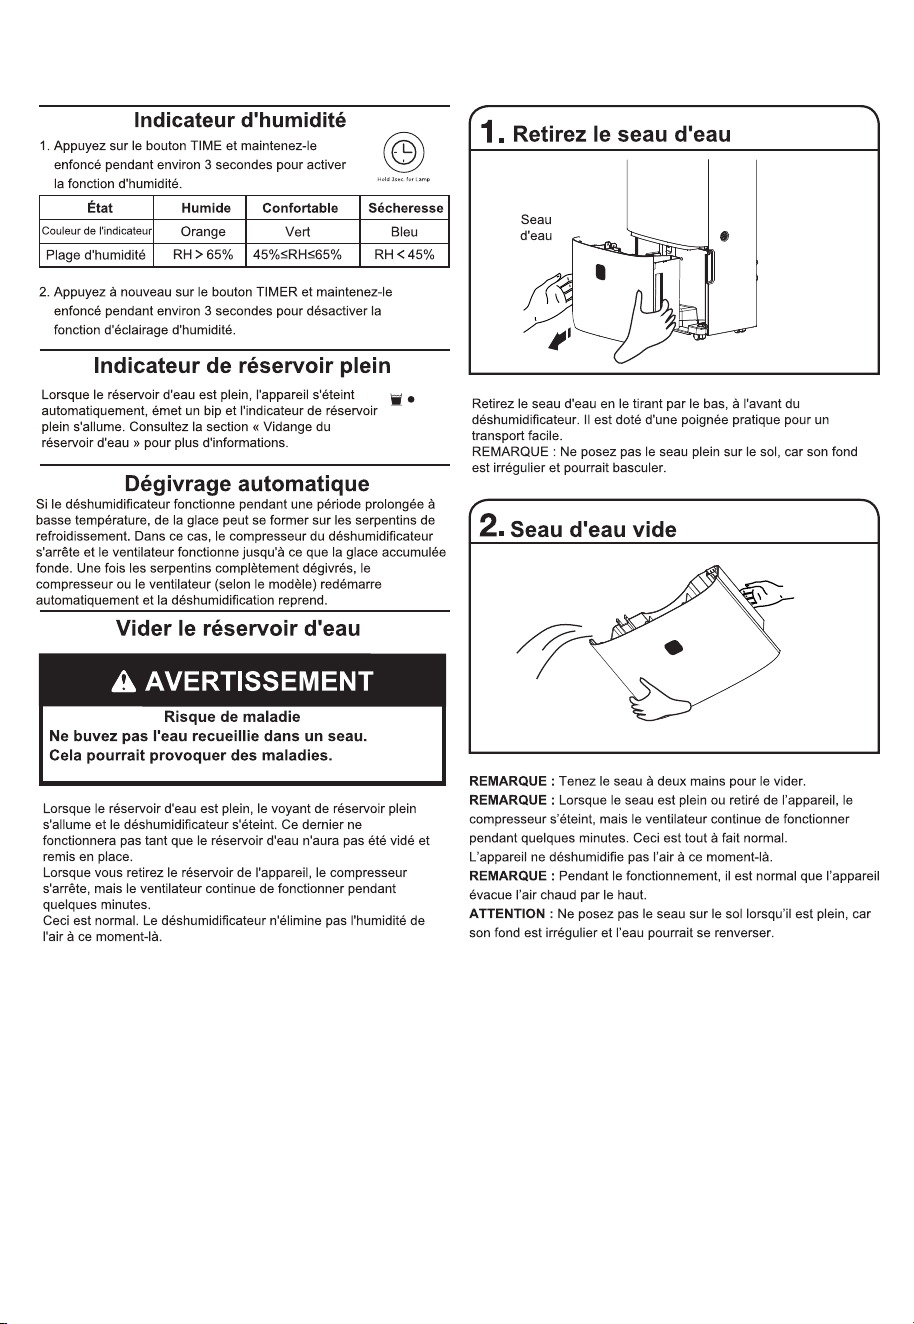
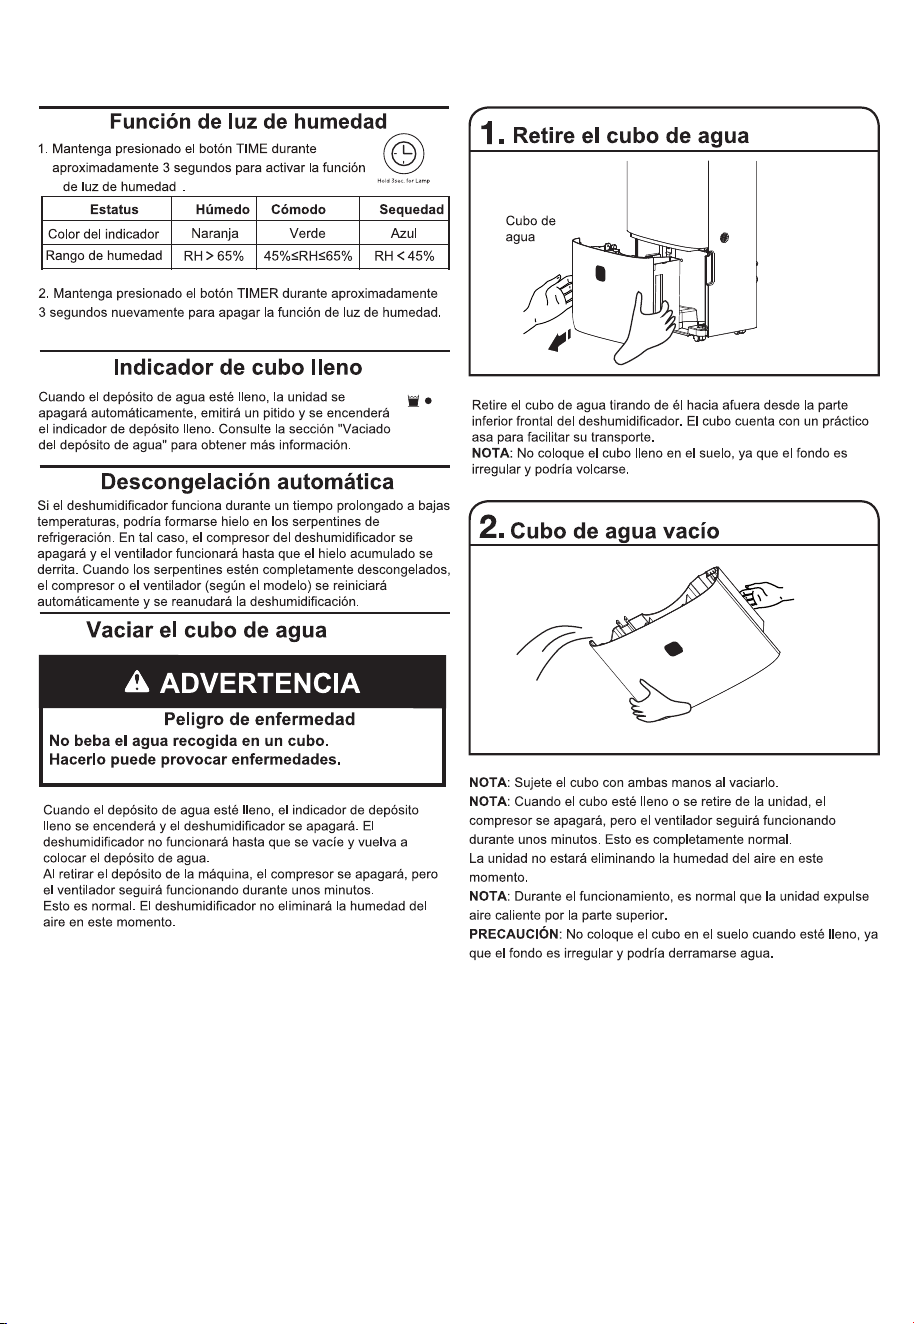
Humidity light function
1. Press and hold the TIME button about 3 seconds
to activate the Humidity light function.
Status
Indicator color
Humidity range
Damp
Orange
RH>65%
Comfortable
Green
45%≤RH≤65%
Dryness
Blue
RH<45%
2. Press and hold the TIMER button about 3 seconds again to turn
off the Humidity light function.
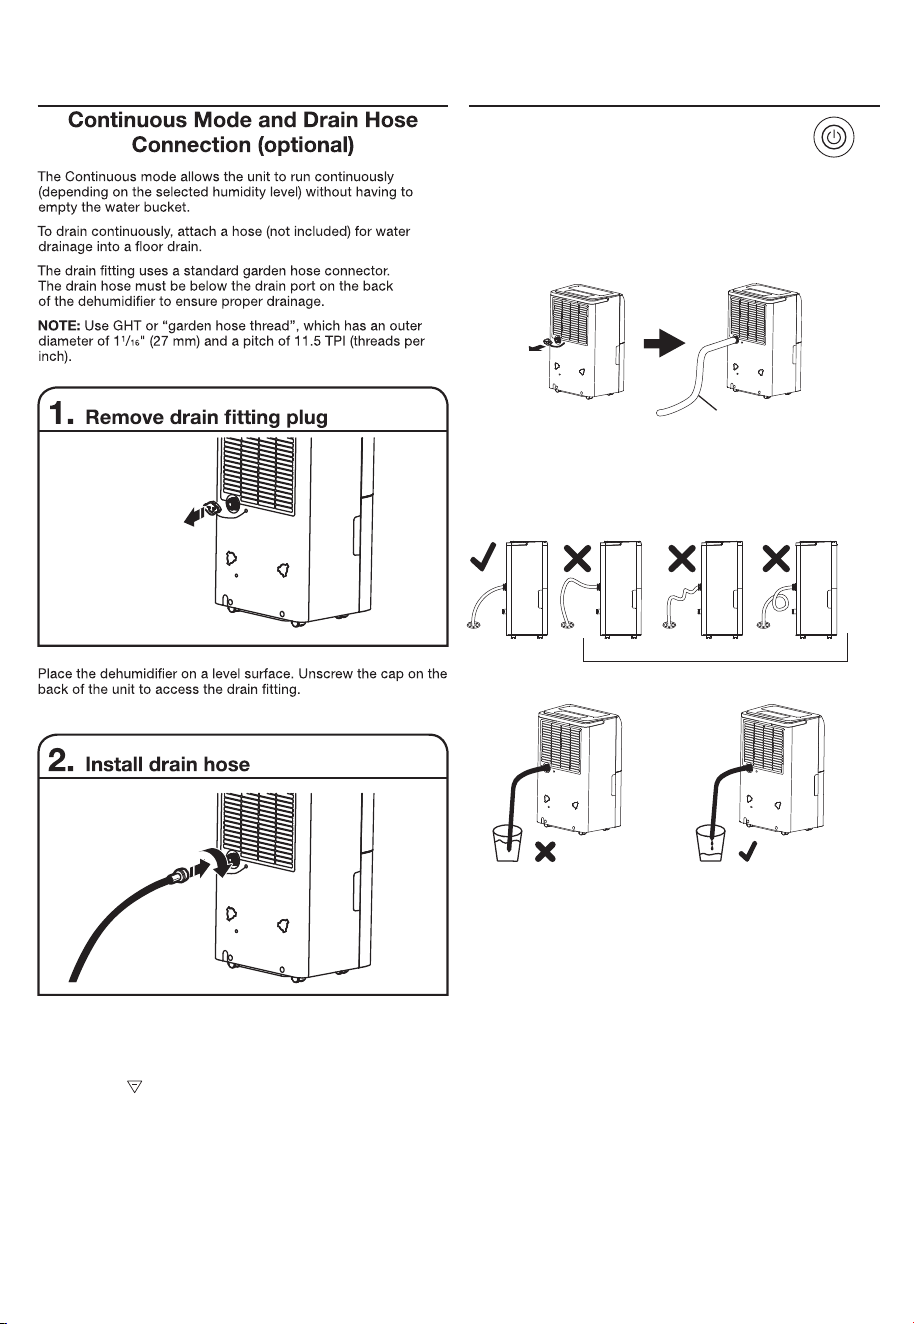
NOTE: Hold the bucket with both hands when emptying.
NOTE: When the bucket is full or removed from the unit, the compressor
will turn off but the fan will continue to run for a few minutes. This is
completely normal.
The unit will not be removing moisture from the air at this time.
NOTE: During operation, it is normal for the unit to exhaust warm air
from the top of the unit.
CAUTION: Do not place the bucket on the floor when it is full as it is
uneven on the bottom and water may spill.
10
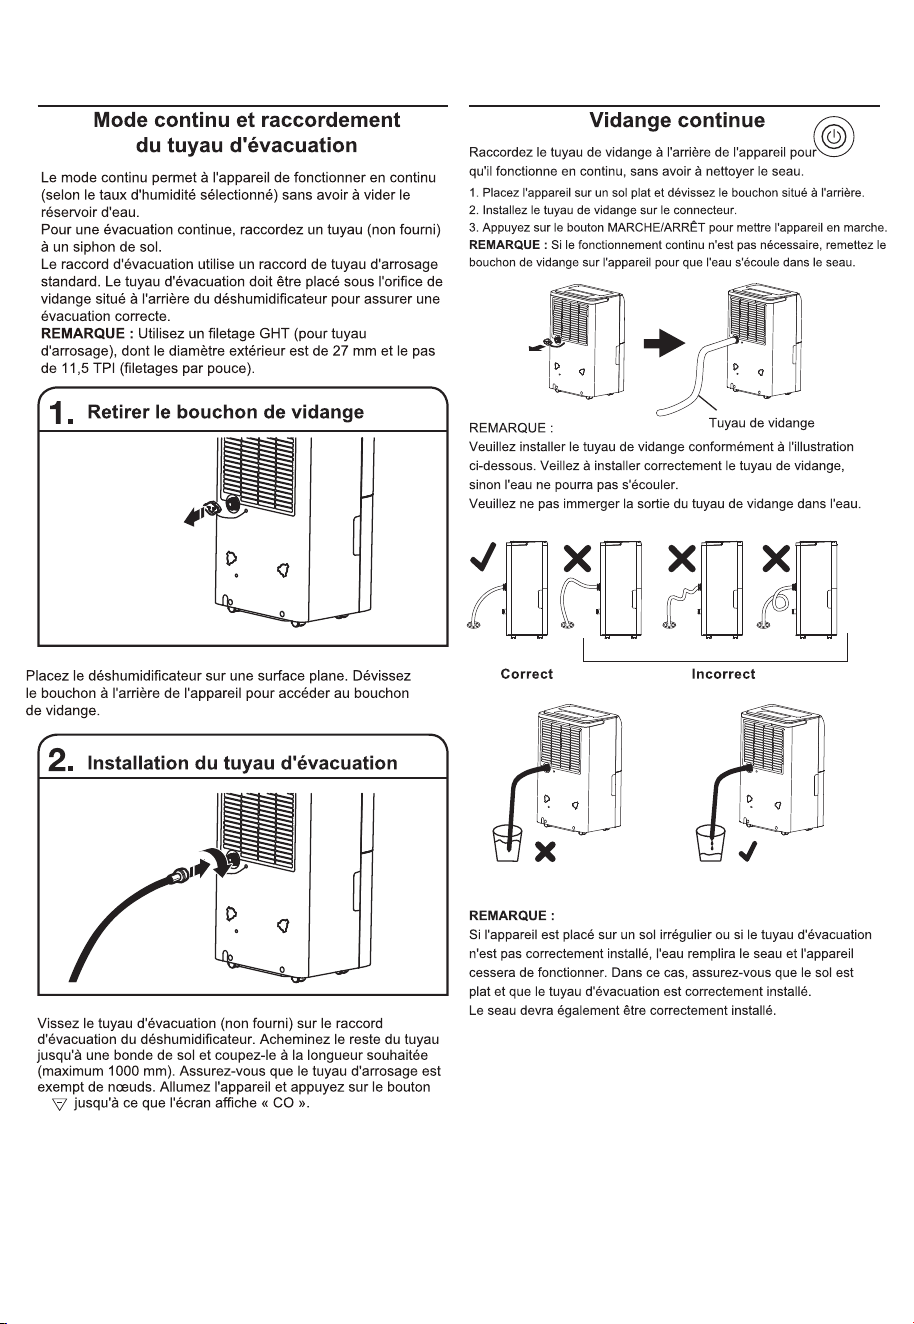
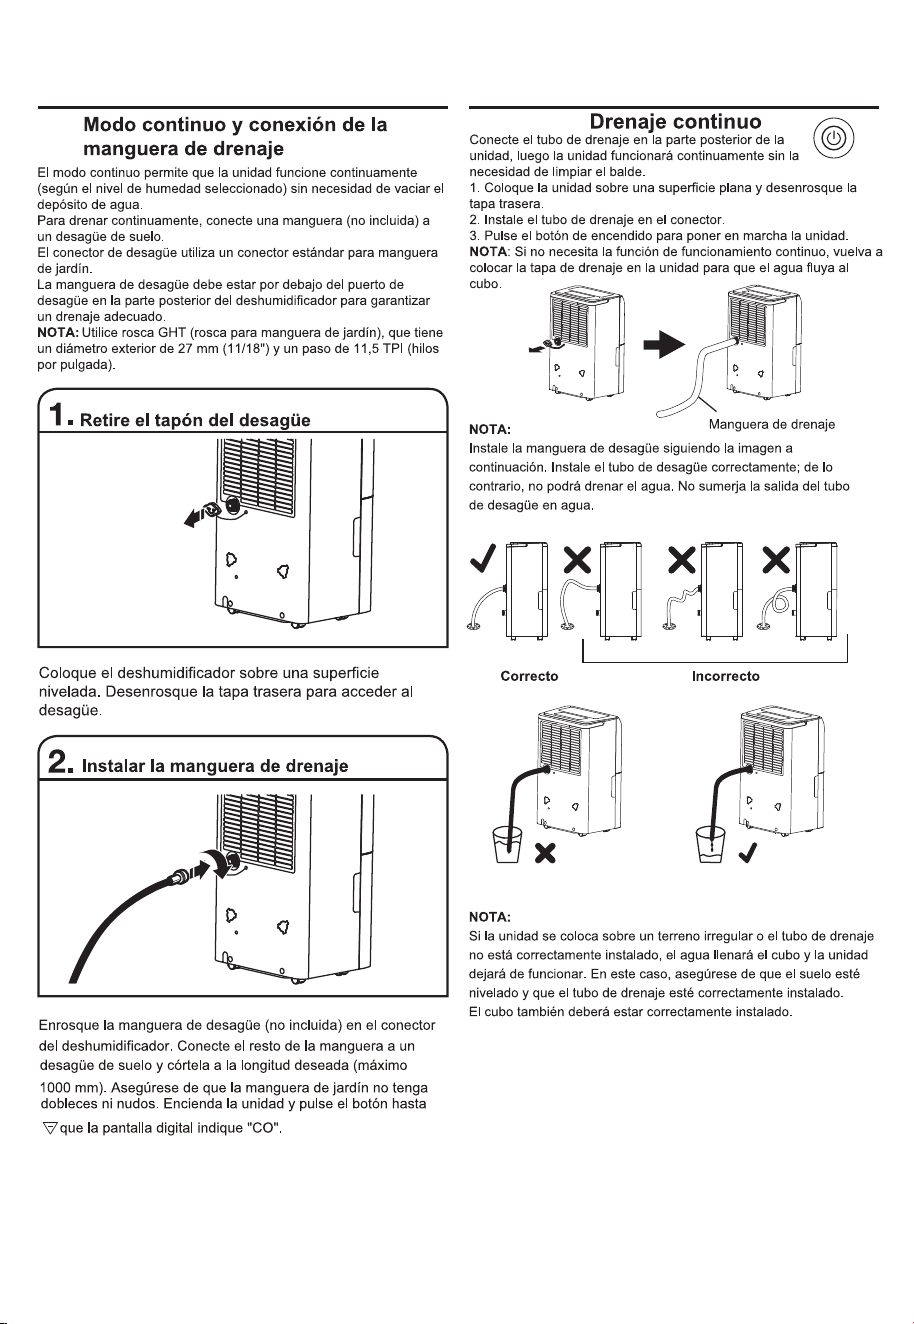
NOTE:
If the unit is placed on uneven ground or the drain pipe is not correctly
installed, the water will fill the bucket and the unit will stop running.
If this happens, please make sure the ground is level and the drain
pipe is correctly installed.
The bucket will also need to be installed correctly.
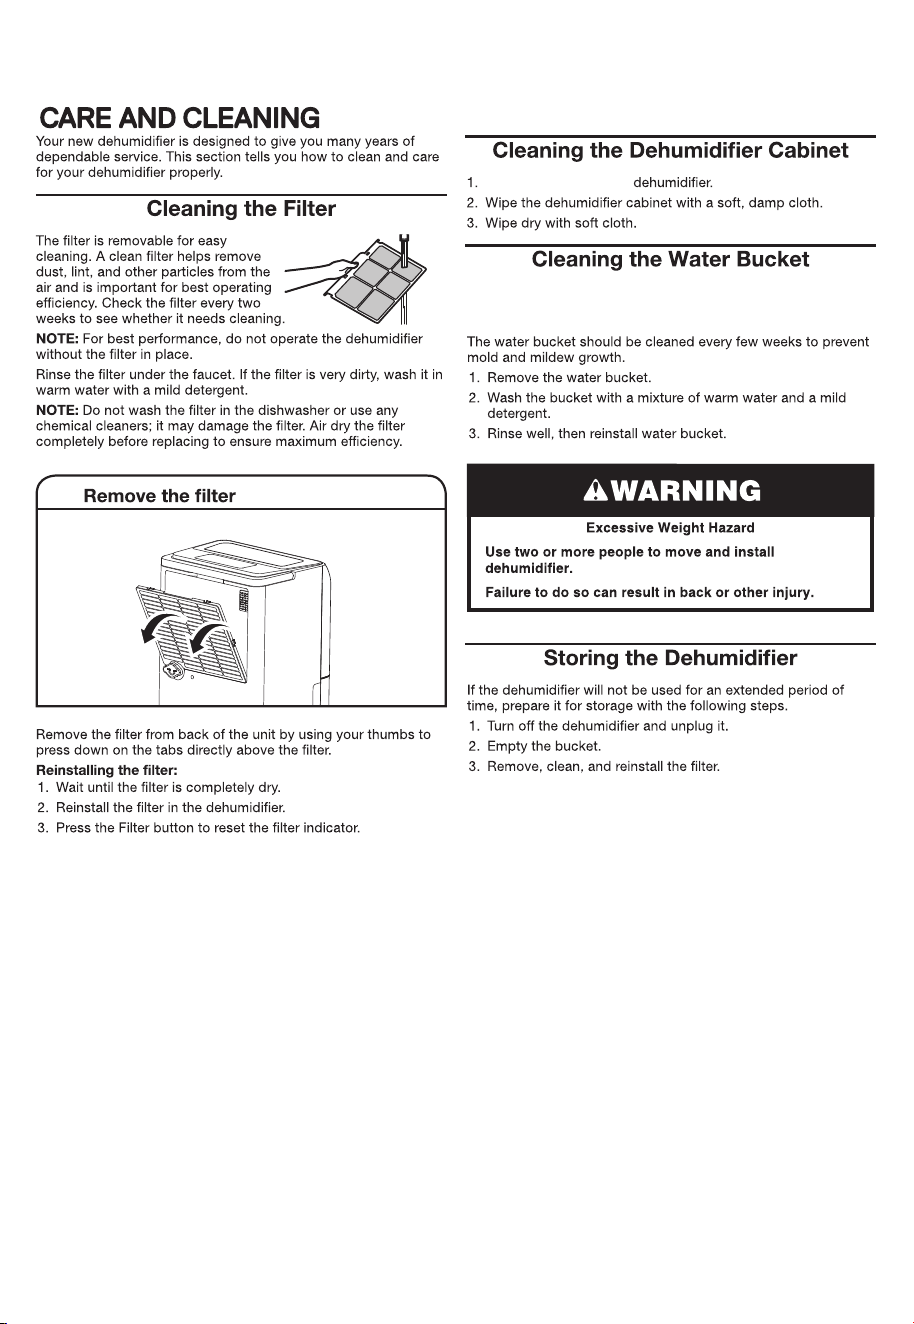
Continuous Drain
Connect the drain pipe on the back of unit, then the unit
will run continuously without the need for cleaning of the bucket.
1. Put the unit on level floor, unscrew the cap on the back of unit;
2. Install the drain pipe on connector;
3. Press POWER button to run the unit.
NOTE: If the continuous run function is not needed, install the drain
cap back on the unit, then the water will flow into bucket.
NOTE:
Please install the drain hose following the picture shown below.
Please install the drain pipe correctly, or the water cannot drain from
the pipe.
Please do not immerse the outlet of the drain pipe in water.
Thread the drain hose (not included) onto the drain fitting on the
dehumidifier. Lead the rest of the hose to a floor drain and cut to
length (no longer than 3.2 feet (1000mm) long). Make sure that
there are no kinks or knots in the garden hose. Turn on the unit
and press the button until set to “ CO ” on the digital display.
Drain Hose
Correct Incorrect
11
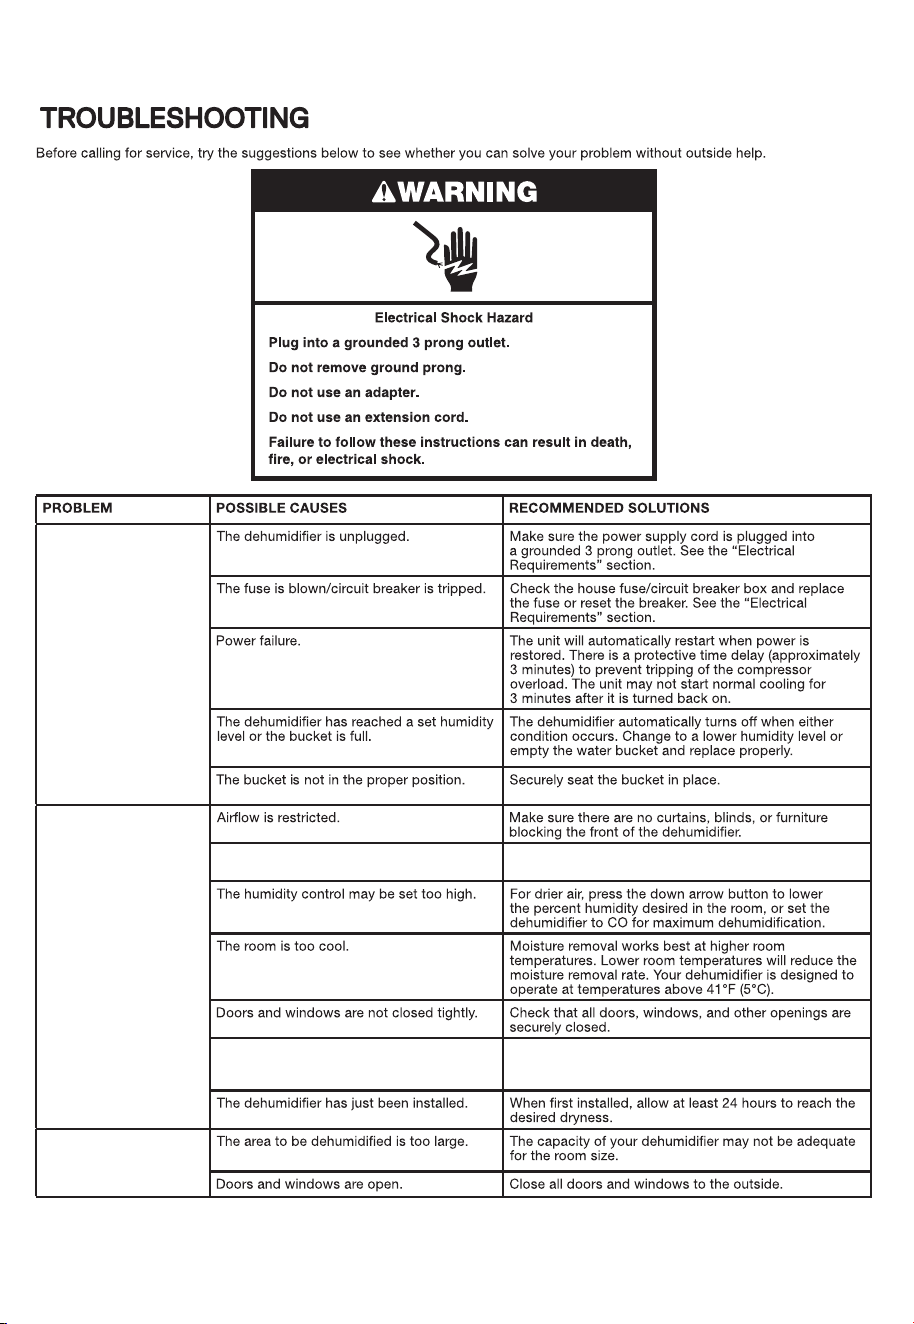
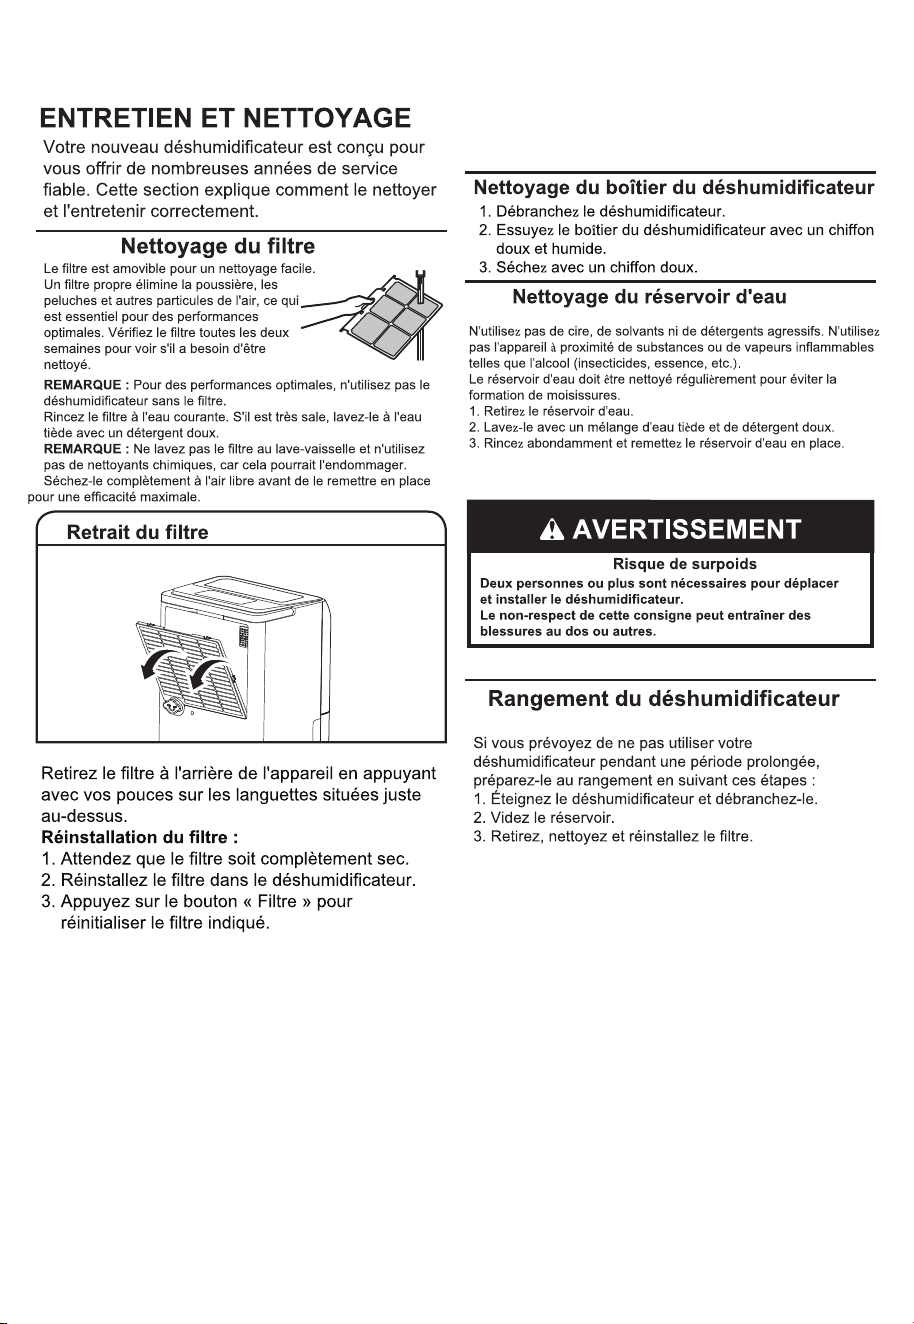
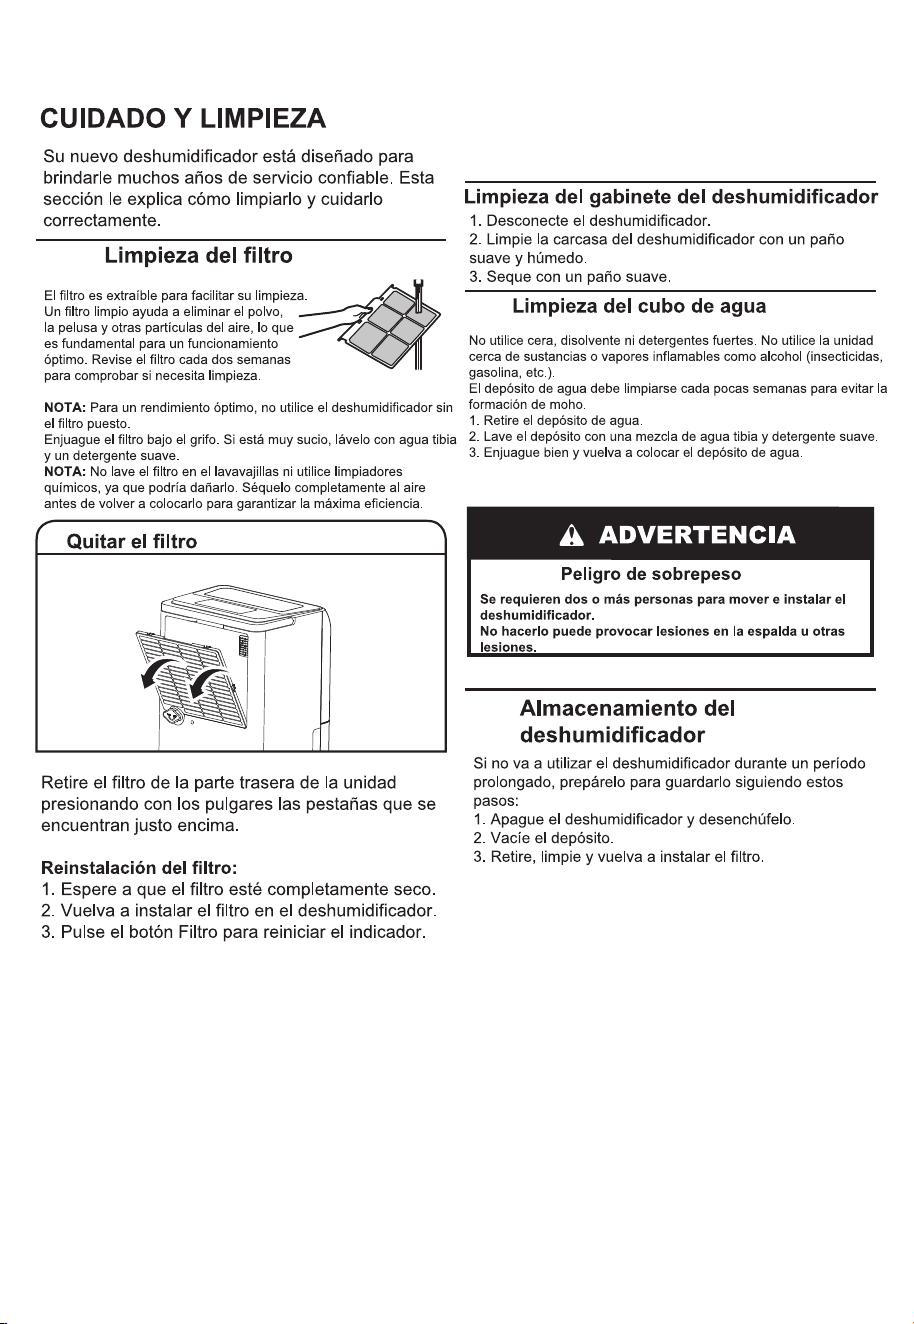
Disconnect the power to
Do not use wax, thinner, or a strong detergent. Do not use the unit in
the presence of inflammable substance or vapor such as alcohol,
insecticides, gasoline, etc
12
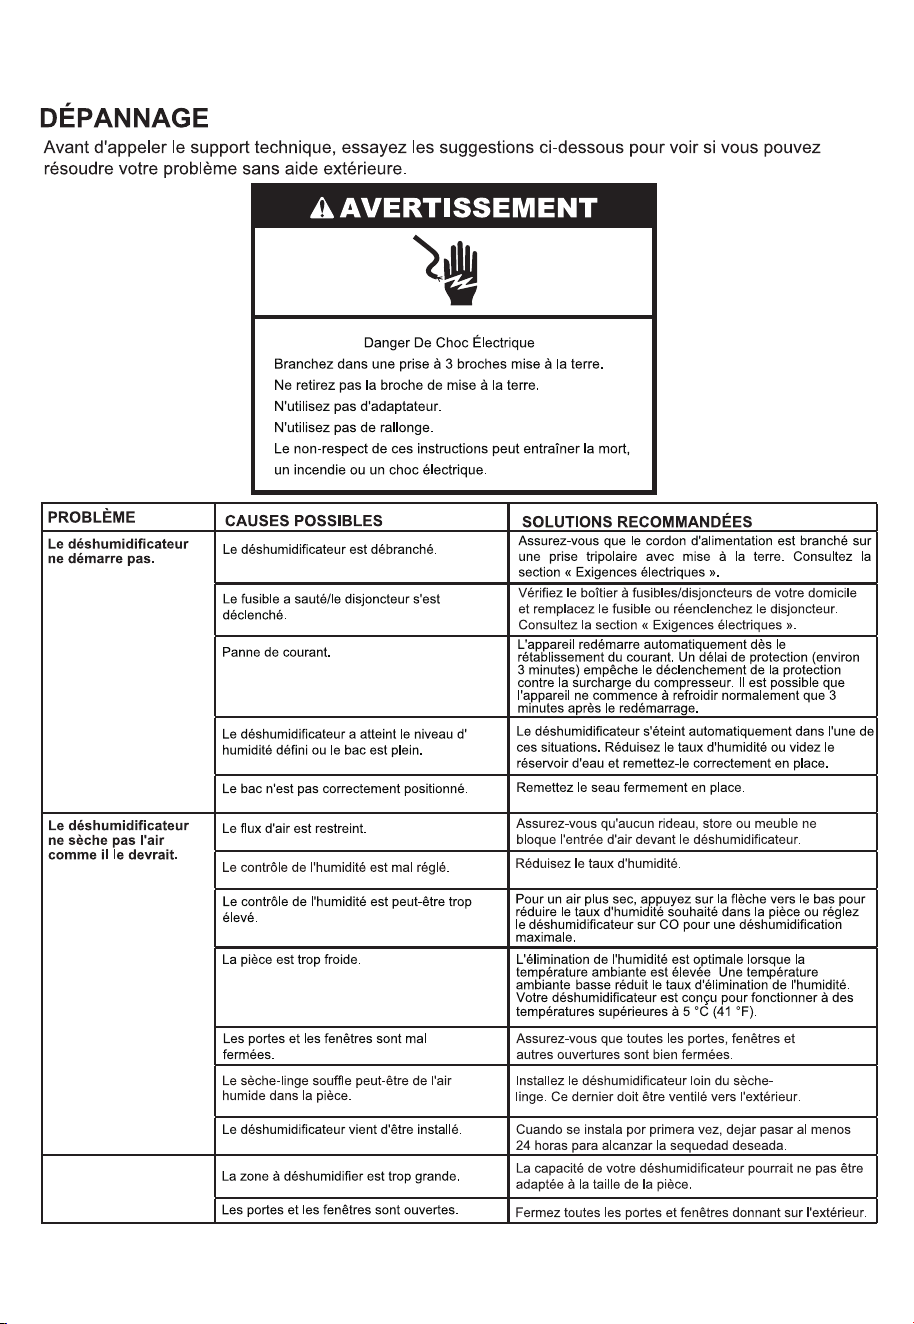
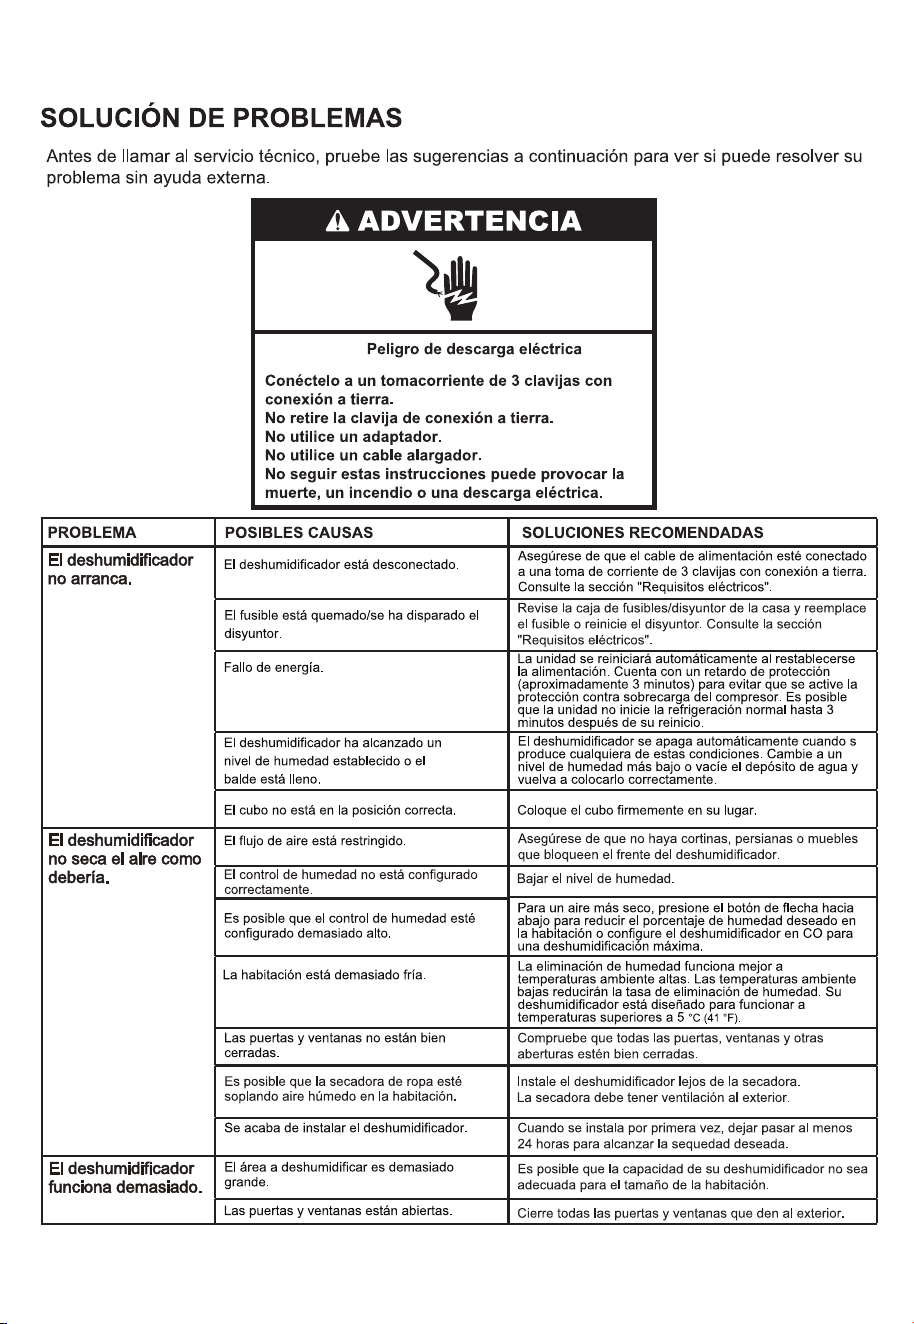
The humidity control is not set correctly.
Clothes dryer may be blowing moist air into
the room.
Install the dehumidifier away from the dryer.
The dryer should be vented outside.
Lower the set of humidity.
The dehumidifier will
not start.
The dehumidifier is
not drying the air as it
should.
The dehumidifier runs
too much.
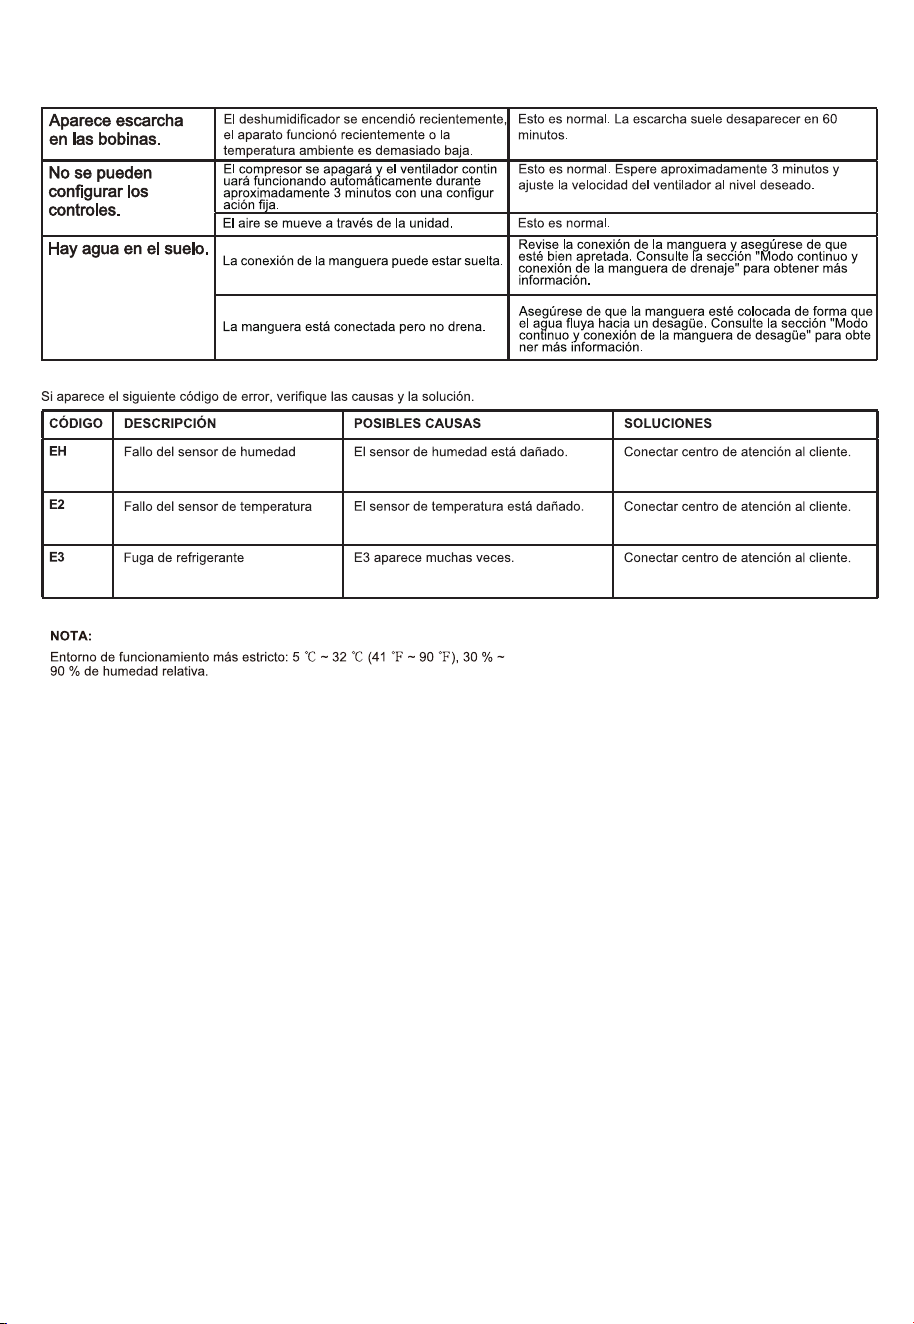
13
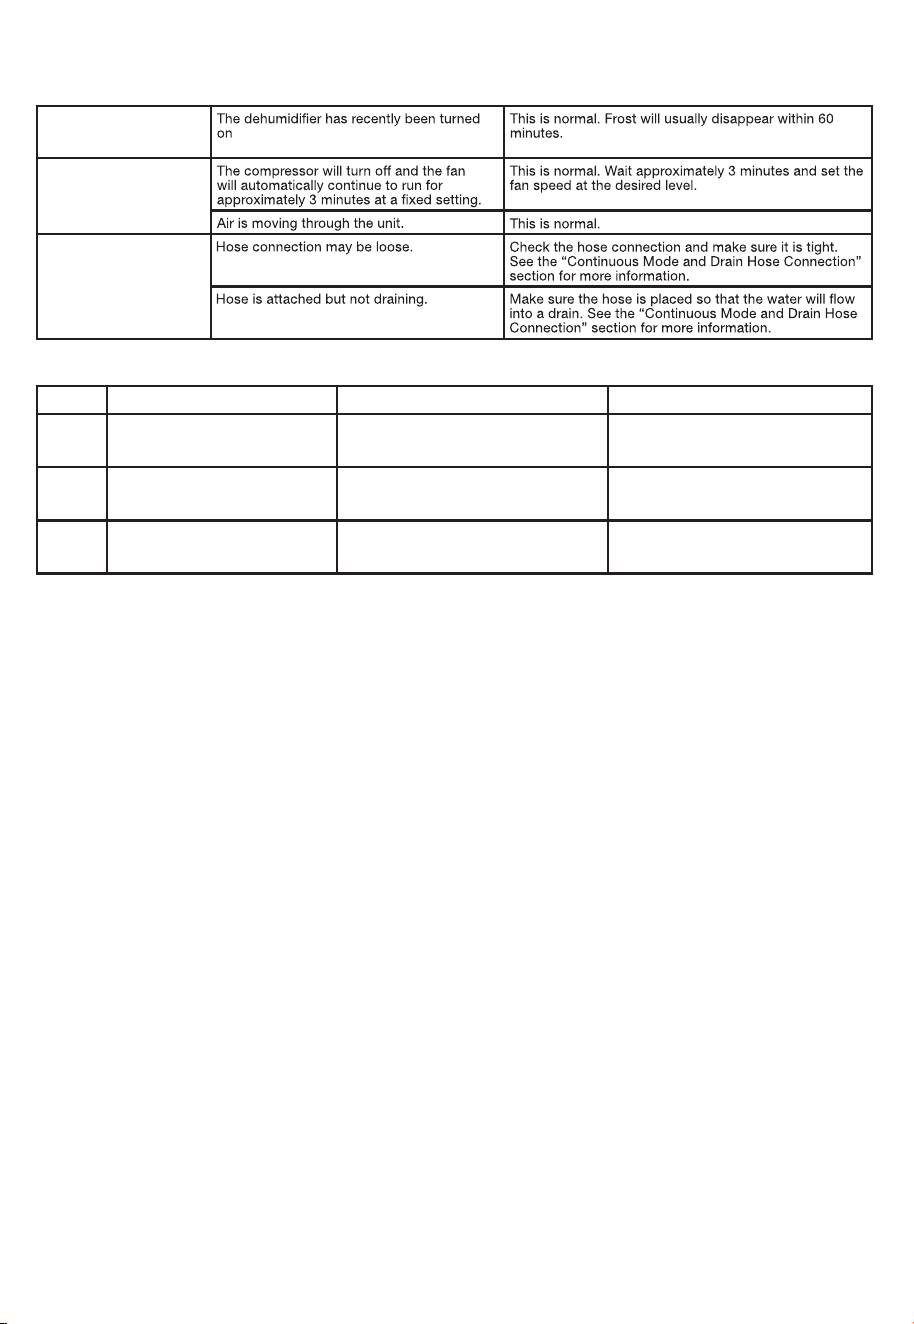
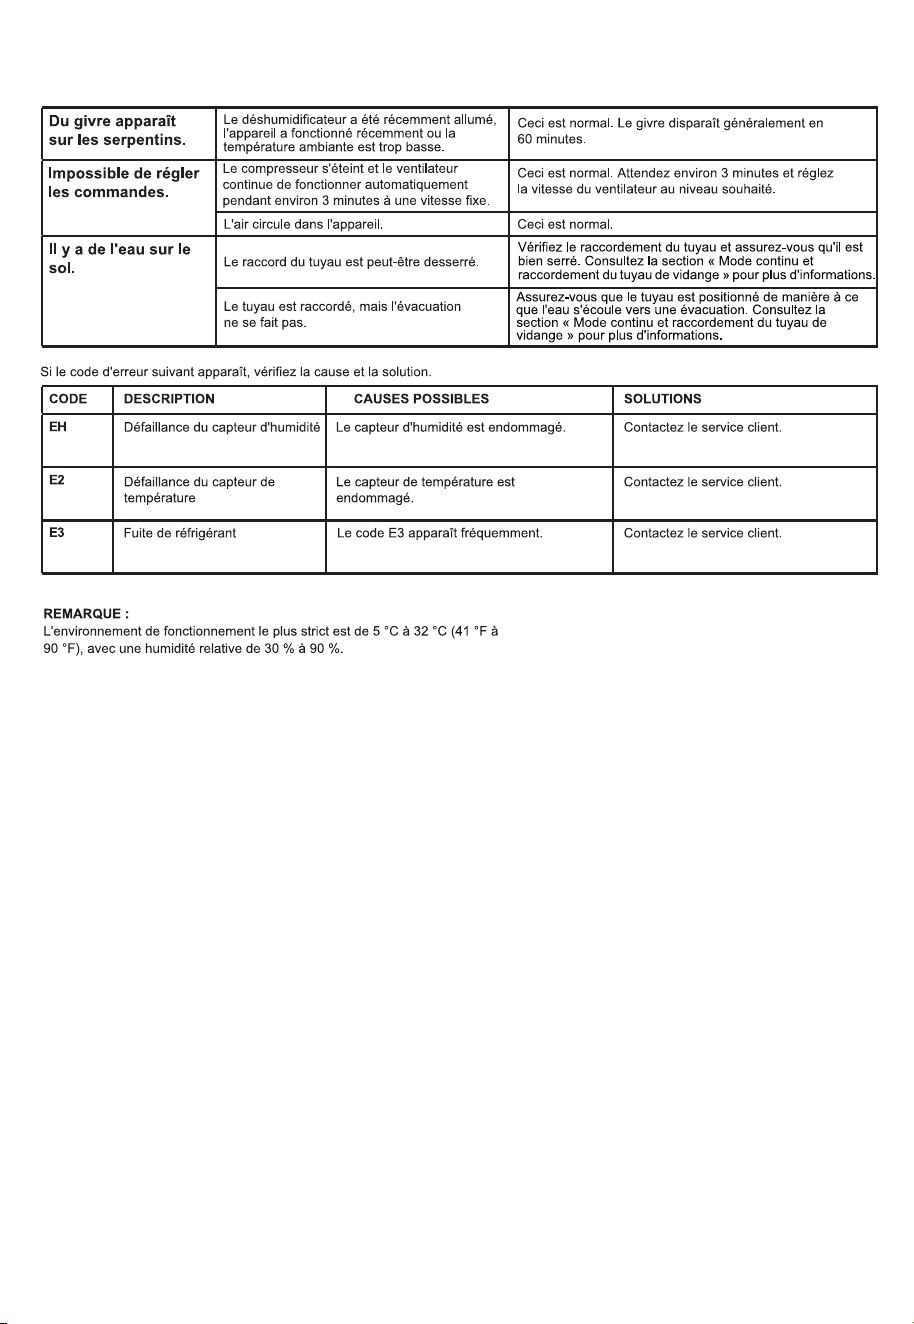
appliance run recently or the room
temperature is too low.
Frost appears on the
Coils.
Controls cannot be set.
There is water on the
floor.
NOTE:
Strictest operation environment: 41℉~90℉(5℃~32℃), 30%RH~90%RH.
CODE
If the following error code appears, please check the causes and solution.
EH
POSSIBLE CAUSES
Humidity sensor is damaged.
DESCRIPTION
Humidity sensor failure
SOLUTIONS
Connect customer service center.
Refrigerant leakage
E3
E3 appears many times.
Temperature sensor failure
E2
Temperature sensor is damaged.
Connect customer service center.
Connect customer service center.
14
15
W11740391A
09/25
2025
16
W11740391A
09/25
3
4
5
6
7
8
9
10
11
12
13
Le déshumidificateur
fonctionne trop.
14
15
16
W11740391A
09/25
3
4
5
Sensor de
humedad
6
7
Conexión Eléctrica
8
9
10
11
12
13
14
15
W11740391A
09/25
16
2025
Products.