CUSTOMER SERVICE 1 (888) 277-6960 | WWW.DK2.COM
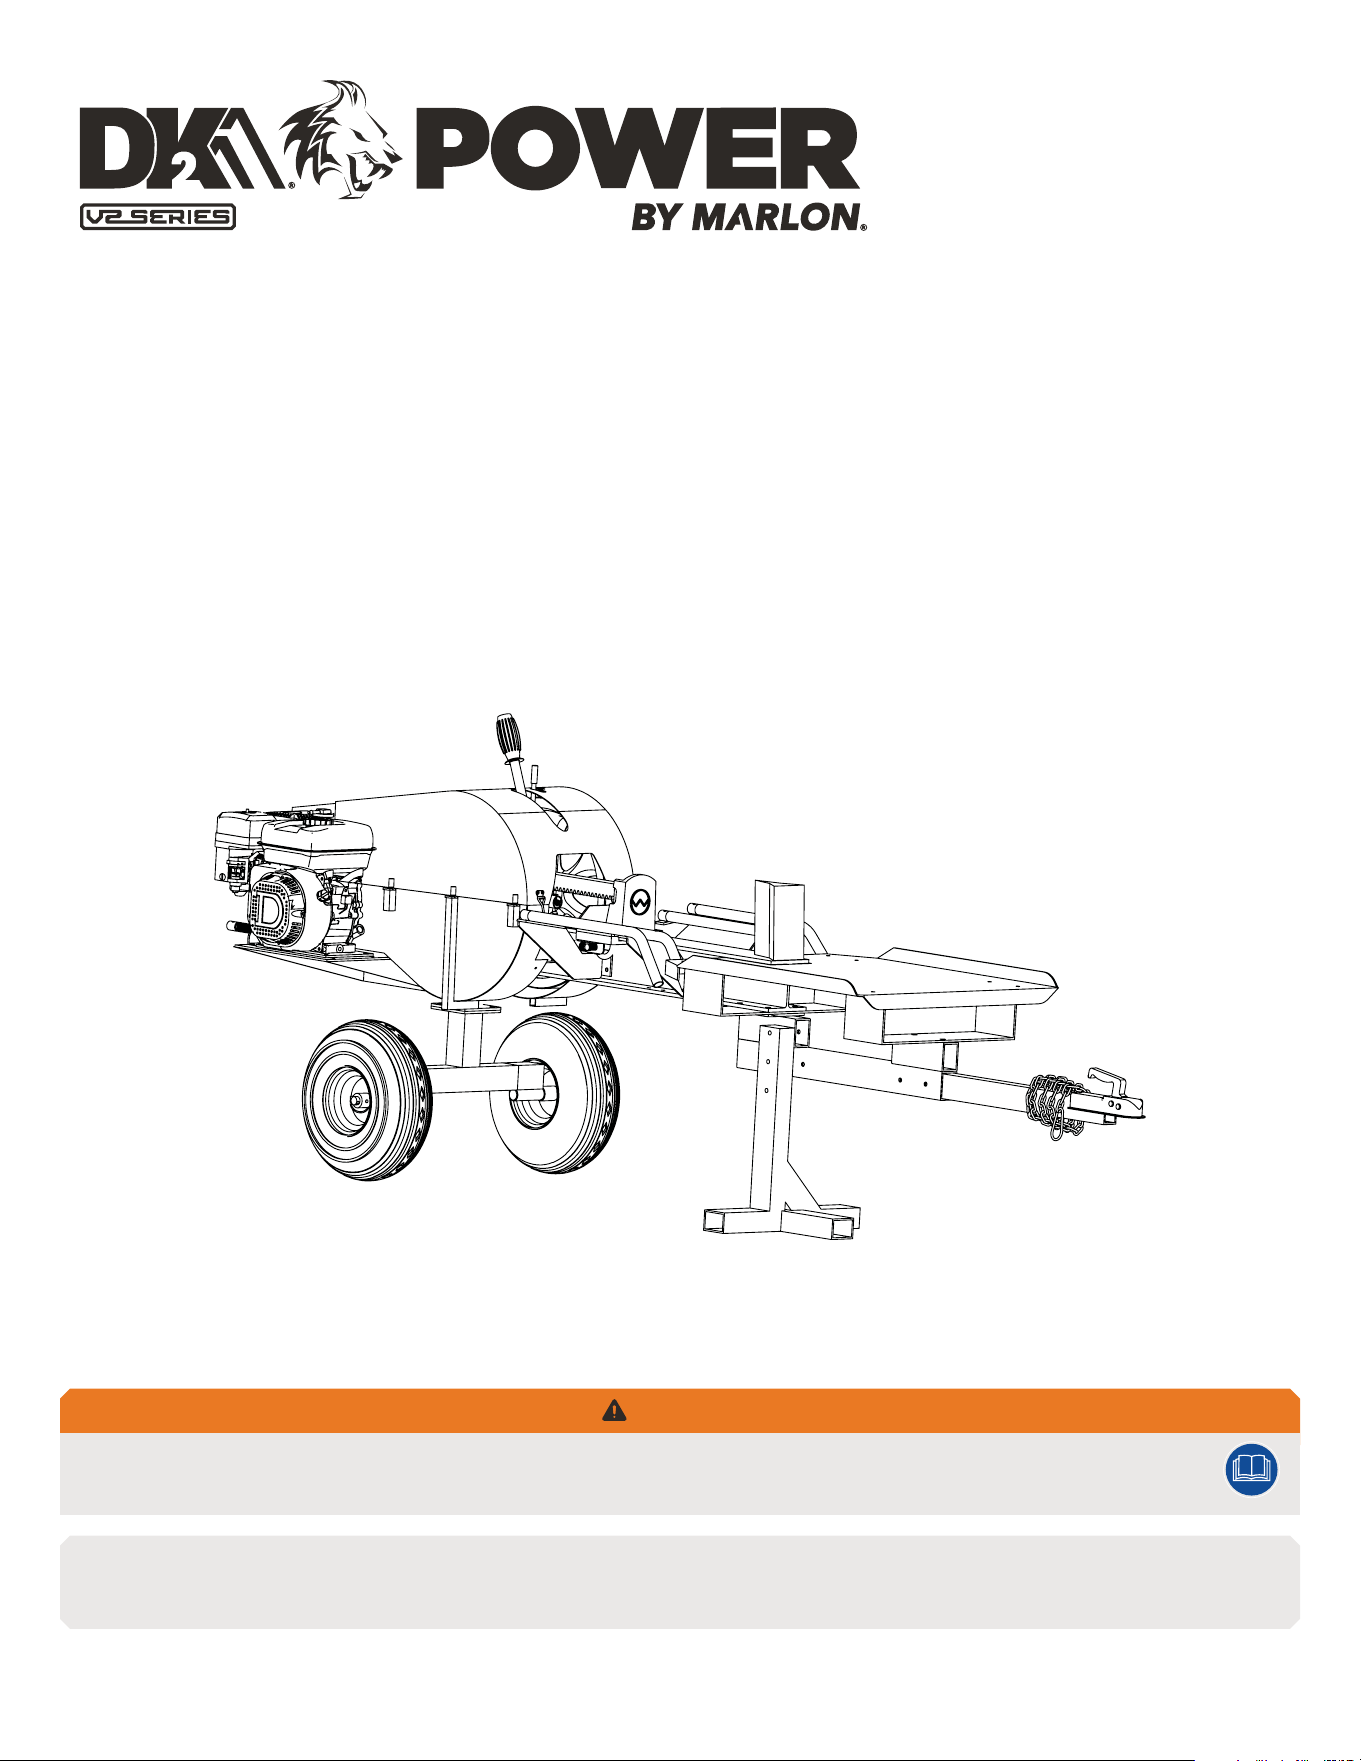
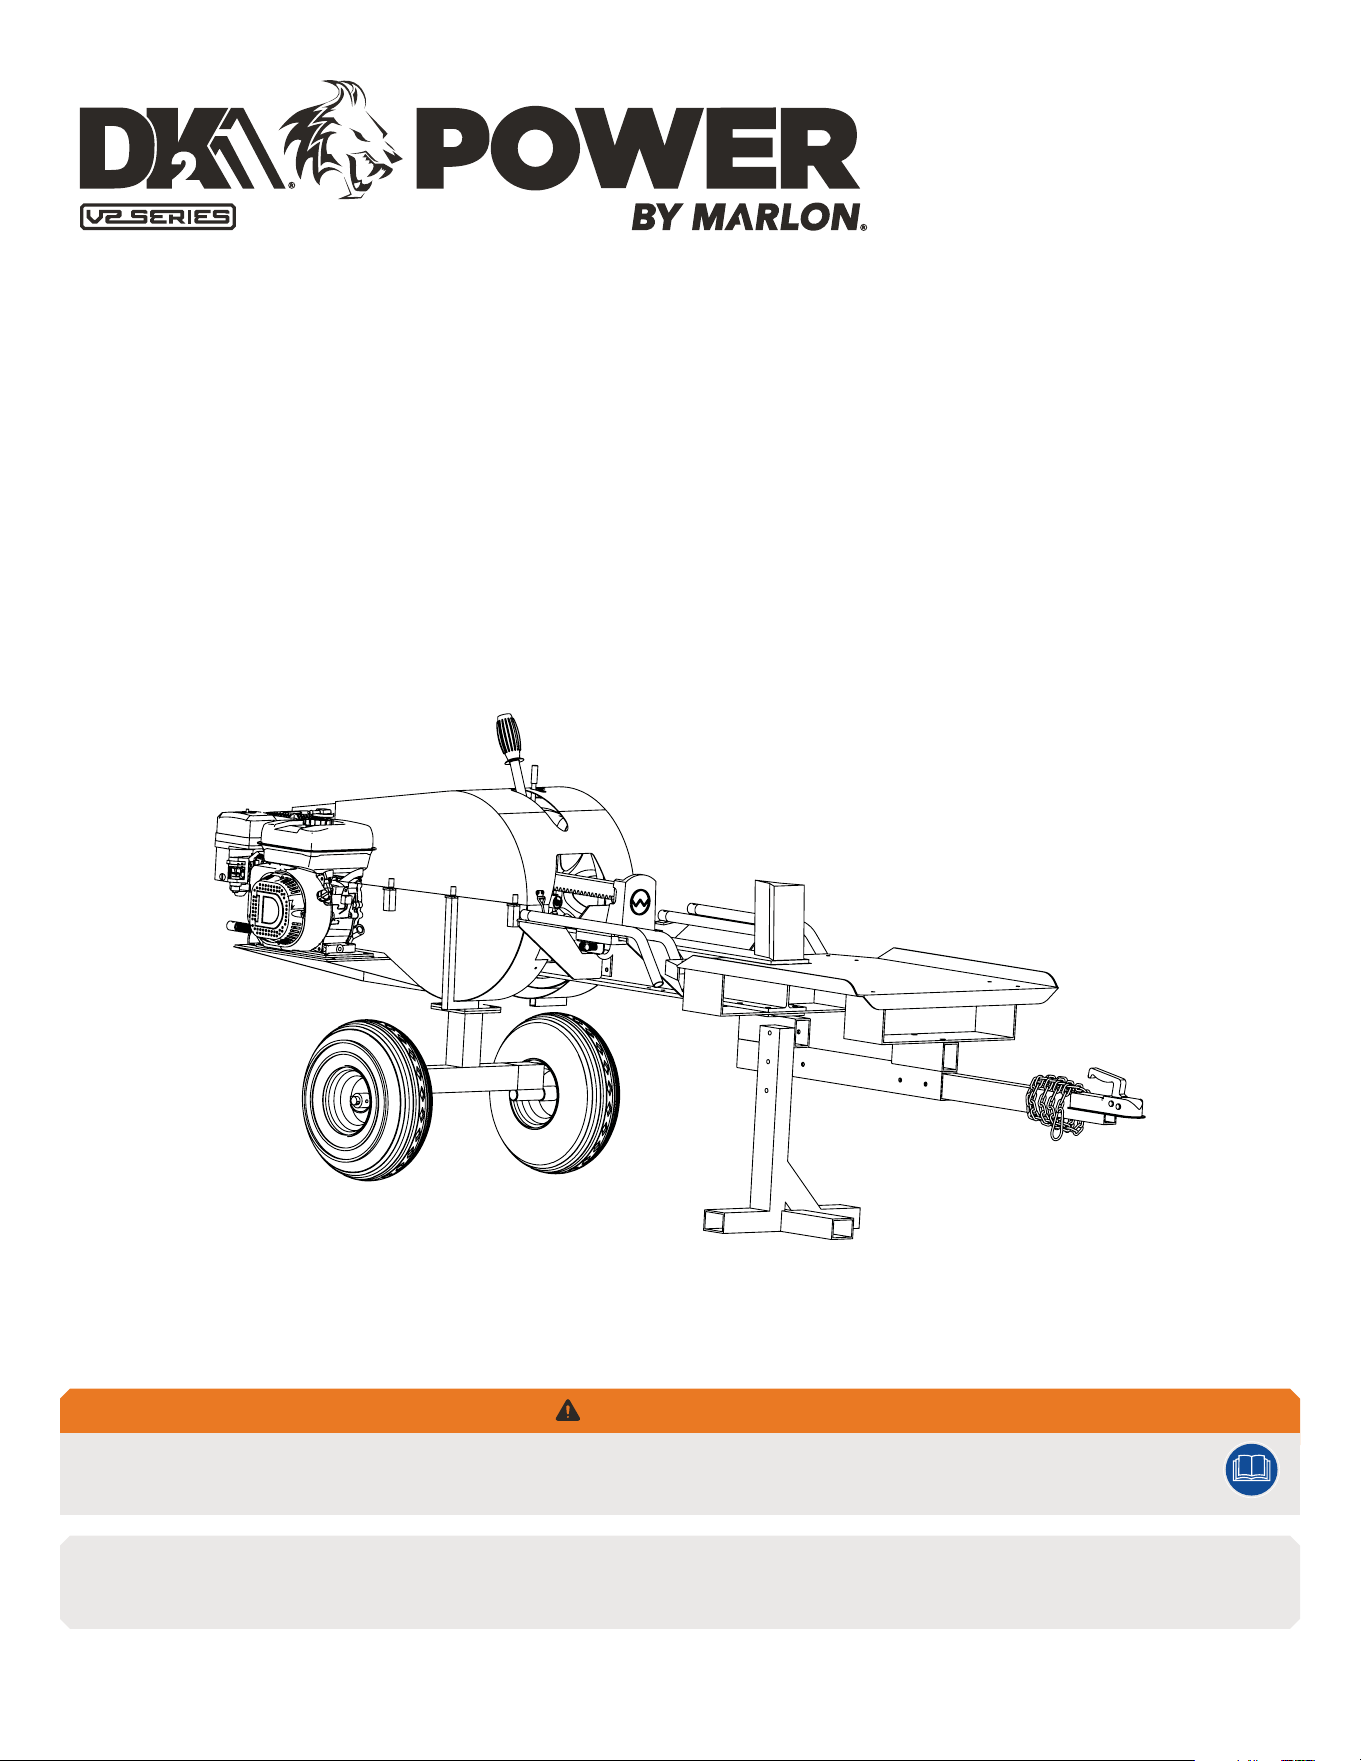
OPS240-V2
40-TON KINETIC LOG SPLITTER
USER MANUAL
NOTE: If you find any damaged or missing parts please call DK2 by Marlon Customer Service or contact us via our website. We will replace any damaged or missing parts to you
for free. Please do not return to the store.
WARNING
Read and understand the complete User Manual before assembling or using this product. Failure to comprehend and comply with warnings,
cautions and instructions for assembly and operation could result in serious injury or death.
© 2025 Marlon Recreational Products Ltd. All Rights Reserved.

2 | OPS240-V2 man.
WARRANTY
PLEASE DO NOT RETURN TO THE STORE.
You have a 1-year warranty and Marlon will replace a defective part for free.
Call us at 1 (888) 277-6960 for warranty parts and questions.
WHAT IS COVERED
2-YEAR ENGINE AND 1-YEAR LIMITED MANUFACTURER WARRANTY INCLUDED
(RESIDENTIAL)
90-DAY LIMITED WARRANTY (COMMERCIAL)
Marlon Recreational Products Ltd. warrants to the original purchaser that
product will be free and clear of manufacturing defects in workmanship and
materials under normal use and service for a period of one (1) year from the
date of the original purchase. If within one (1) year from the original date
of purchase this product fails due to defect in material or workmanship,
Marlon will repair, replace, or supply any covered defective part at our
option. Manufacturer 1-year parts only warranty no labour for residential
use, and 90-day limited warranty no labour for commercial use. Engine
2-year warranty is PARTS and LABOUR for residential use, and 90-day limited
warranty PARTS and LABOUR for commercial use.
Upon expiry of one (1) year, Marlon will have no further liability related to
the product. Marlon does not authorize any party, including its authorized
distributors or dealers, to oer any other warranty on behalf of Marlon
Recreational Products Ltd.
SERIAL NUMBERS MUST BE REGISTERED ONLINE AT WWW.DK2.COM,
WARRANTY IS NON-TRANSFERABLE AND ONLY APPLIES TO THE ORIGINAL
PRODUCT PURCHASER.
Engine — 2-year parts and labour (residential), 90-day parts and labour
(commercial)
Manufacturer — 1-year parts only, no labour (residential), 90-day parts
only, no labour (commercial)
Please see your Engine Manual for further engine warranty information.
THIS WARRANTY DOES NOT COVER OR APPLY TO:
a) Damage to the product due to misuse, mishandling and abuse
b) Improper installation, maintenance, and storage
c) Expendable parts such as nuts and bolts, pins and springs, wiring
and switch components, hydraulic hoses and fittings, cutting
teeth, cutting chains, cutting blades, throttles, belts, and tires
d) Normal wear and tear
e) Consequential damage and incidental damages such as damage
to persons or property
PROCEDURE FOR OUTDOOR EQUIPMENT WARRANTY
Within the one (1) year warranty period, the purchaser of the product can call
1 (888) 277-6960 or contact us at www.dk2.com. Notify us of the claimed
defect and provide proof of original purchase. At this time the validity of the
claim will be determined, and if approved, replacement parts will be issued.
No returned product will be accepted under warranty unless accompanied by
an RGA# issues by Marlon Recreational Products Ltd.
DAMAGED FREIGHT
Damage to your product caused by freight mishandling is not covered under
warranty. If your freight arrives damaged, REFUSE it. Inspect your product
when it arrives, otherwise if you accept it, you will be responsible for filing
any freight claims with the delivery company. Marlon warranty excludes
damage to product.
RETURNS BEFORE GAS AND OIL
Follow the return policy from the retailer you purchased the equipment from.
RESOLUTION FOR A DEFECTIVE PRODUCT AFTER GAS AND OIL HAS BEEN
ADDED
Call us at 1 (888) 277-6960 between 8am - 4pm EST Monday to Friday.
PLEASE REGISTER YOUR DK2 BY MARLON PRODUCT WITHIN 30 DAYS OF
ORIGINAL PURCHASE. SCAN THE QR CODE BELOW OR VISIT WWW.DK2.
COM/WARRANTY TO REGISTER YOUR PRODUCT.
ENGLISH

v.251027 | 3
TABLE OF CONTENTS
WARRANTY .......................................................2
TECHNICAL SPECIFICATIONS ......................................4
SAFETY .......................................... 5
SAFETY CONVENTIONS ............................................ 5
IMPORTANT SAFETY INFORMATION ................................5
FUEL SAFETY .....................................................6
OPERATION SAFETY ...............................................8
GENERAL SAFETY ................................................. 9
SAFETY DECALS ................................................. 10
ASSEMBLY .......................................11
STEP 1: INSPECT THE PACKAGING ..................................11
STEP 2: CROSS FRAME & TOW BAR FRAME .........................11
STEP 3: SAFETY LOCK CONTROL HANDLE .......................... 12
STEP 4: SPLIT HANDLE ........................................... 12
STEP 5: FOOT STAND ............................................. 12
STEP 6: TOW BAR ................................................ 13
STEP 7: FRONT TABLE BRACKET ................................... 13
STEP 8: FASTENING WHEELS TO AXLE ............................. 13
STEP 9: FASTENING AXLE TO ASSEMBLY. . . . . . . . . . . . . . . . . . . . . . . . . . . .14
STEP 10: LOG CRADLE SLIDES ......................................14
STEP 11: WORK TABLE .............................................14
OPERATION .......................................15
SAFE PRACTICES & GENERAL INFORMATION ....................... 15
OPERATOR ZONE ................................................. 16
GENERAL INFORMATION .......................................... 16
STARTING ........................................................17
STOPPING ........................................................17
MAINTENANCE ....................................17
GENERAL REMARKS, STORAGE, AND CHECKLIST ....................17
REGULAR MAINTENANCE CHECKLIST .............................. 18
ENGINE SERVICE ................................................. 18
TROUBLESHOOTING ...............................19
GENERAL REMARKS ..............................................19
TROUBLESHOOTING TABLE ....................................... 19
PARTS & SCHEMATICS ............................20
PARTS LIST .....................................................20
SCHEMATICS .................................................... 21
ENGLISH

4 | OPS240-V2 man.
TECHNICAL SPECIFICATIONS
ENGINE
7HP 212cc OHV
GEARBOX
8.9 ft.-lbs. (12Nm) net torque
WHEELS & TIRES
ATV-locking
SPLITTING CAPACITY
Ø22” x 22” (L)
Ø55 cm x 55.9 cm (L)
CONTROL
Two-hand control
WEDGE
8” (20.32 cm) steel
WEDGE HEIGHT
8” (20.32 cm)
CLEARANCE
25” (63.5 cm) ground clearance
CYCLE TIME
1 second
SPROCKET RATE
1:8
FLYWHEEL MAX RPM
450 RPM
COUPLER
2” (5.08 cm)
DIMENSIONS
120” (L) x 37” (W) x 44” (H)
304.8 cm (L) x 94 cm (W) x 111.8 cm (H)
WEIGHT
616 lbs (279.4 kg)
SHIPPING DIMENSIONS
71” (L) x 27” (W) x 26” (H)
180.3 cm (L) x 68.6 cm (W) x 66 cm (H)
SHIPPING WEIGHT
690 lbs (313 kg)
WARRANTY
3-year engine
1-year chassis
NOTE: The diameter listed is indicative of the maximum suggested size. A small log can be dicult to split when it contains knots or particularly tough fiber. On the
other hand, it may not be dicult to split logs with regular fibers even if its diameter exceeds the maximum indicated above.
ENGLISH
v.251027 | 5
SAFETY
SAFETY CONVENTIONS
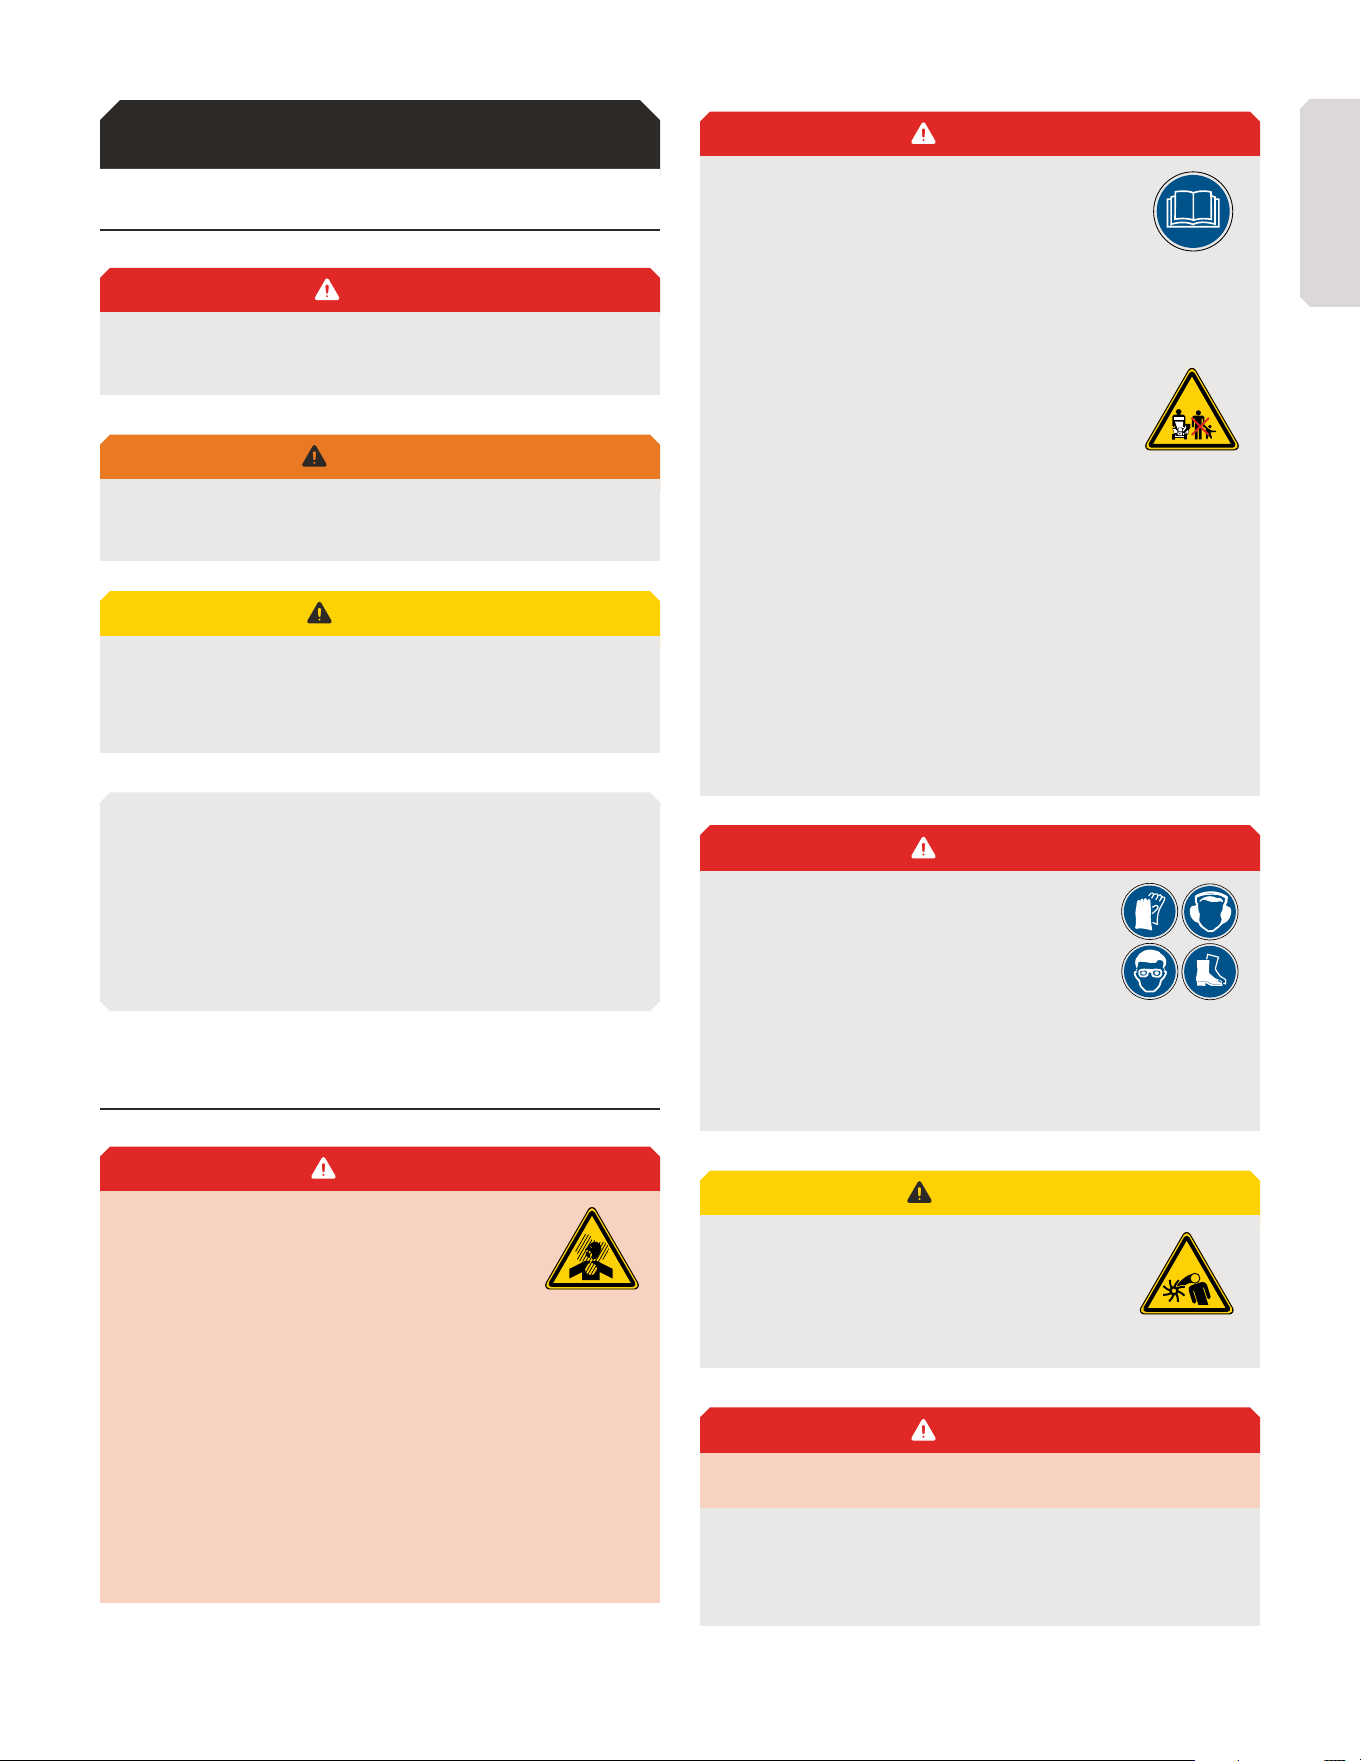
DANGER
This indicates a hazardous situation, which, if not avoided,
could result in death or serious injury.
WARNING
This indicates a hazardous situation, which, if not avoided,
could result in minor or moderate injury.
CAUTION
This information is important in proper use of your machine.
Failure to follow this instruction could result in damage to your
machine or property.
ADDITIONAL INFORMATION AND POTENTIAL CHANGES
We reserve the right to discontinue, change, and improve our products at
any time without notice or obligation to the purchaser. The descriptions and
specifications contained in this manual were in eect at printing. Equipment
described within this manual may be optional. Some illustrations may not be
applicable to your machine.
IMPORTANT SAFETY INFORMATION
DANGER
EXHAUST CONTAINS CARBON MONOXIDE:
Carbon monoxide (CO) is a poisonous, odourless,
colourless gas that can cause serious illness, brain
damage, or death. DO NOT operate gasoline-powered engines
or tools indoors, in garages, basements, or other enclosed
spaces. EVEN WITH VENTILATION, carbon monoxide (CO) can
build up to dangerous or fatal levels. OPERATE ENGINES AND
TOOLS OUTDOORS, away from air intakes, and with adequate
ventilation. If you feel nauseous, have a headache, feel dizzy
or drowsy, move to fresh air immediately and seek medical
attention.
DANGER
A
Read and understand the complete User
Manual before assembling or using this product.
Failure to comprehend and comply with warnings,
cautions, and instructions for assembly and operation could
result in serious injury or death.
B
DO NOT permit children to operate this
equipment at any time. DO NOT permit others
that have not read and understood the complete
User Manual to operate this equipment. Operation of power
equipment can be dangerous. It is the sole responsibility of the
operator to understand the assembly and safe operation of this
product.
C
DO NOT operate the equipment when under the influence
of alcohol, drugs, or medication.
D
DO NOT allow a person who is tired or otherwise impaired
or not completely alert to operate the equipment.
DANGER
PERSONAL PROTECTIVE EQUIPMENT: When
operating this equipment, it is essential that
you wear safety gear including goggles or
safety glasses, steel-toed shoes and tight-fitting
gloves (no loose cus or draw strings). Always wear ear plugs
or sound-deafening headphones to protect against hearing loss
when operating this equipment.
CAUTION
DO NOT wear loose fitting clothing or jewelry that
can be caught by moving parts of the equipment.
Keep clothing and hair away from all moving parts
of the equipment.
DANGER
WORK AREA
A
DO NOT operate the equipment on icy, wet, muddy, or
otherwise slippery ground. ONLY operate your equipment
on level ground. Operating on a slope could cause the
ENGLISH

6 | OPS240-V2 man.
equipment to roll over or logs to fall o the equipment,
which could result in injury.
B
DO NOT operate this equipment in an enclosed area.
Exhaust fumes from the engine contain carbon monoxide which
can be harmful or deadly when inhaled.
C
DO NOT move the equipment over hilly or uneven terrain
without a tow vehicle or adequate help.
D
Use a tire chock or block on wheels to prevent movement
of the equipment while in operation.
E
Operate the equipment in daylight or under good artificial
light.
F
Keep the work area free of clutter.
WARNING
REPAIR AND MAINTENANCE
A
DO NOT operate the equipment when it is in poor
mechanical condition or in need of repair. Frequently check
that all nuts, bolts, screws are tight.
B
DO NOT alter the equipment in any manner. Any alteration
will void the warranty and could cause the equipment to be
unsafe to operate. Perform all recommended maintenance
procedures before using the equipment. Replace all damaged or
worn parts immediately.
C
DO NOT tamper with the engine to run it at excessive
speeds. The maximum engine speed is preset by the
manufacturer and is within safety limits.
D
Remove the spark plug wire before performing any service
or repair on the equipment.
E
ALWAYS check the level of the engine oil before
operation.
F
Replacement parts must meet manufacturer’s
specifications.
FUEL SAFETY
WARNING
Gasoline is a highly flammable liquid. Gasoline
also gives o flammable vapor that can be
easily ignited and cause a fire or explosion.
Never overlook the hazards of gasoline. Always follow these
precautions:
A
Never run the engine in an enclosed area or without
proper ventilation as the exhaust from the engine contains
carbon monoxide, which is an odorless, tasteless, and a deadly
poisonous gas.
B
Store all fuel and oil in containers specifically designed
and approved for this purpose and keep away from heat and
open flame, and out of the reach of children.
C
Replace rubber fuel lines and grommets when worn or
damaged and after 5 years of use.
D
Fill the gasoline tank outdoors with the engine o and
allow the engine to cool completely. Don’t handle gasoline if
you or anyone nearby is smoking, or if you’re near anything that
could cause it to ignite or explode. Reinstall the fuel tank cap
and fuel container cap securely.
E
If you spill gasoline, do not attempt to start the engine.
Move the machine away from the area of the spill and avoid
creating any source of ignition until the gas vapors have
dissipated. Wipe up any spilled fuel to prevent a fire hazard and
properly dispose of the waste.
F
Allow the engine to cool completely before storing in any
enclosure. Never store a machine that has gas in the tank, or
a fuel container, near an open flame or spark such as a water
heater, space heater, clothes dryer or furnace.
G
Never make adjustments or repairs with the engine
running. Shut down the engine, disconnect the spark plug
wire, keeping it away from the spark plug to prevent accidental
starting, wait 5 minutes before making adjustments or repairs.
H
Never tamper with the engine’s governor setting. The
governor controls the maximum safe operation speed and
ENGLISH

v.251027 | 7
protects the engine. Over-speeding the engine is dangerous
and will cause damage to the engine and to the other moving
parts of the machine. If required, see your authorized dealer for
engine governor adjustments.
I
Keep combustible substances away from the engine when
it is hot.
J
Never cover the machine while the muer is still hot.
K
Do not operate the engine with the air cleaner or the
carburetor air intake cover removed. Removal of such parts
could create a fire hazard. Do not use flammable solutions to
clean the air filter.
L
The muer and engine become very hot and can cause a
severe burn; do not touch.
M
Keep a Class B fire extinguisher on hand when operating
this equipment in dry areas as a precautionary measure against
possible flying sparks.
N
Drain the fuel tank prior to storage to avoid a potential
fire hazard. Store gasoline in an approved, tightly sealed
container. Store the container in a cool, dry place.
O
Turn the fuel shut o valve on the engine to the “OFF”
position before towing the equipment. Failure to do so may
result in flooding the engine.
CAUTION
IMPORTANT NOTE: This equipment is equipped with an internal
combustion engine and should not be used on or near any
unimproved forest-covered, brush-covered, or grass-covered
land unless the engine’s exhaust system is equipped with a
spark arrester meeting applicable local or state laws (if any).
If a spark arrester is used, it should be maintained in eective
working order by the operator. In the state of California a spark
arrester is required by law. Other states have similar laws.
Federal laws apply on federal lands. A spark arrester muer is
available as an accessory at your nearest engine dealer. Always
check legal requirements in your area.
CAUTION
TOWING SAFETY
A
DO NOT carry any cargo or wood on the equipment.
B
DO NOT allow anyone to sit or ride on the equipment.
C
Disconnect the equipment from the towing vehicle before
operating it.
D
Use care when backing up with the equipment in tow to
avoid jack-knifing.
E
DO NOT exceed 15 mph (24 km/h) when towing your
equipment. Towing the equipment at speeds higher than 15
mph (24 km/h) could result in loss of control, damage to the
equipment, serious injury or death. Adjust towing speed for
terrain and conditions. Be extra cautious when towing over
rough terrain.
WARNING
PROPER MAINTENANCE AND STORAGE
A
Keep machine, attachments, and accessories in safe
working condition.
B
Check engine mounting bolts and other hardware before
each use for proper tightness. NEVER operate your machine in
poor mechanical condition or when in need of repair. Be sure all
safety guards and shields are in proper position. These safety
devices are for your protection.
C
NEVER store the equipment with fuel in the fuel tank
inside a building where ignition sources are present, such as hot
water and space heaters, clothes dryers and the like. Allow the
engine to cool before storing in any enclosure.
D
If the fuel tank is to be drained, do this outdoors.
E
NEVER tamper with safety devices. Check their proper
operation regularly.
F
Inspect the belt each time you use the equipment. Look
for damage, worn areas or tears. DO NOT use the unit if this
condition exists.
ENGLISH

8 | OPS240-V2 man.
WARNING
CALIFORNIA PROPOSITION 65: Engine exhaust, some of its
constituents and certain product components contain or emit
chemicals known to the State of California to cause cancer and
birth defects or other reproductive harm. For more information
visit www.P65Warnings.ca.gov.
OPERATION SAFETY
DANGER
PROTECT YOURSELF AND THOSE AROUND YOU: This is a
high-powered machine, with moving parts operating with high
energy. You MUST operate the machine safely. Unsafe operation
can create a number of hazards for you, as well as anyone else
in the nearby area. ALWAYS take the following precautions
when using this machine:
A
Keep in mind that the operator or user is responsible for
accidents or hazards occurring to other people, their property,
and themselves.
B
ALWAYS wear protective goggles or safety glasses with
side shields while using the log splitter to protect your eyes
from possible thrown debris.
C
Avoid wearing loose clothing or jewellery, which can catch
on to moving parts of the machine.
D
We recommend wearing gloves while using the log splitter.
Be sure your gloves fit properly and do not have loose cus or
drawstrings.
E
Wear shoes with non-slip treads when using your log
splitter. If you have safety shoes, we recommend wearing them.
DO NOT use the machine while barefoot or wearing open-toed
footwear.
F
Wear long pants while operating the log splitter.
G
Use ear protection or ear plugs rated with at least 20dBA
to protect your hearing.
H
Keep bystanders at least 50 ft. (15.24 m) away from your
work area at all times. Stop the engine when another person or
pet approaches.
DANGER
SAFETY FOR CHILDREN AND PETS: Tragic accidents can occur
if the operator is not alert to the presence of children and pets.
Children are often attracted to the machine and the splitting
activity. NEVER assume that children will remain where you last
saw them. ALWAYS follow these precautions:
A
Keep children and pets at least 50 ft. (15.24 m) away from
the working area and ensure they are under the watchful care
of a responsible adult.
B
Be alert and turn the machine o if children or pets enter
the work area.
C
NEVER allow children to operate the log splitter.
ENGLISH

v.251027 | 9
GENERAL SAFETY
WARNING
GENERAL SAFETY: Operating this log splitter safely is necessary
to prevent or minimize the risk of death or serious injury. Unsafe
operation can create a number of hazards for you. ALWAYS take
the following precautions when operating this log splitter:
A
Your log splitter is a powerful tool, not a plaything. Exercise
extreme caution at all times. The machine is designed to split
logs. DO NOT use it for any other purpose.
B
Know how to stop the log splitter quickly.
C
NEVER operate your unit on a slippery, wet, muddy, or icy
surface. Exercise caution to avoid slipping or falling.
D
NEVER use the machine without ensuring that all guards
and shields are in place.
E
NEVER, under any conditions, remove, bend, cut, fit,
weld, or otherwise alter standard parts on the log splitter. This
includes all shields and guards. Modifications to your machine
could cause personal injuries and property damage and will void
your warranty.
F
Allow only one person to operate the log splitter at any
time.
G
If the machine starts to make an unusual noise or vibrate,
shut down the engine, disconnect the spark plug wire, keeping
it away from the spark plug to prevent accidental starting,
wait five minutes for the engine to cool down, then inspect for
damage. Vibration is generally a warning sign of trouble. Check
damaged parts and clean, repair, and/or replace if necessary.
H
NEVER tamper with safety devices. Check their proper
operation regularly.
I
Before performing any maintenance or inspection
procedure on the log splitter, shut down the engine, disconnect
the spark plug wire keeping it away from the spark plug to
prevent accidental starting, wait five minutes for machine to
cool down.
J
NEVER allow people who are unfamiliar with these rules
of safe operation to use your machine.
K
NEVER overload or attempt to split logs beyond the
manufacturer’s recommendation. It could result in personal
injury or damage to the machine.
L
While using the log splitter, DO NOT hurry or take things
for granted. When in doubt about the equipment or your
surroundings, stop the machine and take time to look things
over.
M
NEVER operate the machine when under the influence of
alcohol, drugs, or medication.
N
Use the machine only in daylight.
O
Stay alert for hidden hazards or trac.
P
Keep all nuts and bolts tight and keep the equipment in
good operating condition.
NOTE: List of warnings and cautions cannot be all-inclusive. If situations
occur that are not covered by this manual, the operator must apply common
sense and operate this log splitter in a safe manner. Contact the dealers for
assistance in your area.
ENGLISH
10 | OPS240-V2 man.
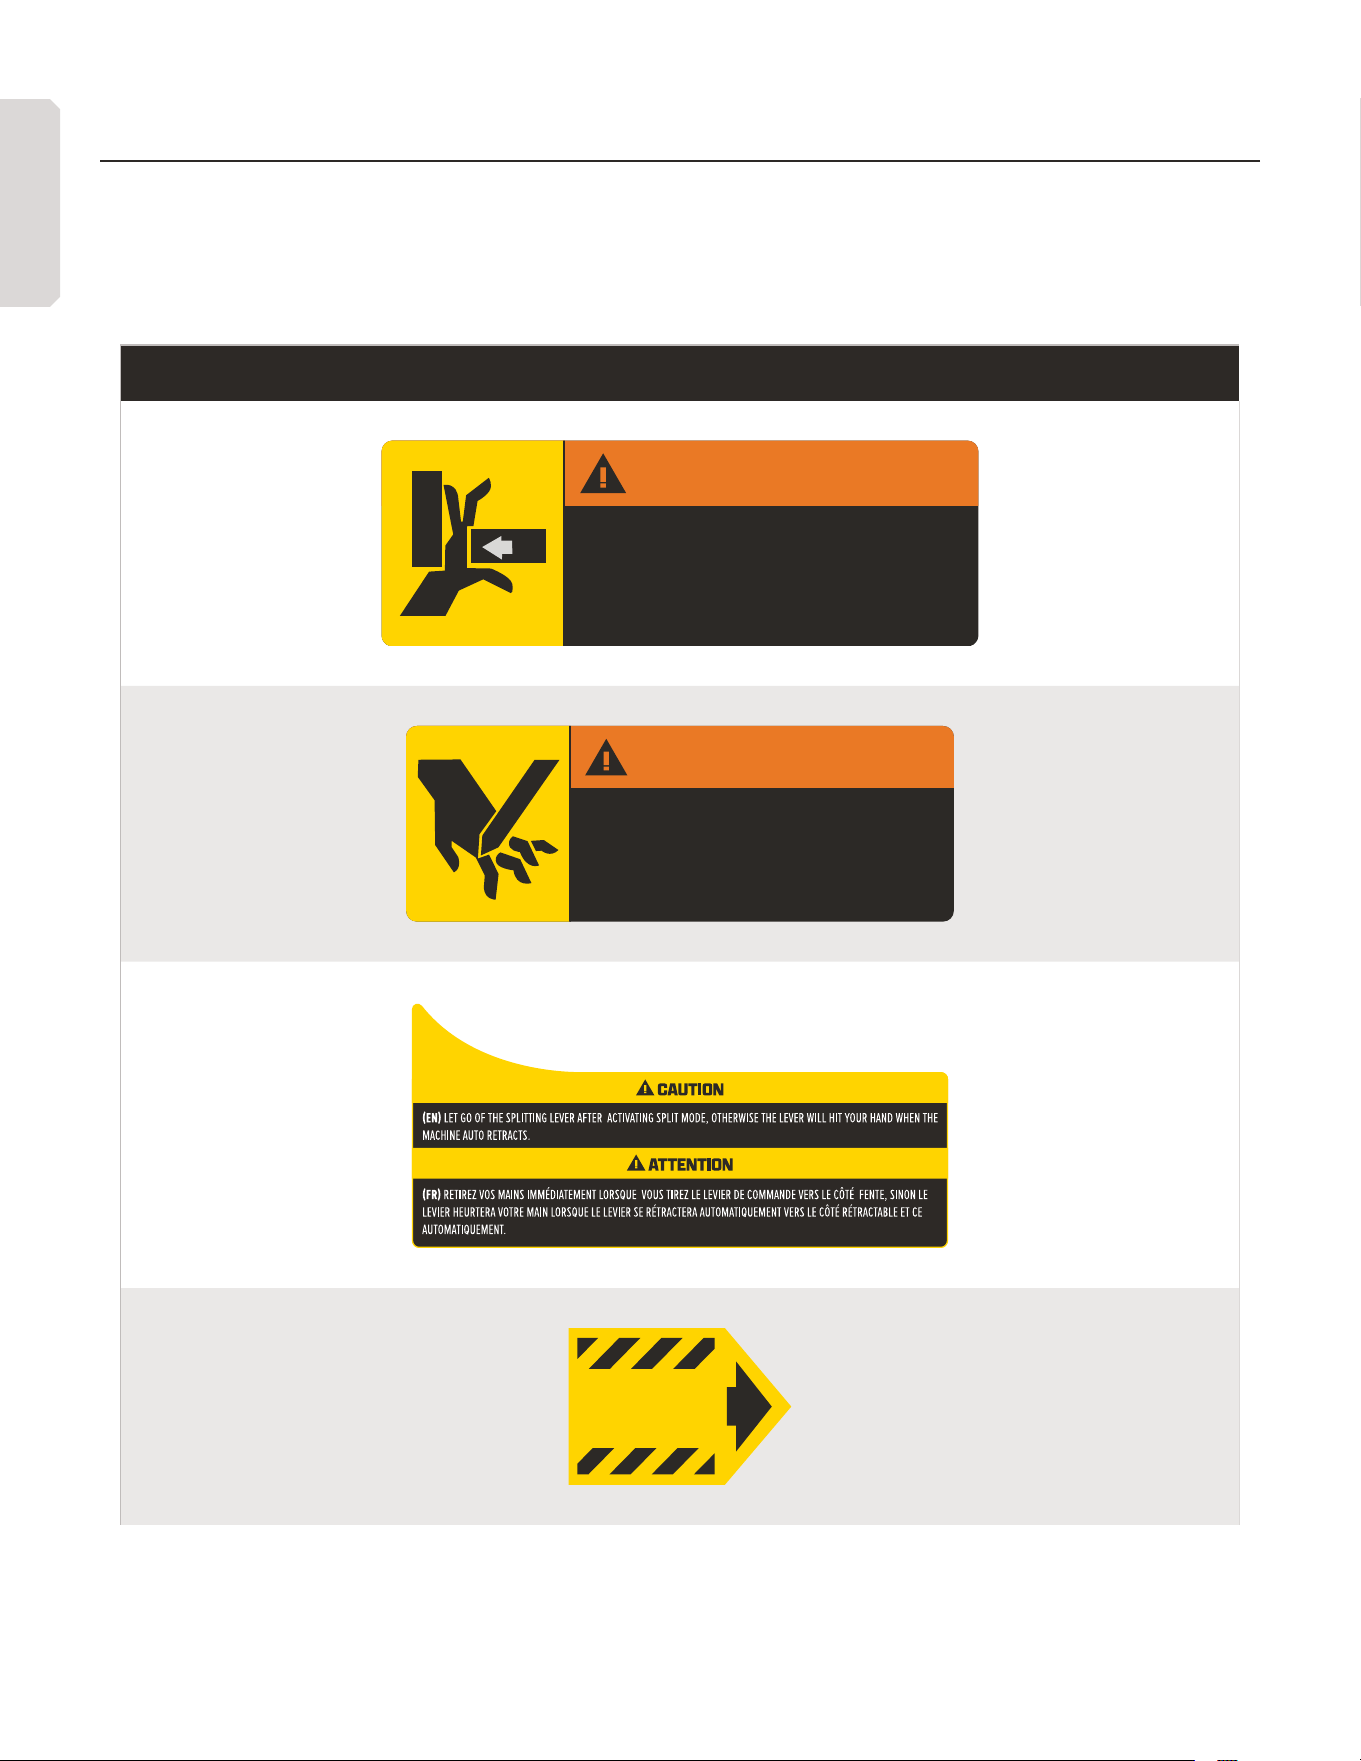
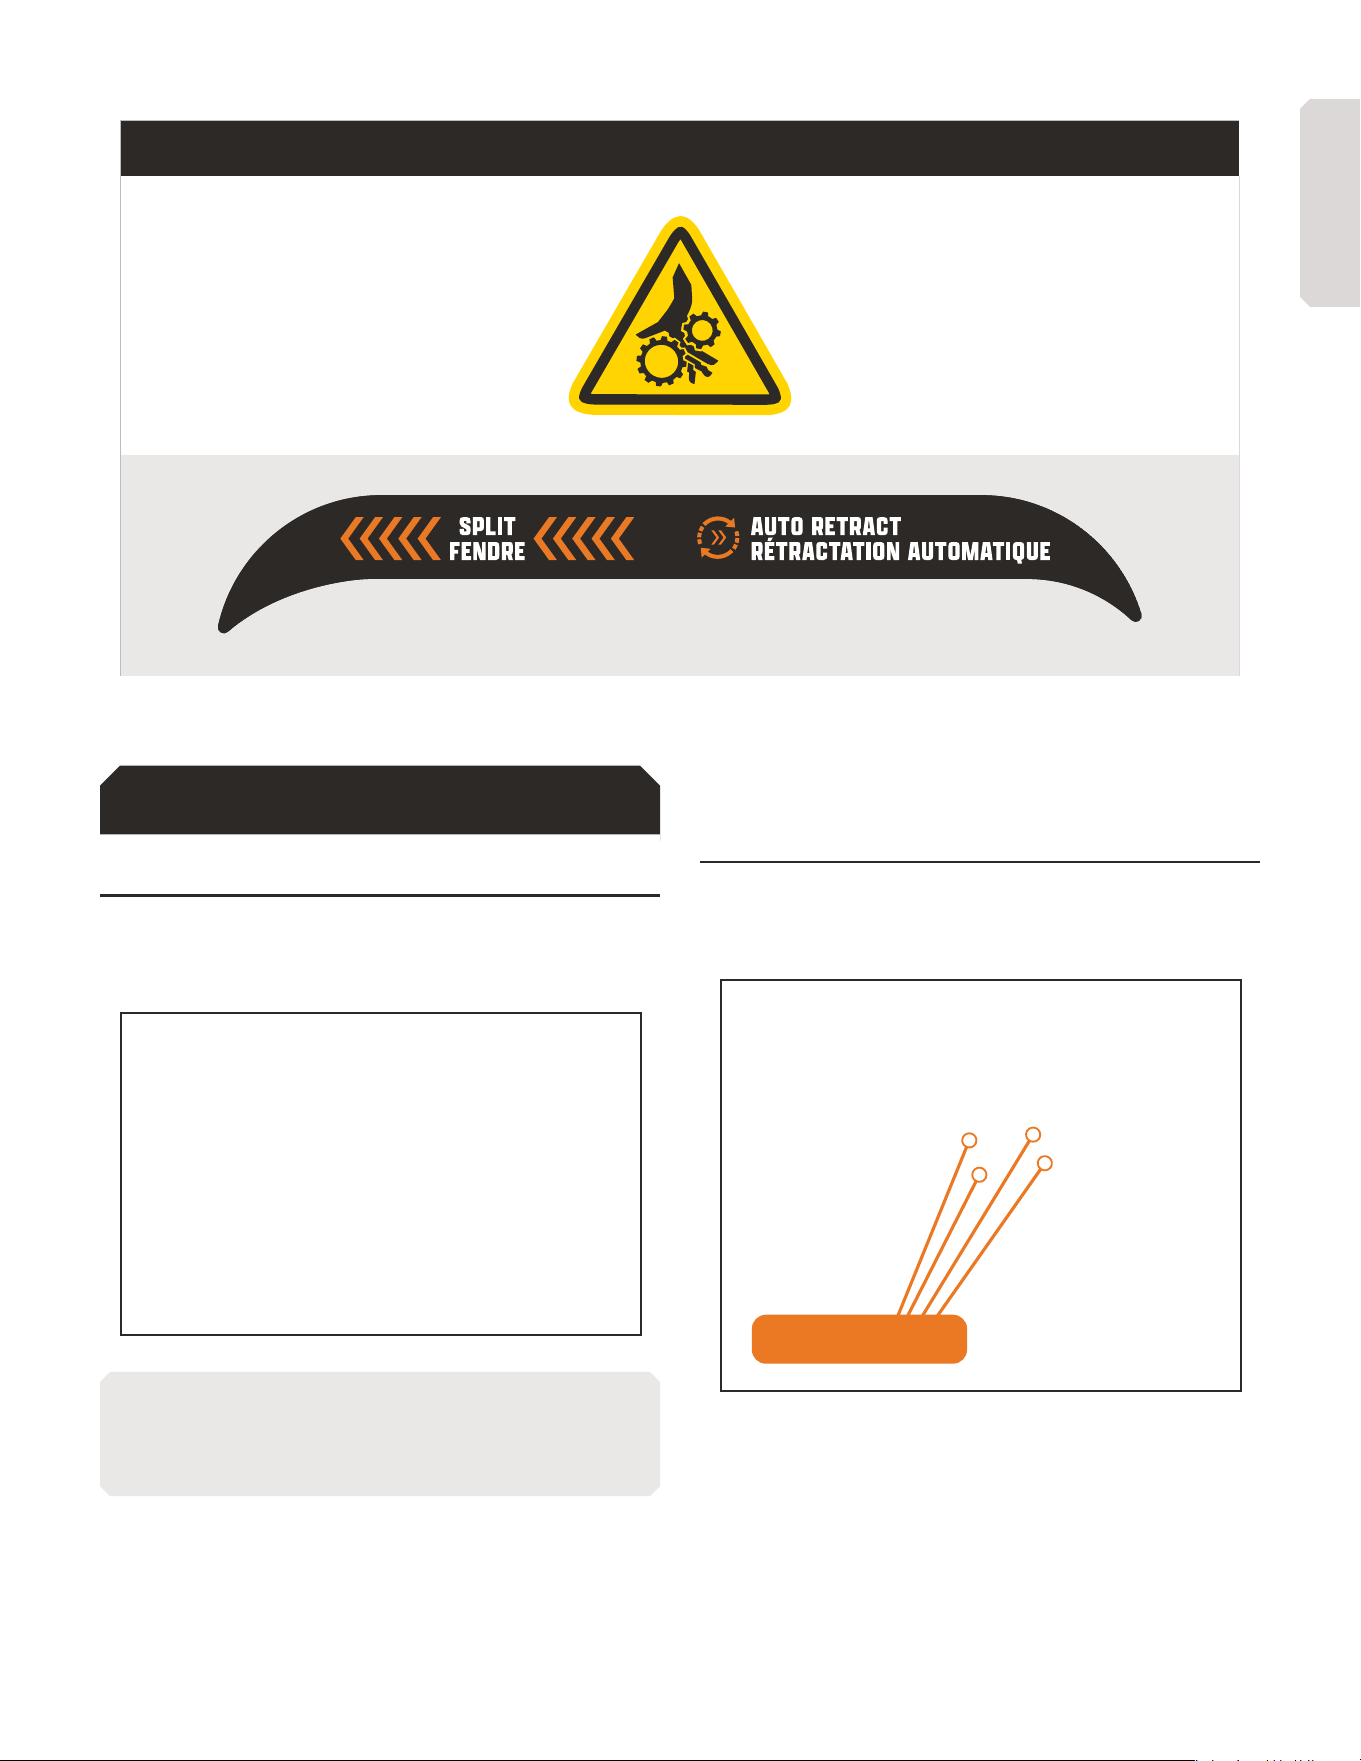
SAFETY DECALS
The purpose of safety decals and symbols is to attract your attention to possible dangers. The safety symbols, and their explanations,
deserve your careful attention and review in order to safely operate this machine. The safety warnings do not eliminate any danger, the
purpose of these warnings is to bring awareness to the dangers of the machine. The instructions or warnings they give are not substitutes
for proper accident prevention measures and care while using the product.
LABEL
WARNING / AVERTISSEMENT
PINCH POINT - KEEP AWAY
POINT DE PINCEMENT - TENIR À L'ÉCART
To avoid serious injury, keep hands clear of moving cylinder. Speeds may change with
loads or valve functions.
Pour éviter toute blessure grave, gardez vos mains loin du vérin et de la cale en mouve-
ment. Les vitesses peuvent varier selon les charges ou le fonctionnement des vannes.
WARNING / AVERTISSEMENT
(EN) Cutting hazard at wood splitter wedge - stay clear. Keep hands and limbs away
from moving parts and log ends. Serious injury or death could result if safety pre-
cautions are not followed.
(FR) Risque de blessure dû au mouvement de la cale de la fendeuse – Restez à
l'écart. Gardez les mains et les membres éloignés des pièces mobiles et des
extrémités des bûches. Le non-respect des consignes de sécurité peut entraîner des
blessures graves, voire mortelles.
LUBRICATION POINT
POINT DE LUBRIFICATION
ENGLISH
v.251027 | 11
LABEL
ASSEMBLY
STEP 1: INSPECT THE PACKAGING
Open and unpack all items, leave lots of working space, and
inspect parts.
NOTE: Upon inspection of parts, if you find any missing or damaged parts
please call Marlon at 1 (888) 277-6960 or contact us via our website at
www.dk2.com. Please do not return to the store.
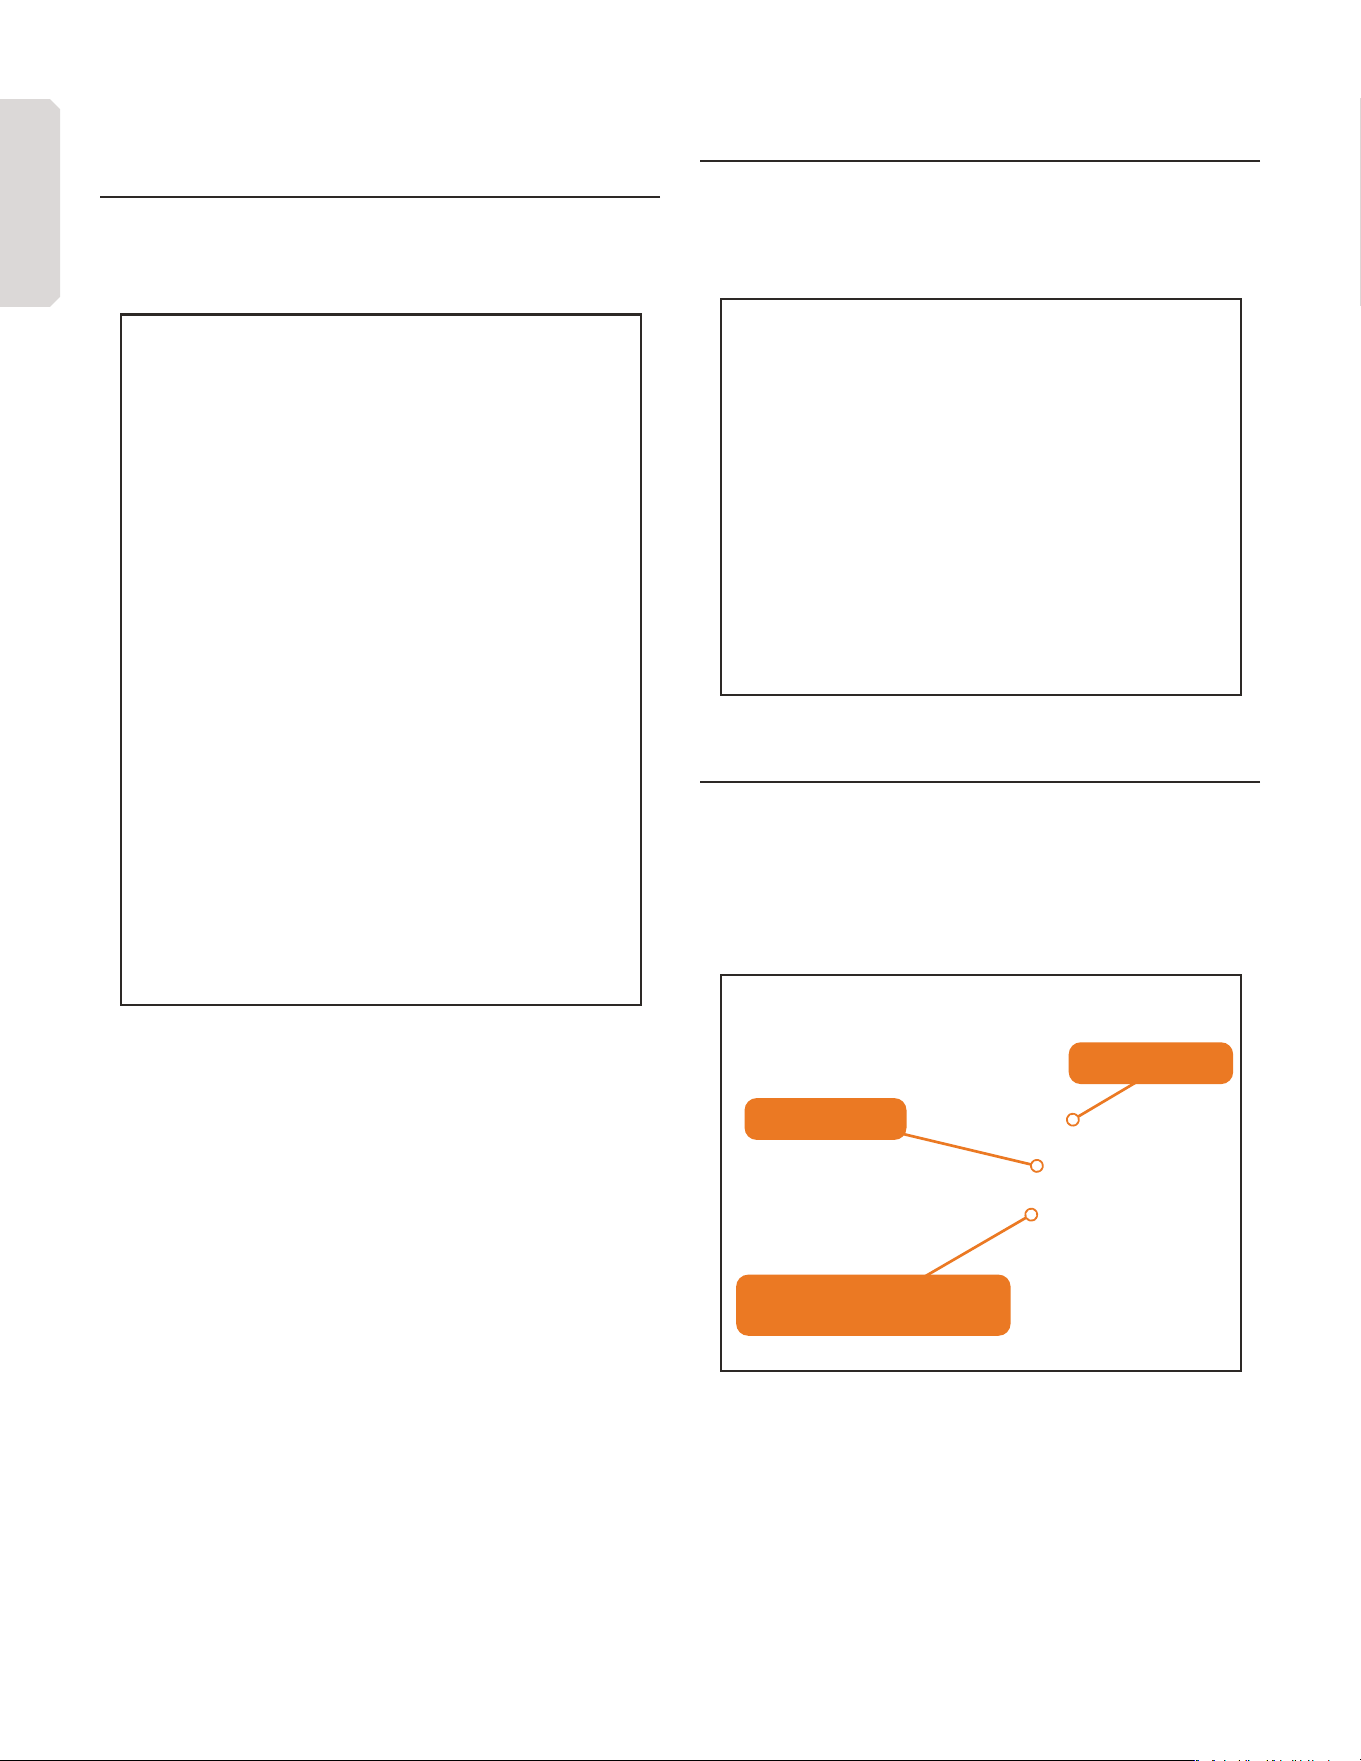
STEP 2: CROSS FRAME & TOW BAR
FRAME
Install the cross frame and tow bar frame. Use four bolts
included to assemble.
FOUR BOLTS & NUTS
ENGLISH
12 | OPS240-V2 man.
STEP 3: SAFETY LOCK CONTROL
HANDLE
Open the hood and install the safety lock control handle. Screw
it until tight into the locking casting.
STEP 4: SPLIT HANDLE
A
Install the split handle with the hardware provided.
B
Close and latch the hood shut.
STEP 5: FOOT STAND
A
Install the foot stand.
B
Bolt the bottom hole.
C
Hitch pin the top hole.
HITCH PIN ON TOP
BOLT ON BOTTOM
RAISE WHEN TOWING.
USE HITCH PIN IN BOTTOM HOLE
ENGLISH

v.251027 | 13
STEP 6: TOW BAR
Using the two bolts provided, secure the tow bar tightly to the
assembly.
STEP 7: FRONT TABLE BRACKET
Install the front table bracket as shown using the hardware
provided.
USE THE HARDWARE
PROVIDED TO FASTEN
NOTE: Keep loose until after the table installation to help with the hole
alignment.
STEP 8: FASTENING WHEELS TO
AXLE
Install the wheels on the axle and insert spring pin.
NOTE: Make sure wheel is freely spinning. You can remove the pin, slide the
wheel and re-pin to lock the wheel during splitting.
ENGLISH

14 | OPS240-V2 man.
STEP 9: FASTENING AXLE TO
ASSEMBLY
A
Get some help lifting the unit by the hitch or safely use a
hydraulic jack or lift chain, and stand the unit upright, resting on
the back bottom plate.
CAUTION
BE CAREFUL, THIS UNIT IS HEAVY AND SHOULD BE HANDLED
BY MULTIPLE PERSONS OR A SAFE LIFTING DEVICE.
B
Insert the four bolts provided and tighten.
STEP 10: LOG CRADLE SLIDES
A
Assemble the log cradle slides to the side of beam as
shown below.
B
Use hardware supplied and bolt both rail cradle
assemblies together. Tighten all bolts securely.
BOLT THROUGH
THE BEAM
STEP 11: WORK TABLE
A
Use the eight flat bolts and hardware provided.
B
Tighten the two bolts on the underside table supports that
were left loose in previous assembly steps.
C
Re-check all assembly bolts and equipment bolts, and
tighten if required.
USE EIGHT BOLTS PROVIDED
NOTE: Grease the rack teeth and spine with standard grease. Keep the log
beam free of grease and keep clean when splitting. The ram slides on a
teflon plate, so keep it clean from grease and wood particles.
ENGLISH

v.251027 | 15
OPERATION
SAFE PRACTICES & GENERAL
INFORMATION
DANGER
Read and understand the complete User Manual before
assembling or using this equipment. Failure to comprehend and
comply with warnings, cautions, and instructions for assembly
and operation could result in serious injury or death.
A
DO NOT permit children to operate this equipment at any
time.
B
DO NOT permit others that have not read and understood
the complete User Manual to operate this equipment.
Operation of power equipment can be dangerous. It is the sole
responsibility of the operator to understand the assembly and
safe operation of this equipment.
CAUTION
OIL MUST BE ADDED TO THE ENGINE BEFORE STARTING OR
OPERATING.
ENGINE OIL RECOMMENDATIONS: SAE 10W-30 is
recommended for general use. Refer to the SAE Viscosity Grades
chart in your engine owner’s manual for average temperature
ranges.
CAUTION
STARTING INSTRUCTIONS: For more information on starting
and stopping the engine, refer to your engine owner’s manual.
WARNING
NOTE: For operation in wooded areas, obtain a spark arrester
for the exhaust system. See the engine operating and
maintenance manual and check with your authorized service
center.
WARNING
BEFORE STARTING ENGINE
A
Clear area of all people and property that could be
damaged. Think safety.
B
This log splitter is fast and can cause injury if safety is not
enforced.
C
Only one operator should work this unit. NEVER have
another person loading logs while another is at the controls.
D
DO NOT remove the second hand safety lever.
WARNING
IF YOUR UNIT WILL NOT START
A
Check the oil level. Your engine has a low oil protection and
will not start if low on oil.
B
Make sure spark plug wire is seated.
C
Move the gas lever ON to the right. Left position is OFF.
D
Use the choke for cold starting.
E
Check your gas level.
WARNING
SAFE PRACTICE
A
DO NOT wear loose fitting clothes that could get stuck in
the ram.
B
ONLY split wood, no metal or plastic.
C
Children SHOULD NOT run this equipment.
D
Stay alert of your surroundings and persons that could
appear in the area while you are working.
E
Load log on beam, slide to splitting wedge.
F
Wear safety glasses, gloves, and protective shoes.
G
Operate outdoors ONLY - gas fumes are deadly indoors.
ENGLISH

16 | OPS240-V2 man.
CAUTION
ALL LOGS SHOULD BE NO LONGER THAN 22” (55.8 CM)
CAUTION
AVOID CROSS-GRAIN SPLITTING: NEVER attempt to split wood
across the grain. The log splitter is not designed for cross-grain
splitting. Doing so could damage the log splitter and may cause
personal injury. Make sure both ends of the log you are splitting
are placed properly and as square as possible. This will prevent
the log from sliding out of position when under pressure.
A
Place the log in the log splitter. Grasp the log on the sides
near the middle of the block. Center the log, side-to-side, on the
rail of the log splitter, making sure that one end is against the
splitting wedge.
B
With your left hand, pull the safety lever, with your right
hand, push the splitting lever, then let go. This machine auto-
retracts after release of the splitting lever.
OPERATOR ZONE
Operate the equipment from within the green operator zone as
shown in the diagram below, avoid the dotted red zones.
DANGER
FAILURE TO OPERATE THE EQUIPMENT IN THIS POSITION CAN
RESULT IN SERIOUS INJURY OR DEATH.
DANGER
IMPORTANT OPERATOR ZONE PRACTICES
A
DO NOT place your hands on the ends of the log when
loading the log splitter. THIS IS VERY UNSAFE and could result
in serious injury to your hands.
B
DO NOT reach or step across the rail while the log splitter
is running. THIS IS VERY UNSAFE and could cause personal
injury, event death.
C
DO NOT reach forward and attempt to catch the split wood
as the log is being split - let it fall to the ground.
GENERAL INFORMATION
Run the engine at full RPM. This machine pushes the ram
forward for a 1/2 second and retracts for another 1/2 second. To
ensure proper use of the splitter, allow the machine to retract
before loading another log.
The splitting process is as follows:
A
Pull the safety lever with your left hand.
B
Push the splitting lever quickly with your right hand, and
let go of the lever.
NOTE: DO NOT hold the splitting lever down. The ram and splitting lever
will automatically retract after the machine has split the log. This allows the
machine to regain kinetic energy for optimal performance.
NOTE: Consult your manual provided for engine maintenance and operation
instruction.
ENGLISH

v.251027 | 17
STARTING
A
Position your log splitter on flat, dry ground, and then stop
the front wheel with the brake, make sure the machine cannot
be moved from this position.
B
Make sure the fuel shut-o valve is in the ON position.
C
Move the choke control lever to the CHOKE position
(should only be needed if the engine is cold).
D
Move the throttle control lever to the FAST position.
E
Turn the ignition switch to the ON position. Grasp the
recoil starter handle and slowly pull until you feel resistance.
Let the cord retract a little bit, then pull the cord rapidly to start
the engine. One or two pulls instantly starts the engine.
F
Move the choke control lever (if used for cold engine)
slowly back to RUN position when the engine is running well.
G
If the log splitter has not been running (cold engine), warm
up the engine by running it at half throttle for three to four
minutes, then advance the engine throttle control to max speed.
STOPPING
A
Move the throttle lever to IDLE.
B
Turn the ignition switch to the OFF position.
MAINTENANCE
GENERAL REMARKS, STORAGE,
AND CHECKLIST
Regular maintenance is the way to ensure the best performance
and long life of your machine. Please refer to this manual
and the engine manufacturer’s user manual for maintenance
procedures.
WARNING
Before performing any maintenance procedure or inspection,
stop the engine, wait five minutes to allow all parts to cool.
Disconnect the spark plug wire, keeping it away from the spark
plug.
WARNING
A
NEVER store engine indoors or in enclosed poorly
ventilated areas with fuel in tank, where fuel fumes may reach
an open flame, spark or pilot light, as on a furnace, water
heater, clothes dryer or other gas appliance. If engine is to be
unused for 30 days or more, prepare as follows: Remove all
gasoline from carburetor and fuel tank to prevent gum deposits
from forming on these parts and causing possible malfunction of
engine. Drain fuel outdoors, into an approved container, away
from open flame. Be sure engine is cool. Do not smoke. Run
engine until fuel tank is empty and engine runs out of gasoline.
B
Fuel stabilizer is an acceptable alternative for minimizing
the formation of gum deposits during storage. Add stabilizer
to gasoline in storage container or fuel tank. Follow stabilizer
manufacturer’s instructions to determine proper mix ratio. Run
engine at least 10 minutes after adding stabilizer to allow it to
reach carburetor.
ENGLISH

18 | OPS240-V2 man.
REGULAR MAINTENANCE CHECKLIST
PROCEDURE
BEFORE EACH
USE
EVERY 3
HOURS
EVERY 25
HOURS
EVERY 100
HOURS
CHECK ENGINE OIL LEVEL
CHECK GENERAL EQUIPMENT CONDITION
CHECK WEDGE FOR SHARPNESS
GREASE SURFACE OF SLIDE RAIL
CHECK BELTS
GREASE RACK AND PINION
CHECK TIRE PRESSURE
CLEAN ENGINE EXTERIOR AND COOLING
CHANGE ENGINE OIL
REPLACE AIR FILTER
REPLACE SPARK PLUG
NOTE: All of the bearings on your splitter are sealed units and should have a sucient amount of lubricant to last the life of your machine with normal use. The rack
and pinion should be greased before every use with standard gear grease.
ENGINE SERVICE
Refer to your engine manual provided for further engine maintenance instruction.
ENGLISH

v.251027 | 19
TROUBLESHOOTING
GENERAL REMARKS
Most problems are easy to fix. Consult the Troubleshooting Table below for common problems and their solutions. If you continue to
experience problems, contact the Marlon Customer Service Team at 1 (888) 277-6960.
WARNING
Before performing any maintenance procedure or inspection, stop the engine, wait five minutes to allow all parts to cool. Disconnect the
spark plug wire, keeping it away from the spark plug.
TROUBLESHOOTING TABLE
SYMPTOM POSSIBLE CAUSE
THE ENGINE WON’T START.
(PLEASE REFER TO THE ENGINE USE
MANUAL FOR ENGINE-SPECIFIC
PROCEDURES)
1. Is the ignition switch in the ON position?
2. Is the fuel shut-o valve on?
3. Are you using clean, fresh gas? If the gas is old, change it. Use a fuel stabilizer if you keep gas longer than 30 days.
4. Is the spark plug clean? If the spark plug is dirty or cracked, change it. If it is oily, leave it out, hold a rag over the plug
hole and pull the recoil cord several times to blow out any oil in the cylinder, then wipe o the plug and re-insert it.
THE ENGINE LACKS POWER OR
IS NOT RUNNING SMOOTHLY.
(PLEASE REFER TO THE ENGINE USE
MANUAL FOR ENGINE-SPECIFIC
PROCEDURES)
1. Check that the throttle lever is in the RUN position.
2. Is the air filter clean? If it is dirty, change it following the procedure in the engine manufacturer’s manual.
3. Is the spark plug clean? If it is fouled or cracked, change it. If it is oily, leave it out, hold a rag over the plug hole and pull
your recoil cord several times to blow out any oil in the cylinder, then wipe o the plug and re-insert it.
4. Are you using clean, fresh unleaded gas? If it is old, change it. Use a fuel stabilizer if you keep gas longer than 30 days.
5. Does your engine have the right amount of oil? If it is dirty, change it following the procedure in the engine
manufacturer’s owner’s manual.
6. Check the oil level and adjust as needed.
ENGINE SMOKES.
(PLEASE REFER TO THE ENGINE USE
MANUAL FOR ENGINE-SPECIFIC
PROCEDURES)
1. Check the oil level and adjust as needed.
2. Check the air filter and clean or replace if needed.
3. You may be using the wrong oil - too light for the temperature. Refer to your engine owner’s manual for detailed
information.
4. Clean the cooling fins if they’re dirty.
RACK CATCHING ON TAIL TUBE
(AT END OF STROKE).
RACK RETURNING VERY SLOW
OR NOT GOING ALL THE WAY
BACK
1. Adjust carriage hold-downs (slide guides).
2. Check for wood chips or debris between the ram bushing plate and beam.
3. Check rack lift bearing for alignment or damage.
4. Return spring is unhooked or damaged. Reconnect or replace as needed.
5. Machine wedge end too low. Must be almost level or wedge end slightly higher.
OPERATOR LEVER SNAPPING
OUT OF GEAR OR NOT STAYING
IN GEAR
1. Lever not all the way forward when rack comes under full load. Push lever quicker and more forcefully into the full
forward position.
2. Ram has been overloaded at lower part of face. Check rack gear for straightness.
RACK SLAMMING BACK TOO
FAST
1. Wedge end of machine too high. Must be almost level with the ram end of just slightly higher.
2. Springs not operating properly. Fix or replace as needed.
MACHINE DOES NOT SEEM TO
HAVE FULL SPLITTING POWER
The belts may be too loose and slipping. Adjust or replace belts as needed.
OPERATOR LEVER NOT
ENGAGING RACK WITH PINION
GEAR
1. Clean wood chips or other debris from under rack.
2. Clean accumulated dirt from frame where the carriage assembly rests against rubber bumpers.
ENGLISH

20 | OPS240-V2 man.
PARTS & SCHEMATICS
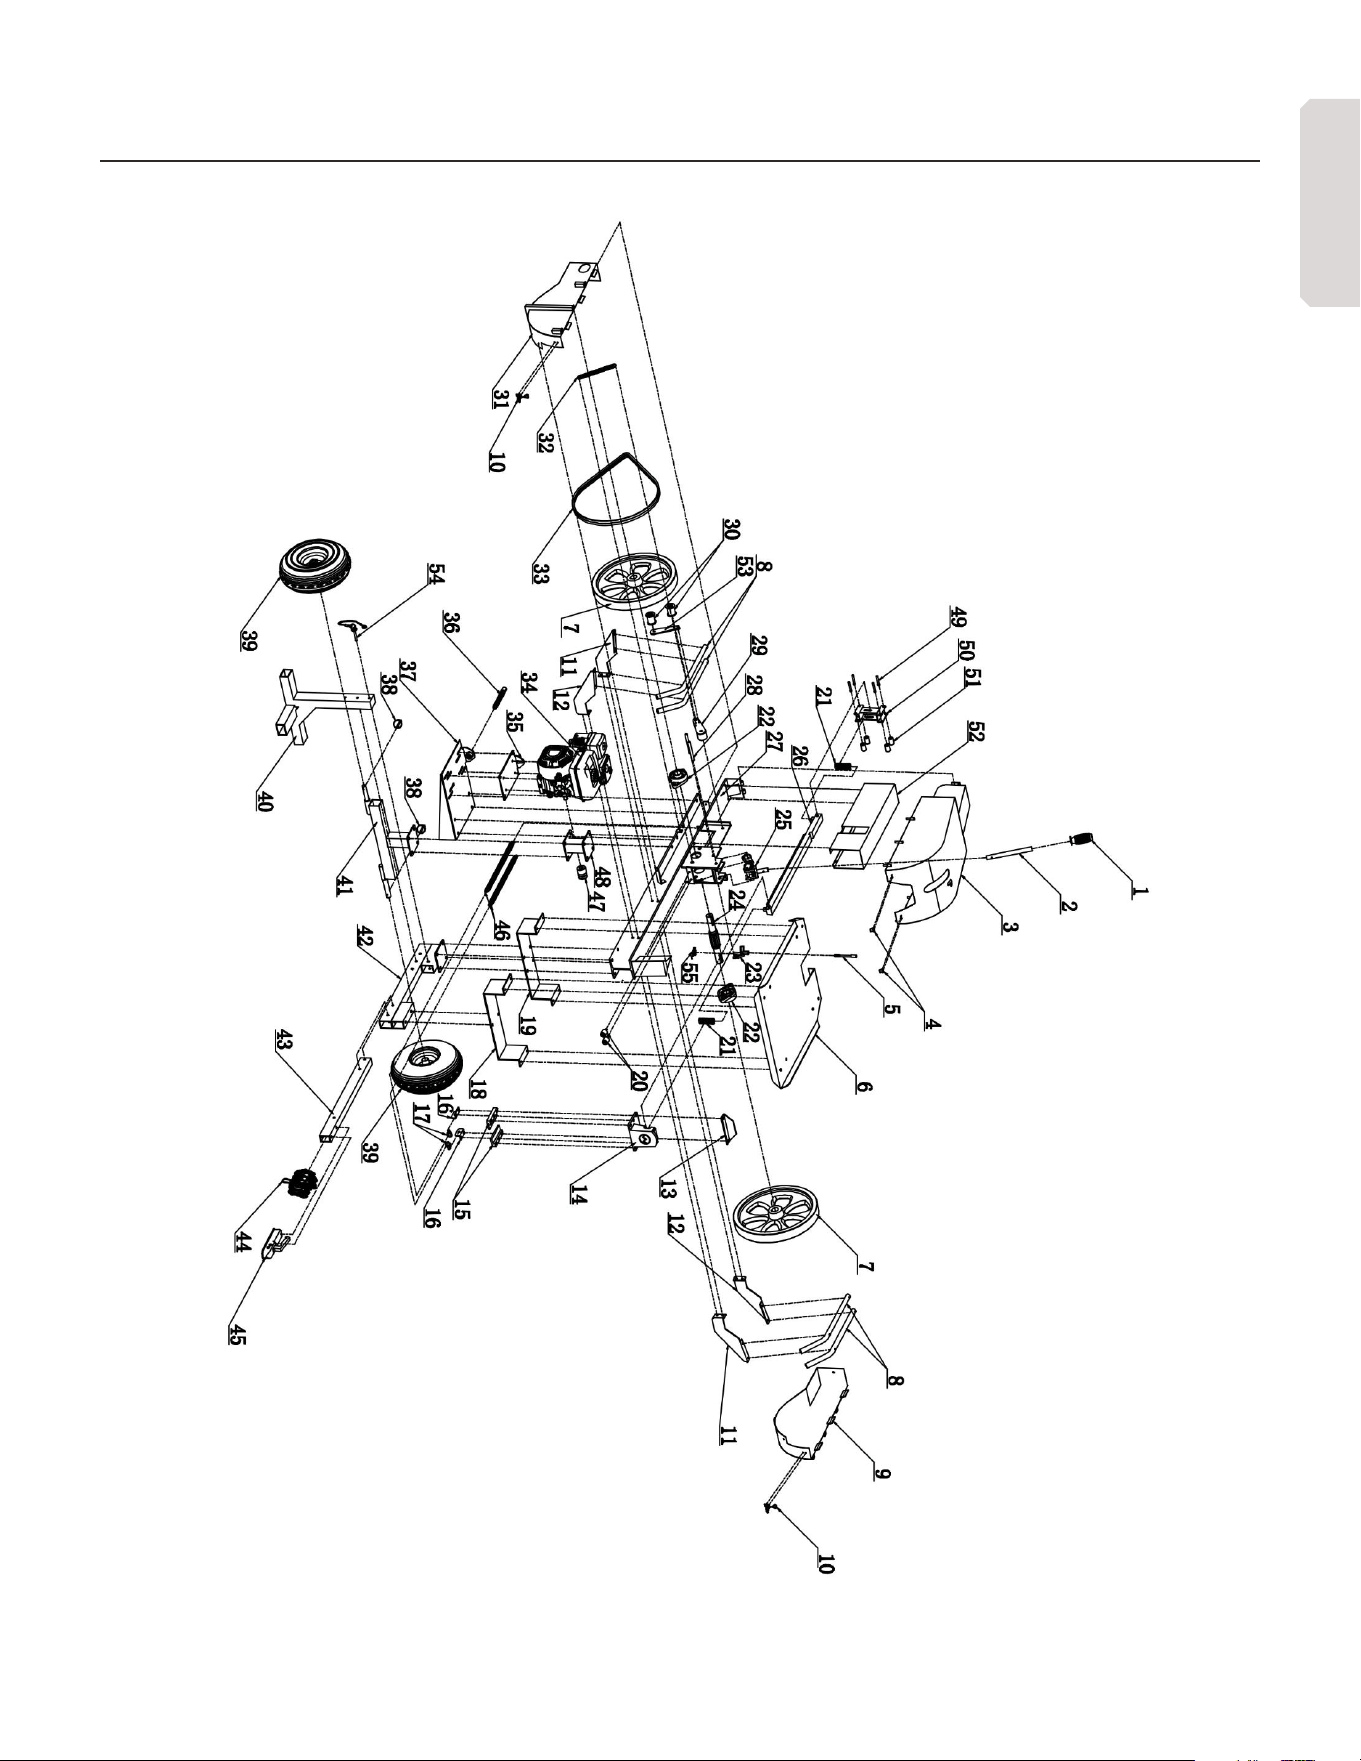
PARTS LIST
ITEM DESCRIPTION PART NO.
1 RUBBER HANDLE SLEEVE 229-0170
2 HANDLE 100-0280
3 ENGINE HOOD 300-0116
4 CLASP 207-0055
5 SMALL SWITCH SCREW 210-0291
6 WORK TABLE 300-0117
7 PULLEY 100-0412
8 FRAME TUBE PROTECTOR 100-0413
9 PULLEY COVER 300-0118
10 PRESSING BUCKLE 207-0058
11 LEFT ARM GUARD 100-0414
12 RIGHT ARM GUARD 100-0415
13 SHOCK BLOCK 100-0416
14 EJECTOR PAD 100-0417
15 SPLIT HEAD FITTING 100-0418
16 RING FIXED BLOCK 100-0419
17 RINGS 210-0293
18 TABLE FRONT SUPPORT PLATE 100-0420
19 TABLE BACK SUPPORT PLATE 100-0421
20 RUBBER CUSHION 229-0171
21 COMPRESSED SPRING (EJECTOR PAD) 219-0017
22 BEARING PEDESTAL 202-0021
23 SMALL SWITCH 100-0422
24 TRANSMISSION SHAFT 100-0423
25 TRIGGER 100-0424
ITEM DESCRIPTION PART NO.
26 GEAR ROD 100-0425
27 BEAM 300-0119
28 TRIGGER PIN 207-0059
29 ROLLER RACK 100-0426
30 PRESSURE ROLLER 216-0009
31 ENGINE LOWER COVER 300-0120
32 ROLLER HOLDER SPRING 219-0018
33 BELT 209-0024
34 ENGINE 601-0010
35 ENGINE PLATE 100-0427
36 SCREW ROD 210-0297
37 ENGINE SUPPORT 100-0428
38 PIN (WHEEL SHAFT) 207-0060
39 TIRE 220-0020
40 SUPPORT FOOT 300-0121
41 AXLE 200-0009
42 SUPPORT FOOT BRACE 300-0122
43 TOW BAR 100-0429
44 CHAIN 100-0430
45 COUPLER 204-0011
46 SPORT SPRING GEAR ROD 219-0019
47 SMALL PULLEY 100-0431
48 AXLE SUPPORT 300-0123
49 OUTER HEXAGON BOLT 210-0298
50 GEAR ROD FIXATION 100-0432
51 SMALL NYLON WHEEL 100-0433
52 GEAR ROD COVER 100-0434
53 UNDER PRESSING ROLLER FIXING PIECE 100-0435
54 SUPPORT FOOT PIN 207-0061
55 TORSIONAL SPRING 219-0020
ENGLISH
v.251027 | 21
SCHEMATICS
ENGLISH
SERVICE À LA CLIENTÈLE 1 (888) 277-6960 | WWW.DK2.COM
OPS240-V2
FENDEUSE À BOIS ÉNERGIE
CINÉTIQUE DE 40 TONNES
MANUEL DE L’UTILISATEUR
REMARQUE : Si vous constatez des pièces endommagées ou manquantes, veuillez contacter le service à la clientèle de DK2 by Marlon ou nous contacter via notre site web. Nous
remplacerons gratuitement toute pièce endommagée ou manquante. Veuillez ne pas retourner l’article en magasin.
AVERTISSEMENT
Veuillez lire attentivement le manuel d’utilisation avant d’assembler ou d’utiliser ce produit. Le non-respect des avertissements, des mises
en garde et des instructions d’assemblage et d’utilisation peut entraîner des blessures graves, voire mortelles.
© 2025 Marlon Recreational Products Ltd. Tous droits réservés.

v.251027 | 23
GARANTIE
VEUILLEZ NE PAS RETOURNER L’ARTICLE AU MAGASIN.
Vous bénéficiez d’une garantie d’un an et Marlon remplacera gratuitement
toute pièce défectueuse. Pour toute question concernant les pièces sous
garantie, veuillez nous contacter au 1 (888) 277-6960.
CE QUI EST COUVERT
GARANTIE MOTEUR DE 2 ANS ET GARANTIE FABRICANT LIMITÉE DE 1 AN
INCLUSES (USAGE RÉSIDENTIEL)
GARANTIE LIMITÉE DE 90 JOURS (USAGE COMMERCIAL)
Marlon Recreational Products Ltd. garantit à l’acheteur initial que le produit
est exempt de défauts de fabrication et de matériaux, dans des conditions
normales d’utilisation et d’entretien, pendant une période d’un (1) an à
compter de la date d’achat initial. Si, dans l’année suivant la date d’achat
initial, le produit présente un défaut de matériel ou de fabrication, Marlon
réparera, remplacera ou fournira, à sa discrétion, toute pièce défectueuse
couverte par la garantie. La garantie du fabricant d’un an couvre uniquement
les pièces (main-d’œuvre non comprise) pour usage résidentiel, et la
garantie limitée de 90 jours couvre uniquement la main-d’œuvre (main-
d’œuvre non comprise) pour un usage commercial. La garantie moteur de
deux ans couvre les pièces et la main-d’œuvre pour usage résidentiel, et la
garantie limitée de 90 jours couvre les pièces et la main-d’œuvre pour usage
commercial.
Après l’expiration de la garantie, Marlon décline toute responsabilité
concernant le produit. Marlon n’autorise aucune partie, y compris ses
distributeurs ou Concessionnaires autorisés, à orir une autre garantie au
nom de Marlon Recreational Products Ltd.
LES NUMÉROS DE SÉRIE DOIVENT ÊTRE ENREGISTRÉS EN LIGNE SUR
WWW.DK2.COM. LA GARANTIE N’EST PAS TRANSFÉRABLE ET S’APPLIQUE
UNIQUEMENT À L’ACHETEUR ORIGINAL DU PRODUIT.
Moteur : 2 ans pièces et main-d’œuvre (usage résidentiel), 90 jours pièces
et main-d’œuvre (usage commercial).
Manufacturier : 1 an pièces seulement, main-d’œuvre non comprise (usage
résidentiel), 90 jours pièces seulement, main-d’œuvre non comprise (usage
commercial).
Veuillez consulter le manuel de votre moteur pour obtenir de plus amples
renseignements sous la garantie du moteur.
CETTE GARANTIE NE COUVRE PAS ET NE S’APPLIQUE PAS À :
a) Les dommages causés au produit par une mauvaise utilisation,
une mauvaise manipulation ou une mauvaise utilisation
b) Une installation, un entretien et un entreposage inadéquats
c) Les pièces consommables comme les écrous et les boulons,
les goupilles et ressorts, le câblage et les composants de
l’interrupteur, les flexibles et raccords hydrauliques, les dents
de coupe, les chaînes de coupe, les lames de coupe, les
accélérateurs, les courroies et les pneus
d) L’usure normale
e) Les dommages indirects et consécutifs tels que les dommages
corporels ou matériels
PROCÉDURE DE GARANTIE POUR LES ÉQUIPEMENTS DE PLEIN AIR
Durant la période de garantie d’un (1) an, l’acheteur du produit peut appeler
le 1 (888) 277-6960 ou nous contacter à l’adresse www.dk2.com. Veuillez
nous signaler le défaut constaté et fournir une preuve d’achat originale. La
validité de la réclamation sera alors déterminée et, si elle est approuvée, des
pièces de rechange seront fournies. Aucun produit retourné ne sera accepté
en vertu de la garantie sans un numéro d’autorisation de retour (RGA) délivré
par Marlon Recreational Products Ltd.
MARCHANDISE ENDOMMAGÉE DANS LE TRANSPORT
Les dommages causés à votre produit par une mauvaise manutention durant
le transport ne sont pas couverts par la garantie. Si votre marchandise arrive
endommagée, REFUSEZ-LA. Inspectez votre produit à la réception. Si
vous l’acceptez, vous serez responsable de toute réclamation auprès du
transporteur. La garantie Marlon exclut les dommages causés au produit.
RETOURS AVANT REMPLISSAGE D’ESSENCE ET D’HUILE
Suivez la politique de retour du détaillant auprès duquel vous avez acheté
l’équipement.
RÉSOLUTION D’UN PRODUIT DÉFECTUEUX APRÈS REMPLISSAGE
D’ESSENCE ET D’HUILE
Appelez-nous au 1 (888) 277-6960 entre 8 h et 16 h HNE, du lundi au
vendredi.
VEUILLEZ ENREGISTRER VOTRE PRODUIT DK2 PAR MARLON DANS LES 30
JOURS SUIVANT L’ACHAT ORIGINAL. NUMÉRISEZ LE CODE QR CI-DESSOUS
OU RENDEZ-VOUS SUR WWW.DK2.COM/WARRANTY POUR ENREGISTRER
VOTRE PRODUIT.
FRANÇAIS

24 | OPS240-V2 man.
TABLE DES MATIÈRES
GARANTIE .......................................................23
SPÉCIFICATIONS TECHNIQUES ....................................25
SÉCURITÉ .......................................26
CONVENTIONS SUR LA SÉCURITÉ .................................26
INFORMATIONS IMPORTANTES DE SÉCURITÉ .......................26
SÉCURITÉ CARBURANT ...........................................27
SÉCURITÉ DE FONCTIONNEMENT ..................................30
SÉCURITÉ GÉNÉRALE. . . . . . . . . . . . . . . . . . . . . . . . . . . . . . . . . . . . . . . . . . . . . 31
AUTOCOLLANTS DE SÉCURITÉ ....................................32
ASSEMBLAGE ....................................33
ÉTAPE 1 : INSPECTER L’EMBALLAGE ...............................33
ÉTAPE 2 : CADRE TRANSVERSAL ET CADRE DE LA BARRE DE REMOR-
QUAGE ..........................................................33
ÉTAPE 3 : LEVIER DE CONTRÔLE VERROUILLAGE DE SÉCURITÉ ......34
ÉTAPE 4 : LEVIER DE FENTE .......................................34
ÉTAPE 5 : SUPPORT ..............................................34
ÉTAPE 6 : BARRE DE REMORQUAGE ................................35
ÉTAPE 7 : SUPPORT DE LA TABLE AVANT ...........................35
ÉTAPE 8 : FIXATION DES ROUES À L’ESSIEU ........................35
ÉTAPE 9 : FIXATION DE L’ESSIEU À L’ASSEMBLE ....................36
ÉTAPE 10 : GLISSIÈRES DU BERCEAU DE BÛCHES ...................36
ÉTAPE 11 : TABLE DE TRAVAIL ......................................36
FONCTIONNEMENT ...............................37
PRATIQUES DE SÉCURITÉ ET INFORMATIONS GÉNÉRALES ...........37
ZONE DE L’OPÉRATEUR ...........................................38
INFORMATIONS GÉNÉRALES ......................................39
DÉMARRAGE ....................................................39
ARRÊT ..........................................................39
ENTRETIEN ......................................40
NOTES GÉNÉRALES, ENTREPOSAGE ET LISTE DE CONTRÔLE .........40
LISTE DE CONTRÔLE D’ENTRETIEN RÉGULIER ......................40
ENTRETIEN MOTEUR ..............................................41
DÉPANNAGE ......................................41
NOTES GÉNÉRALES ...............................................41
TABLEAU DE DÉPANNAGE ........................................42
PIÈCES ET SCHÉMAS .............................43
LISTE DES PIÈCES ...............................................43
SCHÉMAS .......................................................44
FRANÇAIS

v.251027 | 25
SPÉCIFICATIONS TECHNIQUES
MOTEUR
7CV 212cm
3
OHV
BOÎTIER D’ENGRENAGE
Couple net de 12 Nm (8,9 pi-lb)
ROUES ET PNEUS
VTT
CAPACITÉ DE BÛCHE
Ø55 cm x 55,9 cm (L)
Ø22 po x 22 po (L)
COMMANDE
Commande à deux mains
BÛCHE
20,32 cm (8 po) acier
HAUTEUR DE LA BÛCHE
20,32 cm (8 po)
GARDE AU SOL
63,5 cm (25 po) garde au sol
TEMPS DE CYCLE
1 seconde
TAUX DE PIGNON
1:8
VOLANT-MOTEUR MAX TR/MIN
450 tr/min
COUPLEUR
5,08 cm (2 po)
DIMENSIONS
304,8 cm (L) x 94 cm (l) x 111,8 cm (H)
120 po (L) x 37 po (l) x 44 po (H)
POIDS
279,4 kg (616 lb)
DIMENSIONS D’EXPÉDITION
180,3 cm (L) x 68,6 cm (l) x 66 cm (H)
71 po (L) x 27 po (l) x 26 po (H)
POIDS D’EXPÉDITION
313 kg (690 lb)
GARANTIE
3 ans sur la moteur
1 an sur le châssis
REMARQUE : le diamètre indiqué est indicatif de la taille maximale suggérée - une petite bûche peut être dicile à fendre lorsqu’il contient des nœuds ou des fibres
particulièrement résistantes. D’autre part, il peut ne pas être dicile à fendre des bûches à fibres régulières même si son diamètre dépasse le maximum indiqué
ci-dessus.
FRANÇAIS

26 | OPS240-V2 man.
SÉCURITÉ
CONVENTIONS SUR LA SÉCURITÉ
DANGER
Cela indique une situation dangereuse qui, si elle n’est pas
évitée, peut entraîner la mort ou des blessures graves.
AVERTISSEMENT
Cela indique une situation dangereuse qui, si elle n’est pas
évitée, peut entraîner des blessures légères ou modérées.
ATTENTION
Ces renseignements sont importants pour une utilisation
correcte de votre machine. Le non-respect de ces instructions
peut endommager votre machine ou vos biens.
RENSEIGNEMENTS COMPLÉMENTAIRES ET MODIFICATIONS
POTENTIELLES
Nous nous réservons le droit d’interrompre, de modifier et d’améliorer
nos produits en tout temps, sans préavis ni obligation envers l’acheteur.
Les descriptions et les spécifications contenues dans ce manuel étaient en
vigueur au moment de l’impression. L’équipement décrit dans ce manuel
peut être optionnel. Certaines illustrations pourraient ne pas s’appliquer à
votre machine.
INFORMATIONS IMPORTANTES DE
SÉCURITÉ
DANGER
LES GAZ D’ÉCHAPPEMENT CONTIENNENT DU
MONOXYDE DE CARBONE : Le monoxyde de
carbone (CO) est un gaz toxique, inodore et
incolore qui peut causer des maladies graves, des lésions
cérébrales, voire la mort. N’utilisez PAS de moteurs ou
d’outils à essence à l’intérieur, dans un garage, un sous-sol
ou tout autre espace clos. MÊME AVEC UNE VENTILATION,
le monoxyde de carbone (CO) peut s’accumuler à des niveaux
dangereux, voire mortels. FAITES FONCTIONNER LES
MOTEURS ET LES OUTILS À L’EXTÉRIEUR, loin des entrées
d’air et dans un endroit bien aéré. En cas de nausées, de maux
de tête, de vertiges ou de somnolence, sortez immédiatement à
l’air libre et consultez un médecin.
DANGER
A
Lire et comprendre le manuel d’utilisation
au complet avant d’assembler ou d’utiliser ce
produit. La non-compréhension et non-respect des
avertissements, des précautions et les instructions de montage
et d’utilisation peuvent entraîner des graves blessures ou la
mort.
B
Ne laissez jamais les enfants utiliser cet
équipement. Ne laissez pas les autres qui n’ont pas
lu et compris le manuel d’utilisation complet pour
faire fonctionner cet équipement.
C
N’utilisez pas l’équipement sous l’influence de l’alcool,
de drogues ou de médicaments.
D
Ne laissez pas une personne fatiguée ou aaiblie ou pas
complètement alerte faire fonctionner cet équipement.
FRANÇAIS
v.251027 | 27
DANGER
UTILISATION ÉQUIPEMENT DE PROTECTION
INDIVIDUELLE : Lors de l’utilisation de cet
équipement, il est essentiel que vous portiez
un équipement de sécurité comprenant
des lunettes de protection ou des lunettes de sécurité, des
chaussures à embout d’acier et des gants ajustés (pas de
poignets lâches ni de cordons de serrage). Portez toujours des
bouchons d’oreille ou des écouteurs insonorisant pour vous
protéger contre la perte auditive lorsque vous faites fonctionner
cet équipement.
ATTENTION
Ne portez pas de vêtements amples ou de bijoux
pouvant être happés par des pièces mobiles
de l’équipement. Gardez les vêtements et les
cheveux éloignés de toutes les pièces mobiles de l’équipement.
DANGER
ESPACE DE TRAVAIL
A
N’utilisez pas l’équipement sur un sol glacé, mouillé,
boueux ou autrement glissant. utiliser votre équipement sur
un terrain plat SEULEMENT. L’utilisation sur une pente peut
entraîner le l’équipement de se renverser ou des bûches
de tomber de l’équipement, ce qui pourrait entraîner des
blessures.
B
N’utilisez pas cet équipement dans un espace clos. Les
gaz d’échappement du moteur contiennent du monoxyde de
carbone qui peut être nocif ou mortel en cas d’inhalation.
C
Ne déplacez pas l’équipement sur un terrain vallonné ou
accidenté sans véhicule de remorquage ou aide adéquate.
D
Utilisez une cale de pneu ou un bloc sur les roues pour
empêcher le mouvement de l’équipement pendant son
utilisation.
E
Faites fonctionner l’équipement à la lumière du jour ou
sous un bon éclairage artificiel.
F
Gardez la zone de travail libre de tout encombrement.
AVERTISSEMENT
RÉPARATION ET ENTRETIEN
A
N’utilisez pas l’équipement s’il est en mauvais état
mécanique ou s’il a besoin d’être réparation. Vérifiez
fréquemment que tous les écrous, boulons et vis sont bien
serrés.
B
Ne modifiez en aucun cas l’équipement. Toute
modification annulera la garantie et pourrait rendre
l’équipement dangereux à utiliser. Eectuez toutes les
recommandations et procédures d’entretien avant d’utiliser
l’équipement. Remplacer toutes pièces endommagée ou usée
immédiatement.
C
Ne modifiez pas le moteur pour le faire tourner à des
vitesses excessives. La vitesse maximale du moteur maximal
est préréglée par le fabricant et se situe dans les limites de
sécurité.
D
Retirez le fil de la bougie avant d’eectuer tout entretien
ou réparation sur l’équipement.
E
Vérifiez toujours le niveau d’huile moteur avant
l’utilisation.
F
Les pièces de rechange doivent répondre aux
spécifications du fabricant.
SÉCURITÉ CARBURANT
AVERTISSEMENT
L’essence est un liquide hautement inflammable.
Elle émet aussi des vapeurs inflammables qui
peuvent facilement s’enflammer et causer un
incendie ou une explosion. Ne négligez jamais les dangers de
l’essence. Suivez toujours ces précautions:
A
Ne jamais faire tourner le moteur dans un endroit clos
ou sans ventilation adéquate, car les gaz d’échappement
contiennent du monoxyde de carbone, un gaz inodore, insipide
et mortellement toxique.
B
Conservez le carburant et l’huile dans des contenants
spécialement conçus et homologués à cet eet, à l’abri de la
FRANÇAIS

28 | OPS240-V2 man.
chaleur et des flammes nues, et hors de portée des enfants.
C
Remplacez les conduites de carburant et les œillets en
caoutchouc lorsqu’ils sont usés ou endommagés, et après 5 ans
d’utilisation.
D
Remplissez le réservoir d’essence à l’extérieur, moteur
arrêté, et laissez-le refroidir complètement. Ne manipulez pas
d’essence si vous ou une personne à proximité fumez, ou si vous
vous trouvez à proximité de tout objet susceptible de provoquer
son inflammation ou son explosion. Refermez fermement le
bouchon du réservoir et du bidon.
E
En cas de déversement d’essence, n’essayez pas de
démarrer le moteur. Éloignez la machine de la zone de
déversement et évitez toute source d’inflammation jusqu’à
ce que les vapeurs de gaz se soient dissipées. Essuyez tout
carburant renversé pour éviter tout risque d’incendie et
éliminez-le correctement.
F
Laissez le moteur refroidir complètement avant de le
ranger dans un endroit fermé. Ne jamais ranger une machine
contenant de l’essence ou un bidon de carburant à proximité
d’une flamme nue ou d’une source d’étincelles, comme un
chaue-eau, un radiateur d’appoint, une sécheuse ou une
chaudière.
G
N’eectuez jamais de réglages ou de réparations lorsque
le moteur tourne. Arrêtez le moteur, débranchez le fil de la
bougie et tenez-le loin de la bougie pour éviter tout démarrage
accidentel. Attendez 5 minutes avant de faire des ajustements
ou des réparations.
H
Ne jamais modifier le réglage du régulateur de vitesse du
moteur. Le régulateur contrôle le régime maximal de sécurité
et protège le moteur. Un régime moteur excessif est dangereux
et peut endommager le moteur et les autres pièces mobiles
de la machine. Si nécessaire, consultez votre concessionnaire
autorisé pour le réglage du régulateur de vitesse.
I
Garder les substances combustibles loin du moteur quand
il est chaud.
J
Ne jamais couvrir la machine quand le silencieux est
encore chaud.
K
Ne pas faire fonctionner le moteur si le filtre à air ou le
couvercle d’admission d’air du carburateur sont retirés. Le
retrait de ces pièces peut entraîner un risque d’incendie. Ne pas
utiliser de solutions inflammables pour nettoyer le filtre à air.
L
Le silencieux et le moteur deviennent très chauds et
peuvent causer de graves brûlures ; ne pas les toucher.
M
Gardez un extincteur de classe B à portée de main lorsque
vous utilisez cet équipement dans des zones sèches par mesure
de précaution contre d’éventuelles étincelles volantes.
N
Vidanger le réservoir de carburant avant de le ranger
pour éviter tout risque d’incendie. Gardez l’essence dans un
contenant approuvé et hermétiquement fermé. Conserver le
récipient dans un endroit frais et sec.
O
Tournez le robinet d’arrêt de carburant sur le moteur à
la position “OFF” avant de remorquer l’équipement. Le non-
respect de cette consigne peut entraîner un surplus d’essence
du moteur.
ATTENTION
REMARQUE IMPORTANTE : Cette unité est équipée d’un
moteur à combustion interne et ne doit pas être utilisée sur
ou à proximité de terrains boisés, couverts de broussailles
non nettoyées. Ou un terrain couvert d’herbe à moins que
le système d’échappement du moteur ne soit équipé avec
un pare-étincelles conforme aux lois locales ou nationales
applicables (le cas échéant). Si un pare-étincelles est utilisé,
il doit être maintenu en bon état de fonctionnement par
l’opérateur. Dans l’État de Californie, un pare-étincelles est
requis par la loi. D’autres États ont des lois similaires. Les lois
fédérales s’appliquent sur les terres fédérales. Un silencieux
pare-étincelles est disponible en accessoire chez votre
concessionnaire de moteurs le plus proche. Vérifiez toujours les
exigences légales de votre région.
FRANÇAIS

v.251027 | 29
ATTENTION
SÉCURITÉ DE REMORQUAGE
A
Vérifiez toutes les réglementations locales et nationales
concernant le remorquage, les licences et les feux avant de
remorquer votre unité.
B
Vérifiez avant le remorquage pour vous assurer que
l’équipement est correctement et solidement fixé au véhicule
tracteur.
C
Ne transportez aucun chargement ou bois sur
l’équipement.
D
Ne laissez personne s’asseoir ou monter sur
l’équipement.
E
Débranchez l’équipement du véhicule tracteur avant de
l’utiliser.
F
Soyez prudent lorsque vous reculez avec l’équipement en
remorque pour éviter la mise en portefeuille. Autoriser pour
longueur supplémentaire de l’équipement lors des virages, du
stationnement, du franchissement des intersections et dans
toute situation de conduite.
G
Ne dépassez pas 24 km/h (15 mi/h) lorsque vous
remorquez votre équipement. Remorquage de l’unité à
des vitesses supérieures à 24 km/h (15 mi/h) peut entraîner
une perte de contrôle, des dommages à l’équipement, des
blessures graves ou la mort. Ajustez la vitesse de remorquage
en fonction du terrain et des conditions. Être très prudent lors
du remorquage sur un terrain accidenté.
AVERTISSEMENT
ENTRETIEN ET REMISAGE APPROPRIÉS
A
Maintenez la machine, les pièces jointes et accessoires en
bon état de fonctionnement.
B
Vérifiez les boulons de montage du moteur et les autres
éléments de quincaillerie avant chaque utilisation pour vous
assurer qu’ils sont bien serrés. N’utilisez jamais votre machine
en mauvais état mécanique ou lorsqu’il a besoin d’être réparé.
Assurez-vous que tous les gardes et écrans de sécurité sont en
bonne position. Ces dispositifs de sécurité sont destinés à votre
protection.
C
Ne remisez jamais l’équipement avec du carburant
dans le réservoir à l’intérieur d’un bâtiment où des sources
sont présentes, telles que l’eau chaude et les radiateurs, les
sécheuses et autres. Laissez le moteur refroidir avant de le
ranger dans une enceinte.
D
Si le réservoir de carburant doit être vidangé, faites-le à
l’extérieur.
E
Ne modifiez jamais les dispositifs de sécurité. Vérifiez
régulièrement leur bon fonctionnement.
F
Inspectez la courroie chaque fois que vous utilisez
l’équipement. Recherchez les dommages, les zones usées ou la
déchirure. N’utilisez pas l’appareil si ces conditions existent.
AVERTISSEMENT
PROPOSITION 65 DE LA CALIFORNIE : Échappement du
moteur, certains de ses constituants et certains composants
du produit contiennent ou émettent des produits chimiques
reconnus par l’État de Californie comme causer le cancer
et des malformations congénitales ou d’autres troubles de
la reproduction. Pour plus d’informations, allez à www.
P65Warnings.ca.gov.
FRANÇAIS

30 | OPS240-V2 man.
SÉCURITÉ DE FONCTIONNEMENT
DANGER
PROTÉGEZ-VOUS ET CEUX QUI VOUS ENTOURENT : Il s’agit
d’une machine de grande puissance, avec des pièces mobiles
fonctionnant à haute énergie. Vous devez utiliser la machine
en toute sécurité. Un fonctionnement dangereux peut créer
un certain nombre de dangers pour vous, ainsi que quelqu’un
d’autre dans les environs. Prenez toujours les précautions
suivantes lorsque vous utilisez cette machine :
A
Gardez à l’esprit que l’opérateur ou l’utilisateur est
responsable des accidents ou des dangers survenant à d’autres
personnes, leurs biens et eux-mêmes.
B
Portez toujours des lunettes de protection ou des lunettes
de sécurité avec écrans latéraux lorsque vous utilisez la
fendeuse pour protéger vos yeux d’éventuels débris projetés.
C
Évitez de porter des vêtements amples ou des bijoux, qui
peuvent s’accrocher aux pièces mobiles du la machine.
D
Nous vous recommandons de porter des gants lors de
l’utilisation de la fendeuse à bois. Assurez-vous que vos gants
sont bien ajustés et n’ont pas de poignets ou de cordons lâches.
E
Portez des chaussures avec des marches antidérapantes
lorsque vous utilisez votre fendeuse à bois. Si vous avez des
chaussures de sécurité, nous recommande de les porter.
N’utilisez pas la machine pieds nus ou en portant des
chaussures à orteils découverts.
F
Portez des pantalons longs lorsque vous utilisez la
fendeuse à bois.
G
Utilisez des protections auditives ou des bouchons d’oreille
conçus pour au moins 20 dBA pour protéger vos oreilles.
H
Gardez les spectateurs à au moins 50 pieds (20 m.)
de votre zone de travail en tout temps. Arrêter le moteur
lorsqu’une autre personne ou un animal domestique
s’approche.
DANGER
SÉCURITÉ POUR LES ENFANTS ET LES ANIMAUX DE
COMPAGNIE : Des accidents tragiques peuvent survenir
si l’opérateur n’est pas attentif à la présence d’enfants et
d’animaux domestiques. Les enfants sont souvent attirés par la
machine et l’activité de fendage. Ne présumez jamais que des
enfants resteront là où vous les avez vus pour la dernière fois.
Suivez toujours ces précautions :
A
Gardez les enfants et les animaux domestiques à au moins
50 pieds (20m) de la zone de travail et assurez-vous qu’ils sont
sous le regard attentif d’un adulte responsable.
B
Soyez vigilant et éteignez la machine si des enfants ou des
animaux domestiques pénètrent dans la zone de travail.
C
NE LAISSEZ JAMAIS les enfants utiliser la fendeuse à bois.
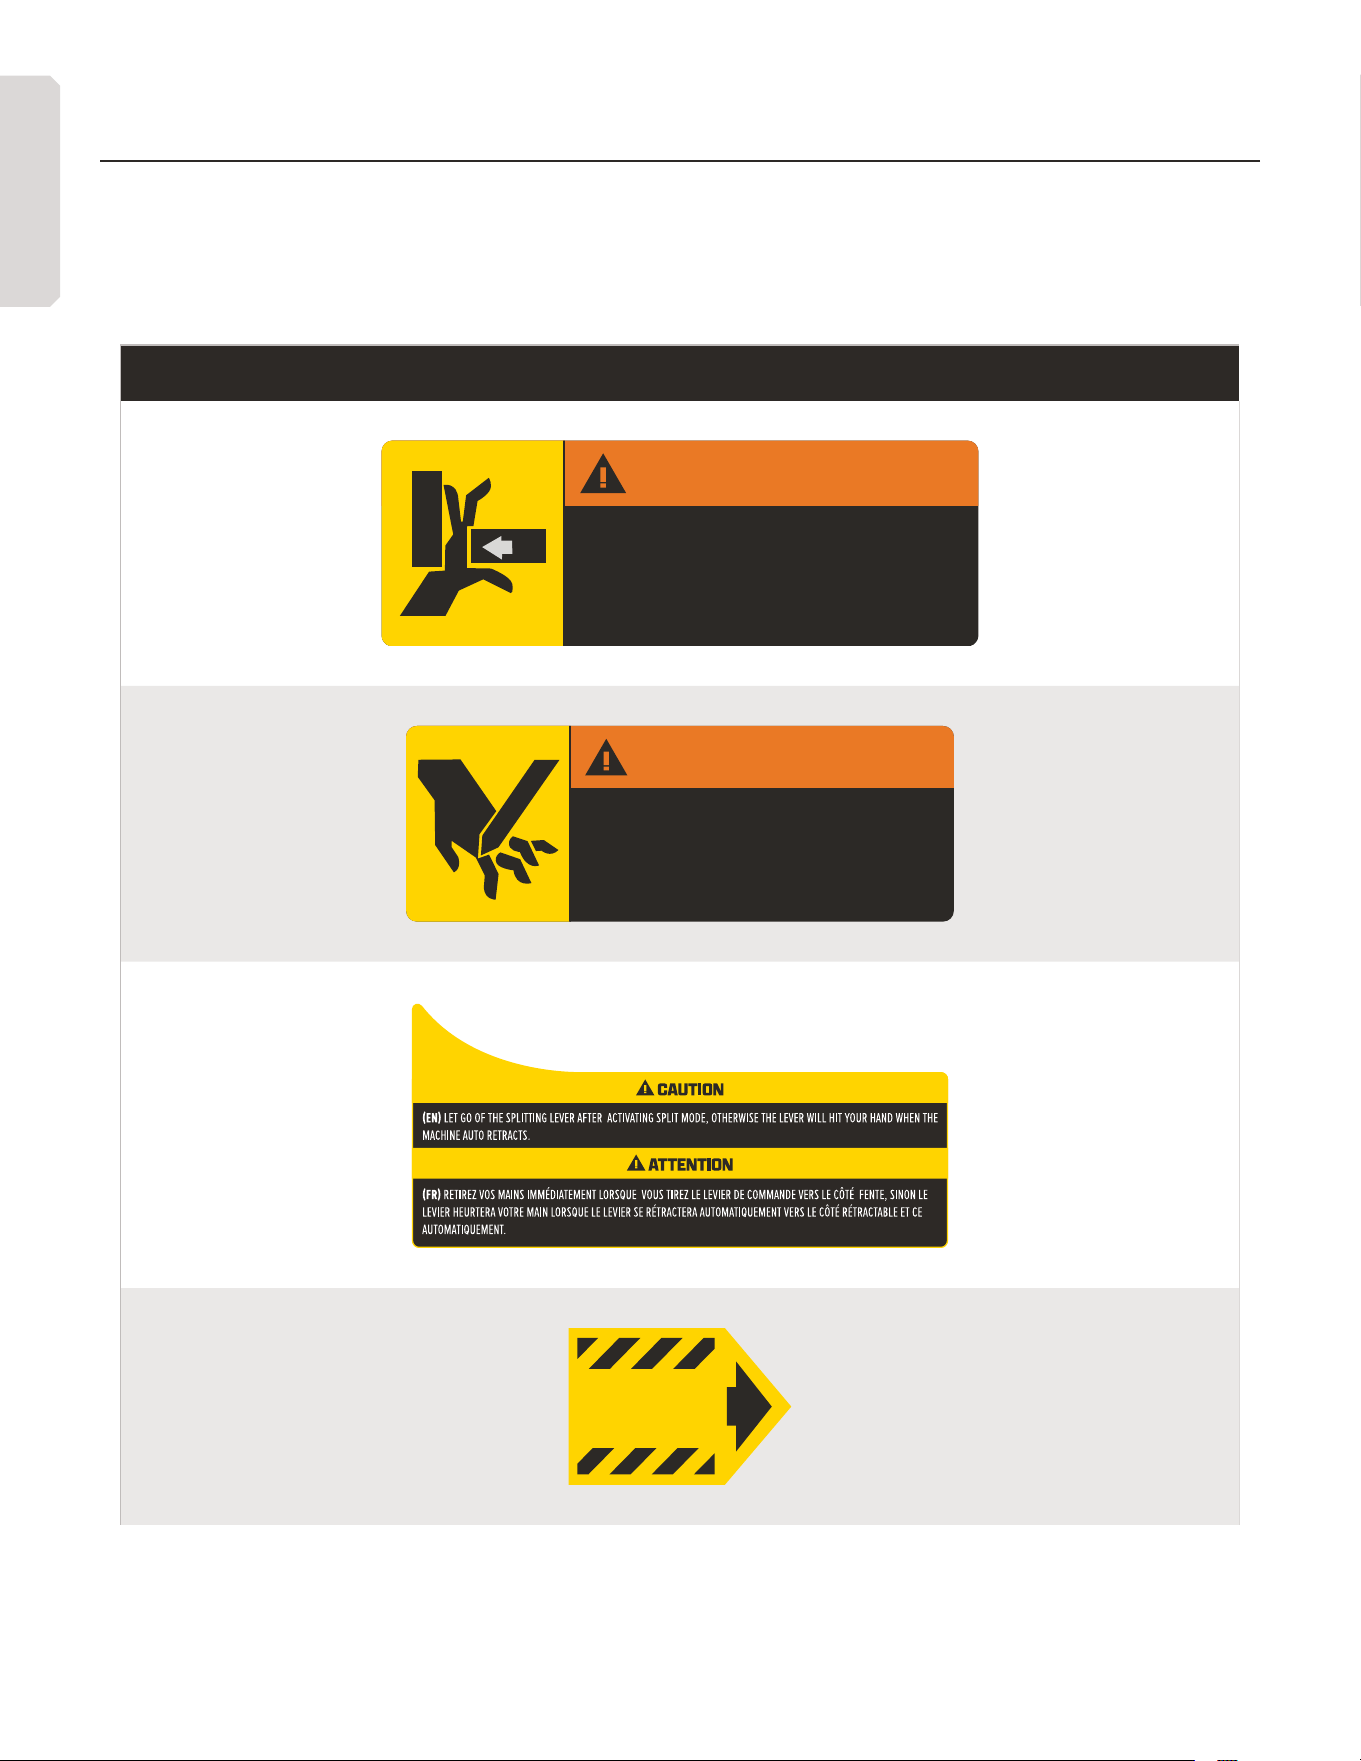
FRANÇAIS

v.251027 | 31
SÉCURITÉ GÉNÉRALE
AVERTISSEMENT
SÉCURITÉ GÉNÉRALE : L’utilisation de cette fendeuse à bois
en toute sécurité est nécessaire pour prévenir ou minimiser le
risque de mort ou de blessure. Un fonctionnement dangereux
peut créer un certain nombre de dangers pour vous. Prenez
toujours les précautions suivantes lors de l’utilisation de cette
fendeuse à bois :
A
Votre fendeuse est un outil puissant, pas un jouet. Faites
toujours preuve d’une extrême prudence. La machine est
conçue pour fendre les bûches. Ne l’utilisez pas à d’autres fins.
B
Savoir arrêter rapidement la fendeuse à bois.
C
N’UTILISEZ JAMAIS votre appareil sur une surface
glissante, humide, boueuse ou glacée. Soyez prudent pour
éviter glisser ou tomber.
D
Voir les instructions du fabricant pour le bon
fonctionnement et l’installation des accessoires.
E
N’UTILISEZ JAMAIS la machine sans vous assurer que
toutes les gardes de protections et tous les écrans sont en
place.
F
NE JAMAIS, sous aucune condition, retirer, plier, couper,
ajuster, souder ou modifier de quelque manière que ce soit
des pièces standard sur la fendeuse. Ceci comprend tous
les boucliers et gardes. Des modifications sur votre machine
pourraient causer des blessures et des dommages matériels et
annulera votre garantie.Autoriser une seule personne à faire
fonctionner la fendeuse à la fois.
G
Si la machine commence à faire un bruit inhabituel ou
à vibrer, arrêtez le moteur, débranchez le fil de la bougie, en
le tenant éloigné de la bougie pour éviter tout démarrage
accidentel, attendez cinq minutes pour que le moteur
refroidisse, puis vérifiez ce qui pourrait être endommagé. Les
vibrations sont généralement un avertissement de problème.
Vérifiez les pièces endommagées et nettoyez, réparez et/ou
remplacez si nécessaire.
H
NE JAMAIS toucher aux dispositifs de sécurité. Vérifiez
régulièrement leur bon fonctionnement.
I
Avant d’eectuer toute procédure d’entretien ou
d’inspection sur la fendeuse de bûches, éteignez le moteur,
débranchez le fil de la bougie en l’éloignant de la bougie pour
éviter démarrage accidentel, attendez cinq minutes que la
machine refroidisse.
J
NE PERMETTEZ JAMAIS à des personnes qui ne
connaissent pas ces règles d’utilisation sécuritaire d’utiliser
votre fendeuse.
K
NE JAMAIS surcharger ou tenter de fendre des bûches au-
delà des recommandations du fabricant. Ceci pourrait entraîner
des blessures corporelles ou endommager la machine.
L
Lorsque vous utilisez la fendeuse, ne vous pressez pas
et ne prenez pas les choses pour acquises. En cas de doute sur
l’équipement ou votre environnement, arrêtez la machine et
prenez le temps de regarder les choses.
M
N’UTILISEZ JAMAIS la machine sous l’influence de
l’alcool, de drogues ou de médicaments.
N
N’UTILISEZ la machine qu’à la lumière du jour.
O
Restez attentif aux dangers cachés ou à la circulation au
tour.
P
Gardez tous les écrous et boulons serrés et maintenez
l’équipement en bon état de fonctionnement.
REMARQUE : La liste des avertissements et des mises en garde ne peut pas
être complète. Si des situations qui ne sont pas couvertes par ce manuel,
l’opérateur doit faire preuve de bon sens et utiliser cette fendeuse de
manière sûre. Contactez les revendeurs pour obtenir de l’aide dans votre
région.
FRANÇAIS
32 | OPS240-V2 man.
AUTOCOLLANTS DE SÉCURITÉ
Les autocollants et les symboles de sécurité visent à attirer votre attention sur les dangers potentiels. Les symboles de sécurité et leurs
explications méritent une attention particulière afin d’utiliser cette machine en toute sécurité. Les avertissements de sécurité n’éliminent
aucun danger ; ils visent à attirer l’attention sur les dangers de la machine. Les instructions ou avertissements qu’ils contiennent ne
remplacent pas les mesures de prévention des accidents et les précautions d’emploi appropriées lors de l’utilisation du produit.
ÉTIQUETTE
WARNING / AVERTISSEMENT
PINCH POINT - KEEP AWAY
POINT DE PINCEMENT - TENIR À L'ÉCART
To avoid serious injury, keep hands clear of moving cylinder. Speeds may change with
loads or valve functions.
Pour éviter toute blessure grave, gardez vos mains loin du vérin et de la cale en mouve-
ment. Les vitesses peuvent varier selon les charges ou le fonctionnement des vannes.
WARNING / AVERTISSEMENT
(EN) Cutting hazard at wood splitter wedge - stay clear. Keep hands and limbs away
from moving parts and log ends. Serious injury or death could result if safety pre-
cautions are not followed.
(FR) Risque de blessure dû au mouvement de la cale de la fendeuse – Restez à
l'écart. Gardez les mains et les membres éloignés des pièces mobiles et des
extrémités des bûches. Le non-respect des consignes de sécurité peut entraîner des
blessures graves, voire mortelles.
LUBRICATION POINT
POINT DE LUBRIFICATION
FRANÇAIS
v.251027 | 33
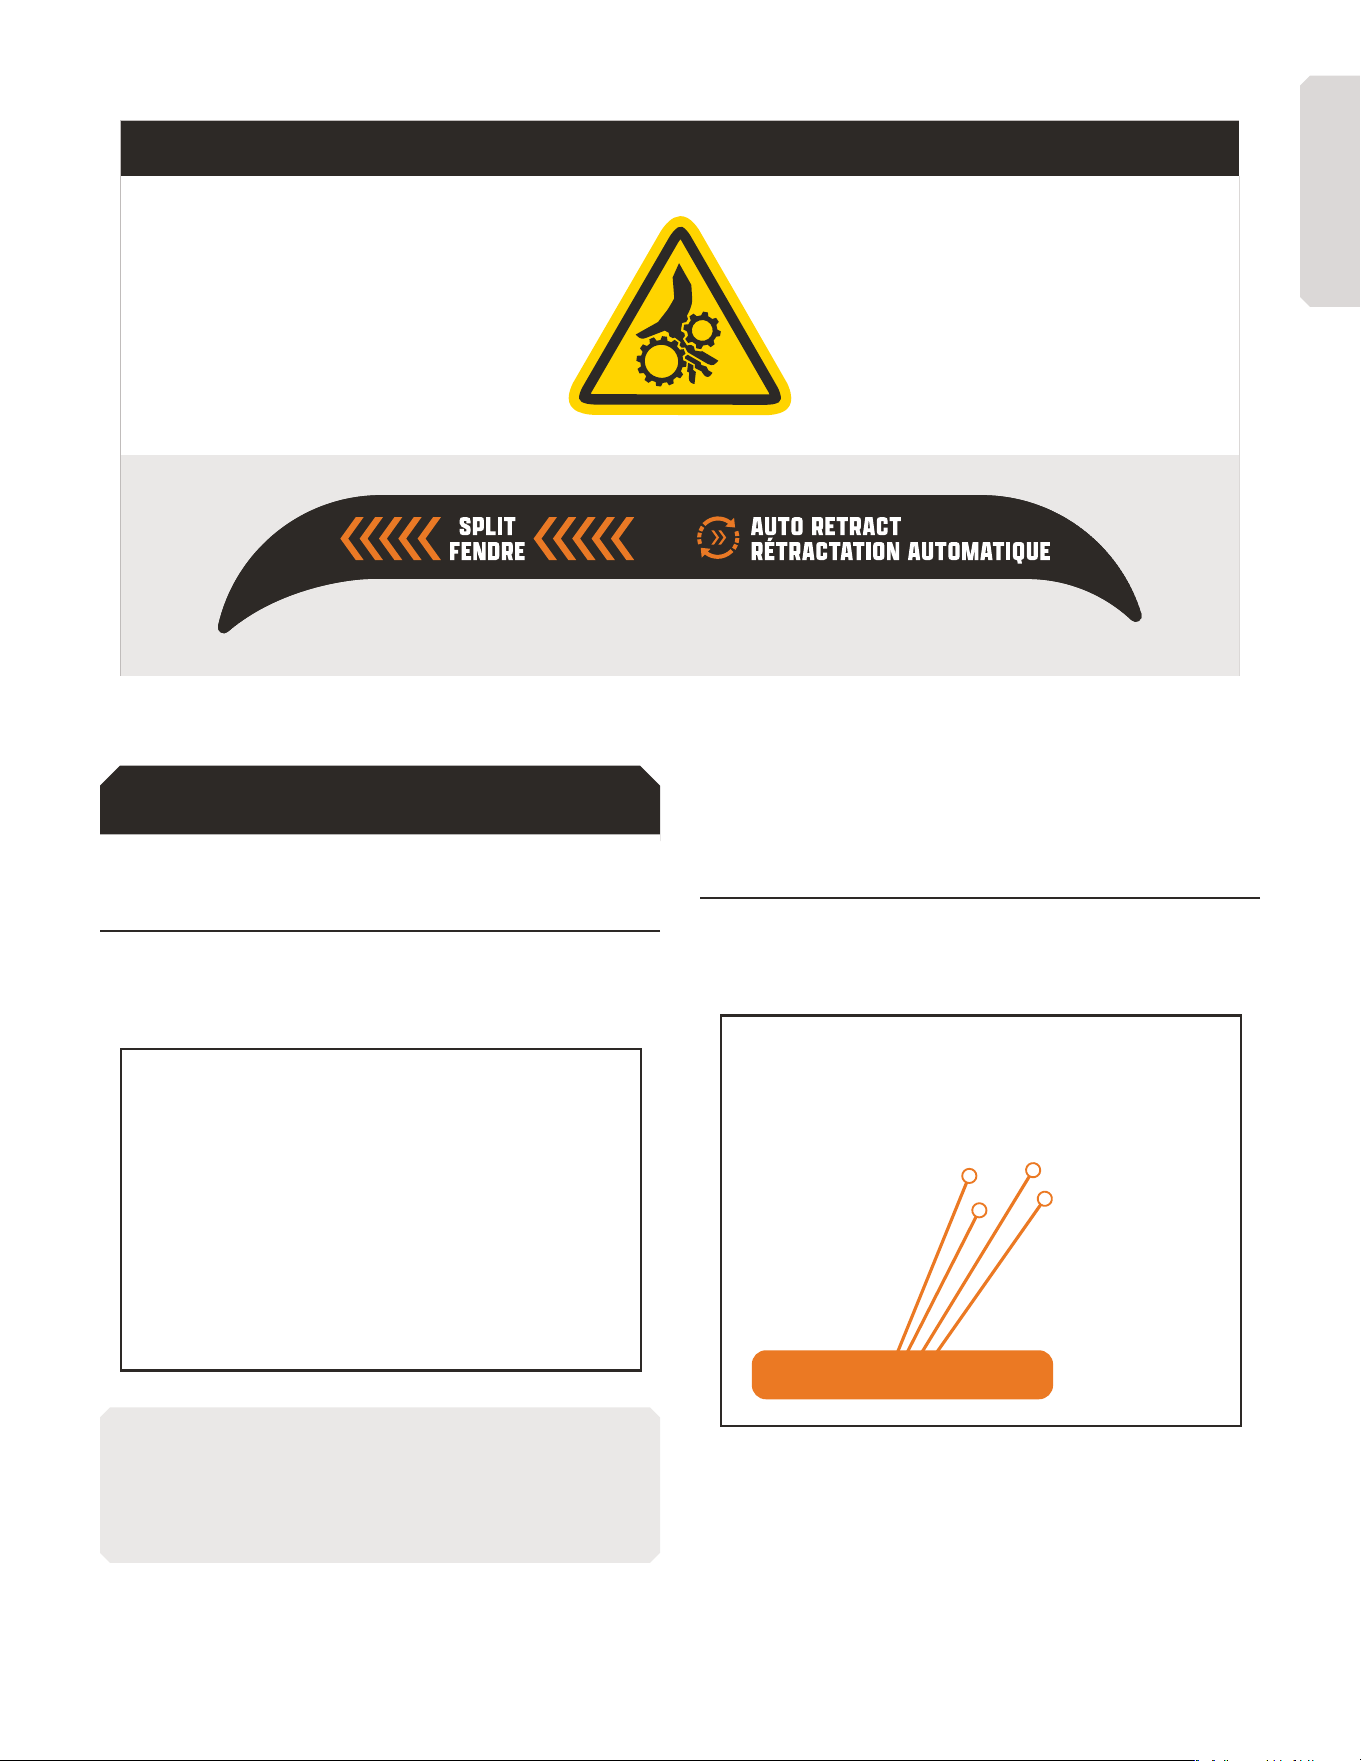
ÉTIQUETTE
ASSEMBLAGE
ÉTAPE 1 : INSPECTER
L’EMBALLAGE
Ouvrez et déballez tous les articles, laissez beaucoup d’espace
de travail et inspectez toutes les pièces.
REMARQUE : Après inspection des pièces, si vous trouvez des pièces
manquantes ou endommagées, veuillez appeler Marlon au 1 (888) 277-
6960 ou contactez-nous via notre site Web à www.dk2.com. Merci de ne
pas retourner en magasin.
ÉTAPE 2 : CADRE TRANSVERSAL
ET CADRE DE LA BARRE DE
REMORQUAGE
Installez le cadre transversal et le cadre de la barre de
remorquage. Utilisez les quatre boulons inclus pour assembler.
QUATRE BOULONS ET ÉCROUS
FRANÇAIS

34 | OPS240-V2 man.
ÉTAPE 3 : LEVIER DE CONTRÔLE
VERROUILLAGE DE SÉCURITÉ
Ouvrez le couvercle et installez la poignée verrouillable de
contrôle de sécurité. Visser jusqu’a ce quelle soit serrer dans la
barrure.
ÉTAPE 4 : LEVIER DE FENTE
A
Installez la levier de fente avec le matériel fourni.
B
Fermez et verrouillez le capot.
ÉTAPE 5 : SUPPORT
A
Installez le support.
B
Boulonnez dans le trou inférieur.
C
Goupille d’attelage dans le trou supérieur.
GOUPILLE DʼATTELAGE
SUR LE DESSUS
BOULON EN BAS
LEVER LORS DU REMORQUAGE
UTILISER LA GOUPILLE
DʼATTELAGE TROU INFÉRIEUR
FRANÇAIS

v.251027 | 35
ÉTAPE 6 : BARRE DE REMORQUAGE
Utilisation des deux boulons fournis, sécurisés la barre de
remorquage dans l’assemblage.
ÉTAPE 7 : SUPPORT DE LA TABLE
AVANT
Installez le support de table avant comme indiqué à l’aide de la
quincaillerie fournie.
UTILISER LE MATÉRIEL
INCLUS POUR FIXER
REMARQUE : Gardez libre non serré jusqu’après l’installation de la table
pour faciliter l’alignement des trous.
ÉTAPE 8 : FIXATION DES ROUES À
L’ESSIEU
Installez les roues sur l’essieu et insérez la goupille à ressort.
REMARQUE : Assurez-vous que la roue tourne librement. Vous pouvez retirer
la goupille, faire glisser la roue et la re-barrer pour bloquer la roue pendant
l’utilisation de la fendeuse.
FRANÇAIS

36 | OPS240-V2 man.
ÉTAPE 9 : FIXATION DE L’ESSIEU À
L’ASSEMBLE
A
Obtenez de l’aide pour soulever l’unité par la barre de
remorquage et l’attelage ou utilisez sécuritairement un cric
hydraulique ou palan à chaîne, et tenez l’unité à la verticale,
reposant sur la plaque de fond arrière.
ATTENTION
CET APPAREIL EST LOURD ET DOIT ÊTRE MANIPULÉ PAR
PLUSIEURS PERSONNES OU UN APPAREIL DE LEVAGE
SÉCURITAIRE.
B
Insérez les quatre boulons fournis et serrez.
ÉTAPE 10 : GLISSIÈRES DU
BERCEAU DE BÛCHES
A
Assemblez les glissières du berceau de bûches sur le côté
de la poutre comme illustré ci-dessous.
B
Utilisez le matériel fourni et boulonnez les deux de
berceau de rail ensemble. Serrez bien tous les boulons
BOULON À TRAVERS
DU CADRE
ÉTAPE 11 : TABLE DE TRAVAIL
A
Utilisez les huit boulons plats et la quincaillerie fournis.
B
Serrez les deux boulons sur les supports de la table
inférieure qui ont été laissés desserrés (étape 7) lors de la
précédente étape de montage.
C
Revérifiez tous les boulons d’assemblage et les boulons
d’équipement, et serrez-les si nécessaire.
UTILISEZ LES HUIT BOULONS FORNIS
REMARQUE : Graissez les dents de la crémaillère et la cannelure avec de la
graisse standard. Gardez la poutre de fente libre de graisse et gardée propre
lors du fendage. Le bélier glisse sur une plaque de téflon, alors gardez-le
propre , sans graisse et des particules de bois.
FRANÇAIS

v.251027 | 37
FONCTIONNEMENT
PRATIQUES DE SÉCURITÉ ET
INFORMATIONS GÉNÉRALES
DANGER
Lisez et comprenez le manuel d’utilisation complet avant
d’assembler ou d’utiliser cet équipement ! Ne pas respecter ou
comprendre les avertissements, mises en garde et instructions
de montage et d’utilisation peut entraîner des blessures graves
ou la mort.
A
Ne laissez jamais les enfants utiliser cet équipement.
B
Ne permettez pas à d’autres personnes qui n’ont pas lu
et compris l’intégralité du manuel d’utilisation de l’utilisateur
de cet équipement. L’utilisation d’équipements motorisés peut
être dangereuse. C’est l’unique responsabilité de l’opérateur
de comprendre l’assemblage et le fonctionnement en toute
sécurité de cet équipement.
ATTENTION
L’HUILE DOIT ÊTRE AJOUTÉE AU MOTEUR AVANT LE
DÉMARRAGE OU LE FONCTIONNEMENT.
RECOMMANDATIONS D’HUILE MOTEUR : SAE 10W-30
est recommandé pour une utilisation générale. Se référer
au tableau des grades de viscosité SAE dans le manuel du
propriétaire de votre moteur pour la température moyenne.
Le constructeur du moteur recommande d’utiliser l’huile API
SERVICE catégorie SE ou SF.
ATTENTION
INSTRUCTIONS DE DÉMARRAGE : Pour plus d’informations
sur le démarrage et l’arrêt du moteur, reportez-vous au votre
manuel du propriétaire du moteur.
AVERTISSEMENT
REMARQUE : Pour une utilisation dans des zones boisées,
procurez-vous un pare-étincelles pour le système de tuyau
d’échappement.
AVERTISSEMENT
AVANT DE DÉMARRER LE MOTEUR
A
Zone dégagée de toutes les personnes et biens qui
pourraient être endommagés. Pensez sécurité.
B
Cette fendeuse est rapide et peut causer des blessures si
la sécurité n’est pas respectée.
C
Un seul opérateur doit travailler sur cet appareil. NE
DEMANDEZ JAMAIS à une autre personne de charger les
bûches pendant un autre personne est aux commandes.
D
Ne retirez pas le levier de sécurité de la deuxième main.
AVERTISSEMENT
SI VOTRE UNITÉ NE DÉMARRE PAS
A
Vérifiez le niveau d’huile. Votre moteur est doté d’une
protection contre le manque d’huile et ne démarrera pas s’il
manque d’huile.
B
Assurez-vous que le fil de la bougie est bien en place.
C
Déplacez le levier de gaz vers la droite. La position gauche
est OFF.
D
Utilisez l’étrangleur pour le démarrage à froid.
E
Vérifiez votre niveau de l’essence.
AVERTISSEMENT
PRATIQUE SÉCURITAIRE
A
NE PORTEZ PAS de vêtements amples qui pourraient se
coincer dans le vérin.
B
Uniquement du bois à fendre, pas de métal ni de
plastique.
C
Les enfants ne doivent pas utiliser cet équipement.
D
Restez attentif à votre environnement et aux personnes
qui pourraient apparaître dans la zone pendant que vous êtes
de travail.
E
Chargez la bûche sur la poutre, glissez jusqu’au coin de
fente.
FRANÇAIS

38 | OPS240-V2 man.
F
Portez des lunettes de sécurité, des gants et des
chaussures de protection.
G
Utilisez uniquement à l’extérieur - les vapeurs de gaz sont
mortelles à l’intérieur.
ATTENTION
LES BÛCHES NE DOIVENT PAS ÊTRE DE PLUS DE 55,8 CM (22
PO)
CAUTION
ÉVITEZ LE FENDAGE TRANSVERSAL : N’ESSAYEZ JAMAIS de
fendre le bois autrement que dans le sens du grain. La fendeuse
n’est pas conçue pour couper la bûche, mais la fendre. Cela
pourrait endommager la fendeuse et causer des blessures.
Assurez-vous que les deux les extrémités de la bûche que
vous fendez sont placées correctement et aussi carrées que
possible. Cela empêchera la bûche de glisser hors de sa position
lorsqu’elle sera sous pression.
A
Placez la bûche dans la fendeuse . Saisissez la bûche sur
les côtés près du milieu de la buche. Centrez la bûche, côte
à côte, sur le rail de la fendeuse , en vous assurant qu’une
extrémité est contre le coin de fendage.
B
Avec votre main gauche, tirez le levier de sécurité, avec
votre main droite, poussez le levier de fendage, puis laissez
aller. Cette machine se rétracte automatiquement après
relâchement du levier de fendage.
ZONE DE L’OPÉRATEUR
Faire fonctionner l’équipement à l’intérieur de la zone verte de
l’opérateur comme indiqué dans le schéma ci-dessous, éviter
les zones rouges pointillées.
DANGER
NE PAS UTILISER L’ÉQUIPEMENT DANS CETTE POSITION PEUT
ENTRAÎNER BLESSURES GRAVES OU MORTELLES.
DANGER
PRATIQUES IMPORTANTES DANS LA ZONE DE L’OPÉRATEUR
A
NE PLACEZ PAS vos mains sur les extrémités de la bûche
lors du chargement de la fendeuse de bûches. C’EST TRÈS
DANGEREUX et pourrait entraîner de graves blessures aux
mains.
B
NE PAS atteindre ou franchir le rail pendant que la
fendeuse est en opération. C’EST TRÈS DANGEREUX et pourrait
causer des blessures corporelles, voire mortelles.
C
NE VOUS PENCHEZ PAS vers l’avant et n’essayez pas
d’attraper le bois fendu pendant que la bûche est fendue -
laissez-la tomber au sol.
FRANÇAIS

v.251027 | 39
INFORMATIONS GÉNÉRALES
Faites tourner le moteur à plein régime. Cette machine pousse
le vérin vers l’avant pendant 1/2 seconde et se rétracte pendant
encore 1/2 seconde. Pour assurer une bonne utilisation de la
fendeuse, laissez la machine se rétracter avant de charger une
autre bûche.
Le processus de fractionnement est le suivant :
A
Tirez le levier de sécurité avec votre main gauche.
B
Poussez rapidement le levier de fendage avec votre main
droite et relâchez le levier.
REMARQUE : NE MAINTENEZ PAS le levier de fendage vers le bas. Le vérin
et le levier de fendage se rétracteront automatiquement une fois que la
machine aura fendu la bûche. Cela permet à la machine de récupérer de
l’énergie cinétique pour des performances optimales
REMARQUE : Consultez le manuel pour les instructions d’entretien et de
fonctionnement du moteur.
DÉMARRAGE
A
Positionnez votre fendeuse sur un sol plat et sec, puis
barrez la roue avant avec le frein, assurez-vous que la machine
ne peut pas être déplacée à partir de cette position.
B
Assurez-vous que le robinet de carburant est ouvert en
position ON.
C
Déplacez le levier de commande de l’étrangleur sur la
position CHOKE (ne devrait être nécessaire que si le moteur est
froid).
D
Déplacez le levier de commande des gaz en position FAST
(RAPIDE).
E
Tournez l’interrupteur d’allumage en position ON.
Saisissez la poignée du lanceur à rappel et tirez lentement
jusqu’à ce que vous sentiez une résistance. Laissez le cordon
se rétracter un peu, puis tirez rapidement pour démarrer le
moteur. Une ou deux tractions démarrent instantanément le
moteur.
F
Ramenez lentement le levier de commande de l’étrangleur
(s’il est utilisé pour un moteur froid) en position RUN lorsque le
moteur tourne bien.
G
Si la fendeuse n’a pas fonctionné (moteur froid), faites
chauer le moteur en le faisant tourner à la moitié du régime
pendant trois à quatre minutes, puis amenez la commande
d’accélérateur du moteur à la vitesse maximale.
ARRÊT
A
Déplacez la manette des gaz sur IDLE.
B
Tournez le contacteur d’allumage en position OFF.
FRANÇAIS

40 | OPS240-V2 man.
ENTRETIEN
NOTES GÉNÉRALES,
ENTREPOSAGE ET LISTE DE
CONTRÔLE
Un entretien régulier assure des performances optimales et
une longue durée de vie de votre machine. Veuillez consulter ce
manuel et le manuel d’utilisation du fabricant du moteur pour
connaître les procédures d’entretien.
AVERTISSEMENT
Avant toute procédure d’entretien ou de contrôle, arrêtez
le moteur et attendez cinq minutes que toutes les pièces
refroidissent. Débranchez le fil de la bougie et tenez-le loin de
la bougie.
AVERTISSEMENT
A
NE JAMAIS remettre le moteur à l’intérieur ou dans un
endroit fermé et mal ventilé avec du carburant dans le réservoir,
où les vapeurs de carburant pourraient atteindre une flamme
nue, une étincelle ou une veilleuse, comme sur une chaudière,
un chaue-eau, une sécheuse ou tout autre appareil à gaz.
Si le moteur doit rester inutilisé pendant 30 jours ou plus,
procédez comme suit : Vidangez toute l’essence du carburateur
et du réservoir afin d’éviter la formation de dépôts de gomme
sur ces pièces et un éventuel mauvais fonctionnement du
moteur. Vidangez le carburant à l’extérieur, dans un contenant
homologué, loin de toute flamme nue. Assurez-vous que le
moteur est froid. Ne fumez pas. Faites tourner le moteur jusqu’à
ce que le réservoir soit vide et que le moteur soit en panne
sèche.
B
Un stabilisateur de carburant est une alternative
acceptable pour minimiser la formation de dépôts de gomme
pendant le remisage. Ajoutez du stabilisateur à l’essence
dans le contenant de l’entreposage ou le réservoir. Suivez les
instructions du fabricant du stabilisateur pour déterminer le
dosage approprié. Faire tourner le moteur au moins 10 minutes
après avoir ajouté le stabilisateur pour lui permettre d’atteindre
le carburateur.
LISTE DE CONTRÔLE D’ENTRETIEN RÉGULIER
PROCÉDURE
AVANT CHAQUE
UTILISATION
TOUTES LES 3
HEURES
TOUTES LES 25
HEURES
TOUTES LES 100
HEURES
VÉRIFIER LE NIVEAU D’HUILE MOTEUR
VÉRIFIER L’ÉTAT GÉNÉRAL DE L’ÉQUIPE-
MENT
VÉRIFIEZ LA NETTETÉ DE LA COUPE DE LA
CALE
GRAISSER LA SURFACE DE LA GLISSIÈRE
VÉRIFIER LES COURROIES
GRAISSEUR À CRÉMAILLÈRE ET PIGNON
VÉRIFIER LA PRESSION DES PNEUS
NETTOYER L’EXTÉRIEUR DU MOTEUR ET
LES AILETTES DE REFROIDISSEMENT DU
MOTEUR
CHANGEZ L’HUILE DU MOTEUR
REMPLACER LE FILTRE À AIR
REMPLACER LA BOUGIE
REMARQUE : Tous les roulements de votre fendeuse sont des unités scellées et doivent avoir une quantité susante de lubrifiant pour durer toute la vie de votre
machine avec une utilisation normale.
FRANÇAIS

v.251027 | 41
ENTRETIEN MOTEUR
Reportez-vous au manuel de votre moteur fourni pour plus d’instructions sur l’entretien du moteur.
DÉPANNAGE
NOTES GÉNÉRALES
La plupart des problèmes sont faciles à résoudre. Consultez le tableau de dépannage ci-dessous pour les problèmes courants et leurs
solutions. Si vous continuez à rencontrer des problèmes, contactez le service à la clientèle de Marlon au 1 (888) 277-6960.
AVERTISSEMENT
Avant d’eectuer toute procédure d’entretien ou d’inspection, arrêtez le moteur, attendez cinq minutes pour permettre à toutes les pièces
de refroidir. Débrancher le fil de bougie, en le gardant éloigner de la bougie.
FRANÇAIS

42 | OPS240-V2 man.
TABLEAU DE DÉPANNAGE
SYMPTÔME CAUSE POSSIBLE
LE MOTEUR NE DÉMARRE PAS.
(VEUILLEZ VOUS RÉFÉRER AU
MANUEL D’UTILISATION DU MOTEUR
POUR MOTEUR SPÉCIFIQUES
PROCÉDURES)
1. L’interrupteur d’allumage est-il en position ON ?
2. Le robinet de carburant est-il ouvert ?
3. Utilisez-vous de l’essence fraîche et propre ? Si l’essence est vieille, changez-la. Utilisez un stabilisateur de carburant si
vous gardez l’essence plus longtemps que 30 jours.
4. La bougie est-elle propre ? Si la bougie est sale ou fissurée, changez-la. Si elle est huileuse, laissez-la de côté, prenez
un chion et mettez-le sur le trou où l’on visse la bougie et tirez le démarreur manuel plusieurs fois pour souer toute
l’huile du cylindre, puis essuyez la bougie et réinsérez-la.
LE MOTEUR MANQUE DE
PUISSANCE OU NE FONCTIONNE
PAS RONDEMENT.
(VEUILLEZ VOUS RÉFÉRER AU
MANUEL D’UTILISATION DU MOTEUR
POUR MOTEUR SPÉCIFIQUES
PROCÉDURES)
1. Vérifiez que la manette des gaz est en position RUN.
2. Le filtre à air est-il propre ? S’il est sale, le changer en suivant la procédure du manuel du constructeur du moteur.
3. La bougie est-elle propre ? Si la bougie est sale ou fissurée, changez-la. Si elle est huileuse, laissez-la de côté, prenez
un chion et mettez-le sur le trou ou l’on visse la bougie et tirez le démarreur manuel plusieurs fois pour souer toute
l’huile du cylindre, puis essuyez la bougie et réinsérez-la.
4. Utilisez-vous de l’essence fraîche et propre ? Si l’essence est vieille, changez-la. Utilisez un stabilisateur de carburant si
vous gardez l’essence plus longtemps que 30 jours.
5. Votre moteur a-t-il la bonne quantité d’huile ? Si elle est sale, changez-la en suivant la procédure du manuel du
propriétaire du fabricant du moteur.
6. Vérifiez le niveau d’huile et ajustez-le si nécessaire.
LE MOTEUR FUME.
(VEUILLEZ VOUS RÉFÉRER AU
MANUEL D’UTILISATION DU MOTEUR
POUR MOTEUR SPÉCIFIQUES
PROCÉDURES)
1. Vérifiez le niveau d’huile et ajustez au besoin.
2. Vérifiez le filtre à air et nettoyez-le ou remplacez-le si nécessaire.
3. Vous utilisez peut-être la mauvaise huile - trop légère pour la température.
Reportez-vous au manuel du propriétaire de votre moteur pour des informations détaillées.
4. Nettoyez les ailettes de refroidissement si elles sont sales.
LE BLOC DE POUSSER
S’ACCROCHE À L’EXTRÉMITÉ DU
TUBE (EN FIN DE COURSE).
BLOC DE RETOUR TRÈS
LENT OU NE REVIENT PAS
COMPLÈTEMENT.
1. Réglez les fixations du chariot (guides coulissants).
2. Vérifiez qu’il n’y a pas de copeaux de bois ou de débris entre le bloc, le vérin et la poutre.
3. Vérifiez que le roulement de levage de crémaillère ne soit pas aligné ou endommagé.
4. Le ressort de rappel est décroché ou endommagé. Reconnectez ou remplacez si nécessaire.
5. L’extrémité de la fendeuse est trop basse. Doit être presque de niveau ou l’extrémité du coin légèrement plus haute.
ENCLENCHEMENT DU LEVIER
DE COMMANDE DÉCROCHE, NE
RESTE PAS ENCLENCHER.
1. Levier pas complètement vers l’avant lorsque le bloc est en pleine charge. Pousser le levier plus rapidement et avec
plus de force dans la position complètement avancée.
2. Le vérin a été surchargé dans la partie inférieure du visage. Vérifiez la rectitude de la crémaillère.
BLOC DE POUSSER RETOURNE
TROP VITE.
1. Coin de l’extrémité de la machine est trop haut. Doit être presque au niveau de l’extrémité du vérin ou juste légèrement
plus haut.
2. Les ressorts ne fonctionnent pas correctement. Réparez ou remplacez au besoin.
LA MACHINE NE SEMBLE
PAS AVOIR SA COMPLÈTE
PUISSANCE DE FENTE.
Les courroies peuvent être trop lâches et glissantes. Ajustez ou remplacez les courroies au besoin.
LEVIER DE FENTE N’ENGAGE
PAS LA CRÉMAILLÈRE AVEC
PIGNON.
1. Nettoyez les copeaux de bois ou autres débris du dessous du panier.
2. Nettoyez la saleté accumulée du cadre où l’ensemble de chariot repose contre les pare-chocs en caoutchouc
FRANÇAIS

v.251027 | 43
PIÈCES ET SCHÉMAS
LISTE DES PIÈCES
ARTICLE DESCRIPTION RÉF. DE PIÈCE
1 MANCHON EN CAOUTCHOUC POUR LEVIER 229-0170
2 LEVIER 100-0280
3 COUVERCLE SUPÉRIEUR 300-0116
4 FERMOIR 207-0055
5 VIS D’INTERRUPTEUR 210-0291
6 TABLE DE TRAVAIL 300-0117
7 POULIE 100-0412
8 PROTECTEUR DE TUBE DE CADRE 100-0413
9 PROTECTEUR INFÉRIEUR 300-0118
10 BOUCLE DE PRESSION 207-0058
11 SUPPORT DE GARDE GAUCHE 100-0414
12 SUPPORT DE GARDE DROIT 100-0415
13 BLOC AMORTISSEUR 100-0416
14 COUSSIN ÉJECTEUR 100-0417
15 FERRURE DE TÊTE 100-0418
16 BAGUE DE BLOC FIXE 100-0419
17 BAGUES 210-0293
18 PLAQUE SUPPORT DE TABLE AVANT 100-0420
19 PLAQUE SUPPORT DE TABLE ARRIÈRE 100-0421
20 COUSSIN CAOUTCHOUC 229-0171
21 RESSORT DE COMPRESSION (TAMPON D’ÉJECTION) 219-0017
22 SOCLE DE ROULEMENT 202-0021
23 PETIT INTERRUPTEUR 100-0422
24 ARBRE DE TRANSMISSION 100-0423
25 GÂCHETTE 100-0424
ARTICLE DESCRIPTION RÉF. DE PIÈCE
26 TIGE DE TRANSMISSION 100-0425
27 POUTRE 300-0119
28 GOUPILLE DE DÉCLENCHEMENT 207-0059
29 SUPPORT DE ROULEAUX 100-0426
30 ROULEAU DE PRESSION 216-0009
31 CAPOT INFÉRIEUR MOTEUR 300-0120
32 RESSORT PORTE-ROULEAU 219-0018
33 COURROIE 209-0024
34 MOTEUR 601-0010
35 PLANCHER DU MOTEUR 100-0427
36 TIGE FILETÉE 210-0297
37 SUPPORT DE MOTEUR 100-0428
38 GOUPILLE (ESSIEU DE ROUE) 207-0060
39 PNEU 220-0020
40 SUPPORT AVANT 300-0121
41 ESSIEU 200-0009
42 ENTRETOISE SUPPORT AVANT 300-0122
43 BARRE DE REMORQUAGE 100-0429
44 CHAÎNE 100-0430
45 ATTACHE D’ATTELAGE 204-0011
46 TIGE D’ENGRENAGE À RESSORT 219-0019
47 PETITE POULIE 100-0431
48 SUPPORT D’ESSIEU 300-0123
49 BOULON HEXAGONAL EXTÉRIEUR 210-0298
50 FIXATION DE LA TIGE D’ENGRENAGE 100-0432
51 ÉCROUS 100-0433
52 COUVERCLE DE TIGE 100-0434
53 PIÈCE DE FIXATION DU ROULEAU 100-0435
54 GOUPILLE DE SUPPORT AVANT 207-0061
55 RESSORT DE TORSION 219-0020
FRANÇAIS
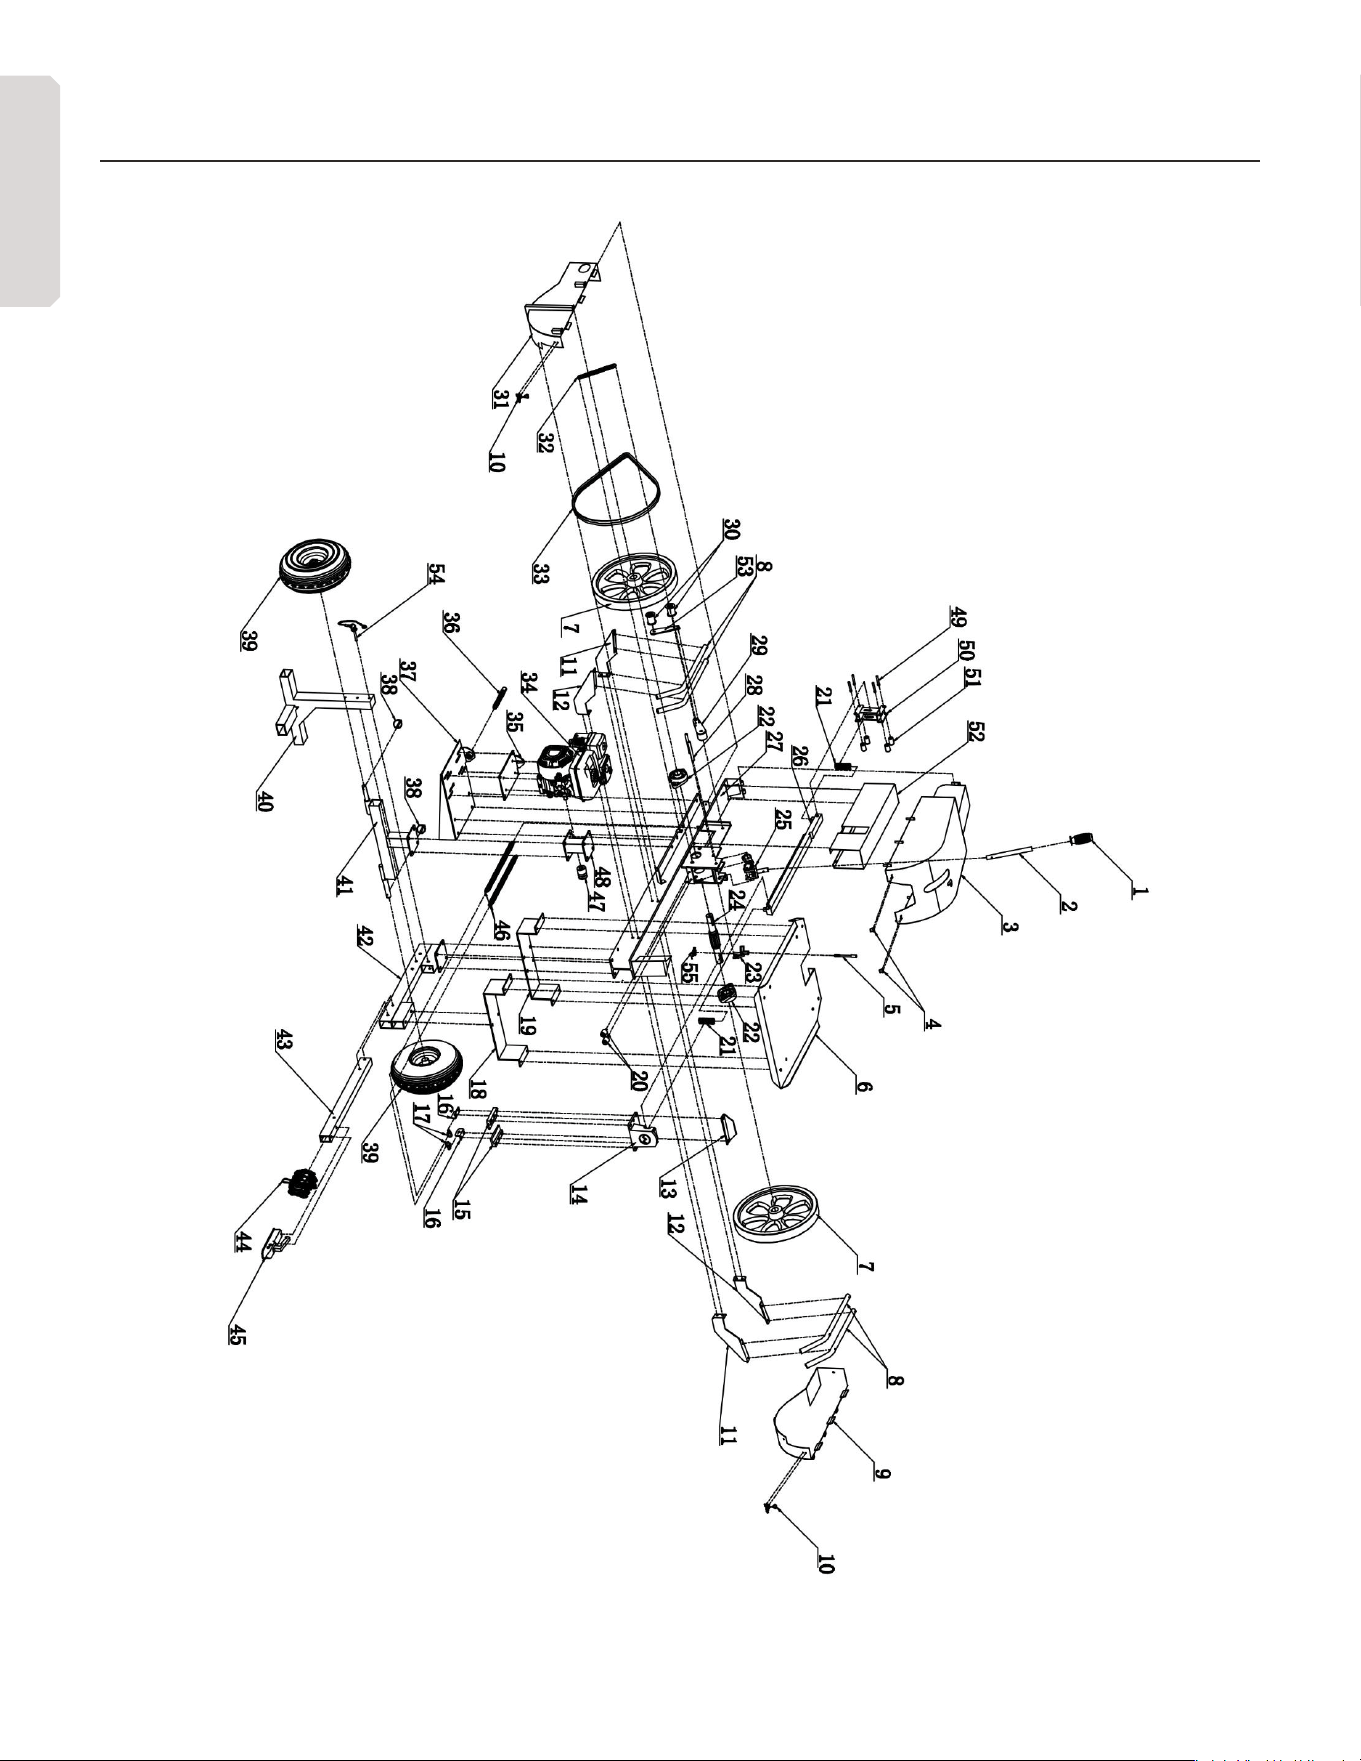
44 | OPS240-V2 man.
SCHÉMAS
FRANÇAIS