www.SereneLifeHome.com
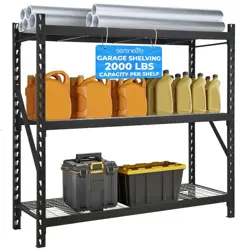
Extra Wide 3-Tier
Metal Garage Shelving
Visit Our Website
SCAN ME
serenelifehome.com
USER GUIDE
Features:
•
High-Quality Tough Steel Construction
• Corrosion-resistant, Sturdy, and Stable Design Capable
of Supporting Heavy Loads
• Perfect for Organizing and Storing Items
• 3-Tier Design for Maximum Storage Capacity
• Ideal for Wall Mounting and Bulk Storage
• Adjustable Height to Accommodate Dierent Storage
Needs and Items of Varying Sizes
• Quick and Hassle-Free Assembly
• Includes Wall-Mounting Brackets
• Suitable for Use in Cellar, Garage, Workshop, Warehouse,
and More
• Perfect for Organizing and Storing Automotive Tools,
Gardening Supplies, Paint Cans, Equipment, and More
• Open Wire Mesh Design Allows Air Circulation and
Minimizes Dust Buildup
• Smooth Surface for Easy Cleaning and Maintenance
• Adjustable Leveling Feet to Ensure Stability on Uneven
Surfaces
• Clear Load-Bearing Capacity Labels on each Shelf for
User Convenience and Safety Awareness
• Some Assembly Needed
What's in the Box:
•
3-Tier Metal Garage Shelving
Technical Specs:
•
Construction Material: High-Quality Tough Steel
• Maximum Weight Capacity: 2000 lbs. Per Shelf
• Post: 0.04 -inches Thickness
• Beam: 0.04 -inches Thickness
• Wire Deck: 4 Pieces
• Item Weight: 109 lbs.
• Product Dimensions (L x W x H) 24" x 77" x 72" -inches
Helpful Items for Assembly (not included)
• Rubber Mallet
• Eye Protecttion
• Gloves
Safety Instructions
Follow these instructions carefully. Failure to do so can
result in property damage or personal injuries.
CAUTION
• Be aware of dynamic loading! Sudden load movement
may briey create excess load, causing product failure.
• Evenly distribute the weight on each shelf and keep the
heaviest loads on the bottom shelf.
• Use only on a at, level, and hard surface capable of
supporting the shelving and any items placed on it.
Maintain proper footing and balance at all times.
• Keep bystanders out of the area during assembly.
• This product is not a toy. Do not allow children to play
with, on, or near the unit.
WARNING
• Do not stand on, step on, or alter this unit for anything
outside the designed function of storage.
• Use care when handling and assembling metal plates.
• The metal may have sharp edges or corners.
The use of protective gloves is recommended.
• Always remember to use proper lifting techniques when
moving the boxed or assembled unit.
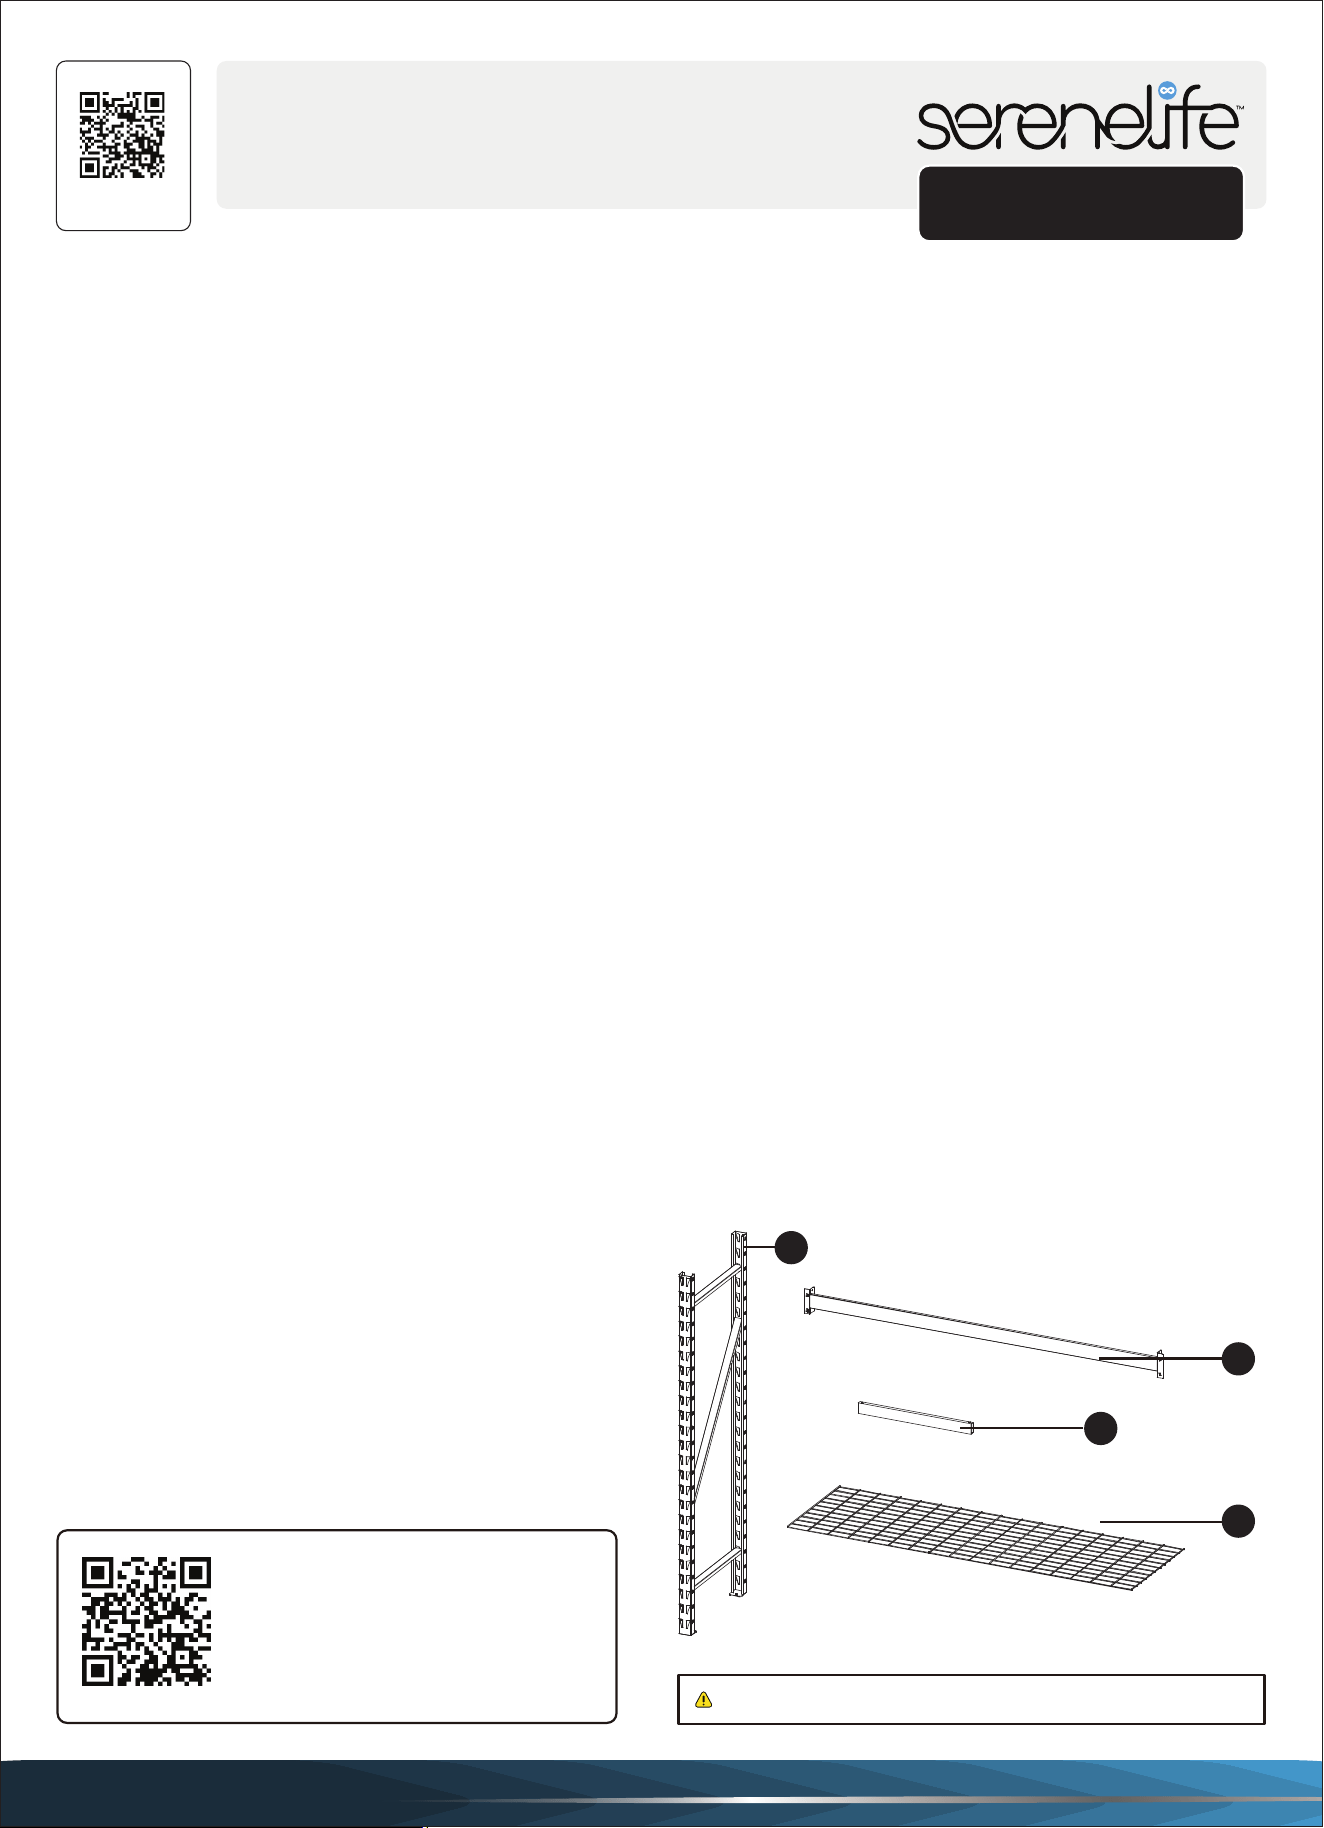
COMPONENTS
Ensure all components are present. If any components
are missing, do not proceed with assembly.
PACKAGE CONTENTS:
Questions or Comments?
We are here to help!
Phone: 1.718.535.1800
Serenelifehome.com/ContactUs
WARNING: Cancer and Reproductive Harm - www.P65warnings.ca.gov
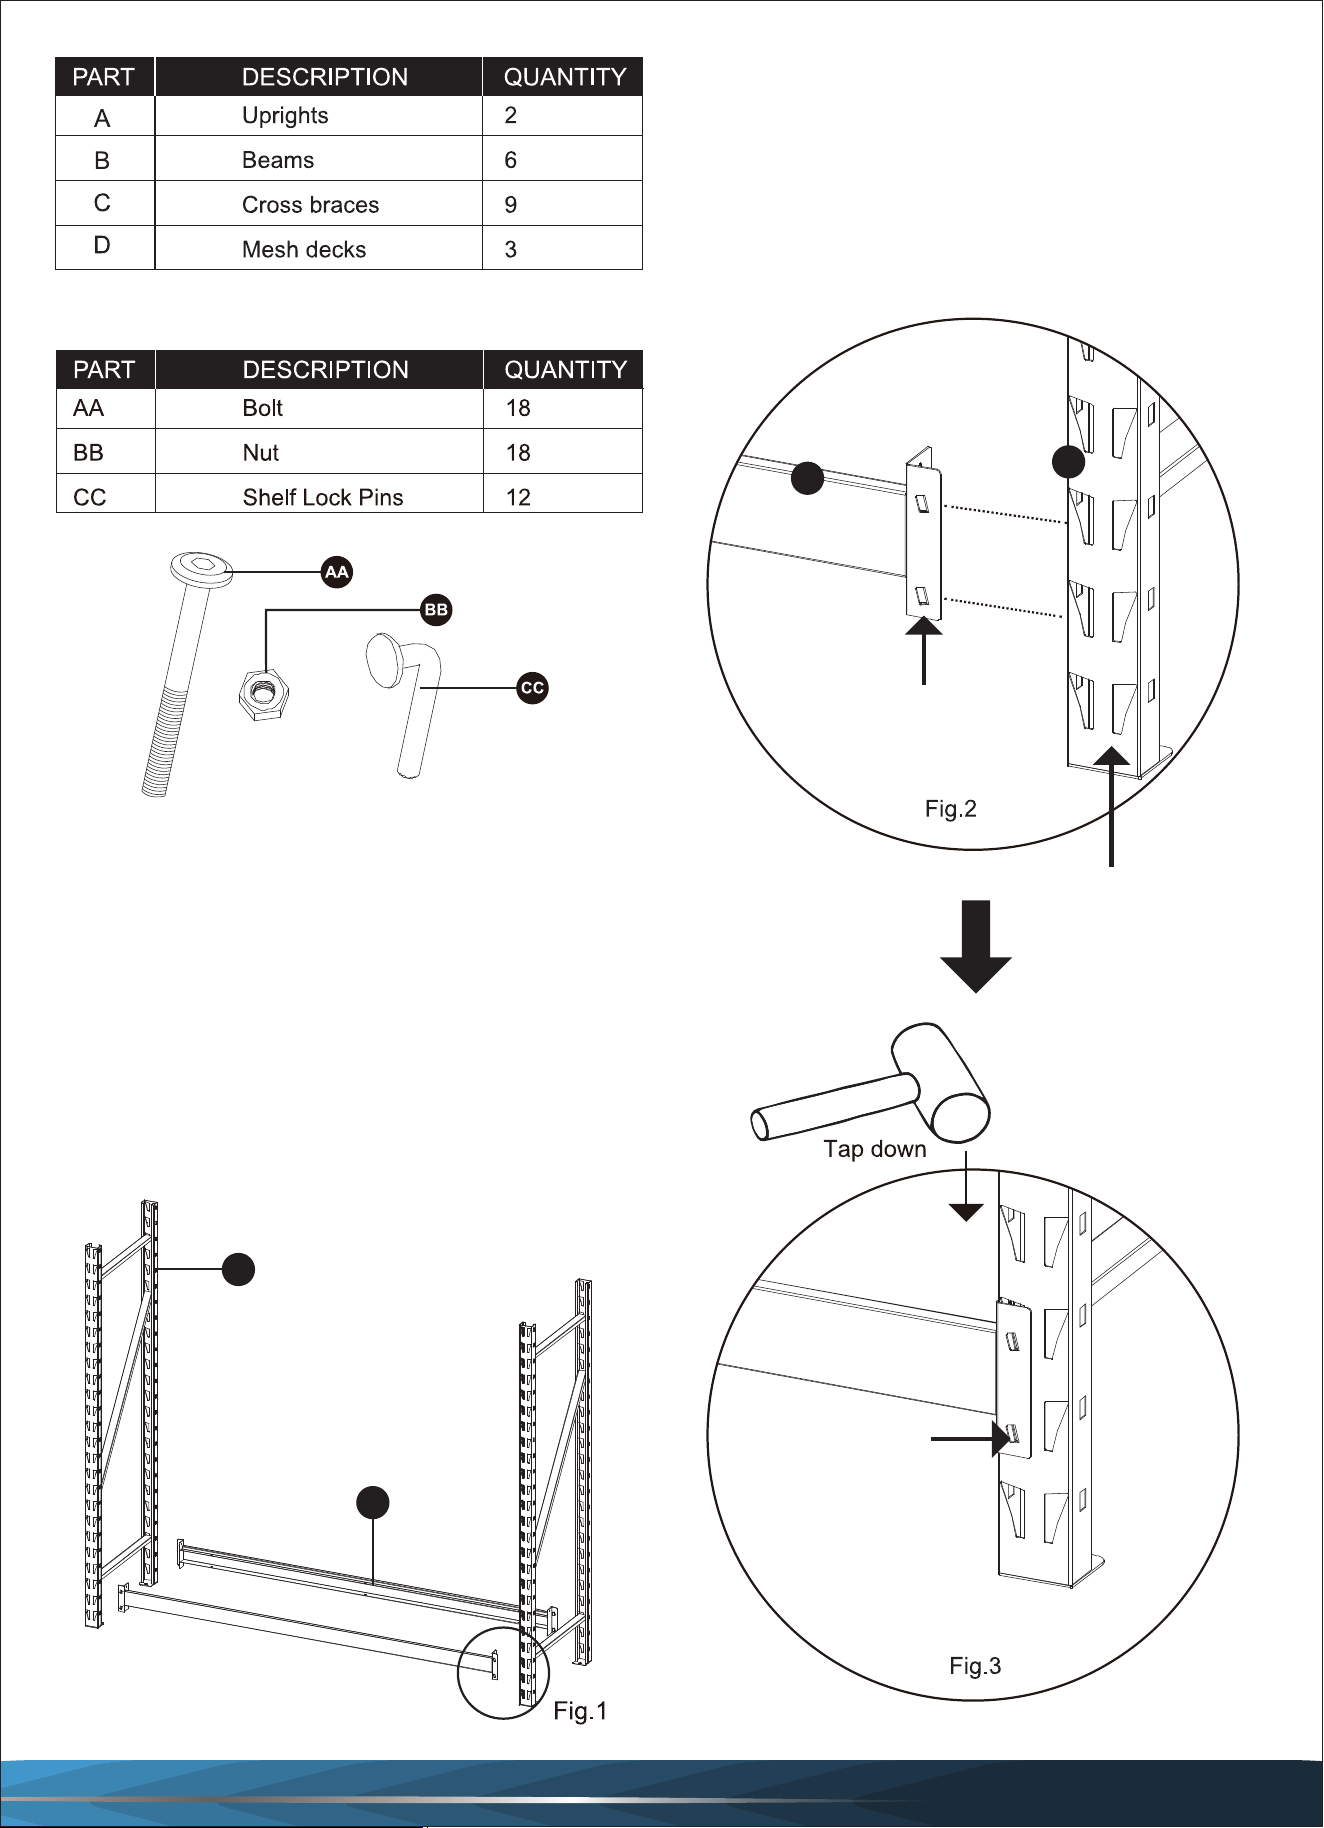
A
B
C
D
www.SereneLifeHome.com
HARDWARE CONTENTS:
Other Tools Required for Assembly: Rubber mallet (not
included), Hex key, Wrench.
ASSEMBLY
Step 1: Starting at the bottom of the upright, take a beam
(B) and attach one side into an upright (A) by inserting
the clips into the two lower keyholes (see Fig. 1). Repeat
with the other end of the beam and the second upright.
Then install a second beam on the backside of the rack,
following the same process as above. This will be your
lowest shelf.
Note: Make sure when assembling the beams (B) to
uprights (A) that the narrow end of the frame slots is
facing down so the beam clips can seat into the bottom
of the slot (see Fig. 2).
A rubber mallet may be used to tap on the beam to
ensure the clips are properly seated into the bottom of
the slots (see Fig. 3).
A
B
A
B
This end face down
Narrow end
of frame slots
face down
The clips should
be fully engaged
into the bottom
of the slots
www.SereneLifeHome.com
Step 2: Follow this process to install the rest of the beams
at your selected height locations. We recommend installing
one set of beams at the top two keyholes to act as the top
shelf, and then spacing the remaining beams at height
intervals that best suit your storage needs.
Make sure your beams are at the same height on both the
front and back of the uprights. (See Fig. 4)
Step 3: Locate the 9 shelf cross braces provided with this
rack. Each beam has 3 pairs of holes that indicate the
assembly points for the cross braces (see Fig. 5).
Starting at the bottom shelf, take a cross brace (C) and
insert it into the beam (B). Make sure that the holes of the
cross braces are aligned with the holes of the beams.
Then use bolts (AA) and nuts (BB) to connect them.
Repeat with the other cross braces until all 9 pieces are
installed. (See Fig. 6)
A
B
C
B
AA
BB
www.SereneLifeHome.com
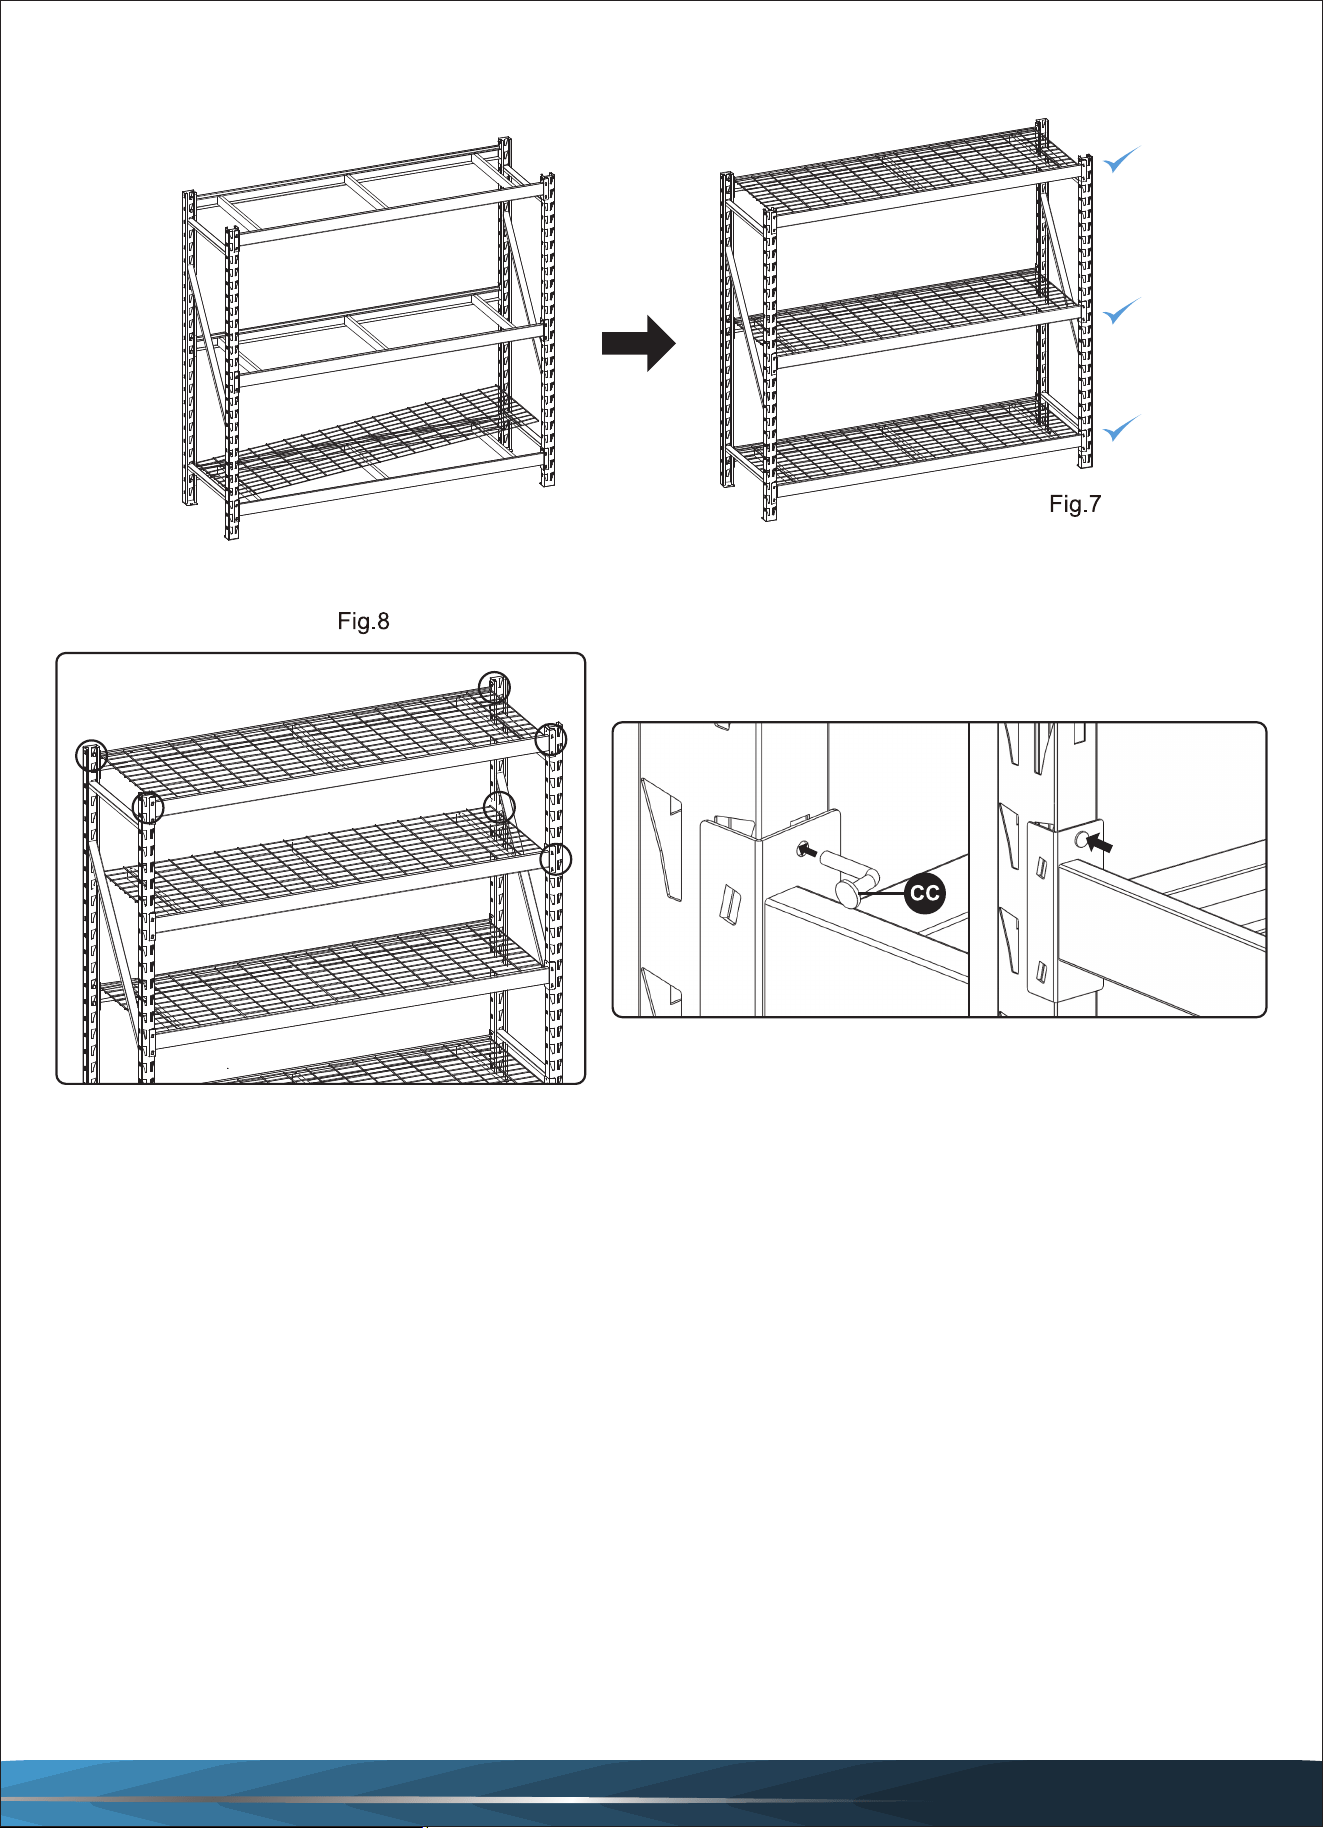
Step 4: Place mesh deck (D) onto the cross braces. Make sure the mesh deck is resting properly on the anges of the
beams. Repeat this step for the remaining mesh decks. (See Fig. 7)
Step 5: Insert locking pins (CC) into holes located on the mounting ange of each beam. Each shelf has 4 pins. (See Fig. 8)
CLEANING AND MAINTENANCE
To ensure the longevity and optimal performance of your shelving unit, regular cleaning and maintenance are
recommended:
CLEANING
• Clean the shelving unit periodically to remove dust, dirt, and debris.
• Use a damp cloth or sponge with mild detergent to wipe down the surfaces.
Avoid using abrasive cleaners or solvents that might damage the nish.
• After cleaning, thoroughly dry the unit with a clean, dry cloth to prevent moisture from causing rust or corrosion.
MAINTENANCE
• Regularly inspect the unit for signs of wear, damage, or instability.
Check all bolts and connections to ensure they are tight and secure.
• If you notice any rust or corrosion, gently sand the aected area with ne sandpaper and apply a rust-inhibiting
primer or paint.
• Maintain proper weight distribution as described in the Safety Information section to avoid overloading the shelves.
• Apply a light oil or lubricant to moving parts or joints, if applicable, to keep them functioning smoothly.
• If the shelving unit is not in use for an extended period, disassemble it if possible and store it in a dry, cool place to
prevent damage from environmental factors.
